The Pioneer Woman Tasty Kitchen
Profile photo of HowSweetEats

Simple Wonton Soup

Posted by in Step-by-Step Recipes

Tasty Kitchen Blog: Simple Wonton Soup. Guest post by Jessica Merchant of How Sweet It Is, recipe submitted by TK member Sarah of The Woks of Life.

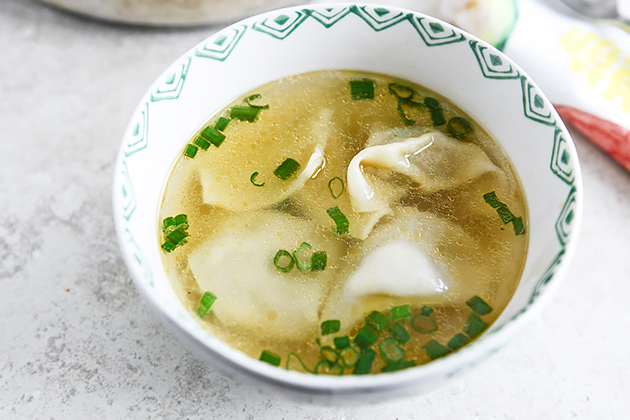
Oh my gosh. Today we’re going to make some easy comfort food and it’s like a giant hug in a bowl. So much flavor, so much punch!

I’ve loved wonton soup forever and a day, but I never thought it was something that was doable at home. Being totally uneducated about it, I was clueless when it came to prepping something like this. But I came across Sarah’s recipe for Simple Wonton Soup and the “simple” part seriously sold me. You mean it isn’t that tough to make wonton soup?

It so isn’t. It’s doable, even on a weeknight, but better yet, this recipe makes a lot of wontons, so you can store them in the freezer and have soup for days. What’s better than that?

Let’s get started.


Tasty Kitchen Blog: Simple Wonton Soup. Guest post by Jessica Merchant of How Sweet It Is, recipe submitted by TK member Sarah of The Woks of Life.

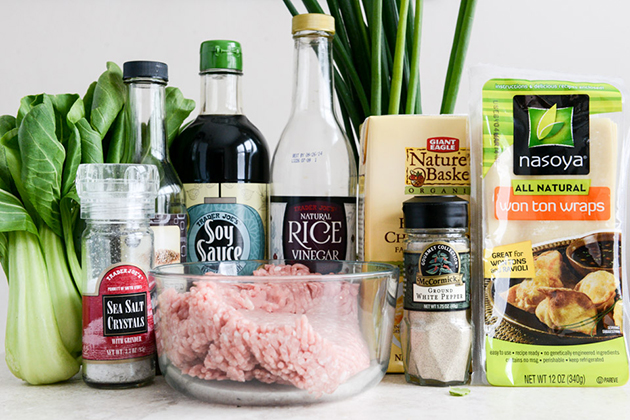
Here are the goods that you need: baby bok choy, sesame oil (I used toasted), soy sauce, shoaxing wine (I subbed rice wine vinegar), green onions, chicken stock, wonton wraps, ground pork, salt and pepper. Pretty simple stuff—I actually had most of it on hand.

First, you make the wontons. It’s definitely simple as the recipe title portrays but it’s slightly time-consuming and requires a little bit of patience. Not lots! Just a little.


Tasty Kitchen Blog: Simple Wonton Soup. Guest post by Jessica Merchant of How Sweet It Is, recipe submitted by TK member Sarah of The Woks of Life.

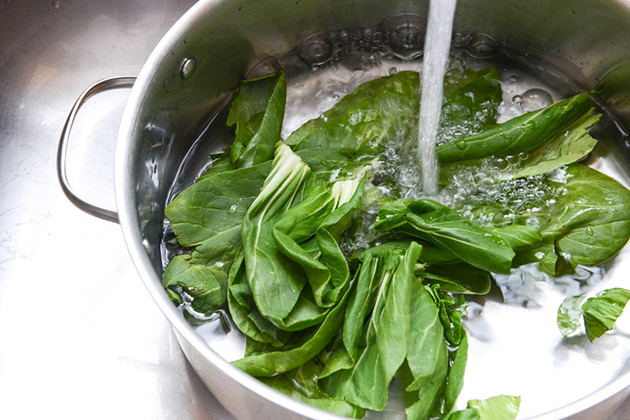
The initial step is to bring your bok choy greens to a boil quickly, then blanch them in cold water.


Tasty Kitchen Blog: Simple Wonton Soup. Guest post by Jessica Merchant of How Sweet It Is, recipe submitted by TK member Sarah of The Woks of Life.

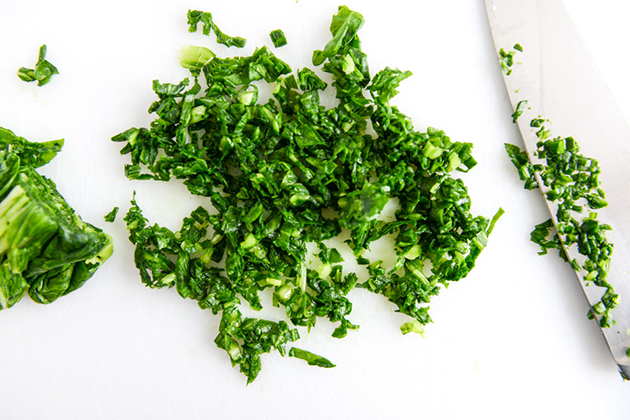
Grab the bunch and squeeze out as much water as you can, then finely chop the greens.


Tasty Kitchen Blog: Simple Wonton Soup. Guest post by Jessica Merchant of How Sweet It Is, recipe submitted by TK member Sarah of The Woks of Life.

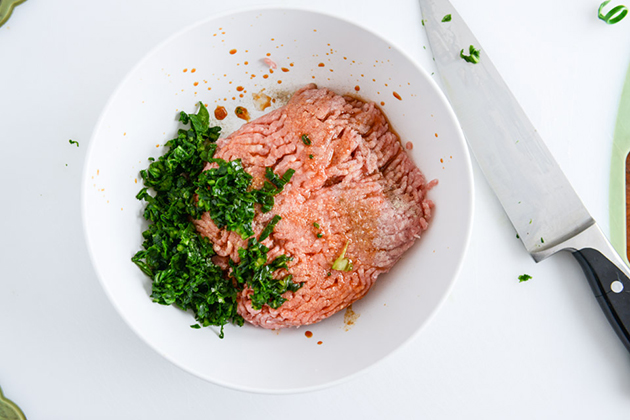
Mix together the ground pork, soy sauce, sesame oil, rice wine vinegar salt, pepper and wilted greens. Stir, stir, stir. Even use your hands. You want it super mixed, almost to the point of being paste-like. After that, grab a small bowl and fill it with water.


Tasty Kitchen Blog: Simple Wonton Soup. Guest post by Jessica Merchant of How Sweet It Is, recipe submitted by TK member Sarah of The Woks of Life.

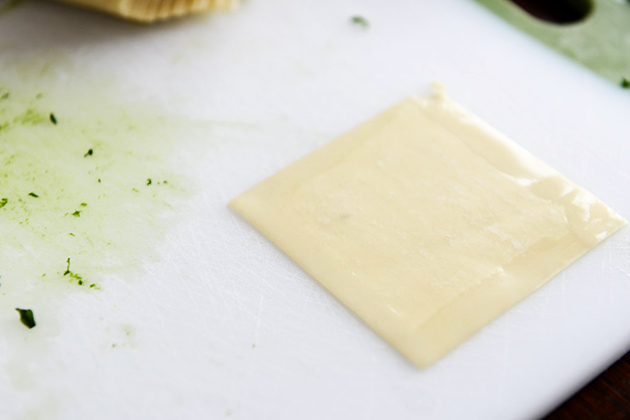
Dip your finger or a thin pastry brunch in the water and brush it along the edges of the wrapper. This will help seal this sucker together.


Tasty Kitchen Blog: Simple Wonton Soup. Guest post by Jessica Merchant of How Sweet It Is, recipe submitted by TK member Sarah of The Woks of Life.

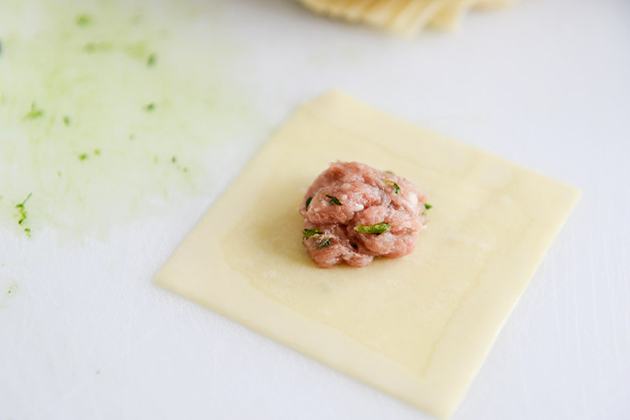
Place about a teaspoon of the ground pork mixture in the center of the wonton…
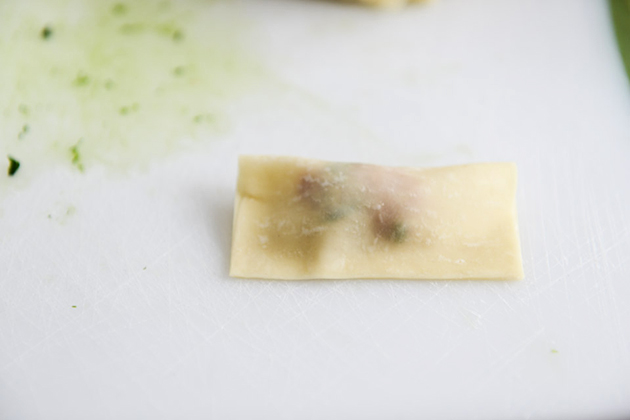


Tasty Kitchen Blog: Simple Wonton Soup. Guest post by Jessica Merchant of How Sweet It Is, recipe submitted by TK member Sarah of The Woks of Life.

Then fold it in half and press the edges together. I also squeeze out any air in the wrapper with my fingers.
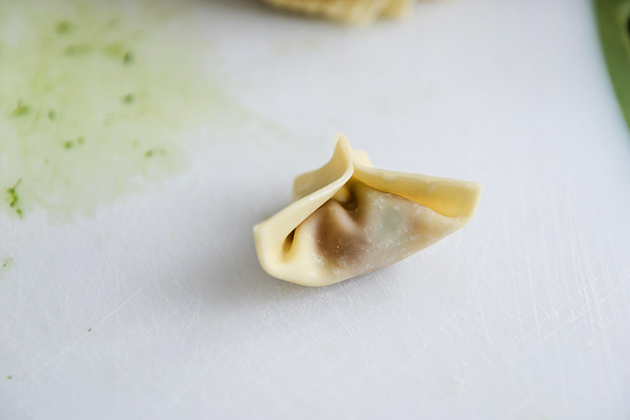


Tasty Kitchen Blog: Simple Wonton Soup. Guest post by Jessica Merchant of How Sweet It Is, recipe submitted by TK member Sarah of The Woks of Life.

Brush a drop of water on one sealed corner of the wrapper and bring it to meet the other corner, forming a little package. So cute!
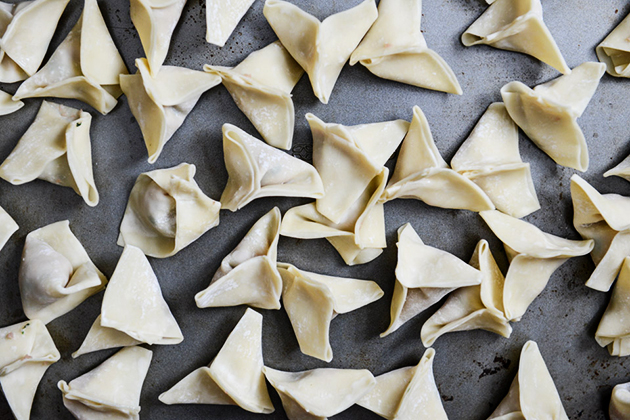


Tasty Kitchen Blog: Simple Wonton Soup. Guest post by Jessica Merchant of How Sweet It Is, recipe submitted by TK member Sarah of The Woks of Life.

Do so with the remaining wrappers and pork until you have a big old tray. It’s kind of soothing and the type of busy work that I love.

Once all of the wontons are made, you can use them or freeze a bunch for later use. To serve two of us, I kept about a quarter of the wontons out and froze the rest. This way, they are ready at the drop of a hat for some soup.


Tasty Kitchen Blog: Simple Wonton Soup. Guest post by Jessica Merchant of How Sweet It Is, recipe submitted by TK member Sarah of The Woks of Life.

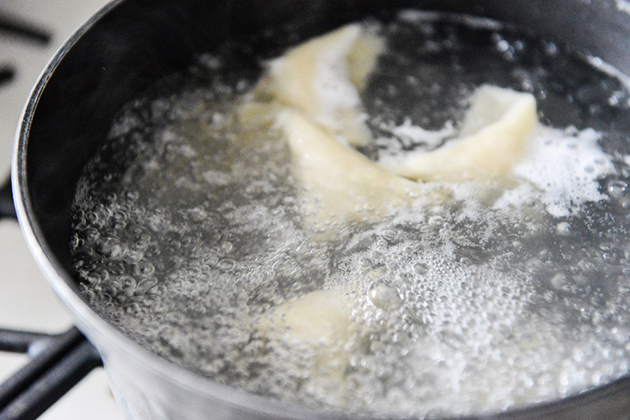
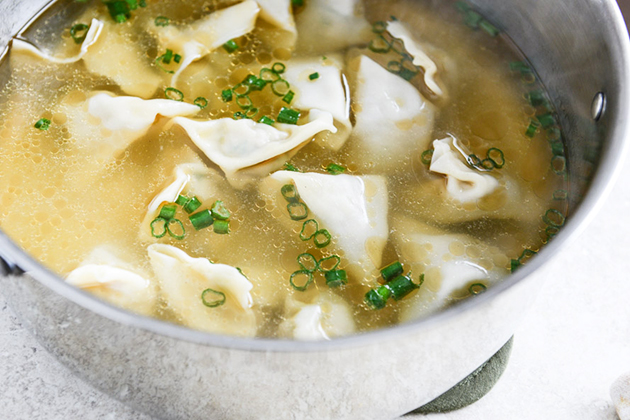
Bring a pot of water to a boil. Once boiling, add the wontons and cook just until they float. At the same time, add the chicken stock to a large pot and bring it to a simmer. When it’s simmering, add in the salt, pepper and sesame oil.


Tasty Kitchen Blog: Simple Wonton Soup. Guest post by Jessica Merchant of How Sweet It Is, recipe submitted by TK member Sarah of The Woks of Life.

Remove the wontons from the water as soon as they are floating. You don’t want to overcook them or else the wontons get very mushy and soft. If you’re serving immediately, you can throw them in the simmering chicken stock, but make sure you’re eating right away. The recipe calls for adding your wontons to a bowl and pouring your chicken stock over when ready to eat. Either way works well. Add some green onions to the broth and you’re good to go.


Tasty Kitchen Blog: Simple Wonton Soup. Guest post by Jessica Merchant of How Sweet It Is, recipe submitted by TK member Sarah of The Woks of Life.

Ah! This was so good. Such comfort food that reminded me of when I was a kid and we’d get take-out Chinese food. It was such a treat. It really is simple yet I never thought I’d be able to make something like this at home with ease. Glad I was wrong. This one’s a keeper.

Be sure to check out Sarah’s blog, The Woks of Life, where she shares more delicious recipes and an array of cuisines!


Printable Recipe

Simple Wonton Soup

See post on Sarah @ The Woks of Life’s site!
5.00 Mitt(s) 3 Rating(s)3 votes, average: 5.00 out of 53 votes, average: 5.00 out of 53 votes, average: 5.00 out of 53 votes, average: 5.00 out of 53 votes, average: 5.00 out of 5

Prep Time:

Cook Time:

Difficulty:

Servings: 6

6
x

Print Options

Page size Letter 3x5 4x6
Text Size Small Medium Large
Content Include description
Include prep time, etc.
Show image

Description

This is the best thing ever on a cold wintry day. Surprisingly simple and so good. You’ll love this!

Ingredients

  • FOR THE WONTONS:
  • 10 ounces, weight Baby Bok Choy Or Similar Green Leafy Vegetable
  • 1 cup Ground Pork
  • 2-½ Tablespoons Sesame Oil
  • 1 pinch White Pepper
  • 1 Tablespoon Soy Sauce
  • ½ teaspoons Salt
  • 1 Tablespoon Shaoxing Wine
  • 1 package Wonton Skins, 12 Ounce Package
  • FOR THE SOUP:
  • 6 cups Good Chicken Stock
  • 1 Tablespoon Sesame Oil
  • 1 teaspoon Salt, Or To Taste
  • ¼ teaspoons White Pepper
  • 1 whole Scallion, Chopped

Preparation Instructions

Start by thoroughly washing the greens. Bring a large pot of water to a boil, add the greens and blanch them just until wilted (this will only take a couple of minutes). Drain off the hot water and rinse the greens in cold water.

Grab a good clump of greens and carefully squeeze out as much water as you can. Very finely chop them (you can also speed up the process by throwing them in the food processor).

In a medium bowl, add the finely chopped greens, ground pork, sesame oil, white pepper, soy sauce, salt and wine. Mix very thoroughly until the mixture is totally emulsified—almost like a paste.

Now it’s time to assemble! Fill a small bowl with water. Grab a wrapper and use your finger to moisten the edges of the wrapper. Add a little over a teaspoon of filling to the middle. Fold the wrapper in half and press the two sides together so you get a firm seal.

Hold the bottom two corners of the little rectangle you just made and bring the two corners together. You can use a bit of water to make sure they stick. And that’s it! Place the assembled wonton on a baking sheet or plate lined with parchment paper to prevent sticking. Keep assembling until all the filling is gone.

At this point, you can cover the wontons with plastic wrap, put the baking sheet/plate into the freezer, and then transfer them to Ziploc bags once they’re frozen. They’ll keep for a couple months in the freezer and be ready for wonton soup whenever you want it.

To make the soup, heat your chicken stock to a simmer in a large pot. Then add sesame oil, salt and white pepper and keep it simmering.

Bring a separate pot of water to a boil. Carefully add the wontons one at a time to the pot. Pick up the pot and use a swirling, twisting motion to keep the pot moving and prevent the wontons from sticking to the bottom. If they do stick, don’t worry, They should come free once they’re cooked. They’re done when they float. Take care not to over-cook them. Remove the wontons with a slotted spoon and put them in bowls.

Pour the broth over the wontons and garnish with scallions. Serve!


_______________________________________

Jessica Merchant is a personal trainer turned food writer and blogger. Her blog, How Sweet Eats, is where she proclaims her love for all things sweet, all things bacon, and everything else in between. She works her magic in her Pittsburgh kitchen, which she shares with her husband of 2 years.

 

Profile photo of HowSweetEats

Cauliflower Crust Pizza

Posted by in Step-by-Step Recipes

Tasty Kitchen Blog: Cauliflower Crust Pizza. Guest post by Jessica Merchant of How Sweet It Is, recipe submitted by TK member Michelle of The Lucky Penny.

 
Oh cauliflower pizza crust, I have been skeptical of you for so long. So, so long. The first time I attempted a cauliflower crust was back in the day, long before Pinterest existed or I knew what a blog was, after getting a recipe from someone in my local gym. I didn’t love cauliflower at the time but I didn’t loathe it either. Plus, it came loaded with lots of cheese, so it had to be a win. Right?

Wrong. It was pretty terrible. So terrible in fact that, until I found this recipe—this recipe for The Best Cauliflower Crust Pizza ever—I vowed that I wouldn’t succumb to the trend once again.

Now, I’m so glad that I did. Michelle is one smart cookie.

Not only is the crust simple, it is FAST. That’s the key for me. Now, let me say that I don’t think I will ever replace my favorite pizza crust. I make a mean whole-wheat dough and love it all up. But this is an awesome recipe for when you want pizza and you are short on time, or when you want pizza but are willing to draw outside the lines a bit, or when you want pizza but need to stay away from gluten. Or maybe you’re trying to sneak in some extra veg. Story of my life.

This gets even better with an array of toppings. I am boring in my pizza choices so I kept it simple with some cheese and sauce. But now, all I’m envisioning is buffalo chicken, grilled vegetables, cheeseburger pizza, and other endless options. So excited. Let’s get started!


Tasty Kitchen Blog: Cauliflower Crust Pizza. Guest post by Jessica Merchant of How Sweet It Is, recipe submitted by TK member Michelle of The Lucky Penny.

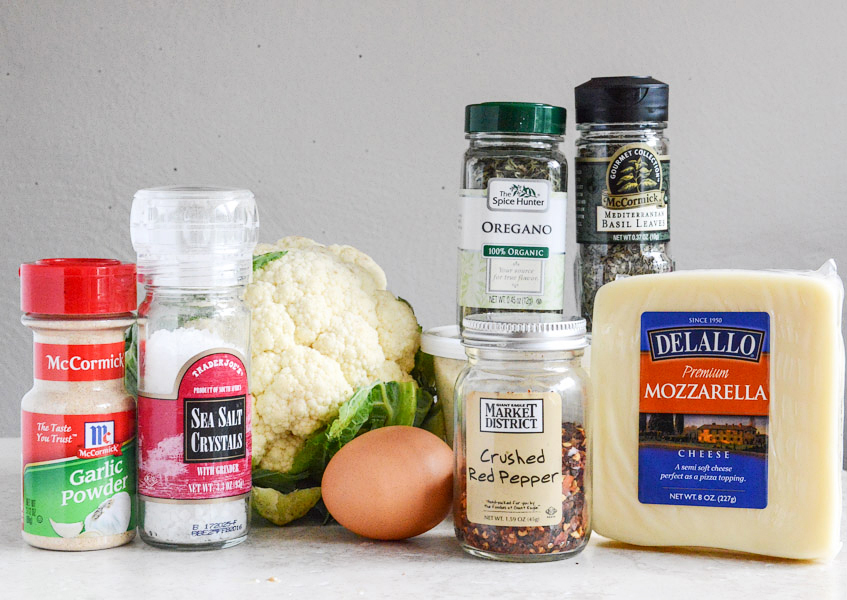
This is all you need for your crust: a small (emphasis on small!) head of cauliflower, one egg, some mozzarella and Parmesan cheese, salt, pepper, garlic powder, oregano, basil and crushed red pepper flakes. That’s it! Plus, whatever toppings you choose.

This specific method uses a pizza stone or baking sheet. Begin by adding the stone or sheet to the oven and preheating your oven. Having a pizza peel is ideal, but if you have another object (like a cutting board) that you can flour, it will work too.


Tasty Kitchen Blog: Cauliflower Crust Pizza. Guest post by Jessica Merchant of How Sweet It Is, recipe submitted by TK member Michelle of The Lucky Penny.

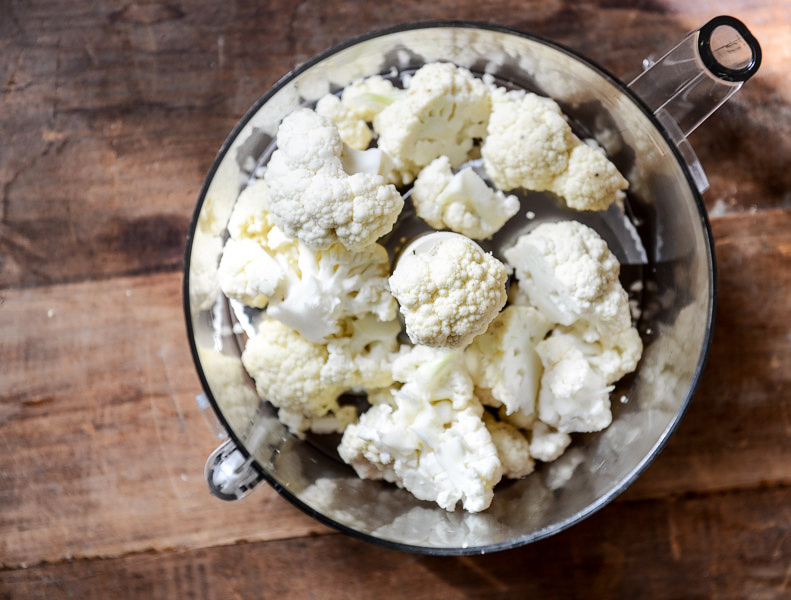
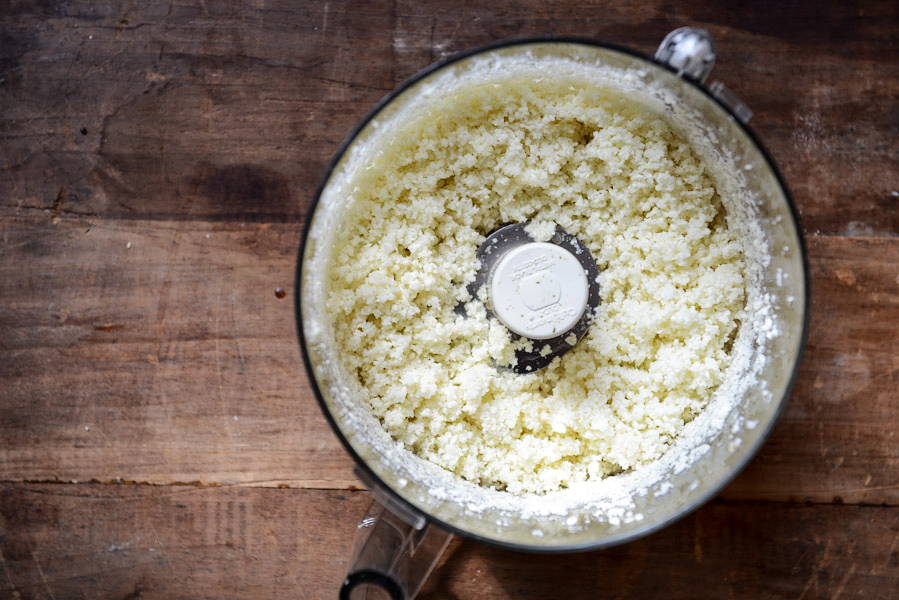
First up, add the cauliflower to your food processor and pulse.


Tasty Kitchen Blog: Cauliflower Crust Pizza. Guest post by Jessica Merchant of How Sweet It Is, recipe submitted by TK member Michelle of The Lucky Penny.

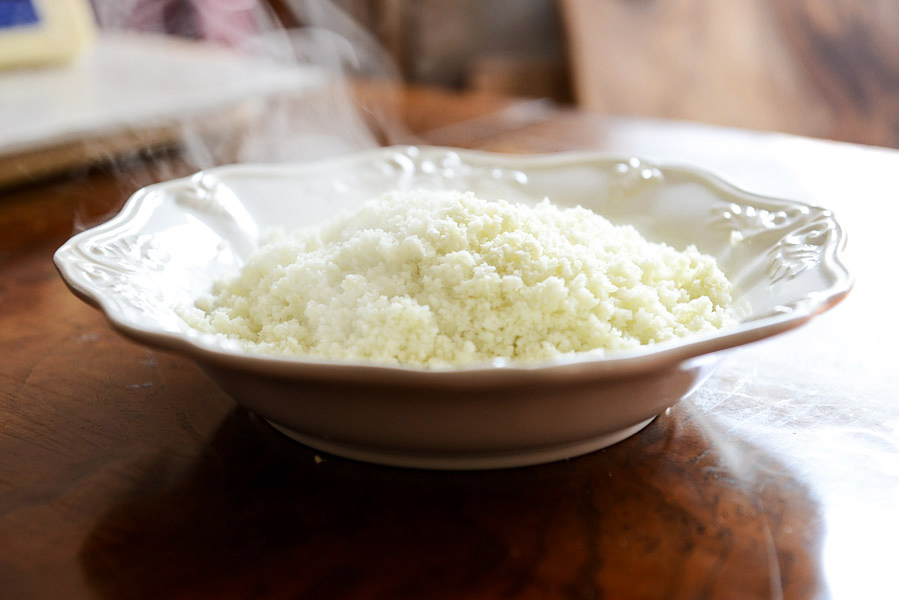
You want it to look like cauliflower “snow.” That expression made me so happy.


Tasty Kitchen Blog: Cauliflower Crust Pizza. Guest post by Jessica Merchant of How Sweet It Is, recipe submitted by TK member Michelle of The Lucky Penny.

Once your cauliflower is pulsed into tiny crumbs, you want to microwave it. Let it cool completely or else you’ll burn the heck out of your hands.


Tasty Kitchen Blog: Cauliflower Crust Pizza. Guest post by Jessica Merchant of How Sweet It Is, recipe submitted by TK member Michelle of The Lucky Penny.

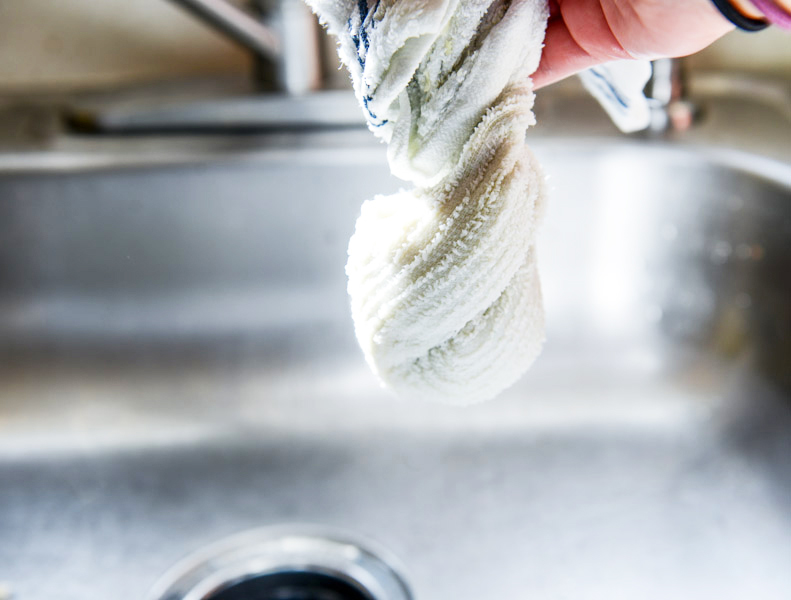
After the cauliflower has cooled, place it in a towel and ring the heck out of it to remove as much liquid as possible.


Tasty Kitchen Blog: Cauliflower Crust Pizza. Guest post by Jessica Merchant of How Sweet It Is, recipe submitted by TK member Michelle of The Lucky Penny.

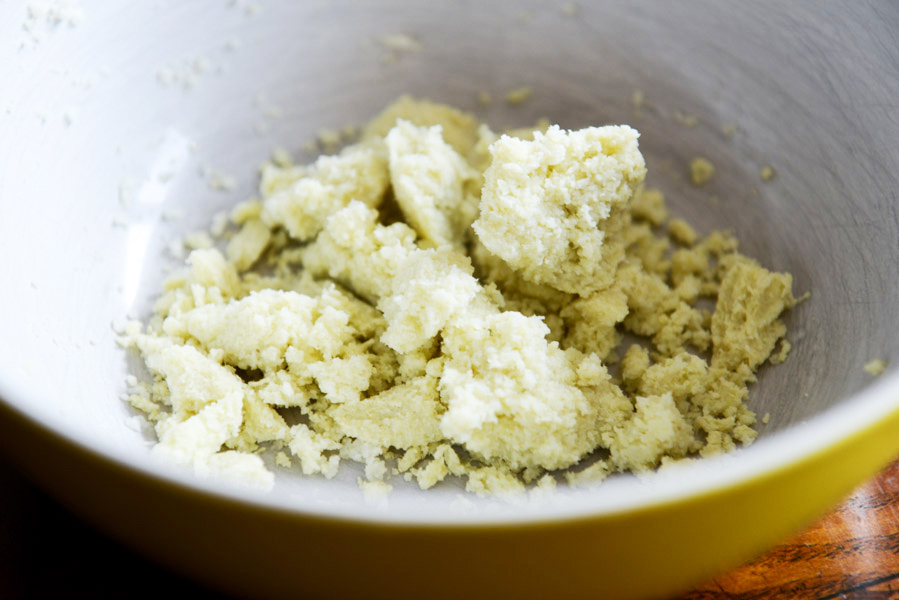
You will be left with something like this—a sort of cauliflower “pulp,” if you will.


Tasty Kitchen Blog: Cauliflower Crust Pizza. Guest post by Jessica Merchant of How Sweet It Is, recipe submitted by TK member Michelle of The Lucky Penny.

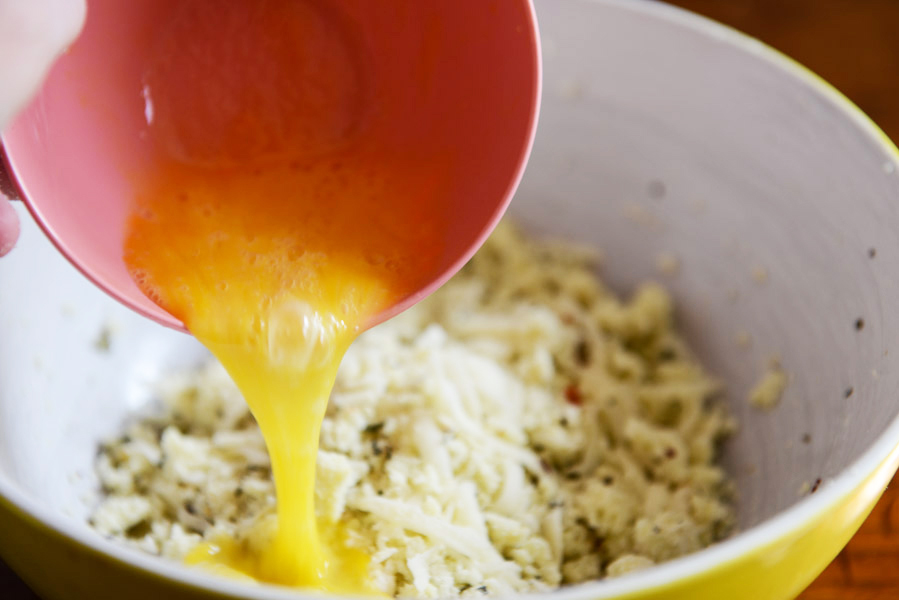
Add in the cheeses and the spices and mix the mixture until combined. Then add in your egg.


Tasty Kitchen Blog: Cauliflower Crust Pizza. Guest post by Jessica Merchant of How Sweet It Is, recipe submitted by TK member Michelle of The Lucky Penny.

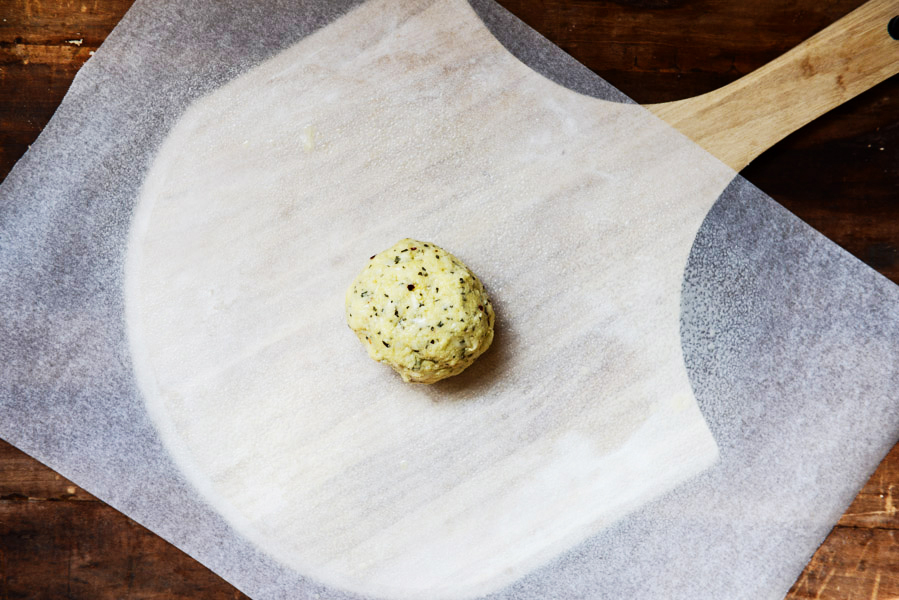
Using your hands to bring the dough together is necessary, and it happens easily. Form the dough into a ball. Spray a sheet of parchment paper with nonstick spray and place it on top of a pizza peel. Add the dough ball on top.


Tasty Kitchen Blog: Cauliflower Crust Pizza. Guest post by Jessica Merchant of How Sweet It Is, recipe submitted by TK member Michelle of The Lucky Penny.

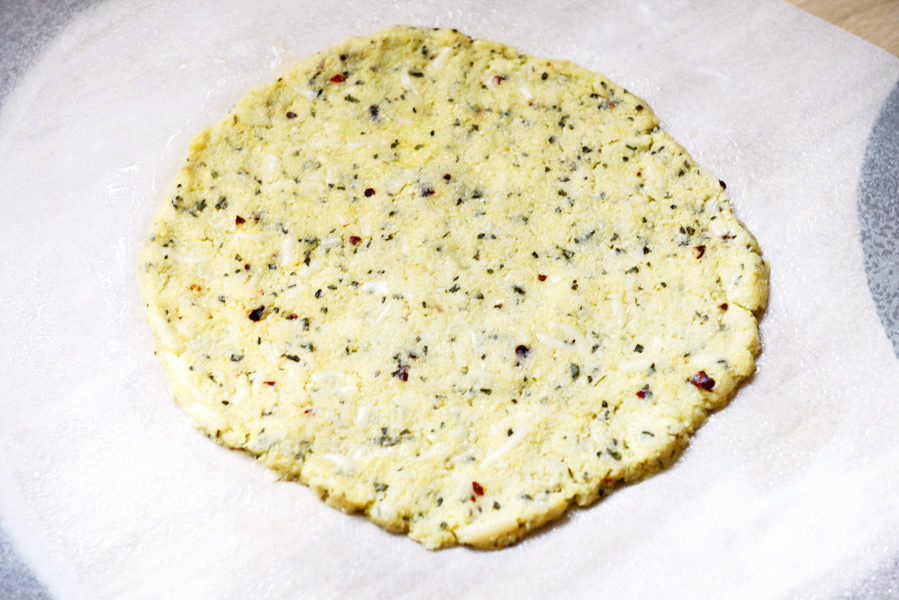
Form the dough into a thin circle and bake it for a few minutes until golden.


Tasty Kitchen Blog: Cauliflower Crust Pizza. Guest post by Jessica Merchant of How Sweet It Is, recipe submitted by TK member Michelle of The Lucky Penny.

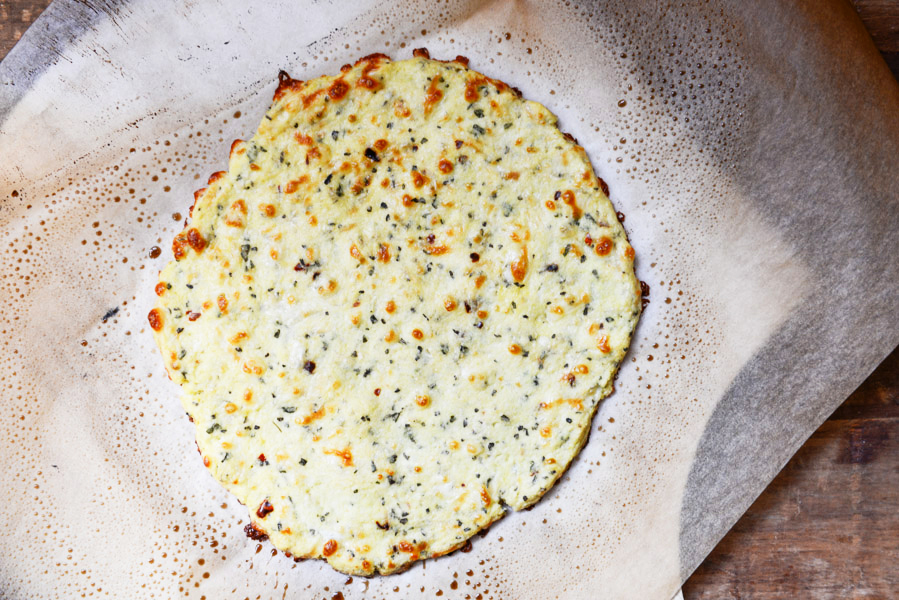
It will look like this! At this point, it smells freaking delicious. Definitely good enough to eat. So much cheeeeeeese.


Tasty Kitchen Blog: Cauliflower Crust Pizza. Guest post by Jessica Merchant of How Sweet It Is, recipe submitted by TK member Michelle of The Lucky Penny.

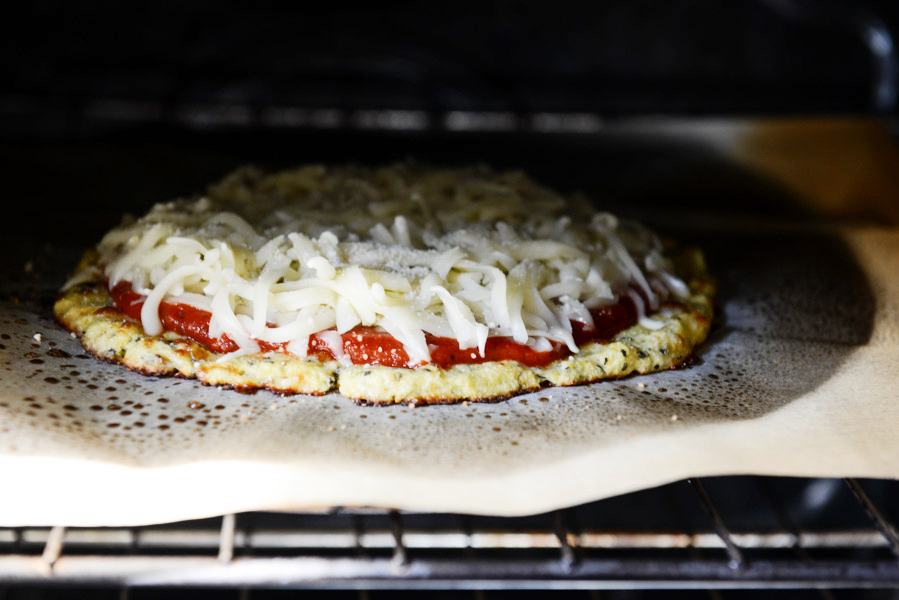
But clearly not enough cheese, as you add your toppings and bake it a bit longer. Uh huh.


Tasty Kitchen Blog: Cauliflower Crust Pizza. Guest post by Jessica Merchant of How Sweet It Is, recipe submitted by TK member Michelle of The Lucky Penny.

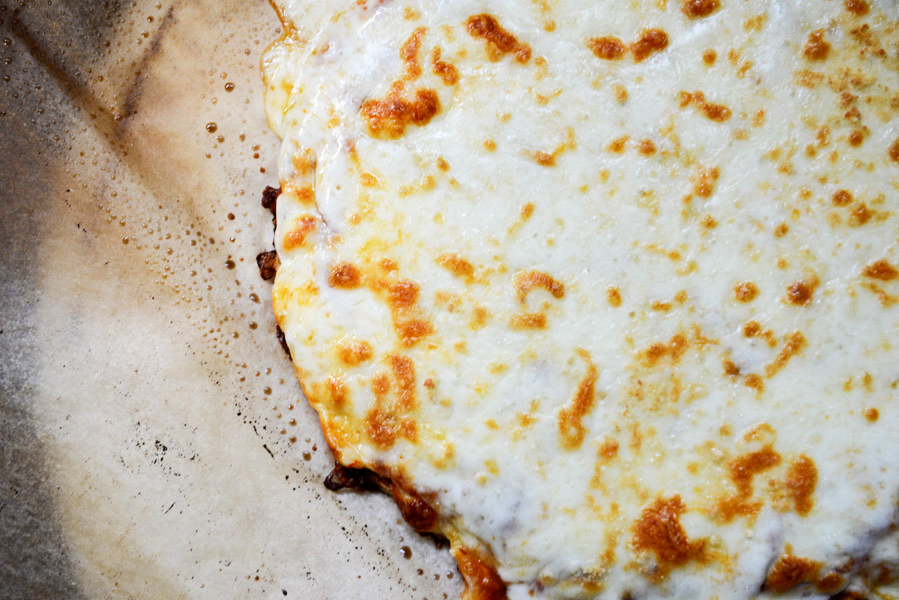
Cheesy goodness. All the way.


Tasty Kitchen Blog: Cauliflower Crust Pizza. Guest post by Jessica Merchant of How Sweet It Is, recipe submitted by TK member Michelle of The Lucky Penny.

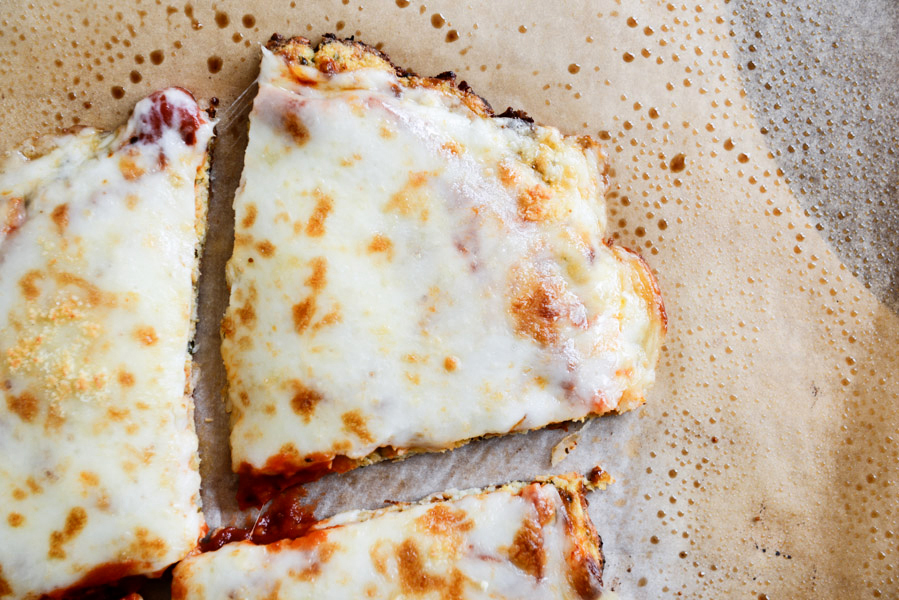
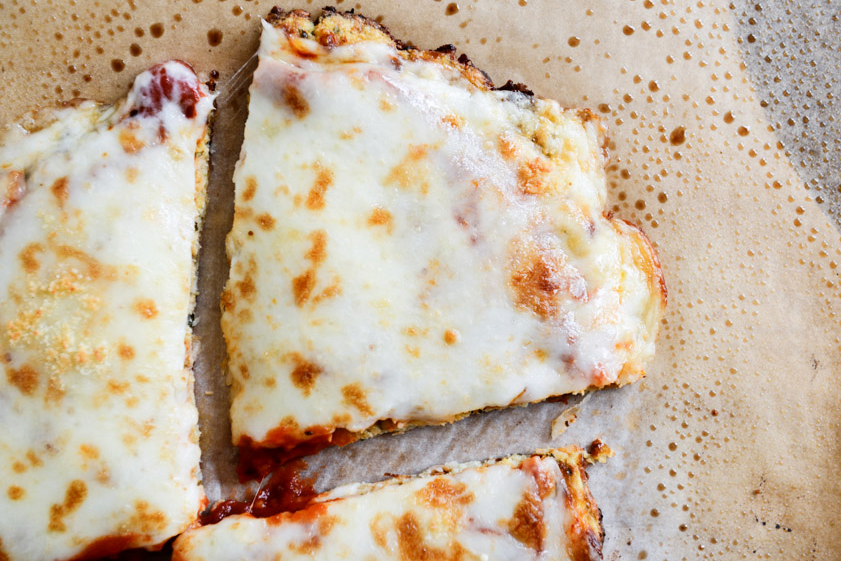
Let the pizza cool slightly before cutting. By doing this, the crust remains intact.


Tasty Kitchen Blog: Cauliflower Crust Pizza. Guest post by Jessica Merchant of How Sweet It Is, recipe submitted by TK member Michelle of The Lucky Penny.

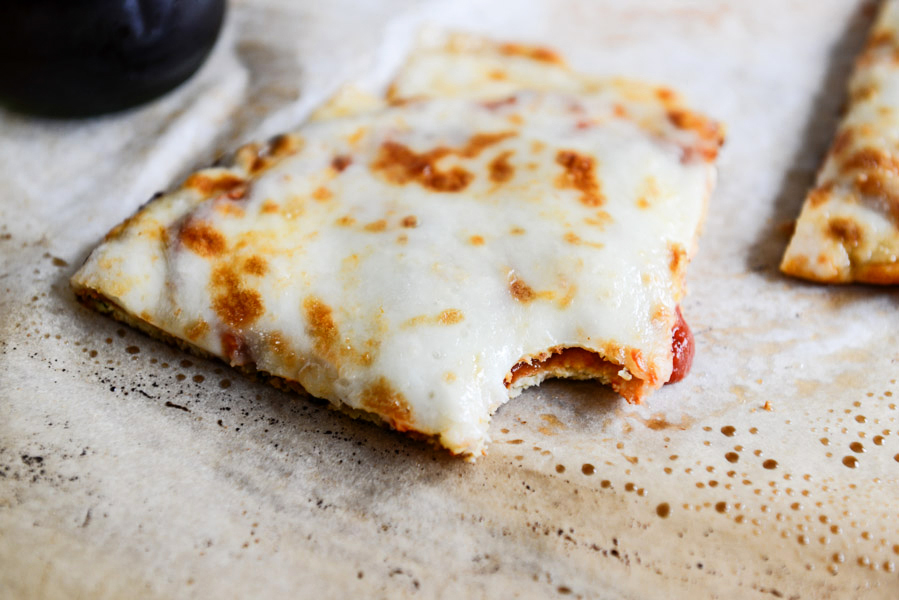
Serve it up. Savor the cheese. So, so good.

I am so glad I took another shot at the cauliflower crust because my mind has changed. It’s totally a winner in my book. Thanks so much to Michelle for the fabulous recipe. Be sure to check out her blog, The Lucky Penny, for more delicious recipes.


Printable Recipe

The Best Cauliflower Crust Pizza

See post on The Lucky Penny Blog’s site!
5.00 Mitt(s) 8 Rating(s)8 votes, average: 5.00 out of 58 votes, average: 5.00 out of 58 votes, average: 5.00 out of 58 votes, average: 5.00 out of 58 votes, average: 5.00 out of 5

Prep Time:

Cook Time:

Difficulty: Easy

Servings: 2

2
x

Print Options

Page size Letter 3x5 4x6
Text Size Small Medium Large
Content Include description
Include prep time, etc.
Show image

Description

This cauliflower crust pizza is so good it’s hard to believe it is gluten and grain-free! You can even pick it up like a regular slice of pizza.

Ingredients

  • 1 head (Small Head) Cauliflower
  • ¼ cups Parmesan Cheese
  • ¼ cups Mozzarella Cheese
  • ¼ teaspoons Kosher Salt
  • ½ teaspoons Dried Basil
  • ½ teaspoons Dried Oregano
  • ½ teaspoons Garlic Powder
  • Red Pepper Flakes (optional)
  • 1 Tablespoon Almond Meal (optional)
  • 1 whole Egg

Preparation Instructions

Place a pizza stone in the oven, or baking sheet if you don’t have a pizza stone. Preheat oven to 450ºF. On a cutting board, place a large piece of parchment paper and spray it with nonstick cooking oil.

Wash and throughly dry a small head of cauliflower. Don’t get one the size of your head unless you are planning on making 2 pizzas. Cut off the florets—you don’t need much stem, just stick with the florets. Pulse in your food processor for about 30 seconds, until you get powdery snow like cauliflower. You should end up with 2 to 3 cups cauliflower “snow”. Place the cauliflower in a microwave safe bowl and cover. Cook for 4 minutes. Dump cooked cauliflower onto a clean tea towel and allow to cool for a bit before attempting the next step.

Once cauliflower is cool enough to handle, wrap it up in the dish towel and wring the heck out of it. You want to squeeze out as much water as possible. This will ensure you get a chewy pizza like crust instead of a crumbly mess.

Dumped squeezed cauliflower into a bowl. Now add Parmesan cheese, mozzarella cheese, kosher salt, dried basil (crush up the leaves even more between your fingers before adding), dried oregano (crush up the leaves even more between your fingers before adding), garlic powder (not garlic salt), and a dash of red pepper if you want. I also added 1 tablespoon almond meal because my cauliflower yielded closer to 2 cups of cauli snow; this is optional and I would not add the almond meal if you have closer to 3 cups of cauli snow. Now add the egg and mix away. Hands tend to work best.

Once mixed together, use your hands to form the dough into a crust on your oiled parchment paper. Pat it down throughly, you want it nice and tightly formed together. Don’t make it too thick or thin either.

Using a cutting board, slide the parchment paper onto your hot pizza stone or baking sheet in the oven. Bake for 8-11 minutes, until it starts to turn golden brown. Remove from oven.

Add however much sauce, cheese, and toppings you want. I’m not gonna give you measurements for this. You know how you like your pizza—so go for it! Slide parchment with topped pizza back in the hot oven and cook for another 5 to 7 minutes until the cheese is melted, bubbly, and slightly golden.

Test your patience and allow it to cool for a minute or two. Probably closer to two. Then using a pizza cutter and a spatula, serve up your delicious grain-free cauliflower crust pizza!


_______________________________________

Jessica Merchant is a personal trainer turned food writer and blogger. Her blog, How Sweet Eats, is where she proclaims her love for all things sweet, all things bacon, and everything else in between. She works her magic in her Pittsburgh kitchen, which she shares with her husband of 2 years.
 

Profile photo of HowSweetEats

Pull-Apart Bread

Posted by in Baking, Step-by-Step Recipes

Tasty Kitchen Blog: Pull-Apart Bread. Guest post by Jessica Merchant of How Sweet It Is, recipe submitted by TK member Fanny of Oh Sweet Day!

 
Pull-apart breads have been blowing up Pinterest for a few years now, and all I’ve gotta say is that I love it. Which truly is saying a lot because, if I’m being honest, Pinterest kinda stresses me out these days. There are just so many things! I browse Pinterest for all of seven minutes and instantly want to plan another wedding, buy a new wardrobe, put jewels on my nails, paint my TV stand robin’s egg blue, travel to Mykonos and design a killer party for a 3-year old kiddo that I don’t even have. And I’d like to do it all next week. It’s like complete sensory overload.

In the world of pull-apart breads, this cinnamon sugar version from TK member Fanny is a classic. A few years ago I made one filled with cheese (which was ah-mazing), but knowing the value in a good gooey, sugar-coated cinnamon bread is the key to all life’s problems. Right?


Tasty Kitchen Blog: Pull-Apart Bread. Guest post by Jessica Merchant of How Sweet It Is, recipe submitted by TK member Fanny of Oh Sweet Day!

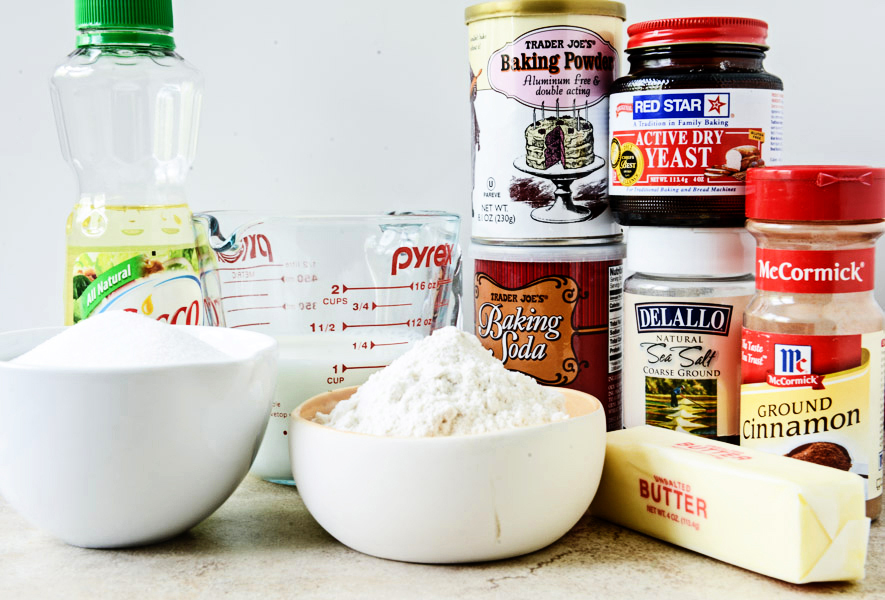
Here’s what you need: some flour and sugar, vegetable oil, whole milk, baking soda and powder, active dry yeast (don’t be scared!), salt, cinnamon, and of course, butter.


Tasty Kitchen Blog: Pull-Apart Bread. Guest post by Jessica Merchant of How Sweet It Is, recipe submitted by TK member Fanny of Oh Sweet Day!

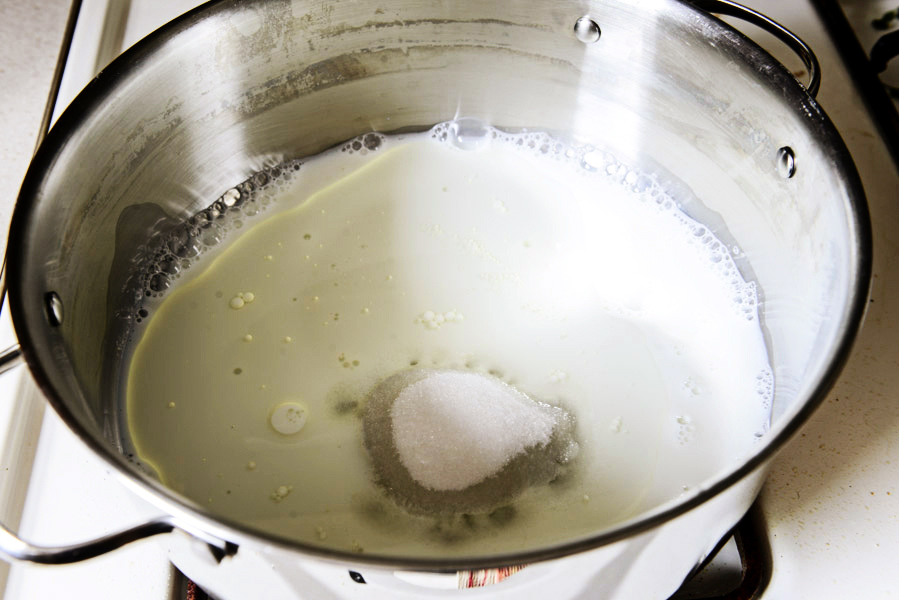
First, heat the milk, oil and sugar together, stirring until the sugar is dissolved and the liquid is slightly warm, but not hot. Remove it from the heat.


Tasty Kitchen Blog: Pull-Apart Bread. Guest post by Jessica Merchant of How Sweet It Is, recipe submitted by TK member Fanny of Oh Sweet Day!

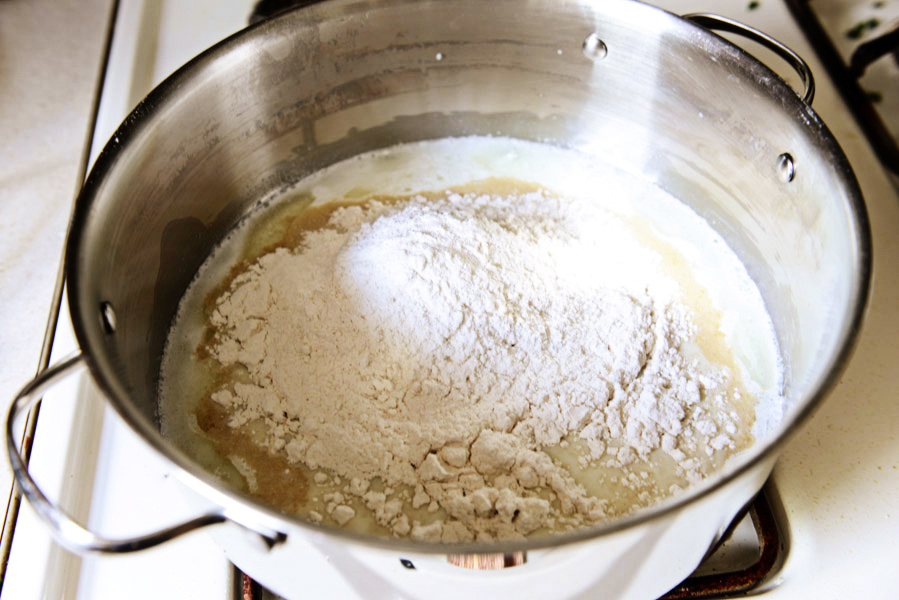
Stir in the flour and the yeast. At this point I was afraid that my pot was a bit too hot, so I transferred the mixture to a different pot and it worked perfectly. All in the name of saving cinnamon bread.

Cover the dough with a towel and let it rise for about an hour.


Tasty Kitchen Blog: Pull-Apart Bread. Guest post by Jessica Merchant of How Sweet It Is, recipe submitted by TK member Fanny of Oh Sweet Day!

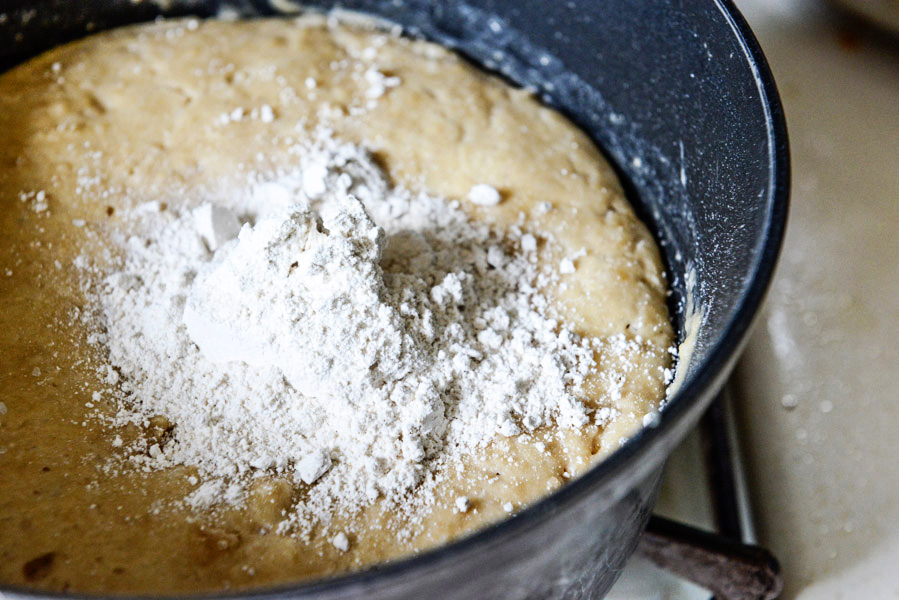
After an hour, stir in the remaining flour, baking soda, powder and salt. If the dough is super sticky, you can add a little extra flour if needed. I probably added in a tablespoon or two.


Tasty Kitchen Blog: Pull-Apart Bread. Guest post by Jessica Merchant of How Sweet It Is, recipe submitted by TK member Fanny of Oh Sweet Day!

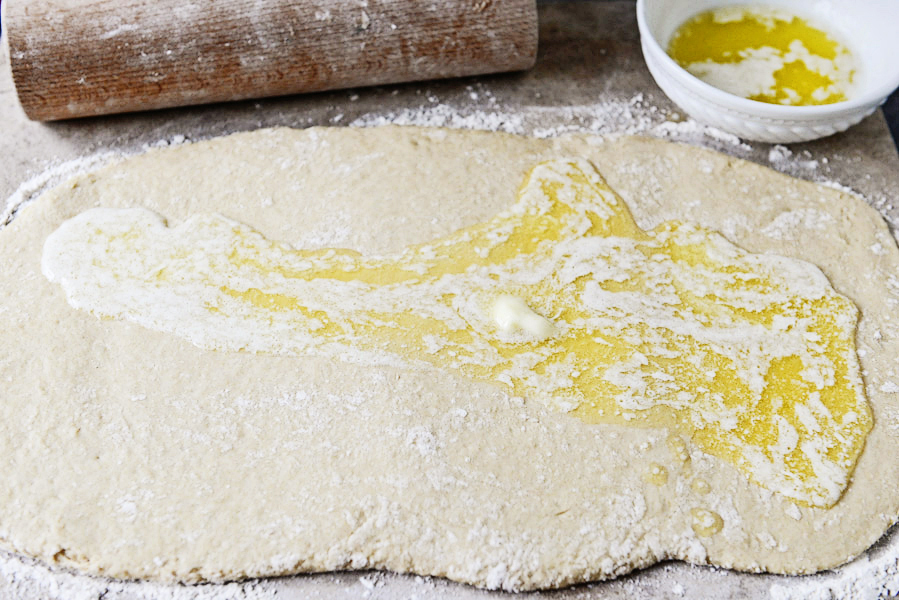
Roll the dough into a large rectangle on a floured surface and cover the entire thing in melted butter…


Tasty Kitchen Blog: Pull-Apart Bread. Guest post by Jessica Merchant of How Sweet It Is, recipe submitted by TK member Fanny of Oh Sweet Day!

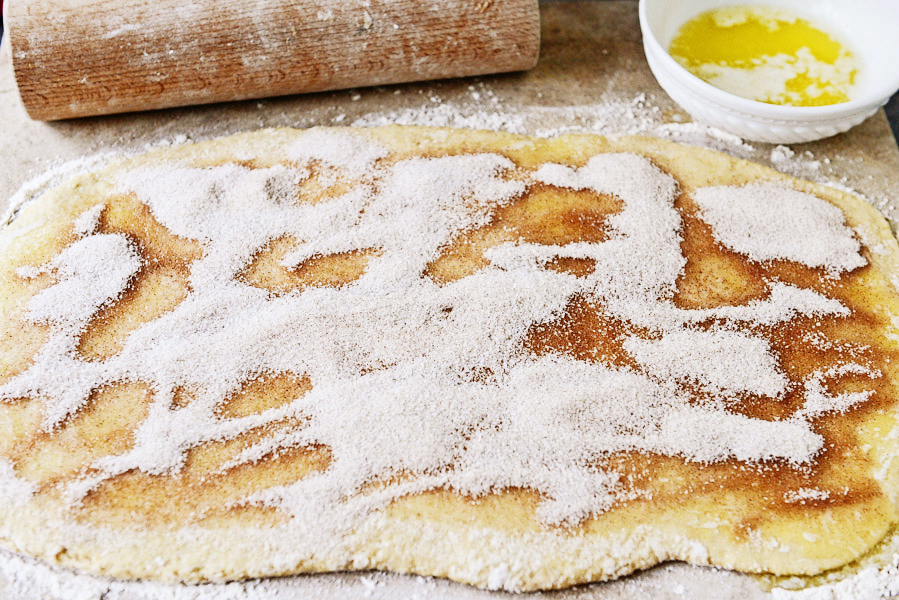
Then cover it in sugar and cinnamon. This is getting good.


Tasty Kitchen Blog: Pull-Apart Bread. Guest post by Jessica Merchant of How Sweet It Is, recipe submitted by TK member Fanny of Oh Sweet Day!

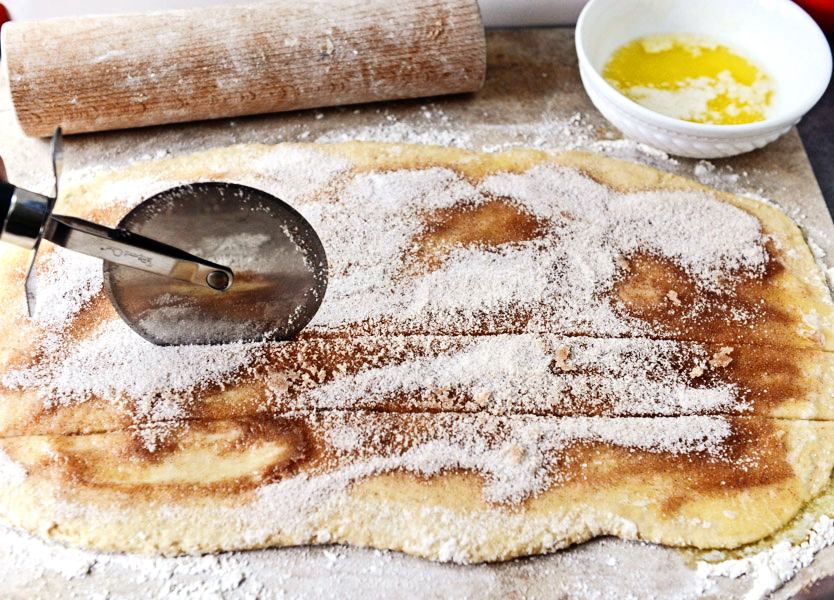
Using a pizza cutter or a large knife, slice the rectangle into six equal strips. Or, uh, five strips. I’m not very skilled at equally cutting dough into perfect strips, so I accidentally ended up with five. Still worked, so if you have that issue, don’t fear.


Tasty Kitchen Blog: Pull-Apart Bread. Guest post by Jessica Merchant of How Sweet It Is, recipe submitted by TK member Fanny of Oh Sweet Day!

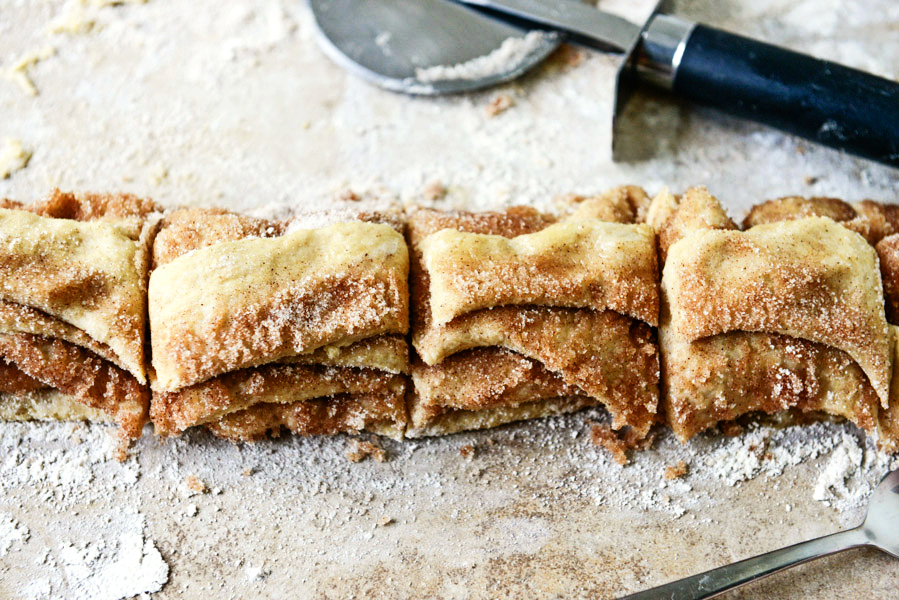
After slicing the strips lengthwise, pile them on top of each other (carefully!) and cut the dough again in six places, creating six stacks. Cute little dough stacks!


Tasty Kitchen Blog: Pull-Apart Bread. Guest post by Jessica Merchant of How Sweet It Is, recipe submitted by TK member Fanny of Oh Sweet Day!

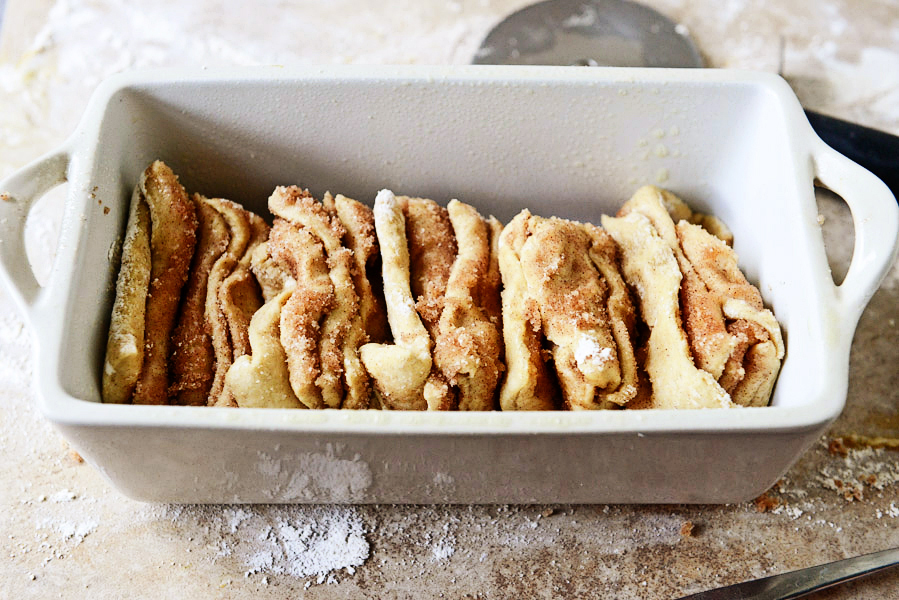
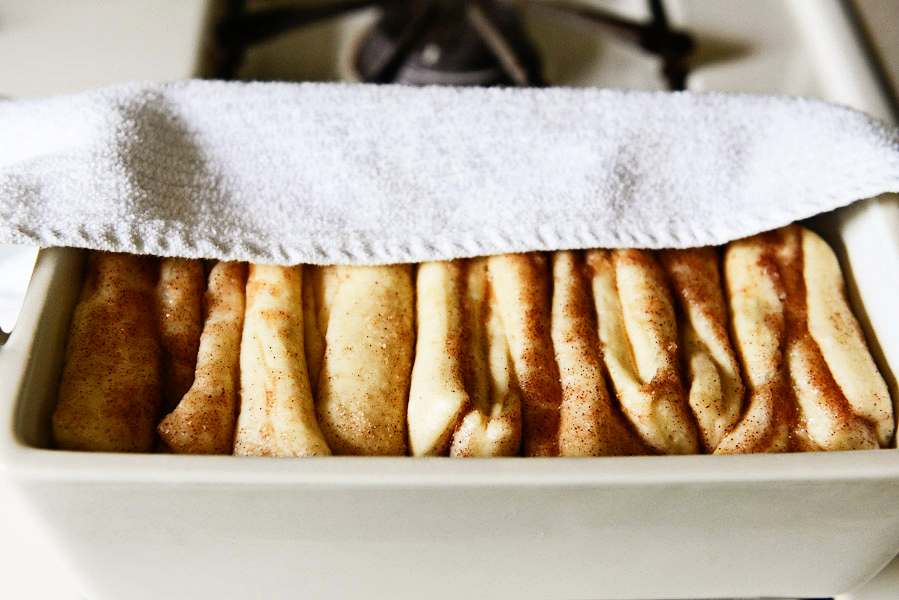
Stuff the cute dough stacks in a buttered 9×5 loaf pan, then cover with the towel and let it rise for another hour or so.


Tasty Kitchen Blog: Pull-Apart Bread. Guest post by Jessica Merchant of How Sweet It Is, recipe submitted by TK member Fanny of Oh Sweet Day!

It should look puffy and pretty!

Stick it in the oven and bake for 30 minutes. If the top gets too brown while baking, tent it with aluminum foil. A few minutes before the bread is finished, whisk together the powdered sugar and milk to create the glaze.


Tasty Kitchen Blog: Pull-Apart Bread. Guest post by Jessica Merchant of How Sweet It Is, recipe submitted by TK member Fanny of Oh Sweet Day!

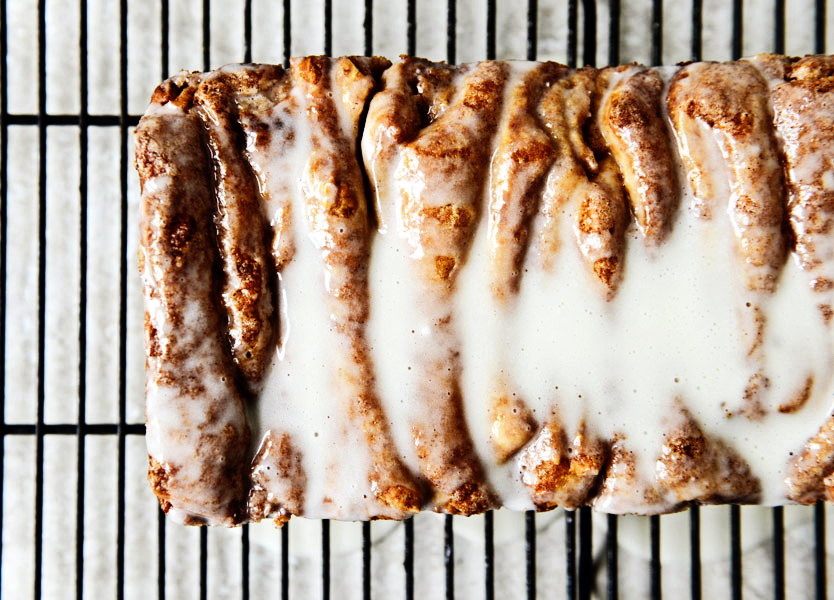
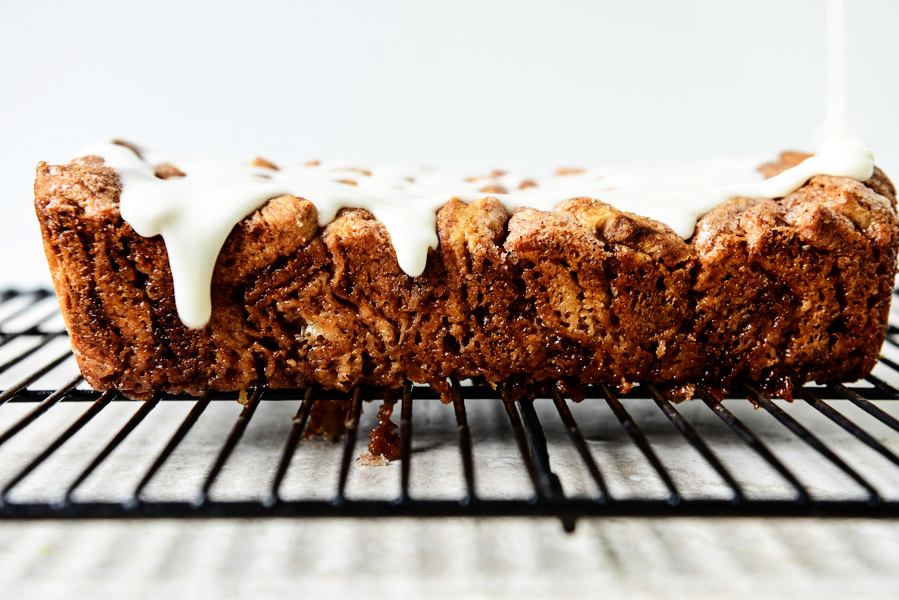
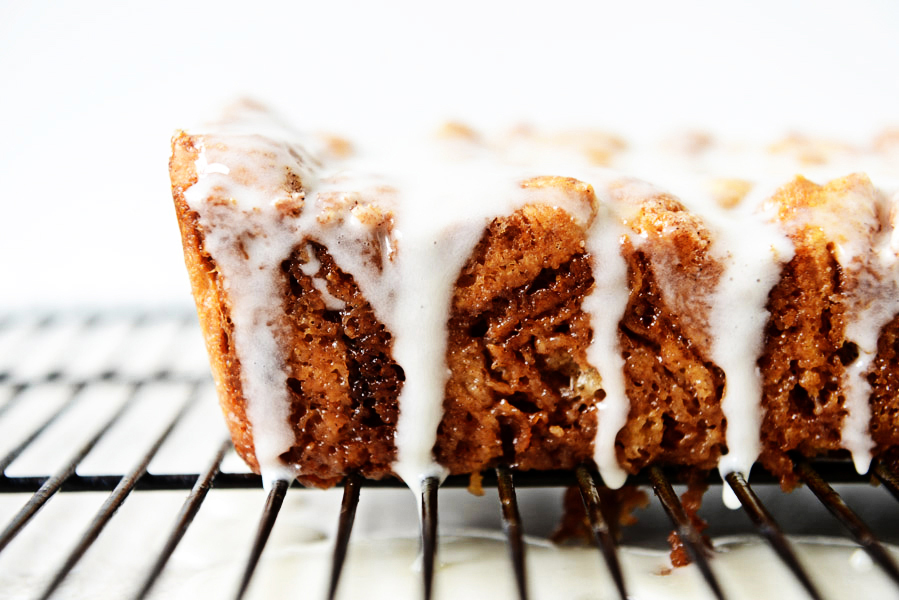
Remove the bread from the oven and let cool for just a few minutes, then gently remove the loaf from the pan and immediately cover in icing.


Tasty Kitchen Blog: Pull-Apart Bread. Guest post by Jessica Merchant of How Sweet It Is, recipe submitted by TK member Fanny of Oh Sweet Day!

The sugary goodness sinks in to all the cracks and crevices since the bread it still warm.


Tasty Kitchen Blog: Pull-Apart Bread. Guest post by Jessica Merchant of How Sweet It Is, recipe submitted by TK member Fanny of Oh Sweet Day!

I’d tell you to wait a few minutes before serving so you don’t burn your mouth, but that’s basically impossible. Just look at it! You’ll want to dig in instantly and I don’t blame you.

Thanks to Fanny for sharing this! Go check out her blog Oh Sweet Day! for more sweetness.


_______________________________________

Jessica Merchant is a personal trainer turned food writer and blogger. Her blog, How Sweet Eats, is where she proclaims her love for all things sweet, all things bacon, and everything else in between. She works her magic in her Pittsburgh kitchen, which she shares with her husband of 2 years.
 

Profile photo of HowSweetEats

Pineapple Upside Down Banana Pancakes

Posted by in Step-by-Step Recipes

Tasty Kitchen Blog: Pineapple Upside Down Banana Pancakes. Guest post by Jessica Merchant of How Sweet It Is, recipe submitted by TK member Donna of Apron Strings.

 
Pancakes are a staple in our house. Well, they’ve actually been a staple in my life since I was a kid, just like many people. My dad grew up eating “short stacks” that his grandmother made him, and in his words? He ate them faster than she could cook them. This is one tradition that he definitely kept up with.

As soon as I got married, my husband became a little obsessed with making pancakes too. Now it’s a constant competition: Who makes the better pancakes? Your dad or your husband? Sheesh. I’m staying out of that one.

So! I’m making my own pancakes: Pineapple Upside Down Banana Pancakes. These are a great twist on good old banana pancakes and better yet, they’re vegan. Donna sure does know what she’s doing with this recipe. Let’s get to it.


Tasty Kitchen Blog: Pineapple Upside Down Banana Pancakes. Guest post by Jessica Merchant of How Sweet It Is, recipe submitted by TK member Donna of Apron Strings.

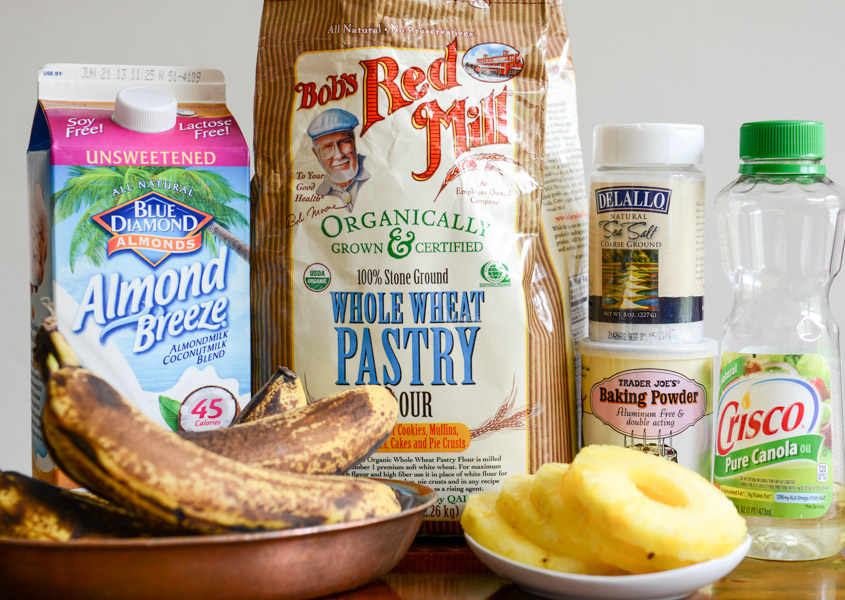
These are such a super simple recipe. You need some soy or almond milk (vanilla coconut is my favorite!), whole grain flour, baking powder, salt, a little canola oil, bananas for mashing and pineapple rings.


Tasty Kitchen Blog: Pineapple Upside Down Banana Pancakes. Guest post by Jessica Merchant of How Sweet It Is, recipe submitted by TK member Donna of Apron Strings.

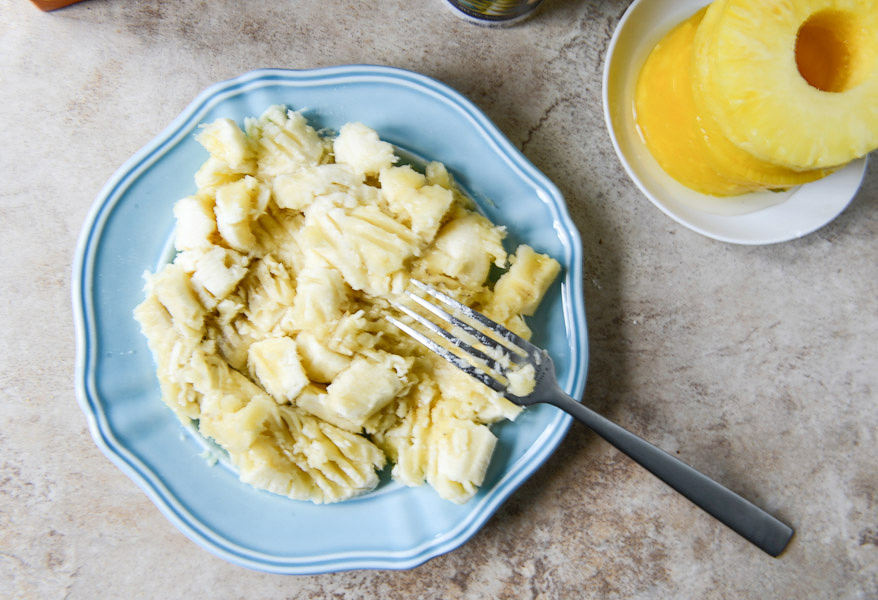
First up, mash the bananas. They don’t need to be completely mashed because we are going to throw them in the food processor.


Tasty Kitchen Blog: Pineapple Upside Down Banana Pancakes. Guest post by Jessica Merchant of How Sweet It Is, recipe submitted by TK member Donna of Apron Strings.

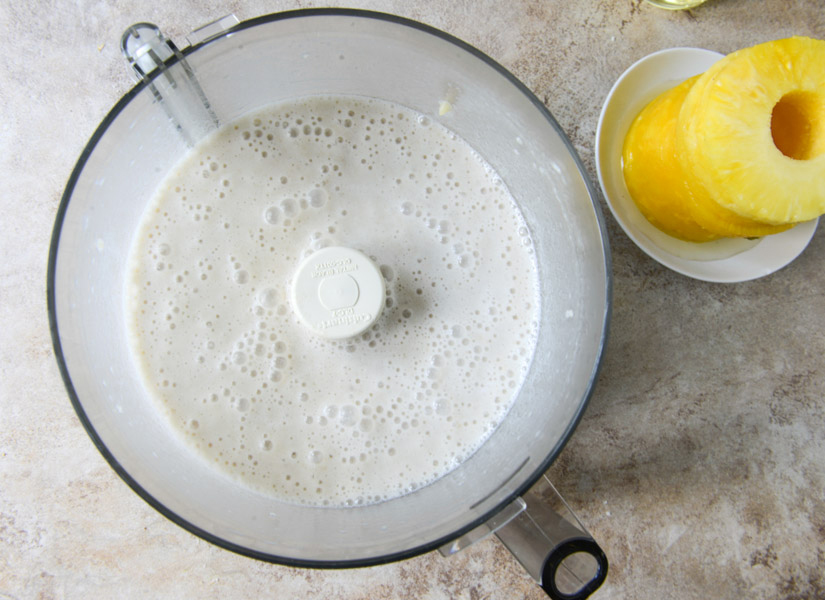
Next, combine them with a little bit of the almond milk and blend, blend, blend. This technique blew my mind. I often make pancakes with mashed bananas, but simply fold them into the batter. Pureeing them with the milk made the batter silky smooth. I love this result.


Tasty Kitchen Blog: Pineapple Upside Down Banana Pancakes. Guest post by Jessica Merchant of How Sweet It Is, recipe submitted by TK member Donna of Apron Strings.

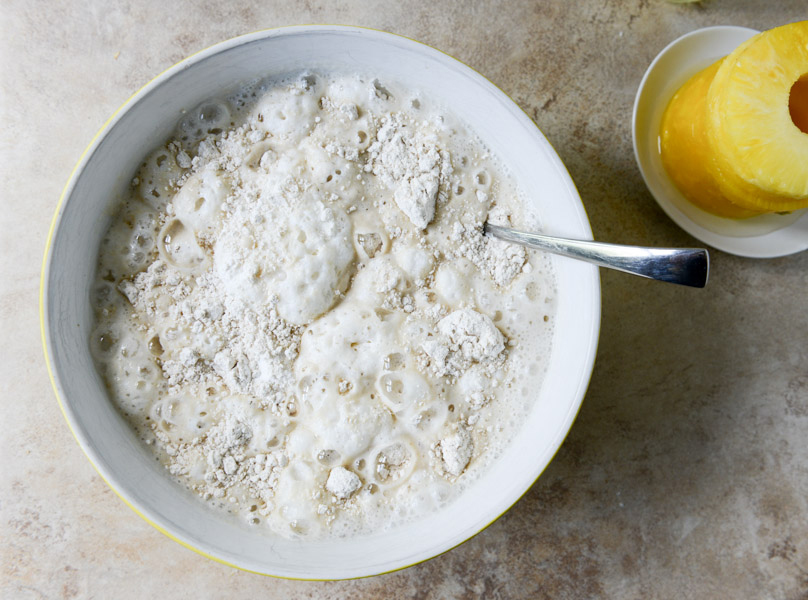
Mix the bananas and milk with the dry ingredients. I used whole wheat pastry flour which tends to be a bit “softer” and not as dense as traditional whole wheat flour. Because of this, I only needed a little less than two cups of milk. I would suggest starting with 1 ½ cups and going from there.


Tasty Kitchen Blog: Pineapple Upside Down Banana Pancakes. Guest post by Jessica Merchant of How Sweet It Is, recipe submitted by TK member Donna of Apron Strings.

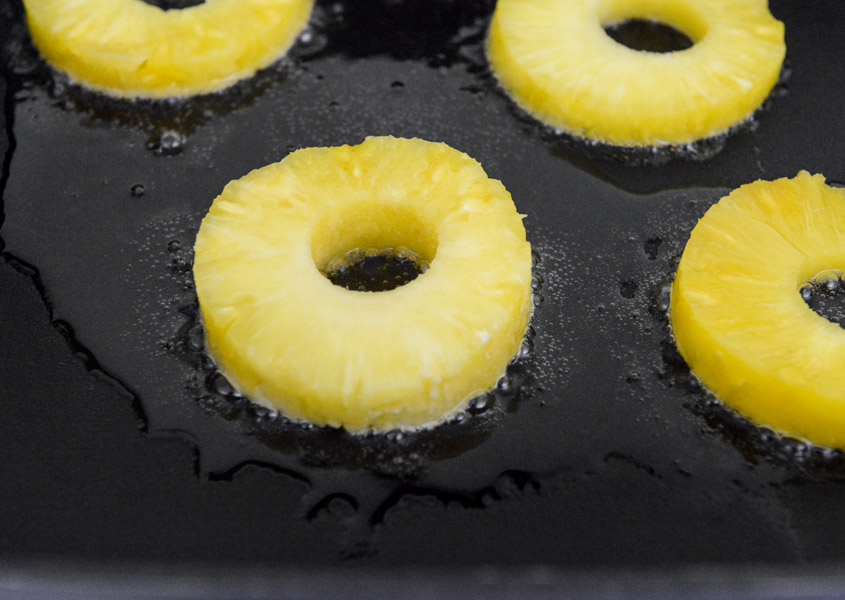
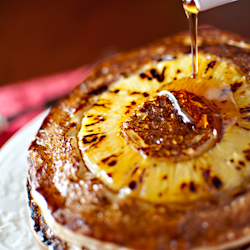
Once the batter is mixed, heat a skillet or griddle over medium-low heat. Add a little canola oil then throw the pineapple rings on to caramelize them. You do want to make sure that your pineapple rings are thin. I learned this the hard way.


Tasty Kitchen Blog: Pineapple Upside Down Banana Pancakes. Guest post by Jessica Merchant of How Sweet It Is, recipe submitted by TK member Donna of Apron Strings.

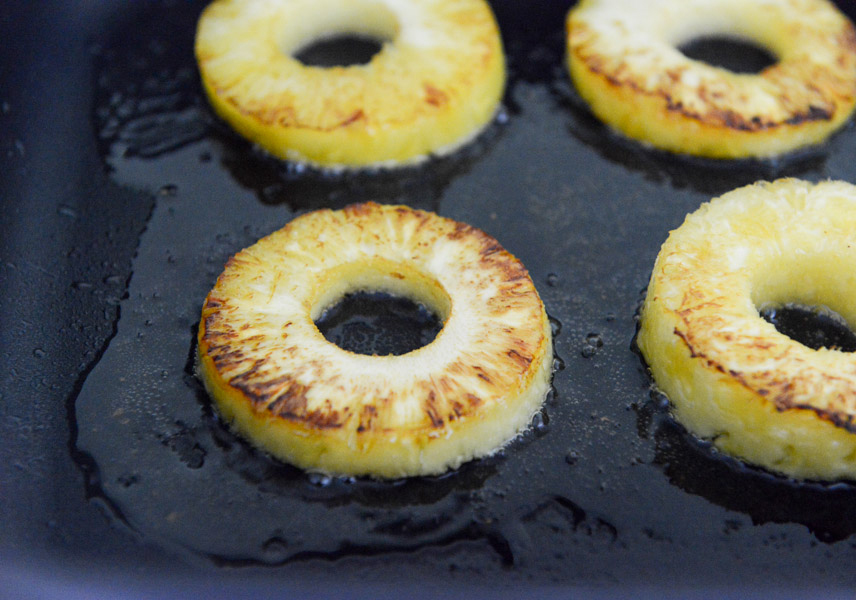
Once one side is golden and delicious, flip it over.


Tasty Kitchen Blog: Pineapple Upside Down Banana Pancakes. Guest post by Jessica Merchant of How Sweet It Is, recipe submitted by TK member Donna of Apron Strings.

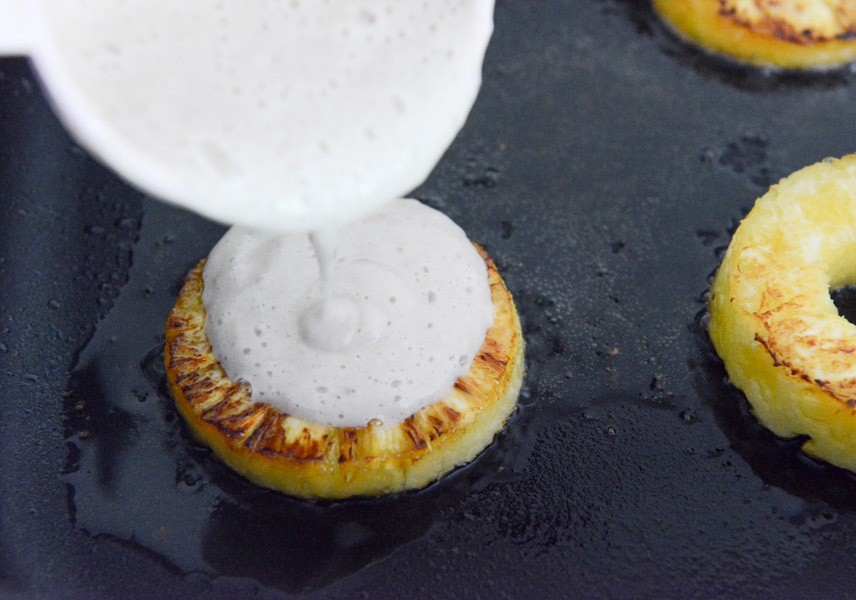
Pour a bit of batter right in the center and just slightly over the outer rings of the pineapple. Let cook until bubbles form and the batter is almost set.


Tasty Kitchen Blog: Pineapple Upside Down Banana Pancakes. Guest post by Jessica Merchant of How Sweet It Is, recipe submitted by TK member Donna of Apron Strings.

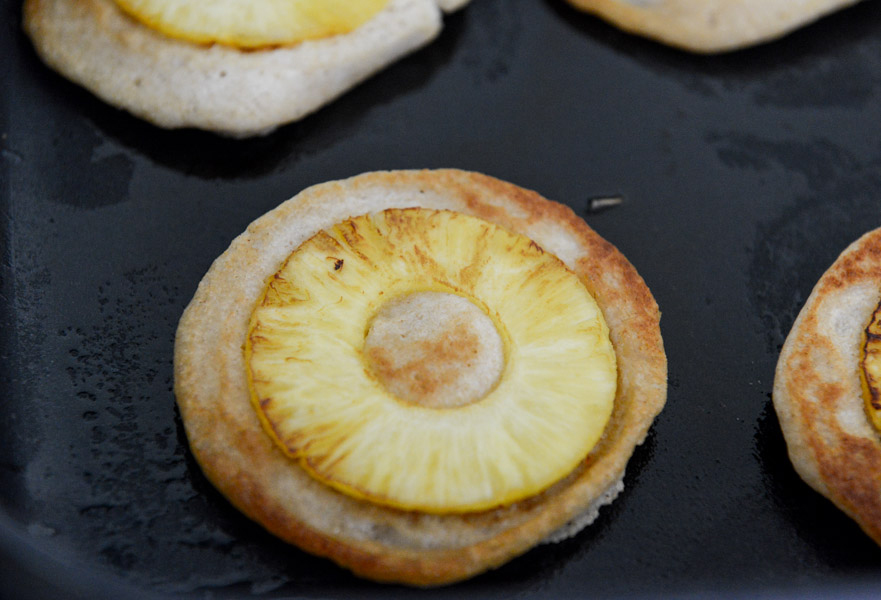
Then flip it! I love using a little oil or butter for my pancakes because they result is that gorgeous, almost crisp exterior.


Tasty Kitchen Blog: Pineapple Upside Down Banana Pancakes. Guest post by Jessica Merchant of How Sweet It Is, recipe submitted by TK member Donna of Apron Strings.

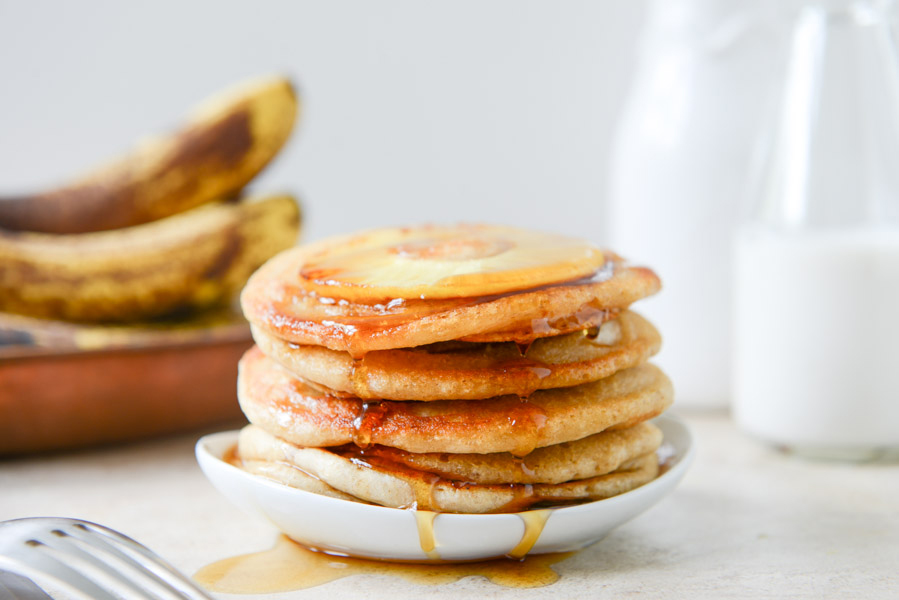
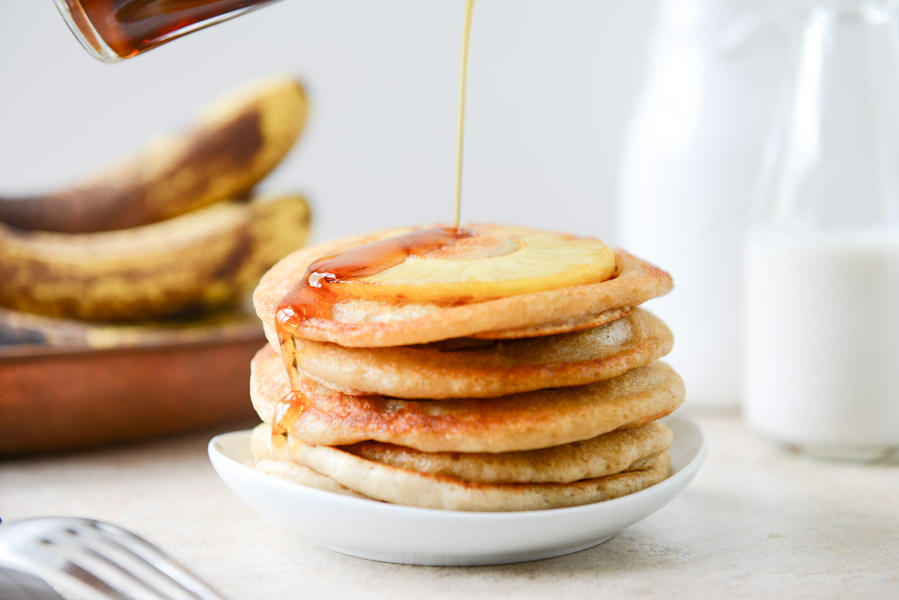
Pile those babies up and cover them in syrup.


Tasty Kitchen Blog: Pineapple Upside Down Banana Pancakes. Guest post by Jessica Merchant of How Sweet It Is, recipe submitted by TK member Donna of Apron Strings.

These were such a fun twist on regular banana pancakes and I just loved how easy they were. Hard to believe they are vegan too. Definitely a new go-to breakfast.

Thanks so much to Donna for the recipe. Be sure to check out her blog, Apron Strings. It’s super cute!


Printable Recipe

Pineapple Upside Down Banana Pancakes

See post on Donna @ apron strings’s site!
2.00 Mitt(s) 3 Rating(s)3 votes, average: 2.00 out of 53 votes, average: 2.00 out of 53 votes, average: 2.00 out of 53 votes, average: 2.00 out of 53 votes, average: 2.00 out of 5

Prep Time:

Cook Time:

Difficulty: Easy

Servings: 8

8
x

Print Options

Page size Letter 3x5 4x6
Text Size Small Medium Large
Content Include description
Include prep time, etc.
Show image

Description

A twist on a classic: These are sugarless and vegan Pineapple Upside Down Banana Pancakes!

Ingredients

  • 3  Ripe Bananas
  • 2-¼ cups Vanilla Almond Or Soy Milk
  • 1-½ cup Whole Grain Flour (such As Wheat Or Oat)
  • 2 teaspoons Baking Powder
  • ½ teaspoons Salt
  • 1  Small Pineapple
  • A Little Canola Oil

Preparation Instructions

Mash bananas with a fork—you should have 1 ½ cups. Process the banana in food processor with about ½ cup of milk until smooth. Blend in remaining milk. Whisk together the flour, baking powder and salt. Stir dry ingredients into banana mixture until blended. Let sit while cooking pineapple slices.

Cut outer skin off pineapple. Cut pineapple into slices ½ inch thick, making 8 slices. Using a small round cookie cutter, remove center core of each slice. Heat a skillet to medium low heat. Add a little oil to skillet. Cook pineapple slices in batches for about 2 minutes.

Turn pineapple slices over. Immediately pour ¼ cup batter into the center of each pineapple slice, allowing batter to spill over and form a circle around the outside of the pineapple slice. Add a little more batter if necessary to form about 1 inch of pancake around the outside of the pineapple slice. Cook for 2 to 3 minutes, until lightly browned.

Carefully flip over and cook other side for about 2 minutes, until pancake is cooked through and is lightly browned.


_______________________________________

Jessica Merchant is a personal trainer turned food writer and blogger. Her blog, How Sweet Eats, is where she proclaims her love for all things sweet, all things bacon, and everything else in between. She works her magic in her Pittsburgh kitchen, which she shares with her husband of 2 years.
 

Profile photo of HowSweetEats

Spicy Buffalo Chicken Cannoli

Posted by in Step-by-Step Recipes

  As a lover of all things Buffalo chicken, I am constantly trying to find new ways to use the flavor combination. You could say that I’m a bit of a Buffalo chicken … freak? But that’s okay. The first step is admitting you have a problem, right? Well. I might have a big problem […]

Profile photo of HowSweetEats

Crispy Avocado, Bacon and Tomato Salad

Posted by in Step-by-Step Recipes

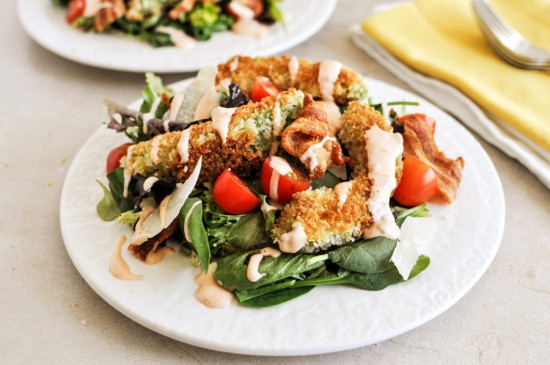
  Crispy fried avocado. Yes, this is a thing. And I couldn’t be more excited! Two of my favorite foods, right here on a bunch of lettuce leaves. I can totally let the lettuce leaves slide, if only because the big bacon slices and crunchy avocado pieces make up for it. Actually those two things […]
Profile photo of HowSweetEats

Bacon and Blue Cheeseburger Potato Skins

Posted by in Step-by-Step Recipes

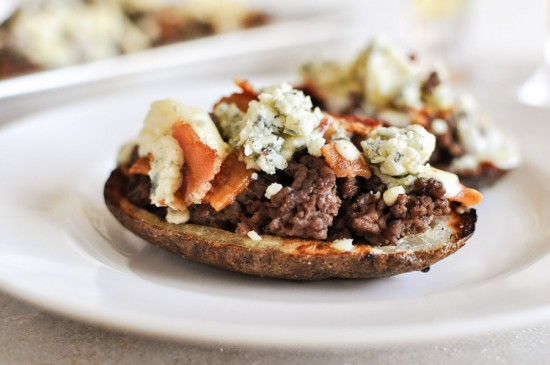
  Oh boy. Do I have a treat for you. Have you ever had a fabulous bacon and blue cheeseburger? Please say yes. If not, please imagine that you have. Thick and crunchy bacon. Covered in gooey Gorgonzola or Stilton or your blue of choice. And now, imagine that entire combination stuffed into a crispy […]

Profile photo of HowSweetEats

Cannoli Tart

Posted by in Baking, Step-by-Step Recipes

Oh my goodness. You know when you have one of those desserts that completely knocks your socks off? This is it. And it’s simple, too. It’s like the new Holy Grail of treats! After seeing this Cannoli Tart from The Seaside…