The Pioneer Woman Tasty Kitchen
Profile photo of HowSweetEats

Homemade Naan

Posted by in Step-by-Step Recipes

Tasty Kitchen Blog: Homemade Naan. Guest post by Jessica Merchant of How Sweet It Is, recipe submitted by TK member Prerna of Indian Simmer.

 
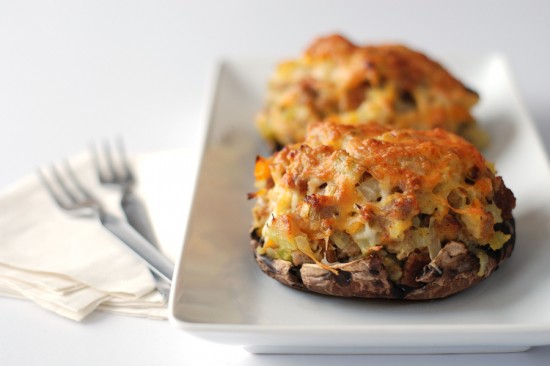
One of my resolutions for New Year was to make more homemade bread. I couldn’t think of a better place to begin than with one of my favorites: fluffy naan.

To be honest, naan has always intimidated me a bit. It is so delicious that I assumed it must be complicated. Luckily, I stumbled upon Prerna’s recipe for Homemade Naan and can say that is has single-handedly changed my life. Long gone are the days that I have to run to the store and purchase naan to satisfy a craving. Now I can make it at home!

Not only that, but I can’t believe how simple it really is. I promise it is even easier than it looks.

I followed Prerna’s recipe exactly, and loved it so much that I also made a second batch with whole wheat pastry flour. It came out great too! Now my only problem is that I can’t stop eating naan with loads of butter. Send help!


Tasty Kitchen Blog: Homemade Naan. Guest post by Jessica Merchant of How Sweet It Is, recipe submitted by TK member Prerna of Indian Simmer.

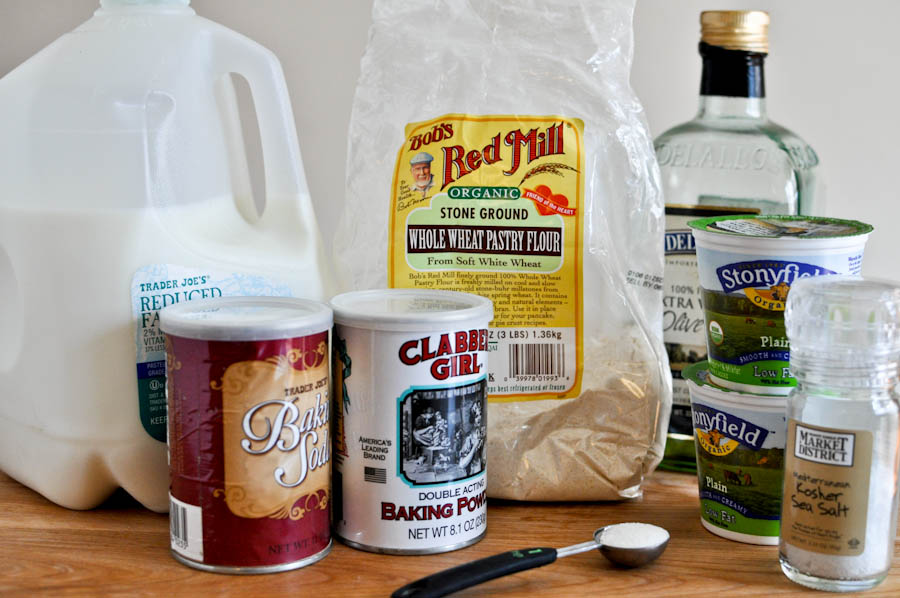
Here’s everything you need for the dough: milk, plain yogurt, baking soda, baking powder, sugar, salt, olive oil and either whole wheat pastry flour or all-purpose flour. You probably have all the ingredients in your kitchen! In fact, I think you should head on in there right now and whip some up.


Tasty Kitchen Blog: Homemade Naan. Guest post by Jessica Merchant of How Sweet It Is, recipe submitted by TK member Prerna of Indian Simmer.

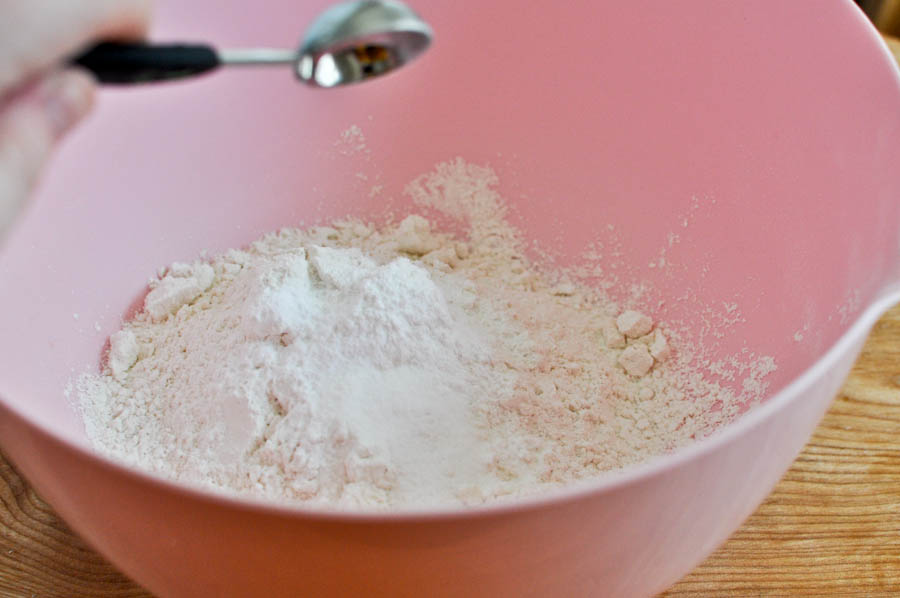
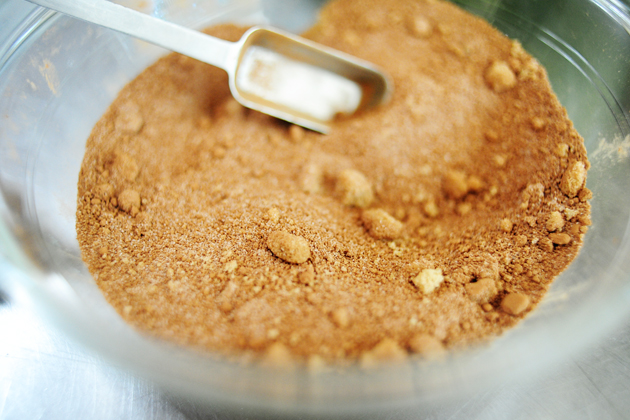
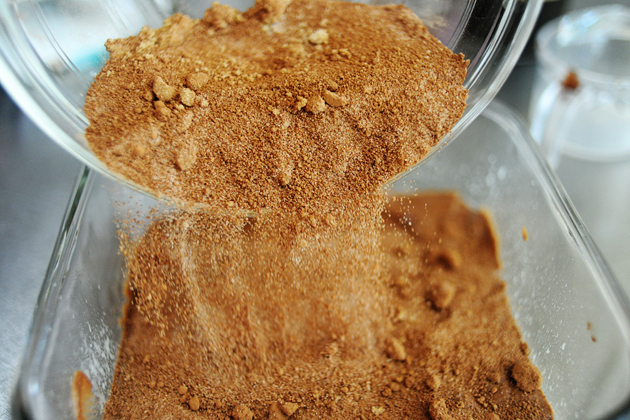
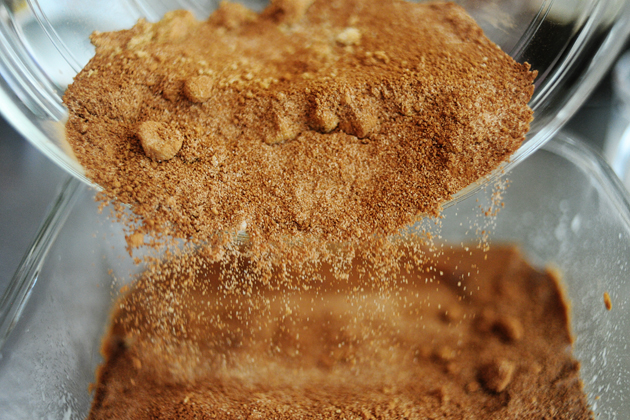
Begin by combining all of your dry ingredients—the flour, baking soda, baking powder, sugar and salt—into a bowl. Mix them up well.


Tasty Kitchen Blog: Homemade Naan. Guest post by Jessica Merchant of How Sweet It Is, recipe submitted by TK member Prerna of Indian Simmer.

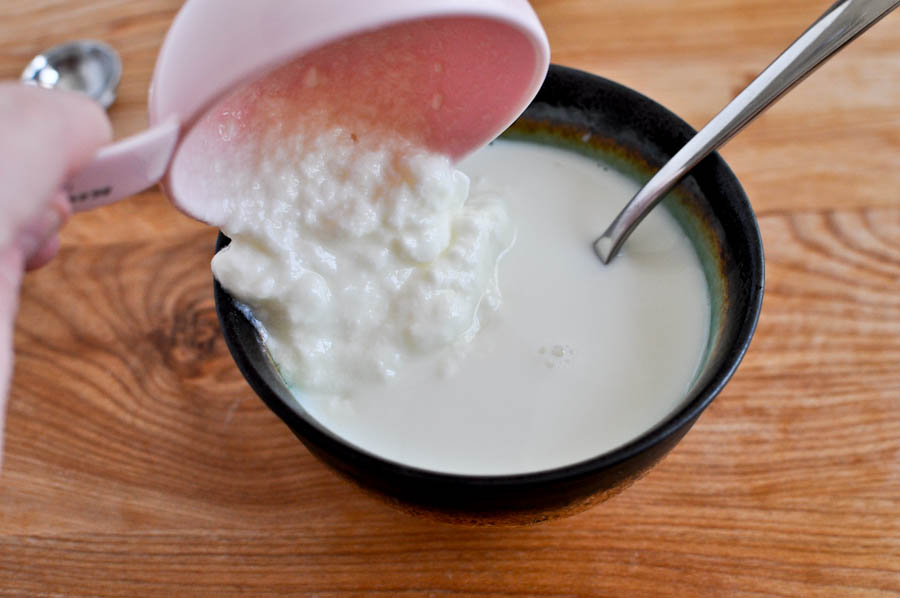
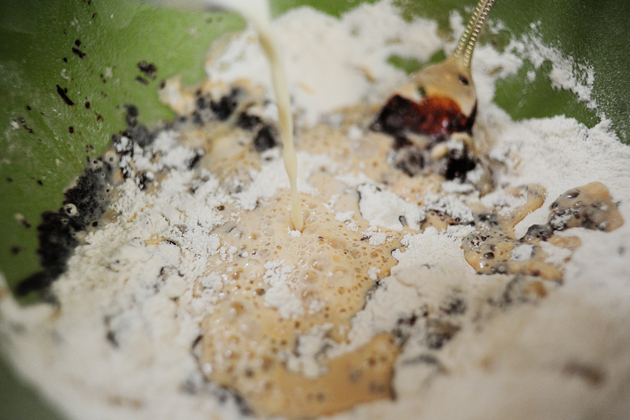
In a separate bowl, warm the milk (I used the microwave and heated mine for about 25 seconds) with the plain yogurt. I let my yogurt sit out for about 15–20 minutes just to take the chill off. It may look a little funky, but just follow the rules. Prerna knows her stuff.


Tasty Kitchen Blog: Homemade Naan. Guest post by Jessica Merchant of How Sweet It Is, recipe submitted by TK member Prerna of Indian Simmer.

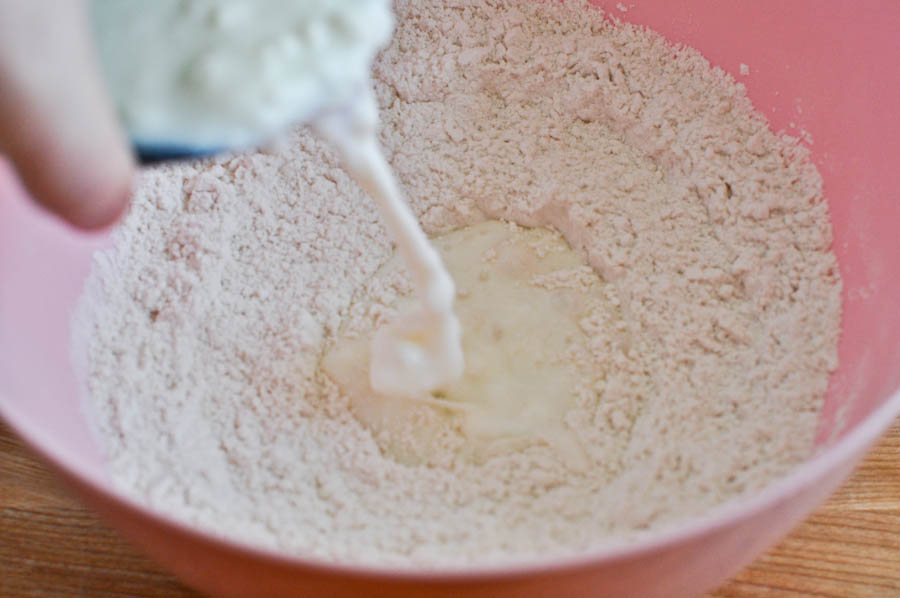
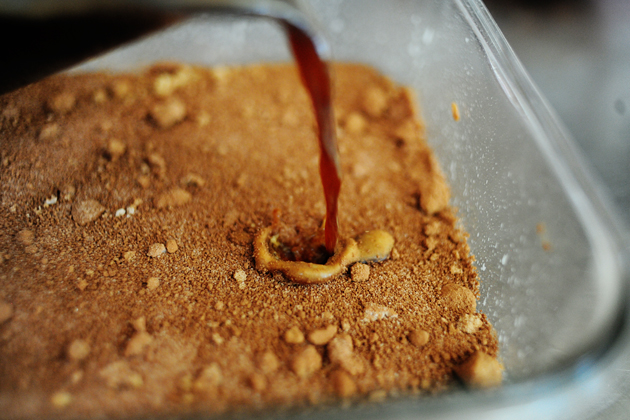
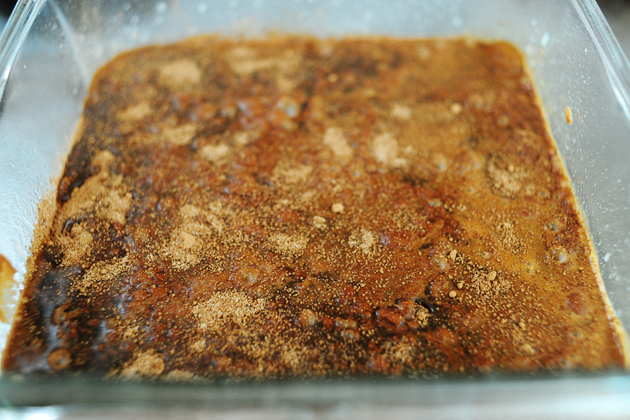
Make a well in the center of the dry ingredients and slowly add half of the yogurt and milk mixture. Right here is where I fell in love with Prerna’s recipe because of her honest instructions: she does not believe that there is one exact liquid measurement to mix with one exact flour measurement to form the perfect dough. I believe the same! While that theory may take a bit of practice and getting used to, it is nearly foolproof when it comes to this naan. After adding half of the mixture, gradually add a bit more until the dough comes together. I ended up using the entire milk and yogurt mixture with the all-purpose flour. However, I only used about 3/4 of the mixture when using the whole wheat pastry flour.


Tasty Kitchen Blog: Homemade Naan. Guest post by Jessica Merchant of How Sweet It Is, recipe submitted by TK member Prerna of Indian Simmer.

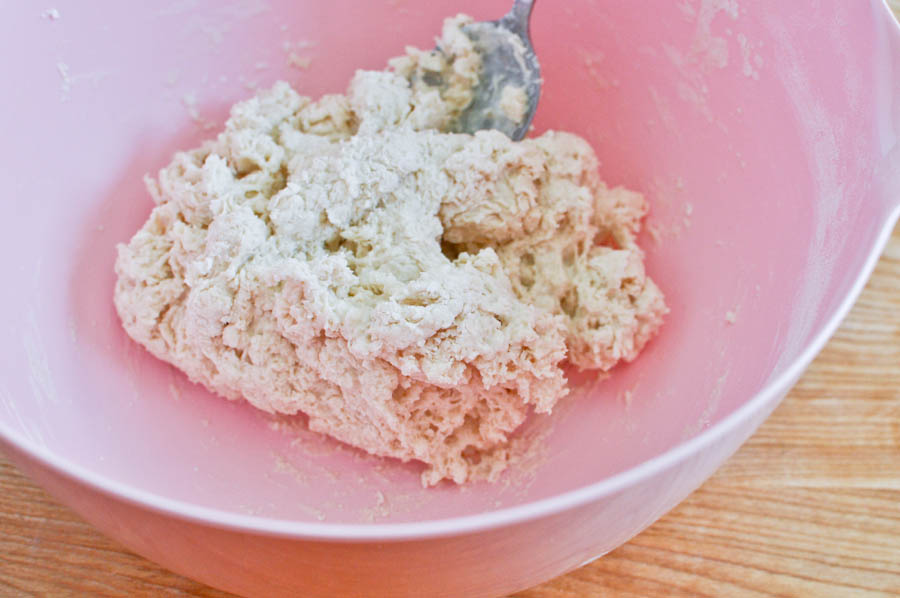
Mix the dough with a spoon until it comes together. Use a bit of oil to grease your hands and form the dough into a ball. No kneading at this stage!


Tasty Kitchen Blog: Homemade Naan. Guest post by Jessica Merchant of How Sweet It Is, recipe submitted by TK member Prerna of Indian Simmer.

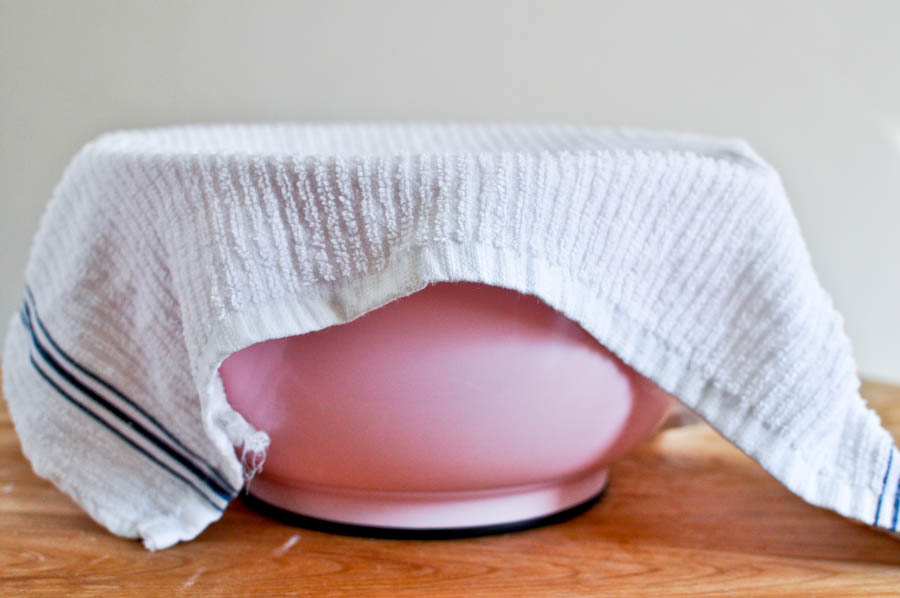
Now it’s time to let the dough work its magic. Cover it with a damp cloth and let it sit for at least 2 hours. In this time, go do something fun like bake cookies or walk the dog. I took this moment to scrub my kitchen floor, which is very out of character for me. I hope I’m not falling ill.


Tasty Kitchen Blog: Homemade Naan. Guest post by Jessica Merchant of How Sweet It Is, recipe submitted by TK member Prerna of Indian Simmer.

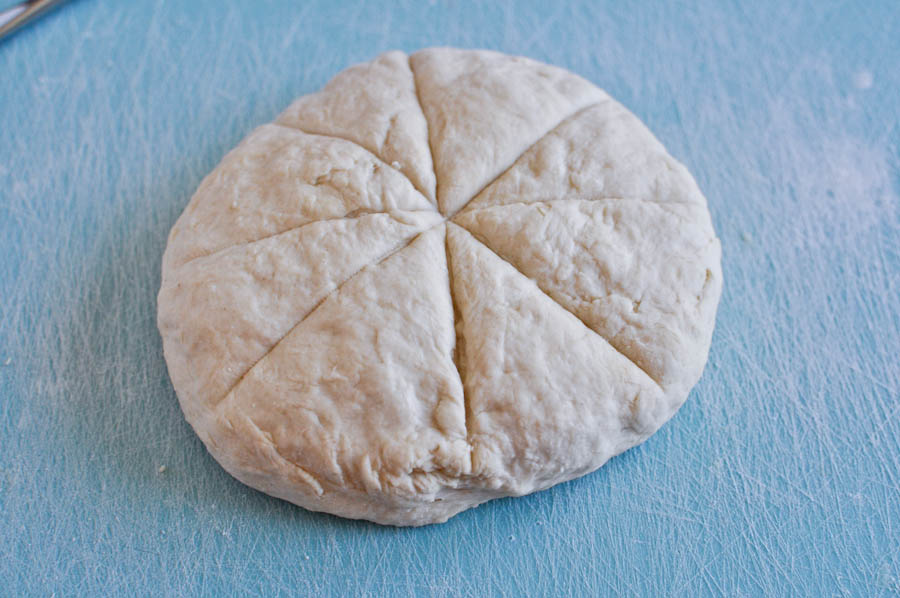
After the two hours have passed, dust your work space with flour and knead the dough for 2-3 minutes. It should be soft and pliable. Form it into a circle. I actually scored my dough to make it easier to get uniform pieces.


Tasty Kitchen Blog: Homemade Naan. Guest post by Jessica Merchant of How Sweet It Is, recipe submitted by TK member Prerna of Indian Simmer.

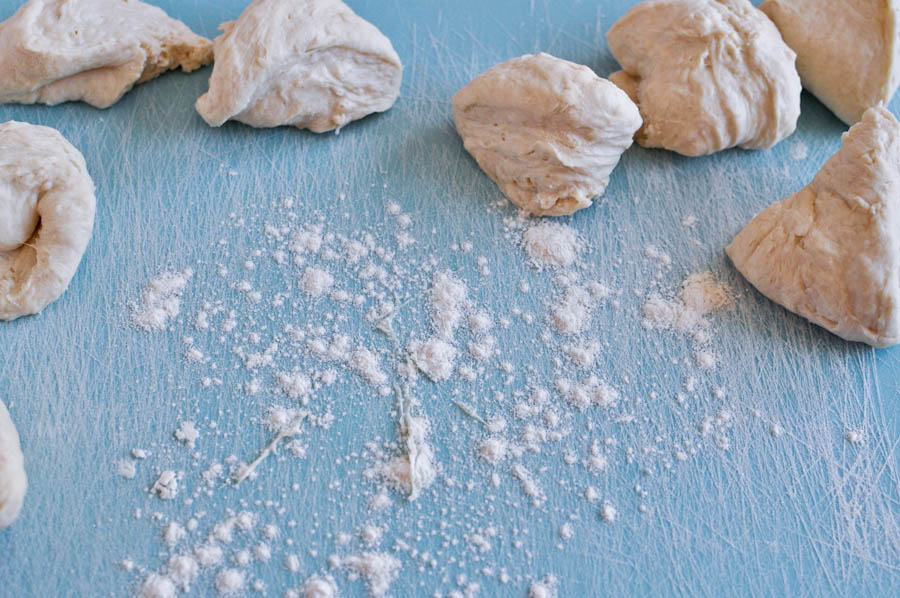
Separate the dough into eight pieces. Sprinkle some flour on your workspace again and flatten each piece of dough. It should still be slightly thick and somewhat elongated.


Tasty Kitchen Blog: Homemade Naan. Guest post by Jessica Merchant of How Sweet It Is, recipe submitted by TK member Prerna of Indian Simmer.

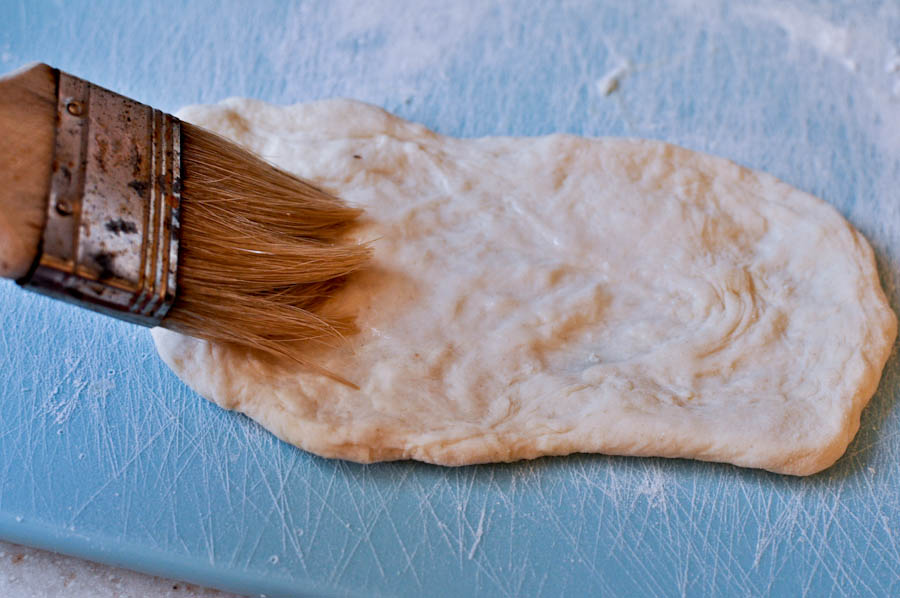
The time has come to season your naan! You want to season one side with your flavor of choice; I chose garlic and a bit of smoked paprika. But there is a world of possibilities out there. Get creative! In the meantime, brush the opposite side with water.


Tasty Kitchen Blog: Homemade Naan. Guest post by Jessica Merchant of How Sweet It Is, recipe submitted by TK member Prerna of Indian Simmer.

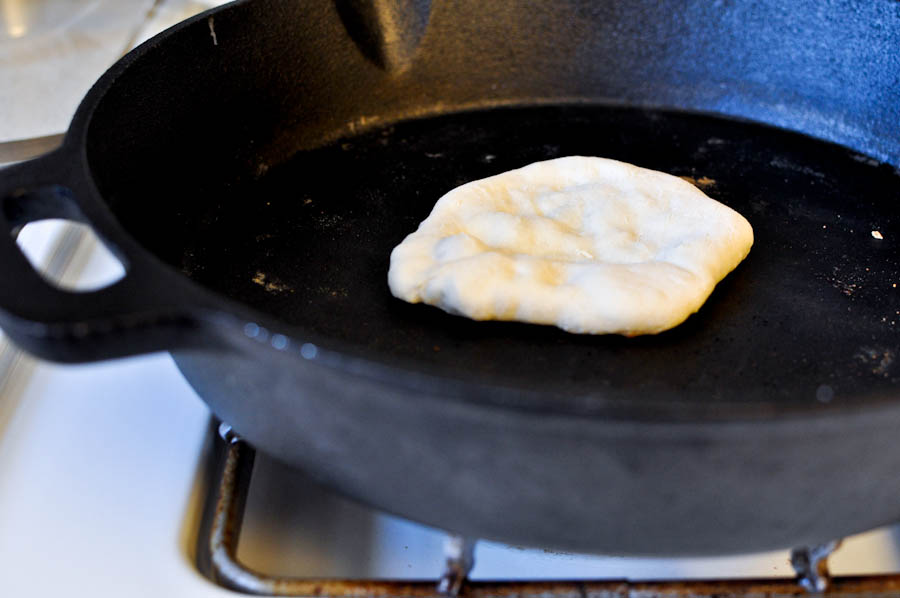
Heat a skillet on medium heat. I used my dandy, trust old cast iron. I couldn’t live without it. Place your dough water-side down in the skillet. It will stick. Cook the naan for about 30-60 seconds. You know it’s time to flip it when you can see the dough bubbling. If it is still sticking, give it another 15 seconds and try again. Gently lift it up with kitchen tongs.

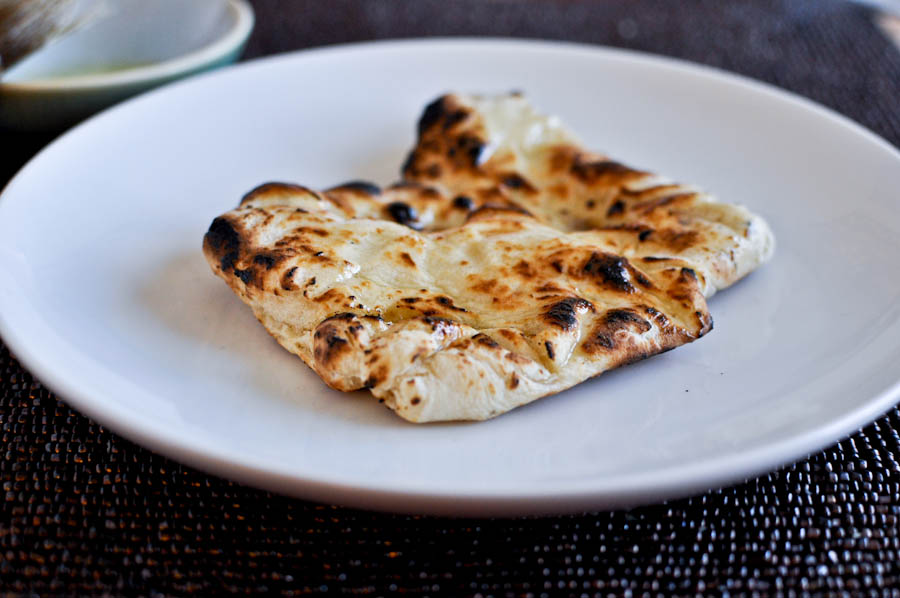
This is where you have two options. You can flip the naan in the skillet and cook the other side just like you did the first. I did this with a handful of my dough and each came out beautifully.


Tasty Kitchen Blog: Homemade Naan. Guest post by Jessica Merchant of How Sweet It Is, recipe submitted by TK member Prerna of Indian Simmer.

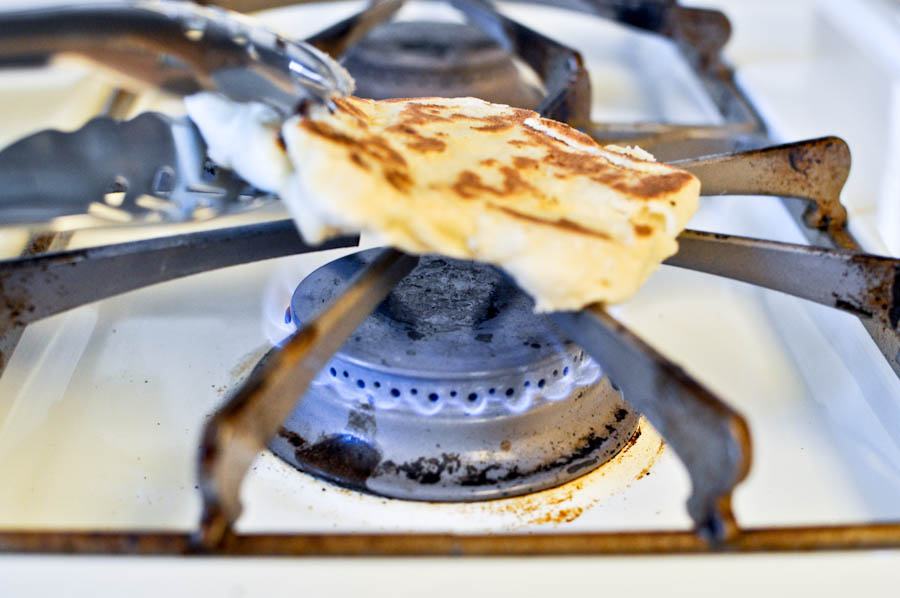
Prerna’s recipe calls for heating the other side of the naan over an open flame to achieve an authentic naan look and taste. I was hesitant at first, but I lit my burner next to my cast iron skillet and got to work.

I absolutely loved this result!

I used kitchen tongs and held the naan over the flame for about 30 seconds, rotating it constantly. The timing worked perfectly since the other naan was toasting in the skillet, and it became natural to get into a routine: move naan from the skillet to the flame, place the next naan in the skillet, rotate the naan over the open flame, then set aside on a plate to cool. Repeat!

I highly recommend this option for those of you with a gas stove. Just be careful! Make sure there is nothing flammable nearby (such as towels or napkins) and give your full attention to the naan.

And remember, the other option of completing the naan in the skillet yields an excellent result as well.


Tasty Kitchen Blog: Homemade Naan. Guest post by Jessica Merchant of How Sweet It Is, recipe submitted by TK member Prerna of Indian Simmer.

I ended up with a tall, fluffy stack of regular and whole wheat naan. I hope there is naan in Heaven.


Tasty Kitchen Blog: Homemade Naan. Guest post by Jessica Merchant of How Sweet It Is, recipe submitted by TK member Prerna of Indian Simmer.

Regardless of how you choose to flavor your naan, I recommend brushing it with tons of melted butter. Why would you do anything else?

Of course, you also have the option of making naan pizzas (a favorite in our house) or peanut butter and jelly naan or even dessert naan. Naan topped with peanut butter, honey, bananas and chocolate chips? Sign me up!


Tasty Kitchen Blog: Homemade Naan. Guest post by Jessica Merchant of How Sweet It Is, recipe submitted by TK member Prerna of Indian Simmer.

I promise you won’t ever want to buy store-bought naan again. Enjoy!

Thanks to Prerna for her fabulous recipe and for helping me step out of my comfort zone in the kitchen. She made my first naan experience quite enjoyable and extremely delicious. Check out her wonderful blog, Indian Simmer, which is chock full of beautiful photography and mouth watering recipes.


Printable Recipe

Homemade Naan

See post on indiansimmer’s site!
4.53 Mitt(s) 19 Rating(s)19 votes, average: 4.53 out of 519 votes, average: 4.53 out of 519 votes, average: 4.53 out of 519 votes, average: 4.53 out of 519 votes, average: 4.53 out of 5

Prep Time:

Cook Time:

Difficulty: Easy

Servings: 4

4
x

Print Options

Page size Letter 3x5 4x6
Text Size Small Medium Large
Content Include description
Include prep time, etc.
Show image

Description

Naan is one of the most popular Indian breads. It is a flat bread made with fermented dough, traditionally cooked in a clay oven called tandoor.

Ingredients

  • 2 cups All Purpose Flour Or Wheat Flour
  • ¾ teaspoons Baking Powder
  • ½ teaspoons Baking Soda
  • ½ teaspoons Sugar
  • ¼ teaspoons Salt
  • ½ cups Warm Milk
  • ½ cups Yogurt
  • ½ Tablespoons Oil, As Needed
  • Additional Optional Herbs And Seasonings To Flavor The Naan (See Note)

Preparation Instructions

Note: The ingredient list includes the ingredients for the dough. You can flavor your naan with all kinds of herbs. I made cumin naan, garlic naan, butter naan, and some topped with cilantro.

Mix all the dry ingredients together and make a well of flour.

Mix milk and yogurt together and pour half of it into the well and slowly combine it together.

I don’t think there’s an exact amount of liquid that should be added to the exact amount of flour to make a perfect dough. So what I do is continue adding liquid slowly and combining it all together slowly until a soft dough is made. The dough should be soft enough for you to be able to dig your finger into it without applying any pressure. If dough sticks to your hand too much, then use little bit of oil on your hands and then punch into the dough.

Cover with a damp cloth and let it sit in a warm place for at least 2 hours.

After a few hours, dust your working board, take out the dough and knead it for about 2-3 minutes. Divide the dough into smaller balls (in this case you should get about 8 balls to make naans).

Dust the board again and flatten the balls to make bread that is a little thick and elongated.

Now sprinkle one side of the bread with your desired flavor. I made cumin, minced garlic, chopped cilantro and some simple butter naans.

Brush the other side with water.

Heat a thick-bottomed skillet or a wok or any heavy-bottomed pan with a lid. Once it is nicely hot, place the naan wet side down (it will stick) and cover it with a lid.

Let it cook for about 30 seconds or until you see bubbles on it. Now cook the other side of the naan over a direct flame on the burner with the help of tongs. When you see some charred brown spots then you know that the naan is done.

Smother a good amount of butter on your naans and when you taste them, you’ll know what a peaceful life means!


_______________________________________

Jessica Merchant is a personal trainer turned food writer and blogger. Her blog, How Sweet Eats, is where she proclaims her love for all things sweet, all things bacon, and everything else in between. She works her magic in her Pittsburgh kitchen, which she shares with her husband of 2 years.


Profile photo of twopeasandtheirpod

Spinach and Feta Hummus

Posted by in Step-by-Step Recipes

Tasty Kitchen Blog: Spinach Feta Hummus. Guest post by Maria Lichty of Two Peas and Their Pod, recipe submitted by TK member Gaby Dalkin of What's Gaby Cooking.

 
One of my all-time favorite snacks is hummus. I love eating it with pita bread, cut up vegetables, or pita chips. I love original hummus, but sometimes I like to mix things up. Roasted red pepper and cilantro lime hummus are a few of my favorites, but I am currently obsessed with this Spinach and Feta Hummus from TK member What’s Gaby Cooking. It is out of this world delicious! It is thick, creamy, and full of flavor. I also appreciate the bright green color.

If you’ve never made hummus at home, don’t be afraid. I promise this recipe is super simple, it only takes about five minutes to make. Spinach and Feta Hummus is perfect for parties or everyday eating. Spread it on a sandwich, use it as a dip, or grab a spoon. It is that good. 


Tasty Kitchen Blog: Spinach Feta Hummus. Guest post by Maria Lichty of Two Peas and Their Pod, recipe submitted by TK member Gaby Dalkin of What's Gaby Cooking.

To make the hummus, you will need: garbanzo beans, fresh spinach leaves, feta cheese, olive oil, lemon juice, tahini paste, red pepper flakes, garlic, and salt. For exact amounts, see the recipe below.


Tasty Kitchen Blog: Spinach Feta Hummus. Guest post by Maria Lichty of Two Peas and Their Pod, recipe submitted by TK member Gaby Dalkin of What's Gaby Cooking.

Add the garbanzo beans to the bowl of a large food processor.


Tasty Kitchen Blog: Spinach Feta Hummus. Guest post by Maria Lichty of Two Peas and Their Pod, recipe submitted by TK member Gaby Dalkin of What's Gaby Cooking.

Add the spinach leaves and put the lid on the food processor. Pulse the beans and spinach together, just until combined. 


Tasty Kitchen Blog: Spinach Feta Hummus. Guest post by Maria Lichty of Two Peas and Their Pod, recipe submitted by TK member Gaby Dalkin of What's Gaby Cooking.

Next, drizzle in the olive oil and squeeze in the fresh lemon juice. 


Tasty Kitchen Blog: Spinach Feta Hummus. Guest post by Maria Lichty of Two Peas and Their Pod, recipe submitted by TK member Gaby Dalkin of What's Gaby Cooking.

Add the tahini paste. 


Tasty Kitchen Blog: Spinach Feta Hummus. Guest post by Maria Lichty of Two Peas and Their Pod, recipe submitted by TK member Gaby Dalkin of What's Gaby Cooking.

Place the lid on the food processor and pulse until combined. 


Tasty Kitchen Blog: Spinach Feta Hummus. Guest post by Maria Lichty of Two Peas and Their Pod, recipe submitted by TK member Gaby Dalkin of What's Gaby Cooking.

Add the feta cheese, red pepper flakes, garlic, and salt. 


Tasty Kitchen Blog: Spinach Feta Hummus. Guest post by Maria Lichty of Two Peas and Their Pod, recipe submitted by TK member Gaby Dalkin of What's Gaby Cooking.

Blend all of the ingredients together until smooth. 


Tasty Kitchen Blog: Spinach Feta Hummus. Guest post by Maria Lichty of Two Peas and Their Pod, recipe submitted by TK member Gaby Dalkin of What's Gaby Cooking.

Serve with pita chips, vegetables, tortilla chips, pita bread, or spread on a sandwich. Enjoy! 

Thanks Gaby for a most delicious recipe! (Gaby’s blog is packed with more wonderful recipes like this one. You should go check it out!)


Printable Recipe

Spinach and Feta Hummus

See post on whatsgabycooking’s site!
4.70 Mitt(s) 10 Rating(s)10 votes, average: 4.70 out of 510 votes, average: 4.70 out of 510 votes, average: 4.70 out of 510 votes, average: 4.70 out of 510 votes, average: 4.70 out of 5

Prep Time:

Cook Time:

Difficulty: Easy

Servings: 10

10
x

Print Options

Page size Letter 3x5 4x6
Text Size Small Medium Large
Content Include description
Include prep time, etc.
Show image

Description

Homemade Spinach and Feta Hummus—perfect for dips, spreads or to just eat with a spoon!

Ingredients

  • 30 ounces, weight Garbanzo Beans Drained
  • 1-½ cup Fresh Spinach
  • 8 ounces, weight Feta Cheese
  • ⅓ cups Olive Oil
  • 5 Tablespoons Lemon Juice
  • 4 Tablespoons Tahini
  • 2 Tablespoons Red Pepper Flakes
  • 2 cloves Garlic, Peeled
  • 2 teaspoons Salt

Preparation Instructions

Combine the garbanzo beans, spinach, olive oil, lemon juice and tahini in a large food processor. Pulse until combined. Add the feta, red pepper flakes, garlic and salt. Pulse until combined. Taste and add salt or more red pepper flakes if desired.


_______________________________________

Maria and her husband Josh (who she affectionately refers to as her “dough boy”) blog at Two Peas and Their Pod. They’ve been featured on Saveur, Eatocracy, Gourmet Live, Glamour, and the Los Angeles Times, to name just a few. We’re so glad to have them here!


Profile photo of missamy

Chicken Satay with Peanut Sauce

Posted by in Step-by-Step Recipes

Tasty Kitchen Blog: Chicken Satay Peanut Sauce. Guest post by Amy Johnson of She Wears Many Hats, recipe submitted by TK member Angie of Angie's Pantry.

 
Bored with the same old chicken dishes? We are. Around here we eat chicken often, and it certainly can get a little mundane after a while.

Here’s a story that may give you an indication of how much chicken we eat.

Years ago, during hunting season, my son showed a sudden interest in going hunting. My husband explained to him that if he wanted to go hunting, he should be willing to eat whatever he was hunting, and not just go kill something to kill something. My son thought for a second, and responded quite seriously, “Can we go chicken hunting?”

Yep, we eat a lot of chicken. So when I saw this recipe submitted by Tasty Kitchen member Angiespantry for Chicken Satay with Peanut Sauce, I had to try it right away. It looked simple enough and I could tell by the list of ingredients we were in for delicious change of pace.

Angie did not disappoint. This recipe is a keeper. And no hunting is involved. Unless you consider grocery shopping hunting.

The recipe combines a marinade and a peanut sauce to create a perfect savory, sweet balance of flavors. Lawsie mercy, the peanut sauce is over-the-top good. The peanut sauce alone is worth giving this recipe a try. It brought rave reviews from my family.

Another thing I liked about this recipe is that the marinade and sauce can be made up to a couple of days ahead. With everything made ahead, it was a simple meal to pull together at the end of a busy day.

Let’s get going.

The ingredients, other than a couple of spices that you can easily find at your local grocer, are fairly basic. Remember, for the full list of ingredients and recipe, see the recipe link at the bottom of this post.


Tasty Kitchen Blog: Chicken Satay Peanut Sauce. Guest post by Amy Johnson of She Wears Many Hats, recipe submitted by TK member Angie of Angie's Pantry.

Begin with boneless skinless chicken breast or chicken tenders, cut into bite size pieces, and skewered on wooden or metal skewers. If you’re using wooden skewers, be sure to pre-soak them so they don’t burn while grilling. Cover and refrigerate chicken until you’re ready to marinate.


Tasty Kitchen Blog: Chicken Satay Peanut Sauce. Guest post by Amy Johnson of She Wears Many Hats, recipe submitted by TK member Angie of Angie's Pantry.

For the marinade you’ll need ground turmeric, ground coriander, ground cumin, vegetable oil, lime juice and soy sauce.


Tasty Kitchen Blog: Chicken Satay Peanut Sauce. Guest post by Amy Johnson of She Wears Many Hats, recipe submitted by TK member Angie of Angie's Pantry.

Combine well. (Reserve 5 tablespoons of marinade for use in the peanut sauce.)


Tasty Kitchen Blog: Chicken Satay Peanut Sauce. Guest post by Amy Johnson of She Wears Many Hats, recipe submitted by TK member Angie of Angie's Pantry.

Pour marinade over skewered chicken and coat well. I used a pastry brush to make sure the chicken was totally coated. Angie suggests using your hands to coat the chicken, but be sure to wear kitchen gloves because the turmeric will stain your hands. Marinate chicken in the refrigerator for at least an hour.


Tasty Kitchen Blog: Chicken Satay Peanut Sauce. Guest post by Amy Johnson of She Wears Many Hats, recipe submitted by TK member Angie of Angie's Pantry.

The peanut sauce is made with simple ingredients: vegetable oil, onion, chili powder, the reserved marinade, brown sugar, water and of course, peanut butter. In addition, a whole lime and fresh cilantro are recommended for garnish, but not required.


Tasty Kitchen Blog: Chicken Satay Peanut Sauce. Guest post by Amy Johnson of She Wears Many Hats, recipe submitted by TK member Angie of Angie's Pantry.

To make the peanut sauce, heat the vegetable oil in a medium saucepan over medium heat, and sauté the chopped onion. Add the chili powder, the reserved marinade, brown sugar and water and whisk together until well-combined.


Tasty Kitchen Blog: Chicken Satay Peanut Sauce. Guest post by Amy Johnson of She Wears Many Hats, recipe submitted by TK member Angie of Angie's Pantry.

Remove from heat and add the peanut butter. Whisk in the peanut butter until incorporated and smooth. If the sauce is too thick, add a little water at a time. Cover pan and set aside until ready to serve with cooked chicken. When ready to serve the sauce, gradually heat over low heat, occasionally whisking so the sauce doesn’t separate. You can also reheat the sauce on 50% power in the microwave a few seconds at a time, stirring in between.


Tasty Kitchen Blog: Chicken Satay Peanut Sauce. Guest post by Amy Johnson of She Wears Many Hats, recipe submitted by TK member Angie of Angie's Pantry.

When ready to cook the chicken, preheat the grill or a grill pan over medium-high heat. Grill chicken for 10-15 minutes, until done.


Tasty Kitchen Blog: Chicken Satay Peanut Sauce. Guest post by Amy Johnson of She Wears Many Hats, recipe submitted by TK member Angie of Angie's Pantry.

Serve cooked chicken with peanut sauce. Garnish with cilantro and/or fresh lime wedges.


Tasty Kitchen Blog: Chicken Satay Peanut Sauce. Guest post by Amy Johnson of She Wears Many Hats, recipe submitted by TK member Angie of Angie's Pantry.

We had enough peanut sauce left over to combine with wide rice noodles for a side dish to accompany the chicken. Perfectly perfect to chase the chicken blahs away. A big thanks to Angie, who blogs at Angie’s Pantry, for the tasty recipe. (Her blog is chock full of good stuff!)


Printable Recipe

Chicken Satay with Peanut Sauce

See post on angiespantry’s site!
4.77 Mitt(s) 13 Rating(s)13 votes, average: 4.77 out of 513 votes, average: 4.77 out of 513 votes, average: 4.77 out of 513 votes, average: 4.77 out of 513 votes, average: 4.77 out of 5

Prep Time:

Cook Time:

Difficulty: Easy

Servings: 8

8
x

Print Options

Page size Letter 3x5 4x6
Text Size Small Medium Large
Content Include description
Include prep time, etc.
Show image

Description

This is one of my favorite recipes for chicken. You can make it as an entree or an appetizer. Easy enough to make ahead and very elegant when entertaining. Enjoy!

Ingredients

  • 2 pounds Boneless Skinless Chicken Breast, Cut Into Bite Size Pieces
  • _____
  • FOR THE MARINADE:
  • 4 Tablespoons Low Sodium Soy Sauce
  • 4 Tablespoons Lime Juice
  • 2 Tablespoons Vegetable Oil
  • 2 teaspoons Cumin
  • 4 teaspoons Coriander
  • 2 teaspoons Turmeric
  • _____
  • FOR THE PEANUT SAUCE:
  • 2 Tablespoons Vegetable Oil
  • ⅓ cups Onion, finely chopped
  • 2 teaspoons Chili Powder
  • 5 Tablespoons MARINADE:
  • ¼ cups Brown Sugar, Packed
  • ½ cups Water, Or More If Needed
  • 1 cup Creamy Peanut Butter, Do Not Use Natural Or Low Fat
  • 1 whole Lime, Cut Into Wedges, For Garnish
  • 1 bunch Fresh Cilantro For Garnish, Chopped

Preparation Instructions

1) Combine all marinade ingredients and whisk well to combine. Reserve 5 tablespoons of marinade for the sauce and refrigerate until you’re ready to make the sauce. Set the remaining marinade aside. Cut the chicken into bite size pieces and skewer*. Skewer your chicken pieces on presoaked (in water) wooden skewers or metal skewers. Pour remaining marinade over chicken skewers being sure to coat thoroughly. (I use gloves, because the turmeric can stain your hands). Marinate chicken in the refrigerator for an hour.
2) For the peanut sauce, heat oil in a medium saucepan over medium heat. Sauté onions for 5-7 minutes. Add chili powder and the reserved 5 tablespoons of marinade, brown sugar, and ½ cup of water. Keep the pan over heat until very hot. Remove from heat and add peanut butter, carefully whisk until completely incorporated. Add additional water if the sauce is too thick. Loosely cover the pan and set aside. To warm the sauce, do so in microwave on 50% power for 30 seconds at a time and stir between. Heat until just warm. If you over heat the sauce, the oil will separate.
3) Preheat grill and cook skewered marinated chicken over medium high heat for 10-15 minutes. Serve chicken with peanut sauce and garnish with cilantro and fresh lime wedges.

Makes approximately 32 – 6″skewers for appetizers or 8 dinner size portion skewers.

*I like to skewer the chicken first before the marinade is added. It’s much less messy and when you’re entertaining, you won’t have to skewer the meat while you have guests. Again, I recommend using gloves.


_______________________________________

Amy Johnson is a blogger who writes about food, travel, the home (both inside and out), and various observations and random musings about anything and everything. Visit her blog She Wears Many Hats for a dose of deliciousness, practicality, hilarity, or just plain fun. She lives in South Carolina with her husband and two children.


Profile photo of Ree | The Pioneer Woman

Mystery Mocha!

Posted by in Baking, Step-by-Step Recipes

Note: Since Valentine’s Day is just around the corner, I’m bringing up this chocolate wonder from the step-by-step archives. Serve this with your V-Day dinner! I absolutely loved it. –Ree

 
Tasty Kitchen Blog: Mystery Mocha. Post by Ree Drummond, recipe submitted by TK member Larry.

 
The second I read the name of this recipe, I just knew I had to make it. First of all, I love any recipe with either “mystery” or “surprise” in the title. Second, I love any recipe with “mocha” in the title. It means good things will happen.

So “Mystery Mocha?” Count me in!

I thought it was funny that halfway through the printable recipe, the submitter (thanks, Larry!) warns us that “this will look TERRIBLE”. You’ve got to love the honesty!

But no matter what it looks like halfway through, the end result is all that I wanted it to be…and more. It turns out a little bit like a lava cake or baked fudge, but with a lovely coffee undertone. I served mine with freshly whipped cream and absolutely loved every bite. This is a treasure!

Here’s how you make it.


Tasty Kitchen Blog: Mystery Mocha. Post by Ree Drummond, recipe submitted by TK member Larry.

Melt butter and unsweetened chocolate in the microwave for about 45 seconds.


Tasty Kitchen Blog: Mystery Mocha. Post by Ree Drummond, recipe submitted by TK member Larry.

Stir it until the mixture is totally melted and smooth.


Tasty Kitchen Blog: Mystery Mocha. Post by Ree Drummond, recipe submitted by TK member Larry.

Sift together sugar, flour, baking powder, and salt. In a separate container, mix together the milk and vanilla. Set aside.


Tasty Kitchen Blog: Mystery Mocha. Post by Ree Drummond, recipe submitted by TK member Larry.

Mix together the sifted mixture, the chocolate mixture, and the milk/vanilla mixture.


Tasty Kitchen Blog: Mystery Mocha. Post by Ree Drummond, recipe submitted by TK member Larry.

Stir it together until all combined, then spread in a thoroughly greased square pan. Mine was about 6 1/2 x 6 1/2, but 8 x 8 would work fine.


Tasty Kitchen Blog: Mystery Mocha. Post by Ree Drummond, recipe submitted by TK member Larry.

Now, this is where it starts getting weird. In a separate bowl, mix together sugar, brown sugar, and cocoa powder.


Tasty Kitchen Blog: Mystery Mocha. Post by Ree Drummond, recipe submitted by TK member Larry.

Stir it to combine…


Tasty Kitchen Blog: Mystery Mocha. Post by Ree Drummond, recipe submitted by TK member Larry.

Then sprinkle the mixture evenly over the top of the cake batter.


Tasty Kitchen Blog: Mystery Mocha. Post by Ree Drummond, recipe submitted by TK member Larry.

Interesting! What does it all mean?


Tasty Kitchen Blog: Mystery Mocha. Post by Ree Drummond, recipe submitted by TK member Larry.

After that mixture is evenly sprinkled and distributed, pour cold coffee all over the top. I didn’t have any coffee made, so I mixed instant coffee crystals in a cup of water. And I made it very strong: two heaping tablespoons of coffee! We’ll see how it turns out.


Tasty Kitchen Blog: Mystery Mocha. Post by Ree Drummond, recipe submitted by TK member Larry.

This would definitely be the part in the recipe where Larry warns “it will look terrible!” I don’t think it looks terrible at all, though…just curious!

Bake for 40 minutes on 350 degrees, then remove from the oven.


Tasty Kitchen Blog: Mystery Mocha. Post by Ree Drummond, recipe submitted by TK member Larry.

And this…THIS is what it looks like!


Tasty Kitchen Blog: Mystery Mocha. Post by Ree Drummond, recipe submitted by TK member Larry.

Oh my word. Oh my.


Tasty Kitchen Blog: Mystery Mocha. Post by Ree Drummond, recipe submitted by TK member Larry.

It’s funny—until I scooped into it, I didn’t realize this would be a lava-type cake. It was a nice surprise!


Tasty Kitchen Blog: Mystery Mocha. Post by Ree Drummond, recipe submitted by TK member Larry.

Gorgeous! And it smells so, so good.


Tasty Kitchen Blog: Mystery Mocha. Post by Ree Drummond, recipe submitted by TK member Larry.

I whipped some cream and plopped it on top.


Tasty Kitchen Blog: Mystery Mocha. Post by Ree Drummond, recipe submitted by TK member Larry.

And this turned out to be a very good move.


Tasty Kitchen Blog: Mystery Mocha. Post by Ree Drummond, recipe submitted by TK member Larry.

The Verdict: This was absolutely delicious. If you use very strong coffee, the flavor will really come through and result in a very rich mocha flavor. This would be perfect for company—so easy to make!

Thank you, Larry, for sharing such a yummy recipe.


Printable Recipe

Mystery Mocha

4.78 Mitt(s) 32 Rating(s)32 votes, average: 4.78 out of 532 votes, average: 4.78 out of 532 votes, average: 4.78 out of 532 votes, average: 4.78 out of 532 votes, average: 4.78 out of 5

Prep Time:

Cook Time:

Difficulty: Easy

Servings: 8

8
x

Print Options

Page size Letter 3x5 4x6
Text Size Small Medium Large
Content Include description
Include prep time, etc.
Show image

Description

My mother’s secret recipe, no longer secret! Decadent chocolate cake with mocha pudding inside. For chocolate lovers, this is a ten.

Ingredients

  • ¾ cups Granulated Sugar
  • 1 cup Sifted All-Purpose Flour
  • 2 teaspoons Baking Powder
  • ⅛ teaspoons Salt
  • 1 piece Unsweetend Chocolate (1 Square)
  • 2 Tablespoons Butter
  • ½ cups Whole Milk
  • 1 teaspoon Vanilla Extract
  • ½ cups Brown Sugar
  • ½ cups Granulated Sugar (additional)
  • 4 Tablespoons Powdered Cocoa (Not Drink Mix)
  • 1 cup Cold Strong Coffee

Preparation Instructions

Sift together 3/4 cup sugar, flour, baking powder, and salt. Set aside.

Melt square of unsweetened chocolate and butter in the microwave. Add to dry ingredients alternately with the milk and vanilla. Blend. Pour into a greased 8×8 pan.

Combine brown sugar, the 1/2 cup additional granulated sugar and cocoa powder. Sprinkle over the cake batter. Pour the one cup COLD coffee on top. This will look TERRIBLE. Bake 350 degrees for 40 minutes.

Serve warm with ice cream or sweetened whip cream or whipped topping. This will serve 8. In a 9×9 square pan, you can cut 9 pieces. Best served warm.


Profile photo of Erika (TK)

Looks Delicious! Banana Bread with Streusel Topping

Posted by in Looks Delicious!

  This isn’t an effort to woo Ree over to the dark banana side. But if this doesn’t help, I don’t know what can. Tasty Kitchen member Laurie shares this incredible-looking recipe for Banana Bread with Streusel Topping and oh, this bread has so many good things going for it. First, she roasts the bananas. […]

Profile photo of EatLiveRun

Salted Fudge Brownies

Posted by in Baking, Step-by-Step Recipes

I’m so excited to introduce Jenna of Eat, Live, Run as our newest contributor here at the Tasty Kitchen Blog. She’s a doll who dearly loves the TK community. She also has quite the recipe box and it just keeps growing every day. We’re absolutely thrilled to have her! –Ree     The first moment […]

Profile photo of Erica Lea

Glorious Stuffed Portobello Mushrooms

Posted by in Step-by-Step Recipes

  Tender, tasty portobello mushrooms stuffed with flavorful vegetables and spices and sprinkled with cheese. Baked until golden. Hungry yet? Today’s recipe, brought to us by acher, would be a splendid starter for a dinner or a full course at lunch. The stuffing is hearty and filling, but has a complexity of flavors. White wine, fresh […]

Profile photo of georgiapellegrini

Homemade English Muffins

Posted by in Step-by-Step Recipes

I love Georgia Pellegrini. She’s as beautiful on the inside as she is on the outside, and her passion for food writing is infectious. She’s also an active Tasty Kitchen member, and I’m so excited to welcome her as a contributor. Take it away, Georgia! –Ree     Sarah Fowler had me at skillet. In […]