The Pioneer Woman Tasty Kitchen
Profile photo of Natalie | Perry's Plate

Gluten-Free Apple, Ginger and Spice Scones

Posted by in Baking, Step-by-Step Recipes

Tasty Kitchen Blog: Gluten-Free Apple, Ginger and Spice Scones. Guest post by Natalie Perry of Perry's Plate, recipe submitted by TK member Jenni Hulet of The Urban Poser.

 
As far as gluten-free baked goods go, these are seriously the bomb. We’re not an entirely gluten-free household, but occasionally I like to play with almond meal in baked goods. I love the rich, nutty (but not too nutty) flavor it imparts. And you can’t beat the nutritional benefits of almonds. These Gluten-Free Apple, Ginger and Spice Scones, submitted by Jenni Hulet have become a favorite of my family.

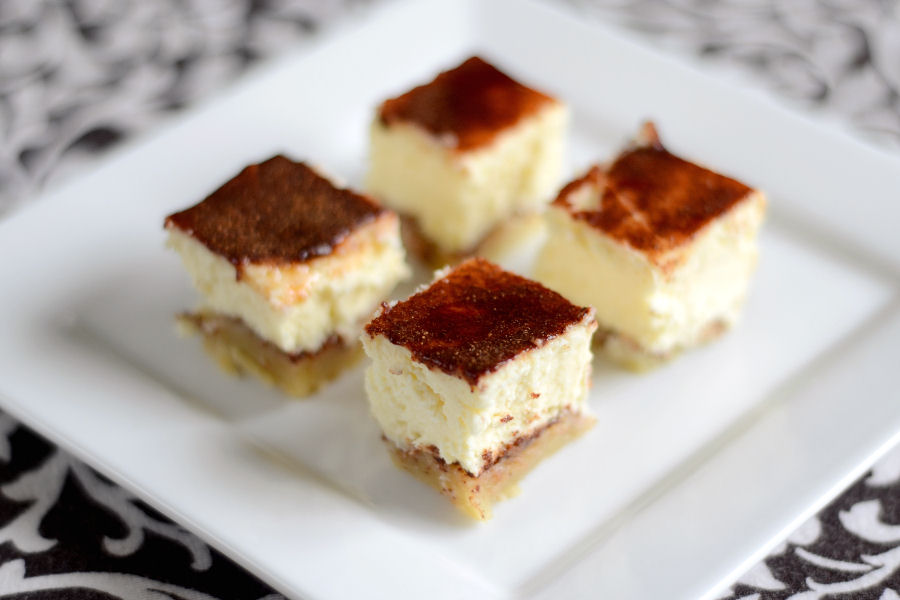
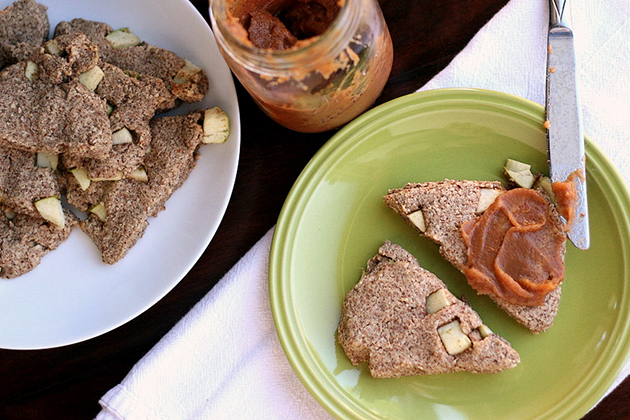
Eating one (or four) of these scones is like eating a hearty, moist apple cookie for breakfast. *Swoon*


Tasty Kitchen Blog: Gluten-Free Apple, Ginger and Spice Scones. Guest post by Natalie Perry of Perry's Plate, recipe submitted by TK member Jenni Hulet of The Urban Poser.

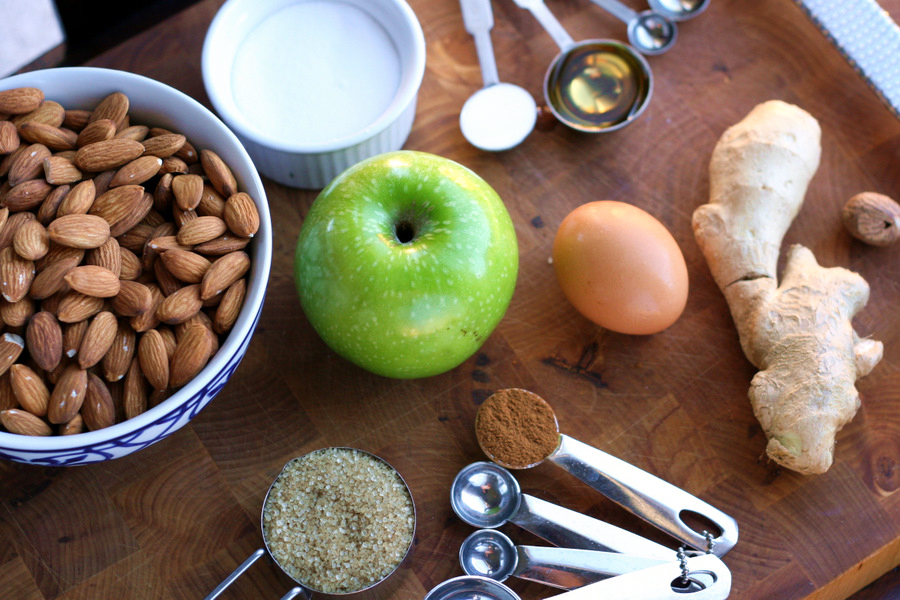
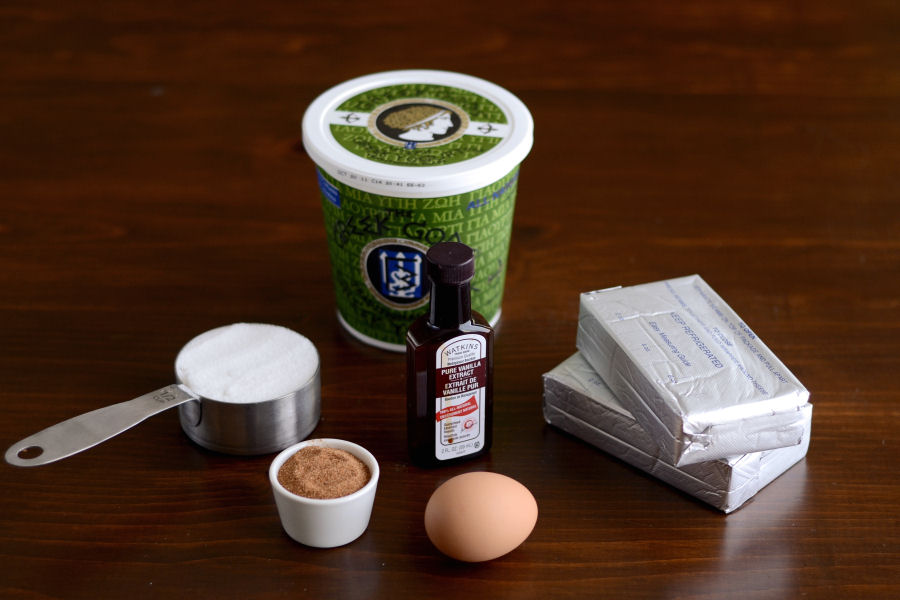
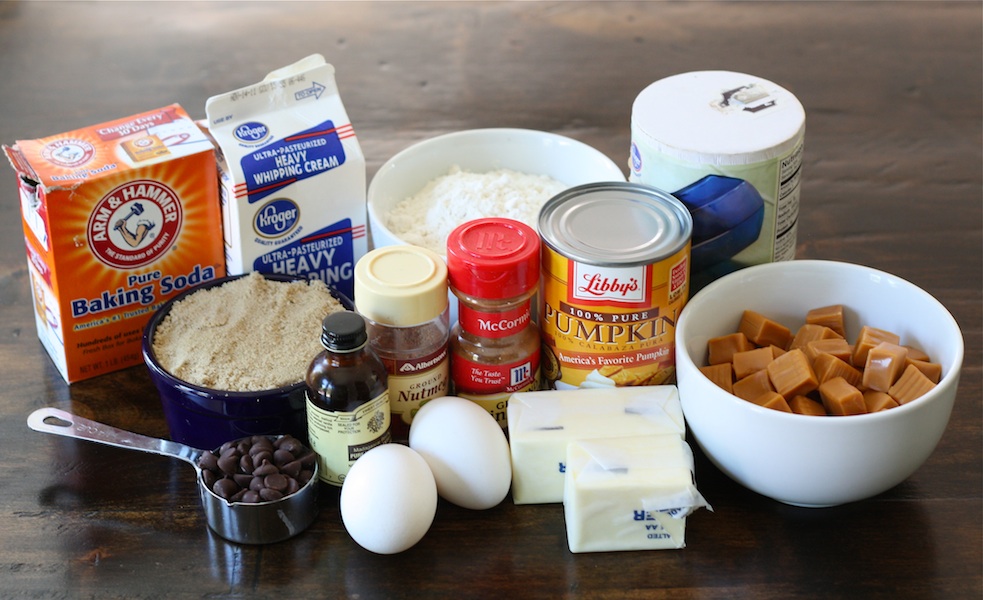
No mysterious ingredients here. You’ll need 3 cups of almond meal/ground almonds (I’ll show you how to make some in a second. Ridiculously easy.), a nice tart apple, an egg, fresh ginger, apple cider vinegar, baking soda, salt, cinnamon, and nutmeg.


Tasty Kitchen Blog: Gluten-Free Apple, Ginger and Spice Scones. Guest post by Natalie Perry of Perry's Plate, recipe submitted by TK member Jenni Hulet of The Urban Poser.

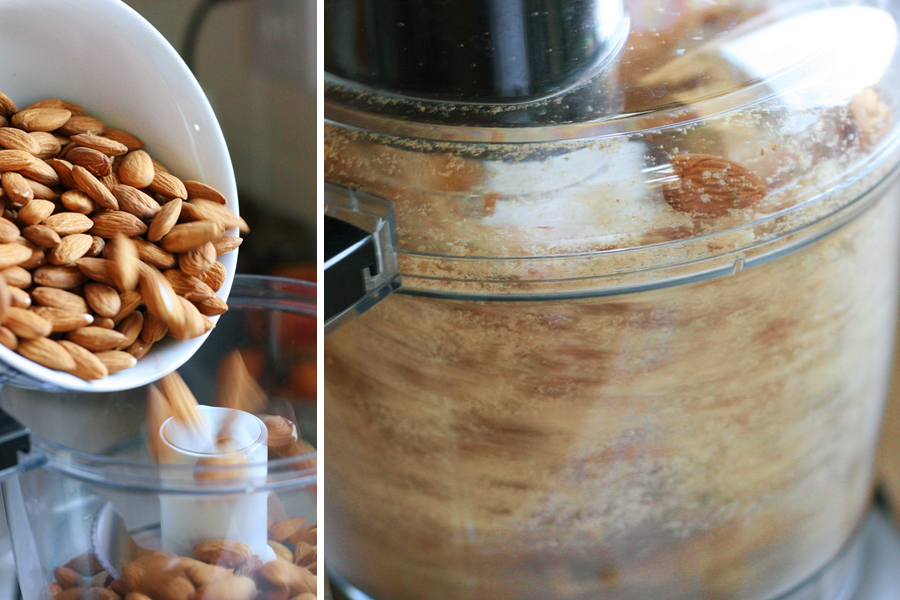
You can find almond meal in health food stores, some well-stocked grocery stores, and always at Trader Joe’s, but if it’s too much trouble to track down you can make your own if you’ve got a food processor. To make three cups of almond meal you’ll need a little over two cups of almonds. For best flavor results in baking, make sure you use raw, unsalted almonds. Buzz them up in your food processor for a minute or two or until no large chunks remain. The mixture may start to stick to the sides. Scrape the sides with a rubber spatula and continue to pulse until you reach the correct consistency.


Tasty Kitchen Blog: Gluten-Free Apple, Ginger and Spice Scones. Guest post by Natalie Perry of Perry's Plate, recipe submitted by TK member Jenni Hulet of The Urban Poser.

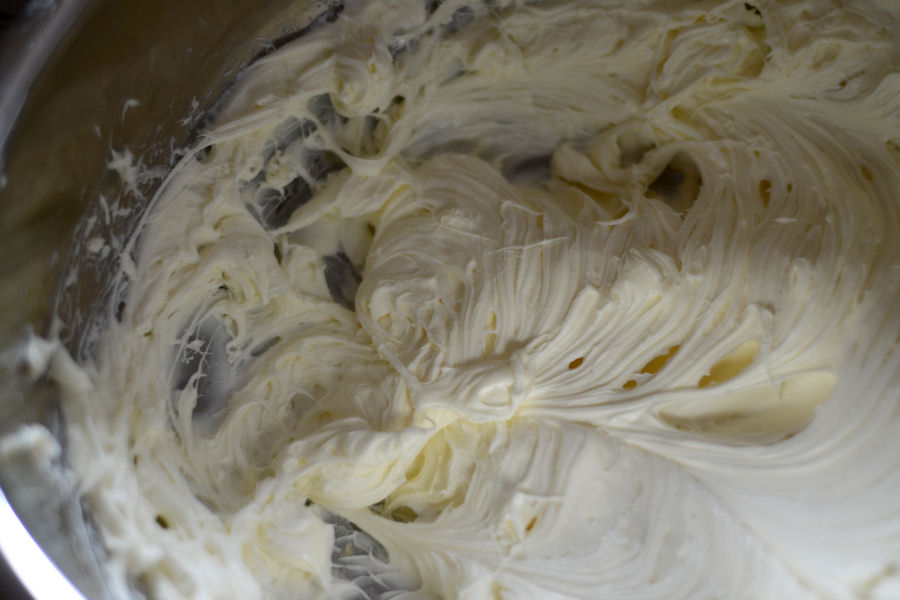
The almond meal should look like this. If you let it run too long, you’ll end up with almond butter. Tasty, but not what we’re looking for here.


Tasty Kitchen Blog: Gluten-Free Apple, Ginger and Spice Scones. Guest post by Natalie Perry of Perry's Plate, recipe submitted by TK member Jenni Hulet of The Urban Poser.

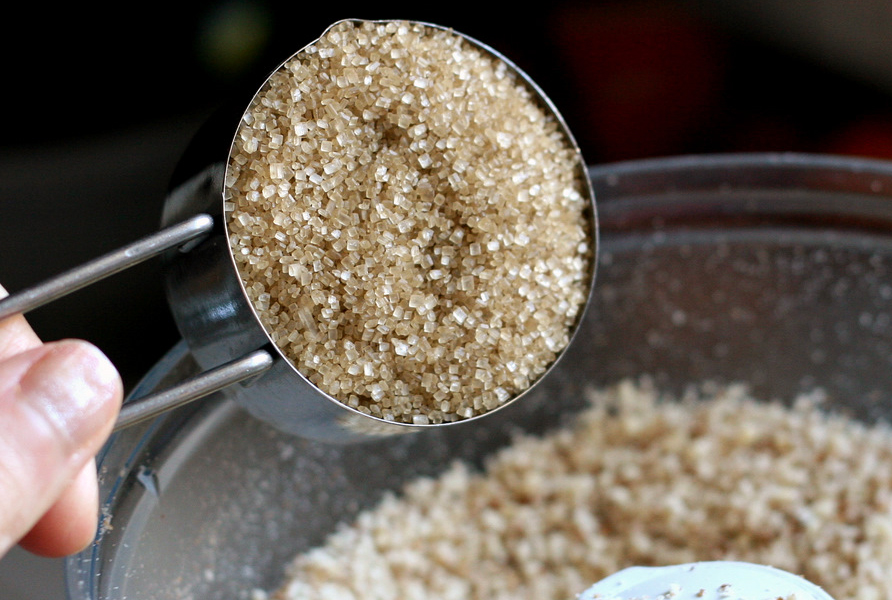
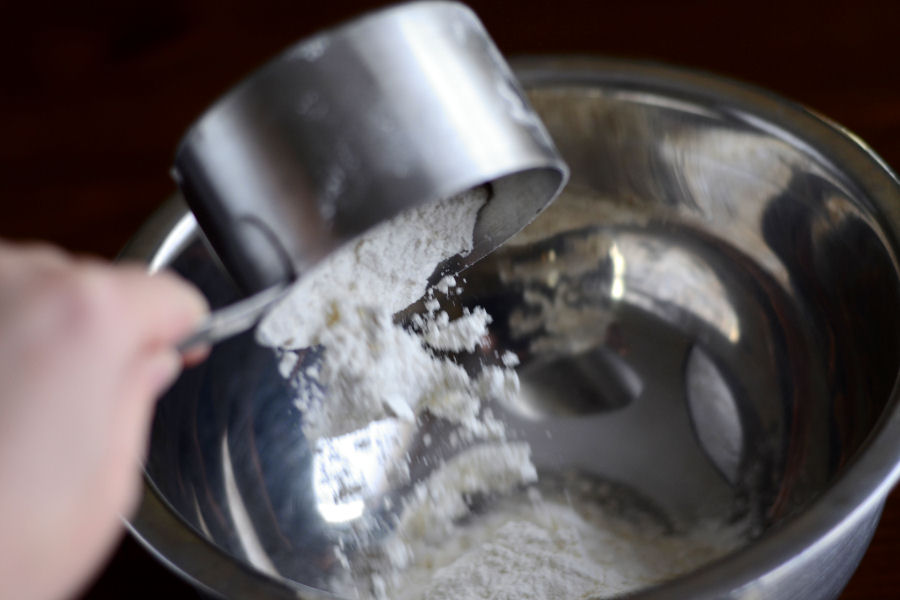
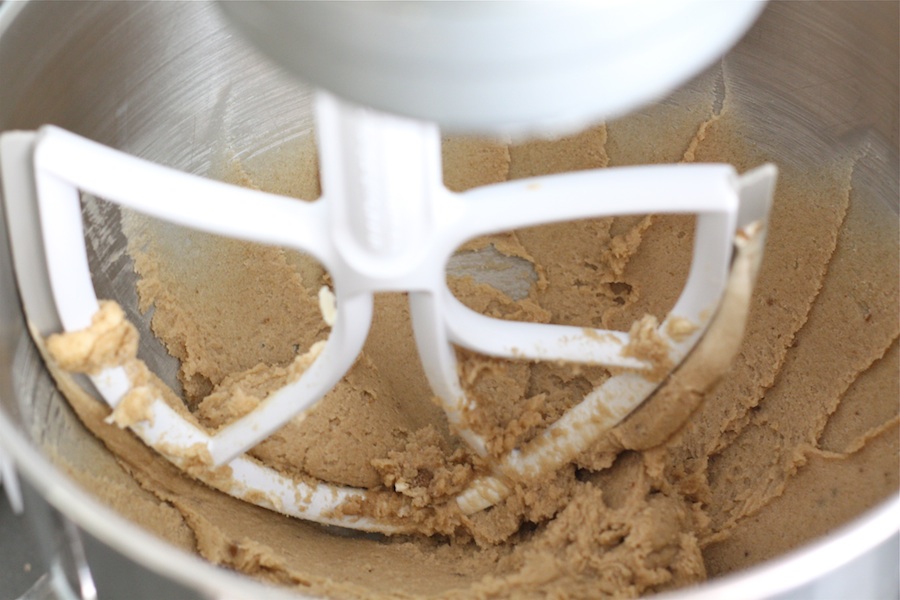
If I were you, I’d dump the almond meal out into a bowl and measure out three cups back into the food processor, just to be sure I had the right amount. Then add the sugar. I used raw turbinado sugar, but you can use any type you want. Run the processor for a few seconds until everything is blended well.


Tasty Kitchen Blog: Gluten-Free Apple, Ginger and Spice Scones. Guest post by Natalie Perry of Perry's Plate, recipe submitted by TK member Jenni Hulet of The Urban Poser.

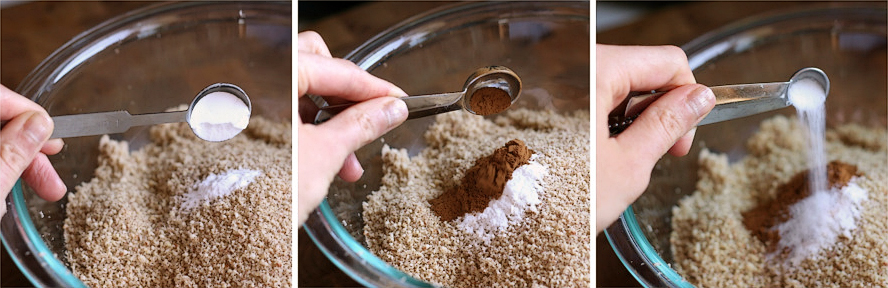
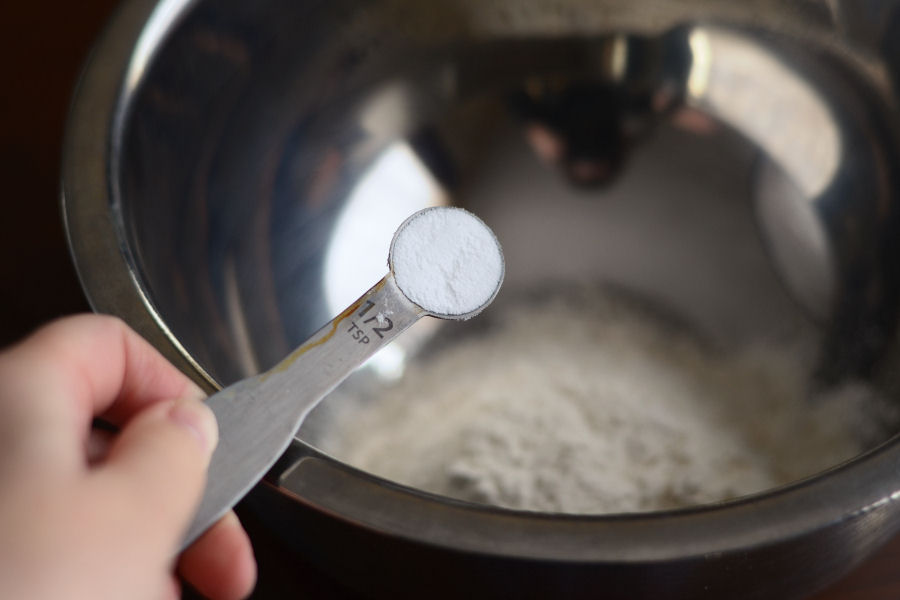
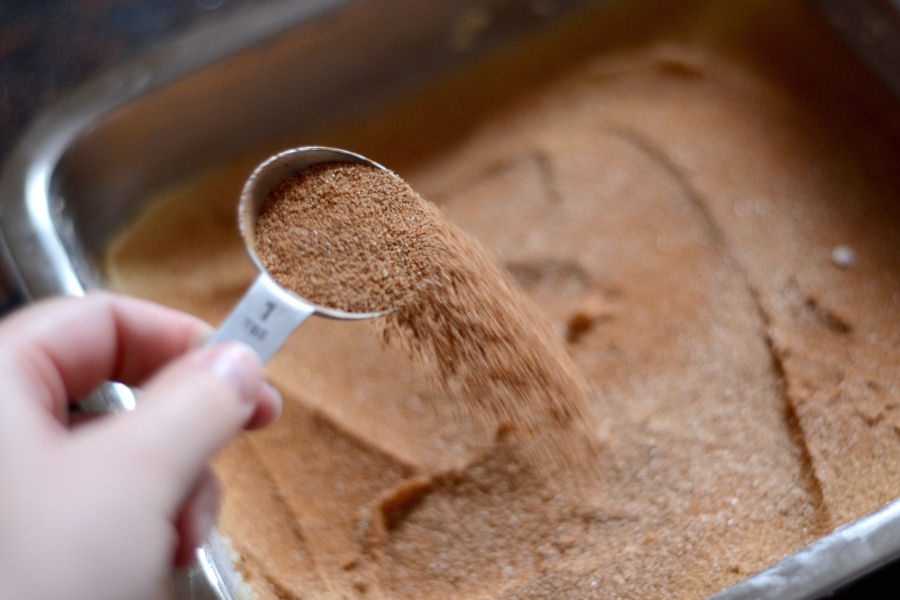
Transfer the mixture into a medium-sized bowl and add the baking soda, cinnamon, and salt.


Tasty Kitchen Blog: Gluten-Free Apple, Ginger and Spice Scones. Guest post by Natalie Perry of Perry's Plate, recipe submitted by TK member Jenni Hulet of The Urban Poser.

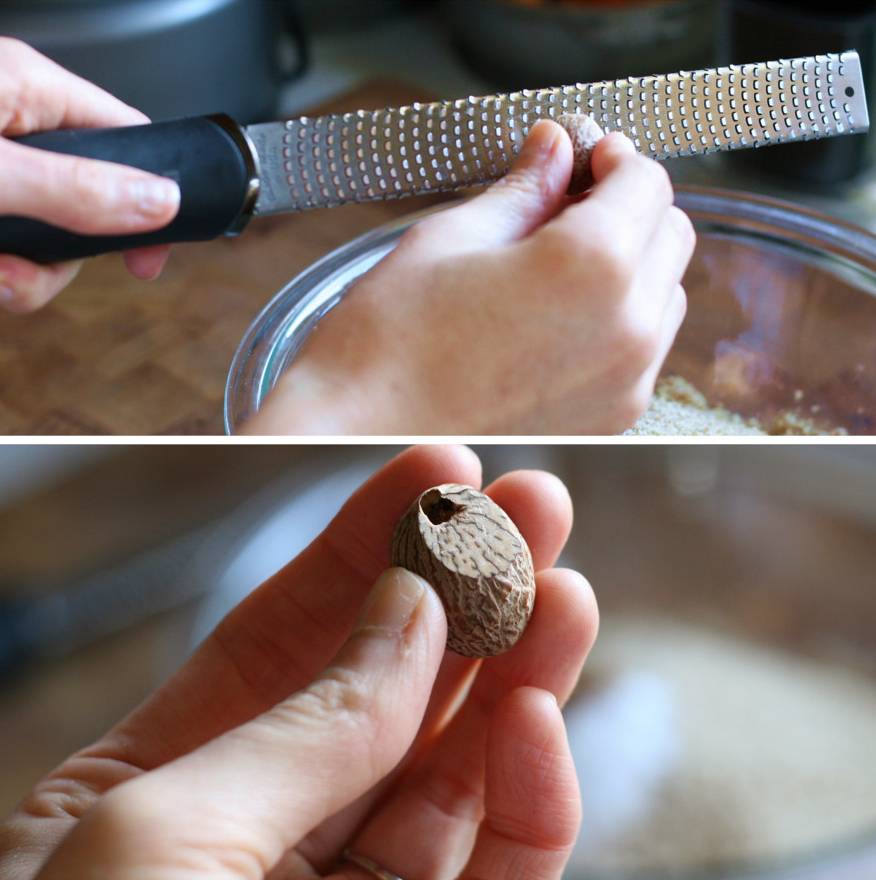
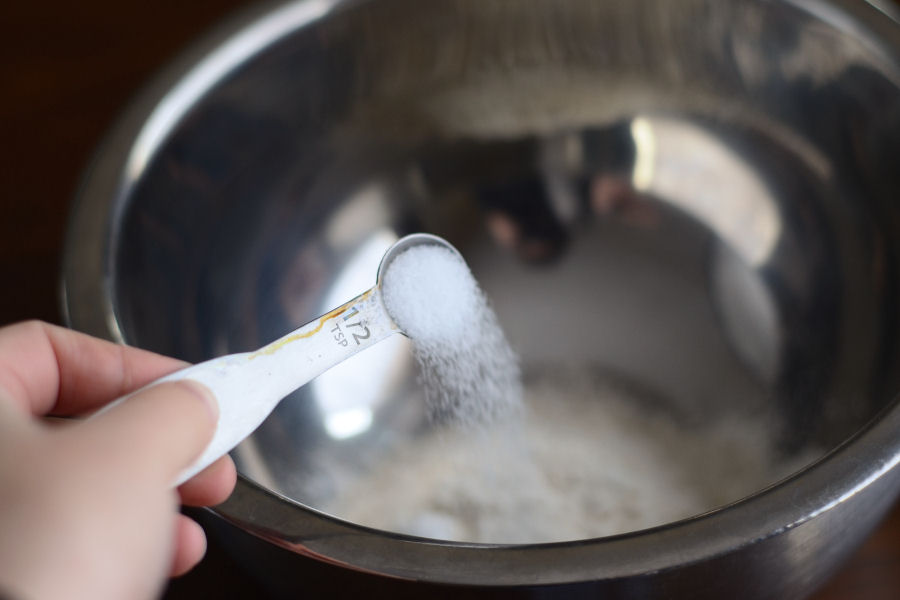
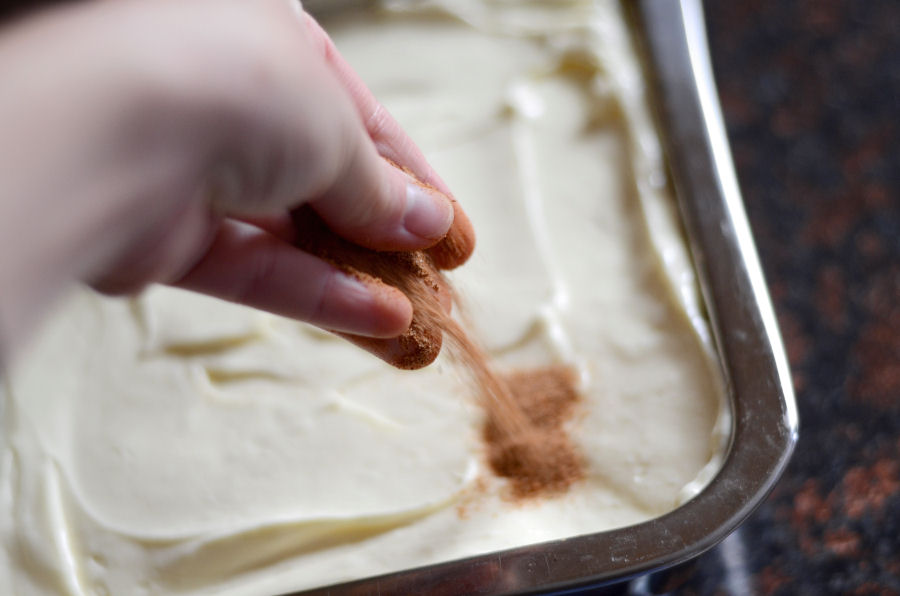
Also add the nutmeg. I’m a big fan of using freshly grated nutmeg (easiest with a Microplane-type grater). I always look at the part I grated. It kind of reminds me of brains.


Tasty Kitchen Blog: Gluten-Free Apple, Ginger and Spice Scones. Guest post by Natalie Perry of Perry's Plate, recipe submitted by TK member Jenni Hulet of The Urban Poser.

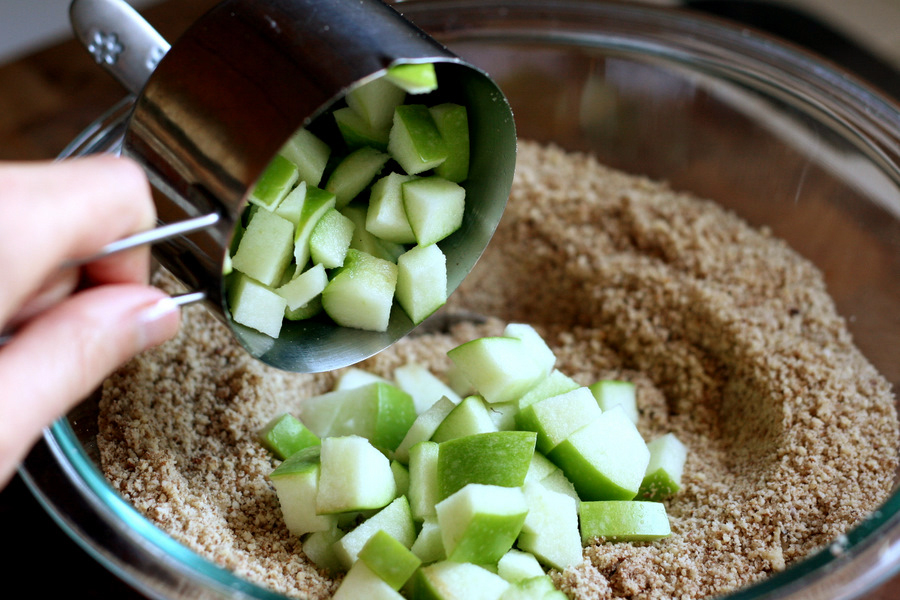
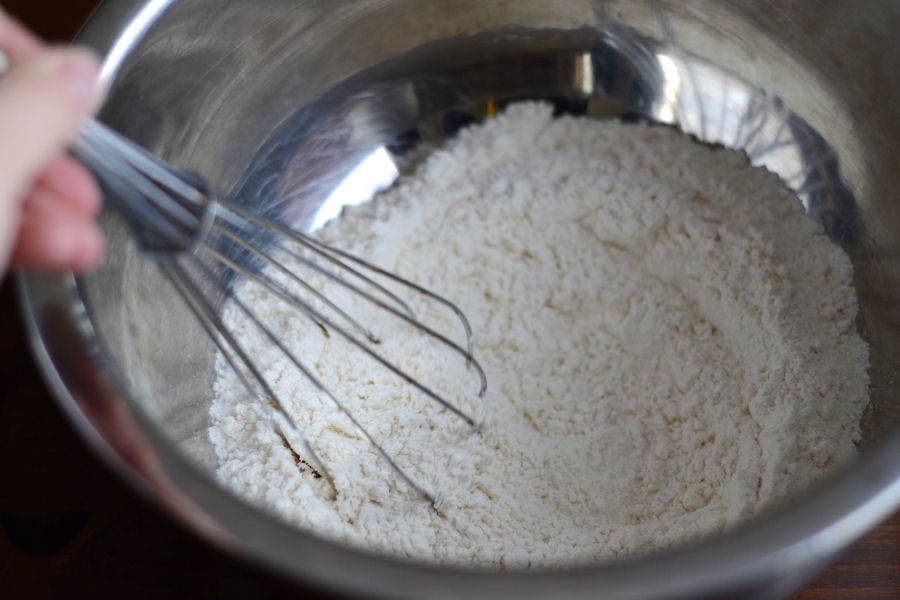
Give it a stir. Chop the apple and add one cup of the cubes. You might not want to add much more than that or the scones will have trouble staying together.


Tasty Kitchen Blog: Gluten-Free Apple, Ginger and Spice Scones. Guest post by Natalie Perry of Perry's Plate, recipe submitted by TK member Jenni Hulet of The Urban Poser.

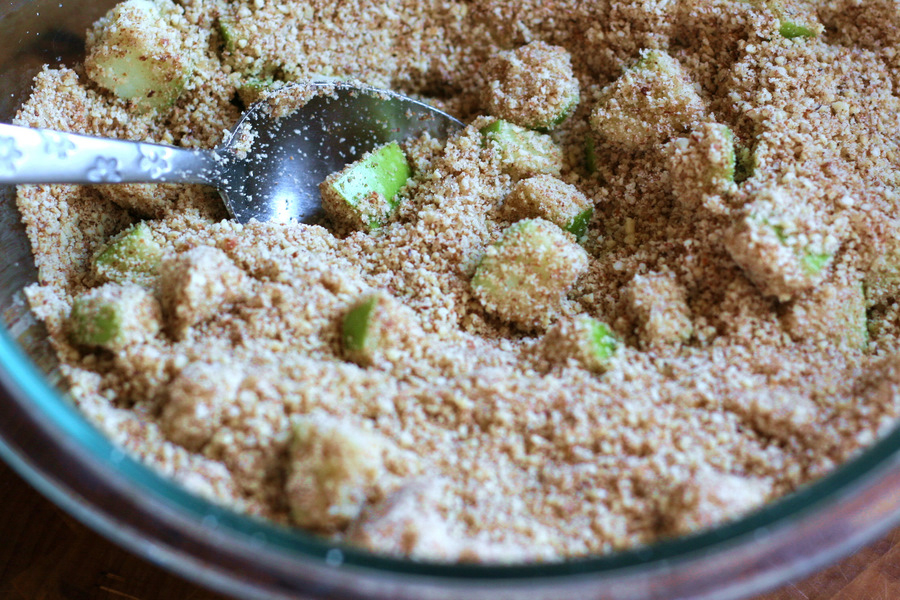
Mix them well so all the apples are coated.


Tasty Kitchen Blog: Gluten-Free Apple, Ginger and Spice Scones. Guest post by Natalie Perry of Perry's Plate, recipe submitted by TK member Jenni Hulet of The Urban Poser.

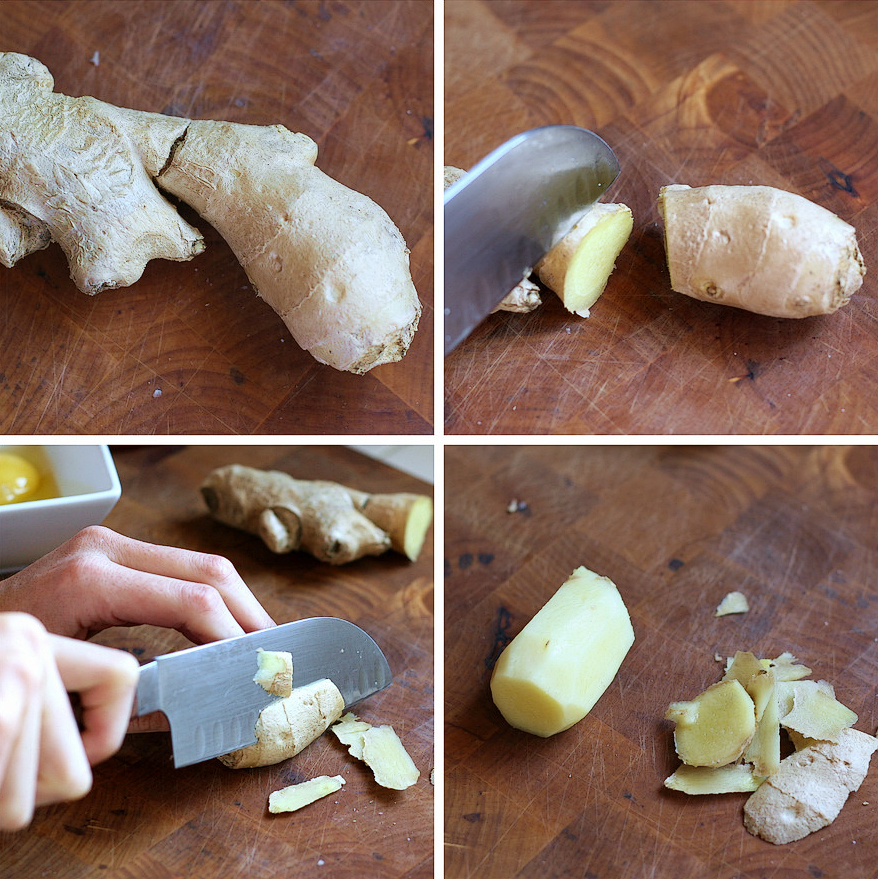
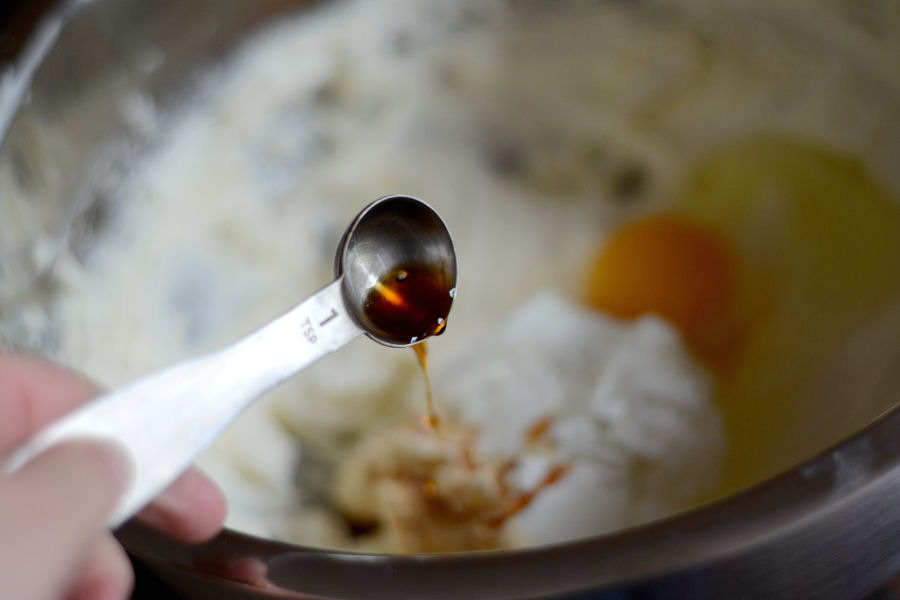
Now for the wet stuff. Prep the ginger by peeling it and grating some into a small bowl.

There are lots of ways to grate ginger, using the back of a spoon and such, but the easiest and fastest way I’ve found is to simply cut it off. Slice as close to the skin as you can, then rotate the knob, slice again, rotate, slice … get my drift?


Tasty Kitchen Blog: Gluten-Free Apple, Ginger and Spice Scones. Guest post by Natalie Perry of Perry's Plate, recipe submitted by TK member Jenni Hulet of The Urban Poser.

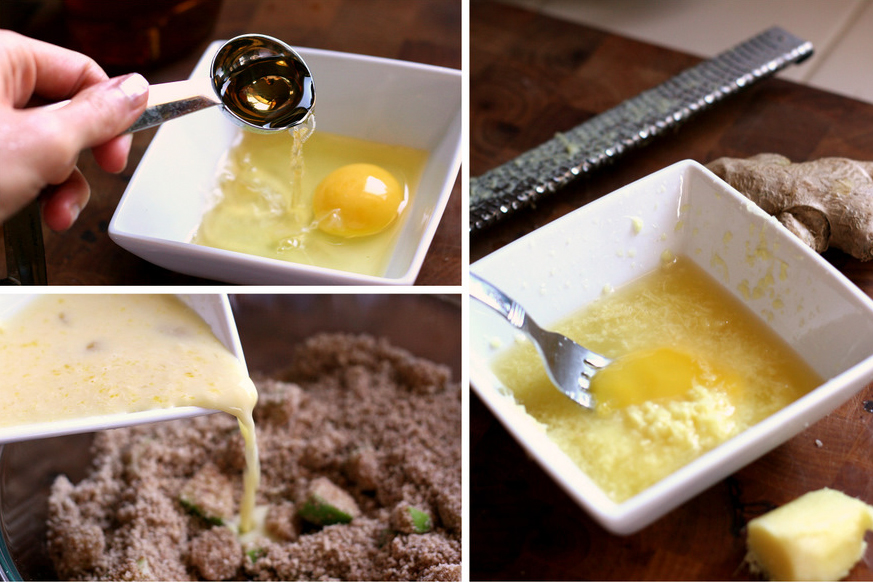
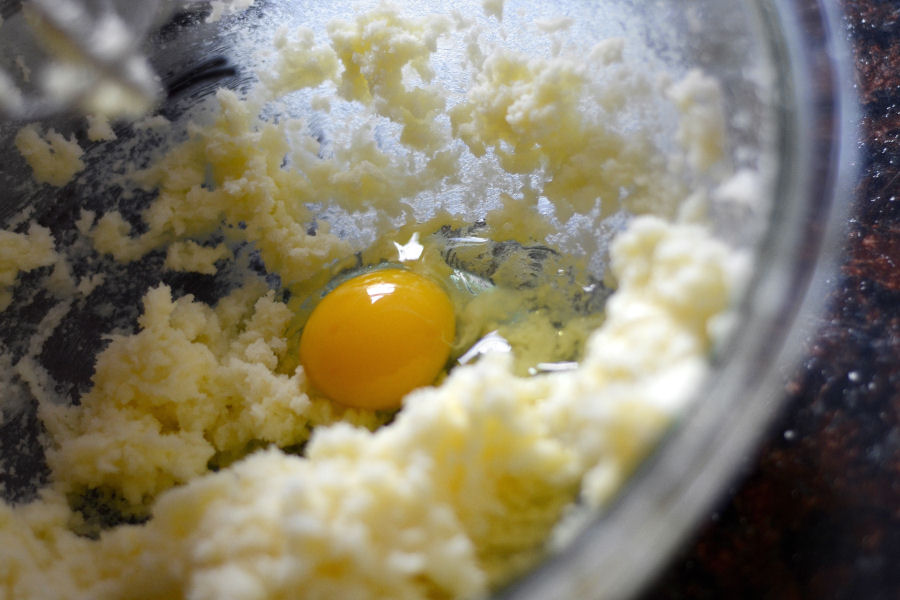
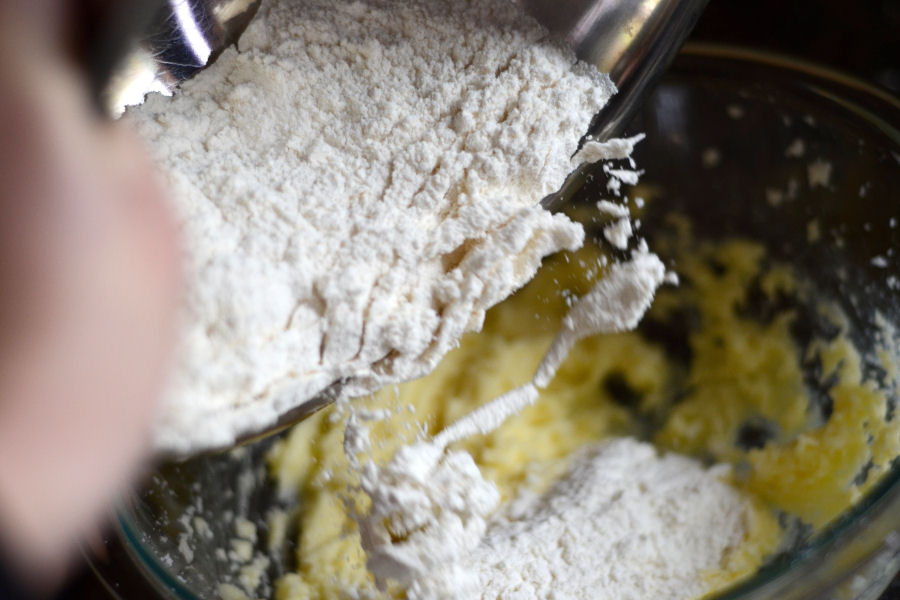
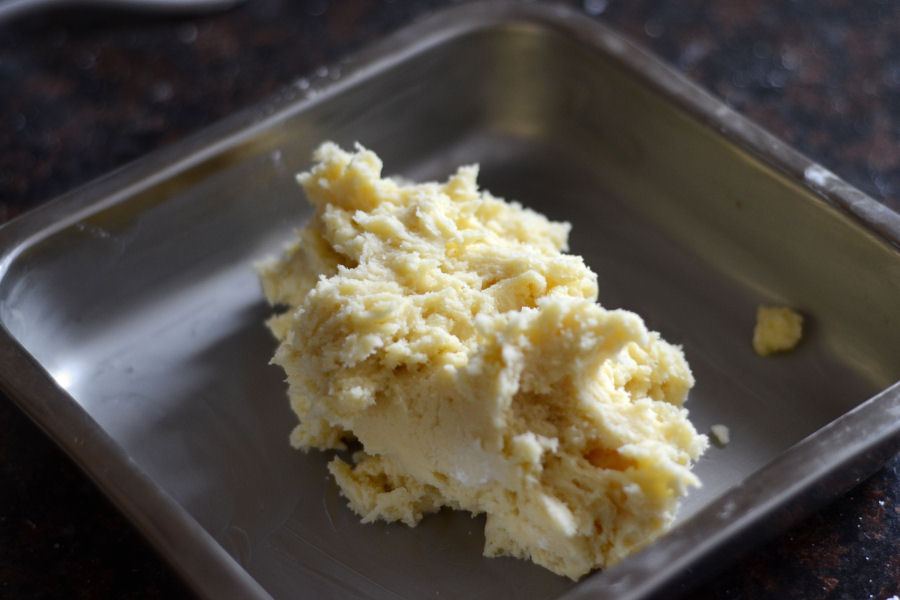
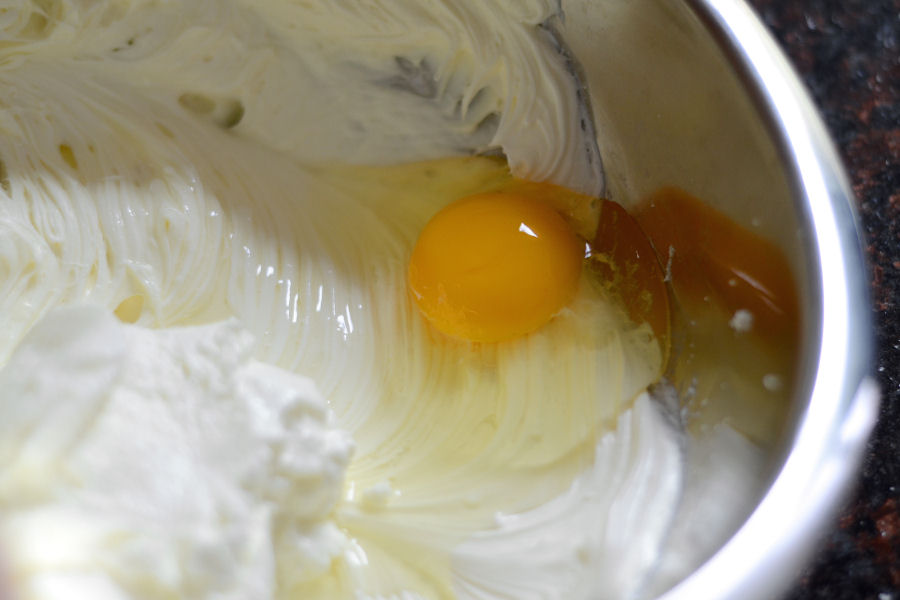
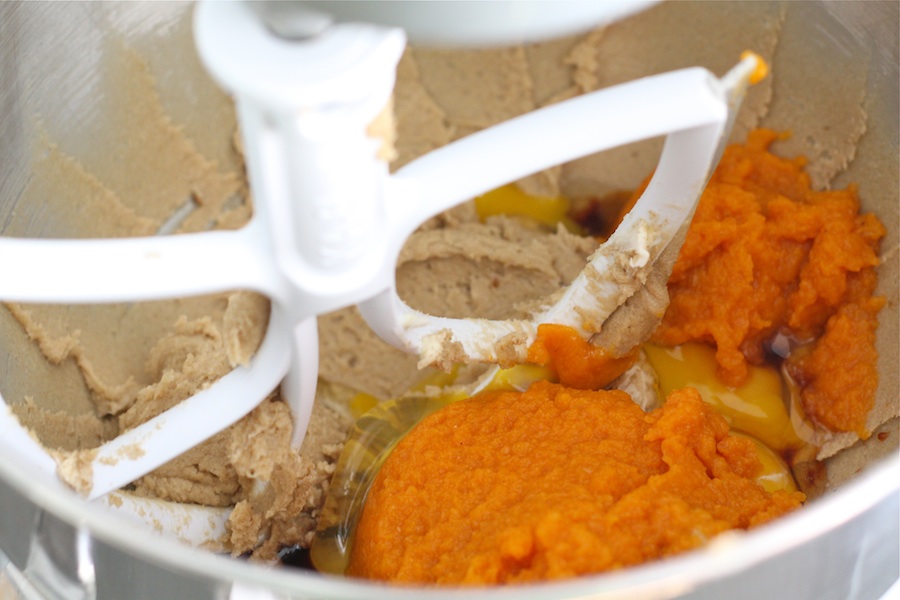
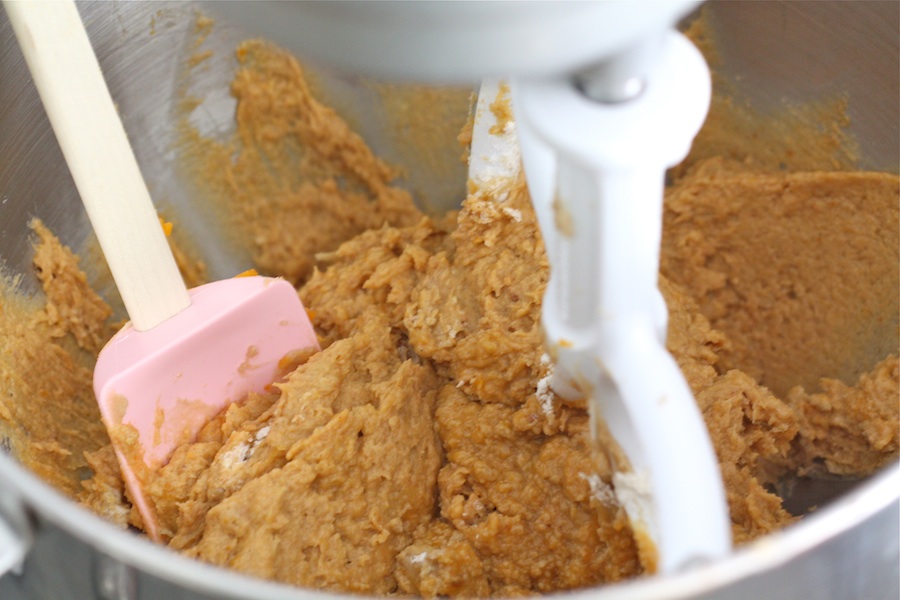
Add the egg and the vinegar to the bowl and beat with a fork. Add the wet mixture to the almond-apple mixture and mix well.


Tasty Kitchen Blog: Gluten-Free Apple, Ginger and Spice Scones. Guest post by Natalie Perry of Perry's Plate, recipe submitted by TK member Jenni Hulet of The Urban Poser.

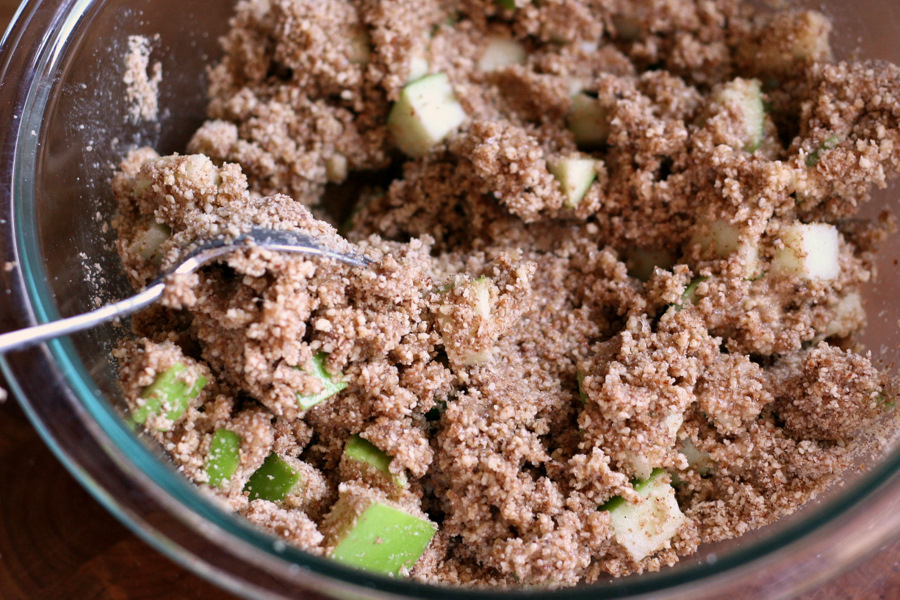
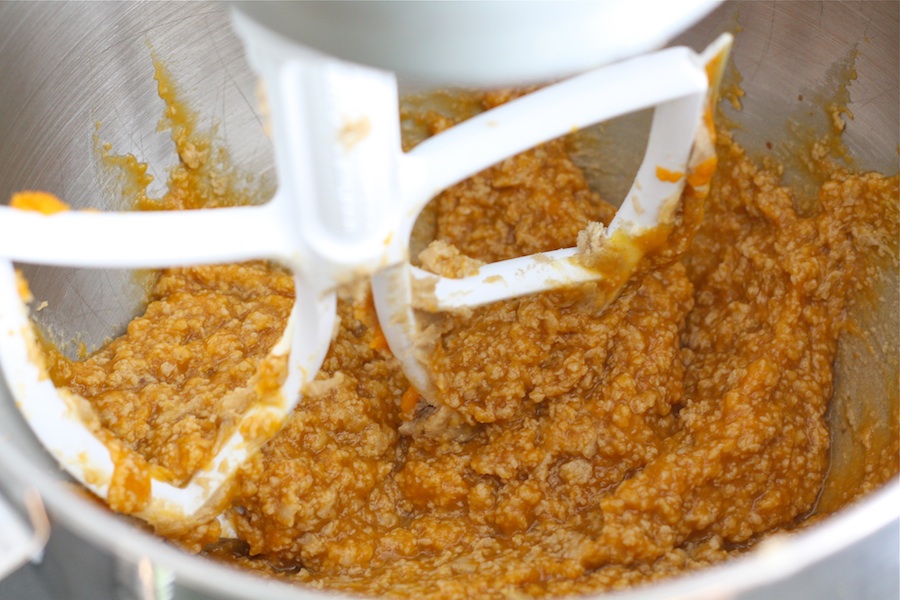
It may seem, at first, that there’s not enough moisture for the dough to hold together, but keep mixing. It’ll come together. I promise.


Tasty Kitchen Blog: Gluten-Free Apple, Ginger and Spice Scones. Guest post by Natalie Perry of Perry's Plate, recipe submitted by TK member Jenni Hulet of The Urban Poser.

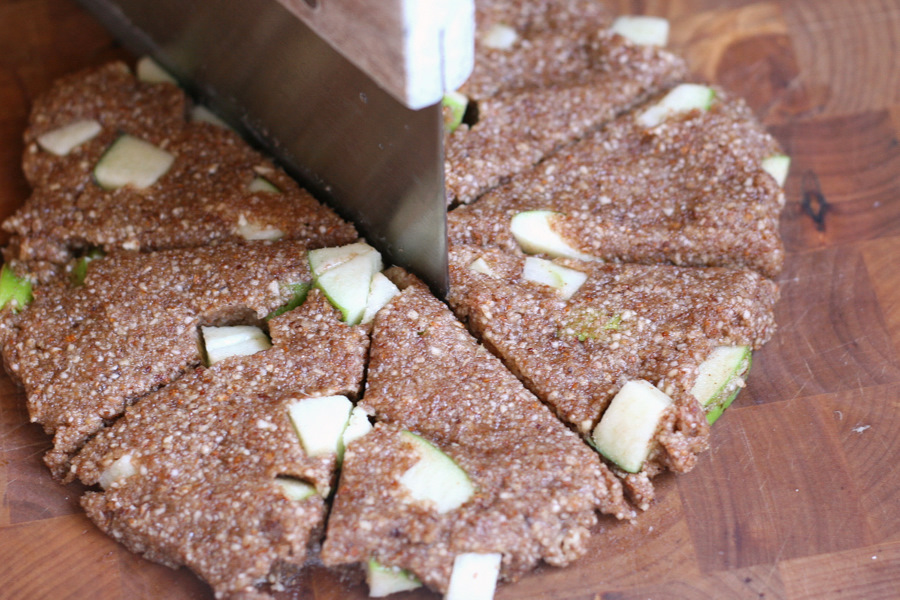
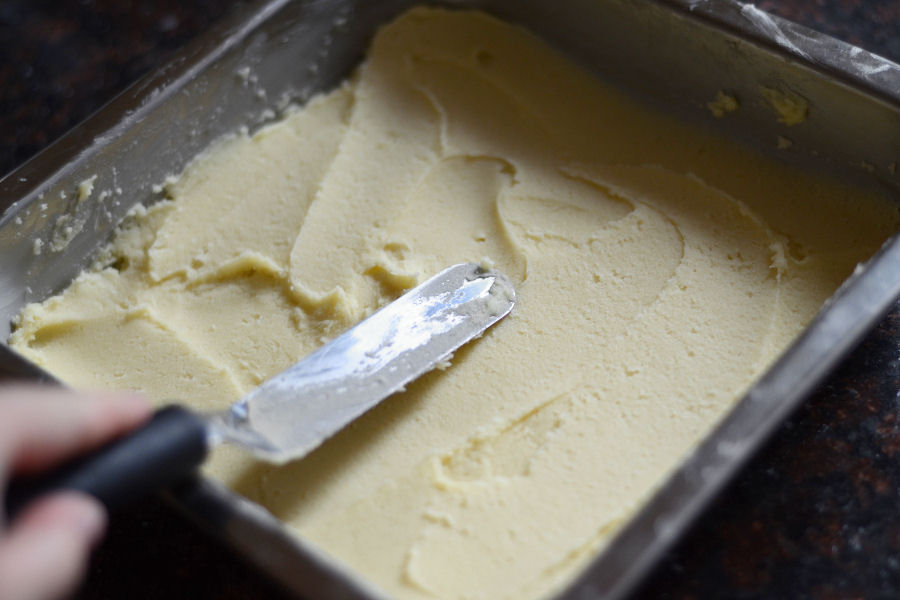
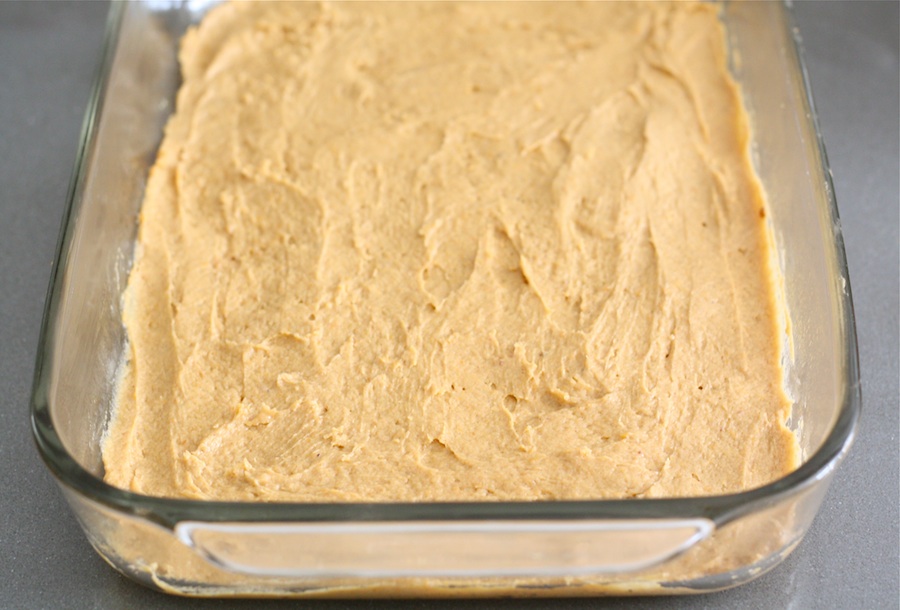
Divide the dough into two balls. Then flatten each ball into a 1/2-inch thick circle and cut into eight segments.

I really, really love my dough cutter. It’s great for cutting dough (of course).


Tasty Kitchen Blog: Gluten-Free Apple, Ginger and Spice Scones. Guest post by Natalie Perry of Perry's Plate, recipe submitted by TK member Jenni Hulet of The Urban Poser.

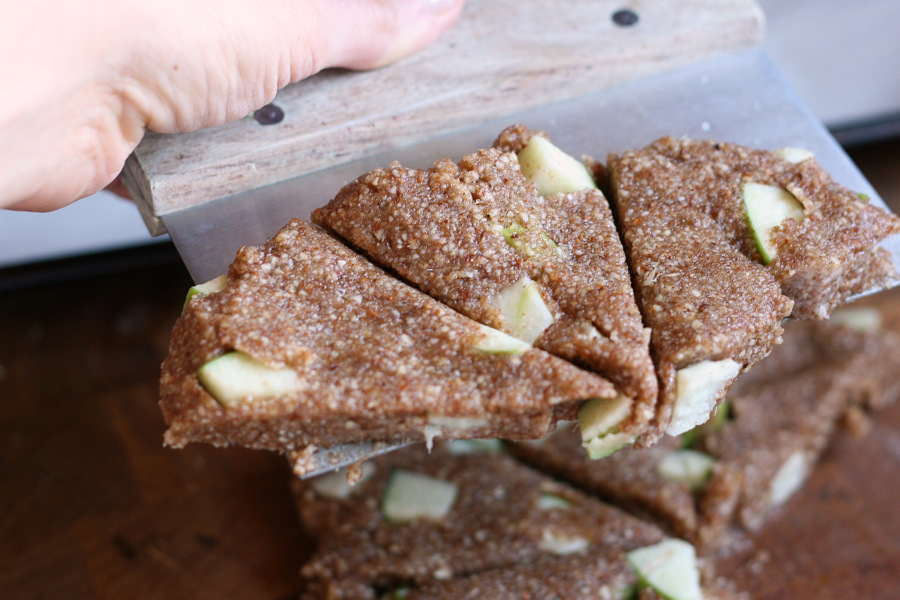
It’s also great for scooping up pieces of dough, and even scraping your countertops clean after you’ve been working with dough and flour. I love you, dough cutter.


Tasty Kitchen Blog: Gluten-Free Apple, Ginger and Spice Scones. Guest post by Natalie Perry of Perry's Plate, recipe submitted by TK member Jenni Hulet of The Urban Poser.

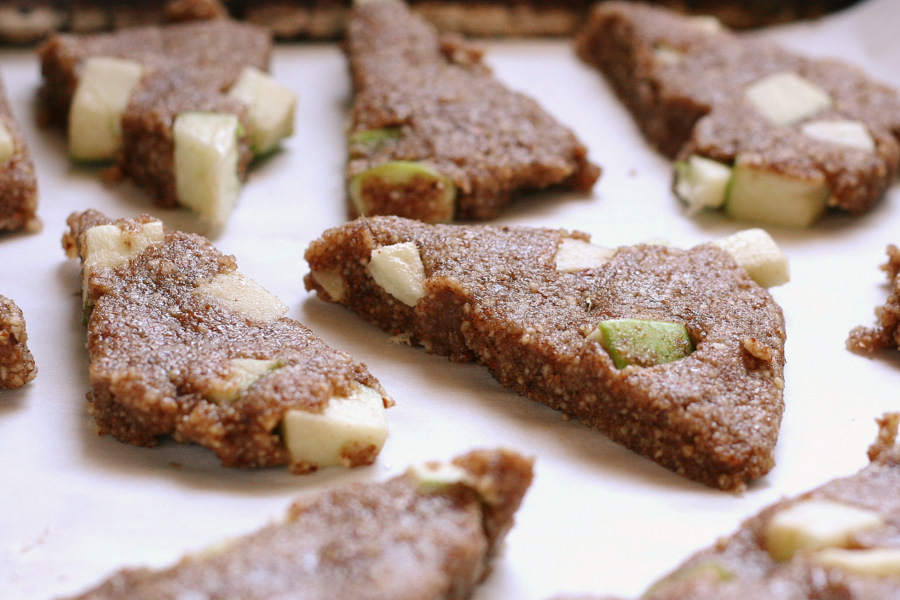
Transfer the scones to parchment-lined stack of baking sheets. Jenni recommended doubling your baking sheets to prevent the bottoms from burning. Nuts tend to burn easily, so this was a great tip.

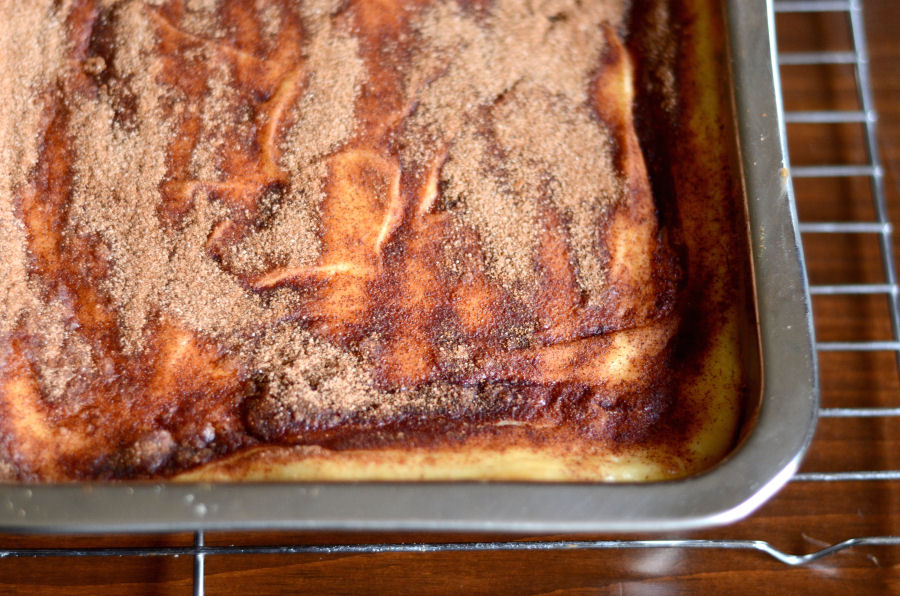
Bake them for 10-12 minutes or until they just barely start to brown. I wouldn’t bake them longer than that or they’ll be dry.


Tasty Kitchen Blog: Gluten-Free Apple, Ginger and Spice Scones. Guest post by Natalie Perry of Perry's Plate, recipe submitted by TK member Jenni Hulet of The Urban Poser.

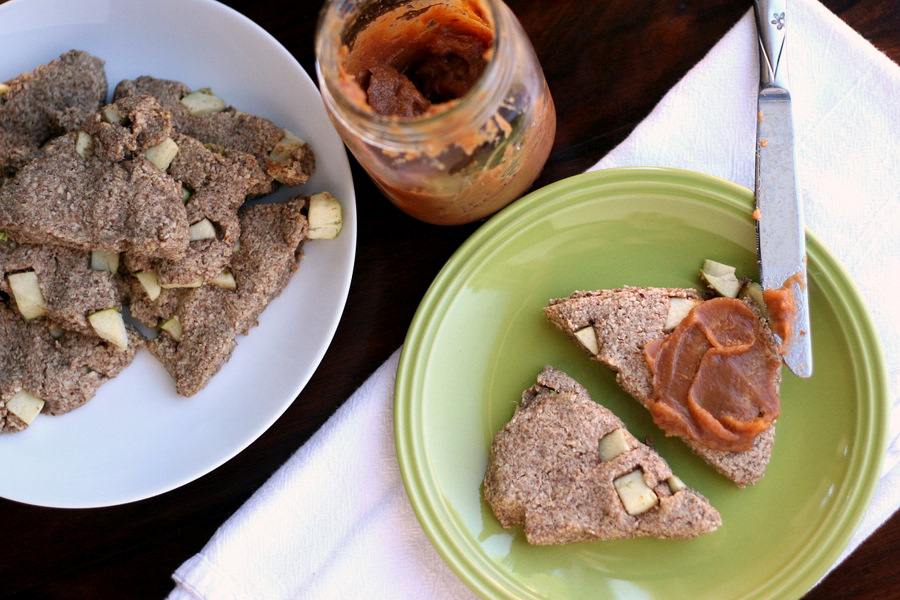
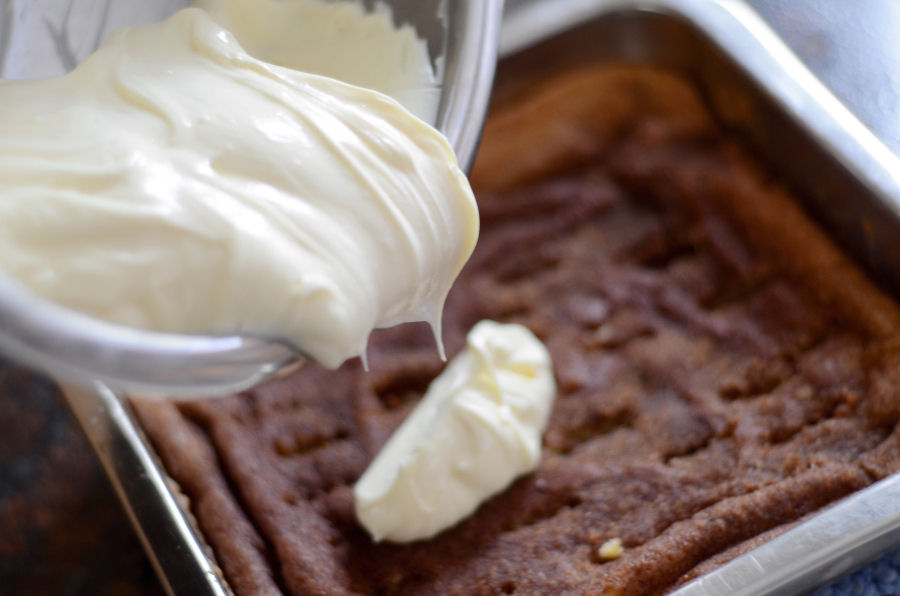
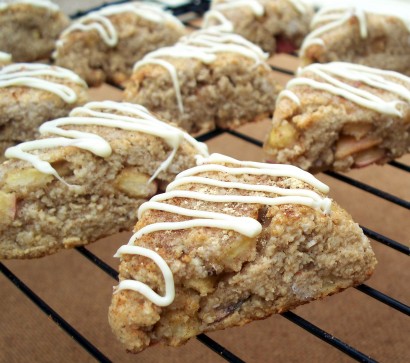
Jenni suggested a drizzle of white chocolate, but we opted for some homemade pear butter. The scones are plenty sweet on their own, more than I thought they’d be with so little sugar. Heck, they’re great with just a smear of regular butter!


Tasty Kitchen Blog: Gluten-Free Apple, Ginger and Spice Scones. Guest post by Natalie Perry of Perry's Plate, recipe submitted by TK member Jenni Hulet of The Urban Poser.

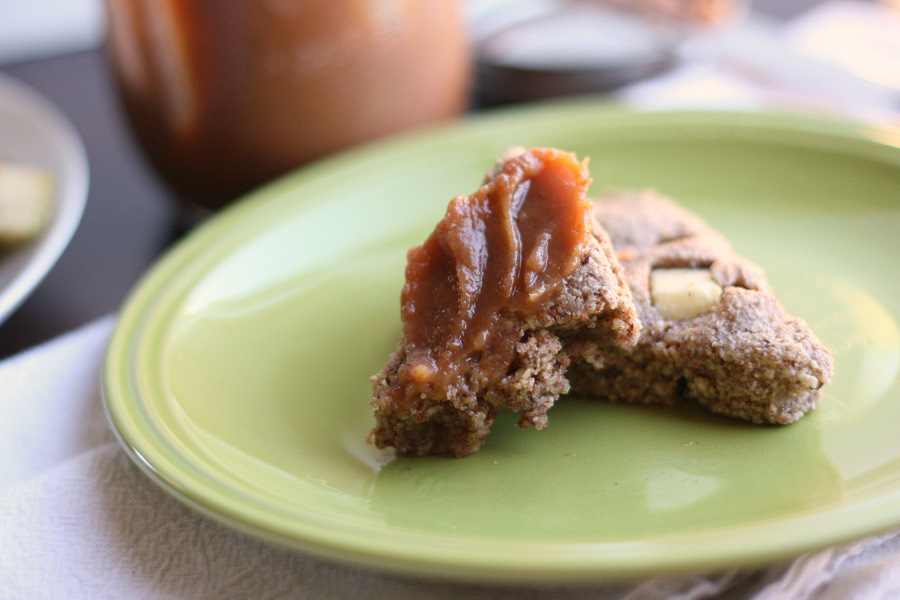
You’ll love these apple-pie-like scones, even if you aren’t on a gluten-free diet. My husband and I and our two small children at the entire batch in one sitting. (Yes, er … all sixteen of them. In our defense, they’re small scones!)

They really are fantastic!

Be sure to visit Jenni’s TK recipe box and her blog The Urban Poser for more natural food recipes!


Printable Recipe

Gluten Free Apple, Ginger, Spice Scones

See post on Jenni Hulet’s site!
5.00 Mitt(s) 1 Rating(s)1 vote, average: 5.00 out of 51 vote, average: 5.00 out of 51 vote, average: 5.00 out of 51 vote, average: 5.00 out of 51 vote, average: 5.00 out of 5

Prep Time:

Cook Time:

Difficulty: Easy

Servings: 16

16
x

Print Options

Page size Letter 3x5 4x6
Text Size Small Medium Large
Content Include description
Include prep time, etc.
Show image

Description

Slightly sweet, reminiscent of apple pie, this gluten free scone will make you want to get up in the morning! Have it with tea or dip it in your coffee. Either way, you won’t care that it’s gluten and grain free! Enjoy.

Ingredients

  • 3 cups Almond Meal
  • 4 Tablespoons Rapunzel Unrefined Cane Sugar
  • ¼ teaspoons Salt
  • 1 teaspoon Baking Soda
  • 1 teaspoon Cinnamon
  • ½ teaspoons Allspice Or Nutmeg
  • 1 cup Chopped Tart Apples
  • 1 whole Egg
  • 1 Tablespoon Apple Cider Vinger
  • 1 Tablespoon Grated Ginger Or Pre-grated Tubed Ginger

Preparation Instructions

First put the almond flour and cane sugar in a blender and blend till fine (a few minuets). You will have to stop and mix a few times as the mixture will get thicker.

Sift the mixture into a large bowl.

Combine the almond flour/sugar mixture with the salt, baking soda, cinnamon, allspice and apples.

In a smaller bowl, combine the egg, vinegar and ginger.

Mix wet ingredients into dry. Lightly knead dough with your hands to ensure proper distribution of ingredients. Don’t worry if it is a bit wet, however you can add a little more almond flour if needed to help bring the dough together.

Form dough into 2 balls and press each one so that each is about ½-inch in thickness. Cut each circle into 8 triangles. Using a metal baking spatula, transfer to parchment paper.

Bake at 375ºF on double or stacked baking sheets (so the bottoms won’t burn). Bake for 10 minutes or till lightly browned.

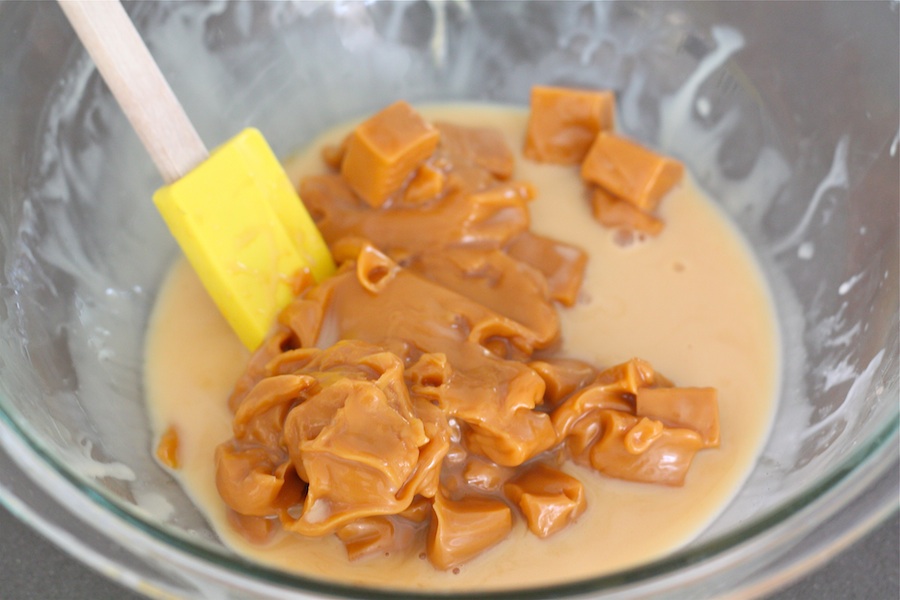
Mildly destroy the healthy goodness with a drizzle of white chocolate goodness. They even make it dairy free these days.

Notes:
You can get almond meal or flour at your local health food store or make your own by grinding almonds in a blender. You can even use other nut flours in the mix. Even better, use sprouted almonds or sprouted almond flour!

Most often you can find pre-grated tubed ginger in the produce section of your local supermarket. I LOVE this stuff. We put it in everything from morning oatmeal, cookies, stir fry to tea.


_______________________________________

Be sure to check out Natalie’s own beautiful food blog, Perrys’ Plate, where you can see her growing collection of lovely recipes. There’s always something new to see there. Go visit now!


Profile photo of Erika (TK)

An Ode to the Sweet Potato

Posted by in The Theme Is...

Tasty Kitchen Blog: Ode to the Sweet Potato

 
Ah, sweet potato. Dear, dear sweet potato. How do I love thee? Let me count the ways.

I love you in the morning, when I can start my day with you in my belly. You singlehandedly (singlespudly?) arm me with—wait for it—769% of my daily recommended value of vitamin A, which helps me see the corner of the bed more clearly and avoid stubbing my toe. I remember that one morning I rushed out forgetting to say hello to you, and I misread the train stop sign and wound up in Fiji. Never again, my love. Never again.

Tasty Kitchen Blog: Ode to the Sweet Potato (Breakfast)

Apple & Sweet Potato Cake with Poached Egg and Sweet Mustard Sauce by Mike (Verses from my Kitchen) Bacon, Kale, and Sweet Potato Breakfast Burritos by Natalie Sweet Potato Walnut Waffles by livlife (Kim) Oven Roasted Sweet Potato Hash by mags7461


I love you when the evenings turn chilly, and all I want is a warm bowl of soup to comfort me. You’re packed with calcium, which helps me fold my legs in all kinds of positions so I can sit on the couch under the covers and balance my bowl on my knees while watching reruns of Three’s Company. And I love that you don’t tell anyone about it.

Tasty Kitchen Blog: Ode to the Sweet Potato (Soup)

Chipotle Sweet Potato Corn Chowder by Angela [YourEverydayMama] Corn and Potato Chowder with Tilapia by Jennifer @ Mother Thyme Sweet Potato Soup with Walnut Pesto by missamy Sweet Potato and Brown Butter Soup by Mike (Verses from my Kitchen) Coconut Curried Sweet Potato Soup by EatLiveRun


I love you on the days when I actually wear proper clothes—decent clothes fit for public consumption—because people (real people!) are coming over. You don’t demand to be the center of attention, and are equally happy playing a supporting role on the side, content with simply making me look good in front of my friends. (Do you have any single brothers? Just asking.)

Tasty Kitchen Blog: Ode to the Sweet Potato (Entrees and Sides)

Rosemary Shrimp & Sweet Potato Grits by Deanna Segrave-Daly Potato and Sweet Potato Gratin by spanishfoodie Chickpea and Sweet Potato Curry by inquiringchef Chipotle-Spiced Sweet Potato Chili by In Good Taste Savory Sweet Potato Skins by HowSweetEats Sweet Potato Foil Packet Tacos by Natalie


I love you after dinner, when you pull out all the stops and amaze me with all the different ways you can entice me with your orange (or yellow) beauty. I marvel at how you can transform yourself from humble spud to decked out princess. Or prince. (How do I tell?)

Tasty Kitchen Blog: Ode to the Sweet Potato (Dessert)

Sugar Cookies with a Spiced Sweet Potato Filling by Alexandra Zeevy Barbecued Sweet Potato Pie by patiodaddio Buttermilk Sweet Potato Pie by barefootbelle Sweet Potato Fudge by Lauren's Latest


As a baker who always works with her hands, I love you for all your antioxidants that help my body fight inflammation and arthritis. When I look at your gnarled and crooked face as you sit quietly in my vegetable bowl, I know your empathy toward my gnarled and crooked fingers is real. (High five.)

Tasty Kitchen Blog: Ode to the Sweet Potato (Bread)

Sweet Potato Banana Muffins or Loaves by Noshings Sweet Potato Scones by A Cozy Kitchen Sweet Potato Mini Loaves with Orange Cinnamon Honey Butter from Lauren's Latest Sweet Potato Rosemary Biscuits by twopeasandtheirpod Sweet Potato Cornbread by Laurie of Simply Scratch Zucchini Sweet Potato Muffins by someonewhobakes Maple Glazed Sweet Potato Bread by Jennifer @ Mother Thyme


And I know my friend Zee the pasta-fiend loves you too, especially when she gets to say “gnocchi” over and over again. (It is a strange-sounding word, I’ll admit.) You play nice with all the other pastas, happy to be stuffed inside, mixed in the dough, or chopped up in the sauce. Everybody loves a team player, and everyone knows there is no “I” in sweet potato.

Tasty Kitchen Blog: Ode to the Sweet Potato (Pasta)

Sweet Potato Ravioli with Pecans and Herb Brown Butter Sauce by A Cozy Kitchen Sweet Potato Gnocchi with Gouda Cheese Sauce by The Noshery Sweet Potato Ricotta Gnocchi by italianfoodforever Sweet Potato and Pepperoni Ragu over Orzo by Natalie


How much more can I say about you, oh sweet potato? I love you morning, afternoon, and night, when the snack monster attacks and will not be appeased until it gets something crunchy or sweet or salty or doughy. You make snacking fun and healthy, which is probably why George Washington wanted you with him in his Virginia farm. 

Tasty Kitchen Blog: Ode to the Sweet Potato (Snacks)

Sweet Potato Garlic Knots by Neil and Jessica at Kohler Created Crunchy Sweet Potato Pie Fries by MonkeyDudesMom Rosemary Cayenne Sweet Potato Fries by bridget350 Sweet Potato and Parmesan Chips by whatsgabycooking


I can go on and on about the wonders of you, and if I called you a superfood, it would be true. But you would blush and start looking like a beet. So I won’t do that. Instead, I will end my ode by once more declaring my undying love for you—a love so great that I am willing to share you with everyone else.

The end.


Note: Click on any of the photos to be taken directly to its recipe page. This is not part of the ode. Over and out.


Profile photo of Erica Lea

Snickerdoodle Cheesecake Bites

Posted by in Baking, Step-by-Step Recipes

Tasty Kitchen Blog: Snickerdoodle Cheesecake Bites. Guest post by Erica Kastner of Cooking for Seven, recipe submitted by TK member Amy of A Stool at the Counter.

 
In these fall months, I gravitate towards sweets with a kick of spice. Cinnamon, ginger, cloves, nutmeg … they speak of autumn and cozy evenings. Today’s recipe, brought to us by Amy (MonkeyDudesMom), adds a dash of cinnamon to cheesecake.

“Cinnamon on cheesecake?!” you say? Hold your horses. Believe me, it’s a wonderful flavor combination, reminiscent of cinnamon rolls.

Instead of the usual graham cracker cheesecake crust, this recipe calls for a cookie dough crust topped with cinnamon sugar. A sprinkling of cinnamon sugar on top of a smooth cheesecake layer finishes this scrumptious dessert. So simple, yet so good.


Tasty Kitchen Blog: Snickerdoodle Cheesecake Bites. Guest post by Erica Kastner of Cooking for Seven, recipe submitted by TK member Amy of A Stool at the Counter.

Here’s what you’ll need for the crust: flour, baking soda, salt, butter, sugar, an egg, and cinnamon sugar (in the photo below).


Tasty Kitchen Blog: Snickerdoodle Cheesecake Bites. Guest post by Erica Kastner of Cooking for Seven, recipe submitted by TK member Amy of A Stool at the Counter.

For the cheesecake filling you’ll need: cream cheese, sugar, plain Greek yogurt (I particularly like Greek Gods yogurt), an egg, vanilla extract, and cinnamon sugar.


Tasty Kitchen Blog: Snickerdoodle Cheesecake Bites. Guest post by Erica Kastner of Cooking for Seven, recipe submitted by TK member Amy of A Stool at the Counter.

Preheat your oven to 350 degrees F. In a medium bowl, combine the flour …


Tasty Kitchen Blog: Snickerdoodle Cheesecake Bites. Guest post by Erica Kastner of Cooking for Seven, recipe submitted by TK member Amy of A Stool at the Counter.

Baking soda …


Tasty Kitchen Blog: Snickerdoodle Cheesecake Bites. Guest post by Erica Kastner of Cooking for Seven, recipe submitted by TK member Amy of A Stool at the Counter.

And salt.


Tasty Kitchen Blog: Snickerdoodle Cheesecake Bites. Guest post by Erica Kastner of Cooking for Seven, recipe submitted by TK member Amy of A Stool at the Counter.

Whisk it all together until it’s well combined. Set aside.


Tasty Kitchen Blog: Snickerdoodle Cheesecake Bites. Guest post by Erica Kastner of Cooking for Seven, recipe submitted by TK member Amy of A Stool at the Counter.

Place the butter and sugar in a medium bowl.


Tasty Kitchen Blog: Snickerdoodle Cheesecake Bites. Guest post by Erica Kastner of Cooking for Seven, recipe submitted by TK member Amy of A Stool at the Counter.

Beat on high speed until well combined.


Tasty Kitchen Blog: Snickerdoodle Cheesecake Bites. Guest post by Erica Kastner of Cooking for Seven, recipe submitted by TK member Amy of A Stool at the Counter.

Add the egg.


Tasty Kitchen Blog: Snickerdoodle Cheesecake Bites. Guest post by Erica Kastner of Cooking for Seven, recipe submitted by TK member Amy of A Stool at the Counter.

Add the flour and beat until well combined.


Tasty Kitchen Blog: Snickerdoodle Cheesecake Bites. Guest post by Erica Kastner of Cooking for Seven, recipe submitted by TK member Amy of A Stool at the Counter.

Turn out the cookie dough into a greased 8×8-inch square pan.


Tasty Kitchen Blog: Snickerdoodle Cheesecake Bites. Guest post by Erica Kastner of Cooking for Seven, recipe submitted by TK member Amy of A Stool at the Counter.

Smooth out the dough with a spoon or an offset spatula.


Tasty Kitchen Blog: Snickerdoodle Cheesecake Bites. Guest post by Erica Kastner of Cooking for Seven, recipe submitted by TK member Amy of A Stool at the Counter.

Sprinkle the dough with cinnamon sugar.


Tasty Kitchen Blog: Snickerdoodle Cheesecake Bites. Guest post by Erica Kastner of Cooking for Seven, recipe submitted by TK member Amy of A Stool at the Counter.

Bake in your preheated oven for 20 minutes. When it’s done, poke with a fork to reduce the puffiness. Allow to cool.


Tasty Kitchen Blog: Snickerdoodle Cheesecake Bites. Guest post by Erica Kastner of Cooking for Seven, recipe submitted by TK member Amy of A Stool at the Counter.

Now for the cheesecake: cream together the cream cheese and sugar until smooth and fluffy.


Tasty Kitchen Blog: Snickerdoodle Cheesecake Bites. Guest post by Erica Kastner of Cooking for Seven, recipe submitted by TK member Amy of A Stool at the Counter.

Add the yogurt …


Tasty Kitchen Blog: Snickerdoodle Cheesecake Bites. Guest post by Erica Kastner of Cooking for Seven, recipe submitted by TK member Amy of A Stool at the Counter.

Egg …


Tasty Kitchen Blog: Snickerdoodle Cheesecake Bites. Guest post by Erica Kastner of Cooking for Seven, recipe submitted by TK member Amy of A Stool at the Counter.

And vanilla extract. Beat until well combined.


Tasty Kitchen Blog: Snickerdoodle Cheesecake Bites. Guest post by Erica Kastner of Cooking for Seven, recipe submitted by TK member Amy of A Stool at the Counter.

Poor the batter over the cooled crust.


Tasty Kitchen Blog: Snickerdoodle Cheesecake Bites. Guest post by Erica Kastner of Cooking for Seven, recipe submitted by TK member Amy of A Stool at the Counter.

Top with the remaining cinnamon sugar.


Tasty Kitchen Blog: Snickerdoodle Cheesecake Bites. Guest post by Erica Kastner of Cooking for Seven, recipe submitted by TK member Amy of A Stool at the Counter.

So pretty.


Tasty Kitchen Blog: Snickerdoodle Cheesecake Bites. Guest post by Erica Kastner of Cooking for Seven, recipe submitted by TK member Amy of A Stool at the Counter.

Bake in the 350ºF oven for 35 minutes. Let cool on a rack to room temperature before transferring to the refrigerator to chill. Chill for at least 3 hours.


Tasty Kitchen Blog: Snickerdoodle Cheesecake Bites. Guest post by Erica Kastner of Cooking for Seven, recipe submitted by TK member Amy of A Stool at the Counter.

Cut into 1-inch squares (bigger if you want a larger bite, which you probably will) and serve.


Tasty Kitchen Blog: Snickerdoodle Cheesecake Bites. Guest post by Erica Kastner of Cooking for Seven, recipe submitted by TK member Amy of A Stool at the Counter.

Note: I found that it was quite difficult to remove the cheesecake from the pan. I would recommend lining the pan with aluminum foil for easy removal and cleanup.

Thank you, Amy, for sharing this super-yummy recipe with us! Visit her blog A Stool at the Counter for more of her delicious recipes.


Printable Recipe

Snickerdoodle Cheesecake Bites

See post on MonkeyDudesMom’s site!
5.00 Mitt(s) 7 Rating(s)7 votes, average: 5.00 out of 57 votes, average: 5.00 out of 57 votes, average: 5.00 out of 57 votes, average: 5.00 out of 57 votes, average: 5.00 out of 5

Prep Time:

Cook Time:

Difficulty: Easy

Servings: 10

10
x

Print Options

Page size Letter 3x5 4x6
Text Size Small Medium Large
Content Include description
Include prep time, etc.
Show image

Description

Spicy-sweet snickerdoodle cookie, topped with tangy, velvety cheesecake. Served up in bite sized pieces so you can eat more right?

Ingredients

  • FOR THE CRUST:
  • 1 cup All-purpose Flour
  • ½ teaspoons Baking Soda
  • ½ teaspoons Salt
  • ½ cups Softened Butter
  • ¾ cups Sugar
  • 1 whole Egg
  • ½ whole Batch Of Cinnamon Sugar Mixture (see Below)
  • FOR THE CHEESECAKE:
  • 12 ounces, weight Softened Cream Cheese
  • ½ cups Sugar
  • ½ cups Plain Greek Yogurt
  • 1 whole Egg
  • ½ Tablespoons Vanilla
  • ½ whole Batch Of Cinnamon Sugar Mixture (see Below)
  • FOR THE CINNAMON SUGAR MIXTURE:
  • 1 Tablespoon Cinnamon
  • 3 Tablespoons Sugar

Preparation Instructions

For the cinnamon sugar mixture:

Stir cinnamon and sugar together in a small bowl. Set aside

For the crust:

Preheat oven to 350F.

In a medium sized bowl, mix together the flour, baking soda, and salt. Set aside.

Beat butter and sugar together using a mixer on high until well combined. Stir in egg.

Add in flour mixture until well combined.

Turn out onto a greased 8×8 inch baking dish and smooth the dough into pan with a spoon.

Sprinkle the cinnamon sugar mixture over the top.

Bake for 20 minutes. Then remove it from the oven and poke holes in it with a fork to reduce puffiness. Allow to cool.

For the cheesecake:

Cream together cream cheese and sugar until smooth and fluffy. Stir in remaining cheesecake ingredients until well combined.

Pour the filling mixture onto the cooled crust and sprinkle with remaining cinnamon sugar.

Bake for 35 minutes (also at 350F).

Let cool on counter for about an hour and half (to room temperature). Then place in the fridge for at least 3 hours.

To serve, cut it into 1 inch cubes with a serrated knife, wiping off the knife frequently.


_______________________________________

Newly-married Erica Kastner shares her wonderful recipes and amazing food photography on her blog, Cooking for Seven. She also writes about crafts and posts more of her beautiful photography in her personal blog, EricaLea.com. There really isn’t much that this amazing young lady can’t do, and we’re thrilled she does some of it here.


Profile photo of twopeasandtheirpod

Ooey Gooey Caramel Pumpkin Blondies

Posted by in Baking, Step-by-Step Recipes

Tasty Kitchen Blog: Ooey Gooey Caramel Pumpkin Blondies with Chocolate and Walnuts. Guest post by Maria Lichty of Two Peas and Their Pod, recipe submitted by TK member Lauren of Lauren's Latest.

 
I’ve been on a pumpkin kick lately. I told myself I was going to stop, it is becoming an addiction, but then I saw Lauren’s (TK member Lauren’s Latest) recipe for Ooey Gooey Caramel Pumpkin Blondies with Chocolate and Walnuts on Tasty Kitchen. Anything with Ooey and Gooey in the title catches my attention and there was also pumpkin and chocolate in the mix. Heaven! I knew I had to try this recipe. Who cares if I have a pumpkin addiction, at least it only lasts during the fall season. I got out my trusty can of pumpkin and started baking. 


Tasty Kitchen Blog: Ooey Gooey Caramel Pumpkin Blondies with Chocolate and Walnuts. Guest post by Maria Lichty of Two Peas and Their Pod, recipe submitted by TK member Lauren of Lauren's Latest.

To make this recipe you will need the following ingredients: butter, brown sugar, eggs, vanilla extract, pumpkin puree, cinnamon, nutmeg, flour, baking soda, salt, walnuts (I omitted the nuts because my husband is allergic), chocolate chips, caramels, and heavy cream. 


Tasty Kitchen Blog: Ooey Gooey Caramel Pumpkin Blondies with Chocolate and Walnuts. Guest post by Maria Lichty of Two Peas and Their Pod, recipe submitted by TK member Lauren of Lauren's Latest.

First, preheat the oven to 350 degrees F and lightly grease a 9×13 pan with cooking spray. Set aside. 


Tasty Kitchen Blog: Ooey Gooey Caramel Pumpkin Blondies with Chocolate and Walnuts. Guest post by Maria Lichty of Two Peas and Their Pod, recipe submitted by TK member Lauren of Lauren's Latest.

Cream together the butter and sugar until light and fluffy. 


Tasty Kitchen Blog: Ooey Gooey Caramel Pumpkin Blondies with Chocolate and Walnuts. Guest post by Maria Lichty of Two Peas and Their Pod, recipe submitted by TK member Lauren of Lauren's Latest.

Stir in the eggs, vanilla, and pumpkin.


Tasty Kitchen Blog: Ooey Gooey Caramel Pumpkin Blondies with Chocolate and Walnuts. Guest post by Maria Lichty of Two Peas and Their Pod, recipe submitted by TK member Lauren of Lauren's Latest.

Mix until combined. 


Tasty Kitchen Blog: Ooey Gooey Caramel Pumpkin Blondies with Chocolate and Walnuts. Guest post by Maria Lichty of Two Peas and Their Pod, recipe submitted by TK member Lauren of Lauren's Latest.

Slowly incorporate the remaining blondie ingredients. Scrape down the sides of the bowl and mix again until you have a smooth batter. 


Tasty Kitchen Blog: Ooey Gooey Caramel Pumpkin Blondies with Chocolate and Walnuts. Guest post by Maria Lichty of Two Peas and Their Pod, recipe submitted by TK member Lauren of Lauren's Latest.

Spread about 2/3 of the batter into the prepared pan. 


Tasty Kitchen Blog: Ooey Gooey Caramel Pumpkin Blondies with Chocolate and Walnuts. Guest post by Maria Lichty of Two Peas and Their Pod, recipe submitted by TK member Lauren of Lauren's Latest.

Sprinkle nuts and chocolate chips evenly over the batter. (Remember that I omitted the walnuts because my husband is allergic.) 


Tasty Kitchen Blog: Ooey Gooey Caramel Pumpkin Blondies with Chocolate and Walnuts. Guest post by Maria Lichty of Two Peas and Their Pod, recipe submitted by TK member Lauren of Lauren's Latest.

Place caramels and heavy cream in a microwave-safe bowl. Heat until the caramel is smooth. You will need to stir the caramel every 20 seconds to prevent it from burning. 


Tasty Kitchen Blog: Ooey Gooey Caramel Pumpkin Blondies with Chocolate and Walnuts. Guest post by Maria Lichty of Two Peas and Their Pod, recipe submitted by TK member Lauren of Lauren's Latest.

Pour melted caramel over the batter and spread gently with a knife so the caramel covers the pan. 


Tasty Kitchen Blog: Ooey Gooey Caramel Pumpkin Blondies with Chocolate and Walnuts. Guest post by Maria Lichty of Two Peas and Their Pod, recipe submitted by TK member Lauren of Lauren's Latest.

Place dollops of the remaining batter over the caramel layer.


Tasty Kitchen Blog: Ooey Gooey Caramel Pumpkin Blondies with Chocolate and Walnuts. Guest post by Maria Lichty of Two Peas and Their Pod, recipe submitted by TK member Lauren of Lauren's Latest.

Spread the dollops with a knife until the batter evenly covers the pan. It is okay if a little caramel peeks through. 


Tasty Kitchen Blog: Ooey Gooey Caramel Pumpkin Blondies with Chocolate and Walnuts. Guest post by Maria Lichty of Two Peas and Their Pod, recipe submitted by TK member Lauren of Lauren's Latest.

Bake for 25 minutes or until the edges are golden brown and a toothpick comes out clean. Let the blondies cool completely before cutting and serving. 


Tasty Kitchen Blog: Ooey Gooey Caramel Pumpkin Blondies with Chocolate and Walnuts. Guest post by Maria Lichty of Two Peas and Their Pod, recipe submitted by TK member Lauren of Lauren's Latest.

Serve blondies with vanilla ice cream or whipped cream. 


Tasty Kitchen Blog: Ooey Gooey Caramel Pumpkin Blondies with Chocolate and Walnuts. Guest post by Maria Lichty of Two Peas and Their Pod, recipe submitted by TK member Lauren of Lauren's Latest.

I loved everything about these blondies. They are the ultimate pumpkin dessert. They are soft, moist, and the caramel and chocolate layer is divine. Ooey and gooey definitely deserves to be in this recipe title. If you are looking for one pumpkin recipe to make this fall—I don’t know how you could make just one, but if you do, make these blondies. Pumpkin perfection indeed! The only problem is you will want to eat the entire pan. I’m okay with it if you do, but if you are feeling generous, share with your family and friends. They will love you even more after tasting these Ooey Gooey Caramel Pumpkin Blondies with Chocolate and Walnuts. Okay, enough already, go make these blondies! 

Thanks Lauren for a most excellent recipe. Make sure you visit Lauren’s blog, Lauren’s Latest, for other delicious recipes and drool-worthy photos. 


Printable Recipe

Ooey Gooey Caramel Pumpkin Blondies with Chocolate and Walnuts

See post on Lauren's Latest’s site!
4.72 Mitt(s) 11 Rating(s)11 votes, average: 4.72 out of 511 votes, average: 4.72 out of 511 votes, average: 4.72 out of 511 votes, average: 4.72 out of 511 votes, average: 4.72 out of 5

Prep Time:

Cook Time:

Difficulty: Easy

Servings: 16

16
x

Print Options

Page size Letter 3x5 4x6
Text Size Small Medium Large
Content Include description
Include prep time, etc.
Show image

Description

Addictive. Festive. Heaven in your mouth.

Ingredients

  • FOR THE BLONDIES:
  • ¾ cups Butter, Softened
  • 1 cup Packed Brown Sugar
  • 2 whole Eggs
  • 1 teaspoon Vanilla Extract
  • 1 cup Pumpkin Puree
  • 1 teaspoon Cinnamon
  • ½ teaspoons Nutmeg
  • 1-¾ cup All-purpose Flour
  • 1 teaspoon Baking Soda
  • ¼ teaspoons Salt
  • FOR THE FILLING:
  • ½ cups Chopped Walnuts
  • ¼ cups Semi-Sweet Chocolate Chips
  • 14 ounces, weight Caramels, Unwrapped (1 Bag)
  • ¼ cups Heavy Cream

Preparation Instructions

Preheat oven to 350 degrees F. Lightly grease a 9×13 pan with non stick cooking spray and set aside.

In a large bowl, cream butter and sugar until light and fluffy. Stir in eggs, vanilla and pumpkin until combined. Slowly incorporate the remaining ‘blondies’ ingredients into the batter. Scrape sides of bowl and mix again briefly to ensure a smooth batter. Spread about 2/3 of the batter evenly into the prepared pan.

For the filling: Sprinkle nuts and chocolate chips over top of the batter.

Place caramels and cream into a heat-proof bowl. Microwave on high until caramel is smooth and completely melted, being sure to stir every 20 seconds. Stop as soon as it’s melted and smooth.

Pour melted caramel over chocolate and nuts. Spread around evenly with a butter knife or spoon. Place dollops of the remaining batter over the top of the caramel layer. Spread those dollops out to try and get a smooth layer of batter over top. (It’s fine if some of the caramel layer is peeking through.)

Bake for 25 minutes or until edges are golden and a toothpick comes out clean when inserted. (It might come out with a little caramel on it which is fine. You don’t want batter on the toothpick.)

Cool completely before serving. Or be prepared to get a whole lot of oozing caramel if you serve it warm.

Serve with vanilla ice cream or whipped cream.


_______________________________________

Maria and her husband Josh (who she affectionately refers to as her “dough boy”) blog at Two Peas and Their Pod. They’ve been featured on Saveur, Eatocracy, Gourmet Live, Glamour, and the Los Angeles Times, to name just a few. They’d also just recently added a little pea to their pod. We’re so glad to have them here!


Profile photo of A Cozy Kitchen

Broccoli Cheddar Soup

Posted by in Step-by-Step Recipes

  Broccoli cheddar soup will forever make me think of those cold college nights when my friends and I would head to Panera to eat copious amounts of soup in bread bowls. It was one of those college activities we did since Panera was super inexpensive, pretty delicious and one of the only restaurants open […]

Profile photo of callimakesdo

Easy Flaky Buttery Biscuits

Posted by in Baking, Step-by-Step Recipes

  A warm biscuit is comfort food, plain and simple. Being from the Mountain West, biscuits aren’t exactly a staple at our dinner table. (My mom did make homemade buttermilk biscuits occasionally, to accompany cabbage rolls—one of my favorite childhood dinners.) But my husband is half Southern; his mother’s family is from Tennessee, and some…

Profile photo of EatLiveRun

Slow-Cooker Chicken Tikka Masala

Posted by in Step-by-Step Recipes

  Indian food is total comfort for me. There’s just something about the spicy heat, the simple side of white basmati rice and the chewy garlic naan that soaks it all up perfectly. And as much as I love hitting up my local Indian restaurant for take-out, I also really love making my own Indian […]

Profile photo of HowSweetEats

Pumpkin Coffee Cake

Posted by in Baking, Step-by-Step Recipes

  It seems that I wait all year for pumpkin. Come May, I am already craving pumpkin cookies, pumpkin roll, and pumpkin pie, and can hardly imagine waiting another four or five months to get in on that goodness. And with the recent pumpkin shortages that have been happening around the country, I sort of […]