The Pioneer Woman Tasty Kitchen
Profile photo of callimakesdo

Pie Crust Tutorial

Posted by in Baking, Kitchen Talk, Step-by-Step Recipes

Tasty Kitchen Blog Pie Crust Tutorial. Guest post and recipe from Calli Taylor of Make It Do.

 
A few weeks ago, I invited my mom to join me in my kitchen for a day of pie making. She’s made hundreds of pies over the years and is known for her tender, flaky crusts. Working beside her brought back memories of making pie with her as a child. I love to watch her hands at work, her touch on the dough is so light and sure. We had a lovely day together and delicious pies to show for our work.

As we worked, my mom and I talked about pie. I told her I know many great cooks who are daunted by pie crust. Her answer was simple: if you want to be good at making pie, practice.

There are lots of tips you can use to improve your crust—how much to cut the fat, how wet the dough should be, and how to roll out and handle your dough. But in the end, there is no substitute for doing.


Tasty Kitchen Blog Pie Crust Tutorial. Guest post and recipe from Calli Taylor of Make It Do.

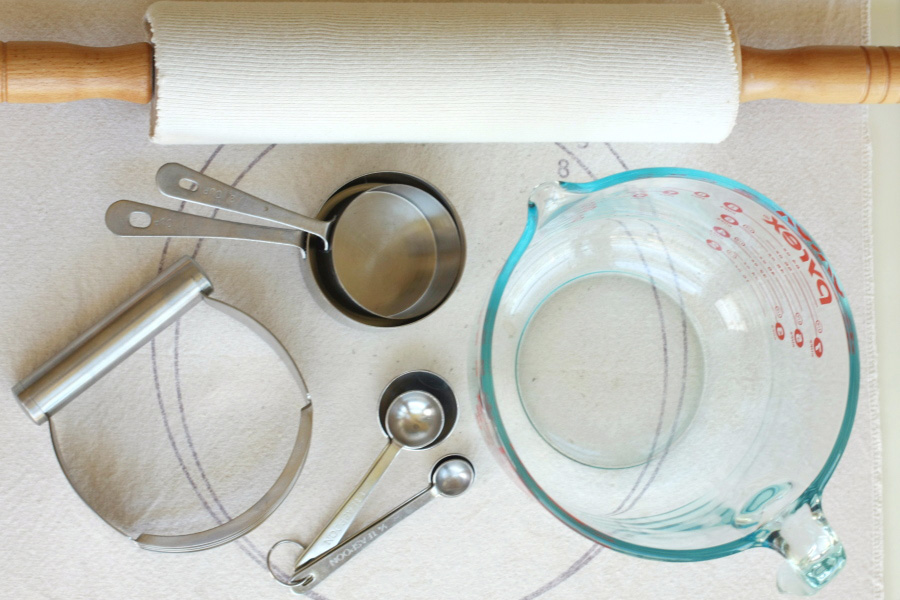
You don’t need fancy tools to make a good pie crust. The essentials are a mixing bowl, measuring cups and spoons, a pastry cutter, a rolling pin and a pie plate.

I use one more tool that’s not a necessity but is my favorite pie secret, and that’s a pastry frame. A pastry frame is canvas stretched tight over a wood and metal frame. It can be used for pies, pastries and even rolls. They are inexpensive (I paid about $15 for mine) and they roll up compactly to store. They make it incredibly easy to roll out your dough without sticking, and thanks to the canvas, your dough absorbs less flour, making your crust lighter and more tender. My frame even has guides so you know exactly how large to roll your dough.


Tasty Kitchen Blog Pie Crust Tutorial. Guest post and recipe from Calli Taylor of Make It Do.

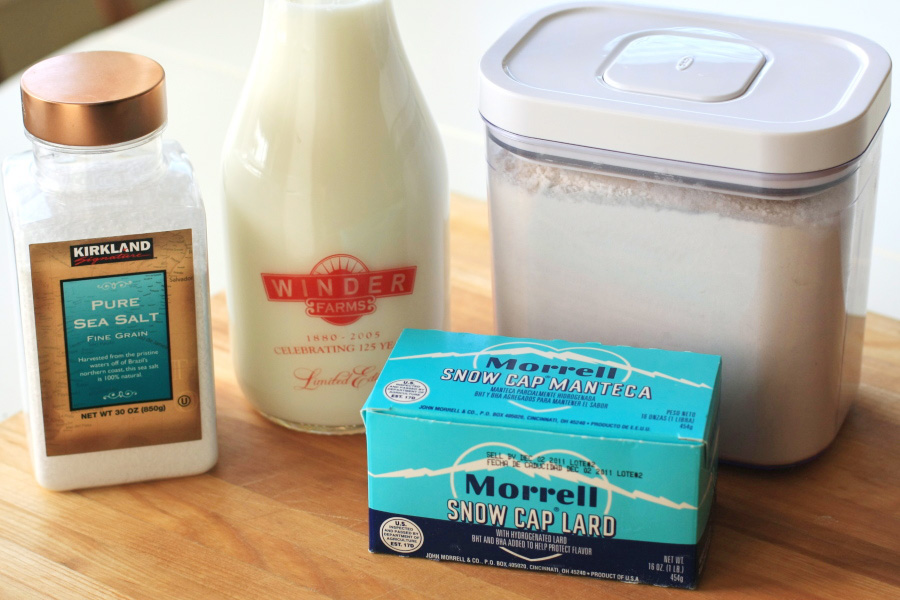
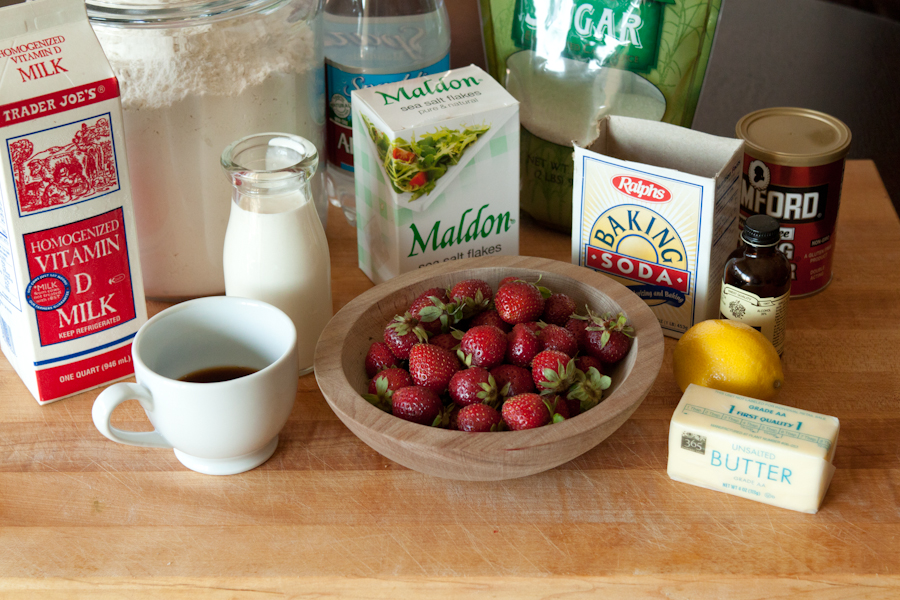
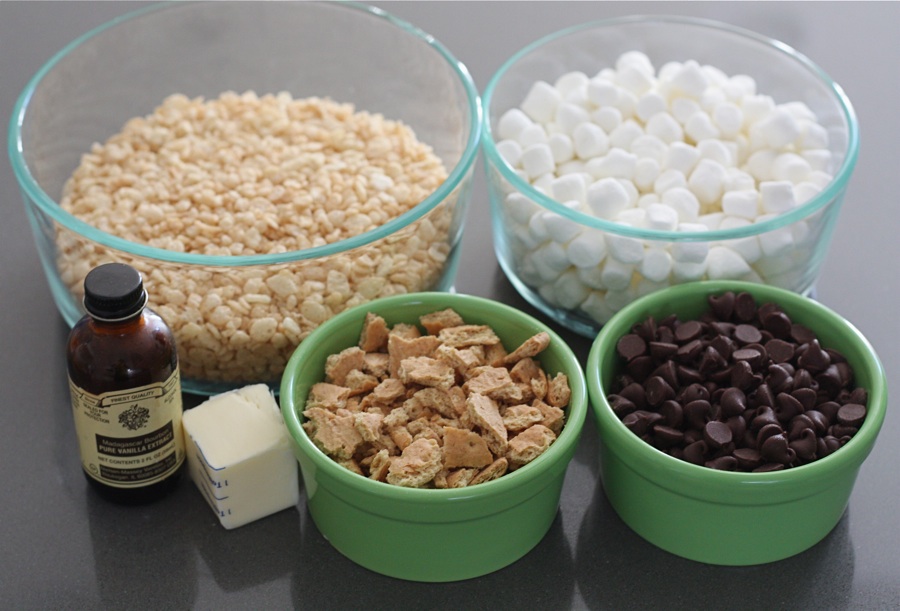
The ingredients for pie are simple too, no matter which recipe you use. Each recipe has dry ingredients, usually all-purpose flour, salt, sometimes sugar, a liquid (ice water, milk or even vodka), and a fat.

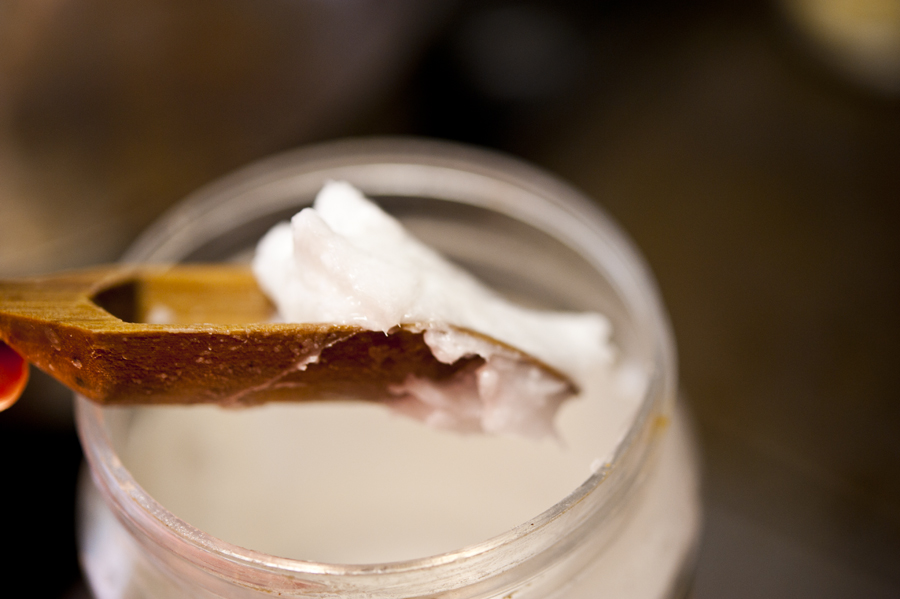
There is great debate in the pie world about which fat is best: butter, shortening, lard, or a combination of those fats. The two best pie makers I’ve known, my mom and my husband’s late grandmother, both use(d) lard. Their crusts speak for themselves—flaky, delicious, out of this world. So lard is what I use, too. Whatever fat you choose, it must be cold, cold, cold. Cold fat makes for flaky crust.

So let’s get baking.


Tasty Kitchen Blog Pie Crust Tutorial. Guest post and recipe from Calli Taylor of Make It Do.

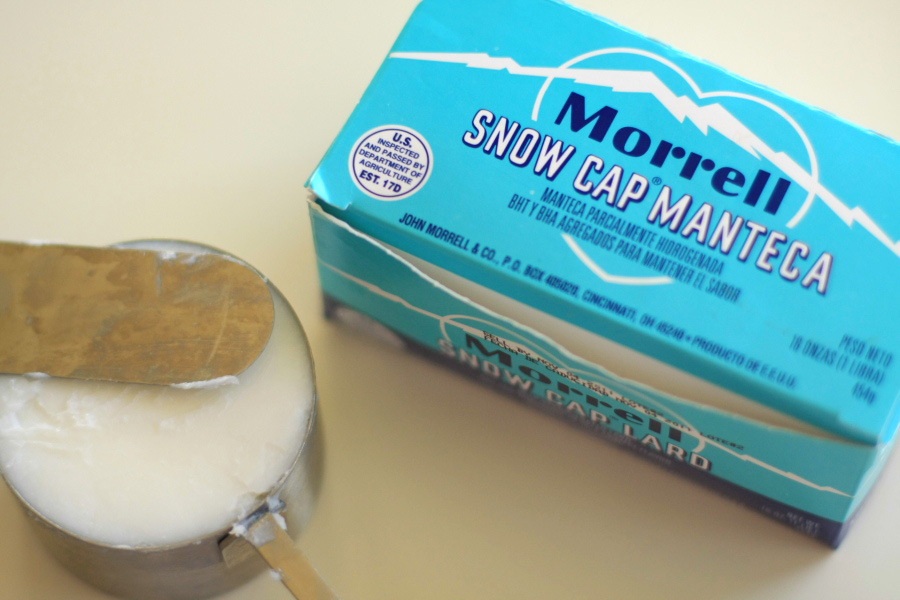
Before anything else, measure the lard and put it in the freezer to get it extra cold. Then prepare the rest of the ingredients.


Tasty Kitchen Blog Pie Crust Tutorial. Guest post and recipe from Calli Taylor of Make It Do.

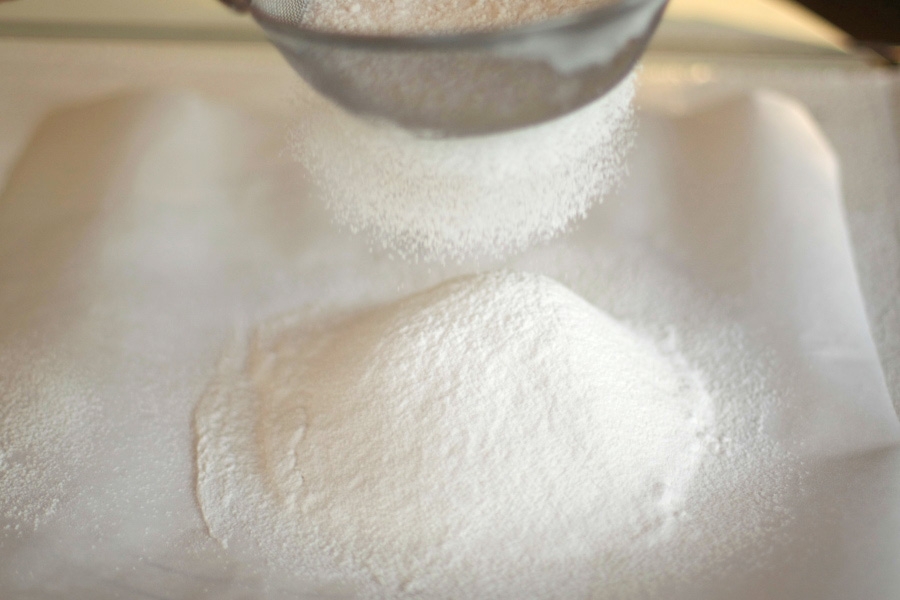
Measure 2 cups of flour and sift onto a piece of parchment or wax paper.


Tasty Kitchen Blog Pie Crust Tutorial. Guest post and recipe from Calli Taylor of Make It Do.

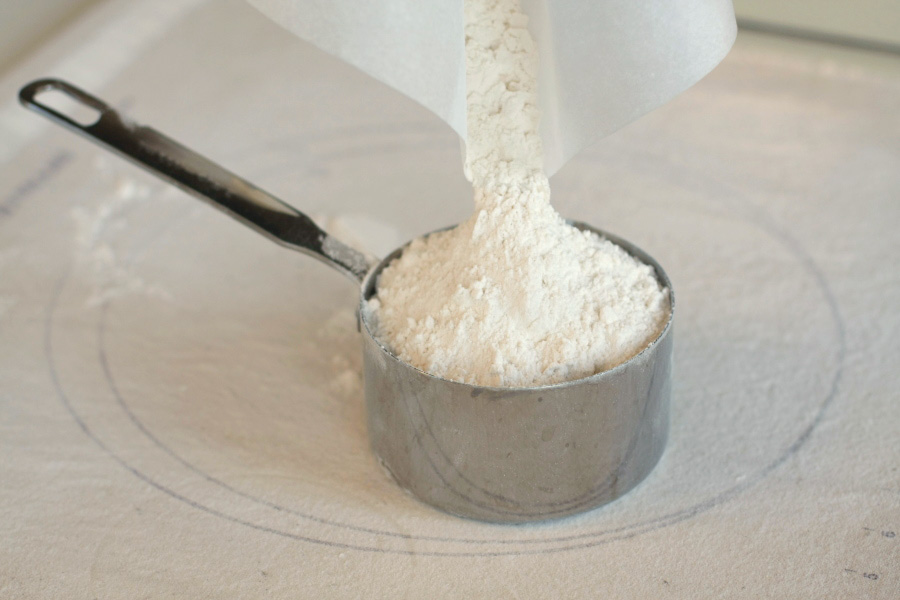
Re-measure the 2 cups of sifted flour. My mom lifts the parchment like a funnel and pours it back into the measuring cup. She also re-measures over the surface where she will be rolling out the dough. The overspill helps to flour the surface. My mom is all about economy of action.


Tasty Kitchen Blog Pie Crust Tutorial. Guest post and recipe from Calli Taylor of Make It Do.

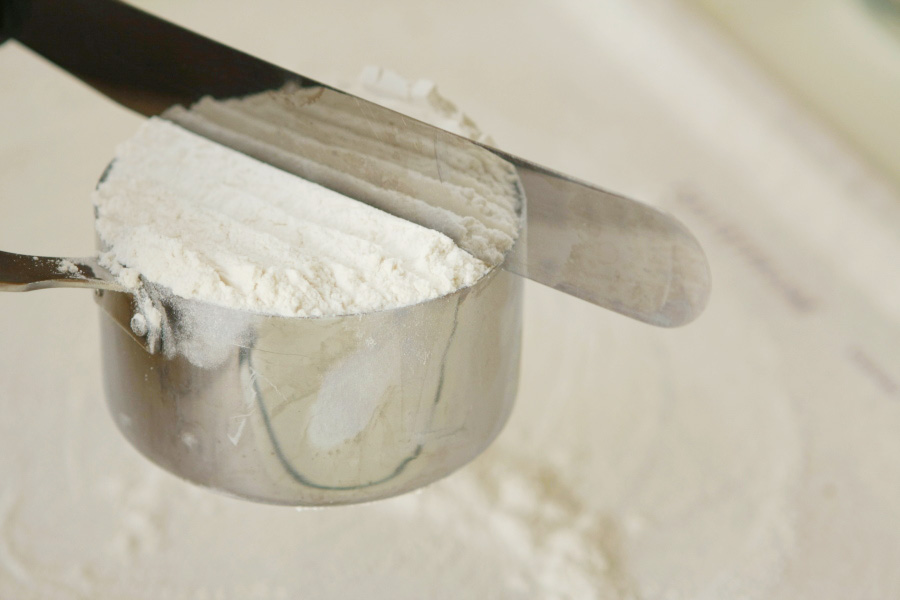
Tap across and level with a knife.


Tasty Kitchen Blog Pie Crust Tutorial. Guest post and recipe from Calli Taylor of Make It Do.

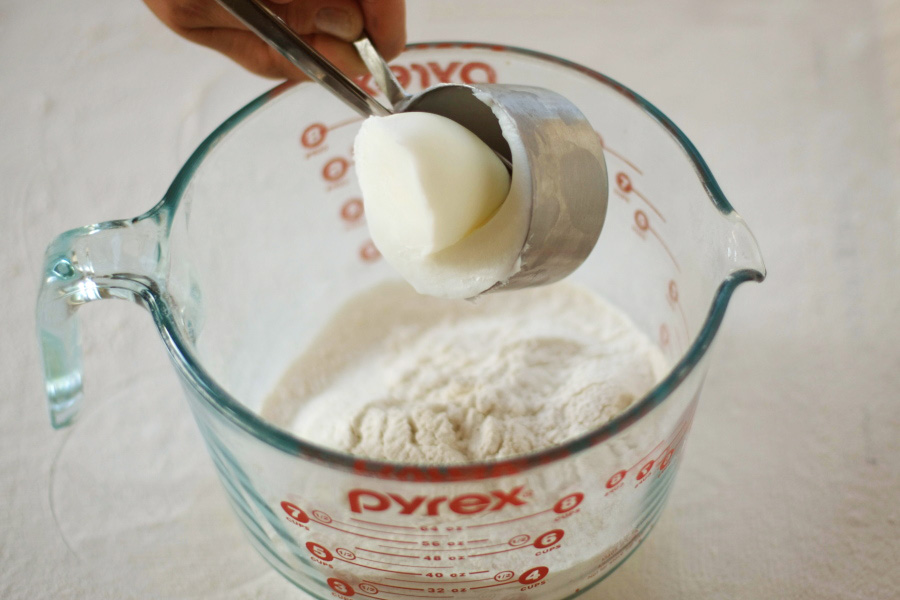
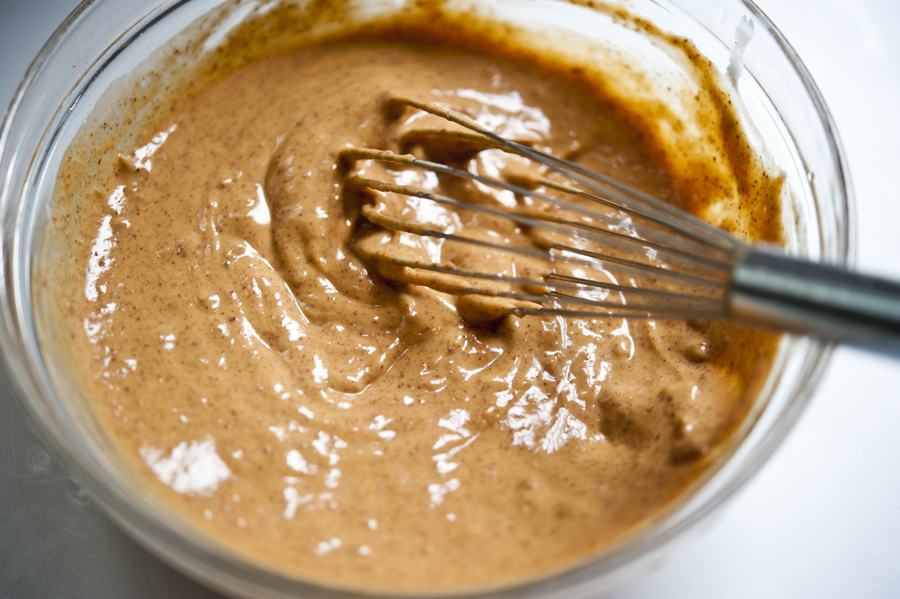
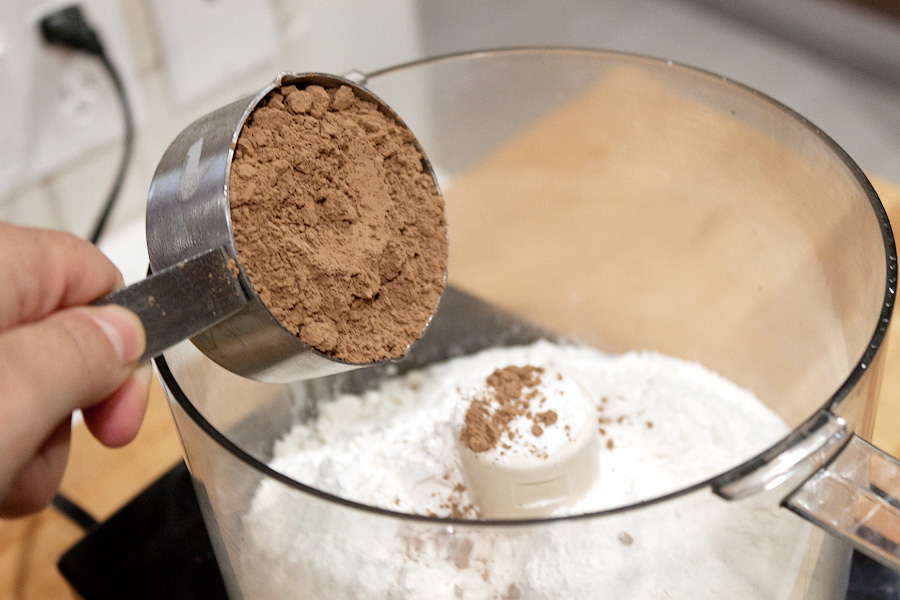
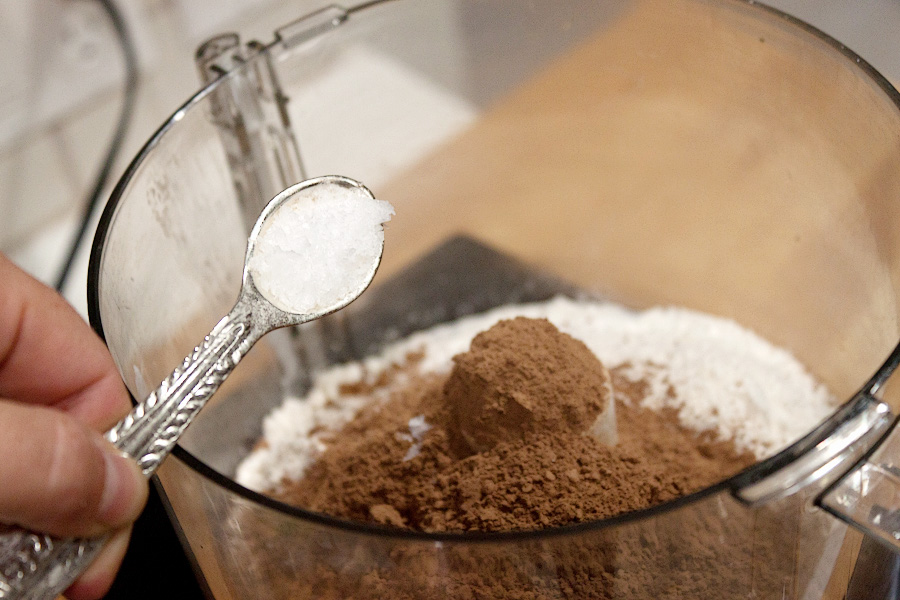
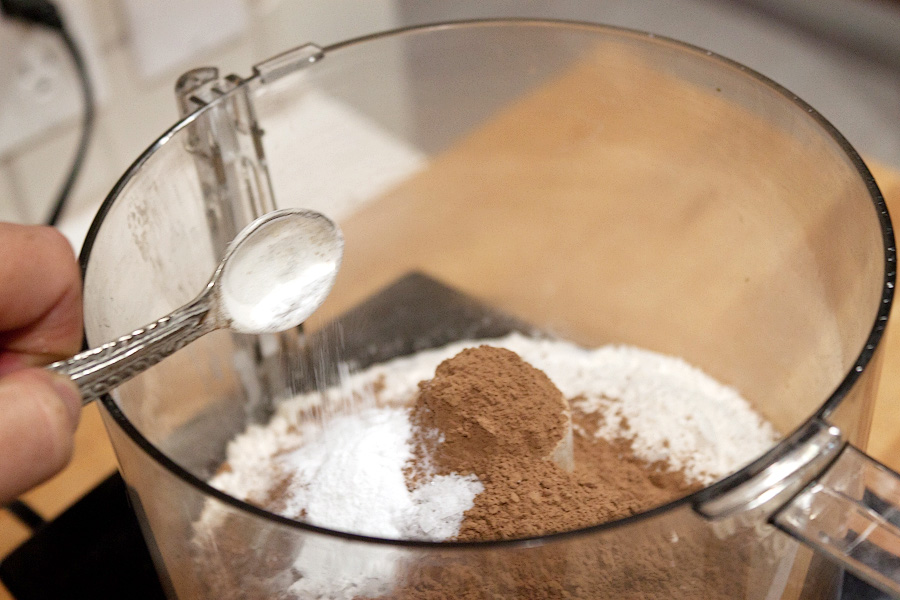
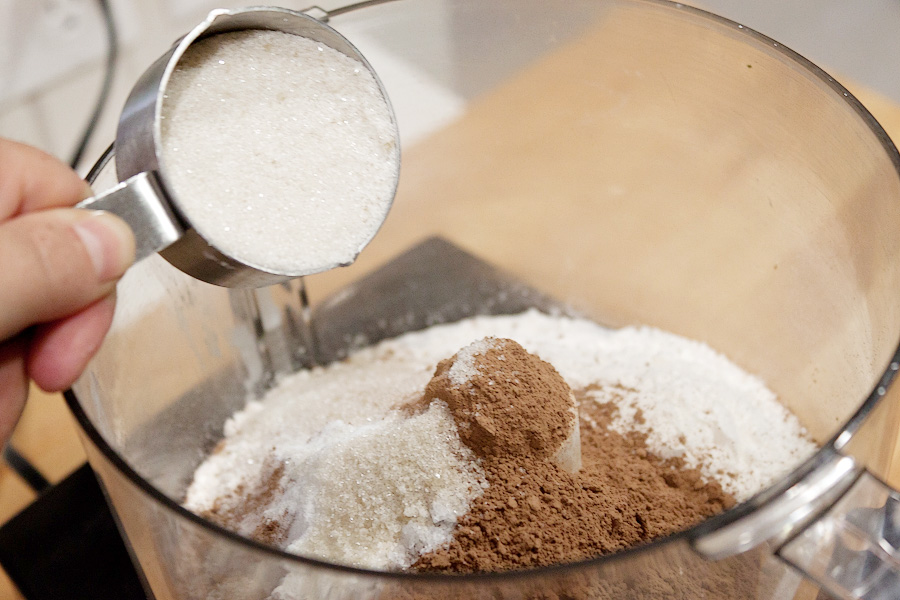
Add the salt to the flour and sift again, this time into your mixing bowl. Then add the cold lard. Using a pastry cutter, cut the lard into the flour. Some pie makers turn this step over to their food processor. Resist the temptation! It’s too easy to overwork the flour and end up with a tough crust. The pastry cutter, on the other hand, will give you a nice workout. I like to think I’m burning off a few bites of pie.


Tasty Kitchen Blog Pie Crust Tutorial. Guest post and recipe from Calli Taylor of Make It Do.

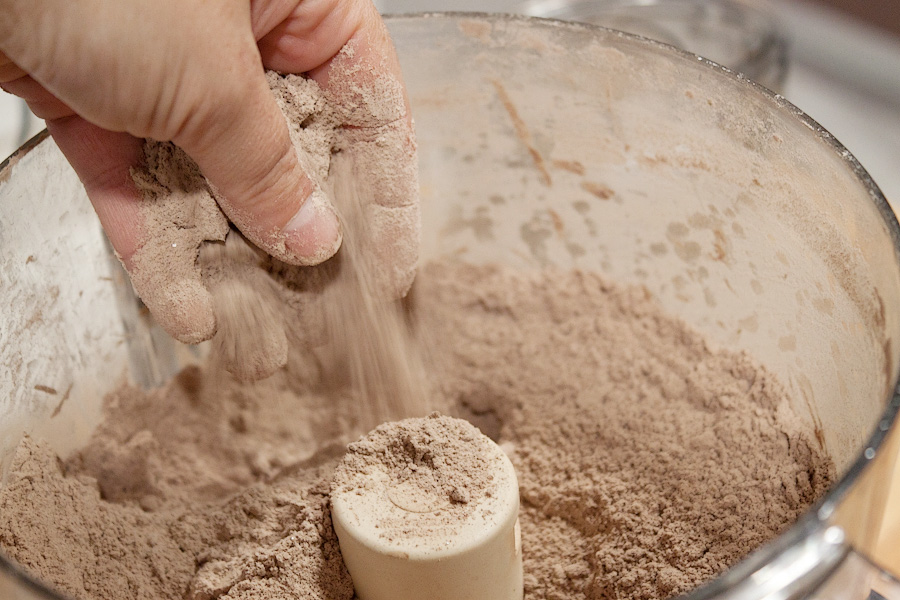
The motion with the cutter is down and twist your wrist one quarter turn, Daniel-san. Down and twist. Continue this motion until the flour has been worked into the lard and your dough resembles small peas. Don’t overwork the dough at this point.


Tasty Kitchen Blog Pie Crust Tutorial. Guest post and recipe from Calli Taylor of Make It Do.

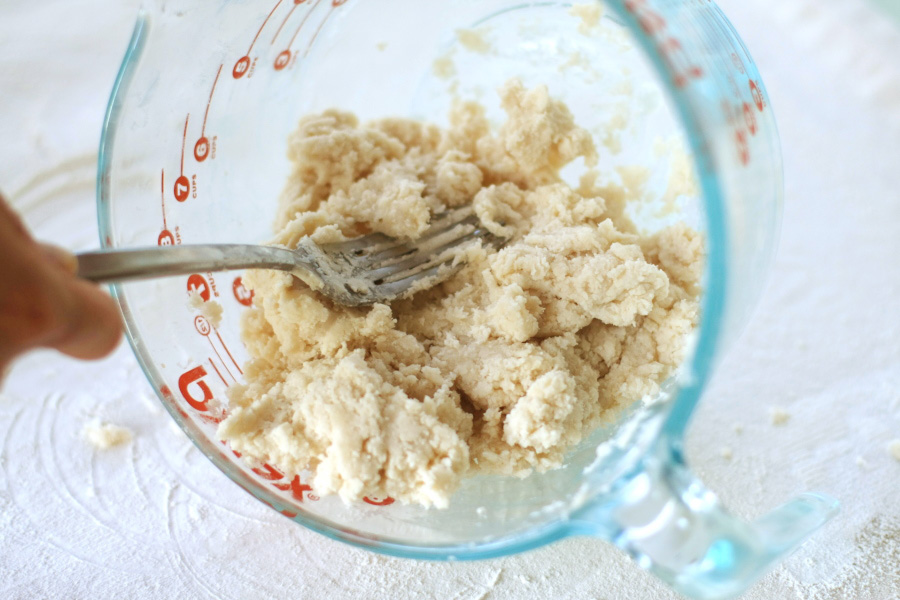
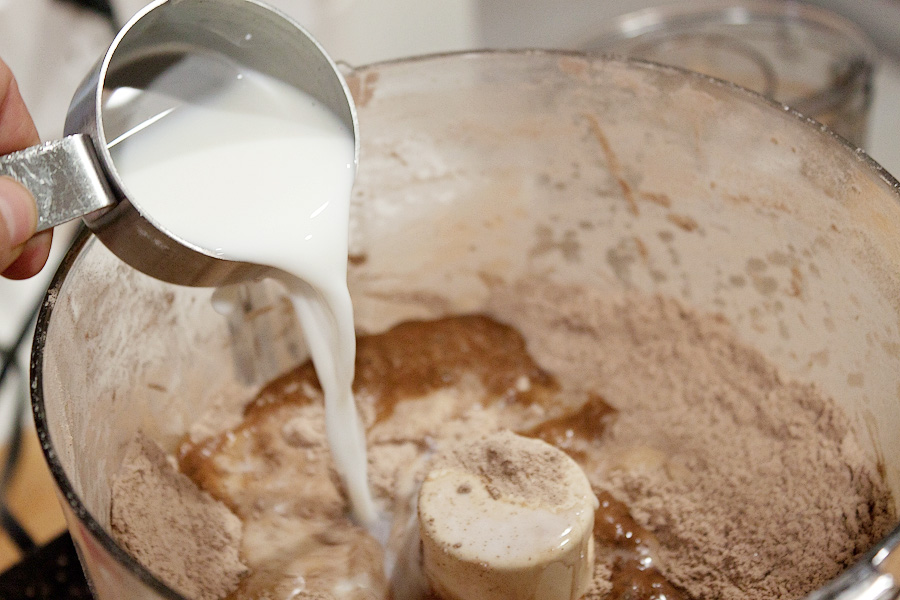
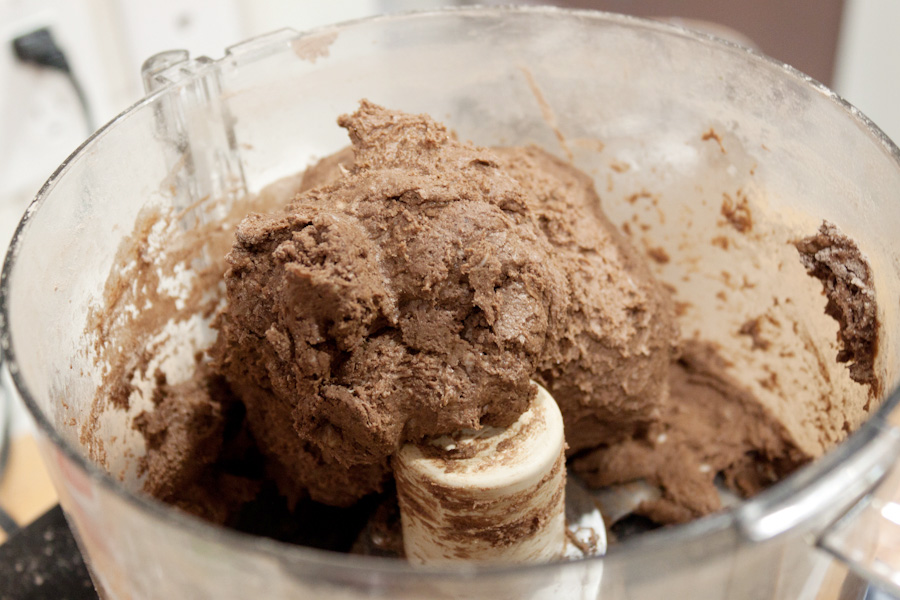
Next add liquid. My mom uses very cold milk. Grandma Eva used ice water. Both work equally well. Start by adding about half the liquid, which for my mom’s crust recipe is 2 tablespoons. Then slowly add one to two tablespoons more, using a fork until the dough pulls together into a ball. Stop before the dough gets too wet but is nicely pulled together.


Tasty Kitchen Blog Pie Crust Tutorial. Guest post and recipe from Calli Taylor of Make It Do.

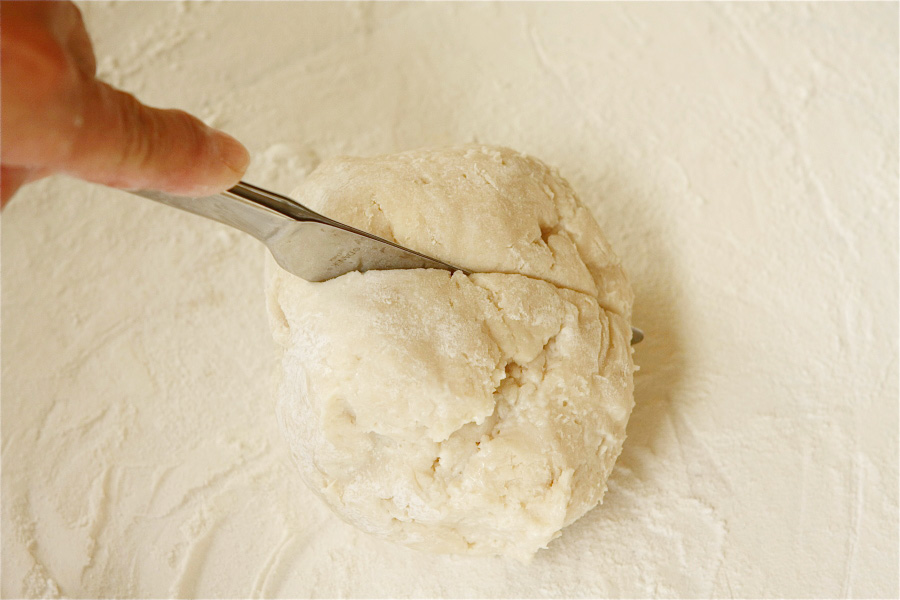
Cut your ball in half and lightly work into two disks. Wrap them individually in plastic wrap and put in the refrigerator for half an hour or up to a day.


Tasty Kitchen Blog Pie Crust Tutorial. Guest post and recipe from Calli Taylor of Make It Do.

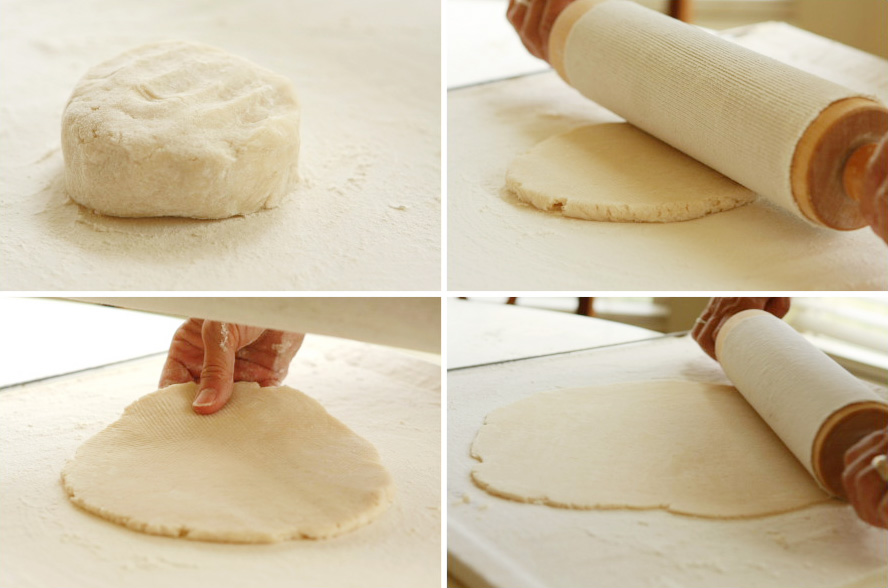
Remove one ball from the refrigerator at a time and turn onto your nicely floured work surface. Don’t be shy about the flour if you are rolling out on a counter or cutting board. It’s not fun to have your dough stick. This is why I love my pastry frame—the dough never sticks, even with a moderate amount of flour.

Work the dough with your rolling pin, applying gentle pressure. Roll away from you, then turn the dough a half turn and roll away from you again. As you turn the dough, make sure to add more flour underneath as needed.

Continue this until your dough is too large to turn. Roll until your dough is about a 12″ circle for a 9-inch pie plate and about 1/8 inch thick.


Tasty Kitchen Blog Pie Crust Tutorial. Guest post and recipe from Calli Taylor of Make It Do.

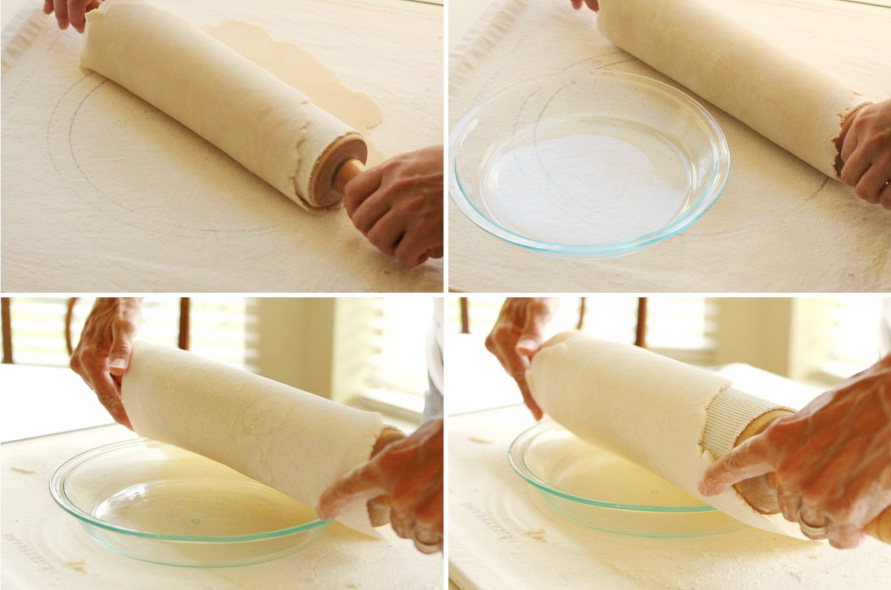
Many pie makers will tell you to fold your dough in quarters then gently lift it into your plate. Our method is much simpler and works like a charm. Gently roll the dough over the top of your rolling pin, slip the plate under, center and roll the dough into the plate.

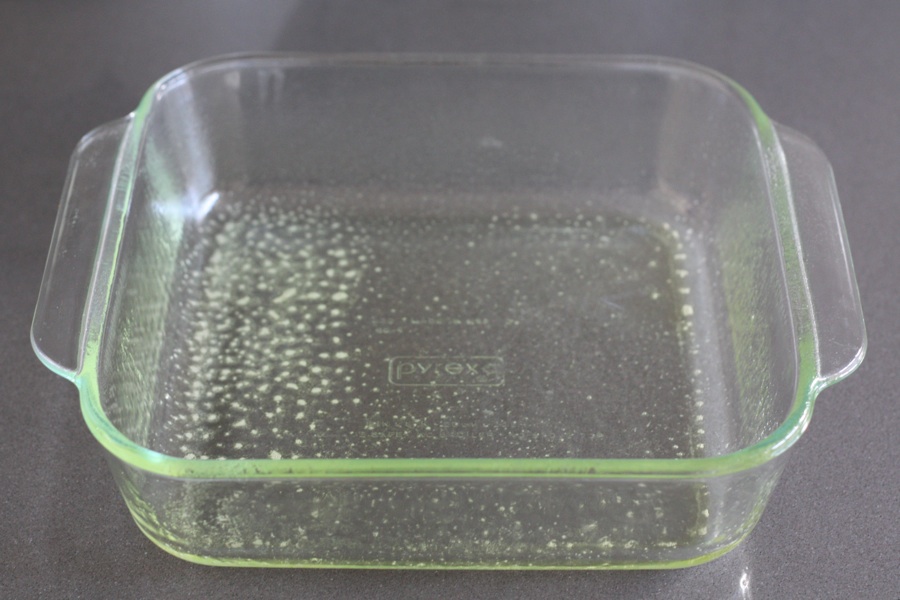
When it comes to pie plates, my mom and I agree: a simple style glass Pyrex is best. It does a wonderful job of evenly cooking your pie crust. We even prefer Pyrex over more expensive ceramic plates.


Tasty Kitchen Blog Pie Crust Tutorial. Guest post and recipe from Calli Taylor of Make It Do.

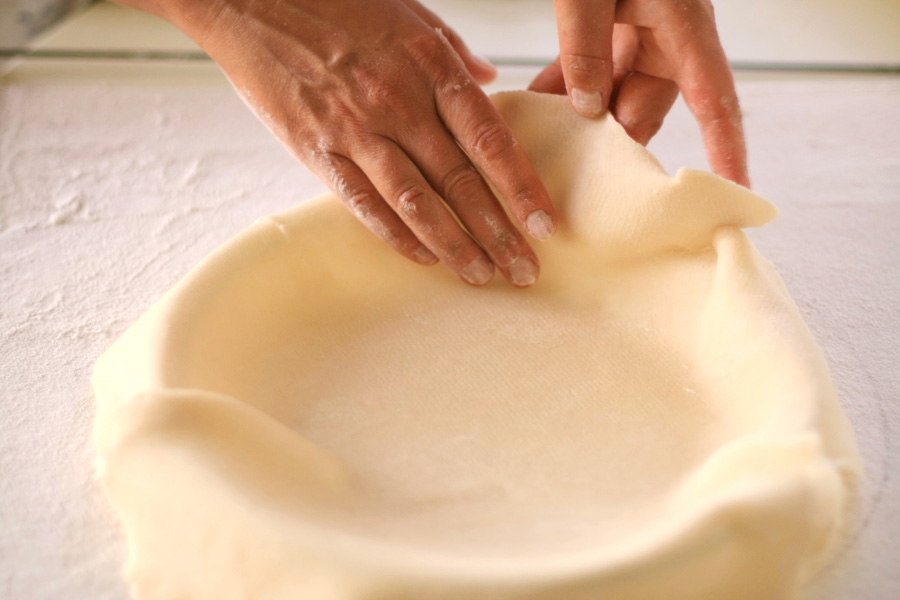
The next step is important. Working around the pie, lift the edges of the dough and make sure the dough is snugged into the corners of the pie plate without stretching the dough. This will keep your dough from slipping down when baking.

If you are making a double crust pie, roll out the top at this point. I like to cut my vents while my dough is still on the pastry frame and the surface is firm. That way I can use a cute little cookie cutter to cut a small shape in the center of the crust.

Fill the pie with your filling. Wet the edge of the dough in the plate with a little water. Roll the top over the rolling pin, carefully center it over the pie, and roll into place. Trim around the pie using kitchen scissors or a knife, leaving about a 1/2-inch overhang.


Tasty Kitchen Blog Pie Crust Tutorial. Guest post and recipe from Calli Taylor of Make It Do.

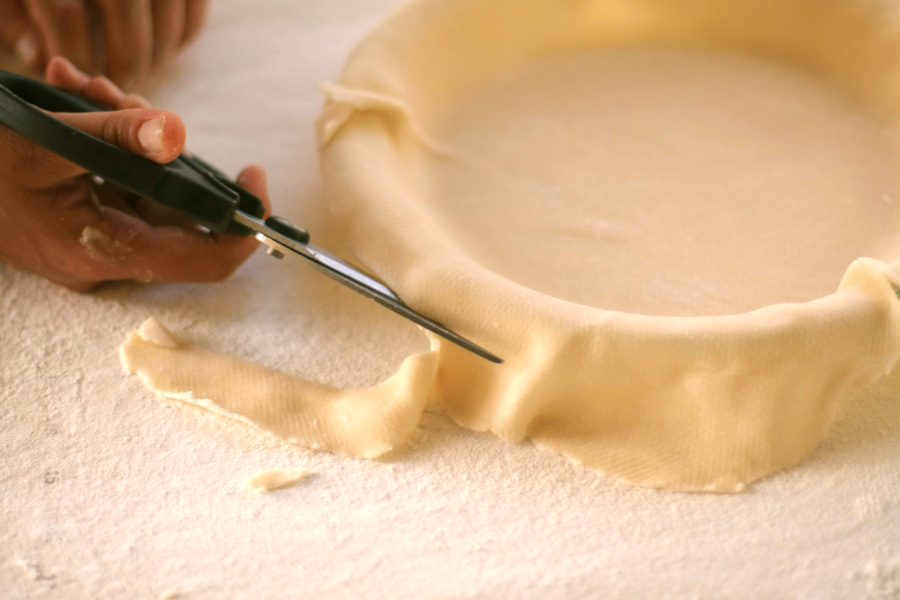
If you are making a single crust, trim around the pie, leaving about 1/2 inch overhang.


Tasty Kitchen Blog Pie Crust Tutorial. Guest post and recipe from Calli Taylor of Make It Do.

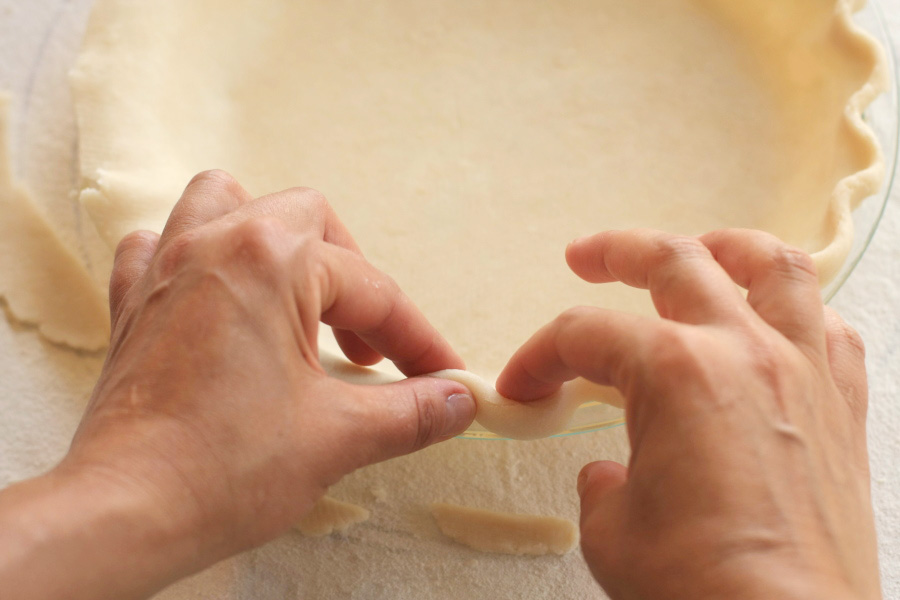
My mom and I both flute the edge of the pie by using a thumb and two index fingers, folding the edge, crimping and fluting as you go. Follow the same process for a double crust pie.

Finish your double crust pie by brushing the top with milk or egg wash and sprinkling the surface with sugar to make a lovely crisp sheen on your crust. If you didn’t before, make sure to cut vents for steam.

For a single crust pie where the filling needs to be baked in the pie, fill and bake according to your recipe. Trust me on this one: once you fill your pie, bake it immediately.


Tasty Kitchen Blog Pie Crust Tutorial. Guest post and recipe from Calli Taylor of Make It Do.

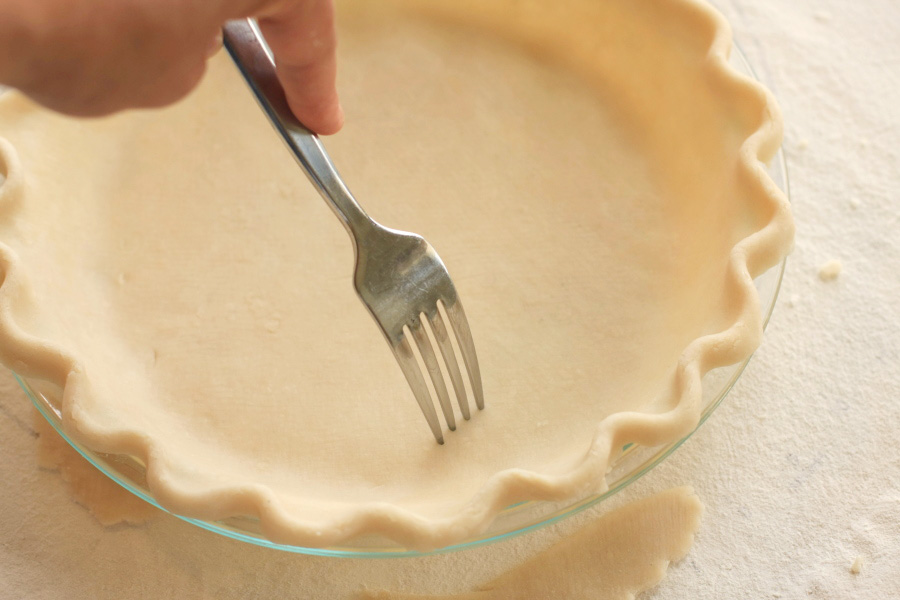
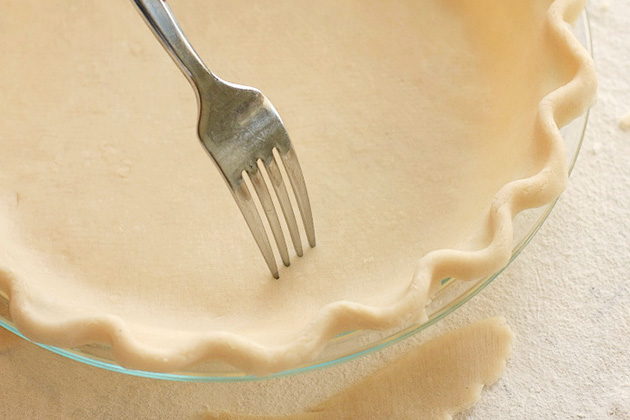
For a pie requiring a precooked crust, use a fork to pierce evenly around your pie crust. Bake in a 400ºF oven for about 15 minutes until your crust is golden brown.

You may wonder why I don’t mention pie weights. The need for them depends on your recipe. My mom and I have never had trouble with our crusts slipping into the pan, and have never needed or used weights. If you feel you need them, line your pie crust with parchment or foil and use dry beans or rice to fill the pie.


Tasty Kitchen Blog Pie Crust Tutorial. Guest post and recipe from Calli Taylor of Make It Do.

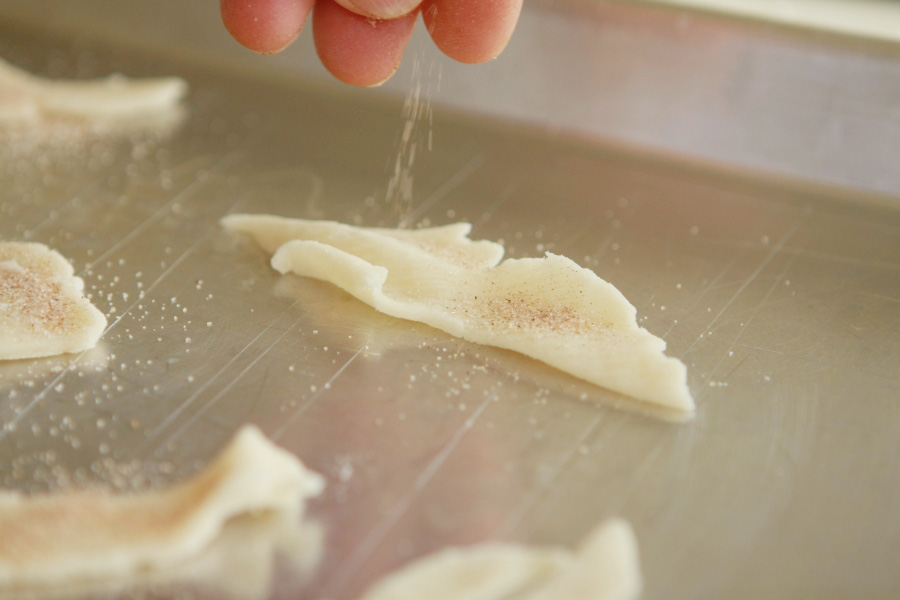
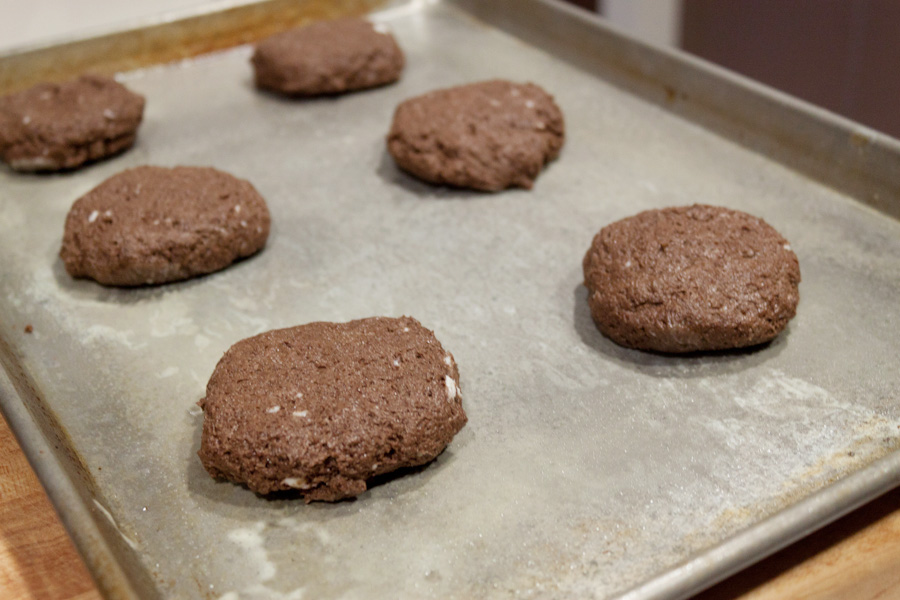
We never throw away our leftover pie scraps. Cinnamon pie scraps are a favorite treat. Place your scraps on a cookie sheet cut in bite-sized pieces. Sprinkle with cinnamon sugar and cook at 400ºF for 8 to 10 minutes or until golden brown.


Tasty Kitchen Blog Pie Crust Tutorial. Guest post and recipe from Calli Taylor of Make It Do.

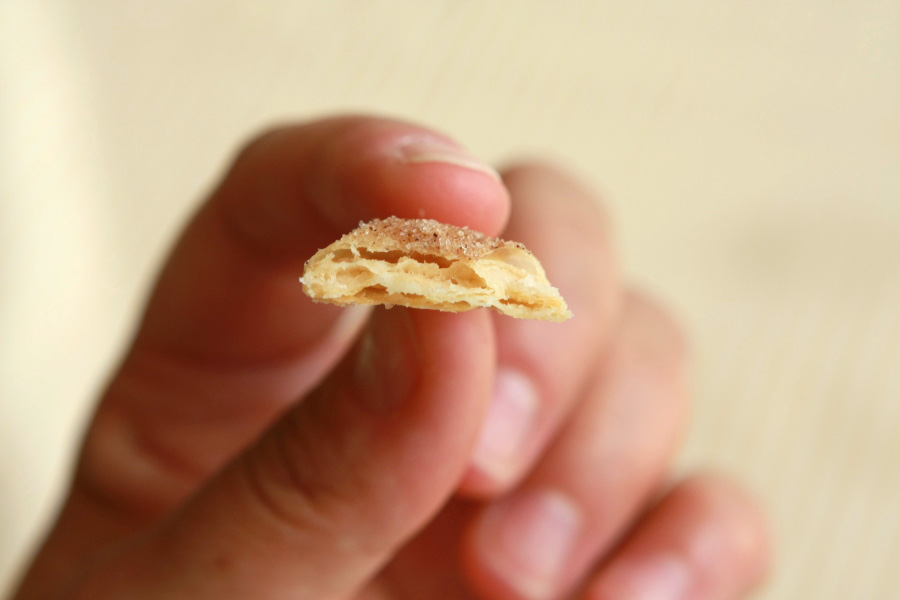
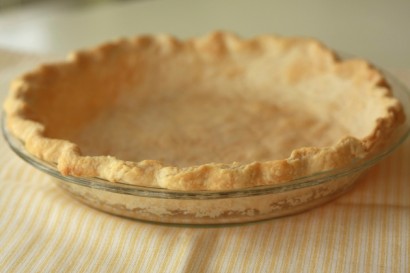
Just look at that crust, so light and flaky.


Tasty Kitchen Blog Pie Crust Tutorial. Guest post and recipe from Calli Taylor of Make It Do.

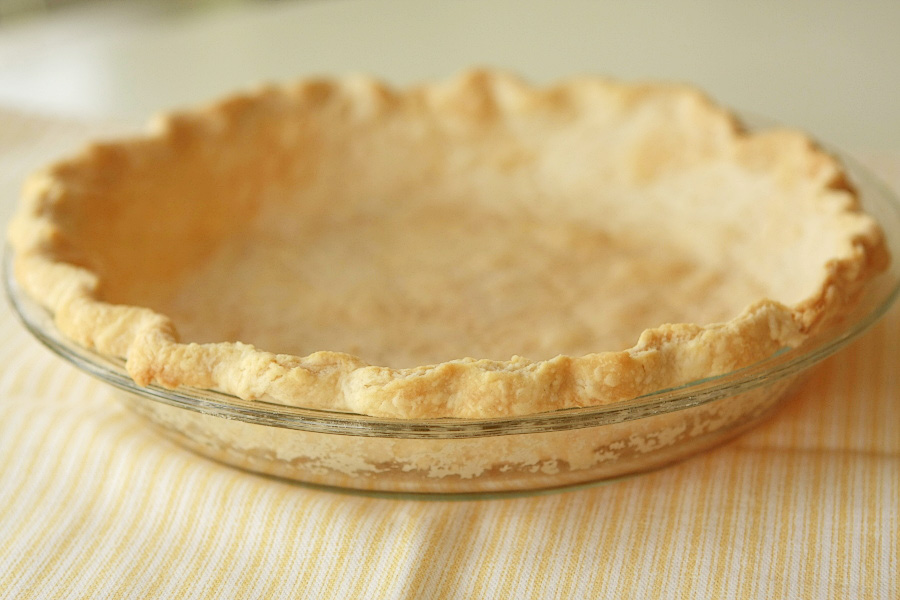
The pre-baked pie crust can be made several days ahead until it is ready to be filled with coconut or banana cream …


Tasty Kitchen Blog Pie Crust Tutorial. Guest post and recipe from Calli Taylor of Make It Do.

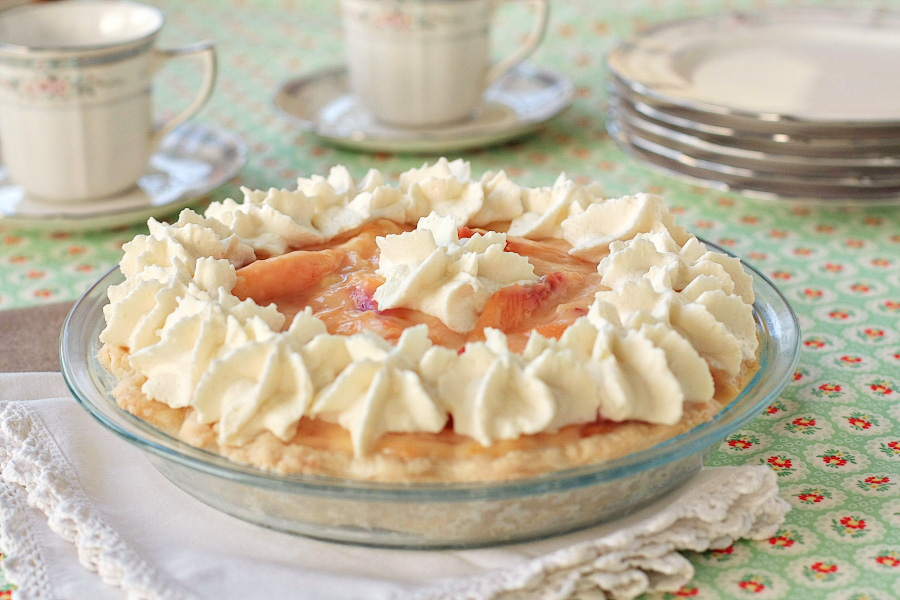
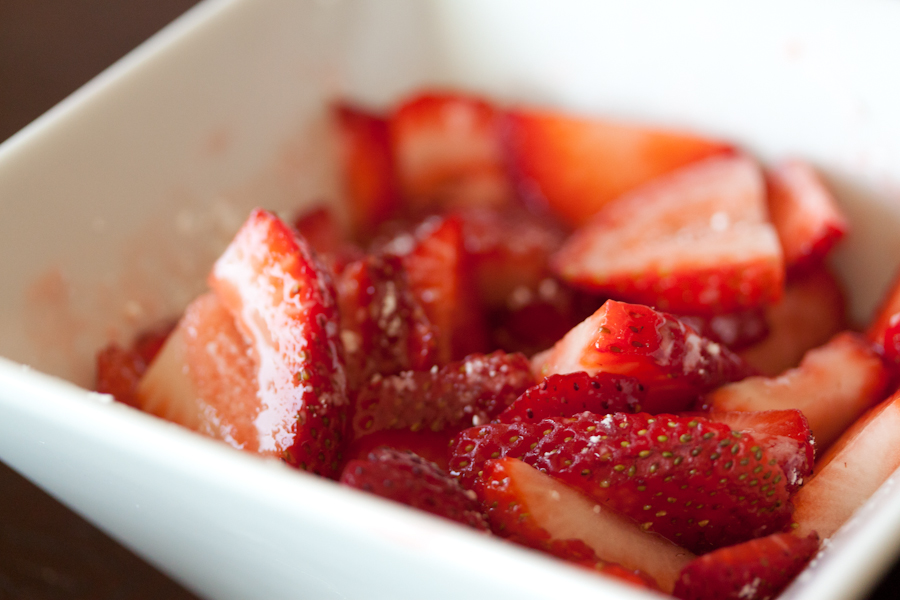
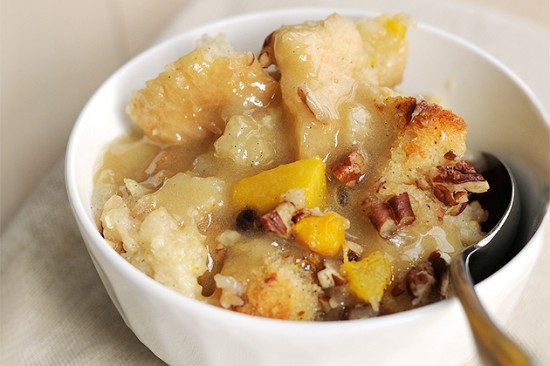
Or one of my favorites: fresh peaches. That’s the pie we made today. While peaches are in season, it’s a treat not to be missed.

The first few pie crusts I made tasted good but weren’t very pretty. I’ve even had a few epic failures, like the time I filled an apple pie and put it in the refrigerator overnight so I could cook it fresh on Thanksgiving morning. It came out of the oven gorgeous and golden. But when I served the pie, the bottom crust had turned to goo. So awful! I’ve lived and learned and gotten better with every crust. It’s a skill worth working at, and one your family and friends will love you for.

There are many ways to make a great pie crust, this is simply one method. But it’s a good one. It creates a flaky, tender, delicious pie crust every time. This tutorial is mostly about technique and could be applied to other recipes.

You can also find the printable recipe for my Mom’s Fresh Peach Pie here on Tasty Kitchen and a step by step tutorial on my blog. And thanks, Mom, for sharing your skill and wisdom.


Printable Recipe

Perfect Pie Crust

See post on callimakesdo’s site!
5.00 Mitt(s) 1 Rating(s)1 vote, average: 5.00 out of 51 vote, average: 5.00 out of 51 vote, average: 5.00 out of 51 vote, average: 5.00 out of 51 vote, average: 5.00 out of 5

Prep Time:

Cook Time:

Difficulty: Intermediate

Servings: 16

16
x

Print Options

Page size Letter 3x5 4x6
Text Size Small Medium Large
Content Include description
Include prep time, etc.
Show image

Description

This crust is simple, yet tender, flaky and delicious. It works for sweet or savory pie fillings. Makes 2 single or 1 double pie crust.

Ingredients

  • ⅔ cups Cold Lard
  • 2 cups Sifted All-Purpose Flour
  • ½ teaspoons Salt
  • 4 Tablespoons Cold Milk

Preparation Instructions

Measure lard and place in the freezer. Sift flour onto a piece of parchment or wax paper. Re-measure flour and sift again with salt into a mixing bowl. Using a pastry cutter, cut cold lard into the flour mixture until the dough resembles small peas. Do not overwork. Add 2 tablespoons milk and work into the dough using a fork. Add one or two more tablespoons of milk, working with a fork until the dough pulls together into a nice ball. Divide into two equal pieces and lightly work into disks. Wrap disks individually in plastic wrap and refrigerate for 1/2 hour or up to one day. On a floured work surface, roll out into a 12-inch disk about 1/8 inch thick and place into a pie plate.

Fill and bake according to your pie recipe. If a recipe calls for a pre-baked pie crust, pierce evenly around the crust with a fork and bake in a 400ºF oven for about 15 minutes or until golden brown. Makes one double crust or 2 single crusts.


_______________________________________

Calli is truly a woman of many talents, from cooking, sewing, crafts, beautiful photography and gardening. Her blog, Make it Do is a treasure trove of recipes, household tips, crafts projects, sewing patterns … you name it. It’s also peppered with photos of her beautiful kids. Go visit her site, and visit it often. There’s always something new to learn there!


Profile photo of georgiapellegrini

Chicken in Coconut-Lime Peanut Sauce

Posted by in Step-by-Step Recipes

Tasty Kitchen Blog: Chicken in Coconut-Lime Peanut Sauce. Guest post by Georgia Pellegrini, recipe submitted by TK member Marla Meredith of Family Fresh Cooking.

 
I get such a craving for Asian food sometimes. I’m not very good at cooking it myself—there’s something about the flavor combinations that aren’t intuitive to me while cooking, but are so delicious when put in front of me at a dinner table. I noticed that Tasty Kitchen member Marla Meridith had a delicious-looking recipe for Chicken in Coconut-Lime Peanut Sauce, and since Marla’s recipes are always so accessible, I thought I’d give it a whirl. Peanut sauce is always worth exploring.


Tasty Kitchen Blog: Chicken in Coconut-Lime Peanut Sauce. Guest post by Georgia Pellegrini, recipe submitted by TK member Marla Meredith of Family Fresh Cooking.

There are two components to this recipe: the chicken and the sauce. To cook the chicken, you’ll need diced onions, diced garlic, asparagus, cubed chicken breast and coconut oil for sautéing. If you can’t find coconut oil, no problem—butter or oil will work well.


Tasty Kitchen Blog: Chicken in Coconut-Lime Peanut Sauce. Guest post by Georgia Pellegrini, recipe submitted by TK member Marla Meredith of Family Fresh Cooking.

Now for the sauce, you’ll need lime juice, cayenne pepper, red curry paste, cinnamon, stevia (or sugar), coconut milk, fish sauce, peanut butter, toasted sesame oil, and soy sauce.


Tasty Kitchen Blog: Chicken in Coconut-Lime Peanut Sauce. Guest post by Georgia Pellegrini, recipe submitted by TK member Marla Meredith of Family Fresh Cooking.

Combine all of the sauce ingredients into a bowl.


Tasty Kitchen Blog: Chicken in Coconut-Lime Peanut Sauce. Guest post by Georgia Pellegrini, recipe submitted by TK member Marla Meredith of Family Fresh Cooking.

Then whisk it all together until it is well-incorporated and creamy. If it seems too thick, just add a dash of water or coconut milk to thin it out. Then set it aside.


Tasty Kitchen Blog: Chicken in Coconut-Lime Peanut Sauce. Guest post by Georgia Pellegrini, recipe submitted by TK member Marla Meredith of Family Fresh Cooking.

Next you’ll cook the chicken. Scoop out some coconut oil, or butter if you prefer …


Tasty Kitchen Blog: Chicken in Coconut-Lime Peanut Sauce. Guest post by Georgia Pellegrini, recipe submitted by TK member Marla Meredith of Family Fresh Cooking.

And get your diced onions nice and tender in a sauté pan.


Tasty Kitchen Blog: Chicken in Coconut-Lime Peanut Sauce. Guest post by Georgia Pellegrini, recipe submitted by TK member Marla Meredith of Family Fresh Cooking.

Next add the chicken cubes and let them brown and cook on all sides.


Tasty Kitchen Blog: Chicken in Coconut-Lime Peanut Sauce. Guest post by Georgia Pellegrini, recipe submitted by TK member Marla Meredith of Family Fresh Cooking.

Next you can either add the asparagus if you want to cook them slightly, or you can simply add them raw at the end.


Tasty Kitchen Blog: Chicken in Coconut-Lime Peanut Sauce. Guest post by Georgia Pellegrini, recipe submitted by TK member Marla Meredith of Family Fresh Cooking.

Pour your sauce in and let it warm over very low heat. You don’t want to get the sauce too hot, otherwise the sauce will break. But it will still taste delicious either way.


Tasty Kitchen Blog: Chicken in Coconut-Lime Peanut Sauce. Guest post by Georgia Pellegrini, recipe submitted by TK member Marla Meredith of Family Fresh Cooking.

Serve heaping spoonfuls of this delicious dish into bowls. It is great warm or at room temperature.

Thank you Marla for such a great recipe and a great lunch! Check out her wonderful blog Family Fresh Cooking. It’s chock full of tasty and healthy recipes.


Printable Recipe

Chicken with Coconut-Lime Peanut Sauce

See post on Marla Meridith’s site!
4.55 Mitt(s) 9 Rating(s)9 votes, average: 4.55 out of 59 votes, average: 4.55 out of 59 votes, average: 4.55 out of 59 votes, average: 4.55 out of 59 votes, average: 4.55 out of 5

Prep Time:

Cook Time:

Difficulty: Easy

Servings: 8

8
x

Print Options

Page size Letter 3x5 4x6
Text Size Small Medium Large
Content Include description
Include prep time, etc.
Show image

Description

This recipe is perfect for family meals and upcoming Super Bowl parties. It is filling, very tasty and much fewer calories than the usual peanut sauce. The blend of Thai/Asian flavors is a big hit over here! The lime brightens up the creamy sauce. It might even brighten up those cold winter days.

Ingredients

  • FOR THE SAUCE:
  • ½ cups Natural Peanut Butter (I Like Crunchy)
  • ½ cups Light Coconut Milk
  • 1 Tablespoon Thai Red Curry Paste
  • 1 Tablespoon Lime Juice
  • 1 Tablespoon Soy Sauce Or Tamari
  • 2 Tablespoons Fish Sauce
  • 2 teaspoons Toasted Sesame Oil
  • 1 pinch Stevia Powder To Taste (or Honey)
  • 1 pinch Black Pepper
  • 1 pinch Cayenne Pepper
  • 1 pinch Cinnamon
  • _____
  • FOR THE CHICKEN:
  • 1 teaspoon Unrefined Coconut Oil
  • ½ cups Diced Onion
  • 3 cloves Garlic, Chopped
  • 2 pounds Chicken Breast Cut Into 1 Inch Cubes
  • 1 cup Chopped Asparagus Spears (1 Inch Pieces)

Preparation Instructions

Note: You can adjust all the peanut sauce ingredients according to taste. If you like sweet, go sweeter, spicier, etc. All is good!

Optional garnishes: cilantro, toasted peanuts, green onion, unsweetened toasted coconut flakes.

Sauce: In a medium bowl whisk together the peanut butter, coconut milk, curry paste, lime juice, soy sauce, fish sauce, sesame oil, sweetener and seasonings to form a sauce. Taste and change anything if you want to. Set aside.

Chicken: Heat coconut oil in a large sauté pan over medium high heat. Add onion and garlic, cook until softened. Add chicken, cook until golden brown and cooked through, about 10 minutes. Stir occasionally for even cooking. Stir sauce into the chicken. Partially cover and simmer for about 5 minutes to let the flavors combine. Add asparagus during the last few minutes of cook time.

Serve with spicy Sriracha sauce and garnishes mentioned above.


_______________________________________

There’s so much to say about Georgia, we don’t know where to start. Leaving Wall Street for the French Culinary Institute, followed by a stint at the Gramercy Tavern and La Chassagnette in France, her passion for food and food traditions are evident and inspiring. Visit her site at Georgia Pellegrini, where you’ll find more recipes, photos, learn all about her wonderful book Food Heroes, and enjoy her latest adventures.


Profile photo of whatsgabycooking

Chocolate Strawberry Shortcake

Posted by in Baking, Step-by-Step Recipes

Tasty kitchen Blog: Chocolate Strawberry Shortcakes. Guest post by Gaby Dalkin of What's Gaby Cooking, recipe submitted by TK member Jackie Dodd of Domestic Fits.

Please join us in welcoming Gaby Dalkin of What’s Gaby Cooking to the Tasty Kitchen Blog! You probably remember her from all the often-featured mouthwatering recipes in her TK recipe box, including just about every variation of guacamole. (We want to try them all.) She’s here today to share a beautiful Chocolate Strawberry Shortcake from TK member Jackie Dodd. Welcome to the TK Blog, Gaby!


Strawberry Shortcake is one of my all-time favorite desserts. Perfectly moist shortbread or biscuits, freshly whipped cream and juicy flavorful strawberries … I mean, what’s not to love? So when I saw this recipe on Tasty Kitchen for Chocolate Strawberry Shortcake, well, I knew that I had to make it! And let me tell you, I’m so glad I did, because it was amazing. The only mistake was serving this at a dinner party where my guests had the nerve to finish everything off without leaving any for me for breakfast the next day!

This recipe was submitted by TK member Jackie Dodd from Domestic Fits, and I think we all need to give her a big round of applause because it’s a total winner!


Tasty kitchen Blog: Chocolate Strawberry Shortcakes. Guest post by Gaby Dalkin of What's Gaby Cooking, recipe submitted by TK member Jackie Dodd of Domestic Fits.

You’ll need some basic pantry ingredients along with some fresh strawberries.


Tasty kitchen Blog: Chocolate Strawberry Shortcakes. Guest post by Gaby Dalkin of What's Gaby Cooking, recipe submitted by TK member Jackie Dodd of Domestic Fits.

Bring out the food processor and combine the flour and cocoa powder.


Tasty kitchen Blog: Chocolate Strawberry Shortcakes. Guest post by Gaby Dalkin of What's Gaby Cooking, recipe submitted by TK member Jackie Dodd of Domestic Fits.

Add in some salt.


Tasty kitchen Blog: Chocolate Strawberry Shortcakes. Guest post by Gaby Dalkin of What's Gaby Cooking, recipe submitted by TK member Jackie Dodd of Domestic Fits.

Next comes the baking soda.


Tasty kitchen Blog: Chocolate Strawberry Shortcakes. Guest post by Gaby Dalkin of What's Gaby Cooking, recipe submitted by TK member Jackie Dodd of Domestic Fits.

And then the baking powder.


Tasty kitchen Blog: Chocolate Strawberry Shortcakes. Guest post by Gaby Dalkin of What's Gaby Cooking, recipe submitted by TK member Jackie Dodd of Domestic Fits.

And finally the sugar. Turn on the food processor and give these ingredients a whirl for a few seconds until everything is combined.


Tasty kitchen Blog: Chocolate Strawberry Shortcakes. Guest post by Gaby Dalkin of What's Gaby Cooking, recipe submitted by TK member Jackie Dodd of Domestic Fits.

Add in cubes of cold butter.


Tasty kitchen Blog: Chocolate Strawberry Shortcakes. Guest post by Gaby Dalkin of What's Gaby Cooking, recipe submitted by TK member Jackie Dodd of Domestic Fits.

Once the butter is added, turn on the food processor once again and process until the butter is incorporated and you have a mixture that resembles coarse sand.


Tasty kitchen Blog: Chocolate Strawberry Shortcakes. Guest post by Gaby Dalkin of What's Gaby Cooking, recipe submitted by TK member Jackie Dodd of Domestic Fits.

Next add in your liquid ingredients: coffee, carbonated water and milk.


Tasty kitchen Blog: Chocolate Strawberry Shortcakes. Guest post by Gaby Dalkin of What's Gaby Cooking, recipe submitted by TK member Jackie Dodd of Domestic Fits.

Give the food processor one last whirl until the dough comes together in a ball.


Tasty kitchen Blog: Chocolate Strawberry Shortcakes. Guest post by Gaby Dalkin of What's Gaby Cooking, recipe submitted by TK member Jackie Dodd of Domestic Fits.

Preheat the oven to 350ºF. Remove the dough from the food processor and make small circular biscuits. You’ll want to use about 1/4 to 1/3 cup of dough per biscuit. Place the biscuits onto a baking sheet, either lined with parchment paper or sprayed with baking spray. Transfer the entire baking sheet to the refrigerator and chill for 30 minutes. Once chilled, remove the baking sheet from the refrigerator and transfer to your preheated oven. Bake the biscuits for about 18-20 minutes. Remove and let cool.


Tasty kitchen Blog: Chocolate Strawberry Shortcakes. Guest post by Gaby Dalkin of What's Gaby Cooking, recipe submitted by TK member Jackie Dodd of Domestic Fits.

Next, combine the heavy cream, powdered sugar and vanilla extract in a mixer. Turn the mixer on high and whip until the mixture resembles whipped cream.

Note: This might have been the most delicious part of the entire dish. The Chantilly Cream is made with powdered sugar instead of regular sugar and it makes a world of difference.


Tasty kitchen Blog: Chocolate Strawberry Shortcakes. Guest post by Gaby Dalkin of What's Gaby Cooking, recipe submitted by TK member Jackie Dodd of Domestic Fits.

Remove the Chantilly Cream from the mixer and set aside. (If you’re feeling extra decadent, you might want to whip up an extra batch of the Chantilly Cream, because it’s pretty good when smothered over cookies, or brownies or pretty much anything sweet!)


Tasty kitchen Blog: Chocolate Strawberry Shortcakes. Guest post by Gaby Dalkin of What's Gaby Cooking, recipe submitted by TK member Jackie Dodd of Domestic Fits.

In another bowl, combine the sliced strawberries, remaining powdered sugar and lemon juice. Gently mix together and set aside.


Tasty kitchen Blog: Chocolate Strawberry Shortcakes. Guest post by Gaby Dalkin of What's Gaby Cooking, recipe submitted by TK member Jackie Dodd of Domestic Fits.

To assemble the Chocolate Strawberry Shortcakes, take 2 cooled chocolate biscuits and place a generous dollop on Chantilly Cream on the inside of one biscuit. Top with a handful of strawberries and then place the remaining chocolate biscuit on top.


Tasty kitchen Blog: Chocolate Strawberry Shortcakes. Guest post by Gaby Dalkin of What's Gaby Cooking, recipe submitted by TK member Jackie Dodd of Domestic Fits.

Then it’s time to devour. Don’t be afraid to get a little messy. Chances are, it’s going to happen. Just embrace the goodness of these Chocolate Strawberry Shortcakes and enjoy!

A big thank you to Jackie Dodd for such a wonderful recipe. Be sure to check out her blog Domestic Fits for more awesome ideas.

Recipe note: I used 1 teaspoon of pure vanilla extract to intensify the flavor of the Chantilly Cream.


Printable Recipe

Chocolate Strawberry Shortcake

See post on Jackie Dodd’s site!
0.00 Mitt(s) 0 Rating(s)0 votes, average: 0.00 out of 50 votes, average: 0.00 out of 50 votes, average: 0.00 out of 50 votes, average: 0.00 out of 50 votes, average: 0.00 out of 5

Prep Time:

Cook Time:

Difficulty: Easy

Servings: 6

6
x

Print Options

Page size Letter 3x5 4x6
Text Size Small Medium Large
Content Include description
Include prep time, etc.
Show image

Description

Strawberry shortcake is classic, and chocolate is a welcome twist on an old favorite.

Ingredients

  • FOR THE SHORTCAKES:
  • 1-½ cup Flour
  • ½ cups Cocoa Powder
  • ½ teaspoons Sea Salt
  • ½ teaspoons Baking Powder
  • ½ teaspoons Baking Soda
  • ¼ cups Sugar
  • 8 Tablespoons Butter, Cut Into Small Cubes
  • ¼ cups Whole Milk
  • ¼ cups Carbonated Water
  • ¼ cups Cold Brewed Coffee (can Use Coffee Made With Instant Coffee Powder)
  • FOR THE STRAWBERRIES:
  • 2-½ cups Chopped Strawberries
  • ½ cups Powdered Sugar
  • 1 teaspoon Lemon Juice
  • FOR THE CHANTILLY CREAM:
  • 1 cup Whipping Cream
  • ½ cups Powdered Sugar
  • ½ teaspoons Real Vanilla Extract

Preparation Instructions

In a food processor combine the flour, cocoa powder, salt, baking powder, baking soda and sugar and pulse until combined. Add the butter and process until it is all incorporated and it resembles coarse meal. Add the milk, water and coffee and process until combined.

These are more like drop biscuits than roll ‘em out and cut ‘em variety. Take about 1/4 a cup of the dough and form a disk, about one inch high, with your hand and place it on a baking sheet covered with parchment paper.

Put your shortcakes in the fridge and allow to chill for 20 minutes while you preheat your oven to 350F. Bake for about 18-20 minutes. Allow to cool.

In a bowl, combine your strawberries, powdered sugar and lemon juice. Mix until combined and allow to sit for 10 minutes.

Chantilly Cream sounds super fancy, but in reality it’s just whipped cream that you make with powdered sugar instead of granulated sugar. It has a slightly different taste and texture that goes well with this recipe. In the bowl of a stand mixer, combine the cream, powdered sugar (between 1/4 cup and 1/2 cup depending on how sweet you like it) and vanilla extract. Beat on high for 3-5 minutes or until stiff peaks form.

Once your shortcakes have cooled, top with berries and cream and serve immediately.


_______________________________________

Gaby Dalkin is the young lady behind What’s Gaby Cooking, a food blog that’s bursting at the seams with incredible recipes and food photography. She’s a personal chef and professional recipe developer, and if you follow her on Twitter, you’ll soon discover her two-fold obsession: guacamole and cheese. She has small feet, a large heart, and a smile that can light up the whole building. We’re pretty stoked to have her here.


Profile photo of twopeasandtheirpod

S’more Rice Krispie Squares

Posted by in Step-by-Step Recipes

Tasty Kitchen Blog S'more Rice Krispie Squares. Guest post by Maria Lichty of Two Peas and Their Pod, recipe submitted by TK member Hannah Jeffries of City Baked.

 
I love summer, but being pregnant during the summer is not my favorite. It is extra hot these days. Every day I am torn—do I turn on the oven to bake or keep the house cool? My love for baking and sweets usually wins, but then I have to suffer through the heat. I was browsing Tasty Kitchen the other day and came across this City Baked’s recipe for S’more Rice Krispie Squares. They looked divine and the best part? No oven is necessary! The squares are made in the microwave. I was jumping for joy—an easy, delicious treat that wouldn’t heat up the house. I wasn’t wasting any time. I got right down to business.


Tasty Kitchen Blog S'more Rice Krispie Squares. Guest post by Maria Lichty of Two Peas and Their Pod, recipe submitted by TK member Hannah Jeffries of City Baked.

To make the S’mores Rice Krispie Squares you will need: marshmallows, butter, vanilla extract, Rice Krispie cereal, graham crackers, and chocolate chips.


Tasty Kitchen Blog S'more Rice Krispie Squares. Guest post by Maria Lichty of Two Peas and Their Pod, recipe submitted by TK member Hannah Jeffries of City Baked.

Grease an 8 by 8 baking pan and set aside.


Tasty Kitchen Blog S'more Rice Krispie Squares. Guest post by Maria Lichty of Two Peas and Their Pod, recipe submitted by TK member Hannah Jeffries of City Baked.

In a large microwave-safe bowl, combine the marshmallows, butter, and vanilla extract.


Tasty Kitchen Blog S'more Rice Krispie Squares. Guest post by Maria Lichty of Two Peas and Their Pod, recipe submitted by TK member Hannah Jeffries of City Baked.

Heat for about one minute, or until marshmallows begin to soften. Remove from the microwave and stir with a spatula.


Tasty Kitchen Blog S'more Rice Krispie Squares. Guest post by Maria Lichty of Two Peas and Their Pod, recipe submitted by TK member Hannah Jeffries of City Baked.

Place the bowl back in the microwave and heat for about one more minute, or until the marshmallows are completely melted and fluffy. Stir again.


Tasty Kitchen Blog S'more Rice Krispie Squares. Guest post by Maria Lichty of Two Peas and Their Pod, recipe submitted by TK member Hannah Jeffries of City Baked.

Add the Rice Krispies and stir until just combined.


Tasty Kitchen Blog S'more Rice Krispie Squares. Guest post by Maria Lichty of Two Peas and Their Pod, recipe submitted by TK member Hannah Jeffries of City Baked.

Stir in the graham cracker pieces and chocolate chips.


Tasty Kitchen Blog S'more Rice Krispie Squares. Guest post by Maria Lichty of Two Peas and Their Pod, recipe submitted by TK member Hannah Jeffries of City Baked.

Press the mixture into the prepared pan and let cool.


Tasty Kitchen Blog S'more Rice Krispie Squares. Guest post by Maria Lichty of Two Peas and Their Pod, recipe submitted by TK member Hannah Jeffries of City Baked.

Cut into squares and serve.


Tasty Kitchen Blog S'more Rice Krispie Squares. Guest post by Maria Lichty of Two Peas and Their Pod, recipe submitted by TK member Hannah Jeffries of City Baked.

If you love S’mores, like I do, then you will really love these S’more Rice Krispie Squares. The chunks of graham crackers and chocolate chips really jazz up these Rice Krispie treats. You get all of the S’more goodness in one simple treat. Plus, this is the perfect no-bake treat for summer. If the kids are still home from school, have them help. This recipe is easy and fun to make. These S’more Rice Krispie Squares are perfect to take camping, to bbqs, on road trips, or picnics. I know I will be making them again.

Thanks Hannah for a wonderful recipe! I am so glad I found a simple, no-bake treat to fulfill my sweet cravings. This recipe is perfect for summertime! Make sure you check out City Baked’s blog for other mouthwatering recipes.


Printable Recipe

S’more Rice Krispie Squares

See post on city baked’s site!
4.00 Mitt(s) 7 Rating(s)7 votes, average: 4.00 out of 57 votes, average: 4.00 out of 57 votes, average: 4.00 out of 57 votes, average: 4.00 out of 57 votes, average: 4.00 out of 5

Prep Time:

Cook Time:

Difficulty: Easy

Servings: 16

16
x

Print Options

Page size Letter 3x5 4x6
Text Size Small Medium Large
Content Include description
Include prep time, etc.
Show image

Description

A delicious switch up for the classic s’more.

Ingredients

  • 3 cups Marshmallows
  • 1 Tablespoon (heaping) Butter
  • 2 teaspoons Vanilla Extract
  • 3 cups Rice Krispies
  • 1 cup Graham Crackers, Broken Into Coarse Pieces
  • 1 cup Milk Chocolate Chips

Preparation Instructions

Butter an 8 x 8 inch square pan.

In a large, microwave-safe bowl, place the marshmallows, butter and vanilla in the microwave until the marshmallows begin to soften, about a minute. Mix with a spatula and microwave for another minute until the marshmallows are fully melted. Add the rice krispies until just mixed together. Add the graham cracker chunks and chocolate chips to combine.

Press the mixture into the prepared pan. Allow to cool and devour.

Just a warning: these 16 squares are on the smaller side—so you can eat more.


_______________________________________

Maria and her husband Josh (who she affectionately refers to as her “dough boy”) blog at Two Peas and Their Pod. They’ve been featured on Saveur, Eatocracy, Gourmet Live, Glamour, and the Los Angeles Times, to name just a few. We’re so glad to have them here!


Profile photo of Natalie | Perry's Plate

Quick and Easy Gyros

Posted by in Step-by-Step Recipes

  If there is such a thing as an easy gyro, it must mean that some shortcuts have been made. I’m willing to bet very few of you own a vertical gyro grill. I do not. And if you glanced at the recipe, you might notice that instead of lamb, these gyros are made with […]

Profile photo of missamy

Marvin’s Peachy Bread Pudding

Posted by in Baking, Step-by-Step Recipes

  Tasty Kitchen is such a fun online community. Discovering delicious recipes is great, but what makes it even better is making new friends. Each time I find a recipe here on Tasty Kitchen, it’s as if a new friend has invited me into their kitchen, into their home, for a peek into their lives […]