The Pioneer Woman Tasty Kitchen
Profile photo of cookincanuck

White Chocolate Walnut Blondies with Maple Butter Sauce

Posted by in Baking, Step-by-Step Recipes

I’m so excited to welcome Dara, also known as prolific Tasty Kitchen contributor Cookin’ Canuck, as a new contributor to the Tasty Kitchen Blog. I’ve been loving Dara’s recipes, both on Tasty Kitchen and on her own food blog, Cookin’ Canuck, for quite some time, so meeting her in person recently was a real treat for me. She’s as sweet as the recipe she’s sharing with us today—a sweet treat from Tasty Kitchen member Brandie (thecountrycook). Welcome, Dara and thank you, Brandie! –Ree

 
Tasty Kitchen Blog: White Chocolate Walnut Blondies with Maple Butter Sauce. Guest post by Dara Michalski of Cookin' Canuck, recipe submitted by TK member Brandie of The Country Cook.

 
As fall seeps in through the seams of summer, all I want to do is pull on my fleece pants, sit on the couch in front of a good chick flick (okay, a rousing football or hockey game will do, too), and eat foods that will test the resolve of the elastic on my waistband. When the siren call of this recipe by TK member thecountrycook reached my ears, I simply could not resist.

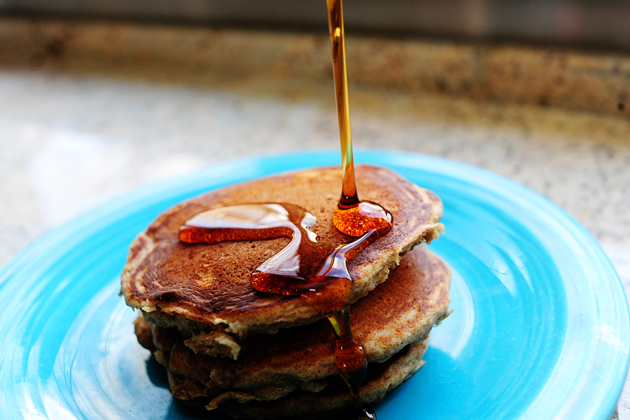
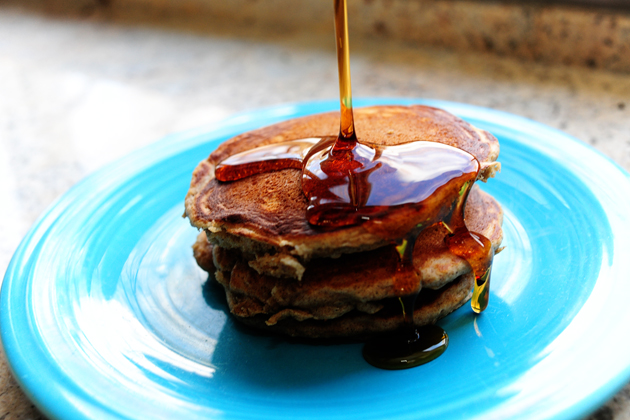
These White Chocolate Walnut Blondies are not just about the brownie, though the rich chewy bar filled with white chocolate and walnuts could certainly stand on its own. This dessert is made even more alluring by the maple butter sauce drizzled—or generously poured—over the top. Think warm, sticky caramel melting a scoop of ice cream down the sides of a tender brownie.

That siren call is getting louder.


Tasty Kitchen Blog: White Chocolate Walnut Blondies with Maple Butter Sauce. Guest post by Dara Michalski of Cookin' Canuck, recipe submitted by TK member Brandie of The Country Cook.

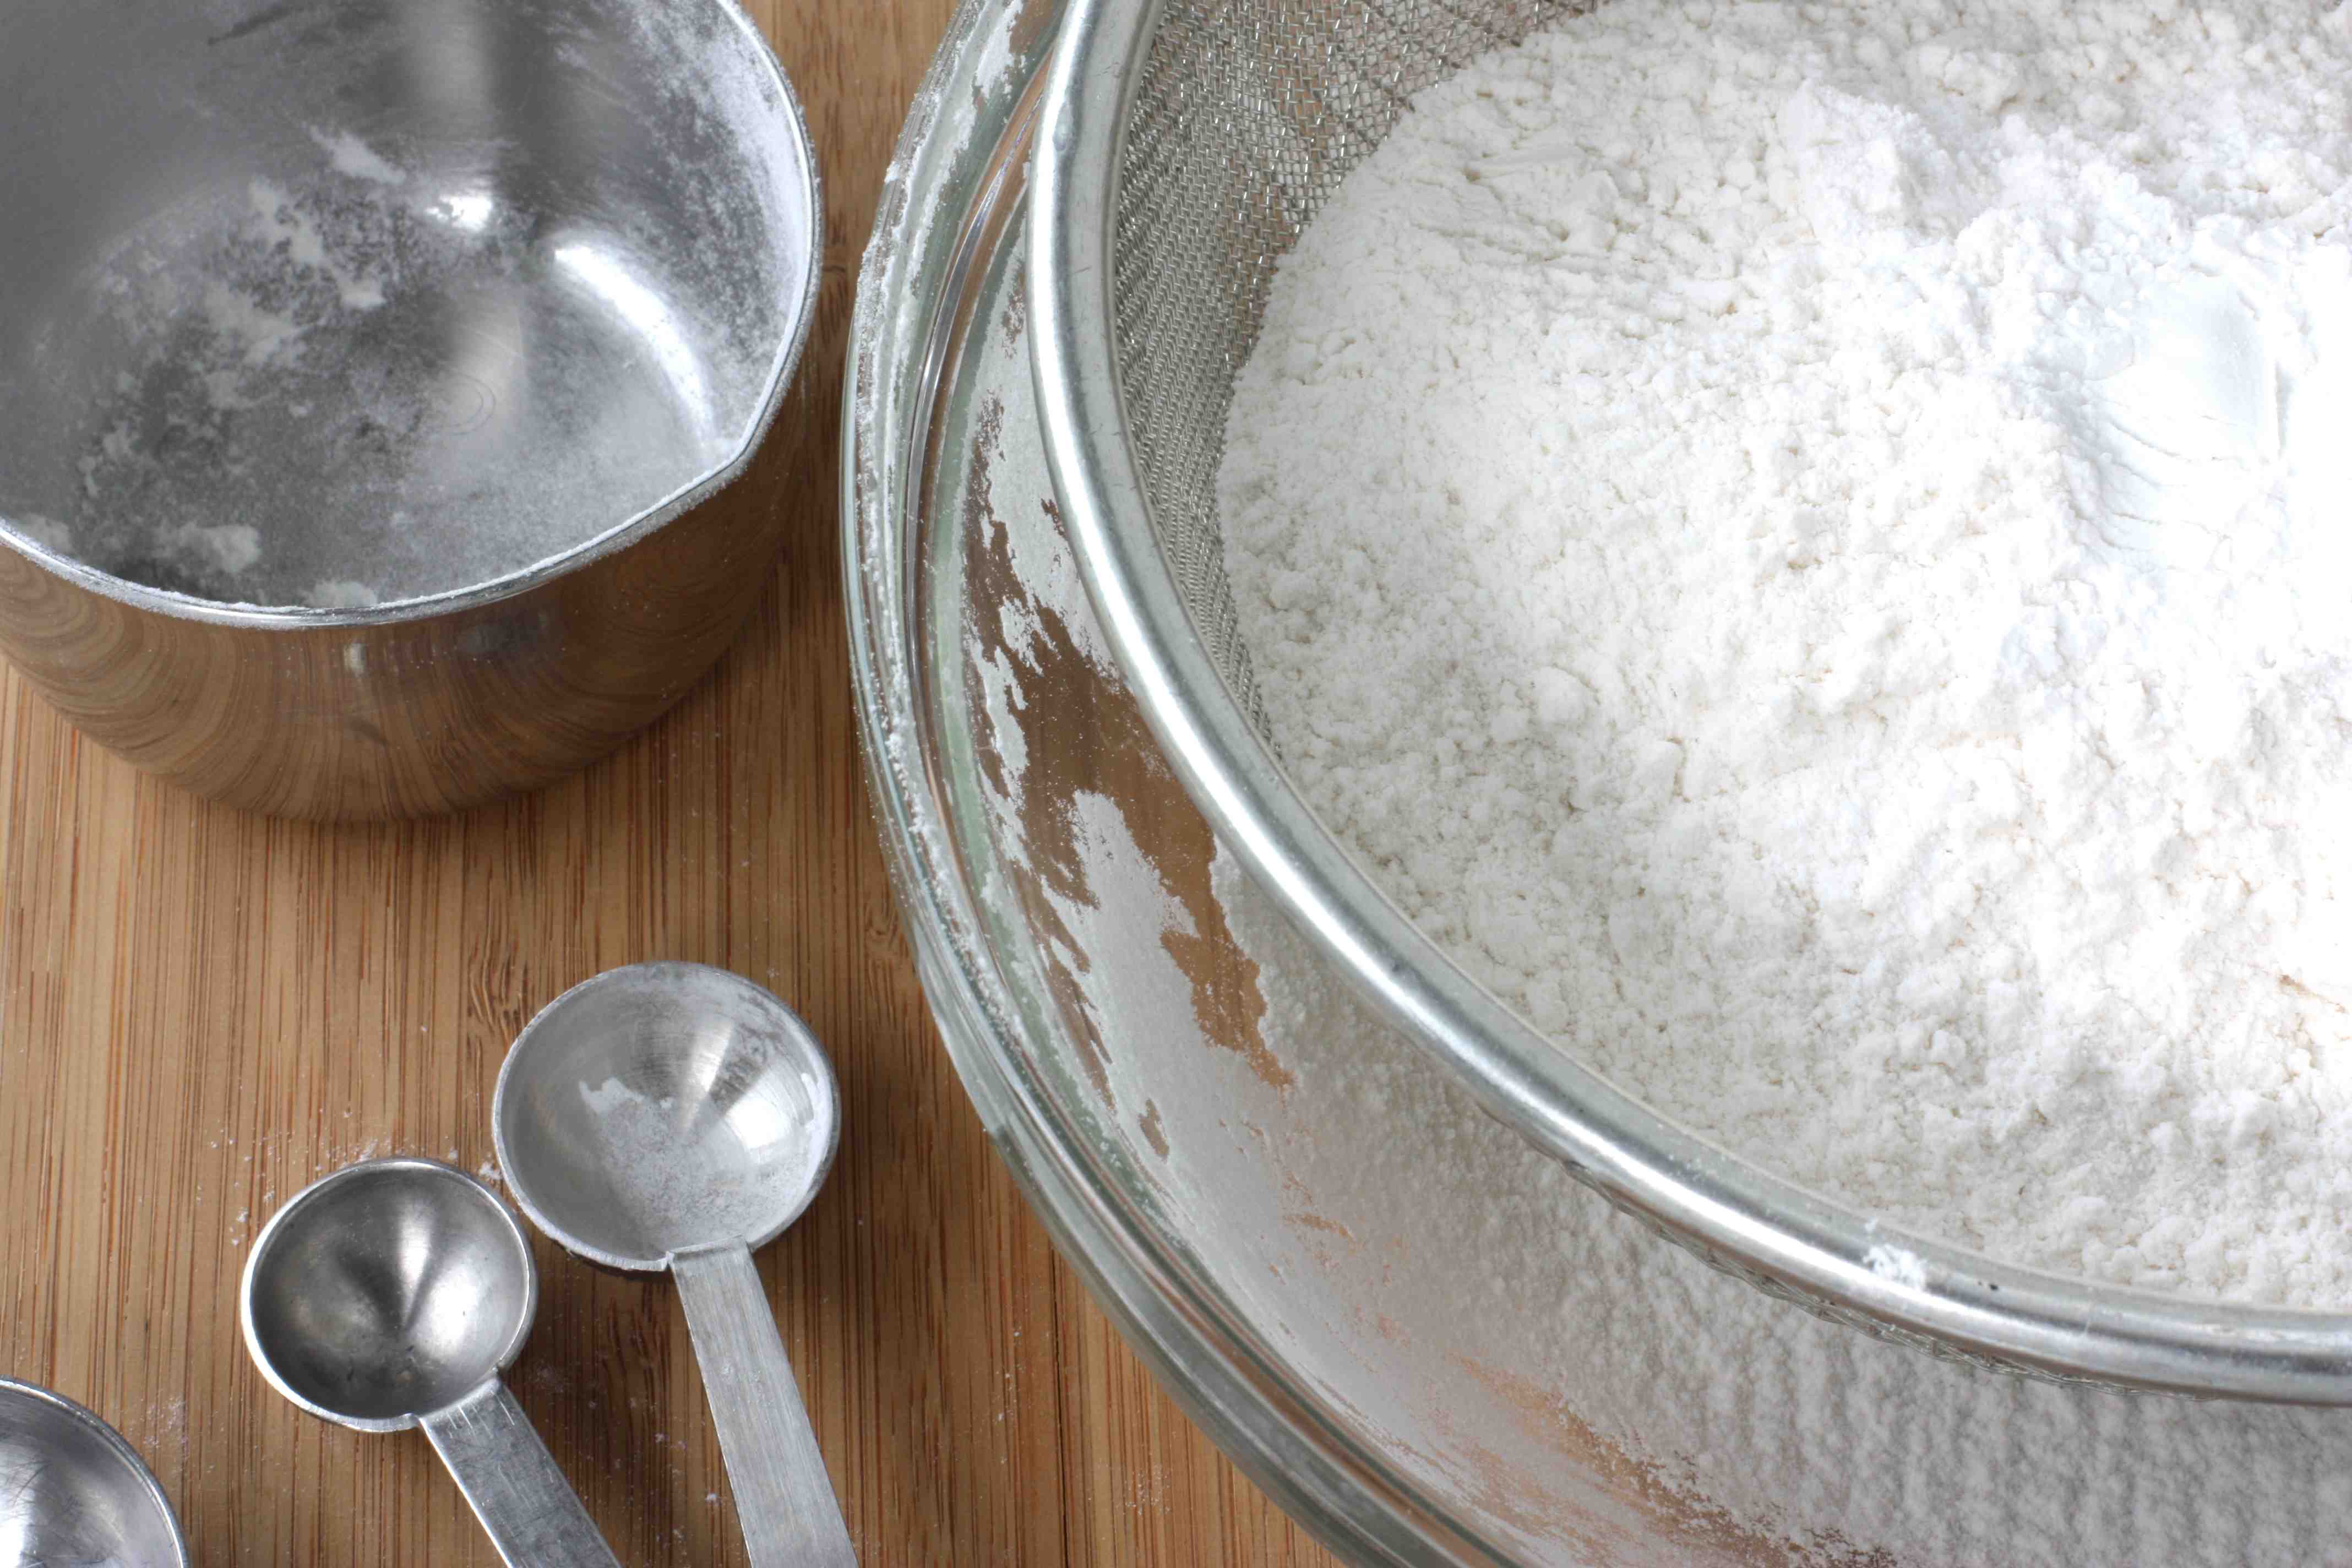
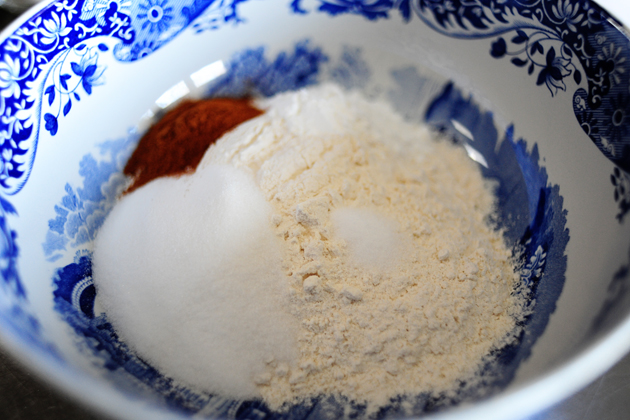
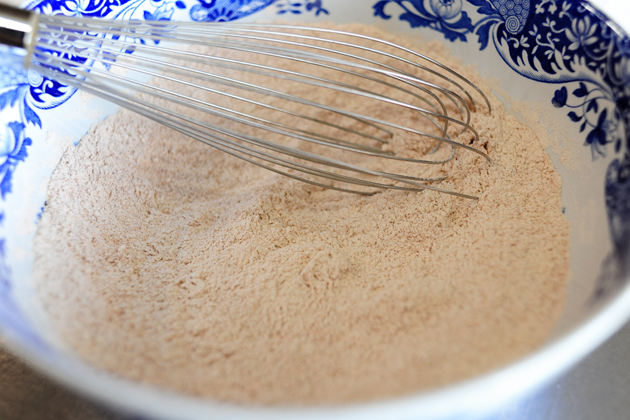
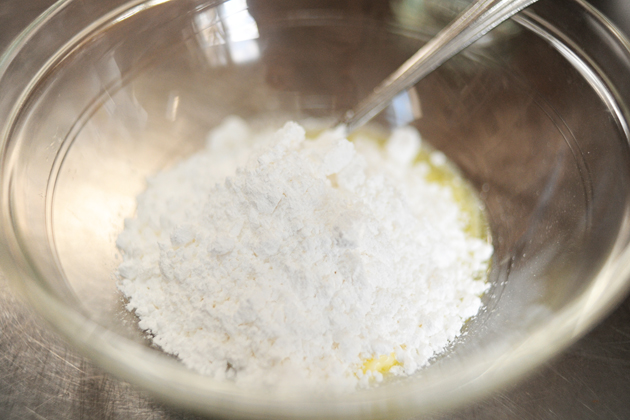
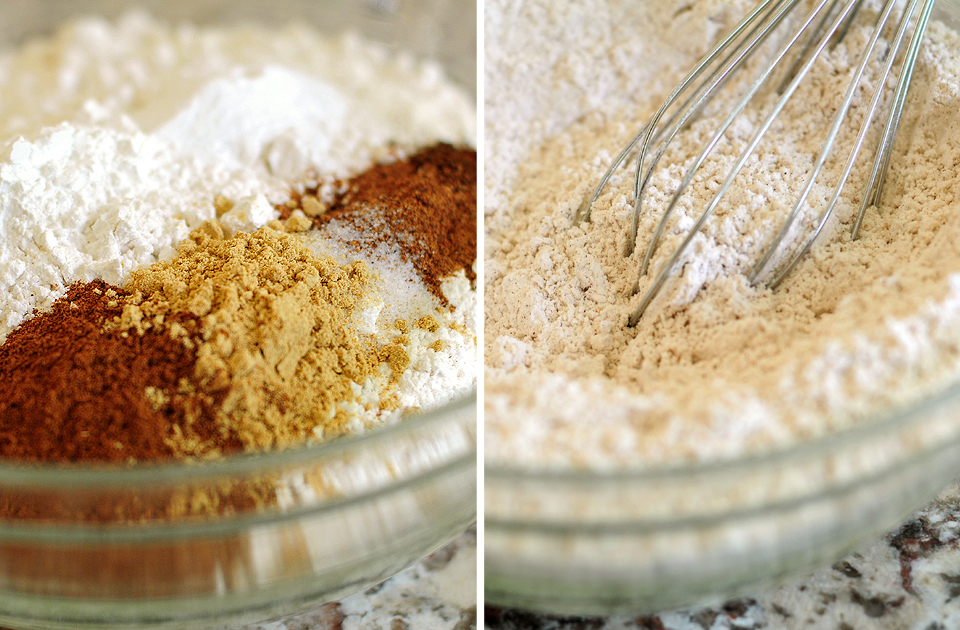
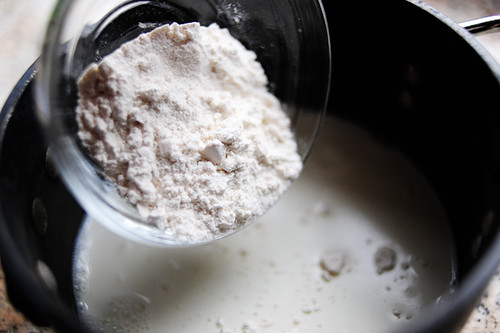
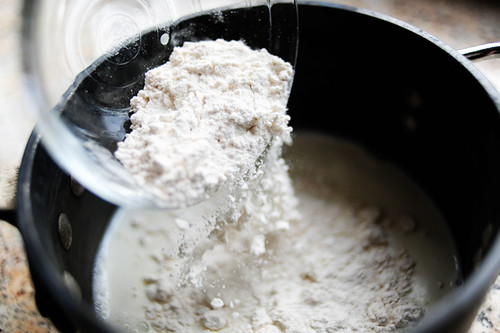
Preheat oven to 350 degrees. In a medium bowl, sift together flour, baking powder, and salt.


Tasty Kitchen Blog: White Chocolate Walnut Blondies with Maple Butter Sauce. Guest post by Dara Michalski of Cookin' Canuck, recipe submitted by TK member Brandie of The Country Cook.

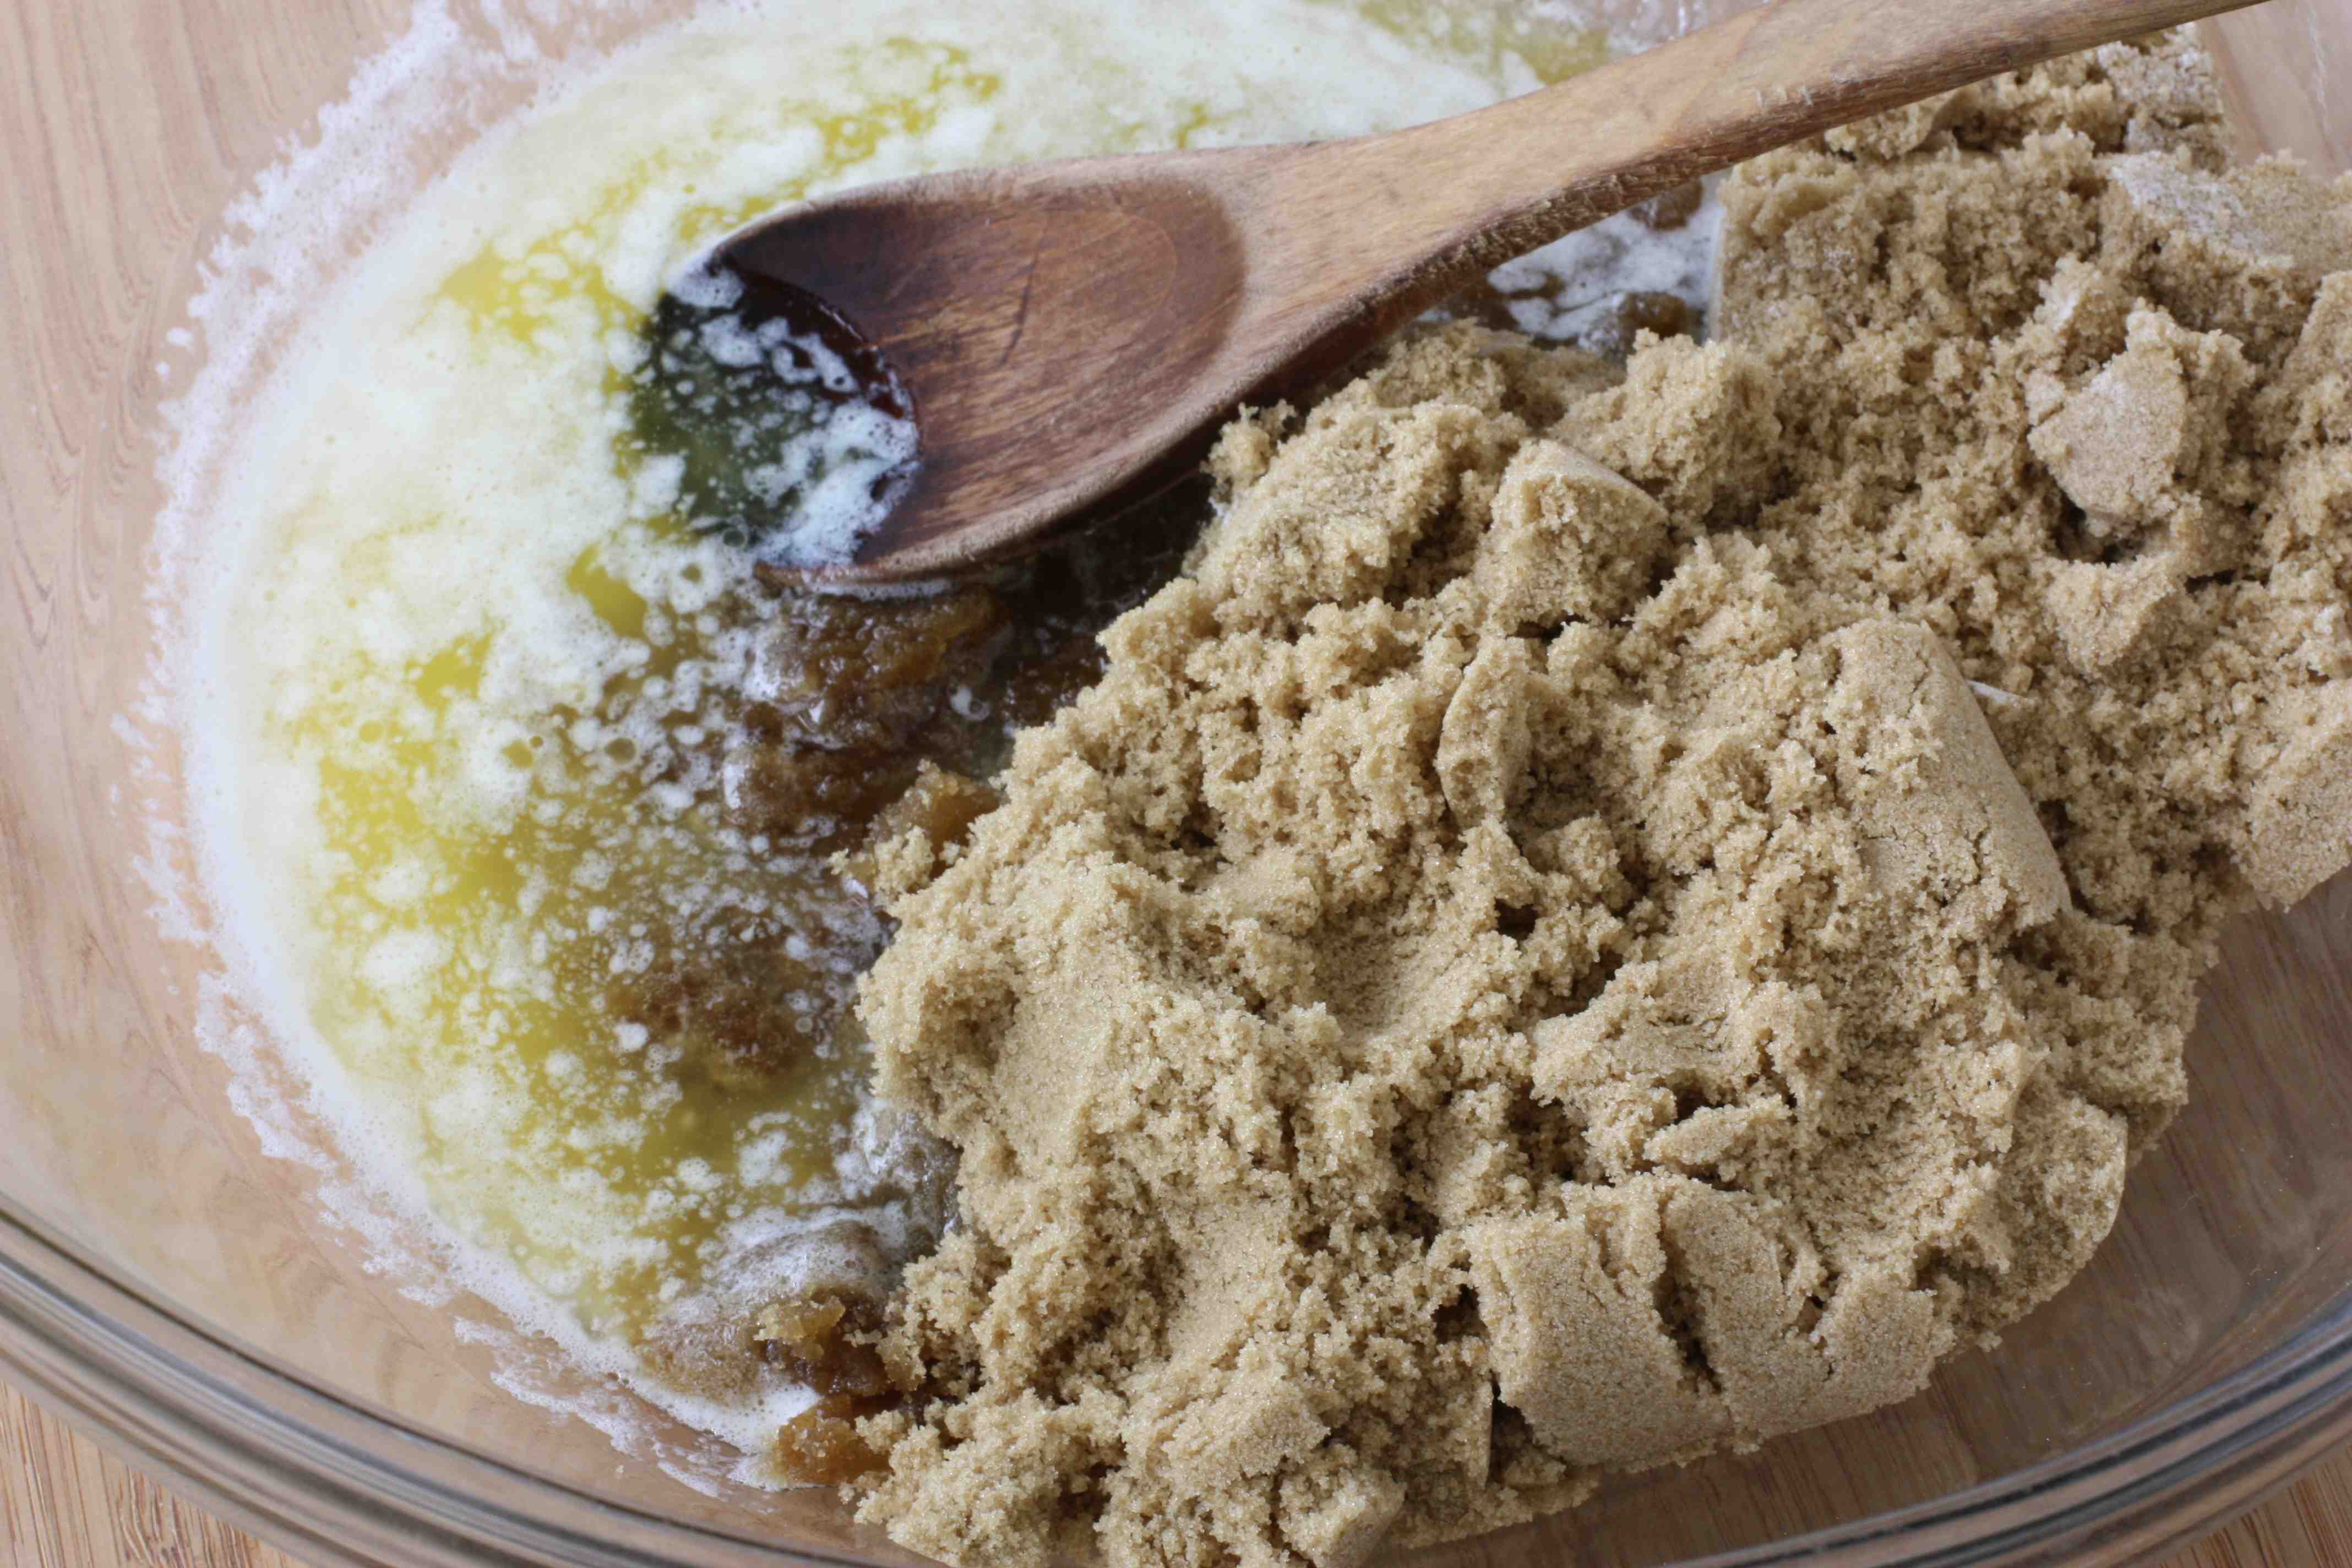
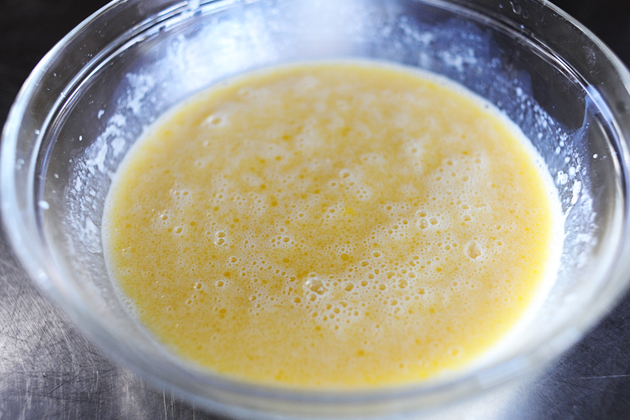
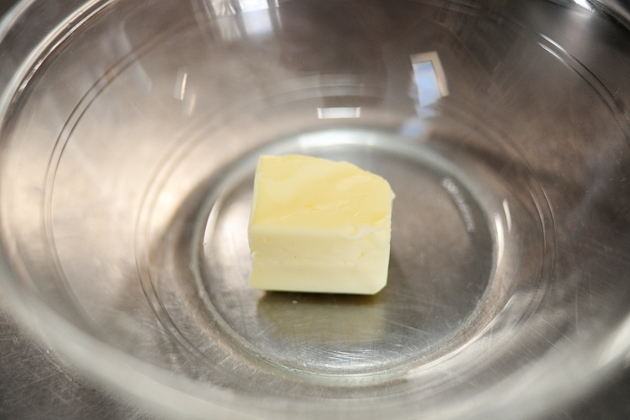
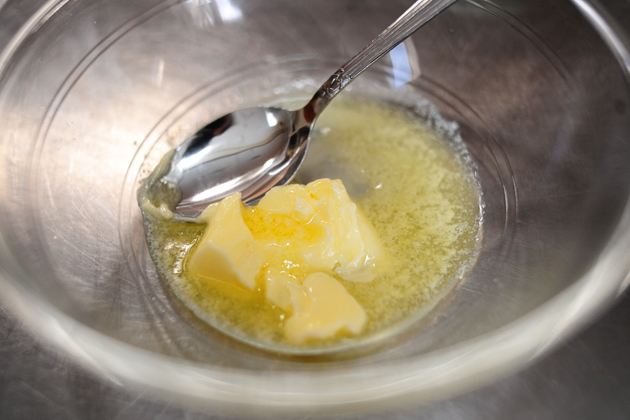
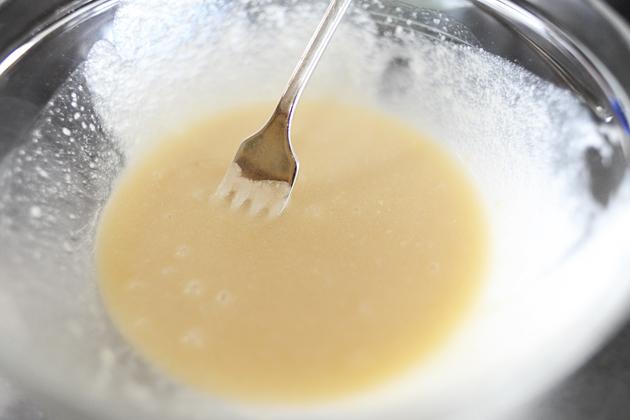
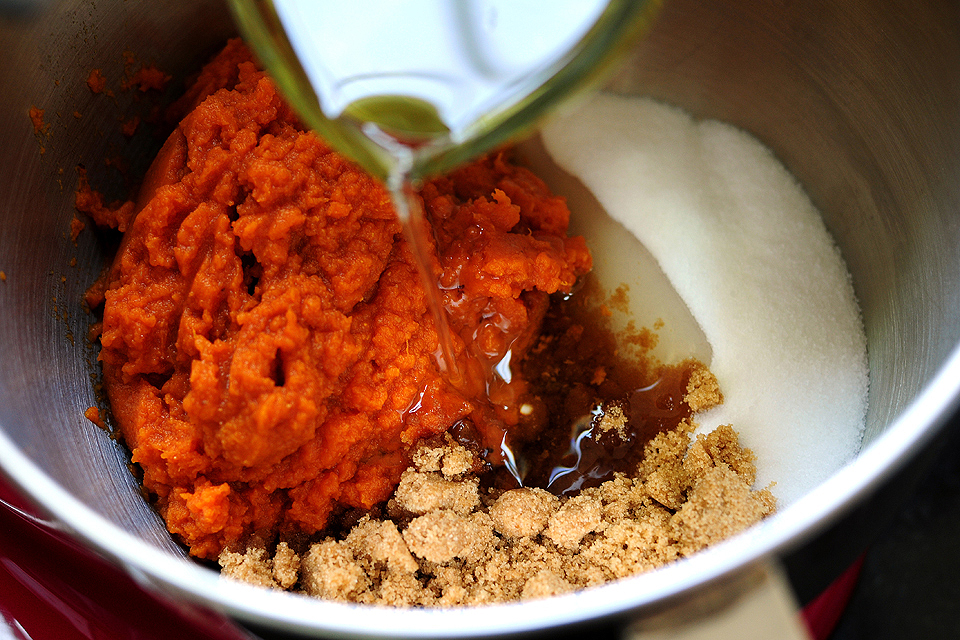
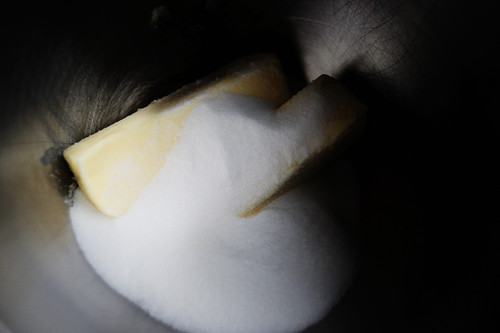
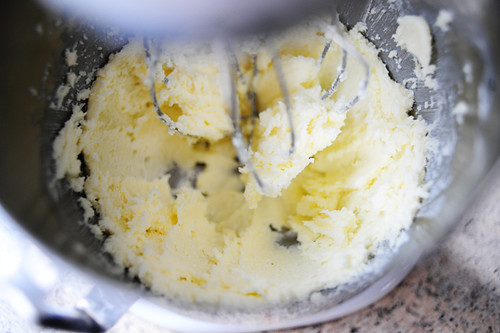
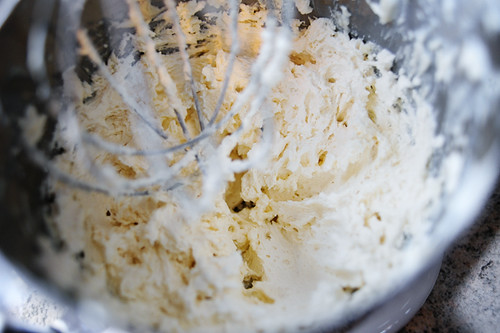
In a large bowl, combine melted butter and brown sugar. (Those are words that make me sigh with pleasure.)


Tasty Kitchen Blog: White Chocolate Walnut Blondies with Maple Butter Sauce. Guest post by Dara Michalski of Cookin' Canuck, recipe submitted by TK member Brandie of The Country Cook.

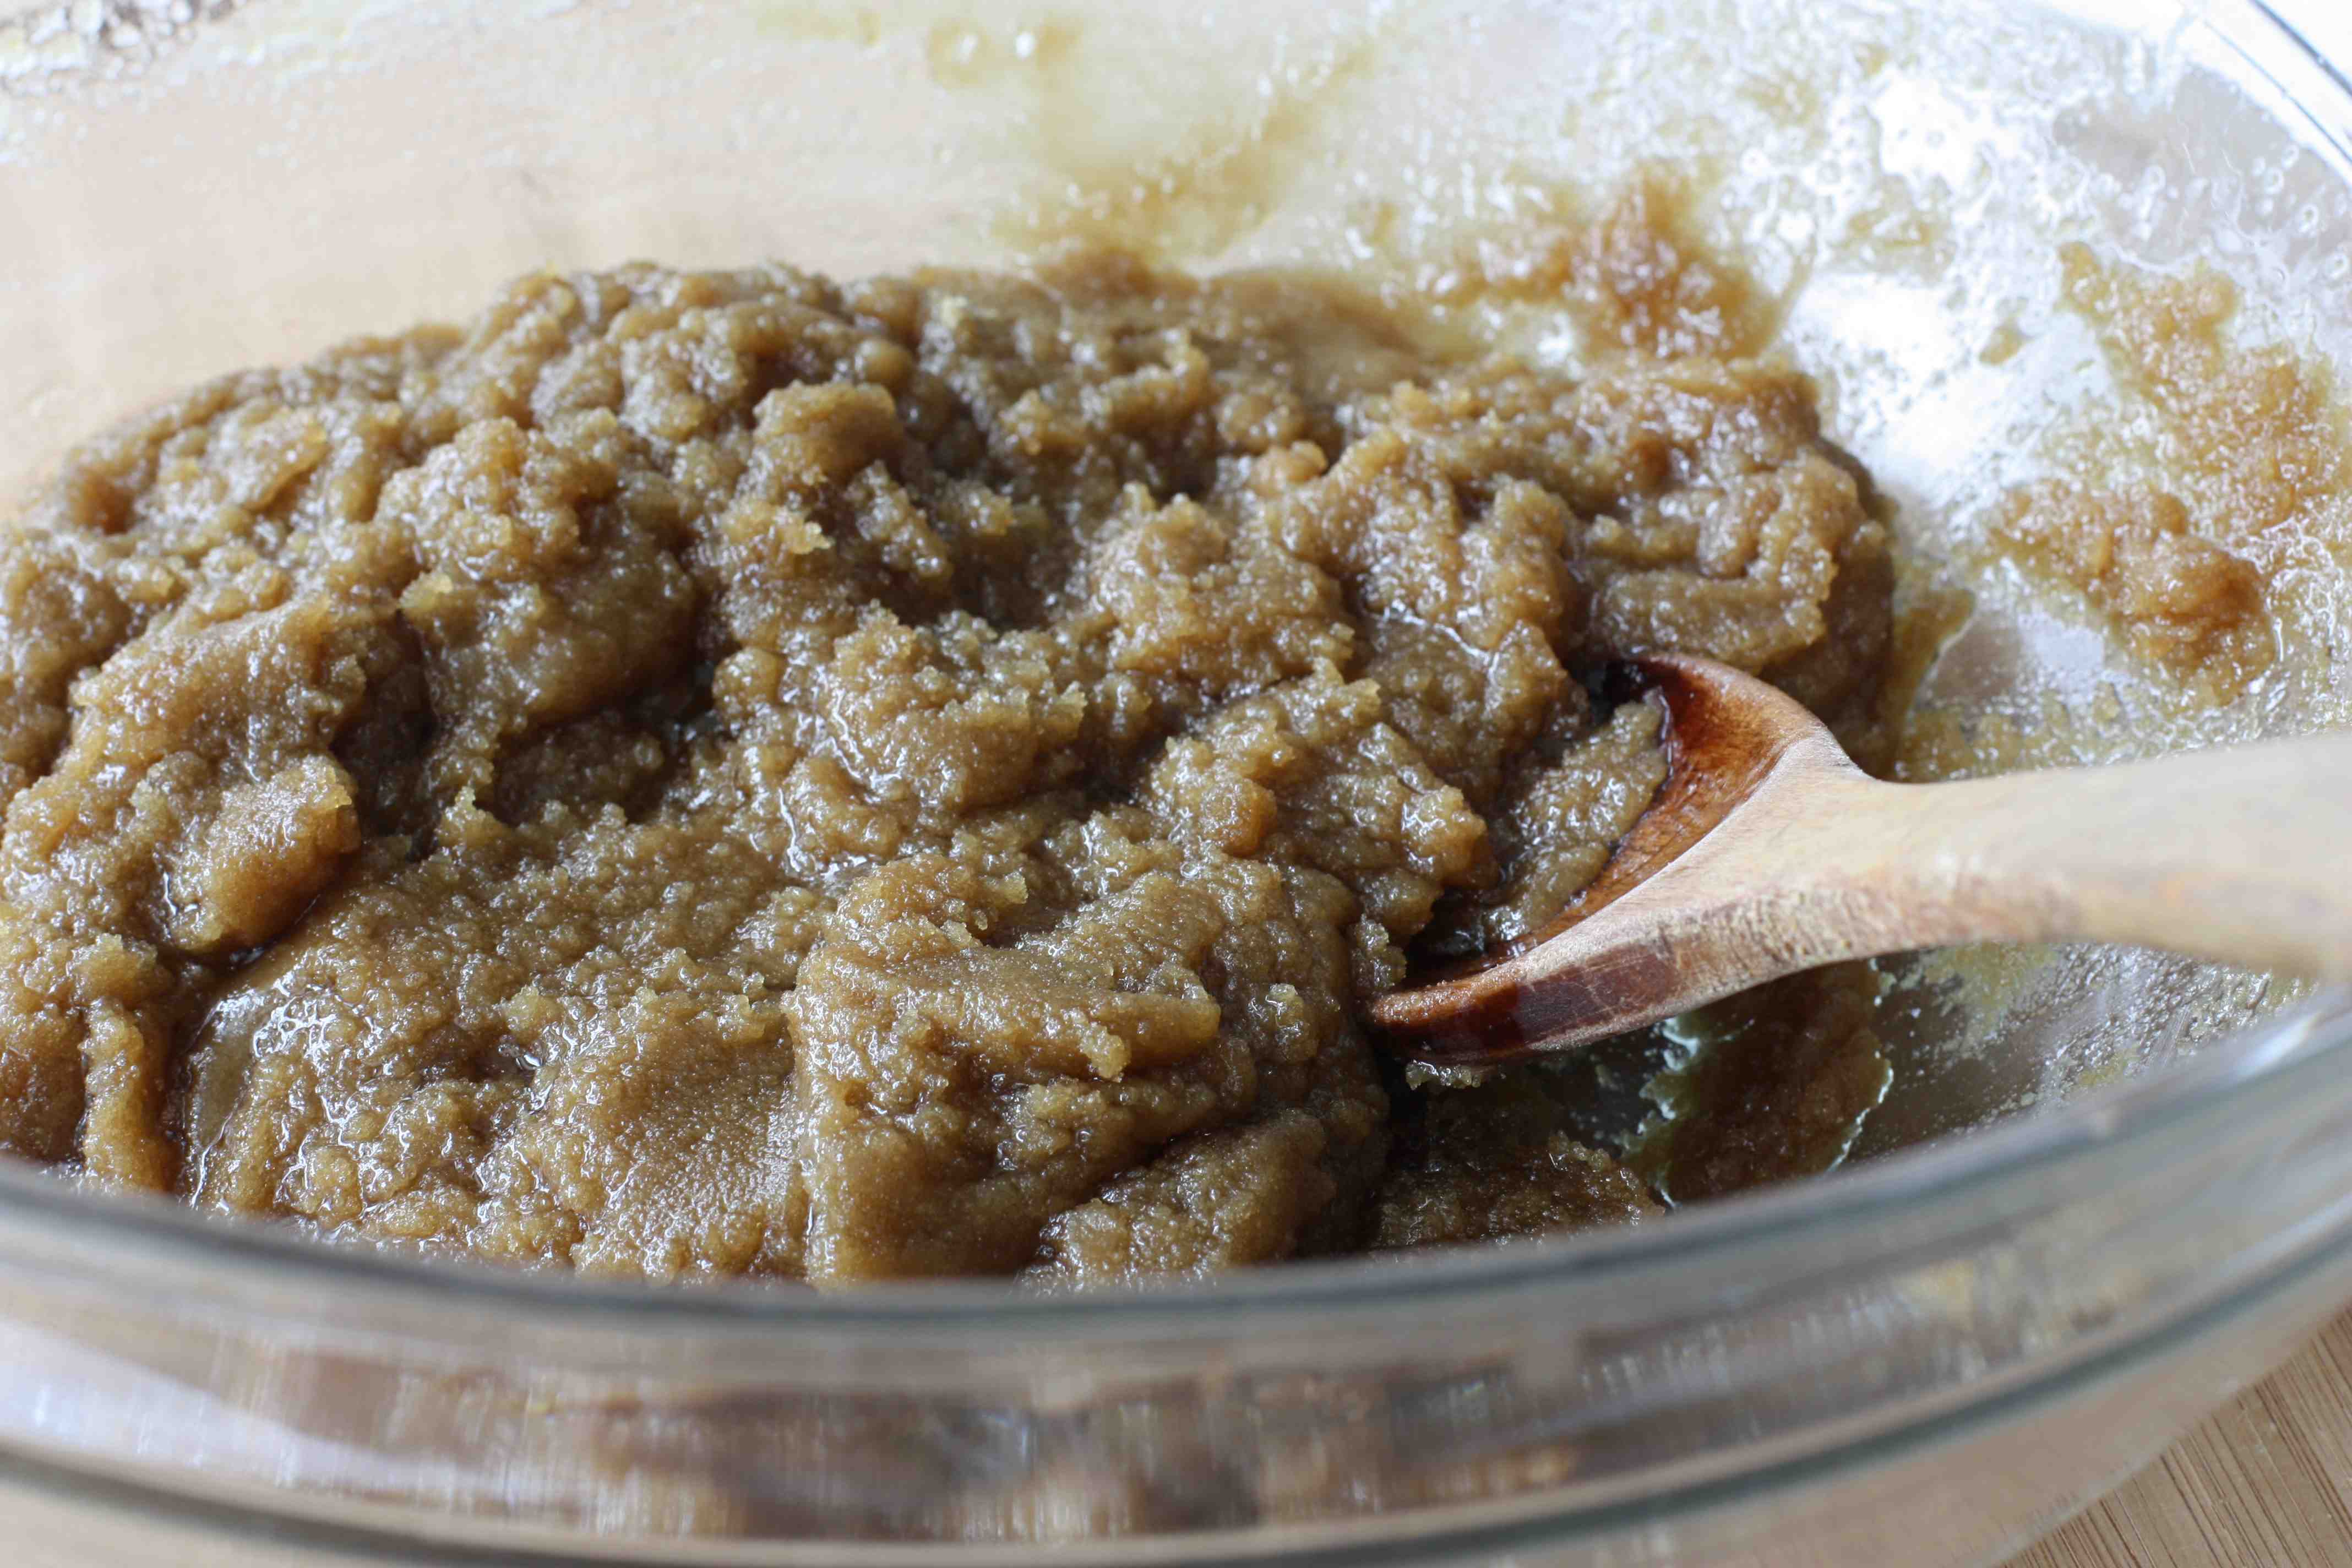
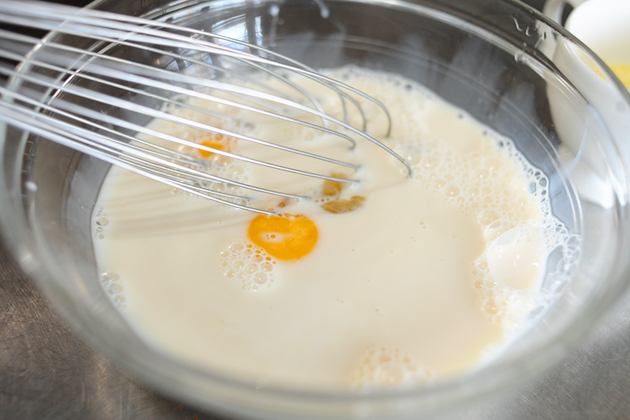
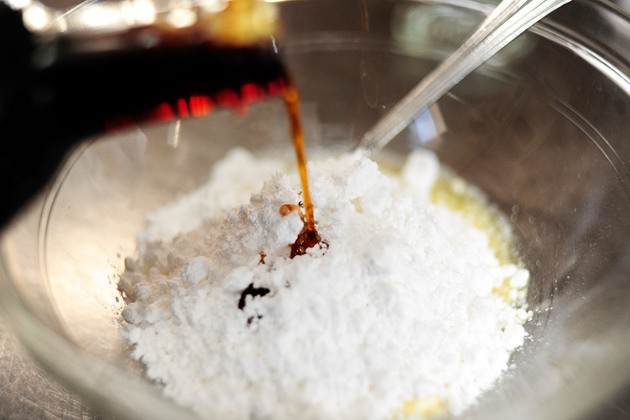
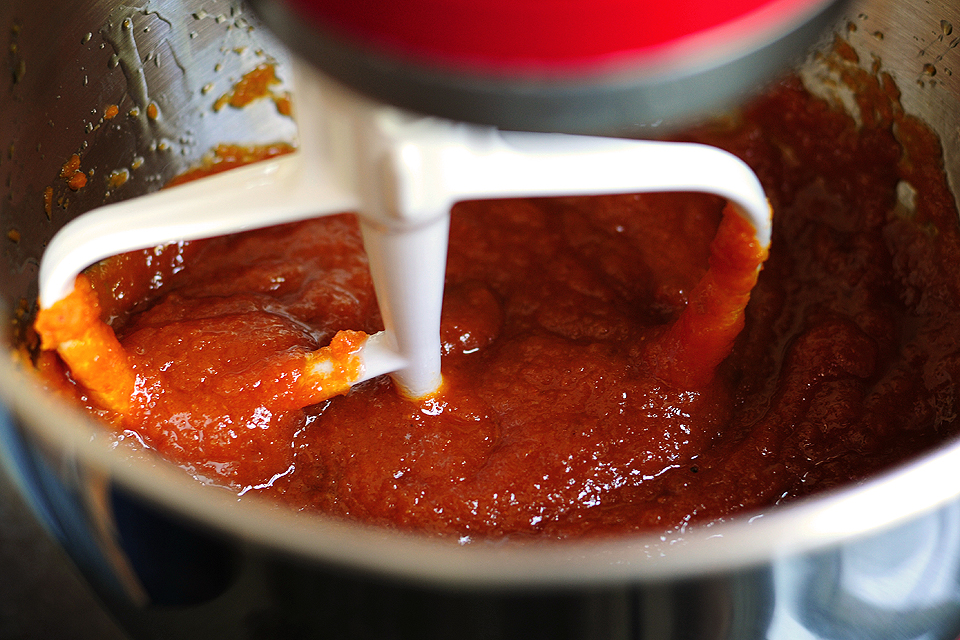
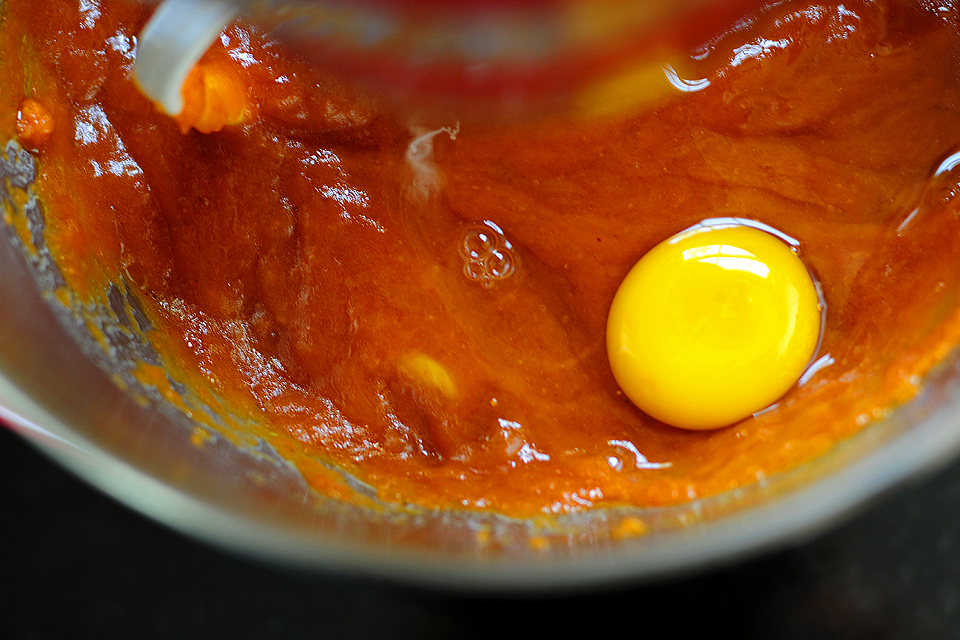
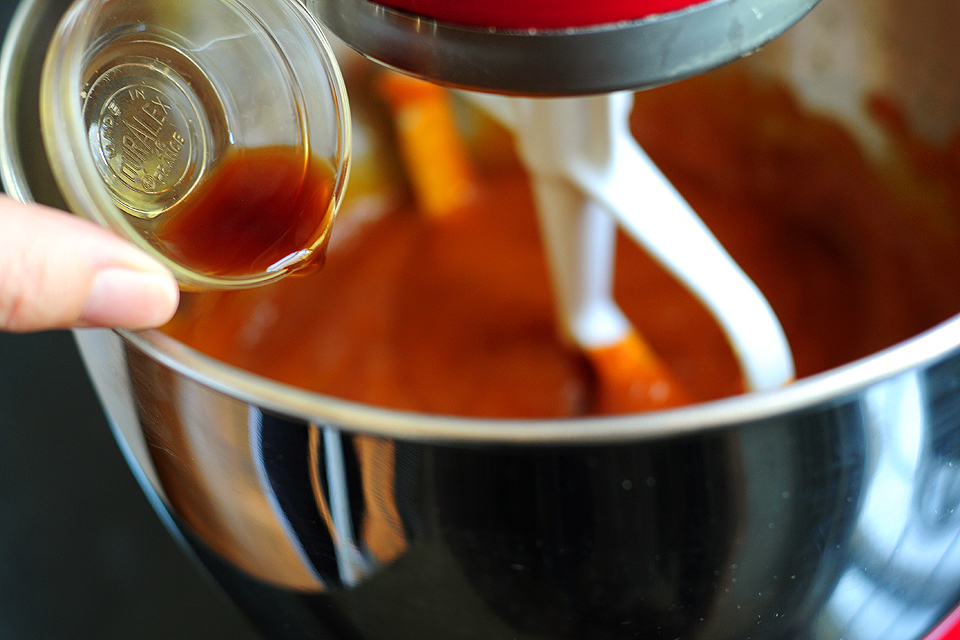
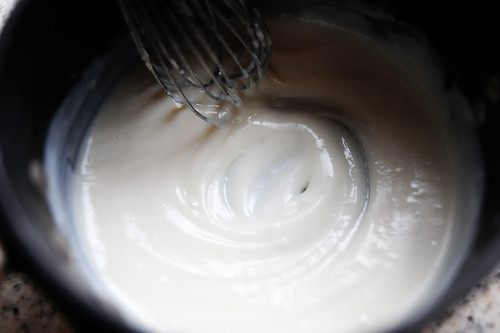
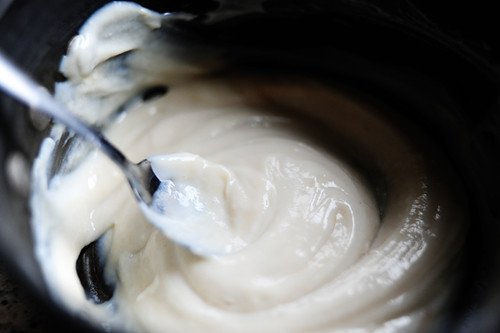
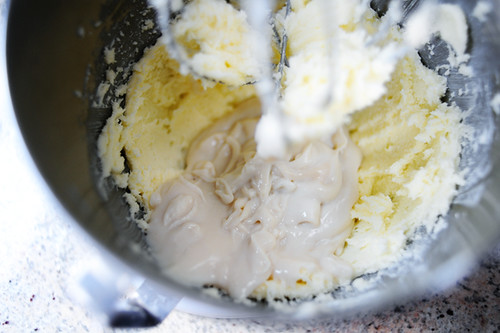
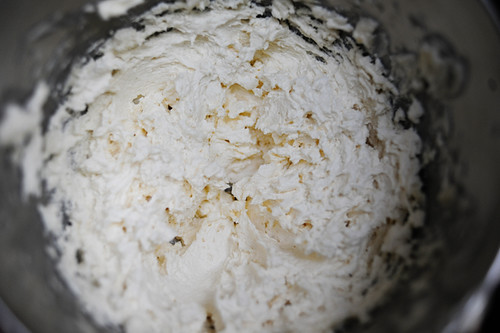
Stir together until combined. (I mean, really, who can resist dipping their finger into this?) Beat eggs and add them, along with a little vanilla, to the brown sugar mixture.


Tasty Kitchen Blog: White Chocolate Walnut Blondies with Maple Butter Sauce. Guest post by Dara Michalski of Cookin' Canuck, recipe submitted by TK member Brandie of The Country Cook.

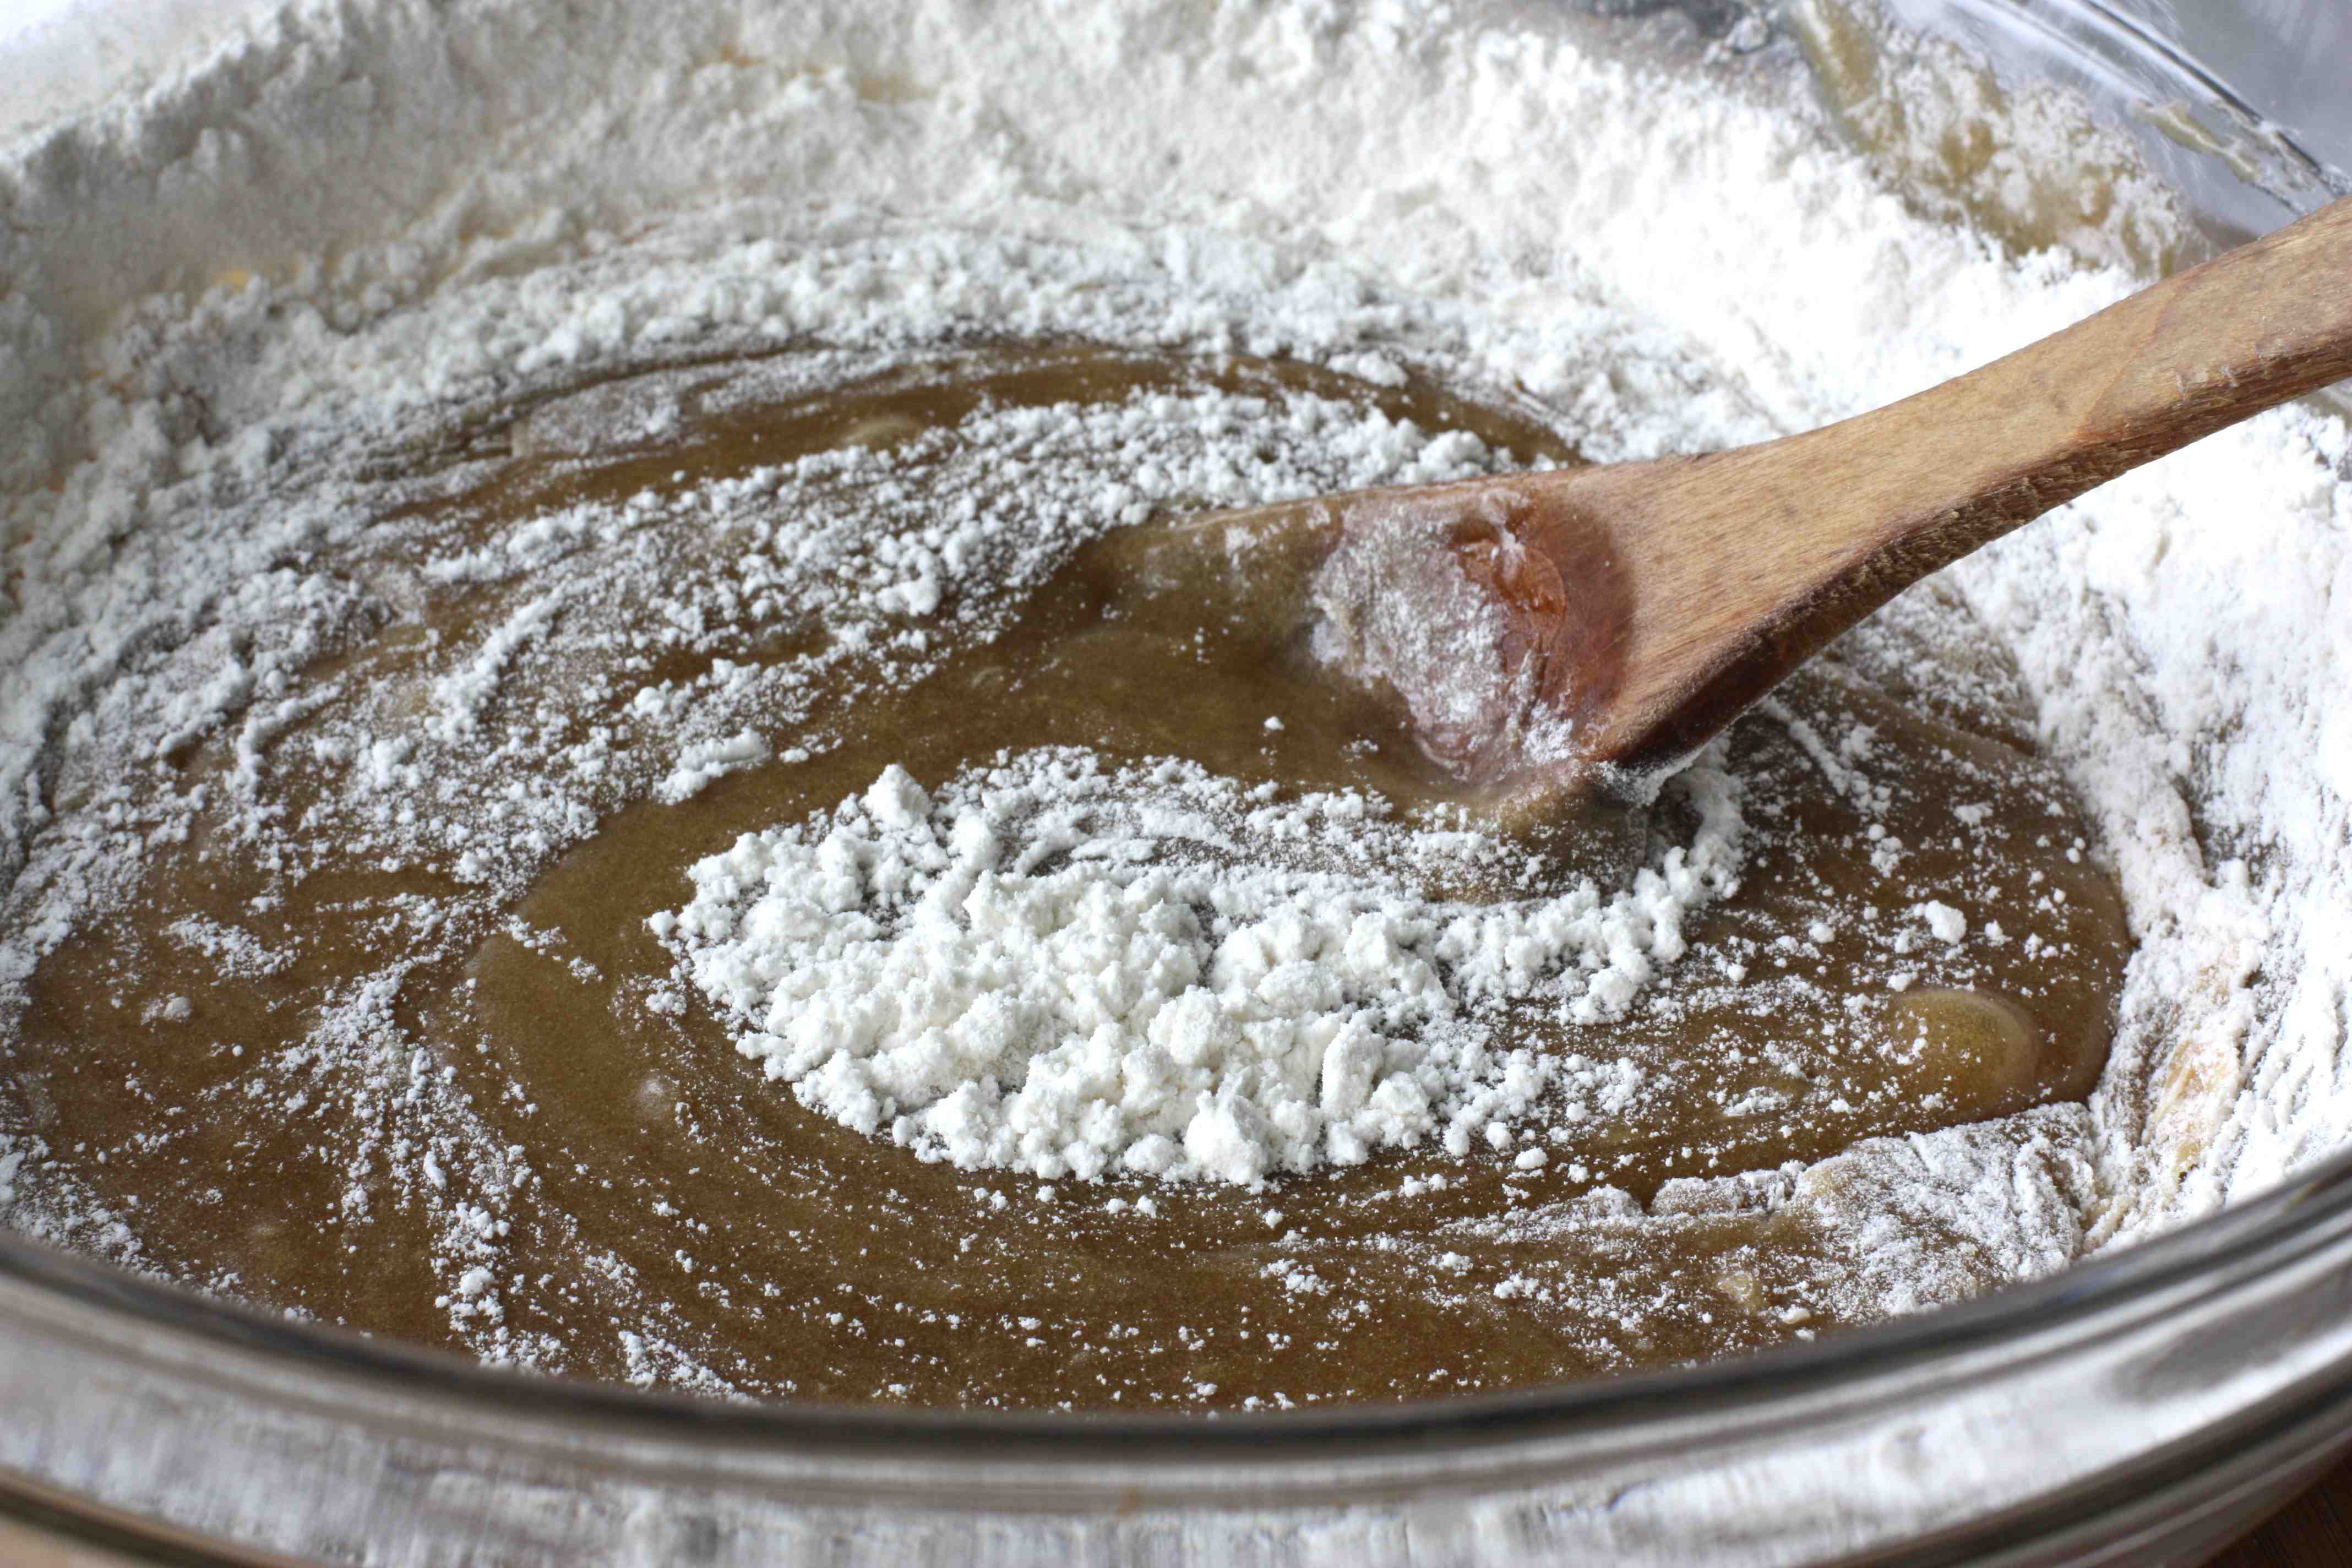
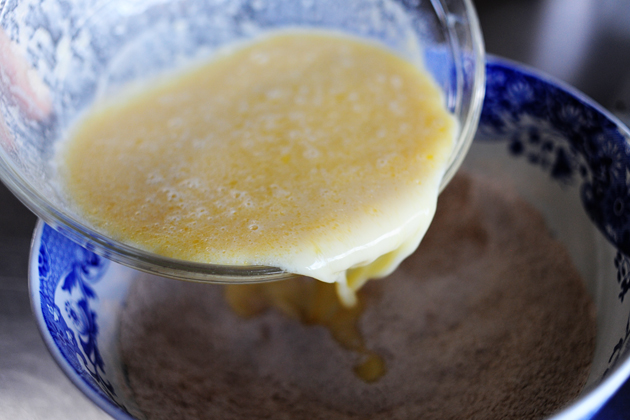
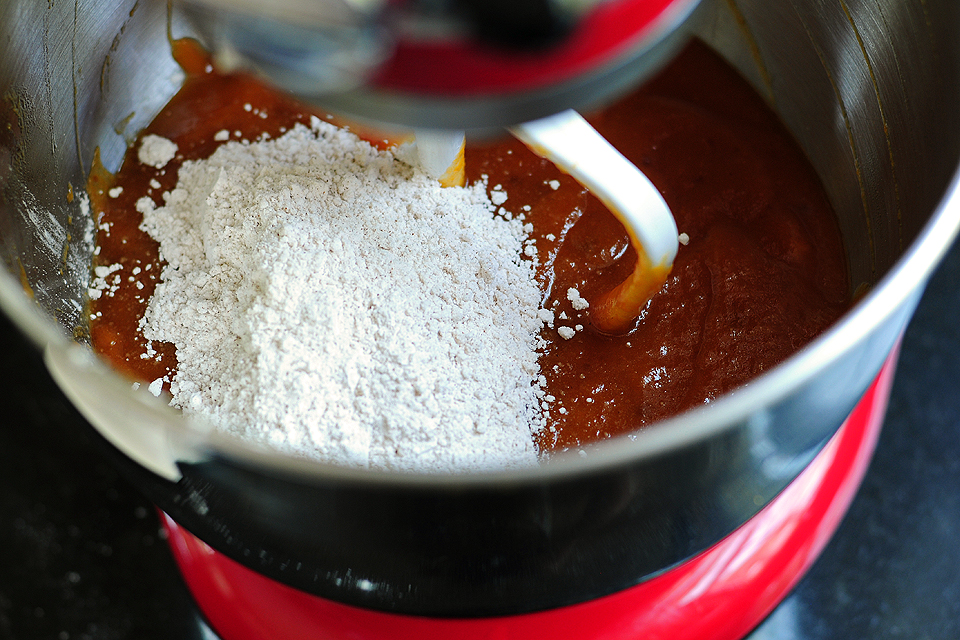
Gradually add the flour mixture and stir thoroughly. Be careful not to overmix the batter or the brownies will become tough. That would be sacreligious.
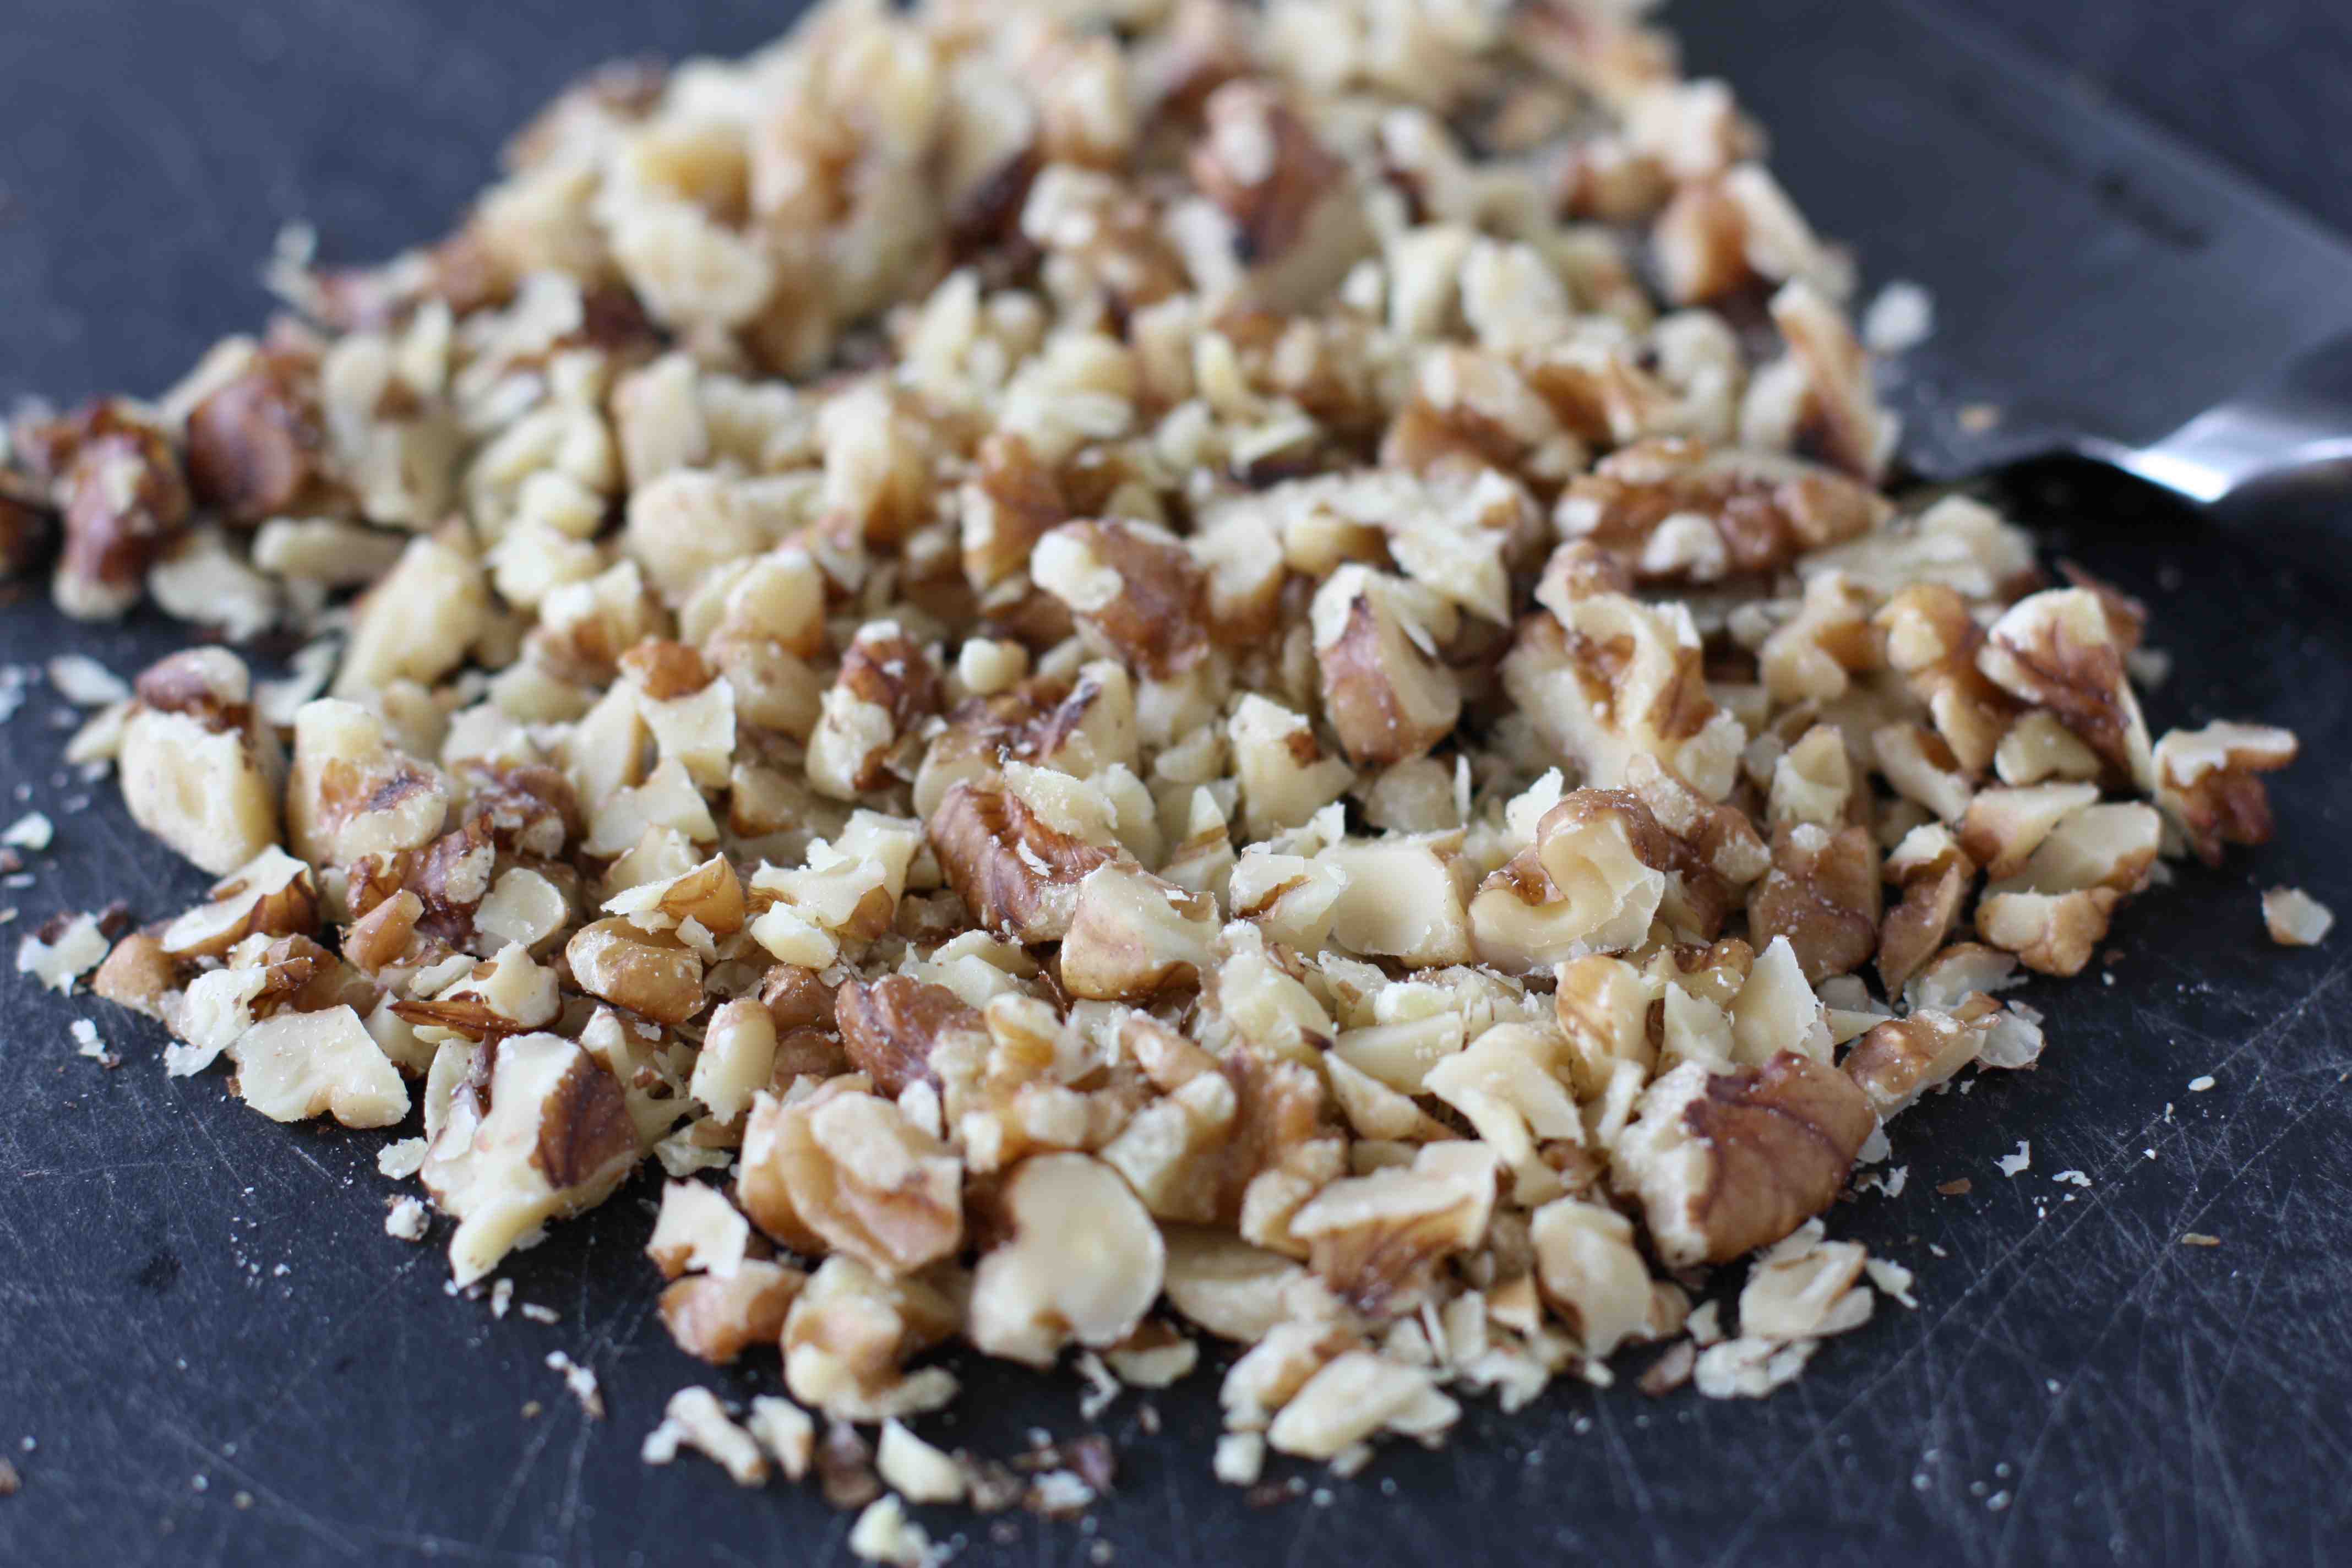


Tasty Kitchen Blog: White Chocolate Walnut Blondies with Maple Butter Sauce. Guest post by Dara Michalski of Cookin' Canuck, recipe submitted by TK member Brandie of The Country Cook.

Chop some walnuts.


Tasty Kitchen Blog: White Chocolate Walnut Blondies with Maple Butter Sauce. Guest post by Dara Michalski of Cookin' Canuck, recipe submitted by TK member Brandie of The Country Cook.

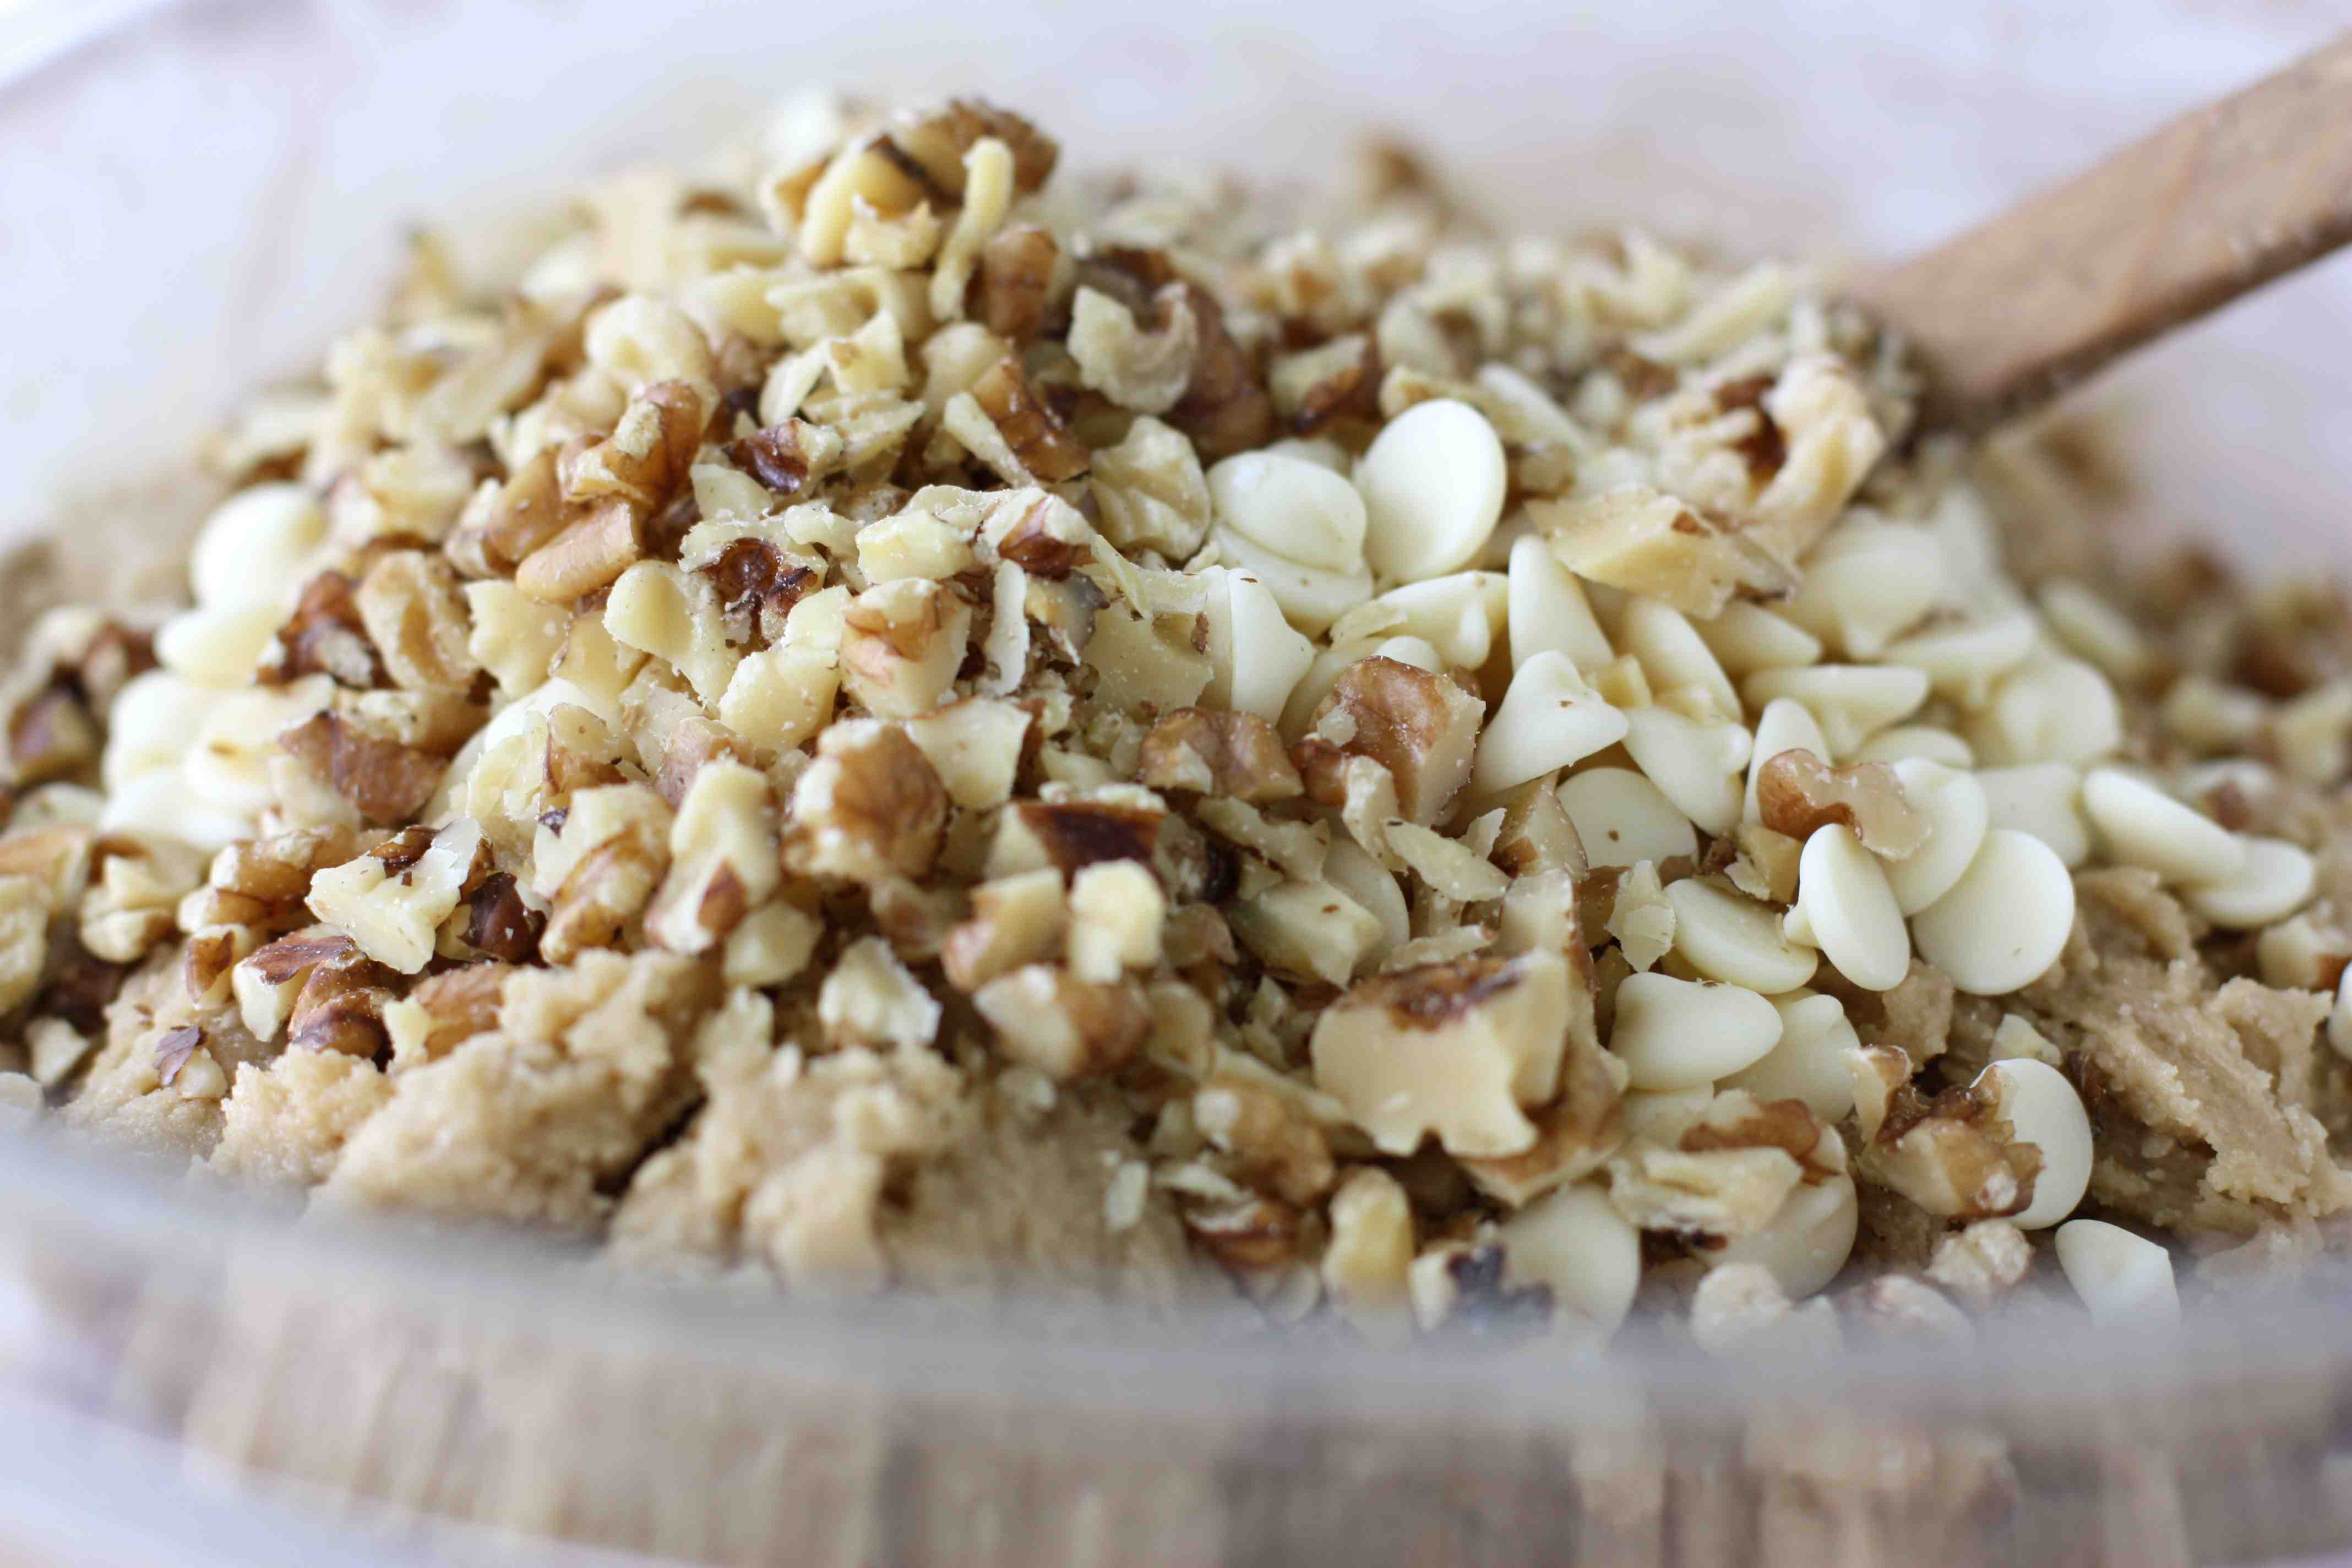
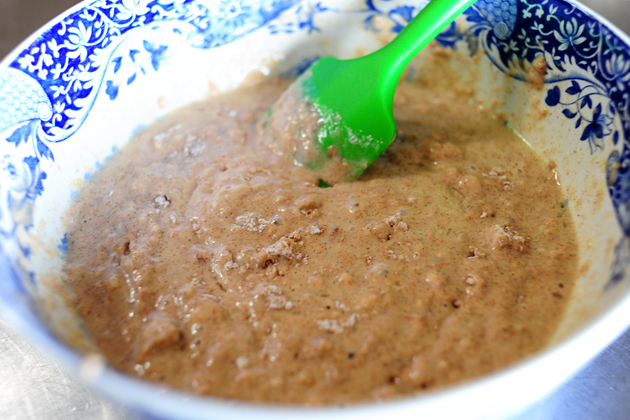
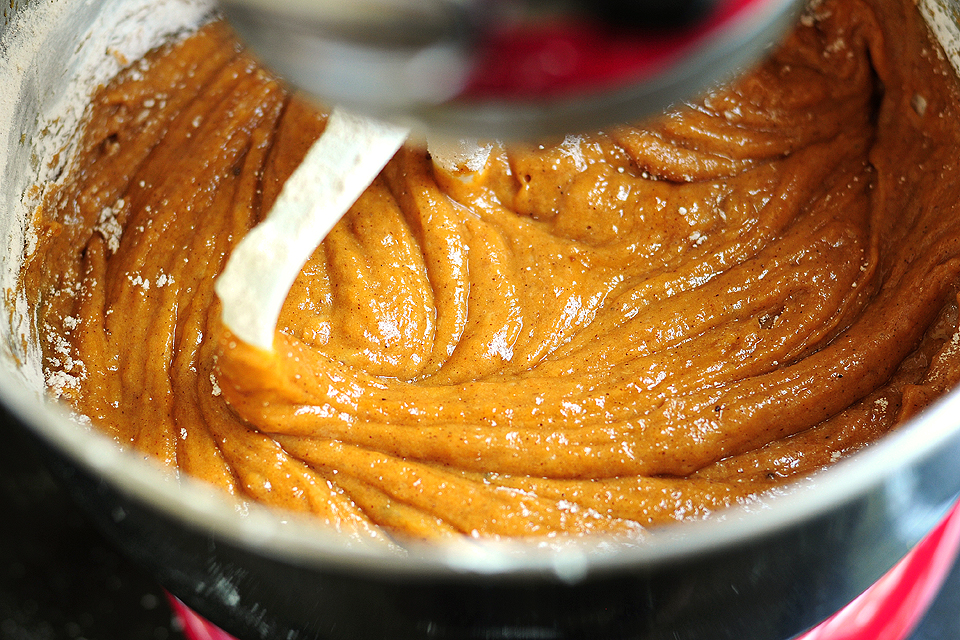
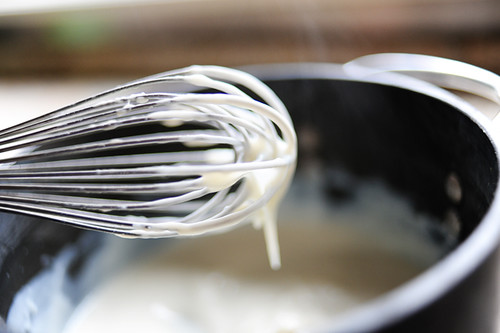
Add the walnuts and white chocolate chips to the batter. Stir them into the batter, which takes a bit of muscle. This workout is how you will justify eating three brownies later.


Tasty Kitchen Blog: White Chocolate Walnut Blondies with Maple Butter Sauce. Guest post by Dara Michalski of Cookin' Canuck, recipe submitted by TK member Brandie of The Country Cook.

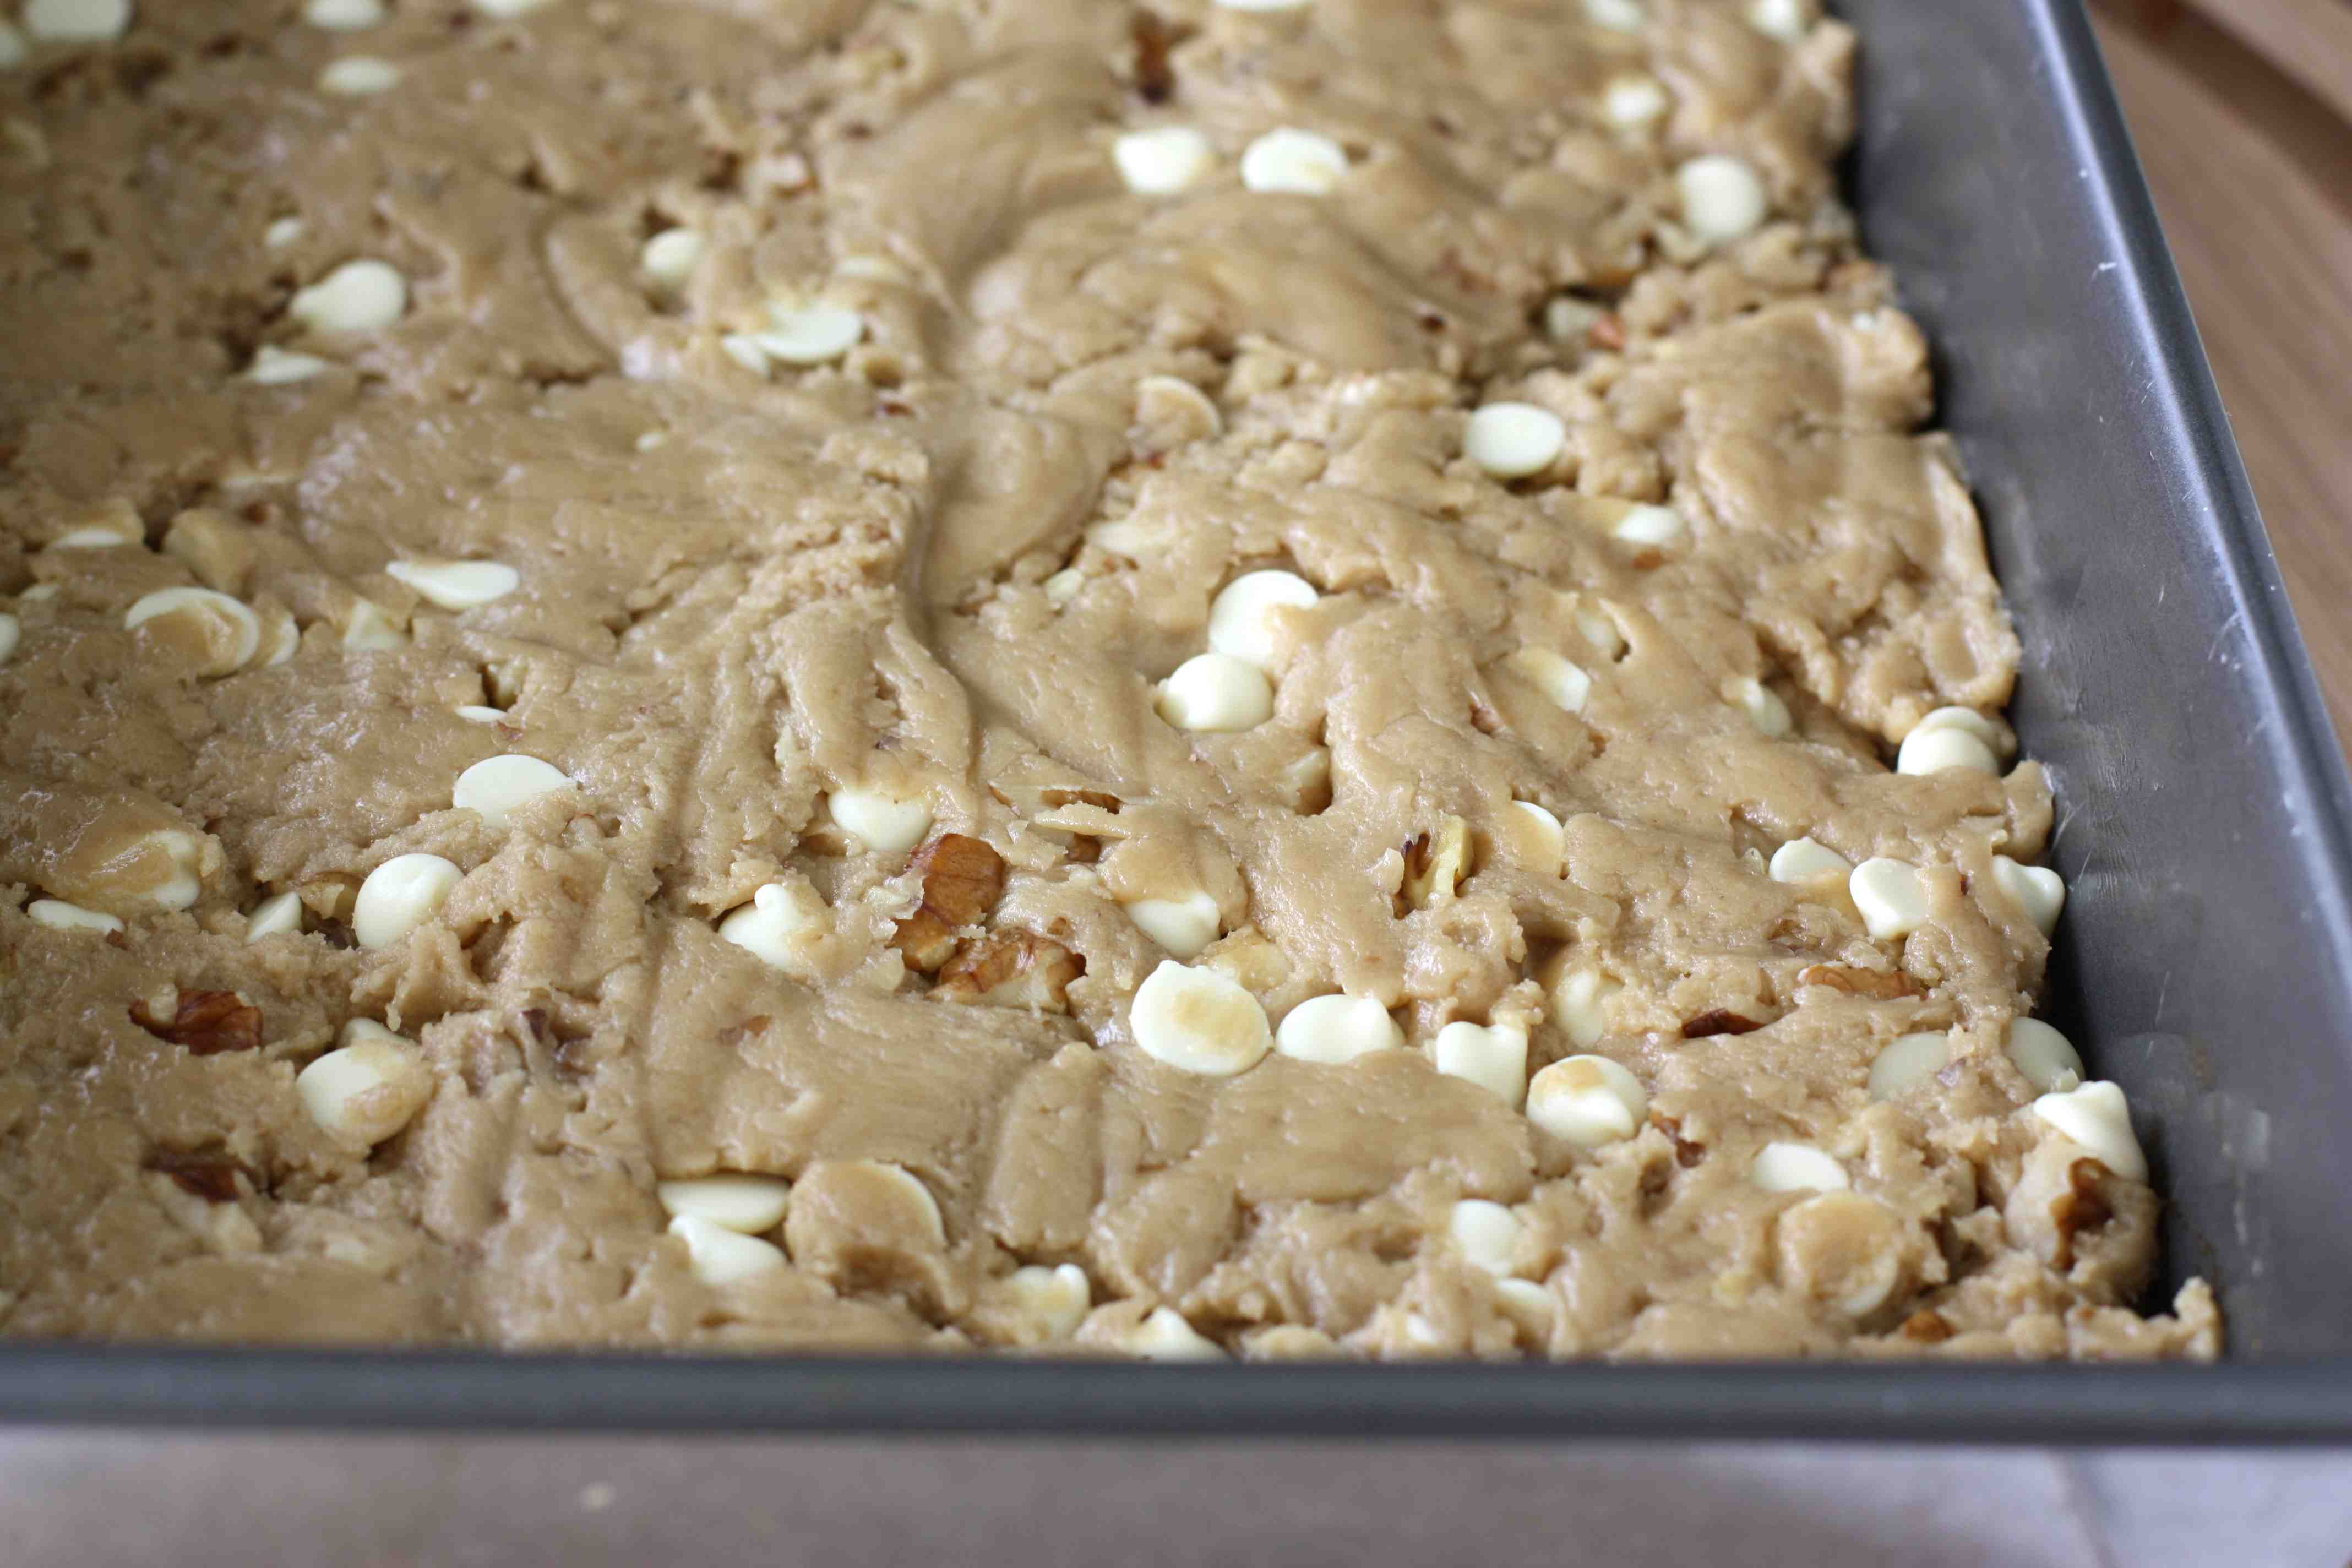
Spray a 9- by 13-inch baking pan with cooking spray. The recipe did not actually state this, but I did not want to risk any of these brownies sticking to the bottom. Press the brownie mixture into the pan.

If you are using your fingers to do this, coat them with some butter first to help with sticking. Of course, any morsels sticking to your fingers should be consumed immediately.


Tasty Kitchen Blog: White Chocolate Walnut Blondies with Maple Butter Sauce. Guest post by Dara Michalski of Cookin' Canuck, recipe submitted by TK member Brandie of The Country Cook.

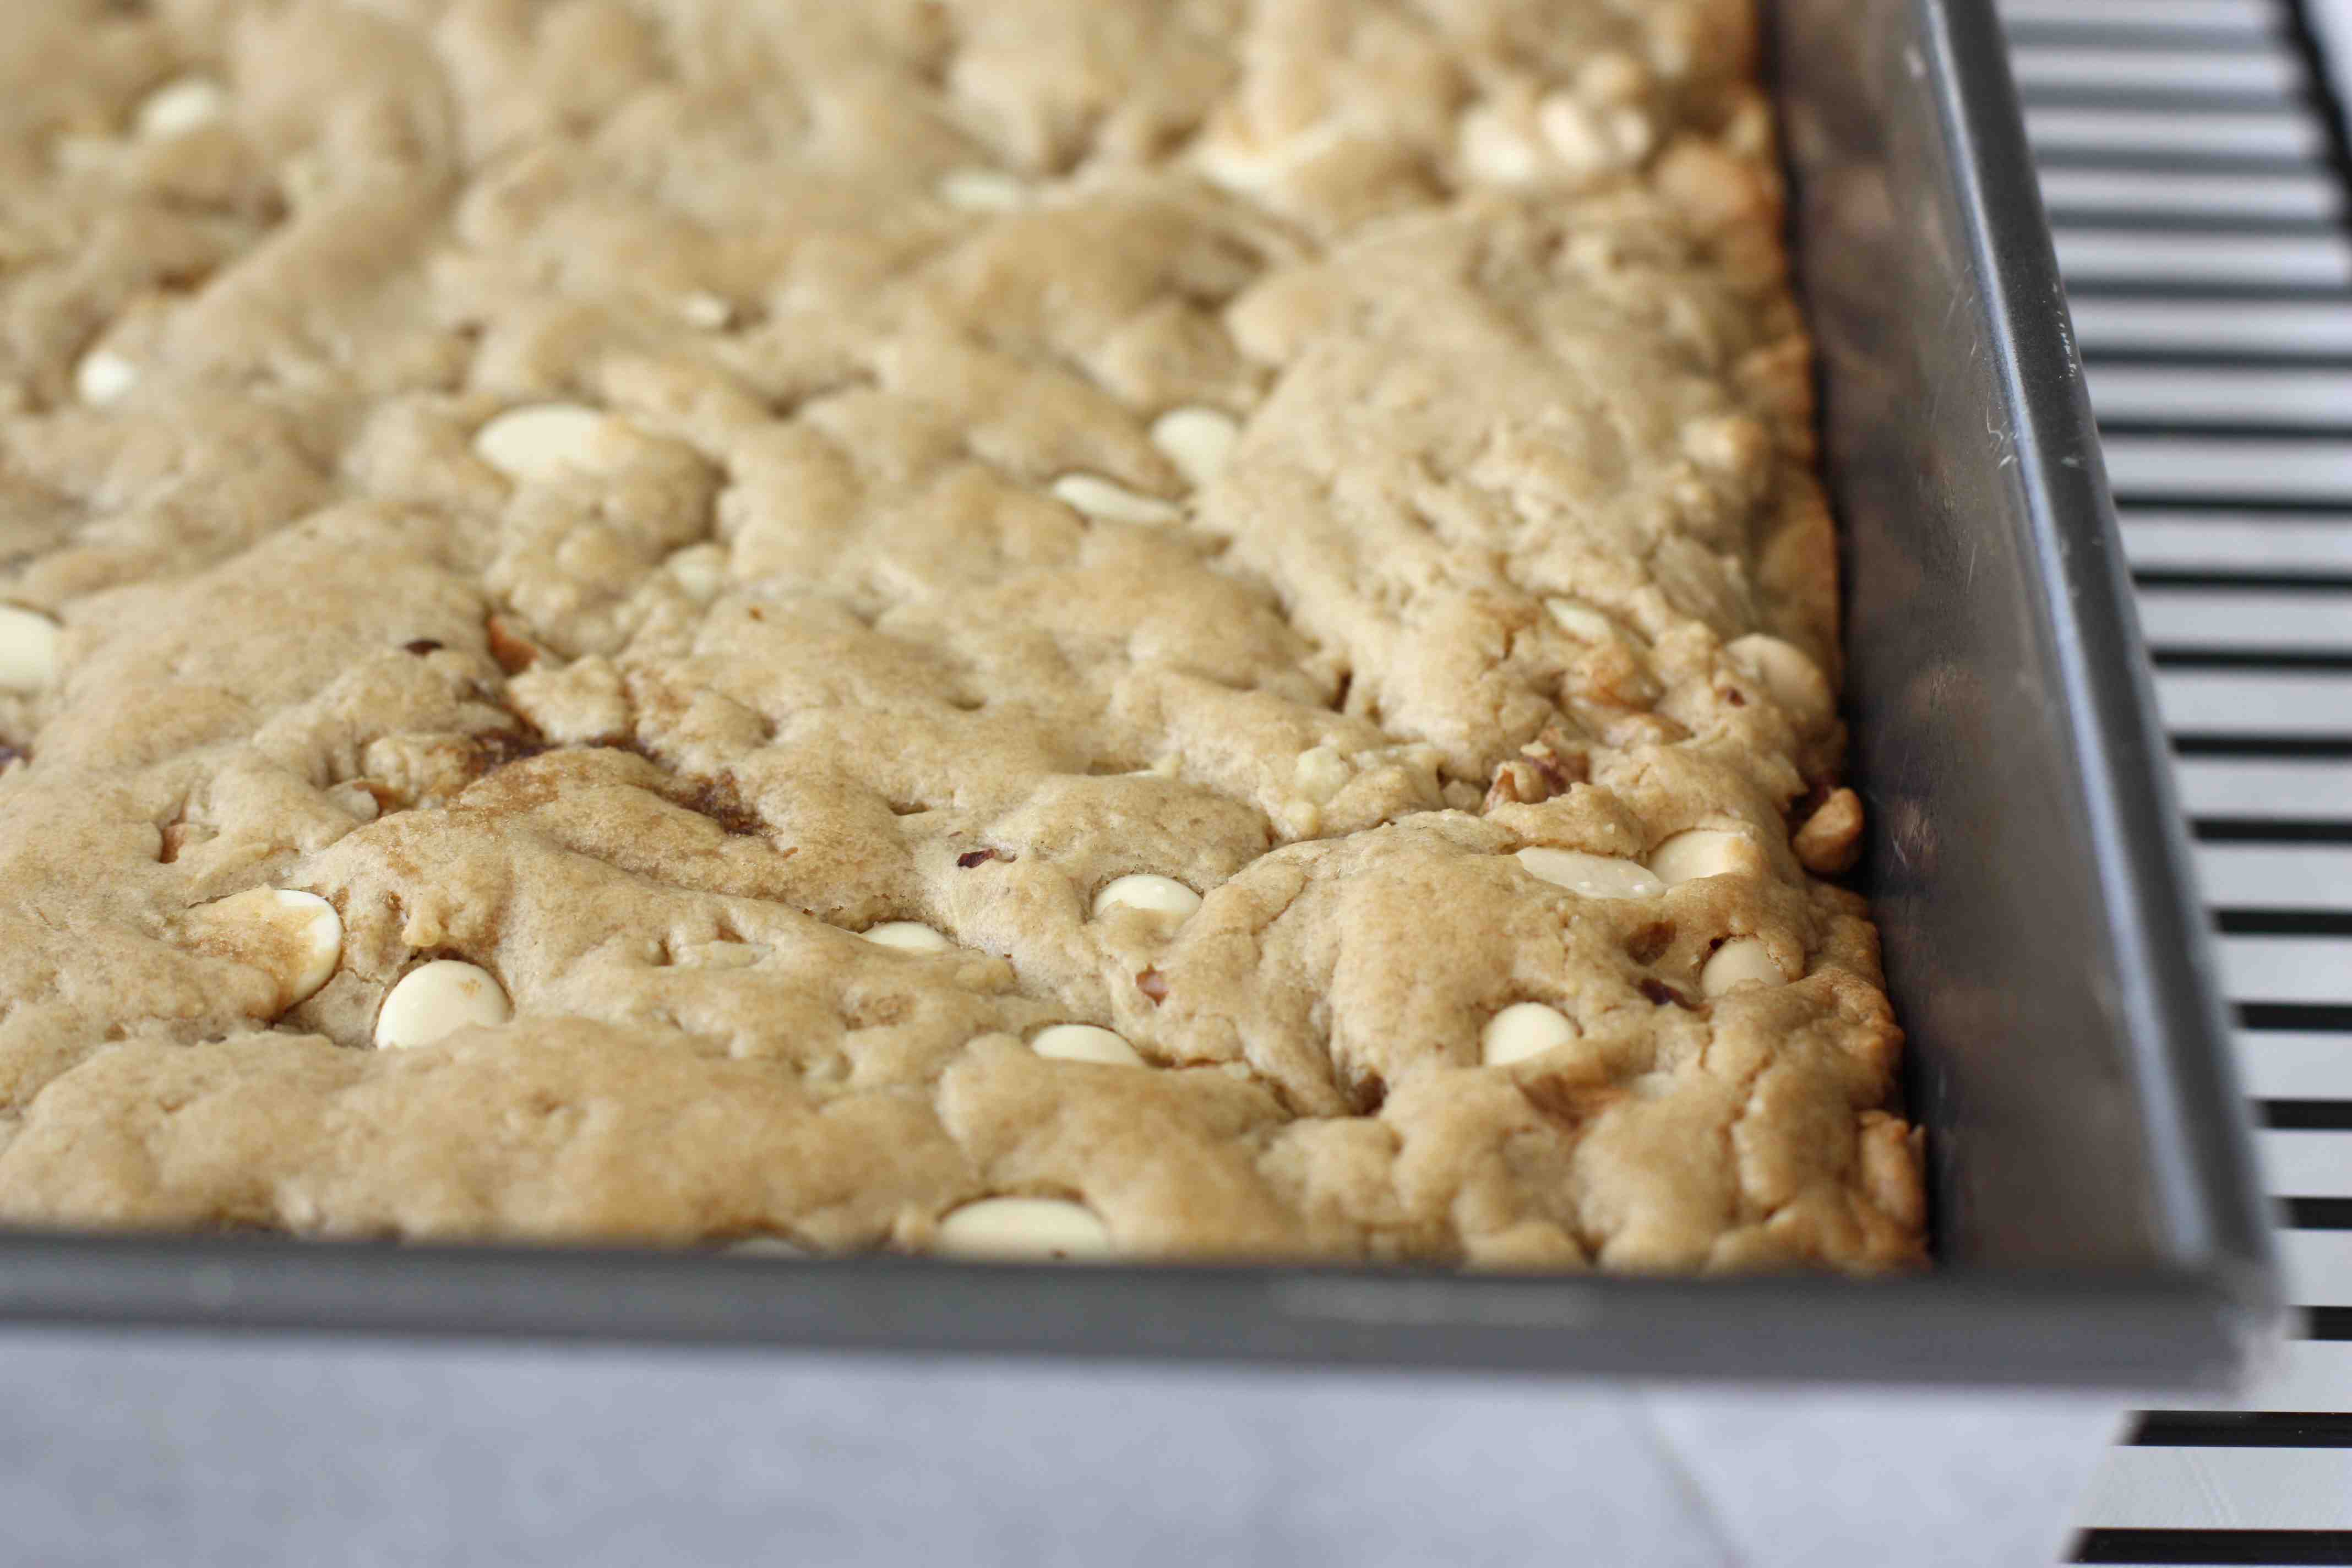
Bake until a toothpick inserted in the center comes out clean, about 25 to 30 minutes. Remove from the oven and allow the brownies to cool on a wire rack.

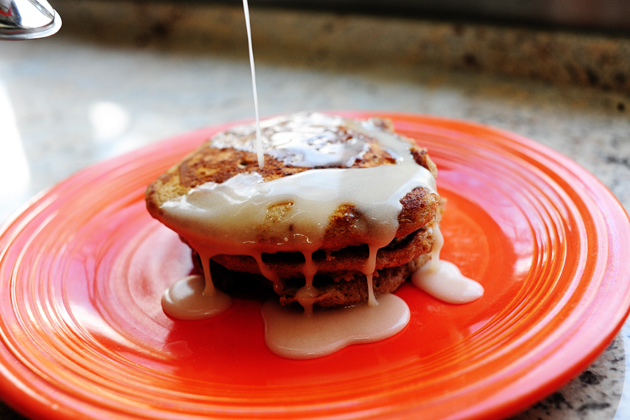
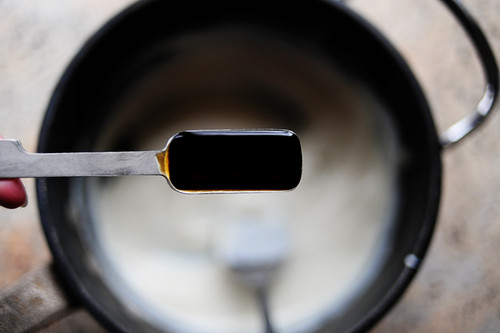
Here comes the good part: the sauce. The maple butter sauce. Need I say more?


Tasty Kitchen Blog: White Chocolate Walnut Blondies with Maple Butter Sauce. Guest post by Dara Michalski of Cookin' Canuck, recipe submitted by TK member Brandie of The Country Cook.

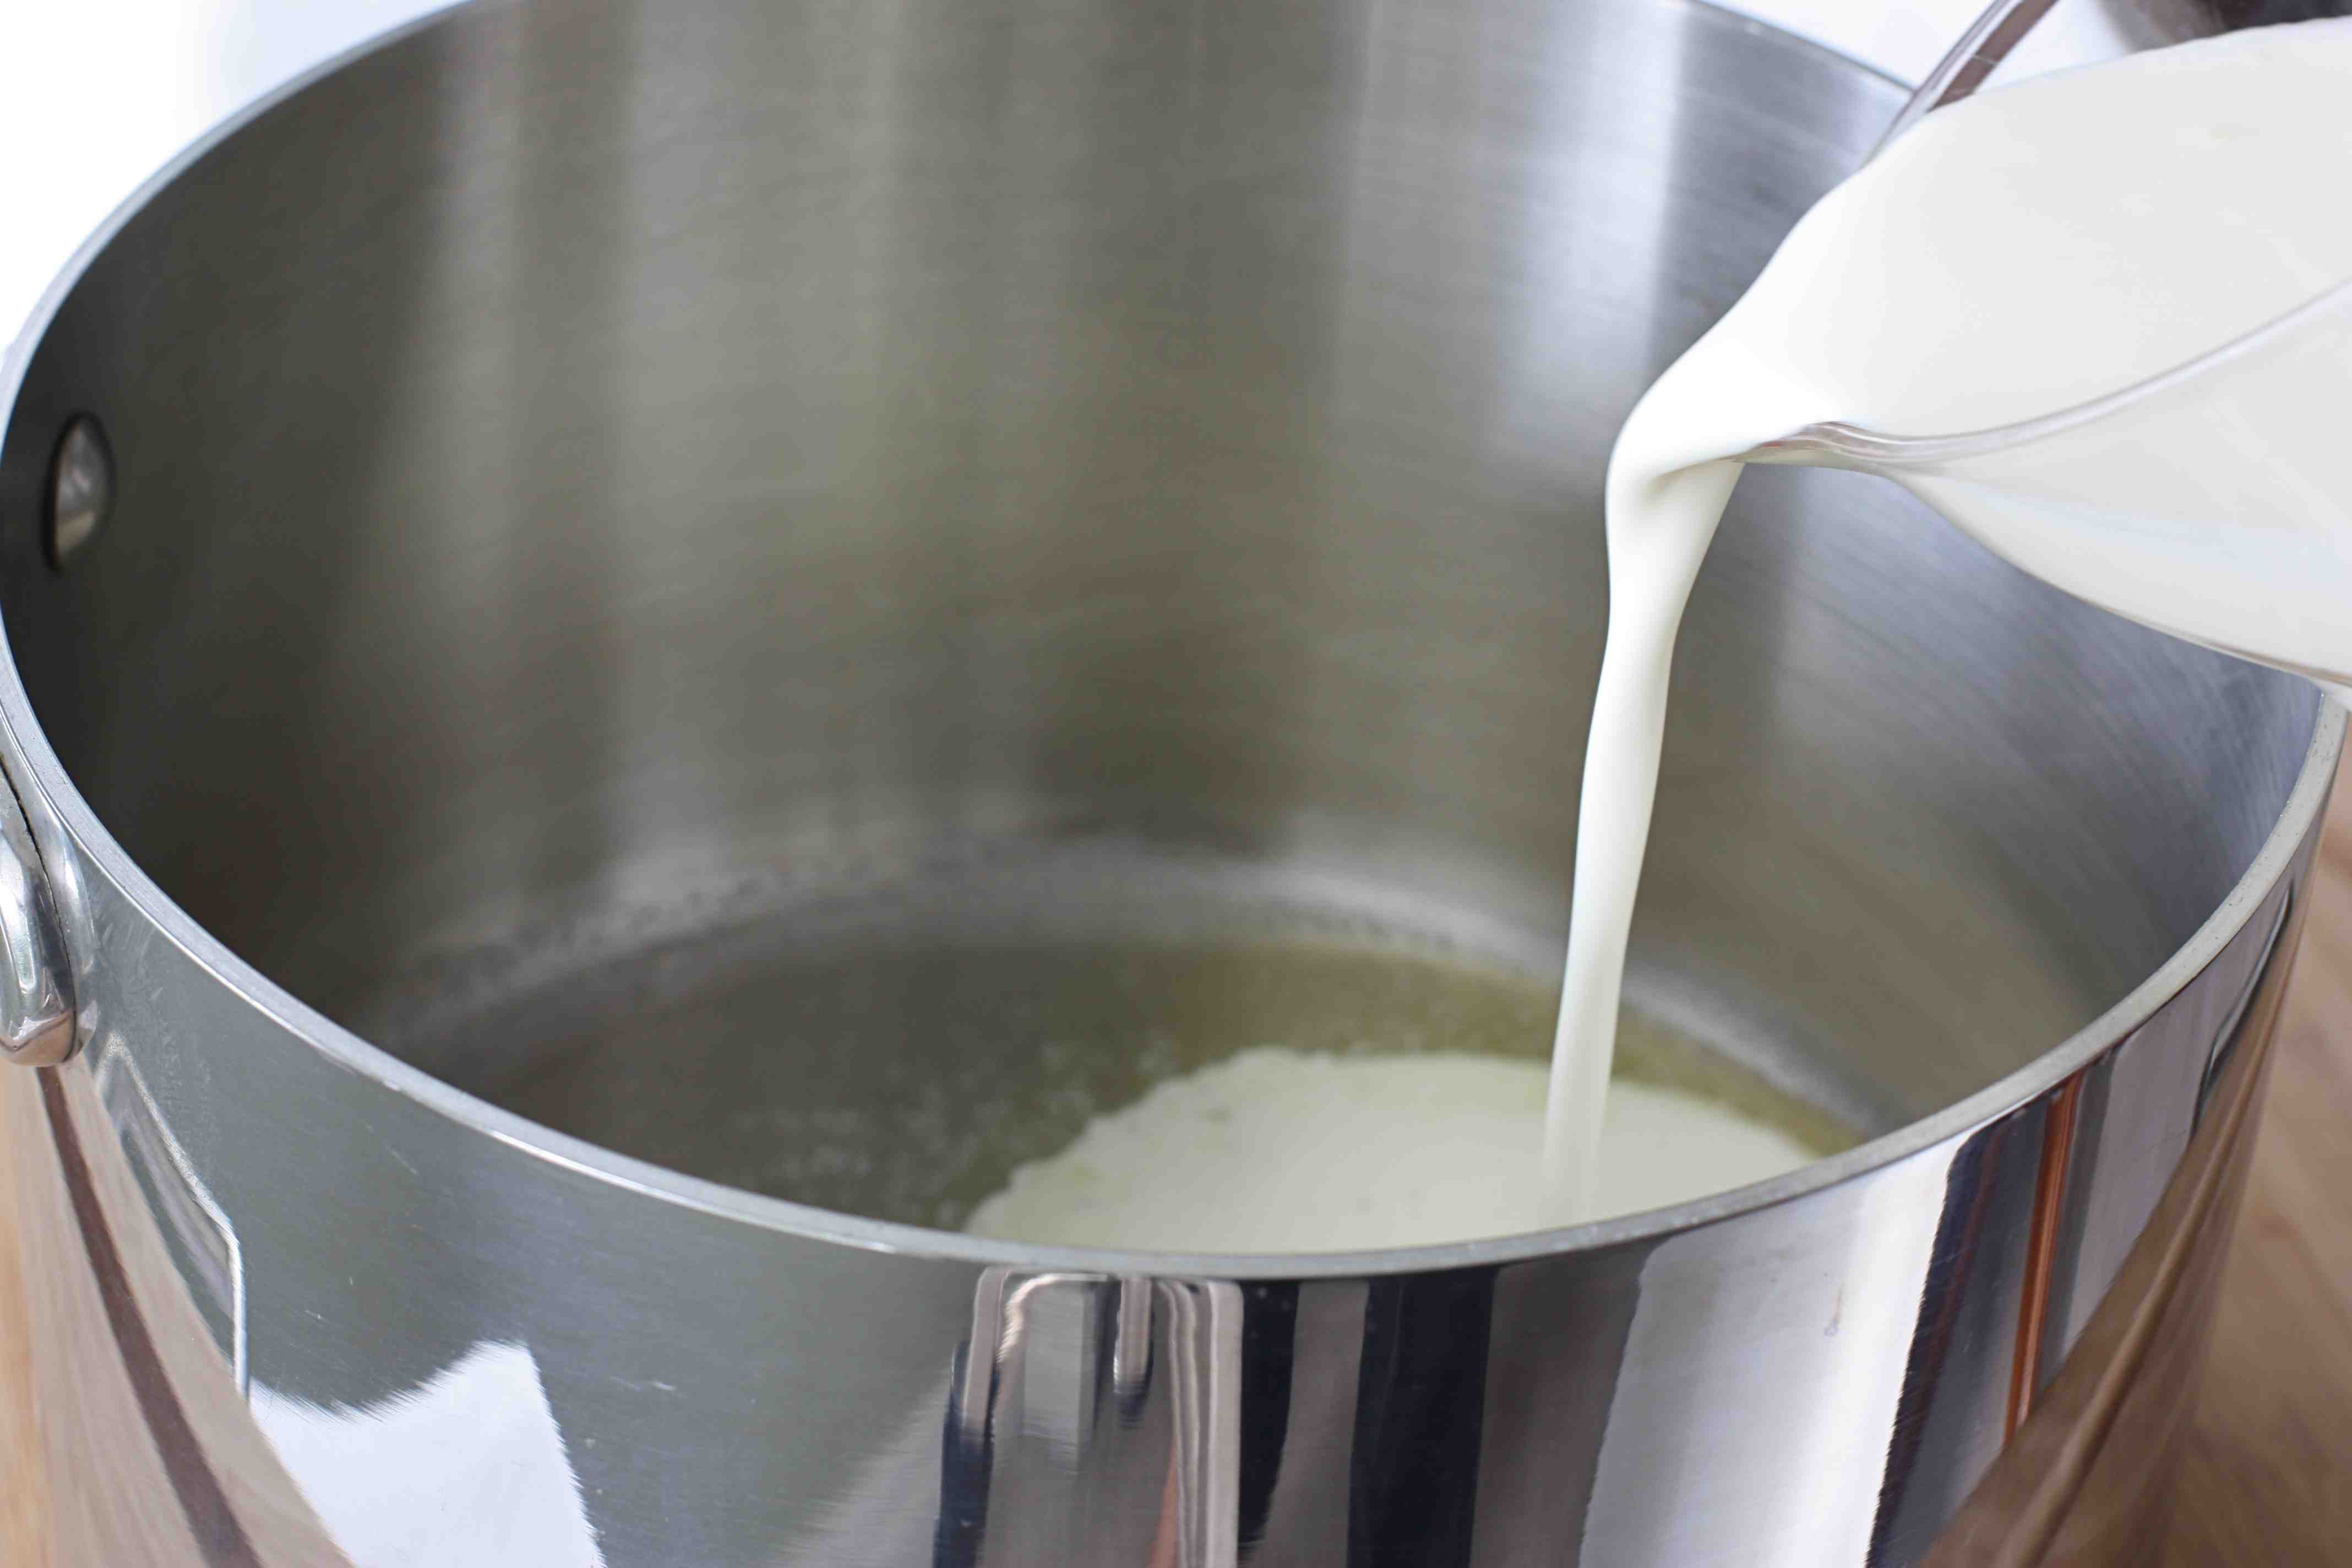
In a medium saucepan set over medium heat, melt the butter. Be certain the butter does not burn. Add heavy cream, maple syrup, and corn syrup.

Bring the mixture to a gentle simmer, adjusting the heat, if necessary. Allow the mixture to simmer for 20-30 minutes, stirring occasionally. Remember when your parents told you that good things come to those who wait? Well, this wait will be torture but oh, so worth it.

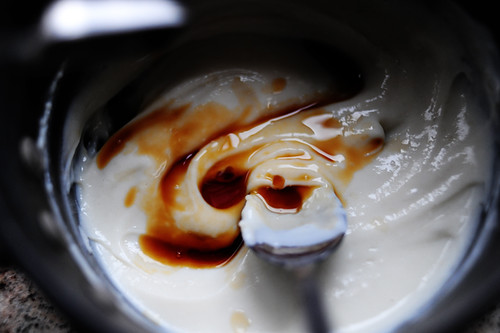
The sauce is done when it is reduced by about one-third and turns a light caramel brown.


Tasty Kitchen Blog: White Chocolate Walnut Blondies with Maple Butter Sauce. Guest post by Dara Michalski of Cookin' Canuck, recipe submitted by TK member Brandie of The Country Cook.

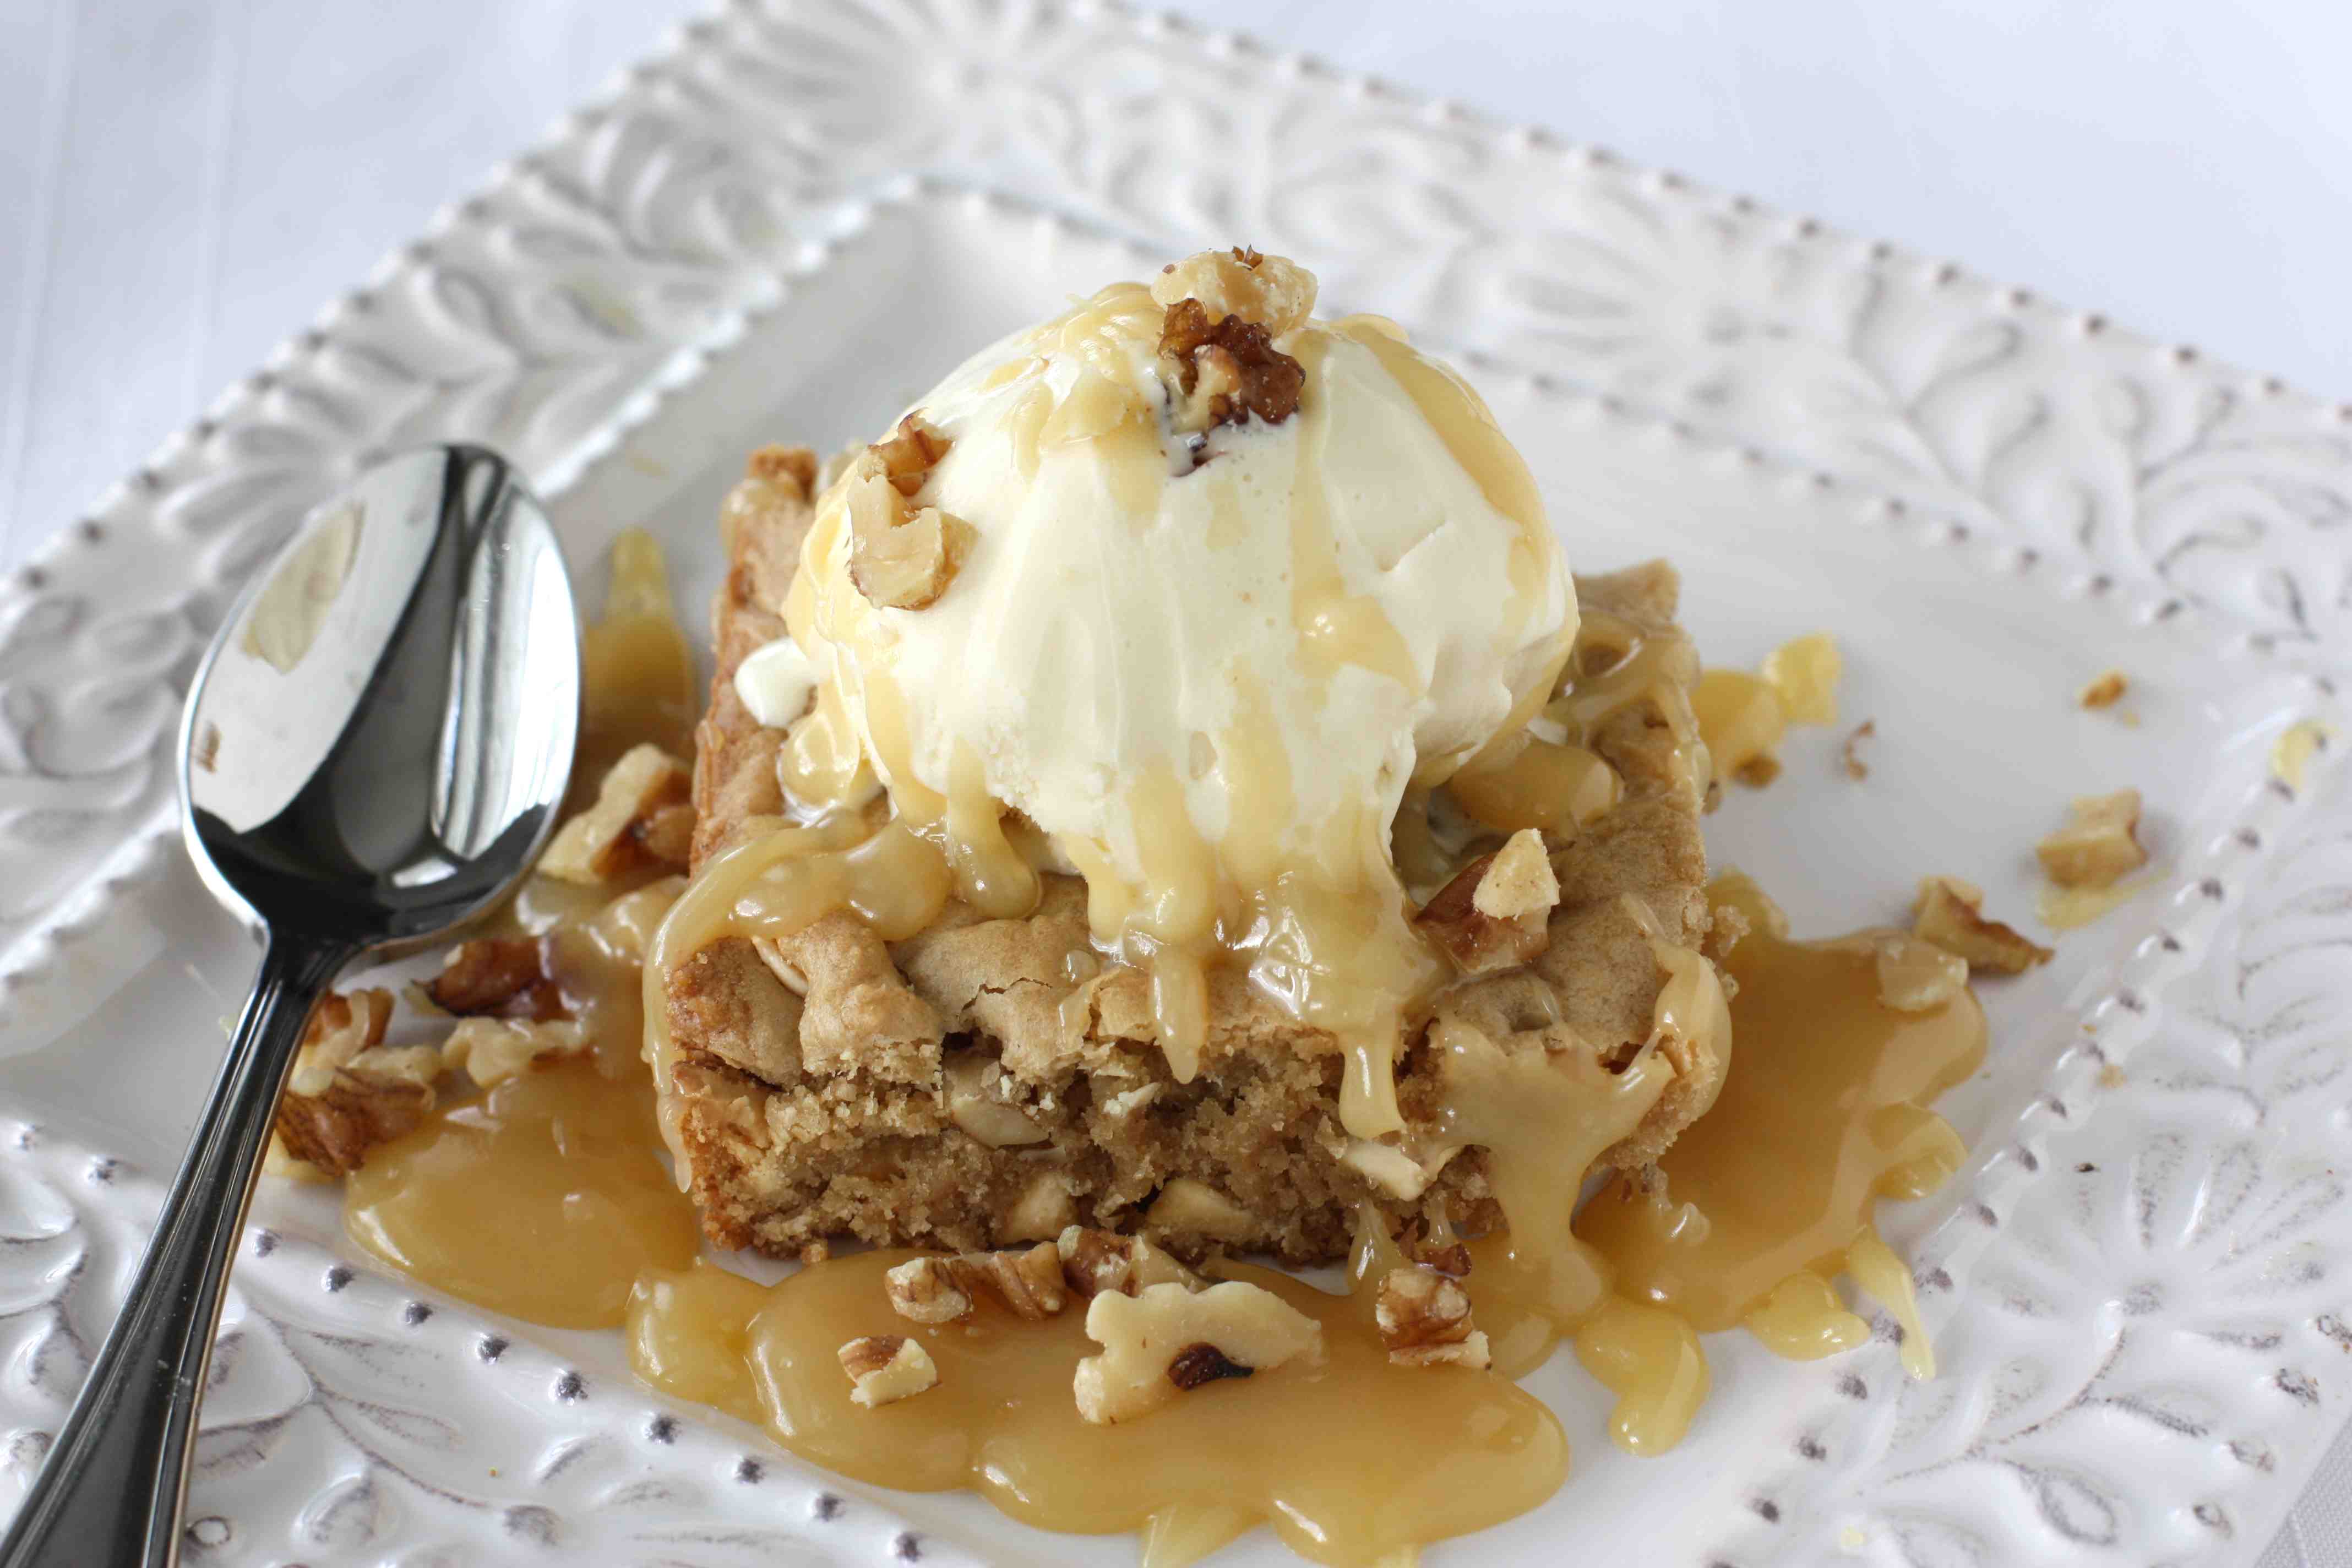
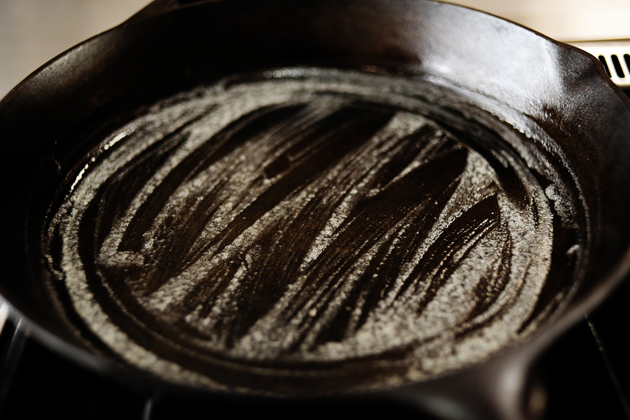
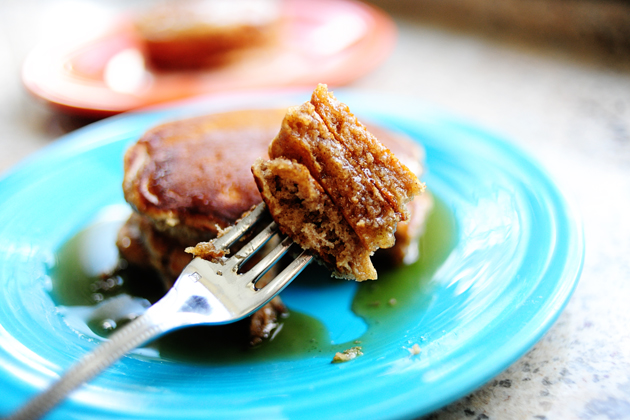
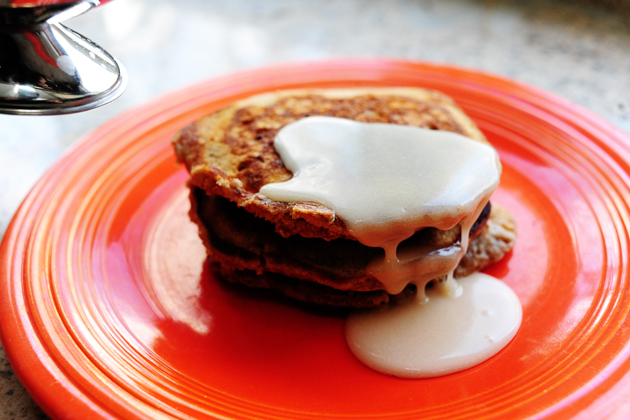
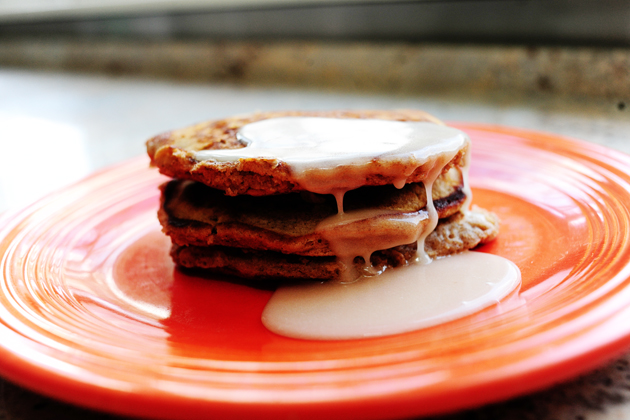
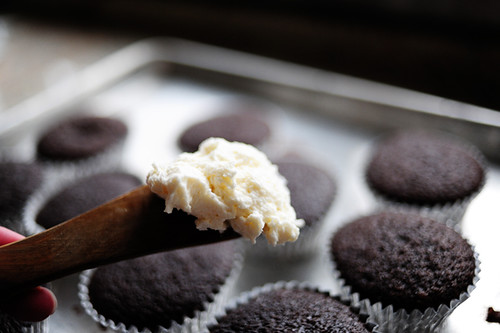
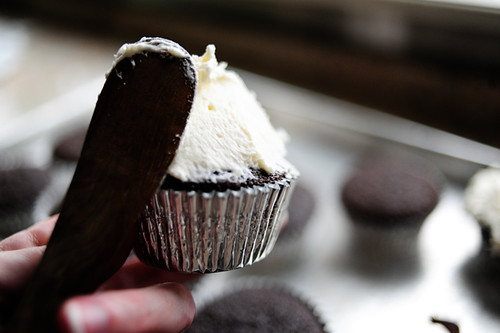
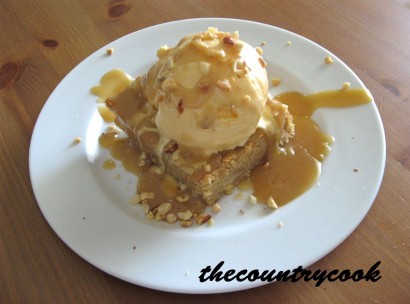
If you want to serve warm brownies (and, really, who doesn’t), warm them in the microwave for about 30 seconds or in a cast iron skillet. These brownies are just begging for ice cream and you do not want to disappoint them. Drizzle the sauce over top and garnish with more chopped walnuts.

Brandie suggests doubling the sauce and I would have to agree. There is no need to skimp on this buttery goodness.

Thank you to Brandie for this decadent, irresistible recipe. Visit her blog, The Country Cook, for more of her recipes!


Printable Recipe

White Chocolate Walnut Blondies with Maple Butter Sauce

4.80 Mitt(s) 15 Rating(s)15 votes, average: 4.80 out of 515 votes, average: 4.80 out of 515 votes, average: 4.80 out of 515 votes, average: 4.80 out of 515 votes, average: 4.80 out of 5

Prep Time:

Cook Time:

Difficulty: Easy

Servings: 12

12
x

Print Options

Page size Letter 3x5 4x6
Text Size Small Medium Large
Content Include description
Include prep time, etc.
Show image

Description

Similar to my favorite Applebee’s dessert. Not an exact copy…but it is still pretty dang good!
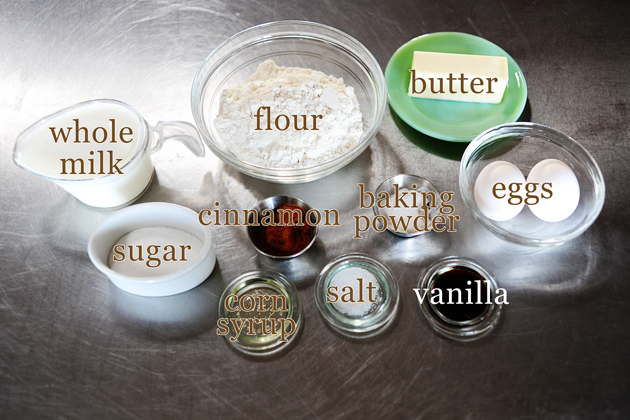
Ingredients

  • FOR THE BLONDIES:
  • 3 cups All-purpose Flour
  • ¼ teaspoons Salt
  • 1 teaspoon Baking Powder
  • 10 Tablespoons Unsalted Butter, melted
  • 2 cups Light Brown Sugar
  • 3 whole Eggs, Lightly Beaten
  • 1 teaspoon Vanilla Extract
  • ½ cups Chopped Walnuts
  • 1 cup White Chocolate Chips
  • _____
  • FOR THE SAUCE:
  • 2 Tablespoons Unsalted Butter
  • 1-½ cup Heavy Cream
  • 6 Tablespoons Maple Syrup
  • 3 Tablespoons Light Corn Syrup
  • Optional Garnish: Vanilla Ice Cream, Chopped Walnuts

Preparation Instructions

Preheat oven to 350 degrees F.

In a medium bowl, sift together flour, salt & baking powder. Set aside.

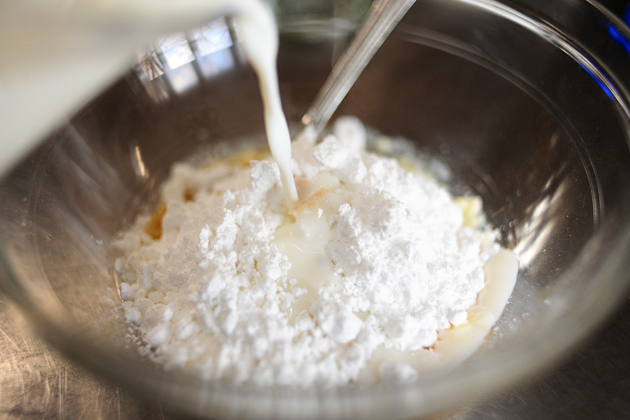
In another large mixing bowl, mix melted butter with brown sugar until well-blended. Add in beaten eggs and vanilla. Stir well.

Slowly add flour mixture to butter/sugar/egg mixture. Stir thoroughly but take care not to overmix your batter. Fold in nuts and chocolate. Batter will be thick.

Spray pan with nonstick cooking spray, then pour batter into 9 x 13 baking pan. Bake for about 25-30 minutes (until a toothpick inserted comes out clean).

For the sauce:
Melt butter in a medium sauce pan over medium heat (do not allow butter to burn). Then add heavy cream, maple syrup and corn syrup. Allow this mixture to simmer over medium heat for about 20-30 minutes. This is the hard part: waiting for the mixture to reduce and thicken. You don’t want to bring this to a boil, just a nice, slightly bubbly simmer. Stir it occasionally. Once it has reduced by about a 1/3, it’s ready.

To serve: you can heat up blondie on a cast iron skillet and serve with a scoop of vanilla ice cream or you can just heat a slice of blondie on a plate in your microwave for about 25 seconds. Add a scoop of ice cream on top then pour the warm maple butter sauce on top and sprinkle with chopped walnuts.

Cook’s note: if using a glass pan, adjust heat to 325 degrees F. You may have to bake slightly longer than given time. Also, you may want to double up the maple butter sauce recipe. It really is the best part. We love a lot of sauce on ours (as you can tell from the picture!).


_______________________________________

Dara Michalski is a doll and a sweetheart who clearly knows her way around the kitchen. She blogs at Cookin’ Canuck, where she shares her flavor-packed recipes and fun, engaging writing. The photography’s pretty incredible, too.


Profile photo of Ree | The Pioneer Woman

Mixer Winners – And Pancake Redux

Posted by in Step-by-Step Recipes

Here are the winners of the KitchenAid mixers.

I can’t thank you all enough for your great feedback; I’ve been reading and taking notes!

Winner #1: Shawn “Tasty Kitchen has been a wonderful resource for finding good recipes to make for our family and for special occasions. It’s very helpful having photos of the recipes for reference. I’m always looking for quick and healthy family meals that everyone in the family will eat.”

Winner #2 Kara: “I heart TK and rely on it more than my cookbooks. If possible, it would be cool if we could have an online recipe box or some way to bookmark. I love the unique names of recipes, but unless you have a better memory than me, they are hard to find again unless you print them right then. An ingredient match would be cool too. Say you enter (chicken, mushrooms, heavy cream) and it matches your ingredients with a recipe that includes those. Hey you said bells and whistles, a girl can dream! Ha, it is already an awesome site!”

Winner #3 Elly: “I am not sure this will help you, but I LOVE the replies from people that have used the recipe and tips given for alternate ways to adjust the recipe. Participation is a great part of this site.”

Congrats, winners! Contact [email protected] to claim your loot.

Here’s a redux of a pancake recipe from last spring. Perfect for Saturday morning!

***********


Here’s what you’ll need. Nothin’ difficult here!


First combine all the dry ingredients in a bowl.


Then whisk it together until totally combined.


Next, combine the remaining ingredients in a separate bowl…


And whisk them together to combine.


Next, combine the wet ingredients with the dry ingredients.


Stir gently to combine.


Heat a skillet over medium-low heat, then smear butter over the surface.


Use a 1/4 cup measure to drop batter onto the skillet.


Cook until you start to see bubbles. Then flip ‘em over and cook on the other side!


Now, we’ll serve this first batch with butter and maple syrup, of course. Of course.


And when I say butter…I mean butter.


And when I say syrup…


I mean syrup, baby.


Okay, that’s the traditional route. You could stop here and be happy forever and ever.

 
But “happy forever and ever” isn’t enough for me.

 
In her recipe, sapeylissy suggests serving these pancakes with icing, recreating the true “cinnamon bun” effect. So I decided to whip up a little bit of a butter/syrup icing.


Throw some butter into a bowl…


Melt it for about 30 seconds…


Then dump in some powdered sugar.


Now throw in some maple syrup. Maple extract would be okay, too.


And some milk.


Then just whisk it together until it’s perfectly smooth and combined. You could also warm this up a little bit before serving.


So ideally, one would place the pancakes on a plate and gingerly drizzle this buttery/mapley icing lightly over the top. But I sorta got carried away and poured a whole tankload on there.


Sorry.


Oops! Sorry again.

I don’t know what came over me.

I really loved both approaches—the maple syrup/butter approach AND the icing approach. I think there wouldn’t be anything wrong with serving both.

Thank you to sapeylissy for the yummy recipe!

Here’s the printable for the pancakes:

Cinnamon Bun Pancakes

Here’s the simple icing recipe:

Maple-Butter Icing for Pancakes

And in case you missed it, here’s Erika’s post on Pancakes, which includes links to many different pancake recipes here on Tasty Kitchen.

The Theme is…Pancakes!

Enjoy!

Profile photo of missamy

Pumpkin Creme Pies

Posted by in Baking, Step-by-Step Recipes

Tasty Kitchen Blog: Pumpkin Creme Pies. Guest post by Amy Johnson of She Wears Many Hats, recipe submitted by TK member The Deutsch Girl.

 
While searching for some goodies to bake during the upcoming holidays, I stumbled across this yummy recipe submitted by TK member The Deutsch Girl for Pumpkin Creme Pies, the perfect portable fall treat. I grew up eating Oatmeal Creme Pies, but never enjoyed a pumpkin version. This time of the year, pumpkin anything is good with me, but soft pumpkin cookies filled with a yummy cream cheese filling sounded over-the-top yum!

Now before we get started, don’t let the long list of ingredients and process scare you off from making these tasty pies. The ingredients are basic, most of which you probably have on hand. And the process may seem complicated, but it’s all very simple.

Here, let me show you.


Tasty Kitchen Blog: Pumpkin Creme Pies. Guest post by Amy Johnson of She Wears Many Hats, recipe submitted by TK member The Deutsch Girl.

For the pies, you’ll need brown sugar, sugar, vegetable oil, eggs, vanilla extract, baking soda, and baking powder.


Tasty Kitchen Blog: Pumpkin Creme Pies. Guest post by Amy Johnson of She Wears Many Hats, recipe submitted by TK member The Deutsch Girl.

You’ll also need canned pumpkin, cinnamon, ginger, salt, ground nutmeg, and ground cloves.

(Remember: you can find the full recipe at the end of the post, with all ingredient measurements and instructions listed. And it’s printable too!)


Tasty Kitchen Blog: Pumpkin Creme Pies. Guest post by Amy Johnson of She Wears Many Hats, recipe submitted by TK member The Deutsch Girl.

The creme filling ingredients are simple: cream cheese, butter, powdered sugar, vanilla extract and cinnamon.

Preheat your oven to 350° F.


Tasty Kitchen Blog: Pumpkin Creme Pies. Guest post by Amy Johnson of She Wears Many Hats, recipe submitted by TK member The Deutsch Girl.

To make the job a little easier later on, individual parchment paper squares will come in handy. Go ahead and cut out 48 squares about 3″ wide. Line your baking sheet(s) so they’ll be ready when you need them.


Tasty Kitchen Blog: Pumpkin Creme Pies. Guest post by Amy Johnson of She Wears Many Hats, recipe submitted by TK member The Deutsch Girl.

For the pumpkin pies, in a mixer bowl add the brown sugar, sugar, oil, and pumpkin.


Tasty Kitchen Blog: Pumpkin Creme Pies. Guest post by Amy Johnson of She Wears Many Hats, recipe submitted by TK member The Deutsch Girl.

Beat together well.


Tasty Kitchen Blog: Pumpkin Creme Pies. Guest post by Amy Johnson of She Wears Many Hats, recipe submitted by TK member The Deutsch Girl.

Then add eggs one at a time. Be sure to combine well after each egg is added.


Tasty Kitchen Blog: Pumpkin Creme Pies. Guest post by Amy Johnson of She Wears Many Hats, recipe submitted by TK member The Deutsch Girl.

The vanilla goes in next. Mix it all up. Pretty color huh?


Tasty Kitchen Blog: Pumpkin Creme Pies. Guest post by Amy Johnson of She Wears Many Hats, recipe submitted by TK member The Deutsch Girl.

Now for the dry ingredients. In a separate bowl, mix together the flour, baking soda, baking powder, cinnamon, ground ginger, salt, ground nutmeg, and ground cloves. A whisk helps to incorporate the ingredients without compacting them.


Tasty Kitchen Blog: Pumpkin Creme Pies. Guest post by Amy Johnson of She Wears Many Hats, recipe submitted by TK member The Deutsch Girl.

Add the dry ingredients into the wet pumpkin mixture.


Tasty Kitchen Blog: Pumpkin Creme Pies. Guest post by Amy Johnson of She Wears Many Hats, recipe submitted by TK member The Deutsch Girl.

Mix together until just combined. Be sure not to over-mix. Scrape down the sides of the bowl when needed. Things should be starting to smell all warm and cozy and mouth-watery good right about now.

Okay, now for the part that may turn some of you off, but don’t go! Stick around. It’s not that difficult. It only looks like a pain. But it’s fun. Promise.

Using a pastry bag or large zipper plastic bag, the pumpkin pies will be piped out onto the parchment squares. It only looks tedious. It goes very quickly, or I would’ve dropped the whole thing and headed for the box of Little Debbies.


Tasty Kitchen Blog: Pumpkin Creme Pies. Guest post by Amy Johnson of She Wears Many Hats, recipe submitted by TK member The Deutsch Girl.

This is how I do it; stand the pastry bag (or plastic zip top bag) in a tall sturdy glass, and fold the sides down a bit.


Tasty Kitchen Blog: Pumpkin Creme Pies. Guest post by Amy Johnson of She Wears Many Hats, recipe submitted by TK member The Deutsch Girl.

Then fill the bag with a portion of the batter. Roll the sides of the bag back up and twist closed, to keep batter from coming out. Snip about 3/8-1/2″ off the end of the bag. Once the end is clipped, the batter will be ready to flow, so be careful to keep bag tip pinched closed until ready to pipe.

Now, let the piping begin. This is the fun part—the ultimate in kitchen play. Easy stuff y’all.


Tasty Kitchen Blog: Pumpkin Creme Pies. Guest post by Amy Johnson of She Wears Many Hats, recipe submitted by TK member The Deutsch Girl.

Begin in the middle of the 3″ square and pipe a spiral. Go around … and around … and around until you make a circle about 2″ wide. You’ll notice in order to make the pies turn out a little mounded, instead of totally flat, I went back and topped the spiral circles with some extra batter. Just a little, not too much.

Bake the pies for about 11 minutes, or until firm.


Tasty Kitchen Blog: Pumpkin Creme Pies. Guest post by Amy Johnson of She Wears Many Hats, recipe submitted by TK member The Deutsch Girl.

When they’re done baking, carefully transfer the parchment squares to a cooling rack to let the pies completely cool.

Here’s where I think the parchment helped the most: when the pies are cool, you can peel the parchment off the back of each pie. The pies are a little soft, so trying to lift them with a spatula could mess them up. The parchment paper works like a charm.

Now for the cream cheese filling.


Tasty Kitchen Blog: Pumpkin Creme Pies. Guest post by Amy Johnson of She Wears Many Hats, recipe submitted by TK member The Deutsch Girl.

Add the cream cheese and butter to a mixing bowl.


Tasty Kitchen Blog: Pumpkin Creme Pies. Guest post by Amy Johnson of She Wears Many Hats, recipe submitted by TK member The Deutsch Girl.

Beat together the cream cheese and butter until well incorporated.


Tasty Kitchen Blog: Pumpkin Creme Pies. Guest post by Amy Johnson of She Wears Many Hats, recipe submitted by TK member The Deutsch Girl.

Next add the powdered sugar, vanilla and cinnamon and mix well.


Tasty Kitchen Blog: Pumpkin Creme Pies. Guest post by Amy Johnson of She Wears Many Hats, recipe submitted by TK member The Deutsch Girl.

Please note: this filling is the bomb. It just is. It should definitely be kept in your arsenal for other baked goods.

Yum. Yum. Yum.

Enough of that. Moving right along.

But don’t forget that y’all.

Don’t. It’s good stuff.

For realz.

Okay, really. I’m finished now. Now for building the finished product.


Tasty Kitchen Blog: Pumpkin Creme Pies. Guest post by Amy Johnson of She Wears Many Hats, recipe submitted by TK member The Deutsch Girl.

Frost the flat side of a pie with the yummy, delicious, make-you-drool filling. Top with another pie, flat side down.

And there you have it. A cute, tasty Pumpkin Creme Pie.


Tasty Kitchen Blog: Pumpkin Creme Pies. Guest post by Amy Johnson of She Wears Many Hats, recipe submitted by TK member The Deutsch Girl.

You’ll want to enjoy right away or chill, up to a couple of days, covered on parchment or waxed paper. The pies can be a tad bit sticky so the parchment paper or waxed paper is definitely recommended. These are such a treat and didn’t last long around here. This recipe makes about 24 finished Pumpkin Creme Pies. Mini versions of these would be so cute, wouldn’t they?

Enjoy! And again, a big thanks to The Deutsch Girl for sharing this one. Mighty fine indeed.


Printable Recipe

Pumpkin Creme Pies

4.86 Mitt(s) 52 Rating(s)52 votes, average: 4.86 out of 552 votes, average: 4.86 out of 552 votes, average: 4.86 out of 552 votes, average: 4.86 out of 552 votes, average: 4.86 out of 5

Prep Time:

Cook Time:

Difficulty: Easy

Servings: 12

12
x

Print Options

Page size Letter 3x5 4x6
Text Size Small Medium Large
Content Include description
Include prep time, etc.
Show image

Description

A delicious twist on the traditional oatmeal creme pie. Very easy to make, looks professional, and has the perfect amount of pumpkin flavor without overpowering. Add to your Thanksgiving dinner for a non-traditional pumpkin flavored dessert!

Ingredients

  • For Creme Pies
  • 1 cup Brown Sugar
  • 1 cup Sugar
  • 1 cup Vegetable Oil
  • 1 can Pumpkin (15 Oz.)
  • 2 whole Eggs
  • 1 teaspoon Vanilla Extract
  • 3 cups All-purpose Flour
  • 1 teaspoon Baking Soda
  • 1 teaspoon Baking Powder
  • 1 Tablespoon Cinnamon
  • 1 teaspoon Ground Ginger
  • ½ teaspoons Salt
  • ½ teaspoons Ground Nutmeg
  • ¼ teaspoons Ground Cloves
  • _____
  • FOR FILLING:
  • 1 package Cream Cheese Softened (8 Oz.)
  • 1 stick Unsalted Butter, Room Temperature
  • 1 package Powdered Sugar (16 Oz.)
  • 3 drops Vanilla Extract
  • 2 dashes Cinnamon

Preparation Instructions

Preheat oven to 350 degrees.

Pumpkin Creme Pies: Beat together brown sugar, sugar, oil and pumpkin. Add eggs one at time, mixing well after each addition, followed by the vanilla.

In a separate bowl, mix together the dry ingredients.

Slowly incorporate the dry ingredients into the wet until just combined.

Cut 3 inch squares of parchment paper, about 24. Using a pastry bag with a round tip, or a big zip top plastic bag with one corner snipped, squeeze out concentric circles of batter, starting from the middle and working outward until the circles are about 2 inches in diameter. (Note that the squares allow the baker to move the square while keeping the bag in the same spot. Just squeeze for easy circle making!)

Transfer each square to a baking sheet. Bake for 11 minutes, or until firm, and cool on a rack.

Cream Cheese Filling: Beat together cream cheese and butter. Add powdered sugar, vanilla and cinnamon. Frost flat side of half the pies and top with another piece.

Enjoy right away, or chill overnight. These keep very nicely in the fridge for at least a few days.


_______________________________________

Amy Johnson is a blogger who writes about food, travel, the home (both inside and out), and various observations and random musings about anything and everything. Visit her blog She Wears Many Hats for a dose of deliciousness, practicality, hilarity, or just plain fun. She lives in South Carolina with her husband and two children.


Profile photo of Ree | The Pioneer Woman

That’s STILL the Best Frosting I’ve Ever Had

Posted by in Baking, Step-by-Step Recipes

The mixer giveaway is still going on through noon today and winners will be announced Friday. Meanwhile, I wanted to re-post this recipe again for a slightly controversial frosting that I love so much I just made it again this week. And I realize it’s strange to call frosting controversial, but the comments on the original post did show mixed reactions and results. I happen to love it. Let me know if you’ve tried it yet!

From the TK Blog archives – March 2010

I’ve been intrigued with this frosting recipe for months, not just because of its alluring title, but also because if its ingredients. Five tablespoons of flour? In frosting? Let’s just say my interest was piqued.

I finally got around to making it yesterday evening; Marlboro Man’s grandmother has some old friends staying at The Lodge and I wanted to take them a treat. So I whipped up this frosting, slapped it on some chocolate cupcakes…and wound up considering not sharing them with the guests because it was so delicious.

You owe it to yourself to make this frosting sometime in your life.

You’ll just have to trust me on this.

Thank you, MissyDew, for submitting!

Here’s how you make it:


TPW_0331

First things first: I made chocolate sheet cake cupcakes. They’re the best cupcakes around.

Here’s the recipe:

The Best Chocolate Sheet Cake (or Cupcakes!) Ever

Let your cupcakes (or cake) cool completely.


TPW_0311

Begin by pouring 5 tablespoons of flour into 1 cup of milk. I used whole milk because I can if I want.


TPW_0312

After adding the flour, whisk it together until combined, then place the saucepan over medium heat. Whisk it as it heats up and thickens, and stop when the mixture is very thick.

Cool the mixture completely.


TPW_0315

TPW_0320

The mixture will be very, very thick.


TPW_0348

Add 1 teaspoon of vanilla to the cooled flour/milk mixture.


TPW_0351

TPW_0356

Stir it around to combine.


TPW_0324


TPW_0346

Pour one cup of sugar into a bowl with one cup of butter.


TPW_0360

Whip it around until it’s light and fluffy, scraping the bowl once or twice to make sure it’s all mixed well.


TPW_0364

Add the cooled flour/milk/vanilla mixture. Make sure it’s not the least bit warm!

 
I’m bossy. Sorry.


TPW_0369

Next, just whip it on medium-high until the mixture resembled whipped cream.


TPW_0378

This was slightly tricky for me, as I was afraid of overbeating the mixture and causing everything to start breaking down and falling apart. I’d say this is about 45 seconds of pretty hard beating.


TPW_0385

And then it was time for the rubber to meet the road.


TPW_0386

TPW_0391

TPW_0397

This was spread with a big spatula…


TPW_0400

This was spread with a dinner knife. The frosting definitely has a whipped cream consistency; it’s not thick like a decorator icing.


TPW_0423

Before I allowed myself to taste it, I made some sprinkled ones for my punks.


TPW_0427

TPW_0429

TPW_0432

This makes for a crunchy cupcake!


And now…for the moment of truth.

 
TPW_0419

THE VERDICT: Okay. Let me just explain something to you. After I took this bite, I looked around for the hidden camera. I was certain someone was playing a trick on me. This frosting is so UNBELIEVABLY divine, I almost couldn’t believe what was happening to me. The consistency is light, the flavor indescribably delicious, and a perfect complement to the rich chocolate cake. And don’t just take my word for it—after my daughter took her first bite, she looked at me and said “WHAT is this FROSTING?”

Even she knew she was in the presence of greatness.

Here’s the frosting recipe:

That’s the Best Frosting I’ve Ever Had

Note: I would probably recommend making the frosting on the same day you intend to serve it.

Thank you to MissyDew for sharing such a great recipe!


Profile photo of Erica Lea

Outrageous Garlic Soup

Posted by in Step-by-Step Recipes

  Are you ready for this? Garlic. Onions. Cream. White wine. Oh, yes. These are just a few of the ingredients that combine to make this wonderful, creamy soup, brought to us by n8tivenyer. I made this soup for our family. It was a big hit. Dad loved it—had several bowls of it. Even Grandma […]

Profile photo of Ree | The Pioneer Woman

Looks Delicious! Roasted Cinnamon Pear Bruschetta

Posted by in Looks Delicious!

  This recipe, submitted by Tasty Kitchen member HowSweetEats, caught my eye for many reasons. The roasted cinnamon pears. The mascarpone. The word “bruschetta,” which only evokes lovely thoughts for me. This would be such a winning appetizer for a holiday party! Thank you, Jessica! Check out Jessica’s food blog, How Sweet It Is. So […]

Profile photo of Erika (TK)

Comfort Food: Mac and Cheese

Posted by in The Theme Is...

  I’ve been meaning to do something here to celebrate the new (well, not so new now) Comfort Food category over at The Pioneer Woman Cooks. It’s loaded with goodies like fried round steak and potatoes au gratin, but for today, I want to focus on one of the most beloved comfort foods of all […]

Profile photo of Erika (TK)

Looks Delicious! Classic Pizza Margherita

Posted by in Looks Delicious!

  Sometimes, all I want is a pizza with simple ingredients. A pizza with classic toppings that uses fresh tomatoes instead of sauce. Whole wheat bread flour in the crust is a plus, too. This Classic Pizza Margherita from Tk member Jessica looks absolutely delicious, and I really like the addition of ricotta and artichoke […]