The Pioneer Woman Tasty Kitchen
Profile photo of cookincanuck

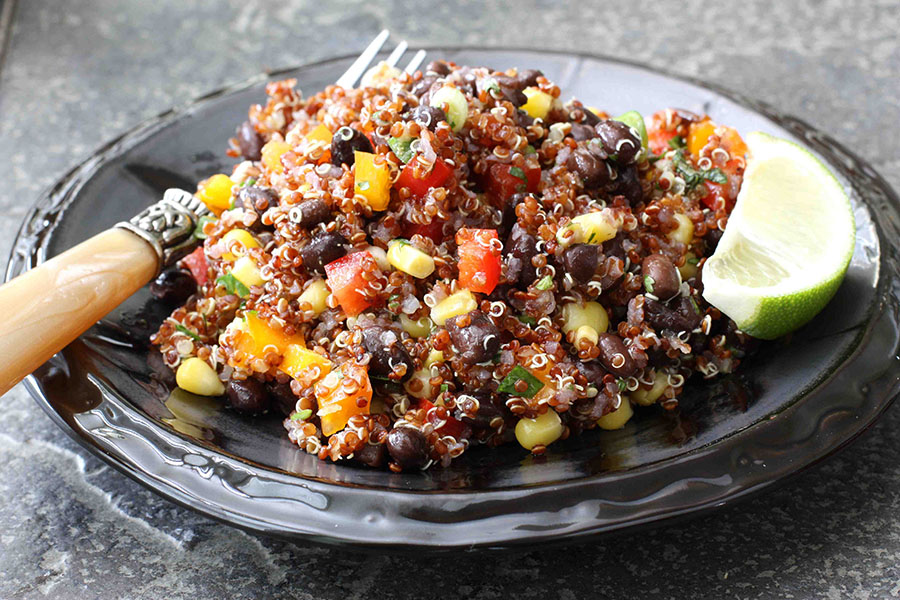
Red Quinoa and Black Bean Salad

Posted by in Step-by-Step Recipes

Tasty Kitchen Blog: Red Quinoa and Black Bean Salad. Guest post by Dara Michalski of Cookin' Canuck, recipe submitted by TK member Kay Heritage of The Church Cook.

 
It was many years ago when my mum first set a bowl of quinoa (pronounced keen-wah) in front of me. It didn’t look like rice. To my teenaged self, it resembled something straight out of a hippie-infested Woodstock-ian field. Quinoa is, in fact, a grain that originated in South America and was once known as “the gold of the Incas”. It became a sustaining grain for the people of the Andean region about 6000 years before Jerry Garcia and Janis Joplin performed for the long-tressed flower-carrying children of the sixties.

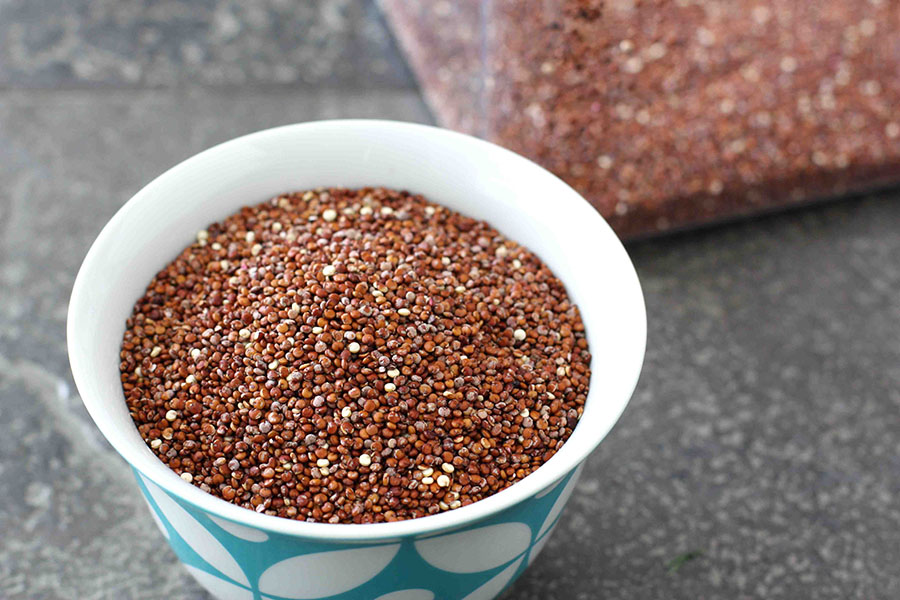
Quinoa can be found in well-stocked supermarkets or health food stores, sold in boxes or in bulk. It is either sold as regular quinoa, which is tan in color, or in this pretty red version. If you are trying to clean up your diet, quinoa is a virtual powerhouse of protein, fiber and folate. I figure I can eat about four slices of bacon for every cup of quinoa I consume. Somehow I don’t think you will find that recommendation sanctioned by any national health organizations, but I can guarantee it will keep that feeling of deprivation in check.

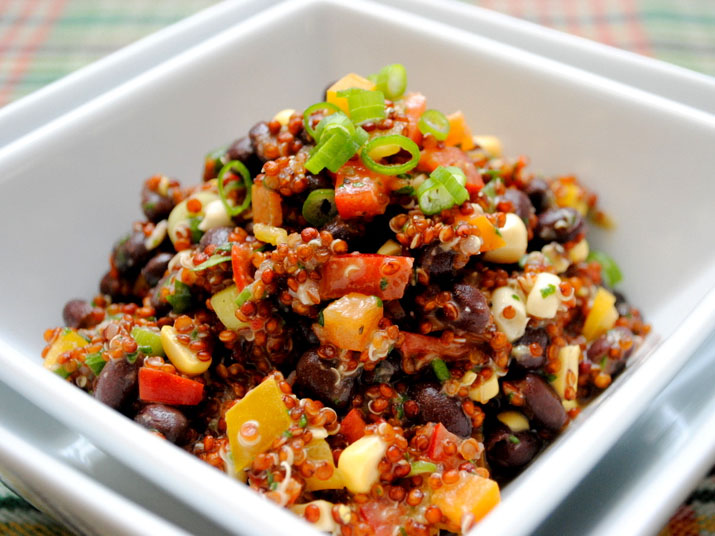
This Red Quinoa and Black Bean Salad by The Church Cook is packed with colorful vegetables, black beans, and a complementary lime-cumin dressing. My husband and I were immediately enamored with the taste and texture of this salad, and proceeded to eat several helpings, either by itself or combined with cooked chicken breast in whole-wheat wraps.

Now, I have a little confession to make. I typically use the lazy cook’s way of preparing quinoa. I simply combine one part quinoa with two parts water in a medium saucepan, bring the mixture to a bowl, cover and reduce the heat to low, and simmer until the quinoa absorbs all of the water, about 20 minutes—just like cooking rice.

However, when I read Kay’s slightly more complicated method, I was up for the challenge. This is the method I am presenting to you in the following photos. Now, a cook that is not as messy as me probably will not spill the quinoa (and end up with a good quantity in her hair) when transferring the quinoa from the cheesecloth to the bowl. By the time I was done, it looked as though a tornado had blown throw my kitchen, leaving a very happy dog (licking the floor) in its wake.

For my own sanity and time considerations on busy weeknights, I will stick with my boil and simmer method. Whichever route you choose, I guarantee that you will be smitten by the tangy dressing, fresh vegetables, tender pop of the quinoa, and the promise of healthy protein and fiber.

Let’s start with the dressing.


Tasty Kitchen Blog: Red Quinoa and Black Bean Salad. Guest post by Dara Michalski of Cookin' Canuck, recipe submitted by TK member Kay Heritage of The Church Cook.

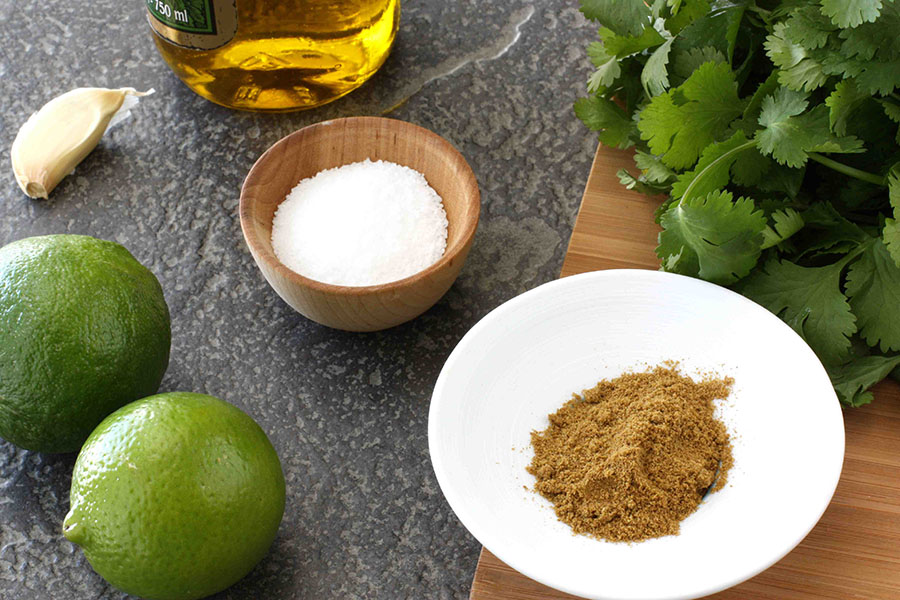
You’ll need fresh lime juice, salt, garlic, cilantro, cumin, and olive oil. You’ll want some freshly ground pepper, too.


Tasty Kitchen Blog: Red Quinoa and Black Bean Salad. Guest post by Dara Michalski of Cookin' Canuck, recipe submitted by TK member Kay Heritage of The Church Cook.

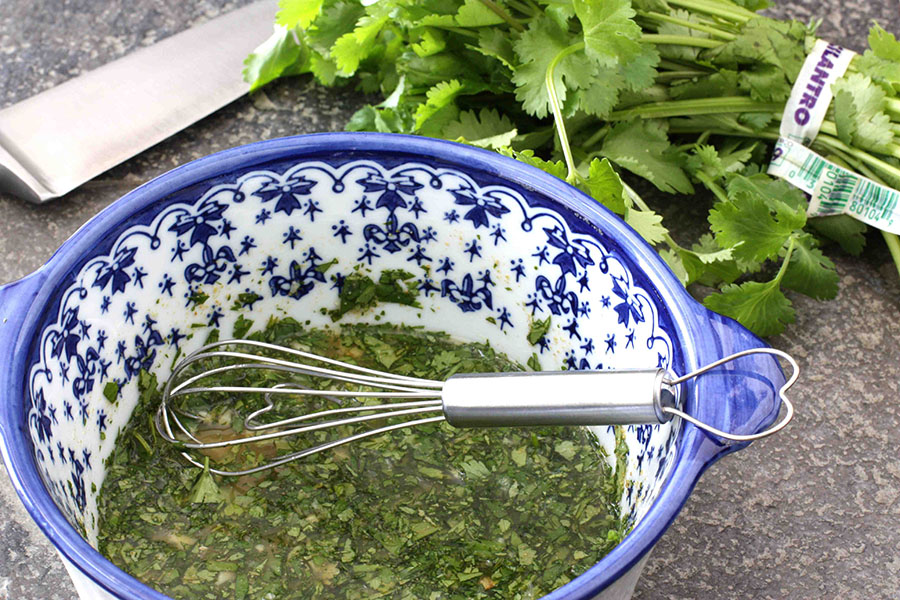
In a small bowl, whisk together lime juice, salt, minced garlic, chopped cilantro, and cumin.


Tasty Kitchen Blog: Red Quinoa and Black Bean Salad. Guest post by Dara Michalski of Cookin' Canuck, recipe submitted by TK member Kay Heritage of The Church Cook.

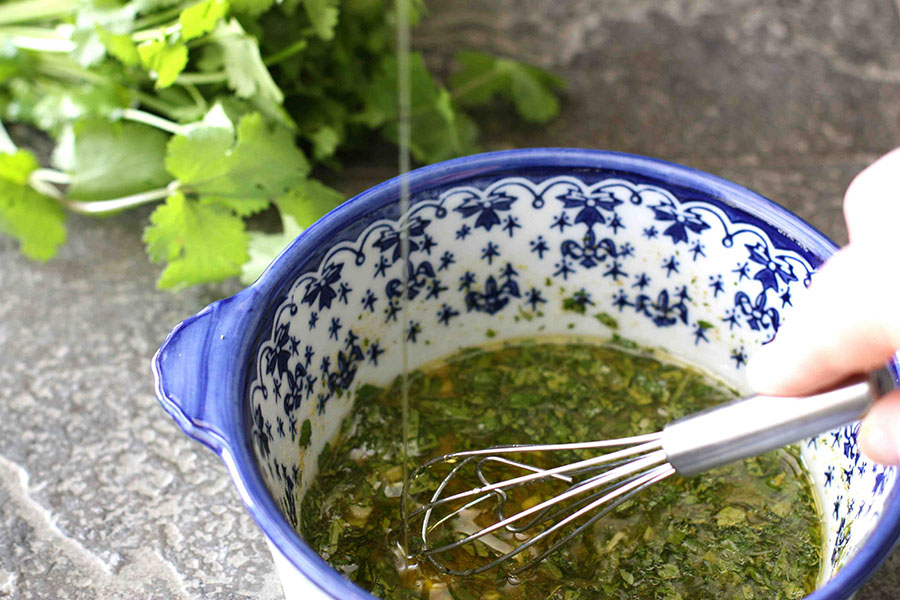
Whisking constantly, slowly add olive oil in a thin stream until combined.

Season with pepper, to taste. Set aside.

Now let’s tackle the quinoa.


Tasty Kitchen Blog: Red Quinoa and Black Bean Salad. Guest post by Dara Michalski of Cookin' Canuck, recipe submitted by TK member Kay Heritage of The Church Cook.

There is a natural coating on quinoa called saponin, which can have a bitter taste. In nature, the saponin helps to repel birds and insects. You have to love a grain that can fend for itself.
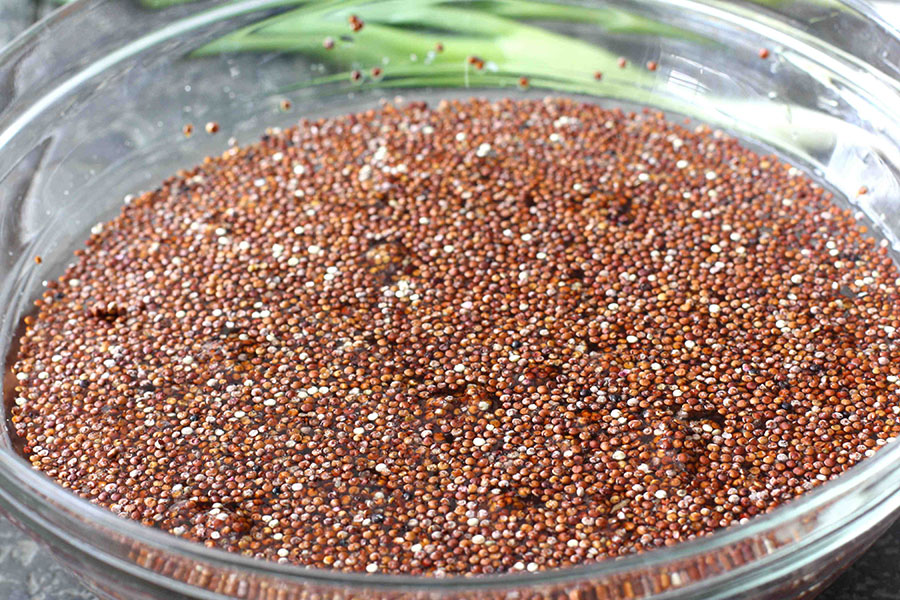


Tasty Kitchen Blog: Red Quinoa and Black Bean Salad. Guest post by Dara Michalski of Cookin' Canuck, recipe submitted by TK member Kay Heritage of The Church Cook.

To remove any bitter taste, rinse the quinoa in several changes of cold water. Each time, let most of the quinoa sink to bottom of the bowl, then pour off the water.
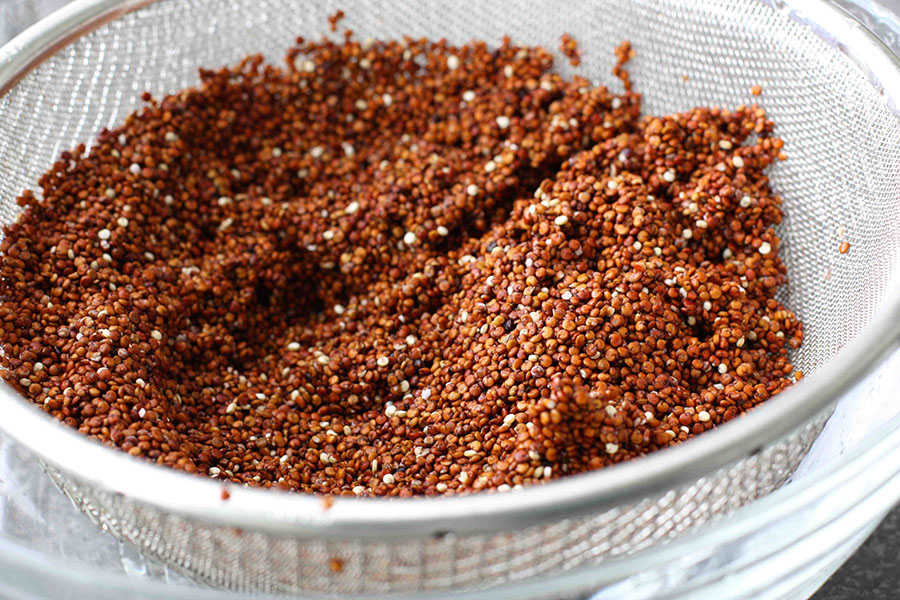


Tasty Kitchen Blog: Red Quinoa and Black Bean Salad. Guest post by Dara Michalski of Cookin' Canuck, recipe submitted by TK member Kay Heritage of The Church Cook.

Strain the quinoa in a large fine mesh sieve.

Bring 1 ½ quarts (about 6 cups) water to a boil in a medium saucepan and add some salt. Pour in the quinoa and boil for 10 minutes.

Meanwhile prepare a colander by lining it with cheesecloth. I used the steamer insert for my double-boiler.
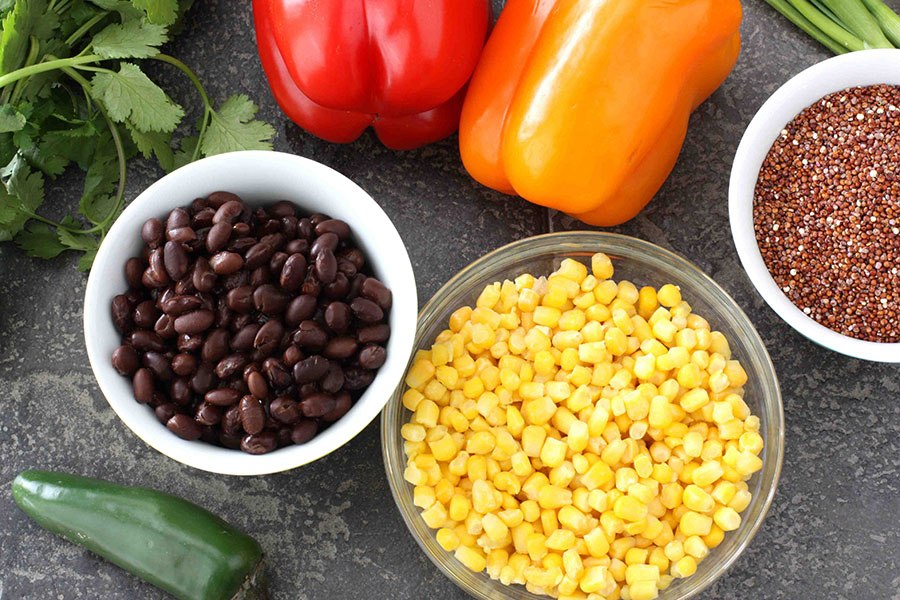


Tasty Kitchen Blog: Red Quinoa and Black Bean Salad. Guest post by Dara Michalski of Cookin' Canuck, recipe submitted by TK member Kay Heritage of The Church Cook.

You can also use this time to prepare the other ingredients that go into this salad.
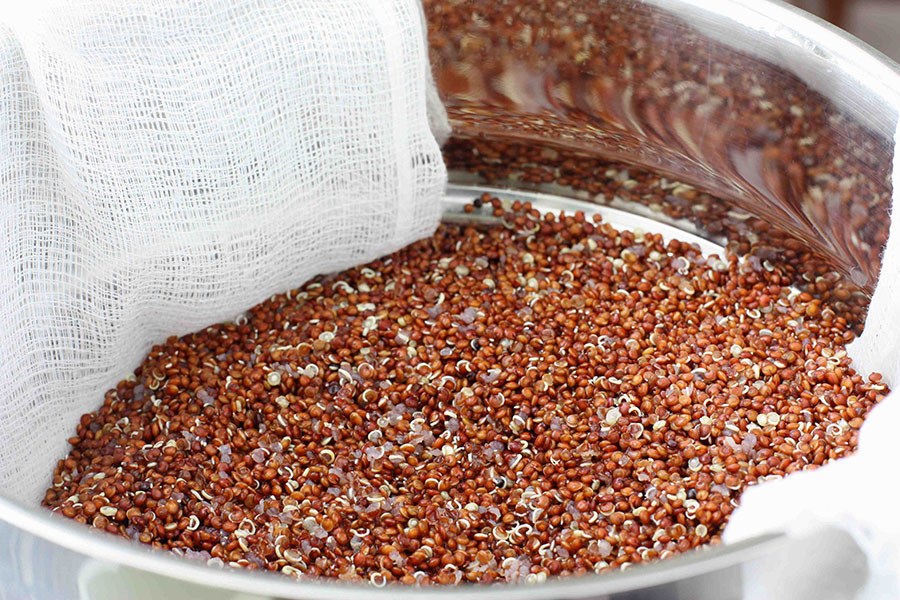


Tasty Kitchen Blog: Red Quinoa and Black Bean Salad. Guest post by Dara Michalski of Cookin' Canuck, recipe submitted by TK member Kay Heritage of The Church Cook.

Drain the quinoa into the cheesecloth.

Add 2 inches of water to the bottom of the pot and bring the water to a boil. Set the steamer insert (with cheesecloth and quinoa) over the boiling water and cover. Be certain that the quinoa is not touching the water. Steam for 10 minutes.

Fluff the quinoa with a fork and cool.


Tasty Kitchen Blog: Red Quinoa and Black Bean Salad. Guest post by Dara Michalski of Cookin' Canuck, recipe submitted by TK member Kay Heritage of The Church Cook.

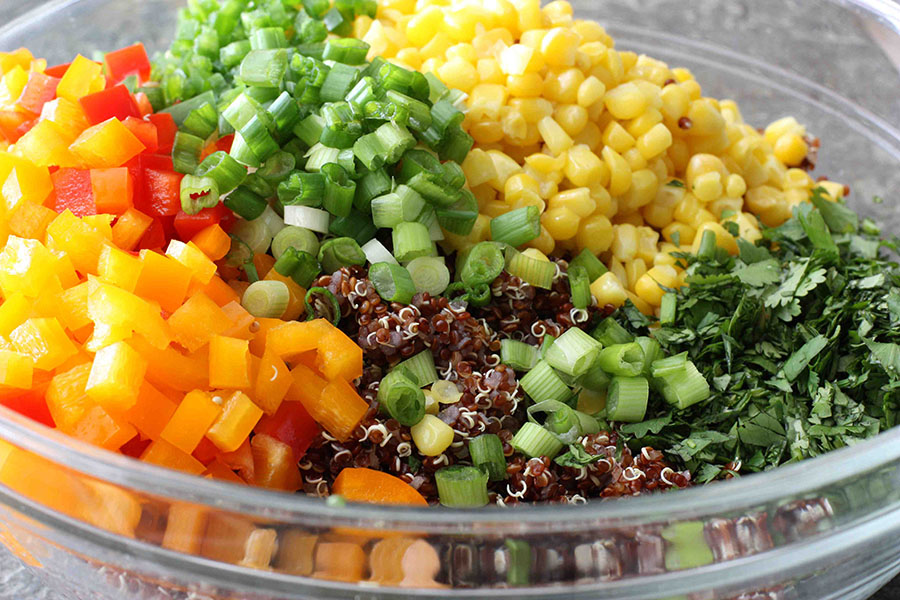
In a large bowl, combine the quinoa, black beans, corn, chopped red and orange bell peppers, jalapeno pepper, cilantro, and green onions.


Tasty Kitchen Blog: Red Quinoa and Black Bean Salad. Guest post by Dara Michalski of Cookin' Canuck, recipe submitted by TK member Kay Heritage of The Church Cook.

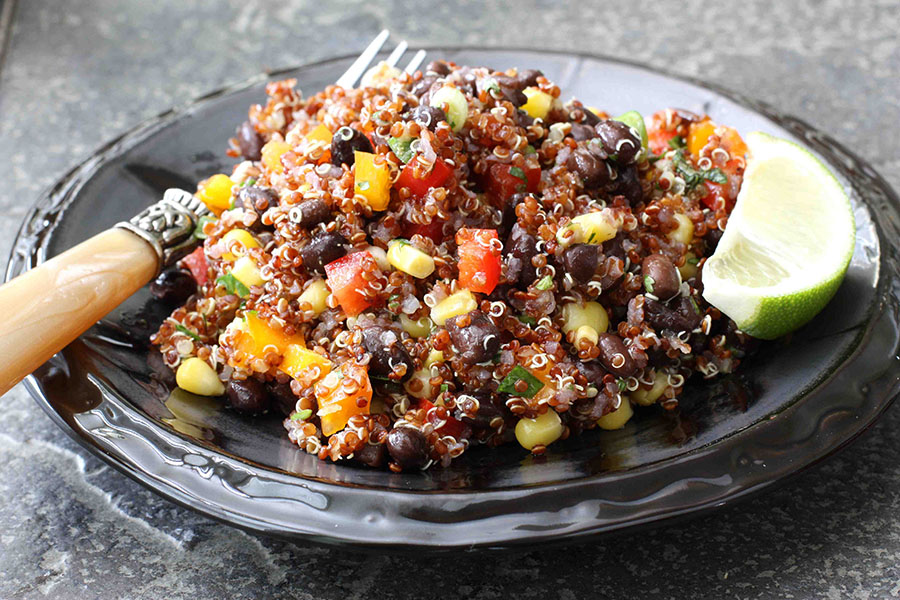
Toss gently with the dressing and serve at room temperature.

Thank you to Kay for this salad that quickly earned a place in our regular lunch and dinner line-ups. Be sure to check out her blog The Church Cook for many other innovative, tasty recipes.


Printable Recipe
Red Quinoa and Black Bean Salad

See post on The Church Cook (Kay Heritage)’s site!
4.81 Mitt(s) 22 Rating(s)22 votes, average: 4.81 out of 522 votes, average: 4.81 out of 522 votes, average: 4.81 out of 522 votes, average: 4.81 out of 522 votes, average: 4.81 out of 5

Prep Time:

Cook Time:

Difficulty: Intermediate

Servings: 6

6
x

Print Options

Page size Letter 3x5 4x6
Text Size Small Medium Large
Content Include description
Include prep time, etc.
Show image

Description

Healthy, delicious Red Quinoa and Black Bean Salad. Great as a side with fish tacos or as a vegetarian meal.

Ingredients

  • FOR THE DRESSING:
  • 5 Tablespoons Fresh Lime Juice
  • 1 teaspoon Salt
  • 1 whole Garlic Clove, Finely Mined
  • ¼ cups Finely Chopped Fresh Cilantro
  • 1 teaspoon Ground Cumin, Or To Taste
  • ⅓ cups Olive Oil
  • ½ teaspoons Freshly Ground Pepper, to taste
  • _____
  • FOR THE SALAD:
  • 1-½ cup Red Quinoa (sold In Health Food Stores)
  • 1 Tablespoon Table Salt, Add When Boiling Quinoa
  • 1 can (14 Oz. Can) Black Beans, Drained, Rinsed
  • 1-½ cup Corn Kernels, Fresh (cut From About 2 Large Ears)
  • 1 cup Finely Chopped Colored Sweet Bell Peppers
  • 1 whole Jalapeño Chilies, Seeded And Minced (wear Rubber Gloves)
  • ¼ cups Finely Chopped Fresh Cilantro
  • ¼ cups Finely Chopped Green Onions

Preparation Instructions

For the dressing:
In a small bowl whisk together lime juice, salt, minced garlic, chopped cilantro, and cumin and add oil in a stream, whisking. Add pepper to taste. Set aside.

For the salad:
In a large bowl wash quinoa in at least 5 changes of cold water, rubbing grains and letting them settle before pouring off most of water, until water runs clear. Drain in a large fine sieve.

In a medium size pot, add the table salt to 1-1/2 quarts of boiling water and cook quinoa 10 minutes. Prepare a colander with cheese cloth over it and drain the cooked quinoa into cheese cloth.

Add 2 inches of water into the pot and bring water to boil. Place the quinoa (still in the colander or another small pan, so you have a double boiler effect), cover cooked quinoa with the cheesecloth and put a lid on your pot. Steam for an additional 10 minutes. Do not let quinoa touch the water. Fluff quinoa with a fork and cool.

Combine in a large mixing bowl the beans, corn, remaining vegetables, herbs, and cooled quinoa. Toss gently with the dressing. Can be prepared a day ahead for flavors to combine. Serve at room temperature.


_______________________________________

Dara Michalski is a doll and a sweetheart who clearly knows her way around the kitchen. She blogs at Cookin’ Canuck, where she shares her flavor-packed recipes and fun, engaging writing. The photography’s pretty incredible, too.


Profile photo of Erika (TK)

Looks Delicious! Baked Spice Doughnuts

Posted by in Looks Delicious!

Tasty Kitchen Blog: Looks Delicious! (Baked Spice Doughnuts, submitted by TK member Jenna Weber of Eat, Live, Run. Adapted from Joy the Baker.)

 
Here’s a quick Sunday treat that’ll help ease the pain of bidding another weekend farewell. It takes less than half an hour to make, using ingredients you likely already have in your pantry. Make extra to have as a Monday morning pick-me-up!

This Baked Spice Doughnuts recipe is brought to us by Jenna, whose blog Eat, Live, Run aptly bears the slogan, “Celebrating life, one crumb at a time.” (Jenna, in turn, adapted her recipe from Joy the Baker, who is also a Tasty Kitchen member.)

Thanks for such a lovely-looking recipe!


Profile photo of ThreeManyCooks

Amazing Spiced Chai Concentrate

Posted by in Step-by-Step Recipes

Tasty Kitchen Blog: Amazing Spiced Chai Concentrate. Guest post by Maggy Keet of Three Many Cooks, recipe submitted by TK member thecatnipcat.

 
Warm spices, strong tea and steamed milk swirling around in my tummy make chai lattes a favorite during the winter months. It warms me from the inside out in a way that puts coffee and tea to shame. Unfortunately, the chai concentrate from certain coffee chains is too sweet. But there is something better.

It never occurred to me to make my own chai. (Certainly it must be too hard.) But when I saw this recipe from thecatnipcat for this Amazing Spiced Chai Concentrate, something about the whole thing seemed doable. If I had known how easy it was, I would have started making my own years ago. Needless to say, this version is delicious! And I love that I can up the quantities of the flavors I like more and reduce the quantities of the flavors I like less. For example, we used less sugar and doubled the cinnamon. Make the original version, then tweak the recipe based on your preferences. I wouldn’t be surprised if you find her recipe is just right for you.


Tasty Kitchen Blog: Amazing Spiced Chai Concentrate. Guest post by Maggy Keet of Three Many Cooks, recipe submitted by TK member thecatnipcat.

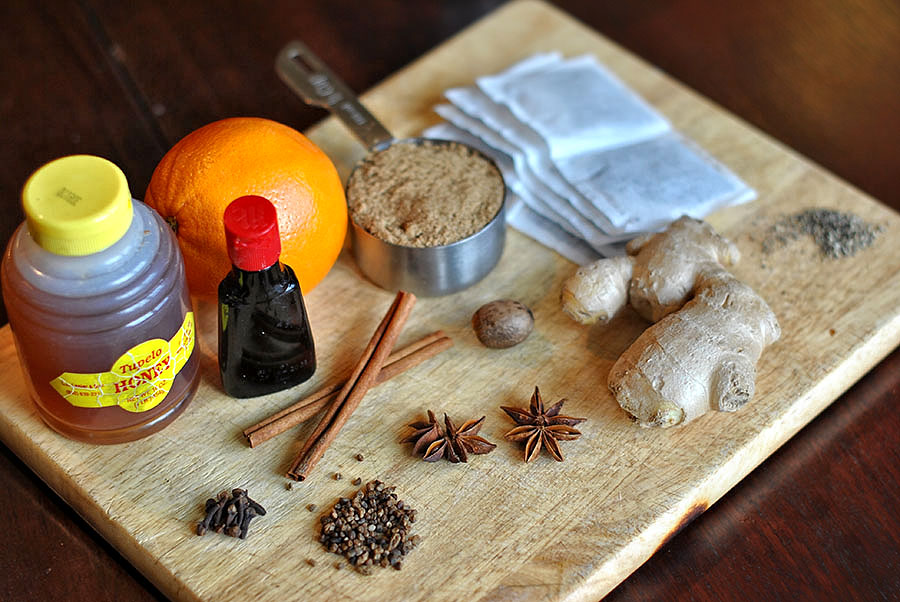
Here are the ingredients you’ll need: cinnamon, ginger, cardamom, star anise, cloves, black pepper, nutmeg, orange zest, tea bags, brown sugar, honey, and vanilla.

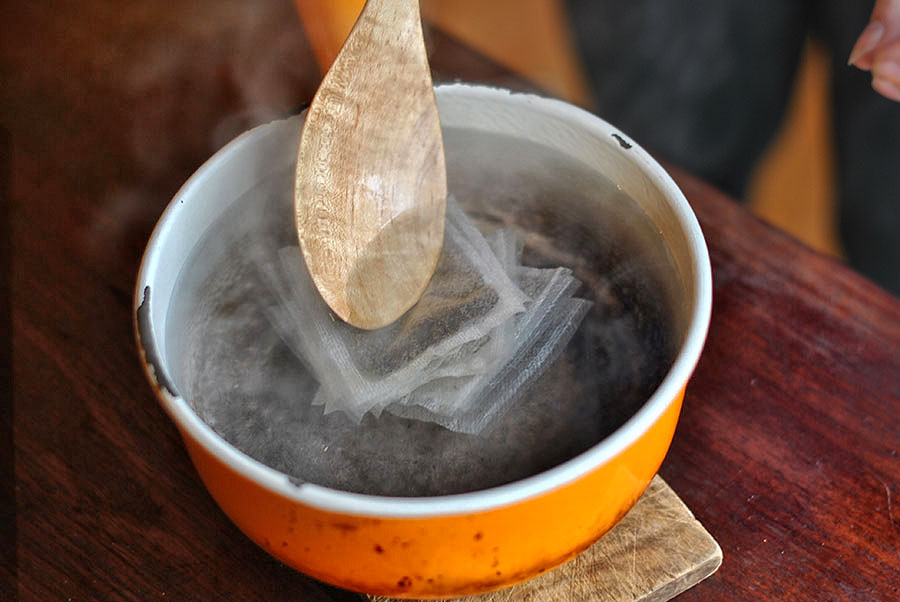
Start by bringing 4 1/2 cups water to the boil on the stove.


Tasty Kitchen Blog: Amazing Spiced Chai Concentrate. Guest post by Maggy Keet of Three Many Cooks, recipe submitted by TK member thecatnipcat.

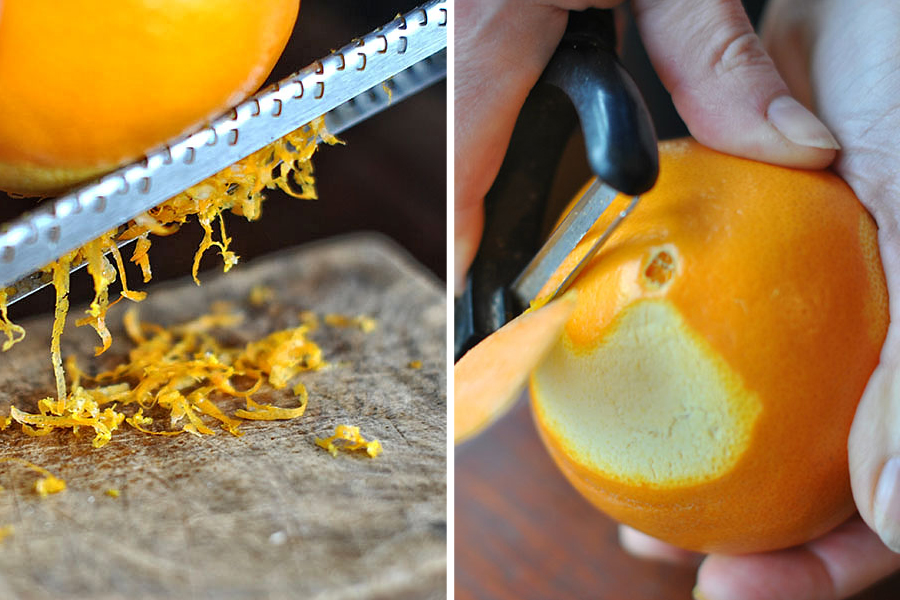
Then you need some orange zest. If you don’t have a zester, you can use a vegetable peeler.


Tasty Kitchen Blog: Amazing Spiced Chai Concentrate. Guest post by Maggy Keet of Three Many Cooks, recipe submitted by TK member thecatnipcat.

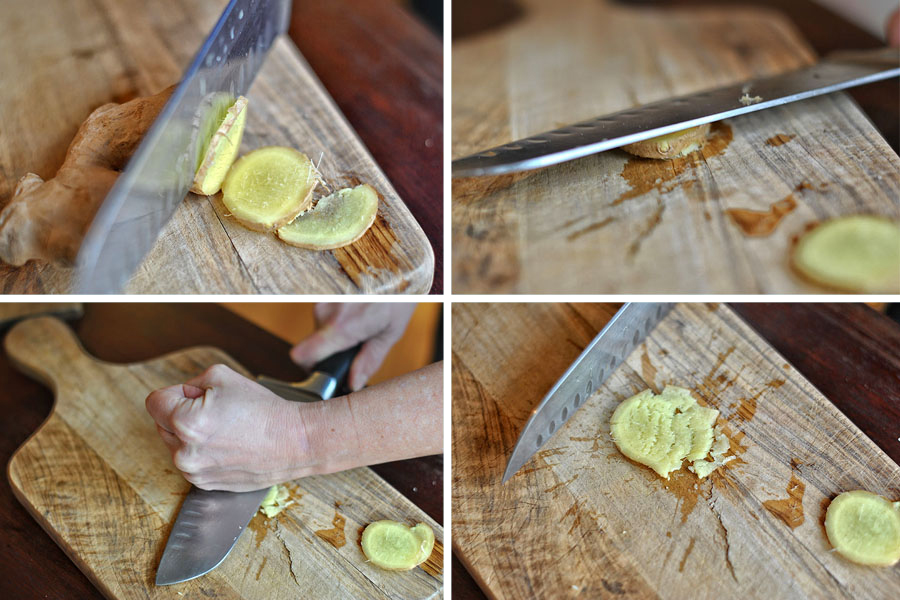
The recipe says to use a piece of ginger. For us that meant three large coins which we smashed to release more flavor.


Tasty Kitchen Blog: Amazing Spiced Chai Concentrate. Guest post by Maggy Keet of Three Many Cooks, recipe submitted by TK member thecatnipcat.

Once the water has come to a boil, remove the pot from the heat and add the tea bags.


Tasty Kitchen Blog: Amazing Spiced Chai Concentrate. Guest post by Maggy Keet of Three Many Cooks, recipe submitted by TK member thecatnipcat.

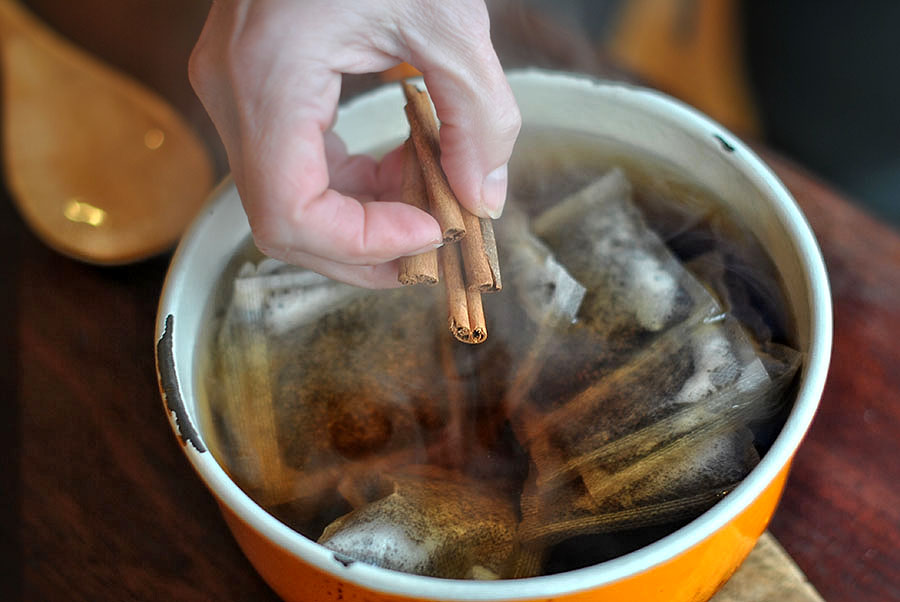
Then add your cinnamon sticks (we only add two—it just looks like we’re using four because we broke them in half).


Tasty Kitchen Blog: Amazing Spiced Chai Concentrate. Guest post by Maggy Keet of Three Many Cooks, recipe submitted by TK member thecatnipcat.

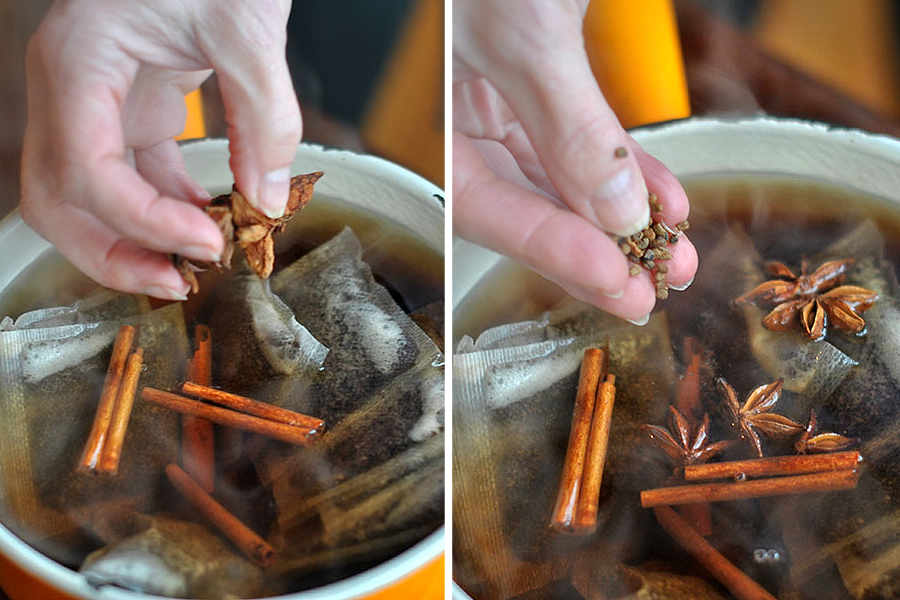
Then add your star anise and seven cardamom pods. We only had cardamom seeds so we looked up how many seeds there are in a pod. The answer is “about 12” so we added roughly 80 cardamom seeds (no we did not count them out).


Tasty Kitchen Blog: Amazing Spiced Chai Concentrate. Guest post by Maggy Keet of Three Many Cooks, recipe submitted by TK member thecatnipcat.

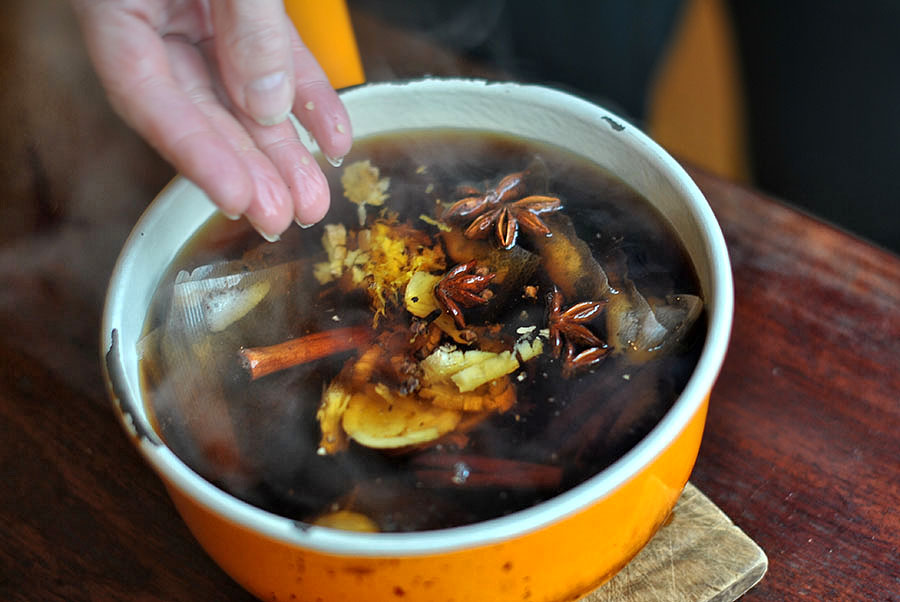
Then add the rest of the spices: the whole cloves, freshly ground pepper, zest (or peel), smashed ginger, and freshly grated nutmeg. Stir the pot to mix all the ingredients. This is the point at which Mom said, “This is starting to look like a witch’s brew.” I concurred.

Add sugar, vanilla and honey and then let this steep for 15-20 minutes. Our family likes our chai concentrate like we like our tea and coffee, strong and dark. So we let it go the full 20 minutes.


Tasty Kitchen Blog: Amazing Spiced Chai Concentrate. Guest post by Maggy Keet of Three Many Cooks, recipe submitted by TK member thecatnipcat.

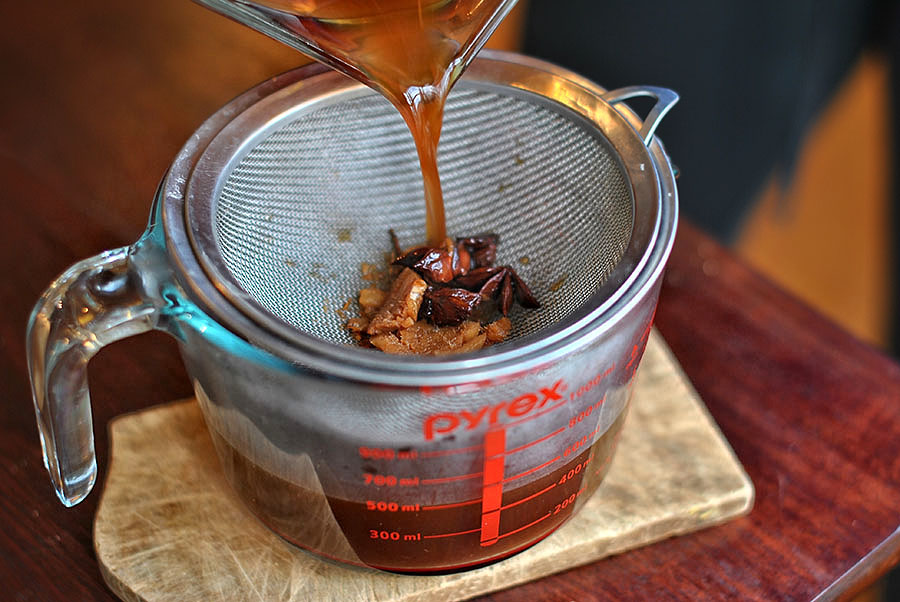
When the chai concentrate has reached desired taste and color, strain out the spices and zest.


Tasty Kitchen Blog: Amazing Spiced Chai Concentrate. Guest post by Maggy Keet of Three Many Cooks, recipe submitted by TK member thecatnipcat.

Now you are left with delicious, homemade chai concentrate.


Tasty Kitchen Blog: Amazing Spiced Chai Concentrate. Guest post by Maggy Keet of Three Many Cooks, recipe submitted by TK member thecatnipcat.

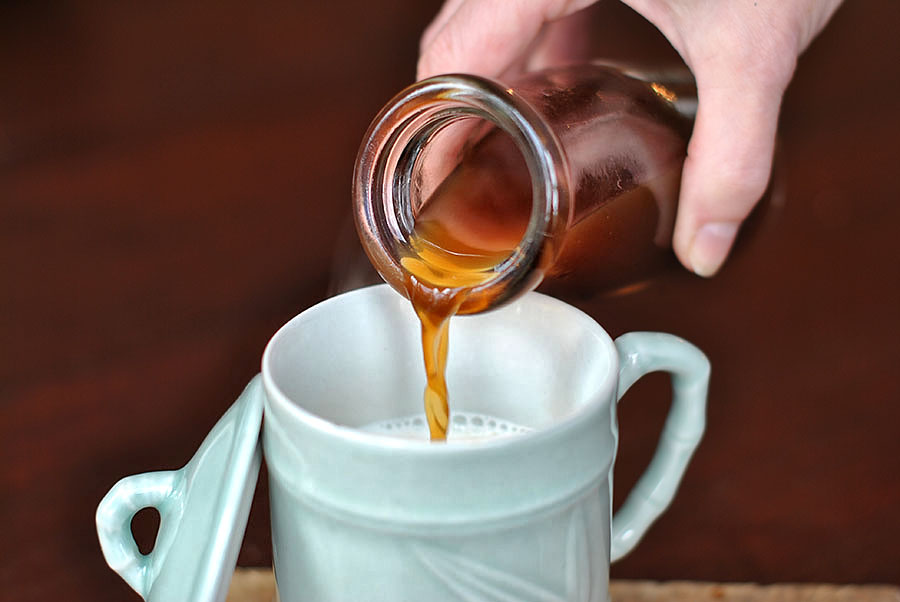
We added the chai concentrate to steamed milk, but you could mix it with ice cream or yogurt to give plain vanilla a flavor kick.


Tasty Kitchen Blog: Amazing Spiced Chai Concentrate. Guest post by Maggy Keet of Three Many Cooks, recipe submitted by TK member thecatnipcat.

All I know is that I will never pay $3.25 for an overly-sweet chai again.

Thanks again, thecatnipcat!


Printable Recipe

Amazing Spiced Chai Concentrate

4.92 Mitt(s) 26 Rating(s)26 votes, average: 4.92 out of 526 votes, average: 4.92 out of 526 votes, average: 4.92 out of 526 votes, average: 4.92 out of 526 votes, average: 4.92 out of 5

Prep Time:

Cook Time:

Difficulty: Easy

Servings: 8

8
x

Print Options

Page size Letter 3x5 4x6
Text Size Small Medium Large
Content Include description
Include prep time, etc.
Show image

Description

All the flavor of a mix, with no funky additives or preservatives! The benefits to making your own mix are obvious: you can customize it all you want, you know exactly what’s in it, and if you buy them in bulk, the spices can be dirt cheap!

Ingredients

  • 4-½ cups Water
  • 1 stick Cinnamon
  • 1 piece Fresh Ginger Chopped
  • 7 whole Cardamom Pods
  • 2 whole Star Anise Pods
  • 10 whole Cloves
  • ¼ teaspoons Freshly Ground Black Pepper
  • ½ teaspoons Freshly-ground Nutmeg
  • 1 teaspoon Orange Zest
  • 10 teaspoons Green Or Black Tea Or 10 Tea Bags
  • ⅔ cups Brown Sugar
  • 1 Tablespoon Honey
  • 1 Tablespoon Vanilla

Preparation Instructions

Bring the water to a boil. Add the spices and tea, remove from heat and let steep 15-20 minutes, depending on how strong you want it. Strain and add the brown sugar, honey, and vanilla. Stir to combine.

Mix 1 part concentrate with 1 part milk, heat and enjoy or pour over ice.

For a stronger flavor, mix 2 parts concentrate with 1 part milk or half-and-half (if you’re like me).

This concentrate will keep in the fridge for around 2 weeks. Freeze it in an icecube tray and add to smoothies!


_______________________________________

Three Many Cooks is the always-entertaining food blog of Pam Anderson and her two daughters, Maggy and Sharon. Pam is a well-known and much-respected food writer and author, Maggy is a “hippy adventurer meets 1950s housewife,” and Sharon refers to herself as a recovering food snob learning to survive on a graduate student’s budget. Theirs is a strong relationship both inside and outside the kitchen, and it shows in the food they create and the stories they tell.


Profile photo of Natalie | Perry's Plate

Roasted Cauliflower Soup

Posted by in Step-by-Step Recipes

Tasty Kitchen Blog: Roasted Cauliflower Soup. Guest post by Natalie Perry of Perry's Plate, recipe submitted by TK member Hailey of Hail's Kitchen.

 
Cauliflower, to me, is a humble vegetable. It’s rarely the star of the meal, it doesn’t have a flashy color or a strong flavor, and let’s face it—its complexion could use some work. Despite its frumpy characteristics, cauliflower has a few tricks up its sleeve. Case in point: this Roasted Cauliflower Soup with White Cheddar Cheese recipe submitted by TK member hailskitchen. Pureeing the cauliflower creates the illusion of a creamy soup without the added richness from cream. Not only did this soup taste great, it was simultaneously light yet rich tasting.

Okay, it does have cheese, too. But if you use a sharp white cheddar, you might not need as much. (If you’re concerned with such things. I wasn’t one of those who swore off cheese-laden foods this year.)


Tasty Kitchen Blog: Roasted Cauliflower Soup. Guest post by Natalie Perry of Perry's Plate, recipe submitted by TK member Hailey of Hail's Kitchen.

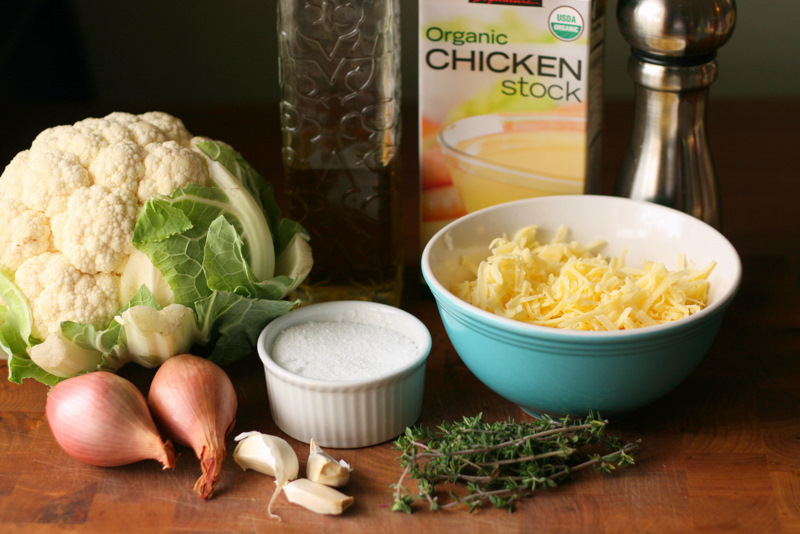
For the soup you’ll need a nice, big head of cauliflower, shallots, fresh garlic, fresh thyme, shredded white cheddar cheese, salt, pepper, olive oil, and chicken (or vegetable) broth.


Tasty Kitchen Blog: Roasted Cauliflower Soup. Guest post by Natalie Perry of Perry's Plate, recipe submitted by TK member Hailey of Hail's Kitchen.

First, preheat your oven to 400 degrees F.

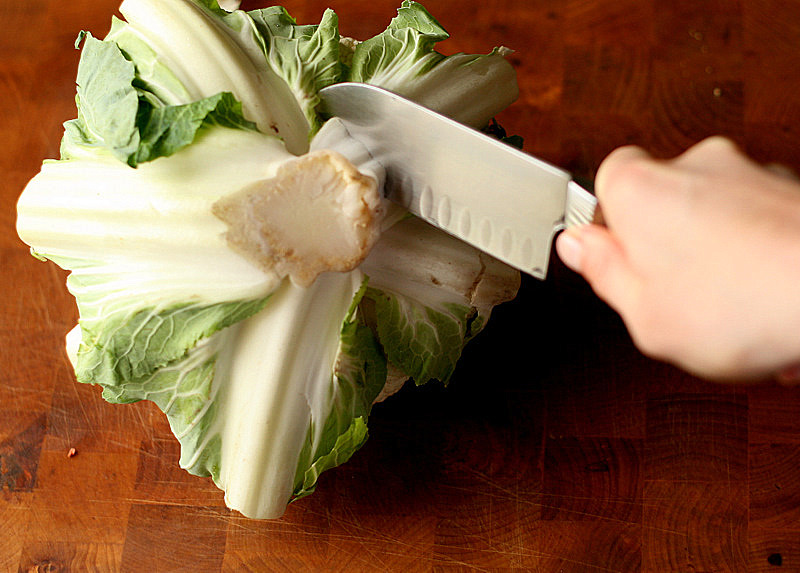
Then prep the cauliflower. I like to turn it upside down and make a few slashes in the bottom to get the tough stem out and remove the leaves.


Tasty Kitchen Blog: Roasted Cauliflower Soup. Guest post by Natalie Perry of Perry's Plate, recipe submitted by TK member Hailey of Hail's Kitchen.

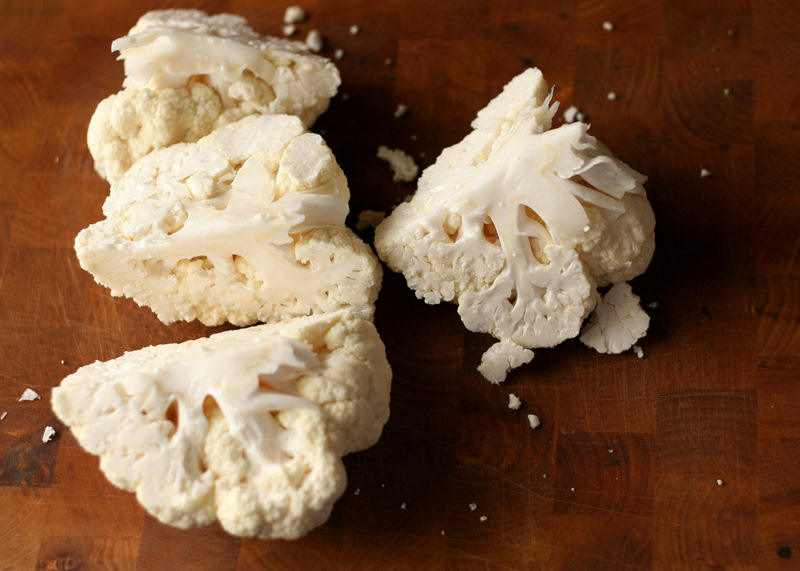
I also like to quarter the head before breaking it down into florets. It’s easier to manage than a giant head.


Tasty Kitchen Blog: Roasted Cauliflower Soup. Guest post by Natalie Perry of Perry's Plate, recipe submitted by TK member Hailey of Hail's Kitchen.

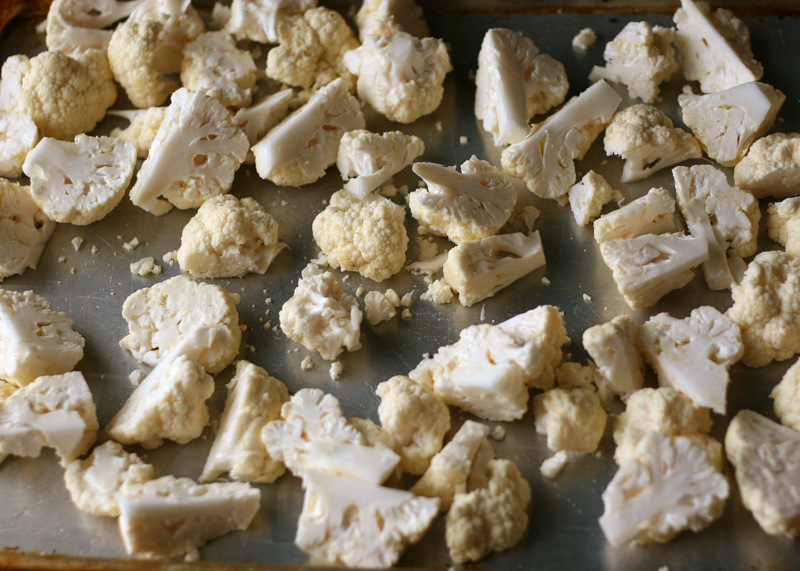
Once you have it broken down, toss it onto a large rimmed baking sheet.


Tasty Kitchen Blog: Roasted Cauliflower Soup. Guest post by Natalie Perry of Perry's Plate, recipe submitted by TK member Hailey of Hail's Kitchen.

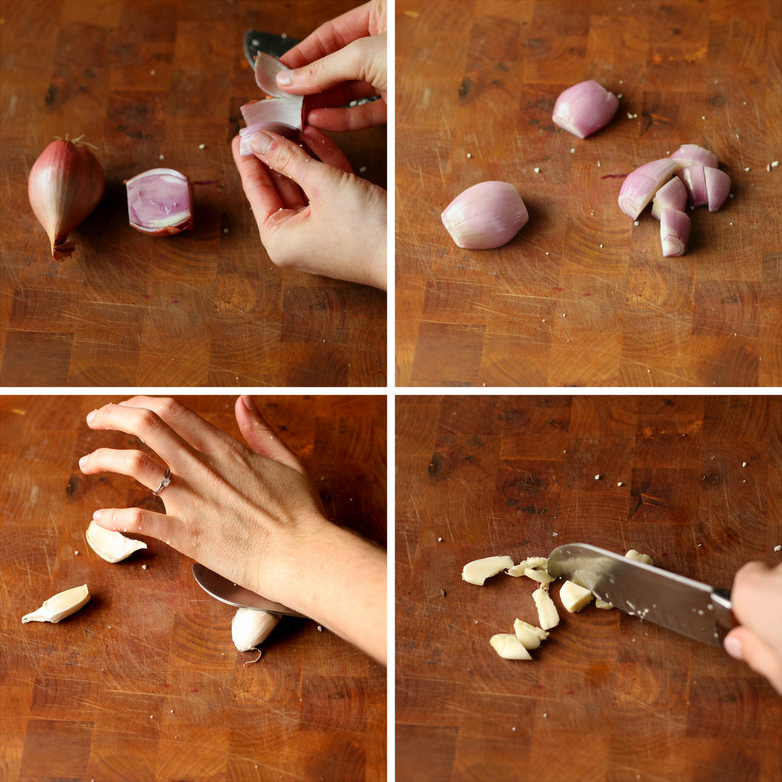
Next, peel the shallots and garlic. If you lay your knife on the garlic and give it a whack with the palm of your hand, the peel comes right off. Don’t chop them too small. Quartering the shallots and cutting the garlic in half ought to do it.


Tasty Kitchen Blog: Roasted Cauliflower Soup. Guest post by Natalie Perry of Perry's Plate, recipe submitted by TK member Hailey of Hail's Kitchen.

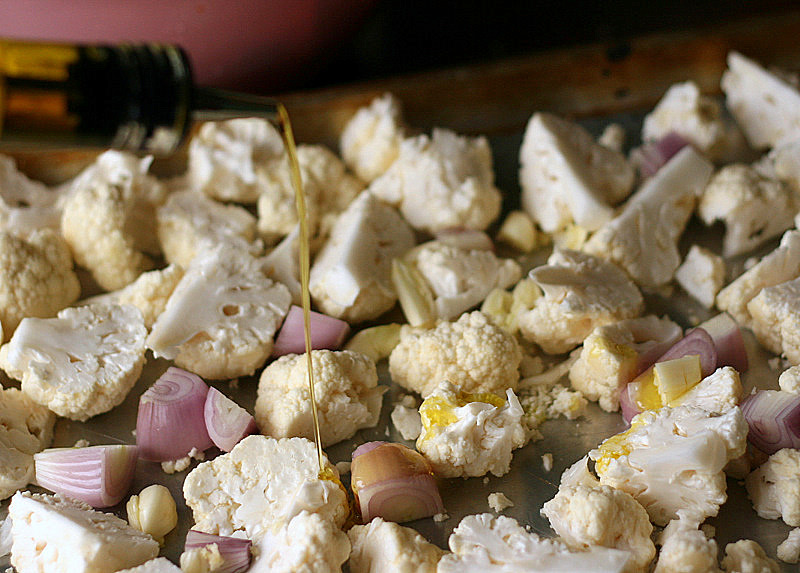
Add the prepped shallots and garlic to the cauliflower on the baking sheet. Drizzle liberally with olive oil, sprinkle with salt, and stick it in that screaming hot oven.


Tasty Kitchen Blog: Roasted Cauliflower Soup. Guest post by Natalie Perry of Perry's Plate, recipe submitted by TK member Hailey of Hail's Kitchen.

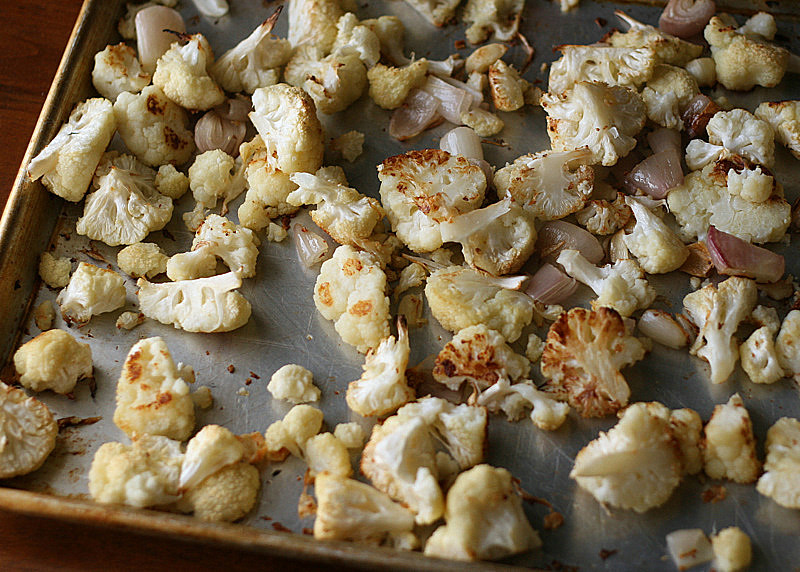
After 40-50 minutes it should look like this. See those dark, caramelized pieces? Roasting should be a part of all vegetable preparation, in my opinion. That’s how I got myself to like Brussels sprouts. Try it.


Tasty Kitchen Blog: Roasted Cauliflower Soup. Guest post by Natalie Perry of Perry's Plate, recipe submitted by TK member Hailey of Hail's Kitchen.

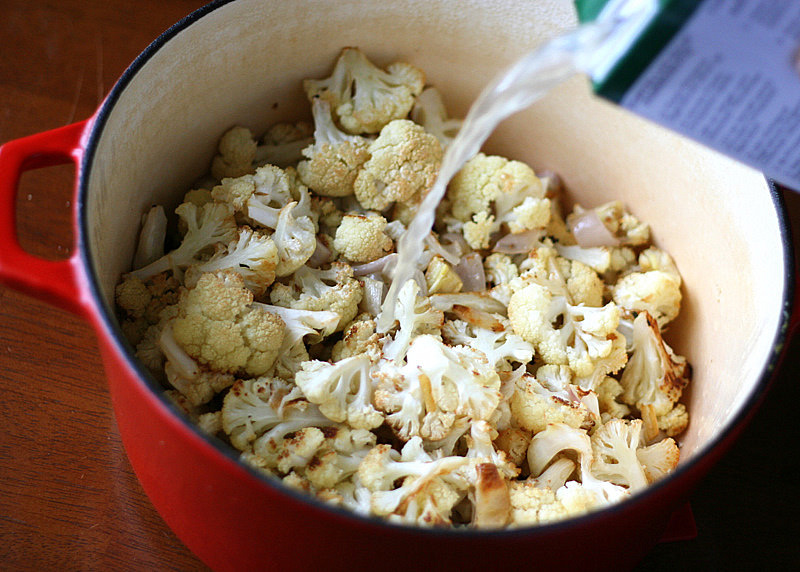
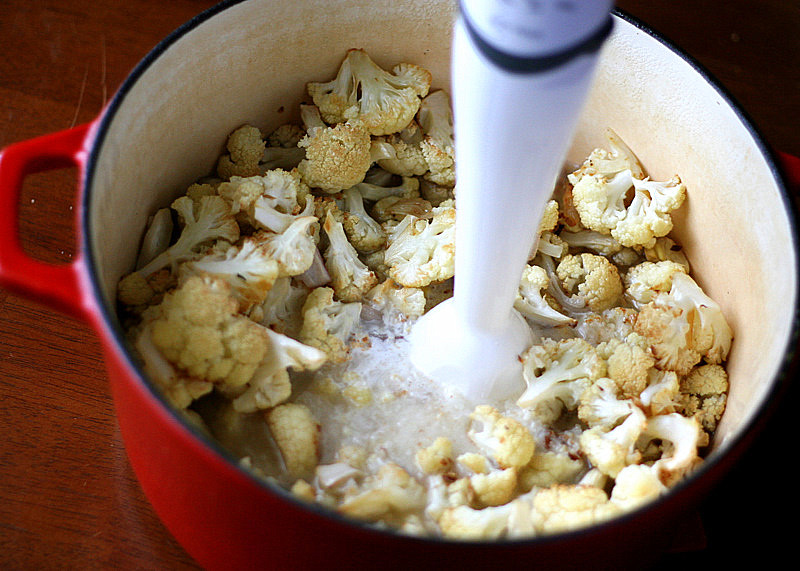
Transfer all of that roasted goodness to a big pot. (I doubled the batch, which is why it looks like my cauliflower suddenly reproduced.) Pour in half of the chicken broth—it makes pureeing much easier.


Tasty Kitchen Blog: Roasted Cauliflower Soup. Guest post by Natalie Perry of Perry's Plate, recipe submitted by TK member Hailey of Hail's Kitchen.

If you have an immersion or stick blender, this will be a snap. Just stick it in and start buzzing it around. If you don’t have one, go buy one. If you can’t go buy one, you can ladle the mixture into a blender and process in batches, returning it back into the pot when you’re finished.


Tasty Kitchen Blog: Roasted Cauliflower Soup. Guest post by Natalie Perry of Perry's Plate, recipe submitted by TK member Hailey of Hail's Kitchen.

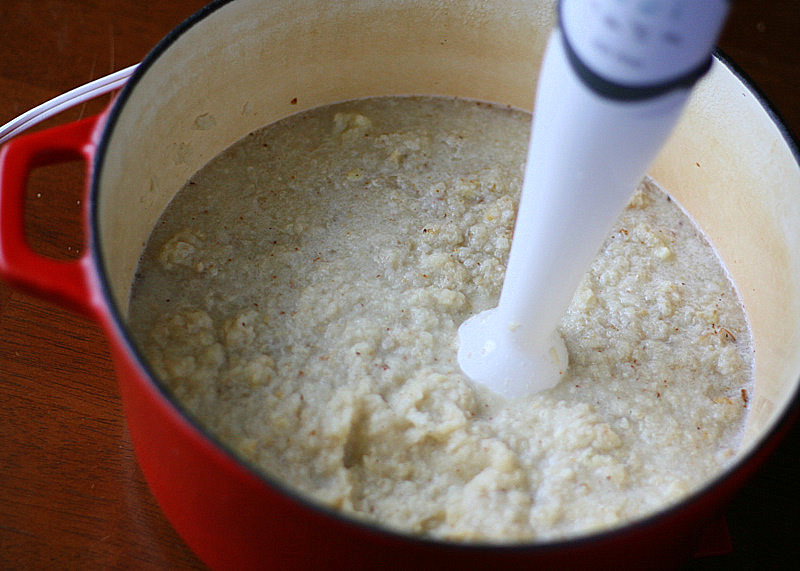
Back to blending. You can leave it a bit chunky if you like. I made it this way the first time and I liked a few chunks. But I found that the texture was really odd.


Tasty Kitchen Blog: Roasted Cauliflower Soup. Guest post by Natalie Perry of Perry's Plate, recipe submitted by TK member Hailey of Hail's Kitchen.

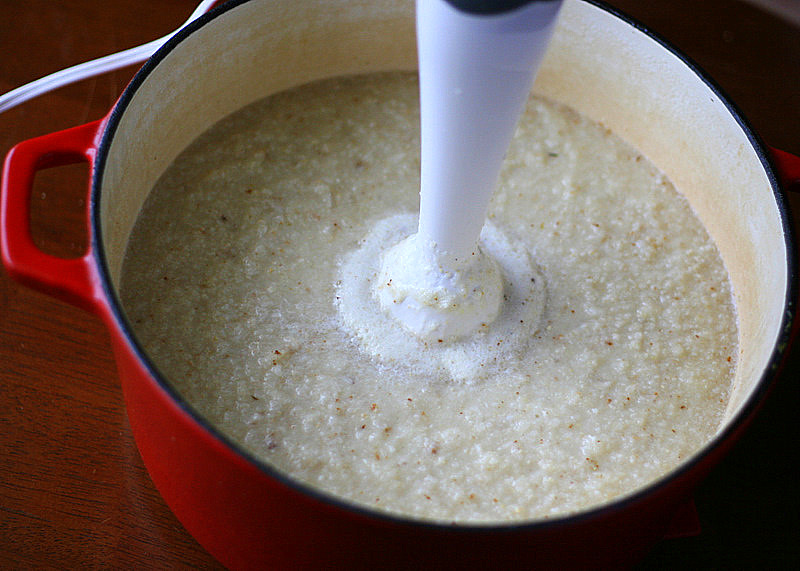
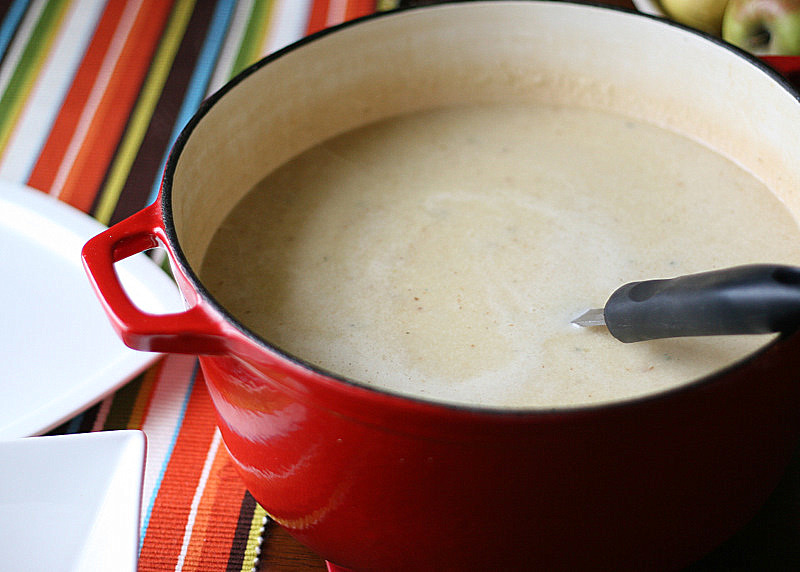
So this time I blended it even more until it was smoother. I liked it better that way.

Place the pot on the stove and bring it to a boil. Reduce the heat and let it simmer for 10 minutes.


Tasty Kitchen Blog: Roasted Cauliflower Soup. Guest post by Natalie Perry of Perry's Plate, recipe submitted by TK member Hailey of Hail's Kitchen.

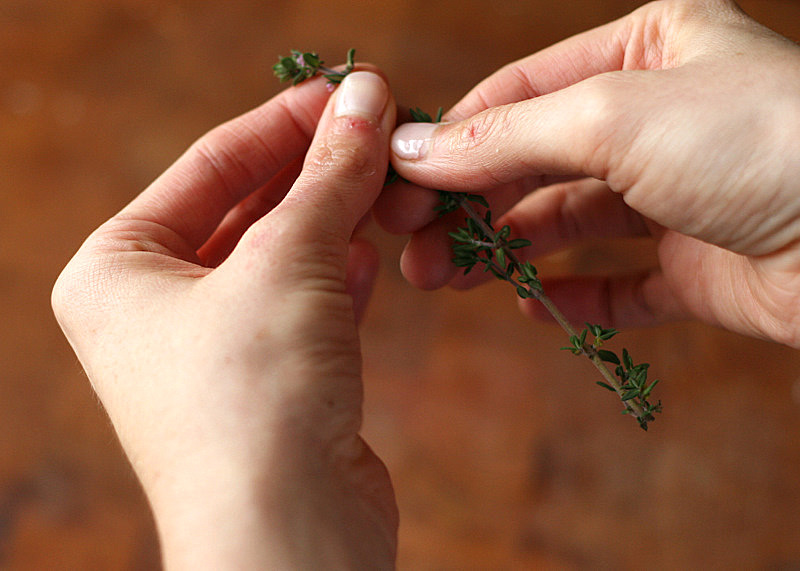
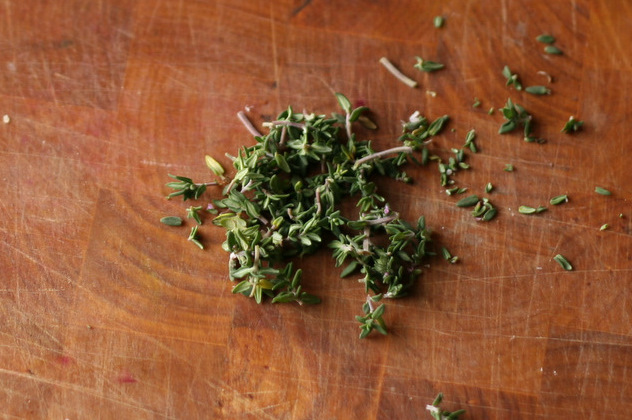
While the soup simmers away, get your thyme ready. Grab it at the top with one hand, and with the other hand, pinch toward the top and pull down the stem to remove leaves.


Tasty Kitchen Blog: Roasted Cauliflower Soup. Guest post by Natalie Perry of Perry's Plate, recipe submitted by TK member Hailey of Hail's Kitchen.

Give them a quick chop if you like. This is just my personal preference, but I found the soup to be really “thyme-y”, so I reduced the measurement by half the second time I made it. The thyme really sings in this soup.


Tasty Kitchen Blog: Roasted Cauliflower Soup. Guest post by Natalie Perry of Perry's Plate, recipe submitted by TK member Hailey of Hail's Kitchen.

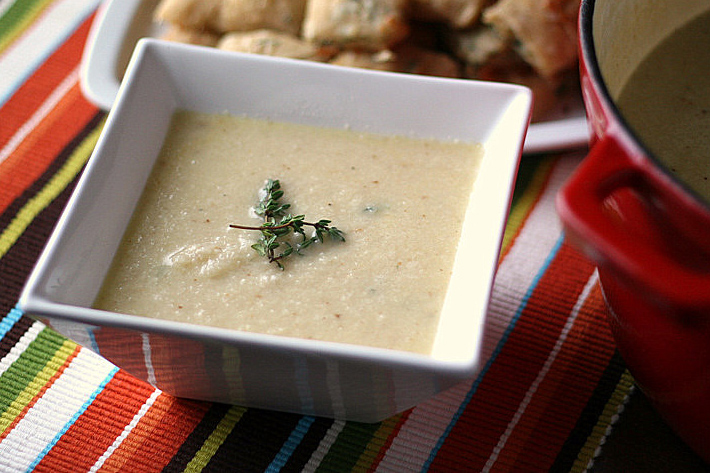
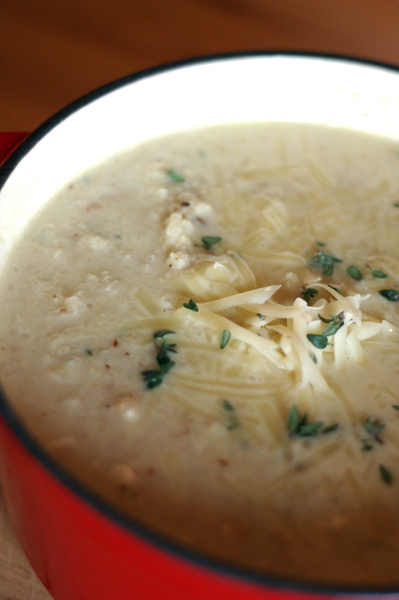
When the soup is done simmering, cut the heat and add the thyme and shredded cheese. Season to taste with a generous dose of salt and black pepper.


Tasty Kitchen Blog: Roasted Cauliflower Soup. Guest post by Natalie Perry of Perry's Plate, recipe submitted by TK member Hailey of Hail's Kitchen.

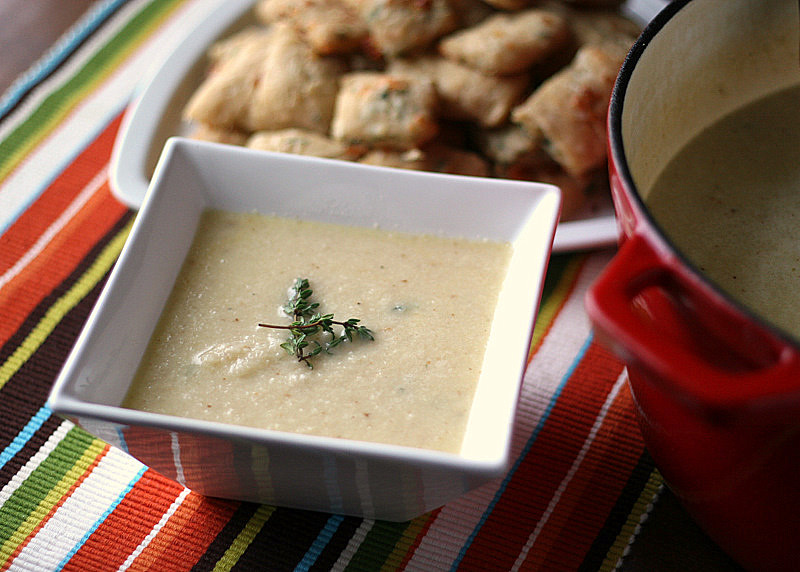
Time to serve it up with crusty bread or biscuits and a fresh salad! One of my favorite things about this recipe is that the steps can be broken up to accommodate your schedule. Roast the vegetables a day or two ahead and when you’re ready to prepare the soup, it’ll be ready in under 30 minutes.

 
Thanks Hailey for a unique and delicious soup! Visit her beautiful blog, Hail’s Kitchen, for more of her great recipes.


Printable Recipe

Roasted Cauliflower Soup with White Cheddar Cheese

See post on hailskitchen’s site!
4.40 Mitt(s) 5 Rating(s)5 votes, average: 4.40 out of 55 votes, average: 4.40 out of 55 votes, average: 4.40 out of 55 votes, average: 4.40 out of 55 votes, average: 4.40 out of 5

Prep Time:

Cook Time:

Difficulty: Easy

Servings: 4

4
x

Print Options

Page size Letter 3x5 4x6
Text Size Small Medium Large
Content Include description
Include prep time, etc.
Show image

Description

This light soup is surprisingly rich and hearty. Perfect for the change in the weather!

Ingredients

  • 1 head Cauliflower, Roughly Chopped
  • 2 whole Shallots, Roughly Chopped
  • 3 cloves Garlic, Roughly Chopped
  • 1 Tablespoon Olive Oil
  • 4 cups Chicken Broth
  • 1-½ cup White Cheddar Cheese, Shredded
  • 1 Tablespoon Fresh Thyme, Chopped
  • 1 Tablespoon Coarse Salt

Preparation Instructions

Preheat your oven to 400 degrees. On a cookie sheet, drizzle the cauliflower, shallots and garlic with the olive oil and season with coarse salt. Roast for about 40 minutes or until the cauliflower is fork-tender.

Carefully place the vegetables in a food processor or blender and roughly puree. Texture is good, large chunks are not so good. Place the vegetables in a pot along with the chicken broth. Bring to a boil. Reduce heat and simmer for about ten minutes. Add the cheese, thyme and a good dose of black pepper. Season to taste with salt. Serve with warm, crusty bread and enjoy!


_______________________________________

Be sure to check out Natalie’s own beautiful food blog, Perrys’ Plate, where you can see her growing collection of lovely recipes. There’s always something new to see there. Go visit now!


Profile photo of patiodaddio

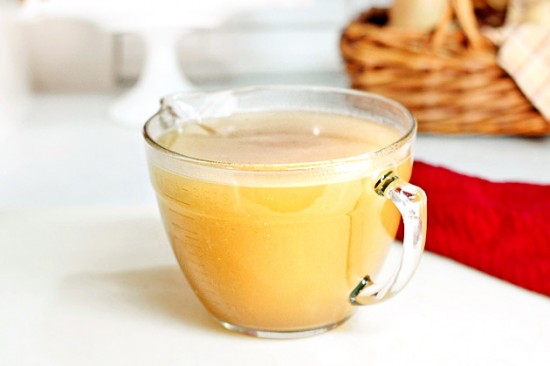
How to Make Pressure Cooker Stock

Posted by in Kitchen Talk

  Stock is an essential ingredient and a secret to great cooking. A good stock is necessary to make soups, sauces, gravies (among many other things) that really shine. Sure, you can grab a box or can of “stock” or broth from your local grocer, but it seriously pales in comparison to the real thing. […]

Profile photo of twopeasandtheirpod

Last Minute Sesame Noodles

Posted by in Step-by-Step Recipes

  The holidays were filled with good food and fun, but I think I overdosed on sugar this year. Ree’s cookie week, turned into cookie month for me. I couldn’t stop baking and eating cookies. I think I am finally sugared out and ready to cook up some healthy recipes. First up, Last Minute Sesame Noodles from […]

Profile photo of ThreeManyCooks

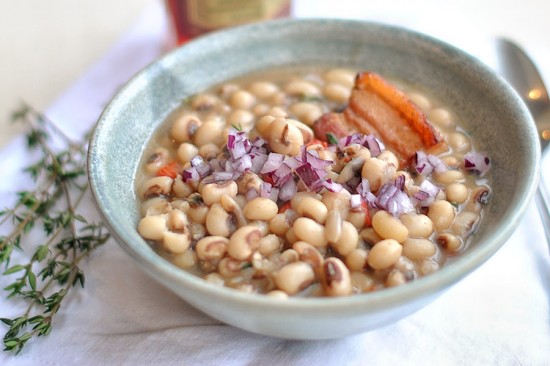
New Year’s Black-Eyed Peas

Posted by in Holidays, Step-by-Step Recipes

  For Southerners, black-eyed peas on New Year’s Day are as mandatory a tradition as turkey on Thanksgiving Day. We’ve had black-eyed peas, collard greens and cornbread on New Year’s Day for as long as I can remember. Even the year my family spent the week after Christmas in Hawaii. While most families would have […]

Profile photo of Erica Lea

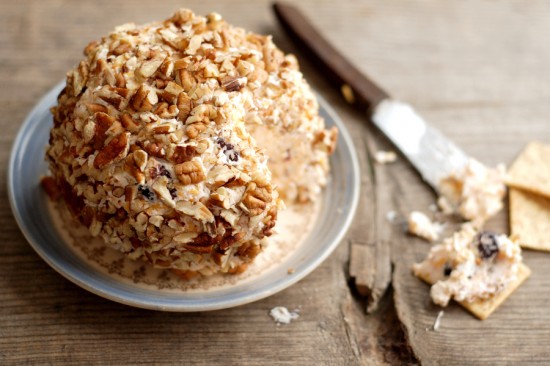
Favorite Cheese Ball

Posted by in Step-by-Step Recipes

  I have made this recipe so often that I could probably do it with my eyes shut and one hand held behind my back. My dad loves it and complains if we try to alter it in any way. My sister and I developed this cheese ball because we couldn’t find a recipe to suit our […]