The Pioneer Woman Tasty Kitchen
Profile photo of georgiapellegrini

Spinach, Scallion and Feta Frittata

Posted by in Step-by-Step Recipes

Tasty Kitchen Blog: Spinach, Scallion and Feta Frittata. Guest post by Georgia Pellegrini, recipe submitted by TK member Kristi of 30 Pounds of Apples.

 
I love a good frittata; it reminds me of my grandmother who always made them full of fresh herbs, and had them sitting on the counter as a snack. She added a dollop of plain yogurt to hers for an extra fluffy version. So of course, when Kristi posted this recipe for this Spinach, Scallion and Feta Frittata, I knew I had to make it. What is so great about a frittata is that it is endlessly versatile. Toss in whatever veggies you have in your refrigerator and it is bound to be delicious.


Tasty Kitchen Blog: Spinach, Scallion and Feta Frittata. Guest post by Georgia Pellegrini, recipe submitted by TK member Kristi of 30 Pounds of Apples.

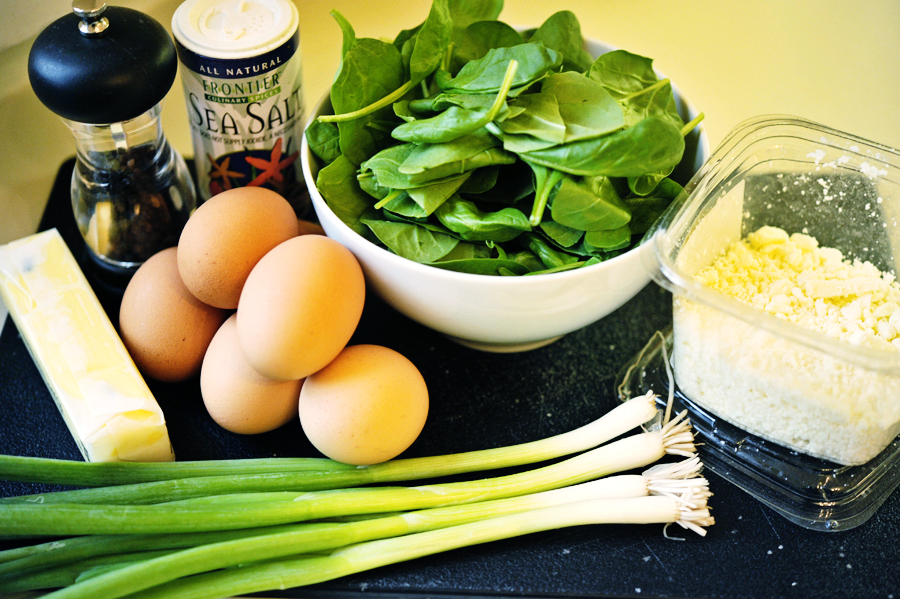
To make Kristi’s version you will need: spinach leaves, scallions, eggs, black pepper, salt, butter, and feta cheese


Tasty Kitchen Blog: Spinach, Scallion and Feta Frittata. Guest post by Georgia Pellegrini, recipe submitted by TK member Kristi of 30 Pounds of Apples.

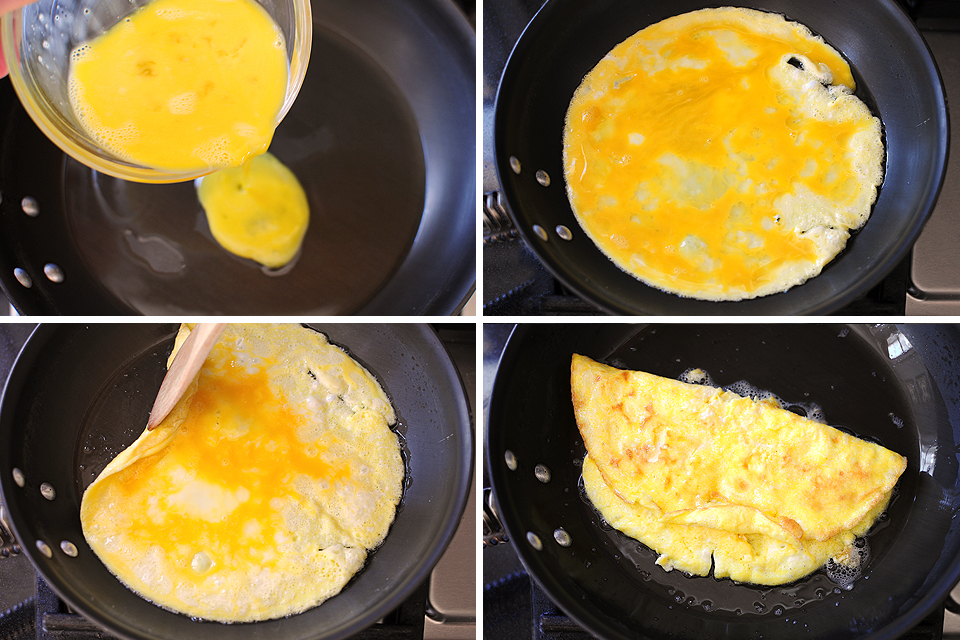
Preheat the oven to the broiler setting. Then, in a medium bowl beat the eggs until light and fluffy.


Tasty Kitchen Blog: Spinach, Scallion and Feta Frittata. Guest post by Georgia Pellegrini, recipe submitted by TK member Kristi of 30 Pounds of Apples.

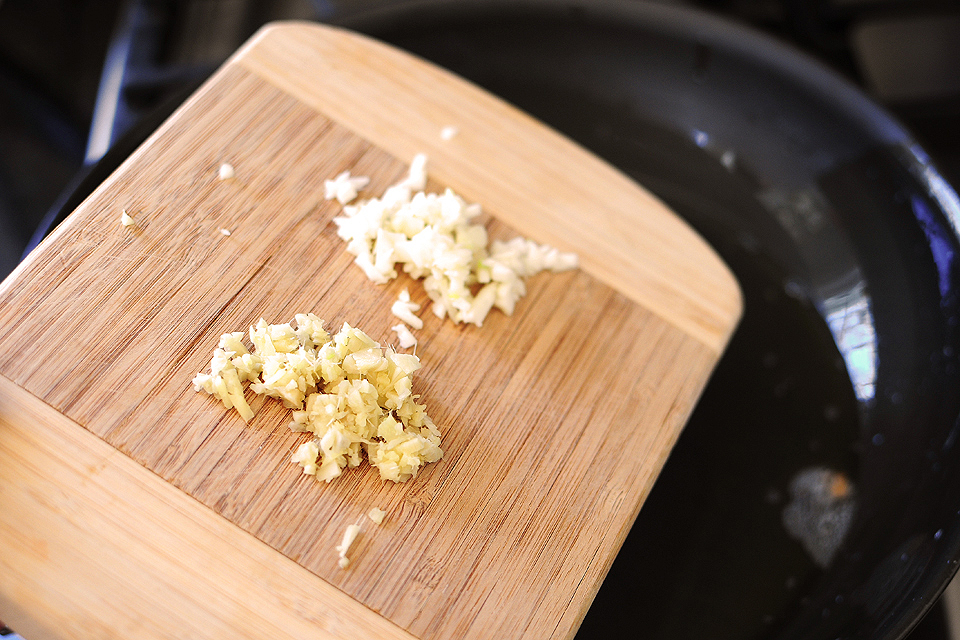
Slice the scallions, both the white and tender green parts.


Tasty Kitchen Blog: Spinach, Scallion and Feta Frittata. Guest post by Georgia Pellegrini, recipe submitted by TK member Kristi of 30 Pounds of Apples.

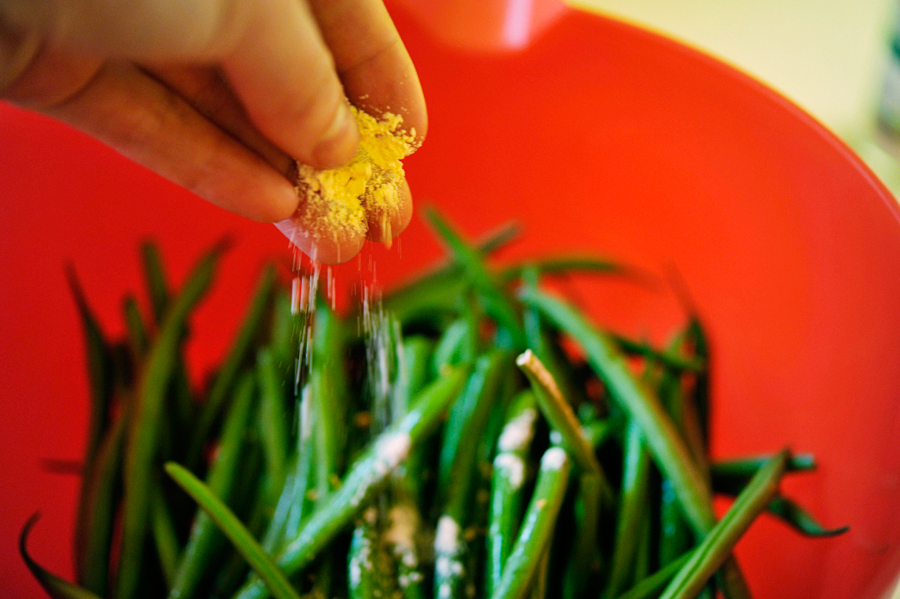
Add the black pepper and salt and whisk some more.


Tasty Kitchen Blog: Spinach, Scallion and Feta Frittata. Guest post by Georgia Pellegrini, recipe submitted by TK member Kristi of 30 Pounds of Apples.

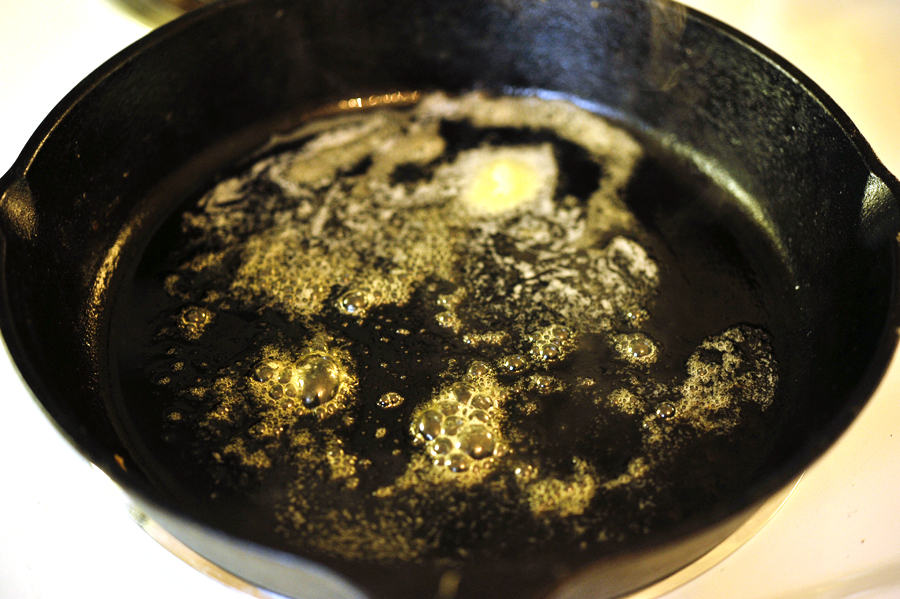
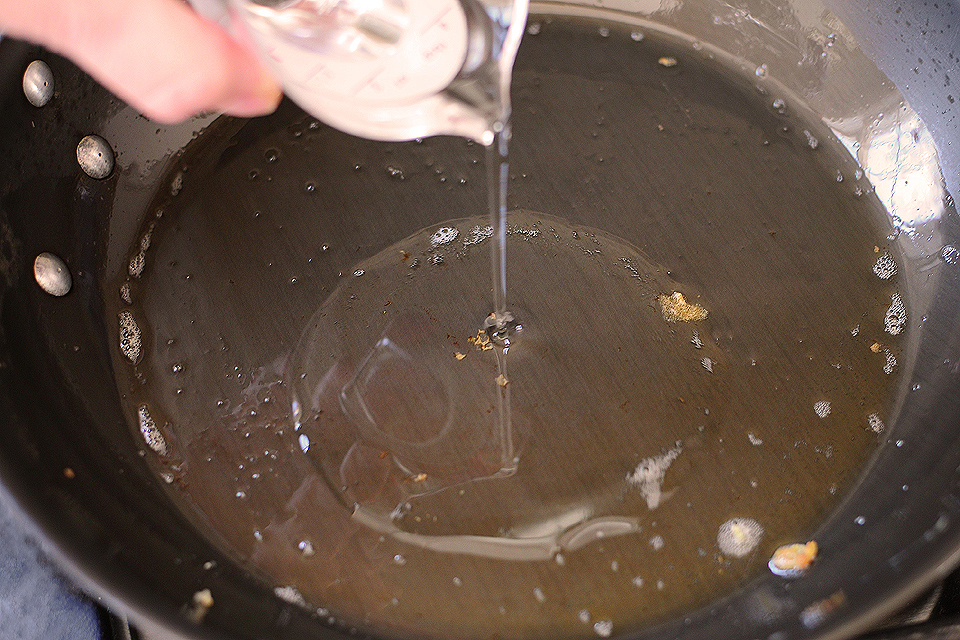
Heat a 10-inch skillet over medium heat and add the butter. Let it melt and bubble.


Tasty Kitchen Blog: Spinach, Scallion and Feta Frittata. Guest post by Georgia Pellegrini, recipe submitted by TK member Kristi of 30 Pounds of Apples.

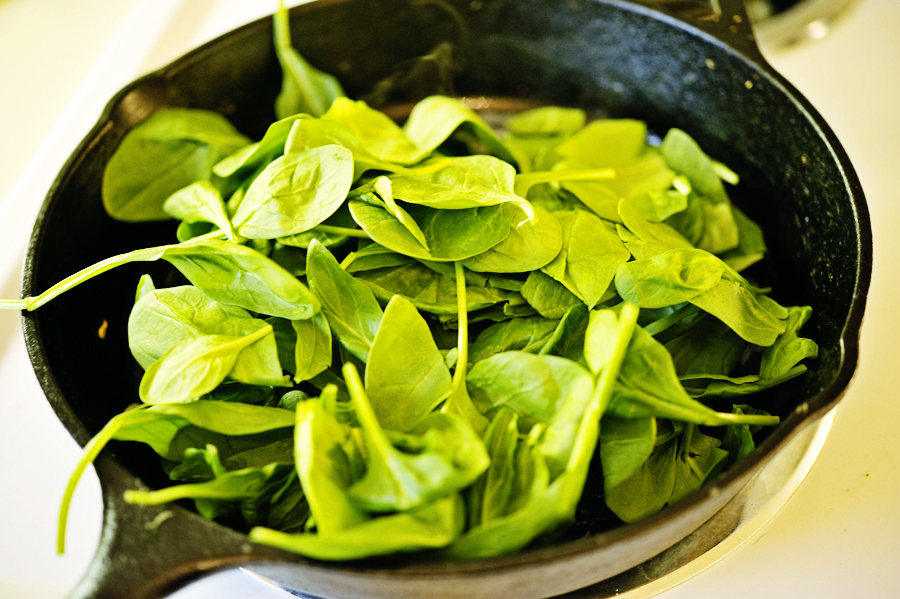
Add the spinach and cook for 2-3 minutes, stirring occasionally until it wilts.


Tasty Kitchen Blog: Spinach, Scallion and Feta Frittata. Guest post by Georgia Pellegrini, recipe submitted by TK member Kristi of 30 Pounds of Apples.

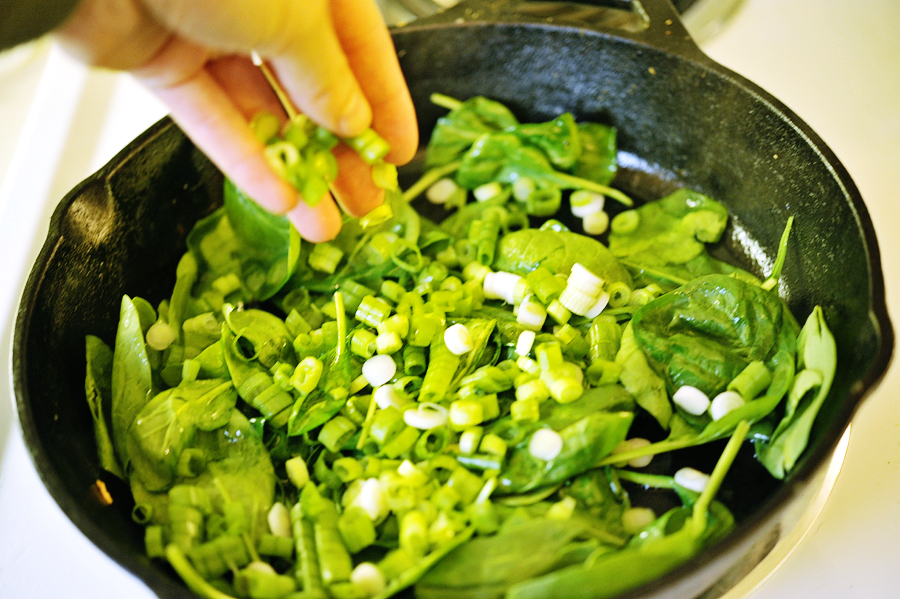
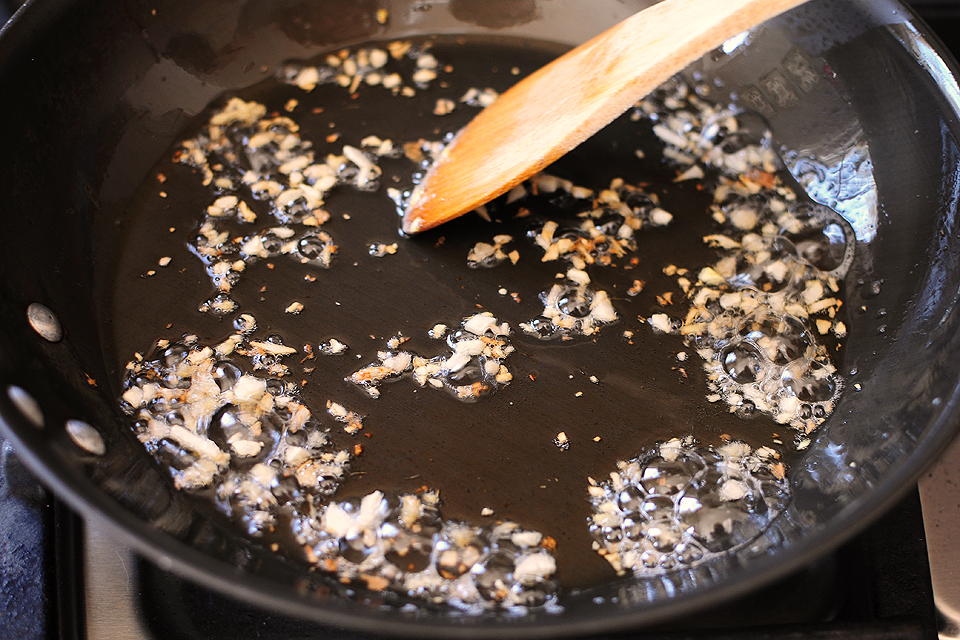
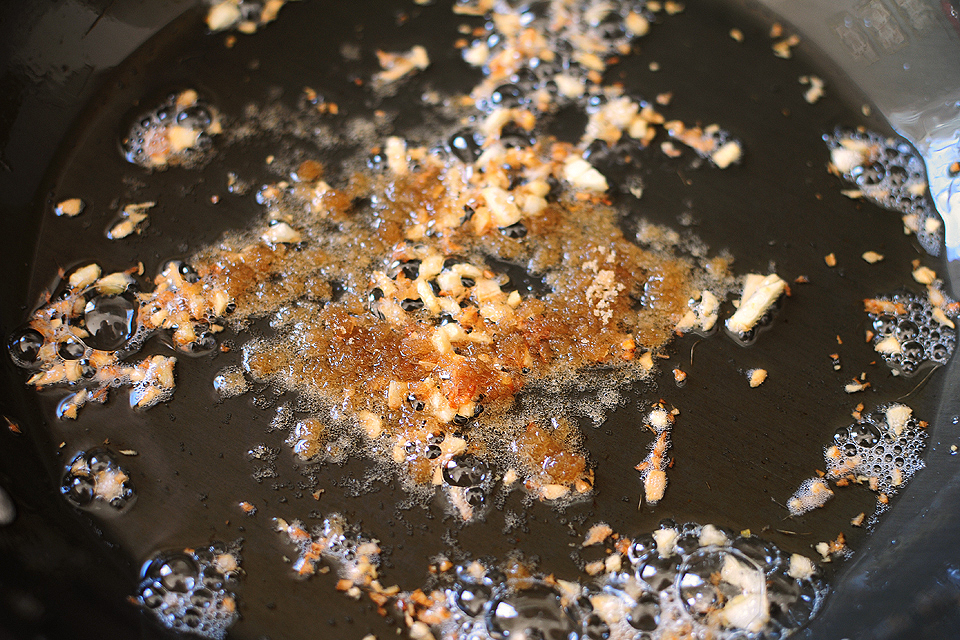
Sprinkle in the scallions and stir. It will begin to smell divine.


Tasty Kitchen Blog: Spinach, Scallion and Feta Frittata. Guest post by Georgia Pellegrini, recipe submitted by TK member Kristi of 30 Pounds of Apples.

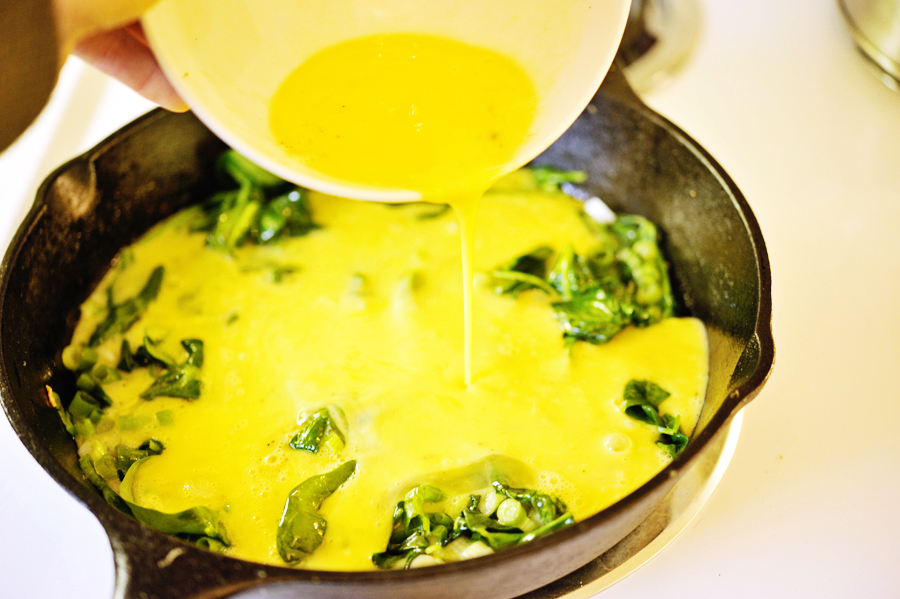
Evenly distribute the spinach and scallions, then pour the beaten egg mixture over the top.


Tasty Kitchen Blog: Spinach, Scallion and Feta Frittata. Guest post by Georgia Pellegrini, recipe submitted by TK member Kristi of 30 Pounds of Apples.

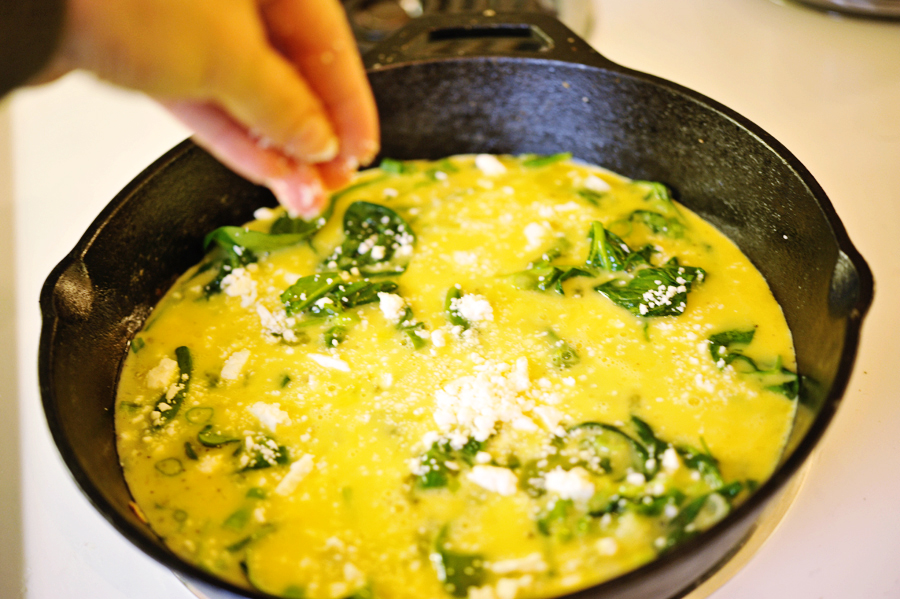
Sprinkle in your favorite cheese all over the top! Because life is better with cheese.


Tasty Kitchen Blog: Spinach, Scallion and Feta Frittata. Guest post by Georgia Pellegrini, recipe submitted by TK member Kristi of 30 Pounds of Apples.

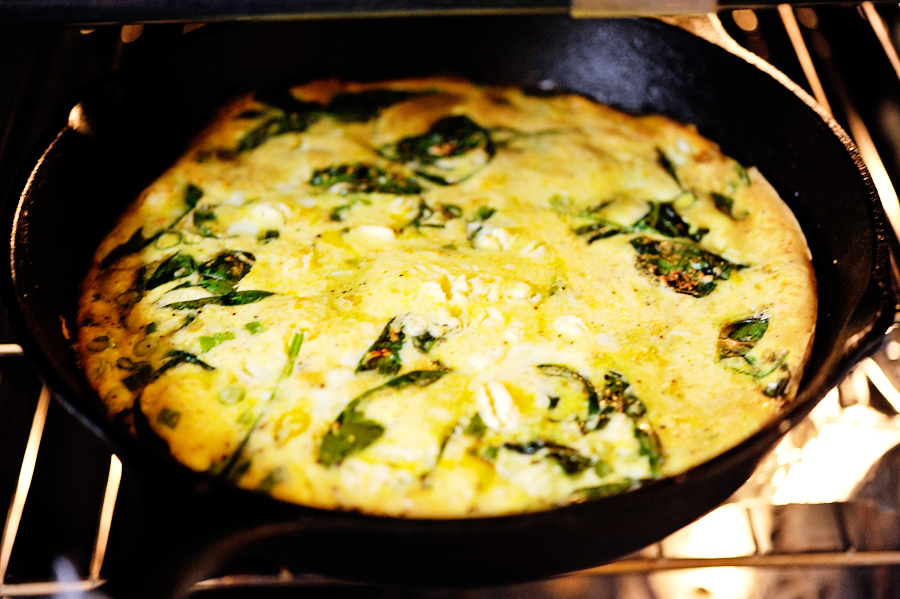
Place the skillet in the oven for 6 to 10 minutes, watching it closely so it doesn’t burn. Alternatively, you can cook it at 350ºF for a longer time and won’t have to watch it as closely.


Tasty Kitchen Blog: Spinach, Scallion and Feta Frittata. Guest post by Georgia Pellegrini, recipe submitted by TK member Kristi of 30 Pounds of Apples.

Remove it from the oven and let cool slightly. Cut it into wedges like a pie and serve!


Tasty Kitchen Blog: Spinach, Scallion and Feta Frittata. Guest post by Georgia Pellegrini, recipe submitted by TK member Kristi of 30 Pounds of Apples.

This is a great make-ahead breakfast and is equally delicious when served at room temperature. If you’re feeling creative, also try sauté peppers, onions, and even ground meat along with the spinach as a variation. And if you want a thicker frittata, simply use a smaller skillet or more eggs.

Thank you to Kristi for sharing this delicious recipe. Check out her website 30 Pounds of Apples for more treats.


Printable Recipe

Spinach, Scallion & Feta Frittata

See post on Kristi at 30 Pounds of Apples’s site!
2.00 Mitt(s) 1 Rating(s)1 vote, average: 2.00 out of 51 vote, average: 2.00 out of 51 vote, average: 2.00 out of 51 vote, average: 2.00 out of 51 vote, average: 2.00 out of 5

Prep Time:

Cook Time:

Difficulty: Easy

Servings: 6

6
x

Print Options

Page size Letter 3x5 4x6
Text Size Small Medium Large
Content Include description
Include prep time, etc.
Show image

Description

Fluffy eggs and spinach studded with zesty onions and creamy feta cheese. Worthy of your weekend breakfast menu.

Ingredients

  • 3 ounces, weight Fresh Spinach Leaves
  • 4 whole Scallions
  • 6 whole Eggs
  • 1 teaspoon Freshly Ground Black Pepper
  • 1 pinch Sea Salt
  • 1 Tablespoon Butter
  • 2 ounces, weight Feta Cheese, Crumbled

Preparation Instructions

Preheat oven on the broiler setting (500ºF). Roughly chop spinach leaves and remove large, stiff stems. Chop the whites and greens of the scallions. In a medium bowl, beat the eggs with a whisk for 3-4 minutes. Add the black pepper and salt to the eggs and whisk a minute or so more.

Heat a 10-inch oven-safe frying pan over medium heat. Add butter and tilt the pan until butter coats the bottom. Cook spinach for 2-3 minutes until it has wilted and collapsed in size. Add scallions and cook for 2-3 more minutes. Pour in egg mixture and quickly stir so the spinach and scallions are evenly distributed. From this point on, do not stir the mixture. Sprinkle the feta evenly over the top of the eggs.

Once the edges of the frittata are cooked (they’ll be lighter in color and look solid), place the frying pan on a middle rack in the oven. Broil for 6-10 minutes, watching it very closely. Stay focused: the frittata will quickly burn if left under the broiler for too long. Once the frittata is starting to turn golden brown and is puffing up, remove from the oven and allow to cool for 2-3 minutes. The frittata will flatten a bit during this time.

Cut the frittata into 6 wedges and serve immediately.


_______________________________________

There’s so much to say about Georgia, we don’t know where to start. Leaving Wall Street for the French Culinary Institute, followed by a stint at the Gramercy Tavern and La Chassagnette in France, her passion for food and food traditions are evident and inspiring. Visit her site at Georgia Pellegrini, where you’ll find more recipes, photos, learn all about her wonderful books Girl Hunter and Food Heroes, and enjoy her latest adventures.


Profile photo of georgiapellegrini

Strawberry Balsamic Vinaigrette

Posted by in Step-by-Step Recipes

Tasty Kitchen Blog: Strawberry Balsamic Vinaigrette. Guest post by Georgia Pellegrini, recipe submitted by TK member Chef Jamie Levine of Green Beans and Grapefruit.

 
Spring seems to finally be here, and with that comes strawberry season! This recipe for a Strawberry Balsamic Vinaigrette from Tasty Kitchen member Jamie Levine caught my eye for its beautiful color and creamy texture. It will brighten up even the simplest of salads.


Tasty Kitchen Blog: Strawberry Balsamic Vinaigrette. Guest post by Georgia Pellegrini, recipe submitted by TK member Chef Jamie Levine of Green Beans and Grapefruit.

To make her recipe, you will need: fresh strawberries, Dijon mustard, balsamic vinegar, salt and olive oil. That’s it!


Tasty Kitchen Blog: Strawberry Balsamic Vinaigrette. Guest post by Georgia Pellegrini, recipe submitted by TK member Chef Jamie Levine of Green Beans and Grapefruit.

Start by rinsing the strawberries and slicing the tops off.


Tasty Kitchen Blog: Strawberry Balsamic Vinaigrette. Guest post by Georgia Pellegrini, recipe submitted by TK member Chef Jamie Levine of Green Beans and Grapefruit.

Drop them in a blender along with the Dijon mustard and balsamic vinegar.


Tasty Kitchen Blog: Strawberry Balsamic Vinaigrette. Guest post by Georgia Pellegrini, recipe submitted by TK member Chef Jamie Levine of Green Beans and Grapefruit.

Turn the blender on and slowly drizzle in the olive oil, blending until fully incorporated. If the mixture doesn’t blend to a smooth consistency easily, simply add a few tablespoons of water until it does.


Tasty Kitchen Blog: Strawberry Balsamic Vinaigrette. Guest post by Georgia Pellegrini, recipe submitted by TK member Chef Jamie Levine of Green Beans and Grapefruit.

The mixture will be emulsified and creamy and the most beautiful color. You can then pass it through a strainer or leave it as it is. It was smooth enough for me so I skipped that step.


Tasty Kitchen Blog: Strawberry Balsamic Vinaigrette. Guest post by Georgia Pellegrini, recipe submitted by TK member Chef Jamie Levine of Green Beans and Grapefruit.

This is a wonderful dressing for spring when the strawberries are plump and ripe. It will brighten up the simplest looking salad and will also store well in the refrigerator.

Try it this spring—you will love it. And thank you to Jamie for this wonderful, silky smooth dressing. Visit her website Green Beans & Grapefruit for some other amazing recipes!


Printable Recipe

Strawberry Balsamic Vinaigrette

See post on Jamie Levine {green beans & grapefruit}’s site!
5.00 Mitt(s) 1 Rating(s)1 vote, average: 5.00 out of 51 vote, average: 5.00 out of 51 vote, average: 5.00 out of 51 vote, average: 5.00 out of 51 vote, average: 5.00 out of 5

Prep Time:

Cook Time:

Difficulty: Easy

Servings: 6

6
x

Print Options

Page size Letter 3x5 4x6
Text Size Small Medium Large
Content Include description
Include prep time, etc.
Show image

Description

Tasty and healthy strawberry vinaigrette—pretty and perfect for Spring!

Ingredients

  • 8 whole Fresh Strawberries (medium), Hulled
  • 1 Tablespoon Dijon Mustard
  • 2 Tablespoons White Balsamic Vinegar
  • 1 pinch Kosher Salt
  • 4 teaspoons Olive Oil

Preparation Instructions

In a small food processor or blender, blend strawberries, Dijon mustard, white balsamic vinegar and salt until smooth. Slowly drizzle in the olive oil as it’s still blending, until fully incorporated. Strain the mixture into a jar. Can be refrigerated for a few days and it freezes well.


_______________________________________

There’s so much to say about Georgia, we don’t know where to start. Leaving Wall Street for the French Culinary Institute, followed by a stint at the Gramercy Tavern and La Chassagnette in France, her passion for food and food traditions are evident and inspiring. Visit her site at Georgia Pellegrini, where you’ll find more recipes, photos, learn all about her wonderful books Girl Hunter and Food Heroes, and enjoy her latest adventures.


Profile photo of georgiapellegrini

Garlic Wasabi and Sage Green Beans

Posted by in Step-by-Step Recipes

Tasty Kitchen Blog: Garlic Wasabi and Sage Green Beans. Guest post by Georgia Pellegrini, recipe submitted by TK member Nancy of The Coupon Clipping Cook.

 
Green bean salads are one of my favorite, especially in the warmer months for a picnic, served room temperature with a tangy vinaigrette. Tasty Kitchen member Nancy’s version caught me eye because of the wasabi spice and browned garlic. It was absolutely delicious! And a great dish to make ahead for the week.


Tasty Kitchen Blog: Garlic Wasabi and Sage Green Beans. Guest post by Georgia Pellegrini, recipe submitted by TK member Nancy of The Coupon Clipping Cook.

You will need: butter, dried sage, garlic powder, olive oil, salt, garlic, wasabi powder and green beans.


Tasty Kitchen Blog: Garlic Wasabi and Sage Green Beans. Guest post by Georgia Pellegrini, recipe submitted by TK member Nancy of The Coupon Clipping Cook.

Rinse the green beans and snap off the ends if need be. Then add them to a medium-sized bowl. Add the olive oil and toss, then set aside to marinate.


Tasty Kitchen Blog: Garlic Wasabi and Sage Green Beans. Guest post by Georgia Pellegrini, recipe submitted by TK member Nancy of The Coupon Clipping Cook.

Add the garlic powder …


Tasty Kitchen Blog: Garlic Wasabi and Sage Green Beans. Guest post by Georgia Pellegrini, recipe submitted by TK member Nancy of The Coupon Clipping Cook.

And the crushed sage …


Tasty Kitchen Blog: Garlic Wasabi and Sage Green Beans. Guest post by Georgia Pellegrini, recipe submitted by TK member Nancy of The Coupon Clipping Cook.

And the wasabi powder.


Tasty Kitchen Blog: Garlic Wasabi and Sage Green Beans. Guest post by Georgia Pellegrini, recipe submitted by TK member Nancy of The Coupon Clipping Cook.

Toss it about well until evenly incorporated.


Tasty Kitchen Blog: Garlic Wasabi and Sage Green Beans. Guest post by Georgia Pellegrini, recipe submitted by TK member Nancy of The Coupon Clipping Cook.

Cut the garlic into ¼-inch pieces and set aside.


Tasty Kitchen Blog: Garlic Wasabi and Sage Green Beans. Guest post by Georgia Pellegrini, recipe submitted by TK member Nancy of The Coupon Clipping Cook.

Heat a skillet over medium-high heat and add the green beans. Cook them for 5 minutes or so, tossing every so often.


Tasty Kitchen Blog: Garlic Wasabi and Sage Green Beans. Guest post by Georgia Pellegrini, recipe submitted by TK member Nancy of The Coupon Clipping Cook.

Add the butter and garlic and toss well to ensure the garlic doesn’t burn.


Tasty Kitchen Blog: Garlic Wasabi and Sage Green Beans. Guest post by Georgia Pellegrini, recipe submitted by TK member Nancy of The Coupon Clipping Cook.

Transfer to a plate and serve. This dish stored well for a week and was delicious when served cold or room temperature. It can be reinvented several times as well with the addition of cherry tomatoes, crumbled cheese or whatever other extras are in your refrigerator.

Thanks to Nancy for this delicious recipe. Visit her website Coupon Clipping Cook for other wonderful treats!


Printable Recipe

Garlic Wasabi and Sage Green Beans

See post on Nancy @ Coupon Clipping Cook’s site!
0.00 Mitt(s) 0 Rating(s)0 votes, average: 0.00 out of 50 votes, average: 0.00 out of 50 votes, average: 0.00 out of 50 votes, average: 0.00 out of 50 votes, average: 0.00 out of 5

Prep Time:

Cook Time:

Difficulty: Easy

Servings: 3

3
x

Print Options

Page size Letter 3x5 4x6
Text Size Small Medium Large
Content Include description
Include prep time, etc.
Show image

Description

A delicious side dish with an earthy flavor.

Ingredients

  • ½ pounds Fresh Fine French Green Beans (Or Regular Green Beans)
  • 2 Tablespoons Olive Oil, Divided
  • ½ teaspoons Garlic Powder
  • ½ teaspoons Ground Sage
  • ½ teaspoons Wasabi Powder
  • ¼ teaspoons Sea Salt
  • 4 cloves Garlic
  • 1 Tablespoon Butter

Preparation Instructions

Snap or cut the stem ends off the green beans, rinse them off and add to a medium size bowl. Add the olive oil (reserving about 2 teaspoons of olive oil for the skillet), garlic powder, sage, wasabi powder, and sea salt.

Toss the green beans until coated. Set aside. Slice the garlic into pieces about ¼-inch thick and set aside for a moment.

Heat a large skillet on medium heat. Add the green beans to the skillet and the reserved 2 teaspoons olive oil. Add the butter and garlic and stir (if using regular green beans, let them sauté in the pan for about 6 minutes before adding the butter and garlic). Continue stirring.

Keep stirring until the garlic starts to turn a light brown or golden color (about 6 minutes) which is about the time when the green beans should be done. If the garlic is cooking too fast and starting to turn a dark brown color, turn the heat down just a bit. Some of the thinner green beans should be a little soft while others should be a bit crisp. Try a quick sample and salt to taste.

Serve hot right out of the skillet as a side dish.


_______________________________________

There’s so much to say about Georgia, we don’t know where to start. Leaving Wall Street for the French Culinary Institute, followed by a stint at the Gramercy Tavern and La Chassagnette in France, her passion for food and food traditions are evident and inspiring. Visit her site at Georgia Pellegrini, where you’ll find more recipes, photos, learn all about her wonderful books Girl Hunter and Food Heroes, and enjoy her latest adventures.


Profile photo of missamy

Zhong-Xi Breakfast

Posted by in Step-by-Step Recipes

Tasty Kitchen Blog: Zhong-Xi Breakfast. Guest post by Amy Johnson of She Wears Many Hats, recipe submitted by TK member Dani of Expat Cucina.

 
Most mornings around here begin with an egg of some form. I’m pretty spoiled with a husband who cooks a mean omelet. It’s not something I take for granted. It’s a mighty nice way to start the day. We’re always trying to mix things up by trying different cheeses and toppings. Omelets are flexible that way. So my interest was piqued when I ran across this recipe for Zhong-Xi Breakfast here from Tasty Kitchen member Dani a few weeks ago. I actually made it for lunch to try out before introducing it into our breakfast mix. It’s a simple mix of ingredients which honestly I didn’t expect much from, but the flavor created by the ginger and garlic, combined with the oh-my-word-tasty cooking oil is quite satisfying. The hubby will be pleased when I surprise him with breakfast for a change with this one. It’s quick and easy. Let me show you how.


Tasty Kitchen Blog: Zhong-Xi Breakfast. Guest post by Amy Johnson of She Wears Many Hats, recipe submitted by TK member Dani of Expat Cucina.

You’ll need eggs, salt, peanut oil, chopped garlic and ginger, brown sugar, red and yellow cherry tomatoes, soy sauce, rice vinegar, sesame oil, and chopped parsley (not shown—oops!).


Tasty Kitchen Blog: Zhong-Xi Breakfast. Guest post by Amy Johnson of She Wears Many Hats, recipe submitted by TK member Dani of Expat Cucina.

Begin by beating the eggs with the salt.


Tasty Kitchen Blog: Zhong-Xi Breakfast. Guest post by Amy Johnson of She Wears Many Hats, recipe submitted by TK member Dani of Expat Cucina.

The omelet portion moves really quick. Heat a portion of the peanut oil in a skillet. Once the oil is hot, pour in the beaten eggs. Let cook for about a minute (see note below). Pull one edge of the omelet to the side so the uncooked eggs can reach the pan. When eggs are almost cooked but center is still soft, fold omelet in half and place on a plate to wait for the yummy toppings.

(Note: My favorite egg-cooking skillet cooks quickly so I should’ve let it go less than a minute. Adjust the cooking time for your stove and skillet.)


Tasty Kitchen Blog: Zhong-Xi Breakfast. Guest post by Amy Johnson of She Wears Many Hats, recipe submitted by TK member Dani of Expat Cucina.

Don’t wash that skillet just yet! Add the remaining peanut oil and heat until hot.


Tasty Kitchen Blog: Zhong-Xi Breakfast. Guest post by Amy Johnson of She Wears Many Hats, recipe submitted by TK member Dani of Expat Cucina.

Add in the garlic and ginger and sauté for about a minute, stirring constantly.


Tasty Kitchen Blog: Zhong-Xi Breakfast. Guest post by Amy Johnson of She Wears Many Hats, recipe submitted by TK member Dani of Expat Cucina.

Garlic can burn very quickly at high heat, so be careful to watch for the garlic burning. Mine got a bit on the dark side, but it was still nice.


Tasty Kitchen Blog: Zhong-Xi Breakfast. Guest post by Amy Johnson of She Wears Many Hats, recipe submitted by TK member Dani of Expat Cucina.

The brown sugar goes in next. Mix together.


Tasty Kitchen Blog: Zhong-Xi Breakfast. Guest post by Amy Johnson of She Wears Many Hats, recipe submitted by TK member Dani of Expat Cucina.

Next, the tomatoes. So much happy color to start the day with! Cook the tomatoes for about a minute or so, until they start getting soft.


Tasty Kitchen Blog: Zhong-Xi Breakfast. Guest post by Amy Johnson of She Wears Many Hats, recipe submitted by TK member Dani of Expat Cucina.

Now pull it altogether with the soy sauce, rice vinegar, and sesame oil. Can you smell it? Oh my. Stir all together.


Tasty Kitchen Blog: Zhong-Xi Breakfast. Guest post by Amy Johnson of She Wears Many Hats, recipe submitted by TK member Dani of Expat Cucina.

Remove from heat and pour the tomatoes with the cooking oil on top of the patiently waiting omelet. Garnish with freshly chopped parsley and enjoy!

If you prep the ingredients the night before, chopping the garlic and ginger and tomatoes, you can have this omelet done in no time. Such a great way to dress up a simple omelet.

Many thanks to Dani of the blog Expat Cucina for sharing this flavorful way to start the day.


Printable Recipe

Zhong-Xi Breakfast

5.00 Mitt(s) 1 Rating(s)1 vote, average: 5.00 out of 51 vote, average: 5.00 out of 51 vote, average: 5.00 out of 51 vote, average: 5.00 out of 51 vote, average: 5.00 out of 5

Prep Time:

Cook Time:

Difficulty: Easy

Servings: 1

1
x

Print Options

Page size Letter 3x5 4x6
Text Size Small Medium Large
Content Include description
Include prep time, etc.
Show image

Description

Zhong-Xi in Chinese means East-West. This recipe takes a bit from the East (in the soy sauce, sesame oil and ginger) and a bit from the West. Try these eggs tomorrow for breakfast!

Ingredients

  • 2 whole Eggs
  • 1 pinch Salt
  • 3 Tablespoons Peanut Oil
  • 1 clove Garlic, Finely Chopped
  • 1 teaspoon Finely Chopped Ginger
  • 1 teaspoon Brown Sugar
  • 3 whole Red Cherry Tomatoes, Washed And Cut In Half
  • 1 teaspoon Soy Sauce
  • 1 teaspoon Rice Vinegar
  • 1 teaspoon Sesame Oil
  • 4 whole Yellow Cherry Tomatoes
  • 1 Tablespoon Chopped Parsley

Preparation Instructions

In a bowl, lightly beat eggs with a pinch of salt.

In a skillet, heat 1 tablespoon of peanut oil. When hot, pour in the eggs.Let cook for a minute or so, till the eggs start solidifying. Then with a wooden spoon, push the edge in so that the soggy, uncooked eggs can touch the pan. When the eggs are almost cooked but the center is still soft, fold your omelet in half and place it on a plate.

In the same skillet (don’t wash it), add the remaining 2 tablespoons of peanut oil and heat till really hot. Throw in chopped garlic and ginger, stir for a minute or so. Then add the sugar and let it caramelize. Add in the tomatoes and cook till they start getting soft (about 1 minute). Pour in soy sauce, rice vinegar and sesame oil; stir all the ingredients together. Remove from heat and pour the tomatoes with its cooking oil on top of your omelet.

Garnish with freshly chopped parsley.


_______________________________________

Amy Johnson is a blogger who writes about food, travel, the home (both inside and out), and various observations and random musings about anything and everything. Visit her blog She Wears Many Hats for a dose of deliciousness, practicality, hilarity, or just plain fun. She lives in South Carolina with her husband and two children.


Profile photo of georgiapellegrini

Tomato Basil Soup with Cheesy Bread

Posted by in Step-by-Step Recipes

  This Tomato Basil Soup with Cheesy Bread from Tasty Kitchen member Serena was so divine. The texture is silky, the color is beautiful, and it is full of robust flavor. The cheesy bread can be left out or swapped for crumbled crackers or straight up cheese. There are so many tasty options.     […]

Profile photo of georgiapellegrini

Chorizo Lentil Soup

Posted by in Step-by-Step Recipes

  I’m a big fan of soups and stews that you can make ahead of time and eat throughout the week. The flavor gets better with time and it is a healthy and satisfying way to eat during a busy week when you don’t have time to cook. This Chorizo Lentil Stew from TK member […]

Profile photo of HowSweetEats

Pineapple Upside Down Banana Pancakes

Posted by in Step-by-Step Recipes

  Pancakes are a staple in our house. Well, they’ve actually been a staple in my life since I was a kid, just like many people. My dad grew up eating “short stacks” that his grandmother made him, and in his words? He ate them faster than she could cook them. This is one tradition […]

Profile photo of georgiapellegrini

Walnut-Crusted Chicken

Posted by in Step-by-Step Recipes

  This Walnut Crusted Chicken from Elaine seemed simple at first but blew me away with just how flavorful it was. And I just love how protein packed it is with the walnut crust and juicy dark meat. It is healthy without making you feel deprived.       To make it you will need: […]