The Pioneer Woman Tasty Kitchen
Profile photo of Betsy (TK)

Packing Lunches

Posted by in Kitchen Talk

Tasty Kitchen Blog: Kitchen Talk (Packing Lunches)

If you’re like me, making lunches in the morning does not represent the height of your culinary creativity. I have been known to let out a pitiful sigh while staring uninspired into the fridge, only to end up grabbing the same few items: fruit, deli meat, cheese. And then, of course, there’s the inevitable mining of the veggie drawer for items my child will actually eat. This time of year, we can really get into autopilot mode, packing the same old lunch every day. So today, we want to pick your brains for ways to pack delicious lunches (for kids or grown-ups!) while keeping the morning sane in the process. So tell us:

What are your tips for packing healthy and interesting lunches?

I’m short on lunch ideas these days, but I do have one simple one that’s tried and true. Veggies and dip! It always feels like a bit of a defeat to open the lunch box at the end of the day and find containers still full of food. Often it’s the vegetables that get left behind, so one of my reliable solutions has been to pack dressing or dip with the vegetables. I have a child who loves foods he can dip, so this encourages him to eat up the healthy stuff, too. I like to use homemade salad dressing I made for dinner the night before, or just hummus, guacamole or yogurt dip, like tzatziki.

Erika has a good system. She says: “I like packing pasta or grain salads because I can easily make them the night before and store them in the refrigerator already packed in a lunch container. Then I can just quickly heat it up in the morning as I make coffee or steep tea. I sometimes make big batch of the pasta or grain base and the protein so I can whip up different versions, like Italian, Greek, Mexican, or Asian.”

Nanci always has whole wheat tortillas handy to throw whatever leftovers from weeknight dinners into a super quick wrap (brisket, fajitas, lunch meat, Philly cheese steak, chicken Caesar salad, pinto beans, etc.). She also has a yogurt maker and makes yogurt each week. So a cup of homemade Greek yogurt with some jam in it is always on her lunch menu. Other than that, she makes big batches of whatever she makes for dinner and typically throws a small container or two of the leftovers into the freezer for a super quick toss into a lunch bag.

Now for your tips! Tell us about your favorite items to pack and/or your brilliant lunch-planning tricks below. We’re ready for our brown bag attitude adjustment!


Profile photo of Natalie | Perry's Plate

Paleo Brownies

Posted by in Baking

Tasty Kitchen Blog: Paleo Brownies. Guest post by Natalie Perry of Perry's Plate, recipe submitted by TK member Elana of Elana's Pantry.

Some days I really want a brownie. Okay, most days I really want a brownie, but making brownies all the time would be a dangerous thing for me. I have very little self-control when there are baked goods sitting on my counter, and I end up eating them for breakfast.

No bueno.

Enter: Paleo Brownies by TK member elanaspantry. Elana is known for her almond flour recipes and paleo-focused blog and cookbooks. I’ve been reading her blog for several years and have had a lot of luck with her recipes. I think she has magical powers.

These chocolatey bites were just the thing to curb my brownie cravings without completely falling off the healthy wagon. They’re naturally sweetened, grain-free, and dairy-free. Can’t get much better than that.

Plus, they have a rich, dark, chocolate flavor. I like my chocolate (and my brownies) dark.

Let’s get started!


Tasty Kitchen Blog: Paleo Brownies. Guest post by Natalie Perry of Perry's Plate, recipe submitted by TK member Elana of Elana's Pantry.

You’ll need eggs, baking soda, vanilla stevia, coconut oil, blanched almond flour, dates, 100% cacao baking chocolate, and salt.


Tasty Kitchen Blog: Paleo Brownies. Guest post by Natalie Perry of Perry's Plate, recipe submitted by TK member Elana of Elana's Pantry.

First, put the almond flour, salt, and baking soda in the work bowl of a food processor. My food processor has a 9-cup bowl. You may be able to get away with a 7-cup bowl but I wouldn’t go smaller than that.

Did I mention all of this is done in a food processor? No other dishes or pots and pans needed! If you don’t have a food processor, go buy one.

Joking. (Kinda.)

You can make it without a food processor, but you’ll have to tweak the instructions a bit. I’ll help you out when we get to that point.


Tasty Kitchen Blog: Paleo Brownies. Guest post by Natalie Perry of Perry's Plate, recipe submitted by TK member Elana of Elana's Pantry.

Chop the chocolate into smaller pieces and add them to the food processor.

If you don’t have a food processor, melt the chocolate over low heat and stir it into the almond flour mixture.


Tasty Kitchen Blog: Paleo Brownies. Guest post by Natalie Perry of Perry's Plate, recipe submitted by TK member Elana of Elana's Pantry.

Pulse the mixture until it resembles wet sand and all of the large chocolate chunks have been broken down.


Tasty Kitchen Blog: Paleo Brownies. Guest post by Natalie Perry of Perry's Plate, recipe submitted by TK member Elana of Elana's Pantry.

Now for the dates. If your dates aren’t pitted, you’ll need to remove the pits. It’s super easy. Just rip them in half and pull the pits out.


Tasty Kitchen Blog: Paleo Brownies. Guest post by Natalie Perry of Perry's Plate, recipe submitted by TK member Elana of Elana's Pantry.

Add the date halves to the food processor.

If you (still) don’t have a food processor, jump in your car and grab one. I’ll wait.


Tasty Kitchen Blog: Paleo Brownies. Guest post by Natalie Perry of Perry's Plate, recipe submitted by TK member Elana of Elana's Pantry.

Pulse the mixture until (again) it looks like wet sand and the dates are broken up well.

No processor, still? You’ll need to chop those babies up really small. As in, mince. Then stir them into the mixture.


Tasty Kitchen Blog: Paleo Brownies. Guest post by Natalie Perry of Perry's Plate, recipe submitted by TK member Elana of Elana's Pantry.

Time for eggs! The recipe suggested three eggs, but my eggs were on the small side, so I used four. Blend the mixture again!


Tasty Kitchen Blog: Paleo Brownies. Guest post by Natalie Perry of Perry's Plate, recipe submitted by TK member Elana of Elana's Pantry.

Add the vanilla stevia.


Tasty Kitchen Blog: Paleo Brownies. Guest post by Natalie Perry of Perry's Plate, recipe submitted by TK member Elana of Elana's Pantry.

And coconut oil. I’ve made this with coconut oil in both liquid and solid form. It didn’t make a difference in the end.


Tasty Kitchen Blog: Paleo Brownies. Guest post by Natalie Perry of Perry's Plate, recipe submitted by TK member Elana of Elana's Pantry.

After the last blend, it should be thick and look something like this.


Tasty Kitchen Blog: Paleo Brownies. Guest post by Natalie Perry of Perry's Plate, recipe submitted by TK member Elana of Elana's Pantry.

Transfer the mixture into a greased 8 or 9-inch square baking pan. I used coconut oil spray to grease my pan.

Bake as directed in the recipe until an inserted toothpick comes out clean.


Tasty Kitchen Blog: Paleo Brownies. Guest post by Natalie Perry of Perry's Plate, recipe submitted by TK member Elana of Elana's Pantry.

Here they are after baking! I was ready to dive into these when I read, “Allow brownies to cool for 2 hours, then serve.”

DEVASTATION.

After making these a few times, I trust Elana. They taste much better after they’ve been sitting around a while. I thought the flavor was even better the next day. So wait, if you can. If you can’t, I won’t judge.


Tasty Kitchen Blog: Paleo Brownies. Guest post by Natalie Perry of Perry's Plate, recipe submitted by TK member Elana of Elana's Pantry.

They come out of the pan and slice so well, too!


Tasty Kitchen Blog: Paleo Brownies. Guest post by Natalie Perry of Perry's Plate, recipe submitted by TK member Elana of Elana's Pantry.

Thanks so much, Elana, for a healthier alternative to one of my favorite treats!

Go check out Elana’s TK Recipe Box as well as her blog, Elana’s Pantry for more paleo recipes and naturally-sweetened grain-free treats!

Notes:
These were slightly more cakey than I like my brownies to be, so I decided three eggs was better, even if said eggs were small. Also, if you reduce the baking time by a few minutes the texture is even more fudgy—which is my favorite.


Printable Recipe

Paleo Brownies

See post on elanaspantry’s site!
5.00 Mitt(s) 1 Rating(s)1 vote, average: 5.00 out of 51 vote, average: 5.00 out of 51 vote, average: 5.00 out of 51 vote, average: 5.00 out of 51 vote, average: 5.00 out of 5

Prep Time:

Cook Time:

Difficulty: Easy

Servings: 16

16
x

Print Options

Page size Letter 3x5 4x6
Text Size Small Medium Large
Content Include description
Include prep time, etc.
Show image

Description

These dark chocolate brownies are lightly-sweetened with dates and packed with other Paleo perks such as coconut oil.

Ingredients

  • 1 cup Blanched Almond Flour
  • ¼ teaspoons Celtic Sea Salt
  • ¼ teaspoons Baking Soda
  • 4 ounces, weight Baking Chocolate, 100% Cacao
  • 7  Medjool Dates
  • 3  Eggs
  • ½ cups Coconut Oil
  • ½ teaspoons Vanilla Stevia

Preparation Instructions

Preheat oven to 350°.

In a food processor, pulse together almond flour, salt and baking soda. Add the squares of dark chocolate and pulse until you reach the texture of coarse sand. Add the dates and pulse until you reach the texture of coarse sand. Add eggs and pulse to combine. Add coconut oil and stevia and pulse until mixture is smooth.

Transfer mixture to a greased 8 x 8 inch baking dish. Mixture will be very thick so you’ll need to smooth it with a spatula.

Bake at 350°F for 18-22 minutes. Remove from oven and set dish on a rack. Allow brownies to cool for 2 hours, then serve.


_______________________________________

Be sure to check out Natalie’s own beautiful food blog, Perrys’ Plate, where you can see her growing collection of lovely recipes. There’s always something new to see there. Go visit now!


Profile photo of georgiapellegrini

Paleo Shepherd’s Pie

Posted by in Step-by-Step Recipes

Tasty Kitchen Blog: Paleo Shepherd's Pie. Guest post by Georgia Pellegrini, recipe submitted by TK member Elana of Elana's Pantry.

A Shepherd’s Pie is one of those classic dishes that makes you feel all warm and cozy when you dig in to it. A traditional English dish that is normally made with lamb or mutton, this Paleo Shepherd’s Pie from Tk member Elana is made with beef and even has a little twist on the mashed potatoes.


Tasty Kitchen Blog: Paleo Shepherd's Pie. Guest post by Georgia Pellegrini, recipe submitted by TK member Elana of Elana's Pantry.

To make it you will need: olive lil, lnion, turkey or pork bacon, diced carrots, diced celery, ground beef, sea salt, black pepper, smoked paprika, chicken broth, and 2 whole large heads of cauliflower, trimmed, chopped and steamed until very soft.


Tasty Kitchen Blog: Paleo Shepherd's Pie. Guest post by Georgia Pellegrini, recipe submitted by TK member Elana of Elana's Pantry.

To start, heat 2 tablespoons of olive oil in a large pan.


Tasty Kitchen Blog: Paleo Shepherd's Pie. Guest post by Georgia Pellegrini, recipe submitted by TK member Elana of Elana's Pantry.

Add the onion and sauté until the onion is soft and translucent. Add the bacon to the pan and cook until done.


Tasty Kitchen Blog: Paleo Shepherd's Pie. Guest post by Georgia Pellegrini, recipe submitted by TK member Elana of Elana's Pantry.

Now you can add the carrots and celery, cooking in the bacon fat until they are soft and cooked through.


Tasty Kitchen Blog: Paleo Shepherd's Pie. Guest post by Georgia Pellegrini, recipe submitted by TK member Elana of Elana's Pantry.

Add the meat to the pan and cook until brown.


Tasty Kitchen Blog: Paleo Shepherd's Pie. Guest post by Georgia Pellegrini, recipe submitted by TK member Elana of Elana's Pantry.

Season with salt, pepper, and smoked paprika.


Tasty Kitchen Blog: Paleo Shepherd's Pie. Guest post by Georgia Pellegrini, recipe submitted by TK member Elana of Elana's Pantry.

Pour in the chicken broth.


Tasty Kitchen Blog: Paleo Shepherd's Pie. Guest post by Georgia Pellegrini, recipe submitted by TK member Elana of Elana's Pantry.

Cook everything together on the stove until the broth has reduced to less than half (about 40%) of the original amount.


Tasty Kitchen Blog: Paleo Shepherd's Pie. Guest post by Georgia Pellegrini, recipe submitted by TK member Elana of Elana's Pantry.

Next put your steamed cauliflower florets into a food processor and puree with remaining olive oil until smooth.


Tasty Kitchen Blog: Paleo Shepherd's Pie. Guest post by Georgia Pellegrini, recipe submitted by TK member Elana of Elana's Pantry.

It should be smooth and creamy.


Tasty Kitchen Blog: Paleo Shepherd's Pie. Guest post by Georgia Pellegrini, recipe submitted by TK member Elana of Elana's Pantry.

Transfer your mixture into a 9×13” baking dish.


Tasty Kitchen Blog: Paleo Shepherd's Pie. Guest post by Georgia Pellegrini, recipe submitted by TK member Elana of Elana's Pantry.

Pour the pureed cauliflower over and smooth the top over with a spatula.


Tasty Kitchen Blog: Paleo Shepherd's Pie. Guest post by Georgia Pellegrini, recipe submitted by TK member Elana of Elana's Pantry.

Bake at 350ºF for about 30 minutes. The top of the cauliflower mixture should turn a golden color.


Tasty Kitchen Blog: Paleo Shepherd's Pie. Guest post by Georgia Pellegrini, recipe submitted by TK member Elana of Elana's Pantry.

Serve hot with your favorite veggies on the side for the perfect hearty meal that everyone will look forward to! I love this recipe and you can find more just like it at Elana’s Pantry!


Printable Recipe

Paleo Shepherd’s Pie

See post on elanaspantry’s site!
4.75 Mitt(s) 4 Rating(s)4 votes, average: 4.75 out of 54 votes, average: 4.75 out of 54 votes, average: 4.75 out of 54 votes, average: 4.75 out of 54 votes, average: 4.75 out of 5

Prep Time:

Cook Time:

Difficulty: Easy

Servings: 8

8
x

Print Options

Page size Letter 3x5 4x6
Text Size Small Medium Large
Content Include description
Include prep time, etc.
Show image

Description

A healthier version of Shepherd’s Pie made Paleo. Shepherd’s Pie is a traditional English dish. In Britain it is generally made with lamb or mutton; in this recipe I have made a simple ground beef shepherd’s pie and added bacon for extra flavor.

Ingredients

  • 4 Tablespoons Olive Oil, Divided
  • 1 whole Large Onion, Diced
  • 1 pound Turkey Or Pork Bacon, Cut Into 2 Inch Slices
  • 2 cups Diced Carrots
  • 2 cups Diced Celery
  • 1 pound Organic Grass Fed Ground Beef
  • ½ teaspoons Celtic Sea Salt
  • 1 teaspoon Black Pepper
  • ½ teaspoons Smoked Paprika
  • 1 cup Chicken Broth
  • 2 whole Large Heads Cauliflower, Trimmed, Chopped And Steamed Until Very Soft

Preparation Instructions

Preheat oven to 350°F. Heat half of the olive oil in a very large frying pan. Saute onion for 15 minutes until soft. Add bacon pieces to pan and sauté until cooked, about 10 minutes.

Add carrots and celery to pan and sauté in bacon fat for 10 minutes until soft. Add ground beef to pan and sauté until brown, just a few minutes. Season with salt, pepper and smoked paprika.

Add chicken broth and cook down broth until 60% evaporated.

Place cauliflower in food processor and puree with remaining olive oil until smooth.

Pour ground beef mixture into a 9×13 inch Pyrex baking dish. Pour mashed cauliflower over beef mixture.

Bake at 350°F for 30 minutes. Serve.


_______________________________________

There’s so much to say about Georgia, we don’t know where to start. Leaving Wall Street for the French Culinary Institute, followed by a stint at the Gramercy Tavern and La Chassagnette in France, her passion for food and food traditions are evident and inspiring. Visit her site at Georgia Pellegrini, where you’ll find more recipes, photos, learn all about her wonderful books (including her latest one, Modern Pioneering, and enjoy her latest adventures.


Profile photo of Natalie | Perry's Plate

Paleo-friendly Cauliflower Fried Rice

Posted by in Step-by-Step Recipes

Tasty Kitchen Blog: Paleo-friendly Cauliflower Fried Rice. Guest post by Natalie Perry of Perry's Plate, recipe submitted by TK member Dani of Expat Cucina.

If you’re familiar with the paleo lifestyle, you might know that this dish doesn’t actually have rice in it. 

The first time I saw cauliflower used as rice, it blew my mind a little. Cauliflower is one of the darlings of the paleo world because it can be manipulated to replace grains in a lot of meals. I’ve used it in place of rice, pureed it to thicken soups, seasoned and roasted it as a vegetarian “steak”, mashed it in place of potatoes, and my favorite, used it as a base for a pizza crust.

No, I’m not joking. And it was all delicious.

Even if you’re not a paleo eater and avoiding grains, dairy, legumes, and sugar for various reasons, replacing grains with vegetables (particularly refined grains) can be a great way to increase nutrient density in a recipe. 

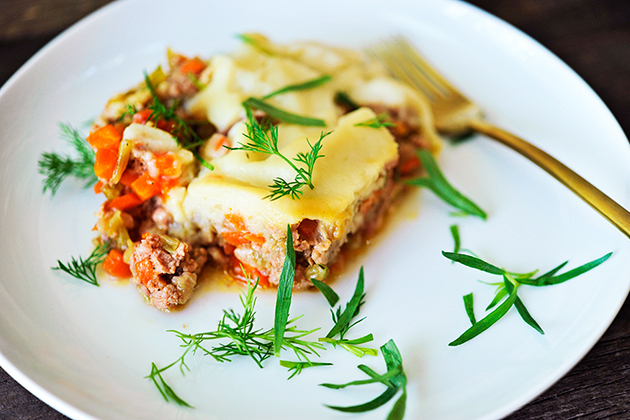
This Paleo-friendly Cauliflower Fried Rice recipe submitted by TK member Dani is a perfect example of grain-swapping. I’m excited to share it with you!

So is the cauliflower. It likes to show off.


Tasty Kitchen Blog: Paleo-friendly Cauliflower Fried Rice. Guest post by Natalie Perry of Perry's Plate, recipe submitted by TK member Dani of Expat Cucina.

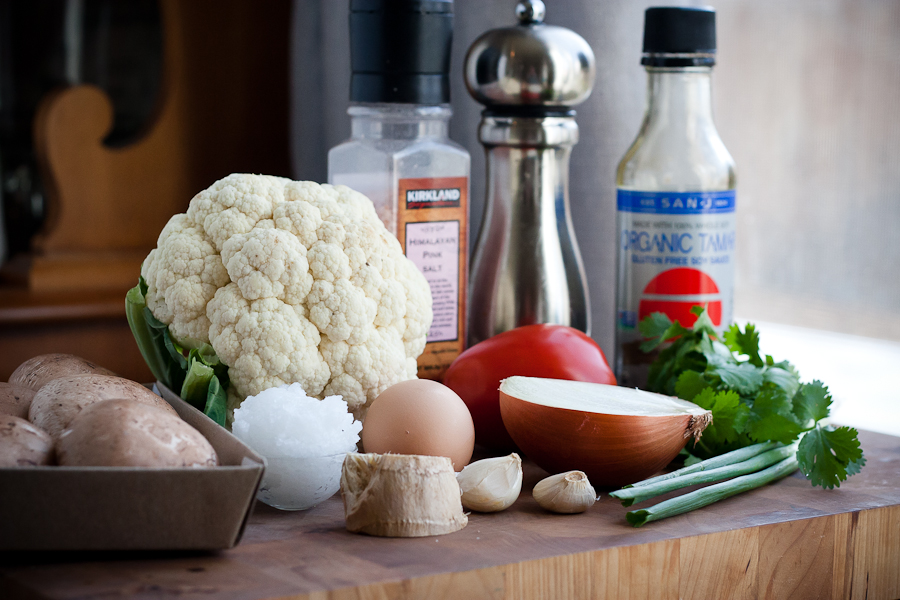
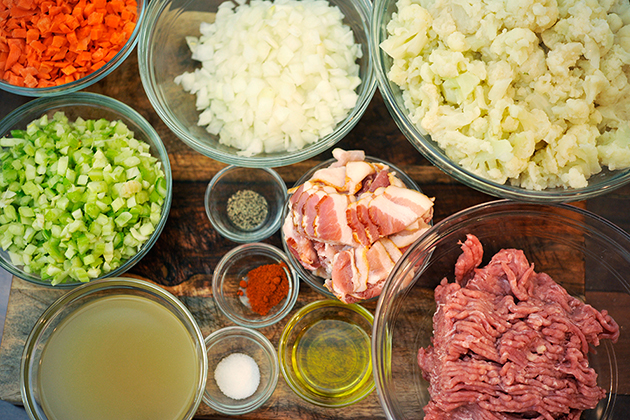
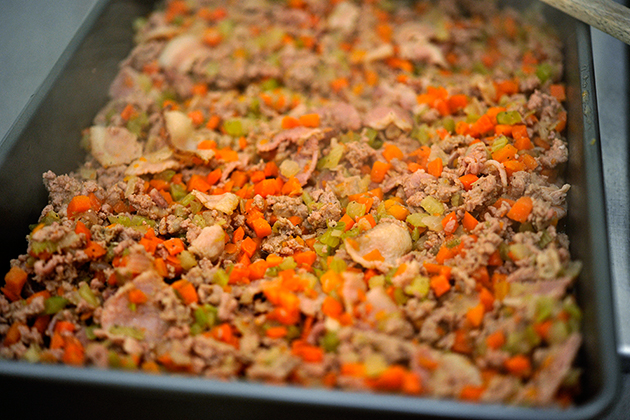
I adapted this recipe slightly, adding a few more things (notes below), so you’ll need a whole head of cauliflower, salt, pepper, soy sauce (or tamari), mushrooms, coconut oil, an egg, fresh ginger, garlic, onion, green onion, a tomato, and cilantro.

If you’re a nit-picky paleo, you may not use soy sauce or tamari. I don’t mind it in very small amounts occasionally, but you can also use coconut aminos which is a good substitute. You may be able to find it at Whole Foods or other natural grocery stores.


Tasty Kitchen Blog: Paleo-friendly Cauliflower Fried Rice. Guest post by Natalie Perry of Perry's Plate, recipe submitted by TK member Dani of Expat Cucina.

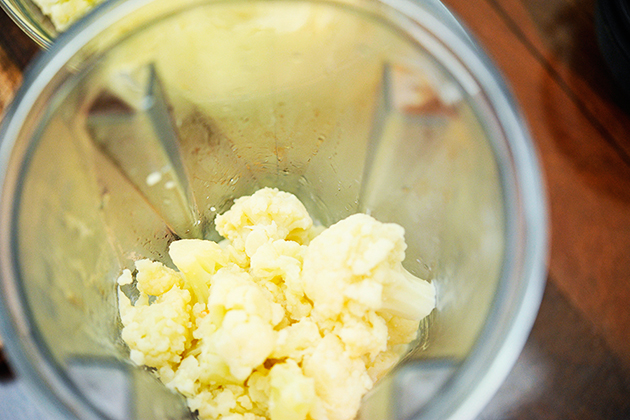
First, dismantle the cauliflower, and cut it into fairly uniform pieces.


Tasty Kitchen Blog: Paleo-friendly Cauliflower Fried Rice. Guest post by Natalie Perry of Perry's Plate, recipe submitted by TK member Dani of Expat Cucina.

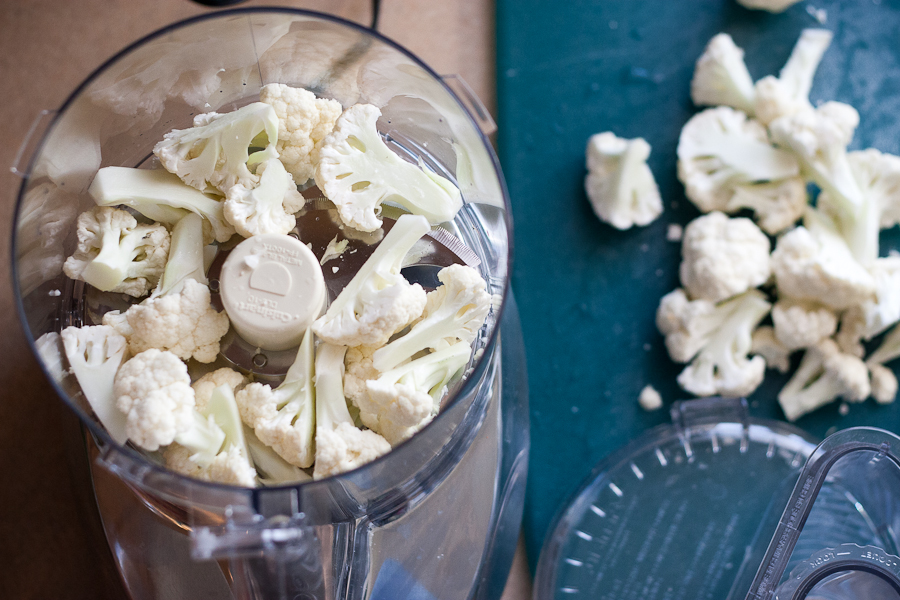
My food processor holds 9 cupd, so I did half the head at a time to ensure even chopping. If you have a larger one you may be able to do it all in one batch.


Tasty Kitchen Blog: Paleo-friendly Cauliflower Fried Rice. Guest post by Natalie Perry of Perry's Plate, recipe submitted by TK member Dani of Expat Cucina.

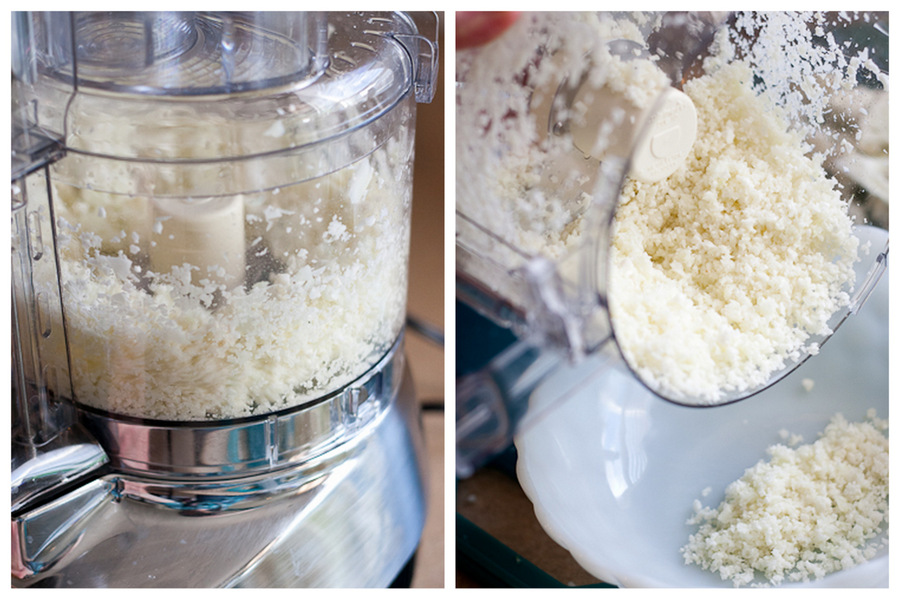
Pulse several times until the cauliflower is about the size of rice grains. Transfer to a bowl and set aside. 


Tasty Kitchen Blog: Paleo-friendly Cauliflower Fried Rice. Guest post by Natalie Perry of Perry's Plate, recipe submitted by TK member Dani of Expat Cucina.

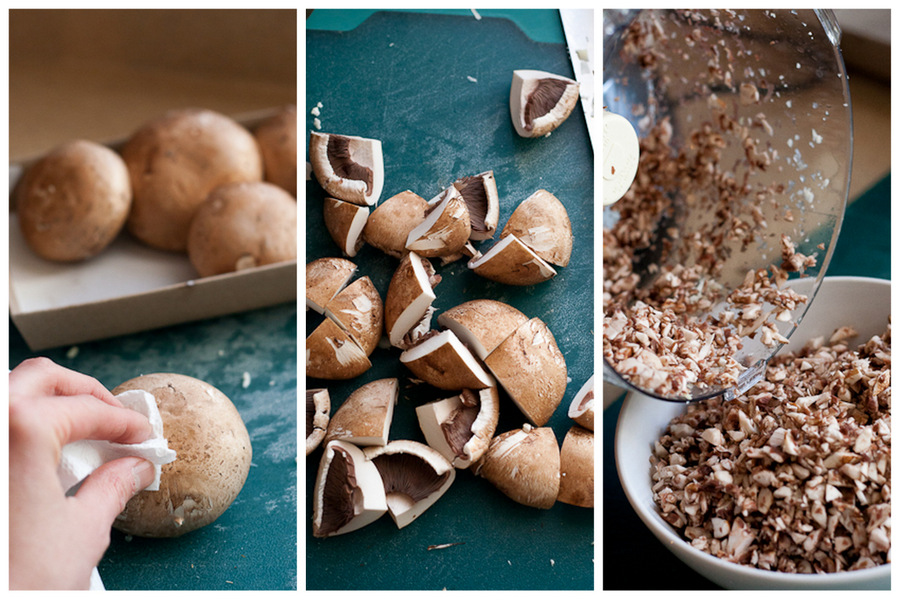
Next, get the mushrooms prepped by wiping any dirt off with a paper towel, breaking off the stems, and quartering them. I used baby portabellas but any type of mushroom would do. Pulse the mushroom quarters in the food processor like you did the rice and transfer to a separate bowl.

You could just slice them into larger pieces and leave them big, but my little picky eaters aren’t into mushrooms, and I didn’t want to start a dinnertime battle. I minced mine out of survival. 


Tasty Kitchen Blog: Paleo-friendly Cauliflower Fried Rice. Guest post by Natalie Perry of Perry's Plate, recipe submitted by TK member Dani of Expat Cucina.

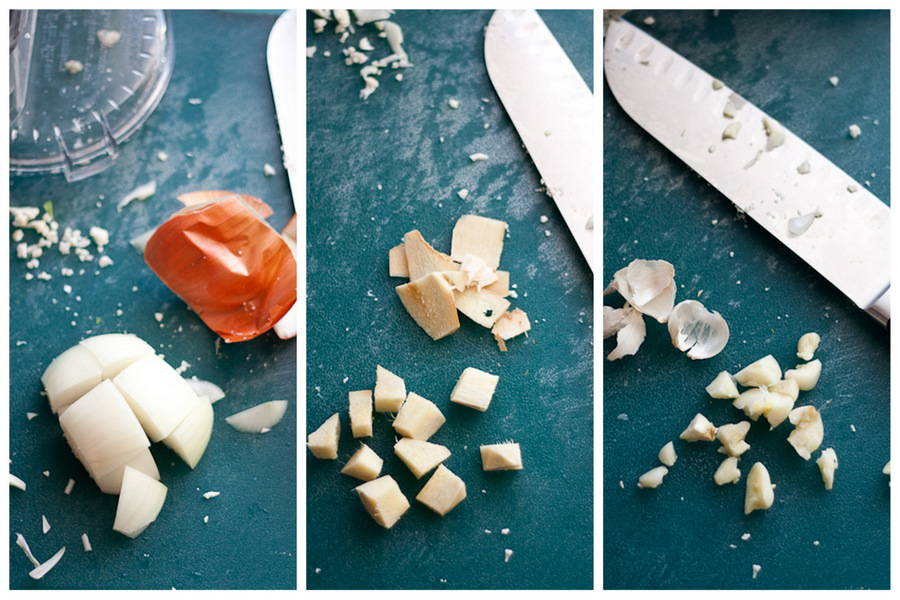
Next, prep the onion, ginger, and garlic. Peel them all, then cut them into chunks. 


Tasty Kitchen Blog: Paleo-friendly Cauliflower Fried Rice. Guest post by Natalie Perry of Perry's Plate, recipe submitted by TK member Dani of Expat Cucina.

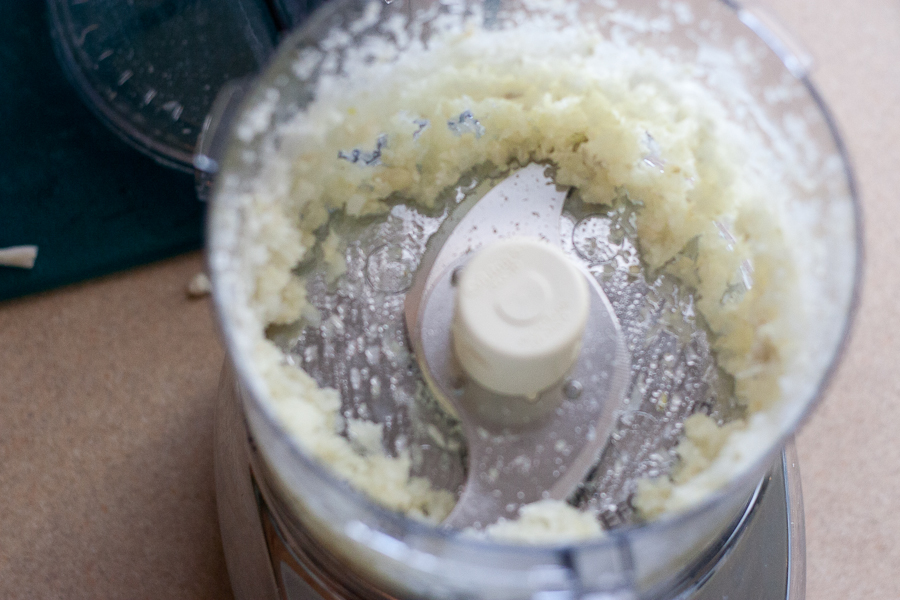
Throw the ginger, garlic, and onion into the food processor and pulse to mince. That machine is going to earn its counterspace today. You could also use a knife. If you wanted. (I didn’t.)


Tasty Kitchen Blog: Paleo-friendly Cauliflower Fried Rice. Guest post by Natalie Perry of Perry's Plate, recipe submitted by TK member Dani of Expat Cucina.

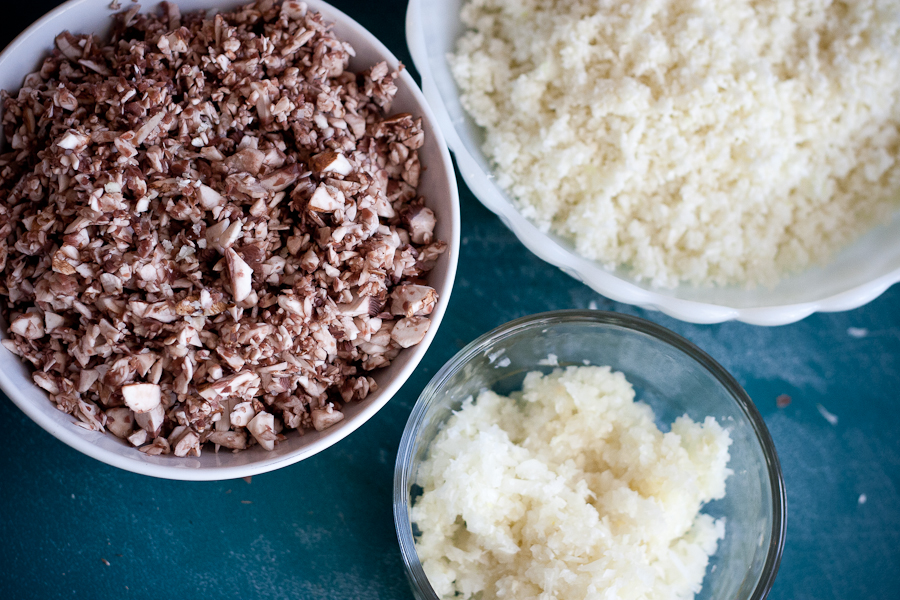
Now you have three bowls of minced ingredients ready to go!

Yes, there is quite a bit of chopping in this recipe (and we’re not quite finished yet), but the dish comes together really easily and quickly. You could do all of the prep a day or two ahead as well.


Tasty Kitchen Blog: Paleo-friendly Cauliflower Fried Rice. Guest post by Natalie Perry of Perry's Plate, recipe submitted by TK member Dani of Expat Cucina.

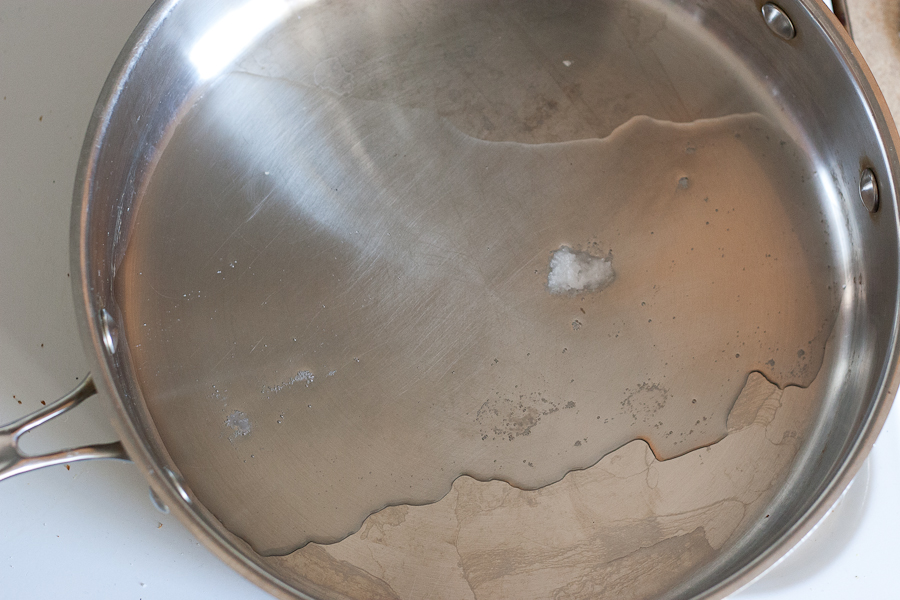
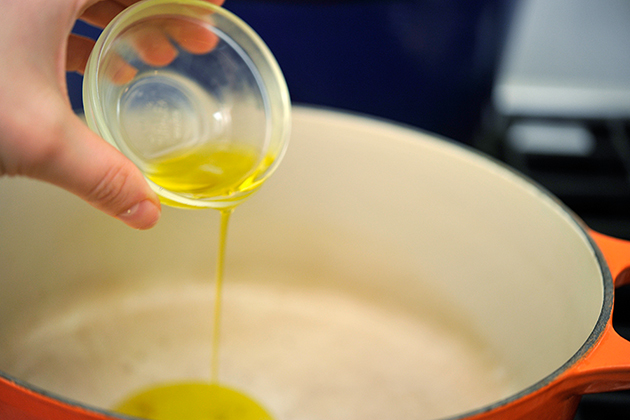
Alright, time for some heat. In a large saute pan, heat the coconut oil to medium-high heat. 


Tasty Kitchen Blog: Paleo-friendly Cauliflower Fried Rice. Guest post by Natalie Perry of Perry's Plate, recipe submitted by TK member Dani of Expat Cucina.

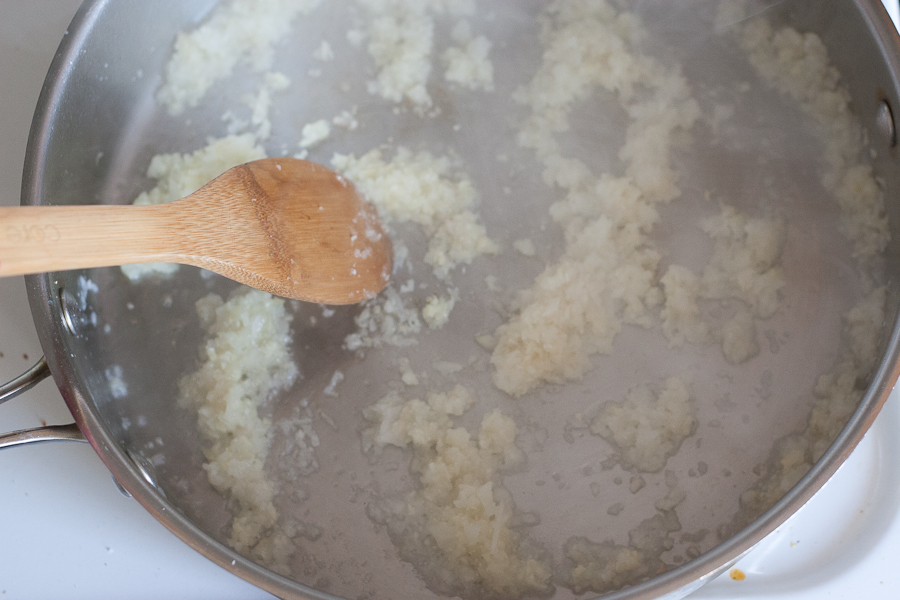
Add the onion-ginger-garlic mixture and cook it for a minute or two.


Tasty Kitchen Blog: Paleo-friendly Cauliflower Fried Rice. Guest post by Natalie Perry of Perry's Plate, recipe submitted by TK member Dani of Expat Cucina.

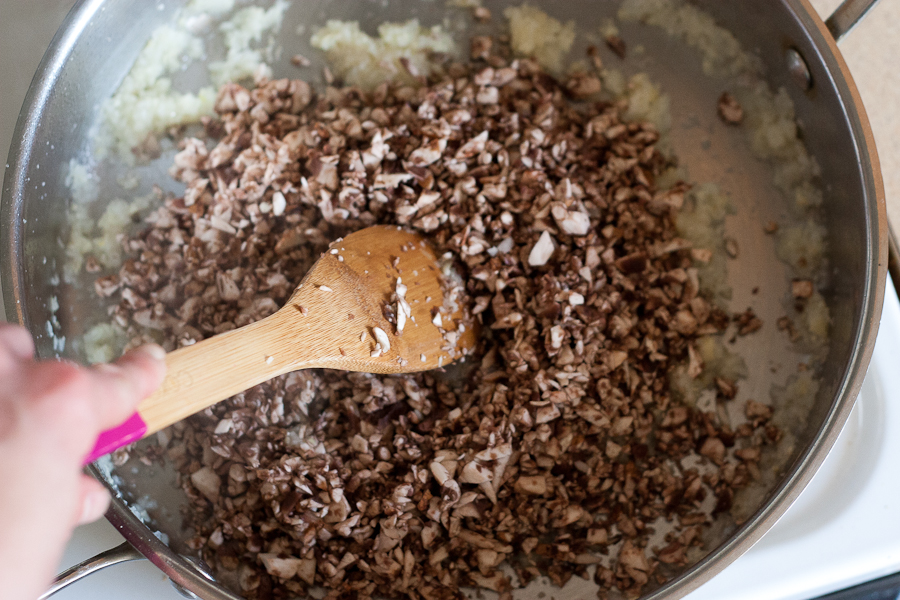
Add the mushrooms and cook those for a few minutes as well.


Tasty Kitchen Blog: Paleo-friendly Cauliflower Fried Rice. Guest post by Natalie Perry of Perry's Plate, recipe submitted by TK member Dani of Expat Cucina.

Now for the cauliflower!


Tasty Kitchen Blog: Paleo-friendly Cauliflower Fried Rice. Guest post by Natalie Perry of Perry's Plate, recipe submitted by TK member Dani of Expat Cucina.

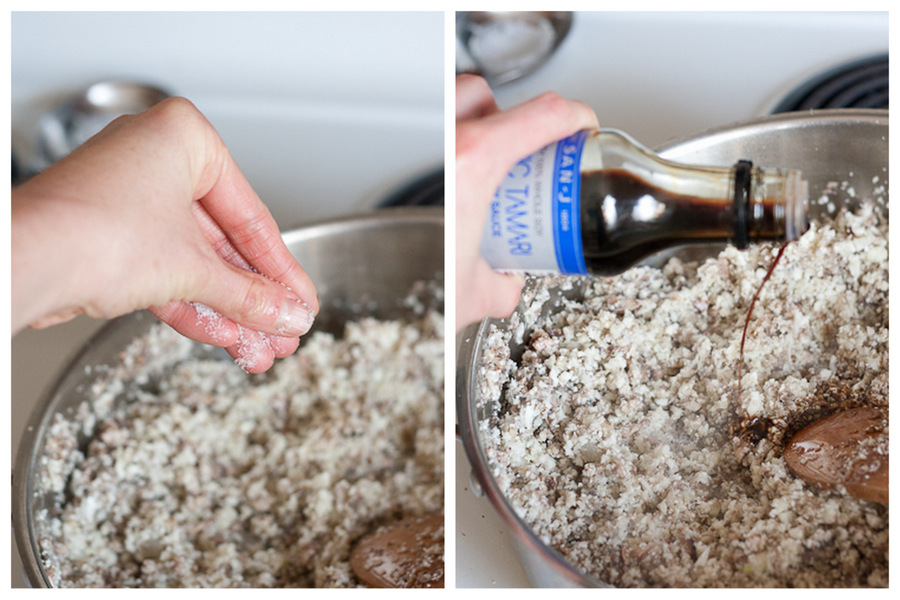
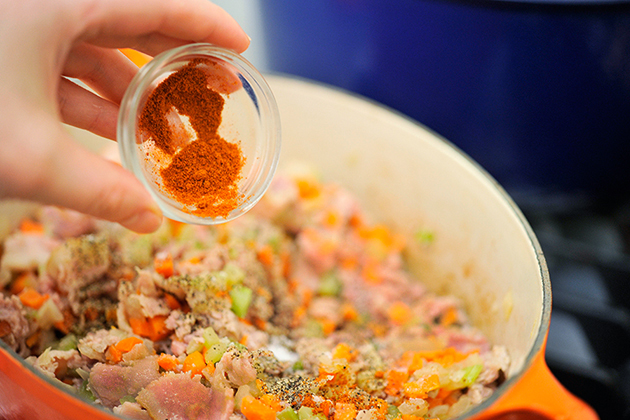
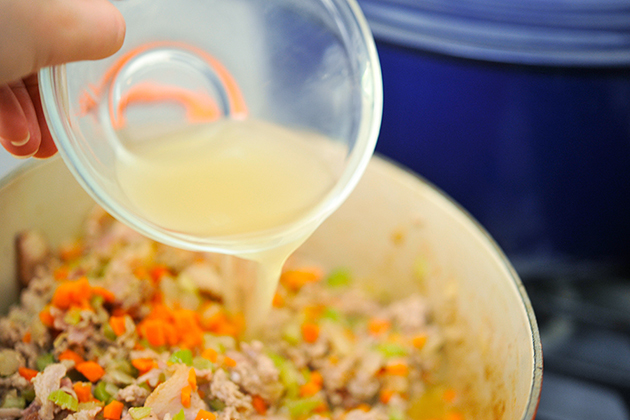
Add salt, pepper, and a splash of soy sauce (or tamari). 


Tasty Kitchen Blog: Paleo-friendly Cauliflower Fried Rice. Guest post by Natalie Perry of Perry's Plate, recipe submitted by TK member Dani of Expat Cucina.

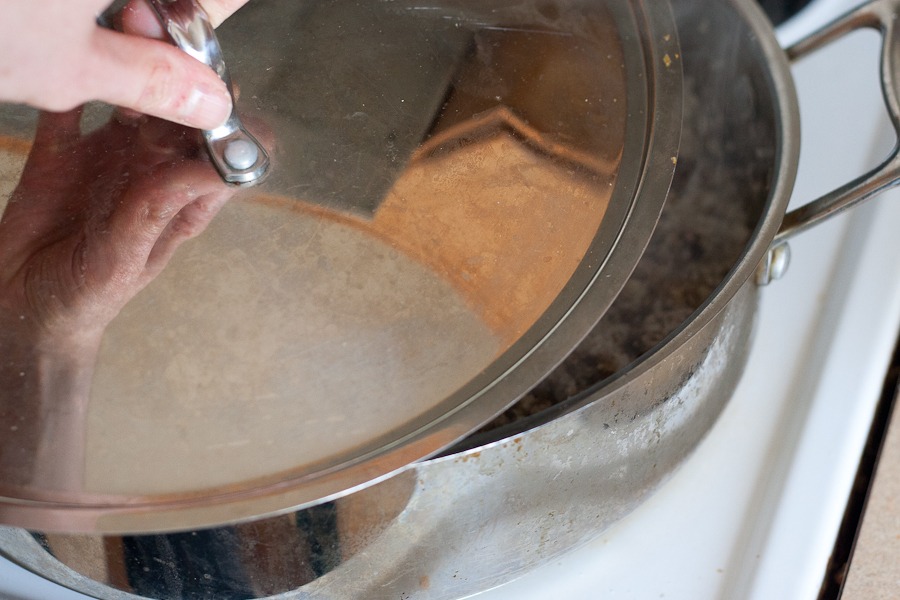
Put the lid on, reduce the heat a bit, and let it steam for a few minutes while you finish up the mix-ins.

While the “rice” is finishing up, dice the tomato, and chop the green onion and cilantro. If you hate cilantro, just leave it out. (And then seek help. Ok, not really. But maybe.)


Tasty Kitchen Blog: Paleo-friendly Cauliflower Fried Rice. Guest post by Natalie Perry of Perry's Plate, recipe submitted by TK member Dani of Expat Cucina.

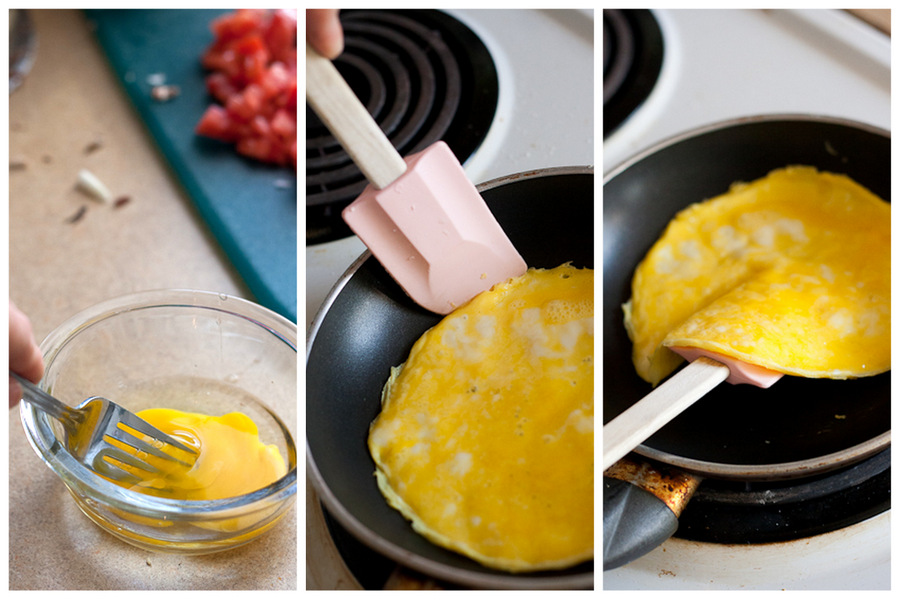
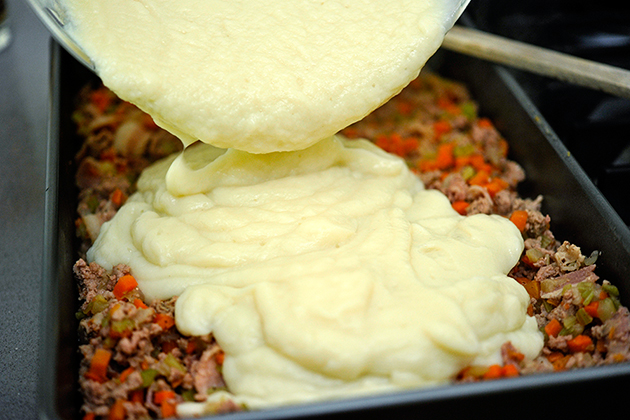
Remember that egg? Well now’s the time to pull it out. Beat it with a fork and cook it in a pan.

You can scramble it if you like, or you can make a flat omelet out of it and slice it up. Your choice.

You could also do it in the saute pan before you throw the vegetables in, but I have emotional meltdowns when I clean eggs out of stainless steel pans. So I do it in a small nonstick skillet. 


Tasty Kitchen Blog: Paleo-friendly Cauliflower Fried Rice. Guest post by Natalie Perry of Perry's Plate, recipe submitted by TK member Dani of Expat Cucina.

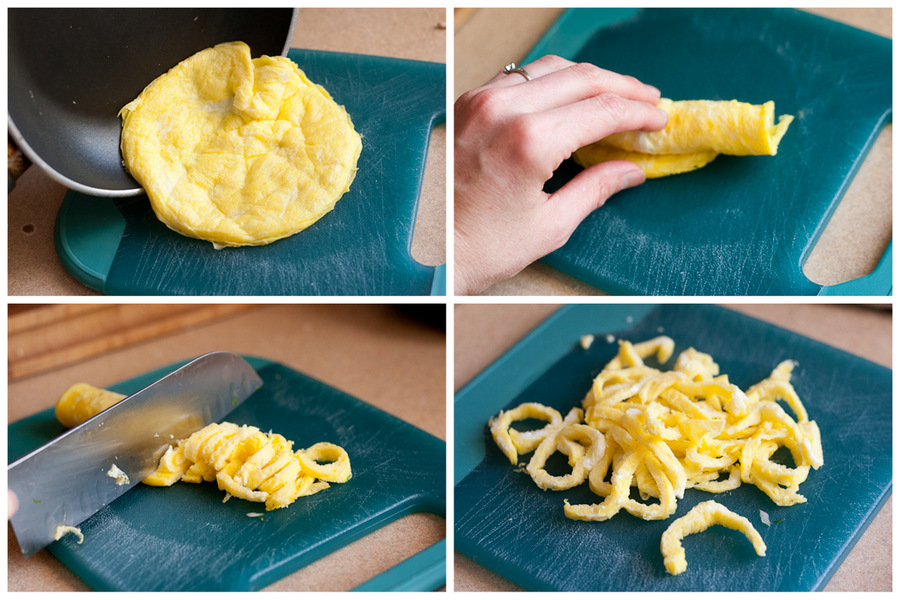
I made a flat omelet, rolled it up, then sliced it into ribbons. They’re much prettier than scrambles, but scrambles are perfectly fine.


Tasty Kitchen Blog: Paleo-friendly Cauliflower Fried Rice. Guest post by Natalie Perry of Perry's Plate, recipe submitted by TK member Dani of Expat Cucina.

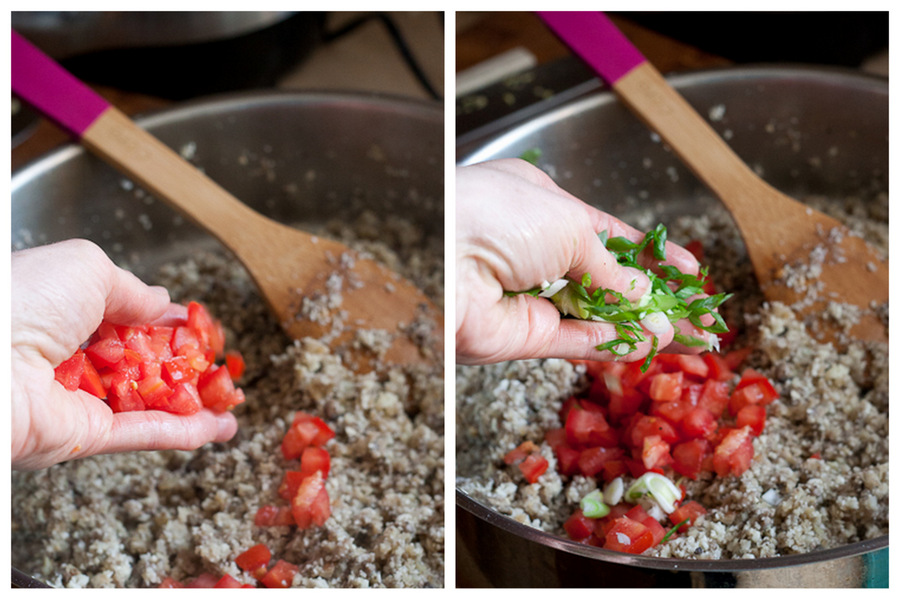
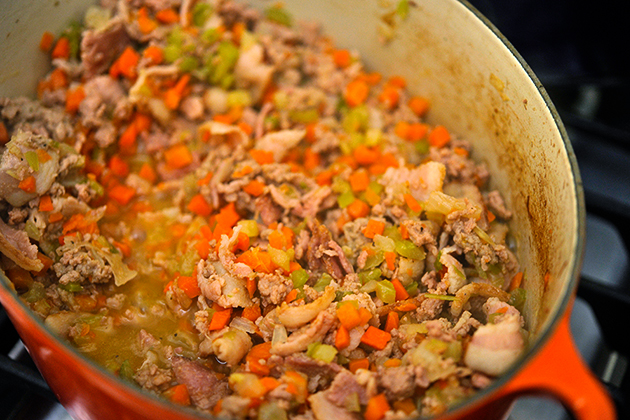
By now the cauliflower should be finished, so go ahead and drop in the tomato and green onions …


Tasty Kitchen Blog: Paleo-friendly Cauliflower Fried Rice. Guest post by Natalie Perry of Perry's Plate, recipe submitted by TK member Dani of Expat Cucina.

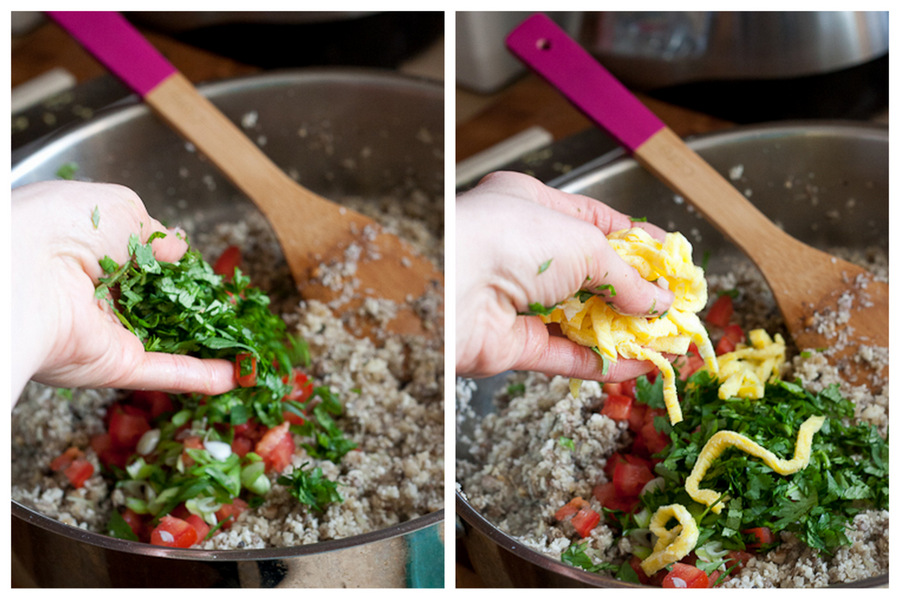
And the cilantro and eggs.


Tasty Kitchen Blog: Paleo-friendly Cauliflower Fried Rice. Guest post by Natalie Perry of Perry's Plate, recipe submitted by TK member Dani of Expat Cucina.

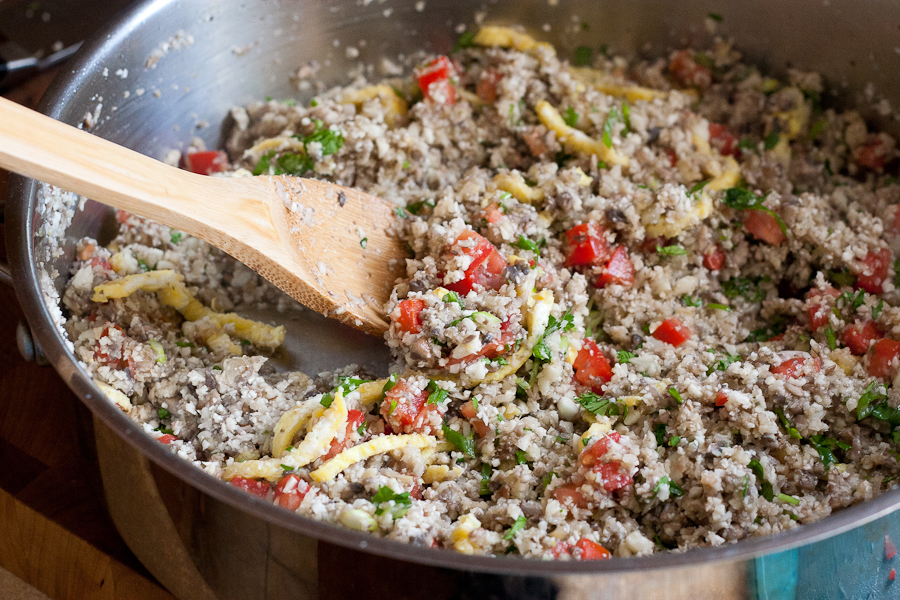
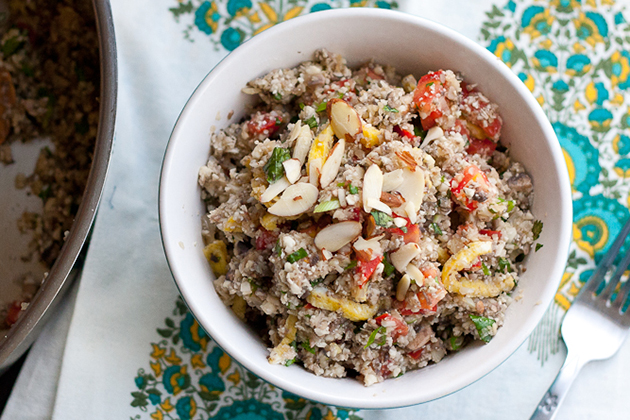
Stir everything gently, and done!

If you want to add more protein, you could stir in some pre-cooked shrimp, chicken, or steak. 


Tasty Kitchen Blog: Paleo-friendly Cauliflower Fried Rice. Guest post by Natalie Perry of Perry's Plate, recipe submitted by TK member Dani of Expat Cucina.

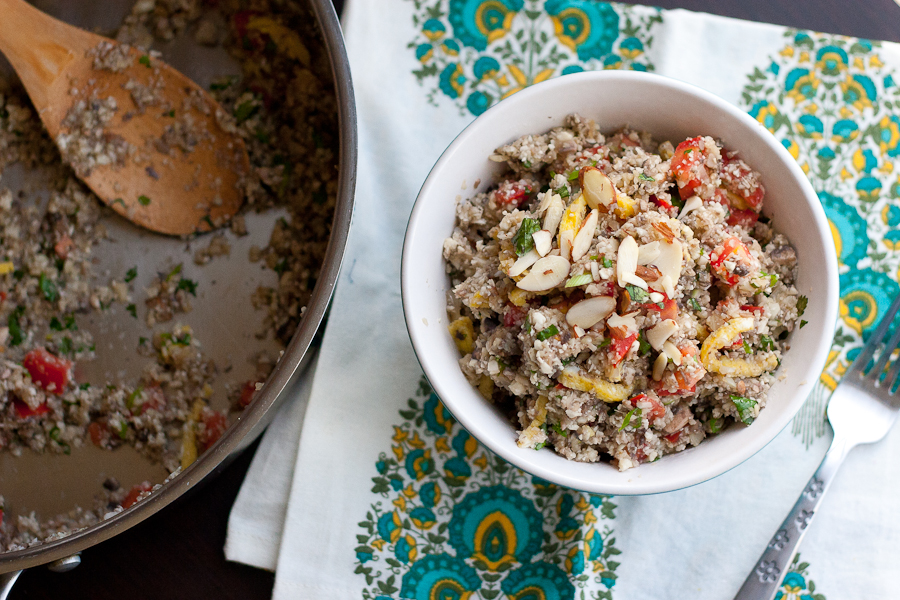
Like I mentioned earlier, you could have dinner on the table in 15 minutes if you prep everything beforehand. I love quick meals like this! 

Thank you, Dani! Be sure to check out Dani’s TK Recipe Box and her blog Expat Cucina for more dinner inspiration!

Recipe notes:
1. I used brown mushrooms, but if that “dirty rice” look bothers you, just use white mushrooms.
2. I added two cloves of garlic, an inch of ginger, and one green onion to boost the flavor of the dish and substituted cilantro for the basil and mint out of personal preference. 
3. I doubled the recipe, but left the mushroom quantity the same.


Printable Recipe

Paleo-friendly Fried Rice (With Cauliflower)

See post on ExpatCucina’s site!
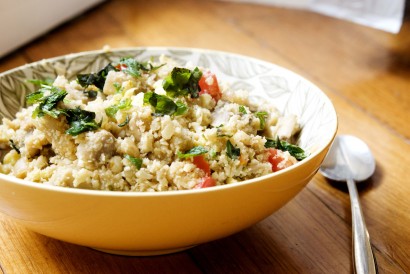
0.00 Mitt(s) 0 Rating(s)0 votes, average: 0.00 out of 50 votes, average: 0.00 out of 50 votes, average: 0.00 out of 50 votes, average: 0.00 out of 50 votes, average: 0.00 out of 5

Prep Time:

Cook Time:

Difficulty: Easy

Servings: 1

1
x

Print Options

Page size Letter 3x5 4x6
Text Size Small Medium Large
Content Include description
Include prep time, etc.
Show image

Description

If you are a paleo-diet person or just on a low-carb diet, this recipe is perfect for you!

Ingredients

  • ⅔ pounds Cauliflower
  • 7 ounces, weight White Mushrooms
  • 2 Tablespoons Chopped Onion
  • ¼ cups Chopped Tomatoes
  • 1 whole Egg
  • 1 whole Egg White
  • 1 teaspoon Coconut Oil
  • 1 dash Soy Sauce
  • 1 pinch Salt And Pepper
  • 1 Tablespoon Chopped Basil And Mint

Preparation Instructions

Wash the cauliflower and place it into your food processor. Pulse it until pieces are the size of rice.

Wash and slice up the mushrooms, chop up onion and tomatoes.

Beat the egg and egg white with a pinch of salt and cook on a hot nonstick skillet (like an omelet). Remove and slice it up.

In the same skillet, heat p the coconut oil. Add the chopped onion and cook until soft. Add the mushrooms and stir around until browned. Next, add the minced cauliflower, a splash of soy sauce and salt and pepper. Cover with a lid and cook for about 5 minutes.

Remove skillet from heat and add the tomatoes. Stir around. Chop up some fresh mint and basil and add it to the pot together with the eggs. Stir everything together and serve immediately. You can garnish the dish with more chopped herbs if desired.


_______________________________________

Be sure to check out Natalie’s own beautiful food blog, Perrys’ Plate, where you can see her growing collection of lovely recipes. There’s always something new to see there. Go visit now!


Profile photo of Erika (TK)

Pancakes!

Posted by in The Theme Is...

  When we started doing theme posts here at Tasty Kitchen, one of our first themes was pancakes. Today, almost a year later, I’m still dreaming of those Carrot Cake Pancakes from multiplydelicious. And okay, also those incredible Cinnamon Bun Pancakes from sapeylissy. Since then, you’ve been sharing so many more delicious-looking pancake recipes with…

Profile photo of Ree | The Pioneer Woman

Panko Mozzarella Sticks!

Posted by in Step-by-Step Recipes

I first discovered panko bread crumbs back in 1999. Please don’t ask me how I know that; I just do. I remember vividly reading a recipe that contained panko bread crumbs, and I remember vividly that I was nursing my second baby, and I remember vividly that I was hormonal and desperate, and the next […]

Profile photo of georgiapellegrini

Parmesan Polenta with Tomatoes and Prosciutto

Posted by in Step-by-Step Recipes

  My latest delicious discovery comes from the talented Melanie Feehan: luscious-looking Parmesan Polenta with Tomatoes and Prosciutto. It’s a quick and easy dish that provides the fresh comfort that we all love.       For the polenta, you’ll need water, salt, quick-cooking polenta, grated Parmesan cheese, milk, heavy cream, black pepper…

Profile photo of Erika (TK)

Passover Potluck

Posted by in Holidays, Looks Delicious!

Tasty Kitchen member (and friend!) Tori Avey of The Shiksa in the Kitchen has graciously invited us to join her online Passover potluck and share some recipes that are kosher for the holiday. It’s a great way to honor tradition and sit at the table, so to speak, with those in our online community. And […]