The Pioneer Woman Tasty Kitchen
Profile photo of georgiapellegrini

Roasted Pepper Meatloaf

Posted by in Step-by-Step Recipes

Tasty Kitchen Blog: Roasted Red Pepper Meatloaf. Guest post by Georgia Pellegrini, recipe submitted by TK member Caressa of Cuddles, Crafts and Cupcakes.

 
I have a thing for meatloaf. My grandmother made it so well that it has always held a special place in my heart. I was so intrigued by the idea of using a meatloaf recipe to stuff into peppers, so I had to try this recipe for Roasted Red Pepper Meatloaf from Tasty Kitchen member Caressa immediately. I’m so glad I did.


Tasty Kitchen Blog: Roasted Red Pepper Meatloaf. Guest post by Georgia Pellegrini, recipe submitted by TK member Caressa of Cuddles, Crafts and Cupcakes.

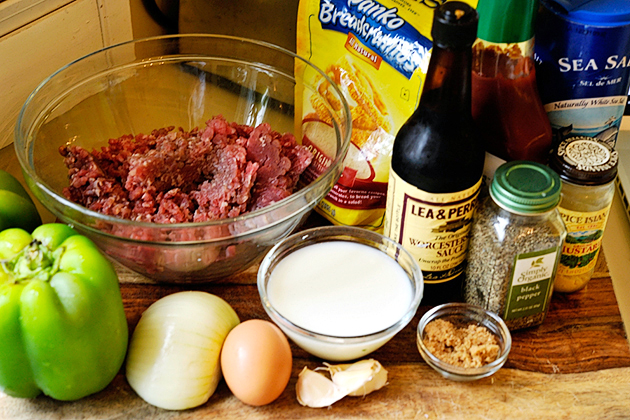
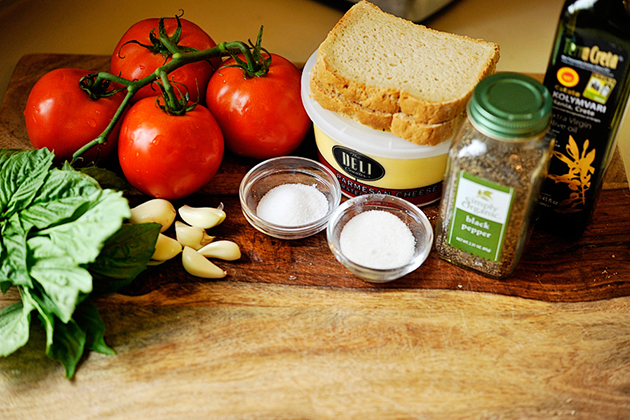
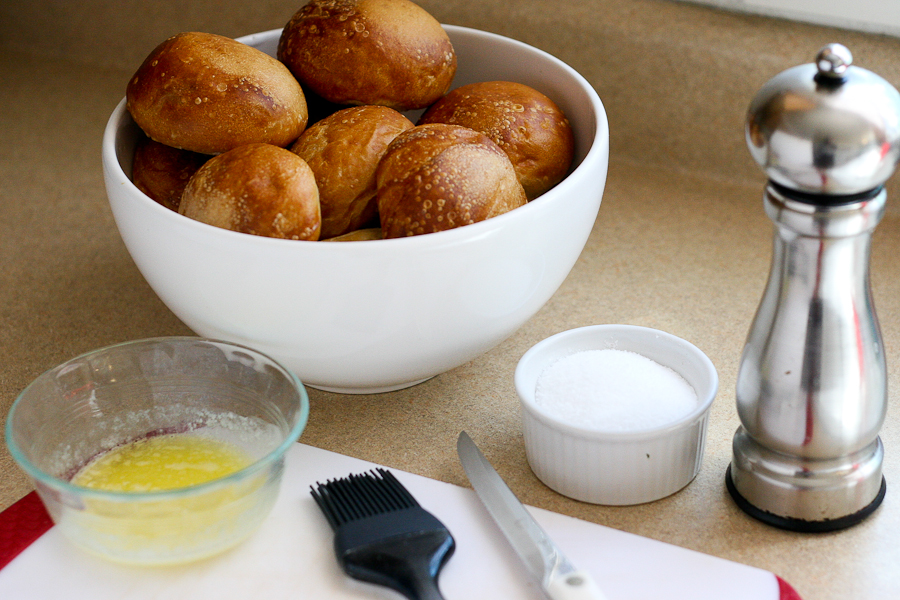
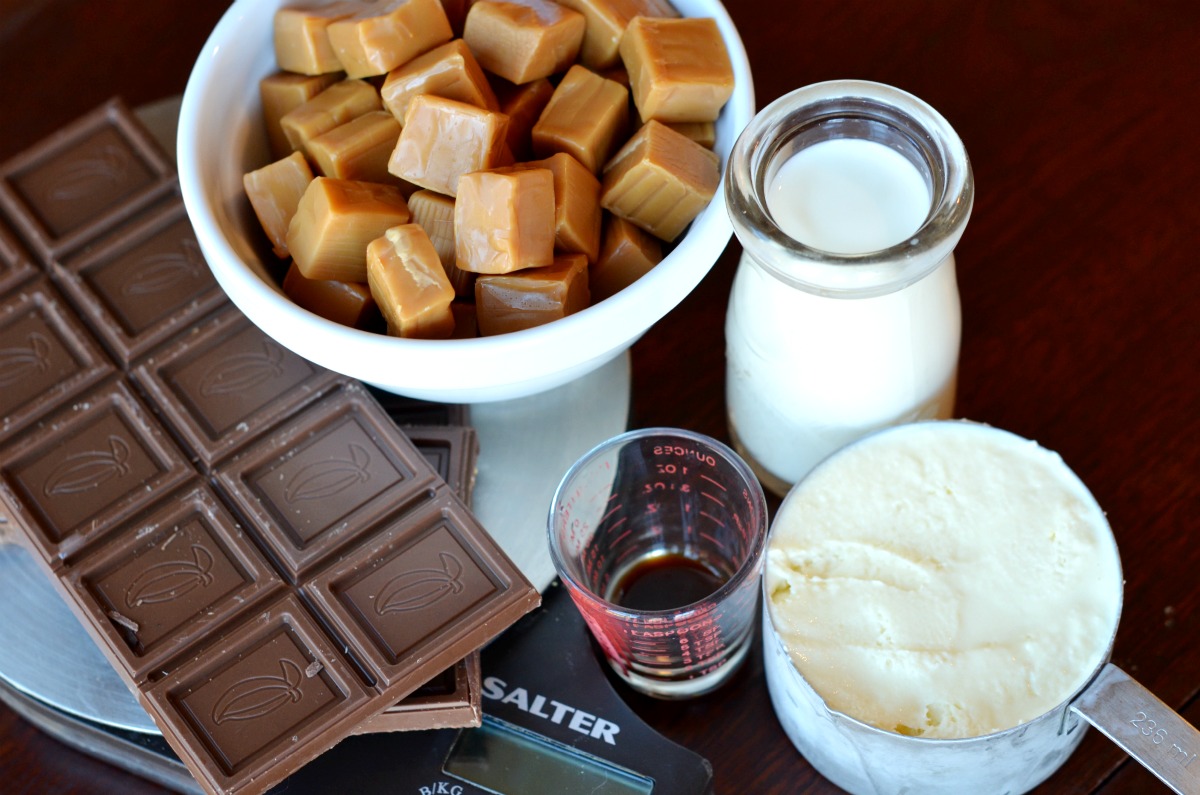
To make it you will need: ground beef, milk, egg, bread crumbs, Worcestershire sauce, diced onion, minced garlic, salt, mustard powder, pepper, large red peppers (except I used green), ketchup, brown sugar, and the optional slices of bread which I didn’t use but you could if you wanted something crusty to soak up the meatloaf juice. (Caressa highly recommends it.)


Tasty Kitchen Blog: Roasted Red Pepper Meatloaf. Guest post by Georgia Pellegrini, recipe submitted by TK member Caressa of Cuddles, Crafts and Cupcakes.

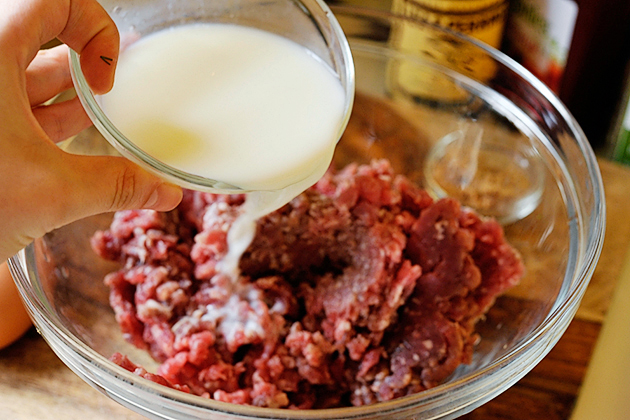
Begin by combining the milk and ground beef in a large bowl.


Tasty Kitchen Blog: Roasted Red Pepper Meatloaf. Guest post by Georgia Pellegrini, recipe submitted by TK member Caressa of Cuddles, Crafts and Cupcakes.

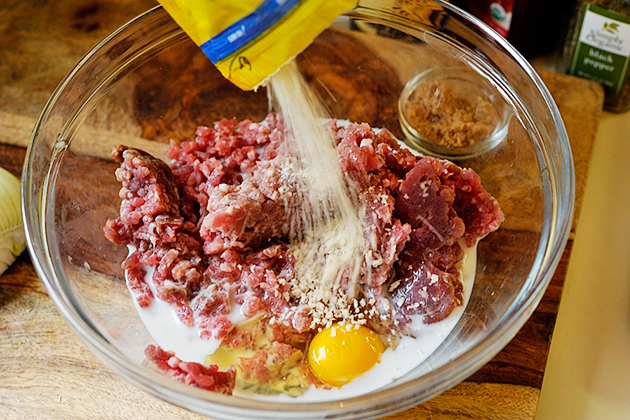
Add the egg and bread crumbs …


Tasty Kitchen Blog: Roasted Red Pepper Meatloaf. Guest post by Georgia Pellegrini, recipe submitted by TK member Caressa of Cuddles, Crafts and Cupcakes.

Along with the Worcestershire sauce …
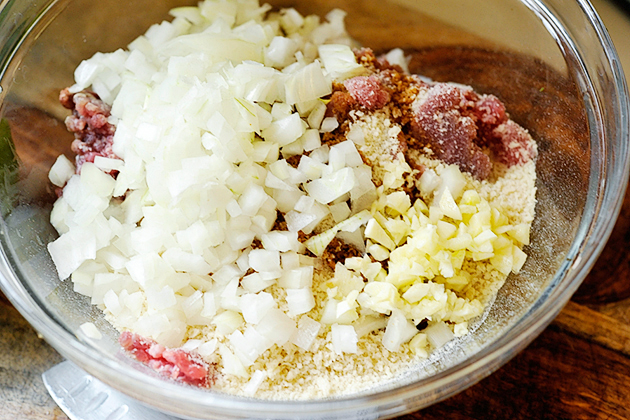
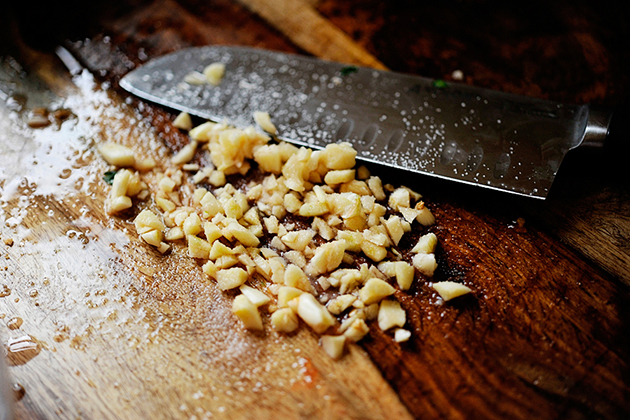
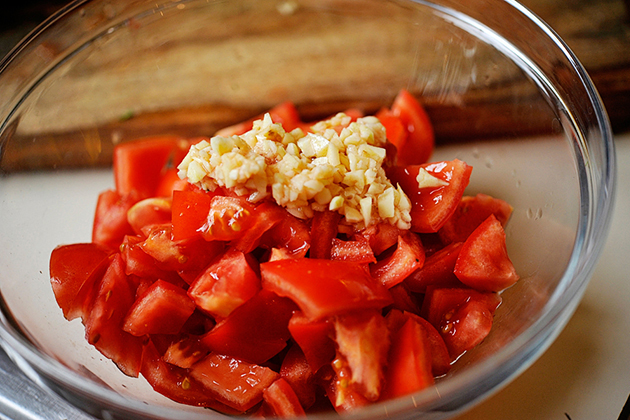


Tasty Kitchen Blog: Roasted Red Pepper Meatloaf. Guest post by Georgia Pellegrini, recipe submitted by TK member Caressa of Cuddles, Crafts and Cupcakes.

Onions and garlic …


Tasty Kitchen Blog: Roasted Red Pepper Meatloaf. Guest post by Georgia Pellegrini, recipe submitted by TK member Caressa of Cuddles, Crafts and Cupcakes.

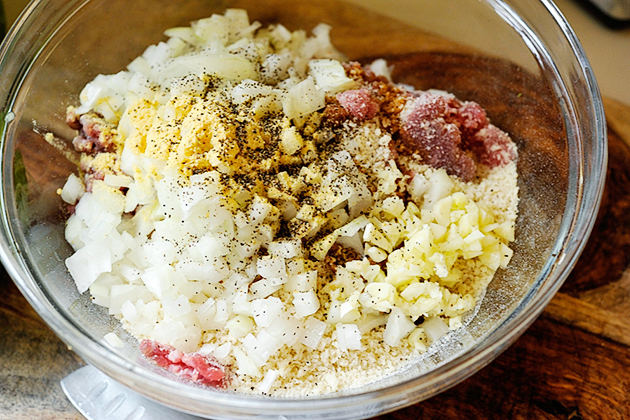
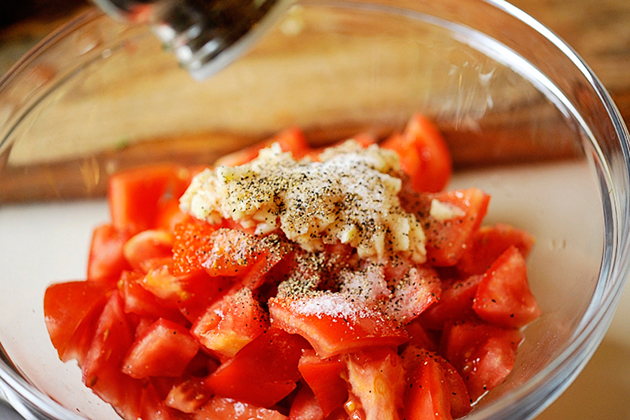
Mustard powder and pepper.


Tasty Kitchen Blog: Roasted Red Pepper Meatloaf. Guest post by Georgia Pellegrini, recipe submitted by TK member Caressa of Cuddles, Crafts and Cupcakes.

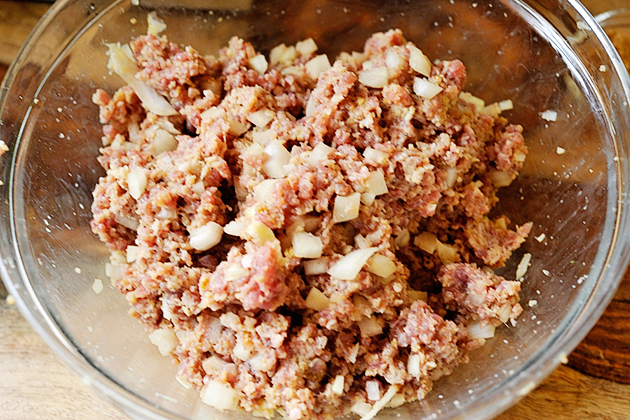
Mix it all together with your hands until it is well combined.


Tasty Kitchen Blog: Roasted Red Pepper Meatloaf. Guest post by Georgia Pellegrini, recipe submitted by TK member Caressa of Cuddles, Crafts and Cupcakes.

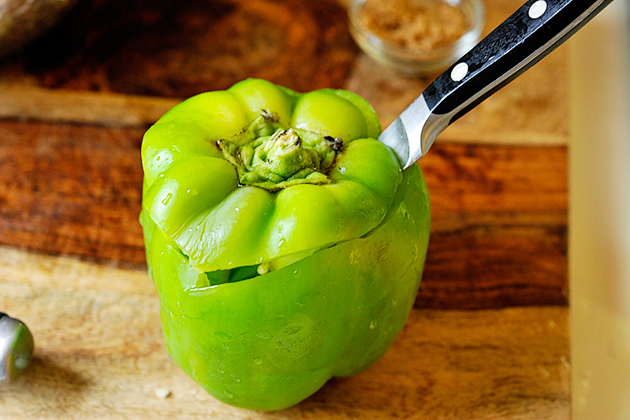
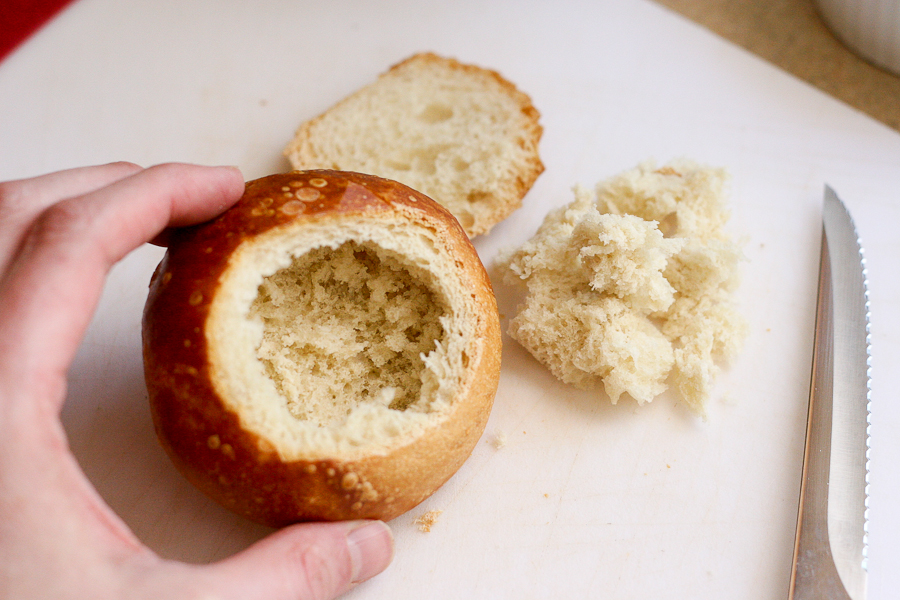
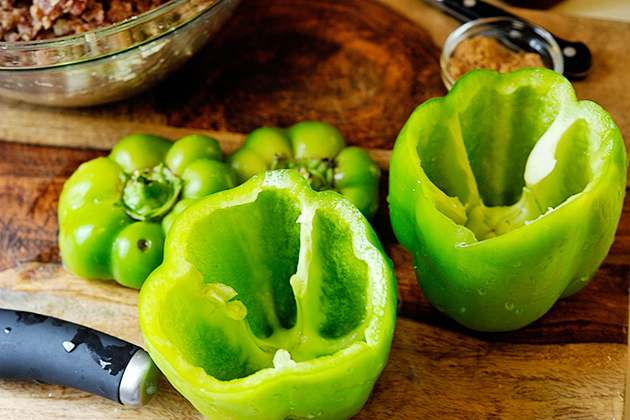
Prepare your peppers by cutting off the tops and removing any seeds …


Tasty Kitchen Blog: Roasted Red Pepper Meatloaf. Guest post by Georgia Pellegrini, recipe submitted by TK member Caressa of Cuddles, Crafts and Cupcakes.

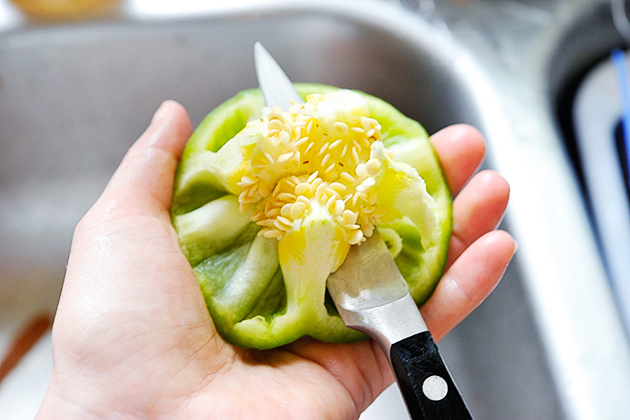
Including what’s on the top.


Tasty Kitchen Blog: Roasted Red Pepper Meatloaf. Guest post by Georgia Pellegrini, recipe submitted by TK member Caressa of Cuddles, Crafts and Cupcakes.

Like so.


Tasty Kitchen Blog: Roasted Red Pepper Meatloaf. Guest post by Georgia Pellegrini, recipe submitted by TK member Caressa of Cuddles, Crafts and Cupcakes.

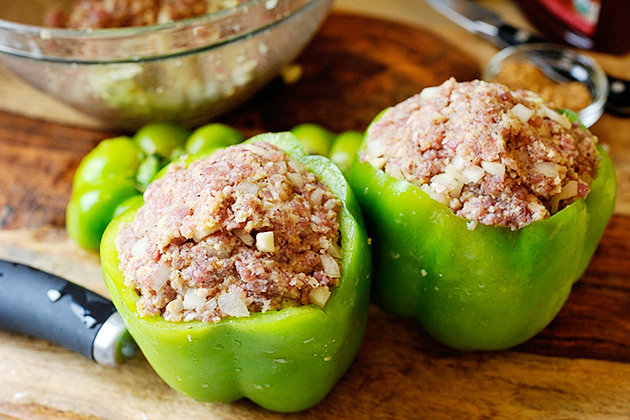
Fill each pepper with the meat mixture so that it is well packed in there.


Tasty Kitchen Blog: Roasted Red Pepper Meatloaf. Guest post by Georgia Pellegrini, recipe submitted by TK member Caressa of Cuddles, Crafts and Cupcakes.

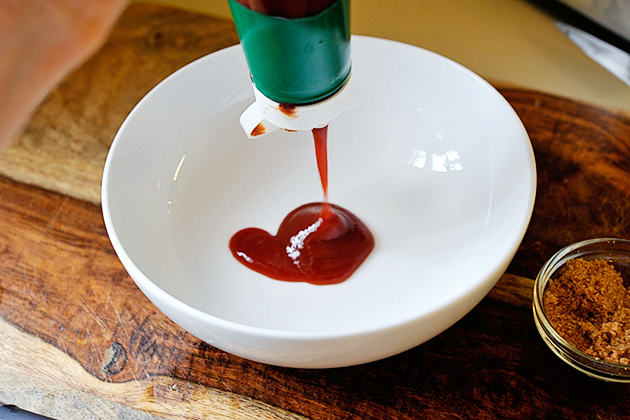
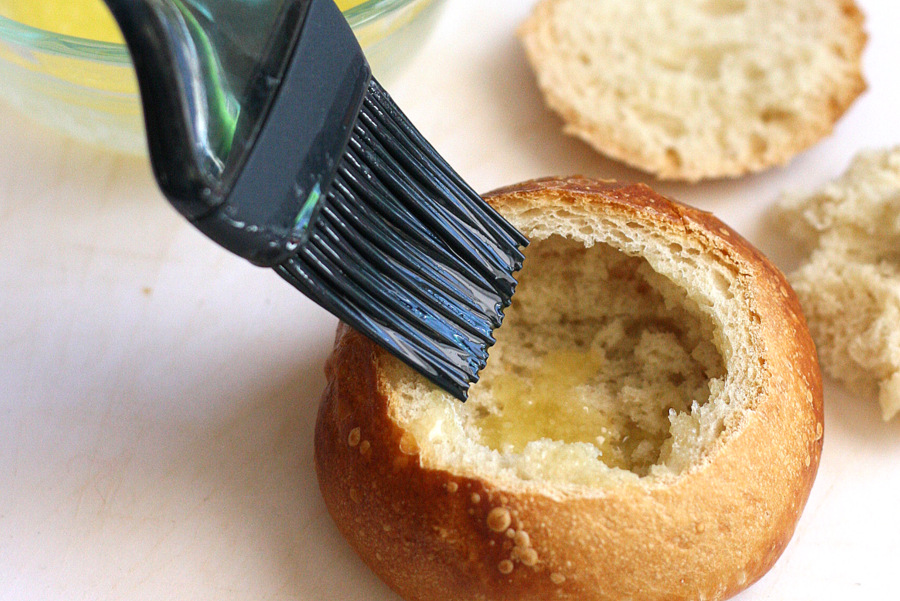
Make a glaze for the top in a small bowl by squirting in a bit of ketchup …


Tasty Kitchen Blog: Roasted Red Pepper Meatloaf. Guest post by Georgia Pellegrini, recipe submitted by TK member Caressa of Cuddles, Crafts and Cupcakes.

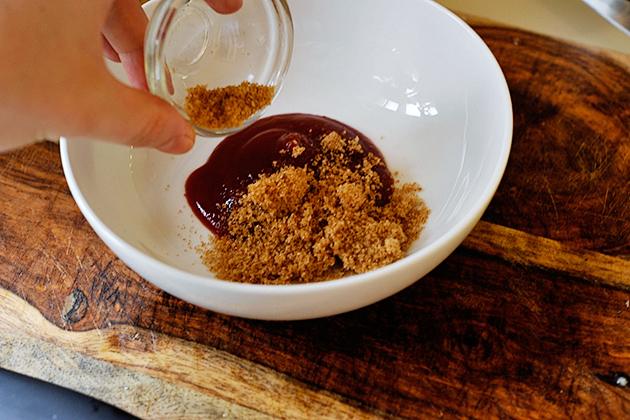
Along with brown sugar …


Tasty Kitchen Blog: Roasted Red Pepper Meatloaf. Guest post by Georgia Pellegrini, recipe submitted by TK member Caressa of Cuddles, Crafts and Cupcakes.

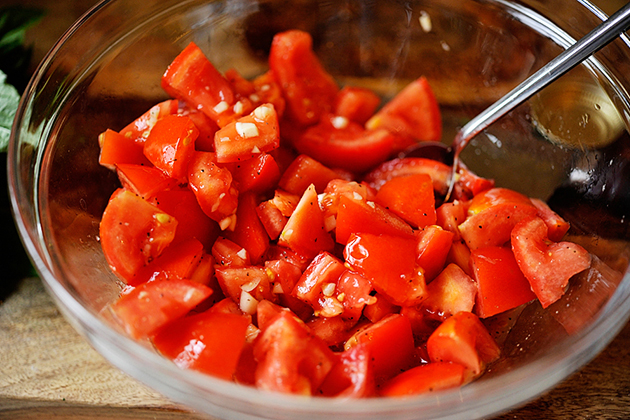
And giving it a stir.


Tasty Kitchen Blog: Roasted Red Pepper Meatloaf. Guest post by Georgia Pellegrini, recipe submitted by TK member Caressa of Cuddles, Crafts and Cupcakes.

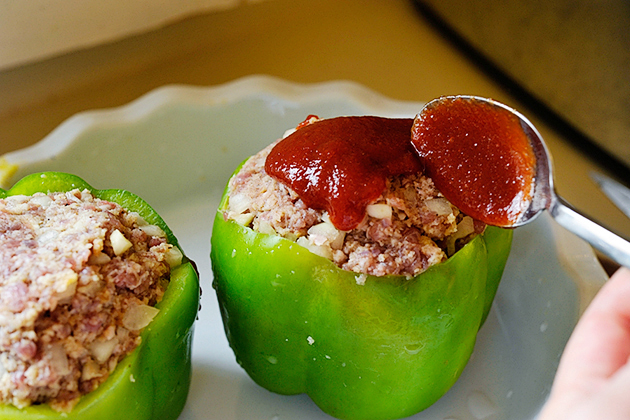
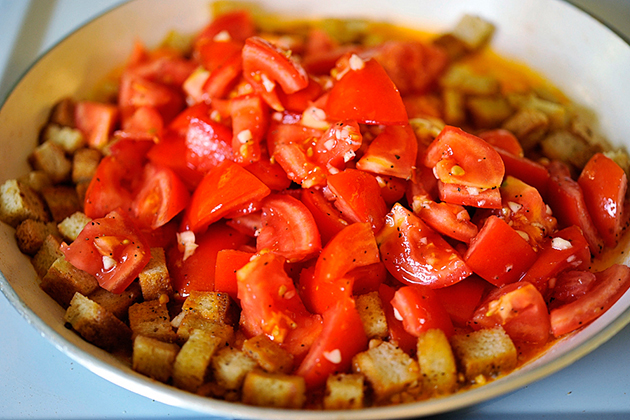
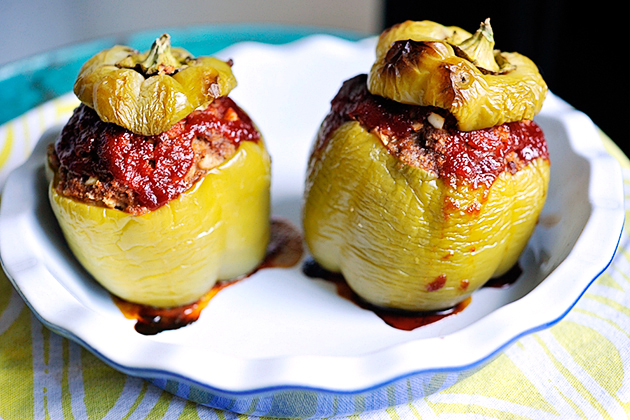
Add it to the top of the peppers. Be generous, it’s delicious.


Tasty Kitchen Blog: Roasted Red Pepper Meatloaf. Guest post by Georgia Pellegrini, recipe submitted by TK member Caressa of Cuddles, Crafts and Cupcakes.

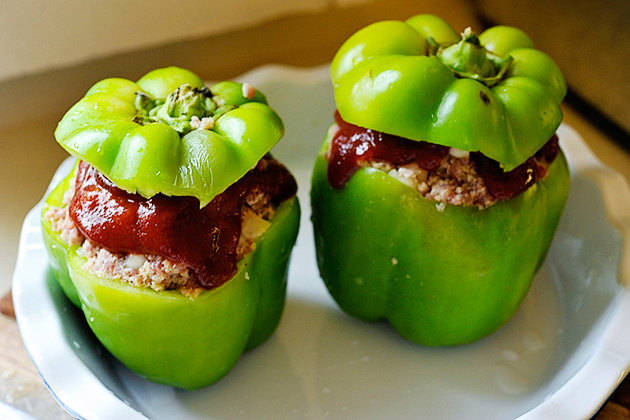
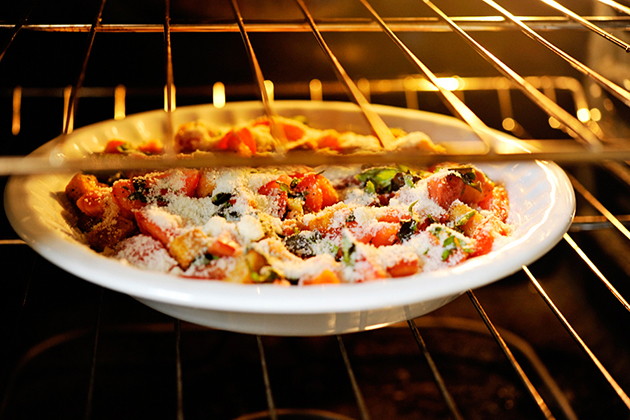
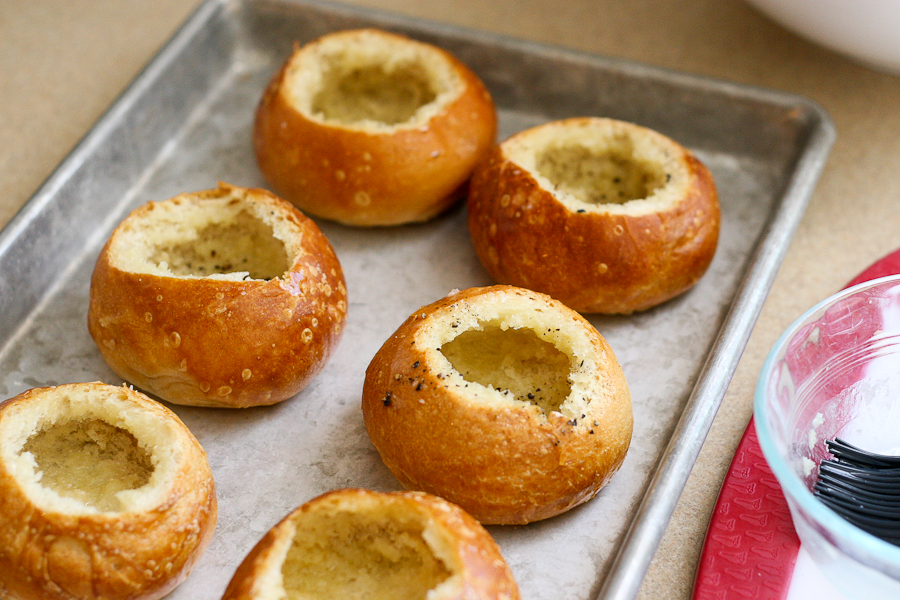
At the pepper tops and pop them all into a 350ºF oven. Bake for 35-40 minutes and let cool for 10 minutes before serving.


Tasty Kitchen Blog: Roasted Red Pepper Meatloaf. Guest post by Georgia Pellegrini, recipe submitted by TK member Caressa of Cuddles, Crafts and Cupcakes.

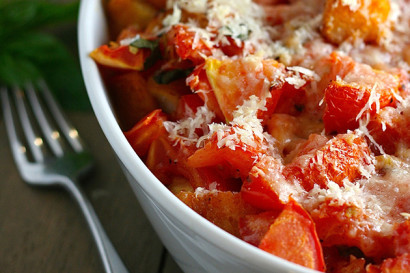
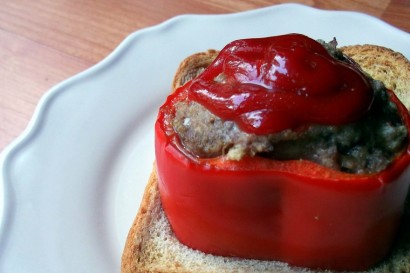
These are individually portioned meatloaves in beautiful packages! You’ll love them. Thank you Caressa for sharing this treat with us. It’s in my new meatloaf repertoire for sure. Check out her cute blog, Cuddles, Crafts & Cupcakes, where you can find more of her kid-friendly recipes!


Printable Recipe

Roasted Red Pepper Meatloaf

See post on iamcaressa’s site!
5.00 Mitt(s) 2 Rating(s)2 votes, average: 5.00 out of 52 votes, average: 5.00 out of 52 votes, average: 5.00 out of 52 votes, average: 5.00 out of 52 votes, average: 5.00 out of 5

Prep Time:

Cook Time:

Difficulty: Easy

Servings: 8

8
x

Print Options

Page size Letter 3x5 4x6
Text Size Small Medium Large
Content Include description
Include prep time, etc.
Show image

Description

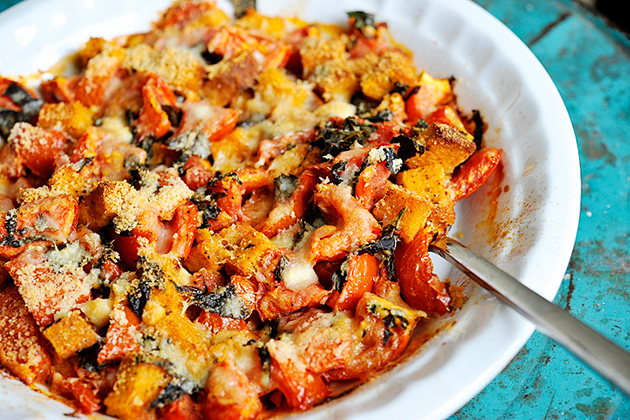
Oh man. Can I just tell you how amazing this meal is? How great it smells? How wonderful it tastes? I love this dish.

Ingredients

  • 1 pound Ground Beef
  • ½ cups Milk
  • 1 whole Egg
  • ¾ cups Panko Bread Crumbs
  • 1 Tablespoon Worcestershire Sauce
  • ½ cups Finely Diced Onions
  • 2 cloves Garlic, Minced
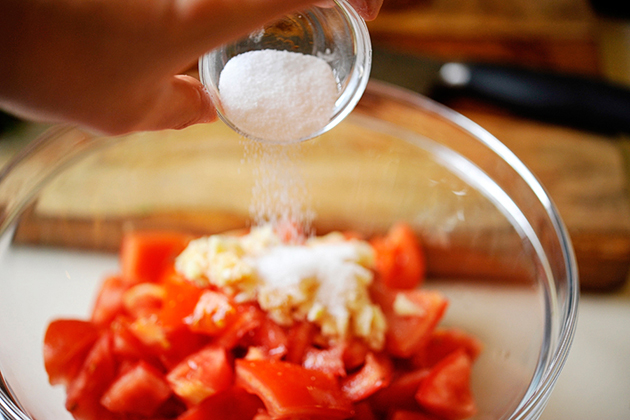
  • ½ teaspoons Salt
  • ¾ teaspoons Dried Ground Mustard
  • ½ teaspoons Black Pepper
  • 3 whole Large Red Peppers, Cut Into 1.5" Rounds
  • 1 cup Ketchup Mixed
  • 1 Tablespoon Brown Sugar
  • 8 slices Bread (optional But Highly Recommended)

Preparation Instructions

Preheat oven to 350ºF.

Mix the beef, milk, egg, bread crumbs, Worcestershire sauce, onions, garlic, mustard, and black pepper with your hands in a bowl. Divide the mixture into eighths and fill into the pepper rounds. Make sure you smoosh (yes, smoosh) them down to completely fill them.

Mix the ketchup and the brown sugar. Top each pepper round with the ketchup mixture and place on top of a slice of bread.

Set each bread/pepper on top of a baking sheet and bake for 35-40 minutes or until a meat thermometer reads 160ºF. Cool for 10 minutes, serve and sigh with happiness.

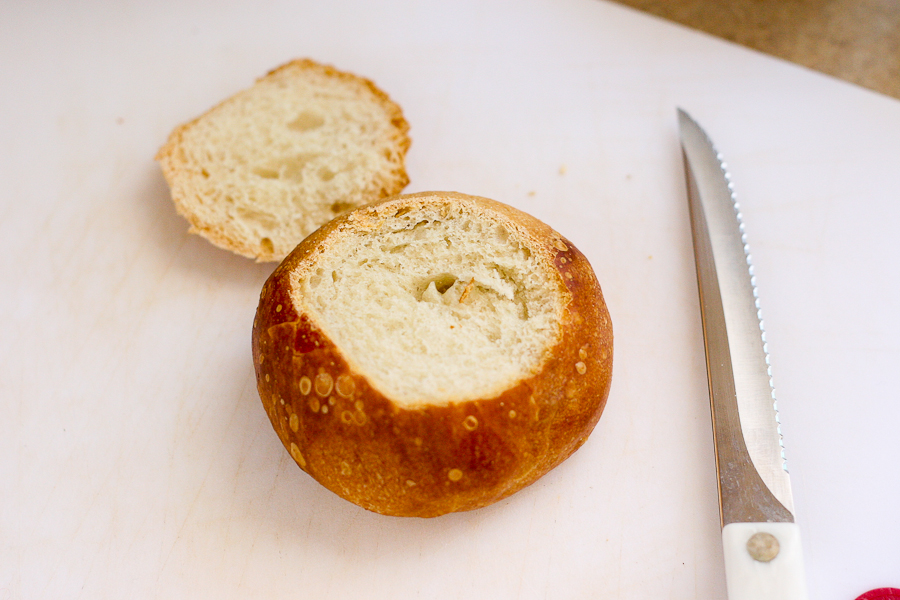
I have to say, you can totally omit the bread, but it gets so fantastically toasty and crunchy and becomes the perfect way to enjoy this meatloaf.


_______________________________________

There’s so much to say about Georgia, we don’t know where to start. Leaving Wall Street for the French Culinary Institute, followed by a stint at the Gramercy Tavern and La Chassagnette in France, her passion for food and food traditions are evident and inspiring. Visit her site at Georgia Pellegrini, where you’ll find more recipes, photos, learn all about her wonderful books Girl Hunter and Food Heroes, and enjoy her latest adventures.


Profile photo of georgiapellegrini

Garlicky Scalloped Tomatoes

Posted by in Step-by-Step Recipes

Tasty Kitchen Blog: Garlicky Scalloped Tomatoes. Guest post by Georgia Pellegrini, recipe submitted by TK member Riley of My Daily Morsel.

 
Riley shared these Garlicky Scalloped Tomatoes recently here on Tasty Kitchen and I am SO glad I made them! It is a perfect side to any meal but also delicious on its own by the spoonful. Make this for your next dinner! It’s such a crowd pleaser and you can even make it gluten-free with the right type of bread.


Tasty Kitchen Blog: Garlicky Scalloped Tomatoes. Guest post by Georgia Pellegrini, recipe submitted by TK member Riley of My Daily Morsel.

To make this dish you will need: garlic cloves, olive oil, cubed bread, roughly chopped tomatoes, sugar, salt, pepper, basil and Parmesan.


Tasty Kitchen Blog: Garlicky Scalloped Tomatoes. Guest post by Georgia Pellegrini, recipe submitted by TK member Riley of My Daily Morsel.

I used a brown rice bread which kept the dish gluten-free, and it was super delicious so that would be one good option if you have any gluten-free friends in your midst.


Tasty Kitchen Blog: Garlicky Scalloped Tomatoes. Guest post by Georgia Pellegrini, recipe submitted by TK member Riley of My Daily Morsel.

Heat the olive oil in a skillet over medium heat and toss the bread cubes about for 5 minutes …


Tasty Kitchen Blog: Garlicky Scalloped Tomatoes. Guest post by Georgia Pellegrini, recipe submitted by TK member Riley of My Daily Morsel.

Until they become golden brown.


Tasty Kitchen Blog: Garlicky Scalloped Tomatoes. Guest post by Georgia Pellegrini, recipe submitted by TK member Riley of My Daily Morsel.

Roughly chop your tomatoes and add them to a bowl.


Tasty Kitchen Blog: Garlicky Scalloped Tomatoes. Guest post by Georgia Pellegrini, recipe submitted by TK member Riley of My Daily Morsel.

Then chop your garlic finely.


Tasty Kitchen Blog: Garlicky Scalloped Tomatoes. Guest post by Georgia Pellegrini, recipe submitted by TK member Riley of My Daily Morsel.

Add it to the bowl of tomatoes …


Tasty Kitchen Blog: Garlicky Scalloped Tomatoes. Guest post by Georgia Pellegrini, recipe submitted by TK member Riley of My Daily Morsel.

Along with the salt and sugar.


Tasty Kitchen Blog: Garlicky Scalloped Tomatoes. Guest post by Georgia Pellegrini, recipe submitted by TK member Riley of My Daily Morsel.

Add some pepper too …


Tasty Kitchen Blog: Garlicky Scalloped Tomatoes. Guest post by Georgia Pellegrini, recipe submitted by TK member Riley of My Daily Morsel.

And toss it all together so that the flavors develop.


Tasty Kitchen Blog: Garlicky Scalloped Tomatoes. Guest post by Georgia Pellegrini, recipe submitted by TK member Riley of My Daily Morsel.

Pour the tomato mixture on top of the croutons and let simmer for 3-4 minutes until the tomatoes break down.


Tasty Kitchen Blog: Garlicky Scalloped Tomatoes. Guest post by Georgia Pellegrini, recipe submitted by TK member Riley of My Daily Morsel.

Chop your fresh basil …


Tasty Kitchen Blog: Garlicky Scalloped Tomatoes. Guest post by Georgia Pellegrini, recipe submitted by TK member Riley of My Daily Morsel.

And sprinkle it on top once the tomatoes are ready and the pan is off the heat.


Tasty Kitchen Blog: Garlicky Scalloped Tomatoes. Guest post by Georgia Pellegrini, recipe submitted by TK member Riley of My Daily Morsel.

Transfer the mixture to a baking dish.


Tasty Kitchen Blog: Garlicky Scalloped Tomatoes. Guest post by Georgia Pellegrini, recipe submitted by TK member Riley of My Daily Morsel.

Sprinkle on a good dose of Parmesan …


Tasty Kitchen Blog: Garlicky Scalloped Tomatoes. Guest post by Georgia Pellegrini, recipe submitted by TK member Riley of My Daily Morsel.

And pop it into a 350ºF oven. Bake for 35 to 40 minutes until the cheese is melted and the top is golden brown and bubbling.


Tasty Kitchen Blog: Garlicky Scalloped Tomatoes. Guest post by Georgia Pellegrini, recipe submitted by TK member Riley of My Daily Morsel.

Your house will smell amazing! Which makes it a particularly great dish to make when you have company coming over. Thank you to Riley for sharing this with us! Visit her website My Daily Morsel for other delicious treats.


Printable Recipe

Garlicky Scalloped Tomatoes

See post on Riley - My Daily Morsel’s site!
5.00 Mitt(s) 1 Rating(s)1 vote, average: 5.00 out of 51 vote, average: 5.00 out of 51 vote, average: 5.00 out of 51 vote, average: 5.00 out of 51 vote, average: 5.00 out of 5

Prep Time:

Cook Time:

Difficulty: Easy

Servings: 6

6
x

Print Options

Page size Letter 3x5 4x6
Text Size Small Medium Large
Content Include description
Include prep time, etc.
Show image

Description

Scalloped plum tomatoes baked with crushed garlic, fresh basil and Parmesan cheese.

Ingredients

  • 8 cloves Garlic, Peeled
  • 2 Tablespoons Olive Oil
  • 2 cups Cubed French Bread
  • 5-½ pounds Plum Tomatoes, Roughly Chopped
  • 2 Tablespoons Sugar
  • 2 teaspoons Kosher Salt
  • 1 teaspoon Freshly Ground Black Pepper
  • ½ cups Julienned Basil Leaves
  • 1 cup Grated Parmesan Cheese

Preparation Instructions

1. Preheat the oven to 350°F. Place the garlic cloves on a cutting board and mash the garlic with the side of the knife until it forms a smooth paste.

2. Heat the olive oil in a large skillet over medium heat. Add the bread cubes and cook for about 5 minutes, tossing often, until the bread is golden brown.

3. Meanwhile, stir together the tomatoes, sugar, salt, pepper, and garlic paste in a large bowl to combine. Add the tomato mixture into the skillet and cook for another 3 to 4 minutes, until the tomatoes begin to break down. Remove from the heat and stir in the basil.

4. Pour the tomato mixture into a large shallow baking dish (I used a large oval baker but a 9×13 dish should work as well) and sprinkle the cheese evenly over the top. Bake for 35 to 40 minutes, until the cheese is melted and golden brown and the tomatoes are bubbling.

Recipe adapted from Barefoot Contessa: Back to Basics.


_______________________________________

There’s so much to say about Georgia, we don’t know where to start. Leaving Wall Street for the French Culinary Institute, followed by a stint at the Gramercy Tavern and La Chassagnette in France, her passion for food and food traditions are evident and inspiring. Visit her site at Georgia Pellegrini, where you’ll find more recipes, photos, learn all about her wonderful books Girl Hunter and Food Heroes, and enjoy her latest adventures.


Profile photo of Natalie | Perry's Plate

Customizable Bread Bowl Breakfast

Posted by in Step-by-Step Recipes

Tasty Kitchen Blog Customizable Bread Bowl Breakfast. Guest post by Natalie Perry of Perry's Plate, recipe submitted by TK member Lindsay of Perfecting the Pairing.

 
If I ask my (almost) 5-year-old what cooking show she wants to watch with Mom, she always says, “Pioneer Woman!” She adores Ree’s show! After one recent episode where Ree made soup in bread bowls, my little girl was obsessed with the idea of eating her bowl when she finished her soup. (It IS pretty cool if you ask me.) She’s been hounding me to make them for several weeks now.

Since bread bowls are pretty substantial (especially for a 5-year-old) I was so excited when I saw a miniature version made from crusty rolls! The Customizable Bread Bowl Breakfast idea comes from TK member Lindsay.

I love recipes like this that are more conceptual than a strict-measurement recipe. You can literally go any direction with these bowls and simply use what you have on hand! They’d also be great to serve a crowd at brunch (perhaps an Easter brunch if you’re planning one?). If you have enough fillings, then there’s bound to be something that everyone will like!


Tasty Kitchen Blog Customizable Bread Bowl Breakfast. Guest post by Natalie Perry of Perry's Plate, recipe submitted by TK member Lindsay of Perfecting the Pairing.

To get started you’ll need some crusty dinner rolls, some melted butter, a sharp serrated knife, a pastry brush, salt, and pepper.


Tasty Kitchen Blog Customizable Bread Bowl Breakfast. Guest post by Natalie Perry of Perry's Plate, recipe submitted by TK member Lindsay of Perfecting the Pairing.

Slice off the very top of the roll.

(These are so easy. It kills me.)


Tasty Kitchen Blog Customizable Bread Bowl Breakfast. Guest post by Natalie Perry of Perry's Plate, recipe submitted by TK member Lindsay of Perfecting the Pairing.

Pull out as much of the inside of the roll as you can without breaking through the crust. My rolls had a pretty thick, crusty outside, so that’s about as far as I could go.


Tasty Kitchen Blog Customizable Bread Bowl Breakfast. Guest post by Natalie Perry of Perry's Plate, recipe submitted by TK member Lindsay of Perfecting the Pairing.

Brush the inside with butter.


Tasty Kitchen Blog Customizable Bread Bowl Breakfast. Guest post by Natalie Perry of Perry's Plate, recipe submitted by TK member Lindsay of Perfecting the Pairing.

Then sprinkle some salt and pepper inside.


Tasty Kitchen Blog Customizable Bread Bowl Breakfast. Guest post by Natalie Perry of Perry's Plate, recipe submitted by TK member Lindsay of Perfecting the Pairing.

Put them on a sheet pan or a platter for your hungry ones to grab and fill.


Tasty Kitchen Blog Customizable Bread Bowl Breakfast. Guest post by Natalie Perry of Perry's Plate, recipe submitted by TK member Lindsay of Perfecting the Pairing.

Here comes the fun part: gathering the fillings! I actually did this before I prepped my rolls, and you can even do it the night before breakfast. They don’t have to be hot because everything gets baked in the oven anyway. I began to “clean out” my fridge, so to speak, and ended up with WAY more fillings than we needed. Things got a bit heady with flavor combinations.

(By the way, if you don’t use all of the fillings, you have everything conveniently prepped for omelets later!)


Tasty Kitchen Blog Customizable Bread Bowl Breakfast. Guest post by Natalie Perry of Perry's Plate, recipe submitted by TK member Lindsay of Perfecting the Pairing.

I let my kids go at it, curious to see what they would put in their rolls. My 3-year-old went straight for the bacon. And the cheese. (She’s a momma’s girl.) One thing we learned through this is to fill the rolls sparingly and really push the fillings down and into the sides. You’ll see why in a second.


Tasty Kitchen Blog Customizable Bread Bowl Breakfast. Guest post by Natalie Perry of Perry's Plate, recipe submitted by TK member Lindsay of Perfecting the Pairing.

I told the 5-year-old to put an egg in hers. I should have been more specific. She figured out soon enough that meant cracking the egg. Silly girl.

I’m not sure if my rolls were on the small side or if my eggs were on the large side (yolks from pastured eggs tend to be larger), but we lost a good bit of the white down the side of the roll. No biggie.

You could also use the whites only or whisk together the eggs (for those who like things mixed up) and only pour as much as you need into each roll.


Tasty Kitchen Blog Customizable Bread Bowl Breakfast. Guest post by Natalie Perry of Perry's Plate, recipe submitted by TK member Lindsay of Perfecting the Pairing.

After you have your rolls filled and baked, you’re ready to eat! If you like your yolks runny, keep an eye on them closely so they don’t firm up in the oven.


Tasty Kitchen Blog Customizable Bread Bowl Breakfast. Guest post by Natalie Perry of Perry's Plate, recipe submitted by TK member Lindsay of Perfecting the Pairing.

Thanks to Lindsay for a fabulous brunch idea! Be sure to visit her TK recipe box as well as her own blog, Perfecting the Pairing, for more delicious recipes.


Printable Recipe

Customizable Bread Bowl Breakfast

See post on Lindsay’s site!
4.83 Mitt(s) 6 Rating(s)6 votes, average: 4.83 out of 56 votes, average: 4.83 out of 56 votes, average: 4.83 out of 56 votes, average: 4.83 out of 56 votes, average: 4.83 out of 5

Prep Time:

Cook Time:

Difficulty: Easy

Servings: 8

8
x

Print Options

Page size Letter 3x5 4x6
Text Size Small Medium Large
Content Include description
Include prep time, etc.
Show image

Description

Egg in a bread bowl is the perfect breakfast for a crowd because it is completely customizable!

Ingredients

  • 8 whole Crusty Bread Rolls
  • 2 Tablespoons Butter, Melted
  • Salt And Pepper
  • Assorted Fillings (See Suggestions In Instructions)
  • 8 whole Eggs

Preparation Instructions

Preheat your oven to 350ºF. Slice off the top of each roll and scoop out the soft bread inside, leaving the sides of the roll intact. Brush the inside of each roll with the melted butter and season with salt and pepper.

Let your guests fill the roll with their favorite toppings (see suggestions below). Crack an egg or egg white on top, season with salt and pepper, and place on a cookie sheet. Bake for 10-12 minutes and then cover the pan loosely with foil. Bake an additional 20-25 minutes, or until the egg is just set.

Suggested fillings: grape tomatoes, cilantro, parsley, thyme, shredded cheese, herbed goat cheese, caramelized onions, pre-cooked breakfast potatoes, spinach artichoke dip, deli ham, cooked sausage, crumbled bacon, onions, mushrooms, spinach, feta cheese.


_______________________________________

Be sure to check out Natalie’s own beautiful food blog, Perrys’ Plate, where you can see her growing collection of lovely recipes. There’s always something new to see there. Go visit now!


Profile photo of ThreeManyCooks

Sander’s Hot Fudge Sauce

Posted by in Step-by-Step Recipes

Tasty Kitchen Blog: Sander’s Hot Fudge Sauce. Guest post by Maggy Keet of Three Many Cooks, recipe submitted by TK member Kathy Marie.

 
A bit of history in a recipe’s headnote always catches my eye. So when I stumbled upon Kathy Marie’s recipe for Sander’s Hot Fudge Sauce, a recipe passed down by her 82 year-old mother-in-law who grew up in Detroit, I figured it had t be great. Her mother-in-law recalled what a treat it was in high school to go Sander’s Ice Cream Parlor for a sundae.

I tend to glorify the past—what it would be like to live in another era (have you seen Midnight in Paris?). This image of a young woman sitting at the Sander’s counter, savoring her ice cream sundae, topped with this very hot fudge sauce in the 1940s made me feel nostalgic for a long lost era. So I made it, poured it liberally over my favorite ice cream, and savored each bite. Get ready for a chocolate blast from the past.


Tasty Kitchen Blog: Sander’s Hot Fudge Sauce. Guest post by Maggy Keet of Three Many Cooks, recipe submitted by TK member Kathy Marie.

You need just five ingredients to make this hot fudge sauce: caramels, milk, chocolate, vanilla ice cream and vanilla extract.


Tasty Kitchen Blog: Sander’s Hot Fudge Sauce. Guest post by Maggy Keet of Three Many Cooks, recipe submitted by TK member Kathy Marie.

It starts with a pound of caramels in a double boiler. Good start, right?


Tasty Kitchen Blog: Sander’s Hot Fudge Sauce. Guest post by Maggy Keet of Three Many Cooks, recipe submitted by TK member Kathy Marie.

Then we add the milk and stir continuously until smooth.


Tasty Kitchen Blog: Sander’s Hot Fudge Sauce. Guest post by Maggy Keet of Three Many Cooks, recipe submitted by TK member Kathy Marie.

Next mix in all that lovely chocolate.


Tasty Kitchen Blog: Sander’s Hot Fudge Sauce. Guest post by Maggy Keet of Three Many Cooks, recipe submitted by TK member Kathy Marie.

Stir to ensure it is melted and smooth.


Tasty Kitchen Blog: Sander’s Hot Fudge Sauce. Guest post by Maggy Keet of Three Many Cooks, recipe submitted by TK member Kathy Marie.

And this is where it gets interesting: you then stir in a cup of vanilla ice cream! This makes the sauce creamy.


Tasty Kitchen Blog: Sander’s Hot Fudge Sauce. Guest post by Maggy Keet of Three Many Cooks, recipe submitted by TK member Kathy Marie.

Then add a dash of vanilla for good measure.


Tasty Kitchen Blog: Sander’s Hot Fudge Sauce. Guest post by Maggy Keet of Three Many Cooks, recipe submitted by TK member Kathy Marie.

Mix until super-smooth.


Tasty Kitchen Blog: Sander’s Hot Fudge Sauce. Guest post by Maggy Keet of Three Many Cooks, recipe submitted by TK member Kathy Marie.

Then pour it liberally over your favorite sweet treat.


Tasty Kitchen Blog: Sander’s Hot Fudge Sauce. Guest post by Maggy Keet of Three Many Cooks, recipe submitted by TK member Kathy Marie.

I went with ice cream only because I’m wishing it was summer, but this would be to-die-for over a hot brownie sundae!

Kathy Marie, thank you (and your mother-in-law) for sharing this recipe with us.


Printable Recipe

Sander’s Hot Fudge Sauce

5.00 Mitt(s) 1 Rating(s)1 vote, average: 5.00 out of 51 vote, average: 5.00 out of 51 vote, average: 5.00 out of 51 vote, average: 5.00 out of 51 vote, average: 5.00 out of 5

Prep Time:

Cook Time:

Difficulty: Easy

Servings: 12

12
x

Print Options

Page size Letter 3x5 4x6
Text Size Small Medium Large
Content Include description
Include prep time, etc.
Show image

Description

My mother-in-law grew up in Detroit (she’s 82 now!) and told me it was a treat to go to Sander’s Ice Cream Parlor for a sundae when she was in high school. She got this recipe from an old friend and shared it with me. Oh, my! You’ve got to try this!

Ingredients

  • ½ cups Whole Milk
  • 1 pound Caramels
  • ½ pounds High Quality Milk Chocolate
  • ½ pints Vanilla Ice Cream
  • 1 teaspoon Vanilla Extract

Preparation Instructions

1. Place milk and caramels in a double bloiler, heat over medium heat and stir continuously until a hot smooth cream is formed. Remove from the heat.

2. Chop the chocolate into uniform small pieces and add to the above hot cream. Stir continuously until the chocolate is completely melted and incorporated into the hot cream.

3. Mix in the vanilla ice cream and vanilla extract and stir until completely melted and thoroughly combined.

4. Serve immediately over your favorite ice cream. Store any leftovers in a covered container in the refrigerator. Reheat in the microwave at 30-second intervals, stirring between heating times, until desired temperature is reached.


_______________________________________

Three Many Cooks is the always-entertaining food blog of Pam Anderson and her two daughters, Maggy and Sharon. Pam is a well-known and much-respected food writer and author, Maggy is a “hippy adventurer meets 1950s housewife,” and Sharon refers to herself as a recovering food snob learning to survive on a graduate student’s budget. Theirs is a strong relationship both inside and outside the kitchen, and it shows in the food they create and the stories they tell.


Profile photo of Erica Lea

Blackberry Cobbler Bars

Posted by in Baking, Step-by-Step Recipes

  Raise your hand if you love cobblers! Warm fruit surrounded by a cake or cookie-like topping accompanied by good-quality ice cream. I’ll have that any night of the week. Or for breakfast. Or lunch. Or a snack. Yeah, I’m a bit obsessed. These Blackberry Cobbler Bars, brought to us by TK member Amber, is a […]

Profile photo of georgiapellegrini

Twice-Baked Stuffed Butternut Squash

Posted by in Step-by-Step Recipes

  Seeing as superfood quinoa is all the rage these days, I was excited to try this Twice-Baked Butternut Squash with Quinoa, Pecans, and Parmesan recipe from TK member Jess. This deliciously comforting dish incorporates the season’s sweet butternut squash with cheese, pecans, and of course, the all-mighty quinoa.       To make it, […]

Profile photo of Erica Lea

Pumpkin Cinnamon Roll Scones

Posted by in Baking, Step-by-Step Recipes

There's nothing cozier than a steamy cup of tea accompanied by a pumpkin scone filled with warm, cinnamony goodness and a maple glaze.

Profile photo of Erika (TK)

Last-Minute Thanksgiving Recipes

Posted by in Holidays, The Theme Is...

  We know most of you pretty much have your entire menu set for tomorrow, and bravo! That means you get to avoid the supermarkets today. But some of you might have suddenly found yourselves in a bind. Maybe a guest who was assigned to bring a dish suddenly cancelled, or surprise! Your planned host […]