The Pioneer Woman Tasty Kitchen
Profile photo of georgiapellegrini

Massaged Kale Salad

Posted by in Step-by-Step Recipes

Tasty Kitchen Blog: Massaged Kale Salad. Guest post by Georgia Pellegrini, recipe submitted by TK member Karla (KGracie71) of Forty Cakes.

 
I’m a kale fanatic and I like it any which way. This Protein-Packed Massaged Kale Salad recipe from TK member KGracie71 caught my eye because it is totally raw, relying on the acid from the vinaigrette to tenderize the kale. Keeping it raw means it has a great texture and maximum nutrition in each bite. It also has great color! It is a heavenly kale concoction.


Tasty Kitchen Blog: Massaged Kale Salad. Guest post by Georgia Pellegrini, recipe submitted by TK member Karla (KGracie71) of Forty Cakes.

To make this you will need: kale, cooked quinoa, dried cranberries, apple, walnuts, lime, garlic, olive oil, balsamic vinegar and honey.


Tasty Kitchen Blog: Massaged Kale Salad. Guest post by Georgia Pellegrini, recipe submitted by TK member Karla (KGracie71) of Forty Cakes.

Start by making your vinaigrette in a bowl. Pour in the olive oil …


Tasty Kitchen Blog: Massaged Kale Salad. Guest post by Georgia Pellegrini, recipe submitted by TK member Karla (KGracie71) of Forty Cakes.

Followed by the balsamic vinegar …


Tasty Kitchen Blog: Massaged Kale Salad. Guest post by Georgia Pellegrini, recipe submitted by TK member Karla (KGracie71) of Forty Cakes.

Followed by the lime juice and crushed garlic clove.


Tasty Kitchen Blog: Massaged Kale Salad. Guest post by Georgia Pellegrini, recipe submitted by TK member Karla (KGracie71) of Forty Cakes.

Then add the honey. I used less honey than the recipe called for and it was sweet enough for me, so add it in batches and taste to see what suits your fancy.


Tasty Kitchen Blog: Massaged Kale Salad. Guest post by Georgia Pellegrini, recipe submitted by TK member Karla (KGracie71) of Forty Cakes.

Give it a stir and let the garlic infuse for a few minutes.


Tasty Kitchen Blog: Massaged Kale Salad. Guest post by Georgia Pellegrini, recipe submitted by TK member Karla (KGracie71) of Forty Cakes.

Add the kale to a large bowl and pour the dressing all over. Stir it well.


Tasty Kitchen Blog: Massaged Kale Salad. Guest post by Georgia Pellegrini, recipe submitted by TK member Karla (KGracie71) of Forty Cakes.

Give the kale a massage with your hands for about 5 minutes. This will help it break down and tenderize nicely.


Tasty Kitchen Blog: Massaged Kale Salad. Guest post by Georgia Pellegrini, recipe submitted by TK member Karla (KGracie71) of Forty Cakes.

Next add your quinoa. Toss it in and stir. I like to make quinoa in large batches and toss it into salads throughout the week. It’s a great source of protein. So feel free to make extra and save the rest.


Tasty Kitchen Blog: Massaged Kale Salad. Guest post by Georgia Pellegrini, recipe submitted by TK member Karla (KGracie71) of Forty Cakes.

Toss in your apple…


Tasty Kitchen Blog: Massaged Kale Salad. Guest post by Georgia Pellegrini, recipe submitted by TK member Karla (KGracie71) of Forty Cakes.

Then the walnuts…


Tasty Kitchen Blog: Massaged Kale Salad. Guest post by Georgia Pellegrini, recipe submitted by TK member Karla (KGracie71) of Forty Cakes.

And the cranberries.


Tasty Kitchen Blog: Massaged Kale Salad. Guest post by Georgia Pellegrini, recipe submitted by TK member Karla (KGracie71) of Forty Cakes.

Stir it all together. This can be made in advance and stored covered in the refrigerator. It will tenderize further with time and the flavors will blend nicely.


Tasty Kitchen Blog: Massaged Kale Salad. Guest post by Georgia Pellegrini, recipe submitted by TK member Karla (KGracie71) of Forty Cakes.

You will feel very, very healthy after a big plate of this; it is very satisfying. Thank you to Karla for sharing this recipe with us! Check out her website Forty Cakes for other delicious treats.


Printable Recipe

Protein Packed Massaged Kale Salad

See post on Karla @ FortyCakes’s site!
5.00 Mitt(s) 3 Rating(s)3 votes, average: 5.00 out of 53 votes, average: 5.00 out of 53 votes, average: 5.00 out of 53 votes, average: 5.00 out of 53 votes, average: 5.00 out of 5

Prep Time:

Cook Time:

Difficulty: Easy

Servings: 8

8
x

Print Options

Page size Letter 3x5 4x6
Text Size Small Medium Large
Content Include description
Include prep time, etc.
Show image

Description

So much protein! So much taste! So much health!

Ingredients

  • FOR THE SALAD:
  • 1-½ cup Cooked And Cooled Quinoa
  • 5 cups Kale
  • ½ cups Walnuts
  • ¼ cups Dried Cranberries
  • 1  Apple, Chopped
  • Salt And Pepper, to taste
  • FOR THE VINAIGRETTE:
  • ¼ cups Olive Oil
  • 2 Tablespoons Balsalmic Vinegar
  • 1  Lime, Juiced
  • 1 clove Garlic
  • 3 Tablespoons Honey

Preparation Instructions

Prepare quinoa according to package directions. Let cool.

For the vinaigrette:
Whisk together the olive oil, vinegar, juice from the lime, garlic and the honey. Set aside while you prepare the salad.

For the salad:
Put chopped kale in a large bowl and pour the vinaigrette over the beautiful leaves. Massage the vinaigrette into the kale for about 5 minutes. The size of the kale will decrease significantly and you should be able to feel the kale becoming more tender.

After the massage, add in the quinoa. Toss together with the kale.

Once those are well combined, toss in the walnuts, cranberries and chopped apples. Season with a bit of salt and pepper, to taste.

It would be great served with goat cheese or some other kind of cheese but was excellent without it as well.


_______________________________________

There’s so much to say about Georgia, we don’t know where to start. Leaving Wall Street for the French Culinary Institute, followed by a stint at the Gramercy Tavern and La Chassagnette in France, her passion for food and food traditions are evident and inspiring. Visit her site at Georgia Pellegrini, where you’ll find more recipes, photos, learn all about her wonderful books Girl Hunter and Food Heroes, and enjoy her latest adventures.


Profile photo of Faith (An Edible Mosaic)

Cincinnati Chili

Posted by in Step-by-Step Recipes

Tasty Kitchen Blog: Cincinnati Chili. Guest post by Faith Gorsky of An Edible Mosaic, recipe submitted by TK member Dax Phillips.

 
Have you ever been to Cincinnati? If so, you’ve probably had their very unique chili. It’s like eating chicken wings in Buffalo or lobster in Maine—if you want to experience a regional favorite, it’s a must-try!

A couple years ago I had Cincinnati chili while visiting a friend in Cincinnati. Since then, I’ve only dreamt of having it again. For a while now, I’ve been looking for what looked like an authentic version; that is, a bean-less version (you can serve it with beans on the top if you go five-way, but I’ll get to that in a second) that has chocolate. I was pretty excited when I found Tasty Kitchen member Dax Phillips’ recipe for Cincinnati Chili!

First things first, a little bit about how they do chili in Cincinnati. It starts with a complex, rich-flavored, warmly-spiced meat sauce that has a touch of chocolate added, usually in the form of unsweetened cocoa powder. Then that incredible sauce is served one of the following “ways”: two-way (chili over spaghetti noodles); three-way (chili over spaghetti noodles topped with shredded cheese); four-way (chili over spaghetti noodles topped with shredded cheese and diced onion); five-way (chili over spaghetti noodles topped with shredded cheese, diced onion, and kidney beans). And there you have it. Deliciousness in chili form, Cincinnati-style.

Ready to get started?


Tasty Kitchen Blog: Cincinnati Chili. Guest post by Faith Gorsky of An Edible Mosaic, recipe submitted by TK member Dax Phillips.

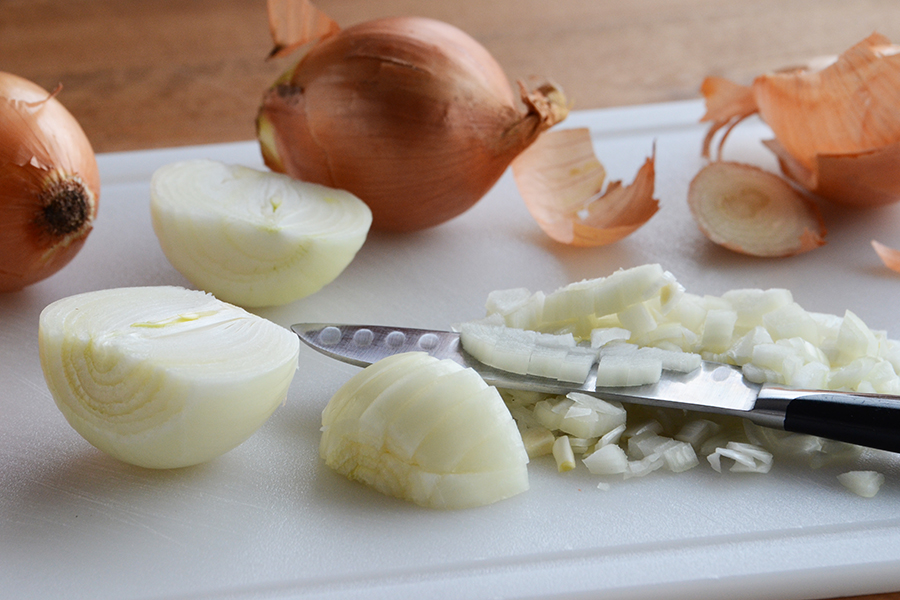
There is minimal prep work required for this recipe! Just dice 2 cups of onion (which is about 2 medium-large onions).


Tasty Kitchen Blog: Cincinnati Chili. Guest post by Faith Gorsky of An Edible Mosaic, recipe submitted by TK member Dax Phillips.

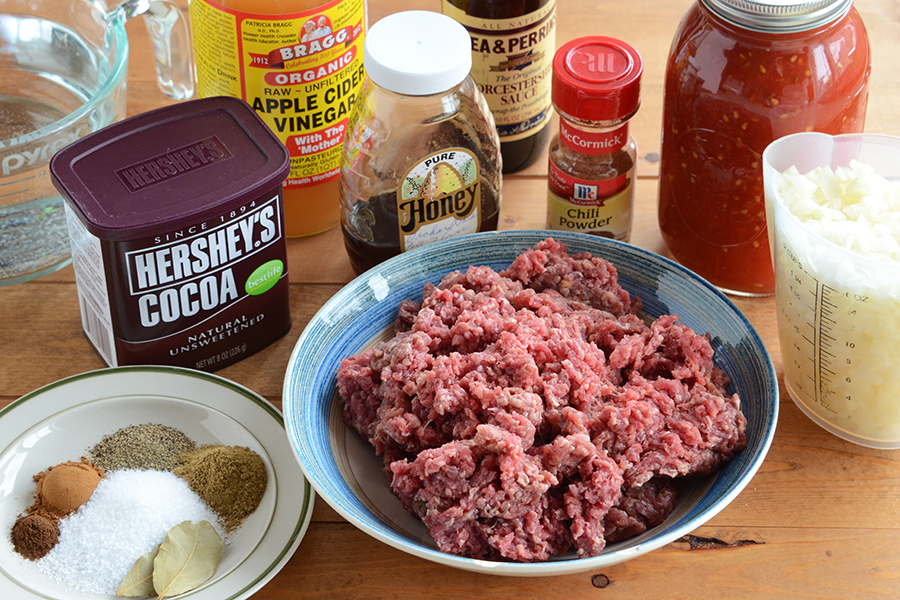
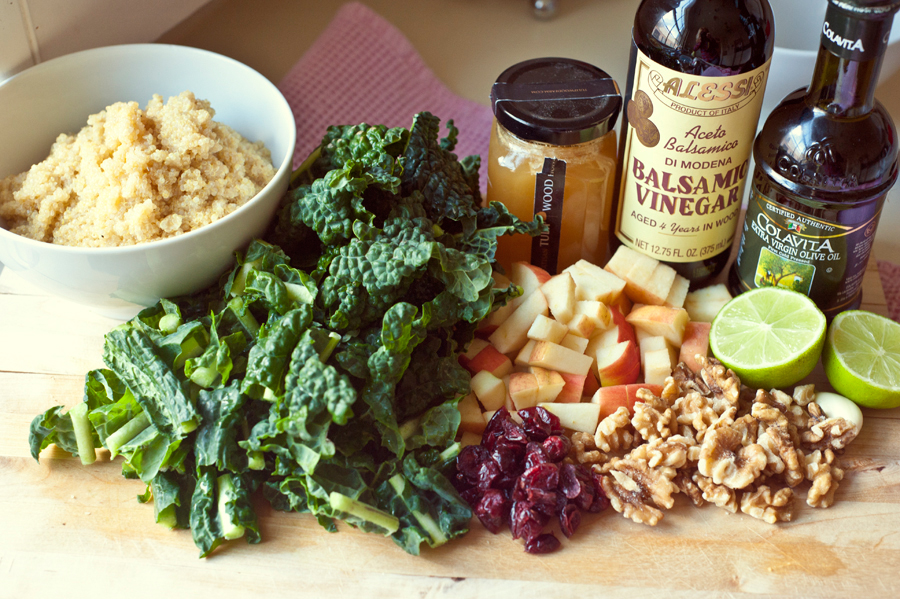
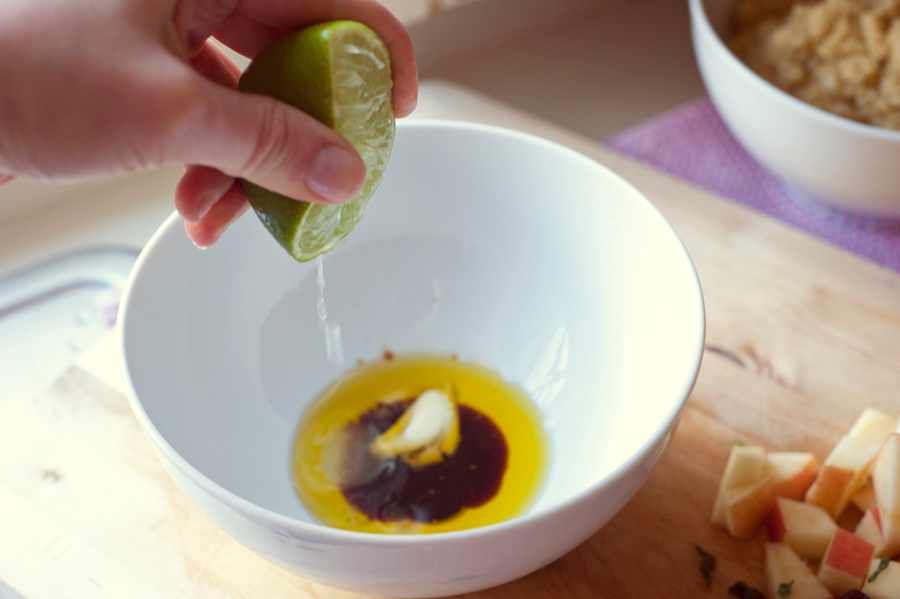
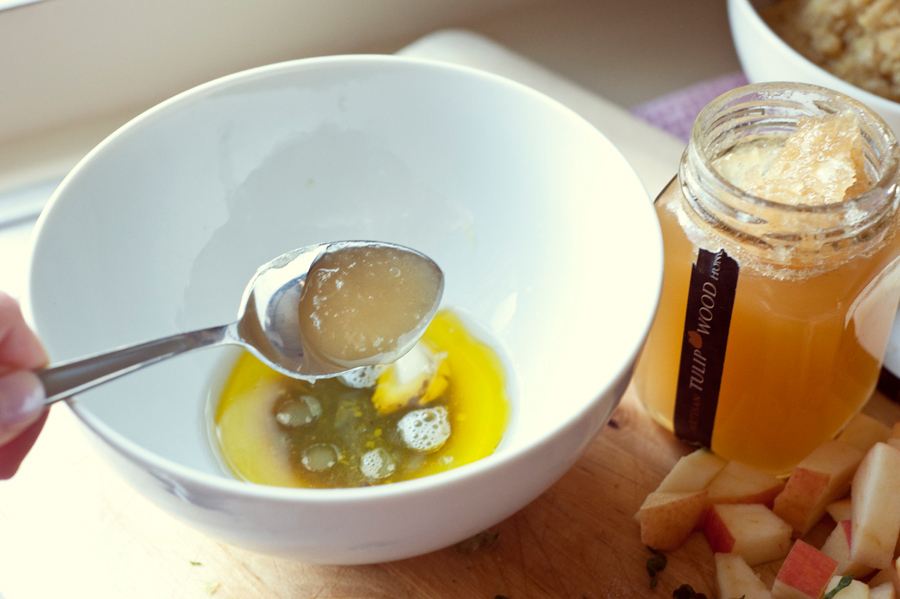
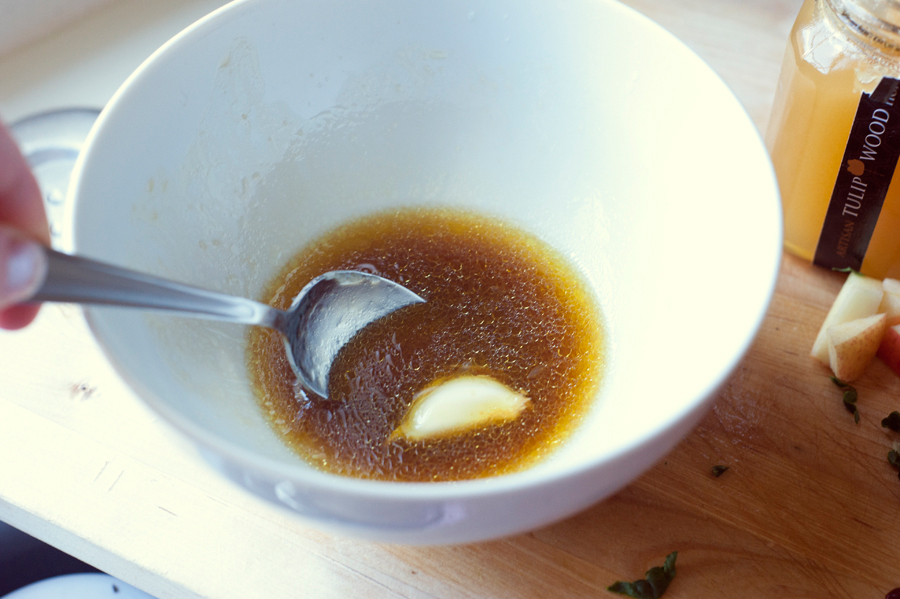
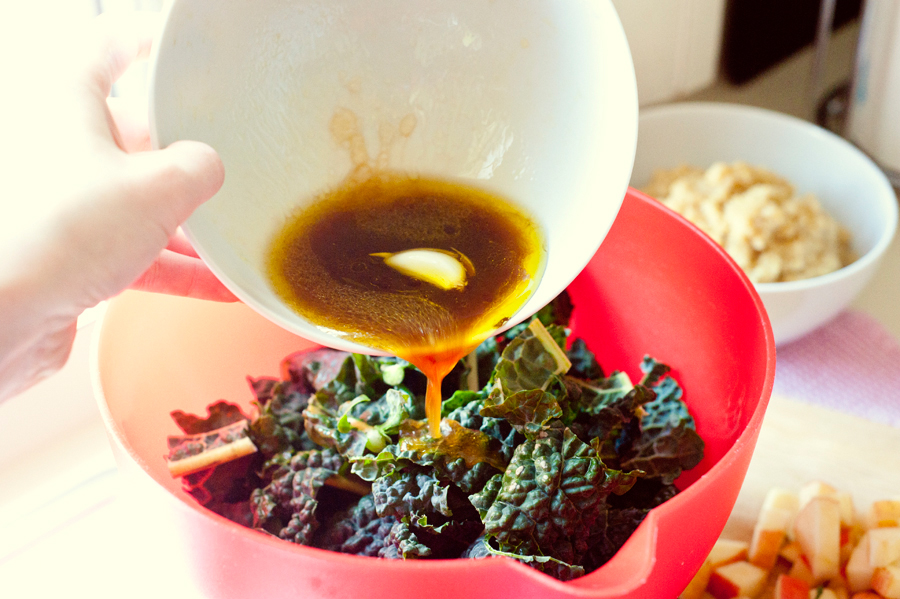
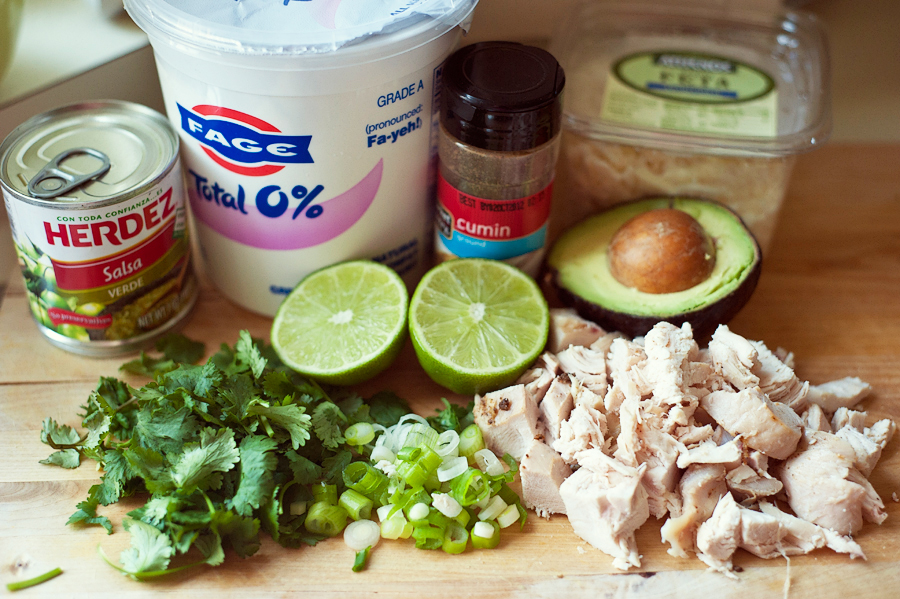
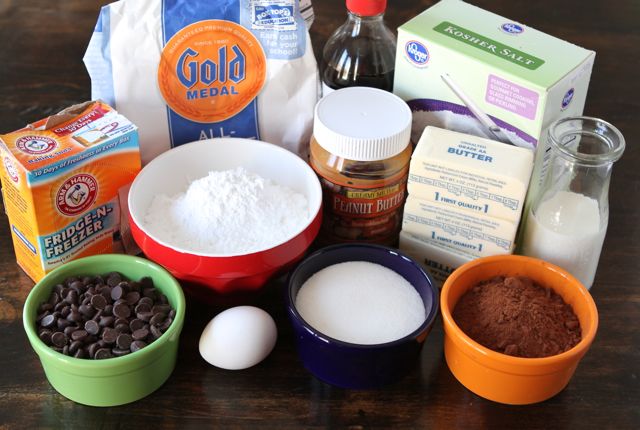
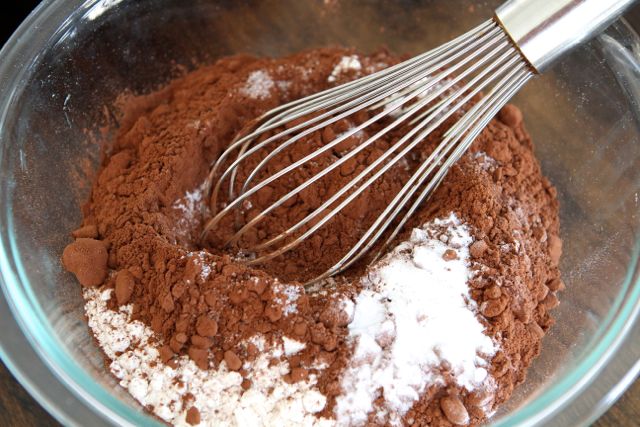
Then get out all your ingredients. Here we have: a plate of spices (cloves, cinnamon, black pepper, cumin, salt, and bay leaves), ground beef (I used 90% lean, but 95% lean would be even better), unsweetened cocoa powder, diced onion, apple cider vinegar, Worcestershire sauce, honey, chili powder (the original recipe calls for 5 tablespoons of chili powder, but I will only use 4 tablespoons next time), crushed tomatoes, and water. I only have 4 cups of water pictured, but I actually did use another 1 cup to make it 5 cups total, like the recipe says, so that the beef was fully covered. Oh, and next time I will add 1/4 teaspoon ground allspice as well.


Tasty Kitchen Blog: Cincinnati Chili. Guest post by Faith Gorsky of An Edible Mosaic, recipe submitted by TK member Dax Phillips.

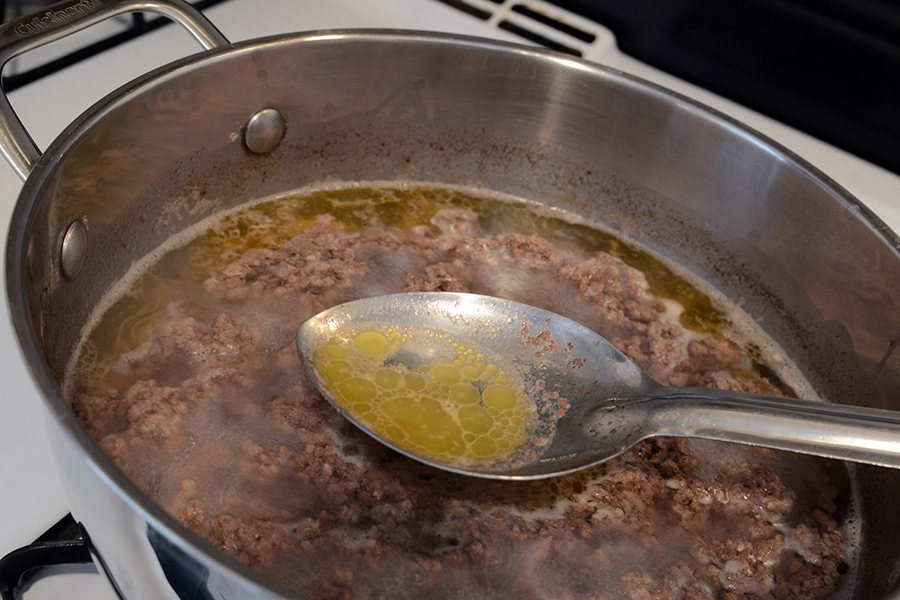
The first cooking step is the initial boiling of the beef. This is the most hands-on part of the cooking process, since it requires you to skim off the fat/other stuff that floats to the top. Not to worry, the chili is worth this extra work!


Tasty Kitchen Blog: Cincinnati Chili. Guest post by Faith Gorsky of An Edible Mosaic, recipe submitted by TK member Dax Phillips.

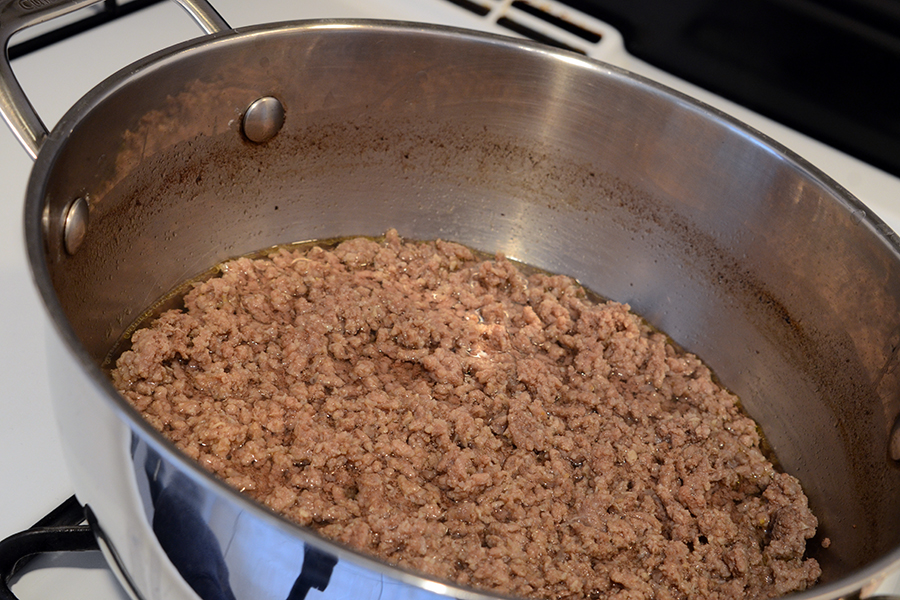
Here’s how the beef looks after boiling uncovered (and skimming off the fat) for about 45 minutes.


Tasty Kitchen Blog: Cincinnati Chili. Guest post by Faith Gorsky of An Edible Mosaic, recipe submitted by TK member Dax Phillips.

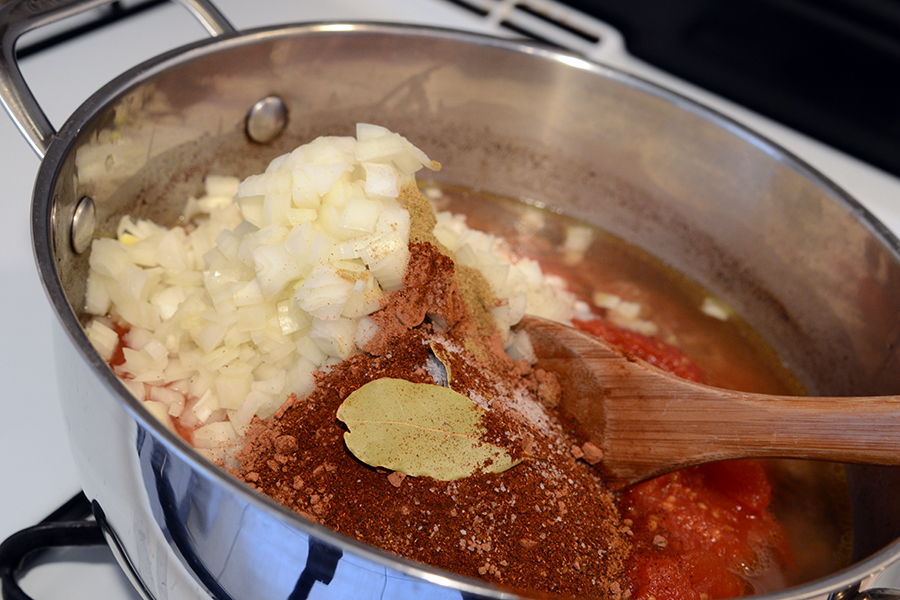
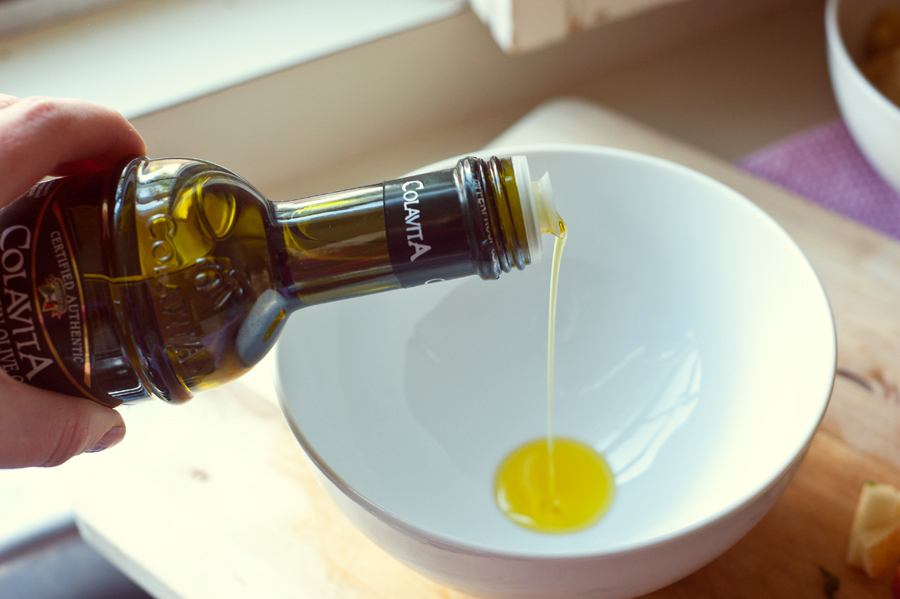
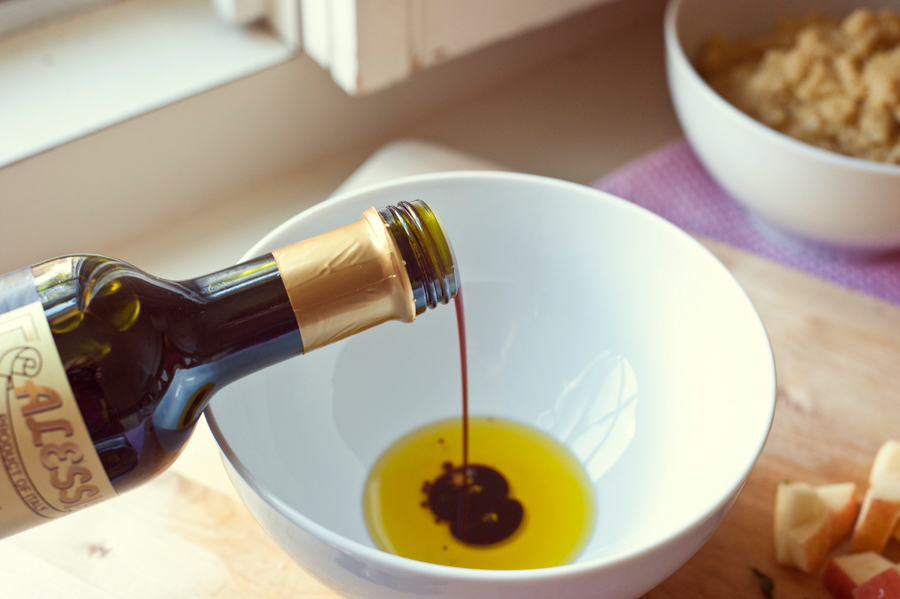
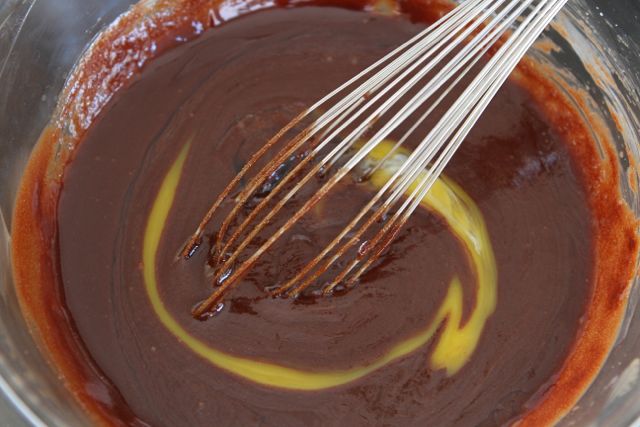
Now you can add all the other chili ingredients …


Tasty Kitchen Blog: Cincinnati Chili. Guest post by Faith Gorsky of An Edible Mosaic, recipe submitted by TK member Dax Phillips.

And give it a good stir.

Bring the chili to a boil, cover the pot, turn the heat down, and simmer for 3 to 3 1/2 hours, stirring every so often.


Tasty Kitchen Blog: Cincinnati Chili. Guest post by Faith Gorsky of An Edible Mosaic, recipe submitted by TK member Dax Phillips.

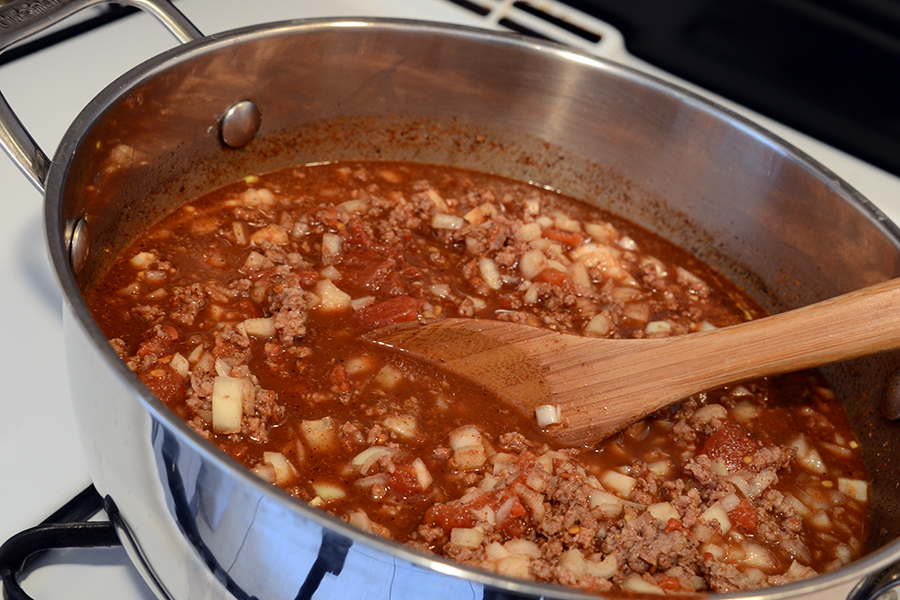
Here it is after cooking for 90 minutes.


Tasty Kitchen Blog: Cincinnati Chili. Guest post by Faith Gorsky of An Edible Mosaic, recipe submitted by TK member Dax Phillips.

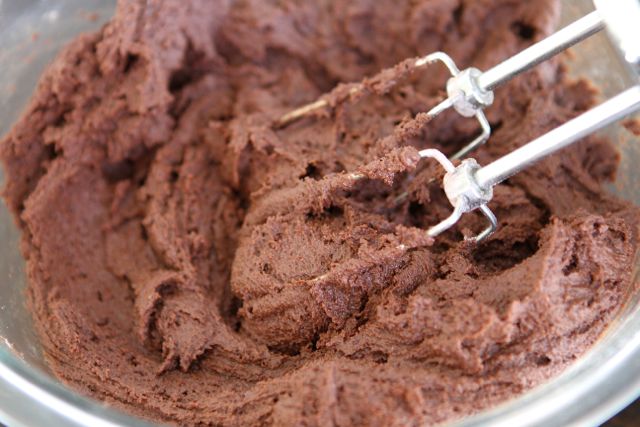
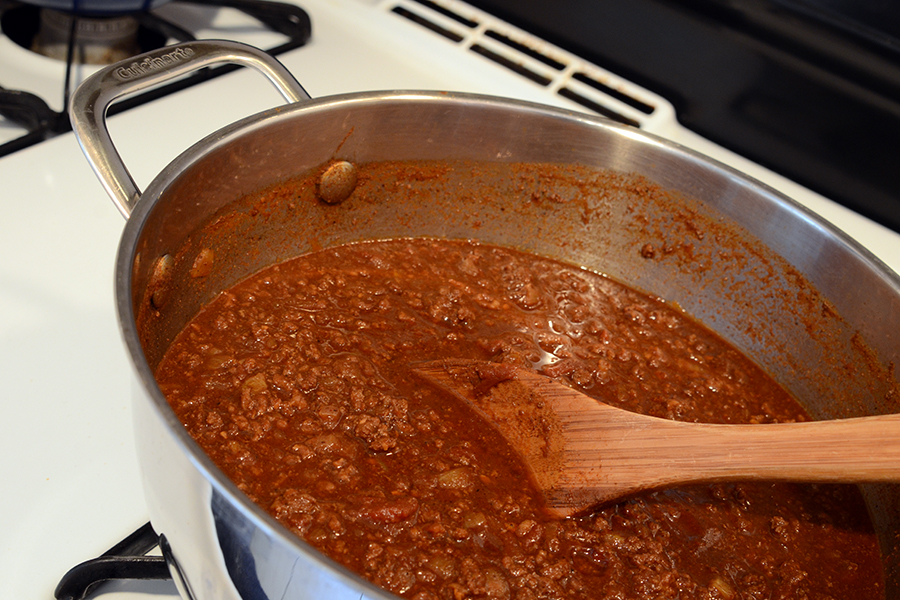
And here it is after cooking for 3 hours. Mine was super thick and just starting to stick on the bottom at that point, so I knew it was done. (Yours might need to go for the full 3 1/2 hours, like the recipe says.) It cooks down a lot; the total volume I had after cooking was 6 cups of chili.


Tasty Kitchen Blog: Cincinnati Chili. Guest post by Faith Gorsky of An Edible Mosaic, recipe submitted by TK member Dax Phillips.

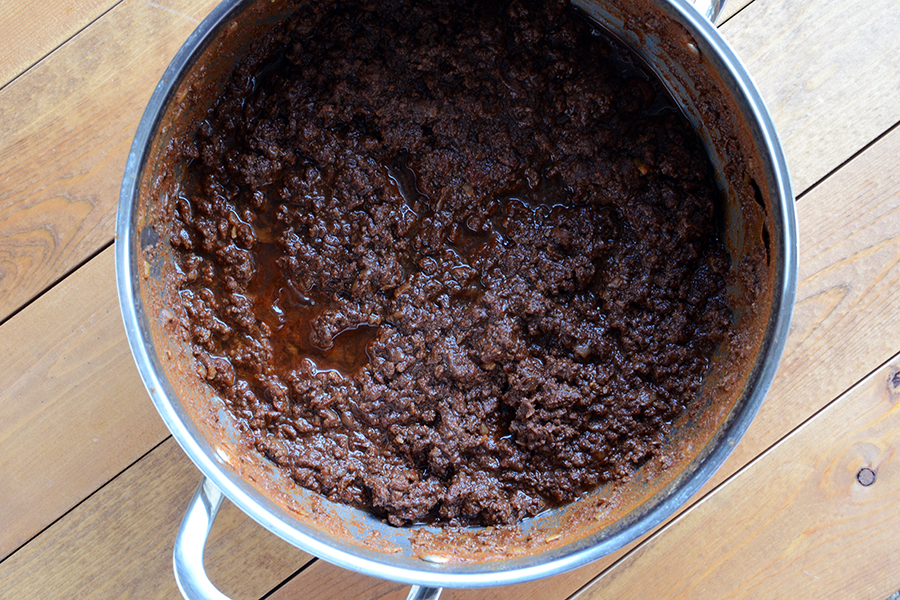
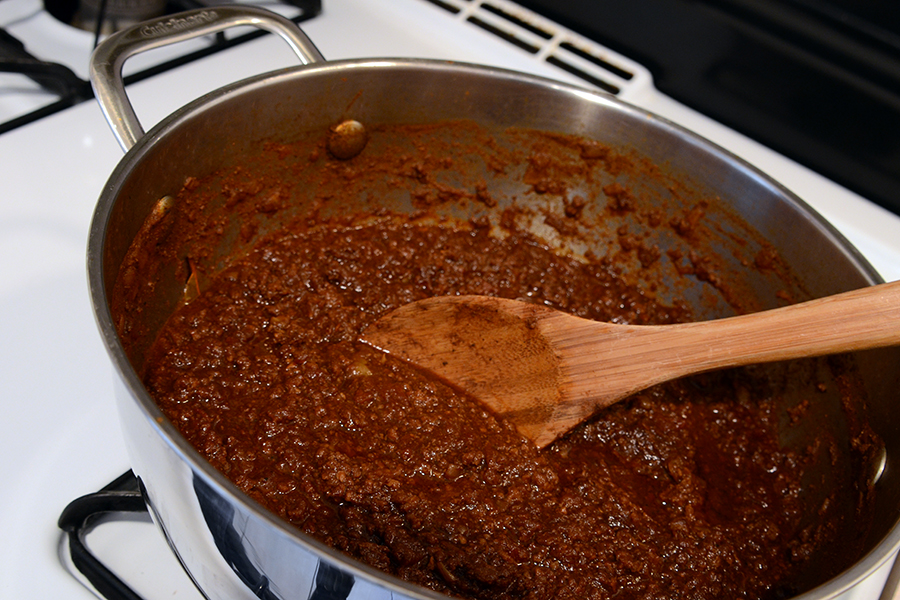
Here’s where the recipe gets a little time-consuming: Dax recommends letting the chili cool to room temperature and refrigerating it overnight so you can remove the fat that rises to the top the next day. This is what my chili looked light the next day—about 2 tablespoons of liquid fat that had pooled on the top that I was able to remove (and that was with using 90% lean ground beef and being very diligent about skimming the fat off during the boiling process). Even though it doesn’t seem like a lot of fat to skim off, I also recommend this step. The flavors of the spices mingle beautifully overnight.


Tasty Kitchen Blog: Cincinnati Chili. Guest post by Faith Gorsky of An Edible Mosaic, recipe submitted by TK member Dax Phillips.

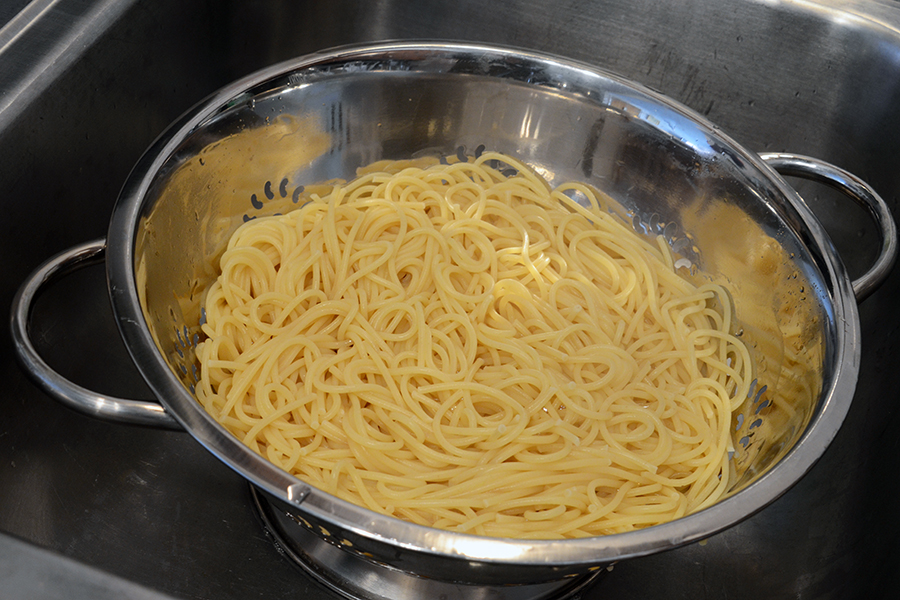
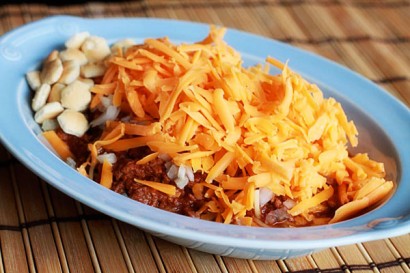
The next day, when you’re ready to serve, heat up the chili (you can add a splash of water if necessary, if it’s too thick). If you’re planning to serve this four-way (chili over spaghetti noodles topped with shredded cheese and diced onion) like Dax and I did, cook and drain your pasta to al dente according to the package directions.


Tasty Kitchen Blog: Cincinnati Chili. Guest post by Faith Gorsky of An Edible Mosaic, recipe submitted by TK member Dax Phillips.

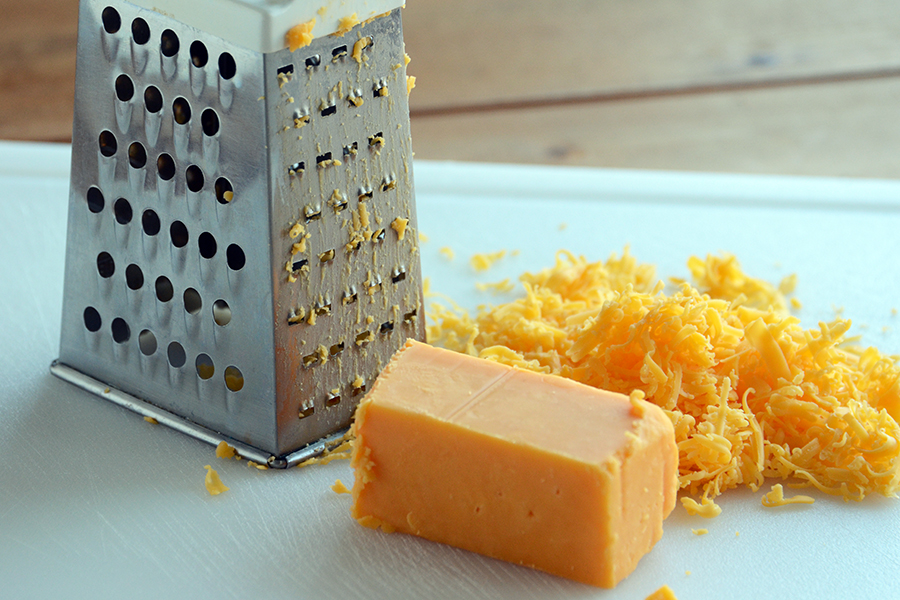
Shred your sharp cheddar cheese. I wanted a little bit of a finer shred for this (I like how it melts that way), so I didn’t use the side with the biggest holes on my box grater.


Tasty Kitchen Blog: Cincinnati Chili. Guest post by Faith Gorsky of An Edible Mosaic, recipe submitted by TK member Dax Phillips.

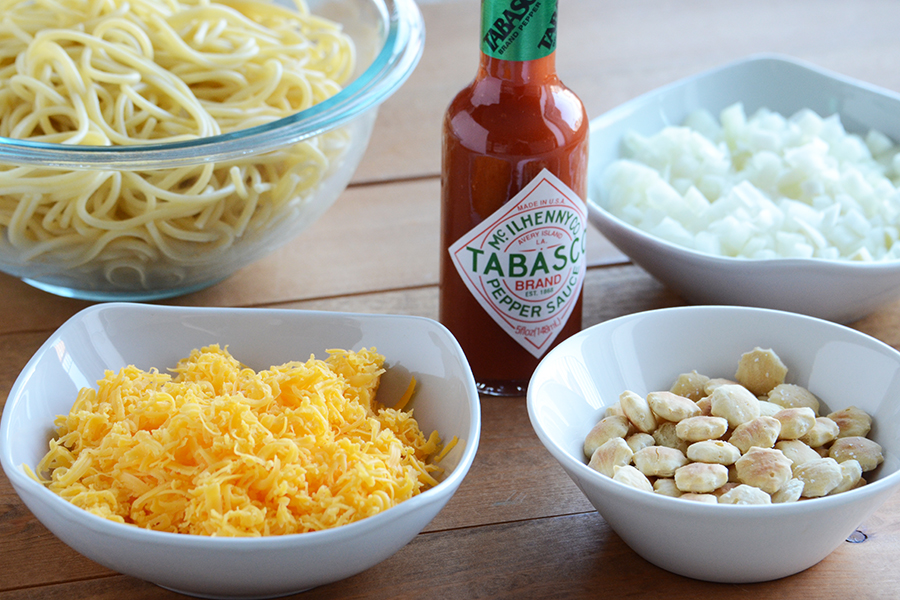
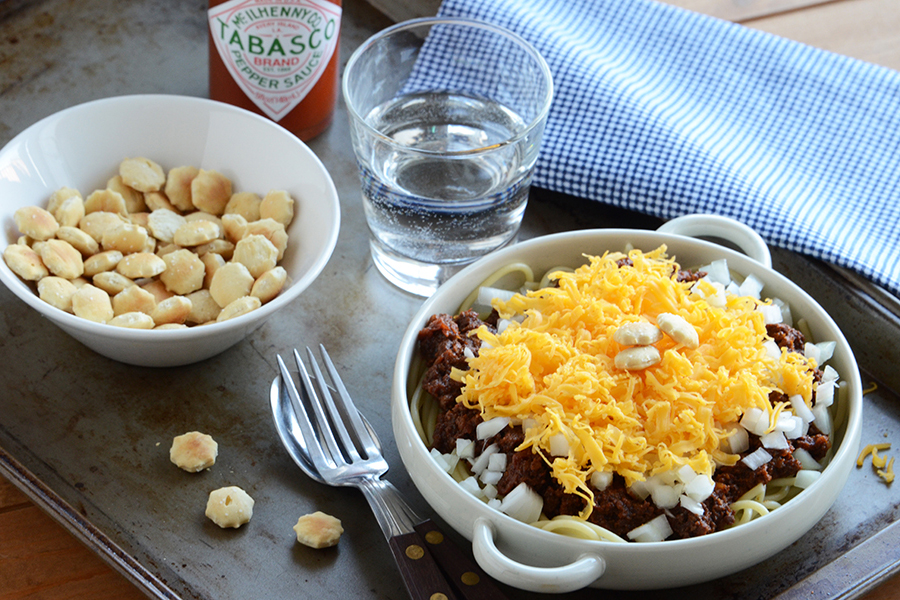
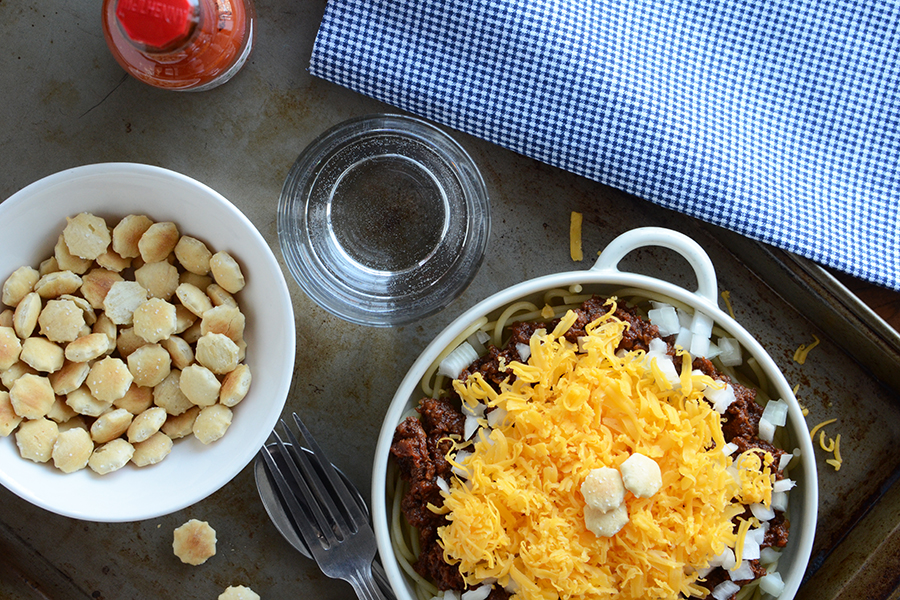
Then assemble the toppings you’ll need to serve: cooked spaghetti noodles, shredded cheese, oyster crackers, diced onion, and hot sauce.


Tasty Kitchen Blog: Cincinnati Chili. Guest post by Faith Gorsky of An Edible Mosaic, recipe submitted by TK member Dax Phillips.

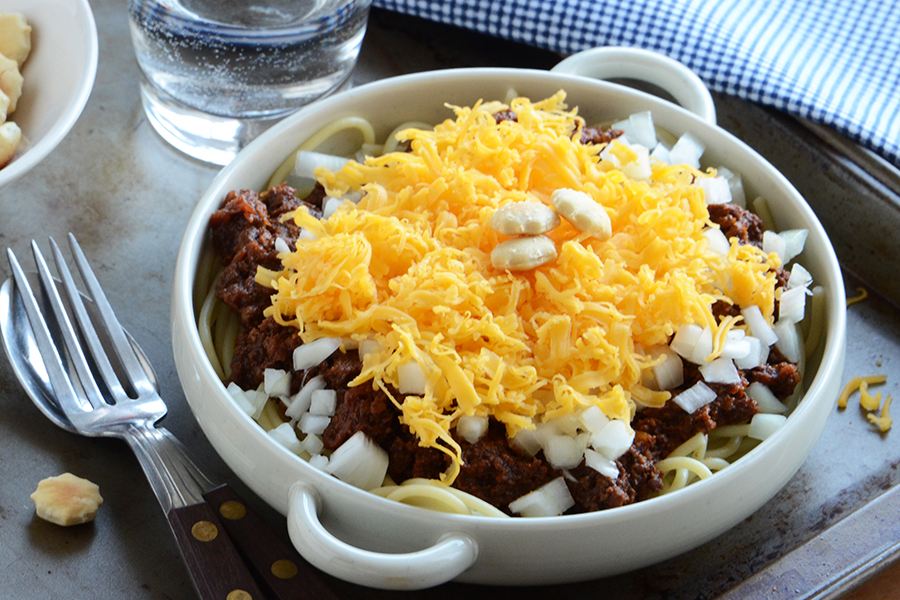
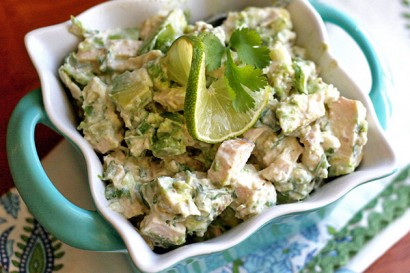
To serve, line a shallow bowl with spaghetti noodles, top with a ladle of chili, a handful of diced onion, and a sprinkle of shredded cheese. Add a few oyster crackers and a dash of hot sauce! (If you decide you want to go five-way, you can add kidney beans on top.)


Tasty Kitchen Blog: Cincinnati Chili. Guest post by Faith Gorsky of An Edible Mosaic, recipe submitted by TK member Dax Phillips.

Cincinnati Chili is the perfect dish for a new twist on an old favorite, and this recipe is incredible—definitely restaurant quality! A huge thanks to Dax for a great recipe; I know it will become a cold-month regular in my kitchen. Be sure to check out his blog Simple Comfort Food for more comforting classics and fresh new flavors with a comfort spin!


Printable Recipe

Cincinnati Chili

See post on Dax Phillips’s site!
4.56 Mitt(s) 9 Rating(s)9 votes, average: 4.56 out of 59 votes, average: 4.56 out of 59 votes, average: 4.56 out of 59 votes, average: 4.56 out of 59 votes, average: 4.56 out of 5

Prep Time:

Cook Time:

Difficulty: Easy

Servings: 12

12
x

Print Options

Page size Letter 3x5 4x6
Text Size Small Medium Large
Content Include description
Include prep time, etc.
Show image

Description

A simple twist on a chili con carne, this classic Cincinnati chili will warm you from your head to your toes.

Ingredients

  • FOR THE CHILI:
  • 2 pounds Ground Beef
  • 5 cups Water, Enough To Cover The Ground Beef
  • 28 ounces, weight Crushed Tomatoes
  • 2 cups Onion, Finely Diced
  • 2 Tablespoons Cocoa Powder
  • ¼ teaspoons Ground Cloves
  • 1 Tablespoon Worcestershire Sauce
  • 5 Tablespoons Chili Powder
  • 1 teaspoon Cinnamon Powder
  • ½ Tablespoons Cumin Powder
  • 1 Tablespoon Cider Vinegar
  • 2 whole Bay Leaves
  • 1 Tablespoon Honey
  • 1 Tablespoon Salt
  • 1 teaspoon Cracked Black Pepper
  • ¼ cups Red Kidney Beans, Cooked (optional)
  • TO SERVE:
  • ½ pounds Spaghetti Noodles, Cooked According To Package Instructions
  • 1 cup Onion, Finely Diced
  • 1 cup Sharp Cheddar Cheese, Grated
  • ½ cups Oyster Crackers
  • 1 dash Hot Sauce

Preparation Instructions

Begin by getting a large pot on the stove. Add the ground beef and water, and bring to a boil. Once the water is boiling, reduce the heat to medium, and begin stirring the beef, breaking it up as you stir. Continue this process for about 45 minutes. Skim off any of the crud that might float to the top and discard it.

Next, add all of the remaining chili ingredients on the above list, giving a good stir. Bring this mixture to a boil, then reduce heat to a simmer, cover, and let it cook for approximately 3 1/2 hours, stirring from time to time. When done, remove bay leaves.

Now if you are living on the edge and like that fatty flavor, you could go ahead and serve this right now, but instead, I recommend that you take it off of the stove, let it cool, then place it in the refrigerator overnight. The reason you will probably want to do this is that when you remove the chili the next day, the fat that was cooked off from boiling the ground beef will rise to the top, allowing you to remove all of that fat. So do just that, and remove that thin layer of fat from the chili.

Once you have removed the fat, put it back onto the stove, bringing it up to a boil and heat throughout, then get ready to serve.

Remember now, I went four-way, which means, spaghetti, chili, onions, and cheese.

To serve, add a layer of the cooked spaghetti on the bottom of your bowl. Ladle a generous amount of the chili on top of the spaghetti. Top with onions, and a lot of grated cheese. Place a small handful of oyster crackers on the side, and dig in!

You will be surprised not only with the awesome texture of this chili, but more importantly, the flavor. You get the richness from the cocoa powder, and the clove and cinnamon really stand out. But it is also the texture you get from the onion and cheese that make this chili just melt in your mouth.

Give it a shot, and I hope you enjoy the recipe!


_______________________________________

Faith Gorsky is the writer, recipe developer, photographer, and food stylist behind the blog An Edible Mosaic. She lives in Upstate New York and loves to travel, especially to places steeped in rich culture and history. She also enjoys reading, vintage shopping, watching movies, and is enamored with ancient cultures. She just released her first cookbook, “An Edible Mosaic: Middle Eastern Fare with Extraordinary Flair” (Tuttle Publishing), a collection of authentic Middle Eastern recipes handed down to her from her husband’s family.


Profile photo of georgiapellegrini

Guacamole Chicken Salad

Posted by in Step-by-Step Recipes

Tasty Kitchen Blog: Guacamole Chicken Salad. Guest post by Georgia Pellegrini, recipe submitted by TK member Natalie Perry of Perry's Plate.

 
I’m on a salad kick these days, especially because they are a great way to use up leftover ingredients, like a roasted chicken. This Guacamole Chicken Salad from Tasty Kitchen member Natalie Perry looked dreamy. It includes avocado and roasted chicken, two of my favorite things in the universe, plus a whole host of other delicious ingredients. Try this today!


Tasty Kitchen Blog: Guacamole Chicken Salad. Guest post by Georgia Pellegrini, recipe submitted by TK member Natalie Perry of Perry's Plate.

You will need: salsa verde or green chilies, plain Greek yogurt, ground cumin, feta or cotija cheese, avocado, lime juice, cilantro, scallions, and chopped roasted chicken.


Tasty Kitchen Blog: Guacamole Chicken Salad. Guest post by Georgia Pellegrini, recipe submitted by TK member Natalie Perry of Perry's Plate.

In a bowl combine the scallions, chicken and yogurt …


Tasty Kitchen Blog: Guacamole Chicken Salad. Guest post by Georgia Pellegrini, recipe submitted by TK member Natalie Perry of Perry's Plate.

Along with the salsa verde and cilantro.


Tasty Kitchen Blog: Guacamole Chicken Salad. Guest post by Georgia Pellegrini, recipe submitted by TK member Natalie Perry of Perry's Plate.

Sprinkle your cheese on top.


Tasty Kitchen Blog: Guacamole Chicken Salad. Guest post by Georgia Pellegrini, recipe submitted by TK member Natalie Perry of Perry's Plate.

And add the chopped avocado and lime juice.


Tasty Kitchen Blog: Guacamole Chicken Salad. Guest post by Georgia Pellegrini, recipe submitted by TK member Natalie Perry of Perry's Plate.

Next sprinkle with the ground cumin and give it a stir.


Tasty Kitchen Blog: Guacamole Chicken Salad. Guest post by Georgia Pellegrini, recipe submitted by TK member Natalie Perry of Perry's Plate.

Put several big spoonfuls over your favorite lettuce or on a slice of bread and dig in. You can use extra big lettuce leaves and make lettuce wraps or scoop it up with tortilla chips. This was light and delicious, a perfect lunch or picnic dish. Keep it on your list as the months get warmer!

Thank you Natalie for this delicious recipe. Check out her website Perry’s Plate for other fab recipes!


Printable Recipe

Guacamole Chicken Salad

See post on Natalie | Perry's Plate’s site!
5.00 Mitt(s) 2 Rating(s)2 votes, average: 5.00 out of 52 votes, average: 5.00 out of 52 votes, average: 5.00 out of 52 votes, average: 5.00 out of 52 votes, average: 5.00 out of 5

Prep Time:

Cook Time:

Difficulty: Easy

Servings: 3

3
x

Print Options

Page size Letter 3x5 4x6
Text Size Small Medium Large
Content Include description
Include prep time, etc.
Show image

Description

Leftover chicken comes to life smothered in a deconstructed guacamole!

Ingredients

  • 2 cups Leftover Cooked Chicken, Cubed Or Shredded
  • ⅓ cups Whole Plain Greek Yogurt
  • 3 Tablespoons Salsa Verde (or A 4-ounce Can Of Diced Green Chiles)
  • 1 whole Green Onion, Chopped
  • ¼ cups Fresh Chopped Cilantro
  • ¼ cups Crumbed Cotija Or Feta Cheese
  • ½ whole Avocado, Pitted, Peeled, And Diced
  • ½ whole Lime, Juiced
  • 1 pinch Salt To Taste
  • 1 pinch Cumin (a Generous Pinch)

Preparation Instructions

In a medium bowl combine the chicken, yogurt, salsa verde, onion, cilantro, and Cotija cheese. Mix thoroughly. Gently fold in the avocado. Add the lime juice, salt, and cumin and stir again gently. Taste and adjust seasonings if necessary.

Serve wrapped in a tortilla, in a pita, with chips, or over salad greens. Or by itself.


_______________________________________

There’s so much to say about Georgia, we don’t know where to start. Leaving Wall Street for the French Culinary Institute, followed by a stint at the Gramercy Tavern and La Chassagnette in France, her passion for food and food traditions are evident and inspiring. Visit her site at Georgia Pellegrini, where you’ll find more recipes, photos, learn all about her wonderful books Girl Hunter and Food Heroes, and enjoy her latest adventures.


Profile photo of twopeasandtheirpod

Homemade Oreos with Peanut Butter

Posted by in Baking, Step-by-Step Recipes

Tasty Kitchen Blog: Homemade Oreos with Peanut Butter. Guest post by Maria Lichty of Two Peas and Their Pod, recipe submitted by TK member Tieghan of Half-Baked Harvest.

 
Oreos are good, homemade Oreos are better, and these Homemade Oreos with Peanut Butter are DEE-VINE! When I saw Half Baked Harvest’s recipe on Tasty Kitchen, I had to do a double take. I’ve made homemade Oreos before, but it never crossed my mind to add peanut butter to the mix. Genius! Tieghan adapted this recipe from Bakerella and it is a winner.


Tasty Kitchen Blog: Homemade Oreos with Peanut Butter. Guest post by Maria Lichty of Two Peas and Their Pod, recipe submitted by TK member Tieghan of Half-Baked Harvest.

To make the Oreos you need: butter, chocolate chips, sugar, vanilla, egg, flour, cocoa, salt, baking soda, powdered sugar, milk, and peanut butter.


Tasty Kitchen Blog: Homemade Oreos with Peanut Butter. Guest post by Maria Lichty of Two Peas and Their Pod, recipe submitted by TK member Tieghan of Half-Baked Harvest.

To make the cookies, put the butter and chocolate chips Into a medium-sized microwave safe bowl.


Tasty Kitchen Blog: Homemade Oreos with Peanut Butter. Guest post by Maria Lichty of Two Peas and Their Pod, recipe submitted by TK member Tieghan of Half-Baked Harvest.

Heat it in the microwave, stirring every 30 seconds, and continuing in additional 30-second heat bursts until melted.


Tasty Kitchen Blog: Homemade Oreos with Peanut Butter. Guest post by Maria Lichty of Two Peas and Their Pod, recipe submitted by TK member Tieghan of Half-Baked Harvest.

Whisk in the sugar until well combined.


Tasty Kitchen Blog: Homemade Oreos with Peanut Butter. Guest post by Maria Lichty of Two Peas and Their Pod, recipe submitted by TK member Tieghan of Half-Baked Harvest.

Add the vanilla extract.


Tasty Kitchen Blog: Homemade Oreos with Peanut Butter. Guest post by Maria Lichty of Two Peas and Their Pod, recipe submitted by TK member Tieghan of Half-Baked Harvest.

Whisk in the egg and set aside.


Tasty Kitchen Blog: Homemade Oreos with Peanut Butter. Guest post by Maria Lichty of Two Peas and Their Pod, recipe submitted by TK member Tieghan of Half-Baked Harvest.

In another bowl, whisk flour, cocoa, salt and baking soda until combined.


Tasty Kitchen Blog: Homemade Oreos with Peanut Butter. Guest post by Maria Lichty of Two Peas and Their Pod, recipe submitted by TK member Tieghan of Half-Baked Harvest.

Stir flour mixture into the chocolate mixture. Beat with a mixer until the dough comes together.


Tasty Kitchen Blog: Homemade Oreos with Peanut Butter. Guest post by Maria Lichty of Two Peas and Their Pod, recipe submitted by TK member Tieghan of Half-Baked Harvest.

Transfer the dough to a sheet of wax paper.


Tasty Kitchen Blog: Homemade Oreos with Peanut Butter. Guest post by Maria Lichty of Two Peas and Their Pod, recipe submitted by TK member Tieghan of Half-Baked Harvest.

Shape into a log about 2 1/2 inches in diameter. Place log along the edge of the wax paper and roll it up in the paper.


Tasty Kitchen Blog: Homemade Oreos with Peanut Butter. Guest post by Maria Lichty of Two Peas and Their Pod, recipe submitted by TK member Tieghan of Half-Baked Harvest.

Shape it as you roll so it keeps a smooth cylinder form. Twist the ends of the paper to secure it closed and help keep it compact. Refrigerate until firm, at least 2 hours. If the log settles and flattens on one side, rotate every 15 minutes or so to keep its round shape. (We forgot to roll our log, so our cookies aren’t perfectly round, but we got no complaints.)


Tasty Kitchen Blog: Homemade Oreos with Peanut Butter. Guest post by Maria Lichty of Two Peas and Their Pod, recipe submitted by TK member Tieghan of Half-Baked Harvest.

Heat oven to 325ºF. Line a baking sheet with parchment paper. Unwrap the dough and put it onto a cutting board.


Tasty Kitchen Blog: Homemade Oreos with Peanut Butter. Guest post by Maria Lichty of Two Peas and Their Pod, recipe submitted by TK member Tieghan of Half-Baked Harvest.

Using a sharp knife, cut dough into quarter-inch-thick slices.


Tasty Kitchen Blog: Homemade Oreos with Peanut Butter. Guest post by Maria Lichty of Two Peas and Their Pod, recipe submitted by TK member Tieghan of Half-Baked Harvest.

Place on prepared baking sheet. Bake for about 12-18 minutes or until cookies are firm to the touch. Allow cookies to cool completely.


Tasty Kitchen Blog: Homemade Oreos with Peanut Butter. Guest post by Maria Lichty of Two Peas and Their Pod, recipe submitted by TK member Tieghan of Half-Baked Harvest.

To make the filling, beat the butter until smooth and creamy. Add sugar and vanilla and beat until smooth.


Tasty Kitchen Blog: Homemade Oreos with Peanut Butter. Guest post by Maria Lichty of Two Peas and Their Pod, recipe submitted by TK member Tieghan of Half-Baked Harvest.

Add milk and salt.


Tasty Kitchen Blog: Homemade Oreos with Peanut Butter. Guest post by Maria Lichty of Two Peas and Their Pod, recipe submitted by TK member Tieghan of Half-Baked Harvest.

Beat the filling until smooth.


Tasty Kitchen Blog: Homemade Oreos with Peanut Butter. Guest post by Maria Lichty of Two Peas and Their Pod, recipe submitted by TK member Tieghan of Half-Baked Harvest.

Place about a tablespoon of filling on the bottom of one cookie and about a tablespoon of peanut butter on another cookie.


Tasty Kitchen Blog: Homemade Oreos with Peanut Butter. Guest post by Maria Lichty of Two Peas and Their Pod, recipe submitted by TK member Tieghan of Half-Baked Harvest.

Sandwich the two cookies together and repeat with remaining cookies. And eat!

Chocolate, cream filling, and peanut butter. These cookies have it all! The cookies are slightly crisp with a deep chocolate flavor. The cream filling is sweet and goes so well with the salty peanut butter. If you are an Oreo fan, you have to make this recipe. I bet you will never be able to buy Oreos again. These Homemade Oreos with Peanut Butter are amazing!!

Thanks Tieghan for introducing me to the best Oreo cookie ever! Make sure you visit Tieghan’s blog, Half Baked Harvest, for lots and lots of delicious recipes. Now get baking, you need these Oreos in your life. Stat!


Printable Recipe

Homemade Oreos with Peanut Butter

See post on halfbakedharvest’s site!
4.33 Mitt(s) 3 Rating(s)3 votes, average: 4.33 out of 53 votes, average: 4.33 out of 53 votes, average: 4.33 out of 53 votes, average: 4.33 out of 53 votes, average: 4.33 out of 5

Prep Time:

Cook Time:

Difficulty: Easy

Servings: 16

16
x

Print Options

Page size Letter 3x5 4x6
Text Size Small Medium Large
Content Include description
Include prep time, etc.
Show image

Description

Cookies ‘n’ cream with an added hit of peanut butter!

Ingredients

  • FOR THE COOKIES:
  • 1 cup Unsalted Butter, Softened
  • 1 cup Semi-Sweet Chocolate Chips
  • ¾ cups Sugar
  • 1 teaspoon Vanilla Extract
  • 1 whole Egg
  • 1-½ cup Flour
  • ¾ cups Cocoa Powder
  • 1 teaspoon Kosher Salt
  • ½ teaspoons Baking Soda
  • FOR THE FILLING:
  • ½ cups Butter, Softened
  • 1-⅔ cup Powdered Sugar
  • 1 teaspoon Vanilla Extract
  • 1 Tablespoon Milk
  • 1 pinch Kosher Salt
  • ¾ cups Creamy Peanut Butter

Preparation Instructions

For the cookies:
Into a medium-sized microwave safe bowl add the butter and semi-sweet chocolate chips. Heat it in the microwave, stirring every 30 seconds, and continuing for additional 30 second heat bursts until melted. Then whisk in the sugar until well combined. Then whisk in the vanilla. Then whisk in the egg until combined. Set aside.

In another bowl, whisk flour, cocoa, salt and baking soda until combined. Stir flour mixture into the chocolate mixture. Beat with a mixer until the dough comes together.

Transfer the dough to a sheet of wax paper. Shape into a log about 2 1/2 inches in diameter. Place log along the edge of the wax paper and roll it up in the paper. Shape it as you roll to maintain a smooth cylinder. Twist the ends of the paper to secure it closed and help keep the shape compact.

Refrigerate at least two hours or until firm. If log settles and flattens on one side, rotate every 15 minutes or so to maintain a round shape.

Heat oven to 325 F and line baking sheet with parchment paper.

Unwrap the dough and put it onto a cutting board. Using a sharp knife, cut dough into quarter inch thick slices and place on prepared baking sheet. Bake for about 12-18 minutes or until cookies are firm to the touch. Just watch them because it’s hard to tell by the looks if they are done since they are so dark to begin with. These bake in batches well, so bake a few to test the bake time, if you have the time. And if your cookies are smaller, adjust the baking time.

When done remove the pan from the oven. Allow cookies to cool while you prepare the filling.

In the bowl of a stand mixer, beat the butter until smooth and creamy. Add sugar and vanilla and beat until smooth. Add milk and salt and continue beating until smooth again. Place about tablespoon of filling on the bottom of one cookie and about a tablespoon of peanut butter on another cookie. Sandwich the two cookies together. Repeat with remaining cookies.

Adapted from Bakerella.


_______________________________________

Maria and her husband Josh (who she affectionately refers to as her “dough boy”) blog at Two Peas and Their Pod. They’ve been featured on Saveur, Eatocracy, Gourmet Live, Glamour, and the Los Angeles Times, to name just a few. They’d also just recently added a little pea to their pod. We’re so glad to have them here!


Profile photo of HowSweetEats

Crispy Avocado, Bacon and Tomato Salad

Posted by in Step-by-Step Recipes

  Crispy fried avocado. Yes, this is a thing. And I couldn’t be more excited! Two of my favorite foods, right here on a bunch of lettuce leaves. I can totally let the lettuce leaves slide, if only because the big bacon slices and crunchy avocado pieces make up for it. Actually those two things […]

Profile photo of Natalie | Perry's Plate

Dark Chocolate Cookie Dough Cups

Posted by in Holidays, Step-by-Step Recipes

  With all of the chocolates flying around this month, I thought I would throw something out there that would satisfy your sweet tooth or chocolate craving, but won’t leave you feeling like you’ve overindulged.  These adorable Dark Chocolate Cookie Dough Cups by TK member Adrienne Jacobs (who blogs at This Country Girl Cooks) are […]

Profile photo of whatsgabycooking

Red Velvet Brownies

Posted by in Baking, Step-by-Step Recipes

  I’m so obsessing over these Red Velvet Brownies. They are crazy decadent and gorgeous and sure to make your boyfriend/girlfriend/husband/wife/secret admirer super happy this coming Valentine’s Day!  You should totally make these.       First, let’s start with lining a baking pan with foil. You could also use parchment. I just…

Profile photo of Amber {Sprinkled With Flour}

Secret Cake

Posted by in Baking, Step-by-Step Recipes

  There’s two things that will automatically make a girls day: chocolate and cake. When you put the two together, you have a recipe for the worlds best pick-me-up that rivals those absurdly cute kitty emails. Yes, that kitty wearing a cowboy outfit while balancing on a tightrope singing Gangnam Style may bring a smile […]