The Pioneer Woman Tasty Kitchen
Profile photo of missamy

Thick and Chewy Chocolate Chip Peanut Butter Cookies

Posted by in Baking, Step-by-Step Recipes

Tasty Kitchen Blog: Thick and Chewy Chocolate Chip Peanut Butter Cookies. Guest post by Amy Johnson of She Wears Many Hats, recipe submitted by TK member Anna of Crunchy Creamy Sweet, adapted from Joy the Baker.

 
It’s cookie time around here, folks. And is there a better way to enjoy cookies than a peanut butter and chocolate combo? I think not.

This gem of a cookie recipe, Thick and Chewy Chocolate Chip Peanut Butter Cookies, from Tasty Kitchen member Anna, caught my eye because it contains 6 ingredients and no flour. Plus it’s adapted from Joy the Baker, and if you know Joy, there’s always goodness flowing from her neck of the internet kitchens. This cookie came together with ease and resulted in a scrumptious treat that totally satisfied our sweet cravings. I think you’ll be very pleased. Very pleased, indeed.


Tasty Kitchen Blog: Thick and Chewy Chocolate Chip Peanut Butter Cookies. Guest post by Amy Johnson of She Wears Many Hats, recipe submitted by TK member Anna of Crunchy Creamy Sweet, adapted from Joy the Baker.

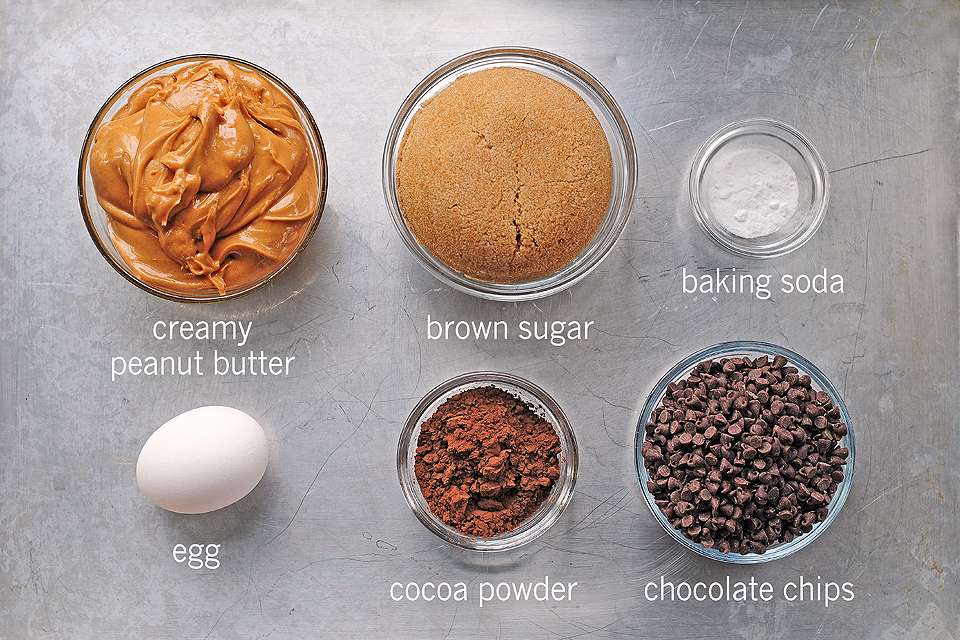
To get started you’ll need 6 ingredients: creamy peanut butter (I used a natural peanut butter), dark brown sugar, baking soda, an egg, cocoa powder (unsweetened), and semi-sweet chocolate chips.

As always, the full recipe is listed below with exact ingredient amounts.

A few notes:
– The recipe calls for chill time in the refrigerator, so make sure your cravings can hold off long enough for that.
– I only had mini semi-sweet chocolate chips on hand so that’s what I used (we keep them stocked for perfect chocolate chip pancakes), and only used half of what was listed in the recipe below.
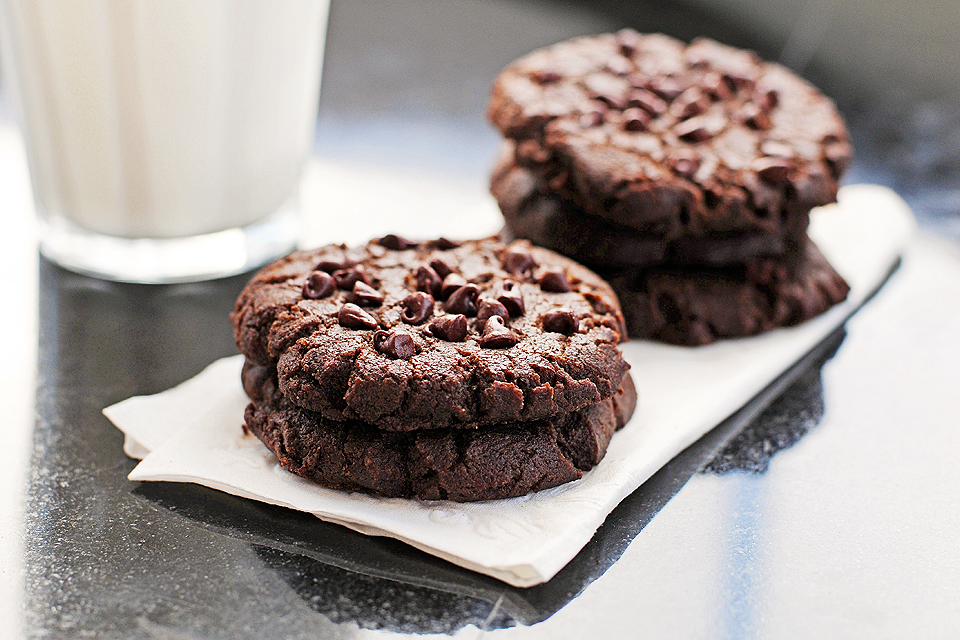
– I used unsweetened dark cocoa powder which accounts for the super dark color of these compared to Anna’s lovely cookies. Regular unsweetened cocoa powder will work just fine, but if you’re a dark chocolate fan, look for the unsweetened dark cocoa powder.


Tasty Kitchen Blog: Thick and Chewy Chocolate Chip Peanut Butter Cookies. Guest post by Amy Johnson of She Wears Many Hats, recipe submitted by TK member Anna of Crunchy Creamy Sweet, adapted from Joy the Baker.

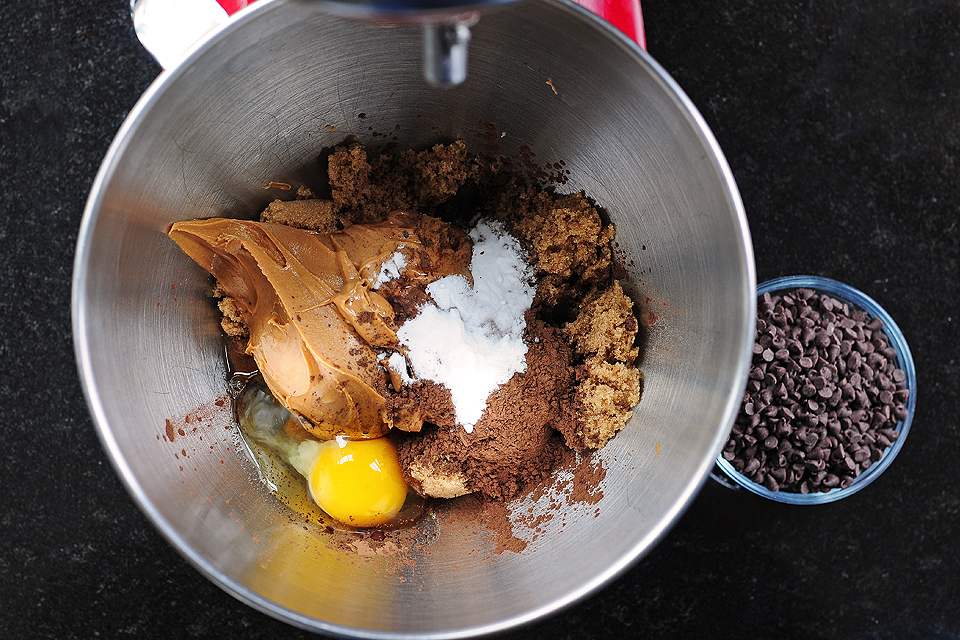
Begin by placing all the ingredients, except for the chocolate chips, into a large mixing bowl.

I used a stand mixer, but if you have a hand mixer, you may want to take it slowly because this dough is mighty thick and dense. Of course, you can get a little workout and mix it by hand. If you plan on mixing by hand, I’d beat the egg slightly first before adding it to the rest of the ingredients so it will incorporate more evenly throughout the dough.


Tasty Kitchen Blog: Thick and Chewy Chocolate Chip Peanut Butter Cookies. Guest post by Amy Johnson of She Wears Many Hats, recipe submitted by TK member Anna of Crunchy Creamy Sweet, adapted from Joy the Baker.

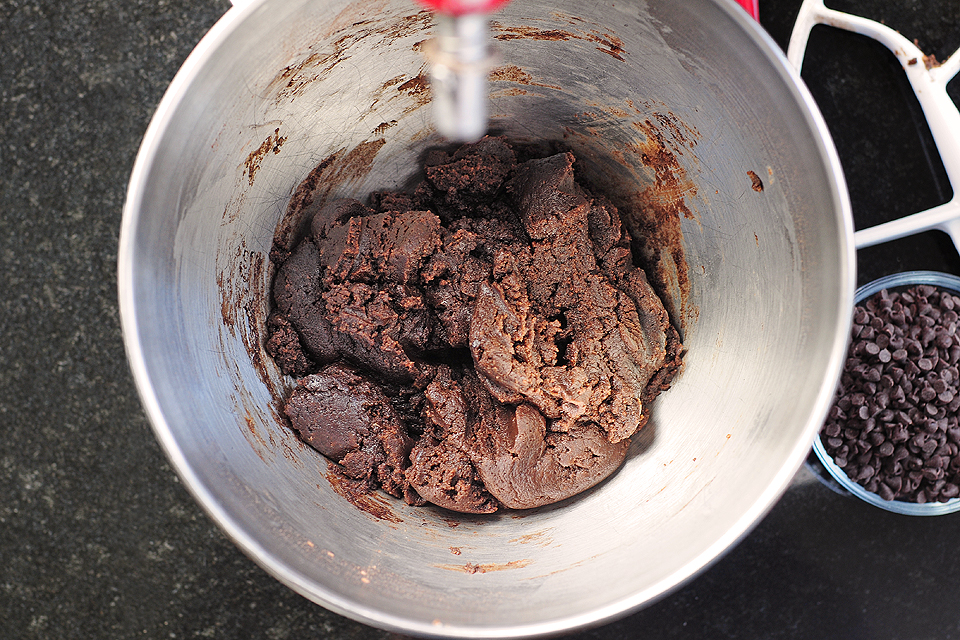
Mix together until combined well. Shouldn’t take very long at all.

At this point, chill the dough for at least an hour. I chilled my overnight, as was recommended.


Tasty Kitchen Blog: Thick and Chewy Chocolate Chip Peanut Butter Cookies. Guest post by Amy Johnson of She Wears Many Hats, recipe submitted by TK member Anna of Crunchy Creamy Sweet, adapted from Joy the Baker.

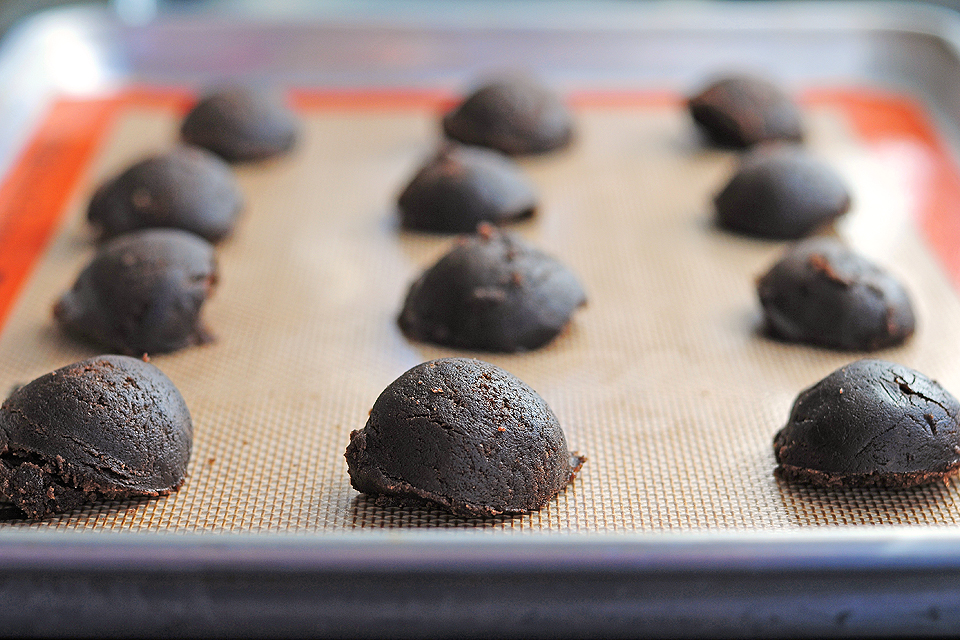
When chilled, scoop dough on a lined baking sheet. I scooped about 1-tablespoon-sized mounds, which worked out perfectly for 2 dozen cookies.


Tasty Kitchen Blog: Thick and Chewy Chocolate Chip Peanut Butter Cookies. Guest post by Amy Johnson of She Wears Many Hats, recipe submitted by TK member Anna of Crunchy Creamy Sweet, adapted from Joy the Baker.

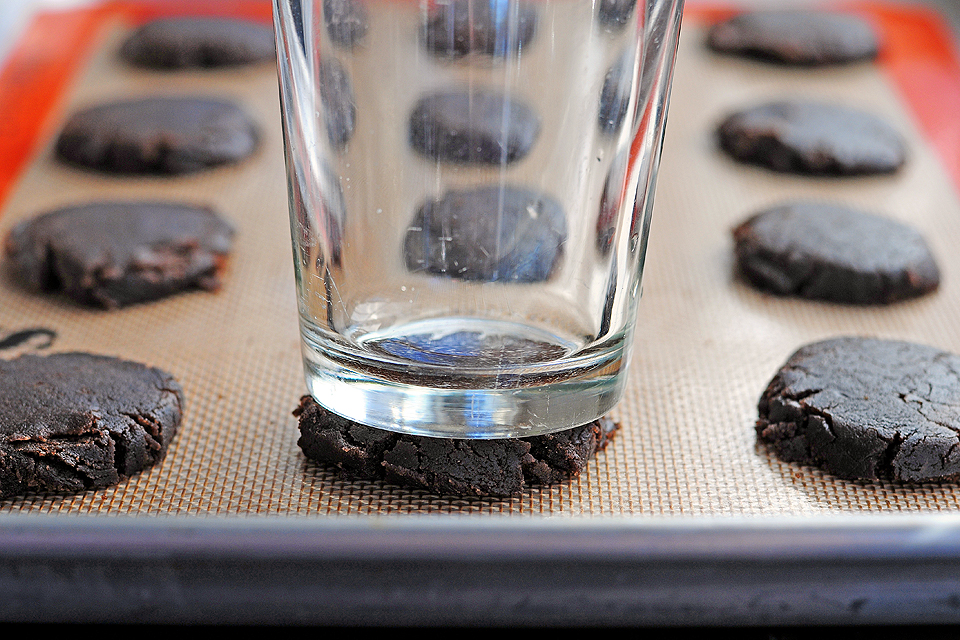
Flatten each cookie.

The recipe calls for flattening each cookie to 1/2″ thick, but I’d say mine were more like 1/4″ thick, and were still pretty substantial. I’ll certainly try different thicknesses and overall cookie sizes with the next batch of these that I make.


Tasty Kitchen Blog: Thick and Chewy Chocolate Chip Peanut Butter Cookies. Guest post by Amy Johnson of She Wears Many Hats, recipe submitted by TK member Anna of Crunchy Creamy Sweet, adapted from Joy the Baker.

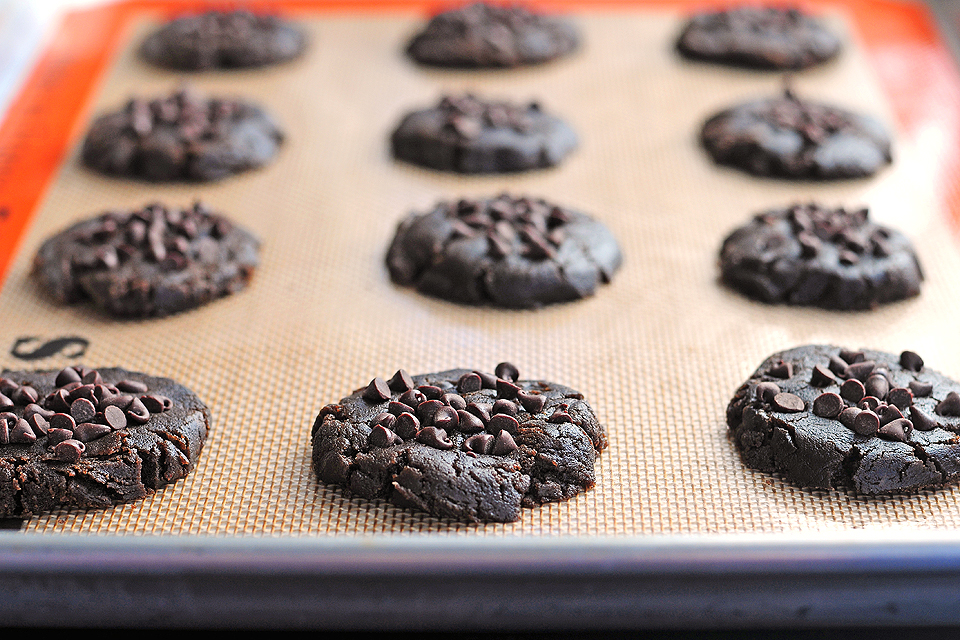
Press chocolate chips into each cookies.

As I mentioned before, I used mini semi-sweet chocolate chips, and used only about 1/4 cup.


Tasty Kitchen Blog: Thick and Chewy Chocolate Chip Peanut Butter Cookies. Guest post by Amy Johnson of She Wears Many Hats, recipe submitted by TK member Anna of Crunchy Creamy Sweet, adapted from Joy the Baker.

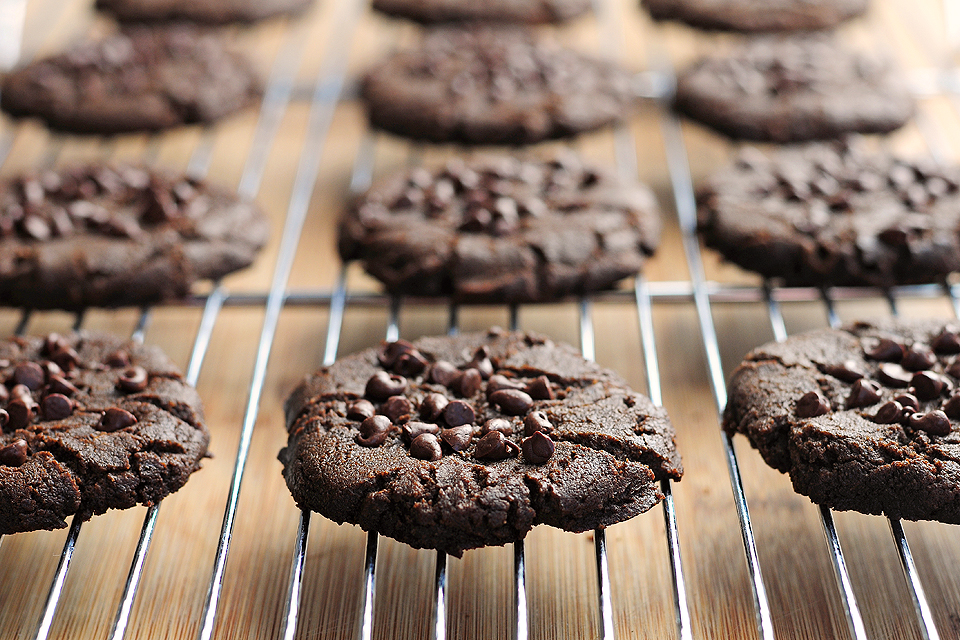
Bake according to recipe below. Let cool on baking sheet for about 30 seconds, then transfer to a wire rack to finish cooling. Or snag a warm one like I did. Oh my!


Tasty Kitchen Blog: Thick and Chewy Chocolate Chip Peanut Butter Cookies. Guest post by Amy Johnson of She Wears Many Hats, recipe submitted by TK member Anna of Crunchy Creamy Sweet, adapted from Joy the Baker.

Grab a glass of milk and get to dunking.

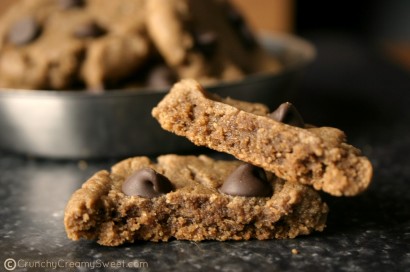
Yep, this one is a keeper. It’ll will certainly make reappearances around here very soon and often. As I chewed on the third one, I began thinking how this cookie is thick and chewy enough to stand up to ice cream sandwich makings. Uh huh … now we’re talking.

Thank you Anna for sharing this delightful recipe with us all. I thank you, my husband thanks you, and our kids thank you.


Printable Recipe

Thick and Chewy Chocolate Chip Peanut Butter Cookies

See post on Anna’s site!
3.66 Mitt(s) 3 Rating(s)3 votes, average: 3.66 out of 53 votes, average: 3.66 out of 53 votes, average: 3.66 out of 53 votes, average: 3.66 out of 53 votes, average: 3.66 out of 5

Prep Time:

Cook Time:

Difficulty: Easy

Servings: 24

24
x

Print Options

Page size Letter 3x5 4x6
Text Size Small Medium Large
Content Include description
Include prep time, etc.
Show image

Description

These flourless thick and chewy cookies are the perfect combination of peanut butter and chocolate.

Ingredients

  • 1 cup Creamy Peanut Butter
  • 1 cup Packed Dark Brown Sugar
  • 1 teaspoon Baking Soda
  • 1 whole Large Egg
  • 3 Tablespoons Unsweetened Cocoa Powder
  • ½ cups Semi-Sweet Chocolate Chips

Preparation Instructions

Place all ingredients, except chocolate chips, in a large mixing bowl of the stand mixer and mix together until combined. Chill the dough for at least 1 hour, preferably overnight.

When ready to bake, preheat the oven to 350ºF.

Scoop the dough onto a parchment paper or Silpat silicone baking mat lined sheet. Flatten each scoop into 1/2″ thick disks. Place few chocolate chips on top of each cookie.

Bake 8 minutes. Let cool on sheet for 30 seconds, then transfer to a wire rack to cool completely.

Recipe slightly adapted from Joy the Baker.


_______________________________________

Amy Johnson is a blogger who writes about food, travel, the home (both inside and out), and various observations and random musings about anything and everything. Visit her blog She Wears Many Hats for a dose of deliciousness, practicality, hilarity, or just plain fun. She lives in South Carolina with her husband and two children.


Profile photo of Natalie | Perry's Plate

Butternut and Black Bean Enchilada Skillet

Posted by in Step-by-Step Recipes

Tasty Kitchen Blog: Butternut and Black Bean Enchilada Skillet. Guest post by Natalie Perry of Perry's Plate, recipe submitted by TK member Monique of Ambitious Kitchen.

 
After having my third baby last summer, I’m beginning to understand the desperation I sometimes hear from moms who want fast, easy meals. Because I love to cook, spending 15 minutes chopping vegetables isn’t a big deal to me, but it is if I have a baby crying at my feet (or strapped to my chest), and two other small children begging for snacks and/or tormenting each other. 

I can’t imagine what that’s like for someone who dislikes being in the kitchen. What a frightening thought.

For that reason, finding meals like this easy and fairly quick Butternut and Black Bean Enchilada Skillet really make my day. (And days down the road when I’m ready to pick up the phone and order pizza.) Let’s all give TK member Monique a great, big virtual hug for adding to our weeknight repertoire!


Tasty Kitchen Blog: Butternut and Black Bean Enchilada Skillet. Guest post by Natalie Perry of Perry's Plate, recipe submitted by TK member Monique of Ambitious Kitchen.

Here’s what you need: butternut squash, black beans, enchilada sauce, grated cheese, a jalapeno, some corn tortillas (I used a wheat-corn blend), an onion, cumin, chili powder, garlic cloves, and heat-safe oil (like coconut or grapeseed oil).


Tasty Kitchen Blog: Butternut and Black Bean Enchilada Skillet. Guest post by Natalie Perry of Perry's Plate, recipe submitted by TK member Monique of Ambitious Kitchen.

First, dice the onion.


Tasty Kitchen Blog: Butternut and Black Bean Enchilada Skillet. Guest post by Natalie Perry of Perry's Plate, recipe submitted by TK member Monique of Ambitious Kitchen.

Chop the garlic and half the jalapeno. (Save the rest for later!)


Tasty Kitchen Blog: Butternut and Black Bean Enchilada Skillet. Guest post by Natalie Perry of Perry's Plate, recipe submitted by TK member Monique of Ambitious Kitchen.

Pour the oil into a large, oven-proof skillet and bring to medium-high heat.


Tasty Kitchen Blog: Butternut and Black Bean Enchilada Skillet. Guest post by Natalie Perry of Perry's Plate, recipe submitted by TK member Monique of Ambitious Kitchen.

Throw in the chopped onion, garlic, and jalapeno.


Tasty Kitchen Blog: Butternut and Black Bean Enchilada Skillet. Guest post by Natalie Perry of Perry's Plate, recipe submitted by TK member Monique of Ambitious Kitchen.

Saute for 3-4 minutes until the onion becomes soft and translucent.


Tasty Kitchen Blog: Butternut and Black Bean Enchilada Skillet. Guest post by Natalie Perry of Perry's Plate, recipe submitted by TK member Monique of Ambitious Kitchen.

Add that gorgeous squash. You can find butternut squash pre-diced, which isn’t a bad idea, considering the manual labor it takes to peel and chop one. 


Tasty Kitchen Blog: Butternut and Black Bean Enchilada Skillet. Guest post by Natalie Perry of Perry's Plate, recipe submitted by TK member Monique of Ambitious Kitchen.

Add the chili powder and cumin, as well as a few generous pinches of salt and black pepper.


Tasty Kitchen Blog: Butternut and Black Bean Enchilada Skillet. Guest post by Natalie Perry of Perry's Plate, recipe submitted by TK member Monique of Ambitious Kitchen.

At this point, you’re supposed to cook it for 8-10 minutes until the squash is fork-tender. I may have diced my squash too large because after 4-5 minutes, it was still rock-hard. 


Tasty Kitchen Blog: Butternut and Black Bean Enchilada Skillet. Guest post by Natalie Perry of Perry's Plate, recipe submitted by TK member Monique of Ambitious Kitchen.

Here’s where some improvisation may be handy. If this also happens to you, add the enchilada sauce, cover the pan, and bring the temperature down to medium-low. Add a little water if too much evaporates. The squash will cook perfectly without sticking to the pan or burning before the center is cooked!


Tasty Kitchen Blog: Butternut and Black Bean Enchilada Skillet. Guest post by Natalie Perry of Perry's Plate, recipe submitted by TK member Monique of Ambitious Kitchen.

While the squash is simmering away, cut the tortillas into strips. I used a wheat-corn blend, which were slightly thicker than regular corn tortillas. I only used 6, but I will reduce the number even more when I make this again. 


Tasty Kitchen Blog: Butternut and Black Bean Enchilada Skillet. Guest post by Natalie Perry of Perry's Plate, recipe submitted by TK member Monique of Ambitious Kitchen.

Add the tortillas and beans to the skillet. Oh, and most of the cheese!


Tasty Kitchen Blog: Butternut and Black Bean Enchilada Skillet. Guest post by Natalie Perry of Perry's Plate, recipe submitted by TK member Monique of Ambitious Kitchen.

Stir it up, and cook it for a couple more minute until the tortillas get softer and everything is combined well. Taste, and season with salt and pepper if necessary. Sprinkle the remaining cheese over top, and stick it under the broiler for a few minutes.


Tasty Kitchen Blog: Butternut and Black Bean Enchilada Skillet. Guest post by Natalie Perry of Perry's Plate, recipe submitted by TK member Monique of Ambitious Kitchen.

Sprinkle some freshly chopped cilantro on top, and dig in!

We loved this with homemade guacamole, sour cream, and some lime wedges. (Most things in my life can be improved with those three things…)


Tasty Kitchen Blog: Butternut and Black Bean Enchilada Skillet. Guest post by Natalie Perry of Perry's Plate, recipe submitted by TK member Monique of Ambitious Kitchen.

Thank you Monique! Please check out Monique’s quickly growing TK Recipe Box as well as her beautiful blog, Ambitious Kitchen. You’ll find the complete recipe and instructions below.


Printable Recipe

Butternut Squash and Black Bean Enchilada Skillet

See post on Monique of Ambitious Kitchen’s site!
4.96 Mitt(s) 24 Rating(s)24 votes, average: 4.96 out of 524 votes, average: 4.96 out of 524 votes, average: 4.96 out of 524 votes, average: 4.96 out of 524 votes, average: 4.96 out of 5

Prep Time:

Cook Time:

Difficulty: Easy

Servings: 6

6
x

Print Options

Page size Letter 3x5 4x6
Text Size Small Medium Large
Content Include description
Include prep time, etc.
Show image

Description

Put a spin on Mexican night with this healthy, vegetarian skillet dish. Ready in 30 minutes!

Ingredients

  • 2 teaspoons Olive Oil
  • 1  Medium Yellow Onion, Diced
  • 3 cloves Garlic, Minced
  • ½  Jalapeno, Seeded And Diced
  • 3 cups 1/2 Inch Diced, Peeled Butternut Squash
  • 1 teaspoon Cumin
  • 1 teaspoon Chili Powder
  • Salt And Pepper To Season
  • 1 can (15 Oz. Size) Black Beans, Rinsed And Drained
  • 8  Yellow Corn Tortillas (taco Size), Cut Into Thick Strips
  • 1 can (15 Oz. Size) Red Enchilada Sauce
  • 1 cup Reduced-fat Colby Jack Or Mexican Cheese, Divided
  • Cilantro And Low Fat Sour Cream, For Serving

Preparation Instructions

Heat olive oil over medium-high heat in a large oven-proof skillet. Add onions, garlic, and jalapeno and cook 2-3 minutes until onions become translucent and garlic is fragrant. Add cubed squash, cumin and chili powder and season with salt and pepper. Cook, stirring occasionally, until the squash is slightly tender, 8 to 10 minutes. You want the squash to be fork tender, but not so tender that it starts to fall apart and become mush.

Next add the black beans, corn tortilla pieces, and can of enchilada sauce and stir to combine. Reduce heat to medium-low and sprinkle in 1/2 cup of cheese. Stir again and simmer for a few minutes until everything is nice and melted.

Turn your oven broiler to high. Sprinkle an additional 1/2 cup of cheese over the top of the enchilada mixture and place in the oven under broiler for 3-5 minutes until cheese melts and tortilla edges become a bit golden brown. Remove from heat and serve immediately.

Serve with sour cream, cilantro, guacamole, or hot sauce!


_______________________________________

Be sure to check out Natalie’s own beautiful food blog, Perrys’ Plate, where you can see her growing collection of lovely recipes. There’s always something new to see there. Go visit now!


Profile photo of Erika (TK)

The Theme Is … Everything Buffalo!

Posted by in The Theme Is...

Tasty Kitchen Blog: The Theme is ... Everything Buffalo!

 
For a football fan, this weekend isn’t just any football weekend. It’s the weekend. The weekend important enough to cause re-scheduling of Mardi Gras parades this year. The one when folks plant themselves on the couch for hours, strategically positioned for the best view of the TV. When snacks aren’t just nice to have; they’re mandatory and usually the only grub served. When adults are allowed to hoot and holler and scream at officials on the screen without being shushed or stared at. And, I admit, it’s just about the only time I actually look forward to watching commercials.

You know what else this weekend is good for? It’s good for noshing. Copious amounts of noshing. And few noshes are as welcome—or even expected—on a Superbowl spread than Buffalo wings.

But of course, you know how we are. We’re not going to show you a recipe for Buffalo wings. Instead, we’ll show you all the incredibly creative ways our members have riffed off Buffalo wings. Because we’re kinda crazy like that, and riffing’s what we do best. (Remember these Cauliflower Buffalo Wings?)

Okay, here we go!


Tasty Kitchen Blog: Everything Buffalo! (Hot Buffalo Chicken Dip, submitted by Rebecca of Foodie with Family)
Hot Buffalo Chicken Dip from Rebecca of Foodie with Family. You know we had to start with this.


Tasty Kitchen Blog: Everything Buffalo! (Buffalo Chicken Quesadillas, submitted by TK member Jessica of A Kitchen Addiction)
Buffalo Chicken Quesadillas from Jessica of A Kitchen Addiction. Because adding melted cheese that you can pick up with your hands is always a good thing.


Tasty Kitchen Blog: Everything Buffalo! (Layered Baked Buffalo Chicken Nachos, submitted by TK member Jessica of How Sweet It Is)
Speaking of picking up melted cheese with your hands, how about some Layered Baked Buffalo Chicken Nachos courtesy of Jessica from How Sweet It Is? Sign me up.


Tasty Kitchen Blog: Everything Buffalo! (Buffalo Chicken Bites, submitted by TK member Sommer of A Spicy Perspective)
Buffalo Chicken Bites from Sommer of A Spicy Perspective. So we can all be a little more dainty-like.


Tasty Kitchen Blog: Everything Buffalo! (Spicy Buffalo Chicken Cannoli, submitted by TK member Sandy of Everyday Southwest)
This kills me: Spicy Buffalo Chicken Cannoli, from Sandy of Everyday Southwest. The first time I saw this, I needed to sit down for a moment and remember to breathe.


Tasty Kitchen Blog: Everything Buffalo! (Buffalo Chicken Flat Bread Pizzas, submitted by TK member Laurie of Simply Scratch)
Buffalo Chicken Flat Bread Pizzas by Laurie of Simply Scratch. This one, too. I almost had to break out the smelling salts.


Tasty Kitchen Blog: Everything Buffalo! (Buffalo Chicken Wraps, submitted by TK member Bev Weidner)
Or, if you’d rather skip the frying, you can make these Buffalo Chicken Wraps from Bev Weidner. Or make both! You know you want to.


Tasty Kitchen Blog: Everything Buffalo! (Shredded Buffalo Chicken Tacos, submitted by TK member Kate of Diethood)
Shredded Buffalo Chicken Tacos by Kate of Diethood. Mmmm. Tacos. They’re always a big hit.


Tasty Kitchen Blog: Everything Buffalo! (Baked Buffalo Chicken Pasta, submitted by TK member Jessica of How Sweet It Is)
Or go with pasta instead, like this Baked Buffalo Chicken Pasta. Jessica does it again! She knows her stuff, that Jessica.


Tasty Kitchen Blog: Everything Buffalo! (Buffalo Chicken Potato Skins, submitted by TK member Amy of A Stool at the Counter)
Buffalo Chicken Potato Skins by Amy of A Stool at the Counter. Like Amy says in her blog post: “It looks like Buffalo wings and potato skins had a love child, and it just showed up to watch the game with you.”


Tasty Kitchen Blog: Everything Buffalo! (Jalapeno Popper Buffalo Chicken Macaroni and Cheese, submitted by TK member Lauren's Latest)
Jalapeno Popper Buffalo Chicken Macaroni and Cheese from Lauren’s Latest. This is one awesome threesome. Not that I generally approve of threeso—you know what I mean.


Tasty Kitchen Blog: Everything Buffalo! (Buffalo Chicken Meatballs, submitted by TK member Colleen of Souffle Bombay)
Buffalo Chicken Meatballs from Colleen of Souffle Bombay. Meatballs swimming in spicy tangy cheesy sauce. Doesn’t get much better than that.


Tasty Kitchen Blog: Everything Buffalo! (Buffalo Chicken Soup, submitted by TK member Cassie of Bake Your Day)
Buffalo Chicken Soup by Cassie of Bake Your Day. Give me a loaf of hot buttered garlic bread for dunking, and I’ll be a happy camper.


Tasty Kitchen Blog: Everything Buffalo! (Grilled Buffalo Shrimp Po’ Boys, submitted by TK member Jennifer of Mother Thyme)
Grilled Buffalo Shrimp Po’ Boys by Jennifer of Mother Thyme. Because Buffalo ain’t just for chickens no more. (That’s me trying to sound all cowboy-like. And failing miserably.)


Tasty Kitchen Blog: Everything Buffalo! (Soft Pretzels with Hot Buffalo Cheese Sauce, submitted by TK member Tieghan of Half Baked Harvest)
And finally, we have these Soft Pretzels with Hot Buffalo Cheese Sauce by Tieghan of Half Baked Harvest. If yeast scares you, you can at least make the Hot Buffalo Cheese Sauce and buy some pretzels, make breadsticks from store-bought dough, or just serve it as a dip for chips or veggies.

 
Of course, you can always just stick to the classic Buffalo Wings, which will be a hit with everyone. But so many of these variations look incredibly good, it’s hard to resist trying even just one. Or three. And if you have your own favorite version that wasn’t mentioned here, shout it out below!

Do you have any big plans this weekend? Are you game central, where everyone hangs out? Or do you have a friend with an amazing setup, the place all your friends want to go to for the game? Got any friendly wagers going? Any tips for those of us dreading the post-game cleanup? Do share!