The Pioneer Woman Tasty Kitchen
Profile photo of Megan {Country Cleaver}

Creamy Chicken and Sun-dried Tomato Fettucine

Posted by in Step-by-Step Recipes

Tasty Kitchen Blog: Creamy Chicken and Sun-dried Tomato Fettucine. Guest post by Megan Keno of Wanna Be a Country Cleaver, recipe submitted by TK member Natalie of Perry’s Plate.

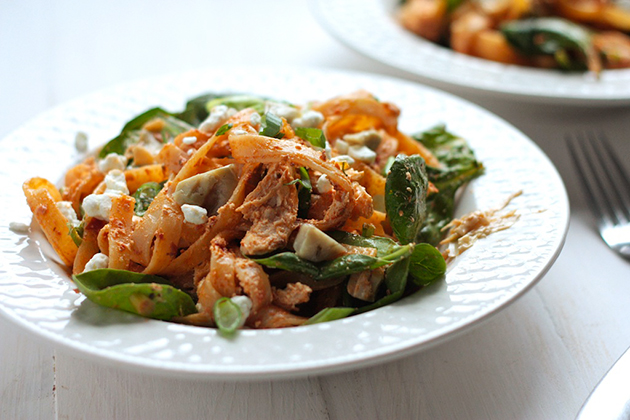
I love finding new inspiration on Tasty Kitchen. There is always new stuff to find and try. When I joined TK, I kept filling my Recipe Box with so many great community recipes that I just “had to try” but it dawned on me that I hadn’t actually made any of them! Tragedy! The first recipe I ever made from Tasty Kitchen was Creamy Chicken and Sun-dried Tomato Fettucine from Natalie Perry. The flavors all combined so beautifully and the sauce was addicting! I would eat it for days on end.


Tasty Kitchen Blog: Creamy Chicken and Sun-dried Tomato Fettucine. Guest post by Megan Keno of Wanna Be a Country Cleaver, recipe submitted by TK member Natalie of Perry’s Plate.

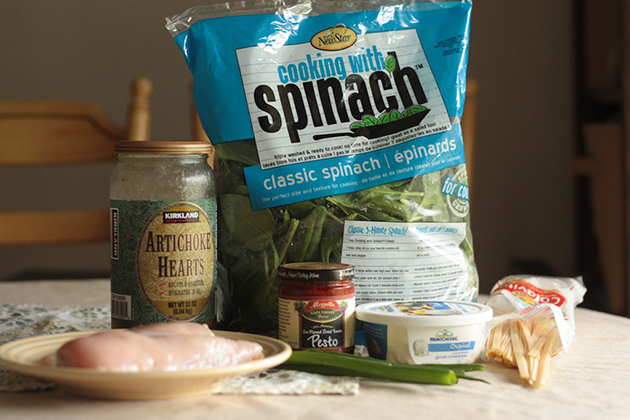
The ingredients in this dish are really simple and include fettuccine, jarred sun-dried tomato pesto (Natalie also has a recipe here in TK for a homemade version), goat cheese crumbles, spinach, marinated artichoke hearts, green onions, and salt and pepper. Shredding leftover roasted chicken into this pasta adds something nice to the dish, or keep it vegetarian for a Meatless Monday meal!


Tasty Kitchen Blog: Creamy Chicken and Sun-dried Tomato Fettucine. Guest post by Megan Keno of Wanna Be a Country Cleaver, recipe submitted by TK member Natalie of Perry’s Plate.

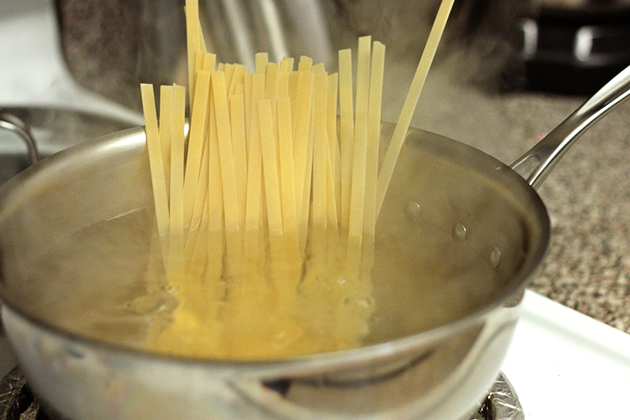
To start, bring a large saucepan of salted water to a boil. Prepare fettuccine noodles according to package directions. Before draining, reserve about 1 cup of the pasta water for making the sauce. Pour the drained pasta into a large bowl.


Tasty Kitchen Blog: Creamy Chicken and Sun-dried Tomato Fettucine. Guest post by Megan Keno of Wanna Be a Country Cleaver, recipe submitted by TK member Natalie of Perry’s Plate.

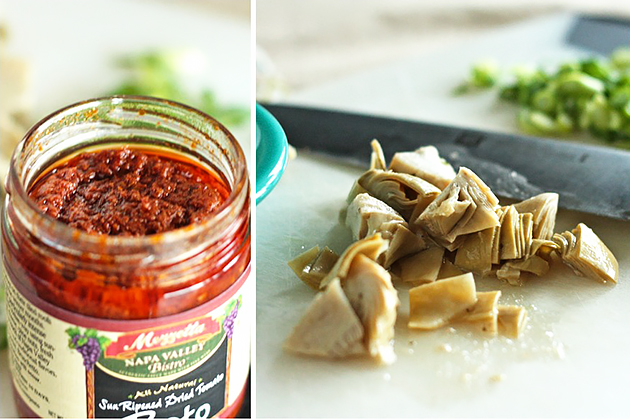
Grab the pesto and chop the artichoke hearts. Now you’re ready to put this all together.


Tasty Kitchen Blog: Creamy Chicken and Sun-dried Tomato Fettucine. Guest post by Megan Keno of Wanna Be a Country Cleaver, recipe submitted by TK member Natalie of Perry’s Plate.

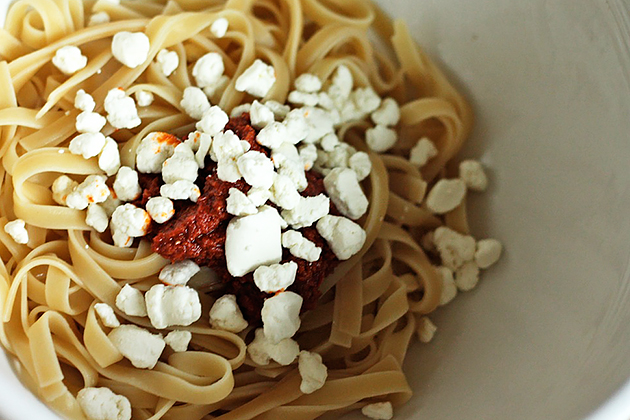
Stir the jarred sun dried tomato pesto, goat cheese, green onions, and artichoke hearts into the pasta and coat the noodles evenly. Add in some of the reserved pasta water if the sauce is too thick. Add in spinach and combine. The heat from the pasta will help the spinach wilt slightly. If you think it needs a little extra seasoning, add in a little salt and pepper to taste.


Tasty Kitchen Blog: Creamy Chicken and Sun-dried Tomato Fettucine. Guest post by Megan Keno of Wanna Be a Country Cleaver, recipe submitted by TK member Natalie of Perry’s Plate.

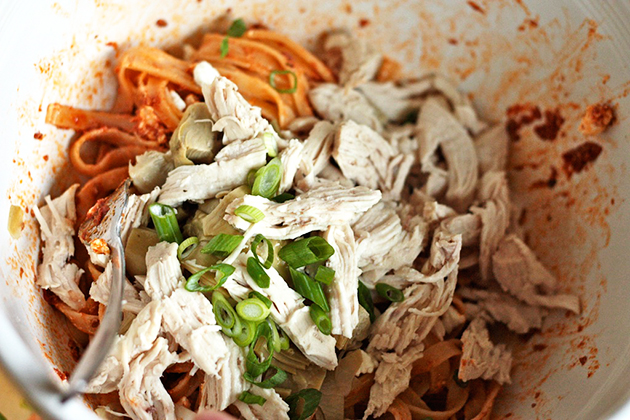
If you do add chicken, stir it in at this step and toss to coat the chicken in the creamy sauce.


Tasty Kitchen Blog: Creamy Chicken and Sun-dried Tomato Fettucine. Guest post by Megan Keno of Wanna Be a Country Cleaver, recipe submitted by TK member Natalie of Perry’s Plate.

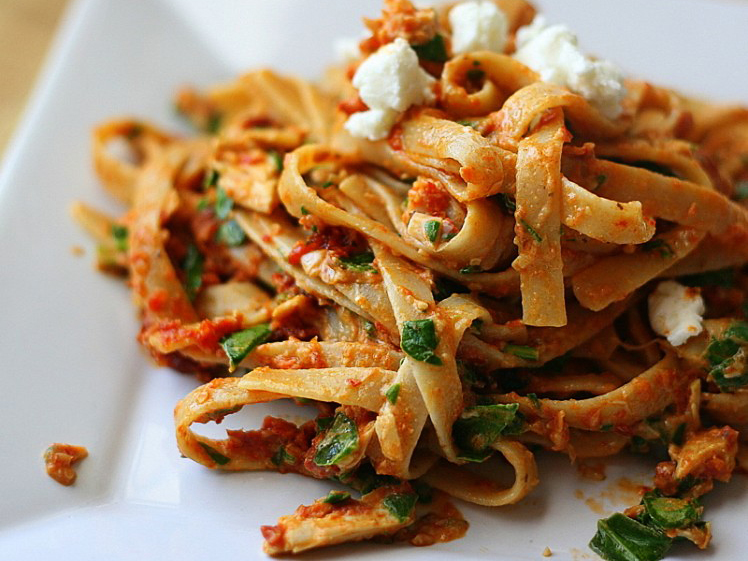
Then serve! I always add a little more goat cheese to the top. The creamy tang is just too irresistible for words!

A big thank you to Natalie for this wonderful dish. Be sure to check out Natalie’s blog, Perry’s Plate, for more amazing recipes, including loads of paleo-inspired dishes. She’s just brimming with creativity and healthy eats!


Printable Recipe
Creamy Chicken & Sun-dried Tomato Fettucine

See post on Natalie | Perry's Plate’s site!
4.33 Mitt(s) 9 Rating(s)9 votes, average: 4.33 out of 59 votes, average: 4.33 out of 59 votes, average: 4.33 out of 59 votes, average: 4.33 out of 59 votes, average: 4.33 out of 5

Prep Time:

Cook Time:

Difficulty: Easy

Servings: 4

4
x

Print Options

Page size Letter 3x5 4x6
Text Size Small Medium Large
Content Include description
Include prep time, etc.
Show image

Description

Made with a homemade sun-dried tomato pesto and comes together in under 30 minutes!

Ingredients

  • 8 ounces, weight Whole Wheat Fettucine (spaghetti Or Linguine Would Also Work)
  • 1-½ cup Cooked Diced Or Shredded Chicken
  • 1 cup Jarred Marinated Artichoke Hearts, Chopped
  • 2 cups Chopped Fresh Baby Spinach (about 3 Big Handfuls)
  • ⅓ cups Sun-dried Tomato Pesto (also In My Recipe Box)
  • 1 whole Green Onion, Sliced Thinly
  • 2 ounces, weight Goat Cheese, Plus More For Garnish
  • ⅛ teaspoons Salt And Black Pepper (or To Taste)

Preparation Instructions

Bring a large pot of water to boil. Add 2 tablespoons salt to the water, then add pasta. Cook according to package directions, until al dente. Meanwhile, prepare other ingredients.

When pasta is finished cooking, remove a cup of the pasta water from the pot and set aside. Drain remaining water and place cooked pasta in a large bowl. Add remaining ingredients and stir until the pesto and goat cheese have coated everything and the spinach has wilted. If it gets too thick and cumbersome, add reserved pasta water a few tablespoonfuls at a time to loosen things up. The pasta should be lightly coated with a sauce, but not watery.

Makes about 4 servings.


_______________________________________

Megan Keno is the writer and photographer of Country Cleaver, a food blog fueled by Nutella and images of June Cleaver—if June wore cowboy boots and flannel, that is. A self-proclaimed country bum, Megan creates from-scratch recipes that range from simple to sublime and how-to’s to build your cooking repertoire. But she couldn’t do it without the help of her trusty—and furry—sous chef, Huckleberry. He’s a world class floor cleaner.


Profile photo of georgiapellegrini

Skinny Crab Rangoon

Posted by in Step-by-Step Recipes

Tasty Kitchen Blog: Skinny Crab Rangoon. Guest post by Georgia Pellegrini, recipe submitted by TK member Dara of Generation Y Foodie.

Ragoons, while always delicious, are not your typical go-to health snack. They are generally time-consuming and full of calories. This quick Skinny Crab Rangoon recipe by TK member Dara of Generation Y Foodie, however, takes about 15 minutes, and is only 41 calories per ragoon!


Tasty Kitchen Blog: Skinny Crab Rangoon. Guest post by Georgia Pellegrini, recipe submitted by TK member Dara of Generation Y Foodie.

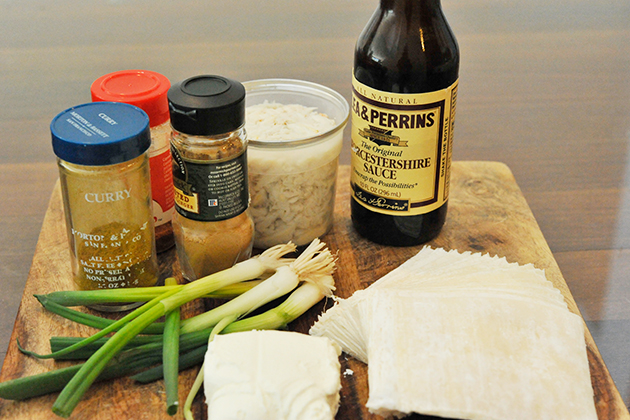
You’re going to start with wonton wrappers, lump crab meat, Worcestershire sauce, curry powder, ground ginger, cayenne pepper, reduced fat cream cheese, and washed and chopped scallions.


Tasty Kitchen Blog: Skinny Crab Rangoon. Guest post by Georgia Pellegrini, recipe submitted by TK member Dara of Generation Y Foodie.

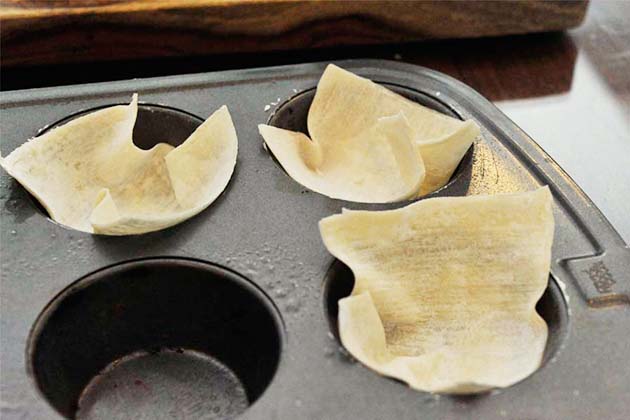
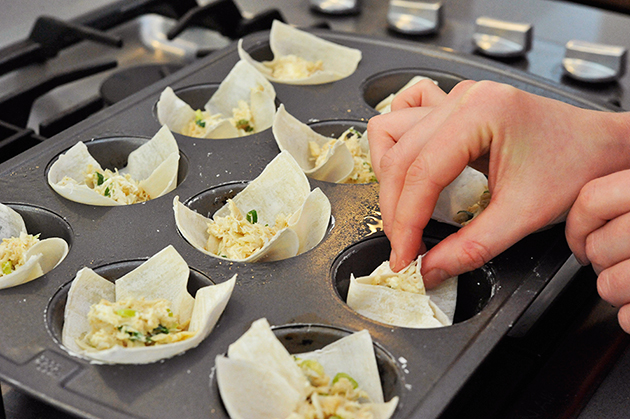
Heat the oven to 375˚F. Spray a muffin tin with olive oil spray and push a wonton wrapper into each tin.


Tasty Kitchen Blog: Skinny Crab Rangoon. Guest post by Georgia Pellegrini, recipe submitted by TK member Dara of Generation Y Foodie.

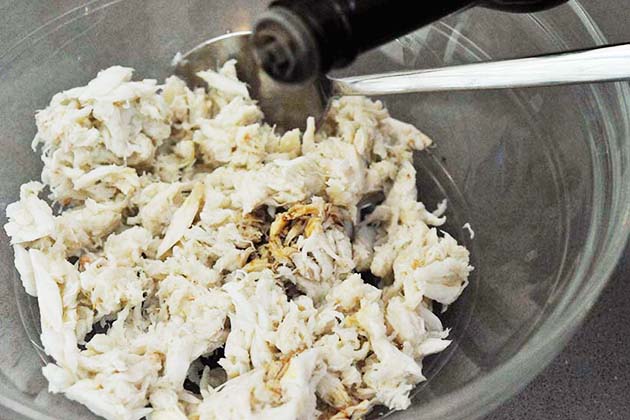
In a mixing bowl, combine the crab (you have to make sure you bought lump crab) with the Worcestershire sauce.


Tasty Kitchen Blog: Skinny Crab Rangoon. Guest post by Georgia Pellegrini, recipe submitted by TK member Dara of Generation Y Foodie.

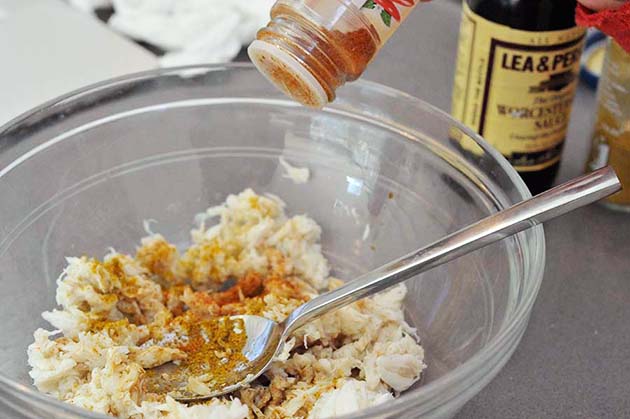
Sprinkle in the curry, ginger, and cayenne pepper.


Tasty Kitchen Blog: Skinny Crab Rangoon. Guest post by Georgia Pellegrini, recipe submitted by TK member Dara of Generation Y Foodie.

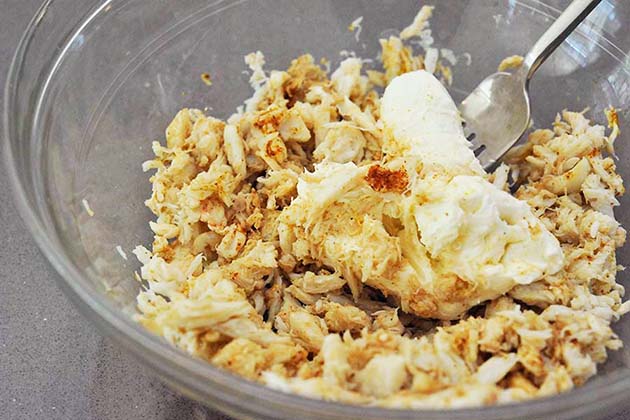
Add the cream cheese and mix it all together.


Tasty Kitchen Blog: Skinny Crab Rangoon. Guest post by Georgia Pellegrini, recipe submitted by TK member Dara of Generation Y Foodie.
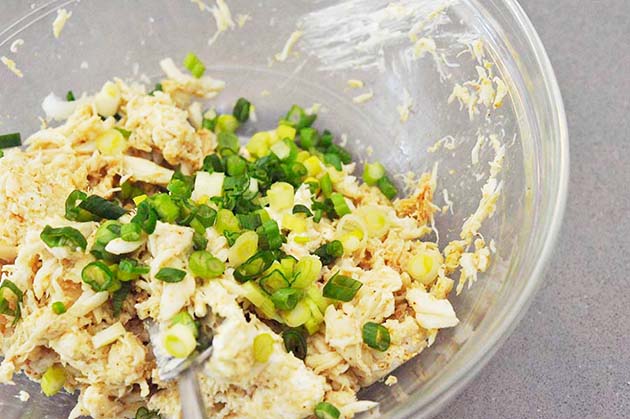
Fold in the scallions, mashing with a fork.


Tasty Kitchen Blog: Skinny Crab Rangoon. Guest post by Georgia Pellegrini, recipe submitted by TK member Dara of Generation Y Foodie.

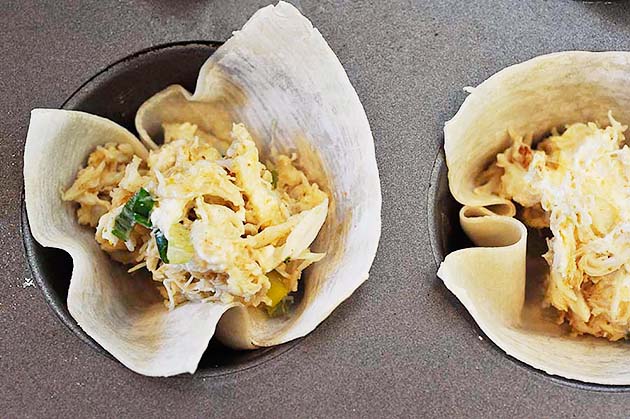
Spoon the mixture into the wonton wrappers.


Tasty Kitchen Blog: Skinny Crab Rangoon. Guest post by Georgia Pellegrini, recipe submitted by TK member Dara of Generation Y Foodie.

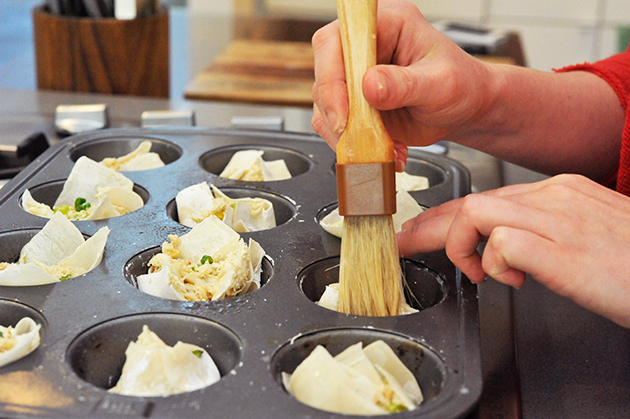
Brush the ends of the wonton wrappers with water so that the tops can be sealed together.


Tasty Kitchen Blog: Skinny Crab Rangoon. Guest post by Georgia Pellegrini, recipe submitted by TK member Dara of Generation Y Foodie.

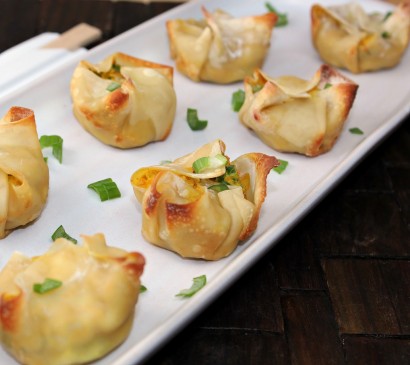
Fold the wontons, sealing the edges with your fingers. Bake for 10 minutes or until the ends are slightly browned.


Tasty Kitchen Blog: Skinny Crab Rangoon. Guest post by Georgia Pellegrini, recipe submitted by TK member Dara of Generation Y Foodie.

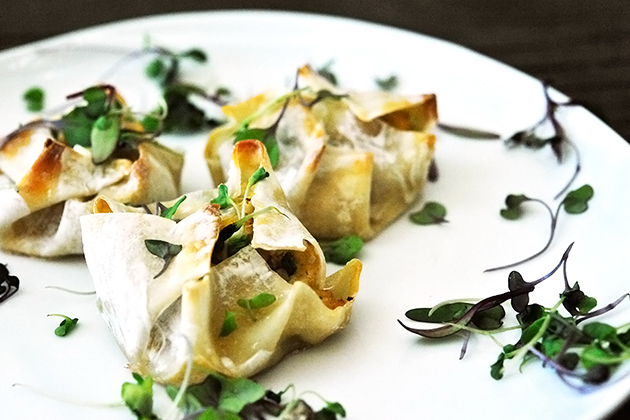
You can garnish these with some greens, and you’re ready to eat! These would make fantastic party food because they are bite-sized, classy-looking, and there’s no mess.

Thanks for the recipe, Dara!


Printable Recipe

Skinny Crab Rangoon

See post on GenYFoodie’s site!
0.00 Mitt(s) 0 Rating(s)0 votes, average: 0.00 out of 50 votes, average: 0.00 out of 50 votes, average: 0.00 out of 50 votes, average: 0.00 out of 50 votes, average: 0.00 out of 5

Prep Time:

Cook Time:

Difficulty: Easy

Servings: 4

4
x

Print Options

Page size Letter 3x5 4x6
Text Size Small Medium Large
Content Include description
Include prep time, etc.
Show image

Description

A low calorie version of your favorite take out treat! Only 41 calories per rangoon!

Ingredients

  • 24  Wonton Wrappers
  • 8 ounces, weight Lump Crab Meat
  • 1 teaspoon Worcestershire Sauce
  • 2-½ teaspoons Curry Powder
  • 1 teaspoon Ground Ginger
  • ½ teaspoons Cayenne Pepper
  • ½ cups Reduced Fat Cream Cheese
  • ⅓ cups Scallions, Washed And Chopped

Preparation Instructions

1. Preheat oven to 375ºF.
2. Spray a mini muffin tin with olive oil spray.
3. Push a wonton wrapper into each muffin tin.
4. In a mixing bowl, combine crab, Worcestershire sauce, curry, ginger and cayenne.
5. Mix with a fork, breaking up large chunks of crab.
6. Add cream cheese and scallions, mashing with a fork until fully incorporated.
7. Using a teaspoon, spoon mixture into wontons.
8. Fold ends of wonton wrapper over mixture. Using a finger, wet the edges to seal.
9. Bake for 10 minutes, until ends are slightly browned.
10. Garnish with additional scallions.


_______________________________________

There’s so much to say about Georgia, we don’t know where to start. Leaving Wall Street for the French Culinary Institute, followed by a stint at the Gramercy Tavern and La Chassagnette in France, her passion for food and food traditions are evident and inspiring. Visit her site at Georgia Pellegrini, where you’ll find more recipes, photos, learn all about her wonderful books (including her latest one, Modern Pioneering, and enjoy her latest adventures.


Profile photo of Erika (TK)

What Was the First Recipe You Mastered?

Posted by in Kitchen Talk

Tasty Kitchen Blog: Kitchen Talk (First Recipe)

We loved reading the comments in last week’s post about favorite cookbooks. There were so many stories, not just about the cookbooks but where you got them, why they were your favorites and how you so lovingly shared the recipes with others.

Let’s continue the trip down memory lane and, this time, let’s get even more specific. For this week’s Kitchen Talk, we want to know:

What was the first recipe you ever mastered?

Every cooking enthusiast starts somewhere. My start came late, when I was in my twenties, so for me, the first recipe I truly mastered was kalbi, or Korean short ribs. (Apparently, I started late but I didn’t mess around.) It got to the point where my cousins would drop by the house 2 or 3 times a week for a midnight snack dinner of ribs, rice, and Caesar salad. My dad would get out of bed because of the commotion, find us all seated at the dinner table for a full meal at 12:30am, shake his head and go back to bed. To this day, it’s still one of my favorite things to make.

How about you? What was the first recipe you mastered, or the one that truly became your signature dish? Was it your mom’s recipe for pancakes? Cookies that everyone started asking you to make for them? Those ever-so-light biscuits you learned from your grandmother? Come tell us your story! And if you’ve posted the recipe here or elsewhere online, feel free to share the link, too!


Profile photo of Natalie | Perry's Plate

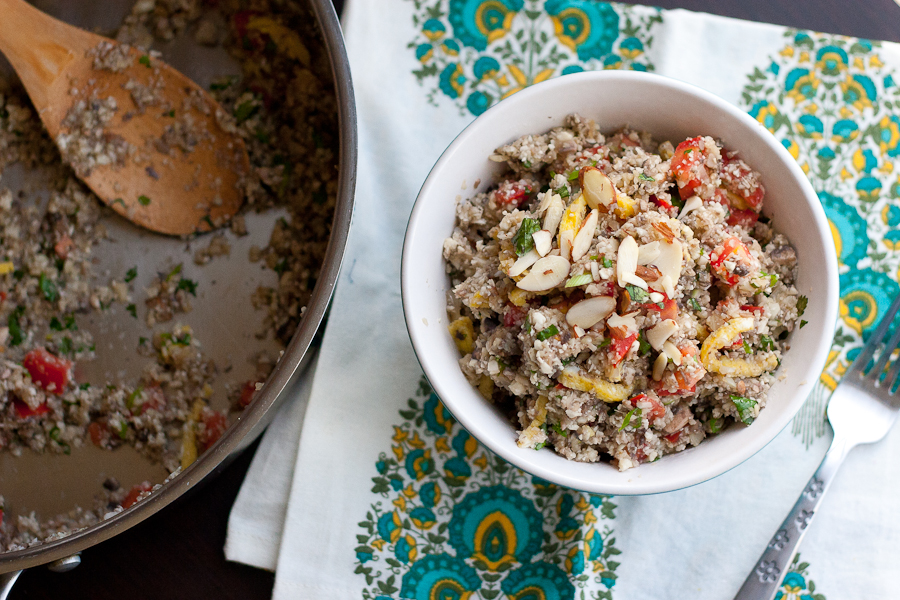
Paleo-friendly Cauliflower Fried Rice

Posted by in Step-by-Step Recipes

Tasty Kitchen Blog: Paleo-friendly Cauliflower Fried Rice. Guest post by Natalie Perry of Perry's Plate, recipe submitted by TK member Dani of Expat Cucina.

If you’re familiar with the paleo lifestyle, you might know that this dish doesn’t actually have rice in it. 

The first time I saw cauliflower used as rice, it blew my mind a little. Cauliflower is one of the darlings of the paleo world because it can be manipulated to replace grains in a lot of meals. I’ve used it in place of rice, pureed it to thicken soups, seasoned and roasted it as a vegetarian “steak”, mashed it in place of potatoes, and my favorite, used it as a base for a pizza crust.

No, I’m not joking. And it was all delicious.

Even if you’re not a paleo eater and avoiding grains, dairy, legumes, and sugar for various reasons, replacing grains with vegetables (particularly refined grains) can be a great way to increase nutrient density in a recipe. 

This Paleo-friendly Cauliflower Fried Rice recipe submitted by TK member Dani is a perfect example of grain-swapping. I’m excited to share it with you!

So is the cauliflower. It likes to show off.


Tasty Kitchen Blog: Paleo-friendly Cauliflower Fried Rice. Guest post by Natalie Perry of Perry's Plate, recipe submitted by TK member Dani of Expat Cucina.

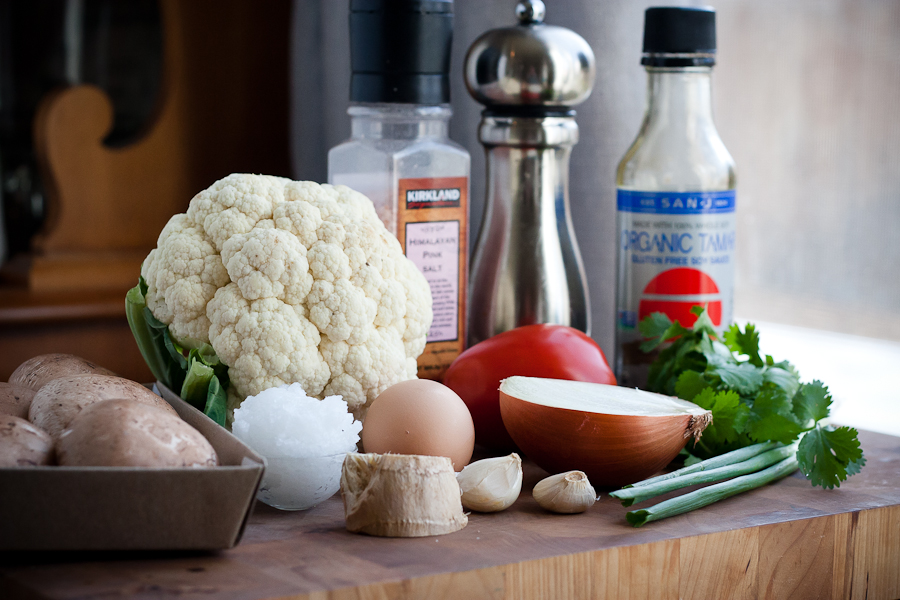
I adapted this recipe slightly, adding a few more things (notes below), so you’ll need a whole head of cauliflower, salt, pepper, soy sauce (or tamari), mushrooms, coconut oil, an egg, fresh ginger, garlic, onion, green onion, a tomato, and cilantro.

If you’re a nit-picky paleo, you may not use soy sauce or tamari. I don’t mind it in very small amounts occasionally, but you can also use coconut aminos which is a good substitute. You may be able to find it at Whole Foods or other natural grocery stores.


Tasty Kitchen Blog: Paleo-friendly Cauliflower Fried Rice. Guest post by Natalie Perry of Perry's Plate, recipe submitted by TK member Dani of Expat Cucina.

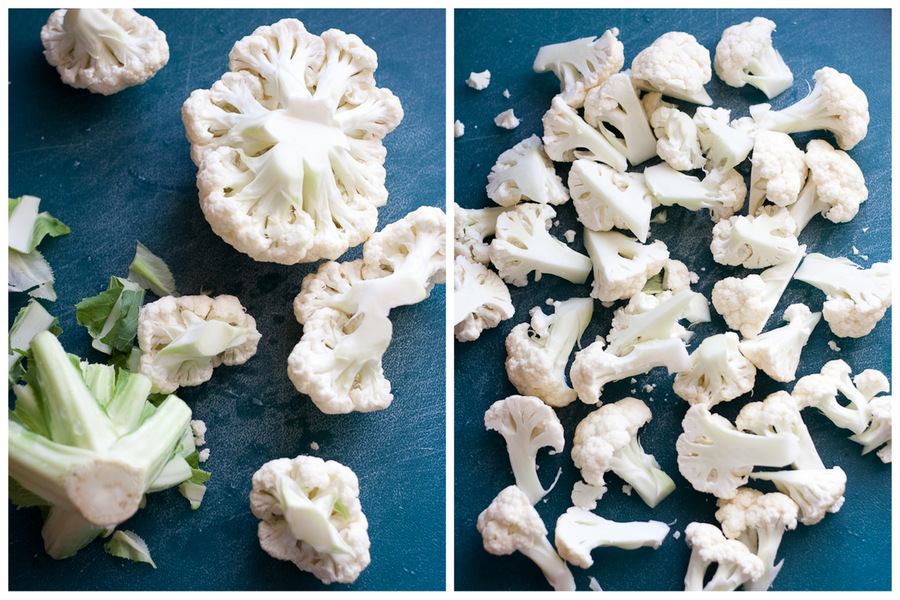
First, dismantle the cauliflower, and cut it into fairly uniform pieces.


Tasty Kitchen Blog: Paleo-friendly Cauliflower Fried Rice. Guest post by Natalie Perry of Perry's Plate, recipe submitted by TK member Dani of Expat Cucina.

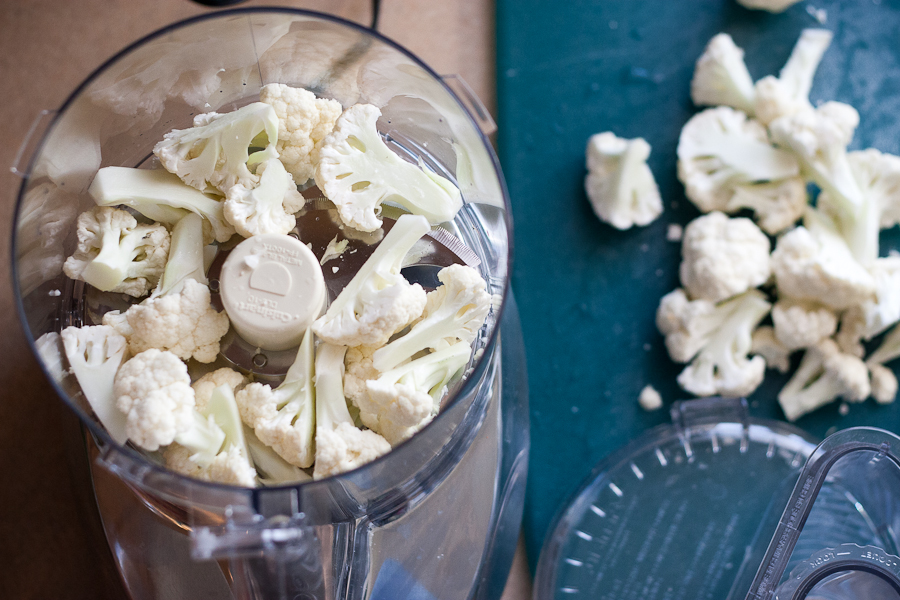
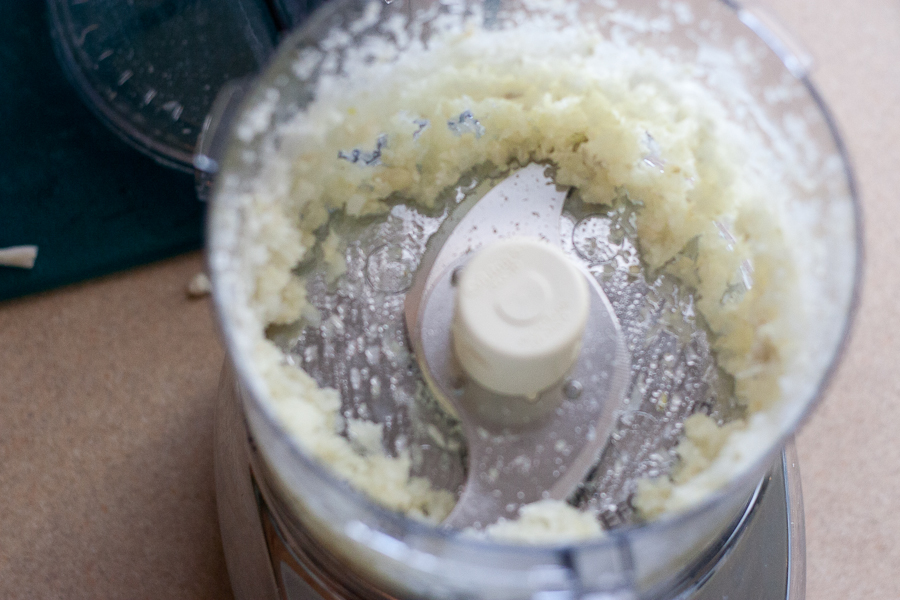
My food processor holds 9 cupd, so I did half the head at a time to ensure even chopping. If you have a larger one you may be able to do it all in one batch.


Tasty Kitchen Blog: Paleo-friendly Cauliflower Fried Rice. Guest post by Natalie Perry of Perry's Plate, recipe submitted by TK member Dani of Expat Cucina.

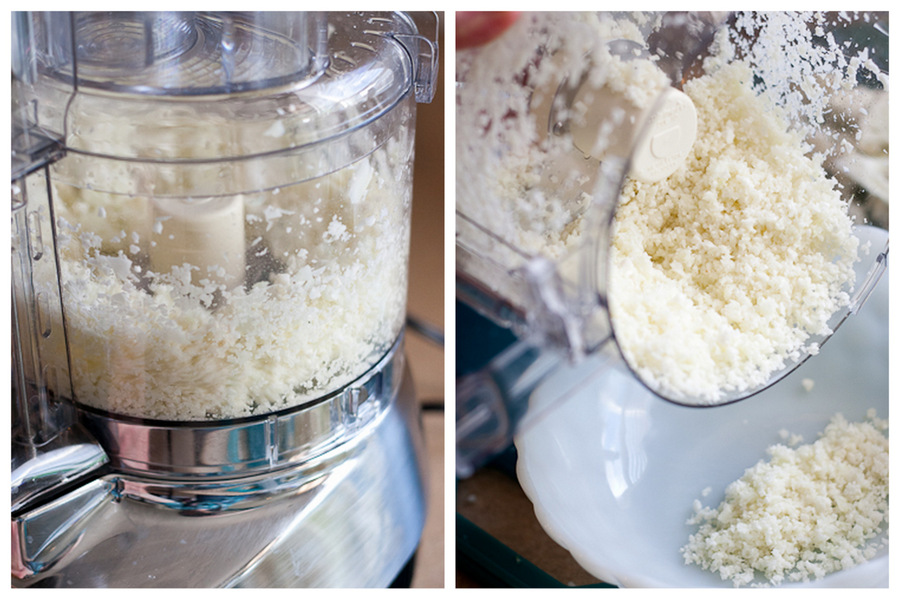
Pulse several times until the cauliflower is about the size of rice grains. Transfer to a bowl and set aside. 


Tasty Kitchen Blog: Paleo-friendly Cauliflower Fried Rice. Guest post by Natalie Perry of Perry's Plate, recipe submitted by TK member Dani of Expat Cucina.

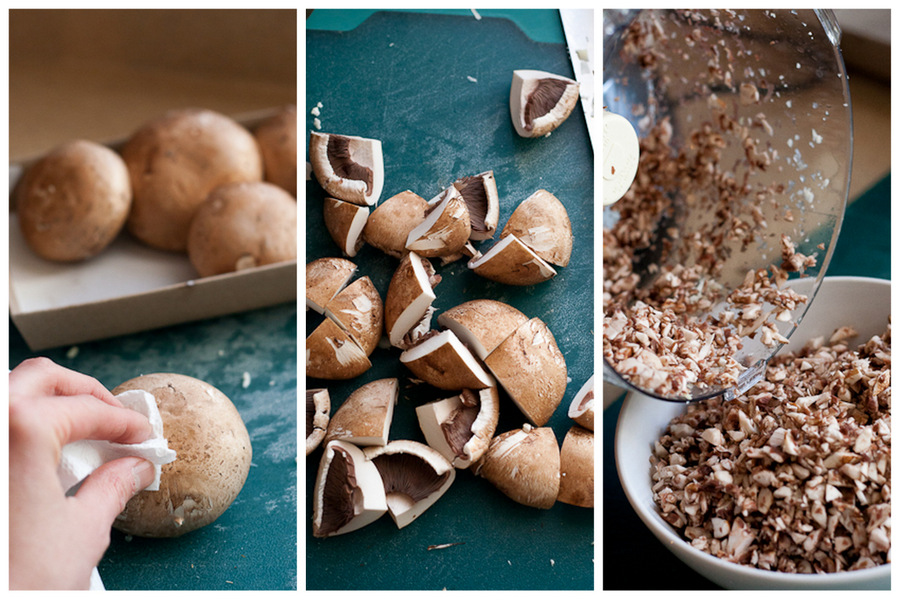
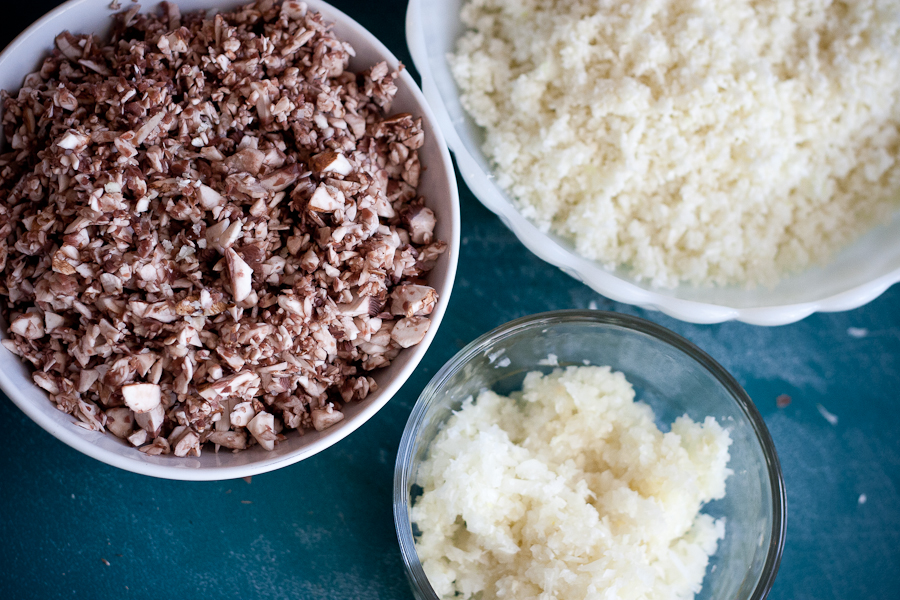
Next, get the mushrooms prepped by wiping any dirt off with a paper towel, breaking off the stems, and quartering them. I used baby portabellas but any type of mushroom would do. Pulse the mushroom quarters in the food processor like you did the rice and transfer to a separate bowl.

You could just slice them into larger pieces and leave them big, but my little picky eaters aren’t into mushrooms, and I didn’t want to start a dinnertime battle. I minced mine out of survival. 


Tasty Kitchen Blog: Paleo-friendly Cauliflower Fried Rice. Guest post by Natalie Perry of Perry's Plate, recipe submitted by TK member Dani of Expat Cucina.

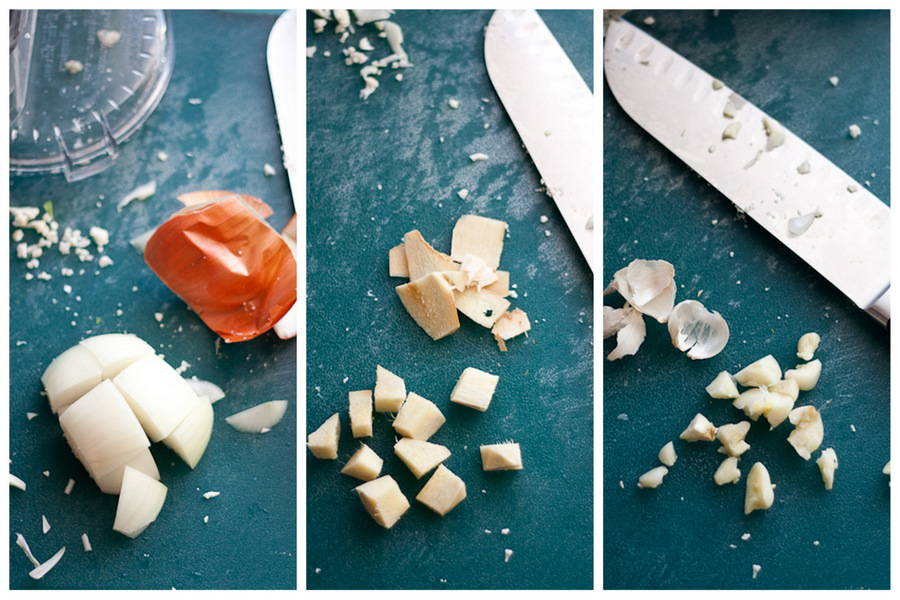
Next, prep the onion, ginger, and garlic. Peel them all, then cut them into chunks. 


Tasty Kitchen Blog: Paleo-friendly Cauliflower Fried Rice. Guest post by Natalie Perry of Perry's Plate, recipe submitted by TK member Dani of Expat Cucina.

Throw the ginger, garlic, and onion into the food processor and pulse to mince. That machine is going to earn its counterspace today. You could also use a knife. If you wanted. (I didn’t.)


Tasty Kitchen Blog: Paleo-friendly Cauliflower Fried Rice. Guest post by Natalie Perry of Perry's Plate, recipe submitted by TK member Dani of Expat Cucina.

Now you have three bowls of minced ingredients ready to go!

Yes, there is quite a bit of chopping in this recipe (and we’re not quite finished yet), but the dish comes together really easily and quickly. You could do all of the prep a day or two ahead as well.


Tasty Kitchen Blog: Paleo-friendly Cauliflower Fried Rice. Guest post by Natalie Perry of Perry's Plate, recipe submitted by TK member Dani of Expat Cucina.

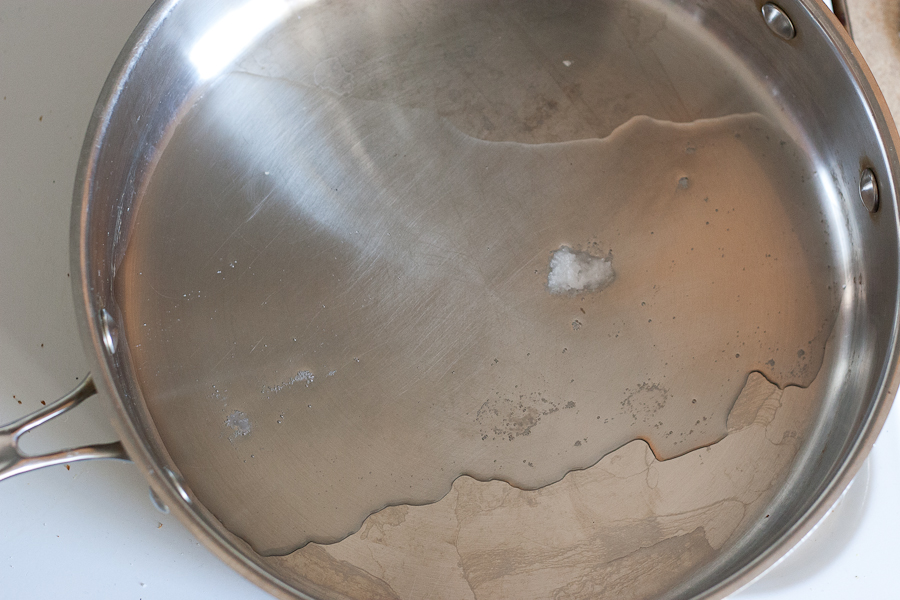
Alright, time for some heat. In a large saute pan, heat the coconut oil to medium-high heat. 


Tasty Kitchen Blog: Paleo-friendly Cauliflower Fried Rice. Guest post by Natalie Perry of Perry's Plate, recipe submitted by TK member Dani of Expat Cucina.

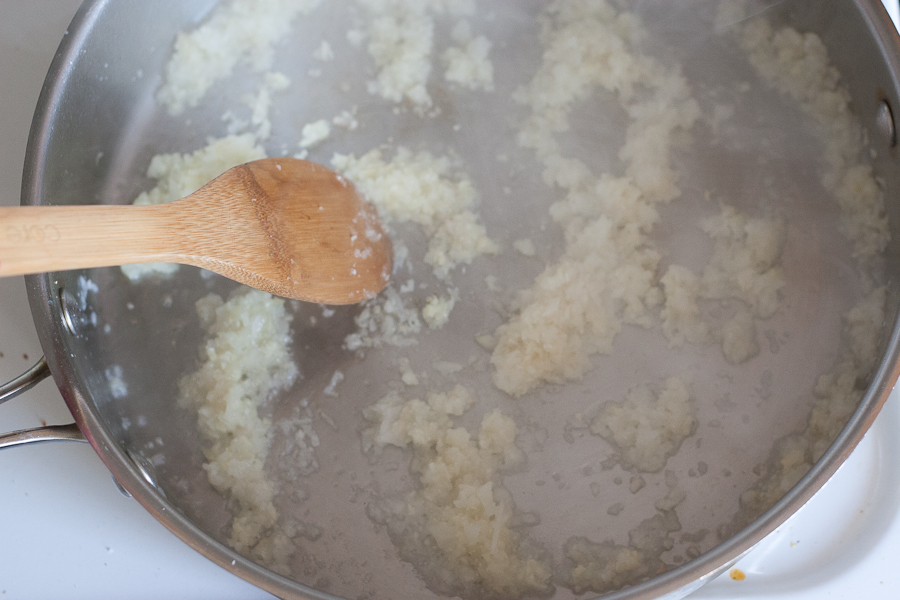
Add the onion-ginger-garlic mixture and cook it for a minute or two.


Tasty Kitchen Blog: Paleo-friendly Cauliflower Fried Rice. Guest post by Natalie Perry of Perry's Plate, recipe submitted by TK member Dani of Expat Cucina.

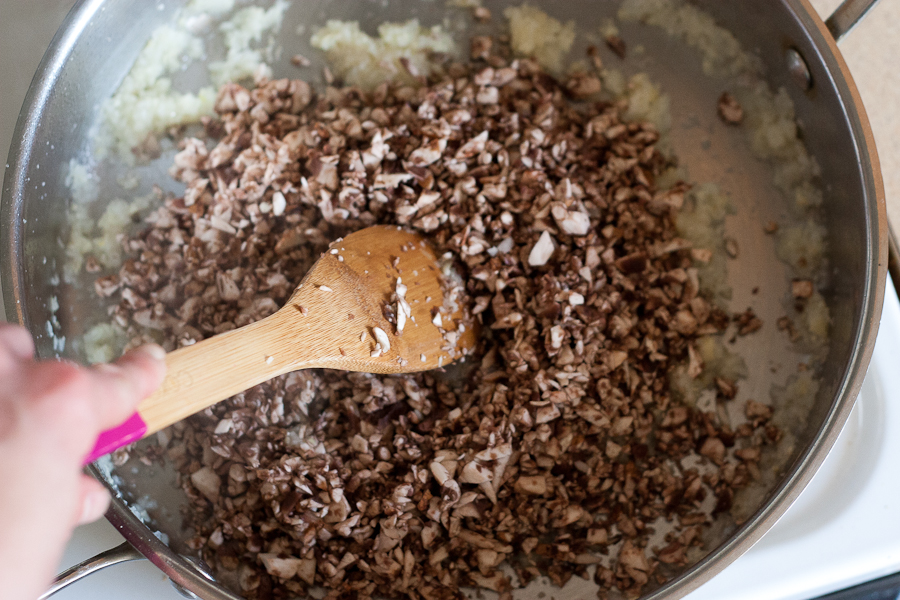
Add the mushrooms and cook those for a few minutes as well.


Tasty Kitchen Blog: Paleo-friendly Cauliflower Fried Rice. Guest post by Natalie Perry of Perry's Plate, recipe submitted by TK member Dani of Expat Cucina.

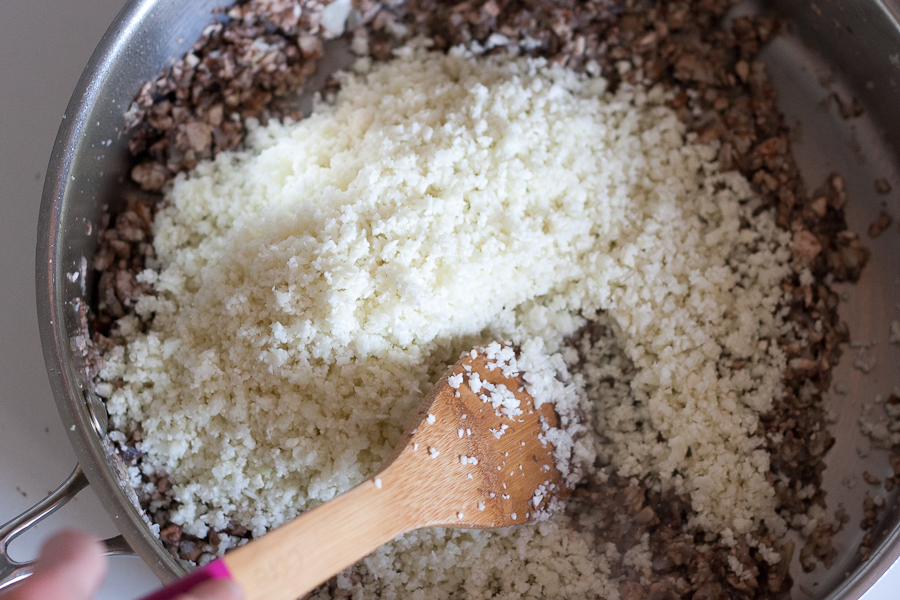
Now for the cauliflower!


Tasty Kitchen Blog: Paleo-friendly Cauliflower Fried Rice. Guest post by Natalie Perry of Perry's Plate, recipe submitted by TK member Dani of Expat Cucina.

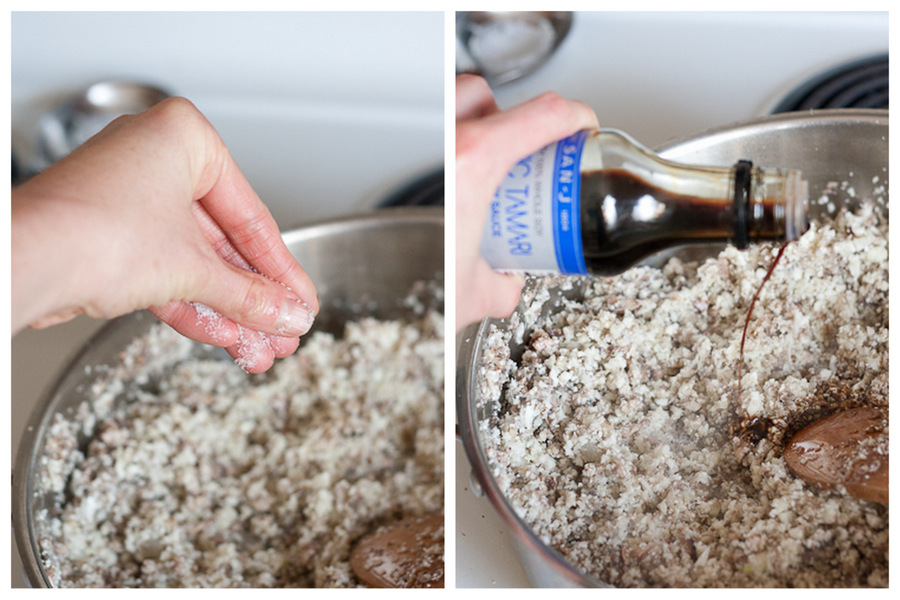
Add salt, pepper, and a splash of soy sauce (or tamari). 


Tasty Kitchen Blog: Paleo-friendly Cauliflower Fried Rice. Guest post by Natalie Perry of Perry's Plate, recipe submitted by TK member Dani of Expat Cucina.

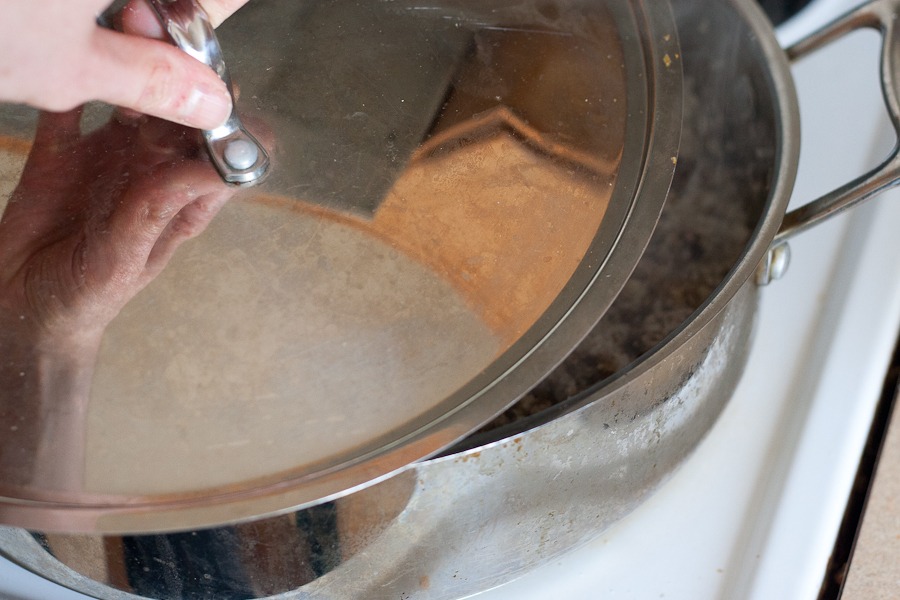
Put the lid on, reduce the heat a bit, and let it steam for a few minutes while you finish up the mix-ins.

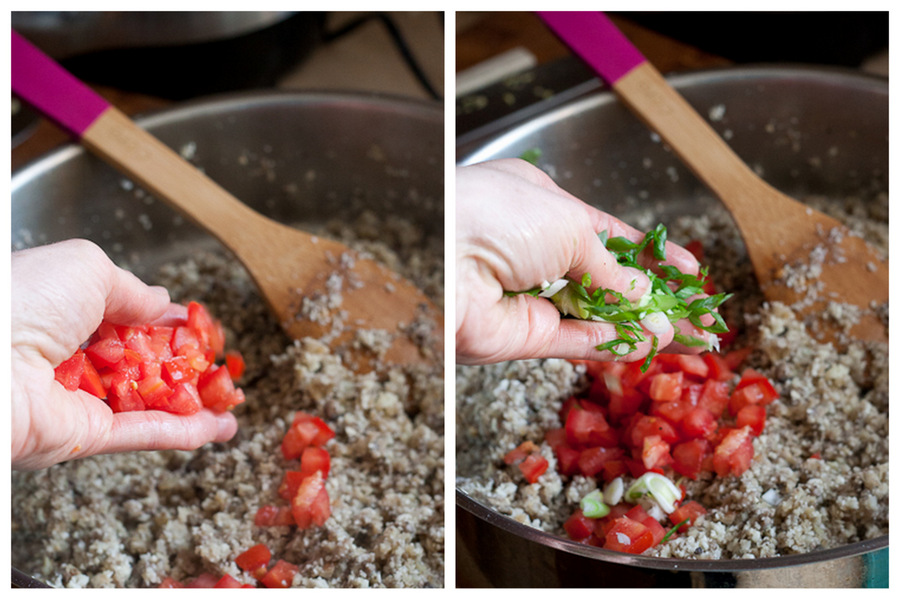
While the “rice” is finishing up, dice the tomato, and chop the green onion and cilantro. If you hate cilantro, just leave it out. (And then seek help. Ok, not really. But maybe.)


Tasty Kitchen Blog: Paleo-friendly Cauliflower Fried Rice. Guest post by Natalie Perry of Perry's Plate, recipe submitted by TK member Dani of Expat Cucina.

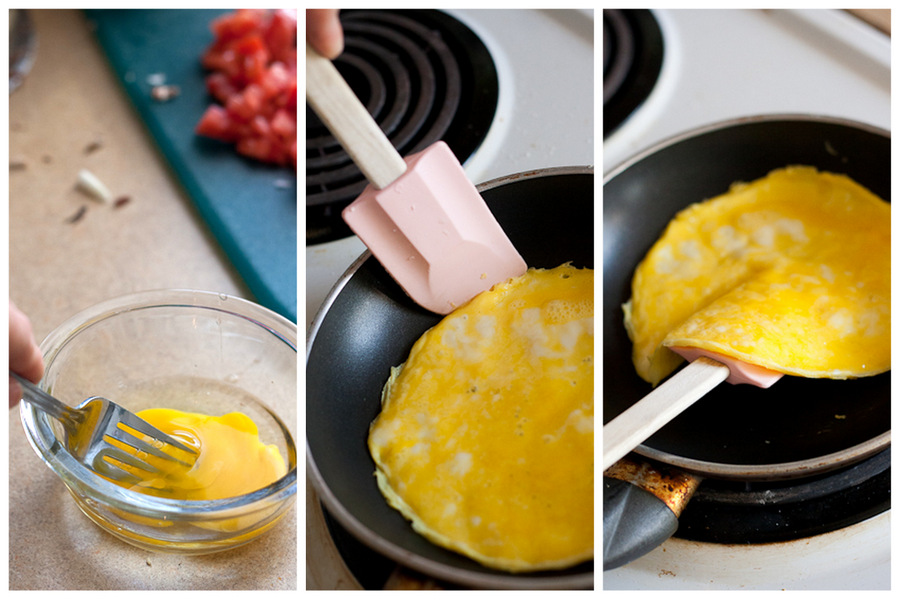
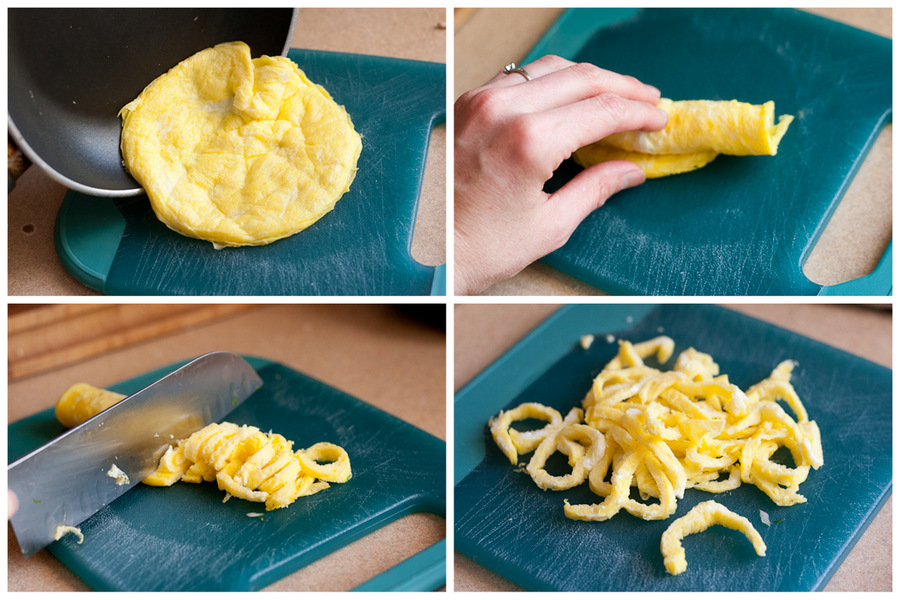
Remember that egg? Well now’s the time to pull it out. Beat it with a fork and cook it in a pan.

You can scramble it if you like, or you can make a flat omelet out of it and slice it up. Your choice.

You could also do it in the saute pan before you throw the vegetables in, but I have emotional meltdowns when I clean eggs out of stainless steel pans. So I do it in a small nonstick skillet. 


Tasty Kitchen Blog: Paleo-friendly Cauliflower Fried Rice. Guest post by Natalie Perry of Perry's Plate, recipe submitted by TK member Dani of Expat Cucina.

I made a flat omelet, rolled it up, then sliced it into ribbons. They’re much prettier than scrambles, but scrambles are perfectly fine.


Tasty Kitchen Blog: Paleo-friendly Cauliflower Fried Rice. Guest post by Natalie Perry of Perry's Plate, recipe submitted by TK member Dani of Expat Cucina.

By now the cauliflower should be finished, so go ahead and drop in the tomato and green onions …


Tasty Kitchen Blog: Paleo-friendly Cauliflower Fried Rice. Guest post by Natalie Perry of Perry's Plate, recipe submitted by TK member Dani of Expat Cucina.

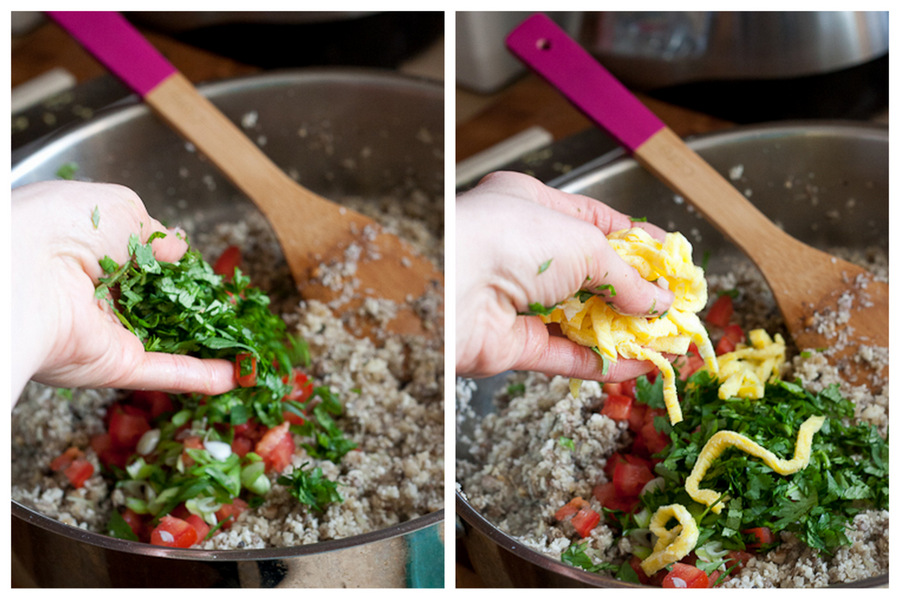
And the cilantro and eggs.


Tasty Kitchen Blog: Paleo-friendly Cauliflower Fried Rice. Guest post by Natalie Perry of Perry's Plate, recipe submitted by TK member Dani of Expat Cucina.

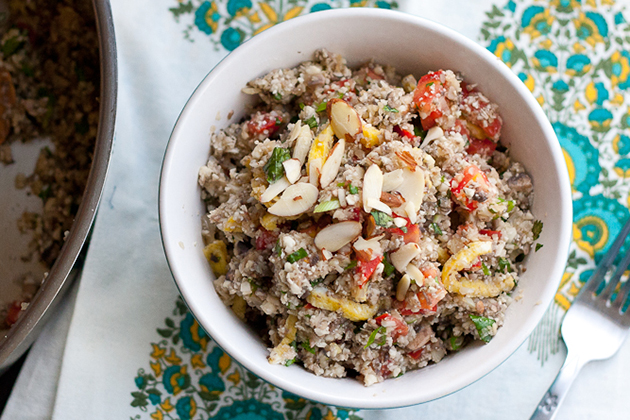
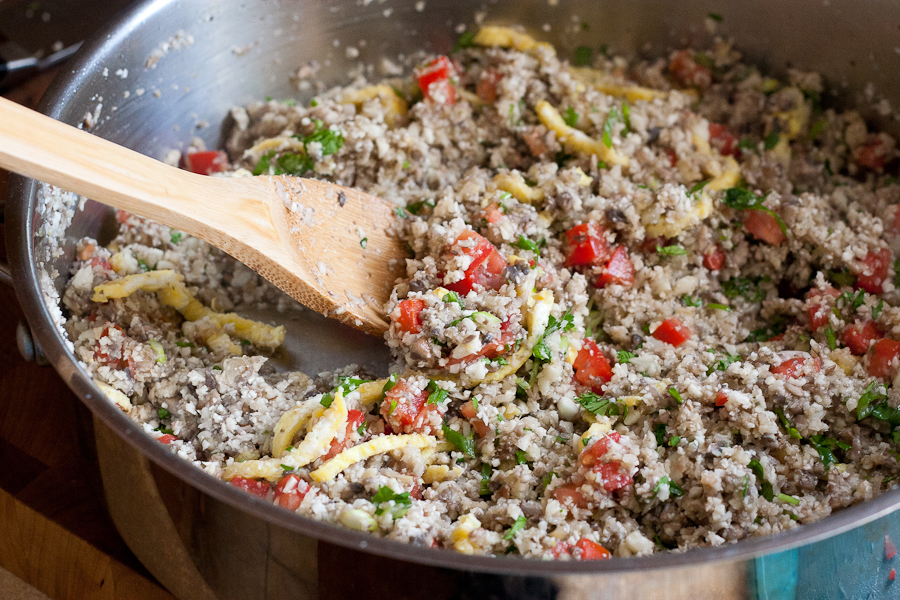
Stir everything gently, and done!

If you want to add more protein, you could stir in some pre-cooked shrimp, chicken, or steak. 


Tasty Kitchen Blog: Paleo-friendly Cauliflower Fried Rice. Guest post by Natalie Perry of Perry's Plate, recipe submitted by TK member Dani of Expat Cucina.

Like I mentioned earlier, you could have dinner on the table in 15 minutes if you prep everything beforehand. I love quick meals like this! 

Thank you, Dani! Be sure to check out Dani’s TK Recipe Box and her blog Expat Cucina for more dinner inspiration!

Recipe notes:
1. I used brown mushrooms, but if that “dirty rice” look bothers you, just use white mushrooms.
2. I added two cloves of garlic, an inch of ginger, and one green onion to boost the flavor of the dish and substituted cilantro for the basil and mint out of personal preference. 
3. I doubled the recipe, but left the mushroom quantity the same.


Printable Recipe

Paleo-friendly Fried Rice (With Cauliflower)

See post on ExpatCucina’s site!
0.00 Mitt(s) 0 Rating(s)0 votes, average: 0.00 out of 50 votes, average: 0.00 out of 50 votes, average: 0.00 out of 50 votes, average: 0.00 out of 50 votes, average: 0.00 out of 5

Prep Time:

Cook Time:

Difficulty: Easy

Servings: 1

1
x

Print Options

Page size Letter 3x5 4x6
Text Size Small Medium Large
Content Include description
Include prep time, etc.
Show image

Description

If you are a paleo-diet person or just on a low-carb diet, this recipe is perfect for you!

Ingredients

  • ⅔ pounds Cauliflower
  • 7 ounces, weight White Mushrooms
  • 2 Tablespoons Chopped Onion
  • ¼ cups Chopped Tomatoes
  • 1 whole Egg
  • 1 whole Egg White
  • 1 teaspoon Coconut Oil
  • 1 dash Soy Sauce
  • 1 pinch Salt And Pepper
  • 1 Tablespoon Chopped Basil And Mint

Preparation Instructions

Wash the cauliflower and place it into your food processor. Pulse it until pieces are the size of rice.

Wash and slice up the mushrooms, chop up onion and tomatoes.

Beat the egg and egg white with a pinch of salt and cook on a hot nonstick skillet (like an omelet). Remove and slice it up.

In the same skillet, heat p the coconut oil. Add the chopped onion and cook until soft. Add the mushrooms and stir around until browned. Next, add the minced cauliflower, a splash of soy sauce and salt and pepper. Cover with a lid and cook for about 5 minutes.

Remove skillet from heat and add the tomatoes. Stir around. Chop up some fresh mint and basil and add it to the pot together with the eggs. Stir everything together and serve immediately. You can garnish the dish with more chopped herbs if desired.


_______________________________________

Be sure to check out Natalie’s own beautiful food blog, Perrys’ Plate, where you can see her growing collection of lovely recipes. There’s always something new to see there. Go visit now!


Profile photo of EatLiveRun

Tiramisu Sandwich Cookies

Posted by in Baking

Tiramisu is our favorite dessert to order out at a restaurant. Whenever we see it on a menu, we always have to get it! No self-control there. I rarely make it at home because it’s pretty time consuming and, let’s be honest, a little complicated. That being said, when I saw these mouth-watering Tiramisu Sandwich […]

Profile photo of Erika (TK)

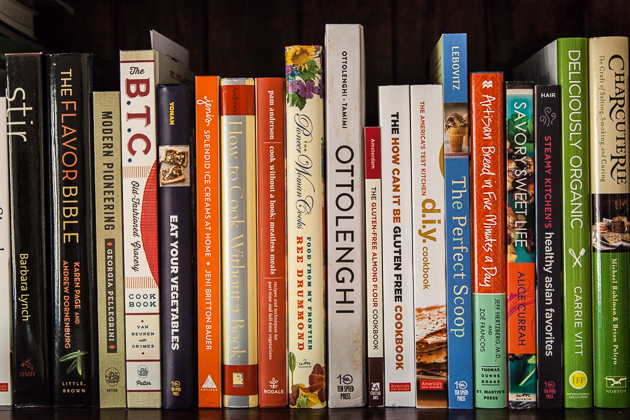
Let’s Talk Cookbooks

Posted by in Kitchen Talk

The other day, I decided to tackle the task of organizing my bookshelf. Growing up, my shelves used to be filled with all kinds of books on philosophy, theology, military intelligence groups, and every single one of Gabriel Garcia Marquez’s novels. Strange child, I was. Fast forward a few decades and now my shelves contain […]

Profile photo of halfbakedharvest

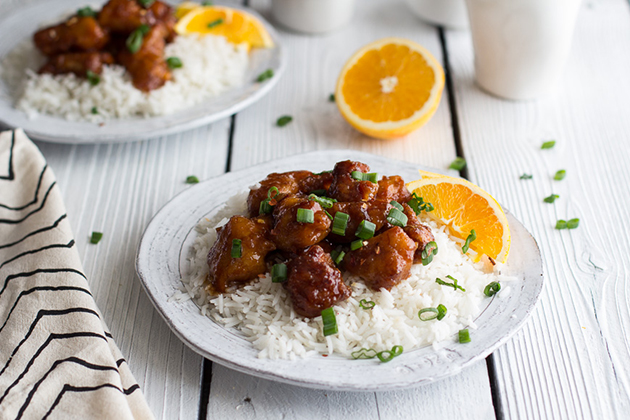
Chinese Orange Chicken

Posted by in Step-by-Step Recipes

Some of my favorite foods to re-create at home are the ones you would normally order from your favorite carryout restaurants. Some people call it fake-out take-out but I just like to think of it as making good food healthier, quicker and tastier at home. This Chinese Orange Chicken is…

Profile photo of Megan {Country Cleaver}

Baked Blueberry Pecan French Toast

Posted by in Baking

Baked French toast, or bread pudding, always reminds me of my mom. She loves it. And so do I! It’s comforting, warm, and best of all, full of carbs. When I found Mel’s recipe for Baked…