The Pioneer Woman Tasty Kitchen
Profile photo of ThreeManyCooks

Thai Honey Peanut Chicken

Posted by in Step-by-Step Recipes

Tasty Kitchen Blog: Thai Honey Peanut Chicken. Guest post by Maggy Keet of Three Many Cooks, recipe submitted by TK member spygirl.

 
Getting dinner on the table can be a royal struggle. Sometimes it’s exhaustion and an empty fridge, other times it’s a lack of inspiration or time. In any event, one hand starts gravitating towards the phone and the other starts reaching for the take-out menu drawer. Then come the pangs of guilt. It’s expensive. Not as healthy. I should really make my husband a home cooked meal. He’s worth it. So am I.

Beaten by my conscience, I open my fridge and stare at the contents hoping a dinner idea will jump out at me. Languishing vegetables, milk, pickles, chocolate, condiments and a Tupperware filled with long-forgotten leftovers. Not promising. When that fails, I close the fridge and open the freezer hoping I’ll find dinner there. Ice cubes, peas, ice cream, unidentifiable thing in a Ziploc bag, chicken breasts. I nearly close the freezer, but stop myself: “Chicken breasts. OK, that’s a start.”

But a chicken breast is a blank canvas, so all home cooks need a few good chicken breast recipes in their arsenal. That’s why this Tasty Kitchen submission by spygirl jumped out at me. I’m always looking for a weeknight dinner that starts with chicken breasts, and Thai Honey Peanut Chicken sounded mighty good.


Tasty Kitchen Blog: Thai Honey Peanut Chicken. Guest post by Maggy Keet of Three Many Cooks, recipe submitted by TK member spygirl.

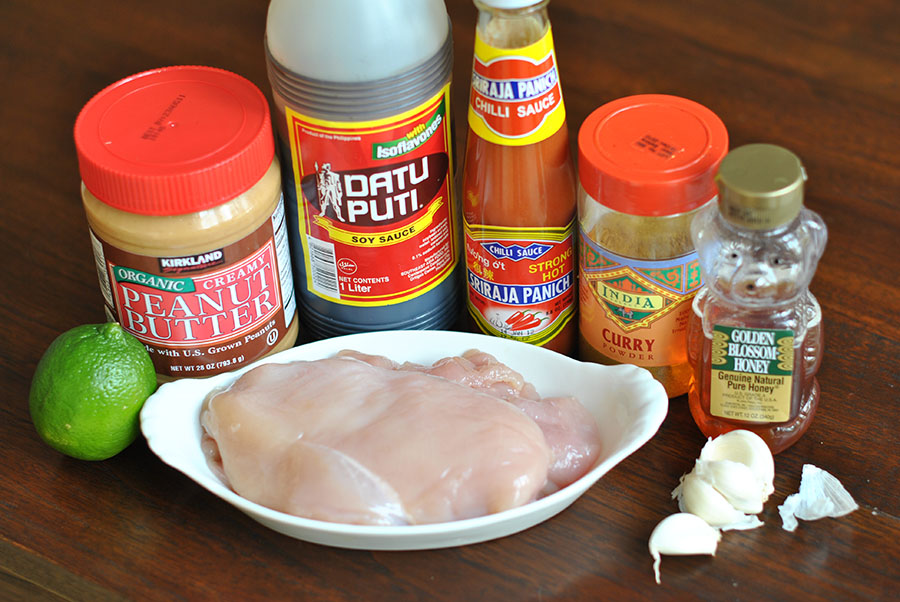
This recipe was particularly attractive not only because Thai food is my absolute favorite, but also because I had everything else for the recipe in my pantry or fridge.


Tasty Kitchen Blog: Thai Honey Peanut Chicken. Guest post by Maggy Keet of Three Many Cooks, recipe submitted by TK member spygirl.

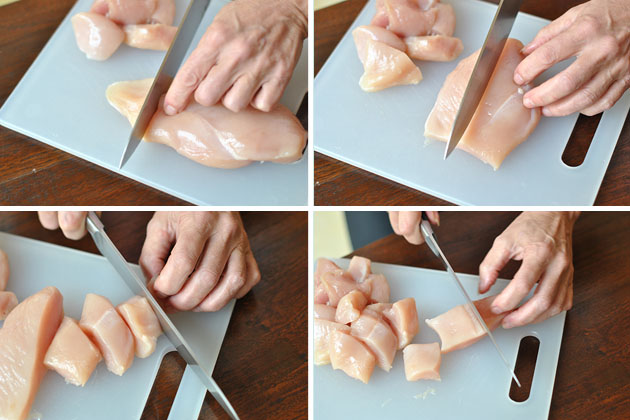
First cut your chicken into pieces. Here’s a neat little trick: Cut off the tip of the chicken breast, then cut the breast down the middle, making it easier to cut even, square pieces.


Tasty Kitchen Blog: Thai Honey Peanut Chicken. Guest post by Maggy Keet of Three Many Cooks, recipe submitted by TK member spygirl.

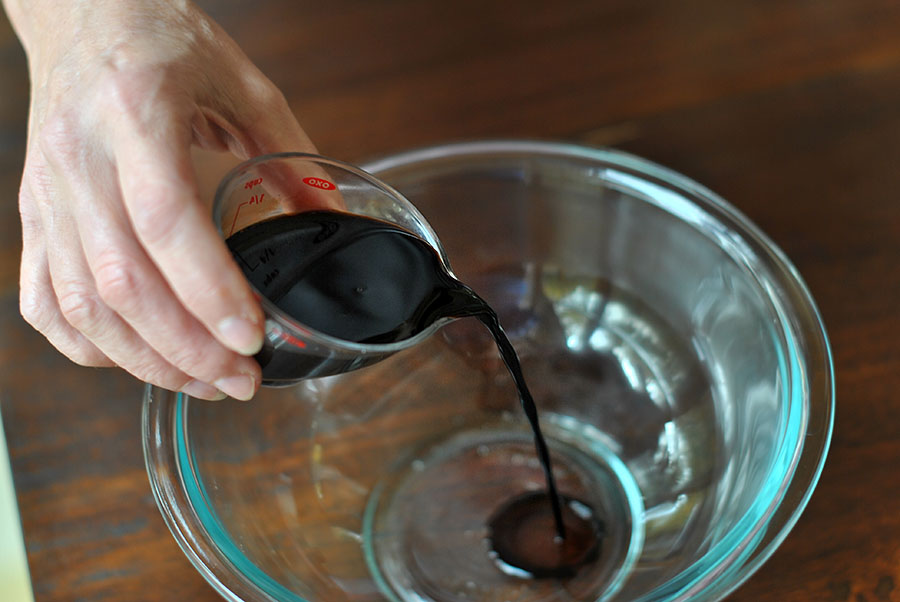
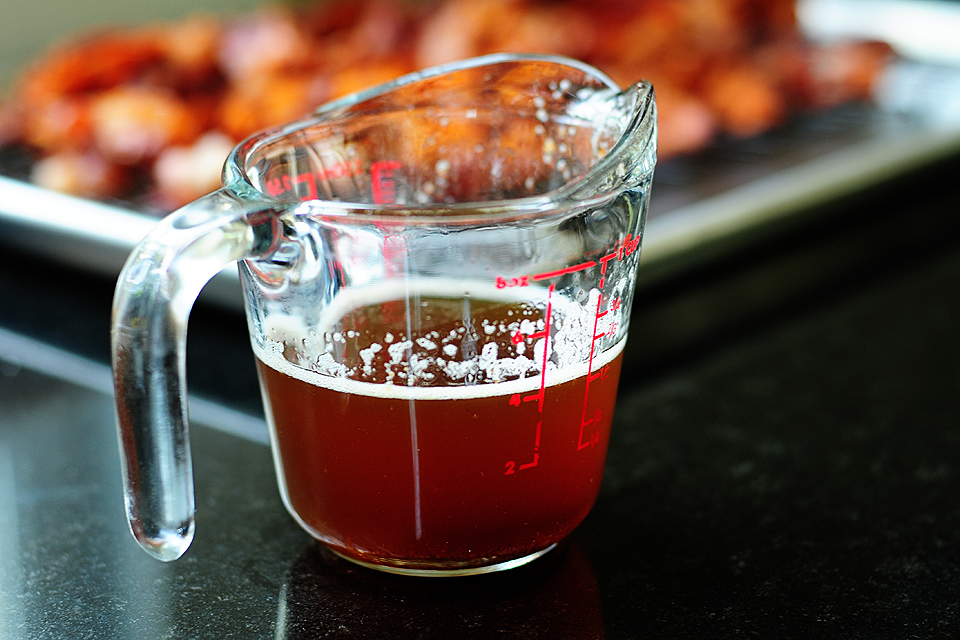
In a medium bowl add the soy sauce. This is Filipino soy sauce, which I think is superior to all other soy sauces, thanks to a friend of mine. She’s got me hooked. But all soy sauces will work just fine.


Tasty Kitchen Blog: Thai Honey Peanut Chicken. Guest post by Maggy Keet of Three Many Cooks, recipe submitted by TK member spygirl.

Then add the honey. Spray your measuring cup or spoon with vegetable cooking spray before you squeeze in the honey and it will slide right out instead of sticking to the cup.


Tasty Kitchen Blog: Thai Honey Peanut Chicken. Guest post by Maggy Keet of Three Many Cooks, recipe submitted by TK member spygirl.

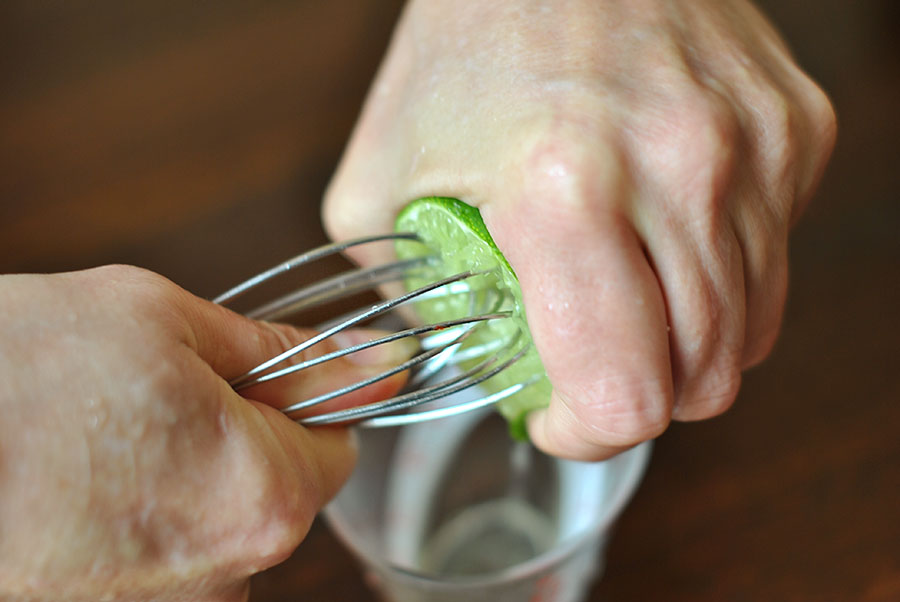
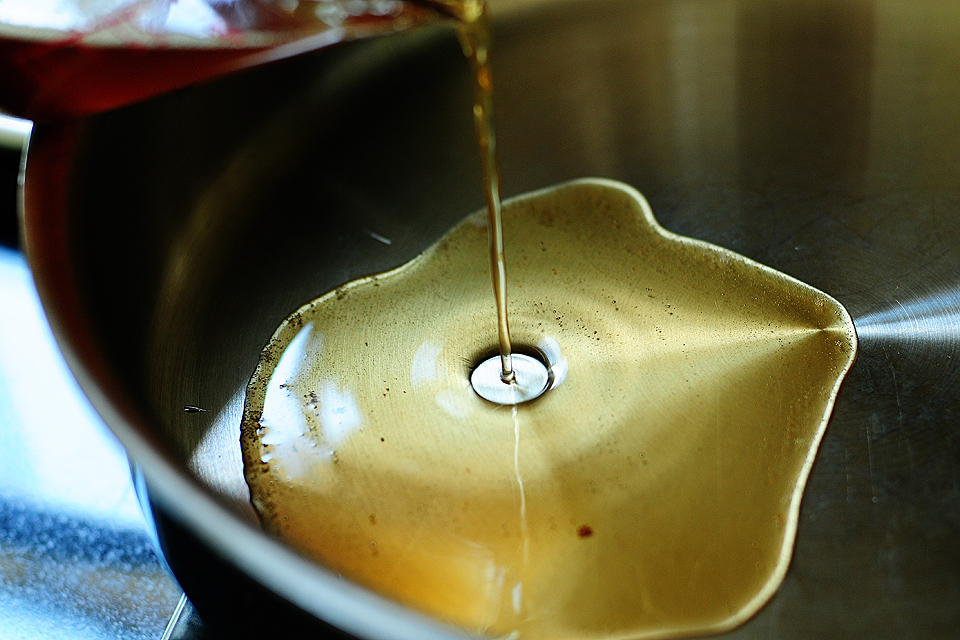
Add the lime juice next. If you don’t have a juicer, use a whisk to get the juice out of your lime.


Tasty Kitchen Blog: Thai Honey Peanut Chicken. Guest post by Maggy Keet of Three Many Cooks, recipe submitted by TK member spygirl.

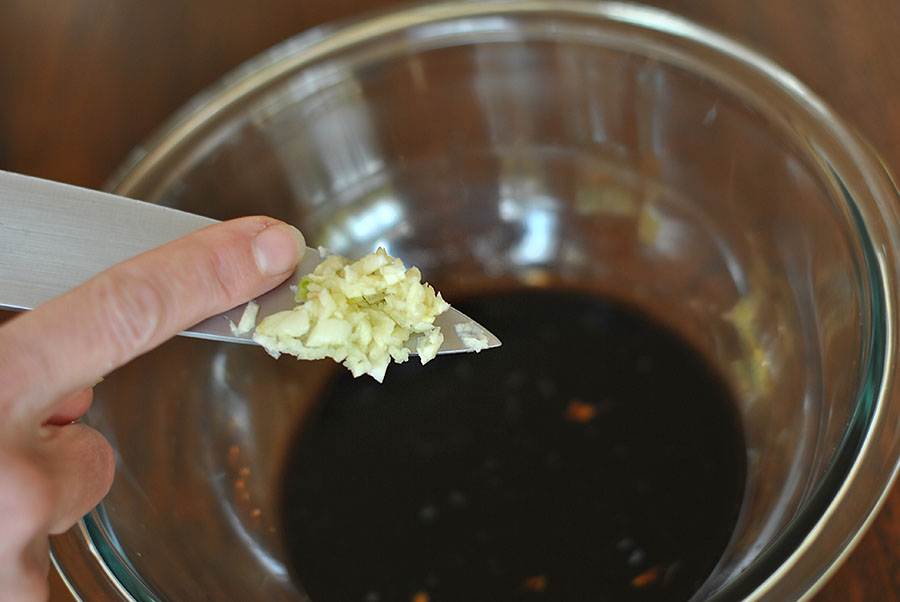
Then add the minced garlic. (Here is a quick tutorial on how to mince garlic like my Mom does. You want to learn. It’s like magic).


Tasty Kitchen Blog: Thai Honey Peanut Chicken. Guest post by Maggy Keet of Three Many Cooks, recipe submitted by TK member spygirl.

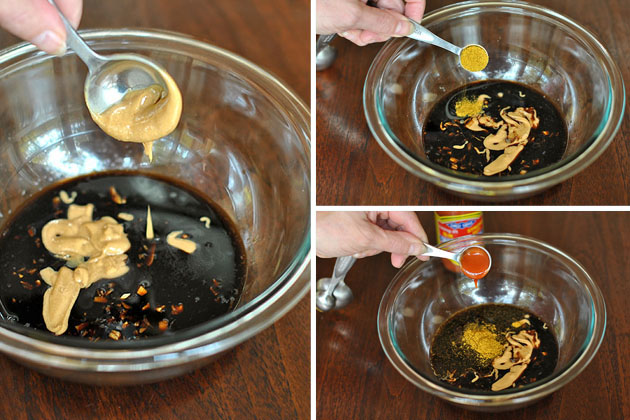
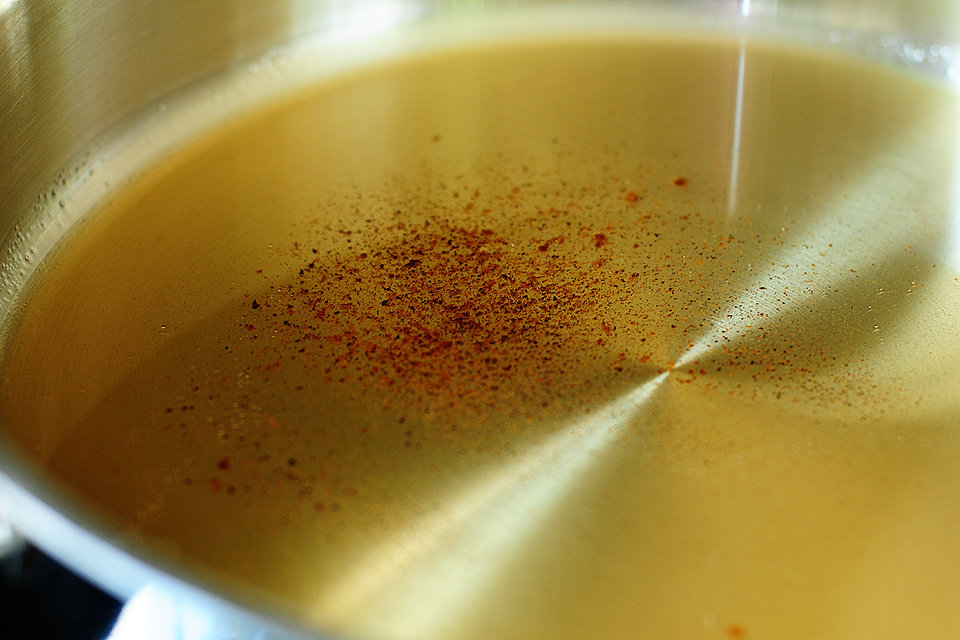
Add the peanut butter and curry powder, then finally the Sriracha. The latter is optional, but I promise it doesn’t make the dish too spicy.


Tasty Kitchen Blog: Thai Honey Peanut Chicken. Guest post by Maggy Keet of Three Many Cooks, recipe submitted by TK member spygirl.

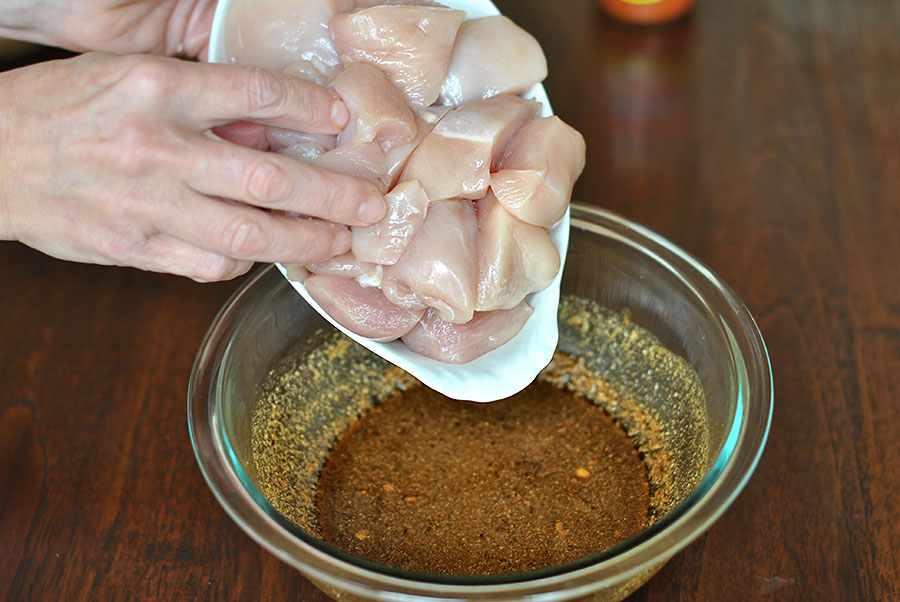
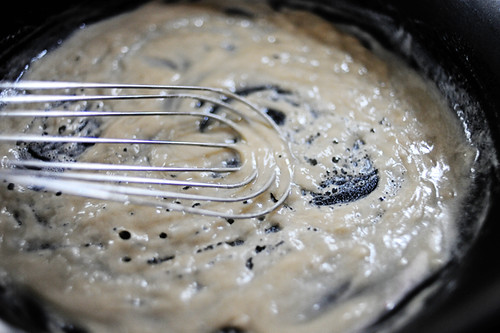
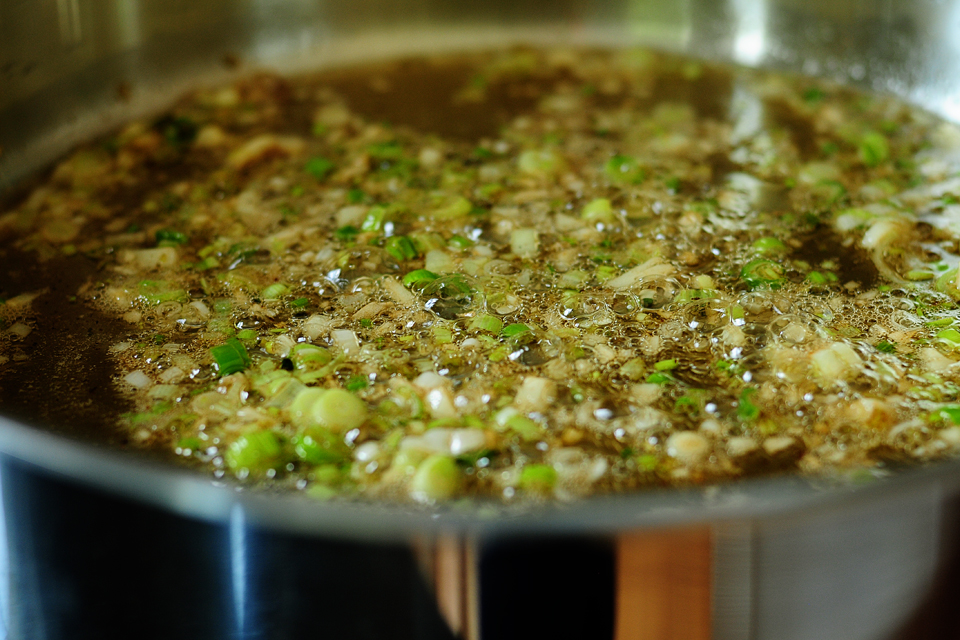
Whisk the ingredients together. Add the chicken pieces and then marinate for 2-3 hours.


Tasty Kitchen Blog: Thai Honey Peanut Chicken. Guest post by Maggy Keet of Three Many Cooks, recipe submitted by TK member spygirl.

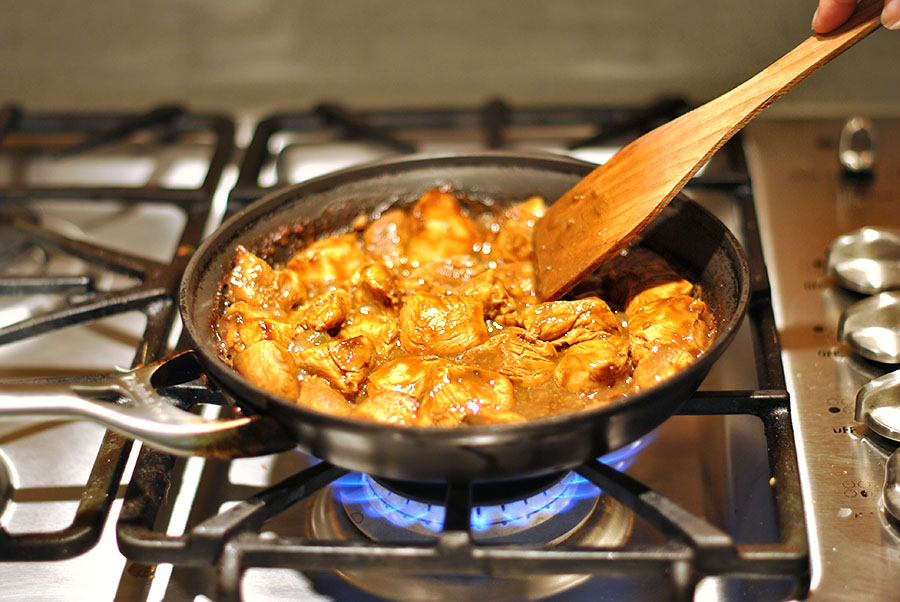
Heat a large skillet over medium-high heat, add the chicken (along with all that good sauce) for 7-8 minutes or until the chicken is done.


Tasty Kitchen Blog: Thai Honey Peanut Chicken. Guest post by Maggy Keet of Three Many Cooks, recipe submitted by TK member spygirl.

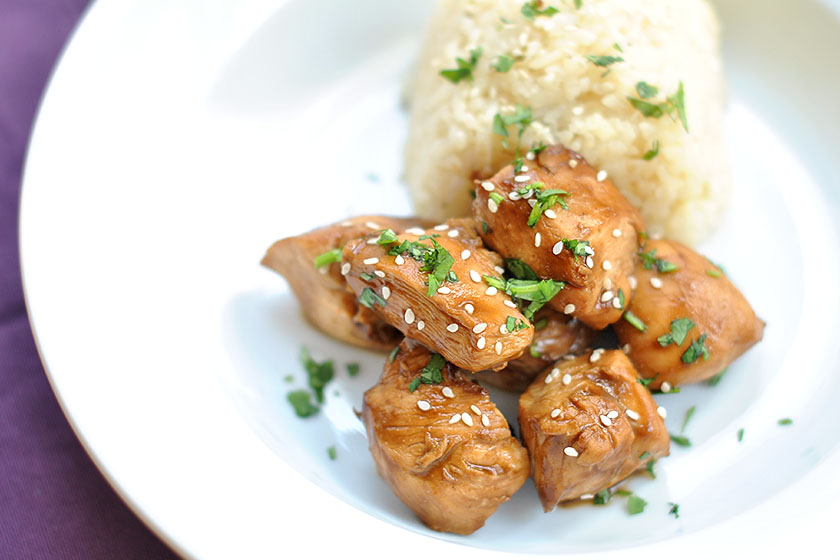
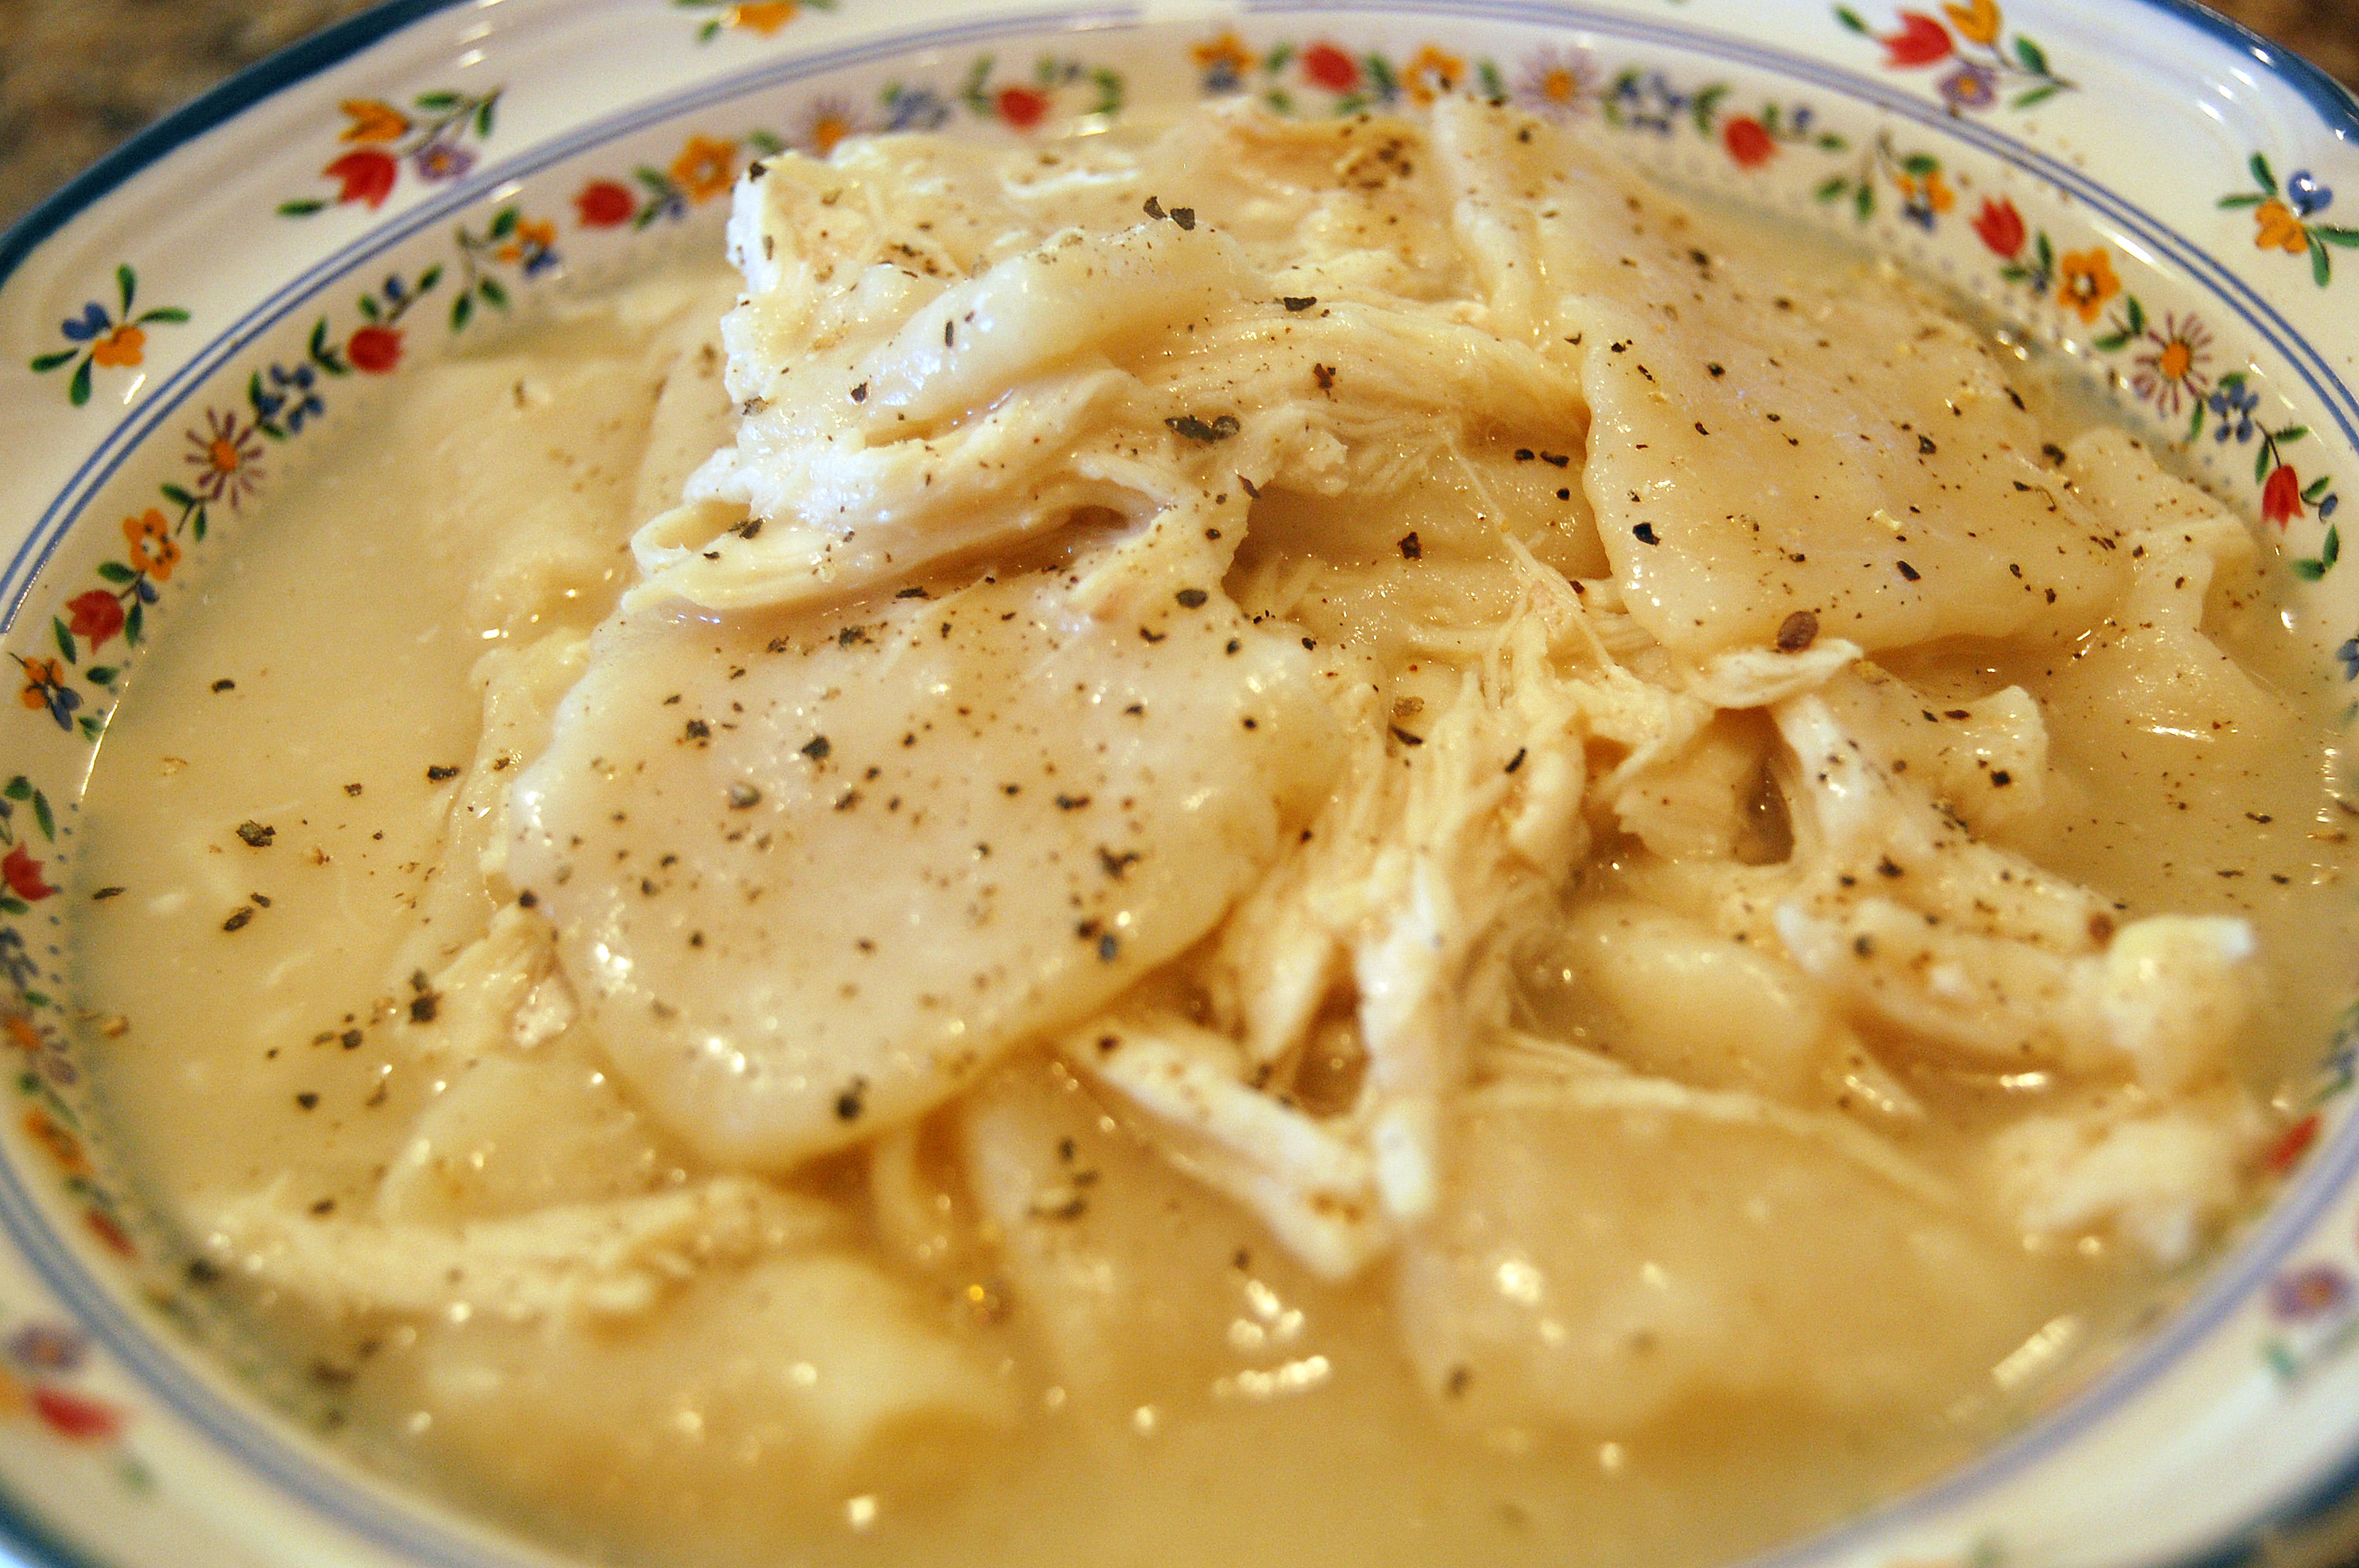
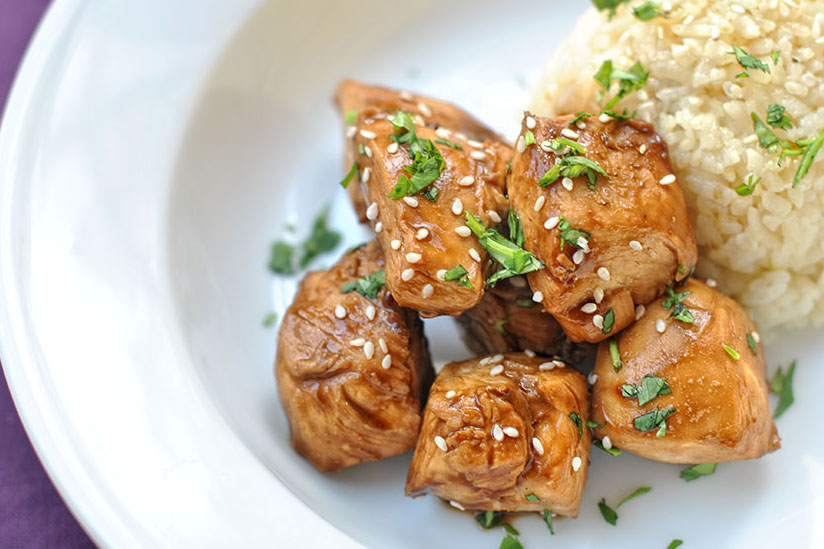
Serve with rice and top with sesame seeds. We added chopped cilantro too because we love it and it adds some color to the plate.

I made this dish in about 30 minutes, and it didn’t disappoint. As long as I keep a spare chicken breast or two in my freezer, I know I’ll be pulling this recipe out whenever that I find my hands reaching for the phone and the take-out menu drawer.

Thank you spygirl for this lovely dish!


Printable Recipe

Thai Honey Peanut Chicken

4.27 Mitt(s) 33 Rating(s)33 votes, average: 4.27 out of 533 votes, average: 4.27 out of 533 votes, average: 4.27 out of 533 votes, average: 4.27 out of 533 votes, average: 4.27 out of 5

Prep Time:

Cook Time:

Difficulty: Easy

Servings: 3

3
x

Print Options

Page size Letter 3x5 4x6
Text Size Small Medium Large
Content Include description
Include prep time, etc.
Show image

Description

Quick, sweet, optionally spicy stir fry—scales up and down, accommodates veggies or tofu, and best with homemade peanut butter.

Ingredients

  • 1 pound Chicken, In Chunks
  • ¼ cups Soy Sauce
  • 2 Tablespoons Honey
  • 1 Tablespoon Lime Juice
  • 1 teaspoon Minced Garlic (approximately 1 Large Clove)
  • 1 Tablespoon Natural Peanut Butter (heaping Tablespoon Even Better)
  • ½ teaspoons Curry Powder
  • 1 teaspoon Sriracha (optional)

Preparation Instructions

Mix ingredients and marinate chicken for 2-3 hours.

Cook chicken in the sauce over medium-high heat for 7-8 minutes or until chicken is done. Reduce heat to medium-low and add precooked veggies if desired. Serve topped with sesame seeds.

To thicken sauce if needed: reduce heat to medium-low and add a cornstarch slurry (1 teaspoon cornstarch in 1 tablespoon water).

Substitutions: replace chicken with tofu; replace peanut butter with tahini or another nut butter; if using regular peanut butter (i.e. Skippy) instead of natural peanut butter, reduce honey by 1 tablespoon.


_______________________________________

Three Many Cooks is the always-entertaining food blog of Pam Anderson and her two daughters, Maggy and Sharon. Pam is a well-known and much-respected food writer and author, Maggy is a “hippy adventurer meets 1950s housewife,” and Sharon refers to herself as a recovering food snob learning to survive on a graduate student’s budget. Theirs is a strong relationship both inside and outside the kitchen, and it shows in the food they create and the stories they tell.


Profile photo of EatLiveRun

Homemade Chicken and Dumplings

Posted by in Step-by-Step Recipes

Tasty Kitchen Blog: Homemade Chicken and Dumplings. Guest post by Jenna Weber of Eat, Live, Run; recipe submitted by TK member Tiffany of Eat at Home.

 
Homemade chicken and dumplings. Or, chicken n’ dumplins’ rather, as we like to say in the South. I had been eagerly searching for a recipe like the kind I enjoyed so much growing up and this one, from TIffany (TK member Eat at Home), nailed it.

There are many different versions of chicken and dumplings and this is definitely the one that reminds me of home. For this version, the dumplings are rolled out thin and sliced, rather than dropped biscuit-style into the bubbling chicken stock. The result is a creamy, thick chicken stew that is just perfect for chilly nights! Try it and be converted to a dumplin’ lover forever.


Tasty Kitchen Blog: Homemade Chicken and Dumplings. Guest post by Jenna Weber of Eat, Live, Run; recipe submitted by TK member Tiffany of Eat at Home.

Another reason I love this dish so much? Look how simple it is! You don’t need anything fancy—just cooked chicken, flour, milk, butter, salt, baking powder and broth. The recipe said to use cooked chicken and I had just finished roasting one, so it turned out perfect! I highly recommend using a roast chicken (either roasted at home or rotisserie for this!).


Tasty Kitchen Blog: Homemade Chicken and Dumplings. Guest post by Jenna Weber of Eat, Live, Run; recipe submitted by TK member Tiffany of Eat at Home.

To make the dumplings, in a large bowl measure out 2 cups of flour …


Tasty Kitchen Blog: Homemade Chicken and Dumplings. Guest post by Jenna Weber of Eat, Live, Run; recipe submitted by TK member Tiffany of Eat at Home.

A half teaspoon of baking powder …


Tasty Kitchen Blog: Homemade Chicken and Dumplings. Guest post by Jenna Weber of Eat, Live, Run; recipe submitted by TK member Tiffany of Eat at Home.


And some butter! Cut this in with your fingers and mix until the dough looks crumbly, sort of like making pie dough!


Tasty Kitchen Blog: Homemade Chicken and Dumplings. Guest post by Jenna Weber of Eat, Live, Run; recipe submitted by TK member Tiffany of Eat at Home.

Then add a little less than a cup of milk and a pinch of salt.


Tasty Kitchen Blog: Homemade Chicken and Dumplings. Guest post by Jenna Weber of Eat, Live, Run; recipe submitted by TK member Tiffany of Eat at Home.

Mix the dough together and then roll out on a heavily floured surface. You definitely don’t want to go easy on the flour—using a lot of flour here is what will make the broth thicken later!


Tasty Kitchen Blog: Homemade Chicken and Dumplings. Guest post by Jenna Weber of Eat, Live, Run; recipe submitted by TK member Tiffany of Eat at Home.

Once you have the dough rolled out, make long slices either using a pizza cutter, a pastry cutter or just a plain ol’ knife.


Tasty Kitchen Blog: Homemade Chicken and Dumplings. Guest post by Jenna Weber of Eat, Live, Run; recipe submitted by TK member Tiffany of Eat at Home.

Then make criss-crosses so you have lots of cute little dumpling squares. Remember to keep everything covered in flour!


Tasty Kitchen Blog: Homemade Chicken and Dumplings. Guest post by Jenna Weber of Eat, Live, Run; recipe submitted by TK member Tiffany of Eat at Home.

Bring your broth or stock to a boil and drop the dumplings in, along with any extra flour on the table. Gently stir but be careful not to mash them.


Tasty Kitchen Blog: Homemade Chicken and Dumplings. Guest post by Jenna Weber of Eat, Live, Run; recipe submitted by TK member Tiffany of Eat at Home.

Finally, add your cooked chicken to the pot and serve. So, so, so easy! When I served this to my boyfriend for dinner, I slyly asked him how long he thought I spent making it. He guessed four hours (four hours, people!) and couldn’t believe it when I told him it took me only 30 minutes. Amazing.

You’ll want to make this recipe, asap. Thank you so much Tiffany for such a nostalgic treat! Be sure to check out her blog Eat at Home for more of her delicious recipes.


Printable Recipe

Homemade Chicken and Dumplings

See post on Eat at Home’s site!
4.95 Mitt(s) 44 Rating(s)44 votes, average: 4.95 out of 544 votes, average: 4.95 out of 544 votes, average: 4.95 out of 544 votes, average: 4.95 out of 544 votes, average: 4.95 out of 5

Prep Time:

Cook Time:

Difficulty: Easy

Servings: 8

8
x

Print Options

Page size Letter 3x5 4x6
Text Size Small Medium Large
Content Include description
Include prep time, etc.
Show image

Description

A bowl of chicken and dumplings. A glass of sweet tea. It’s a meal any Kentuckian would be proud to fix and danged happy to sit down to. And it’s not hard to make. Come on, I’ll show you how.

Ingredients

  • 2 cups Flour
  • ½ teaspoons Baking Powder
  • 1 pinch Salt
  • 2 Tablespoons Butter
  • 1 cup Milk, A Bit Less Than A Full Cup
  • 2 quarts Chicken Broth
  • 3 cups Cooked Chicken

Preparation Instructions

In a bowl, combine the flour, baking powder and salt. Cut the butter into the dry ingredients with a fork or pastry blender. Stir in the milk, mixing with a fork until the dough forms a ball.

Heavily flour a work surface. You’ll need a rolling pin and something to cut the dumplings with. I like to use a pizza cutter. I also like to use a small spatula to lift the dumplings off the cutting surface.

Roll the dough out thin with a heavily floured rolling pin. Dip your cutter in flour and cut the dumplings in squares about 2″x2″. It’s okay for them not to be exact. Just eye ball it. Some will be bigger, some smaller, some shaped funny.

Use the floured spatula to put them on a heavily floured plate. Just keep flouring between the layers of dumplings.

To cook them, bring the broth to a boil. Drop the dumplings in one at a time, stirring while you add them. The extra flour on them will help thicken the broth. Cook them for about 15-20 minutes or until they not doughy tasting. Add the cooked chicken to the pot and you’re done!

For more pictures and instructions, see the related link above!


_______________________________________

Jenna is a food writer who has worked as a pastry chef and bread baker. Her blog Eat, Live, Run has great recipes, travel stories, and the perfect slogan: “Celebrating life, one crumb at a time.”


Profile photo of Ree | The Pioneer Woman

Mac and Cheese…and Panko

Posted by in Step-by-Step Recipes

I continue to love, adore, and revere panko.

Panko are Japanese breadcrumbs, and are lighter and flakier than regular breadcrumbs. They absorb less oil, too, so after baking or frying they still have an incredibly crunchy texture.

Here’s what I really love: topping casseroles with panko breadcrumbs. They’re the modern day crushed potato chips or corn flakes. I make a zucchini and tomato casserole that’s absolutely transformed by the crunch of panko. I once made an Eggplant Parmesan with panko that pretty much changed my entire life. Just check out this list of recipes on Tasty Kitchen that use panko break crumbs…its magic can’t be denied!

Panko Recipes on Tasty Kitchen

Baked pastas are probably my favorite things to top with Panko. As perfectly delicious as they are on their own, the little crunch (and subtle flavor) that panko crumbs bring is such a treat. Try it on your favorite baked pasta dish; you’ll see what I mean!

Here’s a good, basic Mac & Cheese dish that’s perfect for your Labor Day potluck. Topped with beautiful tomatoes and panko crumbs, it’s pretty, crunchy…and will make you swoon.

 
TPW_3106
Start by grating a pound of cheese. I’m using cheddar and Fontina, but you can use any combination of cheese you’d like. (You can even throw in some Gorgonzola or goat cheese. Yum.)


TPW_3107
In a skillet melt 1/2 stick of butter over medium-low heat.


TPW_3108
Sprinkle 1/4 cup of flour over the melted butter.


TPW_3111
Whisk the flour into the butter until it’s totally combined.


TPW_3113
Next, pour in 2 1/2 cups of milk.


TPW_3115
Measure a couple of teaspoons of mustard powder.


TPW_3117
Dump it in, and whisk, cooking the mixture for 2 to 3 minutes or until it starts to deepen in color. Add 1 teaspoon of salt and plenty of black pepper.


TPW_3118
The mixture will be thick enough to coat a spoon.


TPW_3120
Throw in the cheese!


TPW_3122
Stir it together until the cheese melts.


TPW_3124
Throw in the cooked pasta and stir it together.


TPW_3125
Now rub the bottom of a baking dish with butter.


TPW_3128
Pour the pasta in the dish…


TPW_3129
And smooth it out to even the surface.


TPW_9010
Now grab the package of panko crumbs…


TPW_3133
And coat the surface generously! I’m not talking a tablespoon here, folks. I’m talking a bunch. You want to taste that crunch!


TPW_3130
Now, slice up some Roma tomatoes. Not too thin—you’ll need them to hold together during the baking process.


TPW_3135
Arrange them neatly over the surface of the dish.


TPW_3141
Pretty! Now sprinkle the tomatoes lightly with salt and pepper.


TPW_3144
Now add another layer of panko crumbs. Trust me. You want the tomatoes to be crunchy, too!

Now bake it at 350 degrees for 20 minutes. At the end, turn on the broiler and let it brown the top a little more. Watch it the whole time, though! You don’t want to burn this beauty.

 
TPW_3146
And it is a beauty.


TPW_3152
Look at the gorgeous topping!


TPW_3162
What I love about this, too, is that the tomatoes make it easy to divide portions. Every portion gets a tomato!

I love it when the world makes sense.


TPW_3168
And I love this macaroni and cheese.

Throw some panko crumbs onto your next pasta or vegetable casserole. They really change things up.

Enjoy!

Here’s a link to the printable. Make it for Labor Day. Speaking from experience, it’s almost more delicious at room temperature!

Mac and Cheese…and Panko

__________________________________


This is the last in a series of posts featuring Kikkoman panko crumbs (though it will hardly be the last time I use them!) Special thanks to Kikkoman for sponsoring this series.

Profile photo of missamy

Bacon Tomato Capellini

Posted by in Step-by-Step Recipes

Tasty Kitchen Blog: Bacon Tomato Capellini. Guest post by Amy Johnson of She Wears Many Hats, recipe submitted by TK member PlanoSheila (sheilajfoster).

 
As I was perusing the Tasty Kitchen offerings, this Bacon Tomato Capellini recipe jumped out at me. It actually jumped out of the screen, grabbed me by the neck, and forced me to make it. Bacon has that way about it, a mysterious, addicting, intoxicating way that grips you at the core and won’t let go. Plus pasta is involved. Pasta and bacon? What’s not to like?

A big thanks to PlanoSheila for sharing the love on this one. It turned out just like she said it would: “unbelievable.” Magnificent, really. It’s an easy recipe to throw together. Six simple ingredients (salt is optional, and the bacon grease is a by-product of the bacon) are all you’ll need to create a dinner that folks within sniffing distance will be flocking to. So barricade your door, get the bacon, and let’s get to it.


Tasty Kitchen Blog: Bacon Tomato Capellini. Guest post by Amy Johnson of She Wears Many Hats, recipe submitted by TK member PlanoSheila (sheilajfoster).

Here’s what you’ll need: bacon, of course, bacon grease, fresh basil, green onion, garlic, diced tomatoes, salt (optional), and capellini or angel hair pasta.


Tasty Kitchen Blog: Bacon Tomato Capellini. Guest post by Amy Johnson of She Wears Many Hats, recipe submitted by TK member PlanoSheila (sheilajfoster).

Start by chopping the produce. Give the basil a quick rough chop.


Tasty Kitchen Blog: Bacon Tomato Capellini. Guest post by Amy Johnson of She Wears Many Hats, recipe submitted by TK member PlanoSheila (sheilajfoster).

Then the green onion and garlic.


Tasty Kitchen Blog: Bacon Tomato Capellini. Guest post by Amy Johnson of She Wears Many Hats, recipe submitted by TK member PlanoSheila (sheilajfoster).

Next, begin frying the bacon. Not too crispy, though.


Tasty Kitchen Blog: Bacon Tomato Capellini. Guest post by Amy Johnson of She Wears Many Hats, recipe submitted by TK member PlanoSheila (sheilajfoster).

While the bacon is frying, pour the diced tomatoes in a bowl.


Tasty Kitchen Blog: Bacon Tomato Capellini. Guest post by Amy Johnson of She Wears Many Hats, recipe submitted by TK member PlanoSheila (sheilajfoster).

Add the the chopped basil.


Tasty Kitchen Blog: Bacon Tomato Capellini. Guest post by Amy Johnson of She Wears Many Hats, recipe submitted by TK member PlanoSheila (sheilajfoster).

Mix tomato and basil together and set aside to mingle.


Tasty Kitchen Blog: Bacon Tomato Capellini. Guest post by Amy Johnson of She Wears Many Hats, recipe submitted by TK member PlanoSheila (sheilajfoster).

Finish frying the bacon, remove it from the pan and let cool.


Tasty Kitchen Blog: Bacon Tomato Capellini. Guest post by Amy Johnson of She Wears Many Hats, recipe submitted by TK member PlanoSheila (sheilajfoster).

Reserve 1/2 cup of the bacon grease.


Tasty Kitchen Blog: Bacon Tomato Capellini. Guest post by Amy Johnson of She Wears Many Hats, recipe submitted by TK member PlanoSheila (sheilajfoster).

Pour the 1/2 cup of bacon grease in a large sauté pan. If you’d like, you can use the same pan that you fried the bacon in—you don’t even need to clean it!


Tasty Kitchen Blog: Bacon Tomato Capellini. Guest post by Amy Johnson of She Wears Many Hats, recipe submitted by TK member PlanoSheila (sheilajfoster).

Look at all of that bacon goodness, just waiting to make friends with the rest of the bunch. Warm the bacon grease over medium heat.


Tasty Kitchen Blog: Bacon Tomato Capellini. Guest post by Amy Johnson of She Wears Many Hats, recipe submitted by TK member PlanoSheila (sheilajfoster).

When the bacon grease is ready, add the green onion and garlic. Sauté for a few minutes, until just beginning to brown. Be careful to watch closely so you don’t burn the garlic. Burnt garlic will make you sad. And this is happy cooking here on Tasty Kitchen.


Tasty Kitchen Blog: Bacon Tomato Capellini. Guest post by Amy Johnson of She Wears Many Hats, recipe submitted by TK member PlanoSheila (sheilajfoster).

While the onion and garlic are sautéing, crumble the bacon.


Tasty Kitchen Blog: Bacon Tomato Capellini. Guest post by Amy Johnson of She Wears Many Hats, recipe submitted by TK member PlanoSheila (sheilajfoster).

Add all of the crumbled bacon to the pan, except maybe two pieces. Okay, three, but who’s counting?


Tasty Kitchen Blog: Bacon Tomato Capellini. Guest post by Amy Johnson of She Wears Many Hats, recipe submitted by TK member PlanoSheila (sheilajfoster).

Combine well, and sauté the bacon, onions and garlic over low heat for about 10 minutes.


Tasty Kitchen Blog: Bacon Tomato Capellini. Guest post by Amy Johnson of She Wears Many Hats, recipe submitted by TK member PlanoSheila (sheilajfoster).

The temptation. Doesn’t it look like the perfect appetizer? Be strong. Put the spoon down. Keep going.


Tasty Kitchen Blog: Bacon Tomato Capellini. Guest post by Amy Johnson of She Wears Many Hats, recipe submitted by TK member PlanoSheila (sheilajfoster).

The tomato/basil mixture goes in next.


Tasty Kitchen Blog: Bacon Tomato Capellini. Guest post by Amy Johnson of She Wears Many Hats, recipe submitted by TK member PlanoSheila (sheilajfoster).

Combine well, bring to a simmer, cover and cook for about 20 minutes, stirring occasionally.


Tasty Kitchen Blog: Bacon Tomato Capellini. Guest post by Amy Johnson of She Wears Many Hats, recipe submitted by TK member PlanoSheila (sheilajfoster).

It will cook down and thicken a bit.


Tasty Kitchen Blog: Bacon Tomato Capellini. Guest post by Amy Johnson of She Wears Many Hats, recipe submitted by TK member PlanoSheila (sheilajfoster).

Cook the pasta according to packaging directions (don’t forget to salt your pasta water!) and drain.

You’re almost there! Bacon, pasta dreamland awaits! Can you smell it?


Tasty Kitchen Blog: Bacon Tomato Capellini. Guest post by Amy Johnson of She Wears Many Hats, recipe submitted by TK member PlanoSheila (sheilajfoster).

I like to combine the pasta directly in the pan with the sauce, but you can always combine it all together in your favorite large serving dish.


Tasty Kitchen Blog: Bacon Tomato Capellini. Guest post by Amy Johnson of She Wears Many Hats, recipe submitted by TK member PlanoSheila (sheilajfoster).

Gently toss the pasta with the sauce, making sure to coat pasta well. Taste and add salt if needed. I didn’t add any as the bacon seemed to add enough saltiness to the dish.


Tasty Kitchen Blog: Bacon Tomato Capellini. Guest post by Amy Johnson of She Wears Many Hats, recipe submitted by TK member PlanoSheila (sheilajfoster).

Again, thanks Sheila for the recipe. My family wanted to call you to thank you in person. This one is definitely going to be a regular around here. I don’t think I have a choice.


Tasty Kitchen Blog: Bacon Tomato Capellini. Guest post by Amy Johnson of She Wears Many Hats, recipe submitted by TK member PlanoSheila (sheilajfoster).


Printable Recipe

Bacon Tomato Capellini

4.72 Mitt(s) 29 Rating(s)29 votes, average: 4.72 out of 529 votes, average: 4.72 out of 529 votes, average: 4.72 out of 529 votes, average: 4.72 out of 529 votes, average: 4.72 out of 5

Prep Time:

Cook Time:

Difficulty: Intermediate

Servings: 8

8
x

Print Options

Page size Letter 3x5 4x6
Text Size Small Medium Large
Content Include description
Include prep time, etc.
Show image

Description

The flavor of this pasta dish is unbelievable! When I’m having someone for dinner for the first time, this is what I make. My kids have gotten mad at me for making it when they’re not home, and my husband LOVES this dish!

Ingredients

  • 2 packages (16 Oz. Package) Bacon, Naturally Flavored
  • ½ cups Bacon Grease, From The Bacon You're Cooking
  • 2 cans (28 Oz. Cans) Diced Tomatoes, Nothing Added
  • ½ cups Chopped Fresh Basil
  • 2 cloves Fresh Garlic, Minced
  • 1 bunch Chopped Green Onions
  • 2 teaspoons Salt (optional)
  • 1 box (16 Oz. Box) Capellini Or Angel Hair Pasta

Preparation Instructions

Fry bacon in a large frying pan, making sure it’s cooked thoroughly but not too crispy. Drain cooked bacon on paper towels, but don’t throw away the grease in the pan! You want to reserve 1/2 cup bacon grease. Dump the rest of the bacon grease out, then put the skillet back on the stove without cleaning it. Trust me. When the bacon is cool, use your fingers to tear it into small pieces. (Please, don’t ever use store bought bacon bits in this recipe.) Set your cooked, crumbled bacon aside.

Now, open your tomato cans and dump them into a large bowl. Throw in the chopped fresh basil and stir. You want to be able to see the basil, distributed evenly in the tomatoes, so if you have to add more, you can. Set this bowl aside and let the flavors mingle while you do the next step.

Dice your garlic, and chop your green onions. Pour your 1/2 cup of bacon grease back into the skillet and heat it to medium. Throw in and saute your garlic and onions. When they’re getting a nice tan from the color of the bacon grease, add your bacon. On low heat, saute the bacon together with the garlic and onions for around ten minutes. When you start getting high from the smell in your kitchen, pour in the bowl of tomatoes and basil. Stir together really well, bring to a boil and then cover and simmer 20 minutes, stirring occasionally. Taste and add salt if necessary.

Meanwhile, in a large pot, cook your pasta according the directions on the package. Drain noodles and set aside. Right before serving, in a very large bowl, add the bacon/tomato sauce to the noodles and mix well.

This stuff is also pretty amazing reheated the next day. I usually just pop it into the microwave for a minute or two.


_______________________________________

Amy Johnson is a blogger who writes about food, travel, the home (both inside and out), and various observations and random musings about anything and everything. Visit her blog She Wears Many Hats for a dose of deliciousness, practicality, hilarity, or just plain fun. She lives in South Carolina with her husband and two children.


Profile photo of savorysweetlife

Nutella and Banana Wontons

Posted by in Step-by-Step Recipes

Our good friend Alice of Sweet Savory Life is back with another fun recipe, this time from Tasty Kitchen member Miss Mischief. She also patiently shows us how to properly fill, seal and fry wontons, so you can take this idea and run with it! But please listen to Alice and don’t run where there’s […]

Profile photo of Ree | The Pioneer Woman

Lettuce Wraps

Posted by in Step-by-Step Recipes

While Ree’s in NYC, she and I wanted to share this blast from the past, which just happens to be the first Tasty Recipe she posted. Cool, crisp lettuce wrapped around flavorful meat and veggies make a great summertime appetizer or light meal. Enjoy!   I’m excited about the new Tasty Kitchen Blog! Lots of […]

Profile photo of Erica Lea

Homemade Hot Chocolate

Posted by in Step-by-Step Recipes

  This is hot chocolate (or drinking chocolate), not hot cocoa. What’s the difference, you ask? Hot cocoa is made by adding hot water or hot milk to a powdered mix of cocoa, often containing sweeteners, dried milk, and flavoring. Hot chocolate is created by melting chocolate (either from a bar or chips) in milk. […]

Profile photo of Erika (TK)

Looks Delicious! Simple Black Beans and Rice

Posted by in Looks Delicious!

There’s just something so warm and comforting about beans and rice, and done right, you rarely need anything else to complete the meal. This Simple Black Beans and Rice from Bev is one of those “done right” versions. Plus, she uses Jasmine rice, which scores all kinds of extra points in my book. Hungry for […]