The Pioneer Woman Tasty Kitchen
Profile photo of DessertForTwo

Fudgy Black Bean Brownies

Posted by in Baking

Tasty Kitchen Blog: Fudgy Black Bean Brownies. Guest post by Christina of Dessert for Two, recipe submitted by TK member Sarah of Simple and Sweets.

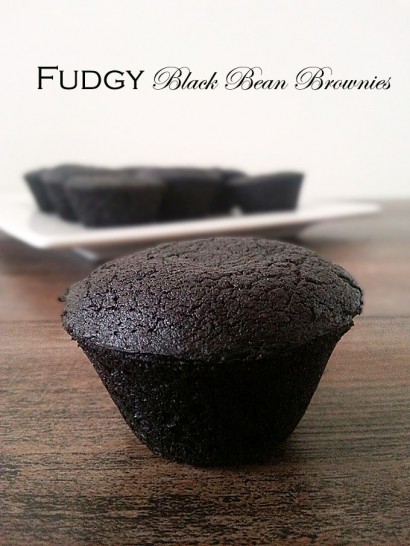
I just now noticed that this is the second recipe I’ve pulled from Sarah’s recipe box to share here on the Tasty Kitchen Blog. It was pure coincidence, but after these Fudgy Black Bean Brownies, I’ll be pulling from her TK recipe box even more. Sarah knows her chocolate desserts, and these brownies are no exception.

These brownies are made in the bowl of the food processor entirely (no cleanup!), and they’re also relatively healthy with a gluten-free option. I didn’t think all of my chocolate dreams were going to come true with this recipe, but they really did. You might be discouraged by the recipe title, but don’t be. If the black beans are pureed very, very well, they are completely indistinguishable. I promise. Cross my heart. I wouldn’t tell a lie here on the Tasty Kitchen Blog!


Tasty Kitchen Blog: Fudgy Black Bean Brownies. Guest post by Christina of Dessert for Two, recipe submitted by TK member Sarah of Simple and Sweets.

So yes, we’re really making brownies with black beans. Embrace it. They’re good for you!


Tasty Kitchen Blog: Fudgy Black Bean Brownies. Guest post by Christina of Dessert for Two, recipe submitted by TK member Sarah of Simple and Sweets.

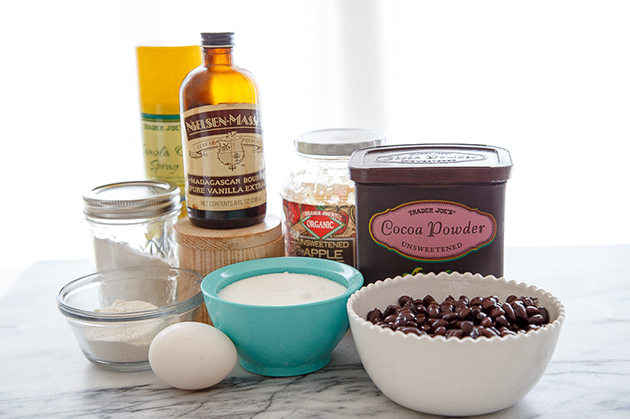
Let’s start with our lineup of ingredients: black beans, cocoa powder, applesauce, sugar, vanilla, salt, almond flour, an egg, baking soda, and cooking spray. I used regular flour in place of the almond flour successfully, but Sarah’s original recipe is gluten-free with almond flour.


Tasty Kitchen Blog: Fudgy Black Bean Brownies. Guest post by Christina of Dessert for Two, recipe submitted by TK member Sarah of Simple and Sweets.

You’re going to need a food processor for this recipe. I’m worried if you just hand-mashed the beans, you would have bean skins in the final product. I don’t think you want that, so use a food processor, my dears.

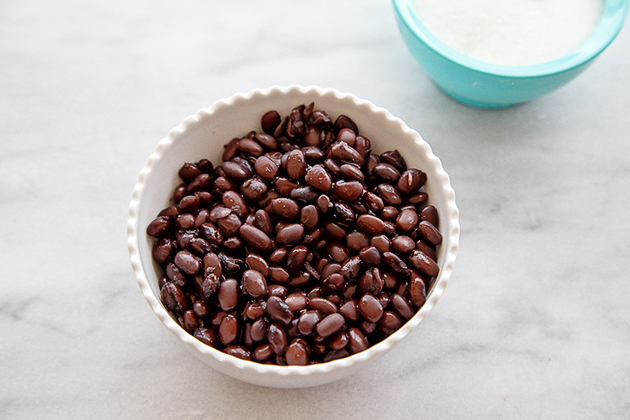
Into the bowl of the food processor goes the beans first. Puree them very, very well. Stop and scrape the sides several times to ensure everything is well blended.

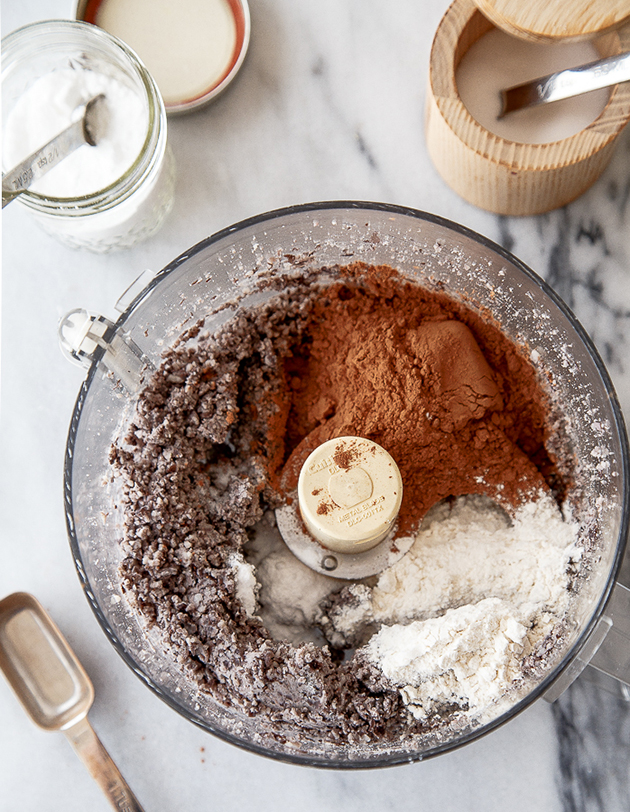
Next, Sarah says to add all the dry ingredients: cocoa powder, baking soda, almond flour, and salt.


Tasty Kitchen Blog: Fudgy Black Bean Brownies. Guest post by Christina of Dessert for Two, recipe submitted by TK member Sarah of Simple and Sweets.

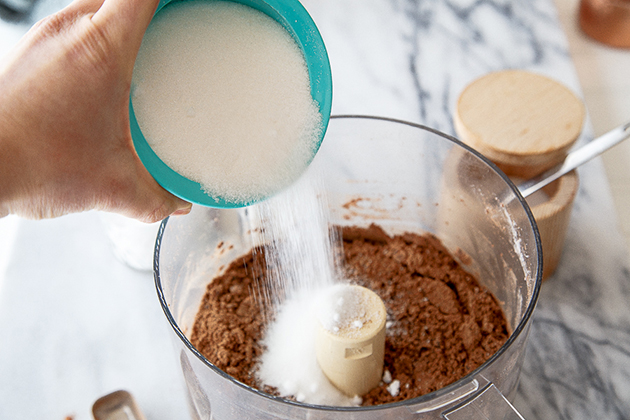
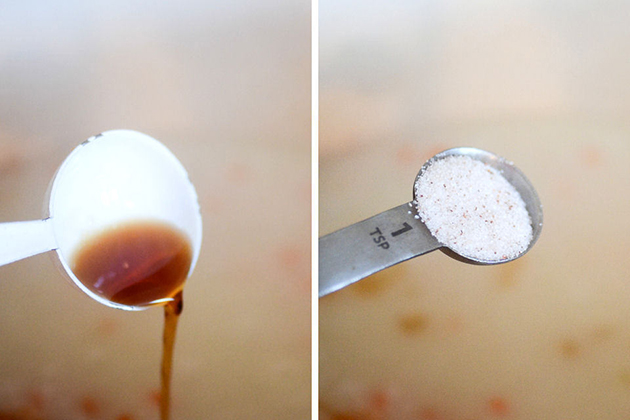
Add the wet ingredients: sugar, applesauce …
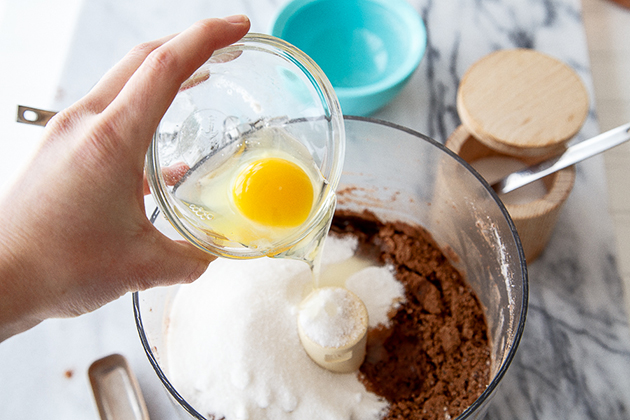


Tasty Kitchen Blog: Fudgy Black Bean Brownies. Guest post by Christina of Dessert for Two, recipe submitted by TK member Sarah of Simple and Sweets.

… egg, and vanilla.


Tasty Kitchen Blog: Fudgy Black Bean Brownies. Guest post by Christina of Dessert for Two, recipe submitted by TK member Sarah of Simple and Sweets.

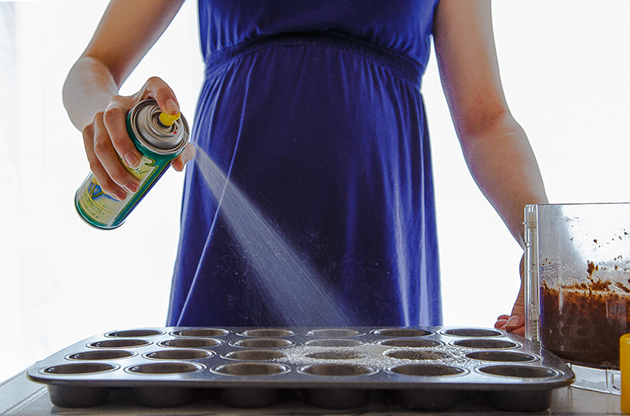
Spray a mini muffin pan with 24 cups with cooking spray very well. This is something originally omitted in the recipe, but when I reached out to Sarah, she definitely recommended it.


Tasty Kitchen Blog: Fudgy Black Bean Brownies. Guest post by Christina of Dessert for Two, recipe submitted by TK member Sarah of Simple and Sweets.

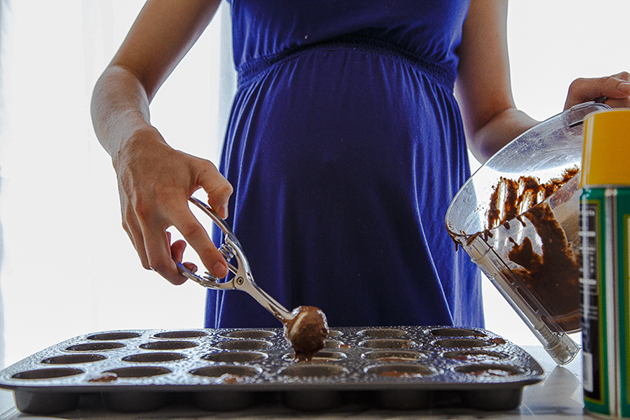
Then, use a cookie scoop to make quick work of the batter. You will get 24 mini fudgy brownies. That’s a lot of brownies for not a lot of work. Sarah makes me one happy pregnant lady!


Tasty Kitchen Blog: Fudgy Black Bean Brownies. Guest post by Christina of Dessert for Two, recipe submitted by TK member Sarah of Simple and Sweets.

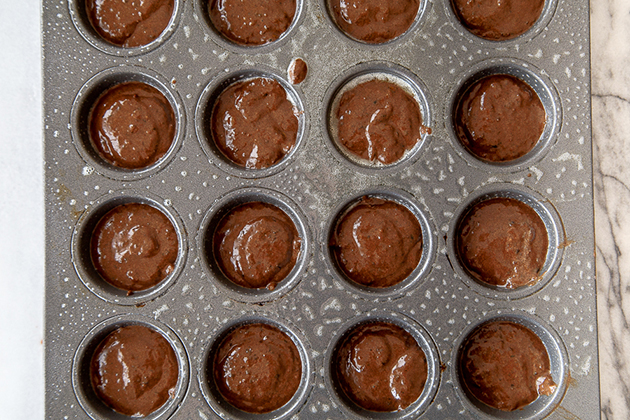
Here’s what it looks like before baking.


Tasty Kitchen Blog: Fudgy Black Bean Brownies. Guest post by Christina of Dessert for Two, recipe submitted by TK member Sarah of Simple and Sweets.

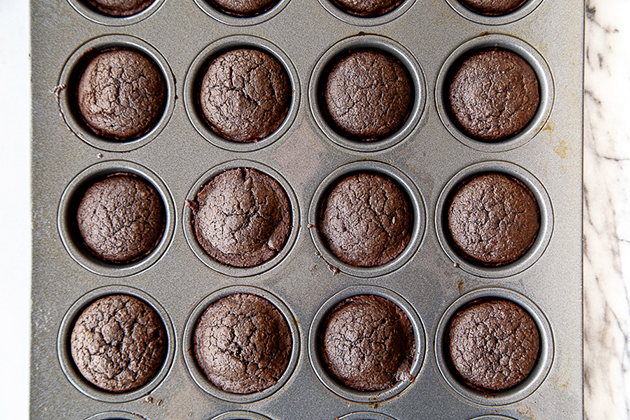
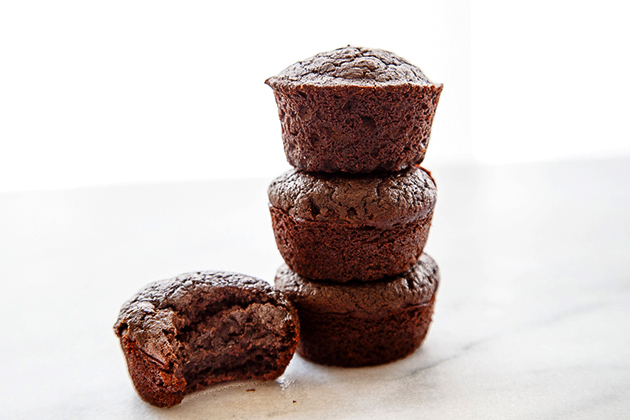
And this is after the brownies have baked.


Tasty Kitchen Blog: Fudgy Black Bean Brownies. Guest post by Christina of Dessert for Two, recipe submitted by TK member Sarah of Simple and Sweets.

Thanks again, Ms. Sarah! Your blog Simple and Sweets continues to inspire me in the kitchen, and keeps me very well fed!


Printable Recipe

Fudgy Black Bean Brownies

See post on Sarah’s site!
5.00 Mitt(s) 2 Rating(s)2 votes, average: 5.00 out of 52 votes, average: 5.00 out of 52 votes, average: 5.00 out of 52 votes, average: 5.00 out of 52 votes, average: 5.00 out of 5

Prep Time:

Cook Time:

Difficulty: Easy

Servings: 24

24
x

Print Options

Page size Letter 3x5 4x6
Text Size Small Medium Large
Content Include description
Include prep time, etc.
Show image

Description

Obviously, using black beans makes these brownies way healthier, but I’m not even focusing on that fact right now.

These are probably some of the best brownies I have ever made. They are thick, with soft centers, a crunchy top, and fudgy. They melt in your mouth.

Ingredients

  • 15 ounces, fluid Canned Black Beans, Drained And Rinsed
  • 9 Tablespoons Unsweetened Cocoa Powder
  • ¼ cups Almond Flour
  • 1 teaspoon Baking Soda
  • ⅛ teaspoons Salt
  • 1 cup Sugar
  • 1 whole Egg
  • 4 ounces, fluid Applesauce
  • 1 teaspoon Vanilla Extract

Preparation Instructions

Preheat oven to 350ºF.

In a food processor, blend black beans until they form into a smooth paste. You don’t want any chunks of black beans in your brownies.

Add in cocoa powder, almond flour, baking soda, and salt. Pulse the food process a couple more times to combine.

Add in sugar, egg, applesauce and vanilla. Run the food processor until everything is completely mixed together.

Spoon mixture into a mini muffin pan, filling each ¾ full. Bake for 15–20 minutes, or until the brownies are set, pull away from the side of the pan, and a toothpick inserted in the center comes out clean.


_______________________________________

Growing up in a food-obsessed family and spending a lot of time in her Aunt Rose’s restaurant as a child, Christina was destined to be a fantastic cook. She’s a private chef during the day, but cooks for two at home. Like all of us, she has a sweet tooth that needs indulging after dinner. After becoming frustrated with the lack of recipes made for two, especially in the dessert category, she took matters into her own hands and started her blog, Dessert for Two, to share how she takes Southern classics (and a few surprises) and turns them into recipes that are perfect for just a few people. Her first cookbook is due out in February 2015.


Profile photo of Erika (TK)

Looks Delicious! Chicken Shawarma

Posted by in Looks Delicious!

Tasty Kitchen Blog: Looks Delicious! (Chicken Shawarma with Hummus and Pita, submitted by TK member Julie of The Gourmet RD)

Have you ever had shawarma?

“There’s a shawarma joint about two blocks from here. I don’t know what it is but I want to try it.”

Iron Man may not know have known shawarma then but he quickly remedied that. And I don’t blame him. Shawarma is very similar to a gyro or doner kebab, and many years ago, I was fortunate enough to live in a place where I had easy access to it. It’s one of my all-time favorite street foods, so imagine my excitement when I saw a home-kitchen-friendly version here on Tasty Kitchen!

I say “home-kitchen-friendly” because, like gyros, shawarma meat is usually roasted on a vertical rotating spit, preferably over a wood fire. I don’t know many home kitchens equipped with one, but Julie’s recipe for Chicken Shawarma with Hummus and Pita only needs a hot oven. And she makes chili hummus to go with it. (Click the photo above to get the printable!)

Ah, chicken shawarma. Luscious chicken full of earthy flavors, roasted in the oven, served on toasted pita bread spread with chili hummus and topped with fresh veggies and some tzatziki or tahini sauce. It’s no wonder even superheroes who just spent a few hard days saving the world make time to kick back and polish off one or two (or twenty—I’m looking at you, Hulk) of these.

Thanks for sharing, Julie! Chicken shawarma is definitely happening in my kitchen soon, and you can bet I’m going to have fun saying “shawarma” over and over again until someone tells me to quit it already.

Have a great weekend, friends!


Profile photo of Erika (TK)

Corned Beef Ideas

Posted by in Holidays

Tasty Kitchen Blog: Kitchen Talk (Corned Beef Leftovers)

Growing up, corned beef was an occasional—and much-enjoyed—breakfast treat. I was more familiar with the kind that came in a can, and I always looked forward to Saturday mornings watching cartoons as the smell of corned beef frying with garlic, onions, and tomatoes filled the kitchen. It was many years later that I was properly introduced to the kind that didn’t come in a can, which opened my eyes to a whole other world of cured meat goodness.

Corned beef, however it’s packaged, is not inexpensive, but around this time of year, almost every supermarket has it on sale because of St. Patrick’s Day. I don’t know about you, but every time I prepare corned beef, I always end up with a lot left over. If you find yourself in that same predicament, we thought we’d help you out with a few ideas for those corned beef leftovers.

Here are a few that caught our eye:


Tasty Kitchen Blog: Kitchen Talk (Corned Beef Leftovers)

Corned Beef and Slaw Sandwich. It doesn’t get easier than this. Turn any extra cabbage into a quick creamy slaw that pairs perfectly with the salty goodness of corned beef.


Tasty Kitchen Blog: Kitchen Talk (Corned Beef Leftovers)

Corned Beef Hash with Creamy Horseradish Sauce. Go the corned beef hash route and spice it up with creamy horseradish sauce.


Tasty Kitchen Blog: Kitchen Talk (Corned Beef Leftovers)

Corned Beef Hash Baked Eggs. Same hash idea, but with a twist: baked eggs on top!


Tasty Kitchen Blog: Kitchen Talk (Corned Beef Leftovers)

Corned Beef Cabbage Grilled Cheese. Because melted cheese. Amen.


Tasty Kitchen Blog: Kitchen Talk (Corned Beef Leftovers)

Corned Beef Cheeseburger. Take the corned beef and melted cheese, then add a burger. Boom.


Tasty Kitchen Blog: Kitchen Talk (Corned Beef Leftovers)

Caraway Havarti Grits with Shrimp and Corned Beef. Southern dish with an Irish twist. Plus, who can resist cheesy grits?

Those are just a few ideas from our lovely TK members! How about you? Do you have any favorite ways to enjoy leftover corned beef? Come share below!


Profile photo of Erica Lea

Korean Shrimp and Rice Porridge (Saewoojuk)

Posted by in Step-by-Step Recipes

Tasty Kitchen Blog: Korean Shrimp and Rice Porridge (Saewoojuk). Guest post by Erica Kastner of Buttered Side Up, recipe submitted by TK member Erica of Apricosa.

Confession: my decision to make this porridge was based, in part, on my love of the Korean drama and culture. When I saw this Korean Shrimp and Rice Porridge (Saewoojuk) in Erica’s recipe box, I knew it needed to happen in my kitchen.

Juk is basically the Korean version of congee or rice porridge. Saewoo means shrimp. Juk is served to those feeling under the weather, since it is easily digested. But its merits reach far beyond healing powers. All of the flavors are simply delightful, and the possibilities for add-ons are endless.

I know what you might be thinking: a savory porridge sounds a bit odd. In reality it’s a delicious, comforting way to start your day.


Tasty Kitchen Blog: Korean Shrimp and Rice Porridge (Saewoojuk). Guest post by Erica Kastner of Buttered Side Up, recipe submitted by TK member Erica of Apricosa.

Here’s what you’ll need: short-grained rice (I used sushi rice), sesame oil, garlic, carrot, shrimp, fish sauce, salt, green onions, roasted kim (seaweed), and lots of water (not shown).


Tasty Kitchen Blog: Korean Shrimp and Rice Porridge (Saewoojuk). Guest post by Erica Kastner of Buttered Side Up, recipe submitted by TK member Erica of Apricosa.

Begin by rinsing your rice in several changes of water. Now the rice needs to soak for at least two hours, or overnight.


Tasty Kitchen Blog: Korean Shrimp and Rice Porridge (Saewoojuk). Guest post by Erica Kastner of Buttered Side Up, recipe submitted by TK member Erica of Apricosa.

Once the rice has been soaked, drain it well. I used a fine mesh sieve for this. Set it aside for now.


Tasty Kitchen Blog: Korean Shrimp and Rice Porridge (Saewoojuk). Guest post by Erica Kastner of Buttered Side Up, recipe submitted by TK member Erica of Apricosa.

Time to get cooking! Heat the sesame oil in a pot that’s set over medium heat. Once it’s hot, add the garlic, carrots, and shrimp. Sauté for about 30 seconds, stirring.


Tasty Kitchen Blog: Korean Shrimp and Rice Porridge (Saewoojuk). Guest post by Erica Kastner of Buttered Side Up, recipe submitted by TK member Erica of Apricosa.

Add the drained rice.


Tasty Kitchen Blog: Korean Shrimp and Rice Porridge (Saewoojuk). Guest post by Erica Kastner of Buttered Side Up, recipe submitted by TK member Erica of Apricosa.

Sauté for a few more minutes, stirring often.


Tasty Kitchen Blog: Korean Shrimp and Rice Porridge (Saewoojuk). Guest post by Erica Kastner of Buttered Side Up, recipe submitted by TK member Erica of Apricosa.

Now it’s time to add the water. 7 cups. You heard me right. Just pour it in; trust me.


Tasty Kitchen Blog: Korean Shrimp and Rice Porridge (Saewoojuk). Guest post by Erica Kastner of Buttered Side Up, recipe submitted by TK member Erica of Apricosa.

Bring everything to a simmer, turn the heat down to low, and cover the pot. Cook for 30 minutes. Your kitchen will start to smell wonderful.

Make sure to lift the lid and give it a stir every once in a while. Otherwise things can get kind of scorchy.


Tasty Kitchen Blog: Korean Shrimp and Rice Porridge (Saewoojuk). Guest post by Erica Kastner of Buttered Side Up, recipe submitted by TK member Erica of Apricosa.

Add the fish sauce and salt. Give it a taste. I ended up adding more salt.


Tasty Kitchen Blog: Korean Shrimp and Rice Porridge (Saewoojuk). Guest post by Erica Kastner of Buttered Side Up, recipe submitted by TK member Erica of Apricosa.

Ladle into bowls. Top with green onions and crumbled kim, and enjoy a satisfying breakfast (or lunch, or supper). My toddler absolutely loved this porridge. I need to make up another batch as soon as I can get my hands on some quality shrimp!


Tasty Kitchen Blog: Korean Shrimp and Rice Porridge (Saewoojuk). Guest post by Erica Kastner of Buttered Side Up, recipe submitted by TK member Erica of Apricosa.

Notes: 

1) If you don’t like your shrimp soft, I would suggest adding them during the last few minutes of cooking. They won’t have as much time to impart their flavor to the rice, however.

2) Unless you adore green onions, you won’t need to chop up three. We’re just not big onion people.

3) If you would like to turn this into a main dish, Erica suggests that you serve it with kimchi, broiled fish, japchae, sigeumchi namul (a seasoned spinach side dish), or kongnamul muchim (a soybean sprout side dish).

4) Next time I make this, I’ll use part chicken broth for the cooking liquid, to add more nutrients.


Tasty Kitchen Blog: Korean Shrimp and Rice Porridge (Saewoojuk). Guest post by Erica Kastner of Buttered Side Up, recipe submitted by TK member Erica of Apricosa.

Thank you to Erica for sharing this recipe with the Tasty Kitchen community! If you enjoy international recipes, make sure to check out her blog, Apricosa and her TK recipe box, where she shares many types of dishes from different cuisines.


Printable Recipe

Korean Shrimp and Rice Porridge (Saewoojuk)

See post on Apricosa (Erica)’s site!
0.00 Mitt(s) 0 Rating(s)0 votes, average: 0.00 out of 50 votes, average: 0.00 out of 50 votes, average: 0.00 out of 50 votes, average: 0.00 out of 50 votes, average: 0.00 out of 5

Prep Time:

Cook Time:

Difficulty: Easy

Servings: 4

4
x

Print Options

Page size Letter 3x5 4x6
Text Size Small Medium Large
Content Include description
Include prep time, etc.
Show image

Description

Savory rice porridge, warming and nourishing as breakfast or for loved ones who are under the weather!

Ingredients

  • 1 cup Short-grained Rice
  • 7 cups Water, For The Porridge (plus About 4 Cups For Soaking The Rice)
  • 1 Tablespoon Sesame Oil
  • 2 cloves Garlic, Minced
  • ¼ cups Chopped Carrot
  • 1 cup Chopped Raw Shrimp
  • 7 cups Water
  • 1 Tablespoon Fish Sauce
  • 1 teaspoon Salt
  • 3 whole Green Onions, Chopped
  • Roasted Kim (seasoned Seaweed), Crumbled

Preparation Instructions

Place rice in a large bowl and wash rice in several changes of water, then cover with about 4 cups water and let soak two hours to overnight. Drain rice thoroughly before proceeding.

Heat sesame oil over medium-high heat in a medium-large pot, then add the garlic, carrot, and shrimp and saute for about 30 seconds, stirring about to cook evenly. Add the soaked, drained rice to the pot and continue stirring and sauteing for a few minutes. Add 7 cups water and bring to a boil, then reduce heat to low, cover pot and simmer 30 minutes, stirring occasionally to prevent the bottom from burning.

Add fish sauce and salt, then taste and check seasoning and add more salt if desired. Ladle juk into serving bowls and sprinkle with chopped green onions and crumbled kim.

To make this a more substantial meal, suggested accompaniments include kimchi and other other side dishes such as broiled fish, japchae, sigeumchi namul, and kongnamul muchim.


_______________________________________

Erica Kastner has always been one of our most cherished members of the Tasty Kitchen community. She shares her wonderful recipes and amazing food photography on her blog, Buttered Side Up, and she also writes about crafts and posts more of her beautiful photography in her personal blog, Simple Days. There really isn’t much that this amazing young wife and mother can’t do, and we’re thrilled she does some of it here.


Profile photo of Erika (TK)

Looks Delicious! Cajun Eggs Benedict

Posted by in Looks Delicious!

It's Friday! You know what that means. It means the weekend is almost upon us, giving us two days to sleep in a little bit, and the luxury of spending a little more time enjoying a sit-down breakfast instead of just the usual grab-and-go weekday fare.

Profile photo of Erika (TK)

Quick Dinner Options

Posted by in Kitchen Talk

Many things can interfere with our daily schedule and we sometimes find ourselves scrambling to put together that last meal of the day. So let's put our heads together and gather ideas to help each other out when we find ourselves in that predicament!

Profile photo of Betsy (TK)

Looks Delicious! Guinness-Beer-Battered Cod and Chips

Posted by in Holidays

I can't think of anything more satisfying and perfect for St. Patrick's Day than fish and chips made with Guinness. The Guinness is perfect in the batter for the cod. It's also a great fish recipe, if you're observing Lent!

Profile photo of Erika (TK)

Looks Delicious! Peanut Butter S’mores Dip

Posted by in Looks Delicious!

I say we make a summer dish this weekend, like Gayle's simple and perfectly summery Peanut Butter S'mores Dip.