The Pioneer Woman Tasty Kitchen
Profile photo of Erica Lea

Sausage and Potato Soup

Posted by in Step-by-Step Recipes

Tasty Kitchen Blog: Sausage Potato Soup. Guest post and recipe by Erica Kastner of Cooking for Seven.

 
One day, over two years ago, I asked my dad what he wanted for supper. His reply? Soup. This was fine by me since soup is one of my favorite meals to make. I planned to make his favorite: cream of broccoli soup, but was stopped short by freezer-burnt broccoli. Not appetizing.

Avoiding panic, I decided to make up an entirely new recipe. I threw together some of my favorite soup ingredients and called it good. To my delight, everyone loved my creation. Thus, this soup was born.

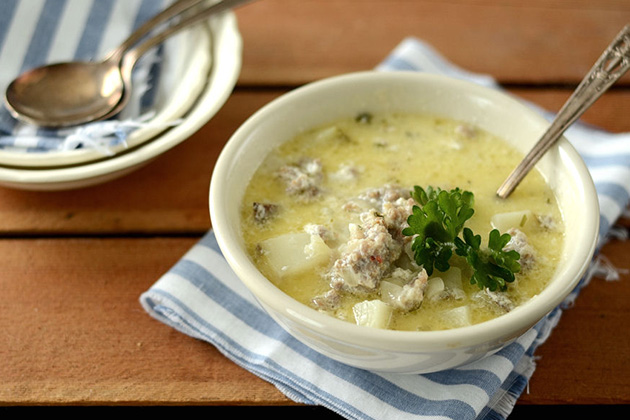
Two years later, I’m still making this Sausage and Potato Soup on a regular basis, receiving the same rave reviews. Reuben loves it and it’s oh-so-easy to make. Win-win.

Let me take you through the steps of how to make it:


Tasty Kitchen Blog: Sausage Potato Soup. Guest post and recipe by Erica Kastner of Cooking for Seven.

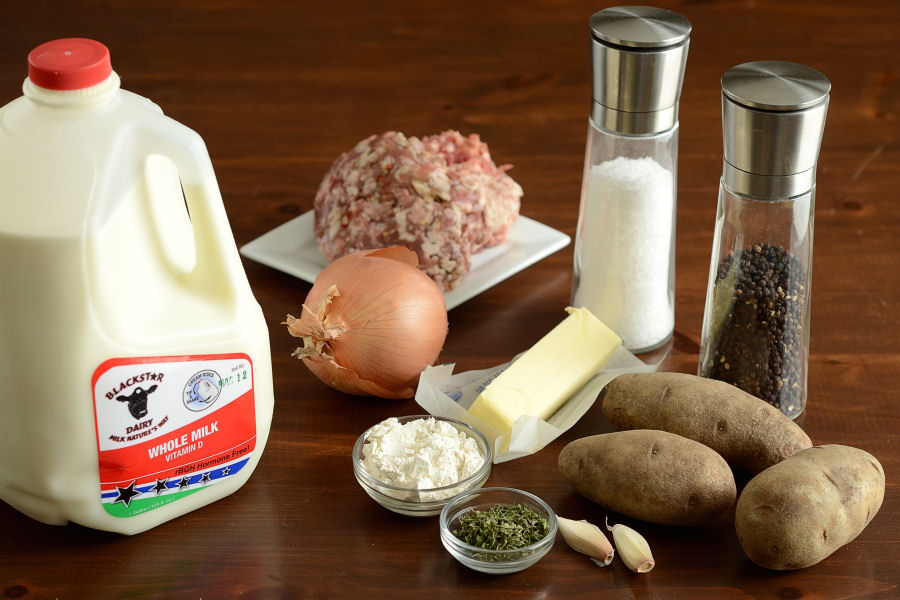
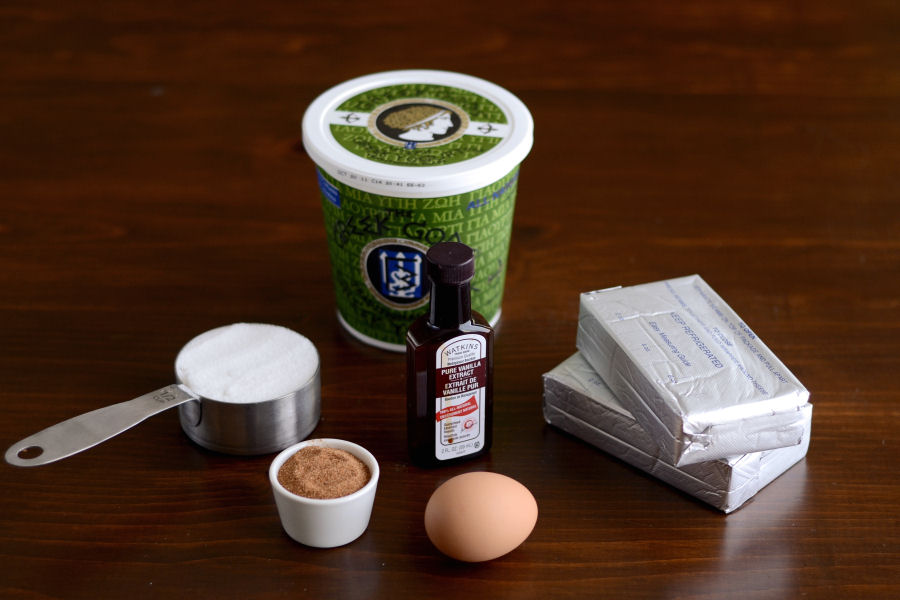
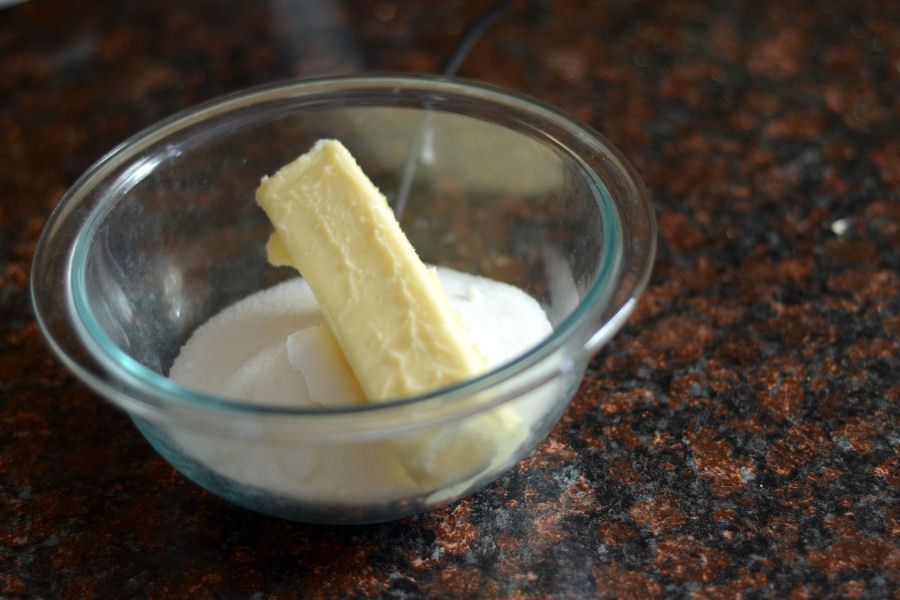
Assemble your ingredients: mild or spicy Italian sausage (store-bought or homemade), butter (yep, a whole stick), an onion, a couple cloves of garlic, 3 medium-sized russet potatoes, salt and pepper, dried parsley, all-purpose flour, and whole milk.


Tasty Kitchen Blog: Sausage Potato Soup. Guest post and recipe by Erica Kastner of Cooking for Seven.

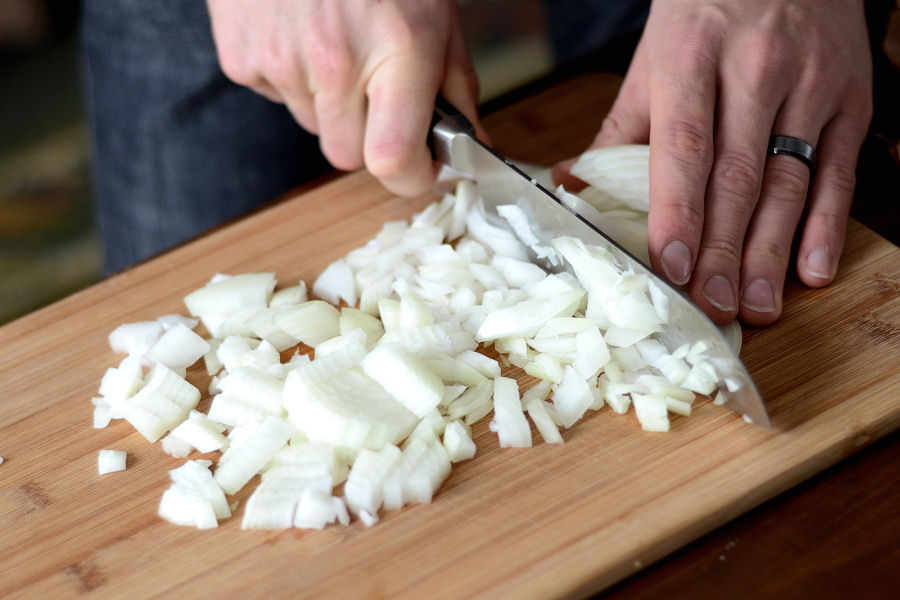
Begin by prepping your ingredients. Chop the onions fairly coarse. Reuben was kind enough to cut them for me, seeing as they made my eyes hurt.
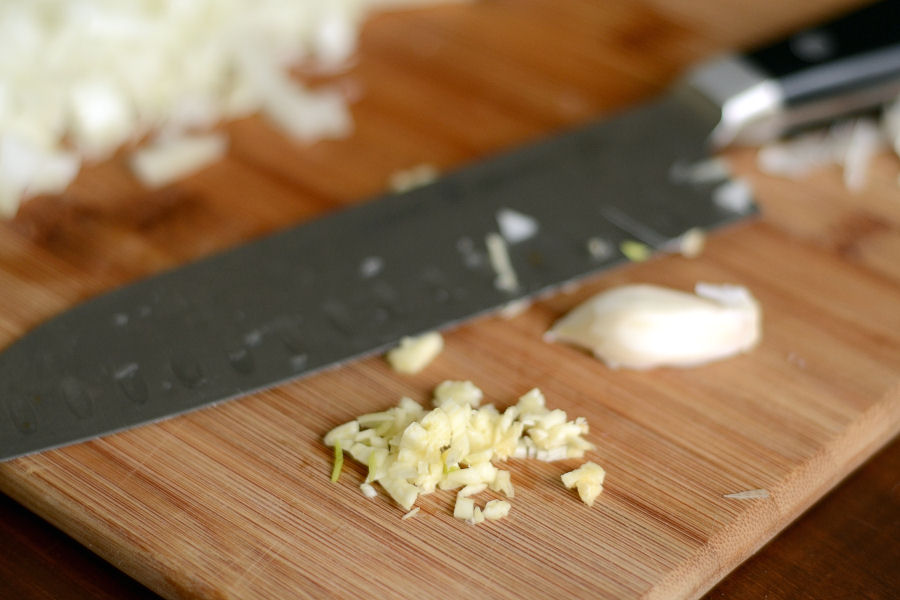


Tasty Kitchen Blog: Sausage Potato Soup. Guest post and recipe by Erica Kastner of Cooking for Seven.

Mince the garlic.


Tasty Kitchen Blog: Sausage Potato Soup. Guest post and recipe by Erica Kastner of Cooking for Seven.

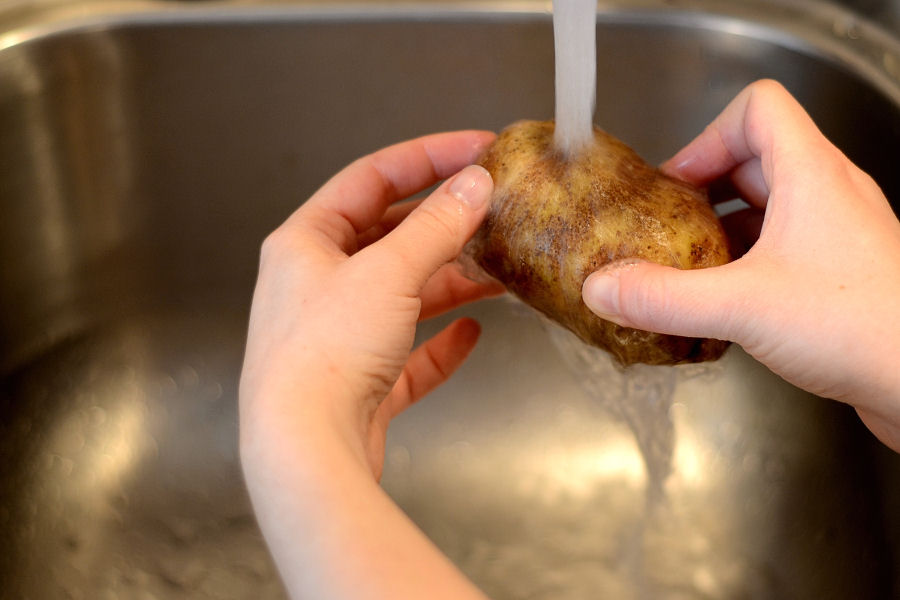
Wash (and by wash, I mean scrub) the potatoes and cut off any icky parts.


Tasty Kitchen Blog: Sausage Potato Soup. Guest post and recipe by Erica Kastner of Cooking for Seven.

Chop the potatoes into about ½ – ¾-inch cubes.


Tasty Kitchen Blog: Sausage Potato Soup. Guest post and recipe by Erica Kastner of Cooking for Seven.

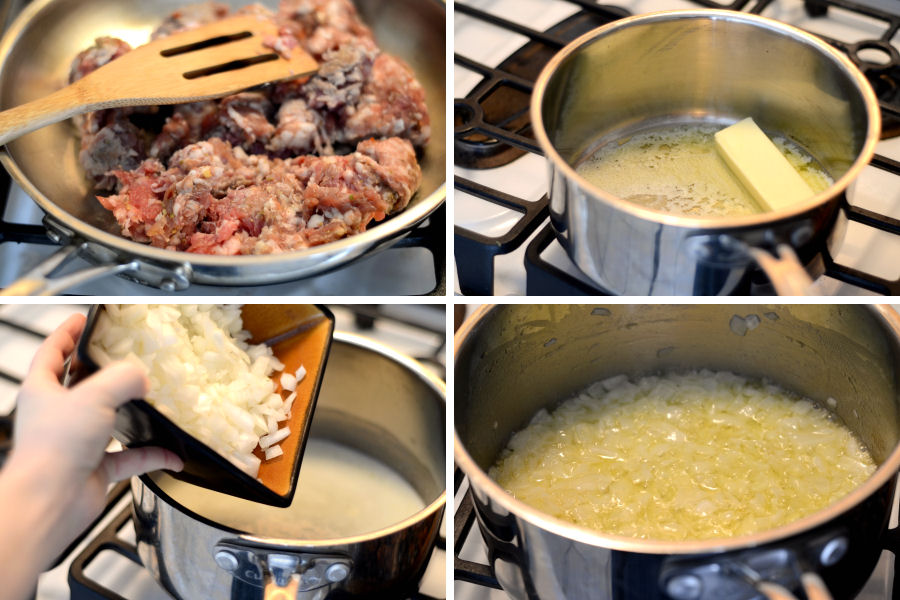
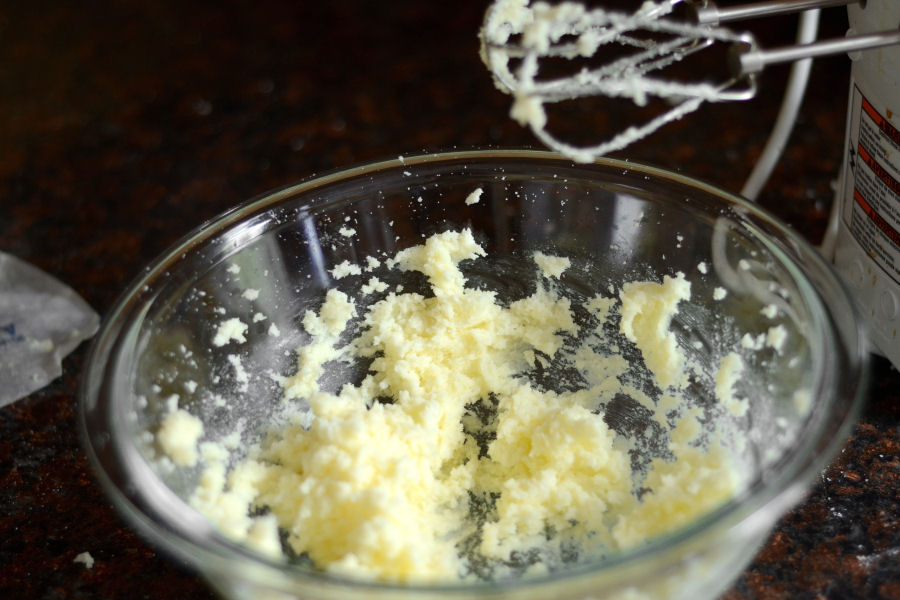
Put the sausage in a skillet and cook until no longer pink. Meanwhile, melt the butter in your soup pan. Add the onions and cook until soft and translucent.


Tasty Kitchen Blog: Sausage Potato Soup. Guest post and recipe by Erica Kastner of Cooking for Seven.

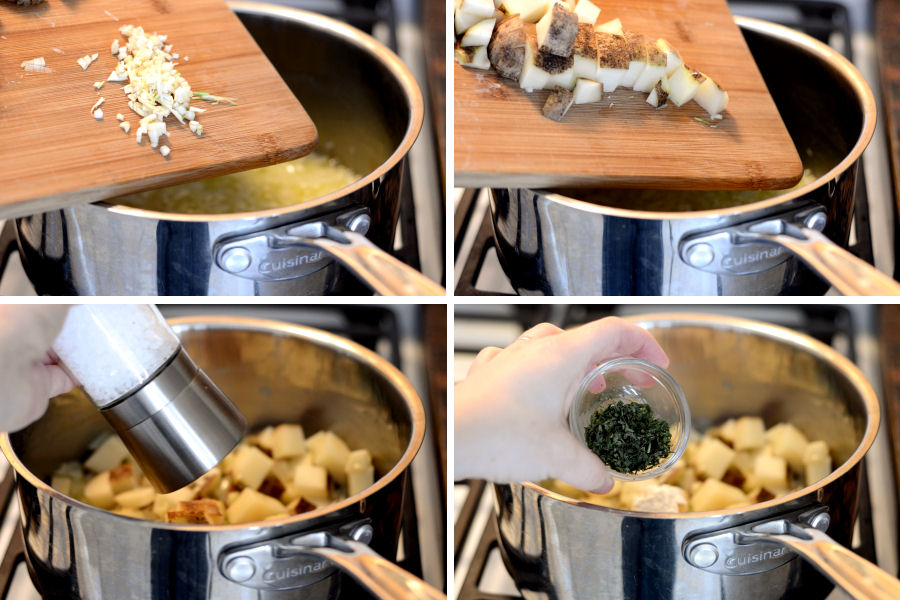
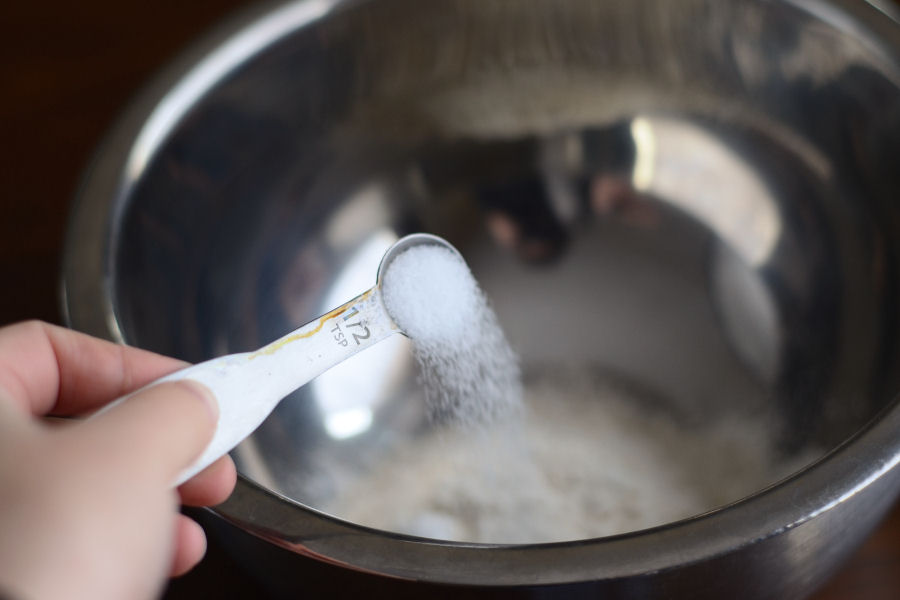
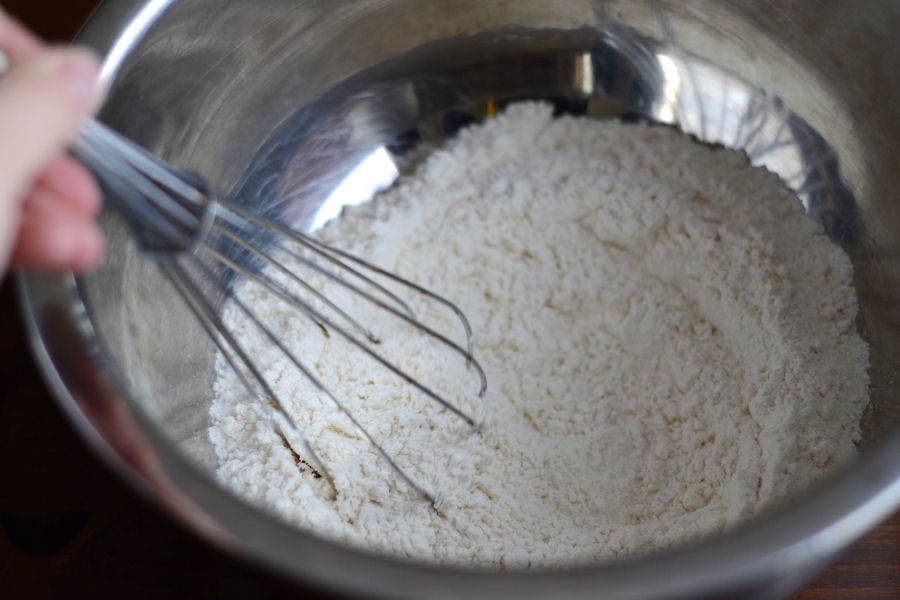
Add the garlic, potatoes, salt and pepper, and parsley. Cook for 3 minutes.


Tasty Kitchen Blog: Sausage Potato Soup. Guest post and recipe by Erica Kastner of Cooking for Seven.

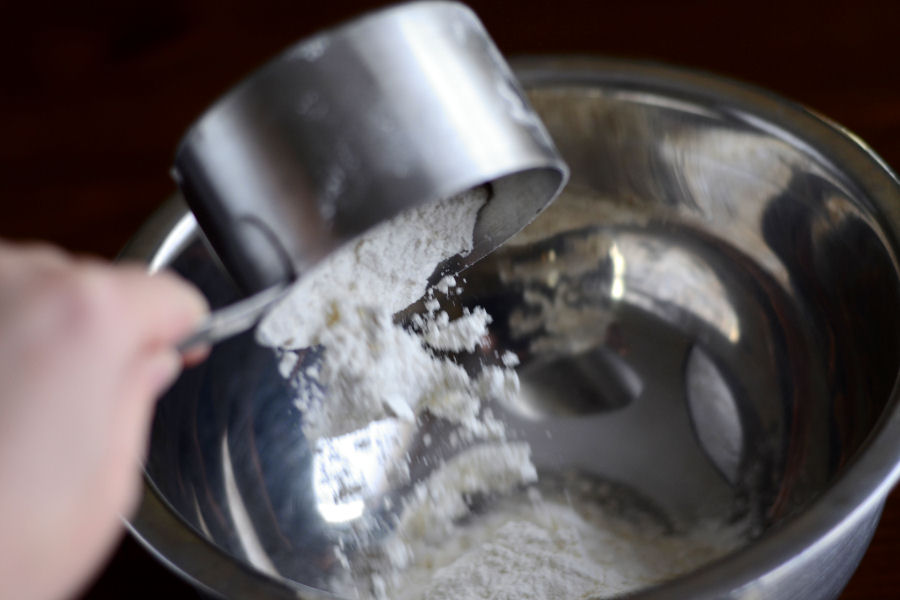
Add the flour and cook for an additional 2 minutes. Then stir in the sausage. Lovely, lovely sausage.


Tasty Kitchen Blog: Sausage Potato Soup. Guest post and recipe by Erica Kastner of Cooking for Seven.

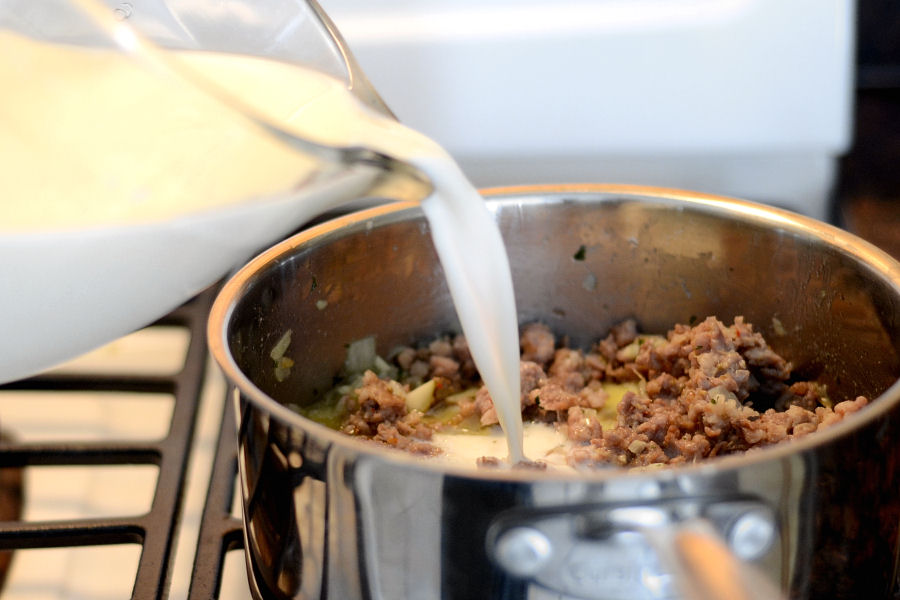
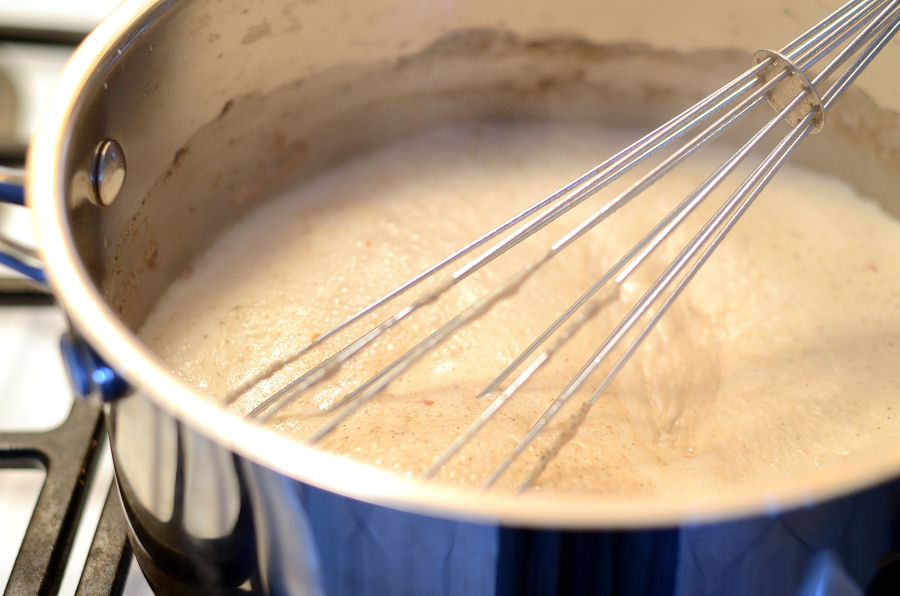
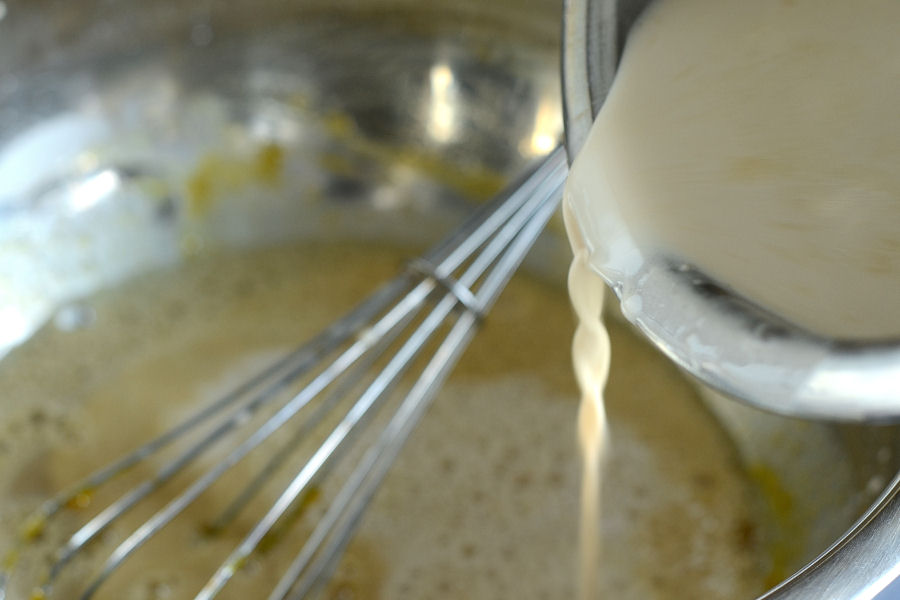
Slowly pour in the milk. Bring to a boil and simmer just until the potatoes are tender, about 15 minutes. Taste and adjust seasonings as necessary.


Tasty Kitchen Blog: Sausage Potato Soup. Guest post and recipe by Erica Kastner of Cooking for Seven.

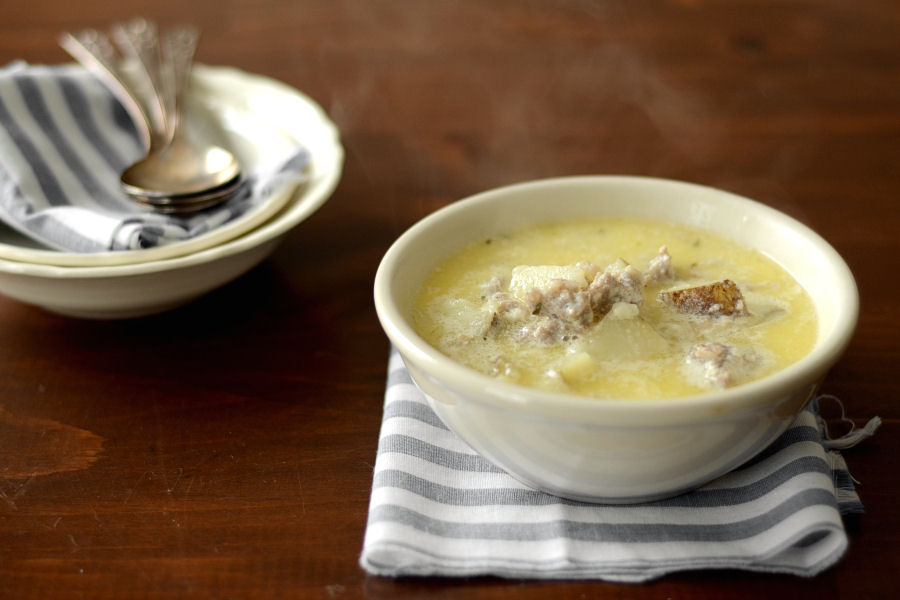
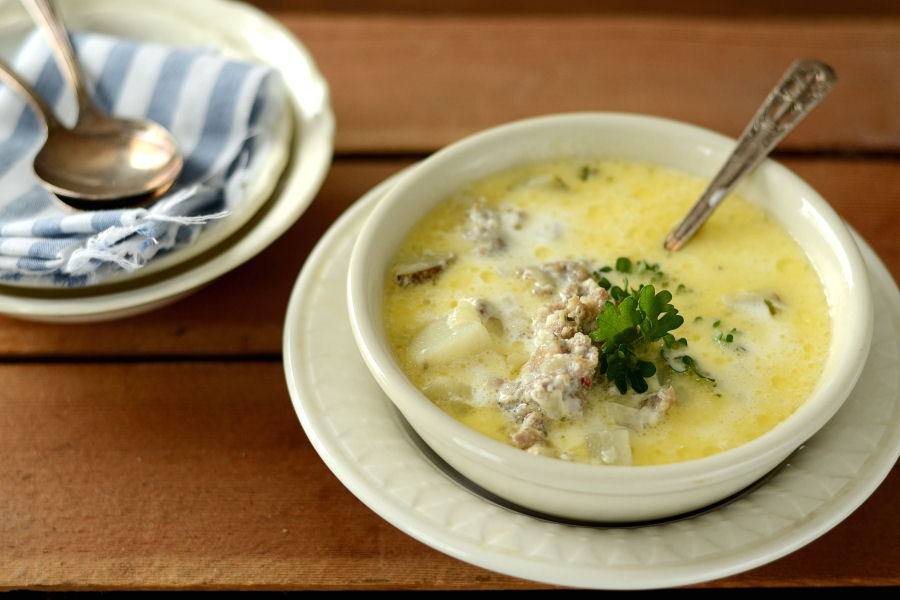
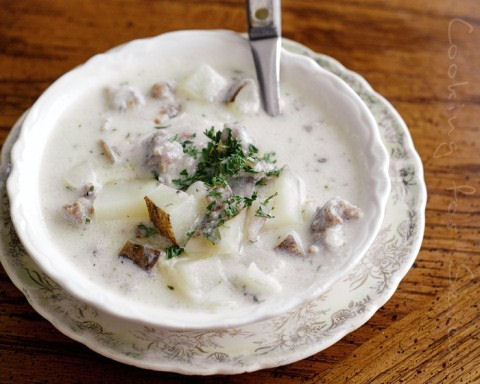
Ladle yourself a big bowl and devour. Be careful not to burn yourself in your eagerness to consume.


Tasty Kitchen Blog: Sausage Potato Soup. Guest post and recipe by Erica Kastner of Cooking for Seven.
 
Notes:

• Don’t be scared by the stick of butter included in this recipe. It is very necessary. If you must, you could substitute some of the milk for chicken or vegetable stock and cut down on some of the butter.
• If you prefer a thicker soup, simply add an additional tablespoon or so of flour at the beginning.
• You can add different spices to the soup (be creative!), but I find that parsley, salt and pepper are sufficient. If you like a spicy soup, try adding a few flakes of red pepper.


Printable Recipe

Sausage & Potato Soup

See post on Erica Lea’s site!
5.00 Mitt(s) 8 Rating(s)8 votes, average: 5.00 out of 58 votes, average: 5.00 out of 58 votes, average: 5.00 out of 58 votes, average: 5.00 out of 58 votes, average: 5.00 out of 5

Prep Time:

Cook Time:

Difficulty: Easy

Servings: 4

4
x

Print Options

Page size Letter 3x5 4x6
Text Size Small Medium Large
Content Include description
Include prep time, etc.
Show image

Description

A creamy soup made with Italian sausage and russet potatoes. Seasoned with parsley, garlic, and salt and pepper.

Ingredients

  • ½ pounds Bulk Italian Sausage, Cooked Until No Longer Pink
  • 1 stick Butter
  • 1 whole Onion, Chopped
  • 2 cloves Garlic, Minced Or Crushed
  • 3 whole Medium Russet Potatoes
  • 1 teaspoon Salt
  • 1 teaspoon Pepper
  • 2 teaspoons Parsley
  • 2-½ teaspoons Flour
  • 4 cups Whole Milk

Preparation Instructions

1) Melt the butter in a large stockpot over medium-low heat. Add the onion and cook, stirring frequently, until transparent. Add the garlic, potatoes, salt and pepper, and parsley and cook for 3 more minutes. Stir in the sausage.

2) Add the flour and cook for an additional 2 minutes. Slowly add the milk. Bring to a boil and simmer just until the potatoes are tender. Taste and adjust seasonings if necessary.


_______________________________________

Newly-married Erica Kastner shares her wonderful recipes and amazing food photography on her blog, Cooking for Seven. She also writes about crafts and posts more of her beautiful photography in her personal blog, EricaLea.com. There really isn’t much that this amazing young lady can’t do, and we’re thrilled she does some of it here.


Profile photo of Erica Lea

Chai Pots de Creme

Posted by in Step-by-Step Recipes

Tasty Kitchen Blog: Chai Pots de Creme. Guest post by Erica Kastner of Cooking for Seven, recipe submitted by TK member Stacey of Just Stacey J.

 
Creamy, smooth custard contrasted with intense, spicy flavors. Today, I bring you these lovely Chai Pots de Creme, shared by Stacey (butterbean).

I’ll not lie. The ingredient list contains a few specialty items. And the process is a bit time-consuming. But these little custards are very much worth it. So rich and full of flavor; and they can be made a day or so in advance, for those crazy days when you’re expecting visitors and have no time to make something awesome.

Here’s how to make these scrumptious little bowls of creaminess:


Tasty Kitchen Blog: Chai Pots de Creme. Guest post by Erica Kastner of Cooking for Seven, recipe submitted by TK member Stacey of Just Stacey J.

First, the ingredient list:  heavy cream, whole milk, chai concentrate (I used Tazo, but you can use any kind you wish), ground ginger, cinnamon stick, ground cardamom, whole cloves, crushed red pepper, egg yolks, and brown sugar. 


Tasty Kitchen Blog: Chai Pots de Creme. Guest post by Erica Kastner of Cooking for Seven, recipe submitted by TK member Stacey of Just Stacey J.

Preheat your oven to 325ºF. Place 1 1/2 cups cream, milk, chai concentrate, ginger…


Tasty Kitchen Blog: Chai Pots de Creme. Guest post by Erica Kastner of Cooking for Seven, recipe submitted by TK member Stacey of Just Stacey J.

…cinnamon stick, cardamom, cloves, and red pepper in a saucepan. 


Tasty Kitchen Blog: Chai Pots de Creme. Guest post by Erica Kastner of Cooking for Seven, recipe submitted by TK member Stacey of Just Stacey J.

Bring to a boil and simmer for 5 minutes. 


Tasty Kitchen Blog: Chai Pots de Creme. Guest post by Erica Kastner of Cooking for Seven, recipe submitted by TK member Stacey of Just Stacey J.

Remove from heat, cover, and let steep for 15 minutes. This will help to intensify the flavors.


Tasty Kitchen Blog: Chai Pots de Creme. Guest post by Erica Kastner of Cooking for Seven, recipe submitted by TK member Stacey of Just Stacey J.

Meanwhile, place 6 ramekins in a 13×9-inch pan.


Tasty Kitchen Blog: Chai Pots de Creme. Guest post by Erica Kastner of Cooking for Seven, recipe submitted by TK member Stacey of Just Stacey J.

Strain the cream mixture into a bowl. Discard the solids, or boil in a pan of water for a lovely aroma.


Tasty Kitchen Blog: Chai Pots de Creme. Guest post by Erica Kastner of Cooking for Seven, recipe submitted by TK member Stacey of Just Stacey J.

Separate the egg yolks from the whites. Whisk together the brown sugar and egg yolks.


Tasty Kitchen Blog: Chai Pots de Creme. Guest post by Erica Kastner of Cooking for Seven, recipe submitted by TK member Stacey of Just Stacey J.

Whisk in the strained cream mixture.


Tasty Kitchen Blog: Chai Pots de Creme. Guest post by Erica Kastner of Cooking for Seven, recipe submitted by TK member Stacey of Just Stacey J.

Divide the custard evenly among the prepared ramekins. I find it easiest to place the custard in a pitcher first.


Tasty Kitchen Blog: Chai Pots de Creme. Guest post by Erica Kastner of Cooking for Seven, recipe submitted by TK member Stacey of Just Stacey J.

Pour hot water into the baking dish to reach halfway up the sides of the ramekins.


Tasty Kitchen Blog: Chai Pots de Creme. Guest post by Erica Kastner of Cooking for Seven, recipe submitted by TK member Stacey of Just Stacey J.

Cover with aluminum foil.


Tasty Kitchen Blog: Chai Pots de Creme. Guest post by Erica Kastner of Cooking for Seven, recipe submitted by TK member Stacey of Just Stacey J.

Pierce the foil in several places.


Tasty Kitchen Blog: Chai Pots de Creme. Guest post by Erica Kastner of Cooking for Seven, recipe submitted by TK member Stacey of Just Stacey J.

Bake until softly set, about 30 minutes. Remove from pan and let cool for 1 hour. Cover with wax paper (I used plastic wrap) and refrigerate for at least 2 hours. Just before serving, whip the remaining cream to soft peaks. Dollop a little (or a lot) onto each custard. Enjoy!


Tasty Kitchen Blog: Chai Pots de Creme. Guest post by Erica Kastner of Cooking for Seven, recipe submitted by TK member Stacey of Just Stacey J.

Notes: 

• My husband and I found that the red pepper was a little odd. You could easily leave this out if you prefer a less spicy (and by spicy, I mean hot) chai. 
• As Stacey mentioned, it was necessary for me to remove the foil and bake the custards for an additional 20 minutes or so. Everyone’s oven is different, so start with 30 minutes and work from there.

Thank you so much, butterbean, for sharing this amazing recipe with us! Visit her blog Just Stacey J. for recipes, photos, and so much more.


Printable Recipe

Chai Pots de Creme

See post on butterbean’s site!
4.00 Mitt(s) 1 Rating(s)1 vote, average: 4.00 out of 51 vote, average: 4.00 out of 51 vote, average: 4.00 out of 51 vote, average: 4.00 out of 51 vote, average: 4.00 out of 5

Prep Time:

Cook Time:

Difficulty: Easy

Servings: 6

6
x

Print Options

Page size Letter 3x5 4x6
Text Size Small Medium Large
Content Include description
Include prep time, etc.
Show image

Description

Sweet and spicy dessert. The flavors make the whole house smell wonderful. Easy and tasty alike.

Ingredients

  • 2-½ cups Heavy Cream, Divided
  • ½ cups Whole Milk
  • ½ cups Chai Concentrate
  • ½ teaspoons Ginger
  • 1 whole Cinnamon Stick
  • 1 teaspoon Cardamom
  • 8 whole Cloves
  • ¼ teaspoons Crushed Red Pepper Flakes
  • 4 whole Egg Yolks
  • ½ cups Brown Sugar

Preparation Instructions

Preheat the oven to 325°F. In a saucepan, bring 1 1/2 cups cream, the milk, chai concentrate, ginger, cinnamon, cardamom, cloves and crushed red pepper to a boil; simmer for 5 minutes. Remove from the heat, cover and let steep for 15 minutes.

Place six 1/2-cup ramekins in a 9-by-13-inch baking dish. Strain the cream mixture into a bowl, pressing on the solids; discard the solids.

In a medium bowl, whisk together the egg yolks and brown sugar. Whisk in the cream mixture. Divide the custard among the ramekins; pour enough hot water into the baking dish to come halfway up the sides of the ramekins. Cover the dish with foil and pierce in several spots.

Bake the custards until softly set, about 30 minutes. (I had to uncover and cook mine for about another 20 minutes.) Remove from the water and let cool for 1 hour. Cover with wax paper and refrigerate for at least 2 hours. Before serving, whip the remaining 1 cup cream until soft peaks form; dollop onto each custard and sprinkle with the candied ginger if desired.


_______________________________________

Newly-married Erica Kastner shares her wonderful recipes and amazing food photography on her blog, Cooking for Seven. She also writes about crafts and posts more of her beautiful photography in her personal blog, EricaLea.com. There really isn’t much that this amazing young lady can’t do, and we’re thrilled she does some of it here.


Profile photo of Erica Lea

Homemade Hot Chocolate

Posted by in Step-by-Step Recipes

Tasty Kitchen Blog: Homemade Hot Chocolate. Guest post and recipe from Erica Kastner of Cooking for Seven.

 
This is hot chocolate (or drinking chocolate), not hot cocoa. What’s the difference, you ask? Hot cocoa is made by adding hot water or hot milk to a powdered mix of cocoa, often containing sweeteners, dried milk, and flavoring. Hot chocolate is created by melting chocolate (either from a bar or chips) in milk.

The difference between hot chocolate and hot cocoa is not only in the method and ingredients, it’s in the flavor and texture as well. I find many of the hot cocoa mixes to be quite sweet and lacking in good flavor and somewhat thin. Hot chocolate, on the other hand, is rich and creamy and deep. The chocolate flavor takes center stage, not the sweetener or artificial flavorings. It’s so rich that I find that I can’t drink very much of it! Granted, you can make some excellent hot cocoa by mixing it yourself. But it lacks the depth of flavor and wonderful texture of hot chocolate.

Last winter I tried hot chocolate for the first time. I was won over instantly. It was so thick and smooth that it felt like I was drinking chocolate pudding.

Now get into your kitchen and try it out! It’s so easy to make.


Tasty Kitchen Blog: Homemade Hot Chocolate. Guest post and recipe from Erica Kastner of Cooking for Seven.

You’ll need 6 simple ingredients: whole milk, cream, a little sweetener (I used demerara, but you can use anything you like), a bit of salt, pure vanilla extract, and some good-quality chocolate (I used 70% cacao, but you could use something sweeter if you prefer).


Tasty Kitchen Blog: Homemade Hot Chocolate. Guest post and recipe from Erica Kastner of Cooking for Seven.

Begin by chopping up your favorite chocolate nice and fine. You want to chop it up quite a bit so it melts easily.


Tasty Kitchen Blog: Homemade Hot Chocolate. Guest post and recipe from Erica Kastner of Cooking for Seven.

Heat the milk and cream to a low simmer, whisking occasionally. You don’t want to scorch your milk. Add your sweetener, salt, and chocolate.


Tasty Kitchen Blog: Homemade Hot Chocolate. Guest post and recipe from Erica Kastner of Cooking for Seven.

Whisk in the vanilla extract.


Tasty Kitchen Blog: Homemade Hot Chocolate. Guest post and recipe from Erica Kastner of Cooking for Seven.

Whisk vigorously until all of the chocolate has melted. Cook for an additional 4 minutes, whisking constantly. The hot chocolate will thicken a bit as it cooks.


Tasty Kitchen Blog: Homemade Hot Chocolate. Guest post and recipe from Erica Kastner of Cooking for Seven.

Pour into your favorite mug and enjoy all by itself or with a dollop of whipped cream or some good marshmallows. Prepare for some major enjoyment!

Note: If you find this hot chocolate to be too rich, you could try replacing the cream with milk.

You can check out my original post on my blog, or view the recipe below.


Printable Recipe

Homemade Hot Chocolate

See post on Erica Lea’s site!
4.66 Mitt(s) 3 Rating(s)3 votes, average: 4.66 out of 53 votes, average: 4.66 out of 53 votes, average: 4.66 out of 53 votes, average: 4.66 out of 53 votes, average: 4.66 out of 5

Prep Time:

Cook Time:

Difficulty: Easy

Servings: 4

4
x

Print Options

Page size Letter 3x5 4x6
Text Size Small Medium Large
Content Include description
Include prep time, etc.
Show image

Description

Real hot chocolate, made with dark chocolate and whole milk. It’s like drinking chocolate pudding.

Ingredients

  • 8 ounces, weight Chocolate (preferably Dark)
  • 3-½ cups Whole Milk
  • ½ cups Heavy Cream
  • 3 teaspoons Maple Syrup Or Natural Sweetener Of Choice
  • 1 teaspoon Vanilla Extract
  • ⅛ teaspoons Salt

Preparation Instructions

1. Chop chocolate very finely.

2. In a medium saucepan, bring milk and cream to a low simmer over medium heat, whisking occasionally.

3. Add chocolate, maple syrup, vanilla, and salt. Whisk vigorously until all of the chocolate has melted. Cook for an additional 4 minutes, whisking constantly.

4. Serve with whipped cream, if desired.


_______________________________________

Newly-married Erica Kastner shares her wonderful recipes and amazing food photography on her blog, Cooking for Seven. She also writes about crafts and posts more of her beautiful photography in her personal blog, EricaLea.com. There really isn’t much that this amazing young lady can’t do, and we’re thrilled she does some of it here.


Profile photo of Erica Lea

Snickerdoodle Cheesecake Bites

Posted by in Baking, Step-by-Step Recipes

Tasty Kitchen Blog: Snickerdoodle Cheesecake Bites. Guest post by Erica Kastner of Cooking for Seven, recipe submitted by TK member Amy of A Stool at the Counter.

 
In these fall months, I gravitate towards sweets with a kick of spice. Cinnamon, ginger, cloves, nutmeg … they speak of autumn and cozy evenings. Today’s recipe, brought to us by Amy (MonkeyDudesMom), adds a dash of cinnamon to cheesecake.

“Cinnamon on cheesecake?!” you say? Hold your horses. Believe me, it’s a wonderful flavor combination, reminiscent of cinnamon rolls.

Instead of the usual graham cracker cheesecake crust, this recipe calls for a cookie dough crust topped with cinnamon sugar. A sprinkling of cinnamon sugar on top of a smooth cheesecake layer finishes this scrumptious dessert. So simple, yet so good.


Tasty Kitchen Blog: Snickerdoodle Cheesecake Bites. Guest post by Erica Kastner of Cooking for Seven, recipe submitted by TK member Amy of A Stool at the Counter.

Here’s what you’ll need for the crust: flour, baking soda, salt, butter, sugar, an egg, and cinnamon sugar (in the photo below).


Tasty Kitchen Blog: Snickerdoodle Cheesecake Bites. Guest post by Erica Kastner of Cooking for Seven, recipe submitted by TK member Amy of A Stool at the Counter.

For the cheesecake filling you’ll need: cream cheese, sugar, plain Greek yogurt (I particularly like Greek Gods yogurt), an egg, vanilla extract, and cinnamon sugar.


Tasty Kitchen Blog: Snickerdoodle Cheesecake Bites. Guest post by Erica Kastner of Cooking for Seven, recipe submitted by TK member Amy of A Stool at the Counter.

Preheat your oven to 350 degrees F. In a medium bowl, combine the flour …


Tasty Kitchen Blog: Snickerdoodle Cheesecake Bites. Guest post by Erica Kastner of Cooking for Seven, recipe submitted by TK member Amy of A Stool at the Counter.

Baking soda …


Tasty Kitchen Blog: Snickerdoodle Cheesecake Bites. Guest post by Erica Kastner of Cooking for Seven, recipe submitted by TK member Amy of A Stool at the Counter.

And salt.


Tasty Kitchen Blog: Snickerdoodle Cheesecake Bites. Guest post by Erica Kastner of Cooking for Seven, recipe submitted by TK member Amy of A Stool at the Counter.

Whisk it all together until it’s well combined. Set aside.


Tasty Kitchen Blog: Snickerdoodle Cheesecake Bites. Guest post by Erica Kastner of Cooking for Seven, recipe submitted by TK member Amy of A Stool at the Counter.

Place the butter and sugar in a medium bowl.


Tasty Kitchen Blog: Snickerdoodle Cheesecake Bites. Guest post by Erica Kastner of Cooking for Seven, recipe submitted by TK member Amy of A Stool at the Counter.

Beat on high speed until well combined.


Tasty Kitchen Blog: Snickerdoodle Cheesecake Bites. Guest post by Erica Kastner of Cooking for Seven, recipe submitted by TK member Amy of A Stool at the Counter.

Add the egg.


Tasty Kitchen Blog: Snickerdoodle Cheesecake Bites. Guest post by Erica Kastner of Cooking for Seven, recipe submitted by TK member Amy of A Stool at the Counter.

Add the flour and beat until well combined.


Tasty Kitchen Blog: Snickerdoodle Cheesecake Bites. Guest post by Erica Kastner of Cooking for Seven, recipe submitted by TK member Amy of A Stool at the Counter.

Turn out the cookie dough into a greased 8×8-inch square pan.


Tasty Kitchen Blog: Snickerdoodle Cheesecake Bites. Guest post by Erica Kastner of Cooking for Seven, recipe submitted by TK member Amy of A Stool at the Counter.

Smooth out the dough with a spoon or an offset spatula.


Tasty Kitchen Blog: Snickerdoodle Cheesecake Bites. Guest post by Erica Kastner of Cooking for Seven, recipe submitted by TK member Amy of A Stool at the Counter.

Sprinkle the dough with cinnamon sugar.


Tasty Kitchen Blog: Snickerdoodle Cheesecake Bites. Guest post by Erica Kastner of Cooking for Seven, recipe submitted by TK member Amy of A Stool at the Counter.

Bake in your preheated oven for 20 minutes. When it’s done, poke with a fork to reduce the puffiness. Allow to cool.


Tasty Kitchen Blog: Snickerdoodle Cheesecake Bites. Guest post by Erica Kastner of Cooking for Seven, recipe submitted by TK member Amy of A Stool at the Counter.

Now for the cheesecake: cream together the cream cheese and sugar until smooth and fluffy.


Tasty Kitchen Blog: Snickerdoodle Cheesecake Bites. Guest post by Erica Kastner of Cooking for Seven, recipe submitted by TK member Amy of A Stool at the Counter.

Add the yogurt …


Tasty Kitchen Blog: Snickerdoodle Cheesecake Bites. Guest post by Erica Kastner of Cooking for Seven, recipe submitted by TK member Amy of A Stool at the Counter.

Egg …


Tasty Kitchen Blog: Snickerdoodle Cheesecake Bites. Guest post by Erica Kastner of Cooking for Seven, recipe submitted by TK member Amy of A Stool at the Counter.

And vanilla extract. Beat until well combined.


Tasty Kitchen Blog: Snickerdoodle Cheesecake Bites. Guest post by Erica Kastner of Cooking for Seven, recipe submitted by TK member Amy of A Stool at the Counter.

Poor the batter over the cooled crust.


Tasty Kitchen Blog: Snickerdoodle Cheesecake Bites. Guest post by Erica Kastner of Cooking for Seven, recipe submitted by TK member Amy of A Stool at the Counter.

Top with the remaining cinnamon sugar.


Tasty Kitchen Blog: Snickerdoodle Cheesecake Bites. Guest post by Erica Kastner of Cooking for Seven, recipe submitted by TK member Amy of A Stool at the Counter.

So pretty.


Tasty Kitchen Blog: Snickerdoodle Cheesecake Bites. Guest post by Erica Kastner of Cooking for Seven, recipe submitted by TK member Amy of A Stool at the Counter.

Bake in the 350ºF oven for 35 minutes. Let cool on a rack to room temperature before transferring to the refrigerator to chill. Chill for at least 3 hours.


Tasty Kitchen Blog: Snickerdoodle Cheesecake Bites. Guest post by Erica Kastner of Cooking for Seven, recipe submitted by TK member Amy of A Stool at the Counter.

Cut into 1-inch squares (bigger if you want a larger bite, which you probably will) and serve.


Tasty Kitchen Blog: Snickerdoodle Cheesecake Bites. Guest post by Erica Kastner of Cooking for Seven, recipe submitted by TK member Amy of A Stool at the Counter.

Note: I found that it was quite difficult to remove the cheesecake from the pan. I would recommend lining the pan with aluminum foil for easy removal and cleanup.

Thank you, Amy, for sharing this super-yummy recipe with us! Visit her blog A Stool at the Counter for more of her delicious recipes.


Printable Recipe

Snickerdoodle Cheesecake Bites

See post on MonkeyDudesMom’s site!
5.00 Mitt(s) 7 Rating(s)7 votes, average: 5.00 out of 57 votes, average: 5.00 out of 57 votes, average: 5.00 out of 57 votes, average: 5.00 out of 57 votes, average: 5.00 out of 5

Prep Time:

Cook Time:

Difficulty: Easy

Servings: 10

10
x

Print Options

Page size Letter 3x5 4x6
Text Size Small Medium Large
Content Include description
Include prep time, etc.
Show image

Description

Spicy-sweet snickerdoodle cookie, topped with tangy, velvety cheesecake. Served up in bite sized pieces so you can eat more right?

Ingredients

  • FOR THE CRUST:
  • 1 cup All-purpose Flour
  • ½ teaspoons Baking Soda
  • ½ teaspoons Salt
  • ½ cups Softened Butter
  • ¾ cups Sugar
  • 1 whole Egg
  • ½ whole Batch Of Cinnamon Sugar Mixture (see Below)
  • FOR THE CHEESECAKE:
  • 12 ounces, weight Softened Cream Cheese
  • ½ cups Sugar
  • ½ cups Plain Greek Yogurt
  • 1 whole Egg
  • ½ Tablespoons Vanilla
  • ½ whole Batch Of Cinnamon Sugar Mixture (see Below)
  • FOR THE CINNAMON SUGAR MIXTURE:
  • 1 Tablespoon Cinnamon
  • 3 Tablespoons Sugar

Preparation Instructions

For the cinnamon sugar mixture:

Stir cinnamon and sugar together in a small bowl. Set aside

For the crust:

Preheat oven to 350F.

In a medium sized bowl, mix together the flour, baking soda, and salt. Set aside.

Beat butter and sugar together using a mixer on high until well combined. Stir in egg.

Add in flour mixture until well combined.

Turn out onto a greased 8×8 inch baking dish and smooth the dough into pan with a spoon.

Sprinkle the cinnamon sugar mixture over the top.

Bake for 20 minutes. Then remove it from the oven and poke holes in it with a fork to reduce puffiness. Allow to cool.

For the cheesecake:

Cream together cream cheese and sugar until smooth and fluffy. Stir in remaining cheesecake ingredients until well combined.

Pour the filling mixture onto the cooled crust and sprinkle with remaining cinnamon sugar.

Bake for 35 minutes (also at 350F).

Let cool on counter for about an hour and half (to room temperature). Then place in the fridge for at least 3 hours.

To serve, cut it into 1 inch cubes with a serrated knife, wiping off the knife frequently.


_______________________________________

Newly-married Erica Kastner shares her wonderful recipes and amazing food photography on her blog, Cooking for Seven. She also writes about crafts and posts more of her beautiful photography in her personal blog, EricaLea.com. There really isn’t much that this amazing young lady can’t do, and we’re thrilled she does some of it here.


Profile photo of Erica Lea

Smoky BBQ Sauce

Posted by in Step-by-Step Recipes

Pungent spices. Tangy vinegar. Sweet maple syrup. A hint of smoke. These rich flavors meld together to make the perfect BBQ sauce. Not only is this BBQ sauce wonderfully tasty, it's also super easy to make. Just whisk a few ingredients together, and you're done! Plus, it's much less expensive than the gourmet sauces you find at the grocery store. And you know exactly…

Profile photo of Erica Lea

Peachy-keen Muffins

Posted by in Baking, Step-by-Step Recipes

  Ever since I can remember, peaches have been a special treat. This beautiful, golden fruit has such a delicate yet fabulous flavor. Soft and juicy, sweet but not overly so. These muffins, brought to us by Karalie, are a wonderful way to feast upon peaches. Not only are they scrumptious, they’re nutritious as well! Whole […]

Profile photo of Erica Lea

Homemade Pizza Sauce

Posted by in Step-by-Step Recipes

  There’s nothing like homemade pizza—being able to choose exactly which ingredients you want on your pizza, adding just the right amount of cheese, cooking it until the crust is crispy or soft. Making your own sauce is just another way of personalizing your pizza. Sure, it’s easy to pick a can of pizza sauce […]

Profile photo of Erica Lea

Red Wine Cake

Posted by in Baking, Step-by-Step Recipes

Whenever I see a recipe that calls for wine, I must admit that I’m immediately drawn to it. It adds such a wonderfully distinct flavor that cannot adequately be replaced by fresh fruit juice. Just a splash can create depth in a quick pasta sauce. Before making this cake, I had never used wine in […]