The Pioneer Woman Tasty Kitchen
Profile photo of Erica Lea

Rosemary and Thyme Spread

Posted by in Step-by-Step Recipes

Tasty Kitchen Blog: Rosemary and Thyme Spread. Guest post and recipe from Erica Kastner of Cooking for Seven.

 
Five. Simple. Ingredients. Seriously! That’s all that goes into this ultra-simple yet super-yummy dip. You’ll weep when you realize how easily it comes together. Okay, maybe you won’t have quite that emotional reaction, but you’re sure to be pleased at how quickly you’ll have it on the table.

Let me show you how!


Tasty Kitchen Blog: Rosemary and Thyme Spread. Guest post and recipe from Erica Kastner of Cooking for Seven.

Here are the five simple ingredients: cream cheese, dried rosemary, dried thyme, garlic powder, and freshly ground black pepper.


Tasty Kitchen Blog: Rosemary and Thyme Spread. Guest post and recipe from Erica Kastner of Cooking for Seven.

Place the cream cheese in a bowl and mash it around a bit with a fork.


Tasty Kitchen Blog: Rosemary and Thyme Spread. Guest post and recipe from Erica Kastner of Cooking for Seven.

Add 1 teaspoon of dried rosemary …


Tasty Kitchen Blog: Rosemary and Thyme Spread. Guest post and recipe from Erica Kastner of Cooking for Seven.

1/2 teaspoon dried thyme …


Tasty Kitchen Blog: Rosemary and Thyme Spread. Guest post and recipe from Erica Kastner of Cooking for Seven.

And 1/4 teaspoon of garlic powder.


Tasty Kitchen Blog: Rosemary and Thyme Spread. Guest post and recipe from Erica Kastner of Cooking for Seven.

Grind in some black pepper.


Tasty Kitchen Blog: Rosemary and Thyme Spread. Guest post and recipe from Erica Kastner of Cooking for Seven.

Here are your five ingredients in all their glory.


Tasty Kitchen Blog: Rosemary and Thyme Spread. Guest post and recipe from Erica Kastner of Cooking for Seven.

Mash it around with your fork until well mixed.


Tasty Kitchen Blog: Rosemary and Thyme Spread. Guest post and recipe from Erica Kastner of Cooking for Seven.

All mixed up.


Tasty Kitchen Blog: Rosemary and Thyme Spread. Guest post and recipe from Erica Kastner of Cooking for Seven.

Spread on your favorite crackers. Enjoy!


Tasty Kitchen Blog: Rosemary and Thyme Spread. Guest post and recipe from Erica Kastner of Cooking for Seven.

 
Notes:
 
1. This spread is best if you allow it to come to room temperature. This really allows you to taste the flavors.

2. It’s best to choose crackers without a lot of extra flavor so they don’t overpower the dip.

3. If you wish, you could try using fresh ingredients instead of dry. However, you will need to increase the amounts since dried herbs are more “concentrated.”


Printable Recipe

Rosemary & Thyme Spread

See post on Erica Lea’s site!
5.00 Mitt(s) 4 Rating(s)4 votes, average: 5.00 out of 54 votes, average: 5.00 out of 54 votes, average: 5.00 out of 54 votes, average: 5.00 out of 54 votes, average: 5.00 out of 5

Prep Time:

Cook Time:

Difficulty: Easy

Servings: 8

8
x

Print Options

Page size Letter 3x5 4x6
Text Size Small Medium Large
Content Include description
Include prep time, etc.
Show image

Description

A delicious blend of spices and cream cheese.

Ingredients

  • 8 ounces, weight Cream Cheese
  • 1 teaspoon Dried Rosemary
  • ½ teaspoons Dried Thyme
  • ¼ teaspoons Garlic Powder
  • ¼ teaspoons Ground Black Pepper

Preparation Instructions

Mix all ingredients together thoroughly. Taste and adjust seasonings if needed. Serve with crackers, toast, or crostini.


_______________________________________

Erica Berge shares her wonderful recipes and amazing food photography on her blog, Cooking for Seven. She also writes about crafts and posts more of her beautiful photography in her personal blog, EricaLea.com. There really isn’t much that this amazing young lady can’t do, and we’re thrilled she does some of it here.


Profile photo of Erica Lea

Via Cappuccino Muffins

Posted by in Baking, Step-by-Step Recipes

Tasty Kitchen Blog Via Cappuccino Muffins. Guest post by Erica Kastner of Cooking for Seven, recipe submitted by TK member Nancy (nanycpants) of Consider the Lilies.

 
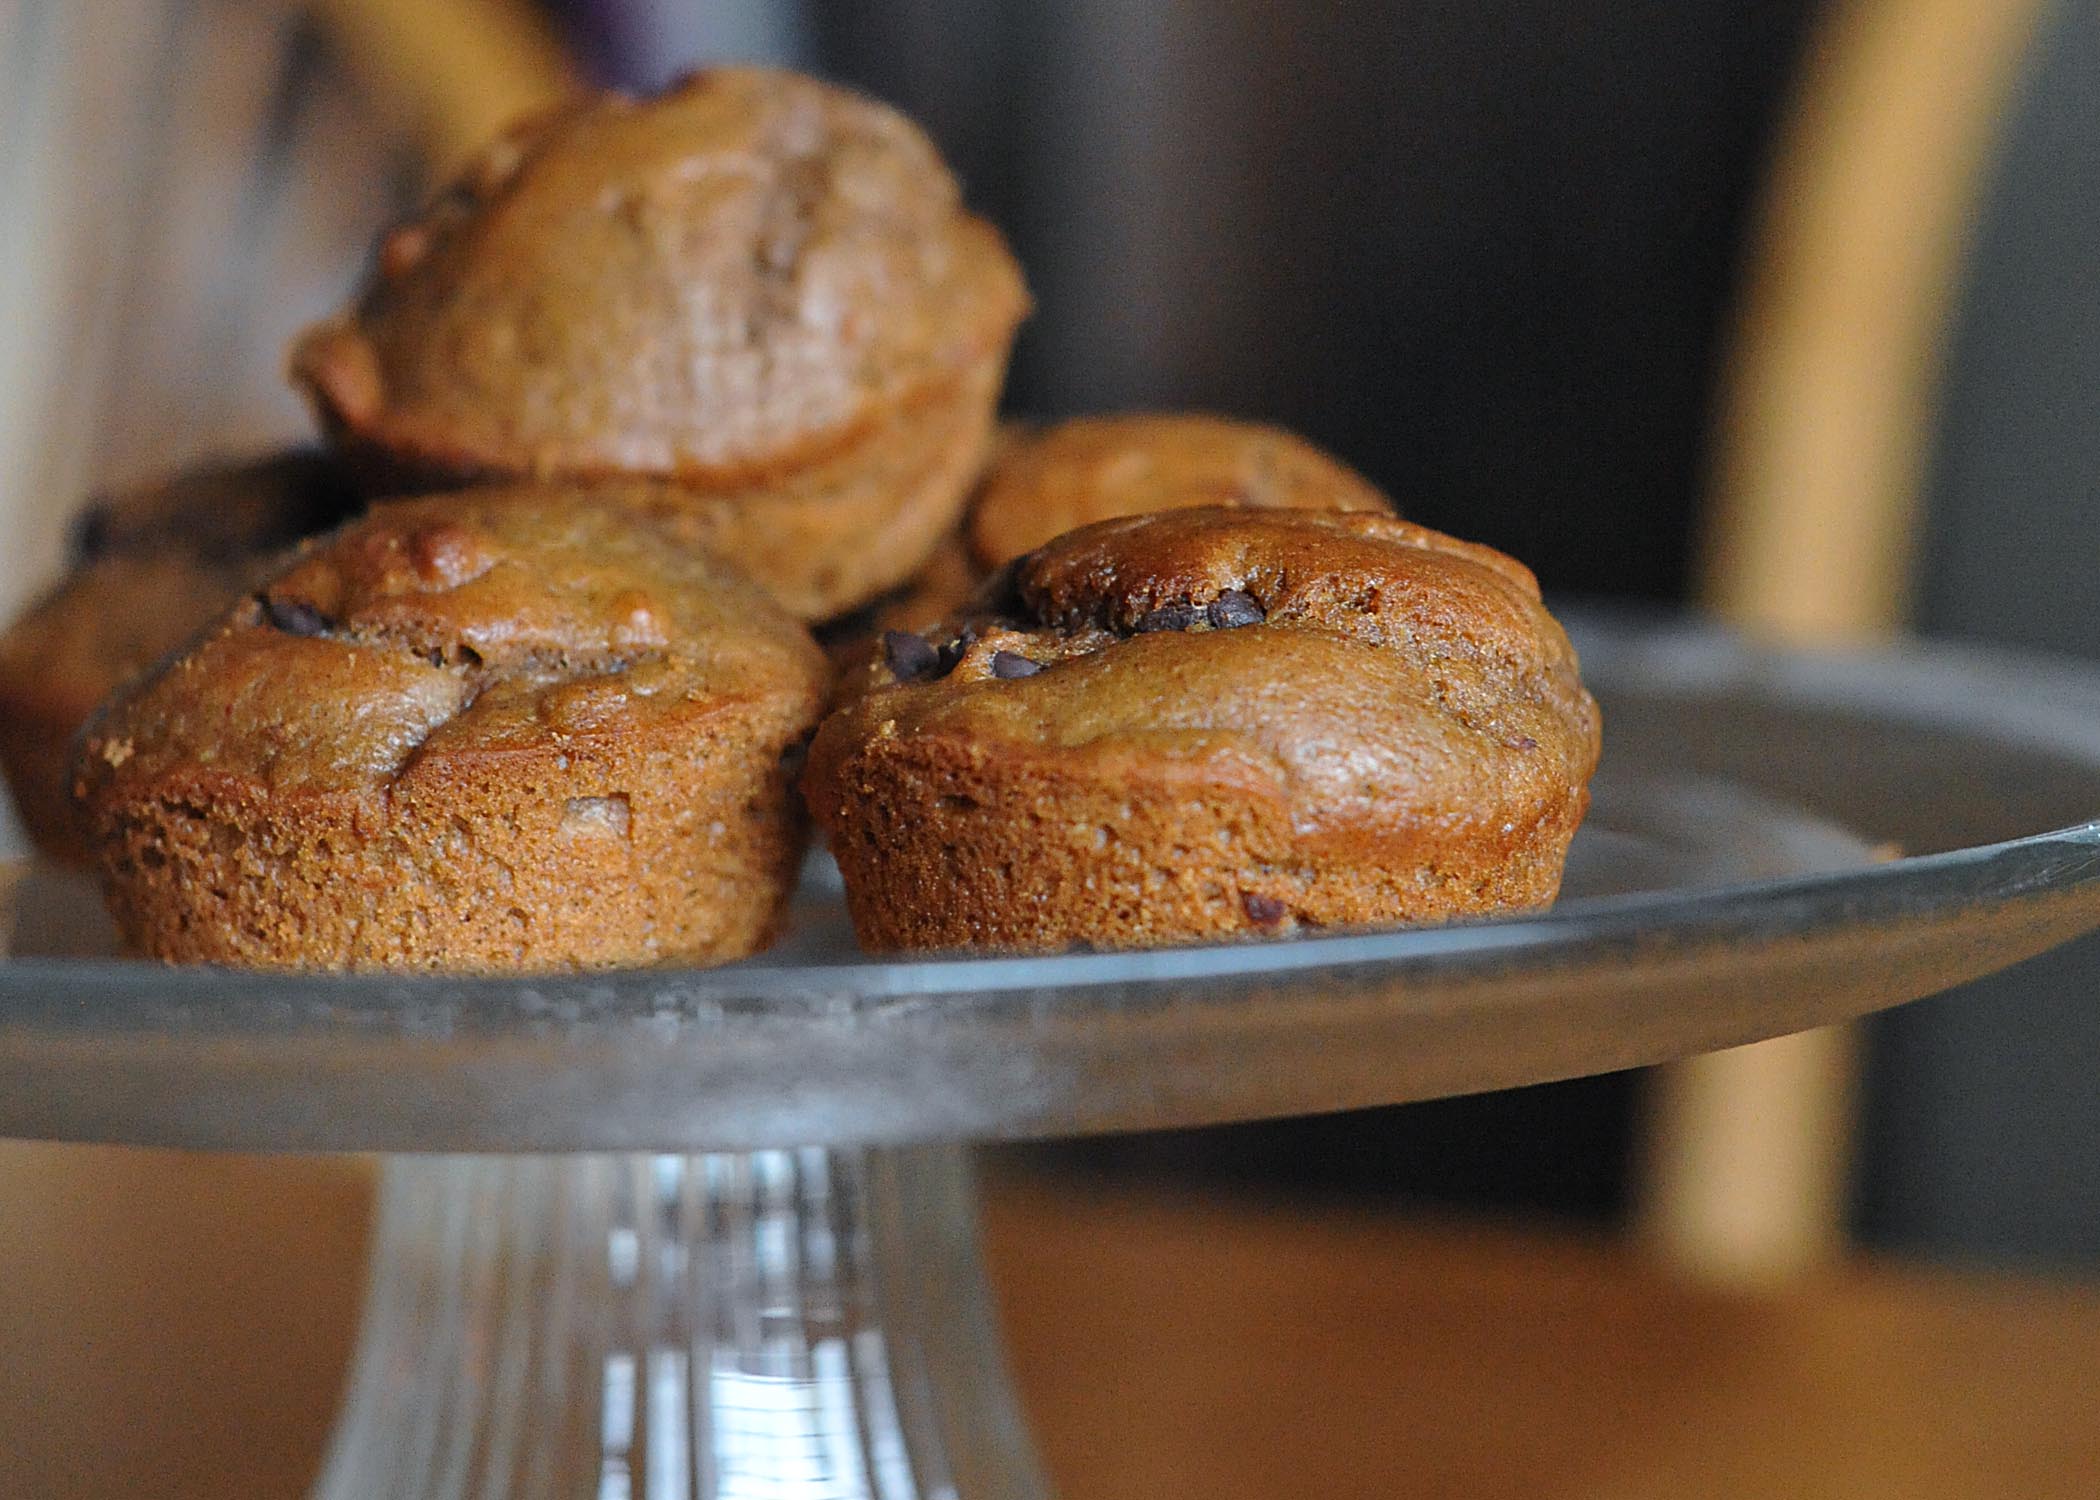
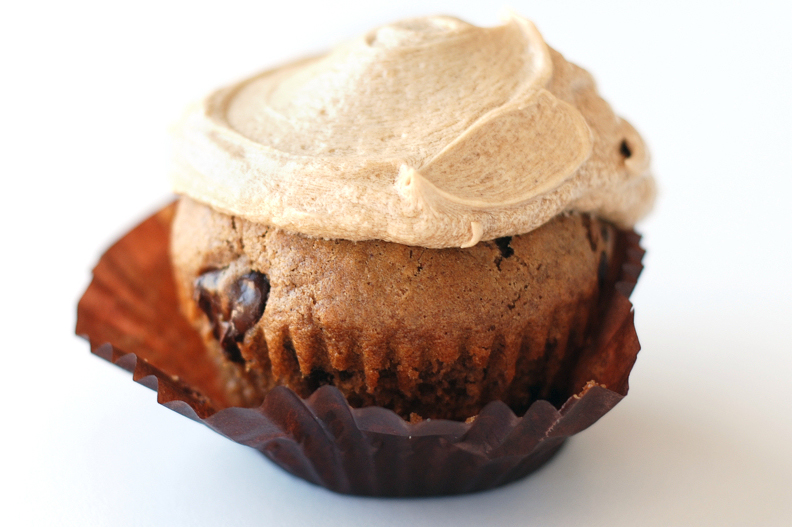
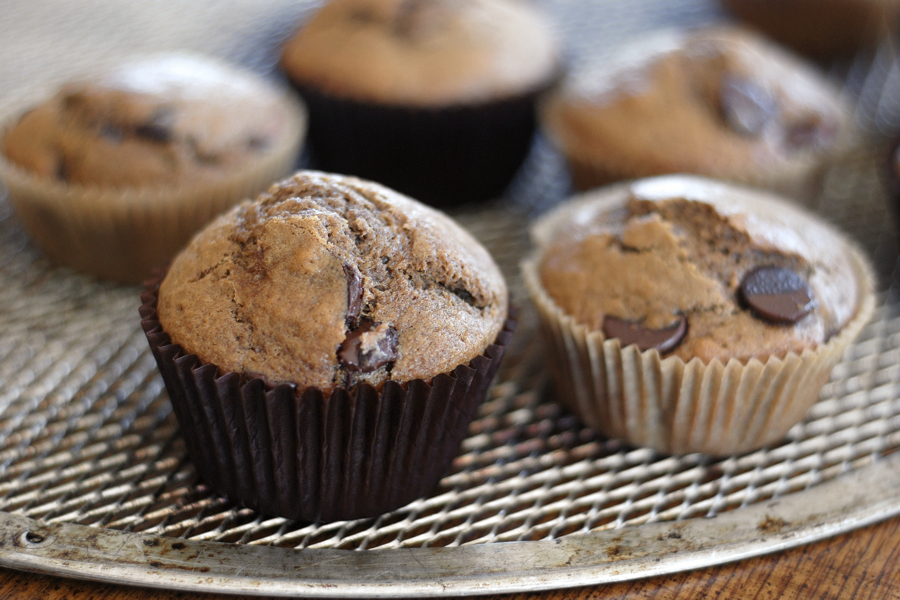
Looking for a way to get your daily dose of caffeine? These muffins are a scrumptious alternative (or addition) to your morning cup.

Today’s recipe, brought to us by nancypants, is a wonderful brew of flavors: spicy cinnamon, intense coffee, dark chocolate.


Tasty Kitchen Blog Via Cappuccino Muffins. Guest post by Erica Kastner of Cooking for Seven, recipe submitted by TK member Nancy (nanycpants) of Consider the Lilies.

My dad, a coffee enthusiast, especially loved the frosting. “That has such a great coffee flavor,” he raved. And though I’m usually not a frosting lover, I have to admit that it was my favorite part.

Ready to see how to make them?


Tasty Kitchen Blog Via Cappuccino Muffins. Guest post by Erica Kastner of Cooking for Seven, recipe submitted by TK member Nancy (nanycpants) of Consider the Lilies.

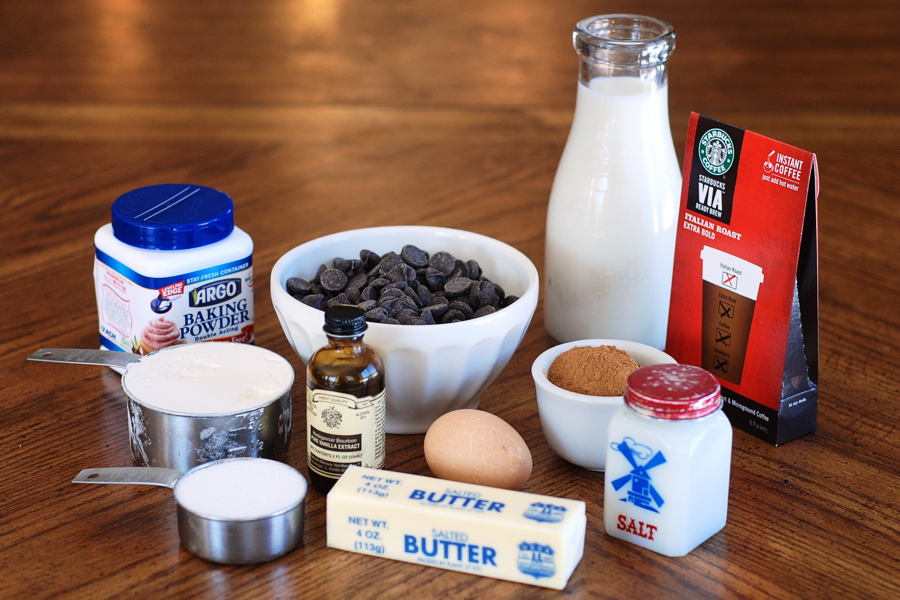
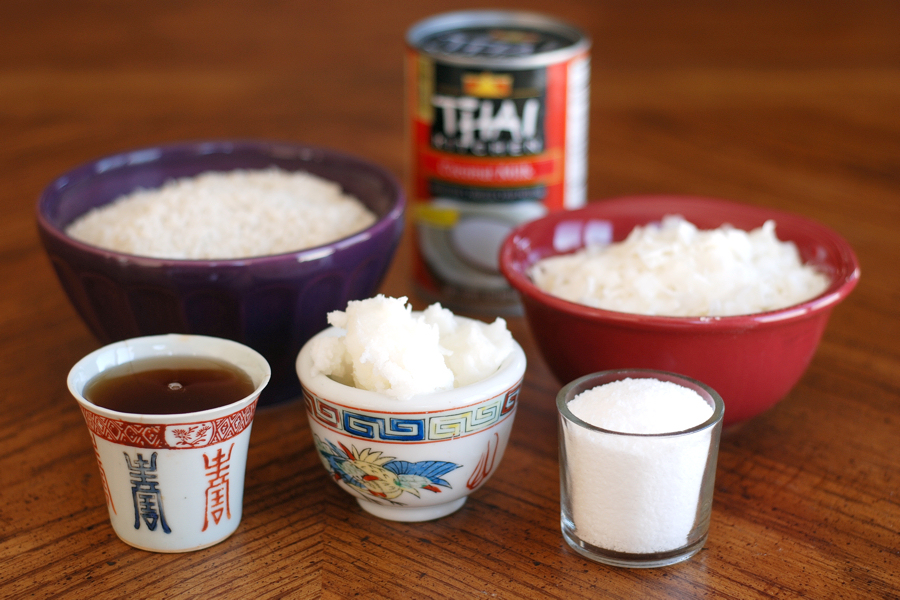
Here’s what you’ll need: butter, sugar, flour, baking powder, salt, cinnamon, milk, egg, Via instant coffee, vanilla extract, and chocolate chips.

Editor’s Note: This post is not sponsored by Starbucks. Any instant coffee will work, but Via works particularly well.


Tasty Kitchen Blog Via Cappuccino Muffins. Guest post by Erica Kastner of Cooking for Seven, recipe submitted by TK member Nancy (nanycpants) of Consider the Lilies.

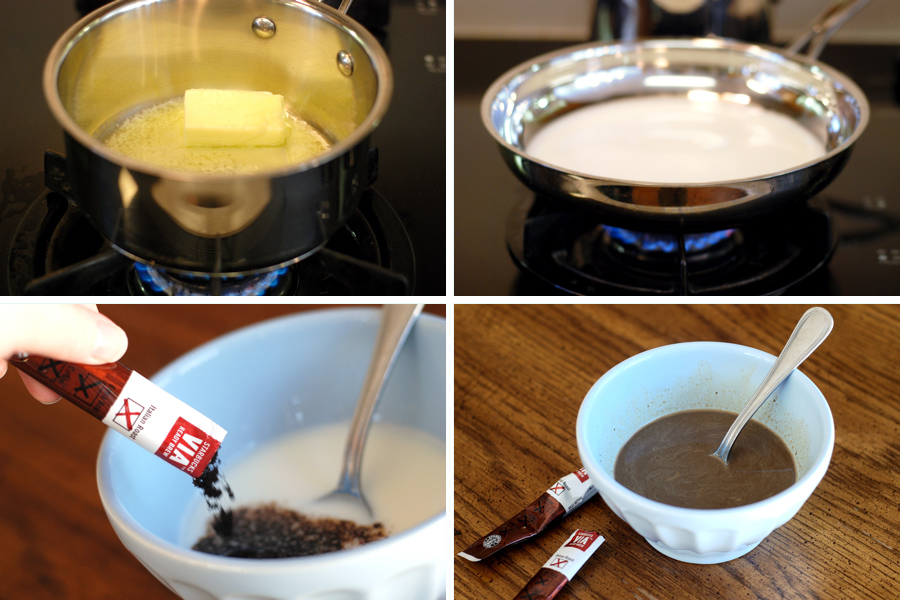
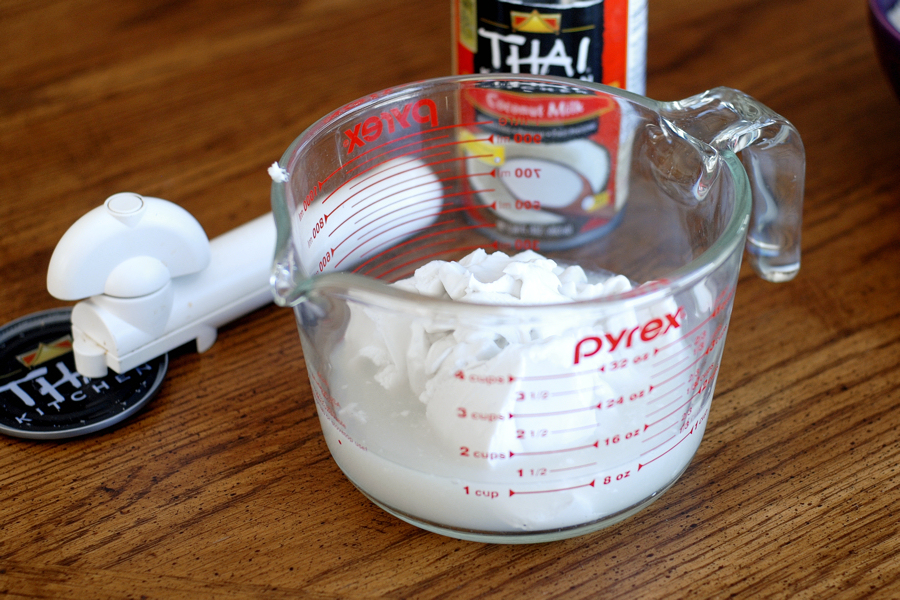
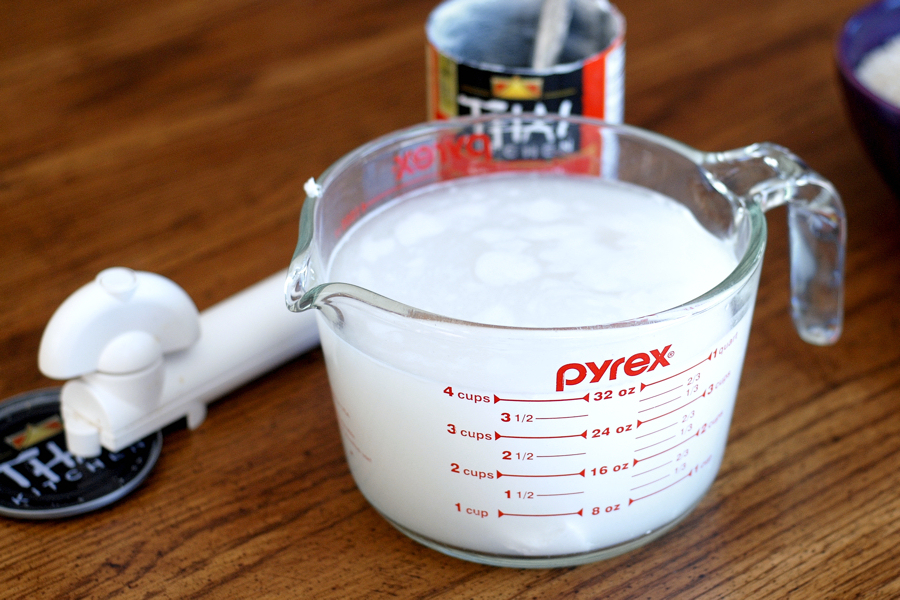
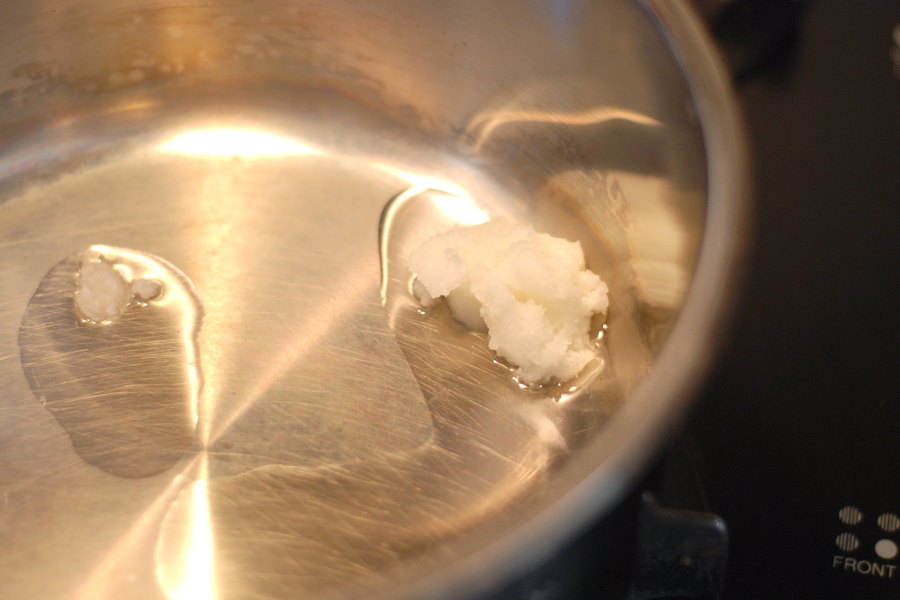
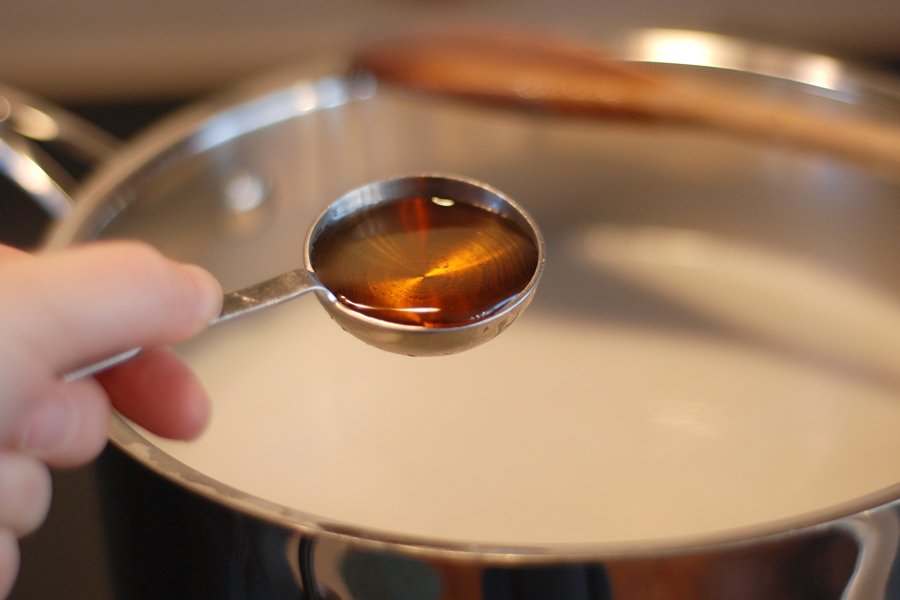
Begin by preheating your oven to 375° F. Melt the butter. Warm the milk. Dissolve the coffee in the warm milk.


Tasty Kitchen Blog Via Cappuccino Muffins. Guest post by Erica Kastner of Cooking for Seven, recipe submitted by TK member Nancy (nanycpants) of Consider the Lilies.

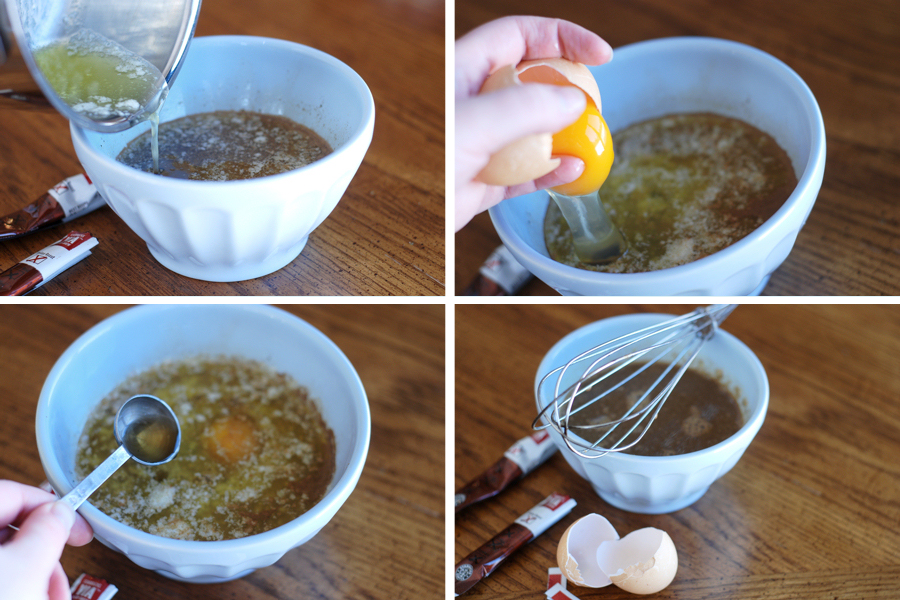
Add the melted butter, egg, and vanilla extract to the coffee/milk mixture.


Tasty Kitchen Blog Via Cappuccino Muffins. Guest post by Erica Kastner of Cooking for Seven, recipe submitted by TK member Nancy (nanycpants) of Consider the Lilies.

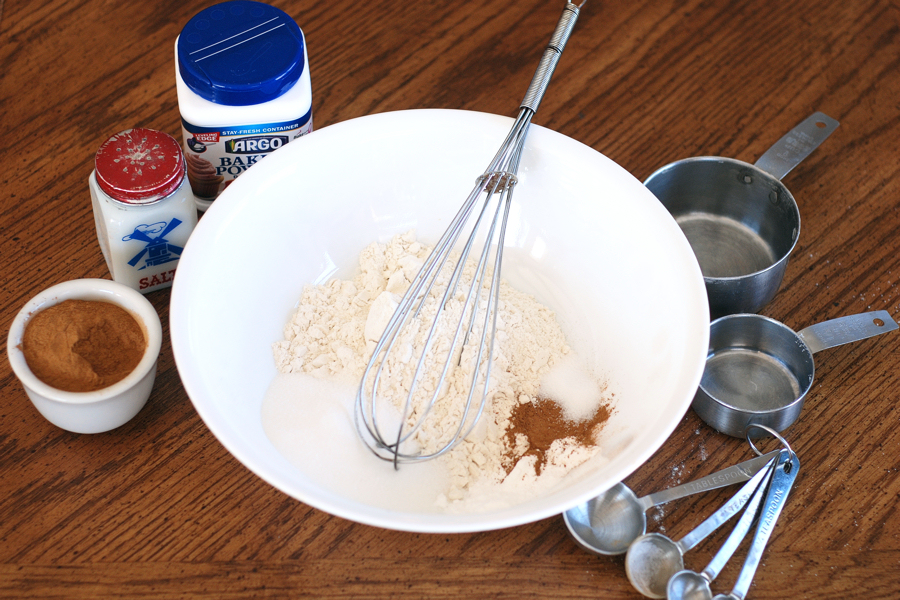
In a separate bowl, whisk together the flour, sugar, baking powder, salt, and cinnamon.


Tasty Kitchen Blog Via Cappuccino Muffins. Guest post by Erica Kastner of Cooking for Seven, recipe submitted by TK member Nancy (nanycpants) of Consider the Lilies.

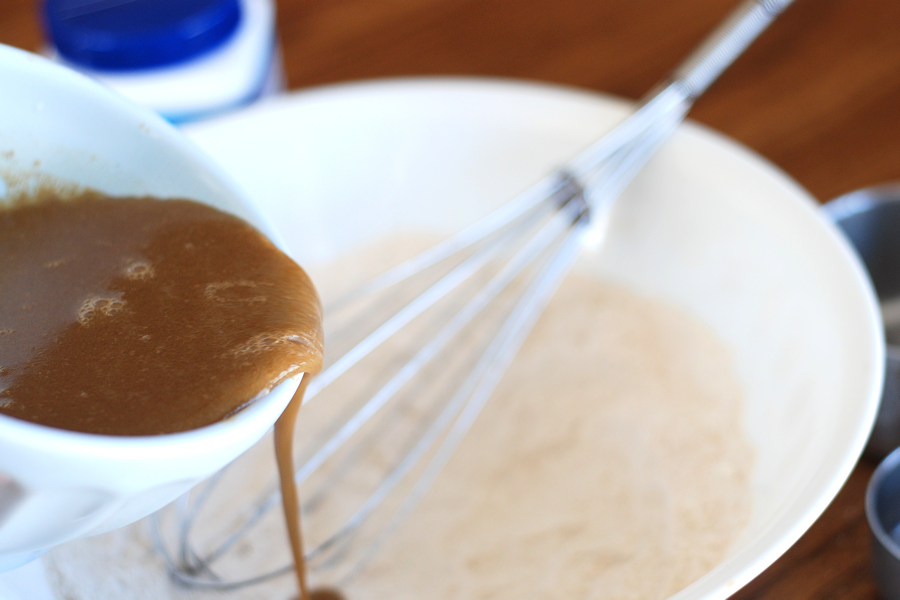
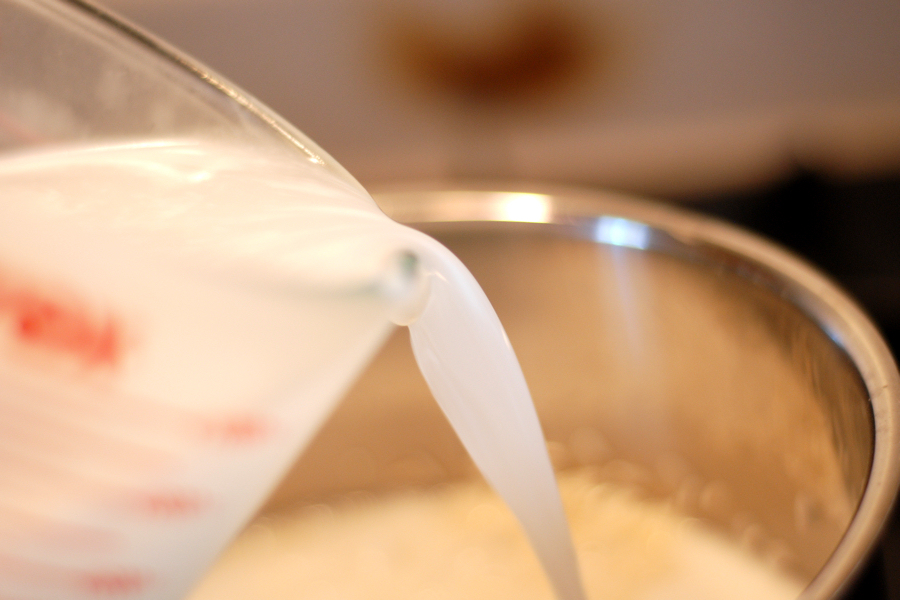
Pour the wet ingredients into a well in the center of the dry ingredients.
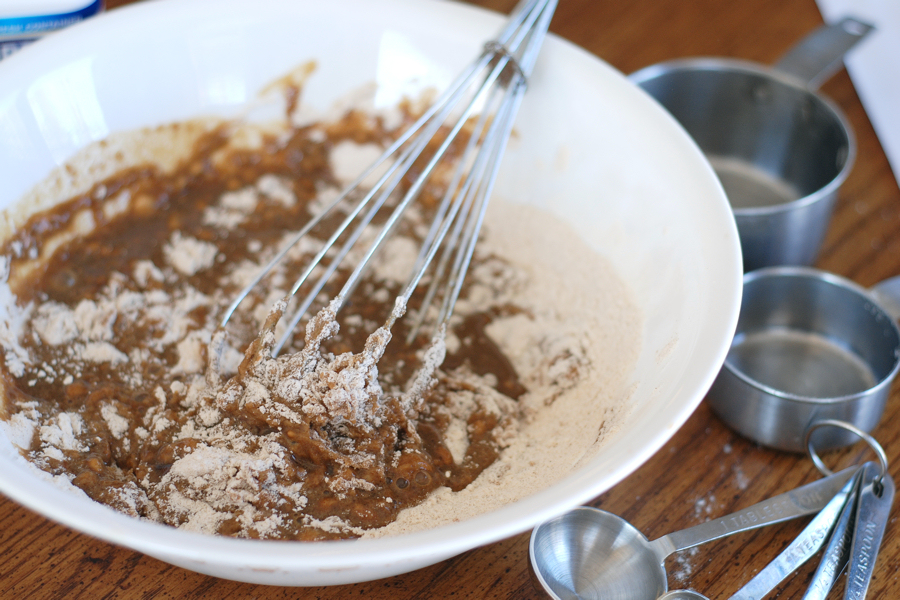


Tasty Kitchen Blog Via Cappuccino Muffins. Guest post by Erica Kastner of Cooking for Seven, recipe submitted by TK member Nancy (nanycpants) of Consider the Lilies.

Mix together.


Tasty Kitchen Blog Via Cappuccino Muffins. Guest post by Erica Kastner of Cooking for Seven, recipe submitted by TK member Nancy (nanycpants) of Consider the Lilies.

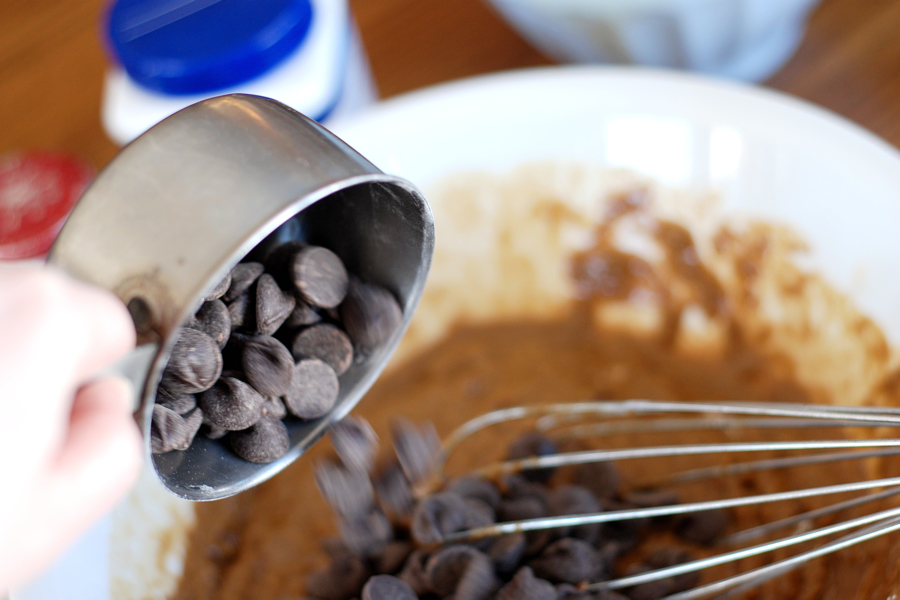
Stir in the chocolate chips.


Tasty Kitchen Blog Via Cappuccino Muffins. Guest post by Erica Kastner of Cooking for Seven, recipe submitted by TK member Nancy (nanycpants) of Consider the Lilies.

Grease or line you muffin tins with papers.


Tasty Kitchen Blog Via Cappuccino Muffins. Guest post by Erica Kastner of Cooking for Seven, recipe submitted by TK member Nancy (nanycpants) of Consider the Lilies.

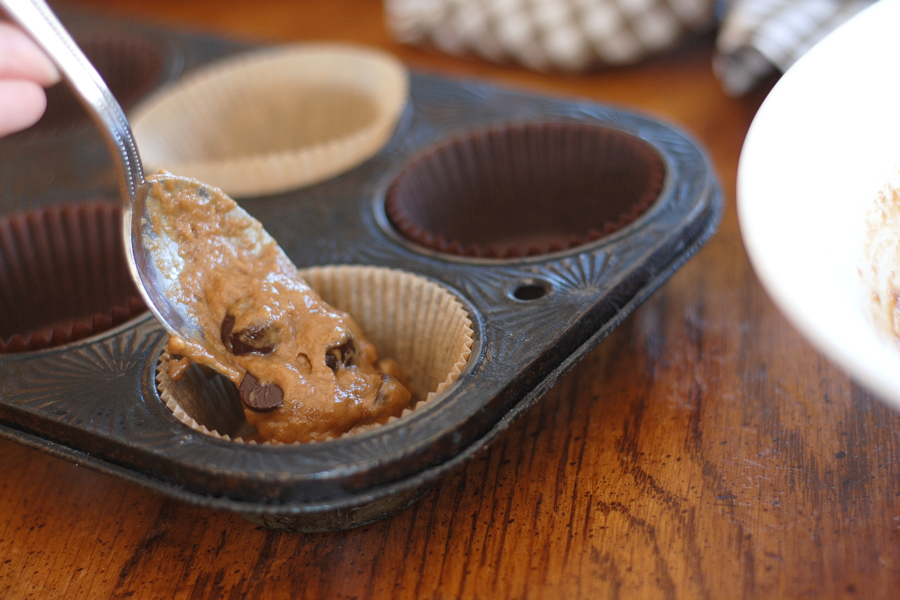
Fill the muffin cups 2/3 full with the batter.


Tasty Kitchen Blog Via Cappuccino Muffins. Guest post by Erica Kastner of Cooking for Seven, recipe submitted by TK member Nancy (nanycpants) of Consider the Lilies.

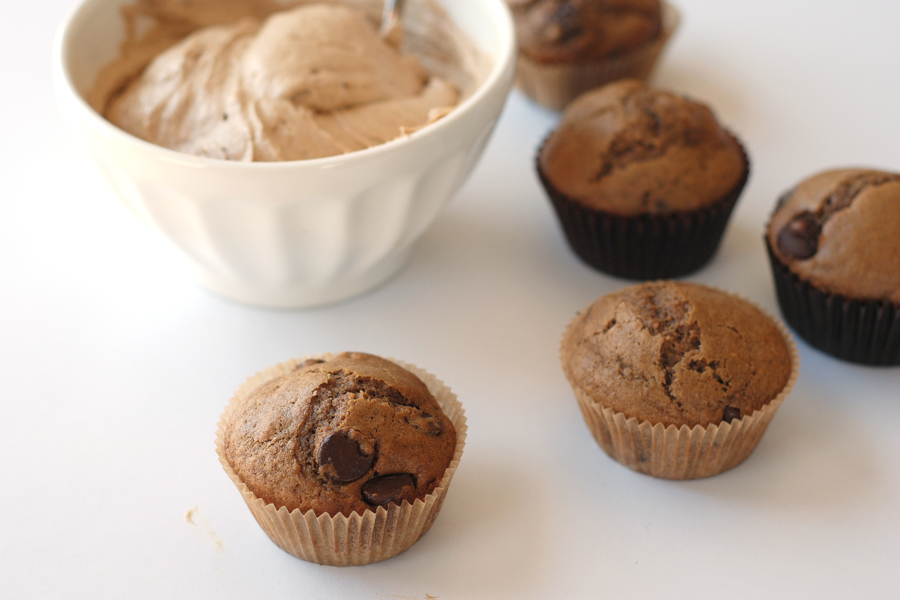
Bake in the preheated 375°F oven for 17–20 minutes. Cool completely.


Tasty Kitchen Blog Via Cappuccino Muffins. Guest post by Erica Kastner of Cooking for Seven, recipe submitted by TK member Nancy (nanycpants) of Consider the Lilies.

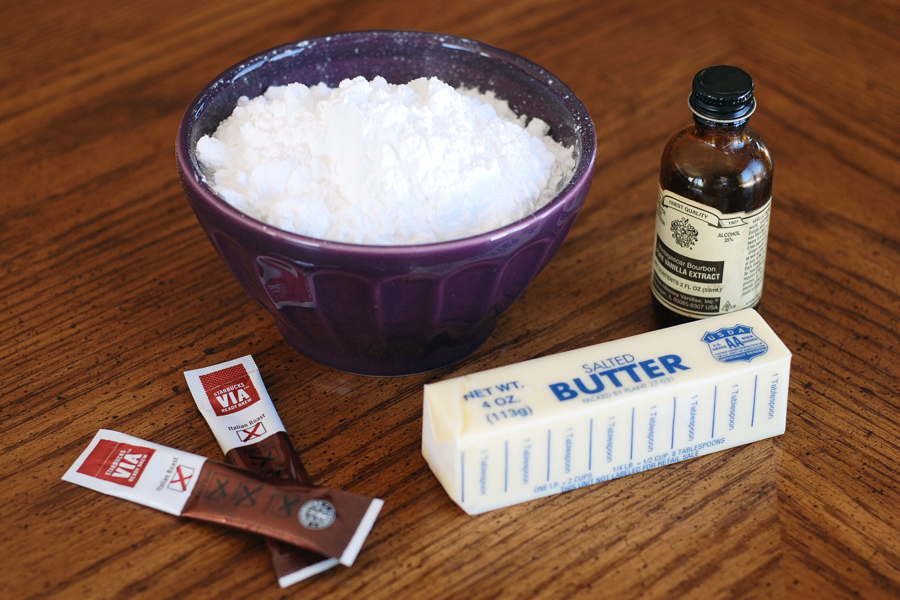
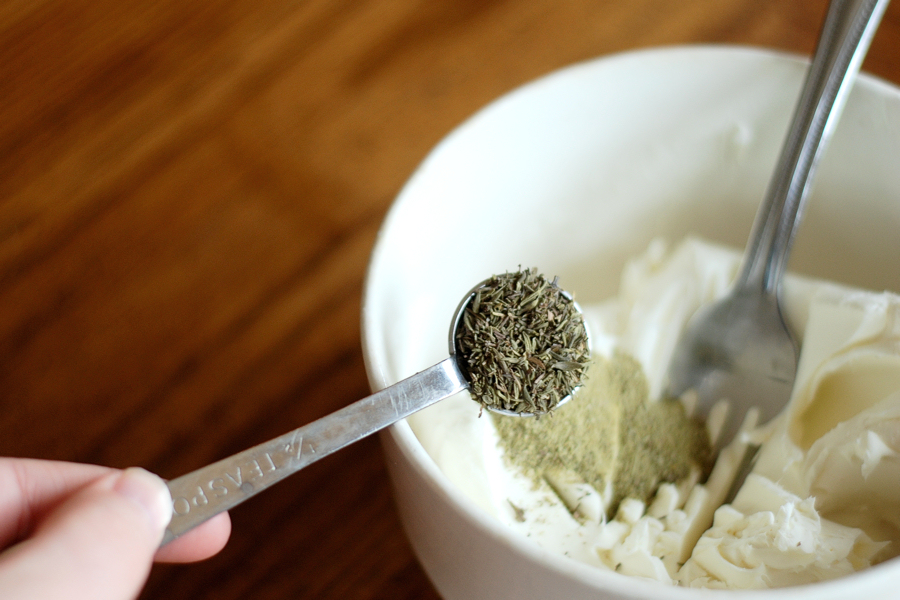
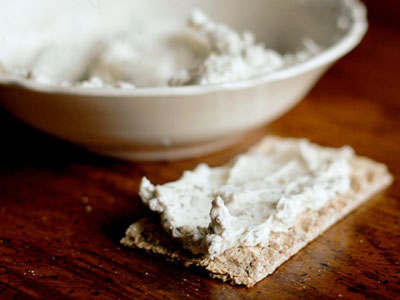
While the muffins are baking, make the icing. You’ll need butter, powdered sugar, vanilla, Via instant coffee, and water.


Tasty Kitchen Blog Via Cappuccino Muffins. Guest post by Erica Kastner of Cooking for Seven, recipe submitted by TK member Nancy (nanycpants) of Consider the Lilies.

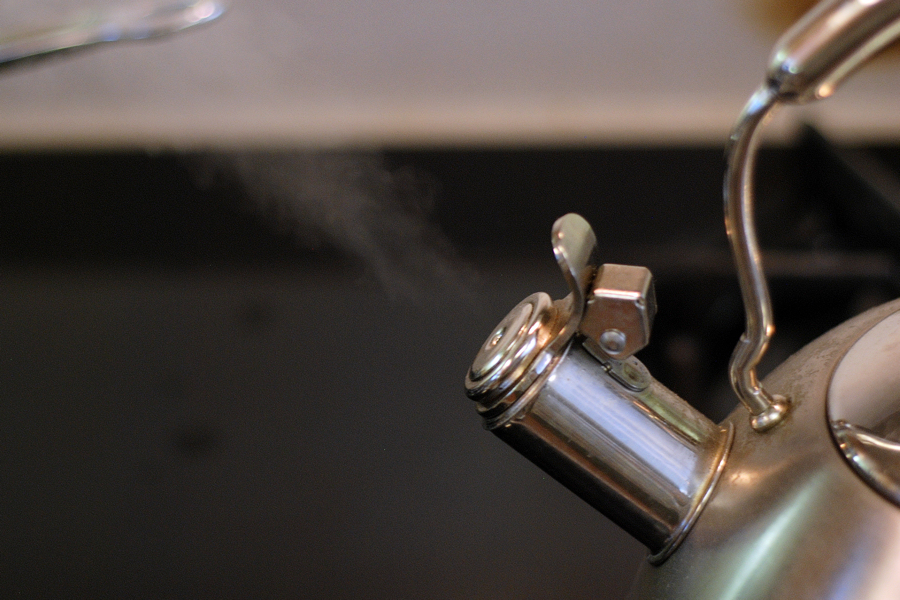
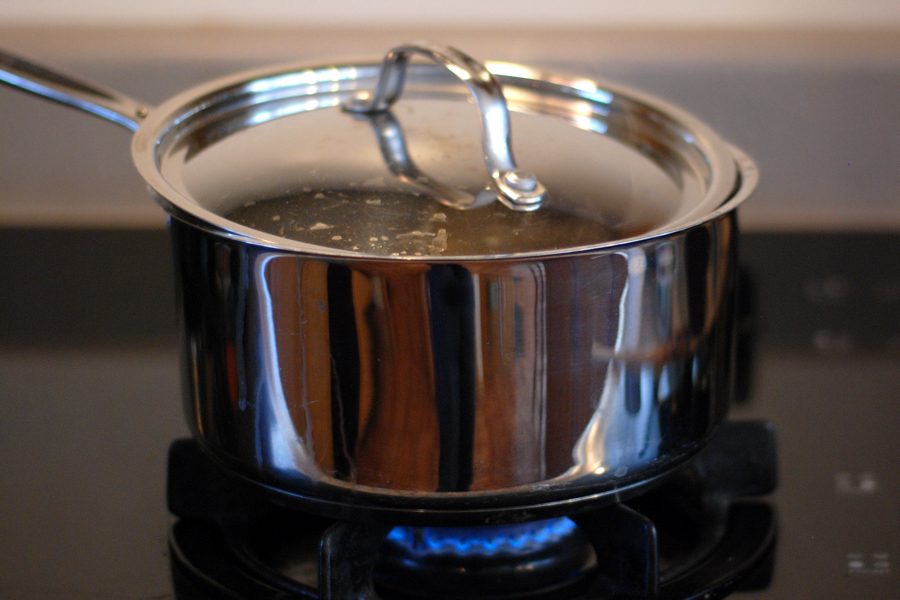
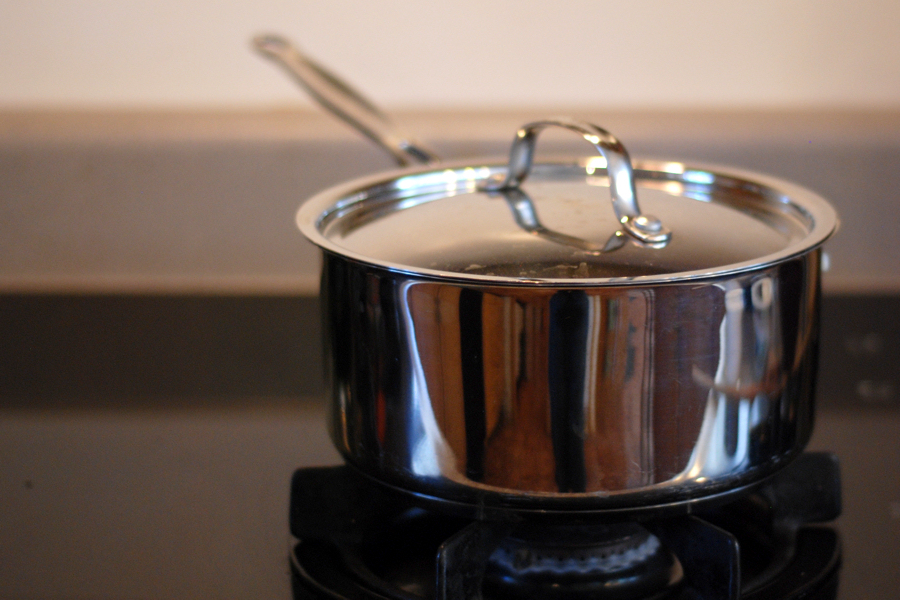
Bring some water to a boil.


Tasty Kitchen Blog Via Cappuccino Muffins. Guest post by Erica Kastner of Cooking for Seven, recipe submitted by TK member Nancy (nanycpants) of Consider the Lilies.

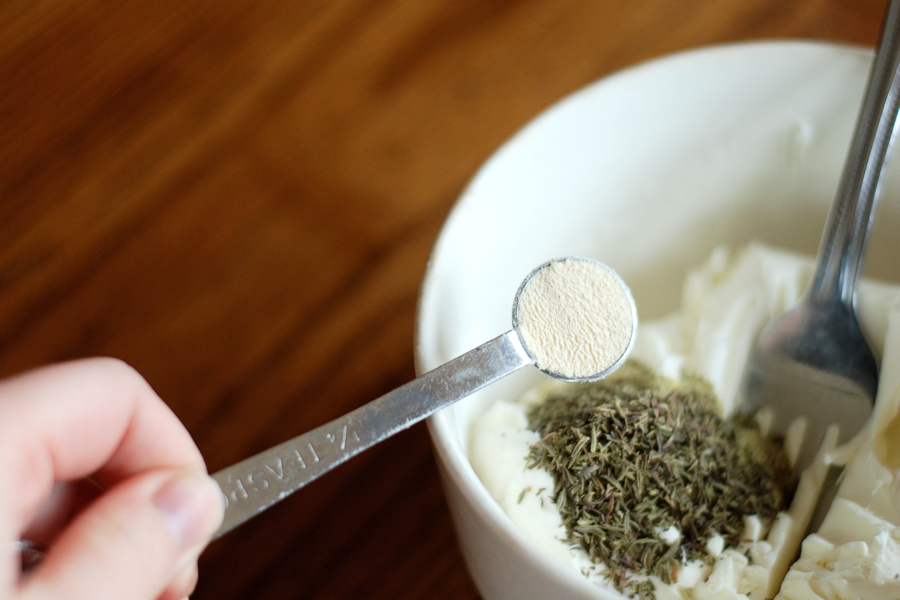
Dissolve the coffee in a tablespoon of the water.


Tasty Kitchen Blog Via Cappuccino Muffins. Guest post by Erica Kastner of Cooking for Seven, recipe submitted by TK member Nancy (nanycpants) of Consider the Lilies.

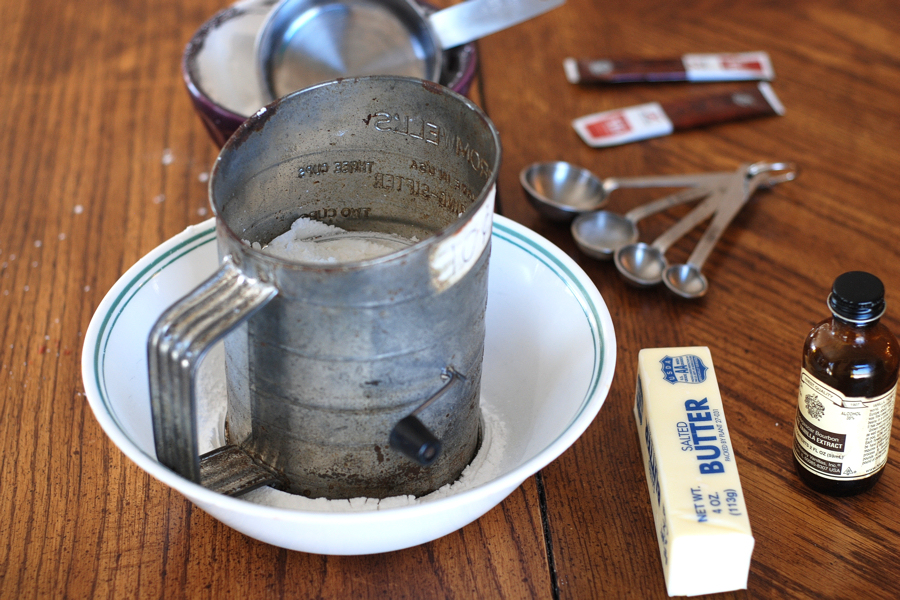
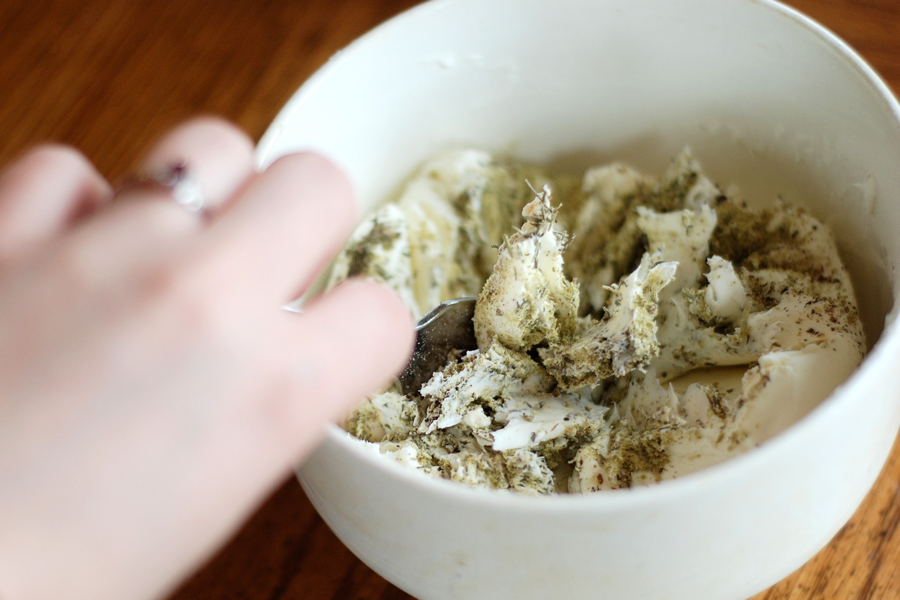
Sift the powdered sugar into a bowl. You should use a larger bowl than I did. It gets messy…


Tasty Kitchen Blog Via Cappuccino Muffins. Guest post by Erica Kastner of Cooking for Seven, recipe submitted by TK member Nancy (nanycpants) of Consider the Lilies.

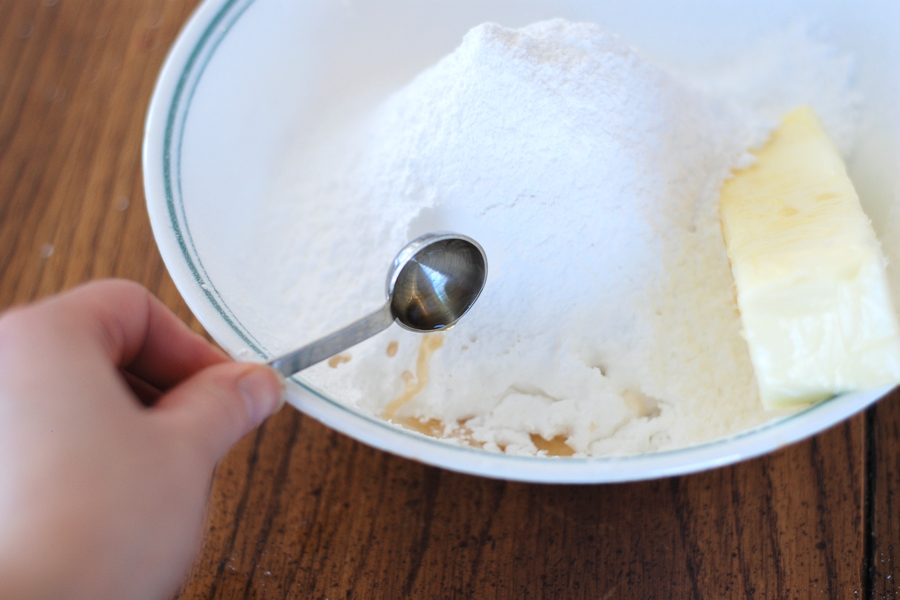
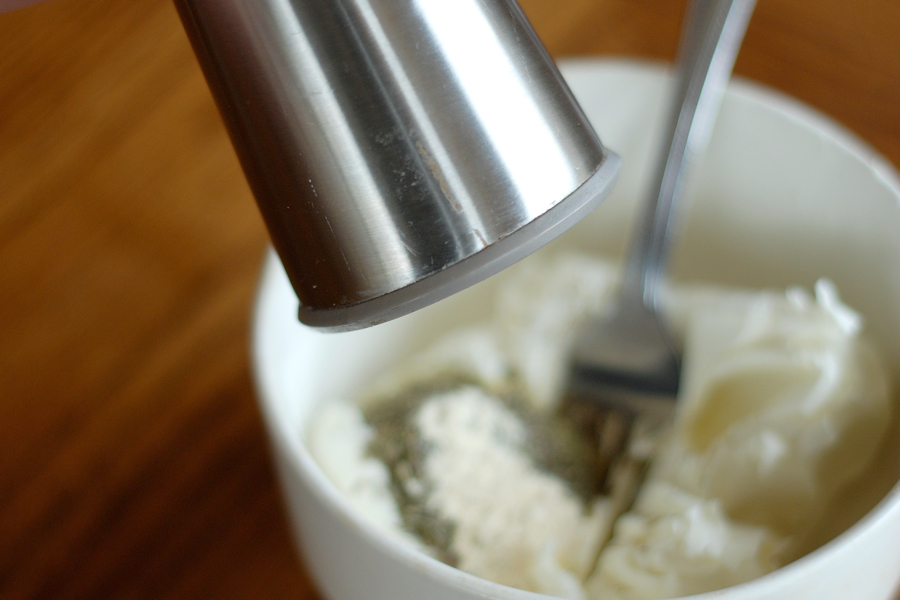
Add the vanilla and butter.


Tasty Kitchen Blog Via Cappuccino Muffins. Guest post by Erica Kastner of Cooking for Seven, recipe submitted by TK member Nancy (nanycpants) of Consider the Lilies.

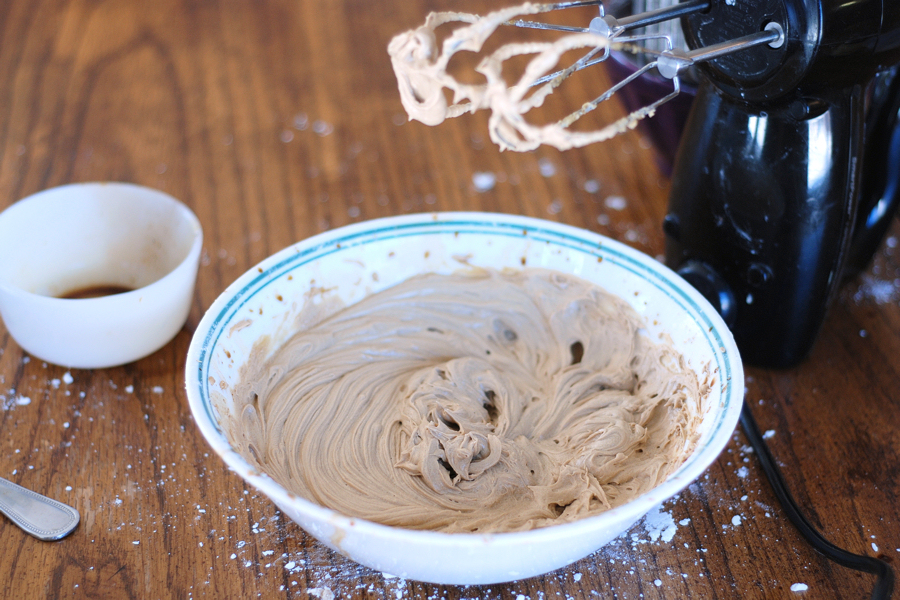
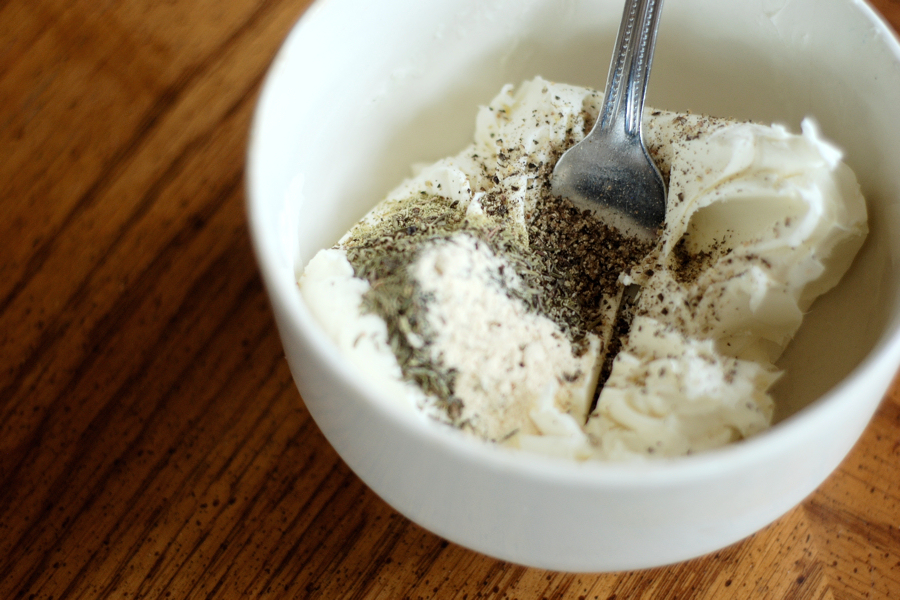
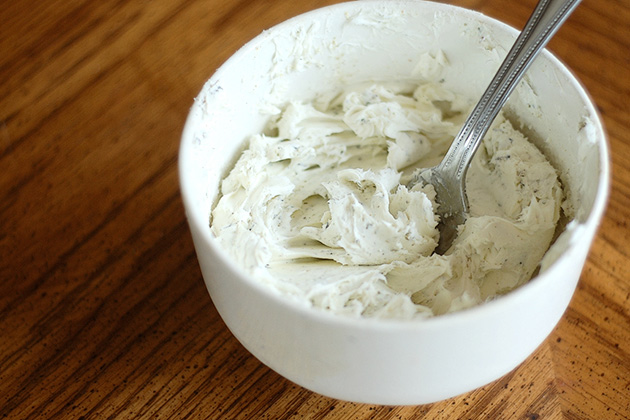
Beat the butter, sugar and vanilla until well-combined. Add the coffee. See? Told you it’d get messy.


Tasty Kitchen Blog Via Cappuccino Muffins. Guest post by Erica Kastner of Cooking for Seven, recipe submitted by TK member Nancy (nanycpants) of Consider the Lilies.

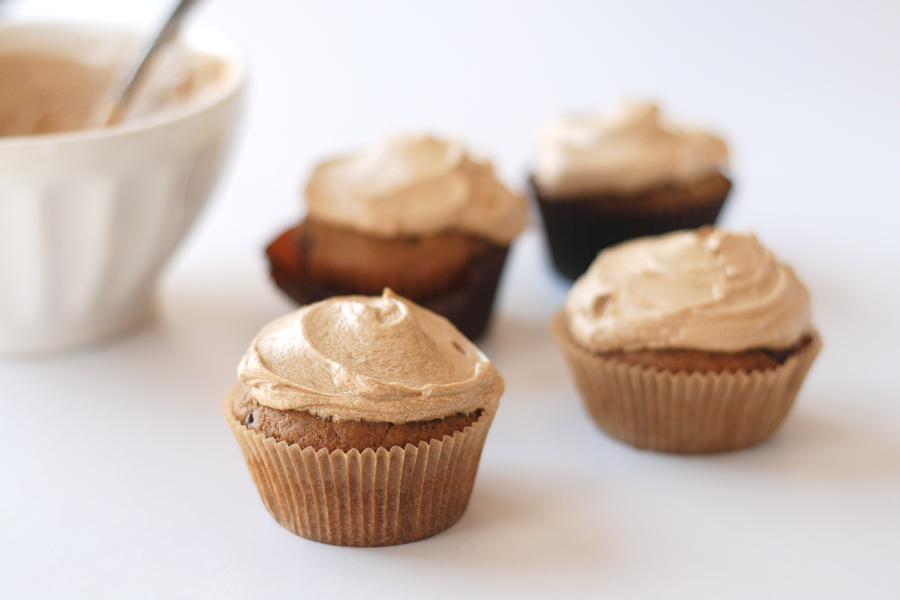
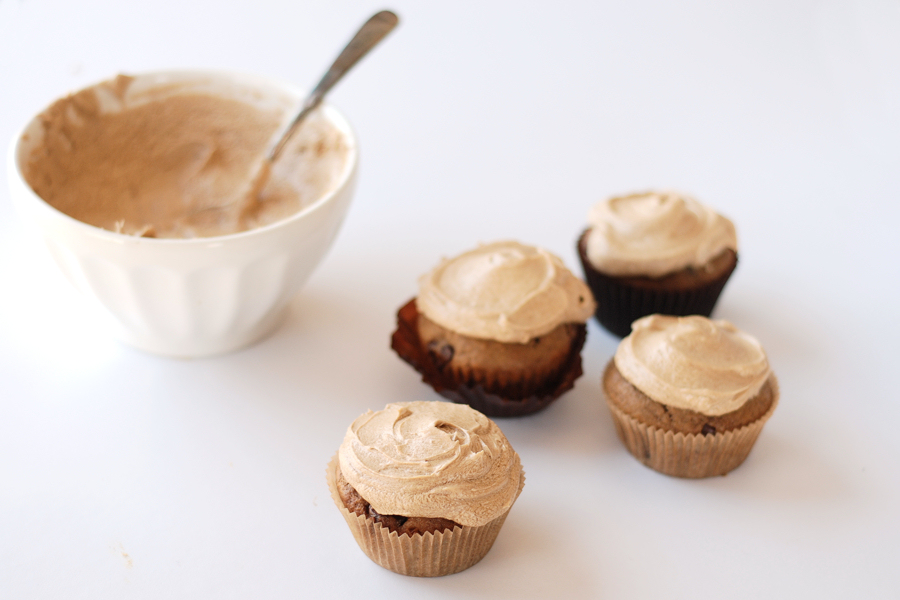
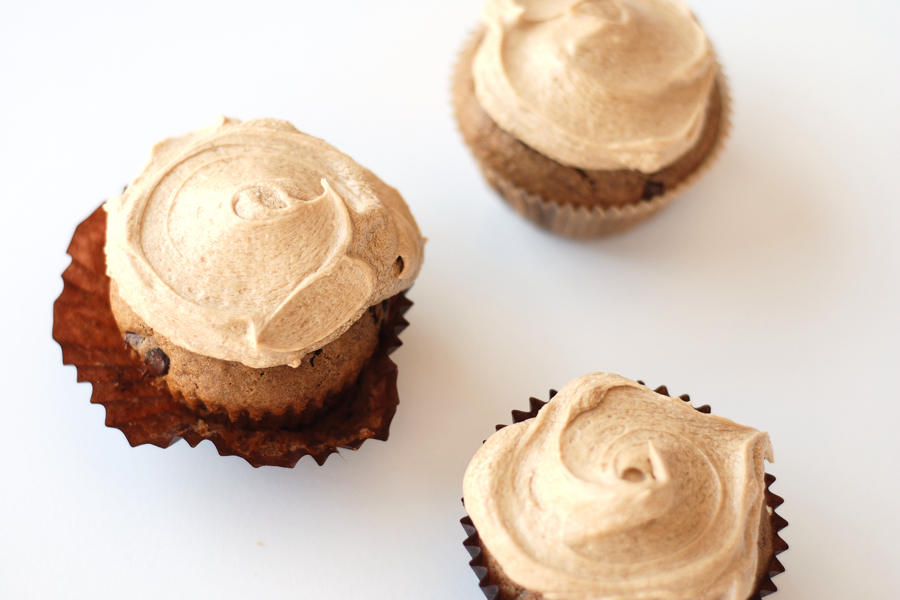
When the muffins are completely cool, add the frosting.


Tasty Kitchen Blog Via Cappuccino Muffins. Guest post by Erica Kastner of Cooking for Seven, recipe submitted by TK member Nancy (nanycpants) of Consider the Lilies.

Notes:

1. Make sure you wait until the muffins are completely cooled until you add the frosting. If you don’t wait, the frosting will melt.
2. My sister thought the cinnamon in the muffins was a little odd. I thought it was lovely. If you aren’t a big cinnamon fan, you could easily leave it out.
3. You may find that, when you add the coffee, the icing will separate a little. Not to worry! If doesn’t harm it a bit.


Tasty Kitchen Blog Via Cappuccino Muffins. Guest post by Erica Kastner of Cooking for Seven, recipe submitted by TK member Nancy (nanycpants) of Consider the Lilies.

Thank you, Nancy, for sharing this yummy recipe with us! (Nancy’s blog is Consider the Lilies, where she shares her poetry and photography.)


Printable Recipe

Via Cappucino Muffins

4.76 Mitt(s) 13 Rating(s)13 votes, average: 4.76 out of 513 votes, average: 4.76 out of 513 votes, average: 4.76 out of 513 votes, average: 4.76 out of 513 votes, average: 4.76 out of 5

Prep Time:

Cook Time:

Difficulty: Easy

Servings: 12

12
x

Print Options

Page size Letter 3x5 4x6
Text Size Small Medium Large
Content Include description
Include prep time, etc.
Show image

Description

Delectable kick-start-your-morning-muffins that might just help you get through the morning and bed down your chocolate craving at the same time. This is a recipe from a friend of mine that I have altered a bit. Enjoy!

Ingredients

  • FOR THE MUFFINS:
  • 2 packages Starbucks Via Instant Coffee
  • ½ cups Warm Milk
  • ¼ cups Melted Margarine
  • 1 whole Egg
  • 1 teaspoon Vanilla
  • 1 cup Flour
  • ⅓ cups Sugar
  • 1-½ teaspoon Baking Powder
  • 1 teaspoon Cinnamon
  • ½ teaspoons Salt
  • 1 cup Chocolate Chips
  • _____
  • FOR THE ICING (optional):
  • ½ cups Butter, Softened
  • 2 cups Powdered Sugar, Or More As Needed
  • ½ teaspoons Vanilla
  • 2 packages Starbucks Via Instant Coffee
  • 1 Tablespoon Boiling Water

Preparation Instructions

Dissolve Starbucks Via instant coffee in warm milk. Stir and mash with a spoon up against the side of the bowl until instant coffee is completely dissolved. Next, add melted margarine, egg and vanilla and whisk until combined.

In another bowl, combine flour, sugar, baking powder, cinnamon and salt.

Pour wet ingredients into a well in the center of the dry ingredients and stir well to incorporate completely. Finally, stir in the chocolate chips.

Fill muffin tins 2/3 full and bake at 375° for 17-20 minutes.

These muffins are pretty sweet and caffeinated, so the icing is really just a much quicker way to send you into some kind of sugar or caffeine-induced coma. You don’t really need it.

BUT should you choose to heed no warning and care nothing for your pancreas and make the icing anyway, start by beating together the butter, sifted powdered sugar (which you can use more than two cups of to attain the right consistency) and vanilla. In a small bowl, mix the Via Instant Coffee together with the boiling water until coffee is dissolved. Add it to the butter mixture and mix until fully incorporated. And now if you have gone and done this, you have probably inadvertently crossed that faded line from the muffin world into the cupcake world. C’est la vie!


_______________________________________

Erica Berge shares her wonderful recipes and amazing food photography on her blog, Cooking for Seven. She also writes about crafts and posts more of her beautiful photography in her personal blog, EricaLea.com. There really isn’t much that this amazing young lady can’t do, and we’re thrilled she does some of it here.


Profile photo of Erica Lea

Thai Coconut Rice

Posted by in Step-by-Step Recipes

Tasty Kitchen Blog: Thai Coconut Rice. Guest post and recipe from Erica Kastner of Cooking for Seven.

 
Soft, slightly sweet rice, infused with the flavor of coconut. The perfect accompaniment to any curry. It is also delicious all by itself, topped with a bit of crunchy toasted coconut. Add a bit of butter and cream, and you have a scrumptious dessert.

This recipe is hardly more difficult than cooking regular rice. It simply has a few more steps and ingredients:


Tasty Kitchen Blog: Thai Coconut Rice. Guest post and recipe from Erica Kastner of Cooking for Seven.

Here’s what you’ll need to make coconut rice: medium-grain rice, a can of coconut milk (Please use full fat. Thank you!), coconut oil, maple syrup (or sweetener of choice), Kosher salt, and large flaked coconut (optional but very good).


Tasty Kitchen Blog: Thai Coconut Rice. Guest post and recipe from Erica Kastner of Cooking for Seven.

Open the can of coconut milk and dump the contents into a measuring cup.


Tasty Kitchen Blog: Thai Coconut Rice. Guest post and recipe from Erica Kastner of Cooking for Seven.

Add enough water to make 4 cups total liquid.


Tasty Kitchen Blog: Thai Coconut Rice. Guest post and recipe from Erica Kastner of Cooking for Seven.

Melt the coconut oil over medium heat.


Tasty Kitchen Blog: Thai Coconut Rice. Guest post and recipe from Erica Kastner of Cooking for Seven.

Add 2 cups rice and cook, stirring occasionally, for about 2 minutes. This will give the rice some nice flavor.


Tasty Kitchen Blog: Thai Coconut Rice. Guest post and recipe from Erica Kastner of Cooking for Seven.

Add the coconut milk …


Tasty Kitchen Blog: Thai Coconut Rice. Guest post and recipe from Erica Kastner of Cooking for Seven.

Salt …


Tasty Kitchen Blog: Thai Coconut Rice. Guest post and recipe from Erica Kastner of Cooking for Seven.

And maple syrup or sweetener of choice. You could also add a bit of coconut flavoring if desired.


Tasty Kitchen Blog: Thai Coconut Rice. Guest post and recipe from Erica Kastner of Cooking for Seven.

Bring to a boil, reduce heat, and place the lid askew on the pot to allow some of the steam to escape. Please don’t mind the water spots on my lid. Thank you!


Tasty Kitchen Blog: Thai Coconut Rice. Guest post and recipe from Erica Kastner of Cooking for Seven.

Cook until the rice has absorbed all (or nearly all) of the coconut milk/water, about 15-20 minutes.


Tasty Kitchen Blog: Thai Coconut Rice. Guest post and recipe from Erica Kastner of Cooking for Seven.

Turn off the heat. Cover the pot tightly and allow to rest for about 5-10 minutes.


Tasty Kitchen Blog: Thai Coconut Rice. Guest post and recipe from Erica Kastner of Cooking for Seven.

When you’re ready to serve, fluff the rice with a fork.


Tasty Kitchen Blog: Thai Coconut Rice. Guest post and recipe from Erica Kastner of Cooking for Seven.

If desired, toast up a bit of coconut flakes.


Tasty Kitchen Blog: Thai Coconut Rice. Guest post and recipe from Erica Kastner of Cooking for Seven.

Serve the rice warm, topped with toasted coconut.


Tasty Kitchen Blog: Thai Coconut Rice. Guest post and recipe from Erica Kastner of Cooking for Seven.

This recipe turns an old curry standby into a special meal. It’s wonderful as a side dish for an Asian-themed meal as well. My sisters and I also enjoy it with a bit of extra maple syrup and butter as an after-dinner treat.


Printable Recipe

Thai Coconut Rice

See post on Erica Lea’s site!
5.00 Mitt(s) 2 Rating(s)2 votes, average: 5.00 out of 52 votes, average: 5.00 out of 52 votes, average: 5.00 out of 52 votes, average: 5.00 out of 52 votes, average: 5.00 out of 5

Prep Time:

Cook Time:

Difficulty: Easy

Servings: 6

6
x

Print Options

Page size Letter 3x5 4x6
Text Size Small Medium Large
Content Include description
Include prep time, etc.
Show image

Description

Coconut flavored rice, the perfect accompaniment to curry.

Ingredients

  • 2 cups Medium Grain Rice
  • 2 cups Regular Coconut Milk
  • 2 cups Water
  • ½ teaspoons Kosher Or Sea Salt
  • 1 Tablespoon Coconut Oil
  • 2 Tablespoons Maple Syrup, Sucanat, Brown Sugar, Or Sweetener Of Choice
  • ½ teaspoons Coconut Flavoring (optional)
  • 2 Tablespoons Tasted Coconut, Optional

Preparation Instructions

1. In a large, deep-sided pot, melt the coconut oil over medium heat. Add the rice and cook, stirring occasionally, for about 2 minutes.

2. Add the coconut milk, water, salt, sweetener, and flavoring if using. Stir well. Bring the rice to a boil, stirring occasionally to prevent the rice from burning.

3. When it comes to a boil, reduce the heat to medium-low. Place the lid askew on the pot, allowing some of the steam to escape. Cook for 15-20 minutes, or until the rice has absorbed all (or nearly all) of the coconut-water.

4. Turn off the heat. Cover the pot tightly with the lid and allow to rest for 5-10 minutes, or until you are ready to serve. When you are ready to serve, fluff the rice with a fork or chopsticks. Top with toasted coconut if desired.


_______________________________________

Erica Berge shares her wonderful recipes and amazing food photography on her blog, Cooking for Seven. She also writes about crafts and posts more of her beautiful photography in her personal blog, EricaLea.com. There really isn’t much that this amazing young lady can’t do, and we’re thrilled she does some of it here.


Profile photo of Erica Lea

Glorious Stuffed Portobello Mushrooms

Posted by in Step-by-Step Recipes

Tasty Kitchen Blog: Glorious Stuffed Portobello Mushrooms. Guest post by Erica Kastner of Cooking for Seven, recipe submitted by TK member Acher.

 
Tender, tasty portobello mushrooms stuffed with flavorful vegetables and spices and sprinkled with cheese. Baked until golden. Hungry yet?

Today’s recipe, brought to us by acher, would be a splendid starter for a dinner or a full course at lunch. The stuffing is hearty and filling, but has a complexity of flavors. White wine, fresh fennel, and Italian sausage all lend lovely notes.

All you need is a few ingredients from the market.


Tasty Kitchen Blog: Glorious Stuffed Portobello Mushrooms. Guest post by Erica Kastner of Cooking for Seven, recipe submitted by TK member Acher.

Portobello mushroom caps, olive oil, white wine or broth, Italian sausage, fennel, onion, bell pepper, celery, garlic, egg, cheese (I used marble jack), sandwich bread (I used homemade), rosemary (I used dried, but you can use fresh), and crushed red pepper flakes.


Tasty Kitchen Blog: Glorious Stuffed Portobello Mushrooms. Guest post by Erica Kastner of Cooking for Seven, recipe submitted by TK member Acher.

Preheat your oven to 450° F. Wipe the mushrooms with a paper towel to remove any dirt.


Tasty Kitchen Blog: Glorious Stuffed Portobello Mushrooms. Guest post by Erica Kastner of Cooking for Seven, recipe submitted by TK member Acher.

Scrape out the gills with a spoon.


Tasty Kitchen Blog: Glorious Stuffed Portobello Mushrooms. Guest post by Erica Kastner of Cooking for Seven, recipe submitted by TK member Acher.

Drizzle some oil in the bottom of a baking dish and place the mushrooms on top. Drizzle a bit of oil on top of the mushrooms. Set aside.


Tasty Kitchen Blog: Glorious Stuffed Portobello Mushrooms. Guest post by Erica Kastner of Cooking for Seven, recipe submitted by TK member Acher.

Brown the sausage over medium-high heat.


Tasty Kitchen Blog: Glorious Stuffed Portobello Mushrooms. Guest post by Erica Kastner of Cooking for Seven, recipe submitted by TK member Acher.

Add a sprinkling of crushed red pepper flakes.


Tasty Kitchen Blog: Glorious Stuffed Portobello Mushrooms. Guest post by Erica Kastner of Cooking for Seven, recipe submitted by TK member Acher.

As the meat is browning, chop up the vegetables: onions …


Tasty Kitchen Blog: Glorious Stuffed Portobello Mushrooms. Guest post by Erica Kastner of Cooking for Seven, recipe submitted by TK member Acher.

Fennel …


Tasty Kitchen Blog: Glorious Stuffed Portobello Mushrooms. Guest post by Erica Kastner of Cooking for Seven, recipe submitted by TK member Acher.

Bell pepper …


Tasty Kitchen Blog: Glorious Stuffed Portobello Mushrooms. Guest post by Erica Kastner of Cooking for Seven, recipe submitted by TK member Acher.

And celery. Whew!


Tasty Kitchen Blog: Glorious Stuffed Portobello Mushrooms. Guest post by Erica Kastner of Cooking for Seven, recipe submitted by TK member Acher.

Slice the garlic very thinly.


Tasty Kitchen Blog: Glorious Stuffed Portobello Mushrooms. Guest post by Erica Kastner of Cooking for Seven, recipe submitted by TK member Acher.

Chop the rosemary finely.


Tasty Kitchen Blog: Glorious Stuffed Portobello Mushrooms. Guest post by Erica Kastner of Cooking for Seven, recipe submitted by TK member Acher.

Add the vegetables and rosemary to the sausage and saute until crisp-tender, about 5-10 minutes.


Tasty Kitchen Blog: Glorious Stuffed Portobello Mushrooms. Guest post by Erica Kastner of Cooking for Seven, recipe submitted by TK member Acher.

Add the wine or broth to deglaze the pan. Cook for about 5 minutes.


Tasty Kitchen Blog: Glorious Stuffed Portobello Mushrooms. Guest post by Erica Kastner of Cooking for Seven, recipe submitted by TK member Acher.

Meanwhile, toast the bread.


Tasty Kitchen Blog: Glorious Stuffed Portobello Mushrooms. Guest post by Erica Kastner of Cooking for Seven, recipe submitted by TK member Acher.

Cut the toasted bread into cubes.


Tasty Kitchen Blog: Glorious Stuffed Portobello Mushrooms. Guest post by Erica Kastner of Cooking for Seven, recipe submitted by TK member Acher.

Stir the bread cubes and cheese into the sausage/veggie mix. The bread will soak up the wine/broth. Taste and add salt and pepper if needed.


Tasty Kitchen Blog: Glorious Stuffed Portobello Mushrooms. Guest post by Erica Kastner of Cooking for Seven, recipe submitted by TK member Acher.

Lightly beat the egg.


Tasty Kitchen Blog: Glorious Stuffed Portobello Mushrooms. Guest post by Erica Kastner of Cooking for Seven, recipe submitted by TK member Acher.

Remove pan from heat and stir in the egg.


Tasty Kitchen Blog: Glorious Stuffed Portobello Mushrooms. Guest post by Erica Kastner of Cooking for Seven, recipe submitted by TK member Acher.

Mound the stuffing mixture into the mushroom caps.


Tasty Kitchen Blog: Glorious Stuffed Portobello Mushrooms. Guest post by Erica Kastner of Cooking for Seven, recipe submitted by TK member Acher.

Sprinkle with a bit of extra cheese.


Tasty Kitchen Blog: Glorious Stuffed Portobello Mushrooms. Guest post by Erica Kastner of Cooking for Seven, recipe submitted by TK member Acher.

Bake in preheated oven for 30-40 minutes or until the mushrooms are tender and the stuffing is browned.


Tasty Kitchen Blog: Glorious Stuffed Portobello Mushrooms. Guest post by Erica Kastner of Cooking for Seven, recipe submitted by TK member Acher.

Glorious.

Notes:

1. There was much more stuffing than could fill two mushroom caps. Thankfully I had some baby bellas on hand to fill.
2. I found that I only needed to cook the mushrooms for around 25 minutes. You should set your timer to 15 minutes and check the mushrooms every so often so they don’t burn.

 
Thank you, acher, for sharing this delicious recipe with us!


Printable Recipe

Glorious Stuffed Portobello Mushrooms

5.00 Mitt(s) 3 Rating(s)3 votes, average: 5.00 out of 53 votes, average: 5.00 out of 53 votes, average: 5.00 out of 53 votes, average: 5.00 out of 53 votes, average: 5.00 out of 5

Prep Time:

Cook Time:

Difficulty: Easy

Servings: 4

4
x

Print Options

Page size Letter 3x5 4x6
Text Size Small Medium Large
Content Include description
Include prep time, etc.
Show image

Description

What to do when you have odds and ends of veggies and two beautiful portobello caps? Make stuffed mushrooms of course! The amount of filling in this recipe will stuff two large portobello caps, and easily feeds 4 with a loaf of crusty bread and a salad.

Ingredients

  • 2 whole Portobello Mushroom Caps
  • Olive Oil
  • ½ pounds Bulk Italian Sausage, Or Links With Casings Removed
  • 2 teaspoons Crushed Red Pepper Flakes
  • 1 whole Onion
  • 1 bulb Fresh Fennel
  • 1 whole Bell Pepper, Any Color
  • 3 stalks Celery, With Leaves
  • 4 cloves Garlic
  • 3 sprigs Rosemary
  • ¾ cups White Wine (can Substitute Stock/broth)
  • ½ cups Shredded Monterey Jack, Plus Extra For Sprinkling
  • 4 slices Good Sandwich Bread, Toasted And Cubed
  • 1 whole Egg, Lightly Beaten

Preparation Instructions

Preheat oven to 450F.

Wipe the portobellos clean with a paper towel and scrape out the gills with a spoon. Drizzle enough olive oil in the bottom of a glass baking dish to coat. Place portobello caps in the baking dish, top down, drizzle with oil, and set aside.

Brown sausage in a large skillet with a little bit of olive oil and the crushed red pepper over medium high heat.

While the sausage is browning, dice the onion, fennel, and bell pepper, chop the celery, and slice the garlic as thin as you can get it.

Remove the rosemary leaves from the stems and finely chop. Add the veggies and garlic and rosemary to the skillet and saute with the sausage until crisp-tender, about 5-7 minutes.

Add the wine to deglaze the pan and allow to cook for another 5 minutes or so.

Stir in the shredded cheese and bread cubes. The bread cubes should soak up whatever wine remains in the pan.

Taste it at this point, and add salt and freshly ground black pepper to taste (or more red pepper!). Stir in the beaten egg. The stuffing mixture should seem a little wet.

Mound stuffing mixture into portobello caps. It’s ok to pack it down a little bit to make sure that it stays in place.

Sprinkle with a little extra shredded cheese. Bake at 450F for 35-40 minutes, or until the portobello is tender and the stuffing is golden brown.


_______________________________________

Erica Berge shares her wonderful recipes and amazing food photography on her blog, Cooking for Seven. She also writes about crafts and posts more of her beautiful photography in her personal blog, EricaLea.com. There really isn’t much that this amazing young lady can’t do, and we’re thrilled she does some of it here.


Profile photo of Erica Lea

Favorite Cheese Ball

Posted by in Step-by-Step Recipes

  I have made this recipe so often that I could probably do it with my eyes shut and one hand held behind my back. My dad loves it and complains if we try to alter it in any way. My sister and I developed this cheese ball because we couldn’t find a recipe to suit our […]

Profile photo of Erica Lea

Chai Gingerbread Bars

Posted by in Baking, Step-by-Step Recipes

  Chai meets Gingerbread. These bars, brought to us by Nika (who also shared the utterly delicious Red Curry Coconut Noodles), are the perfect addition to a steaming cup of coffee, cocoa, or tea. Curl up with your toes by the fire and savor a wonderful treat. What really drew me to these Chai Gingerbread […]

Profile photo of Erica Lea

Bacon and Parmesan Pasta

Posted by in Step-by-Step Recipes

  Bacon. Parmesan cheese. Cream cheese. Heavy cream. Oh yes. This stuff is good. This recipe, brought to us by Trish Boese, brings together some of the most enticing ingredients known to man into an easy, irresistible dish. It was hard to keep my fork out of the pot before serving the pasta. Even my […]

Profile photo of Erica Lea

A Family Recipe: Yankee Cornbread

Posted by in Baking, Step-by-Step Recipes

  Ever since I can remember, I have eaten my cornbread like a Yank: generously spread with butter and drizzled with maple syrup. You southerners may disagree, but that’s the way I like it. Slightly sweet, barely savory. This is the recipe that our family loves and uses again and again.       You […]