The Pioneer Woman Tasty Kitchen
Profile photo of Natalie | Perry's Plate

Cranberry Butter

Posted by in Holidays, Step-by-Step Recipes

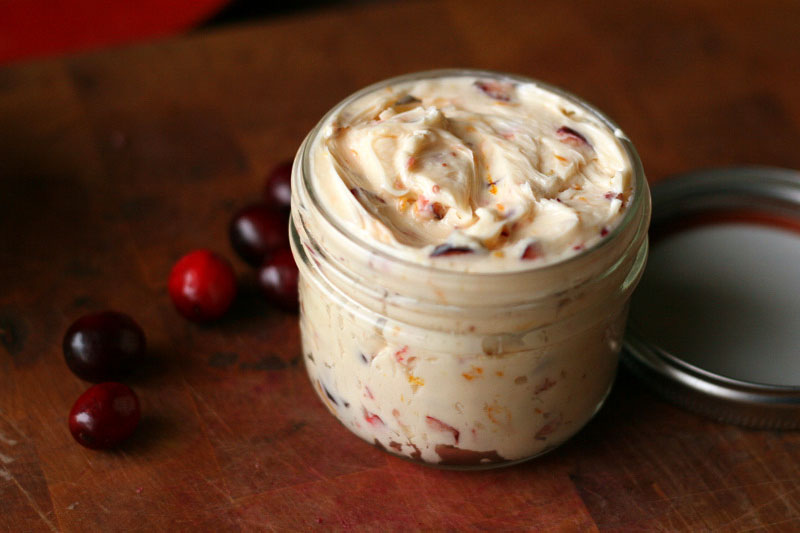
Grab an extra bag of cranberries this week and make this incredibly simple and ridiculously delicious Cranberry Butter. It’s great to have on hand, especially when you need an quick and easy breakfast treat—or midday snack!–after a long day of cooking. It also makes the perfect hostess gift. We’re bringing back this old favorite so you can make a batch or two, or six!
 
Tasty Kitchen Blog: Cranberry Butter. Guest post by Natalie Perry of Perry's Plate, recipe submitted by TK member MissyDew.

 
Need a quick, edible, last-minute gift? Have a few extra cranberries lying around? You’ve got to try this Cranberry Butter, a recipe from MissyDew (the woman who also blessed us with That’s the Best Frosting I’ve Ever Had). I swear it’s magical. Even more magical than butter is on its own.


Tasty Kitchen Blog: Cranberry Butter. Guest post by Natalie Perry of Perry's Plate, recipe submitted by TK member MissyDew.

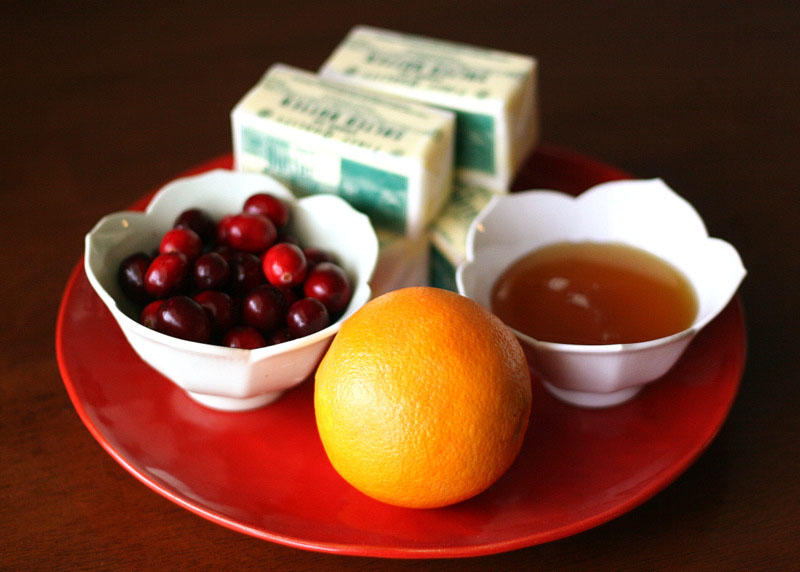
You only need four things: fresh cranberries, honey, an orange, and a pound of softened butter. Because you probably haven’t used enough butter this month.


Tasty Kitchen Blog: Cranberry Butter. Guest post by Natalie Perry of Perry's Plate, recipe submitted by TK member MissyDew.

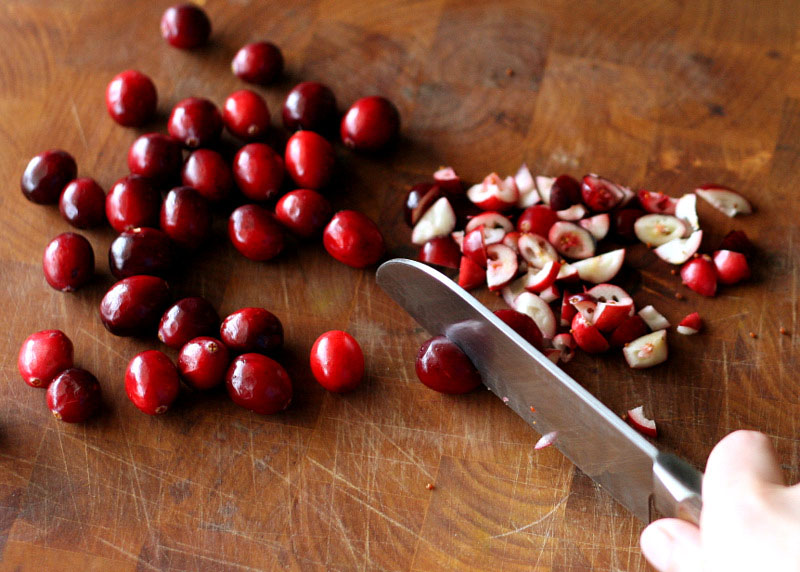
First give the cranberries a chop.


Tasty Kitchen Blog: Cranberry Butter. Guest post by Natalie Perry of Perry's Plate, recipe submitted by TK member MissyDew.

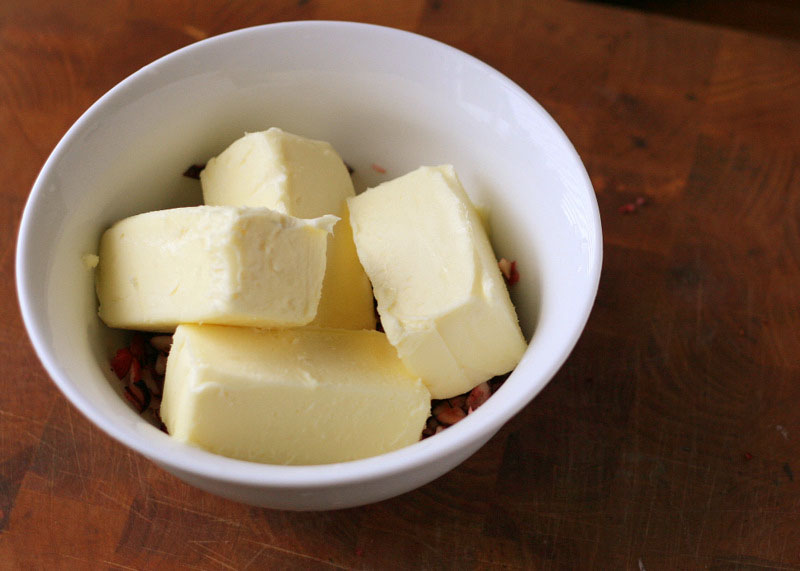
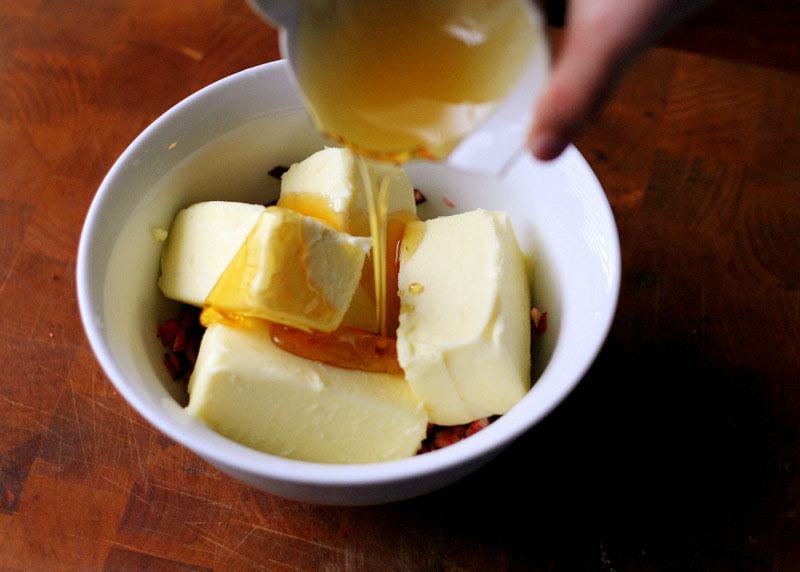
Stick them in a bowl with the butter.


Tasty Kitchen Blog: Cranberry Butter. Guest post by Natalie Perry of Perry's Plate, recipe submitted by TK member MissyDew.

Add the honey.


Tasty Kitchen Blog: Cranberry Butter. Guest post by Natalie Perry of Perry's Plate, recipe submitted by TK member MissyDew.

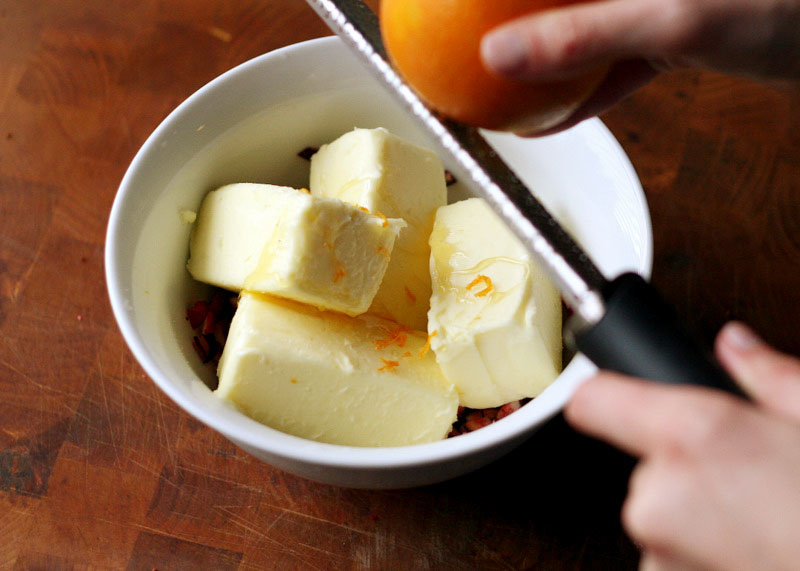
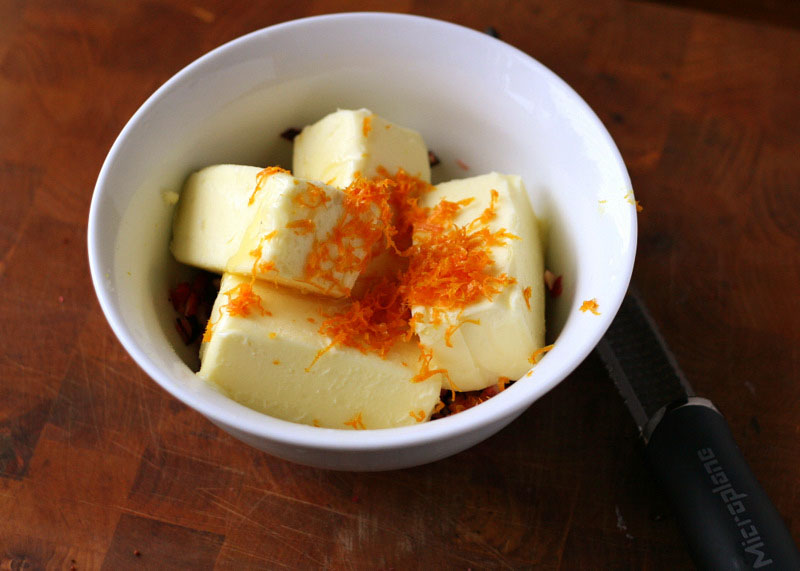
Get out your trusty zester and get all the zest you can off that orange. Don’t have a zester? It’s probably not too late to ask Santa for one. Although you might want to spell out “Microplane” for him, just so he can get it right. He’s getting old, you know.


Tasty Kitchen Blog: Cranberry Butter. Guest post by Natalie Perry of Perry's Plate, recipe submitted by TK member MissyDew.

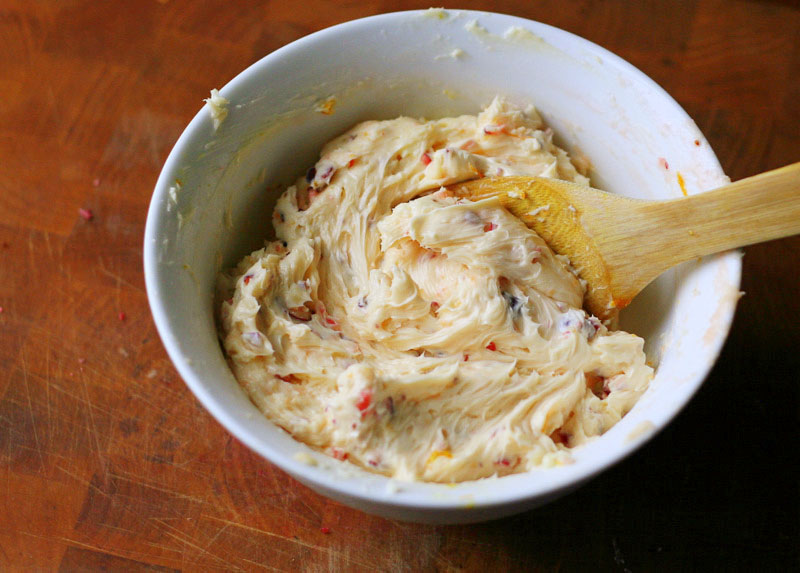
There. Everything’s in the bowl. That took, what, 5 minutes?


Tasty Kitchen Blog: Cranberry Butter. Guest post by Natalie Perry of Perry's Plate, recipe submitted by TK member MissyDew.

Give it a good stir.

(Or more realistically, stir until you realize your butter isn’t as soft as you thought. Dump it into a larger bowl, buzz it with an electric mixer, and return it to the smaller, prettier bowl like nothing happened.)

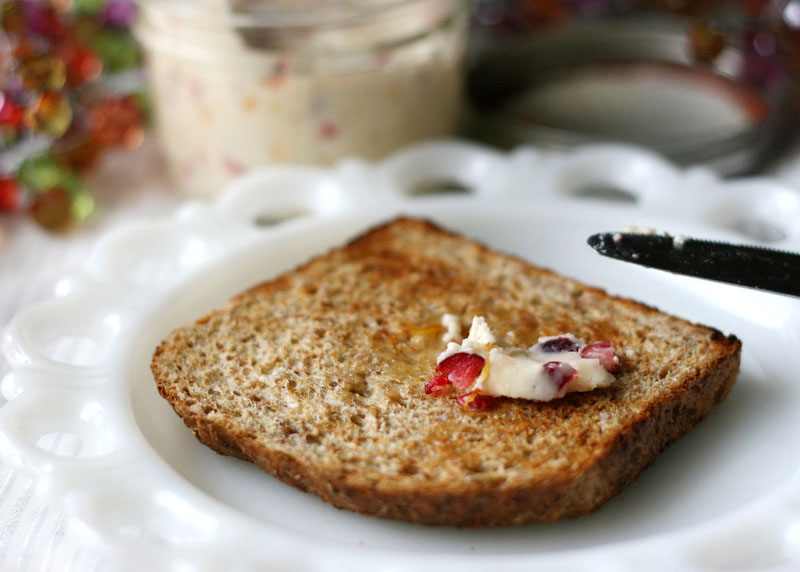
Now, please don’t make the mistake that I made. Once I made this, I was dying to schmear it on something, but I realized, with actual horror, that I didn’t have a single thing to spread it on in my house. We were even out of bread that day. I almost put it on a tortilla because I was desperate, but I did the same thing that any of you might have done—I put a big glob of it on my finger and popped it in my mouth. Talk about a burst of sweet, citrus-y, buttery goodness.


Tasty Kitchen Blog: Cranberry Butter. Guest post by Natalie Perry of Perry's Plate, recipe submitted by TK member MissyDew.

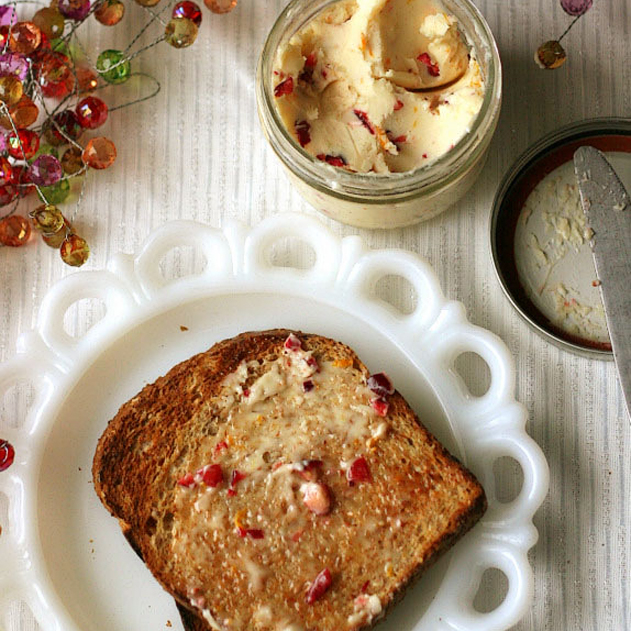
When I came to my senses and actually bought some bread, I discovered this Cranberry Butter will turn even the humblest piece of toast into an $8 piece of room service toast at a four-star hotel. You could also put it on pancakes, waffles, muffins, scones, chubby baby cheeks, and even popcorn,.

C’mon, I know I’m not the only one who has cannablistic tendencies toward cute babies.

By the way, I’ve had it melted over popcorn. It’s divine.


Tasty Kitchen Blog: Cranberry Butter. Guest post by Natalie Perry of Perry's Plate, recipe submitted by TK member MissyDew.


This spread would be great on so many baked goods here at Tasty Kitchen, but here are a few that caught my eye. And may keep me from eating the whole bowl with my fingers.
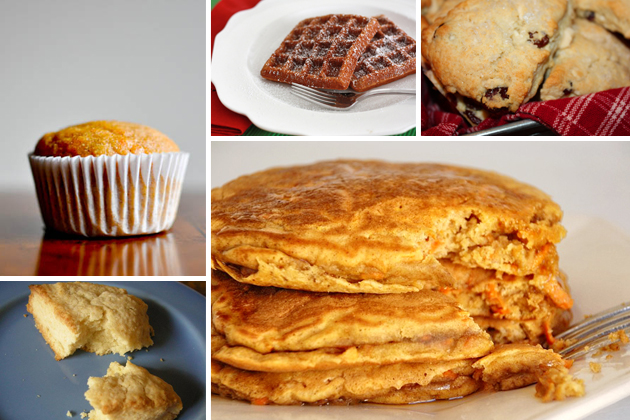
Tasty Kitchen Blog: Cranberry Butter. Guest post by Natalie Perry of Perry's Plate.Clockwise from top left: Whole Wheat Sweet Potato Muffins from HowSweetEats, Gingerbread Waffles from emily {onelovelylife}, White Chocolate Cranberry Scones from crobbins (there is a slew of cranberry scone recipes on TK!), Carrot Cake Pancakes from multiplydelicious, and Double Ginger Scones from angpritch.


Thanks MissyDew for a fantastic recipe!


Printable Recipe

Cranberry Butter

4.93 Mitt(s) 15 Rating(s)15 votes, average: 4.93 out of 515 votes, average: 4.93 out of 515 votes, average: 4.93 out of 515 votes, average: 4.93 out of 515 votes, average: 4.93 out of 5

Prep Time:

Cook Time:

Difficulty: Easy

Servings: 20

20
x

Print Options

Page size Letter 3x5 4x6
Text Size Small Medium Large
Content Include description
Include prep time, etc.
Show image

Description

I love this during the holidays. I first received some as a gift in a jar and enjoyed every bit of it, especially on toast or on homemade rolls or lefse. Make some for yourself and some to share with others.

Ingredients

  • 1 pound Butter, Softened To Room Temperature
  • ½ cups Chopped Fresh Cranberries
  • ½ cups Honey
  • 1 whole Orange (just The Zest)

Preparation Instructions

Such an easy recipe, it’s easy to adjust the ingredients to your personal taste. Want more orange flavor? Zest another orange! Want it less sweet? Reduce the amount of honey. Make it your own!

Combine softened butter, chopped fresh cranberries, honey to taste (about 1/2 cup) and the ZEST ONLY of one orange. Mix until well blended.

You’ll need to store this in the refrigerator.


_______________________________________

Be sure to check out Natalie’s own beautiful food blog, Perrys’ Plate, where you can see her growing collection of lovely recipes. There’s always something new to see there. Go visit now!


Profile photo of Natalie | Perry's Plate

Quick and Easy Baked Apples

Posted by in Baking

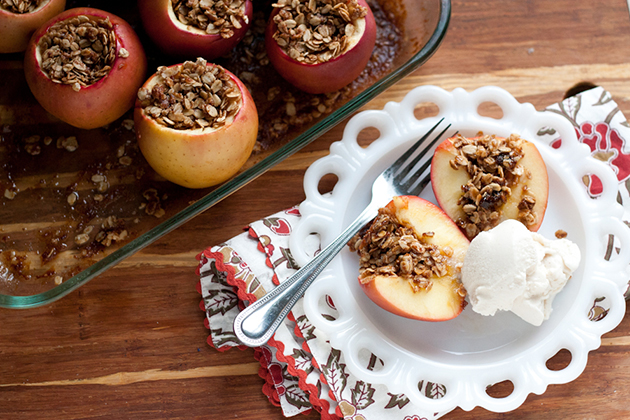
It’s apple season! Celebrate with these quick and easy baked apples. Reposted from December 2014.

 
Tasty Kitchen Blog: Baked Apples. Guest post by Natalie Perry of Perry's Plate, recipe submitted by TK member Laura of My Friend's Bakery.

I’m not sure if it’s fair that pumpkin gets the most culinary attention when fall rolls around. As much as I love me some pumpkin [insert any dish that can feasibly be made with pumpkin], I’d much prefer something with apples. 

I could live off of apple pie, apple crisp, apple-filled crepes, apple cider syrup-covered pancakes, apple-cheddar squash soup … you get the idea. Just bury me in apples, and I’ll be a happy girl. 

One treat I don’t make too often is baked apples. I’m not sure why. Oh, wait, yes I do. It’s the hollowing out of the apples, which, in my head, seems like a chore, but in reality only takes a few minutes. I need to quit playing mind games with myself because I’ve been seriously missing out. 

We had some friends over for dinner recently, and I searched for a simple and delicious dessert to make. I also wanted something that screamed fall. The Baked Apples recipe submitted by TK member Laura seemed like just the thing I was searching for. 


Tasty Kitchen Blog: Baked Apples. Guest post by Natalie Perry of Perry's Plate, recipe submitted by TK member Laura of My Friend's Bakery.

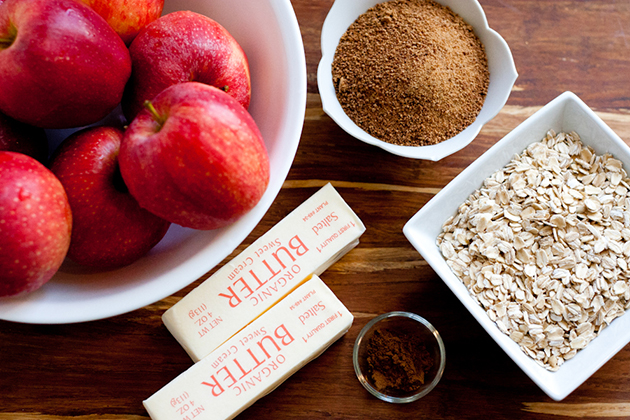
First, let’s gather our ingredients! To be honest, when I gathered everything I kept thinking that this couldn’t possibly be everything. I even grabbed an extra stick of butter. (You know, just in case.) Really, all you need are smallish baking apples, oats, brown sugar, cinnamon, and softened butter. That’s it.

This is an excellent jumping point for adaptations! If you’re avoiding dairy, grains, or refined sugar, you can use coconut oil, chopped nuts/dried fruit/coconut, and honey. You could also play with the spices and add some nutmeg or cardamom for a more exotic taste. The only substitution I made was using coconut sugar instead of brown sugar. 


Tasty Kitchen Blog: Baked Apples. Guest post by Natalie Perry of Perry's Plate, recipe submitted by TK member Laura of My Friend's Bakery.

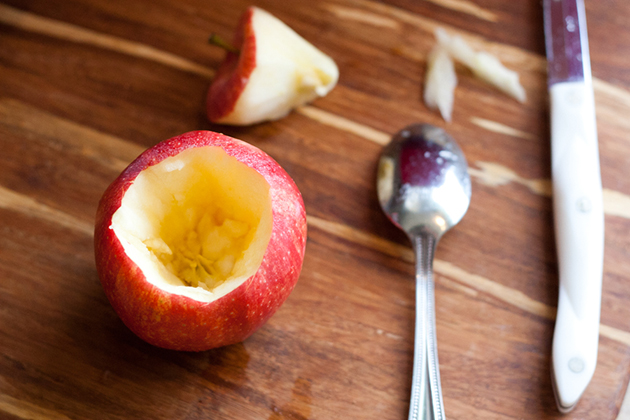
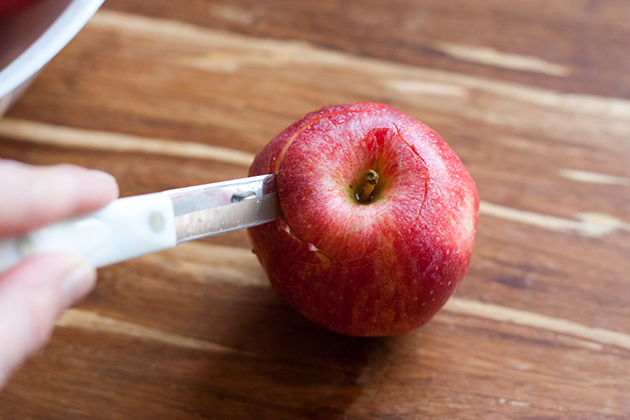
Okay, now for the part that I dread (which isn’t that bad, really). Grab a sharp paring knife and cut around the stem of the apple, going about 1/3 the way into the center. 


Tasty Kitchen Blog: Baked Apples. Guest post by Natalie Perry of Perry's Plate, recipe submitted by TK member Laura of My Friend's Bakery.

You can also use a spoon at this point to scrape out any seeds or tough bits of core remaining. Repeat with remaining apples.


Tasty Kitchen Blog: Baked Apples. Guest post by Natalie Perry of Perry's Plate, recipe submitted by TK member Laura of My Friend's Bakery.

If you’re assembling these early and plan to refrigerate them for a few hours before baking them, I would rub some lemon juice on the insides of the apples so they don’t turn brown. Lemon juice will brighten the flavor of the apples, too.  If you happen to have a two-year-old around who is dying to help you, they’re great for that.


Tasty Kitchen Blog: Baked Apples. Guest post by Natalie Perry of Perry's Plate, recipe submitted by TK member Laura of My Friend's Bakery.

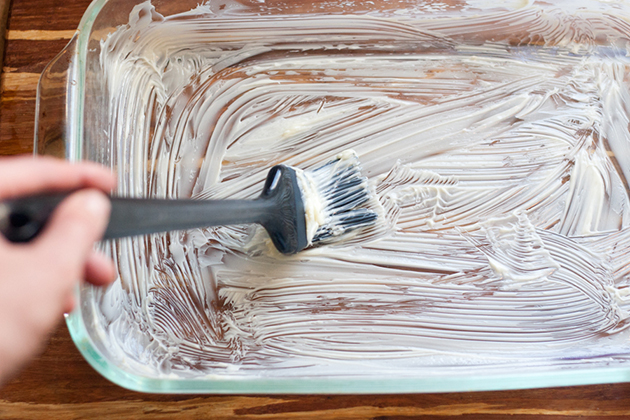
Grab a baking dish large enough to hold all of the apples. My 9×13 inch glass baking dish was the perfect size. Brush a liberal amount of butter on the sides and bottom of the pan. Don’t be shy. 


Tasty Kitchen Blog: Baked Apples. Guest post by Natalie Perry of Perry's Plate, recipe submitted by TK member Laura of My Friend's Bakery.

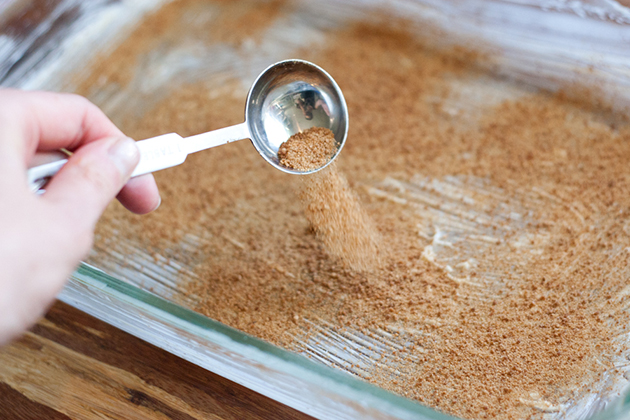
Sprinkle some of the brown sugar into the pan as well.


Tasty Kitchen Blog: Baked Apples. Guest post by Natalie Perry of Perry's Plate, recipe submitted by TK member Laura of My Friend's Bakery.

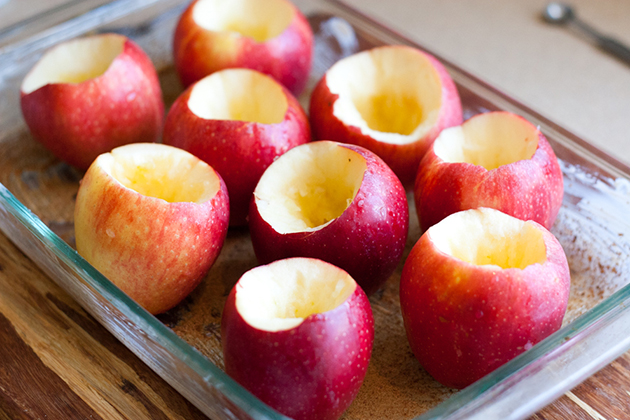
Nestle your apples into the pan so they all stay upright. You don’t want that precious filling to spill out!


Tasty Kitchen Blog: Baked Apples. Guest post by Natalie Perry of Perry's Plate, recipe submitted by TK member Laura of My Friend's Bakery.

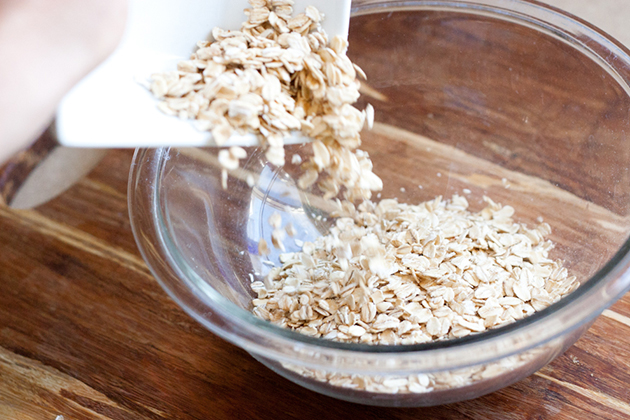
Speaking of the filling, grab a small bowl and pour the oats in. 


Tasty Kitchen Blog: Baked Apples. Guest post by Natalie Perry of Perry's Plate, recipe submitted by TK member Laura of My Friend's Bakery.

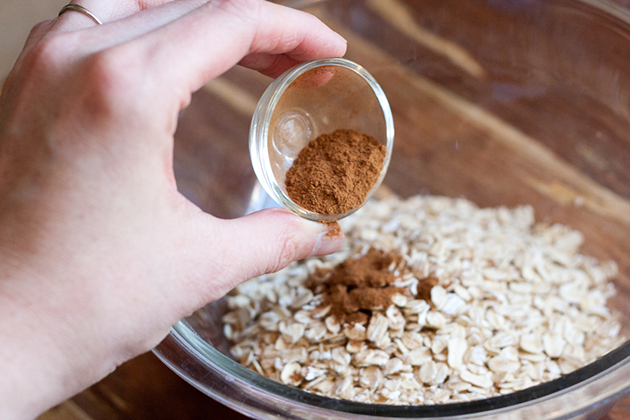
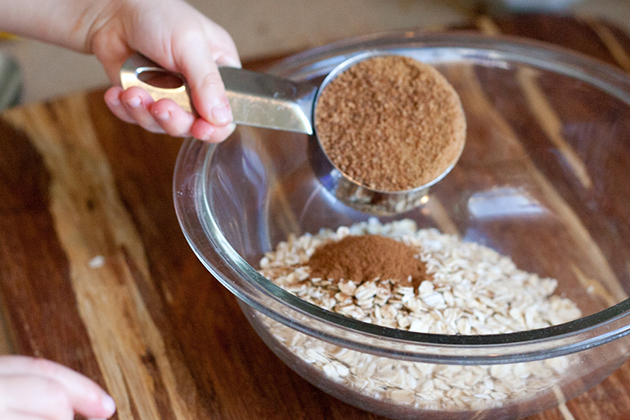
Add the cinnamon (and any other spices you’d like to add).


Tasty Kitchen Blog: Baked Apples. Guest post by Natalie Perry of Perry's Plate, recipe submitted by TK member Laura of My Friend's Bakery.

And the rest of the brown sugar.


Tasty Kitchen Blog: Baked Apples. Guest post by Natalie Perry of Perry's Plate, recipe submitted by TK member Laura of My Friend's Bakery.

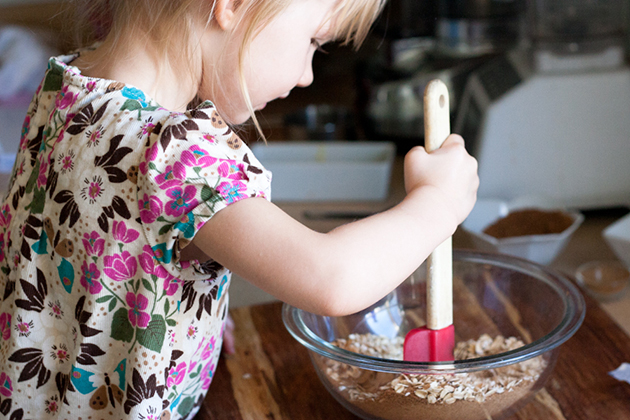
Give it a good mix. Or have your kitchen-maid-in-training do it for you.


Tasty Kitchen Blog: Baked Apples. Guest post by Natalie Perry of Perry's Plate, recipe submitted by TK member Laura of My Friend's Bakery.

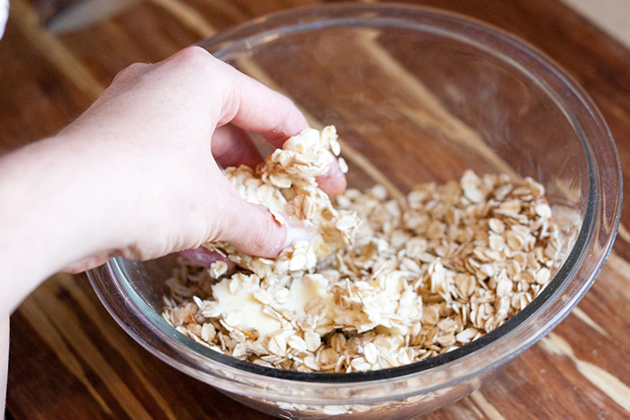
This is the fun part. Put the rest of the softened butter in the oats and, using your hands, blend it until the butter is incorporated and you get a crumbly texture.


Tasty Kitchen Blog: Baked Apples. Guest post by Natalie Perry of Perry's Plate, recipe submitted by TK member Laura of My Friend's Bakery.

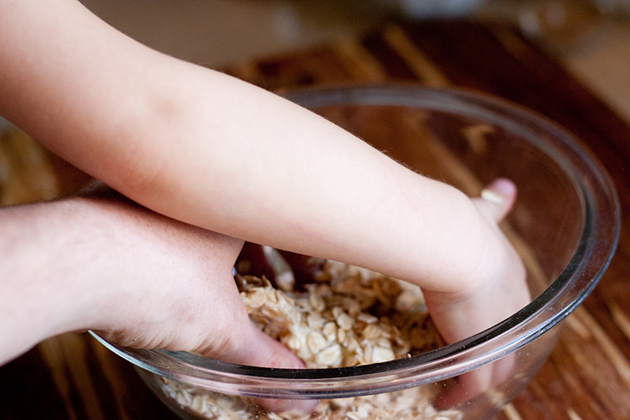
I knew she wouldn’t be able to resist this part.


Tasty Kitchen Blog: Baked Apples. Guest post by Natalie Perry of Perry's Plate, recipe submitted by TK member Laura of My Friend's Bakery.

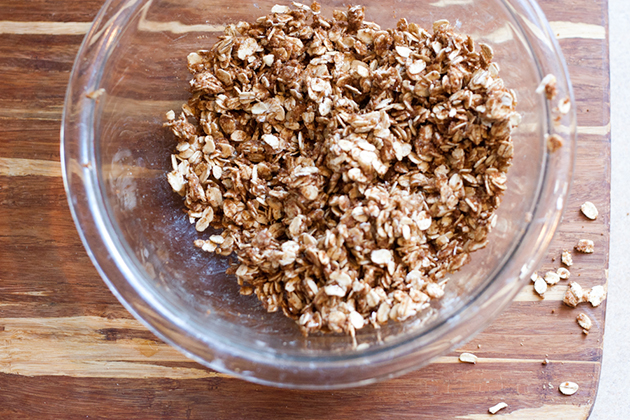
This is roughly the texture you’re looking for. Try not to eat it right out of the bowl. Believe me, it’s hard.


Tasty Kitchen Blog: Baked Apples. Guest post by Natalie Perry of Perry's Plate, recipe submitted by TK member Laura of My Friend's Bakery.

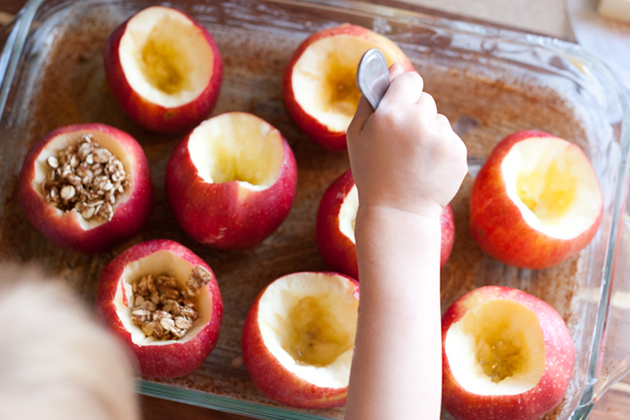
Call your lovely assistant back over and have her spoon the filling into the apples. I was surprised at how well she did this. This is such a great recipe to involve kids in the kitchen!


Tasty Kitchen Blog: Baked Apples. Guest post by Natalie Perry of Perry's Plate, recipe submitted by TK member Laura of My Friend's Bakery.

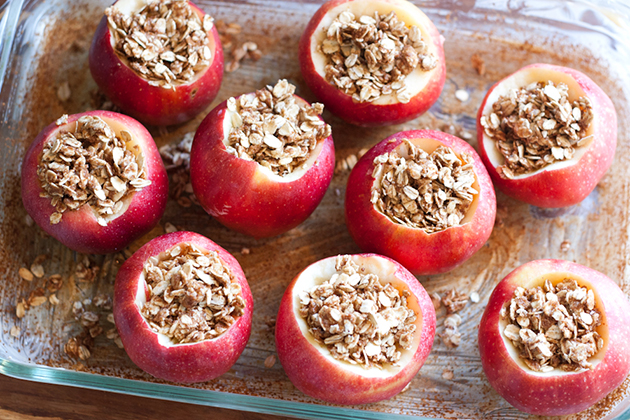
We just kept piling it on until we ran out of filing. 

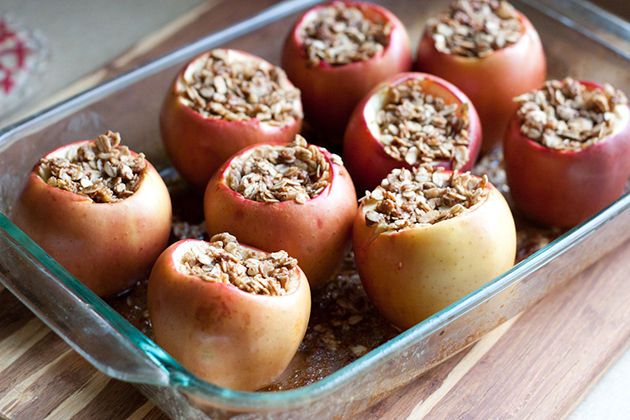
Pop them into the oven for a while and …


Tasty Kitchen Blog: Baked Apples. Guest post by Natalie Perry of Perry's Plate, recipe submitted by TK member Laura of My Friend's Bakery.

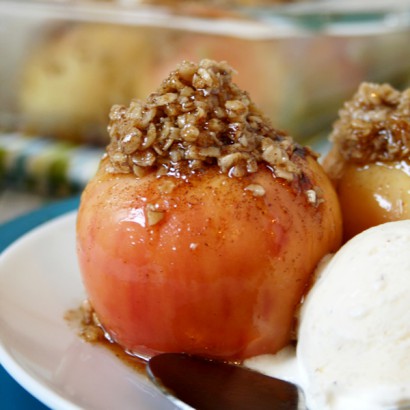
Not only will your house smell amazing, but you’re super close to heaven in a bowl.


Tasty Kitchen Blog: Baked Apples. Guest post by Natalie Perry of Perry's Plate, recipe submitted by TK member Laura of My Friend's Bakery.

The instructions say to spoon the caramel sauce from the pan over the apples, but I didn’t have much sauce to speak of. Instead, we served these with vanilla bean gelato.

I also whipped up some sea salt vanilla bean caramel sauce and poured it over the top. Why I didn’t do that in the beginning is beyond me. If you’d like to make some homemade caramel sauce, there are a lots of recipes here on Tasty Kitchen! I included a few below that caught my eye.

Easy Caramel Sauce from Ree
Spiced Caramel Butter Sauce from Terri of That’s Some Good Cookin’
Vegan Caramel Sauce from tonijean
Salted Caramel Sauce from Megan Betz

Many thanks go to Laura for a fantastic and easy recipe to do with my kids! Be sure to check out her TK recipe box and her beautiful blog, My Friend’s Bakery, for more recipes. 


Printable Recipe

Baked Apples

See post on Laura @ My Friend's Bakery’s site!
5.00 Mitt(s) 1 Rating(s)1 vote, average: 5.00 out of 51 vote, average: 5.00 out of 51 vote, average: 5.00 out of 51 vote, average: 5.00 out of 51 vote, average: 5.00 out of 5

Prep Time:

Cook Time:

Difficulty: Easy

Servings: 9

9
x

Print Options

Page size Letter 3x5 4x6
Text Size Small Medium Large
Content Include description
Include prep time, etc.
Show image

Description

A simple, delicious dessert using fresh picked apples. Enjoy the season’s bountiful harvest.

Ingredients

  • FOR THE APPLES:
  • 9 whole Small Baking Apples, Like MacIntosh
  • 2 Tablespoons Butter, Room Temperature, For Greasing The Dish
  • 2 Tablespoons Brown Sugar
  • FOR THE FILLING:
  • ⅓ cups Butter, Room Temperature
  • ⅓ cups Brown Sugar
  • 1 cup Quick Cooking Oats
  • 1 teaspoon Ground Cinnamon

Preparation Instructions

Preheat the oven to 350 F.

Wash and core the apples. Generously coat the bottom of an oven-safe baking dish (use one that’s big enough to fit all the apples into) with butter. Sprinkle the first amount of brown sugar over the base of the dish. Arrange the apples into the baking dish to fit.

In a separate bowl, crumble together the filling ingredients. Fill each cored apple with a generous amount of the filling.

Bake the apples for 30 to 40 minutes until soft. Remove from the oven and place 1 or 2 apples on each serving plate. Use a spoon to scoop some of the hot caramel from the bottom of the dish, and spoon it over each apple. Serve with a scoop of vanilla ice cream.


_______________________________________

Be sure to check out Natalie’s own beautiful food blog, Perrys’ Plate, where you can see her growing collection of lovely recipes. There’s always something new to see there. Go visit now!
 

Profile photo of Natalie | Perry's Plate

Grilled Macadamia-Crusted Pineapple with Coconut Cream

Posted by in Step-by-Step Recipes

Tasty Kitchen Blog: Grilled Macadamia-Crusted Pineapple with Coconut Cream. Guest post by Natalie Perry of Perry's Plate, recipe submitted by TK member Taylor Kiser of Food Faith Fitness.

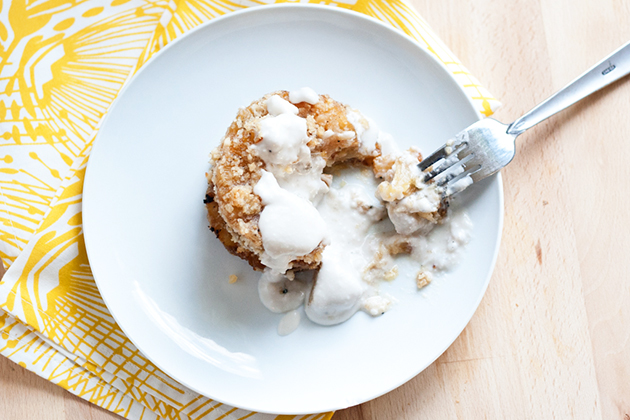
I big puffy heart love grilled pineapple. To me, it’s right up there with corn on the cob, watermelon, and drippy popsicles on my favorite summer food list. Cover it in crushed macadamia nuts and coconut cream, though? It’ll seem like you’re indulging, but it’s actually a pretty healthy treat!

I’ve been eyeing Taylor Kiser’s recipes for a while and her Grilled Macadamia-Crusted Pineapple with Coconut Cream caught my eye. Naturally.

Let’s make some!


Tasty Kitchen Blog: Grilled Macadamia-Crusted Pineapple with Coconut Cream. Guest post by Natalie Perry of Perry's Plate, recipe submitted by TK member Taylor Kiser of Food Faith Fitness.

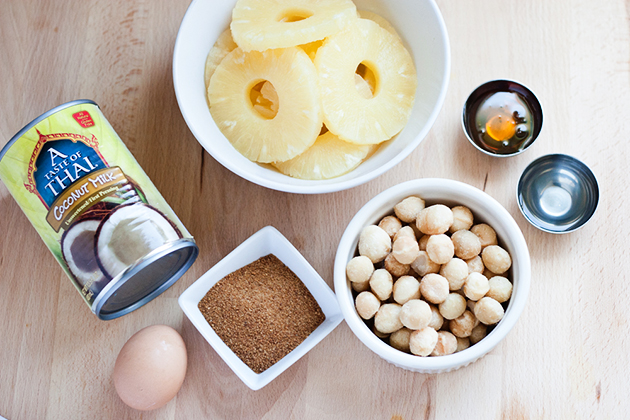
You’ll need coconut milk, pineapple rings,macadamia nuts, honey, coconut oil, coconut sugar, and an egg.

Yes, I went with canned pineapple rings. I don’t have one of those nifty pineapple slicers. Plus, I had a 4-month-old baby strapped to my chest.

You’ll need to put the coconut milk in the fridge for several hours—preferably 24 hours.


Tasty Kitchen Blog: Grilled Macadamia-Crusted Pineapple with Coconut Cream. Guest post by Natalie Perry of Perry's Plate, recipe submitted by TK member Taylor Kiser of Food Faith Fitness.

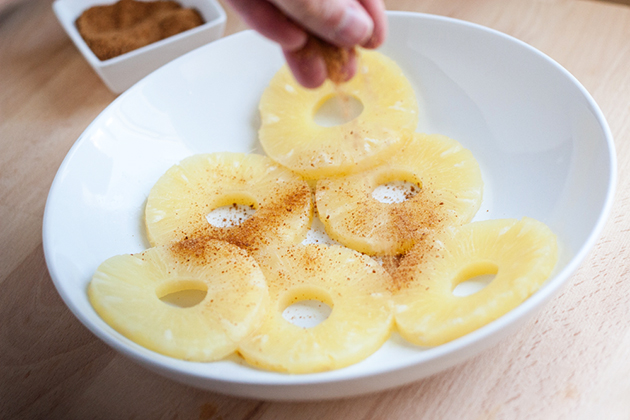
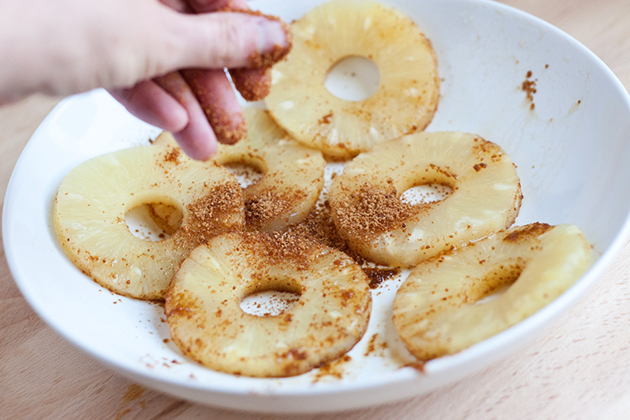
Sprinkle some coconut sugar on the pineapple rings.


Tasty Kitchen Blog: Grilled Macadamia-Crusted Pineapple with Coconut Cream. Guest post by Natalie Perry of Perry's Plate, recipe submitted by TK member Taylor Kiser of Food Faith Fitness.

Flip them over and do the same on the other side.


Tasty Kitchen Blog: Grilled Macadamia-Crusted Pineapple with Coconut Cream. Guest post by Natalie Perry of Perry's Plate, recipe submitted by TK member Taylor Kiser of Food Faith Fitness.

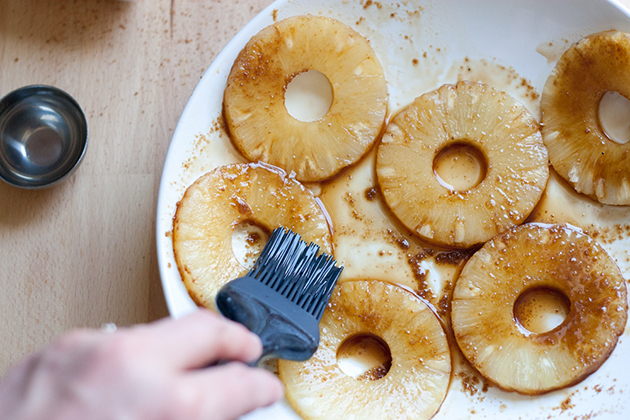
Brush them with coconut oil.


Tasty Kitchen Blog: Grilled Macadamia-Crusted Pineapple with Coconut Cream. Guest post by Natalie Perry of Perry's Plate, recipe submitted by TK member Taylor Kiser of Food Faith Fitness.

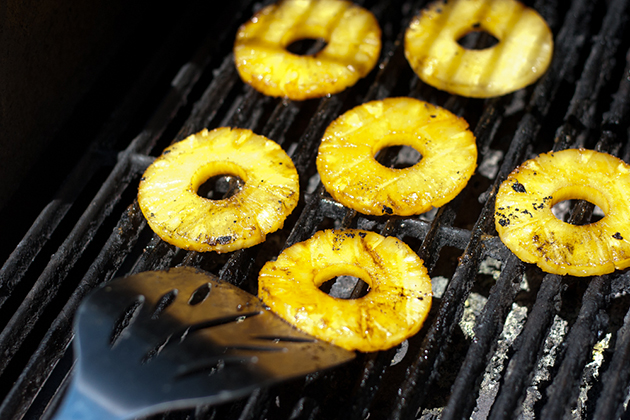
Is your grill hot? You mean you don’t just leave it on all summer and constantly throw stuff on it? Party pooper.

Okay, grill those rings. You don’t have to make distinct grill marks, just get them golden brown and heated through. Flip them once, let them grill a little longer, then pull them off and set them aside.


Tasty Kitchen Blog: Grilled Macadamia-Crusted Pineapple with Coconut Cream. Guest post by Natalie Perry of Perry's Plate, recipe submitted by TK member Taylor Kiser of Food Faith Fitness.

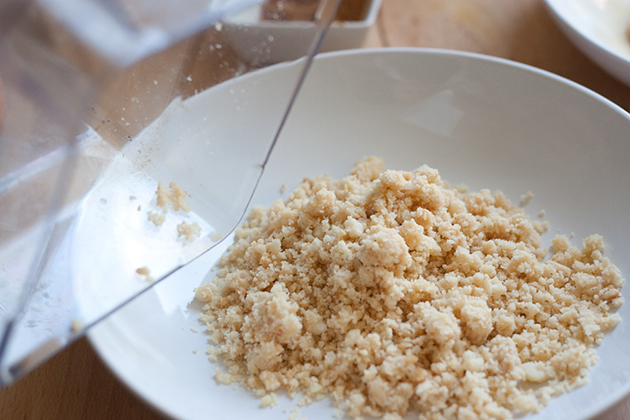
Crush the nuts in a food processor or if your processor bowl happens to be in the dishwasher, use your blender. But be careful not to make macadamia nut butter. Not that that’s a bad thing, but in this case you might not want it.

Transfer the nuts to a shallow bowl.


Tasty Kitchen Blog: Grilled Macadamia-Crusted Pineapple with Coconut Cream. Guest post by Natalie Perry of Perry's Plate, recipe submitted by TK member Taylor Kiser of Food Faith Fitness.

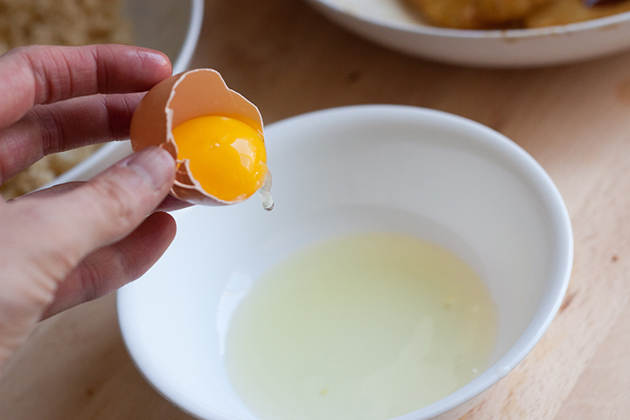
Put your egg white into another shallow bowl.


Tasty Kitchen Blog: Grilled Macadamia-Crusted Pineapple with Coconut Cream. Guest post by Natalie Perry of Perry's Plate, recipe submitted by TK member Taylor Kiser of Food Faith Fitness.

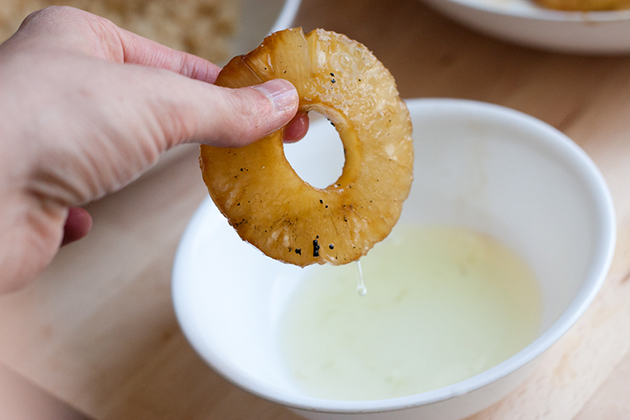
Dip each ring into the egg white.


Tasty Kitchen Blog: Grilled Macadamia-Crusted Pineapple with Coconut Cream. Guest post by Natalie Perry of Perry's Plate, recipe submitted by TK member Taylor Kiser of Food Faith Fitness.

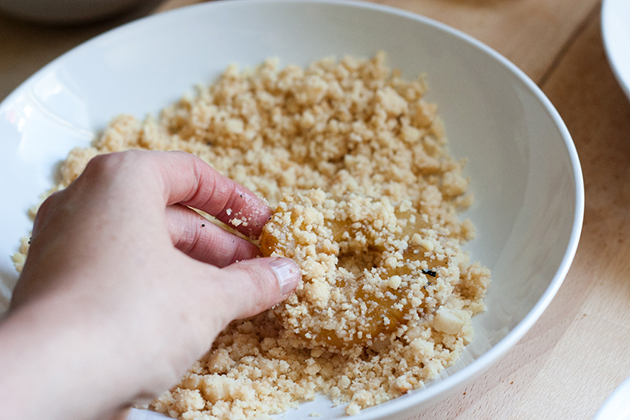
Then coat with the crushed nuts.


Tasty Kitchen Blog: Grilled Macadamia-Crusted Pineapple with Coconut Cream. Guest post by Natalie Perry of Perry's Plate, recipe submitted by TK member Taylor Kiser of Food Faith Fitness.

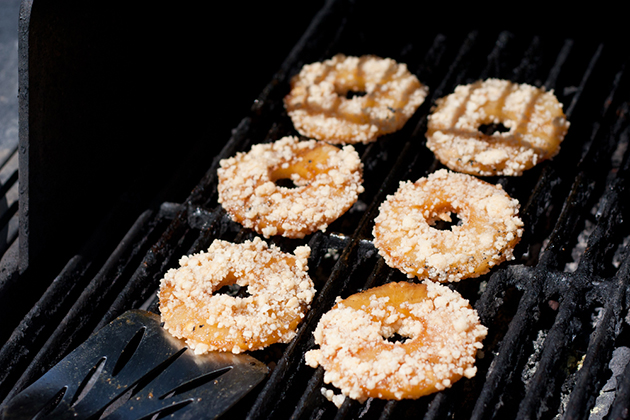
Throw the pineapple back on the grill for a few minutes until the nuts are lightly toasted. They burn easy, so keep an eye on them. I wouldn’t try to flip them or you’ll lose the coating.


Tasty Kitchen Blog: Grilled Macadamia-Crusted Pineapple with Coconut Cream. Guest post by Natalie Perry of Perry's Plate, recipe submitted by TK member Taylor Kiser of Food Faith Fitness.

Pull the coconut milk out of the fridge. Turn it upside down and open it from the bottom. Pour out the watery coconut milk and scrape out the cream at the bottom of the can. This is the coconut cream. Pretty cool, huh?


Tasty Kitchen Blog: Grilled Macadamia-Crusted Pineapple with Coconut Cream. Guest post by Natalie Perry of Perry's Plate, recipe submitted by TK member Taylor Kiser of Food Faith Fitness.

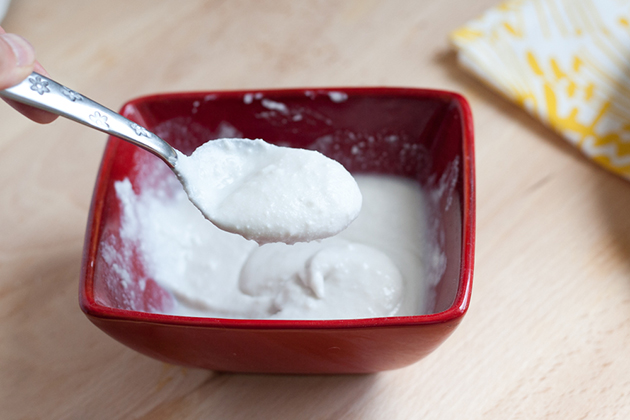
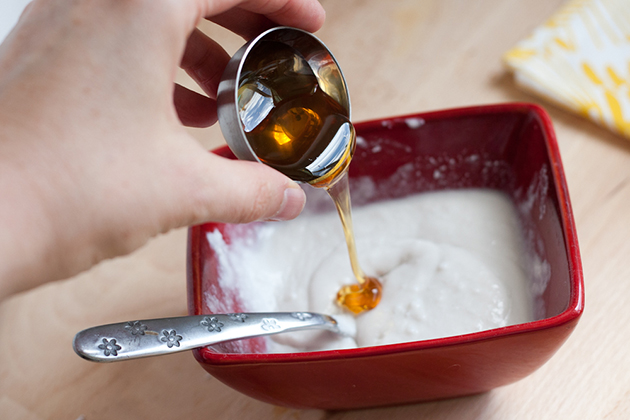
Stir in the honey, to taste.


Tasty Kitchen Blog: Grilled Macadamia-Crusted Pineapple with Coconut Cream. Guest post by Natalie Perry of Perry's Plate, recipe submitted by TK member Taylor Kiser of Food Faith Fitness.

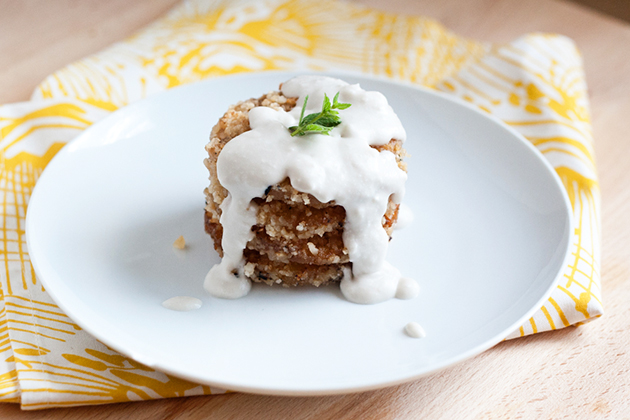
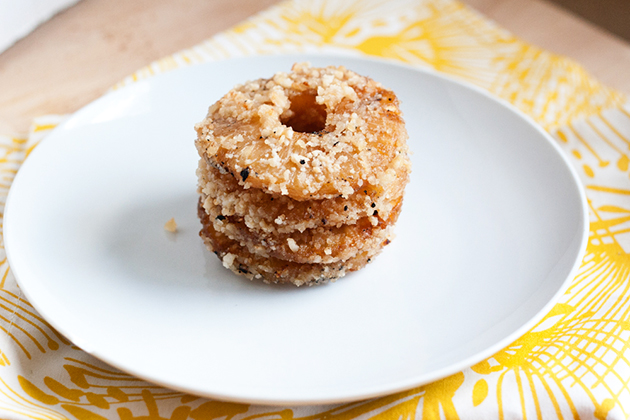
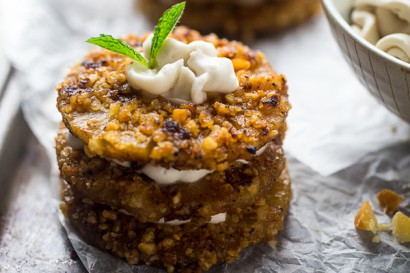
Stack a few of those grilled, toasty pineapple rings …


Tasty Kitchen Blog: Grilled Macadamia-Crusted Pineapple with Coconut Cream. Guest post by Natalie Perry of Perry's Plate, recipe submitted by TK member Taylor Kiser of Food Faith Fitness.

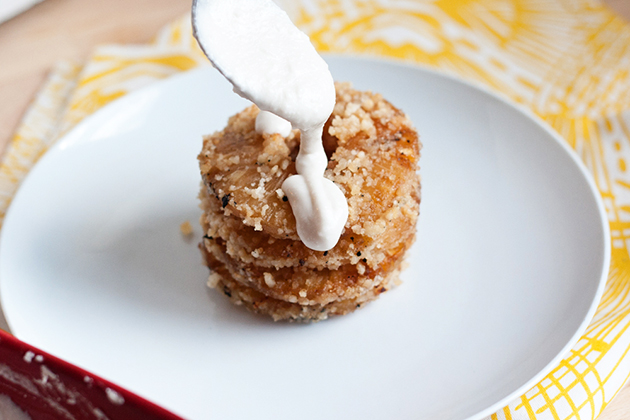
And drizzle some cream on top. You could also put the cream in the fridge for several hours so it thickens up. I can’t wait that long. (Nor plan ahead these days.)


Tasty Kitchen Blog: Grilled Macadamia-Crusted Pineapple with Coconut Cream. Guest post by Natalie Perry of Perry's Plate, recipe submitted by TK member Taylor Kiser of Food Faith Fitness.

Eat up, friends.

Many thanks to Taylor Kiser for a delicious, light (paleo-friendly!) dessert! Go check out her blog Food Faith Fitness and her TK recipe box, which are both overflowing with great recipes.


Printable Recipe

Grilled Macadamia-Crusted Pineapple with Coconut Cream

See post on Taylor Kiser’s site!
0.00 Mitt(s) 0 Rating(s)0 votes, average: 0.00 out of 50 votes, average: 0.00 out of 50 votes, average: 0.00 out of 50 votes, average: 0.00 out of 50 votes, average: 0.00 out of 5

Prep Time:

Cook Time:

Difficulty: Easy

Servings: 4

4
x

Print Options

Page size Letter 3x5 4x6
Text Size Small Medium Large
Content Include description
Include prep time, etc.
Show image

Description

Smokey-sweet grilled pineapple is crusted with macadamia nuts and then layered with coconut whipped cream for an easy, healthy, paleo-friendly summer dessert!

Ingredients

  • FOR THE PINEAPPLE:
  • 12  Pineapple Rings
  • 5-½ Tablespoons Coconut Sugar, Divided
  • 1-¼ cup Dry Roasted Macadamia Nut Pieces
  • 2  Large Egg Whites
  • Coconut Oil, Melted (for Grilling)
  • FOR THE COCONUT CREAM:
  • 13 ounces, weight Canned Full-fat Coconut Milk, Chilled At Least 24 Hours
  • 2 Tablespoons Honey
  • Mint, For Garnish

Preparation Instructions

Note: I like to whip my coconut cream a few hours in advance and then cover and refrigerate it. This way it hardens up and doesn’t melt as quickly one sandwiched between the warm pineapple. If you want to do this, do step 7 first.

1. Rub your grill generously with coconut oil and preheat to medium/high heat.
2. Lightly pat the pineapple rings dry and place them into a large bowl. Toss with 3 tablespoons of the coconut sugar until evenly coated.
3. Place the pineapple onto the preheated grill and cook until lightly charred and caramelized, about 2 minutes. Flip and repeat again. Place grilled pineapple on a plate and set aside. Turn your grill down to medium heat.
4. While the pineapple cools, place macadamia pieces into a small food processor (mine is 3 cups size) and process until large crumbs form. Spread the crumbs into a large, sided plate. Place the egg whites into a medium bowl.
5. Take one pineapple ring and dunk it into the egg whites, shaking off the excess. Then, place the pineapple into the macadamia pieces, using your opposite hand, and gently press both sides into the nut pieces. You’ll need to lightly press the nuts on to adhere them to the pineapple. Place onto a separate plate and repeat with remaining pieces.
6. Brush a little more coconut oil on the grill and place the pineapple back on it. Cook until the macadamia pieces are just beginning to look charred and the egg appears to set, about 1-2 minutes per side. Watch carefully so you don’t burn them. Transfer to a plate and let them cool while you make the coconut cream.
7. Turn your can of chilled coconut milk upside down and open. Pour out the liquid that has risen to the top (save it for a smoothie later) and scoop the thick cream from the bottom of the can into a large bowl. Add in the honey and beat with an electric hand mixer until light and fluffy (see note).
8. Place one ring of pineapple down on your serving plate and spoon (or pipe, like I did) some coconut cream (about a heaping 1 ½ tablespoons) onto the center. Top with another ring and repeat. Finish with one more piece of pineapple and a squeeze of coconut cream. Repeat with remaining rings.
9. Garnish with mint, if desired, and devour immediately!


_______________________________________

Be sure to check out Natalie’s own beautiful food blog, Perrys’ Plate, where you can see her growing collection of lovely recipes. There’s always something new to see there. Go visit now!
 

Profile photo of Natalie | Perry's Plate

Moroccan Eggs

Posted by in Step-by-Step Recipes

Tasty Kitchen Blog: Moroccan Eggs. Guest post by Natalie Perry of Perry's Plate, recipe submitted by TK member Katie of 24 Carrot Life.

Pregnancy makes me super lazy and undisciplined. We’re usually pretty health-conscious around here, but we’ve gone out to eat more times in the last few months than I’d like to admit. (I also have an aversion to doing dishes.)

When I find quick, simple, yet healthy meals to feed our little family (that my girls like!), I do a little dance of joy. This recipe for Moroccan Eggs submitted by TK member Katie is exactly that.

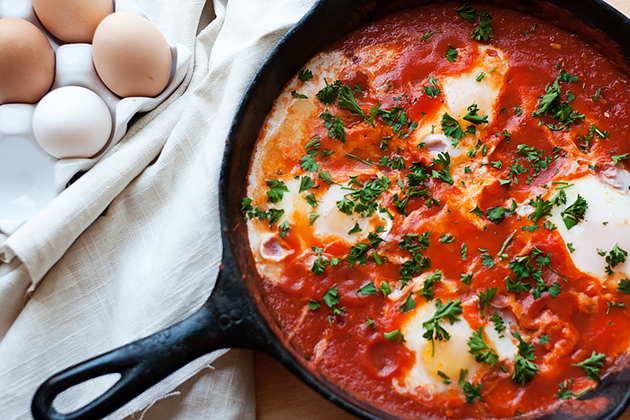
This is basically a recipe for shakshuka, which is eggs cooked in a spicy tomato sauce. This version is very simple, but very delicious. If you wanted to spice it up even more, you could add a Moroccan-style spice blend or some spicy sausage. I quite liked the simplicity of only using a handful of ingredients. Here, I’ll show you.


Tasty Kitchen Blog: Moroccan Eggs. Guest post by Natalie Perry of Perry's Plate, recipe submitted by TK member Katie of 24 Carrot Life.

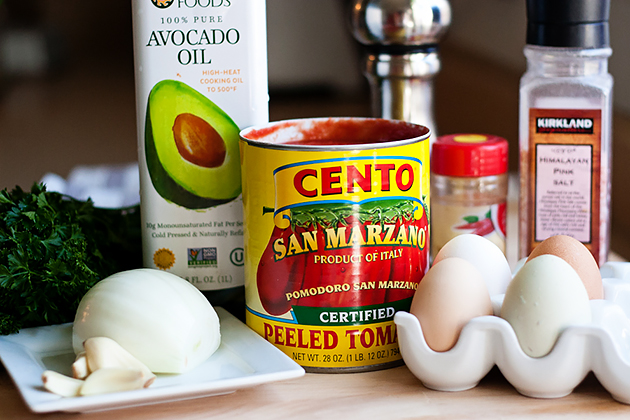
You’ll only need a large can of tomatoes, a sweet onion, garlic, parsley, eggs, cooking oil (I used avocado oil), cayenne, and salt and pepper. And perhaps something to accompany the eggs, such as crusty bread, rice, or roasted vegetables. (More on that later.)

The recipe calls for diced tomatoes, but I happened to have these San Marzano tomatoes on hand and decided to blend them up for a smoother consistency. Whatever floats your boat.


Tasty Kitchen Blog: Moroccan Eggs. Guest post by Natalie Perry of Perry's Plate, recipe submitted by TK member Katie of 24 Carrot Life.

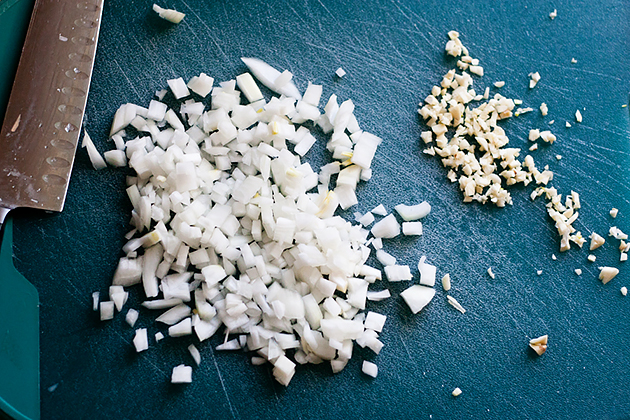
Yes, you’ll need to break out that knife and cutting board, but just for a minute! Dice that onion and give those cloves a good mincing.


Tasty Kitchen Blog: Moroccan Eggs. Guest post by Natalie Perry of Perry's Plate, recipe submitted by TK member Katie of 24 Carrot Life.

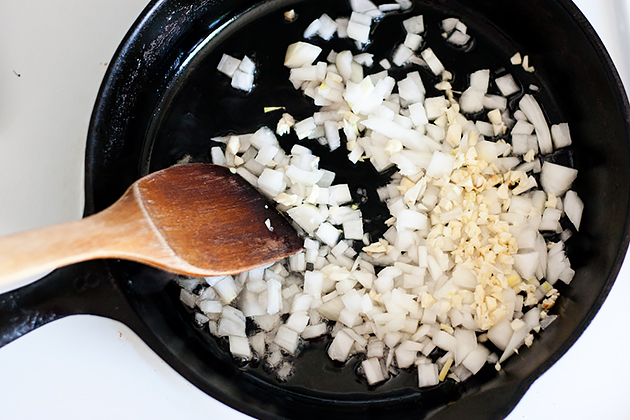
Heat the oil in a medium-sized skillet and cook the onion and garlic until the onion is somewhat translucent and soft.


Tasty Kitchen Blog: Moroccan Eggs. Guest post by Natalie Perry of Perry's Plate, recipe submitted by TK member Katie of 24 Carrot Life.

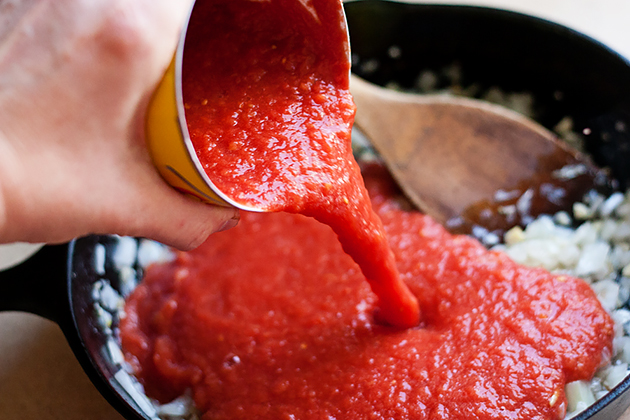
Add the tomatoes!


Tasty Kitchen Blog: Moroccan Eggs. Guest post by Natalie Perry of Perry's Plate, recipe submitted by TK member Katie of 24 Carrot Life.

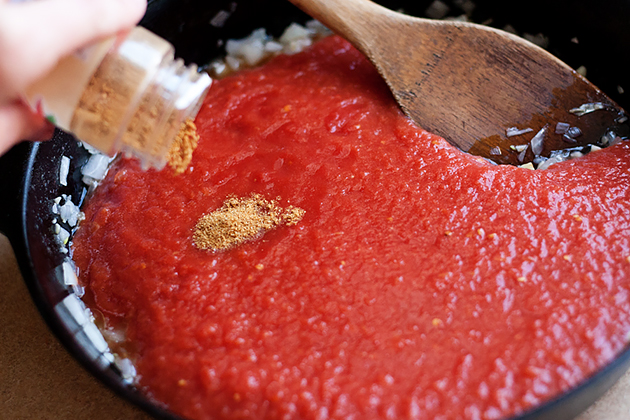
And however much cayenne you prefer. This little dusting was enough for me.


Tasty Kitchen Blog: Moroccan Eggs. Guest post by Natalie Perry of Perry's Plate, recipe submitted by TK member Katie of 24 Carrot Life.

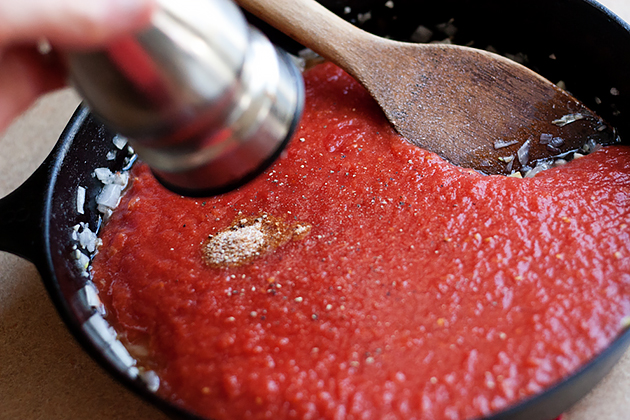
Don’t forget the salt and pepper.


Tasty Kitchen Blog: Moroccan Eggs. Guest post by Natalie Perry of Perry's Plate, recipe submitted by TK member Katie of 24 Carrot Life.

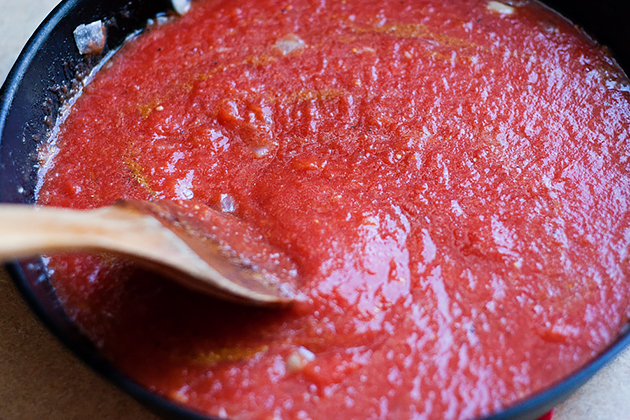
Give it a stir. Notice how watery it is? We’re going to fix that.


Tasty Kitchen Blog: Moroccan Eggs. Guest post by Natalie Perry of Perry's Plate, recipe submitted by TK member Katie of 24 Carrot Life.

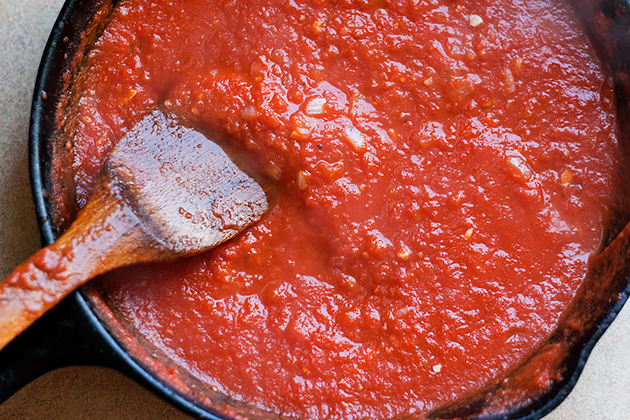
Let the sauce simmer over medium-high heat for about 10 minutes or until some of that water has cooked off. Bubbling tomato sauce is a stovetop’s worst nightmare. You can partially cover the skillet with some foil so it doesn’t splatter everywhere and steam can still escape.


Tasty Kitchen Blog: Moroccan Eggs. Guest post by Natalie Perry of Perry's Plate, recipe submitted by TK member Katie of 24 Carrot Life.

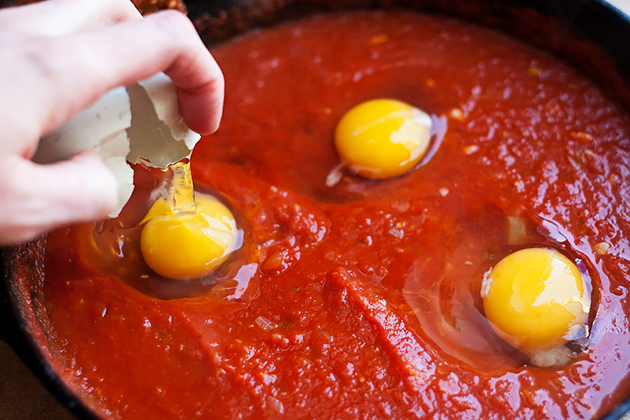
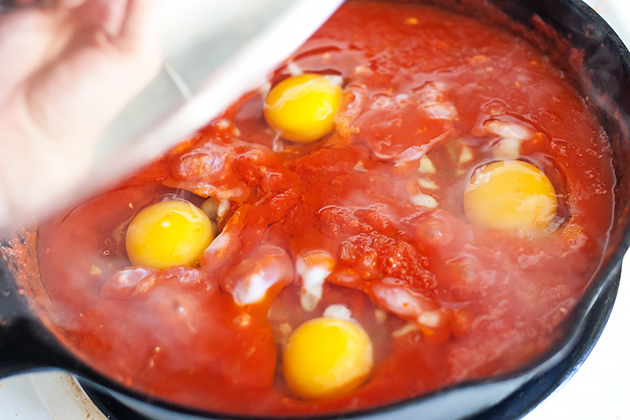
Now for the fun part. If your sauce is thick enough, make little divots in the sauce and add the eggs. The recipe suggests cracking them into a small bowl first, but I like living on the edge.


Tasty Kitchen Blog: Moroccan Eggs. Guest post by Natalie Perry of Perry's Plate, recipe submitted by TK member Katie of 24 Carrot Life.

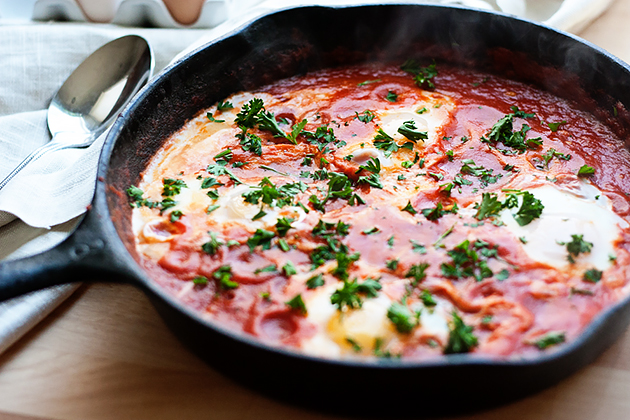
Bring the heat down to about medium-low and cover the skillet, allowing the eggs to cook. The whites should be cooked and the yolks should be a little runny.


Tasty Kitchen Blog: Moroccan Eggs. Guest post by Natalie Perry of Perry's Plate, recipe submitted by TK member Katie of 24 Carrot Life.

Chop a little parsley and sprinkle it over the top. And you’re done! Easy, huh?


Tasty Kitchen Blog: Moroccan Eggs. Guest post by Natalie Perry of Perry's Plate, recipe submitted by TK member Katie of 24 Carrot Life.

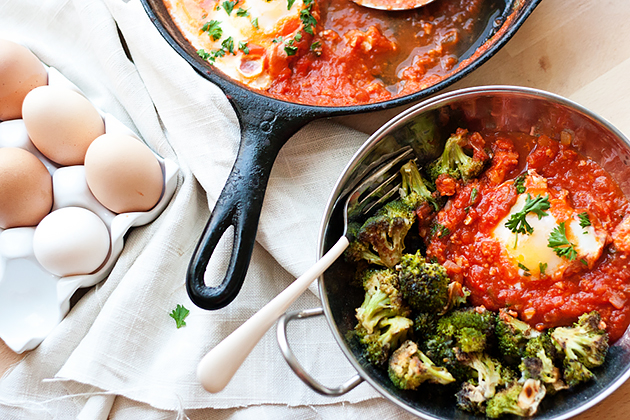
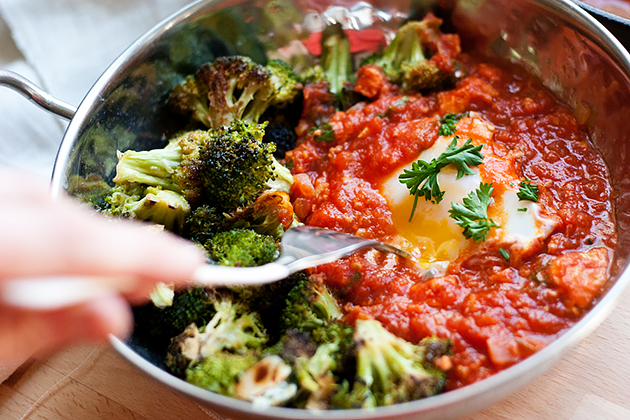
I try to avoid eating grains, except when I’m pregnant (see comment above about being undisciplined), but I made a valiant effort for you guys. So, I pushed thoughts of crusty bread out of my head and warmed up some leftover roasted Parmesan broccoli.


Tasty Kitchen Blog: Moroccan Eggs. Guest post by Natalie Perry of Perry's Plate, recipe submitted by TK member Katie of 24 Carrot Life.

It was a PERFECT vehicle for those eggs and spicy sauce! Thank you, Katie, for a deliciously simple meal that may save us from grabbing a pizza!

Be sure to check out Katie’s TK recipe box and her blog, 24 Carrot Life for more tasty and healthy recipes!


Printable Recipe

Moroccan Eggs

See post on 24 Carrot Life’s site!
5.00 Mitt(s) 1 Rating(s)1 vote, average: 5.00 out of 51 vote, average: 5.00 out of 51 vote, average: 5.00 out of 51 vote, average: 5.00 out of 51 vote, average: 5.00 out of 5

Prep Time:

Cook Time:

Difficulty: Easy

Servings: 4

4
x

Print Options

Page size Letter 3x5 4x6
Text Size Small Medium Large
Content Include description
Include prep time, etc.
Show image

Description

These Moroccan Eggs are made with just a few natural ingredients and taste so great with toasted crusty bread.

Ingredients

  • 1 Tablespoon Olive Oil
  • 1 whole Red Onion, Chopped
  • 4 cloves Garlic, Minced
  • 28 ounces, weight Canned Chopped Tomatoes
  • ¼ teaspoons Cayenne Pepper
  • Salt And Pepper, to taste
  • 4 whole Large Eggs
  • Chopped Parsley For Garnish
  • Crusty Bread, Toasted, To Serve

Preparation Instructions

Add olive oil to a pan over medium heat. Once hot, add onion and garlic and cook for about 4 minutes, or until translucent.

Add tomatoes and cook on medium high heat for about 10 minutes. Once tomato juice has cooked off, add cayenne pepper, salt, and pepper. Stir to combine.

Using the back of a large cooking spoon, make a divot for each egg. Crack eggs one by one into a separate bowl to make sure there are no shell pieces. Slowly add one egg into each divet, repeating separately with each egg.

Cover the skillet and cook on low heat until the egg whites are cooked, about 5 minutes.

Garnish with parsley and serve with toasted bread for dipping.


_______________________________________

Be sure to check out Natalie’s own beautiful food blog, Perrys’ Plate, where you can see her growing collection of lovely recipes. There’s always something new to see there. Go visit now!
 

Profile photo of Natalie | Perry's Plate

Scalloped Hasselback Sweet Potatoes

Posted by in Holidays

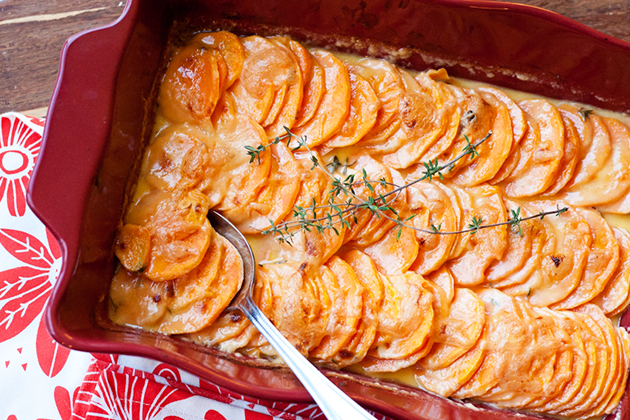
This Scalloped Hasselback Sweet Potatoes recipe submitted by TK member Tove is the newest addition to my special occasion recipe file.

Profile photo of Natalie | Perry's Plate

Tropical Thai Chicken Curry

Posted by in Step-by-Step Recipes

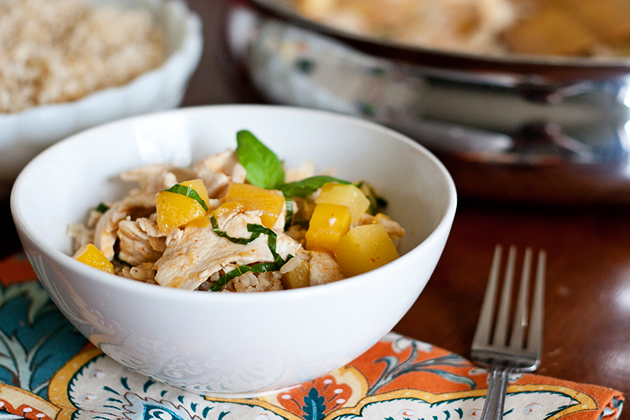
You know what's great? Easy, approachable ethnic recipes to make during the holidays. I can only eat so much bread, potatoes, and heavy cream, you know? I need recipes that are quick and different from the typically rich meals of the season. 

Profile photo of Natalie | Perry's Plate

Grilled Brie with Grilled Corn and Mango Salsa

Posted by in Step-by-Step Recipes

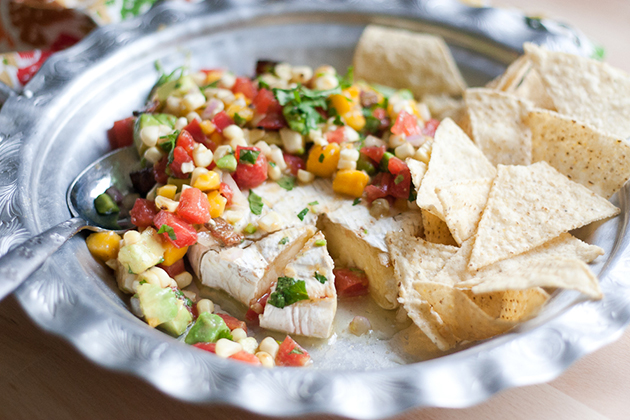
It never occurred to me to grill brie. Or pair it with a salsa. Or put bacon in mango salsa. The whole thing almost made my head explode---in the best way possible. It's brilliant. And it was like summertime on a platter. Luckily it's not hard, either. Here, I'll show you!

Profile photo of Natalie | Perry's Plate

Singapore Noodles (Singapore Mei Fun)

Posted by in Step-by-Step Recipes

Having small children definitely helps with the temptation to eat out frequently. So does finding popular restaurant or take out recipes to prepare at home. Enter: Singapore Noodles (Singapore Mei Fun) from Tasty Kitchen member