The Pioneer Woman Tasty Kitchen
Profile photo of Erica Lea

No-Bake Granola Bars

Posted by in Step-by-Step Recipes

Here’s a great idea for a grab-and-go breakfast, school snack, or after-school treat. It’s no-bake too, perfect for those of you still battling summer heat. Enjoy this post from our archives!

 
Tasty Kitchen Blog: No-Bake Granola Bars. Guest post by Erica Kastner of Cooking for Seven, recipe submitted by TK member Cheri of Kitchen Simplicity.

 
I’m the type of person that, when I get hungry, I need to eat something immediately. Perhaps it’s just my imagination, but if I go too long without eating I start to feel sick. And cranky. So it helps if I stuff handy snacks into my purse to ensure I’m never in an emergency food situation.

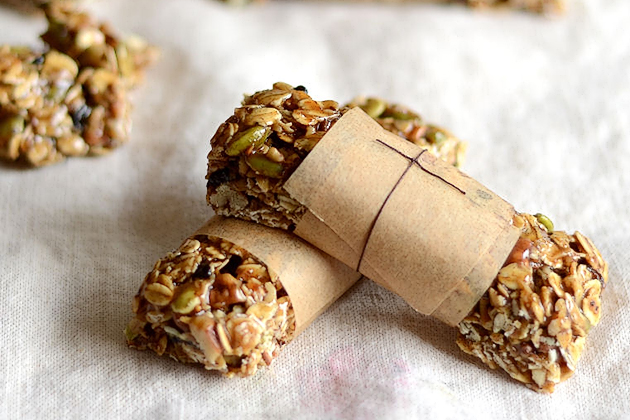
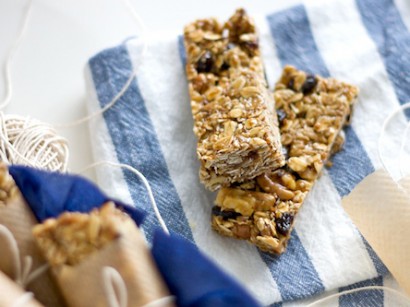
These No-Bake Granola Bars, brought to us by Cheri, are a wonderful power snack for on-the-go. They’re filled with nutritious oats, nuts, dried fruit and honey. Plus they’re pretty tasty little treats.

Let me show you how to make them!


Tasty Kitchen Blog: No-Bake Granola Bars. Guest post by Erica Kastner of Cooking for Seven, recipe submitted by TK member Cheri of Kitchen Simplicity.

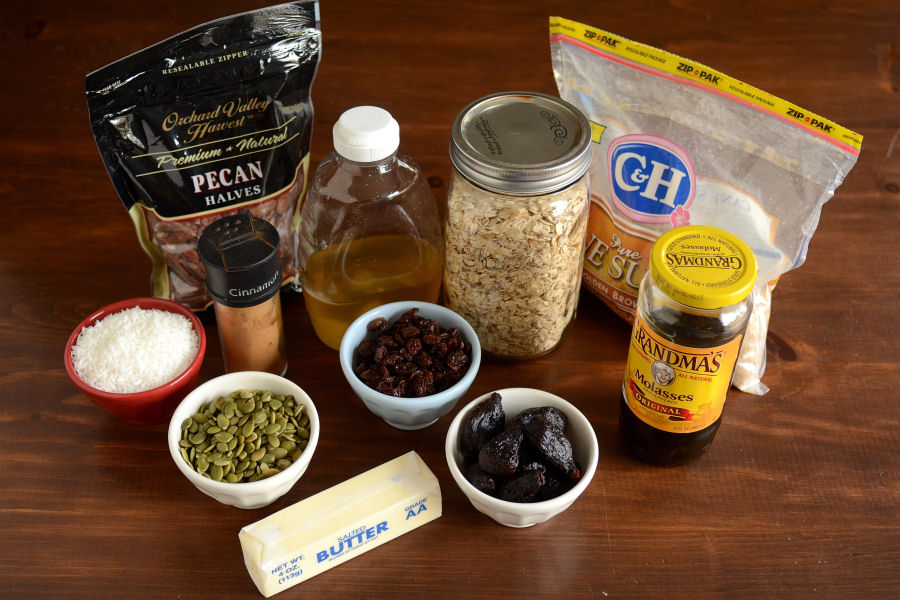
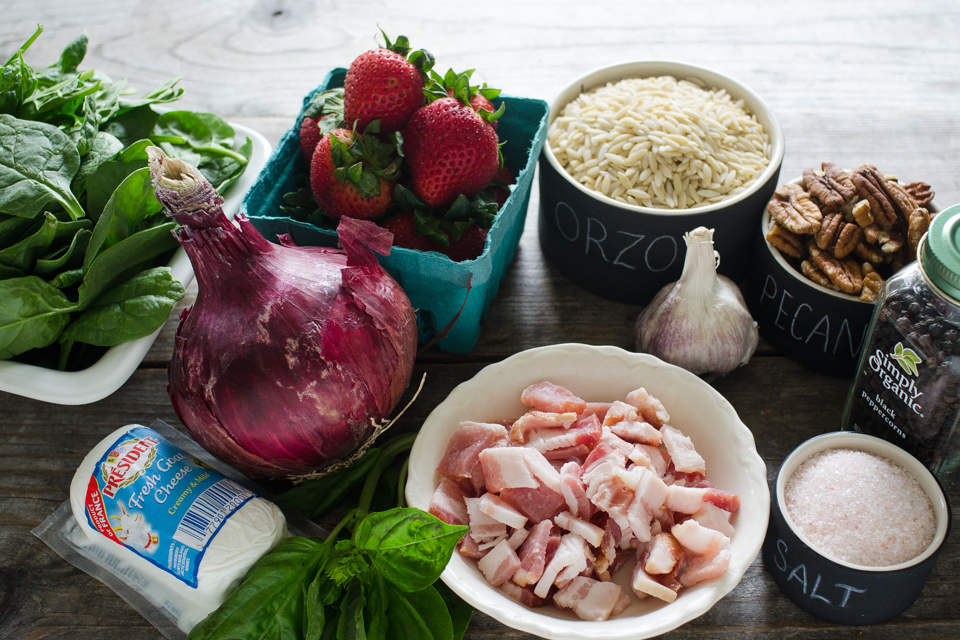
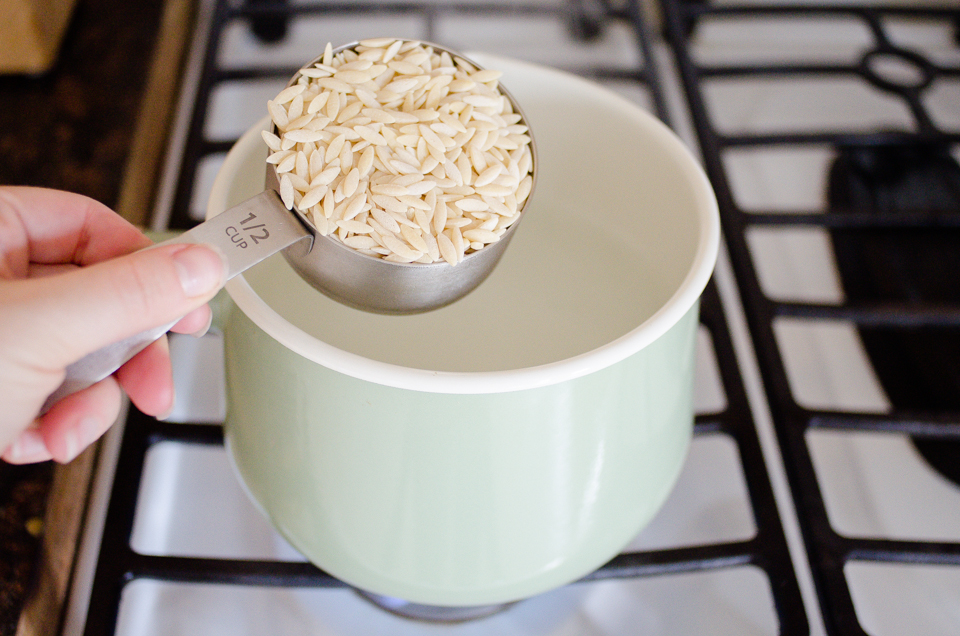
Here’s the ingredients you’ll need: rolled oats, nuts (I used pecans and pumpkin seeds), shredded coconut, dried fruit (I used raisins and figs), butter, brown sugar, cinnamon, honey and molasses.


Tasty Kitchen Blog: No-Bake Granola Bars. Guest post by Erica Kastner of Cooking for Seven, recipe submitted by TK member Cheri of Kitchen Simplicity.

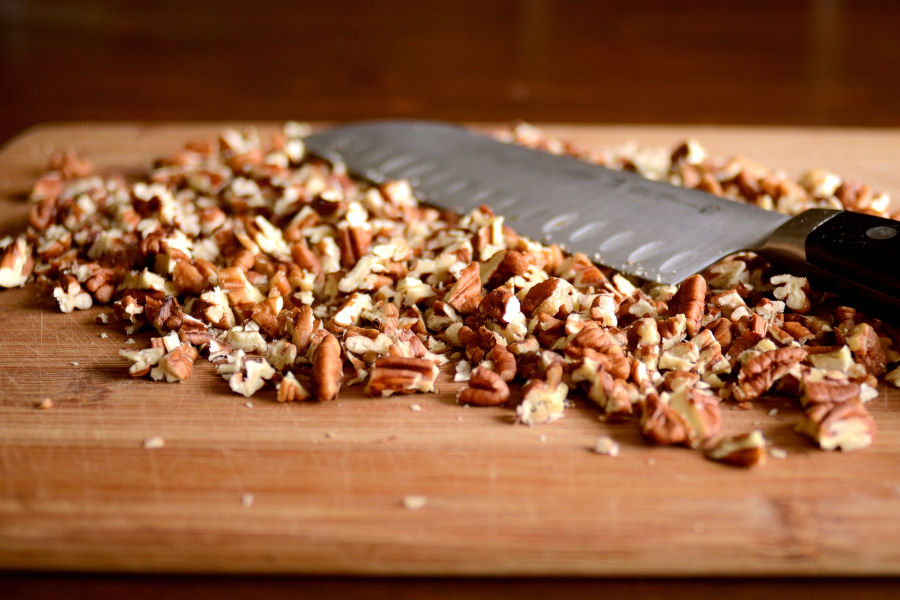
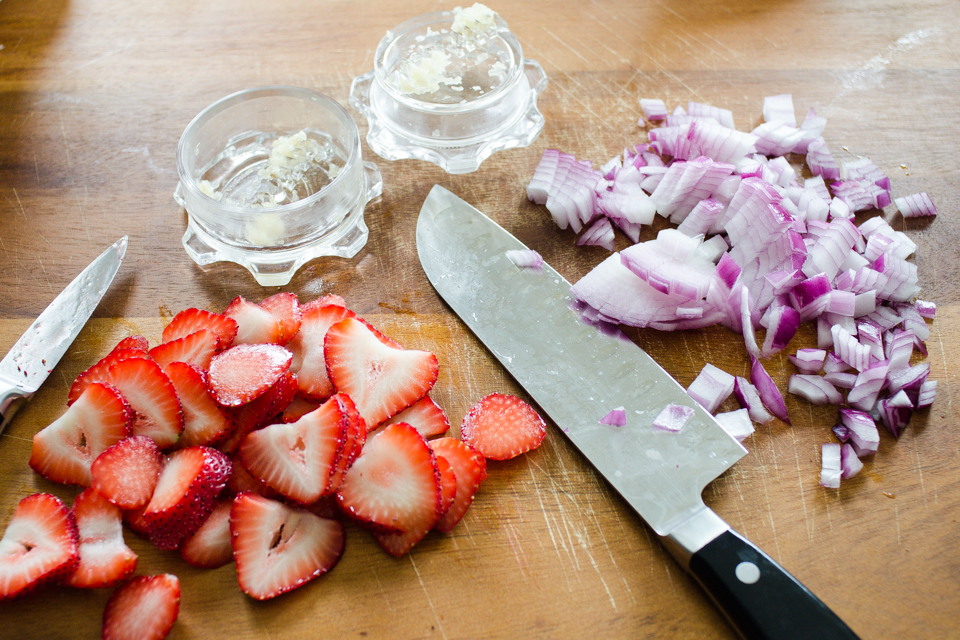
Begin by chopping your nuts. The pumpkin seeds are nice and small so I didn’t chop them.


Tasty Kitchen Blog: No-Bake Granola Bars. Guest post by Erica Kastner of Cooking for Seven, recipe submitted by TK member Cheri of Kitchen Simplicity.

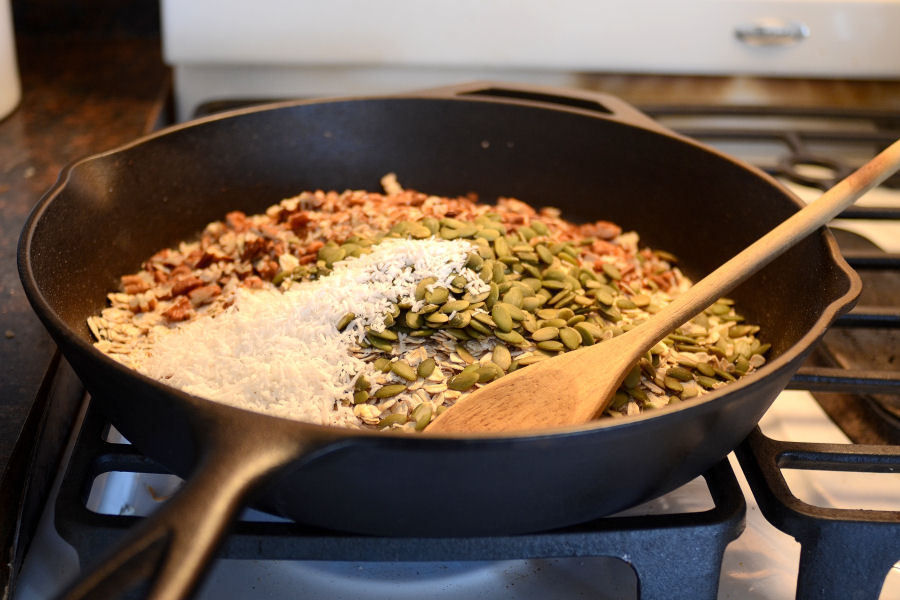
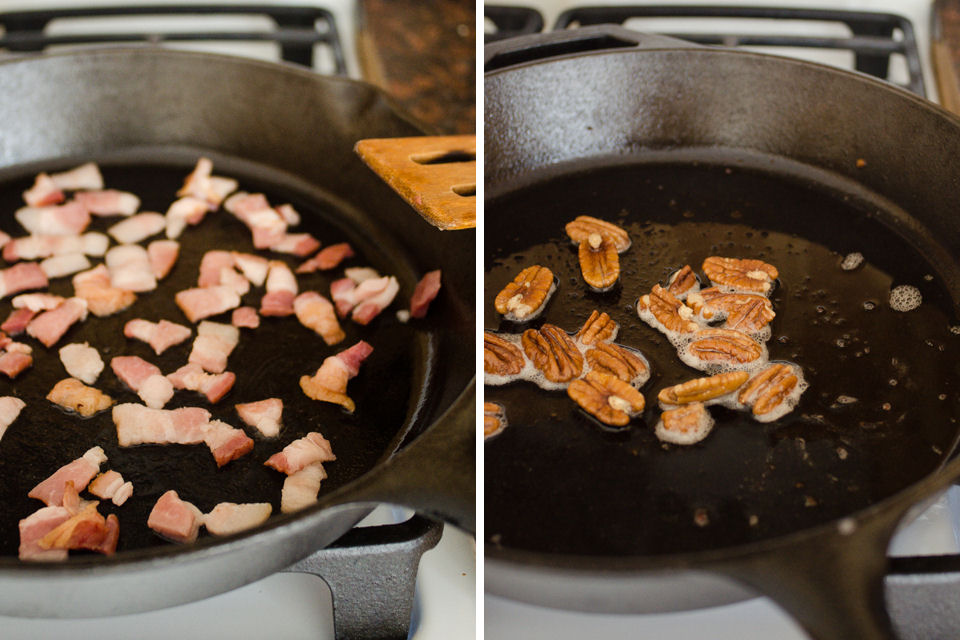
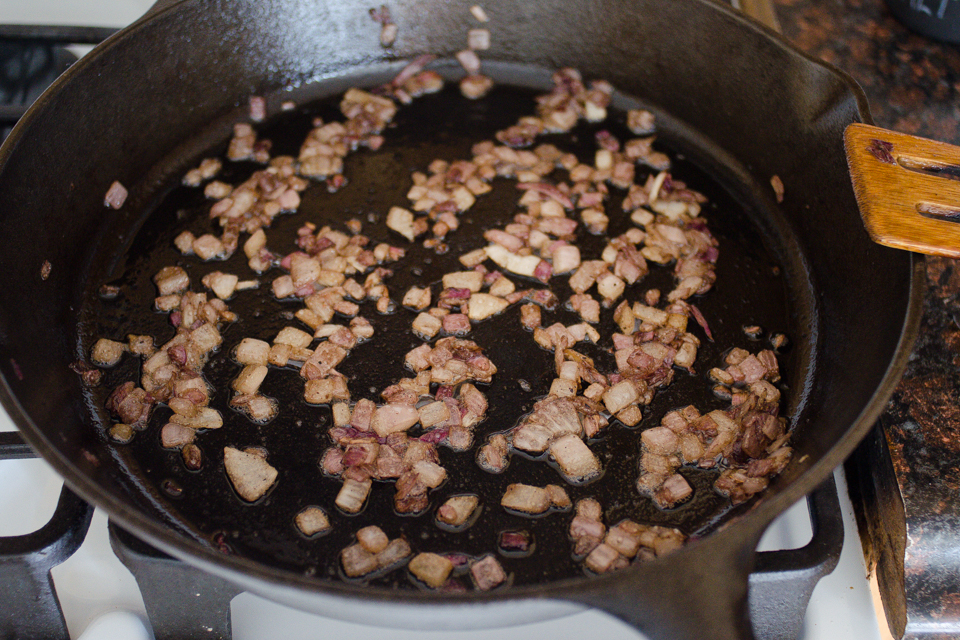
In a large skillet set over medium-high heat, toast the oats, nuts and coconut until fragrant. Make sure to stir often so it doesn’t burn!


Tasty Kitchen Blog: No-Bake Granola Bars. Guest post by Erica Kastner of Cooking for Seven, recipe submitted by TK member Cheri of Kitchen Simplicity.

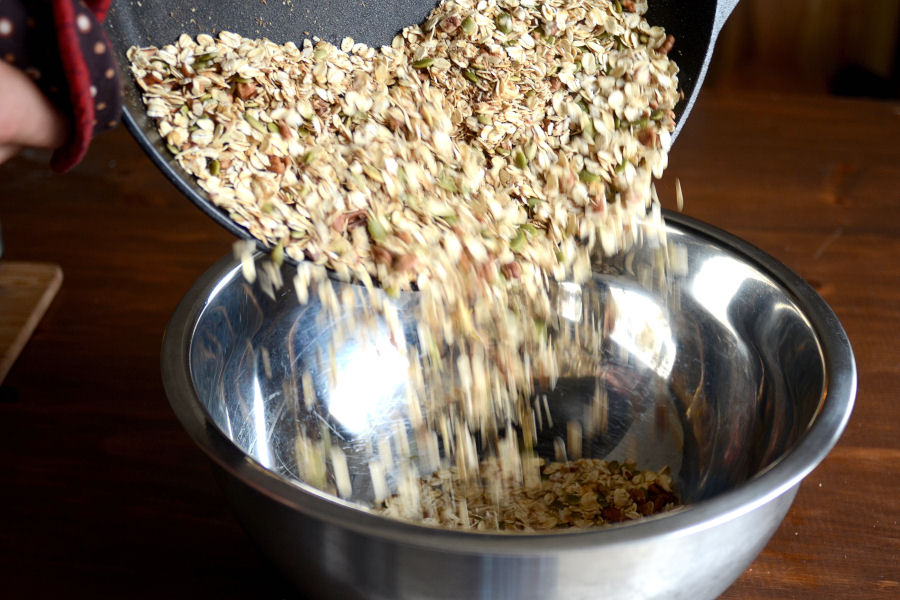
Pour the toasted oat mixture into a large bowl.


Tasty Kitchen Blog: No-Bake Granola Bars. Guest post by Erica Kastner of Cooking for Seven, recipe submitted by TK member Cheri of Kitchen Simplicity.

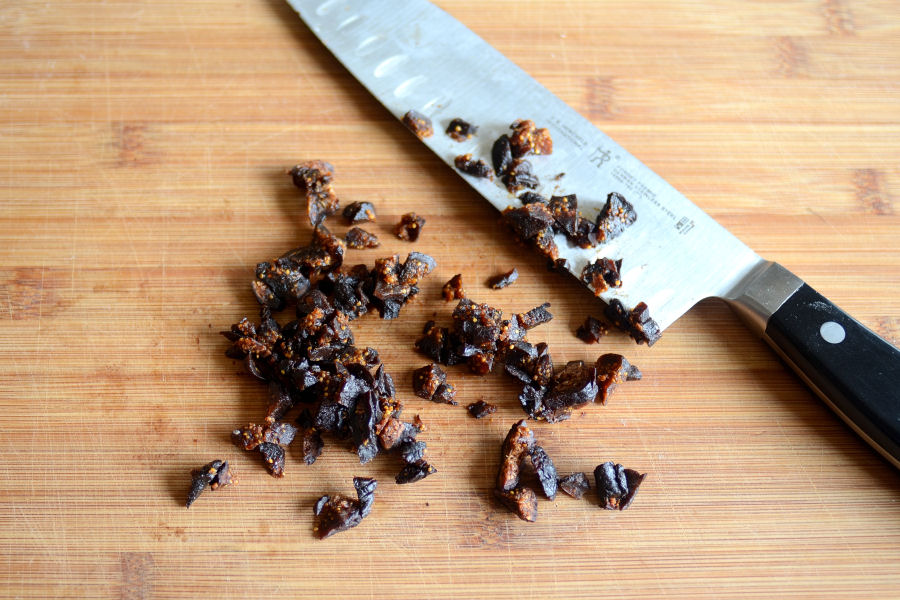
If you’re using larger dried fruit you’ll want to chop it up as well.


Tasty Kitchen Blog: No-Bake Granola Bars. Guest post by Erica Kastner of Cooking for Seven, recipe submitted by TK member Cheri of Kitchen Simplicity.

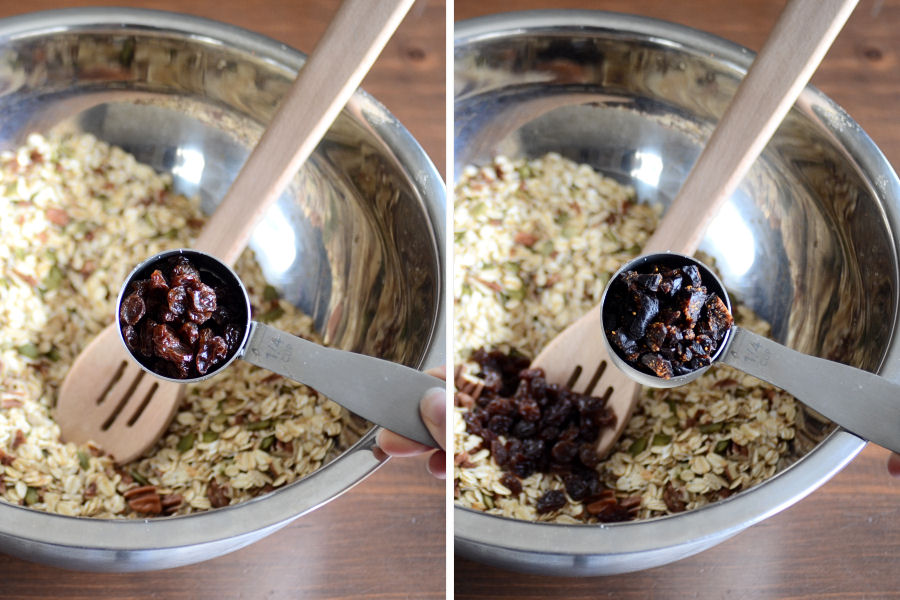
Add the dried fruit to the oat mixture.
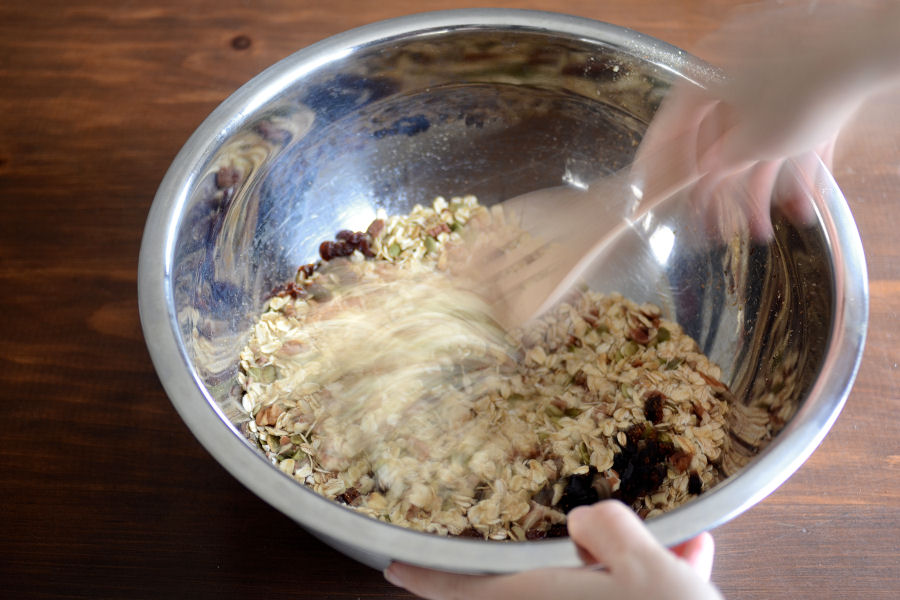


Tasty Kitchen Blog: No-Bake Granola Bars. Guest post by Erica Kastner of Cooking for Seven, recipe submitted by TK member Cheri of Kitchen Simplicity.

Stir to combine.


Tasty Kitchen Blog: No-Bake Granola Bars. Guest post by Erica Kastner of Cooking for Seven, recipe submitted by TK member Cheri of Kitchen Simplicity.

Place the butter, brown sugar, cinnamon, honey and molasses in a small saucepan.


Tasty Kitchen Blog: No-Bake Granola Bars. Guest post by Erica Kastner of Cooking for Seven, recipe submitted by TK member Cheri of Kitchen Simplicity.

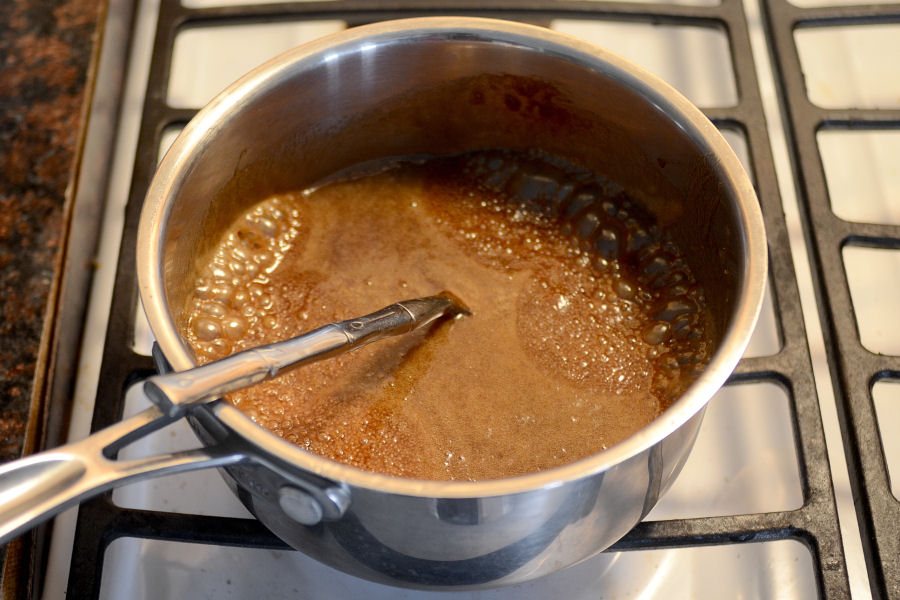
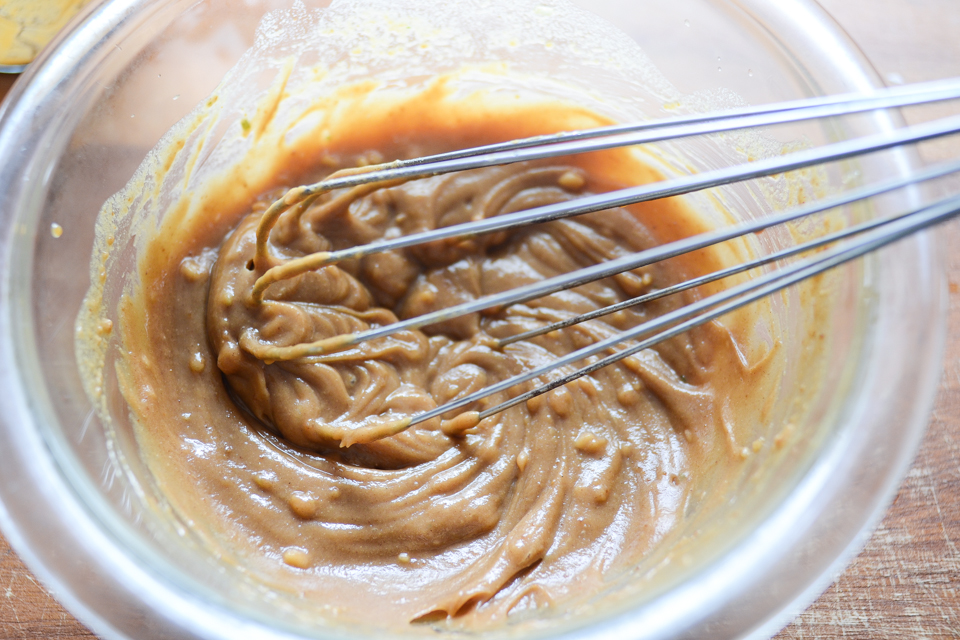
Bring to a boil over medium heat, stirring occasionally.


Tasty Kitchen Blog: No-Bake Granola Bars. Guest post by Erica Kastner of Cooking for Seven, recipe submitted by TK member Cheri of Kitchen Simplicity.

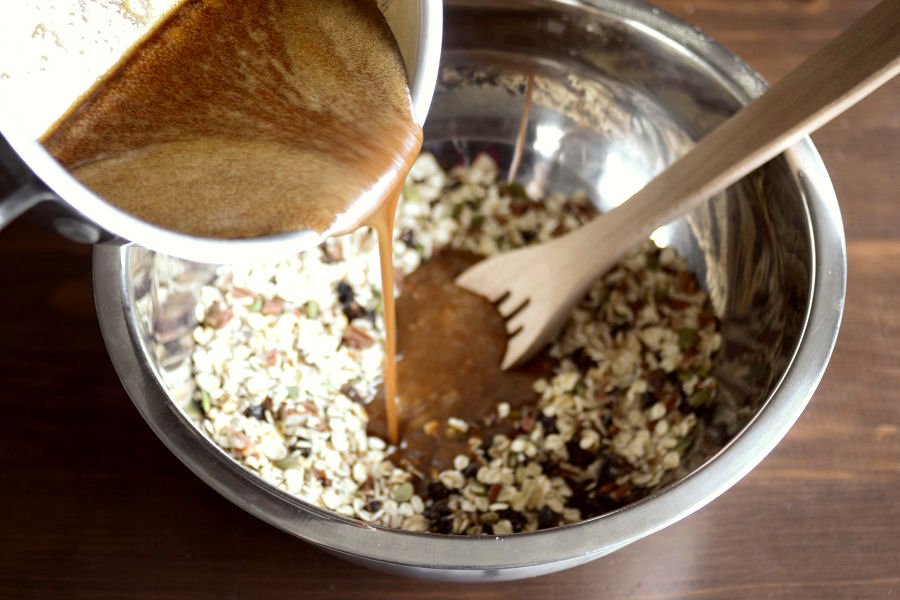
Pour the butter mixture over the oat mixture.


Tasty Kitchen Blog: No-Bake Granola Bars. Guest post by Erica Kastner of Cooking for Seven, recipe submitted by TK member Cheri of Kitchen Simplicity.

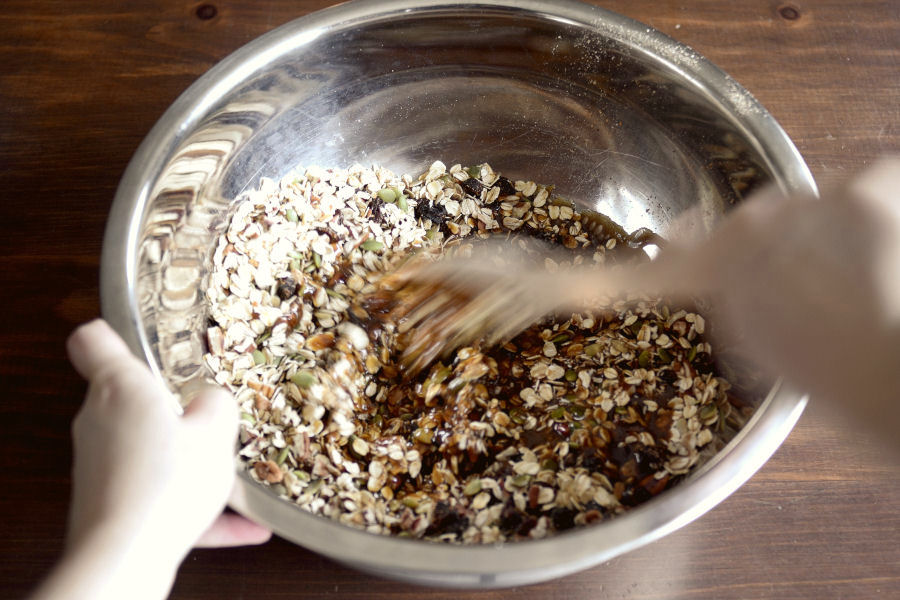
Stir until the oat mixture is evenly coated with the butter mixture. Set aside to cool a little.


Tasty Kitchen Blog: No-Bake Granola Bars. Guest post by Erica Kastner of Cooking for Seven, recipe submitted by TK member Cheri of Kitchen Simplicity.

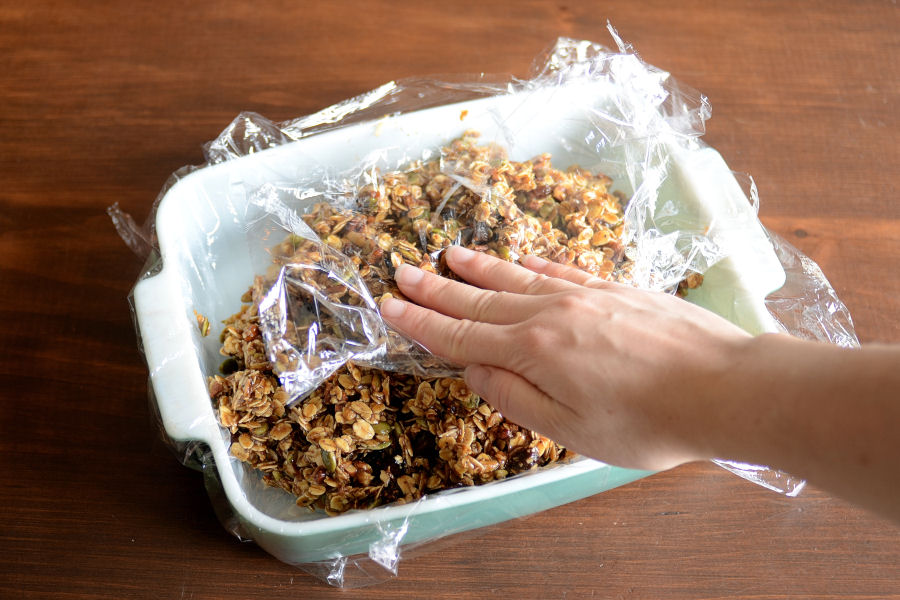
Line a dish with plastic wrap. Spoon mixture into pan and press down to compact. I used an extra piece of plastic wrap to keep my hands clean.


Tasty Kitchen Blog: No-Bake Granola Bars. Guest post by Erica Kastner of Cooking for Seven, recipe submitted by TK member Cheri of Kitchen Simplicity.

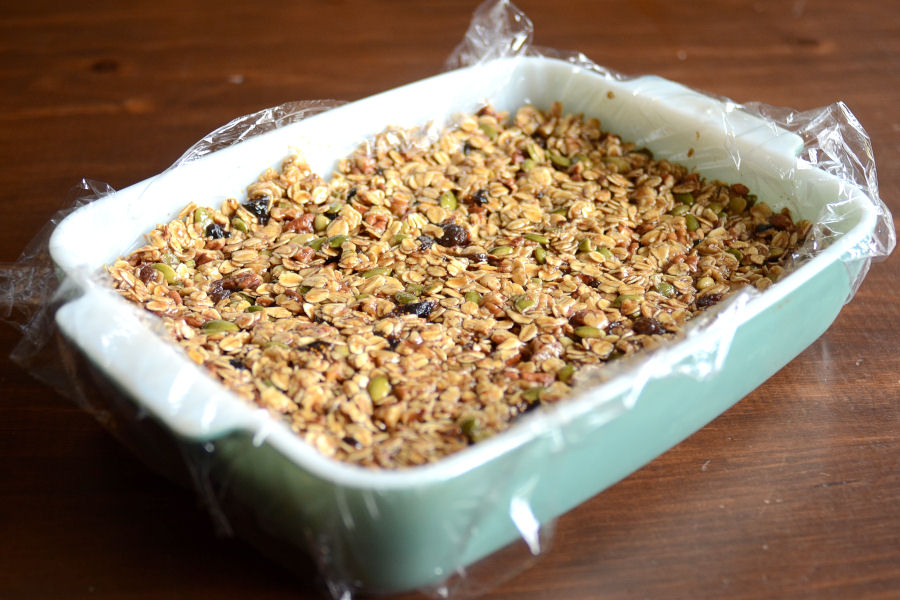
Place in the refrigerator to firm up, about 30 minutes.


Tasty Kitchen Blog: No-Bake Granola Bars. Guest post by Erica Kastner of Cooking for Seven, recipe submitted by TK member Cheri of Kitchen Simplicity.

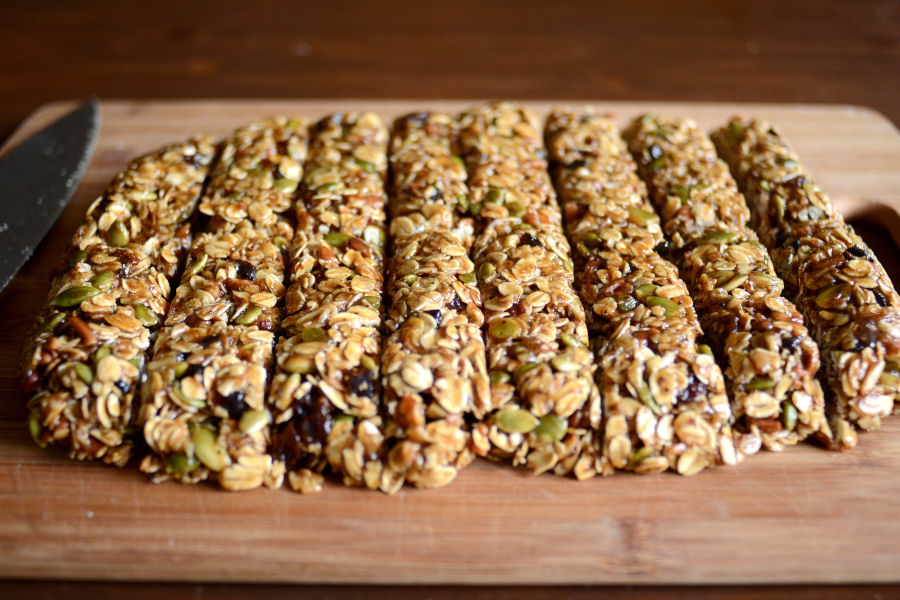
Once firmed, turn out onto a cutting board and cut into bars.


Tasty Kitchen Blog: No-Bake Granola Bars. Guest post by Erica Kastner of Cooking for Seven, recipe submitted by TK member Cheri of Kitchen Simplicity.

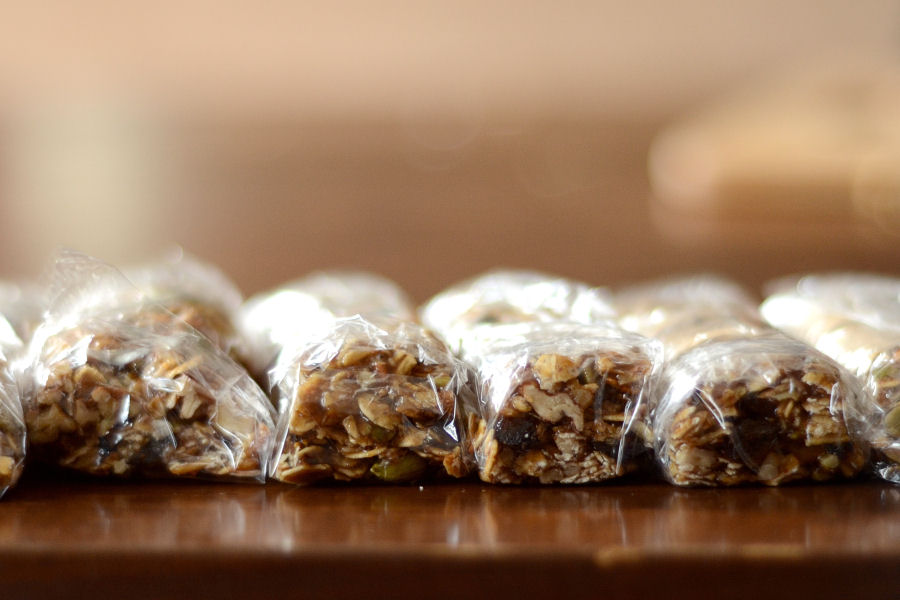
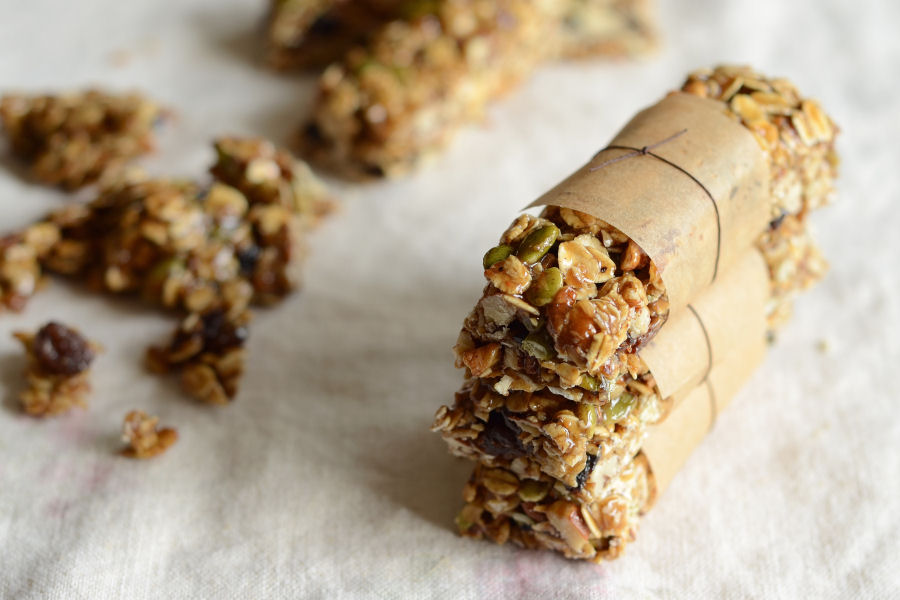
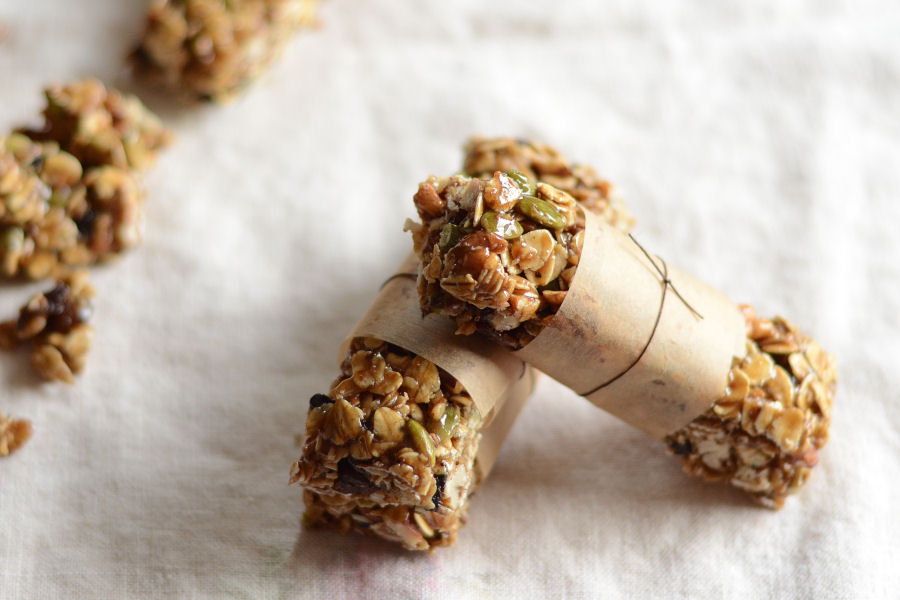
Wrap the bars individually with plastic wrap, parchment paper or wax paper. Now they’re grab-and-go ready!


Tasty Kitchen Blog: No-Bake Granola Bars. Guest post by Erica Kastner of Cooking for Seven, recipe submitted by TK member Cheri of Kitchen Simplicity.

Recipe notes:

1. These bars are just a hair too sweet for my taste. I cut the amount of sugar down to 3/4 cup, so next time I’ll try going down to 1/2 cup and using a full stick of butter. If you like your treats nice and sweet, this shouldn’t be an issue for you.

2. I might add a pinch of salt next time as well.

3. I love how customizable these are. You could come up with so many different flavor combinations by switching up the nuts and fruits you use.


Tasty Kitchen Blog: No-Bake Granola Bars. Guest post by Erica Kastner of Cooking for Seven, recipe submitted by TK member Cheri of Kitchen Simplicity.

Thanks so much to Cheri for sharing her recipe with us! Make sure to check out her blog, Kitchen Simplicity, where she writes many more delicious recipes. I may have to make her Quick & Cheesy Chicken Pot Pie for supper sometime.


Printable Recipe

No-Bake Granola Bars

See post on Cheri | Kitchen Simplicity’s site!
4.50 Mitt(s) 6 Rating(s)6 votes, average: 4.50 out of 56 votes, average: 4.50 out of 56 votes, average: 4.50 out of 56 votes, average: 4.50 out of 56 votes, average: 4.50 out of 5

Prep Time:

Cook Time:

Difficulty: Easy

Servings: 16

16
x

Print Options

Page size Letter 3x5 4x6
Text Size Small Medium Large
Content Include description
Include prep time, etc.
Show image

Description

Chewy No-Bake Granola Bars that are perfect to make with the kiddos. Prepare to never buy store-bought granola bars again.

Ingredients

  • 2-½ cups Rolled Oats
  • 1-½ cup Nuts, Chopped, I Used Walnuts And Pecans
  • ¼ cups Shredded Coconut
  • ½ cups Raisins
  • 6 Tablespoons Salted Butter
  • 1 cup Brown Sugar
  • 1-½ teaspoon Ground Cinnamon
  • 6 Tablespoons Liquid Honey
  • 2 Tablespoons Molasses

Preparation Instructions

1. Toast oats, nuts and coconut in a large skillet over medium-high heat until fragrant, stirring often. Remove to a large bowl and toss with raisins.

2. Place butter, sugar, cinnamon, honey and molasses in a small saucepan. Cook over medium heat, stirring occasionally, until it comes to a boil. Remove from heat and stir into oat mixture until evenly coated. Let sit just until cool enough to handle.

3. In the meantime, line a 7×11 inch pan with plastic wrap. Spoon mixture into pan, pressing down to compact. Place in the fridge for 30 minutes to firm up. Once firmed, remove from pan, peel away plastic wrap and slice into 16 bars (half lengthwise and then into 8). Wrap individually in plastic wrap or parchment paper, if desired. Store covered at room temperature.


_______________________________________

Newly-married Erica Kastner shares her wonderful recipes and amazing food photography on her blog, Cooking for Seven. She also writes about crafts and posts more of her beautiful photography in her personal blog, EricaLea.com. There really isn’t much that this amazing young lady can’t do, and we’re thrilled she does some of it here.


Profile photo of Erica Lea

Tiramisu Ice Cream

Posted by in Step-by-Step Recipes

Tasty Kitchen Blog: Tiramisu Ice Cream. Guest post by Erica Kastner of Buttered Side Up, recipe submitted by TK member Mira of Cooking LSL.

Hooray for ice cream season!

Of course, if someone were to make the argument that ice cream is a year ’round affair, I wouldn’t try to convince them otherwise.

This Tiramisu Ice Cream recipe, brought to us by Mira, may sound all fancy-schmancy, but the only difficult part is locating a couple of ingredients. Most supermarkets carry mascarpone, and Kahlúa is actually a very popular liqueur. I’ve been wanting to try it in cooking for years, and now I have a bottle to experiment with.

Side note: I like to pronounce mascarpone incorrectly on purpose to bug Reuben. I’m such a good wife.


Tasty Kitchen Blog: Tiramisu Ice Cream. Guest post by Erica Kastner of Buttered Side Up, recipe submitted by TK member Mira of Cooking LSL.

For the base of the ice cream, you only need 5 ingredients: milk, cream, eggs (just the yolks), sugar, and mascarpone.


Tasty Kitchen Blog: Tiramisu Ice Cream. Guest post by Erica Kastner of Buttered Side Up, recipe submitted by TK member Mira of Cooking LSL.

You’ll also need 4 ingredients to flavor the ice cream: Kahlúa (or any coffee liqueur), instant espresso powder, brewed espresso, and vanilla extract.


Tasty Kitchen Blog: Tiramisu Ice Cream. Guest post by Erica Kastner of Buttered Side Up, recipe submitted by TK member Mira of Cooking LSL.

Start by heating the milk and cream in a saucepan.


Tasty Kitchen Blog: Tiramisu Ice Cream. Guest post by Erica Kastner of Buttered Side Up, recipe submitted by TK member Mira of Cooking LSL.

Meanwhile, put your egg yolks and sugar into a largish bowl.


Tasty Kitchen Blog: Tiramisu Ice Cream. Guest post by Erica Kastner of Buttered Side Up, recipe submitted by TK member Mira of Cooking LSL.

Whisk them together until the mixture is pale and frothy (mine never quite got to the frothy stage, but it did have bubbles).


Tasty Kitchen Blog: Tiramisu Ice Cream. Guest post by Erica Kastner of Buttered Side Up, recipe submitted by TK member Mira of Cooking LSL.

Add the mascarpone.


Tasty Kitchen Blog: Tiramisu Ice Cream. Guest post by Erica Kastner of Buttered Side Up, recipe submitted by TK member Mira of Cooking LSL.

Gently fold in the cheese with a rubber spatula or spoon.


Tasty Kitchen Blog: Tiramisu Ice Cream. Guest post by Erica Kastner of Buttered Side Up, recipe submitted by TK member Mira of Cooking LSL.

Once the milk and cream are simmering, slowly add half a cup to the egg/sugar/mascarpone mixture. Make sure you whisk while you add the hot milk and cream!


Tasty Kitchen Blog: Tiramisu Ice Cream. Guest post by Erica Kastner of Buttered Side Up, recipe submitted by TK member Mira of Cooking LSL.

Pour the tempered egg mixture back into the pot on the stove.


Tasty Kitchen Blog: Tiramisu Ice Cream. Guest post by Erica Kastner of Buttered Side Up, recipe submitted by TK member Mira of Cooking LSL.

Turn the heat up to medium and cook until the custard coats the back of a wooden spoon. This should only take about 5-8 minutes. Don’t overcook the mixture and scramble your eggs! Not like I speak from experience or anything.


Tasty Kitchen Blog: Tiramisu Ice Cream. Guest post by Erica Kastner of Buttered Side Up, recipe submitted by TK member Mira of Cooking LSL.

This step is optional, but I like to pour my custard base through a fine-mesh sieve to catch any bits that got a little too cooked.


Tasty Kitchen Blog: Tiramisu Ice Cream. Guest post by Erica Kastner of Buttered Side Up, recipe submitted by TK member Mira of Cooking LSL.

See? Do you want that in your ice cream? I think not.

Once the custard cools to room temperature, cover and place in the refrigerator. Let it chill until it’s bone cold. I left mine overnight.


Tasty Kitchen Blog: Tiramisu Ice Cream. Guest post by Erica Kastner of Buttered Side Up, recipe submitted by TK member Mira of Cooking LSL.

Now that your ice cream base is completely cold, it’s time to add the flavorings! A teaspoon of vanilla extract…


Tasty Kitchen Blog: Tiramisu Ice Cream. Guest post by Erica Kastner of Buttered Side Up, recipe submitted by TK member Mira of Cooking LSL.

A teaspoon of instant espresso powder…


Tasty Kitchen Blog: Tiramisu Ice Cream. Guest post by Erica Kastner of Buttered Side Up, recipe submitted by TK member Mira of Cooking LSL.

Just half a teaspoon of Kahlúa (or coffee liqueur of choice)…


Tasty Kitchen Blog: Tiramisu Ice Cream. Guest post by Erica Kastner of Buttered Side Up, recipe submitted by TK member Mira of Cooking LSL.

And 1/4 cup of brewed espresso. Now you have layers of coffee flavors.


Tasty Kitchen Blog: Tiramisu Ice Cream. Guest post by Erica Kastner of Buttered Side Up, recipe submitted by TK member Mira of Cooking LSL.

Whisk it all together until smooth.


Tasty Kitchen Blog: Tiramisu Ice Cream. Guest post by Erica Kastner of Buttered Side Up, recipe submitted by TK member Mira of Cooking LSL.

Pour the custard into your ice cream maker and churn according to the manufacturer’s instructions.


Tasty Kitchen Blog: Tiramisu Ice Cream. Guest post by Erica Kastner of Buttered Side Up, recipe submitted by TK member Mira of Cooking LSL.

It only took about 20 minutes for mine to turn into a creamy, soft-serve consistency.


Tasty Kitchen Blog: Tiramisu Ice Cream. Guest post by Erica Kastner of Buttered Side Up, recipe submitted by TK member Mira of Cooking LSL.

Scoop the ice cream into a freezer-safe container and freeze until firm. Or eat it straight out of the ice cream maker—I won’t judge!


Tasty Kitchen Blog: Tiramisu Ice Cream. Guest post by Erica Kastner of Buttered Side Up, recipe submitted by TK member Mira of Cooking LSL.

Note: The mascarpone has a bit of a grainy texture. If you’re a stickler about perfectly smooth ice cream, you could always substitute another soft cheese that is creamier. I personally didn’t mind it, and my sister said that the graininess was reminiscent of real tiramisu.


Tasty Kitchen Blog: Tiramisu Ice Cream. Guest post by Erica Kastner of Buttered Side Up, recipe submitted by TK member Mira of Cooking LSL.

If you like, you can dust the top of the ice cream with cocoa powder, or sprinkle with it with finely chopped chocolate. This gives it even more of a tiramisu vibe.

Thanks to Mira for sharing her recipe with us here on Tasty Kitchen. Stop by her blog, Cooking LSL, for more delicious recipes. Her Berries and Peach Pudding Tart sounds scrumptious.


Printable Recipe

Tiramisu Ice Cream

See post on Cookinglsl’s site!
0.00 Mitt(s) 0 Rating(s)0 votes, average: 0.00 out of 50 votes, average: 0.00 out of 50 votes, average: 0.00 out of 50 votes, average: 0.00 out of 50 votes, average: 0.00 out of 5

Prep Time:

Cook Time:

Difficulty: Easy

Servings: 6

6
x

Print Options

Page size Letter 3x5 4x6
Text Size Small Medium Large
Content Include description
Include prep time, etc.
Show image

Description

Creamy, coffee-flavored frozen dessert to enjoy on its own or add it on top of brownies, crepes or cookies.

Recipe makes a little less than 1 quart. I used an ice cream maker with 1 to 1 1/2 quart capacity.

Ingredients

  • 1 cup Whole Milk
  • 1 cup Heavy Cream
  • 3  Egg Yolks
  • ½ cups Sugar
  • 1 cup Mascarpone Cheese, At Room Temperature
  • 1 teaspoon Vanilla
  • 1 teaspoon Instant Espresso Powder
  • ¼ cups Espresso
  • ½ teaspoons Kahlua Or Other Coffee Flavored Liqueur (optional)

Preparation Instructions

In a saucepan, combine milk and cream and turn on heat to medium-low. Heat milk until it is simmering.

In a deep bowl, whisk together egg yolks and sugar, until pale and frothy. Add mascarpone cheese and mix until combined. (Use a wooden spoon or spatula, don’t beat mascarpone with electric mixer).

Add ½ cup hot milk to the mascarpone mixture and whisk to combine. Pour mixture back in the pan with hot milk and mix to combine. Cook for 5–8 minutes on medium heat, stirring constantly, until custard it thick and covers the back of the spoon with a thin film.

Pour mixture to a bowl and let cool completely. Use an ice bath to speed up the process, or you can leave it in the fridge overnight.

Before you add mixture to ice cream machine, add vanilla, espresso powder, espresso and coffee liqueur.
Following manufacturer’s instructions for your ice cream maker, freeze until it resembles soft serve ice cream.

Transfer to a 9″x13″ in pan, lined with parchment paper, cover and freeze until firm. Serve and enjoy!


_______________________________________

Erica Kastner has always been one of our most cherished members of the Tasty Kitchen community. She shares her wonderful recipes and amazing food photography on her blog, Buttered Side Up, and she also writes about crafts and posts more of her beautiful photography in her personal blog, Simple Days. There really isn’t much that this amazing young wife and mother can’t do, and we’re thrilled she does some of it here.


Profile photo of Erica Lea

Warm Strawberry Bacon Orzo Salad

Posted by in Step-by-Step Recipes

Tasty Kitchen Blog: Warm Strawberry Bacon Orzo Salad. Guest post by Erica Kastner of Buttered Side Up, recipe submitted by TK member Jessica of How Sweet It Is.

One of the things I love about cooking for the Tasty Kitchen blog is that it pushes me to try out new flavor combinations. Even if I’ve never tried or heard of a certain ingredient, if someone in the community uses it in a delicious-sounding recipe, I’m much more game to give it a go.

This recipe actually contains two ingredients that I had never worked with before: orzo and goat cheese. I like to think of orzo as rice-shaped pasta—not so scary. But I’m not gonna lie, the goat cheese had me a tad worried. I had eaten it before, but I’d never been brave enough to purchase it and put it into a dish. To my surprise, it went with the flavors really well and wasn’t overpowering.

This Warm Strawberry Bacon Orzo Salad, shared by TK member Jessica, is a lovely blend of sweet and savory. The hearty, salty bacon is balanced by the fresh strawberries. The orzo adds a bit of starch and the pecans and cheese just round out the flavors.


Tasty Kitchen Blog: Warm Strawberry Bacon Orzo Salad. Guest post by Erica Kastner of Buttered Side Up, recipe submitted by TK member Jessica of How Sweet It Is.

Here are the gorgeous, colorful ingredients you’ll need: orzo, bacon (chopped), pecans, red onion, garlic, spinach, strawberries, goat cheese, basil, and salt and pepper.


Tasty Kitchen Blog: Warm Strawberry Bacon Orzo Salad. Guest post by Erica Kastner of Buttered Side Up, recipe submitted by TK member Jessica of How Sweet It Is.

Begin by frying your bacon in a large skillet. I like to use a cast iron pan for this. When your bacon is nice and crispy, remove it to a paper-towel-lined plate, but leave the bacon grease behind.

Add the pecans and fry in the bacon grease until nice and toasty. Transfer pecans to the paper-towel-lined plate.


Tasty Kitchen Blog: Warm Strawberry Bacon Orzo Salad. Guest post by Erica Kastner of Buttered Side Up, recipe submitted by TK member Jessica of How Sweet It Is.

While the pecans are toasting, prep the rest of your ingredients: mince the garlic, slice the strawberries, and chop (or slice) the onion. You could also crumble the goat cheese if you have extra time.


Tasty Kitchen Blog: Warm Strawberry Bacon Orzo Salad. Guest post by Erica Kastner of Buttered Side Up, recipe submitted by TK member Jessica of How Sweet It Is.

After the pecans are finished toasting, add the chopped onion to the pan and fry until nicely caramelized.


Tasty Kitchen Blog: Warm Strawberry Bacon Orzo Salad. Guest post by Erica Kastner of Buttered Side Up, recipe submitted by TK member Jessica of How Sweet It Is.

Meanwhile, cook and drain your orzo.


Tasty Kitchen Blog: Warm Strawberry Bacon Orzo Salad. Guest post by Erica Kastner of Buttered Side Up, recipe submitted by TK member Jessica of How Sweet It Is.

Once the onions are soft and caramelized, add the spinach and garlic to the pan.


Tasty Kitchen Blog: Warm Strawberry Bacon Orzo Salad. Guest post by Erica Kastner of Buttered Side Up, recipe submitted by TK member Jessica of How Sweet It Is.

Sauté until the spinach wilts.


Tasty Kitchen Blog: Warm Strawberry Bacon Orzo Salad. Guest post by Erica Kastner of Buttered Side Up, recipe submitted by TK member Jessica of How Sweet It Is.

Add the strawberries and orzo and give it a stir.


Tasty Kitchen Blog: Warm Strawberry Bacon Orzo Salad. Guest post by Erica Kastner of Buttered Side Up, recipe submitted by TK member Jessica of How Sweet It Is.

Season with salt and pepper and add the bacon and pecans.


Tasty Kitchen Blog: Warm Strawberry Bacon Orzo Salad. Guest post by Erica Kastner of Buttered Side Up, recipe submitted by TK member Jessica of How Sweet It Is.

Take the skillet off the heat and add the crumbled goat cheese.


Tasty Kitchen Blog: Warm Strawberry Bacon Orzo Salad. Guest post by Erica Kastner of Buttered Side Up, recipe submitted by TK member Jessica of How Sweet It Is.

Spoon the salad into bowls and garnish with basil, if desired.


Tasty Kitchen Blog: Warm Strawberry Bacon Orzo Salad. Guest post by Erica Kastner of Buttered Side Up, recipe submitted by TK member Jessica of How Sweet It Is.

Notes:
1. Don’t overcook your orzo, or it will stick together. I cooked mine a bit too long and needed to rinse it with cold water to loosen it up.
2. I love that the strawberries don’t get too cooked—just enough to help their flavor meld a tiny bit into the rest of the salad.
3. You could also use other seasonal fruits in this salad. I think blueberries would work really well.
4. Even if you absolutely hate goat cheese, you should still give this recipe a try! You can leave it out or substitute it with another cheese. I think blue cheese or feta would be awesome.
5. This salad was really best fresh. It seemed to deteriorate quickly in the refrigerator for me.


Tasty Kitchen Blog: Warm Strawberry Bacon Orzo Salad. Guest post by Erica Kastner of Buttered Side Up, recipe submitted by TK member Jessica of How Sweet It Is.

Thank you very much, Jessica, for sharing this yummy salad with all of us! If you haven’t discovered Jessica’s blog, How Sweet It Is, make sure to head over and browse through her culinary creations. This Grilled Kale BLT Dip sounds really good to me.


Printable Recipe

Warm Strawberry Bacon Orzo Salad

See post on HowSweetEats’s site!
5.00 Mitt(s) 1 Rating(s)1 vote, average: 5.00 out of 51 vote, average: 5.00 out of 51 vote, average: 5.00 out of 51 vote, average: 5.00 out of 51 vote, average: 5.00 out of 5

Prep Time:

Cook Time:

Difficulty: Easy

Servings: 2

2
x

Print Options

Page size Letter 3x5 4x6
Text Size Small Medium Large
Content Include description
Include prep time, etc.
Show image

Description

A warm salad loaded with strawberries, whole wheat orzo, sauteed spinach, garlic, caramelized onion, bacon, pecans, goat cheese and fresh basil.

Ingredients

  • ½ cups Uncooked Whole Wheat Orzo
  • 2 slices Bacon, Chopped
  • ¼ cups Whole Pecans
  • ½ whole Red Onion, Sliced
  • 2 cloves Garlic, Minced
  • 4 cups Raw Spinach
  • 4 whole Large Strawberries, Sliced
  • 1 ounce, weight Goat Cheese Crumbled
  • Fresh Basil, For Garnish
  • Salt And Pepper

Preparation Instructions

Heat a large skillet over medium heat and add bacon. Fry until golden brown and crispy, then remove bacon with a slotted spoon and drain on a paper towel. Add pecans to the skillet and toast for about 6-8 minutes, stirring occasionally so they do not burn. Remove and drain on a paper towel. Set bacon and pecans aside.

In the meantime, boil a pot of water for orzo and cook according to package directions.

Add sliced red onion to the skillet with a sprinkle of salt and stir to coat with bacon grease. Saute over medium heat until onions are soft and caramelized, about 10 minutes. Add in garlic and spinach and cook until spinach wilts. Add in strawberries and the cooked orzo and mix to coat. Season with salt and pepper, then add in pecans and bacon. Remove from heat and stir in crumbled goat cheese. Top with fresh basil to garnish if you’d like. Serve immediately. It tastes good cold too!


_______________________________________

Erica Kastner has always been one of our most cherished members of the Tasty Kitchen community. She shares her wonderful recipes and amazing food photography on her blog, Buttered Side Up, and she also writes about crafts and posts more of her beautiful photography in her personal blog, Simple Days. There really isn’t much that this amazing young wife and mother can’t do, and we’re thrilled she does some of it here.


Profile photo of Erica Lea

Shrimp Spring Rolls with Sweet and Spicy Peanut Dipping Sauce

Posted by in Step-by-Step Recipes

Tasty Kitchen Blog: Shrimp Spring Rolls with Sweet and Spicy Peanut Dipping Sauce. Guest post by Erica Kastner of Buttered Side Up, recipe submitted by TK member Lauren of Lauren's Latest.

Sometimes, the mere fact that I’ve never tried a recipe before inspires me to make it. I see a fancy recipe and it gets my creativity going. But an unfamiliar recipe can also be quite intimidating. Take spring rolls as an example. A year ago, I saw a recipe that sounded delicious. I knew one day I needed to try my hand at them. I even bought the rice wrappers. But it all seemed very daunting, so I could never quite take the plunge.

Then I saw Lauren’s recipe for Shrimp Spring Rolls with Sweet and Spicy Peanut Dipping Sauce, which included lovely spring vegetables. Erika encouraged me to make them and show you guys how they come together. Seeing step-by-step photos can sometimes open your eyes and explain a process in a way that words never quite can. That’s what we’re all about here on the Tasty Kitchen blog—empowering you to try delicious new recipes.

Let me take you through the steps of making spring rolls!


Tasty Kitchen Blog: Shrimp Spring Rolls with Sweet and Spicy Peanut Dipping Sauce. Guest post by Erica Kastner of Buttered Side Up, recipe submitted by TK member Lauren of Lauren's Latest.

First of all, here are the ingredients that you’ll need:

For the rolls: rice noodles, shrimp, asparagus, spring roll wrappers, green onions, carrot, and cilantro.

For the sauce: smooth peanut butter, brown sugar (I used coconut sugar), dried ginger, garlic, Hoisin sauce (I used Julia’s recipe for homemade Hoisin sauce), cayenne pepper, and hot water (not shown).


Tasty Kitchen Blog: Shrimp Spring Rolls with Sweet and Spicy Peanut Dipping Sauce. Guest post by Erica Kastner of Buttered Side Up, recipe submitted by TK member Lauren of Lauren's Latest.

Begin by soaking the rice noodles in cold water. Place a small pot of water on the stove to boil.


Tasty Kitchen Blog: Shrimp Spring Rolls with Sweet and Spicy Peanut Dipping Sauce. Guest post by Erica Kastner of Buttered Side Up, recipe submitted by TK member Lauren of Lauren's Latest.

Now it’s time to prep your veggies! Slice the green onions, chop the cilantro, julienne the carrot (don’t laugh at my julienning skills), and mince the garlic.


Tasty Kitchen Blog: Shrimp Spring Rolls with Sweet and Spicy Peanut Dipping Sauce. Guest post by Erica Kastner of Buttered Side Up, recipe submitted by TK member Lauren of Lauren's Latest.

To prep the asparagus, start by bending them in half. The woody end should snap right off! This makes me happy for some reason.


Tasty Kitchen Blog: Shrimp Spring Rolls with Sweet and Spicy Peanut Dipping Sauce. Guest post by Erica Kastner of Buttered Side Up, recipe submitted by TK member Lauren of Lauren's Latest.

Slice the spears in half lengthwise. I found that a paring knife worked well for this job.


Tasty Kitchen Blog: Shrimp Spring Rolls with Sweet and Spicy Peanut Dipping Sauce. Guest post by Erica Kastner of Buttered Side Up, recipe submitted by TK member Lauren of Lauren's Latest.

Once the water is boiling, salt it generously.


Tasty Kitchen Blog: Shrimp Spring Rolls with Sweet and Spicy Peanut Dipping Sauce. Guest post by Erica Kastner of Buttered Side Up, recipe submitted by TK member Lauren of Lauren's Latest.

Add the shrimp to the boiling water. It will only take about a minute for them to cook! You’ll know they’re done when they’re pink and opaque.


Tasty Kitchen Blog: Shrimp Spring Rolls with Sweet and Spicy Peanut Dipping Sauce. Guest post by Erica Kastner of Buttered Side Up, recipe submitted by TK member Lauren of Lauren's Latest.

Remove the shrimp to a bowl of ice water.


Tasty Kitchen Blog: Shrimp Spring Rolls with Sweet and Spicy Peanut Dipping Sauce. Guest post by Erica Kastner of Buttered Side Up, recipe submitted by TK member Lauren of Lauren's Latest.

Add the asparagus to the now-empty pot. Cook until crisp-tender, about 2 minutes.


Tasty Kitchen Blog: Shrimp Spring Rolls with Sweet and Spicy Peanut Dipping Sauce. Guest post by Erica Kastner of Buttered Side Up, recipe submitted by TK member Lauren of Lauren's Latest.

Add the asparagus to the bowl of ice water along with the shrimp.


Tasty Kitchen Blog: Shrimp Spring Rolls with Sweet and Spicy Peanut Dipping Sauce. Guest post by Erica Kastner of Buttered Side Up, recipe submitted by TK member Lauren of Lauren's Latest.

Now put the rice noodles into the boiling water and cook until tender, about 7 minutes. Drain.


Tasty Kitchen Blog: Shrimp Spring Rolls with Sweet and Spicy Peanut Dipping Sauce. Guest post by Erica Kastner of Buttered Side Up, recipe submitted by TK member Lauren of Lauren's Latest.

Meanwhile, slice the shrimp in half lengthwise. I used my trusty paring knife for this job as well.


Tasty Kitchen Blog: Shrimp Spring Rolls with Sweet and Spicy Peanut Dipping Sauce. Guest post by Erica Kastner of Buttered Side Up, recipe submitted by TK member Lauren of Lauren's Latest.

Whisk together all of the sauce ingredients. If it’s too thick you can always add more hot water. This peanut sauce is amazing. I would make these rolls just to have an excuse to dip something in it.


Tasty Kitchen Blog: Shrimp Spring Rolls with Sweet and Spicy Peanut Dipping Sauce. Guest post by Erica Kastner of Buttered Side Up, recipe submitted by TK member Lauren of Lauren's Latest.

Have all of your ingredients at the ready.


Tasty Kitchen Blog: Shrimp Spring Rolls with Sweet and Spicy Peanut Dipping Sauce. Guest post by Erica Kastner of Buttered Side Up, recipe submitted by TK member Lauren of Lauren's Latest.

Dip a spring roll wrapper into warm water. I like to use a skillet for this since it’s the right shape and diameter for the rice papers.

It takes a bit of practice to figure out how long to soak the wrappers. There’s a fine line between workable and so soft that it falls apart. Remember that it will continue to soften after you take it out of the water. Some advise you to dip it in the water very briefly, and others suggest going for about a minute. You’ll have to experiment to find what works for you.


Tasty Kitchen Blog: Shrimp Spring Rolls with Sweet and Spicy Peanut Dipping Sauce. Guest post by Erica Kastner of Buttered Side Up, recipe submitted by TK member Lauren of Lauren's Latest.

Place the softened wrapper on a work surface. If you’re working on a porous surface (like a wood cutting board), I find that it’s easier to work with the rolls if the surface is a tad wet.

Lay the shrimp, pink side down, on the end of the wrapper nearest to you.


Tasty Kitchen Blog: Shrimp Spring Rolls with Sweet and Spicy Peanut Dipping Sauce. Guest post by Erica Kastner of Buttered Side Up, recipe submitted by TK member Lauren of Lauren's Latest.

Place the noodles and then the asparagus on top of the shrimp.


Tasty Kitchen Blog: Shrimp Spring Rolls with Sweet and Spicy Peanut Dipping Sauce. Guest post by Erica Kastner of Buttered Side Up, recipe submitted by TK member Lauren of Lauren's Latest.

Stack the green onions and carrots on top.


Tasty Kitchen Blog: Shrimp Spring Rolls with Sweet and Spicy Peanut Dipping Sauce. Guest post by Erica Kastner of Buttered Side Up, recipe submitted by TK member Lauren of Lauren's Latest.

Add the cilantro on top of the stack.


Tasty Kitchen Blog: Shrimp Spring Rolls with Sweet and Spicy Peanut Dipping Sauce. Guest post by Erica Kastner of Buttered Side Up, recipe submitted by TK member Lauren of Lauren's Latest.

Roll the end of the wrapper nearest to you upwards, like you’re rolling up a taco. Fold the sides in and finish rolling up the spring roll.


Tasty Kitchen Blog: Shrimp Spring Rolls with Sweet and Spicy Peanut Dipping Sauce. Guest post by Erica Kastner of Buttered Side Up, recipe submitted by TK member Lauren of Lauren's Latest.

Isn’t it lovely?


Tasty Kitchen Blog: Shrimp Spring Rolls with Sweet and Spicy Peanut Dipping Sauce. Guest post by Erica Kastner of Buttered Side Up, recipe submitted by TK member Lauren of Lauren's Latest.

If you’d like the shrimp to really show through the wrapper you can wait to add them until you’ve folded in the sides.


Tasty Kitchen Blog: Shrimp Spring Rolls with Sweet and Spicy Peanut Dipping Sauce. Guest post by Erica Kastner of Buttered Side Up, recipe submitted by TK member Lauren of Lauren's Latest.

If you want to make an open-ended roll, place the ingredients on the wrapper vertically instead of horizontally. Then fold up the bottom of the spring roll. Finish by folding over one side and rolling it up.


Tasty Kitchen Blog: Shrimp Spring Rolls with Sweet and Spicy Peanut Dipping Sauce. Guest post by Erica Kastner of Buttered Side Up, recipe submitted by TK member Lauren of Lauren's Latest.

Notes:
1) These spring rolls can easily be made gluten free if you make sure to use a GF Hoisin sauce.
2) Make sure you salt the boiling water very generously. When I made these a second time, I definitely added more salt.
3) I find it’s helpful to have a towel handy to wipe your hands on while you’re working with the rolls. This way the ingredients don’t get everywhere and the roll looks less messy.
4) These rolls can be quite sticky. I think it would be a good idea to have a bowl of water to dip your fingers in while you’re eating so your hands don’t stick to them. They’ll also stick to each other, so it’s best to leave some space between them on your serving tray.
5) To make these come together more quickly, you can prep your veggies, cook the shrimp and asparagus, and make the sauce ahead of time.
6) If you have leftovers, you can always make a salad. The peanut sauce is a delicious dressing.


Tasty Kitchen Blog: Shrimp Spring Rolls with Sweet and Spicy Peanut Dipping Sauce. Guest post by Erica Kastner of Buttered Side Up, recipe submitted by TK member Lauren of Lauren's Latest.

Thanks so much to Lauren for sharing this recipe with us! I’m sure you’ve heard of her lovely blog, Lauren’s Latest. If not, make sure to give her a visit! Her Sweet Chili Hoisin Glazed Drumsticks look amazing.

Also, I am still learning the art of spring rolls. If you have any tips or tricks, please share in the comments!


Printable Recipe

Shrimp Spring Rolls with Sweet & Spicy Peanut Dipping Sauce

See post on Lauren's Latest’s site!
0.00 Mitt(s) 0 Rating(s)0 votes, average: 0.00 out of 50 votes, average: 0.00 out of 50 votes, average: 0.00 out of 50 votes, average: 0.00 out of 50 votes, average: 0.00 out of 5

Prep Time:

Cook Time:

Difficulty: Easy

Servings: 4

4
x

Print Options

Page size Letter 3x5 4x6
Text Size Small Medium Large
Content Include description
Include prep time, etc.
Show image

Description

A yummy and healthy snack, appetizer or light lunch.

Ingredients

  • FOR THE SPRING ROLLS:
  • 2 ounces, weight Rice Noodles
  • 12 whole Shrimp, Peeled And Deveined (51-60 Count)
  • 6 whole Asparagus Spears
  • 12 whole Round Rice Spring Roll Wrappers
  • 4 whole Green Onions, Sliced
  • 1 whole Carrot, Peeled And Finely Julienned
  • ½ bunches Cilantro, Chopped
  • FOR THE SAUCE:
  • 2 Tablespoons Smooth Peanut Butter
  • 1-½ Tablespoon Brown Sugar
  • ⅛ teaspoons Dried Ginger
  • 1 clove Garlic, Finely Minced
  • 2 Tablespoons Hoisin Sauce
  • 2 Tablespoons Hot Water
  • 2 pinches Cayenne Pepper (adjust To Your Heat Level)

Preparation Instructions

Place rice noodles in a bowl and cover with cold water. Set aside.

Bring a small pot of water to boil. Salt water generously, drop shrimp in and cook until pink and opaque, about 1 minute. Remove them from the water (keep the pot of water – you’ll use it in a second) and place shrimp into a bowl of ice water.

Bend asparagus in half until the bottom woody end snaps off. Discard the woody end. Slice down the center of the remaining spear vertically to get 2 very skinny spears. Drop them into the boiling water and boil until crisp-tender, 2 minutes. Remove them from the water and place into the ice water with shrimp.

Drain the soaking rice noodles and place them into the boiling water. Cook until tender, about 7 minutes and then drain.

While noodles are cooking, slice shrimp in half lengthwise.

To assemble spring rolls, place one spring roll wrapper into very warm water until it softens up. Remove it from the water and place onto a work surface. Stack up shrimp, noodles, asparagus, green onions, carrot and cilantro on the bottom half of the wrapper. Then roll it up tightly, burrito-style and place on serving platter. Repeat until all wrappers have been filled.

For the sauce, mix all ingredients together until smooth in consistency. If the hot water doesn’t dissolve the sugar or create a smooth sauce, microwave the sauce for 30 seconds. Pour into a serving dish and place along side spring rolls. Serve cold.


_______________________________________

Erica Kastner has always been one of our most cherished members of the Tasty Kitchen community. She shares her wonderful recipes and amazing food photography on her blog, Buttered Side Up, and she also writes about crafts and posts more of her beautiful photography in her personal blog, Simple Days. There really isn’t much that this amazing young wife and mother can’t do, and we’re thrilled she does some of it here.


Profile photo of Erica Lea

Korean Shrimp and Rice Porridge (Saewoojuk)

Posted by in Step-by-Step Recipes

Juk is basically the Korean version of congee or rice porridge. Saewoo means shrimp. All of the flavors are simply delightful, and the possibilities for add-ons are endless.

Profile photo of Erica Lea

Figgy Piggy Pizza

Posted by in Step-by-Step Recipes

This little pizza would make a fantastic (fancy) appetizer for a dinner party. It is surprisingly easy to make, and the list of (just ten) ingredients is actually quite reasonable.

Profile photo of Erica Lea

Gingerbread Waffles

Posted by in Holidays

This Gingerbread Waffle recipe, brought to us by the lovely Emily, is basically an excuse to eat dessert for breakfast (or any meal of the day). And I'm very much okay with that.

Profile photo of Erica Lea

Maple and Onion Jam

Posted by in Step-by-Step Recipes

I have to admit that canning is one of my biggest cooking fears. I’m probably the world’s biggest canning baby. The thought of putting food in a pot that builds pressure that could potentially blow slightly terrifies me. I know this is highly unlikely, but the complication of the process also scares me. While I […]