The Pioneer Woman Tasty Kitchen
Profile photo of Amber {Sprinkled With Flour}

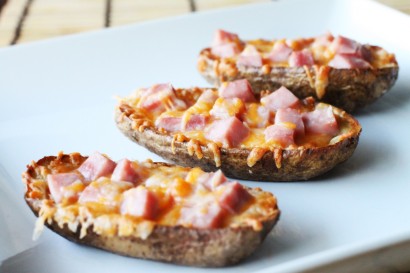
Ham and Cheese Potato Skins

Posted by in Step-by-Step Recipes

Tasty Kitchen Blog: Ham and Cheese Potato Skins. Guest post by Amber Potter of Sprinkled with Flour, recipe submitted by TK member Dax Phillips of Simple Comfort Food.

 
I don’t know about you, but I’ve eaten so many sugary goodies lately that I’m fairly certain I may spontaneously combust into a cloud of sugar at any given moment. So, I thought it was time I take a little break from my sugary friends and give some love to something a bit more savory. When I found this recipe for Ham & Cheese Potato Skins from TK member Dax Phillips, I knew I’d found the perfect recipe to jumpstart the savory love-train.

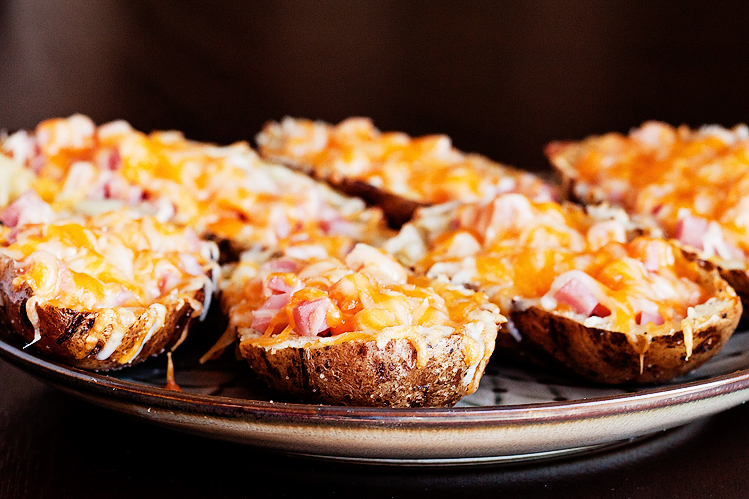
They are perfect for picky eaters, especially the six-year-old variety that hangs out at my house. A generous amount of melty cheese and ham perfectly complements the crispy, salty potato skin, making these a big hit with any crowd.


Tasty Kitchen Blog: Ham and Cheese Potato Skins. Guest post by Amber Potter of Sprinkled with Flour, recipe submitted by TK member Dax Phillips of Simple Comfort Food.

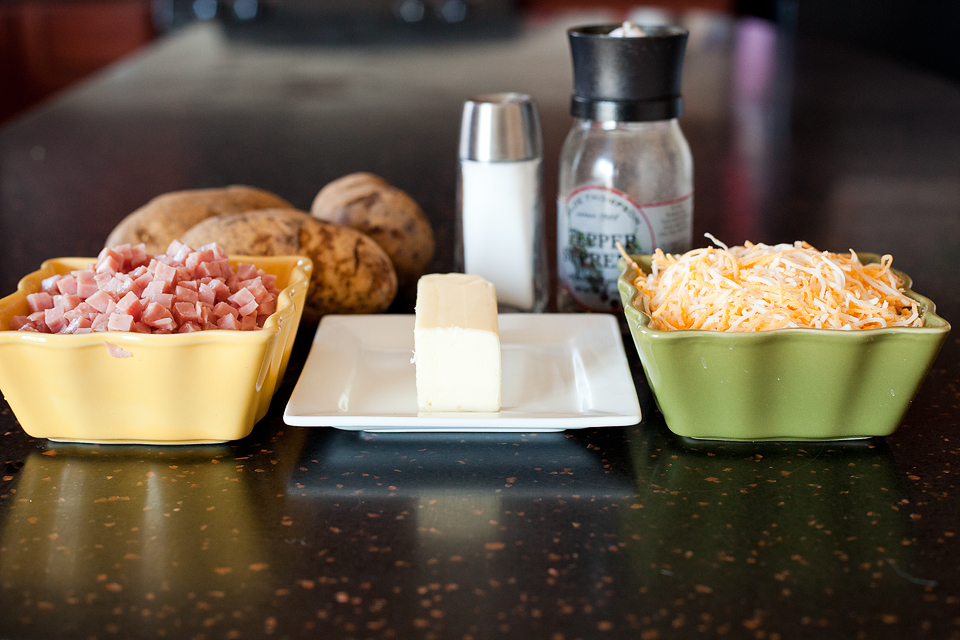
You’ll need: Russet potatoes, shredded cheese, diced ham, butter, salt, and pepper. That’s it. Easy, huh?


Tasty Kitchen Blog: Ham and Cheese Potato Skins. Guest post by Amber Potter of Sprinkled with Flour, recipe submitted by TK member Dax Phillips of Simple Comfort Food.

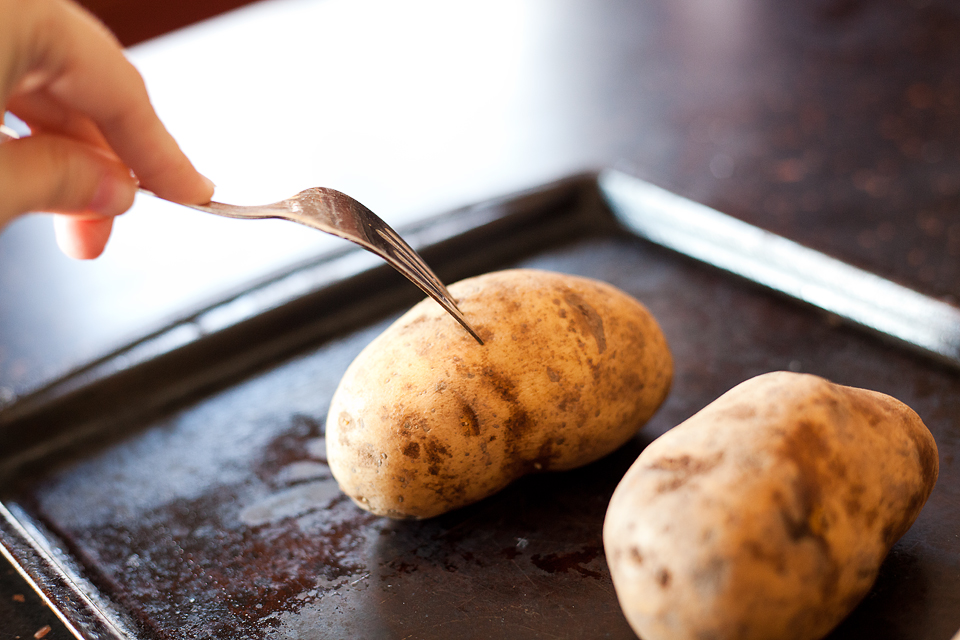
Preheat your oven to 400ºF. Poke the top of each potato with a fork and place on a baking sheet. Cook in the oven for 1 hour. 
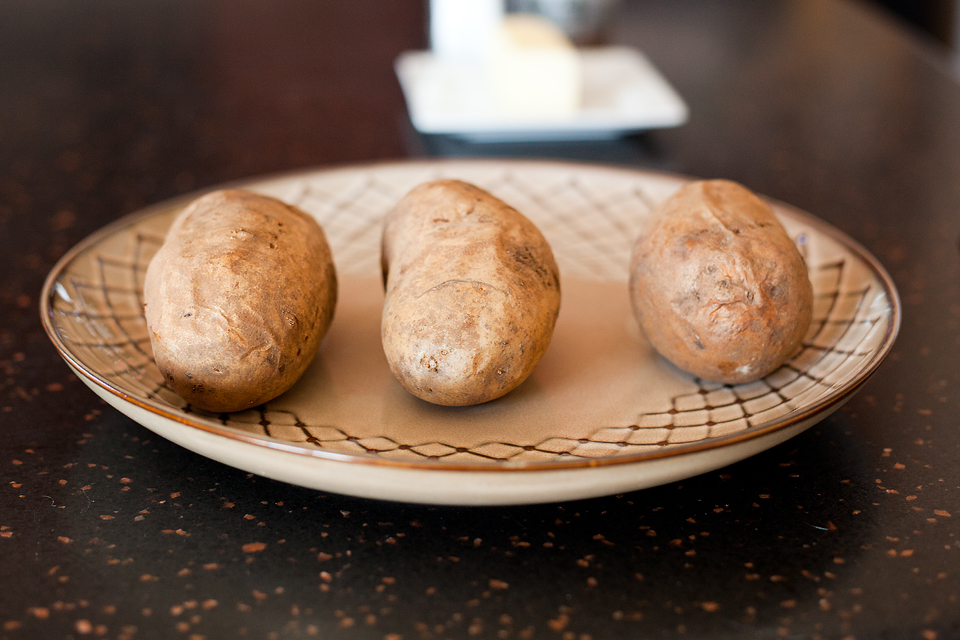


Tasty Kitchen Blog: Ham and Cheese Potato Skins. Guest post by Amber Potter of Sprinkled with Flour, recipe submitted by TK member Dax Phillips of Simple Comfort Food.

Remove the potatoes from the baking sheet and place on a plate to cool for about 15 minutes.


Tasty Kitchen Blog: Ham and Cheese Potato Skins. Guest post by Amber Potter of Sprinkled with Flour, recipe submitted by TK member Dax Phillips of Simple Comfort Food.

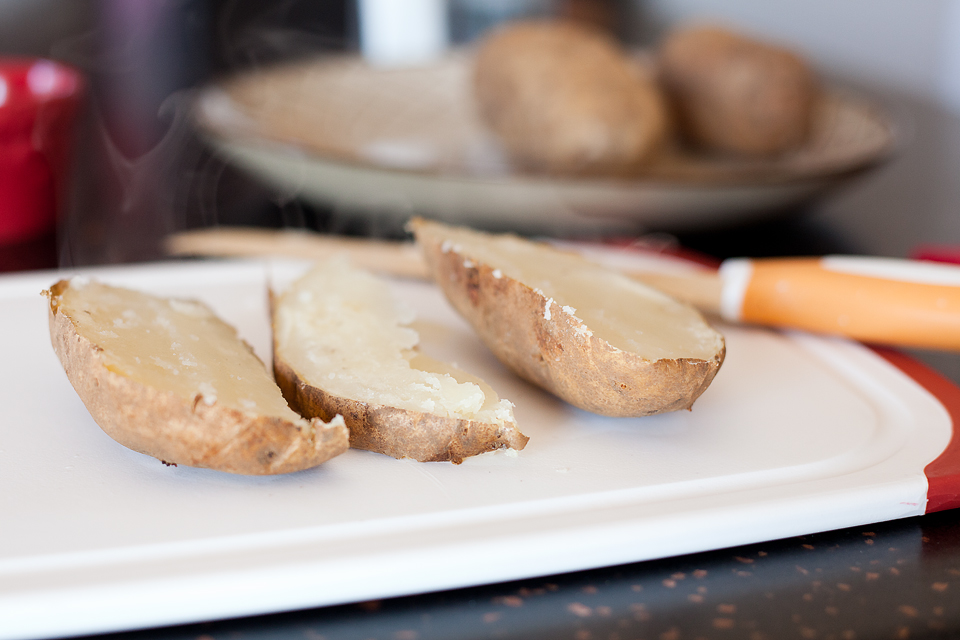
Once your potatoes are cooled, use a sharp bread knife and cut each potato lengthwise into three segments for each potato. So each potato will yield two skins and you can discard the middle slice or use it for something else.


Tasty Kitchen Blog: Ham and Cheese Potato Skins. Guest post by Amber Potter of Sprinkled with Flour, recipe submitted by TK member Dax Phillips of Simple Comfort Food.

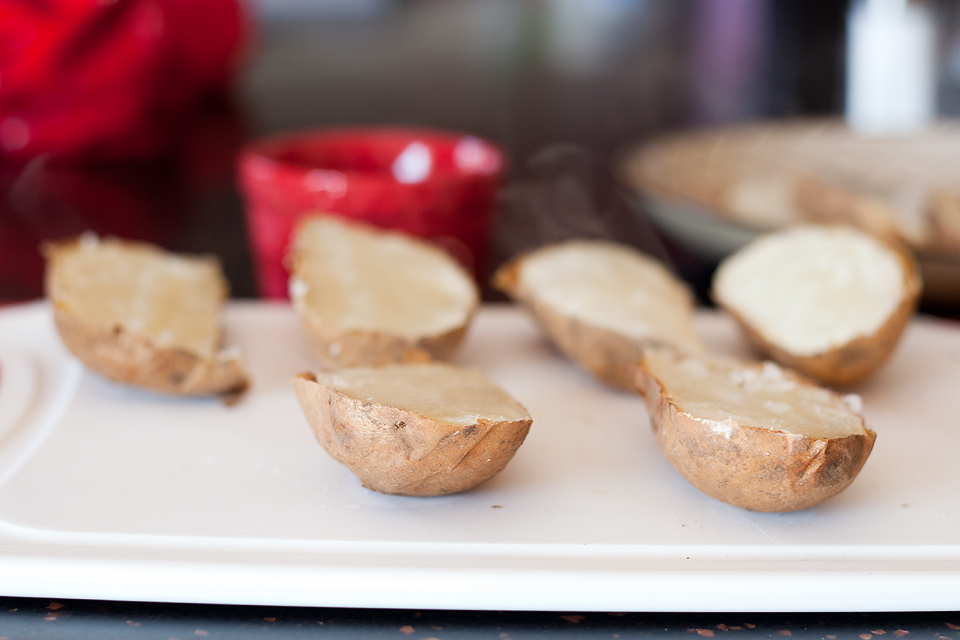
You should end up with 6 potato boats.


Tasty Kitchen Blog: Ham and Cheese Potato Skins. Guest post by Amber Potter of Sprinkled with Flour, recipe submitted by TK member Dax Phillips of Simple Comfort Food.

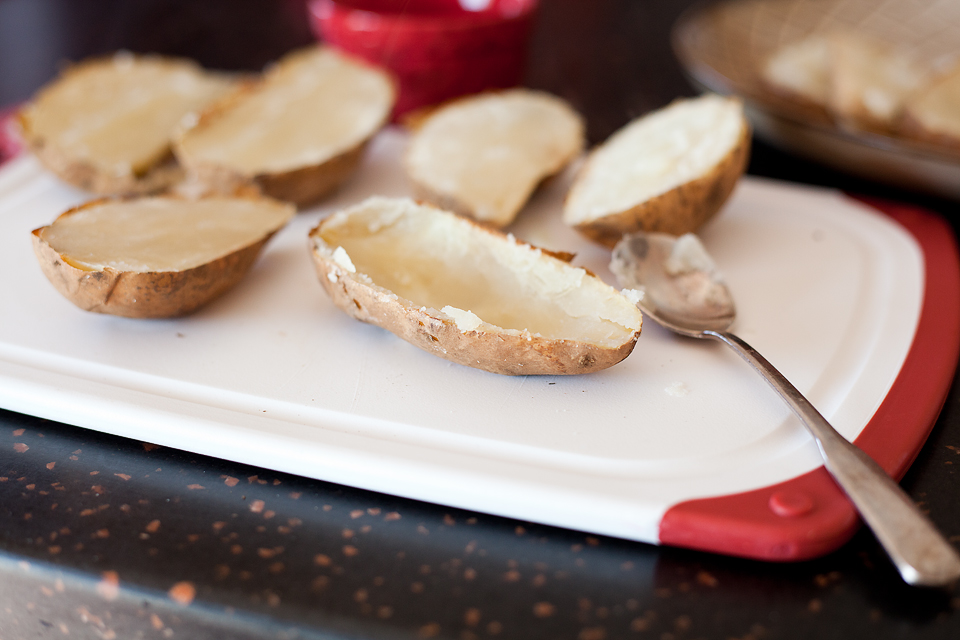
With a small spoon, being careful not to poke through the skin, scoop out about 70 percent of the potato. You still want some potato in your boat.


Tasty Kitchen Blog: Ham and Cheese Potato Skins. Guest post by Amber Potter of Sprinkled with Flour, recipe submitted by TK member Dax Phillips of Simple Comfort Food.

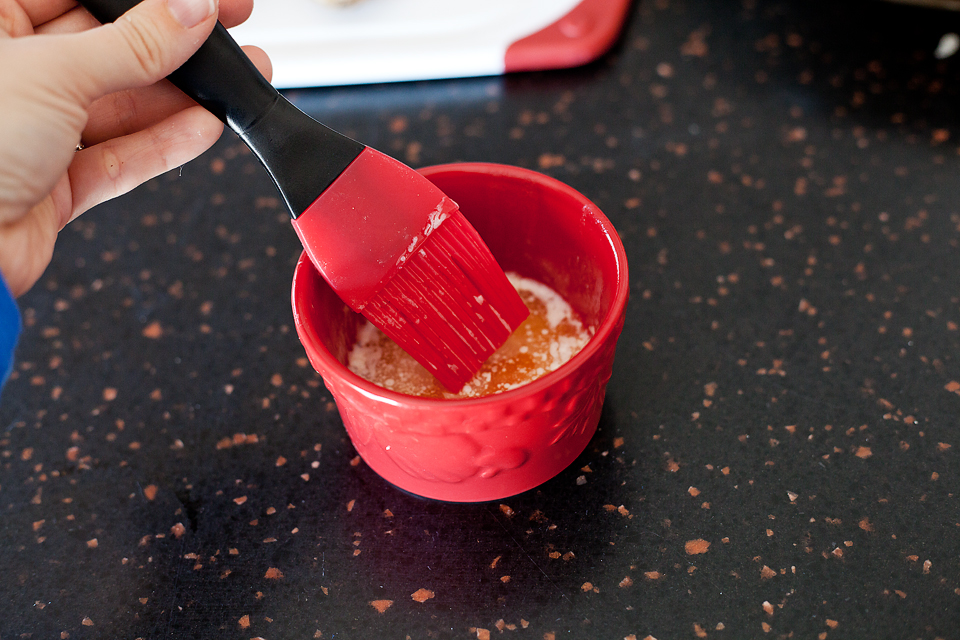
Next, melt your butter in the microwave. This should take 30-60 seconds or so. Turn your broiler to high.


Tasty Kitchen Blog: Ham and Cheese Potato Skins. Guest post by Amber Potter of Sprinkled with Flour, recipe submitted by TK member Dax Phillips of Simple Comfort Food.

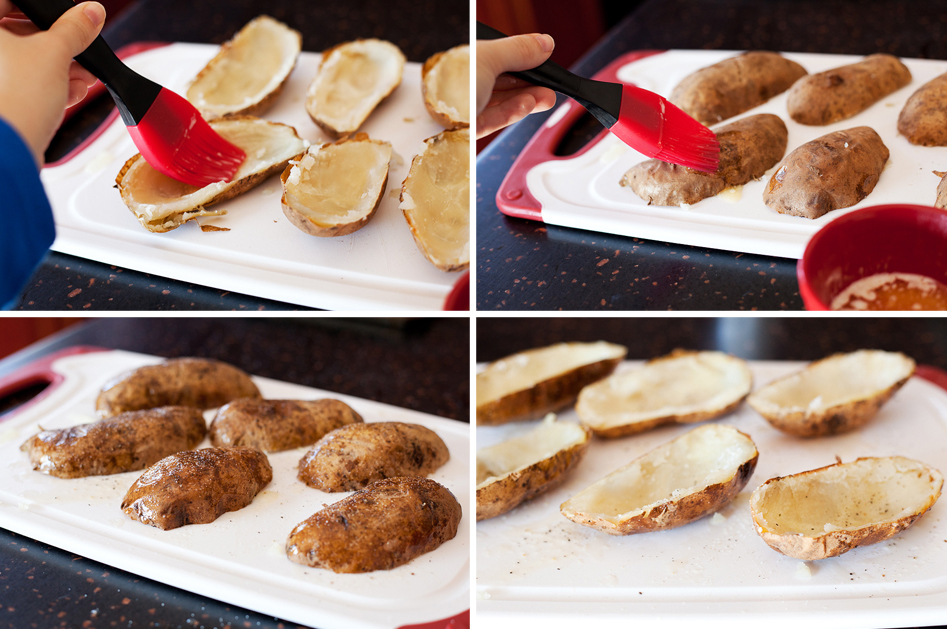
Brush the butter on the inside and outside of each potato skin, then season the inside of each skin with salt and pepper.


Tasty Kitchen Blog: Ham and Cheese Potato Skins. Guest post by Amber Potter of Sprinkled with Flour, recipe submitted by TK member Dax Phillips of Simple Comfort Food.

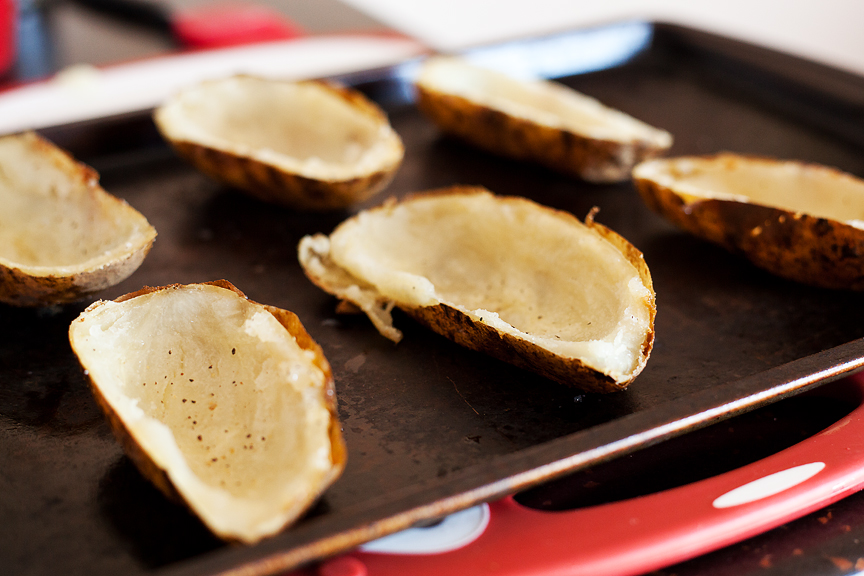
Place them back onto the baking sheet and put them under the broiler for 8-10 minutes, until the insides get a bit crispy from the melted butter.


Tasty Kitchen Blog: Ham and Cheese Potato Skins. Guest post by Amber Potter of Sprinkled with Flour, recipe submitted by TK member Dax Phillips of Simple Comfort Food.

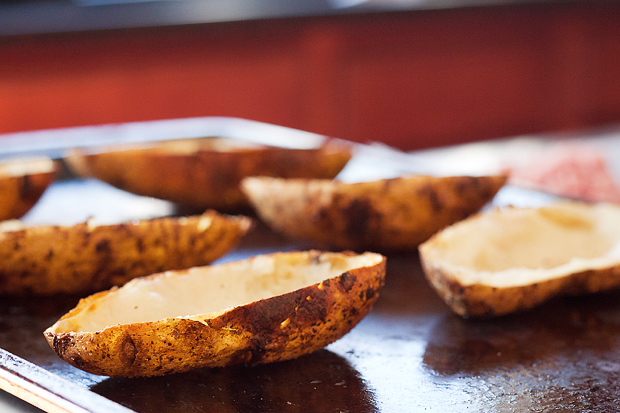
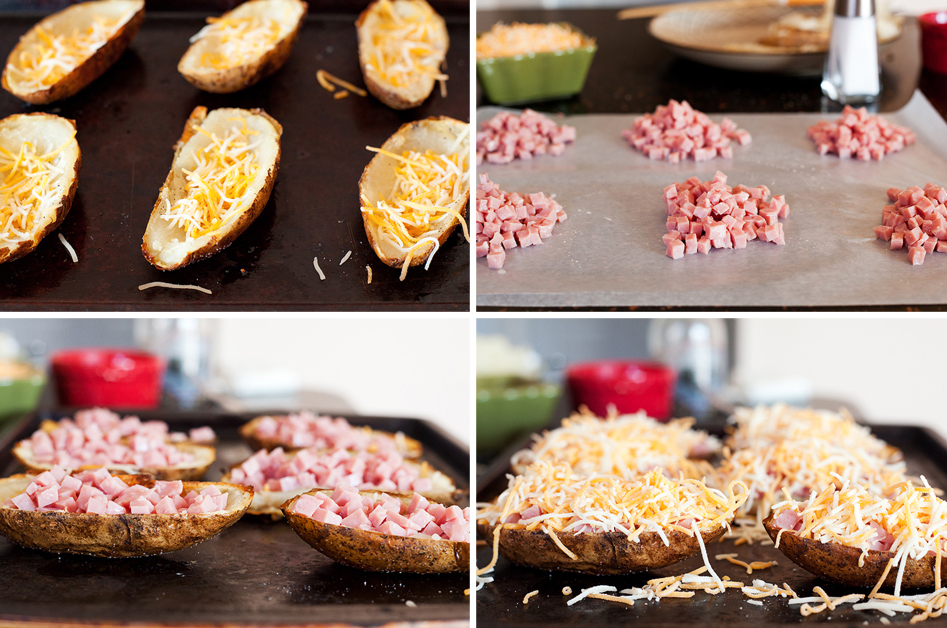
Once the edges and interior are crisp and golden, remove them from the oven. Turn off the broiler, and set the oven to 425ºF.


Tasty Kitchen Blog: Ham and Cheese Potato Skins. Guest post by Amber Potter of Sprinkled with Flour, recipe submitted by TK member Dax Phillips of Simple Comfort Food.

Add a generous amount of cheese into each potato boat. Top with a generous amount of ham. Simply divide the ham into six sections so each potato gets enough of it. Top with a bit more cheese.


Tasty Kitchen Blog: Ham and Cheese Potato Skins. Guest post by Amber Potter of Sprinkled with Flour, recipe submitted by TK member Dax Phillips of Simple Comfort Food.

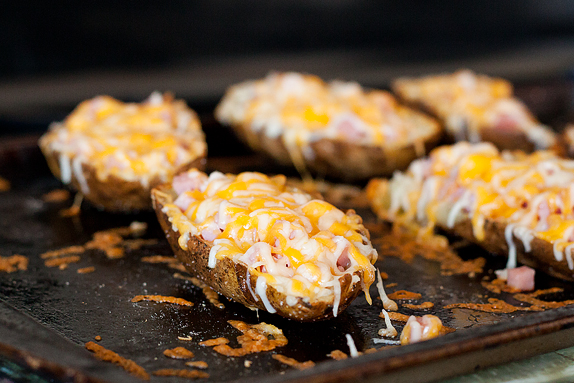
Place the tray back into the oven and cook for about 5 more minutes or until the cheese is nice and bubbly.


Tasty Kitchen Blog: Ham and Cheese Potato Skins. Guest post by Amber Potter of Sprinkled with Flour, recipe submitted by TK member Dax Phillips of Simple Comfort Food.

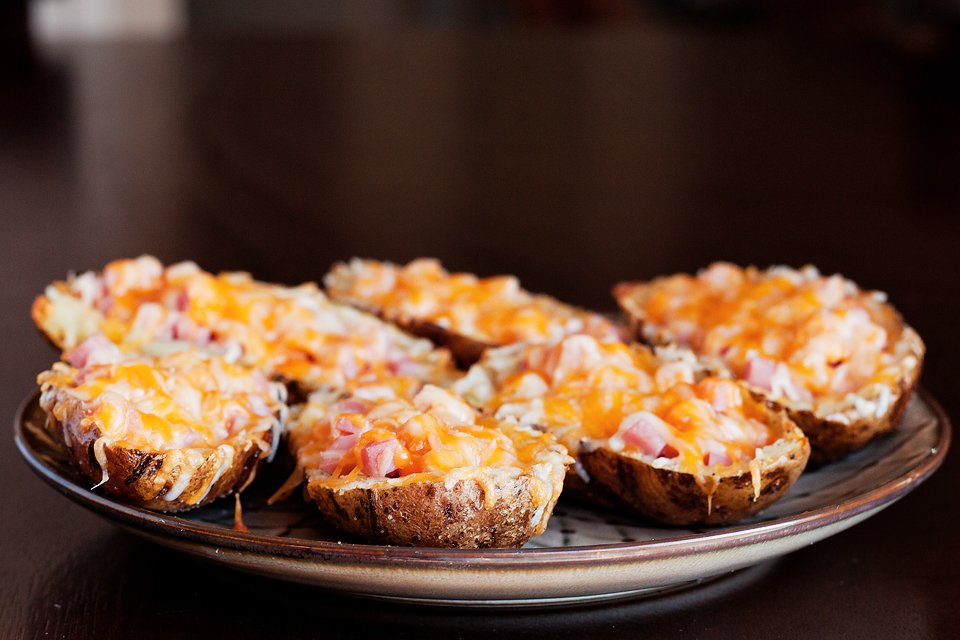
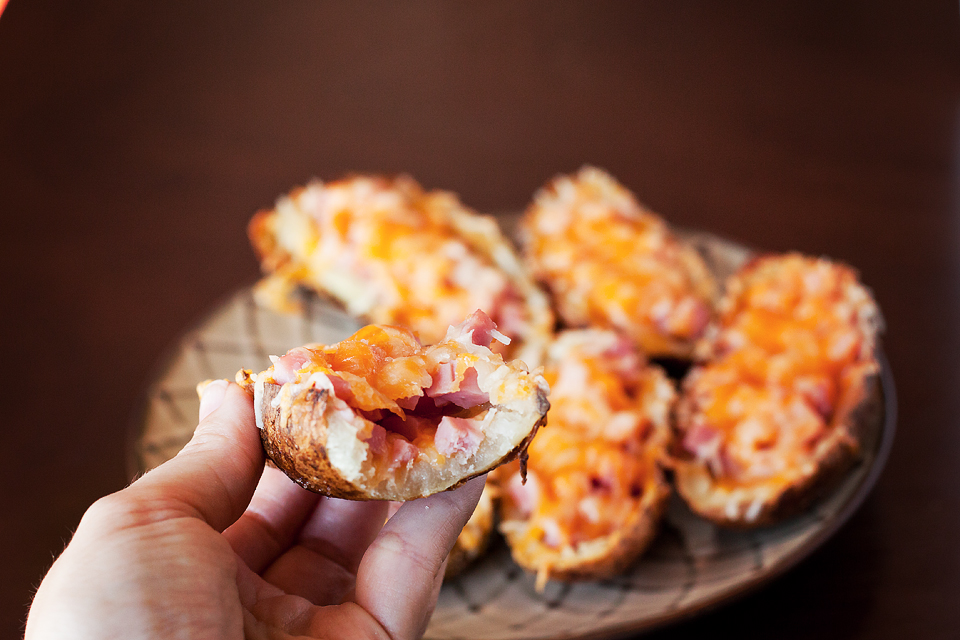
Now take a bite, and you will have a cheesy explosion of pure delicious in your mouth. The cheese, the ham, the crispy, salty potato … it’s pure magic. I foresee these potato skins being the perfect addition to our Superbowl party table. You don’t have to limit yourself to just snacking on them either. Throw in some scrambled eggs for a great breakfast, or pair them with your favorite salad and you’ve got a great lunch or dinner!


Tasty Kitchen Blog: Ham and Cheese Potato Skins. Guest post by Amber Potter of Sprinkled with Flour, recipe submitted by TK member Dax Phillips of Simple Comfort Food.

I’m so glad Dax shared this recipe with us. He’s a whiz when it comes to potato skin creations (among other things), and you’ll find them all on his blog, Simple Comfort Food.


Printable Recipe
Ham and Cheese Potato Skins

See post on Dax Phillips’s site!
5.00 Mitt(s) 3 Rating(s)3 votes, average: 5.00 out of 53 votes, average: 5.00 out of 53 votes, average: 5.00 out of 53 votes, average: 5.00 out of 53 votes, average: 5.00 out of 5

Prep Time:

Cook Time:

Difficulty: Easy

Servings: 6

6
x

Print Options

Page size Letter 3x5 4x6
Text Size Small Medium Large
Content Include description
Include prep time, etc.
Show image

Description

A simple twist on a classic potato skin that is perfect any time of the day.

Ingredients

  • 3 whole Russet Potatoes
  • 1-½ Tablespoon Unsalted Butter
  • 1 pinch Salt
  • 1 pinch Cracked Black Pepper
  • 2 cups Colby-Jack Cheese, Shredded
  • 1 cup Thick Cut Ham, Cut Into Bite Sized Cubes

Preparation Instructions

Begin by preheating your oven to 400 F. Poke the top of each potato with a fork and place on a baking sheet. Cook in the oven for 1 hour. Once cooked, remove them from the baking sheet, and place on a plate to let cool for about 15 minutes.

Once your potatoes are cooled, use a sharp bread knife and cut each potato lengthwise into three segments for each potato. So each potato will yield two skins, right? You can discard the middle slice and reuse for breakfast the following morning, or heck for that matter, add some butter, salt and cream, and make some rustic mashed potatoes. When done you should have 10 skins.

With a small spoon, being careful not to poke through the skin, scoop out about 70 percent of the potato, as you still want some potato in your boat.

Next, melt your butter in the microwave. This should take 30-60 seconds or so.

Get your broiler heated to high.

Brush the butter on the inside and outside of each potato skin and place them back onto the baking sheet. Season the inside of each skin with salt and pepper.

Place them under the broiler for 8-10 minutes until the insides get a bit crispy from the melted butter. Once the edges and interior are a bit crisp and golden, remove them from the oven. Turn off the broiler, and set the oven to 425 F.

Add a generous amount of cheese into each potato boat. Top with a generous amount of ham. Simply divide the ham into six sections so each potato gets enough of it. Top with a bit more cheese.

Place the tray back into the oven, and cook for about 5 more minutes or until the cheese is nice and bubbly.

The end result is nothing short of amazing with these ham and potato skins. These are a perfect bite any time of the day, and as a matter of fact I thought they would be even more amazing with a bit of scrambled egg mixed in before baking. That would be a great breakfast bite! Regardless, these are really simple to make and made everyone happy. Next time I will simply need to make more of them as they went too fast. Hope you enjoy.


_______________________________________

Amber is a stay at home mom who lives in the heart of the Missouri Ozarks. It’s a long way from where she grew up, in Wales (yes, way over in the U.K.). The recipes in her blog Sprinkled with Flour include her original creations as well as her family recipes. Go check them out!

 

Profile photo of missamy

Chocolate Hazelnut Cake

Posted by in Baking, Step-by-Step Recipes

Note: I’ve been doing a bit of housecleaning here at the Tasty Kitchen Blog and haven’t been able to stop thinking about this post from the step-by-step archives. It has chocolate. And hazelnuts. In cake form. I’m just as smitten now as I was before. And rumor has it there’s some kind of romantic holiday coming up—a day that most definitely calls for chocolate. Make this and knock someone’s socks off! – Erika
(Republished from 2011.)

 
Tasty Kitchen Blog: Chocolate Hazelnut Cake. Guest post by Amy Johnson of She Wears Many Hats, recipe submitted by TK member Sabrina of Eat, Drink & Be Merry.

Tasty Kitchen’s Erika emailed me last week asking if I’d seen this Chocolate Hazelnut Cake recently submitted by Sabrina (Eatdrinkandbemerry). She said she thought of me. I don’t know why. Why would I like chocolate, and sugar, and butter, and hazelnuts, and Nutella, and peace, and love, and all things good? Hmmm? I don’t get it.

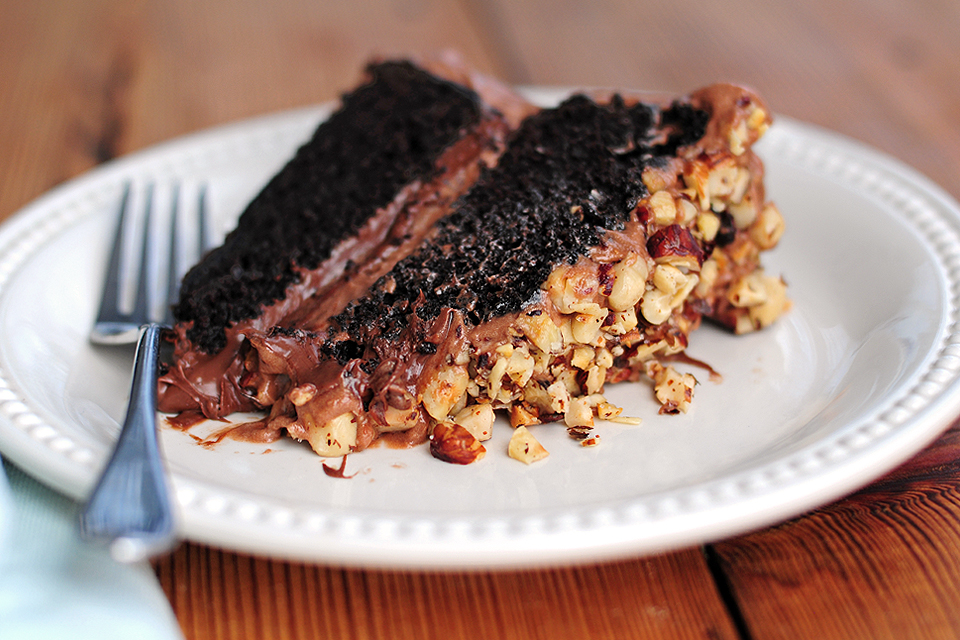
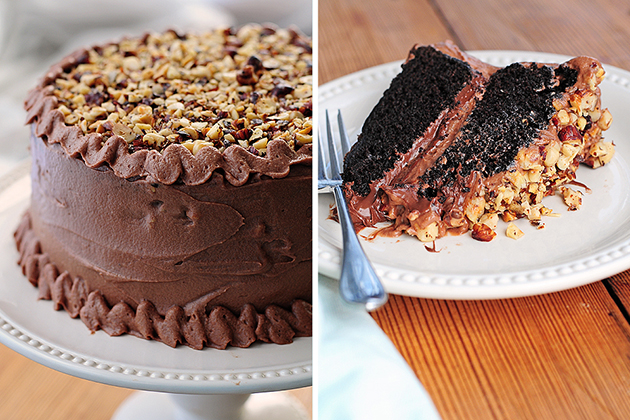
Anyway, I decided to go ahead and make it, ya know, since she twisted my arm and everything. That Erika is one smart cookie, and knows a good cake when she sees one. And this … this is one good cake. One marvelously good cake. Sabrina describes it as tasting like a Ferrero Rocher chocolate, and she’s right on. The super moist, chocolatey cake is topped with a Nutella and mascarpone whipped cream, with a creamy Nutella and whipped cream center. Whoa.

I know you wanna see how to make it, right? Let’s do this thing.


Tasty Kitchen Blog: Chocolate Hazelnut Cake. Guest post by Amy Johnson of She Wears Many Hats, recipe submitted by TK member Sabrina of Eat, Drink & Be Merry.

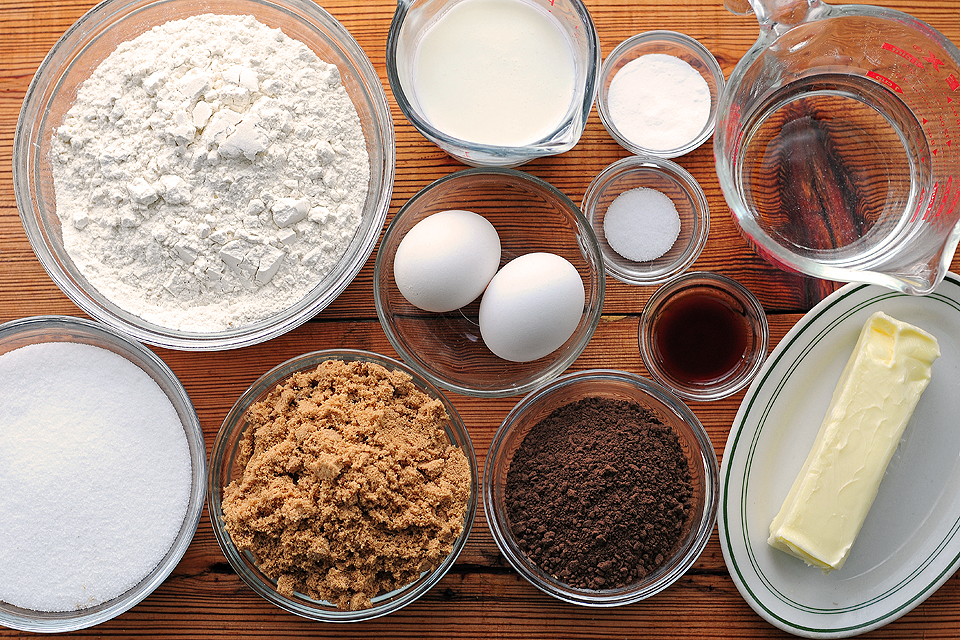
For the cake, you’ll need flour, cocoa powder (I used dark cocoa powder), baking soda, salt, butter, granulated sugar, brown sugar, eggs, vanilla extract, water, and buttermilk.


Tasty Kitchen Blog: Chocolate Hazelnut Cake. Guest post by Amy Johnson of She Wears Many Hats, recipe submitted by TK member Sabrina of Eat, Drink & Be Merry.

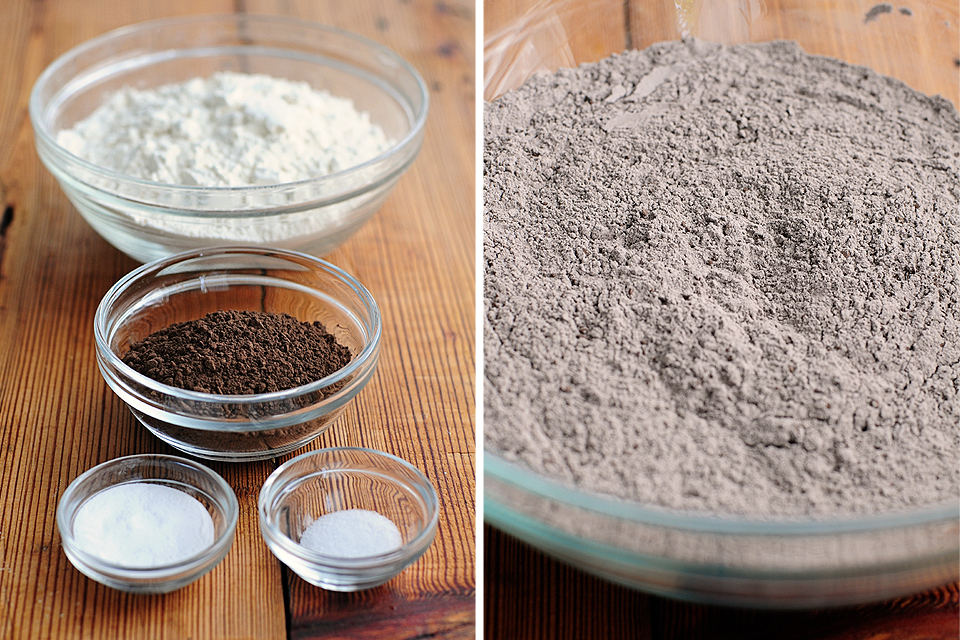
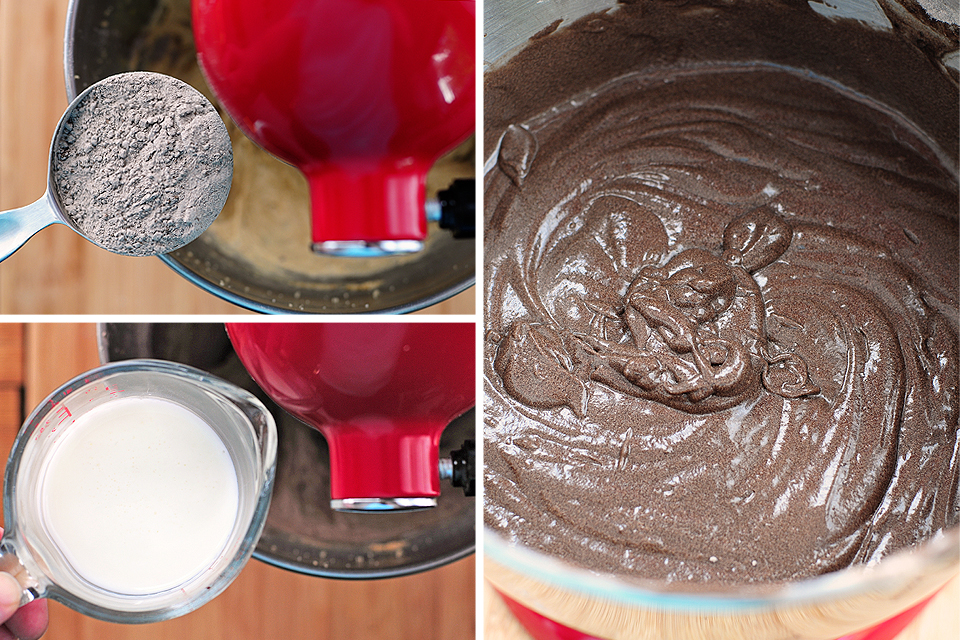
Begin by combining the flour, cocoa powder, baking soda, and salt in a bowl. (The directions say to sift, but shhh. Don’t tell. I whisked it all together lightly.)


Tasty Kitchen Blog: Chocolate Hazelnut Cake. Guest post by Amy Johnson of She Wears Many Hats, recipe submitted by TK member Sabrina of Eat, Drink & Be Merry.

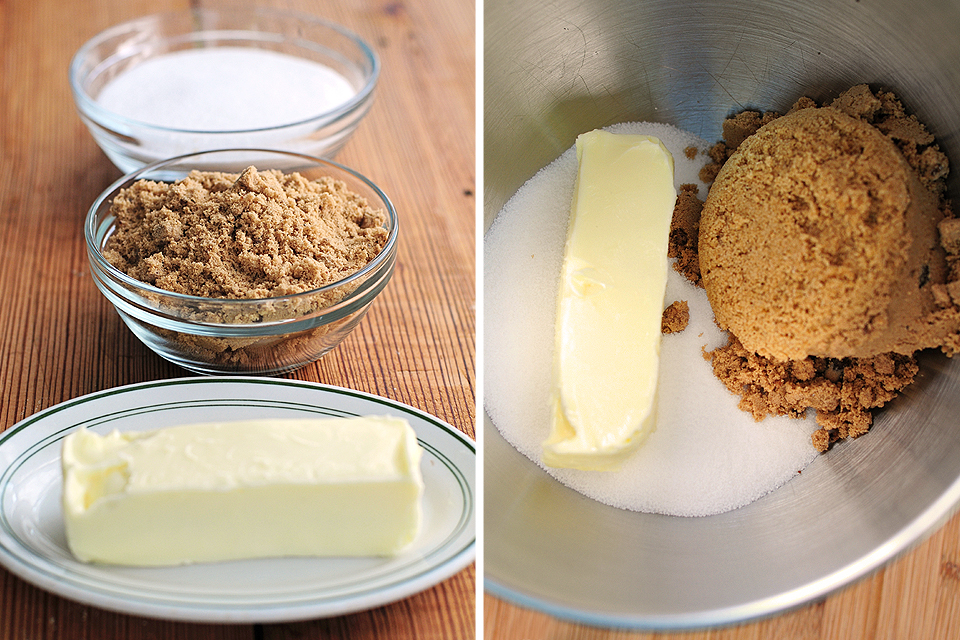
In a mixing bowl, beat together the butter and sugars for about 2-3 minutes.


Tasty Kitchen Blog: Chocolate Hazelnut Cake. Guest post by Amy Johnson of She Wears Many Hats, recipe submitted by TK member Sabrina of Eat, Drink & Be Merry.

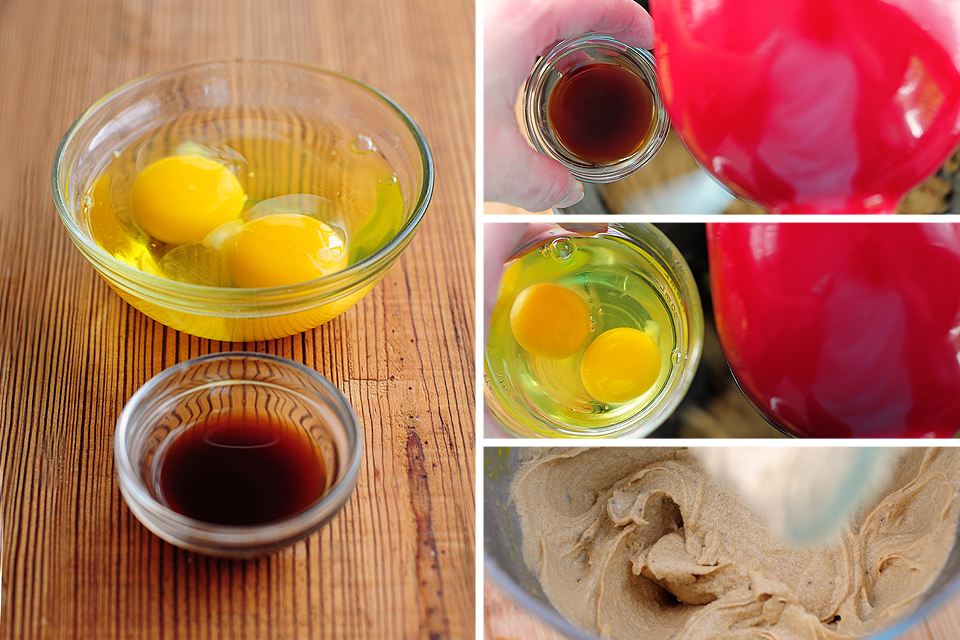
Add the eggs and vanilla and combine well.


Tasty Kitchen Blog: Chocolate Hazelnut Cake. Guest post by Amy Johnson of She Wears Many Hats, recipe submitted by TK member Sabrina of Eat, Drink & Be Merry.

Next, alternate adding the flour mixture with the water and buttermilk. Beat on low speed until thoroughly combined. Make sure to not over beat.


Tasty Kitchen Blog: Chocolate Hazelnut Cake. Guest post by Amy Johnson of She Wears Many Hats, recipe submitted by TK member Sabrina of Eat, Drink & Be Merry.

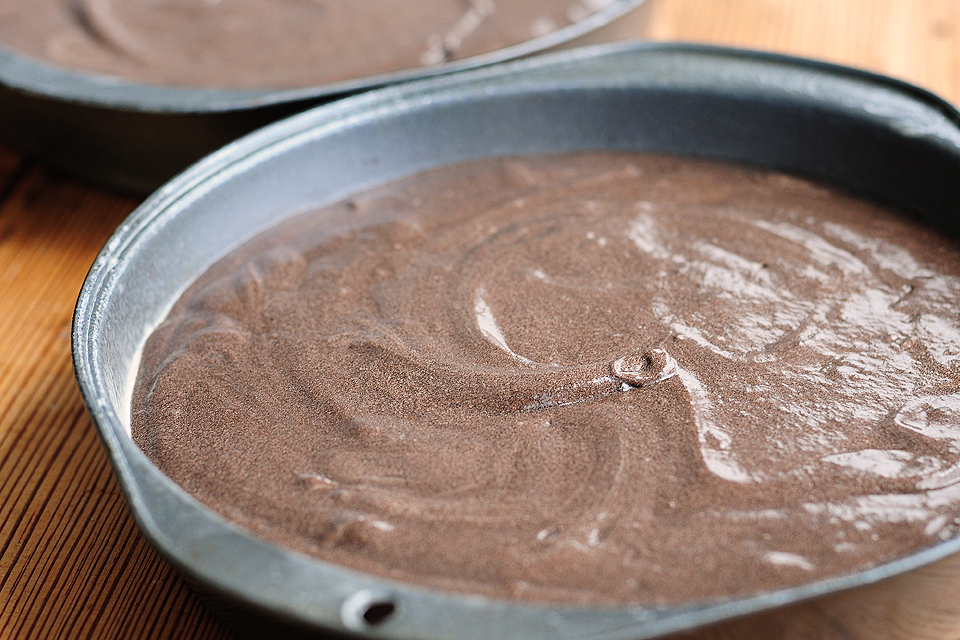
Divide batter mixture evenly into 8″ greased and floured round cake pans. Bake for about 30 minutes or until a toothpick or cake tester comes out clean. It took about 35 minutes in the Johnson kitchen. Cool cakes in the pans for about 10 minutes, then transfer to cooling rack(s) to cool completely.

(Note: I used my old 8″ angled sided cake rounds. I’d recommend using an 8″ cake round that’s straight edged and 2″ tall if you can. It worked fine as you’ll see later, but would make for easier decorating if the edges were straight and not angled.)


Tasty Kitchen Blog: Chocolate Hazelnut Cake. Guest post by Amy Johnson of She Wears Many Hats, recipe submitted by TK member Sabrina of Eat, Drink & Be Merry.

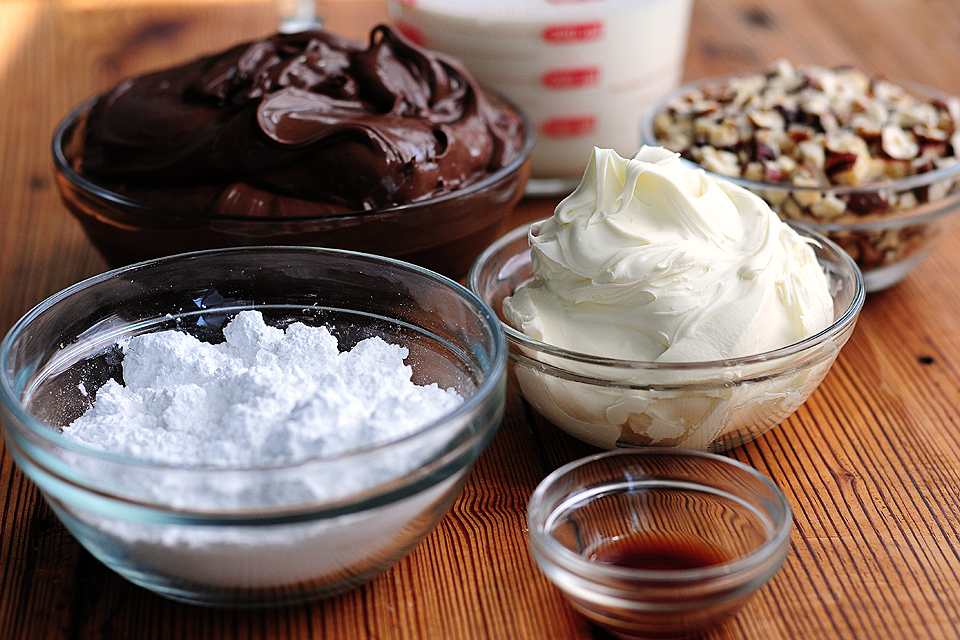
While the cakes are baking, go ahead and make the whipped cream topping. The whipped cream topping calls for mascarpone cheese, powdered sugar, vanilla extract, heavy whipping cream, Nutella, and hazelnuts.


Tasty Kitchen Blog: Chocolate Hazelnut Cake. Guest post by Amy Johnson of She Wears Many Hats, recipe submitted by TK member Sabrina of Eat, Drink & Be Merry.

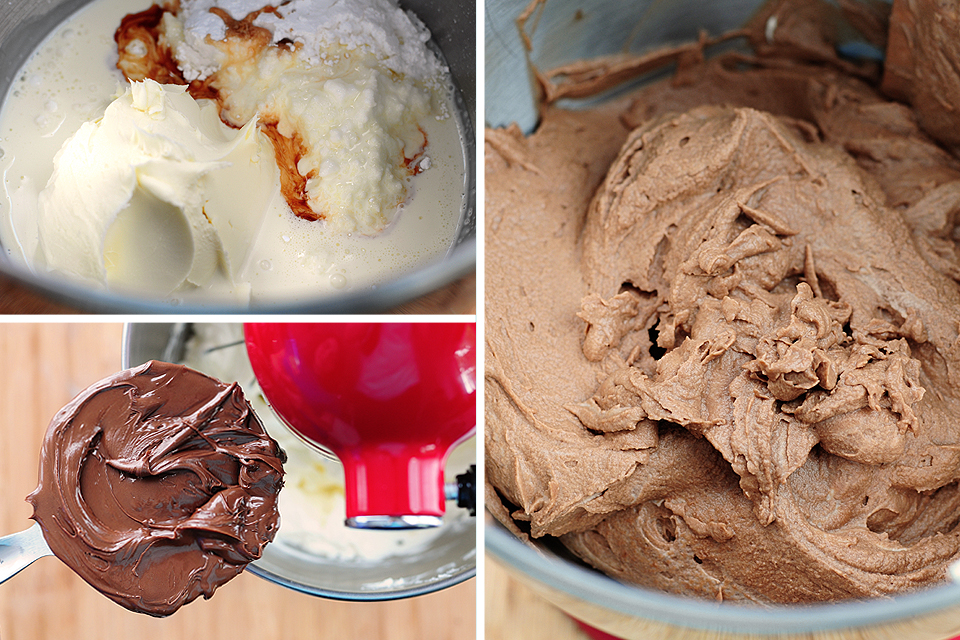
Whip together the mascarpone cheese, sugar, vanilla, and heavy whipping cream until peaks form. Add 1 cup of the Nutella and gently mix until blended well. Refrigerate until ready to use.


Tasty Kitchen Blog: Chocolate Hazelnut Cake. Guest post by Amy Johnson of She Wears Many Hats, recipe submitted by TK member Sabrina of Eat, Drink & Be Merry.

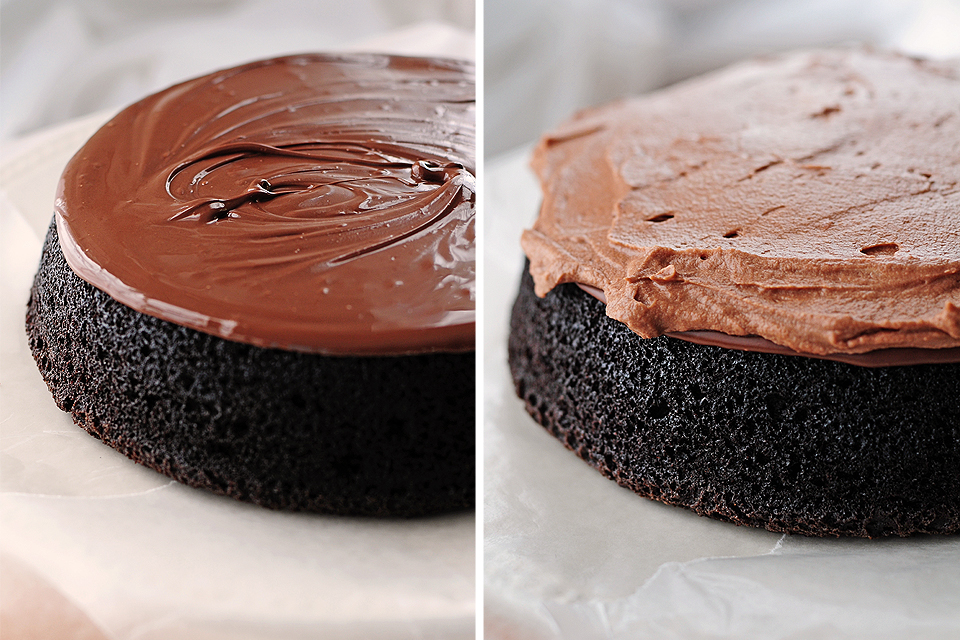
When cakes have cooled and you’re ready to begin assembling layers, microwave the remaining Nutella a tad bit (about 30 seconds depending on your microwave) to loosen so it will be easy to spread. Spread the warmed Nutella over the top of the bottom layer of the cake. Put the cake in the freezer for 5-15 minutes for the Nutella to harden. Remove the cake from the freezer and spread a layer of the whipped cream over the layer of Nutella.


Tasty Kitchen Blog: Chocolate Hazelnut Cake. Guest post by Amy Johnson of She Wears Many Hats, recipe submitted by TK member Sabrina of Eat, Drink & Be Merry.

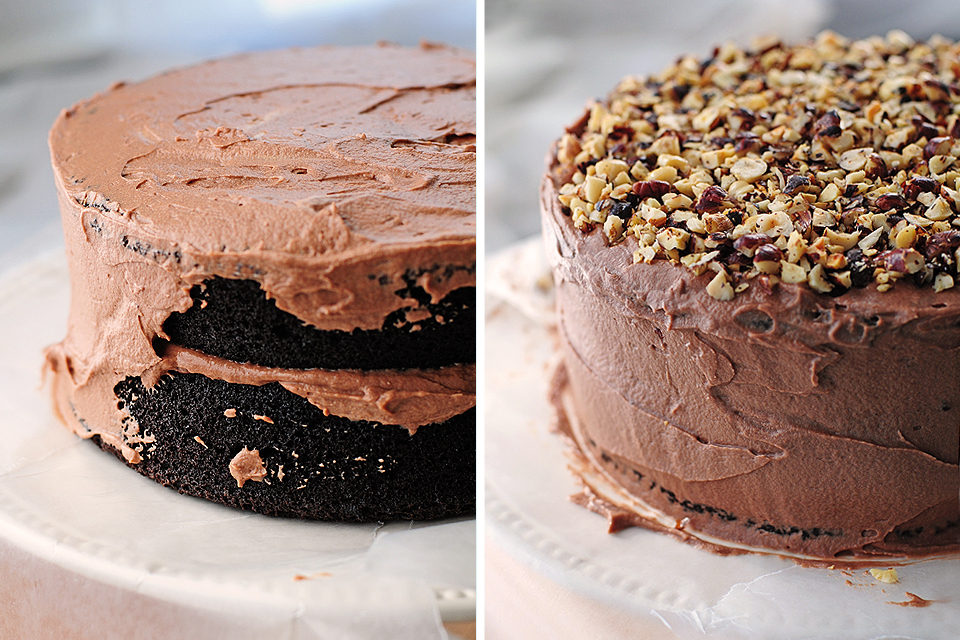
Add the second layer and frost the sides and top with whipped cream.


Tasty Kitchen Blog: Chocolate Hazelnut Cake. Guest post by Amy Johnson of She Wears Many Hats, recipe submitted by TK member Sabrina of Eat, Drink & Be Merry.

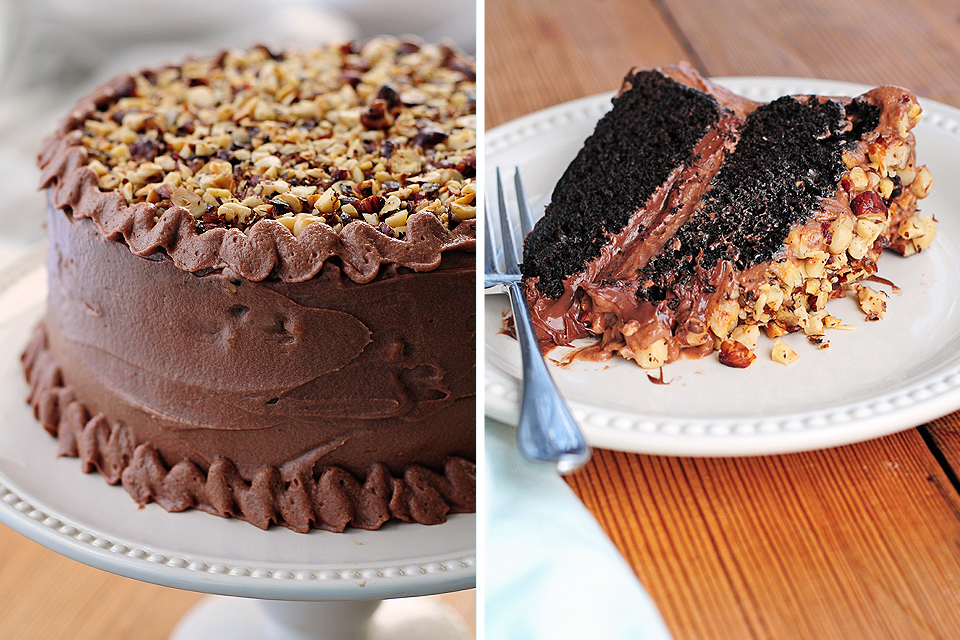
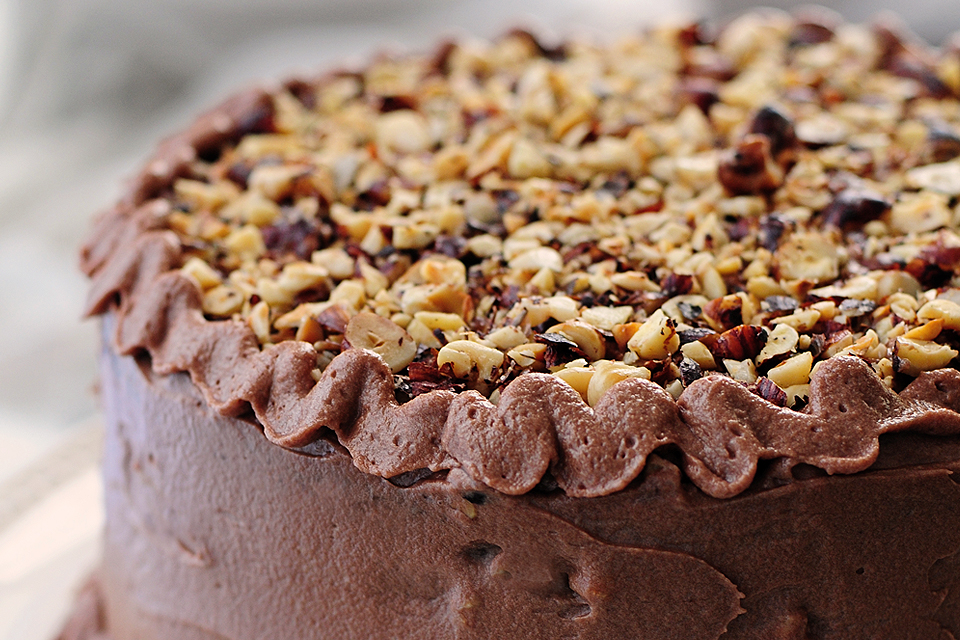
Top with chopped hazelnuts, and add any extra piping decorations to the edges to finish off if desired.


Tasty Kitchen Blog: Chocolate Hazelnut Cake. Guest post by Amy Johnson of She Wears Many Hats, recipe submitted by TK member Sabrina of Eat, Drink & Be Merry.

I tend to have a more rustic style when decorating cakes. I’m sure y’all can do much better. Refrigerate until ready to serve.


Tasty Kitchen Blog: Chocolate Hazelnut Cake. Guest post by Amy Johnson of She Wears Many Hats, recipe submitted by TK member Sabrina of Eat, Drink & Be Merry.

 
Delicious! It’s a decadent and rich cake for sure. Definitely a cake for special occasions. I think the next time I make this cake (and there will be a next time), I’ll make cupcakes, with a thin layer of Nutella, topped with a swirl of the whipped topping and sprinkled with the chopped hazelnuts. The perfect cupcake indeed.

Many thanks to Sabrina for submitting this tempting Chocolate Hazelnut Cake. It’s a keeper. (Check out Sabrina’s blog Eat, Drink & Be Merry for more of her killer recipes!)


Printable Recipe

Chocolate Hazelnut Cake

See post on eatdrinkandbemerry’s site!
4.50 Mitt(s) 8 Rating(s)8 votes, average: 4.50 out of 58 votes, average: 4.50 out of 58 votes, average: 4.50 out of 58 votes, average: 4.50 out of 58 votes, average: 4.50 out of 5

Prep Time:

Cook Time:

Difficulty: Easy

Servings: 10

10
x

Print Options

Page size Letter 3x5 4x6
Text Size Small Medium Large
Content Include description
Include prep time, etc.
Show image

Description

This cake tastes like one of those wonderful Ferrero Rocher candies! (It even has the smooth a creamy chocolate hazelnut center!) This recipe is perfect if you’re looking to celebrate a special occasion or to satisfy another one of those Nutella cravings!

Ingredients

  • FOR THE CAKE:
  • 2 cups All-purpose Flour
  • ½ cups Unsweetend Cocoa Powder
  • 1-½ teaspoon Baking Soda
  • ½ teaspoons Salt
  • 1 stick Butter, At Room Temperature
  • 1 cup Granulated Sugar
  • 1 cup Light Brown Sugar
  • 2  Large Eggs, At Room Temperature
  • 2 teaspoons Vanilla Extract
  • 1 cup Lukewarm Water
  • ½ cups Buttermilk
  • FOR THE CREAM:
  • 8 ounces, weight Mascarpone Cheese, At Room Temperature
  • ¾ cups Powdered Sugar
  • 1 teaspoon Vanilla Extract
  • 1-¼ cup Heavy Whipping Cream
  • 2-½ cups Nutella, Divided
  • 1-½ cup Chopped Hazelnuts, For Topping

Preparation Instructions

Preheat oven to 350ºF.

Sift together the flour, cocoa powder, baking soda, and salt into a bowl. In another bowl, with an electric mixer on medium-high speed, beat the butter and sugars until light and fluffy, about 2 to 3 minutes. Add the eggs and vanilla and beat until combined. Add the flour mixture in 3 additions, alternating with water and buttermilk, beating on low speed until just combined; scape down the sides of the bowl as needed. Beat on medium-high speed just until no traces of flour remain, about 30 seconds; do not overbeat.

Divide the batter evenly into 2 8-inch round pans that have been greased and floured. Bake for about 30 minutes or until an inserted toothpick comes out clean.

To make the cream, whip together cheese, sugar, vanilla, and heavy whipping cream with electric beaters until peaks form. I chill a stainless steel bowl in the freezer so it whips faster. Add 1 cup Nutella and beat until well blended.

Microwave the remaining 1 1/2 cups Nutella (for the inside layer) for 30 seconds or until it is easy to spread but not too loose that it will run off your cake. Spread evenly over the bottom layer of the cake and set in the freezer for 5 to 10 minutes. Once the Nutella layer sets, spread a layer of chocolate hazelnut whipped cream over it. Top with other cake layer and frost the sides and top of the cake with cream. Top with chopped hazelnuts. Feel free to pipe a design around the top and bottom sides of the cake; you will have more than enough cream to do so!


_______________________________________

Amy Johnson is a blogger who writes about food, travel, the home (both inside and out), and various observations and random musings about anything and everything. Visit her blog She Wears Many Hats for a dose of deliciousness, practicality, hilarity, or just plain fun. She lives in South Carolina with her husband and two children.


Profile photo of twopeasandtheirpod

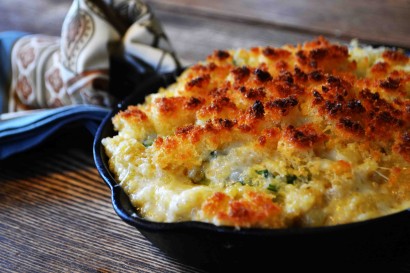
Quinoa Spinach Mac and Cheese

Posted by in Step-by-Step Recipes

Tasty Kitchen Blog: Quinoa Spinach Mac 'n Cheese. Guest post by Maria Lichty of Two Peas and Their Pod, recipe submitted by TK member Carrie Burrill of Bakeaholic Mama.

 
It is the new year and I know we’re supposed to be eating lots and lots of salad, but I just can’t get excited about salad for every meal. Don’t get me wrong, I love a good salad, but sometimes I want something more. Like this Quinoa Spinach Mac ‘n Cheese from Carrie Burrill. When I saw the recipe, I said goodbye salad, hello quinoa mac ‘n cheese! 

This is the perfect comfort food for the new year. The quinoa and spinach make this mac ‘n cheese much healthier than traditional mac ‘n cheese. Sure, there is still cheese and butter involved, but all things in moderation, right? And I love creative versions of mac ‘n cheese. My Avocado Mac and Cheese is a favorite at our house so I knew we would love this recipe! 


Tasty Kitchen Blog: Quinoa Spinach Mac 'n Cheese. Guest post by Maria Lichty of Two Peas and Their Pod, recipe submitted by TK member Carrie Burrill of Bakeaholic Mama.

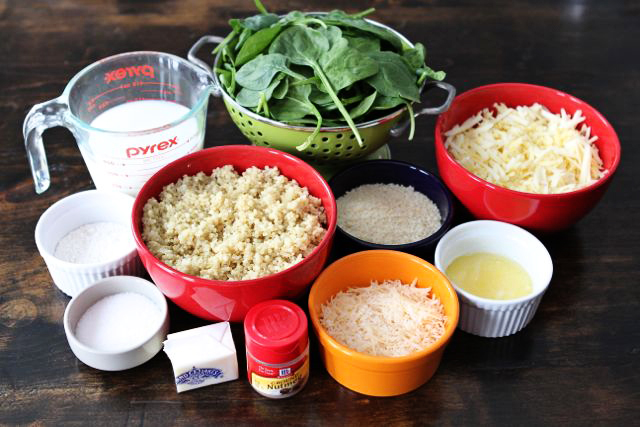
To make the Quinoa Spinach Mac ‘n Cheese you will need the following ingredients: butter, flour, milk, nutmeg, salt, white cheddar cheese, cooked quinoa, spinach, Parmesan cheese, more butter, and panko bread crumbs. 


Tasty Kitchen Blog: Quinoa Spinach Mac 'n Cheese. Guest post by Maria Lichty of Two Peas and Their Pod, recipe submitted by TK member Carrie Burrill of Bakeaholic Mama.

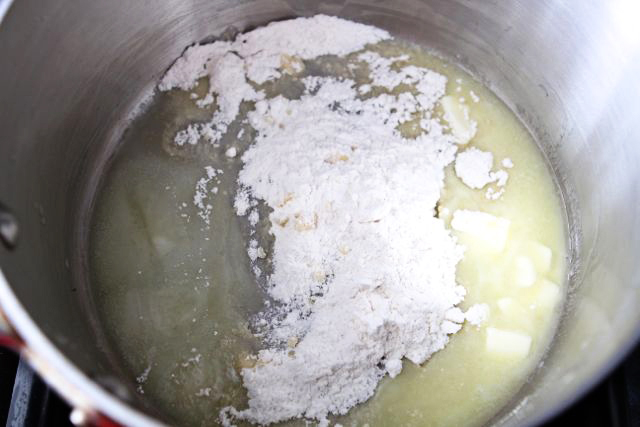
Preheat the oven to 350ºF. In a medium saucepan over medium heat, add butter and flour. 


Tasty Kitchen Blog: Quinoa Spinach Mac 'n Cheese. Guest post by Maria Lichty of Two Peas and Their Pod, recipe submitted by TK member Carrie Burrill of Bakeaholic Mama.

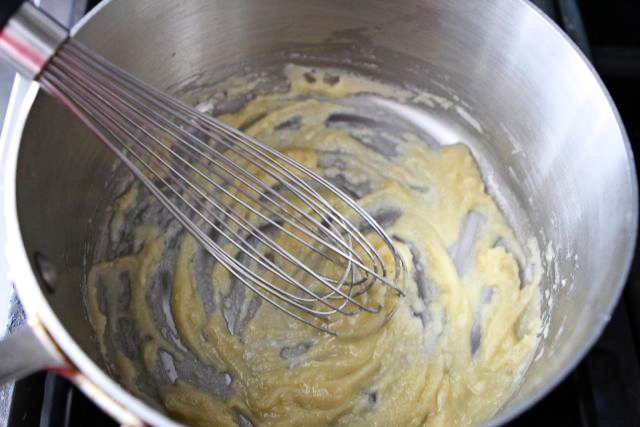
Keep whisking until a paste forms. 


Tasty Kitchen Blog: Quinoa Spinach Mac 'n Cheese. Guest post by Maria Lichty of Two Peas and Their Pod, recipe submitted by TK member Carrie Burrill of Bakeaholic Mama.

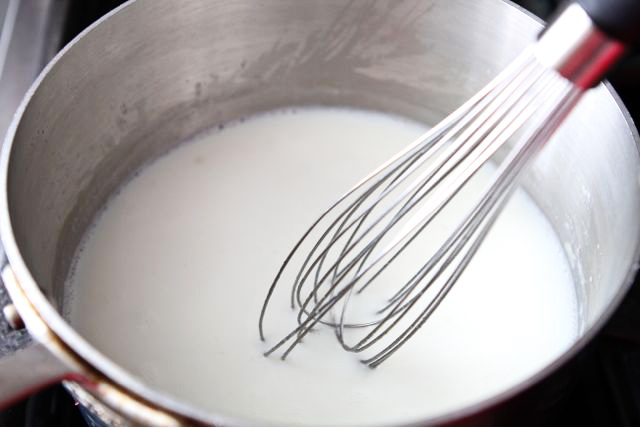
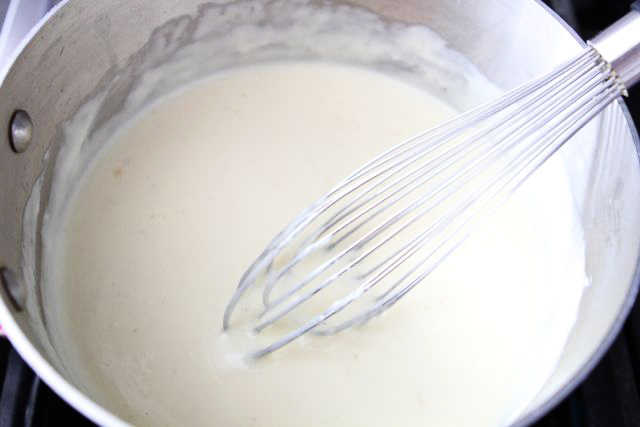
Add the milk and continue whisking. Increase the heat to medium-high and bring it to a boil. Keep whisking the whole time!


Tasty Kitchen Blog: Quinoa Spinach Mac 'n Cheese. Guest post by Maria Lichty of Two Peas and Their Pod, recipe submitted by TK member Carrie Burrill of Bakeaholic Mama.

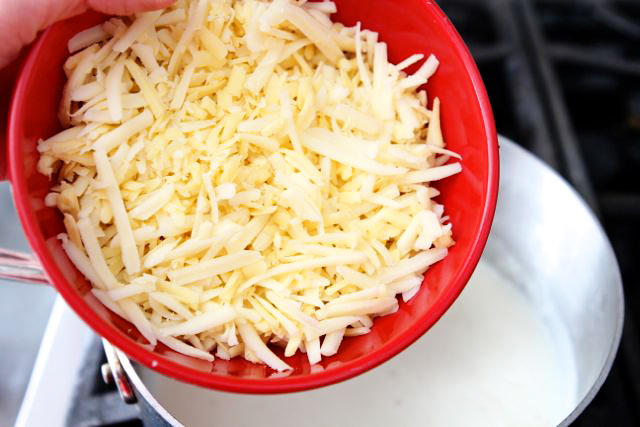
Once it reaches a boil, mix in the nutmeg, salt and cheddar cheese.


Tasty Kitchen Blog: Quinoa Spinach Mac 'n Cheese. Guest post by Maria Lichty of Two Peas and Their Pod, recipe submitted by TK member Carrie Burrill of Bakeaholic Mama.

When the sauce is smooth, take it off heat.


Tasty Kitchen Blog: Quinoa Spinach Mac 'n Cheese. Guest post by Maria Lichty of Two Peas and Their Pod, recipe submitted by TK member Carrie Burrill of Bakeaholic Mama.

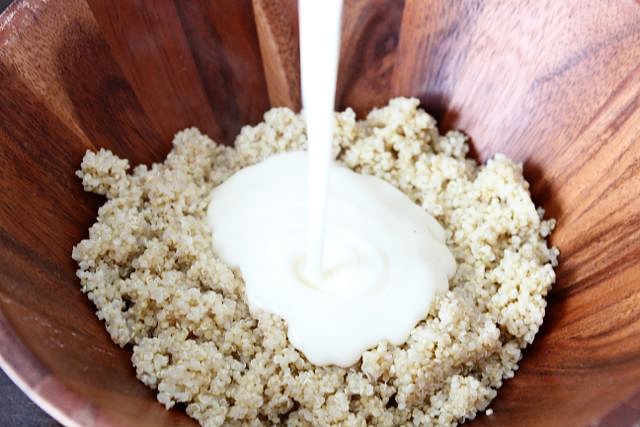
Grab a large bowl. Throw in the cooked quinoa, then pour in that delicious sauce you just made.


Tasty Kitchen Blog: Quinoa Spinach Mac 'n Cheese. Guest post by Maria Lichty of Two Peas and Their Pod, recipe submitted by TK member Carrie Burrill of Bakeaholic Mama.

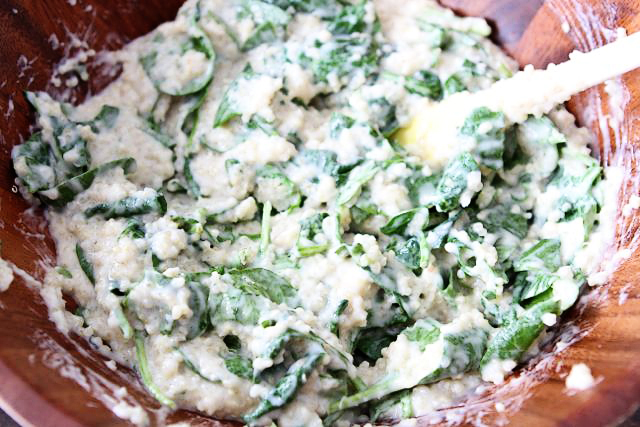
Add the spinach and mix until combined.


Tasty Kitchen Blog: Quinoa Spinach Mac 'n Cheese. Guest post by Maria Lichty of Two Peas and Their Pod, recipe submitted by TK member Carrie Burrill of Bakeaholic Mama.

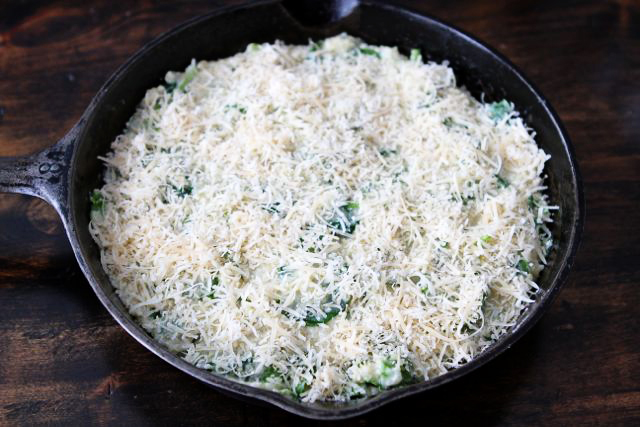
Transfer the mixture into a cast iron skillet or a casserole dish. Top with the freshly grated Parmesan cheese.


Tasty Kitchen Blog: Quinoa Spinach Mac 'n Cheese. Guest post by Maria Lichty of Two Peas and Their Pod, recipe submitted by TK member Carrie Burrill of Bakeaholic Mama.

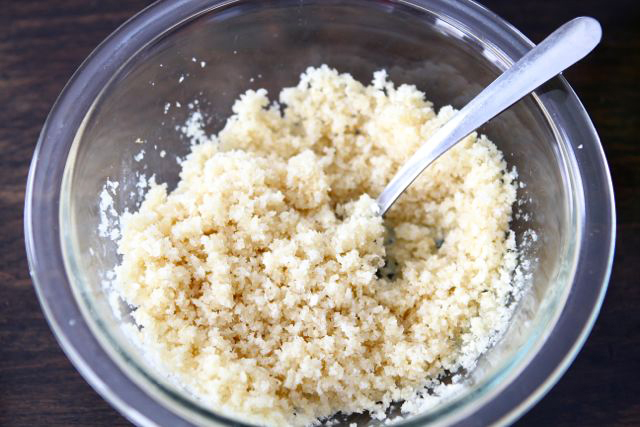
Take a small bowl and mix the butter and bread crumbs.


Tasty Kitchen Blog: Quinoa Spinach Mac 'n Cheese. Guest post by Maria Lichty of Two Peas and Their Pod, recipe submitted by TK member Carrie Burrill of Bakeaholic Mama.

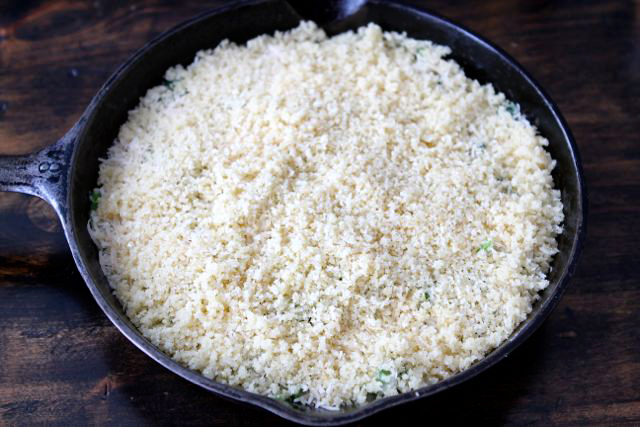
Then sprinkle that crunchy buttery goodness over the top of the casserole!


Tasty Kitchen Blog: Quinoa Spinach Mac 'n Cheese. Guest post by Maria Lichty of Two Peas and Their Pod, recipe submitted by TK member Carrie Burrill of Bakeaholic Mama.

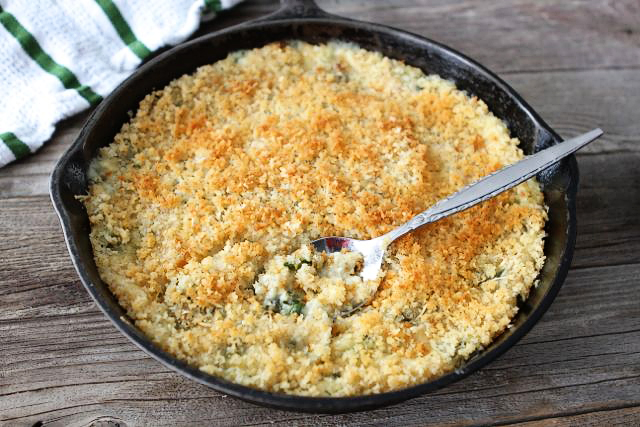
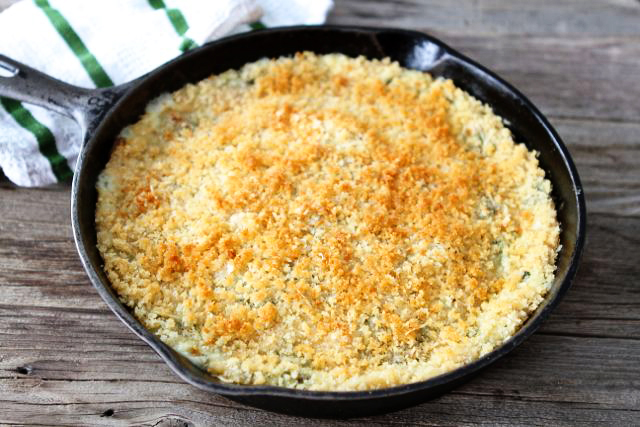
Bake for about 20 minutes, until bubbly. Remove from the oven. 


Tasty Kitchen Blog: Quinoa Spinach Mac 'n Cheese. Guest post by Maria Lichty of Two Peas and Their Pod, recipe submitted by TK member Carrie Burrill of Bakeaholic Mama.

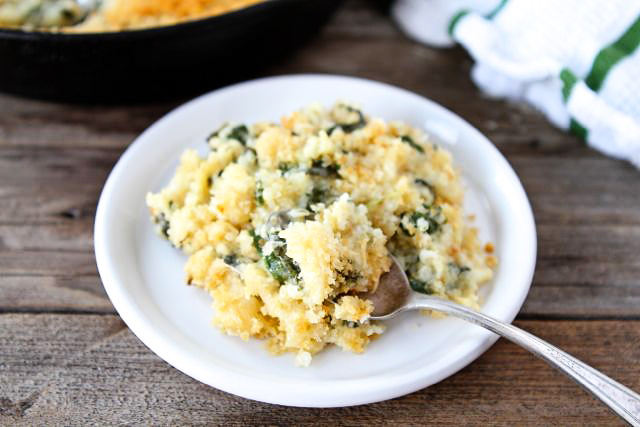
Grab a spoon and dig in! 


Tasty Kitchen Blog: Quinoa Spinach Mac 'n Cheese. Guest post by Maria Lichty of Two Peas and Their Pod, recipe submitted by TK member Carrie Burrill of Bakeaholic Mama.

You will love this healthy twist on the classic mac ‘n cheese. I promise you. It is the real deal. You won’t even miss the macaroni; the quinoa is awesome in this dish. And the salty, crunchy Parmesan panko topping is sooo good! Don’t skip that part. Don’t skip anything. Make this Quinoa Spinach Mac ‘n Cheese right now. It is comforting, filling, and perfect for a cold day. And don’t worry, the kids will love it too! It’s a great dish for the entire family. 

Thanks Carrie for sharing your recipe. Head on over to Carrie’s blog, Bakeaholic Mama, for more delicious sweet and savory recipes. 


Printable Recipe

Quinoa Spinach Mac ‘n Cheese

See post on Carrie Burrill’s site!
4.33 Mitt(s) 3 Rating(s)3 votes, average: 4.33 out of 53 votes, average: 4.33 out of 53 votes, average: 4.33 out of 53 votes, average: 4.33 out of 53 votes, average: 4.33 out of 5

Prep Time:

Cook Time:

Difficulty: Intermediate

Servings: 6

6
x

Print Options

Page size Letter 3x5 4x6
Text Size Small Medium Large
Content Include description
Include prep time, etc.
Show image

Description

Family friendly mac ‘n cheese made a tad healthier!

Ingredients

  • FOR THE CASSEROLE:
  • 3 Tablespoons Butter
  • 3 Tablespoons Flour
  • 1-½ cup Whole Milk
  • 2 dashes Freshly Grated Nutmeg
  • ¼ teaspoons Salt
  • 8 ounces, weight Shredded Sharp Cheddar Cheese
  • 3 cups Cooked Quinoa (cooked According To Package Instructions)
  • 2 bunches Fresh Baby Spinach
  • FOR THE TOPPING:
  • ½ cups Freshly Grated Parmesan Cheese
  • 4 Tablespoons Butter, Melted
  • ¾ cups Panko Bread Crumbs

Preparation Instructions

Preheat oven to 350 F.

In a medium saucepan add 3 tablespoons of butter and flour and heat over medium heat. Whisk continuously until a paste forms. Whisk in milk. Increase heat to medium/high and bring to a boil whisking the whole time. Stir in the nutmeg, salt and cheddar cheese. When cheese sauce is smooth remove from heat.

In a large bowl mix together the cooked quinoa, cheese sauce and spinach.

Transfer the mixture into a casserole dish (I used an 8 inch cast iron skillet). Top with freshly grated Parmesan cheese.

In a small bowl mix together the butter and bread crumbs. Sprinkle over the top of the casserole.

Bake on 350 F until bubbly, about 20 minutes.

Remove from oven and enjoy!


_______________________________________

Maria and her husband Josh (who she affectionately refers to as her “dough boy”) blog at Two Peas and Their Pod. They’ve been featured on Saveur, Eatocracy, Gourmet Live, Glamour, and the Los Angeles Times, to name just a few. They’d also just recently added a little pea to their pod. We’re so glad to have them here!


Profile photo of Faith (An Edible Mosaic)

Cheese Brownies

Posted by in Baking, Step-by-Step Recipes

Tasty Kitchen Blog: Cheese Brownies. Guest post by Faith Gorsky of An Edible Mosaic, recipe submitted by TK member Monica (momx3girls).

 
I don’t know about you, but I love making unique recipes. I think part of the fun for me is when I serve them to my family and everyone tries to guess what they are because no one has ever seen them before! After seeing the title for Monica’s recipe for Cheese Brownies I was so intrigued, I knew I had to make them even before I knew what they were. I had no idea what to expect: Are they sweet? Savory? Is there chocolate involved?

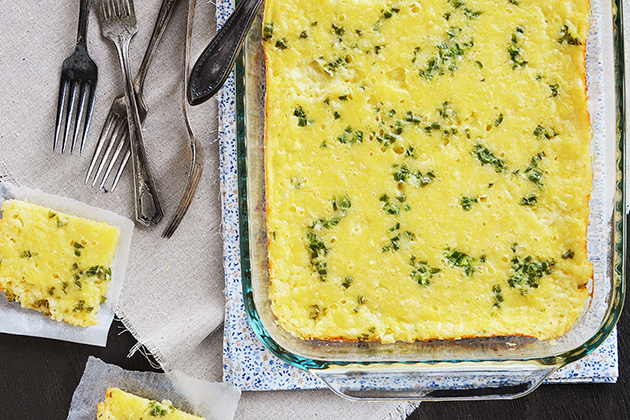
These brownies are savory. Cheese is the base ingredient, a very simple batter of milk, eggs, and flour is poured on top, and jalapeño adds fantastic flavor. These brownies remind me very much of poppers (jalapeño peppers that are stuffed with cheddar cheese, breaded, and deep-fried), but in casserole form. Swoon.

This dish reheats well (just cover with foil and bake at 350ºF until warm to reheat), and these brownies are wonderful along with a hearty meal like chili, but equally delicious served with a poached egg and fruit salad for breakfast. Of course they’d also be the perfect appetizer as part of a big spread.

And they’re so easy to make!


Tasty Kitchen Blog: Cheese Brownies. Guest post by Faith Gorsky of An Edible Mosaic, recipe submitted by TK member Monica (momx3girls).

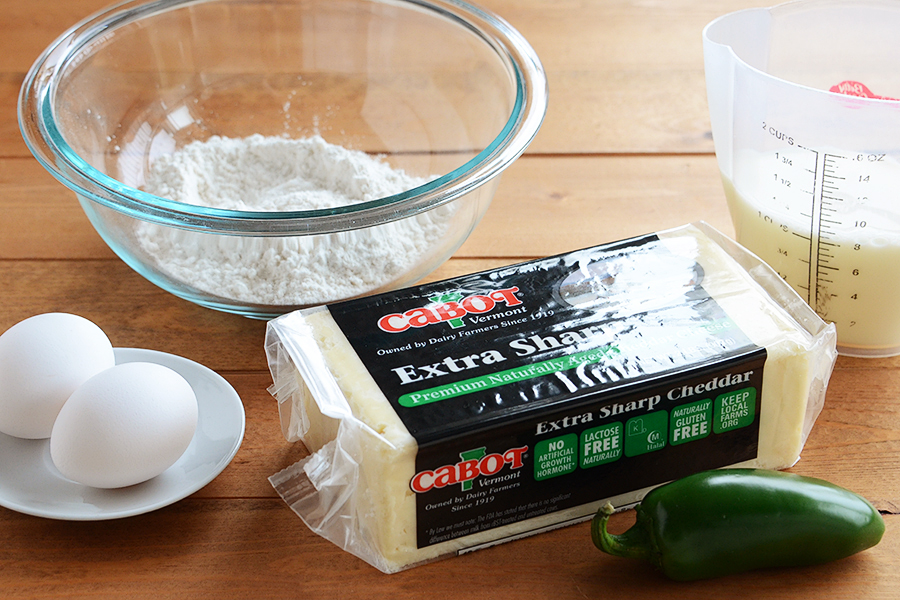
Love me a recipe that has only five ingredients! Note that the block of cheese in the picture is actually a 2-pound block and I only needed half of it for this recipe. And while we’re talking about the cheese, be sure to use something you really like, since these brownies are all about the cheese (I used sharp white cheddar). Oh, also note that I only used 1 jalapeño even though the recipe calls for 2. I was making this dish for some hot-food-averse (ahem, hi Mom!) and I wanted to make sure it wasn’t too spicy for them (more on that later though).


Tasty Kitchen Blog: Cheese Brownies. Guest post by Faith Gorsky of An Edible Mosaic, recipe submitted by TK member Monica (momx3girls).

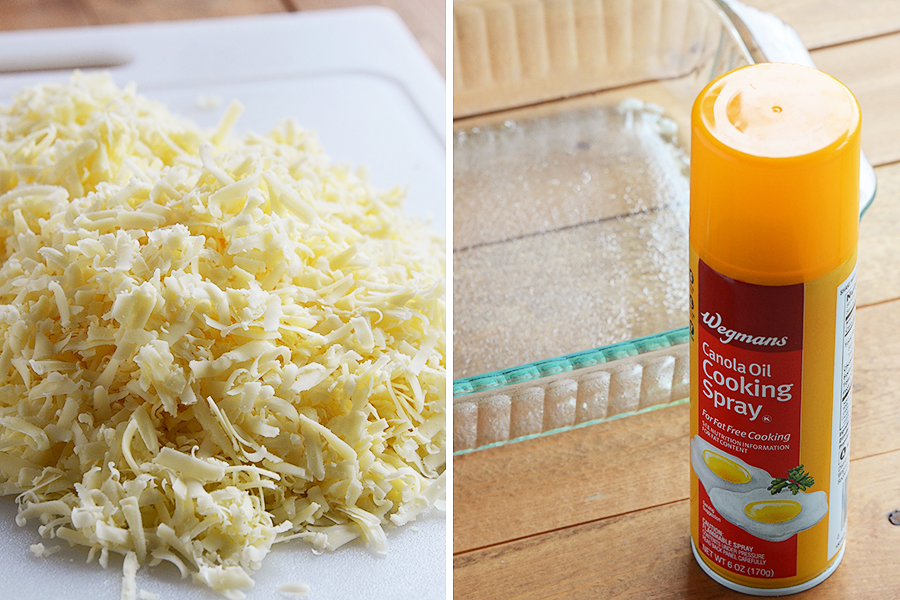
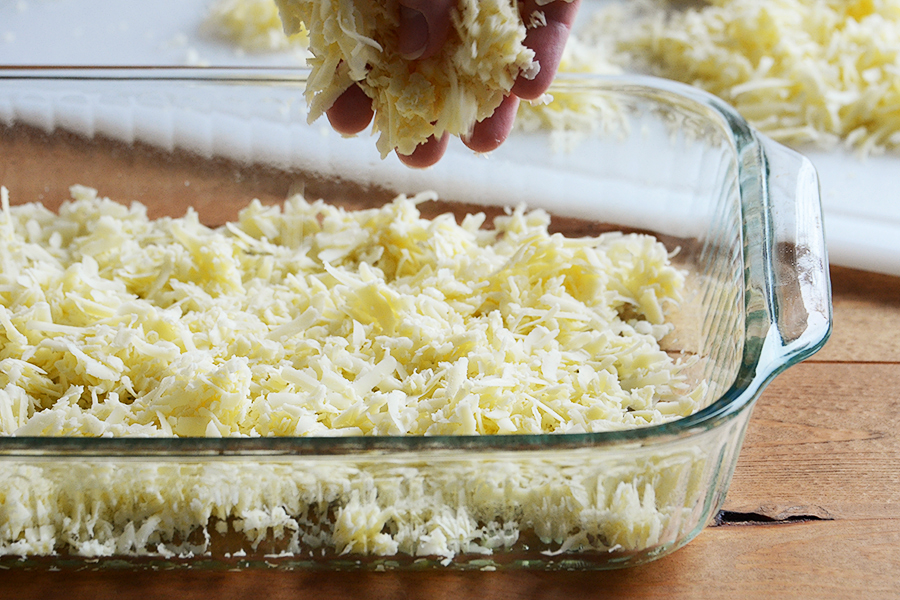
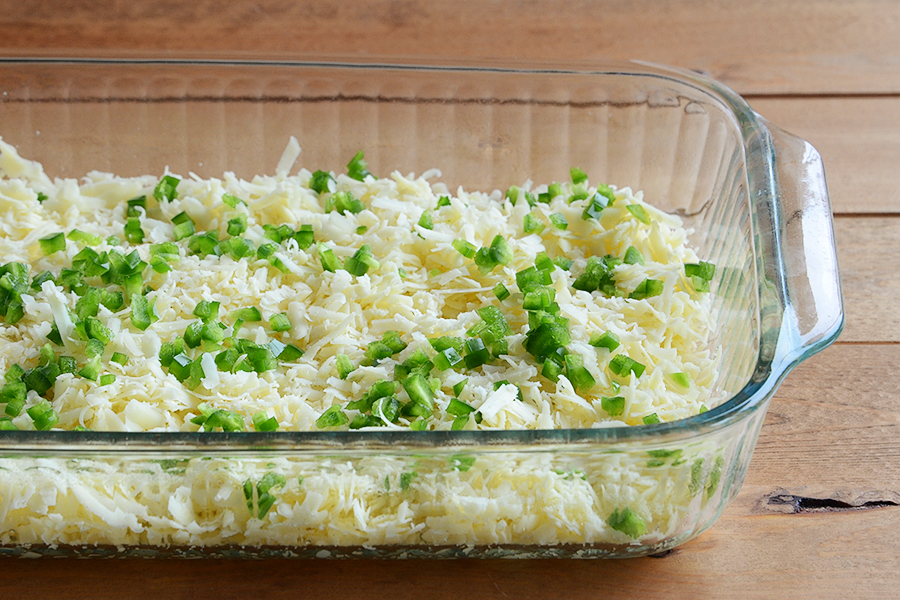
Shred your mountain of cheese, and then spray a 9 by 13-inch baking dish with cooking spray.


Tasty Kitchen Blog: Cheese Brownies. Guest post by Faith Gorsky of An Edible Mosaic, recipe submitted by TK member Monica (momx3girls).

Spread the cheese out in the baking dish.


Tasty Kitchen Blog: Cheese Brownies. Guest post by Faith Gorsky of An Edible Mosaic, recipe submitted by TK member Monica (momx3girls).

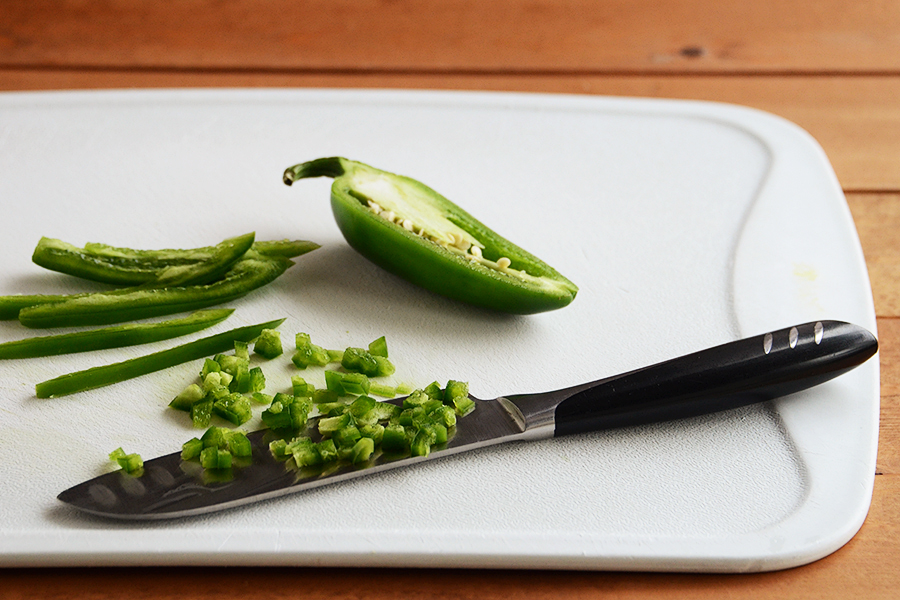
Cut your jalapeño in half, scrape out the seeds and ribs, and finely dice. Be sure to use gloves if you have sensitive skin (or paper cuts!). And even if you use gloves, be sure not to touch your eyes until after washing your hands. (Yes, I might be speaking from experience here.)


Tasty Kitchen Blog: Cheese Brownies. Guest post by Faith Gorsky of An Edible Mosaic, recipe submitted by TK member Monica (momx3girls).

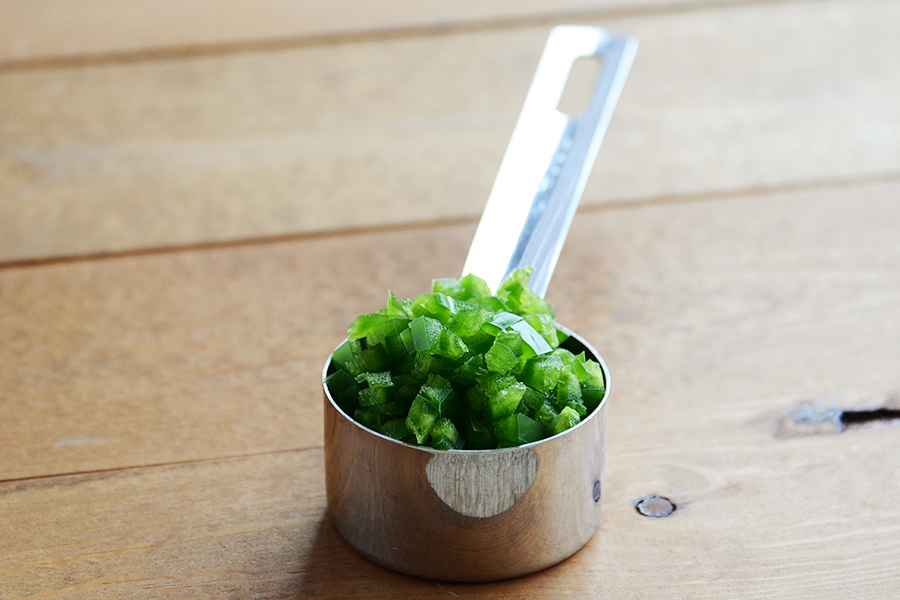
Ok, so remember how I said I only used 1 jalapeño instead of 2? It was a pretty big one—once chopped it was a heaping 1/4 cup. Everyone who tasted the brownies said they were delicious and not spicy at all (even the hot-food-averse!). I think next time I will be using 2 whole jalapeños, even if they are big (and if they’re normal-sized, I’ll be using 3). Just remember that not all jalapeños are created equal, so check the heat level of your peppers before deciding how much to add, just to be safe.


Tasty Kitchen Blog: Cheese Brownies. Guest post by Faith Gorsky of An Edible Mosaic, recipe submitted by TK member Monica (momx3girls).

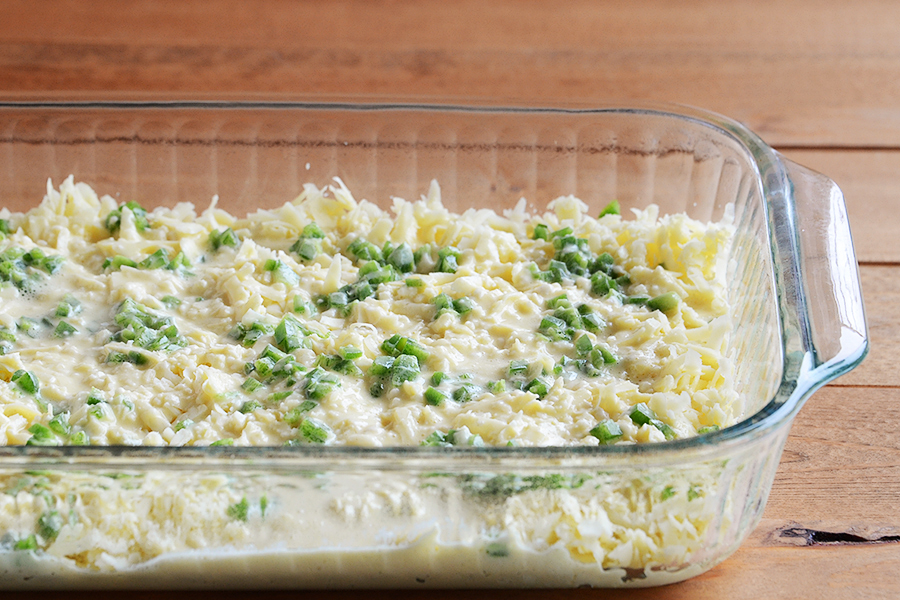
Sprinkle the chopped jalapeño onto the cheese.


Tasty Kitchen Blog: Cheese Brownies. Guest post by Faith Gorsky of An Edible Mosaic, recipe submitted by TK member Monica (momx3girls).

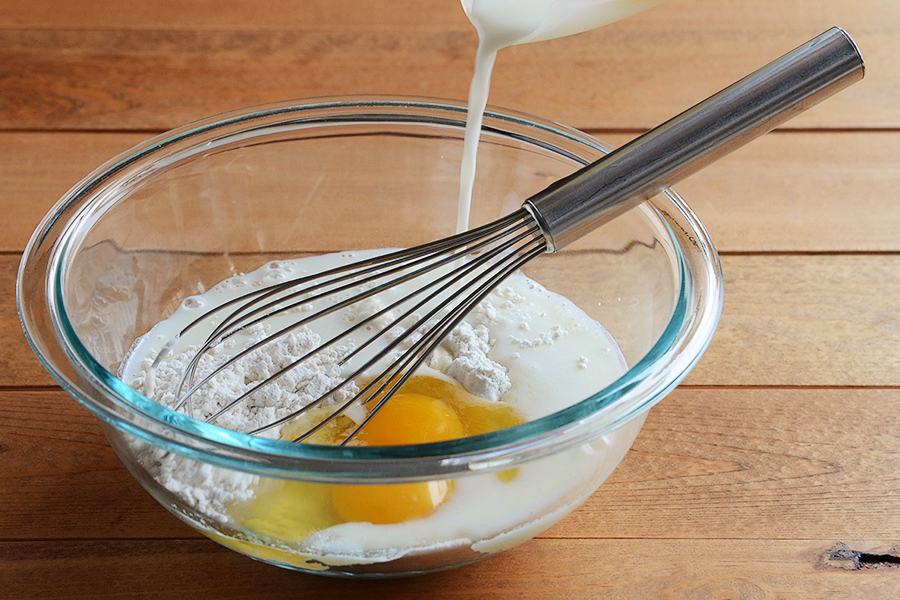
Whisk together the batter. It’s super simple, just milk, eggs, and flour!


Tasty Kitchen Blog: Cheese Brownies. Guest post by Faith Gorsky of An Edible Mosaic, recipe submitted by TK member Monica (momx3girls).

Pour the batter onto the cheese and jalapeño in the dish—but don’t stir!


Tasty Kitchen Blog: Cheese Brownies. Guest post by Faith Gorsky of An Edible Mosaic, recipe submitted by TK member Monica (momx3girls).

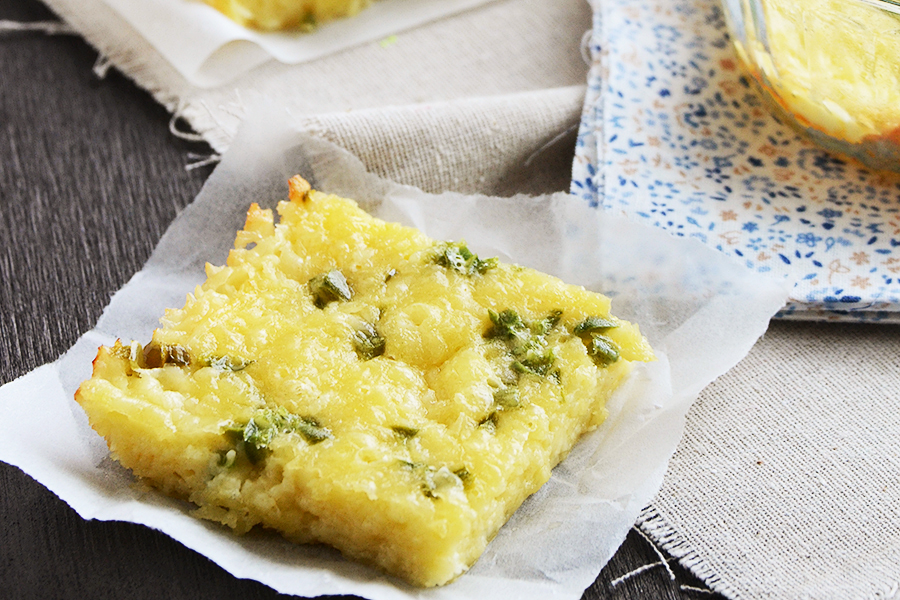
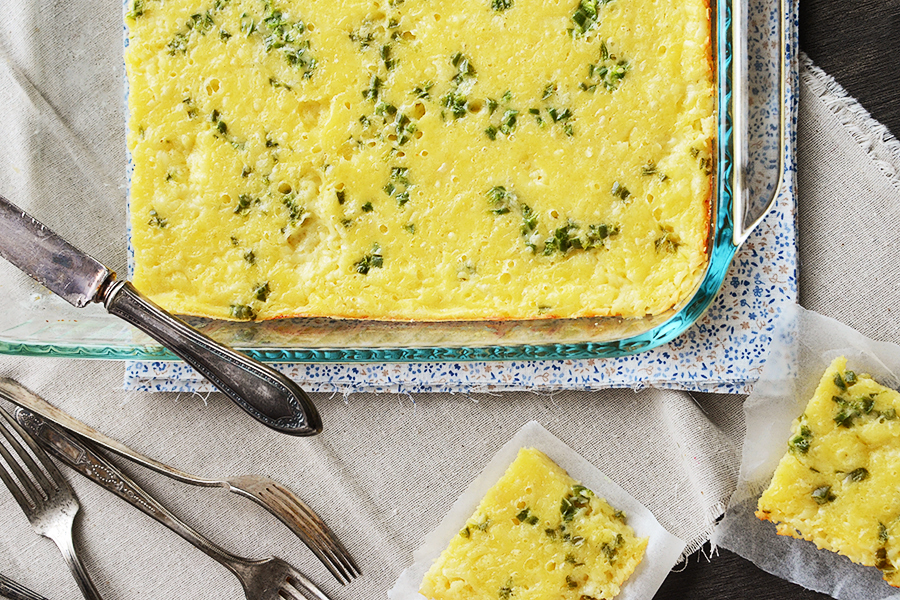
After baking for 30 minutes and letting them cool for 10 to 15 minutes, these little beauties are ready to go!


Tasty Kitchen Blog: Cheese Brownies. Guest post by Faith Gorsky of An Edible Mosaic, recipe submitted by TK member Monica (momx3girls).

And there you have it. This recipe couldn’t be easier and it is a huge crowd-pleaser. Thanks to Monica for a real winner. I know I will be making this again soon!


Printable Recipe

Cheese Brownies

4.38 Mitt(s) 8 Rating(s)8 votes, average: 4.38 out of 58 votes, average: 4.38 out of 58 votes, average: 4.38 out of 58 votes, average: 4.38 out of 58 votes, average: 4.38 out of 5

Prep Time:

Cook Time:

Difficulty: Easy

Servings: 12

12
x

Print Options

Page size Letter 3x5 4x6
Text Size Small Medium Large
Content Include description
Include prep time, etc.
Show image

Description

I received this recipe from my mother-in-law 20 years ago. She doesn’t remember where it came from and I’ve never seen it in any cookbooks. Hope you enjoy as much as we do!

Ingredients

  • 16 ounces, weight Colby Jack Or Cheddar Cheese, Shredded
  • 2 whole Jalapeño Peppers, Seeds And Ribs Removed, Chopped
  • 1 cup Milk
  • 1 cup All-purpose Flour
  • 2 whole Eggs

Preparation Instructions

Preheat the oven to 350ºF. Spray a 9×13 baking dish with nonstick cooking spray and place cheese evenly in the bottom of the dish. Sprinkle the chopped jalapeños over the cheese, do not stir.

In a bowl whisk together the milk, flour and eggs. Drizzle over the cheese and jalapeño as evenly as possible, still not stirring.

Bake for 30 minutes. Cool for 10–15 minutes and cut into squares. Enjoy!

Update July 5, 2016: I made these for our family 4th of July potluck and used a jalapeño cheddar cheese that I bought at the local farmers market and sprinkled the top with some very very mild jalapeños. Everyone thought they tasted great that way! If you like it spicy be sure and try a spicier cheese!


_______________________________________

Faith Gorsky is the writer, recipe developer, photographer, and food stylist behind the blog An Edible Mosaic. She lives in Upstate New York and loves to travel, especially to places steeped in rich culture and history. She also enjoys reading, vintage shopping, watching movies, and is enamored with ancient cultures. She just released her first cookbook, “An Edible Mosaic: Middle Eastern Fare with Extraordinary Flair” (Tuttle Publishing), a collection of authentic Middle Eastern recipes handed down to her from her husband’s family.


Profile photo of whatsgabycooking

Cottage Pie with Yukon Potato Topping

Posted by in Step-by-Step Recipes

How many of us grew up with Cottage Pie? Or maybe you knew it as Shepherd's Pie. I know I certainly did! The main difference between the two is that Cottage Pie is made with ground beef and Shepherd's Pie is traditionally made with ground lamb. And while both are delicious, I think ground beef is a little more widely used, so we totally have to make one!