


I don’t know about you, but I’ve eaten so many sugary goodies lately that I’m fairly certain I may spontaneously combust into a cloud of sugar at any given moment. So, I thought it was time I take a little break from my sugary friends and give some love to something a bit more savory. When I found this recipe for Ham & Cheese Potato Skins from TK member Dax Phillips, I knew I’d found the perfect recipe to jumpstart the savory love-train.
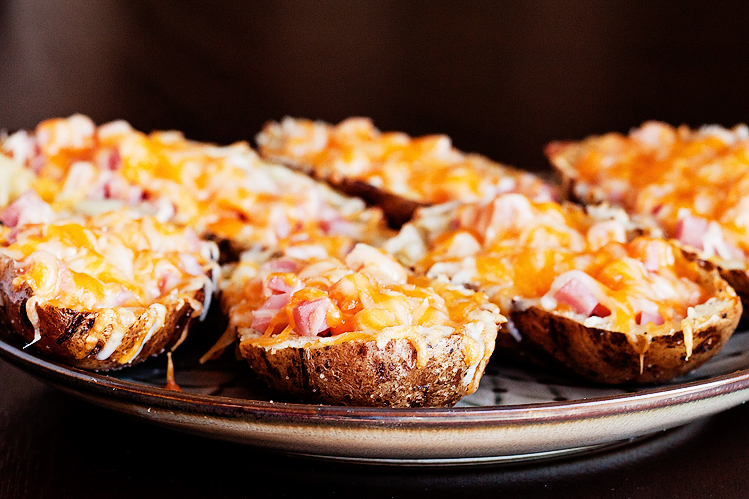
They are perfect for picky eaters, especially the six-year-old variety that hangs out at my house. A generous amount of melty cheese and ham perfectly complements the crispy, salty potato skin, making these a big hit with any crowd.
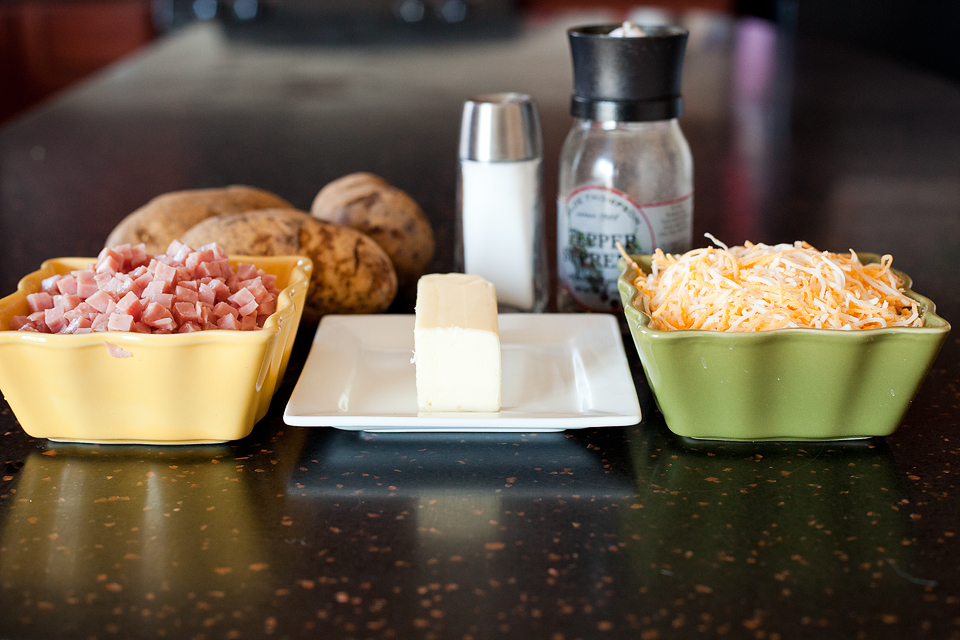
You’ll need: Russet potatoes, shredded cheese, diced ham, butter, salt, and pepper. That’s it. Easy, huh?
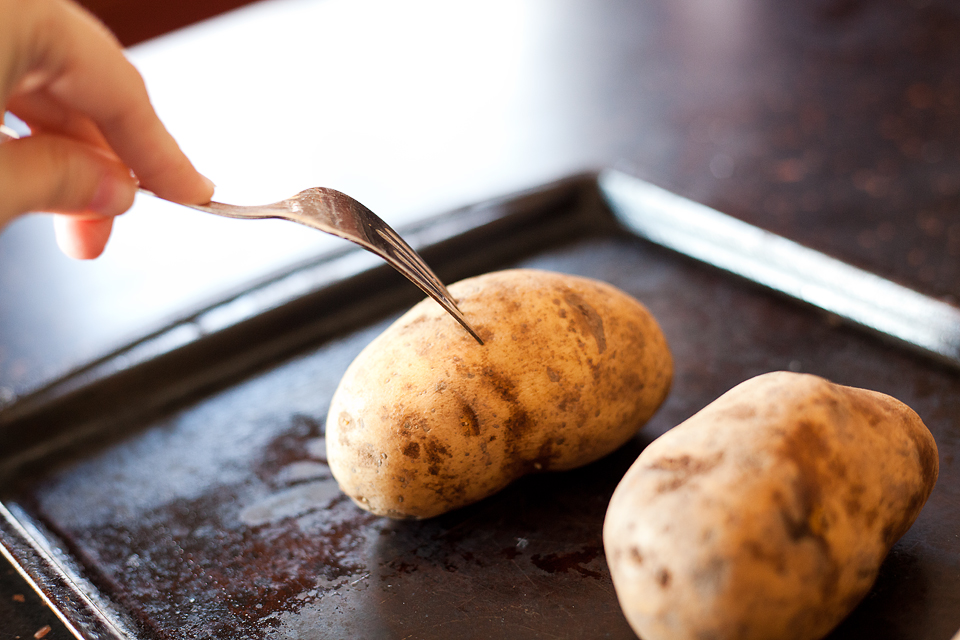
Preheat your oven to 400ºF. Poke the top of each potato with a fork and place on a baking sheet. Cook in the oven for 1 hour.
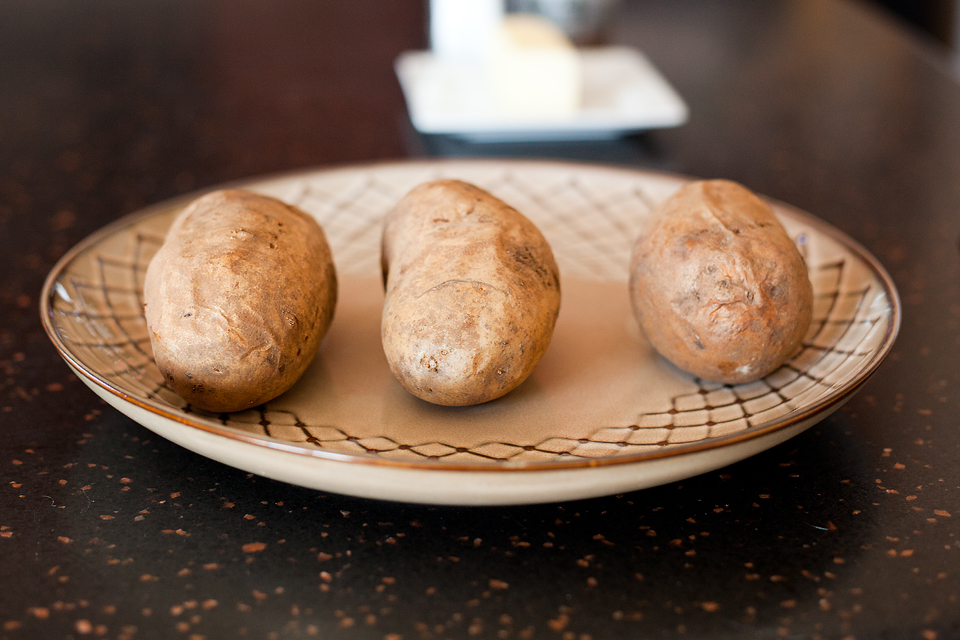
Remove the potatoes from the baking sheet and place on a plate to cool for about 15 minutes.
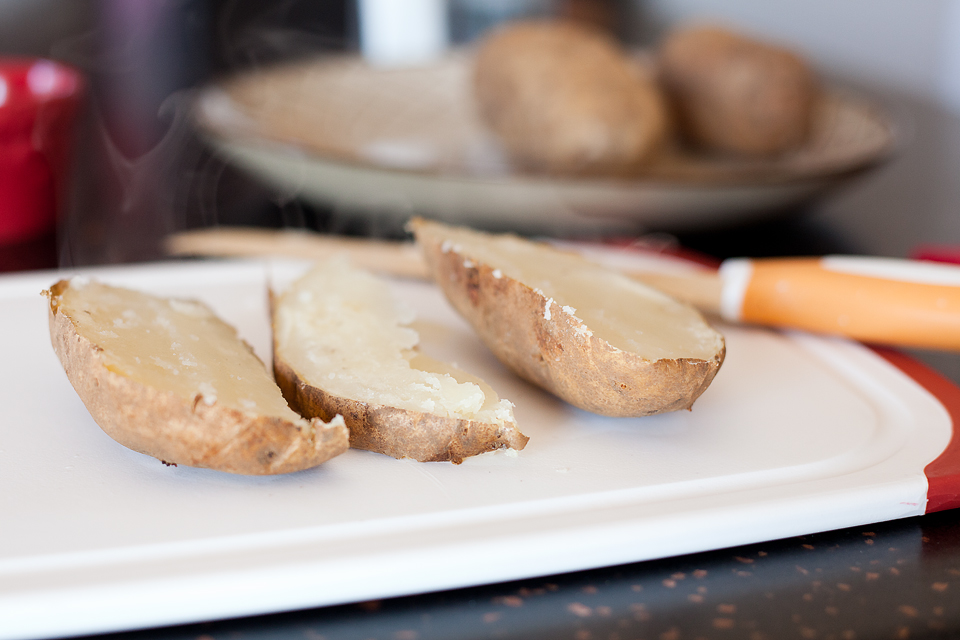
Once your potatoes are cooled, use a sharp bread knife and cut each potato lengthwise into three segments for each potato. So each potato will yield two skins and you can discard the middle slice or use it for something else.
You should end up with 6 potato boats.
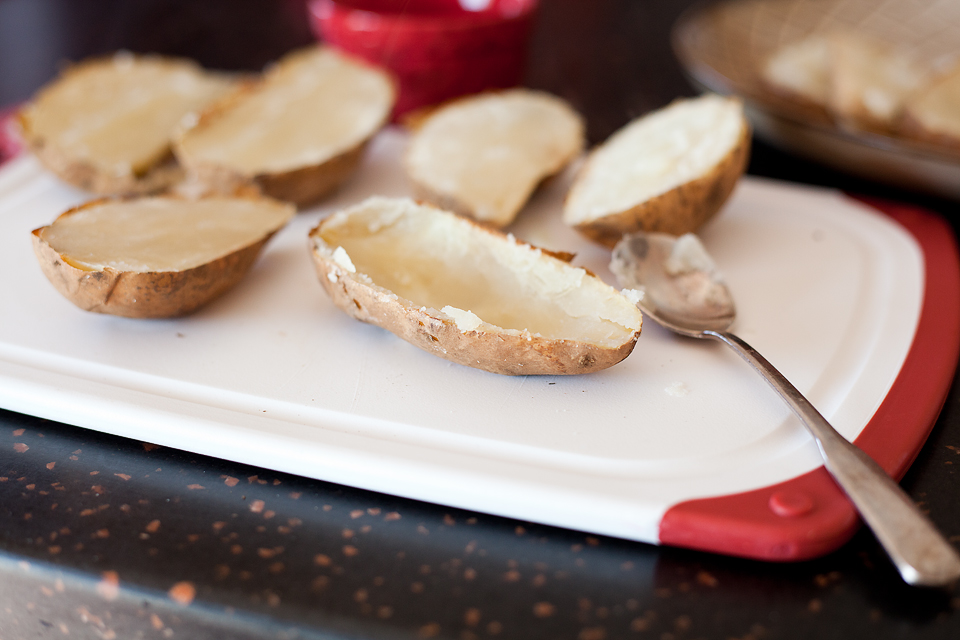
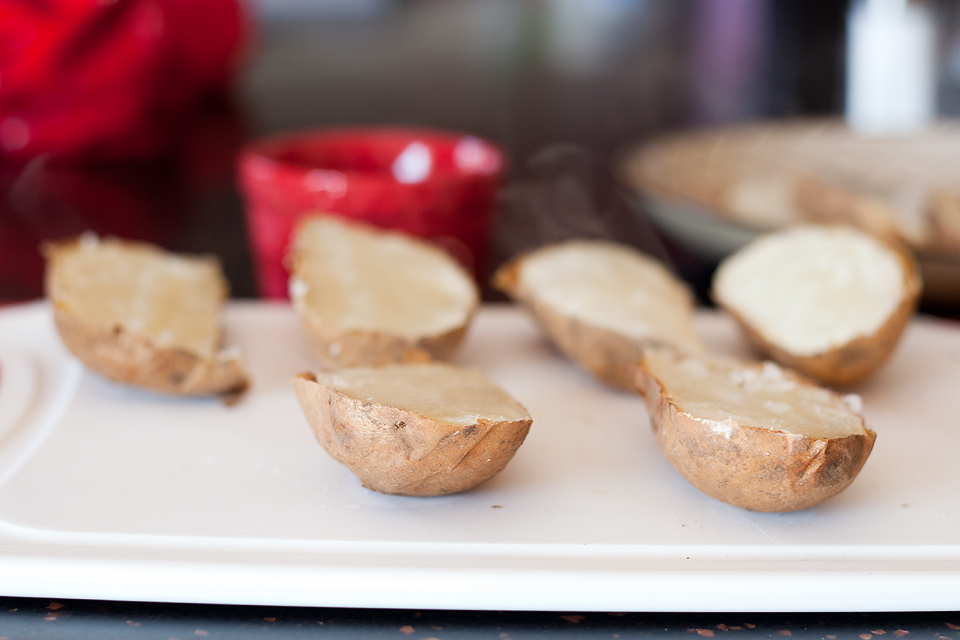
With a small spoon, being careful not to poke through the skin, scoop out about 70 percent of the potato. You still want some potato in your boat.
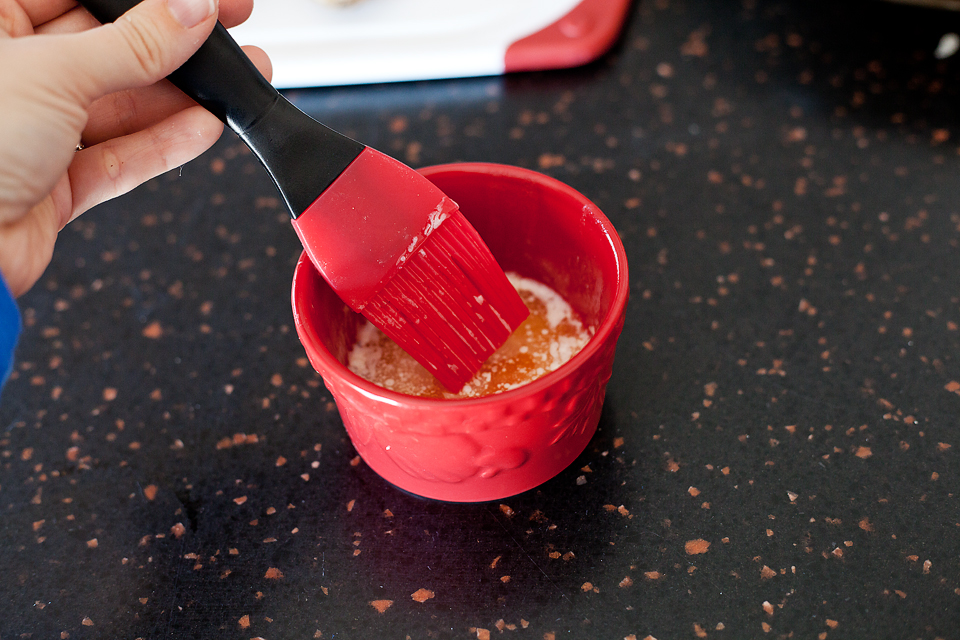
Next, melt your butter in the microwave. This should take 30-60 seconds or so. Turn your broiler to high.
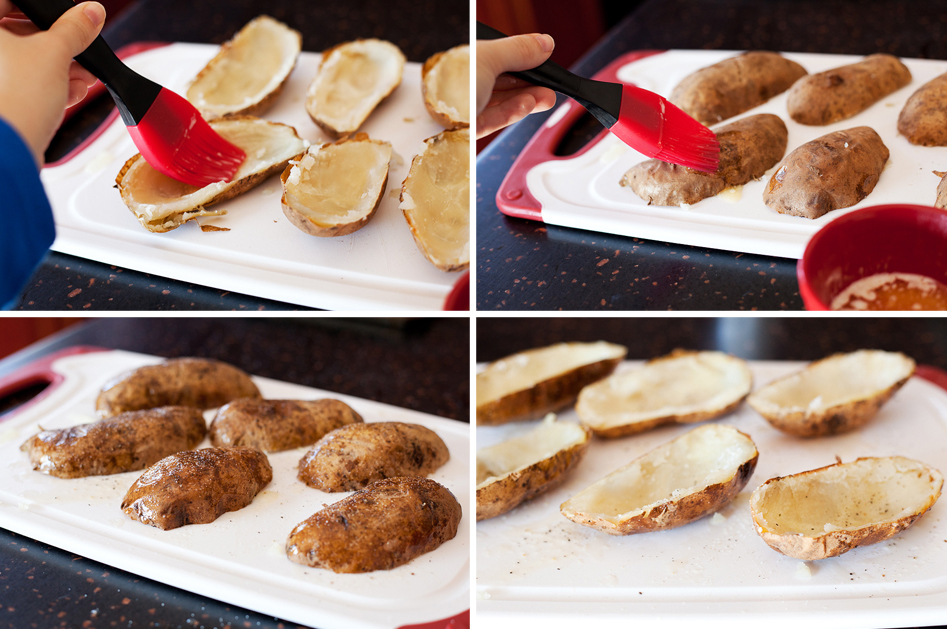
Brush the butter on the inside and outside of each potato skin, then season the inside of each skin with salt and pepper.
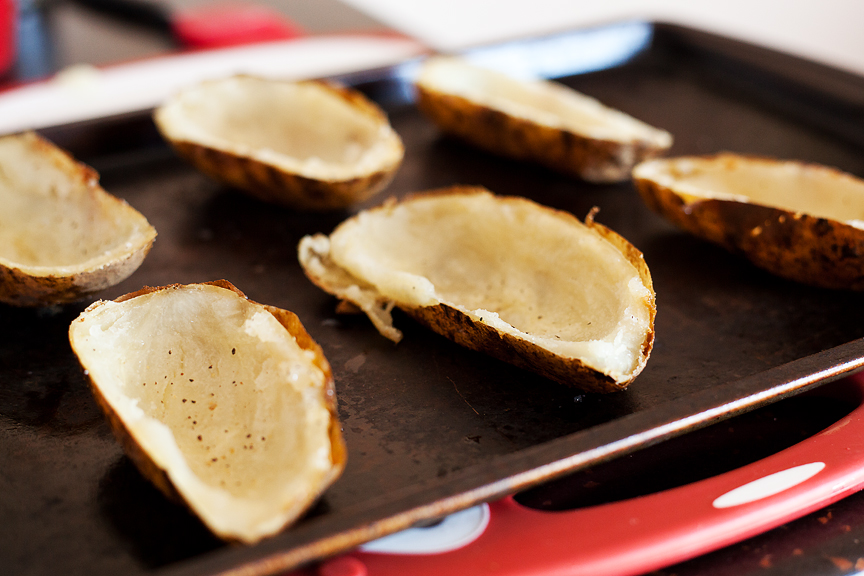
Place them back onto the baking sheet and put them under the broiler for 8-10 minutes, until the insides get a bit crispy from the melted butter.
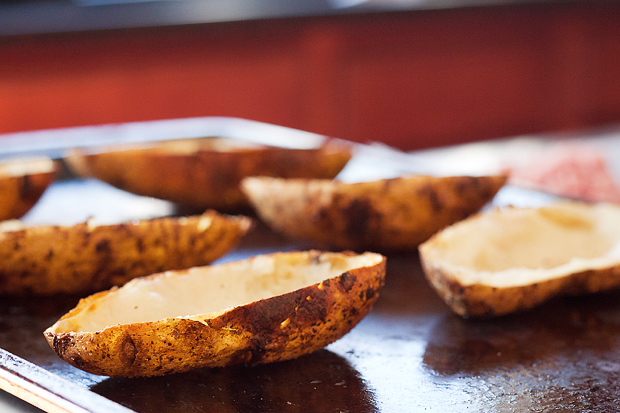
Once the edges and interior are crisp and golden, remove them from the oven. Turn off the broiler, and set the oven to 425ºF.
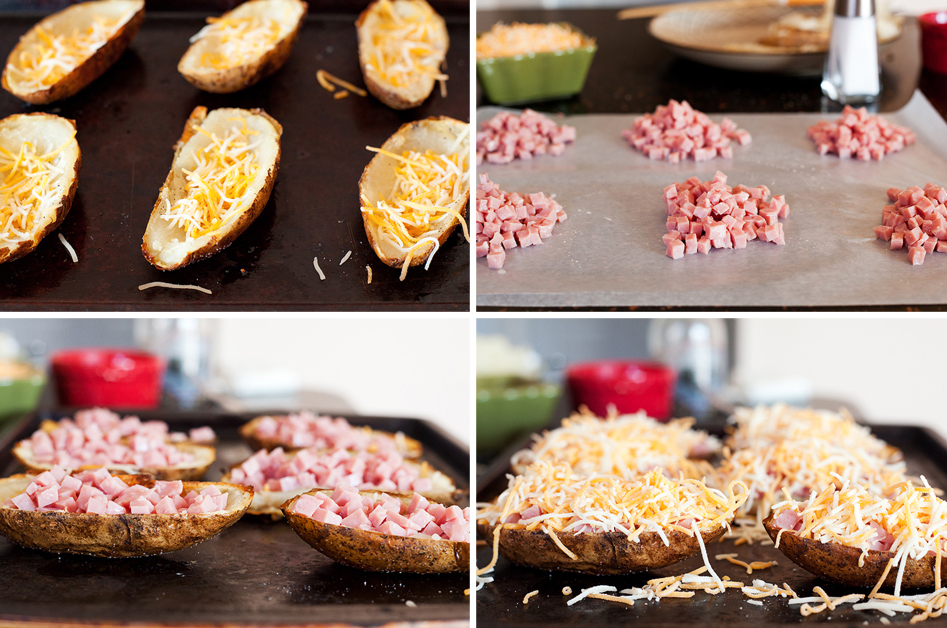
Add a generous amount of cheese into each potato boat. Top with a generous amount of ham. Simply divide the ham into six sections so each potato gets enough of it. Top with a bit more cheese.
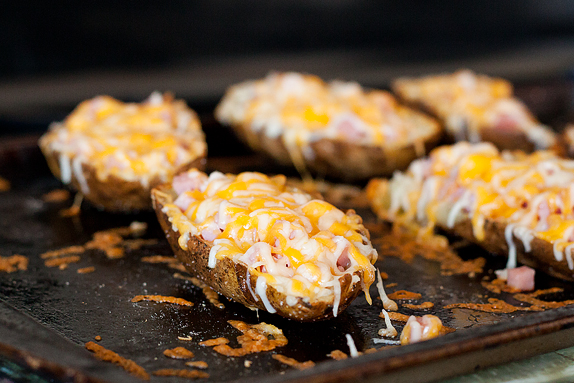
Place the tray back into the oven and cook for about 5 more minutes or until the cheese is nice and bubbly.
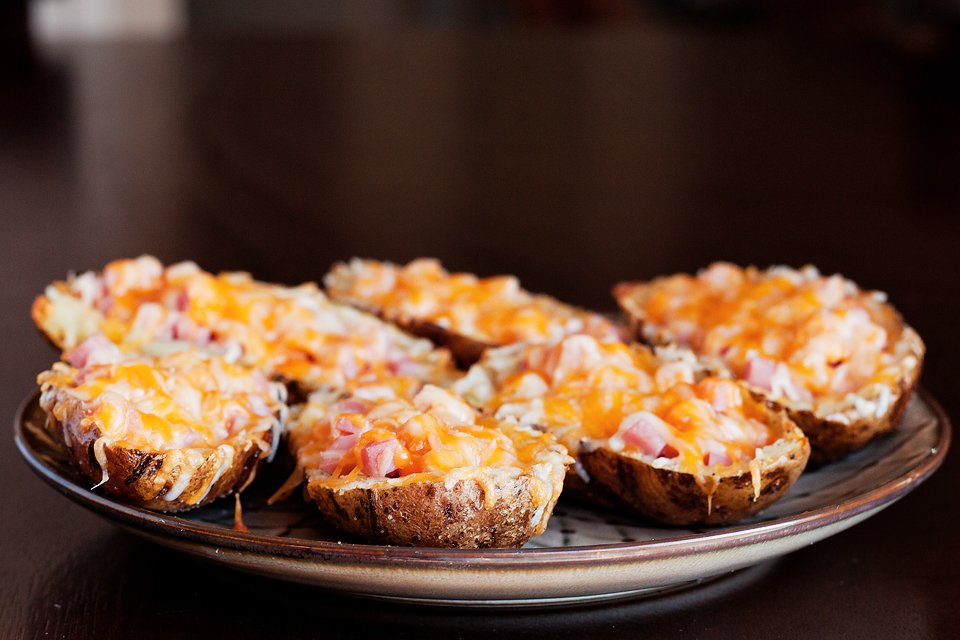
Now take a bite, and you will have a cheesy explosion of pure delicious in your mouth. The cheese, the ham, the crispy, salty potato … it’s pure magic. I foresee these potato skins being the perfect addition to our Superbowl party table. You don’t have to limit yourself to just snacking on them either. Throw in some scrambled eggs for a great breakfast, or pair them with your favorite salad and you’ve got a great lunch or dinner!

I’m so glad Dax shared this recipe with us. He’s a whiz when it comes to potato skin creations (among other things), and you’ll find them all on his blog, Simple Comfort Food.
Printable Recipe


Print Options
Description
A simple twist on a classic potato skin that is perfect any time of the day.
Ingredients
- 3 whole Russet Potatoes
- 1-½ Tablespoon Unsalted Butter
- 1 pinch Salt
- 1 pinch Cracked Black Pepper
- 2 cups Colby-Jack Cheese, Shredded
- 1 cup Thick Cut Ham, Cut Into Bite Sized Cubes
Preparation Instructions
Begin by preheating your oven to 400 F. Poke the top of each potato with a fork and place on a baking sheet. Cook in the oven for 1 hour. Once cooked, remove them from the baking sheet, and place on a plate to let cool for about 15 minutes.
Once your potatoes are cooled, use a sharp bread knife and cut each potato lengthwise into three segments for each potato. So each potato will yield two skins, right? You can discard the middle slice and reuse for breakfast the following morning, or heck for that matter, add some butter, salt and cream, and make some rustic mashed potatoes. When done you should have 10 skins.
With a small spoon, being careful not to poke through the skin, scoop out about 70 percent of the potato, as you still want some potato in your boat.
Next, melt your butter in the microwave. This should take 30-60 seconds or so.
Get your broiler heated to high.
Brush the butter on the inside and outside of each potato skin and place them back onto the baking sheet. Season the inside of each skin with salt and pepper.
Place them under the broiler for 8-10 minutes until the insides get a bit crispy from the melted butter. Once the edges and interior are a bit crisp and golden, remove them from the oven. Turn off the broiler, and set the oven to 425 F.
Add a generous amount of cheese into each potato boat. Top with a generous amount of ham. Simply divide the ham into six sections so each potato gets enough of it. Top with a bit more cheese.
Place the tray back into the oven, and cook for about 5 more minutes or until the cheese is nice and bubbly.
The end result is nothing short of amazing with these ham and potato skins. These are a perfect bite any time of the day, and as a matter of fact I thought they would be even more amazing with a bit of scrambled egg mixed in before baking. That would be a great breakfast bite! Regardless, these are really simple to make and made everyone happy. Next time I will simply need to make more of them as they went too fast. Hope you enjoy.
_______________________________________
Amber is a stay at home mom who lives in the heart of the Missouri Ozarks. It’s a long way from where she grew up, in Wales (yes, way over in the U.K.). The recipes in her blog Sprinkled with Flour include her original creations as well as her family recipes. Go check them out!

7 Comments
Comments are closed for this recipe.
Jayne on 1.11.2013
This looks scrumptious! Potato skins is always a crowd pleaser. Lol abt combusting into a cloud of sugar. Don’t we all feel the same!
cici on 1.11.2013
LOVE, LOVE, LOVE these any time, any where!!!! LOL
HanaS on 1.11.2013
What happens to the potato flesh scooped out? Shall we discard it? I thought you would use it in the filling. Thank you for posting it
Jon, I guess if you keep it just halved the filling (cheese and ham) would not stay on the top of the potato, this way it’s a kind of boat with some space for filling..
Amber {Sprinkled With Flour} on 1.11.2013
Hana, you can keep the discarded potato flesh and save it to make mashed potatoes or whatever you wish. The purpose of removing the excess potato is to make these into potato skins, which usually don’t have much potato in them, and leaves room for all the cheesy ham filling. If you don’t want to discard the potato, you could easily mash it up and turn these into twice baked potatoes!
Jon on 1.11.2013
Quick question — why cut out and discard a center slice? Why wouldn’t we use the entire potato, simply halved?
Amber {Sprinkled With Flour} on 1.11.2013
Hi Jon, I think the purpose of discarding the center slice is to make the boats shallower and not too deep. If your potatoes are on the smaller side you can probably skip this step.
Dax Phillips on 1.11.2013
Thanks for the replication of my recipe! That’s awesome stuff, and so glad you took the time to make them and write about them! I’m flattered on this Friday morning….