The Pioneer Woman Tasty Kitchen
Profile photo of Erica Lea

Chicken Cordon Bleu Casserole

Posted by in Step-by-Step Recipes

Tasty Kitchen Blog: Chicken Cordon Bleu Casserole. Guest post by Erica Kastner of Cooking for Seven, recipe submitted by Terri of That's Some Good Cookin'.

 
Sometimes, you just need a warm, comforting supper; something that will fill your belly and keep you satisfied.

This casserole (or, as I like to call it, hotdish) is admittedly not the most healthy on earth. But, trust me, Terri’s recipe is worth the extra calories.

Let me show you how it goes together.


Tasty Kitchen Blog: Chicken Cordon Bleu Casserole. Guest post by Erica Kastner of Cooking for Seven, recipe submitted by Terri of That's Some Good Cookin'.

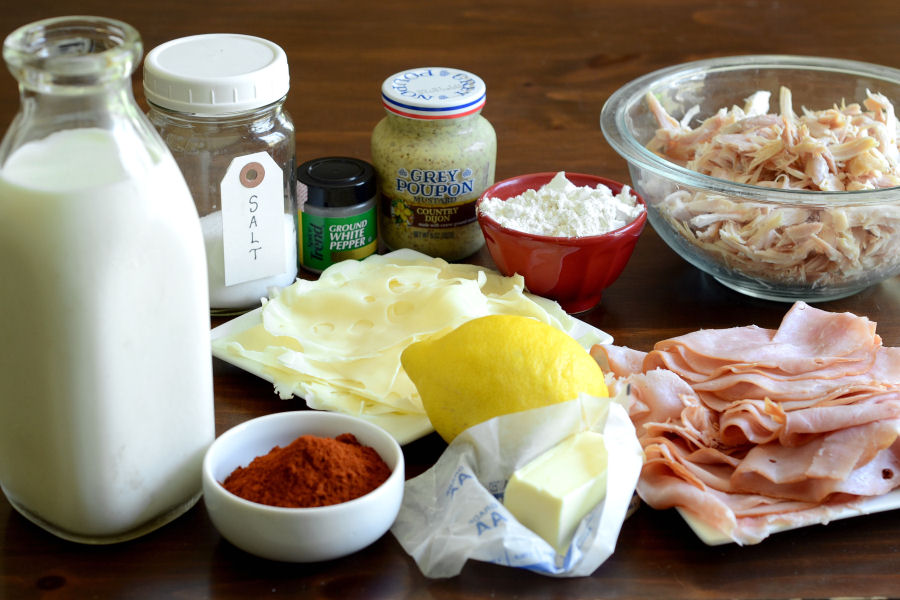
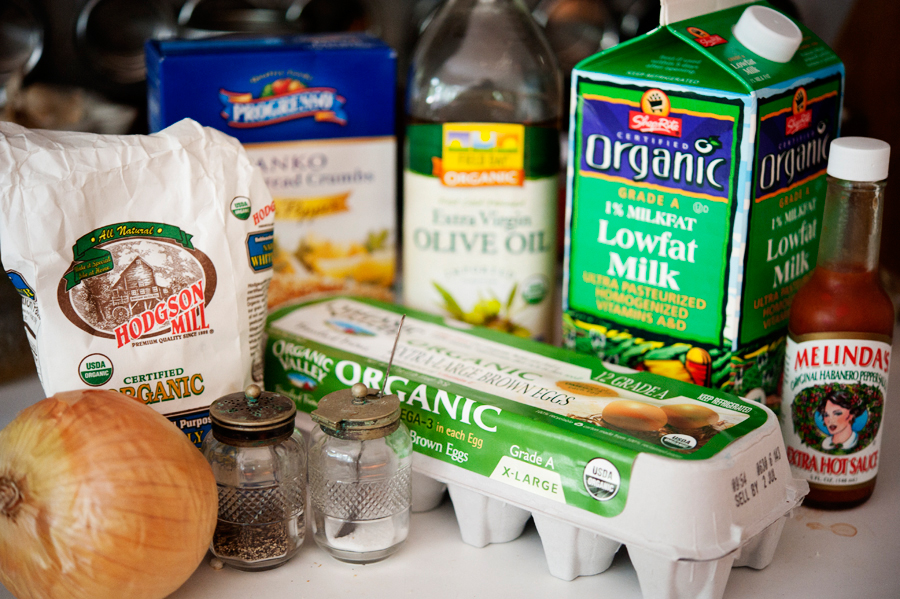
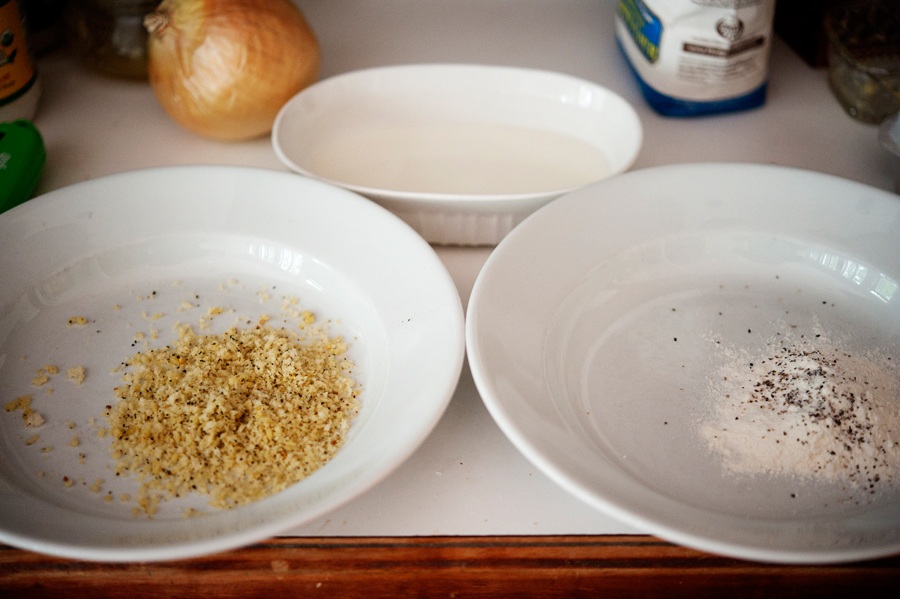
Here’s what you’ll need: 1 whole chicken (I used a rotisserie chicken), thinly sliced honey ham, thinly sliced baby Swiss cheese, butter, flour, milk, lemon, Dijon mustard, salt, smoked paprika and white pepper.


Tasty Kitchen Blog: Chicken Cordon Bleu Casserole. Guest post by Erica Kastner of Cooking for Seven, recipe submitted by Terri of That's Some Good Cookin'.

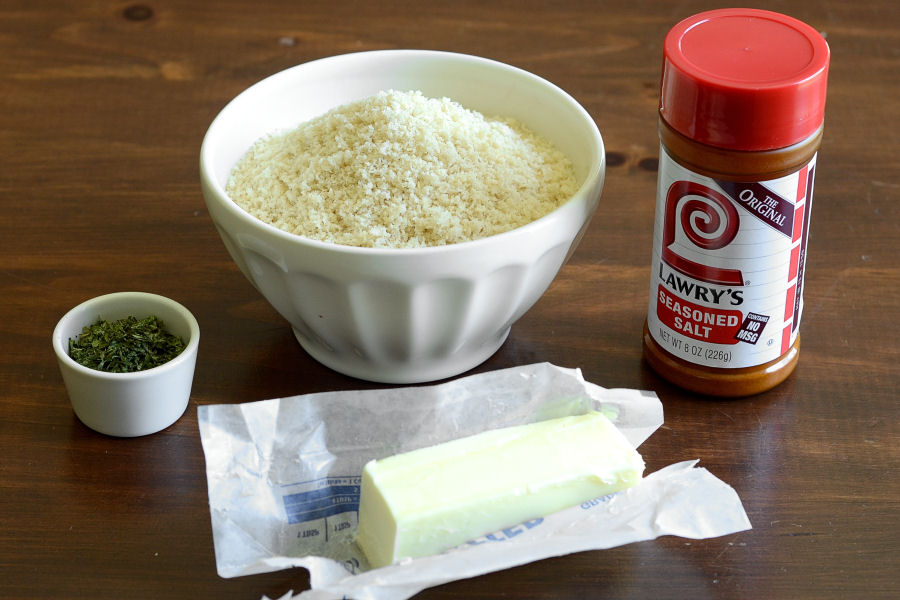
For the topping you will need: more butter (duh!), panko bread crumbs, seasoning salt and parsley.


Tasty Kitchen Blog: Chicken Cordon Bleu Casserole. Guest post by Erica Kastner of Cooking for Seven, recipe submitted by Terri of That's Some Good Cookin'.

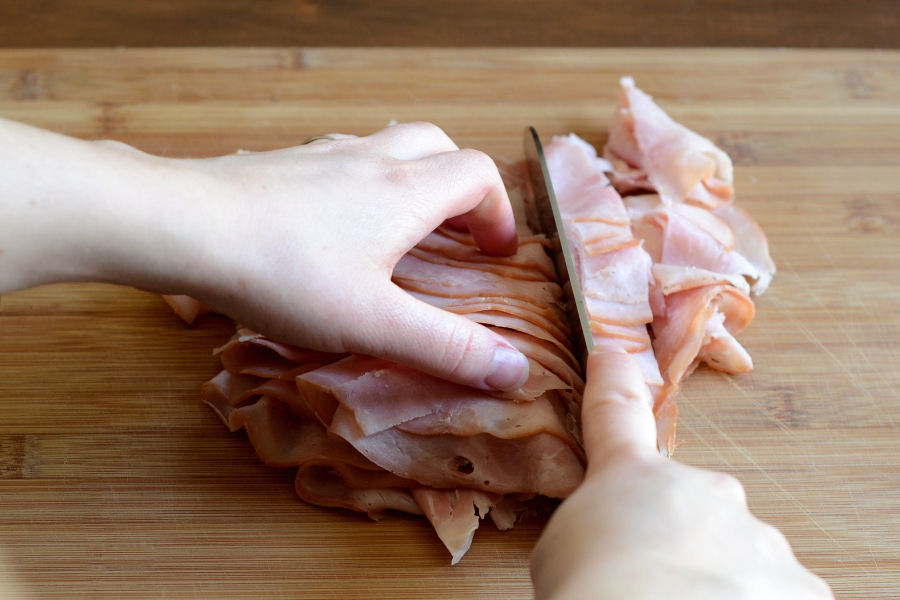
Roughly chop the ham.


Tasty Kitchen Blog: Chicken Cordon Bleu Casserole. Guest post by Erica Kastner of Cooking for Seven, recipe submitted by Terri of That's Some Good Cookin'.

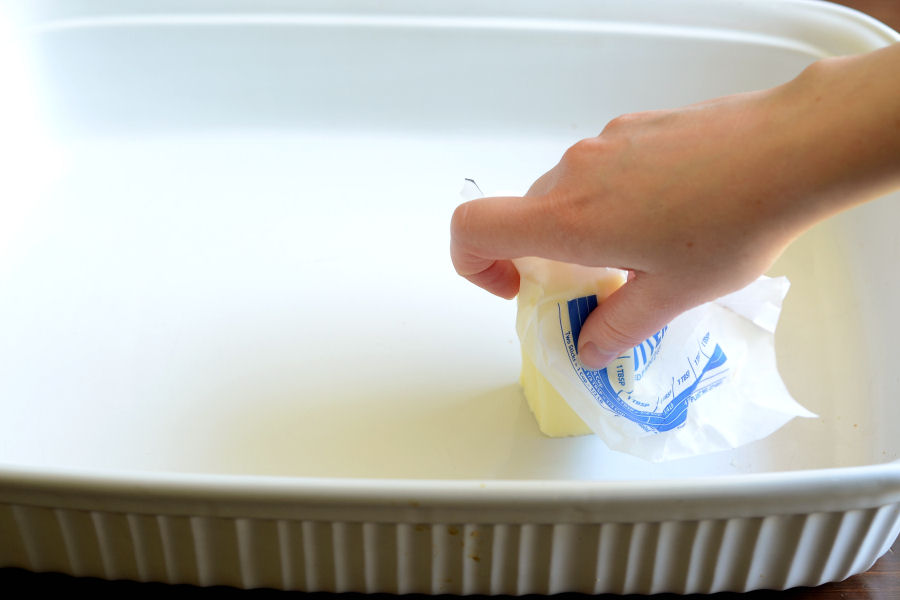
Butter a baking dish. I like to hold onto a stick of butter with the wrapper, but if you like to get your hands greasy, that’s alright, too.


Tasty Kitchen Blog: Chicken Cordon Bleu Casserole. Guest post by Erica Kastner of Cooking for Seven, recipe submitted by Terri of That's Some Good Cookin'.

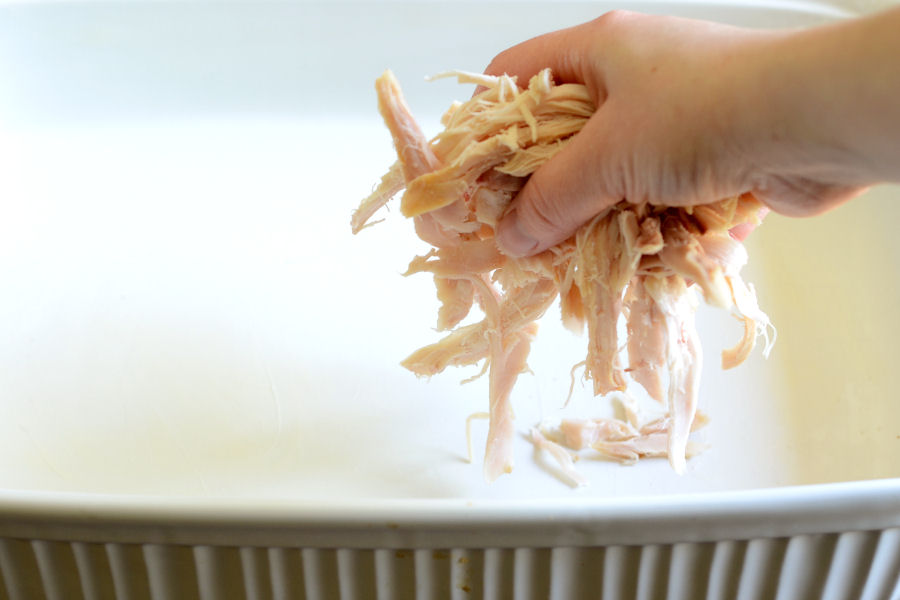
Place the shredded or diced chicken in the bottom of the pan.


Tasty Kitchen Blog: Chicken Cordon Bleu Casserole. Guest post by Erica Kastner of Cooking for Seven, recipe submitted by Terri of That's Some Good Cookin'.

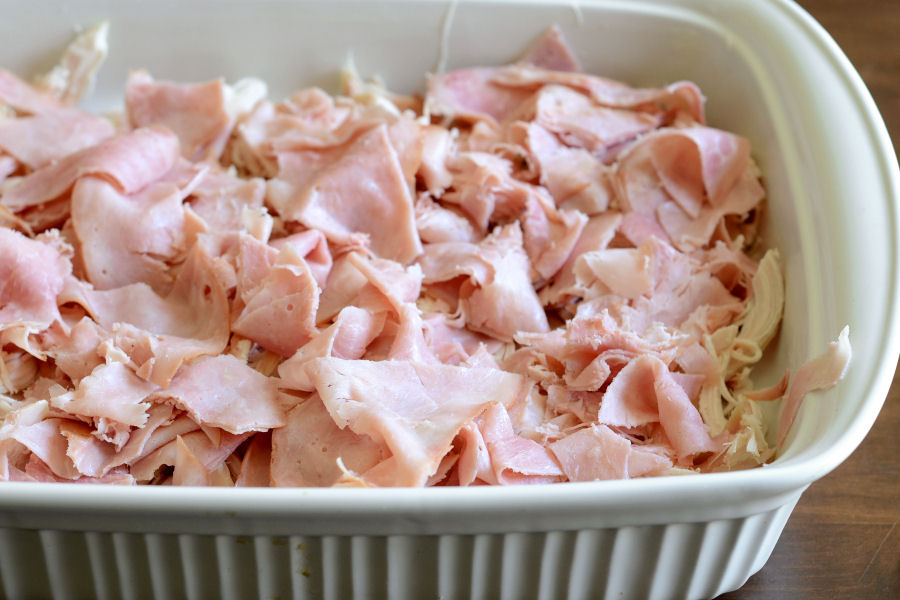
Put the chopped ham on top.


Tasty Kitchen Blog: Chicken Cordon Bleu Casserole. Guest post by Erica Kastner of Cooking for Seven, recipe submitted by Terri of That's Some Good Cookin'.

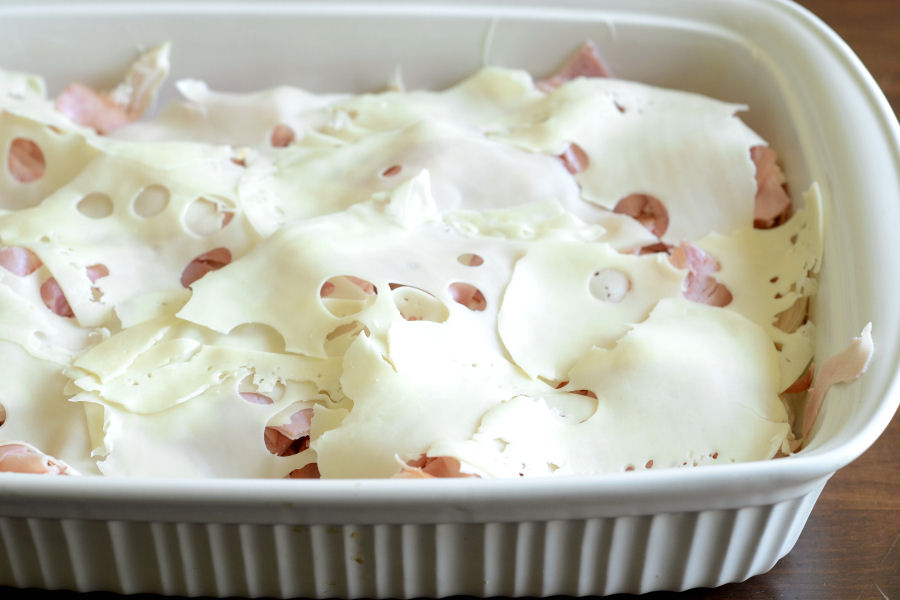
Place the sliced cheese on top of the ham.


Tasty Kitchen Blog: Chicken Cordon Bleu Casserole. Guest post by Erica Kastner of Cooking for Seven, recipe submitted by Terri of That's Some Good Cookin'.

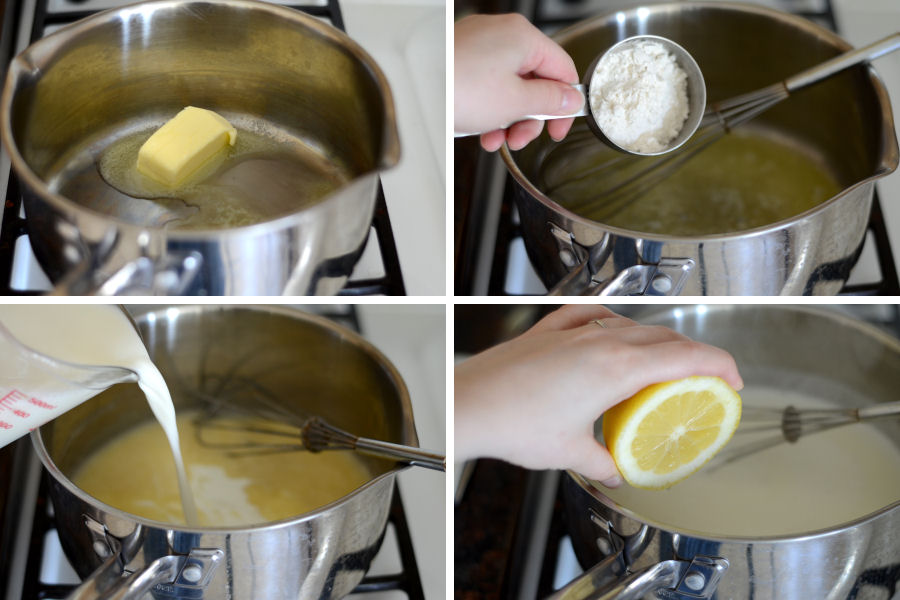
Now make the white sauce: Melt the butter in a saucepan over medium heat. Whisk in the flour and cook until bubbly and smooth. Slowly add the milk. Cook until thickened. Add the lemon juice …


Tasty Kitchen Blog: Chicken Cordon Bleu Casserole. Guest post by Erica Kastner of Cooking for Seven, recipe submitted by Terri of That's Some Good Cookin'.

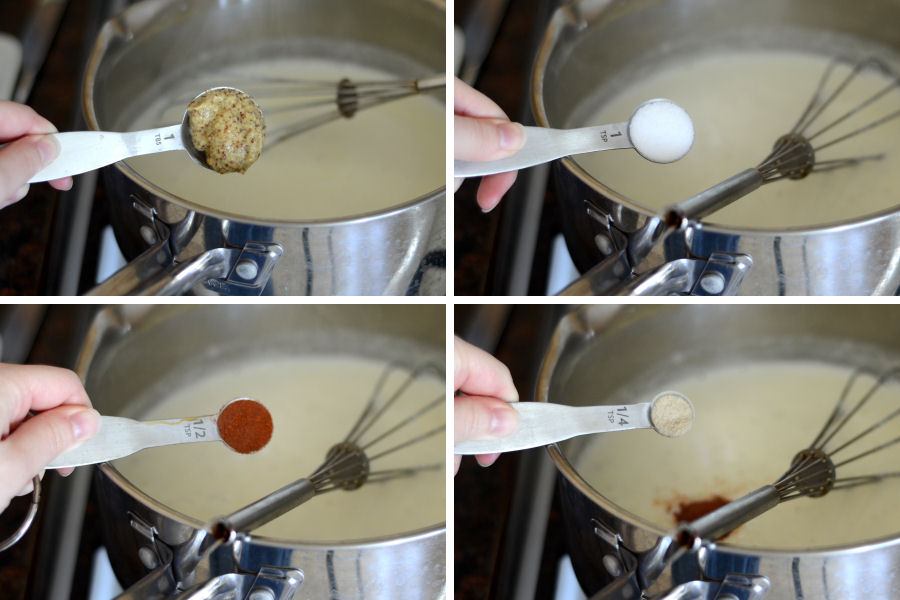
… mustard, salt, paprika and white pepper. Bring up to a boil and remove from heat.


Tasty Kitchen Blog: Chicken Cordon Bleu Casserole. Guest post by Erica Kastner of Cooking for Seven, recipe submitted by Terri of That's Some Good Cookin'.

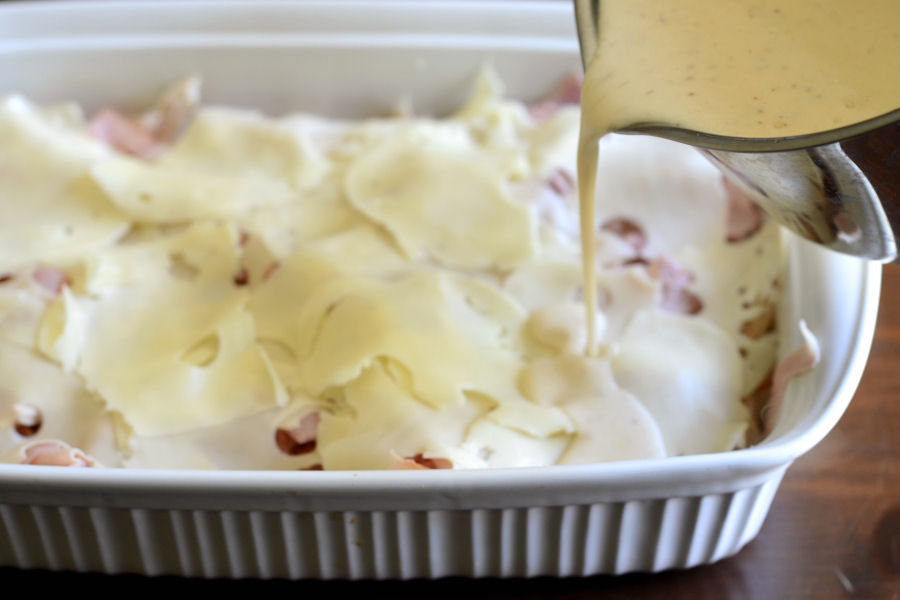
Pour the sauce over the chicken/ham/cheese in the pan.


Tasty Kitchen Blog: Chicken Cordon Bleu Casserole. Guest post by Erica Kastner of Cooking for Seven, recipe submitted by Terri of That's Some Good Cookin'.

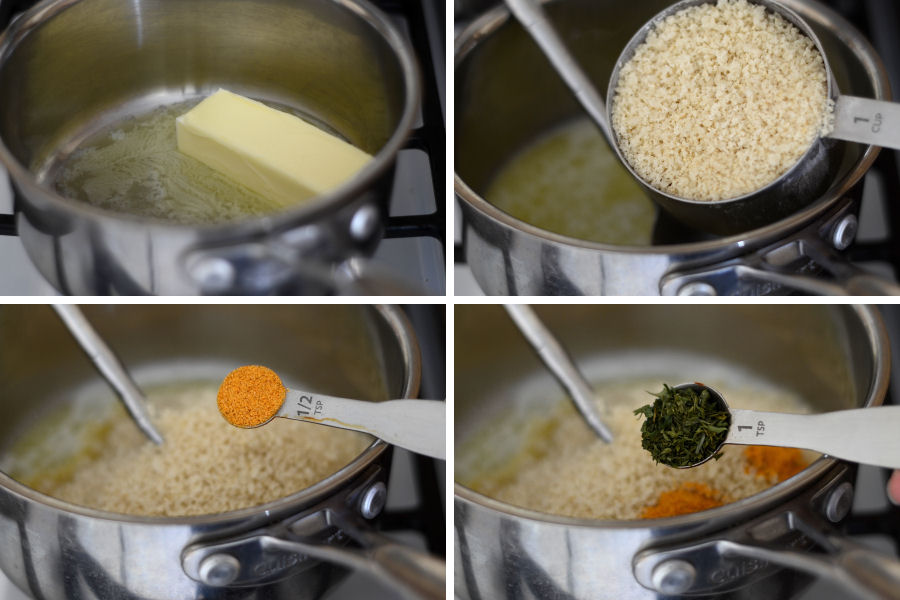
Time to make the topping: Melt the butter. Stir in the breadcrumbs, seasoning salt and parsley.


Tasty Kitchen Blog: Chicken Cordon Bleu Casserole. Guest post by Erica Kastner of Cooking for Seven, recipe submitted by Terri of That's Some Good Cookin'.

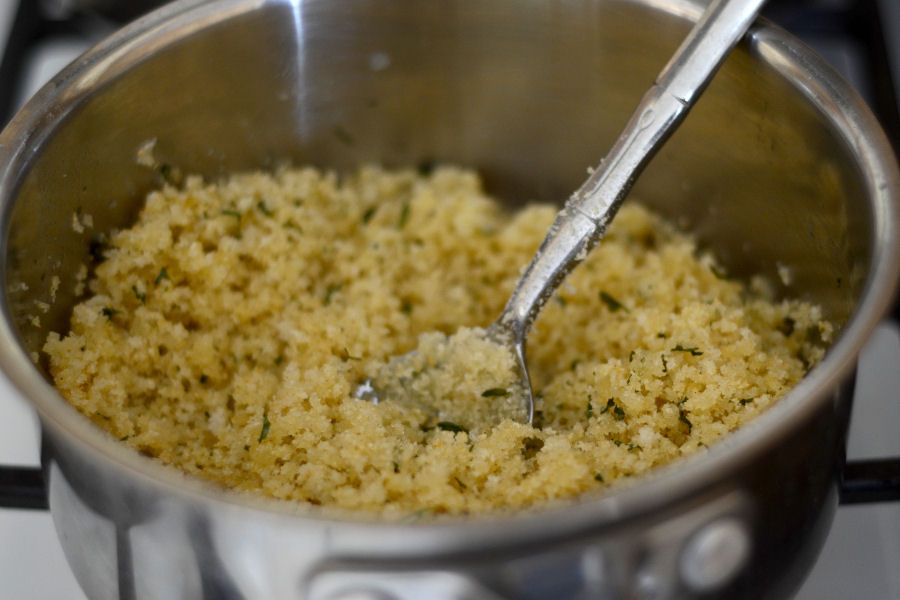
Just look at that buttery goodness. Mmhmm.


Tasty Kitchen Blog: Chicken Cordon Bleu Casserole. Guest post by Erica Kastner of Cooking for Seven, recipe submitted by Terri of That's Some Good Cookin'.

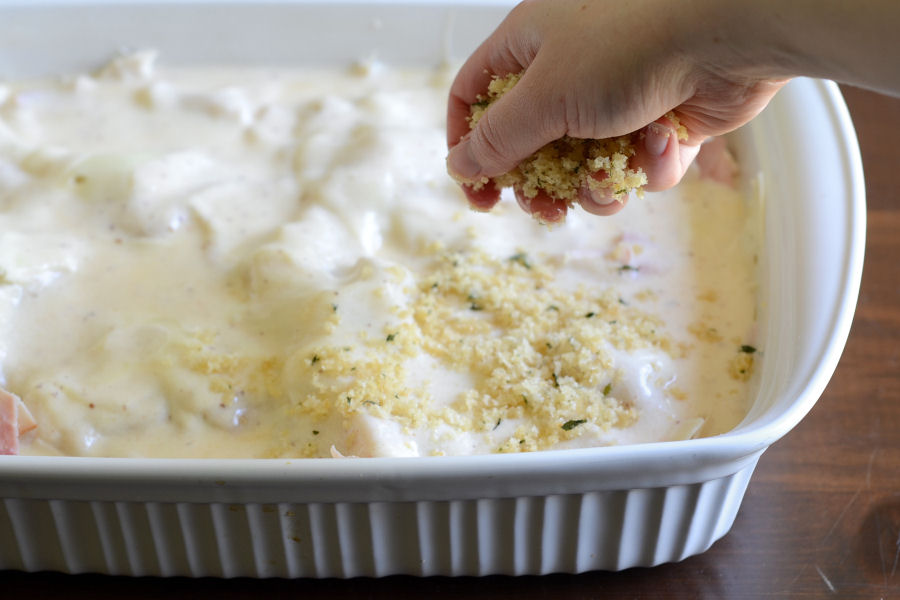
Sprinkle the topping over the sauce-laden chicken/ham/cheese. Oh yeah.


Tasty Kitchen Blog: Chicken Cordon Bleu Casserole. Guest post by Erica Kastner of Cooking for Seven, recipe submitted by Terri of That's Some Good Cookin'.

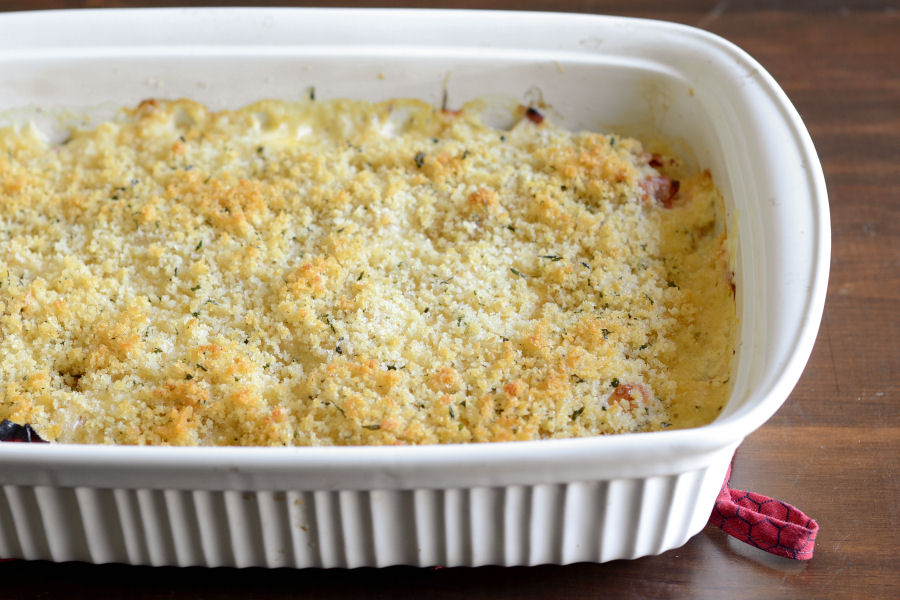
Bake at 350ºF until bubbly and the topping is lightly browned.


Tasty Kitchen Blog: Chicken Cordon Bleu Casserole. Guest post by Erica Kastner of Cooking for Seven, recipe submitted by Terri of That's Some Good Cookin'.

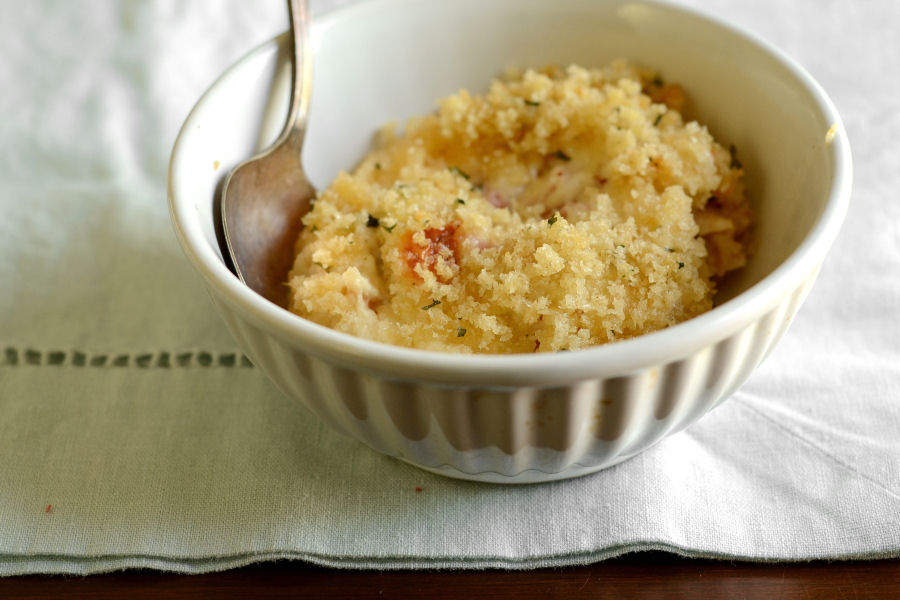
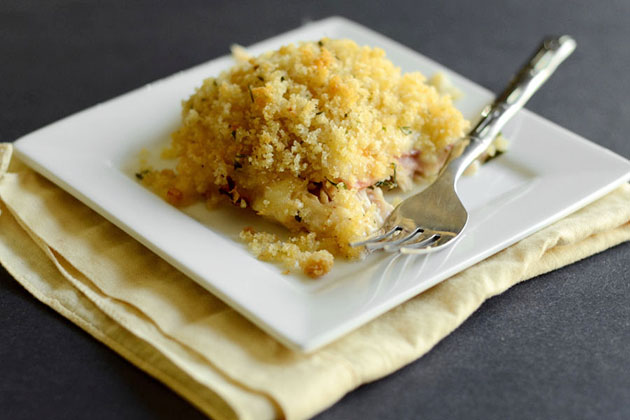
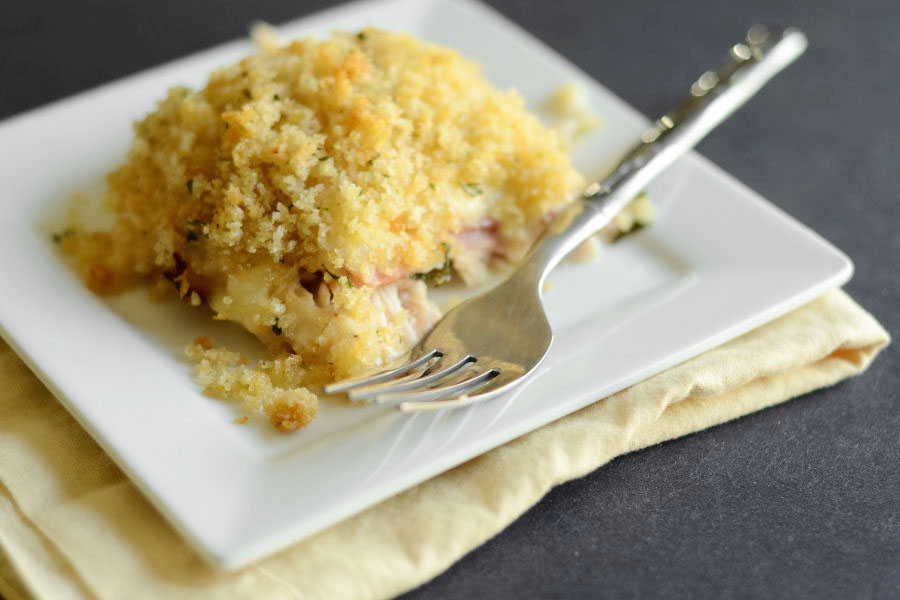
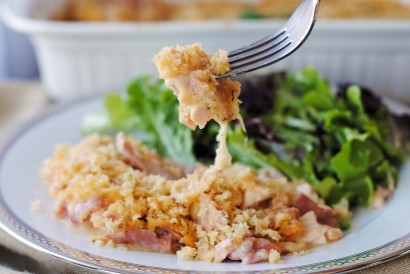
Allow to cool for 5-10 minutes before serving. Then, dig in!


Tasty Kitchen Blog: Chicken Cordon Bleu Casserole. Guest post by Erica Kastner of Cooking for Seven, recipe submitted by Terri of That's Some Good Cookin'.

Recipe Notes:

1. I thought this was brilliant. It tasted a lot like Chicken Cordon Bleu, only richer and creamier. Which is always good, in my book.
2. The sauce didn’t seem to want to thicken up too well for me. Next time I might add a bit more flour.
3. The lemon in the sauce was brilliant. It added just the right amount of tang.

 
Thanks so much to Terri for sharing this delicious recipe! Make sure to check out her blog, That’s Some Good Cookin’, for more lip-smacking recipes. This Cinnamon Roll Cake looks insane. And this Browned Butter Banana Bread sounds scrumptious.


Printable Recipe

Chicken Cordon Bleu Casserole

See post on Terri @ that's some good cookin'’s site!
4.52 Mitt(s) 54 Rating(s)54 votes, average: 4.52 out of 554 votes, average: 4.52 out of 554 votes, average: 4.52 out of 554 votes, average: 4.52 out of 554 votes, average: 4.52 out of 5

Prep Time:

Cook Time:

Difficulty: Easy

Servings: 8

8
x

Print Options

Page size Letter 3x5 4x6
Text Size Small Medium Large
Content Include description
Include prep time, etc.
Show image

Description

Classic flavor, homespun ease.

Please note: due to comments about the salt content of this recipe, the amount of salt has been reduced.

Ingredients

  • FOR THE CASSEROLE:
  • 1 whole Cooked Chicken, Bones Removed, Meat Diced Or Shredded (rotisserie Chicken Is Excellent, Should Be 5-6 Cups Of Chicken
  • ½ pounds Very Thinly Sliced Deli-style Honey Ham, Rough Chopped
  • ¼ pounds Thin Sliced Baby Swiss Cheese
  • FOR THE SAUCE:
  • 4 Tablespoons Butter
  • 4 Tablespoons Flour
  • 3 cups Whole Milk (or A Bit More If Needed; Whole Milk Is Required)
  • 2 Tablespoons Fresh Squeezed Lemon Juice
  • 1 Tablespoon Dijon Mustard
  • ¾ teaspoons Salt
  • ½ teaspoons Smoked Paprika
  • ¼ teaspoons White Pepper
  • FOR THE TOPPING:
  • 1-½ cup Panko Breadcrumbs
  • 4 Tablespoons Butter, Melted
  • ½ teaspoons Seasoning Salt
  • 1-½ teaspoon Crushed Dried Parsley

Preparation Instructions

(2/19/2015—Please note: due to comments about the salt content of this recipe, the amount of salt has been reduced.)

Preheat oven to 350 F. Butter a 9×13-inch baking dish. Set aside.

Put cooked shredded or diced chicken on the bottom of the baking dish. Rough chop the ham and scatter it over the top of the chicken. Lay the Swiss cheese on top of the ham.

For the sauce:

Melt the butter in a large sauce pot over medium heat. When butter is melted, quickly stir in the flour to form a smooth roux. Do not brown! Once the roux is smooth and bubbly, slowly pour in the cold milk while stirring briskly to make a smooth sauce. Cook over medium heat, stirring constantly until the sauce thickens. Stir in the lemon juice, Dijon mustard, salt, smoked paprika and white pepper. Bring sauce just back to a low boil and turn off heat. Pour sauce evenly over the casserole, being certain to get some of the sauce around the edges of the pan.

For the topping:

Melt the butter in the microwave in a medium sized microwaveable bowl. Heat it for 30 seconds at a time and stop once it’s melted. Take the bowl out of the microwave and stir in the panko bread crumbs, crushed dried parsley. Sprinkle over the top of the casserole.

Bake casserole uncovered for 45 minutes until hot and bubbly throughout and topping has turned a light golden brown. Remove from oven and allow to cool for 5-10 minutes prior to serving.


_______________________________________

Newly-married Erica Kastner shares her wonderful recipes and amazing food photography on her blog, Cooking for Seven. She also writes about crafts and posts more of her beautiful photography in her personal blog, EricaLea.com. There really isn’t much that this amazing young lady can’t do, and we’re thrilled she does some of it here.


Profile photo of cookincanuck

Chipotle Shrimp Salad Bowls

Posted by in Step-by-Step Recipes

Tasty Kitchen Blog: Chipotle Shrimp Salad Bowls. Guest post by Dara Michalski of Cookin' Canuck, recipe submitted by Bev Weidner of Bev Cooks.

 
Are you ready for some smoky heat? Well, you have definitely come to the right place. This salad is filled with the flavors of summer: fresh lettuce, ripe avocado and tomatoes. Top that with herb and spice-infused rice, black beans and corn, plus some chipotle shrimp and you have one very satisfying meal.

These Chipotle Shrimp Salad Bowls from Tasty Kitchen member Bev Weidner can pack a punch of heat, but you have some control the level of heat by adjusting the amount of marinade you use to cook the shrimp. If you’re the kind of guy or gal that likes a good sweat-inducing amount of heat, then use every last drop of that marinade. If that’s not you, then scrape/shake most of the marinade and chipotle pepper from the shrimp before cooking them. It’s up to you.

Let’s get cooking.


Tasty Kitchen Blog: Chipotle Shrimp Salad Bowls. Guest post by Dara Michalski of Cookin' Canuck, recipe submitted by Bev Weidner of Bev Cooks.

Here’s everything you’re going to need for this recipe. Packed with flavor!


Tasty Kitchen Blog: Chipotle Shrimp Salad Bowls. Guest post by Dara Michalski of Cookin' Canuck, recipe submitted by Bev Weidner of Bev Cooks.

Using a rice cooker or a saucepan, combine the rice with water, chopped cilantro and the juice of a ½ lime. Bev recommends brown jasmine rice for this recipe, which would work beautifully. I only had regular brown rice on hand and it was a great substitute.

Cook the rice according to the package instructions, fluff and squeeze in more lime juice.


Tasty Kitchen Blog: Chipotle Shrimp Salad Bowls. Guest post by Dara Michalski of Cookin' Canuck, recipe submitted by Bev Weidner of Bev Cooks.

Puree the chipotle peppers and the adobo sauce in a food processor until smooth.


Tasty Kitchen Blog: Chipotle Shrimp Salad Bowls. Guest post by Dara Michalski of Cookin' Canuck, recipe submitted by Bev Weidner of Bev Cooks.

Pour the pureed chipotle peppers into a resealable plastic bag and add the shrimp.


Tasty Kitchen Blog: Chipotle Shrimp Salad Bowls. Guest post by Dara Michalski of Cookin' Canuck, recipe submitted by Bev Weidner of Bev Cooks.

Seal the bag and gently massage the shrimp (they like that) until they are coated with the sauce. Bev recommends sticking them in the fridge to marinate for “at least 2 Tom and Jerry episodes.” My kids are big Tom & Jerry fans, so I happen to know that two episodes last about 20 minutes.


Tasty Kitchen Blog: Chipotle Shrimp Salad Bowls. Guest post by Dara Michalski of Cookin' Canuck, recipe submitted by Bev Weidner of Bev Cooks.

In a small saucepan, heat the olive oil over medium-low heat. Add the defrosted corn, black beans, ground cumin, chili powder, salt and pepper. Keep warm on low heat until you’re ready to assemble the salad.


Tasty Kitchen Blog: Chipotle Shrimp Salad Bowls. Guest post by Dara Michalski of Cookin' Canuck, recipe submitted by Bev Weidner of Bev Cooks.

Chop up a bunch of romaine lettuce for your salad.


Tasty Kitchen Blog: Chipotle Shrimp Salad Bowls. Guest post by Dara Michalski of Cookin' Canuck, recipe submitted by Bev Weidner of Bev Cooks.

Heat a large skillet over medium-high heat. Bev recommended a medium skillet, but I found the shrimp fit a little better in a large one. You really don’t need any oil to sauté with because there is plenty of liquid in the marinade. However, if you’re nervous about your pans, coat them with cooking spray first.

Okay, so here’s where you have to make a decision. If you want to go easy on the heat (which I suggest), shake and/or scrape a good deal of the marinade off of the shrimp. The shrimp will still have plenty of flavor and heat. How much of the marinade you use is completely up to you and your taste buds.

Sear the shrimp for 2 minutes, flip over and sear for 1 additional minute. Remove from the pan.


Tasty Kitchen Blog: Chipotle Shrimp Salad Bowls. Guest post by Dara Michalski of Cookin' Canuck, recipe submitted by Bev Weidner of Bev Cooks.

Divide the romaine lettuce between two large plates or bowls, followed by the rice, corn and bean mixture.


Tasty Kitchen Blog: Chipotle Shrimp Salad Bowls. Guest post by Dara Michalski of Cookin' Canuck, recipe submitted by Bev Weidner of Bev Cooks.

Top with the shrimp, avocados and tomatoes. Squeeze more lime over top and serve.

Thanks so much to Bev Weidner for this recipe. Be sure to check out Bev’s blog Bev Cooks. Not only does Bev take beautiful photos and come up with mouth-watering recipes, but she is completely nutty (I mean this as a compliment) and will give you a good chuckle with every one of her posts.


Printable Recipe

Chipotle Shrimp Salad Bowls

See post on Bev Weidner’s site!
5.00 Mitt(s) 2 Rating(s)2 votes, average: 5.00 out of 52 votes, average: 5.00 out of 52 votes, average: 5.00 out of 52 votes, average: 5.00 out of 52 votes, average: 5.00 out of 5

Prep Time:

Cook Time:

Difficulty: Easy

Servings: 2

2
x

Print Options

Page size Letter 3x5 4x6
Text Size Small Medium Large
Content Include description
Include prep time, etc.
Show image

Description

If you need to climb in, go right ahead.

Ingredients

  • 1 can (7.5 Oz. Size) Chipotle Peppers In Their Adobo Sauce
  • 1 pound Frozen Raw Shrimp, Thawed, Peeled And Deveined
  • ½ cups Brown Jasmine Rice
  • ½ cups Freshly Cilantro, Chopped
  • 1 whole Lime, Divided
  • 1 teaspoon Extra Virgin Olive Oil
  • ½ cups Frozen Corn
  • ½ cans (14.5 Oz. Size) Black Beans, Drained And Rinsed.
  • 1 pinch Coarse Salt And Freshly Ground Pepper
  • 1 teaspoon Ground Cumin
  • 1 teaspoon Chili Powder
  • 2 heads Romaine Hearts, Sliced Into Thin Ribbons And Chopped
  • 1 whole Avocado, diced
  • ½ cups Cherry Tomatoes

Preparation Instructions

Puree the chipotle peppers and their sauce in a small food processor until smooth. Pour into a small baggy. Dump the shrimp into the baggy and squish the sauce all around them, getting everything all coated. Stick in the fridge and marinate as long as you want, at least 2 Tom and Jerry episodes.

In the meantime, cook the rice in a rice cooker (or the traditional way) with the cilantro and the juice from 1/2 the lime. Once cooked, give another squeeze of lime juice into it.

Heat the oil in a small saucepan and add the corn and beans. Season with a pinch of salt and pepper, along with the cumin and chili powder. Keep heated on low until you’re ready to assemble.

Layer the shrimp in a medium skillet (you don’t need any oil as the marinade is plenty liquidy) and sear the shrimp one on side for 2 minutes. Flip and sear another minute.

Evenly divide the romaine over 2 large plates or dinner bowls. Top with rice, corn and beans, shrimp, avocado and tomatoes.

Garnish with more lime and another giant squeeze of lime juice!


_______________________________________

Dara Michalski is a doll and a sweetheart who clearly knows her way around the kitchen. She blogs at Cookin’ Canuck, where she shares her flavor-packed recipes and fun, engaging writing. The photography’s pretty incredible, too.


Profile photo of georgiapellegrini

Onion Ring Eggs

Posted by in Step-by-Step Recipes

Tasty Kitchen Blog: Onion Ring Eggs. Guest post by Georgia Pellegrini, recipe submitted by TK member Carrie of Kiss My Whisk.

 
Seeing as I grew up with chickens roaming around the back yard, I eat eggs most mornings for breakfast. It’s just what I enjoy and I’m a creature of habit. So I’m always seeking new ways to prepare them in the mornings and these Onion Ring Eggs shared by kissmywhisk was one that I definitely had never tried before.

The recipe was inspired by a post on Apron Strings (mom Donna is a Tasty Kitchen member, too!) that used a sautéed onion as a ring mold for eggs (they’re Tasty Kitchen members too!), but Carrie added the extra crunch of panko. It was so delicious that I also made it for dinner one night.


Tasty Kitchen Blog: Onion Ring Eggs. Guest post by Georgia Pellegrini, recipe submitted by TK member Carrie of Kiss My Whisk.

You will need: a large onion, flour, panko bread crumbs, oil, milk, hot sauce (for garnish), eggs, salt and pepper.


Tasty Kitchen Blog: Onion Ring Eggs. Guest post by Georgia Pellegrini, recipe submitted by TK member Carrie of Kiss My Whisk.

Begin by distributing the flour, breadcrumbs and milk into three bowls. Season the flour with salt and pepper while you’re at it.


Tasty Kitchen Blog: Onion Ring Eggs. Guest post by Georgia Pellegrini, recipe submitted by TK member Carrie of Kiss My Whisk.

Cut an onion in half in the center where it is widest.


Tasty Kitchen Blog: Onion Ring Eggs. Guest post by Georgia Pellegrini, recipe submitted by TK member Carrie of Kiss My Whisk.

Then cut a thick slice, about ¼-inch.


Tasty Kitchen Blog: Onion Ring Eggs. Guest post by Georgia Pellegrini, recipe submitted by TK member Carrie of Kiss My Whisk.

Separate the rings and set aside the biggest ones.


Tasty Kitchen Blog: Onion Ring Eggs. Guest post by Georgia Pellegrini, recipe submitted by TK member Carrie of Kiss My Whisk.

Dust them in flour.


Tasty Kitchen Blog: Onion Ring Eggs. Guest post by Georgia Pellegrini, recipe submitted by TK member Carrie of Kiss My Whisk.

Then in some milk.


Tasty Kitchen Blog: Onion Ring Eggs. Guest post by Georgia Pellegrini, recipe submitted by TK member Carrie of Kiss My Whisk.

Then in some panko. You won’t get a full coating this way, but it doesn’t really need it. If you’re looking for more of a true onion ring style, you could combine flour, and a dash of salt, and then whisk in beer until you get a pancake batter consistency. That will give you a heavy-duty coating. But this was lovely for a breakfast.


Tasty Kitchen Blog: Onion Ring Eggs. Guest post by Georgia Pellegrini, recipe submitted by TK member Carrie of Kiss My Whisk.

Brown the onions on all sides in the pan. They will become soft.


Tasty Kitchen Blog: Onion Ring Eggs. Guest post by Georgia Pellegrini, recipe submitted by TK member Carrie of Kiss My Whisk.

Crack your eggs one at a time and drop them in the center of the onion ring.


Tasty Kitchen Blog: Onion Ring Eggs. Guest post by Georgia Pellegrini, recipe submitted by TK member Carrie of Kiss My Whisk.

Let them cook on one side until the whites firm up.


Tasty Kitchen Blog: Onion Ring Eggs. Guest post by Georgia Pellegrini, recipe submitted by TK member Carrie of Kiss My Whisk.

Then add a bit of salt and pepper to the top and cover them to help the tops finish cooking.

You could also go wild here and add cheese, herbs or anything else you’d like on the top.


Tasty Kitchen Blog: Onion Ring Eggs. Guest post by Georgia Pellegrini, recipe submitted by TK member Carrie of Kiss My Whisk.

Garnish with a few good dashes of your favorite hot sauce.


Tasty Kitchen Blog: Onion Ring Eggs. Guest post by Georgia Pellegrini, recipe submitted by TK member Carrie of Kiss My Whisk.

And dig in! This was heavenly. They are now officially in my breakfast repertoire. Check out all of Carrie’s fabulous recipes on her blog Kiss My Whisk!


Printable Recipe

Onion Ring Eggs

See post on Kiss My Whisk’s site!
5.00 Mitt(s) 3 Rating(s)3 votes, average: 5.00 out of 53 votes, average: 5.00 out of 53 votes, average: 5.00 out of 53 votes, average: 5.00 out of 53 votes, average: 5.00 out of 5

Prep Time:

Cook Time:

Difficulty: Easy

Servings: 2

2
x

Print Options

Page size Letter 3x5 4x6
Text Size Small Medium Large
Content Include description
Include prep time, etc.
Show image

Description

A fun twist on egg-in-the-hole and a great excuse to have onion rings for breakfast!

Ingredients

  • 2 whole Large Onion Rings, Sliced Thick From A Large Onion
  • ½ cups Flour
  • 1 teaspoon Salt, Divided
  • 1 teaspoon Ground Black Pepper, Divided
  • ½ cups Milk Or Buttermilk
  • ¾ cups Panko Crumbs
  • ¾ cups Olive Oil
  • 2 whole Eggs
  • Hot Sauce, To Serve

Preparation Instructions

Use the largest 2 outside ring layers of a large onion.

Combine flour, 1/2 teaspoon of salt and 1/2 teaspoon of pepper in a small bowl. Add milk to a second small bowl and panko to a third.

Add olive oil to non stick pan, so there is about 1/4 inch of oil in the pan and preheat over medium high to high heat.

Dredge onions in flour, then dip in milk and coat with panko. Add breaded onions to hot oil; once the bottom side browns, flip over. You can use tongs to brown thick sides of onions as well. Just do the best you can, that’s what I did!

Once onions are browned on all sides, reduce heat to medium and carefully crack eggs into the center of the onion. Sprinkle eggs with remaining salt and pepper and then cover. Cook for about 4 to 6 minutes, until egg is cooked and yolk is still runny (cook longer if you don’t want an over-easy egg).

Carefully use spatula to remove from pan and place on a plate. Garnish with a sprinkle or drizzle of hot sauce and enjoy!

Recipe inspired by Donna and Anne of Apron Strings.


_______________________________________

There’s so much to say about Georgia, we don’t know where to start. Leaving Wall Street for the French Culinary Institute, followed by a stint at the Gramercy Tavern and La Chassagnette in France, her passion for food and food traditions are evident and inspiring. Visit her site at Georgia Pellegrini, where you’ll find more recipes, photos, learn all about her wonderful books Girl Hunter and Food Heroes, and enjoy her latest adventures.