The Pioneer Woman Tasty Kitchen
Profile photo of missamy

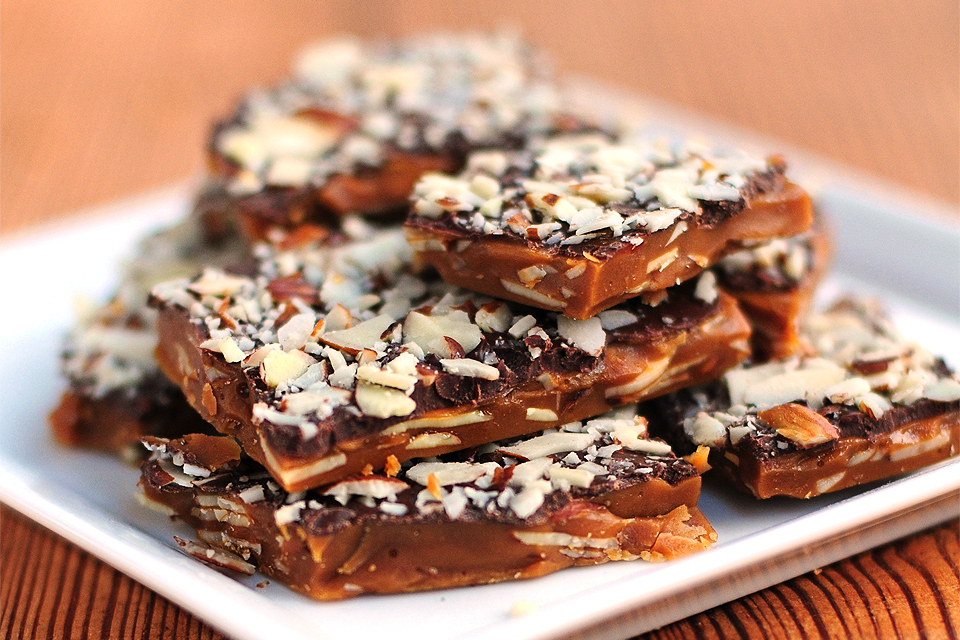
Almond Roca

Posted by in Holidays, Step-by-Step Recipes

Tasty Kitchen Blog: Almond Roca. Guest post by Amy Johnson of She Wears Many Hats, recipe submitted by TK member mdatwell.

 
As far as candy making goes, I pretty much stink. So when I stumbled across this recipe from Tasty Kitchen member mdatwell for Almond Roca, even though I was tempted by the short list of tasty ingredients, I was a bit hesitant knowing my lack of skilz in that department. For realz. I’ve gotz no candy making skilz.

Or at least I didn’t used to have any.

Now, I can attest that, with the help of mdatwell and her excellent directions, I rocked the roca. It was super easy and quick. In no time, and with only one pot and one pan dirty, there was Heath Bar-like goodness before me. Not that it lasted long. This Almond Roca is some mighty fine eats y’all.

So what are we waiting for? Let’s get started! Let’s rock the roca!


Tasty Kitchen Blog: Almond Roca. Guest post by Amy Johnson of She Wears Many Hats, recipe submitted by TK member mdatwell.

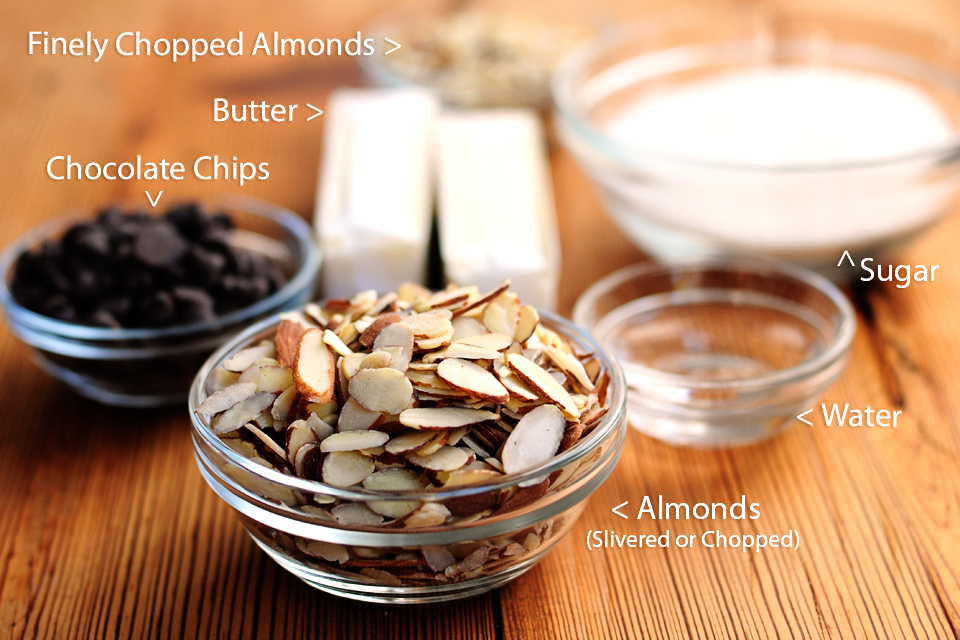
You’ll need butter, sugar, water, chopped or slivered almonds, chocolate chips, and more almonds, finely chopped. Simple.

(For this demonstration, I halved the ingredients. Be sure to check out the full recipe with ingredient amounts listed.)

Before starting, have a sheet pan(s) greased and ready to the side. For half the recipe, I used a quarter-size sheet pan (13″ x 9″), so the full recipe should call for a half-size sheet pan (18″ x 13″).


Tasty Kitchen Blog: Almond Roca. Guest post by Amy Johnson of She Wears Many Hats, recipe submitted by TK member mdatwell.

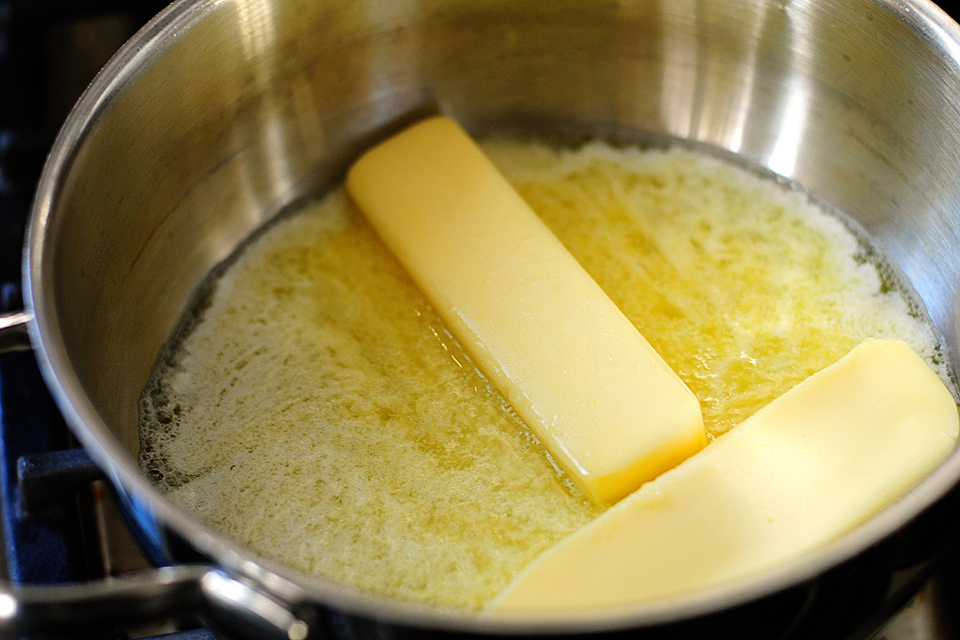
Begin by combining the first three ingredients—the butter, water and sugar—in a medium saucepan. I started by melting the butter first.


Tasty Kitchen Blog: Almond Roca. Guest post by Amy Johnson of She Wears Many Hats, recipe submitted by TK member mdatwell.

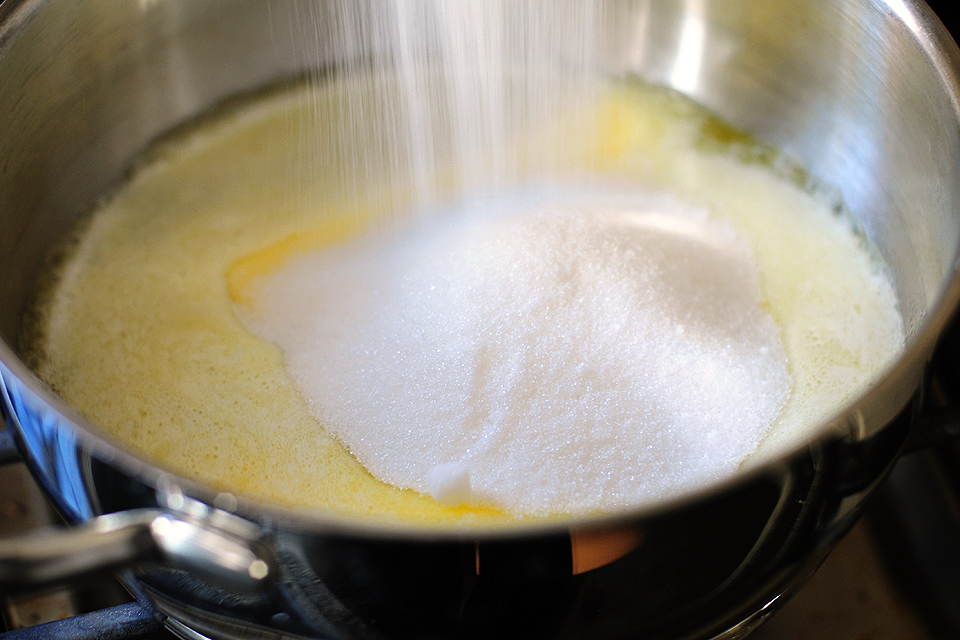
Add the sugar.


Tasty Kitchen Blog: Almond Roca. Guest post by Amy Johnson of She Wears Many Hats, recipe submitted by TK member mdatwell.

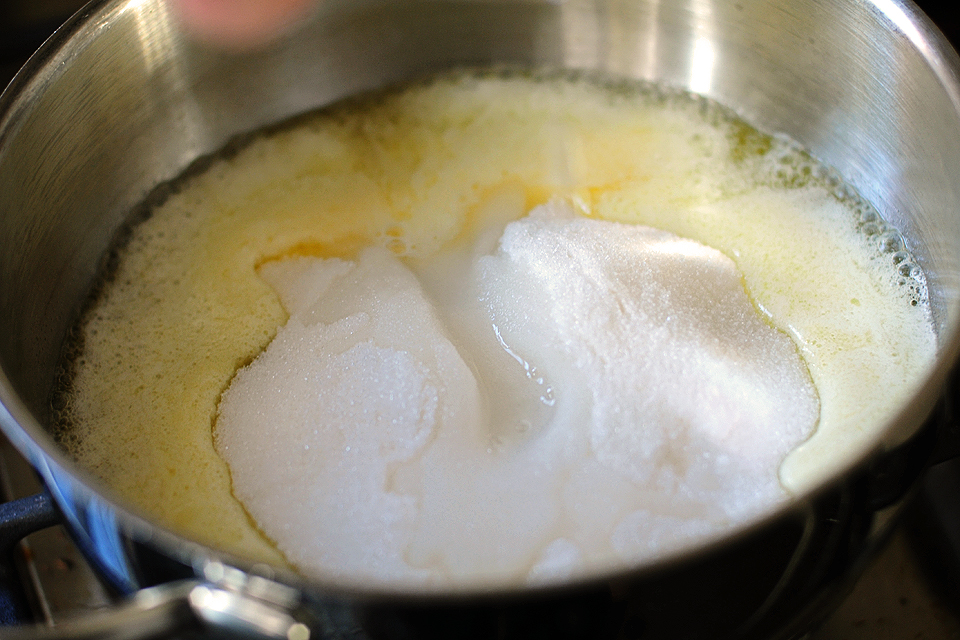
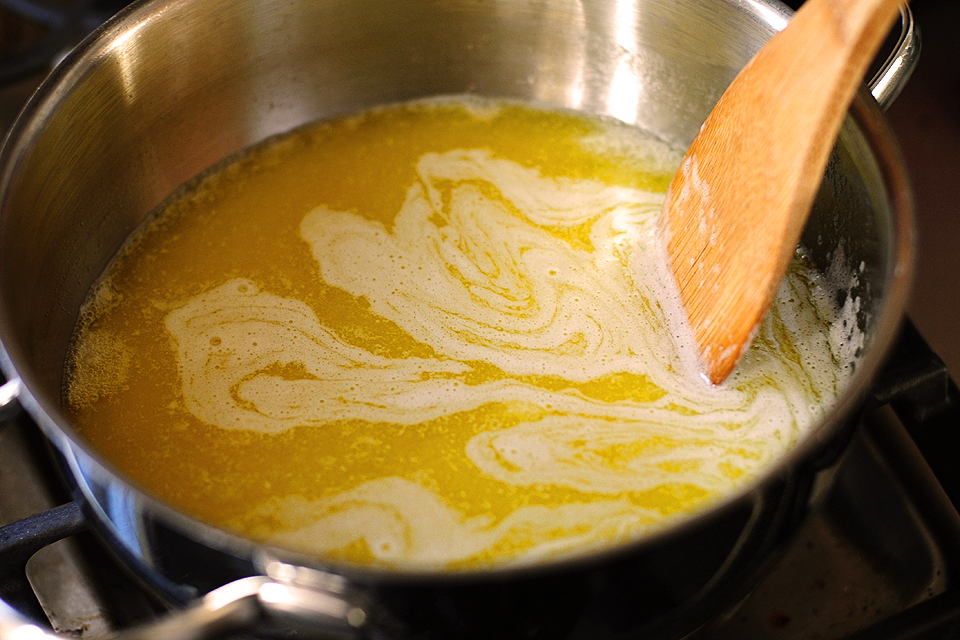
Then the water. What I liked about mdatwell’s instructions was the visual indicators she gave. I’m a visual person, so the three stages she described to watch for—runny, “cheesy” and runny/smooth—worked perfectly for me.

Here, I’ll show you.


Tasty Kitchen Blog: Almond Roca. Guest post by Amy Johnson of She Wears Many Hats, recipe submitted by TK member mdatwell.

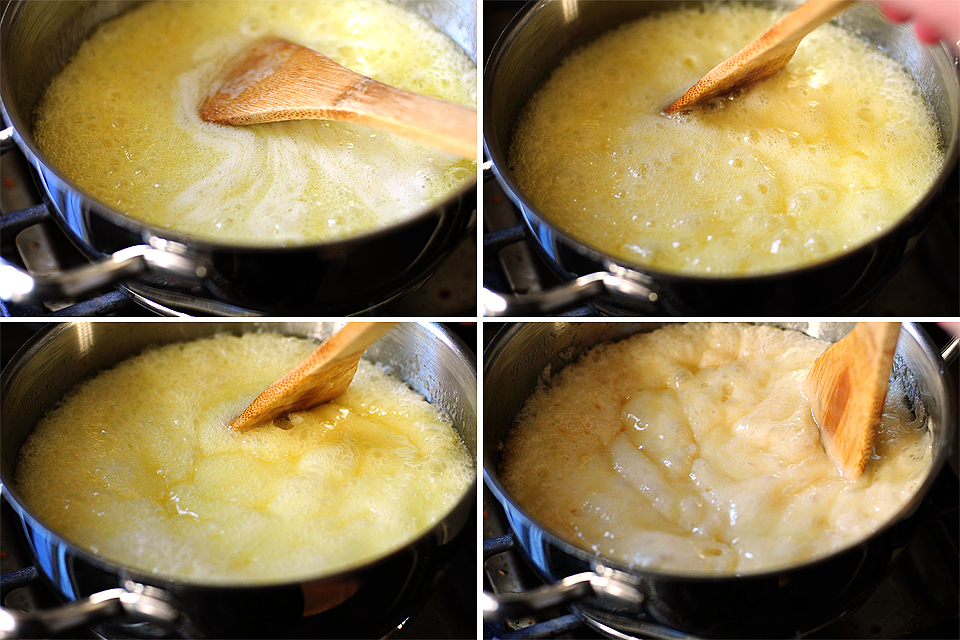
Once the first three ingredients are combined, cook on high, stirring constantly. This is what the first stage, the “runny” stage, looks like. Keep stirring. This takes a few minutes and will move right along into the second stage, the “cheesy” stage or what I like to call the “marshmallow” stage.


Tasty Kitchen Blog: Almond Roca. Guest post by Amy Johnson of She Wears Many Hats, recipe submitted by TK member mdatwell.

It kinda gets a little more gooey at first. Then it really does start looking like melted, bubbling cheese. Keep on stirring. Now is not the time to change your Facebook status, transfer the clothes from the washer to the dryer, or dust the ceiling fans. Change is a comin’. And it’s comin’ fast.
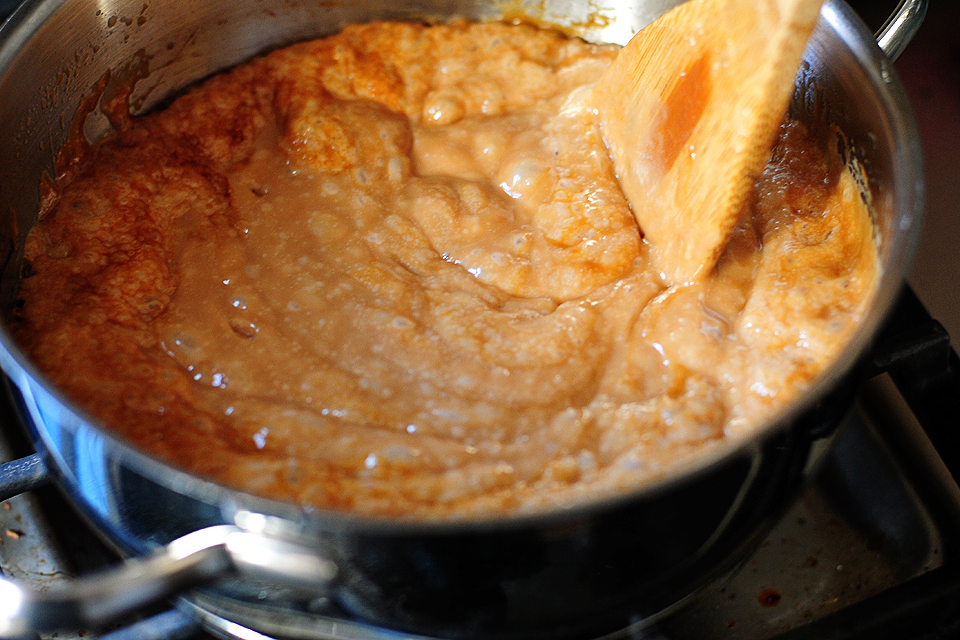


Tasty Kitchen Blog: Almond Roca. Guest post by Amy Johnson of She Wears Many Hats, recipe submitted by TK member mdatwell.

The next thing you’re looking for is the “runny, smooth, caramel brown color” stage. Like this.
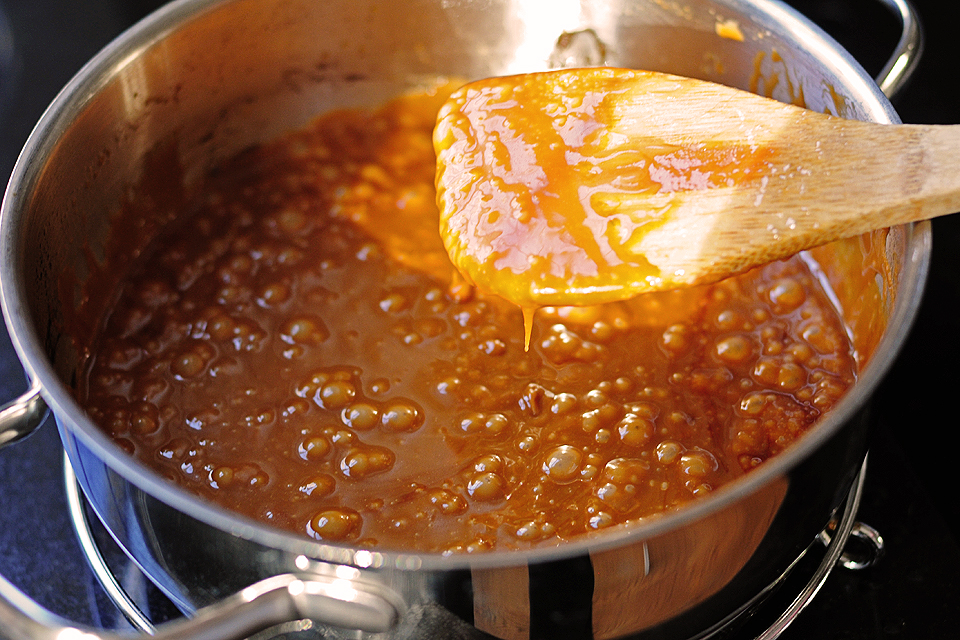


Tasty Kitchen Blog: Almond Roca. Guest post by Amy Johnson of She Wears Many Hats, recipe submitted by TK member mdatwell.

When it gets to this point, remove the pot from the heat. And be careful! The pot will be hot—way hot! Move quickly at this point as the caramel mixture will begin to cool.
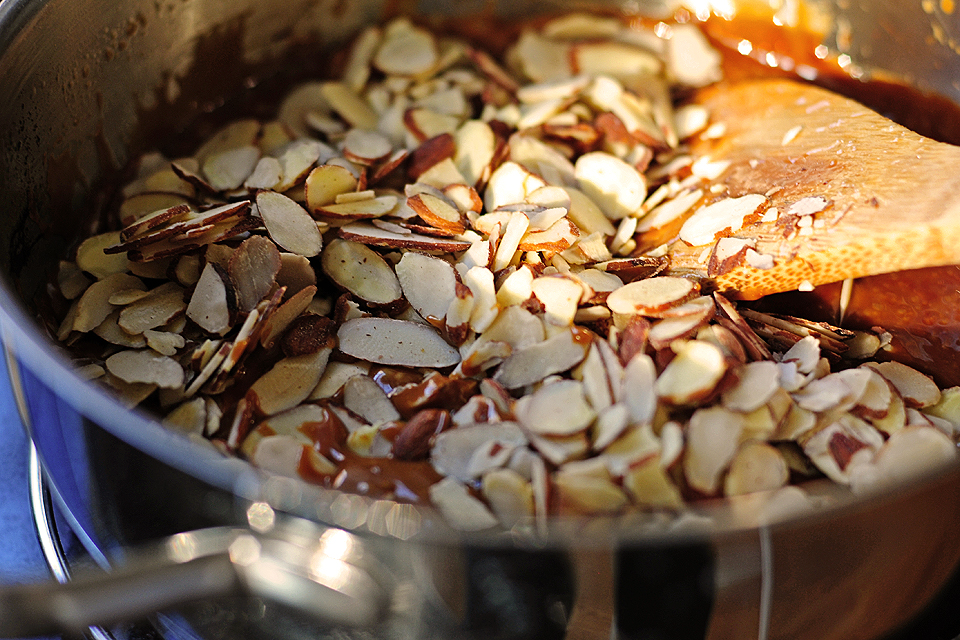


Tasty Kitchen Blog: Almond Roca. Guest post by Amy Johnson of She Wears Many Hats, recipe submitted by TK member mdatwell.

Now add the slivered/chopped almonds.
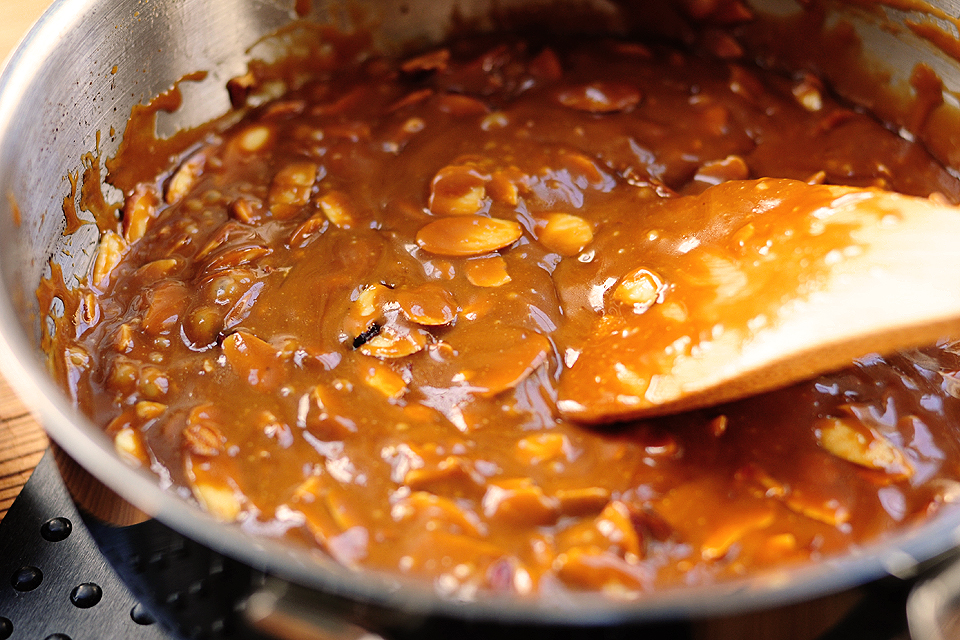


Tasty Kitchen Blog: Almond Roca. Guest post by Amy Johnson of She Wears Many Hats, recipe submitted by TK member mdatwell.

Combine the almonds and caramel mixture well.


Tasty Kitchen Blog: Almond Roca. Guest post by Amy Johnson of She Wears Many Hats, recipe submitted by TK member mdatwell.

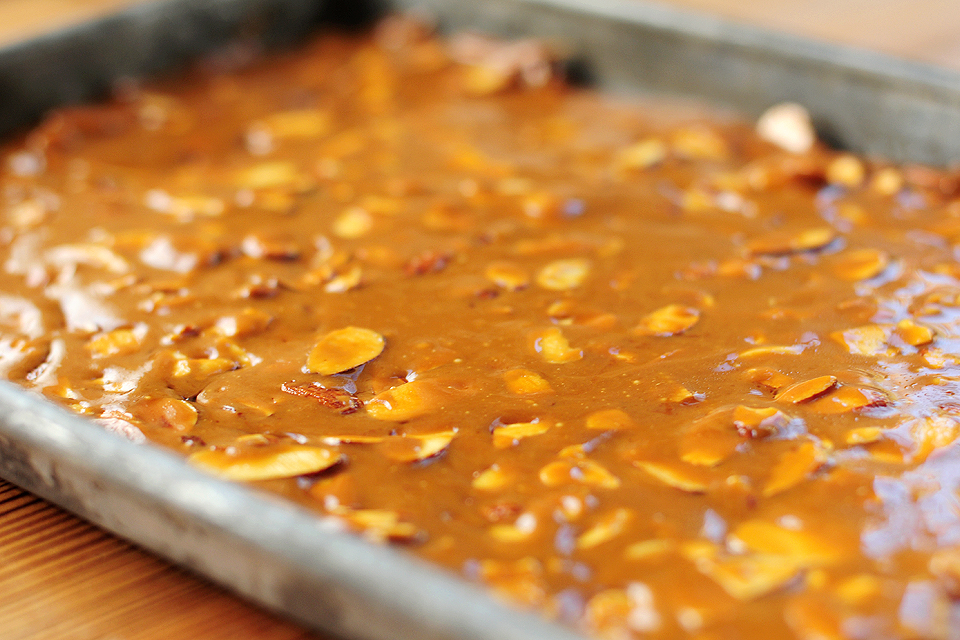
When the almonds are combined well with the caramel mixture, spread them out evenly on a rimmed, greased baking sheet pan (I mentioned pan sizes above). Look! You have toffee. You could stop right there, let it cool and enjoy, but we’re moving on to the chocolate.


Tasty Kitchen Blog: Almond Roca. Guest post by Amy Johnson of She Wears Many Hats, recipe submitted by TK member mdatwell.

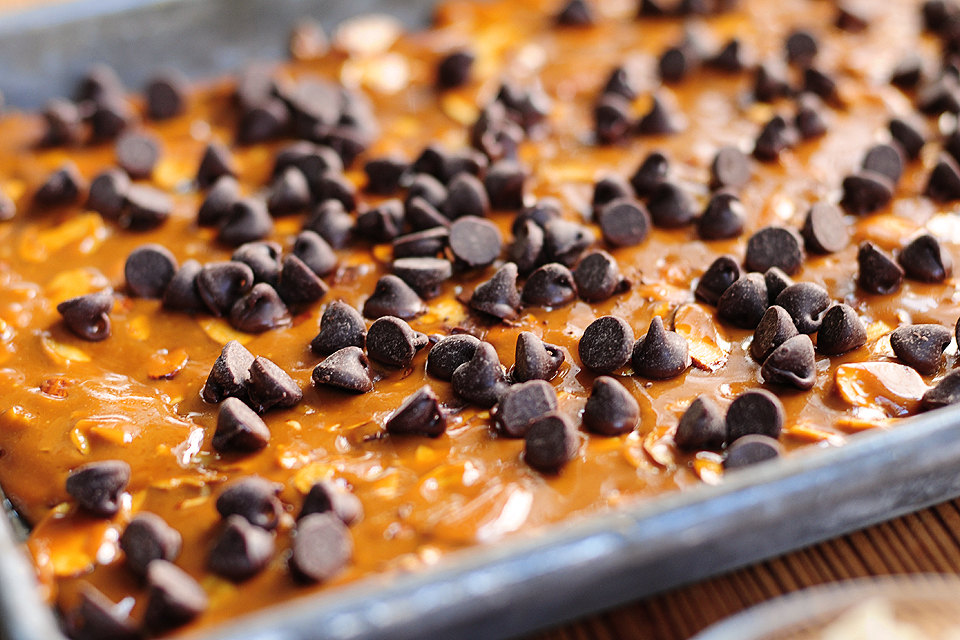
Next, sprinkle the chocolate chips across the top of the toffee. At this point I thought there was not enough chocolate chips and that I must’ve measured incorrectly. But wait just a few seconds. The chocolate chips will begin to melt and they spread a long way. I was surprised how much chocolate is packed in a chocolate chip.


Tasty Kitchen Blog: Almond Roca. Guest post by Amy Johnson of She Wears Many Hats, recipe submitted by TK member mdatwell.

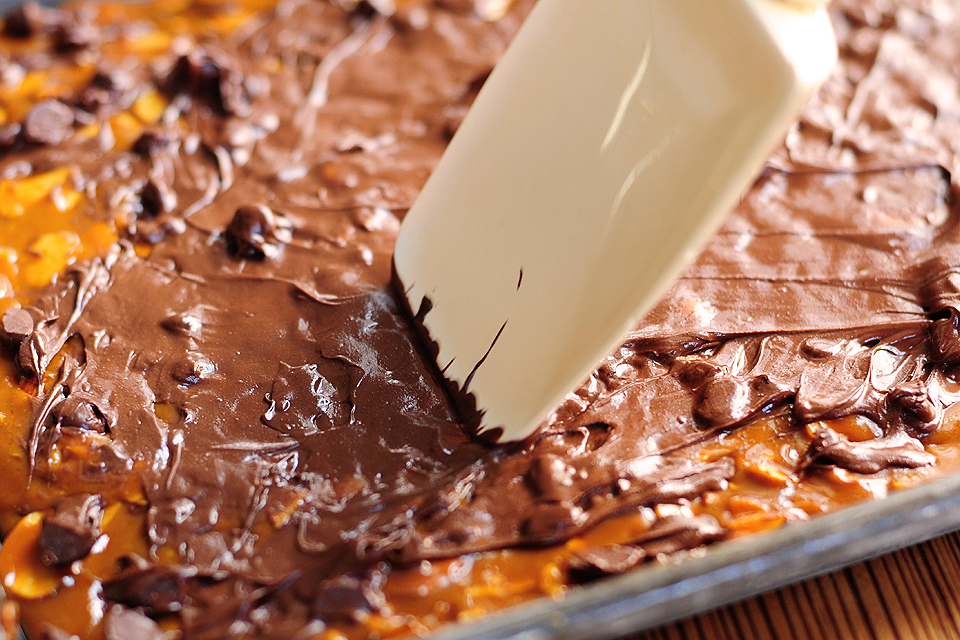
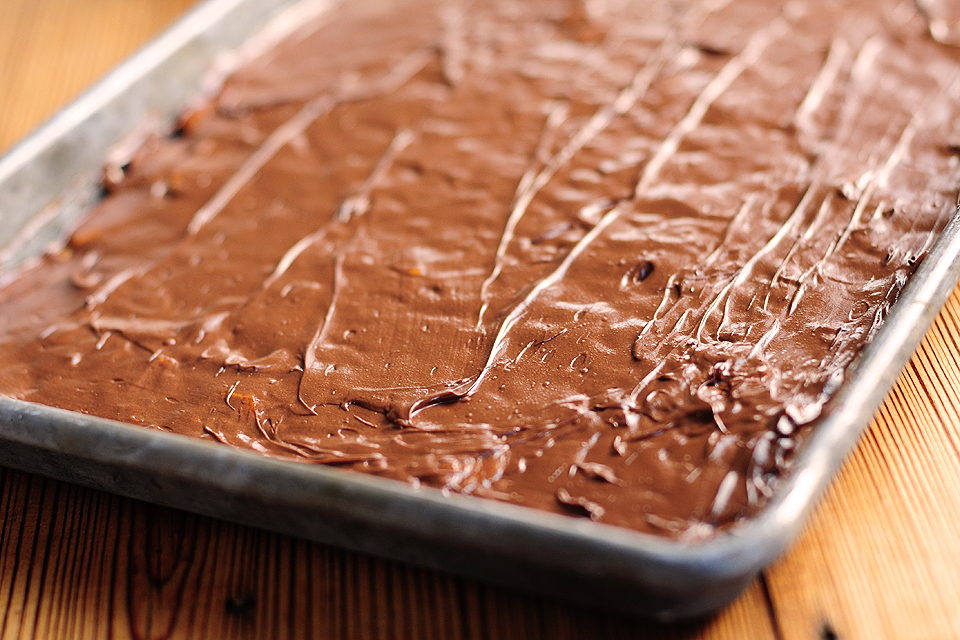
Using a rubber spatula, smooth out the chocolate across the top of the caramel/almond.


Tasty Kitchen Blog: Almond Roca. Guest post by Amy Johnson of She Wears Many Hats, recipe submitted by TK member mdatwell.

See how far that little bit of chocolate chips goes? Amazing.


Tasty Kitchen Blog: Almond Roca. Guest post by Amy Johnson of She Wears Many Hats, recipe submitted by TK member mdatwell.

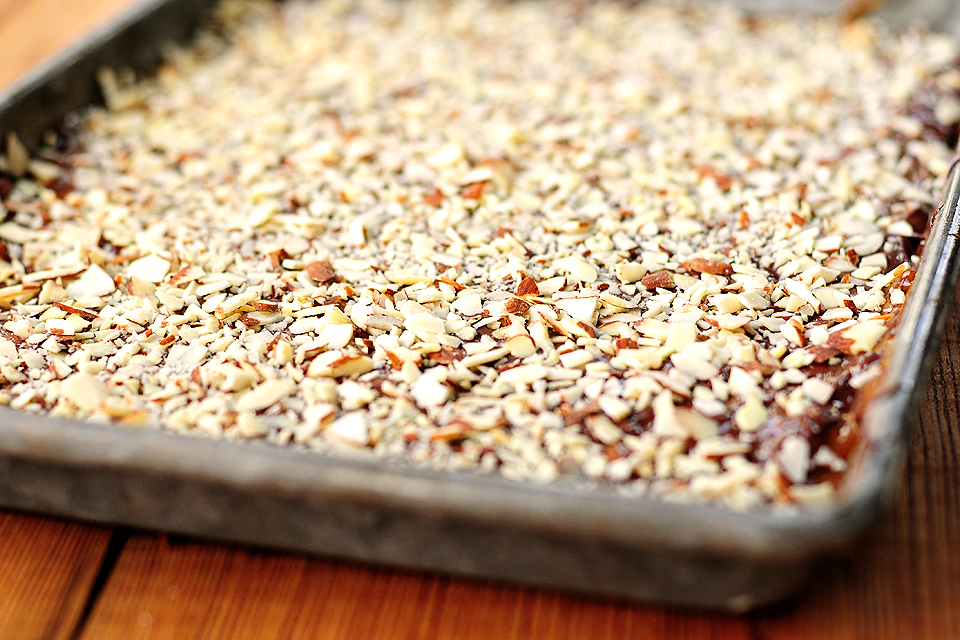
Top the melted chocolate with the finely chopped almonds. If you want even-sized Almond Roca pieces, score the candy with a knife while it’s still warm and soft. I’m all about the rustic look, so I let it be.

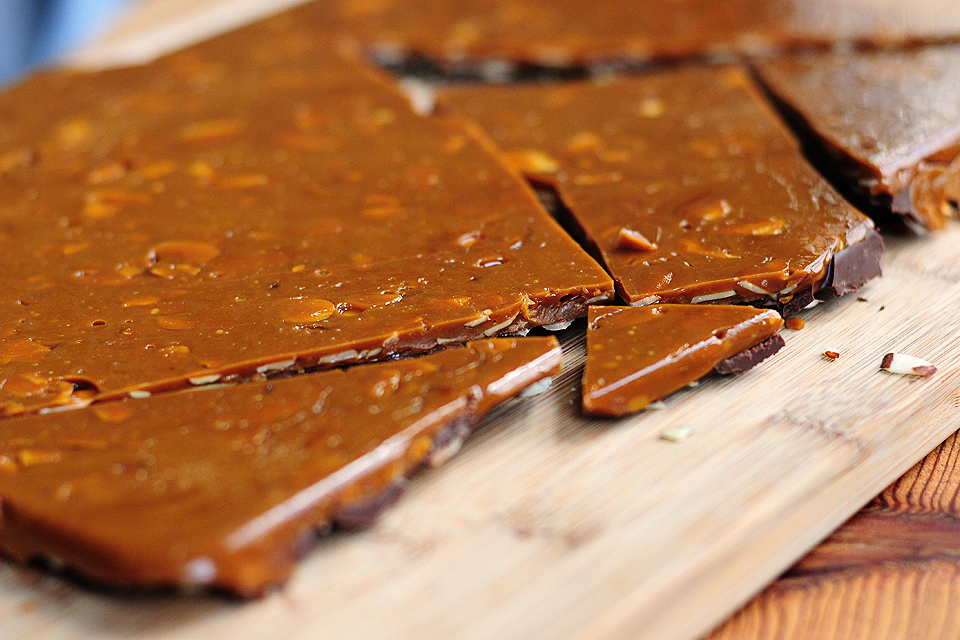
Now comes the hardest part: waiting. Wait until the roca has cooled. But after about 10 minutes, because I was impatient, I stuck my batch in the freezer for about 5-10 minutes to finish cooling. It worked fine.


Tasty Kitchen Blog: Almond Roca. Guest post by Amy Johnson of She Wears Many Hats, recipe submitted by TK member mdatwell.

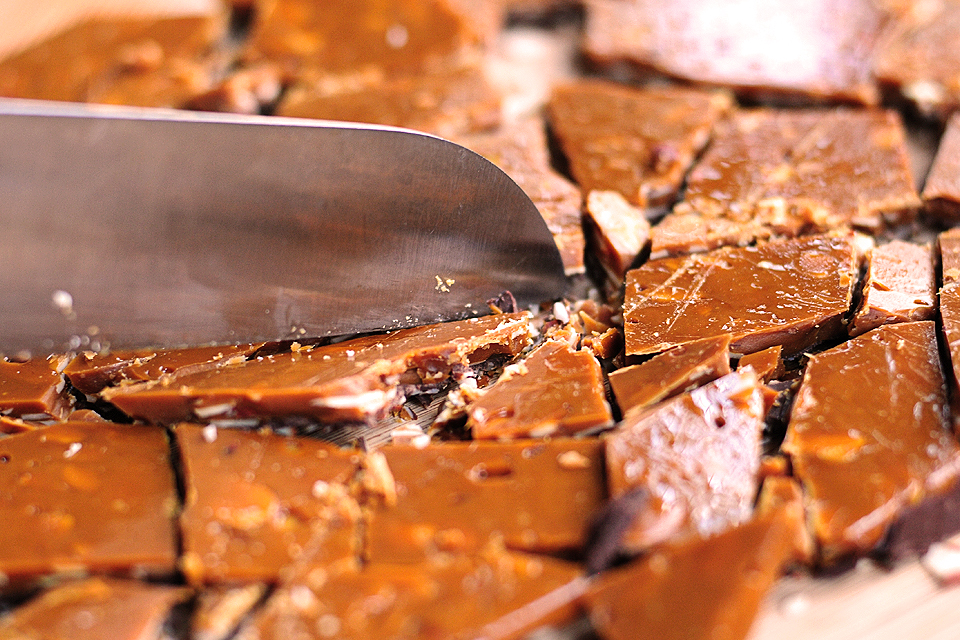
Once it’s cooled and the chocolate has solidified, if you’re going for the rustic look, flip the baking sheet upside down on a cutting board or surface.


Tasty Kitchen Blog: Almond Roca. Guest post by Amy Johnson of She Wears Many Hats, recipe submitted by TK member mdatwell.

It will break apart some on its own but use a knife to break it into smaller pieces. If you’ve scored your candy, carefully separate the pieces. And you’re finished!


Tasty Kitchen Blog: Almond Roca. Guest post by Amy Johnson of She Wears Many Hats, recipe submitted by TK member mdatwell.

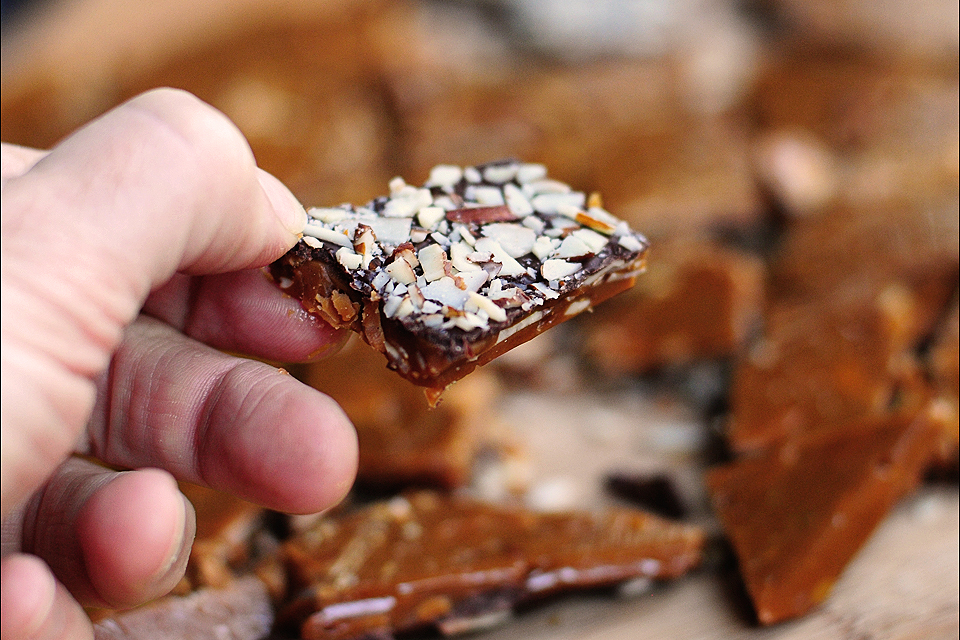
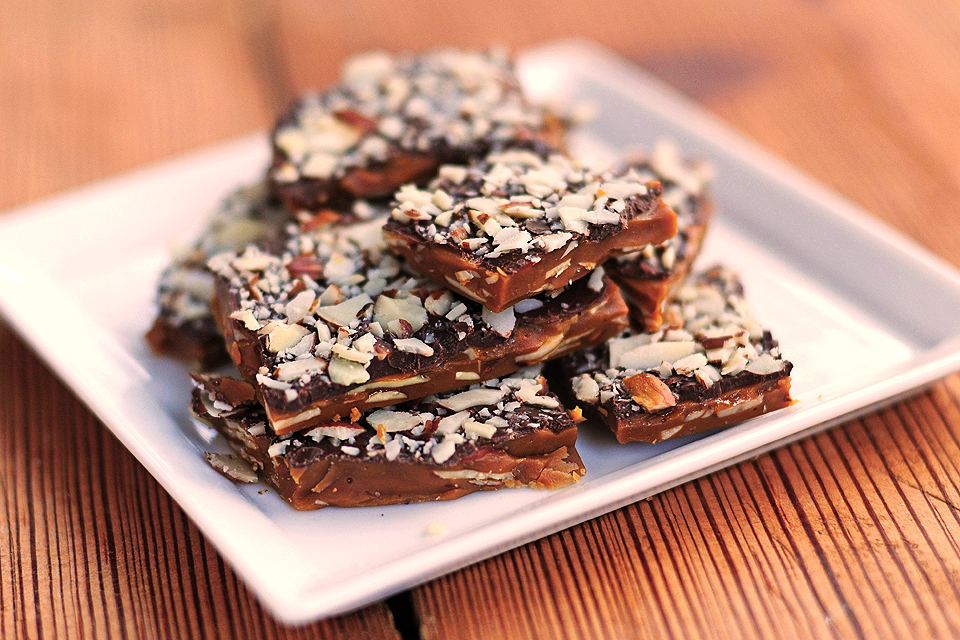
This piece is all I ate … that minute. We enjoyed our share, packed up the rest and sent it far and away. It’s dangerously delicious.


Tasty Kitchen Blog: Almond Roca. Guest post by Amy Johnson of She Wears Many Hats, recipe submitted by TK member mdatwell.

A big thanks to mdatwell for helping me get over my fear of candy making. I’ll definitely be making more batches of this over the holiday season. And maybe afterwards too! Happy cooking y’all!


Printable Recipe
Almond Roca

4.96 Mitt(s) 25 Rating(s)25 votes, average: 4.96 out of 525 votes, average: 4.96 out of 525 votes, average: 4.96 out of 525 votes, average: 4.96 out of 525 votes, average: 4.96 out of 5

Prep Time:

Cook Time:

Difficulty: Intermediate

Servings: 36

36
x

Print Options

Page size Letter 3x5 4x6
Text Size Small Medium Large
Content Include description
Include prep time, etc.
Show image

Description

This is a super easy, quick candy recipe I make every Christmas. It does contain a whole pound of butter, so I can’t make it too often. The recipe is easily halved or doubled for different occasions.

Ingredients

  • 4 sticks Butter
  • 2 cups Sugar (rounded)
  • 4 Tablespoons Water
  • 2 cups Almonds, Chopped
  • 1 cup Chocolate Chips
  • ½ cups Almonds, Finely Chopped, For Sprinkling

Preparation Instructions

Combine the first 3 ingredients and cook on high, stirring constantly through 3 stages:
1. Runny
2. “Cheesy”—it will look like melted white cheese
3. Runny and smooth, caramel brown color

Make sure you have the fan on your stove going, cause you’ll probably set off the smoke alarm towards the end. ;)

When it is runny, smooth and caramel brown in color, remove it from the heat and add the almonds. Stir until combined and pour the mixture onto greased cookie sheets. Spread it into an even layer. It will harden as it cools.

While it is still warm, sprinkle chocolate chips on top and let them melt enough to get soft. Spread the chocolate in an even layer across the candy. While the chocolate is still “wet,” sprinkle the finely chopped almonds on top.
At this point, while it is still warm and soft, you can score the candy with a butter knife to make it break evenly, or just let it harden and break it into rustic pieces.

Store in airtight containers. Enjoy!


_______________________________________

Amy Johnson is a blogger who writes about food, travel, the home (both inside and out), and various observations and random musings about anything and everything. Visit her blog She Wears Many Hats for a dose of deliciousness, practicality, hilarity, or just plain fun. She lives in South Carolina with her husband and two children.

 

Profile photo of missamy

Quick and Easy: Wasabi Spread

Posted by in Step-by-Step Recipes

Tasty Kitchen Blog: Wasabi Spread. Guest post by Amy Johnson of She Wears Many Hats, recipe submitted by TK member Sheila Johnson of Eat2Gather.

 
The holidays are here and while I’m always full of thanks for the time to spend with family and friends (and the tasty food), by the time I’ve had my third leftover turkey or ham sandwich, I’m bored and ready for a change of pace. So when I found this recipe for Wasabi Sandwich Spread from Tasty Kitchen member, Sheila Johnson, I was intrigued. A sandwich spread to add some oomph to the leftover turkey or ham sandwich? I gave it a go and was happy that I did. It’s a simple way to change things up enough to turn an ordinary turkey sandwich into an extraordinary turkey sandwich.

And don’t be scared of the wasabi. Wasabi is your friend. Your mouth will not be on fire. Not at all. The wasabi adds a little spice but is balanced with mayo, honey and soy. A tasty combination that will leave you wishing you’d roasted another turkey. And it’s simple, too. So simple I almost didn’t post it, but then decided it was too good not to mention.


Tasty Kitchen Blog: Wasabi Spread. Guest post by Amy Johnson of She Wears Many Hats, recipe submitted by TK member Sheila Johnson of Eat2Gather.

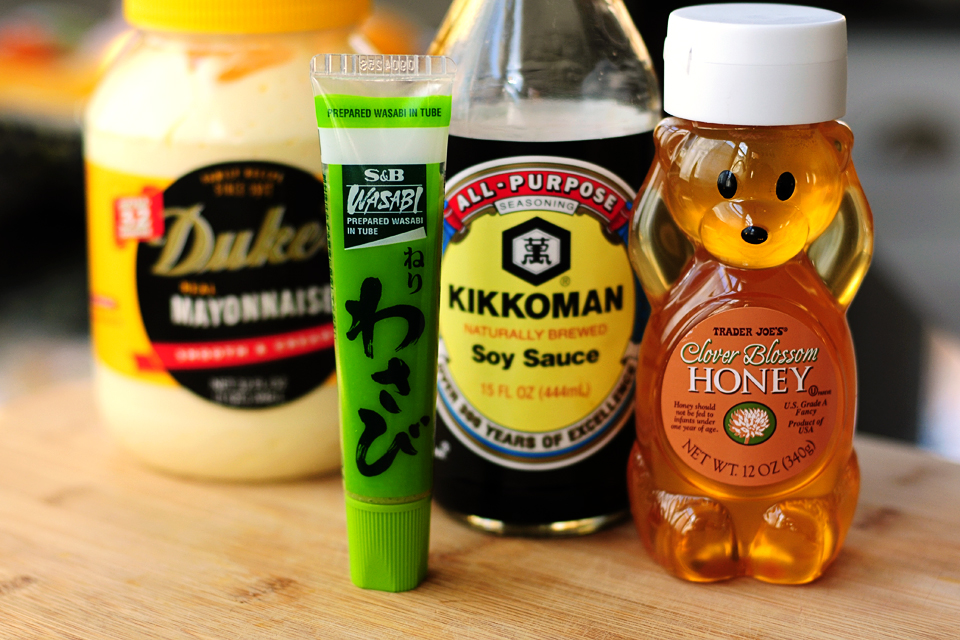
All you’ll need is mayo, wasabi paste (it comes in a cute little tube for only a few dollars), soy sauce and honey. This recipe makes a bunch and can be stored in the fridge to last through the whole holiday season. You can find the full recipe here.


Tasty Kitchen Blog: Wasabi Spread. Guest post by Amy Johnson of She Wears Many Hats, recipe submitted by TK member Sheila Johnson of Eat2Gather.

In a small bowl combine all ingredients.


Tasty Kitchen Blog: Wasabi Spread. Guest post by Amy Johnson of She Wears Many Hats, recipe submitted by TK member Sheila Johnson of Eat2Gather.

Mix together until smooth.

It certainly makes a plain sandwich come alive. We tried it on one of our favorite sandwich combos. It was a total success! Here’s how I used it.


Tasty Kitchen Blog: Wasabi Spread. Guest post by Amy Johnson of She Wears Many Hats, recipe submitted by TK member Sheila Johnson of Eat2Gather.

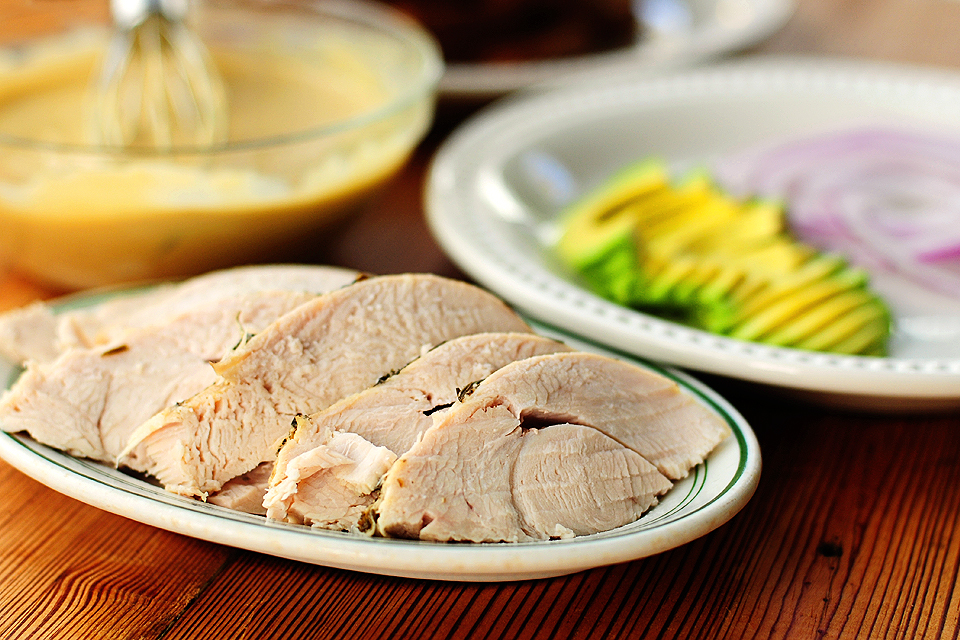
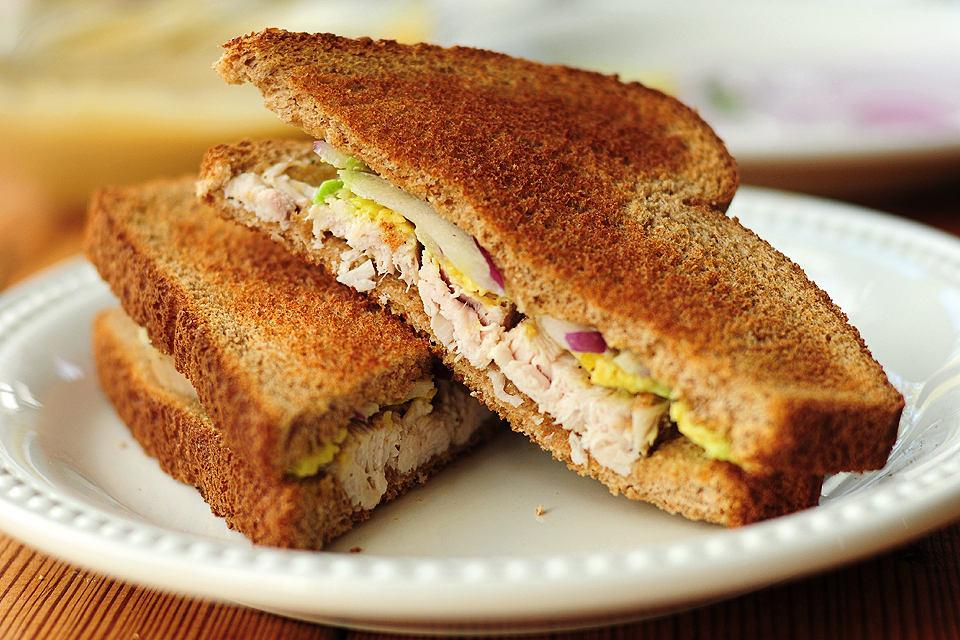
Start with some roasted turkey. We also like using avocado and purple onion, sliced thinly on our favorite sandwich bread, toasted.


Tasty Kitchen Blog: Wasabi Spread. Guest post by Amy Johnson of She Wears Many Hats, recipe submitted by TK member Sheila Johnson of Eat2Gather.

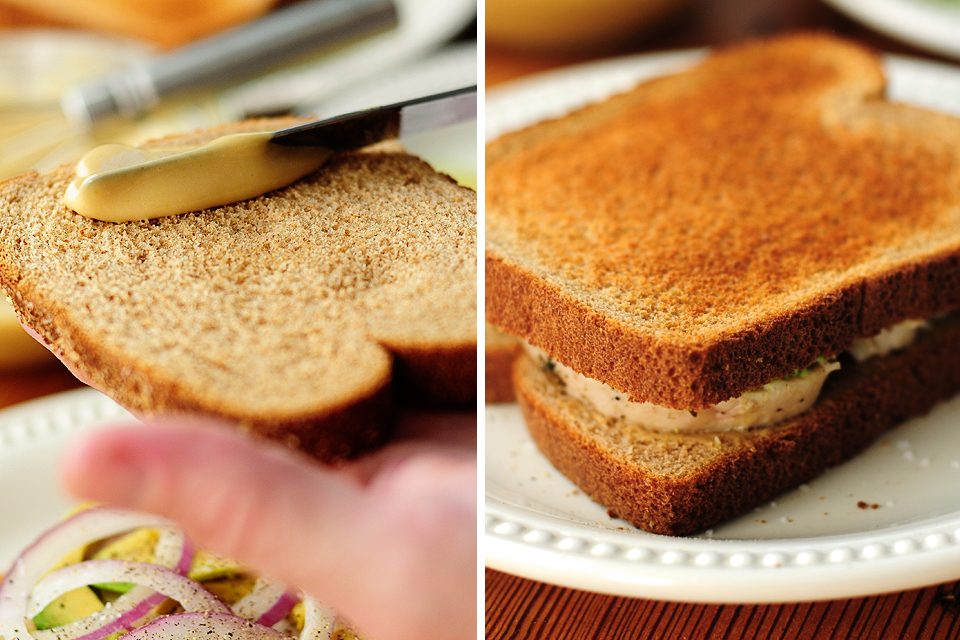
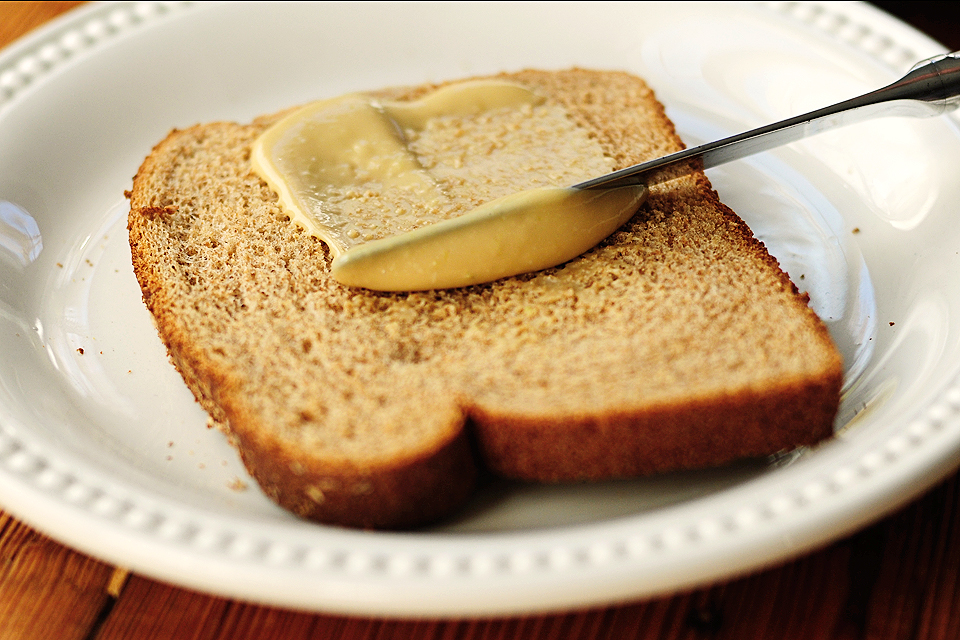
Begin building your sandwich with the wasabi spread going on first. Make sure you don’t skimp on the spread. You won’t need mustard or any other condiment with this spread.


Tasty Kitchen Blog: Wasabi Spread. Guest post by Amy Johnson of She Wears Many Hats, recipe submitted by TK member Sheila Johnson of Eat2Gather.

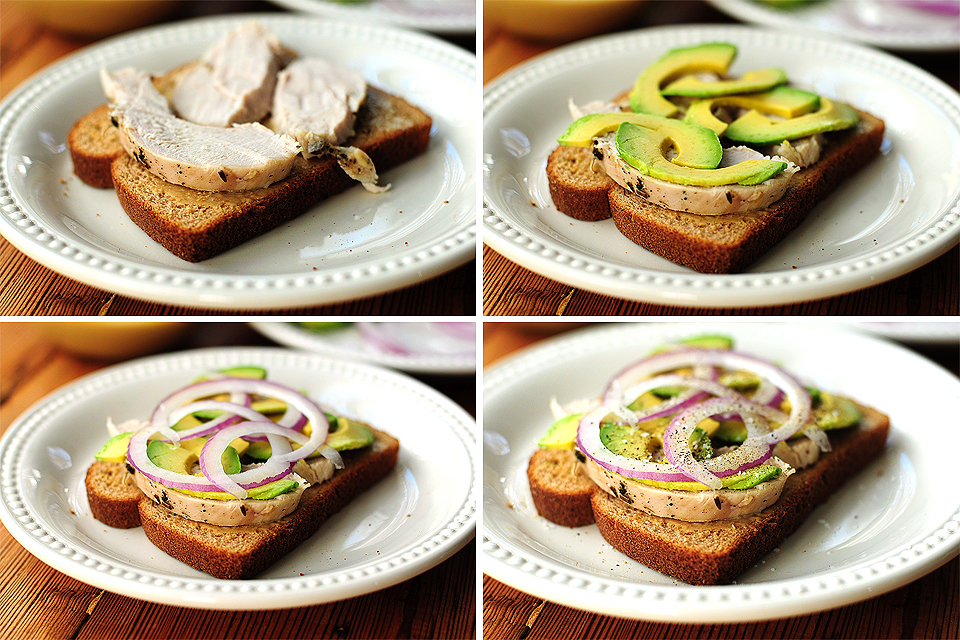
Next add the turkey, the avocado, purple onion, and salt and pepper of course.


Tasty Kitchen Blog: Wasabi Spread. Guest post by Amy Johnson of She Wears Many Hats, recipe submitted by TK member Sheila Johnson of Eat2Gather.

Then top it off with another layer of wasabi spread.


Tasty Kitchen Blog: Wasabi Spread. Guest post by Amy Johnson of She Wears Many Hats, recipe submitted by TK member Sheila Johnson of Eat2Gather.

You’re looking at a not-so-run-of-the-mill leftover turkey sandwich, folks.

Try it. I think you’ll like it.

And thanks to Sheila Johnson, I’m looking forward to those leftovers. Wishing you the best this holiday season! Hope your kitchen is full of much love and tasty grub! (Speaking of tasty grub, check out Sheila’s blog, Eat2Gather. It’s filled with all kinds of yumminess.)


Printable Recipe

Wasabi Sandwich Spread

See post on Eat 2gather’s site!
5.00 Mitt(s) 4 Rating(s)4 votes, average: 5.00 out of 54 votes, average: 5.00 out of 54 votes, average: 5.00 out of 54 votes, average: 5.00 out of 54 votes, average: 5.00 out of 5

Prep Time:

Cook Time:

Difficulty: Easy

Servings: 10

10
x

Print Options

Page size Letter 3x5 4x6
Text Size Small Medium Large
Content Include description
Include prep time, etc.
Show image

Description

This spread is perfect to spice up any sandwich. I personally love it on turkey. Add it to some shredded cabbage and it’s great on fish tacos.

Ingredients

  • ¾ cups Hellman's Mayonnaise
  • 1 Tablespoon Wasabi Paste
  • 1 Tablespoon Soy Sauce
  • 1 Tablespoon Honey (heaping)

Preparation Instructions

Whisk your ingredients together. Use as a sandwich spread or toss with some shredded cabbage and it’s super on fish tacos!


_______________________________________

Amy Johnson is a blogger who writes about food, travel, the home (both inside and out), and various observations and random musings about anything and everything. Visit her blog She Wears Many Hats for a dose of deliciousness, practicality, hilarity, or just plain fun. She lives in South Carolina with her husband and two children.
 

Profile photo of missamy

Scalloped Sweet Potatoes

Posted by in Step-by-Step Recipes

Amy does it again, bringing us beautiful step-by-step instructions for Scalloped Sweet Potatoes, submitted by Tasty Kitchen member quincyskeeper. Thank you, Amy! –PW

 
Tasty Kitchen Blog: Scalloped Sweet Potatoes. Guest post by Amy Johnson of She Wears Many Hats, recipe submitted by TK member quincyskeeper.

 
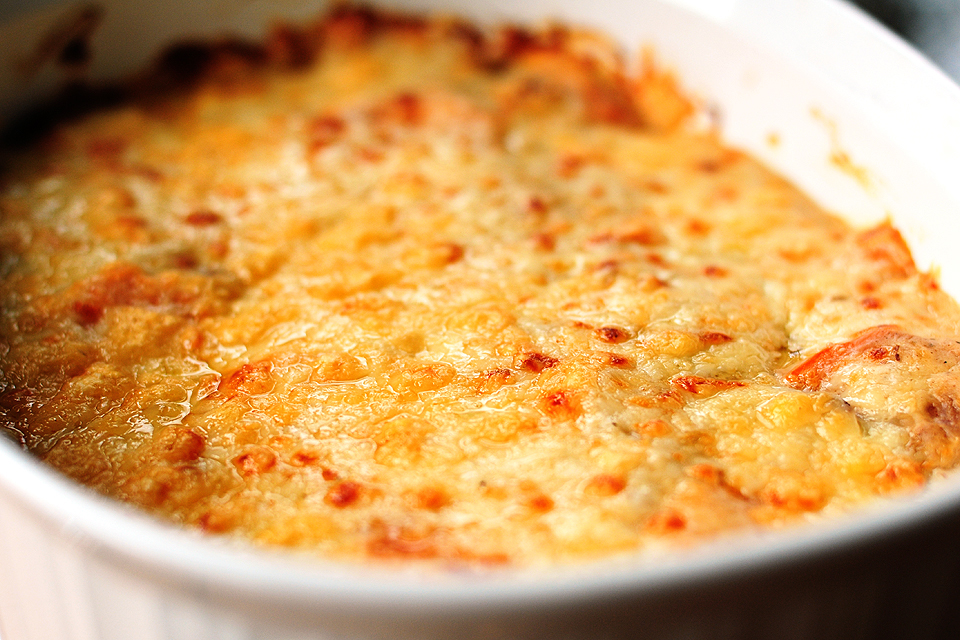
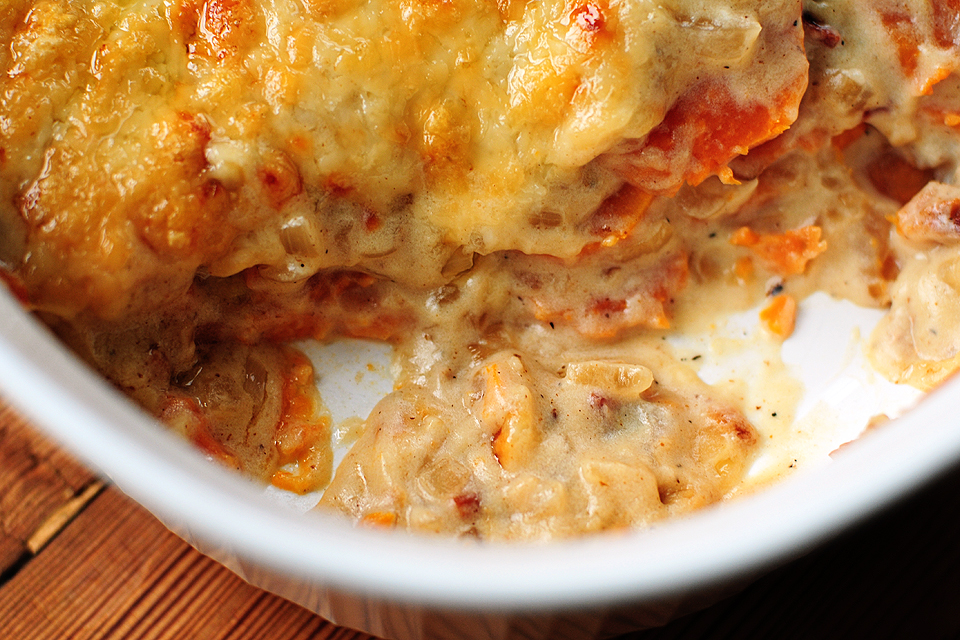
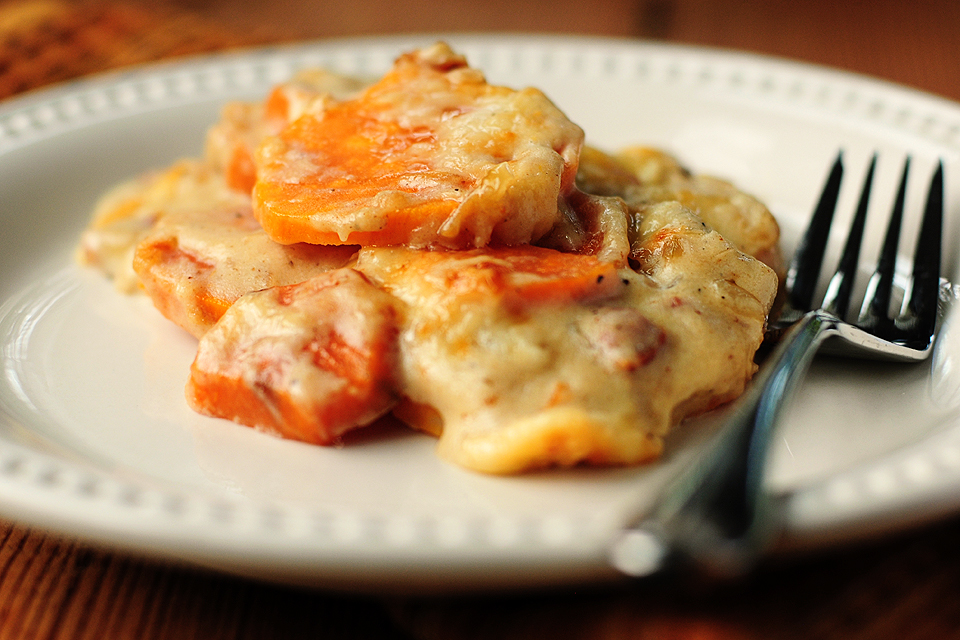
When I think of sweet potatoes, I think of the holidays—in particular, Thanksgiving. So when I stumbled across this recipe for Scalloped Sweet Potatoes, submitted by Tasty Kitchen member quincyskeeper, I thought it would make the perfect side dish for a holiday spread. Instead of waiting until Thanksgiving day to give it a go, I tested it on my willing family first.

Boy was I surprised. To begin with, I’m not usually a big sweet potato fan. I grew up with them being mashed to pieces and topped with marshmallows. But this recipe has changed my mind a bit. It’s a savory bite of goodness, and was perfect served alongside a nice steak and fresh crispy salad. Certainly not a recipe to save only for the holiday table.

Wanna give it a go? Well, alright then. Let’s get started.


Tasty Kitchen Blog: Scalloped Sweet Potatoes. Guest post by Amy Johnson of She Wears Many Hats, recipe submitted by TK member quincyskeeper.

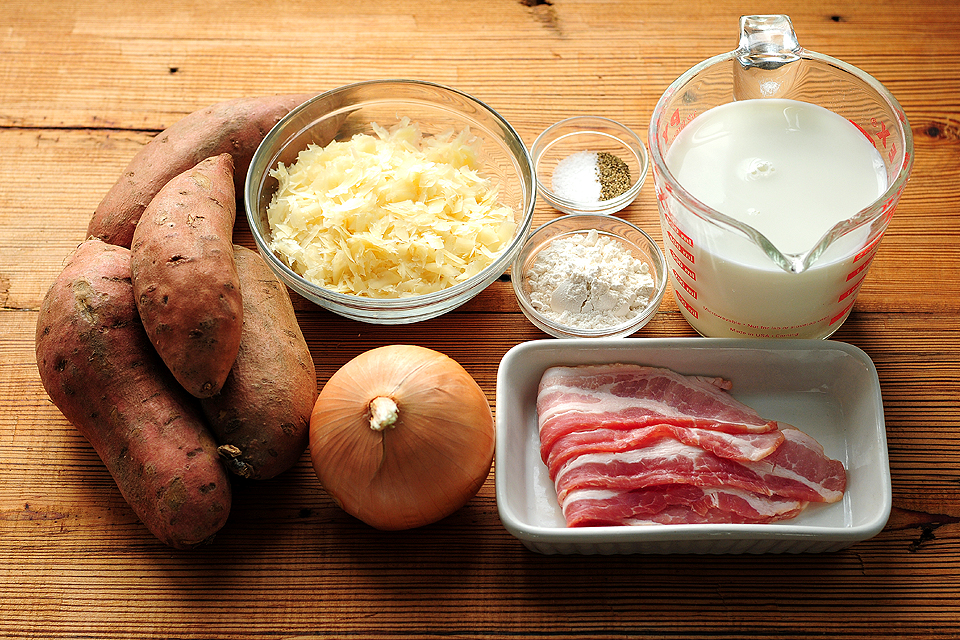
You’ll need sweet potatoes, bacon, an onion, flour, salt, pepper, milk and parmesan cheese. All yummy stuff for sure. (Be sure to look for the link to the full recipe, including all ingredient measurements, preparation details, etcetera at the end of this post.)

Go ahead and preheat your oven to 325°F.


Tasty Kitchen Blog: Scalloped Sweet Potatoes. Guest post by Amy Johnson of She Wears Many Hats, recipe submitted by TK member quincyskeeper.

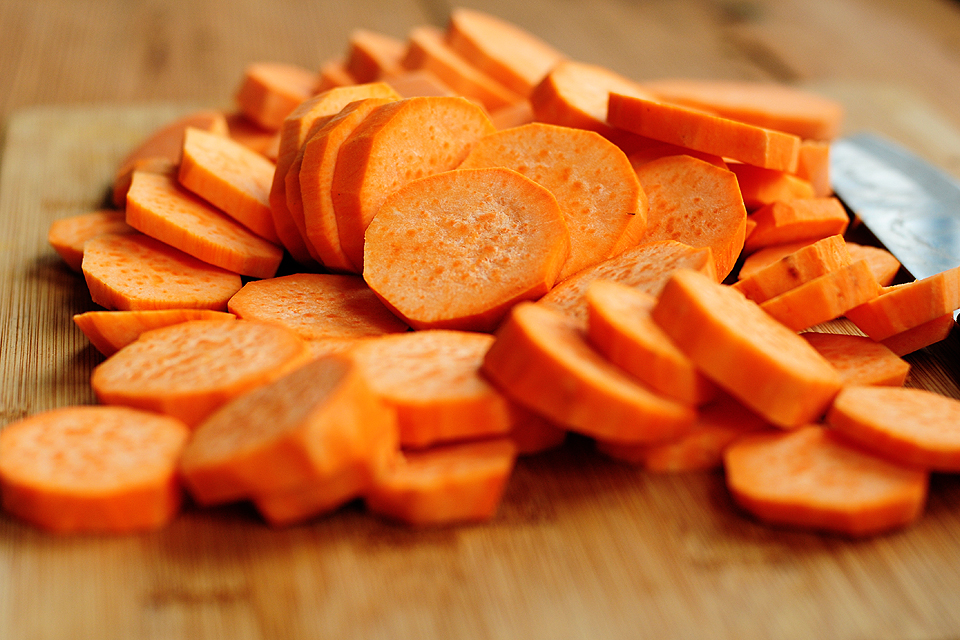
Begin by peeling the sweet potatoes and slicing them about 1/4″ thick.


Tasty Kitchen Blog: Scalloped Sweet Potatoes. Guest post by Amy Johnson of She Wears Many Hats, recipe submitted by TK member quincyskeeper.

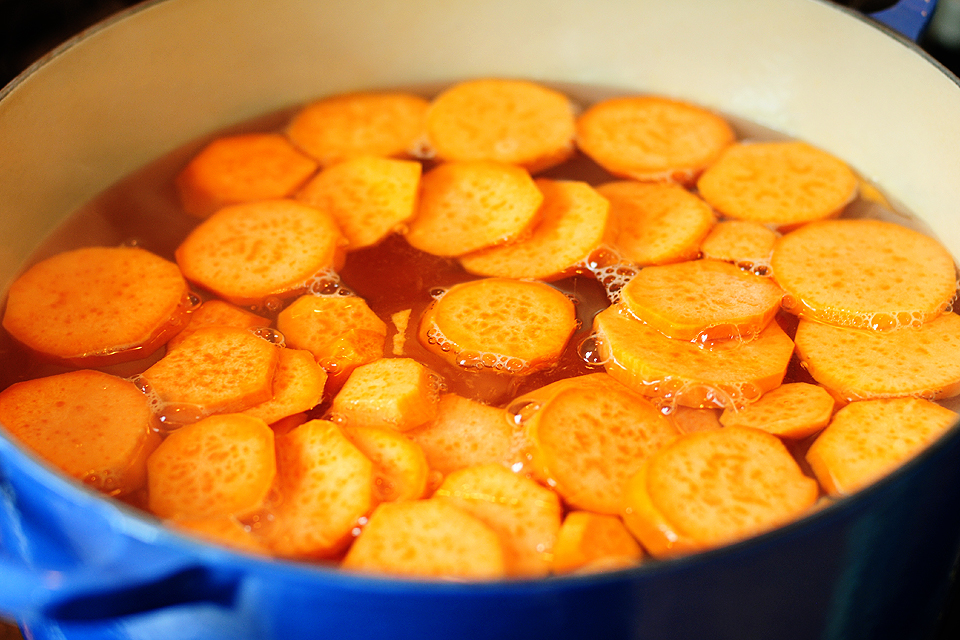
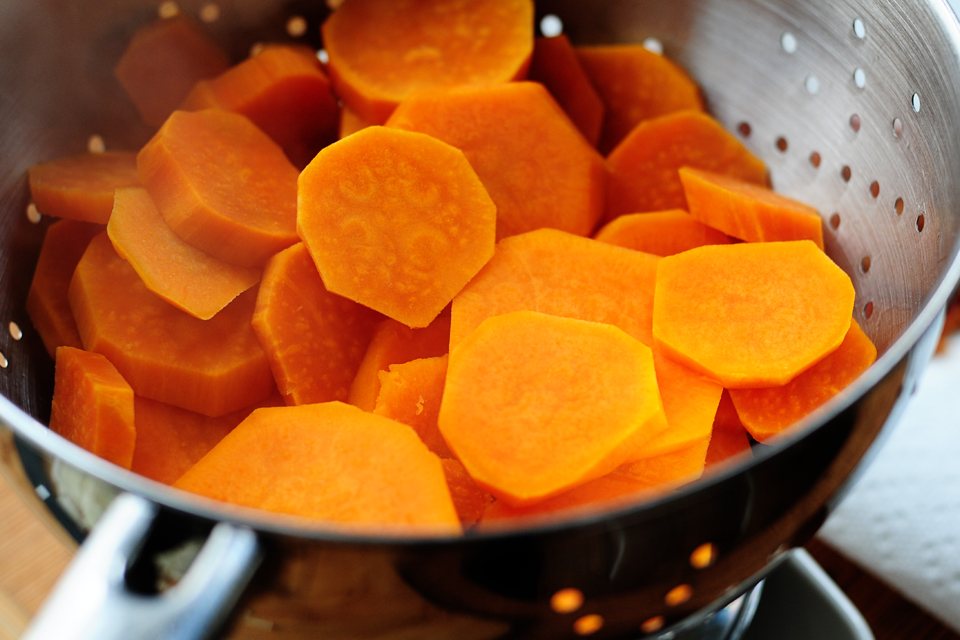
Cook the sweet potatoes for about 5-10 minutes in boiling water.


Tasty Kitchen Blog: Scalloped Sweet Potatoes. Guest post by Amy Johnson of She Wears Many Hats, recipe submitted by TK member quincyskeeper.

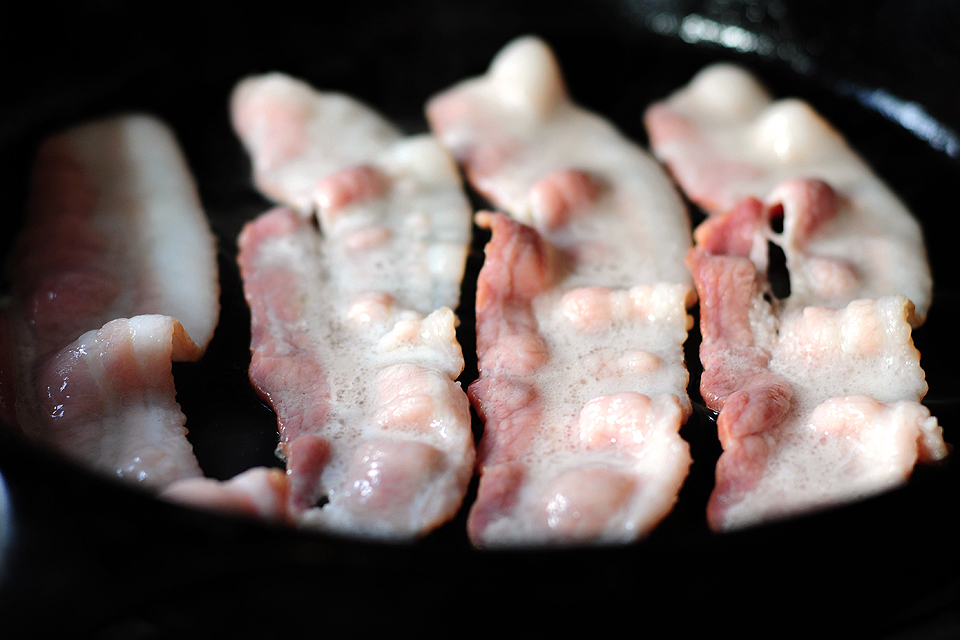
While the sweet potatoes are boiling, fry the bacon until crispy.


Tasty Kitchen Blog: Scalloped Sweet Potatoes. Guest post by Amy Johnson of She Wears Many Hats, recipe submitted by TK member quincyskeeper.

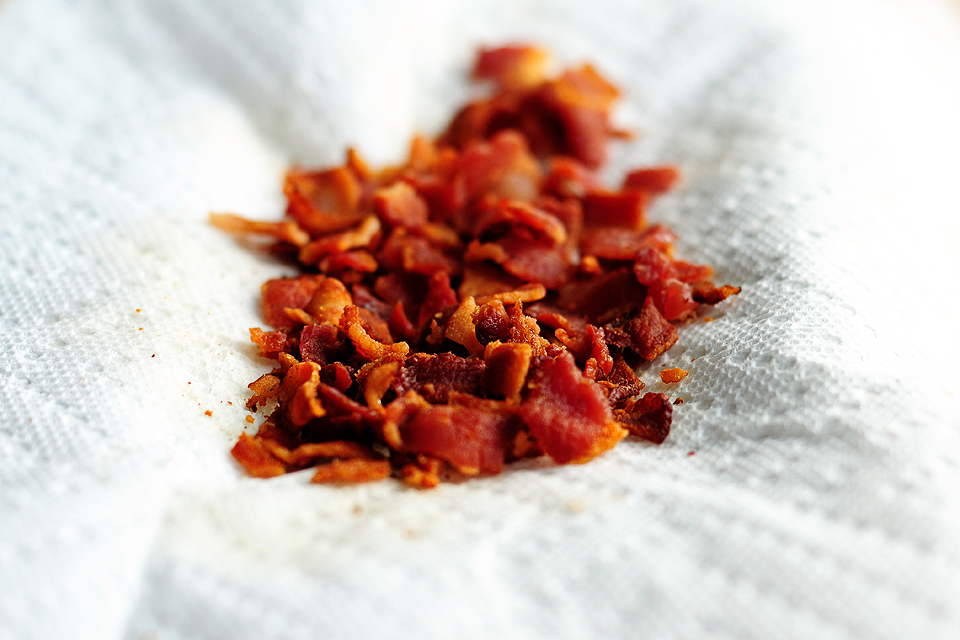
When bacon is done, place it on a paper towel to cool. After it has cooled, crumble it up. No nibbling! The sweet potatoes need it. They need all that bacon goodness. You’ll see. And don’t clean out the pan you fried the bacon in. You’ll need that in a few.


Tasty Kitchen Blog: Scalloped Sweet Potatoes. Guest post by Amy Johnson of She Wears Many Hats, recipe submitted by TK member quincyskeeper.

The sweet potatoes should be ready now. Drain them and set aside.


Tasty Kitchen Blog: Scalloped Sweet Potatoes. Guest post by Amy Johnson of She Wears Many Hats, recipe submitted by TK member quincyskeeper.

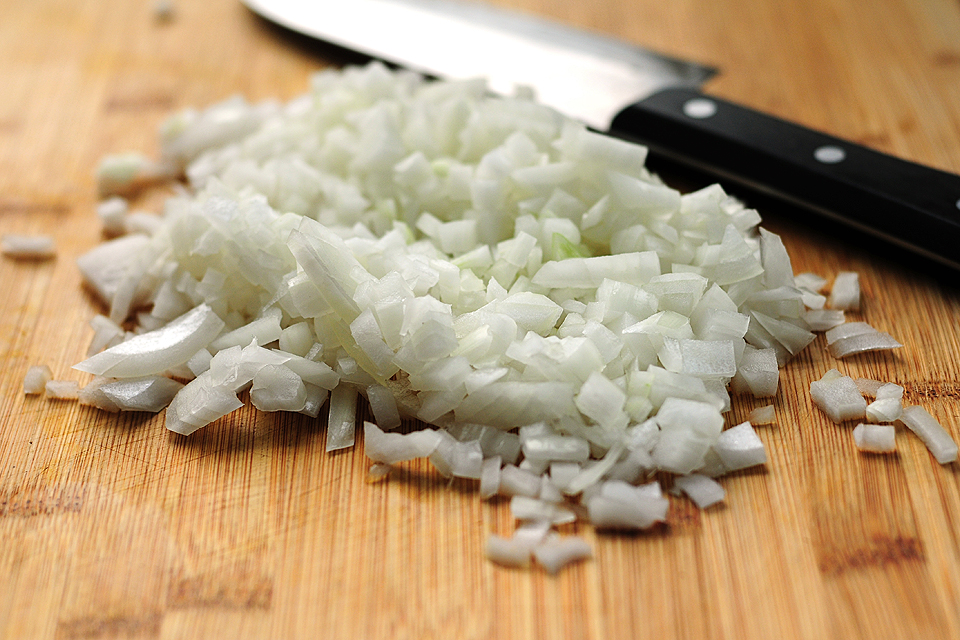
If you haven’t already done so, dice the onion.


Tasty Kitchen Blog: Scalloped Sweet Potatoes. Guest post by Amy Johnson of She Wears Many Hats, recipe submitted by TK member quincyskeeper.

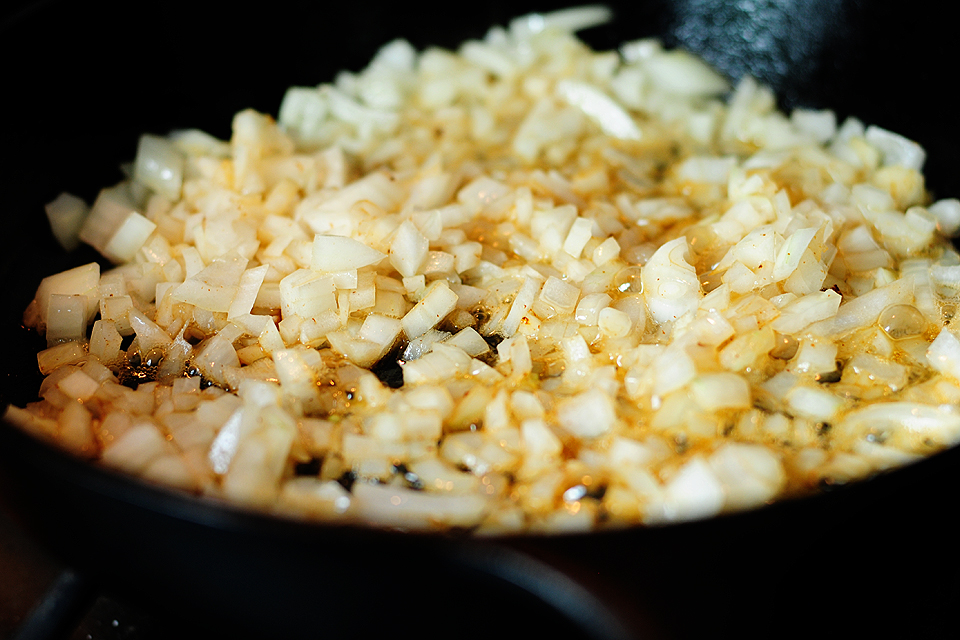
Add the onion to the bacon drippings.


Tasty Kitchen Blog: Scalloped Sweet Potatoes. Guest post by Amy Johnson of She Wears Many Hats, recipe submitted by TK member quincyskeeper.

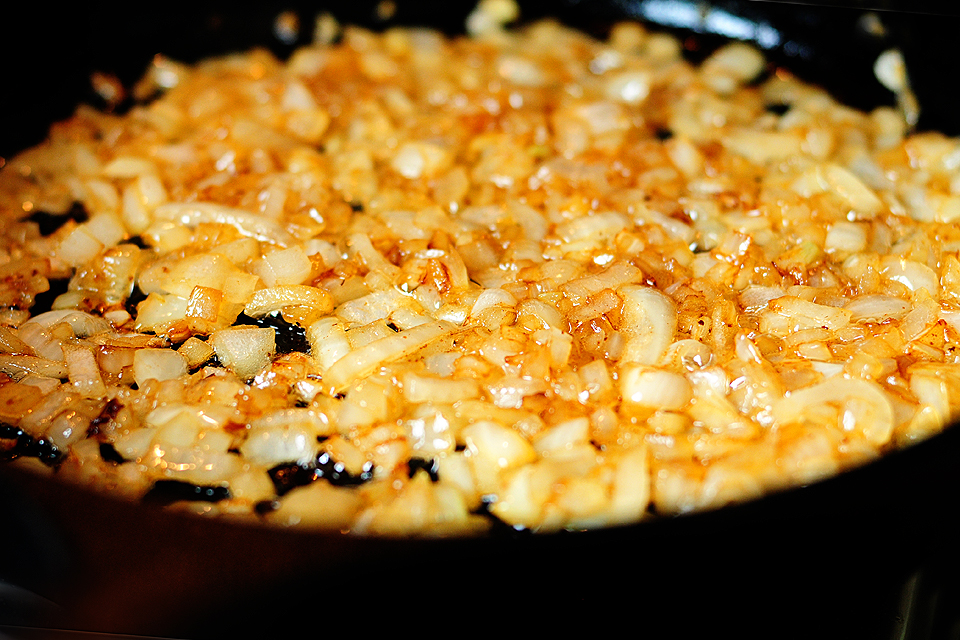
Cook the onions until tender and yumilicious. One of the best aromas ever: sautéed onions. Yum.


Tasty Kitchen Blog: Scalloped Sweet Potatoes. Guest post by Amy Johnson of She Wears Many Hats, recipe submitted by TK member quincyskeeper.

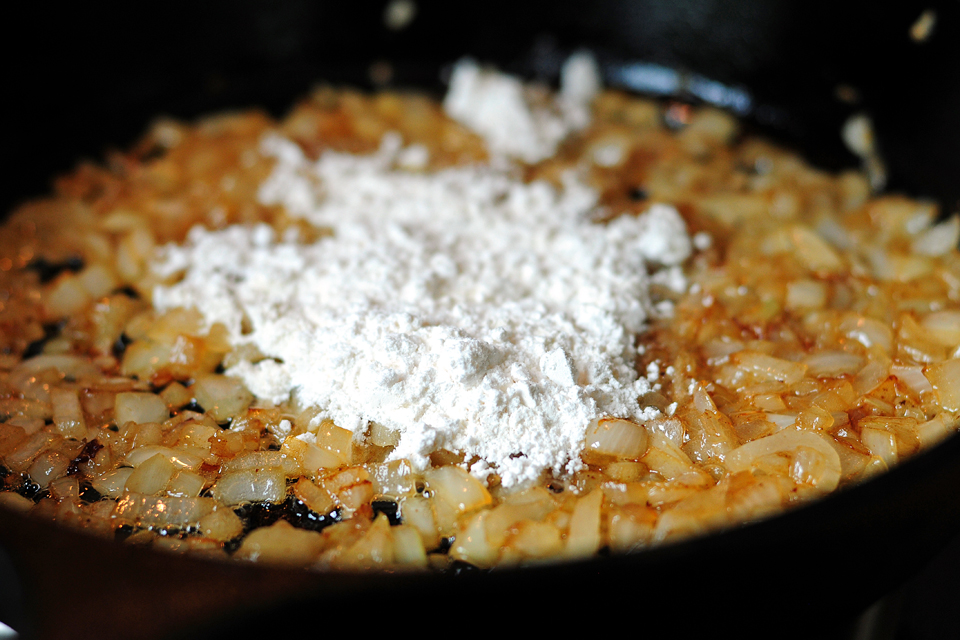
Next, lower the heat, and add the flour to the onions.


Tasty Kitchen Blog: Scalloped Sweet Potatoes. Guest post by Amy Johnson of She Wears Many Hats, recipe submitted by TK member quincyskeeper.

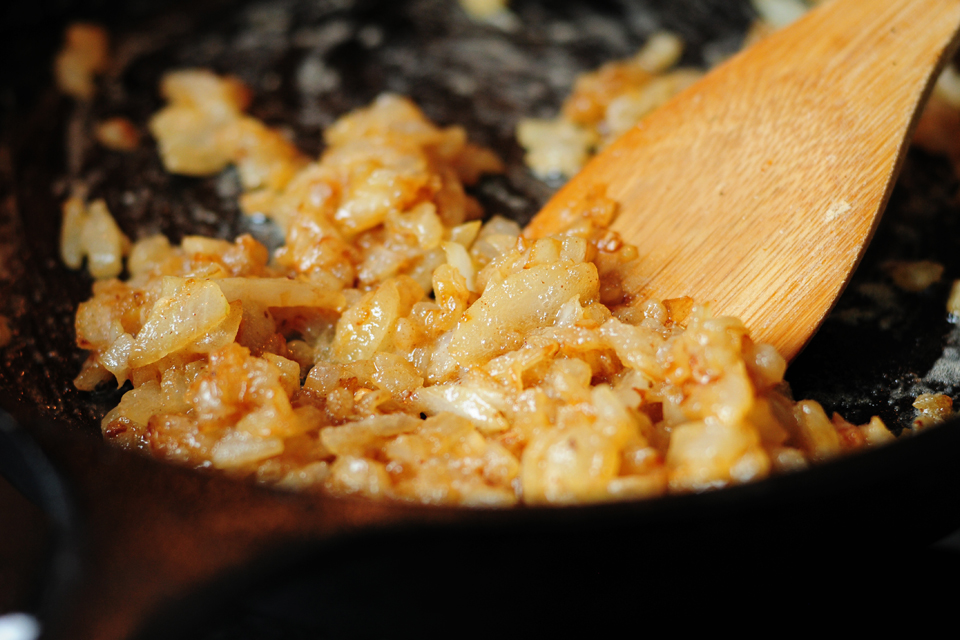
Combine well. It’ll turn into a paste-like mixture.


Tasty Kitchen Blog: Scalloped Sweet Potatoes. Guest post by Amy Johnson of She Wears Many Hats, recipe submitted by TK member quincyskeeper.

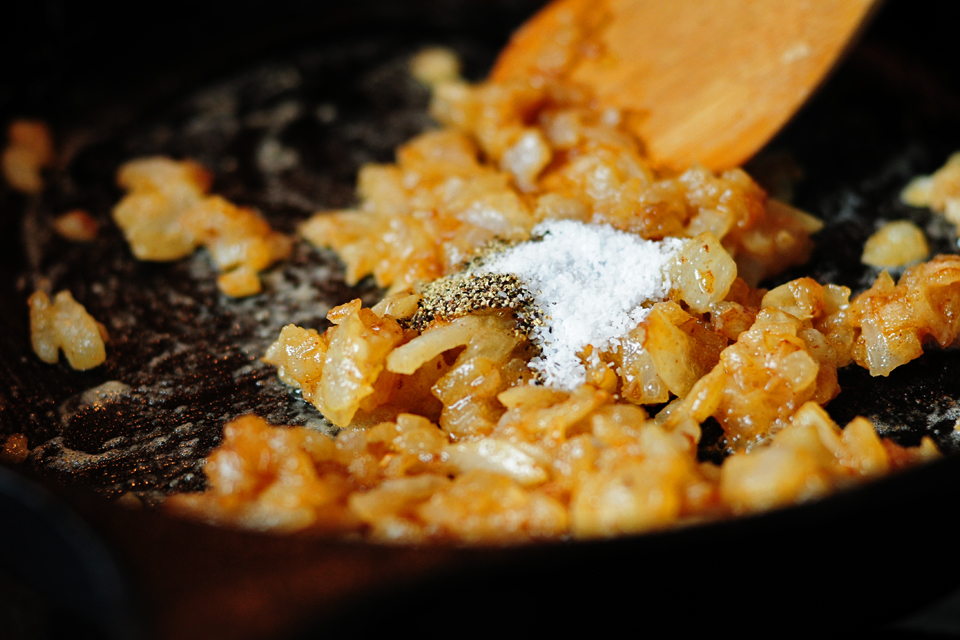
Add the salt and pepper next.


Tasty Kitchen Blog: Scalloped Sweet Potatoes. Guest post by Amy Johnson of She Wears Many Hats, recipe submitted by TK member quincyskeeper.

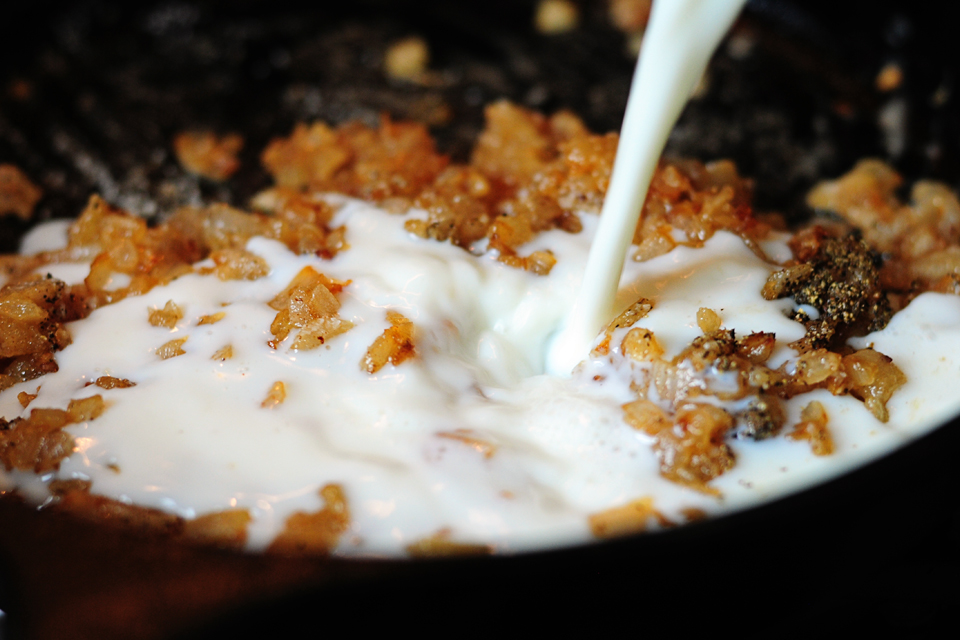
In goes the milk.


Tasty Kitchen Blog: Scalloped Sweet Potatoes. Guest post by Amy Johnson of She Wears Many Hats, recipe submitted by TK member quincyskeeper.

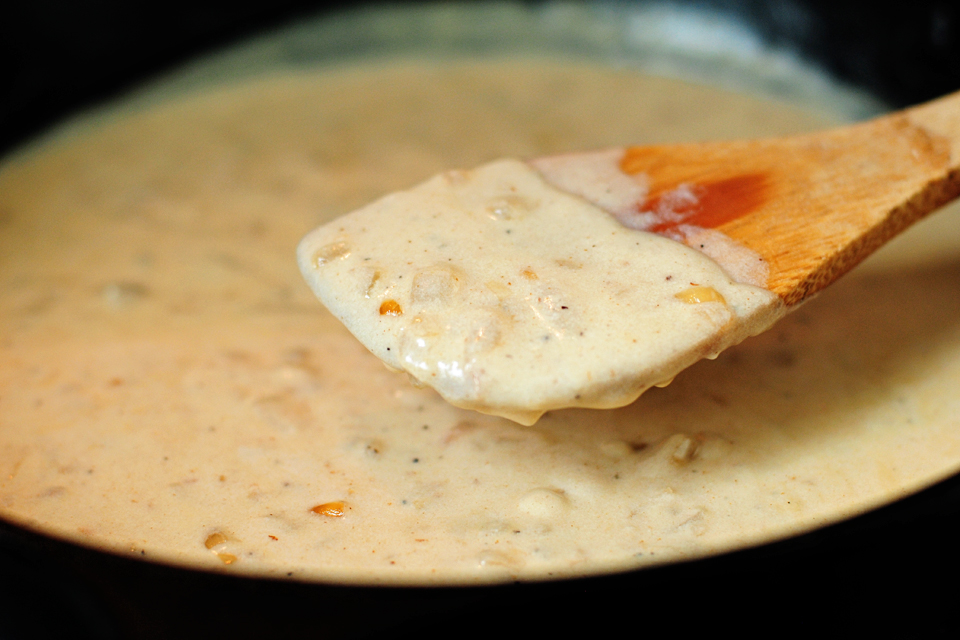
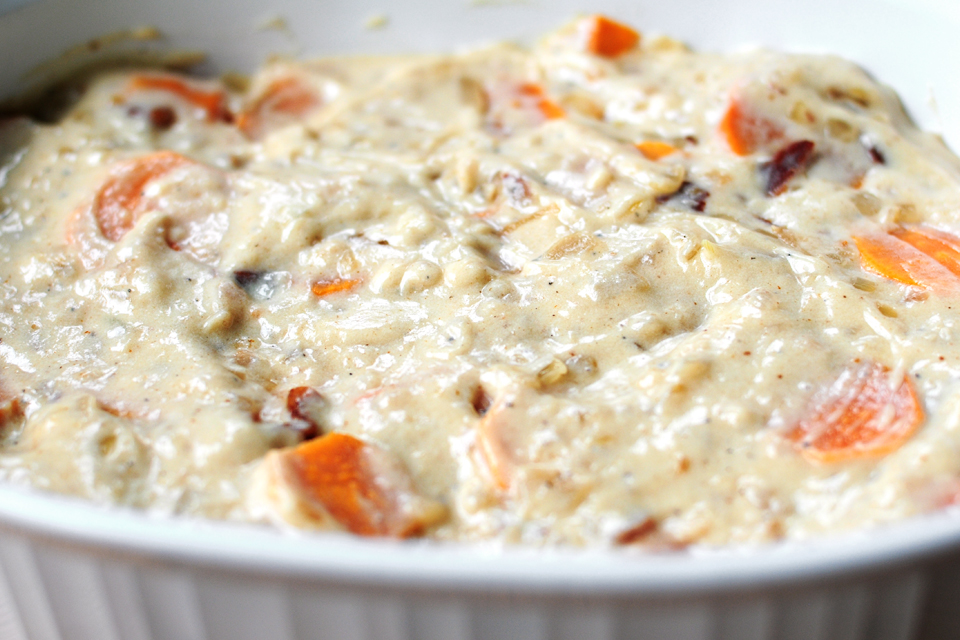
Stir the milk in and cook, stirring occasionally until mixture thickens. It should have the consistency of gravy. Not too thick but not watery either.


Tasty Kitchen Blog: Scalloped Sweet Potatoes. Guest post by Amy Johnson of She Wears Many Hats, recipe submitted by TK member quincyskeeper.

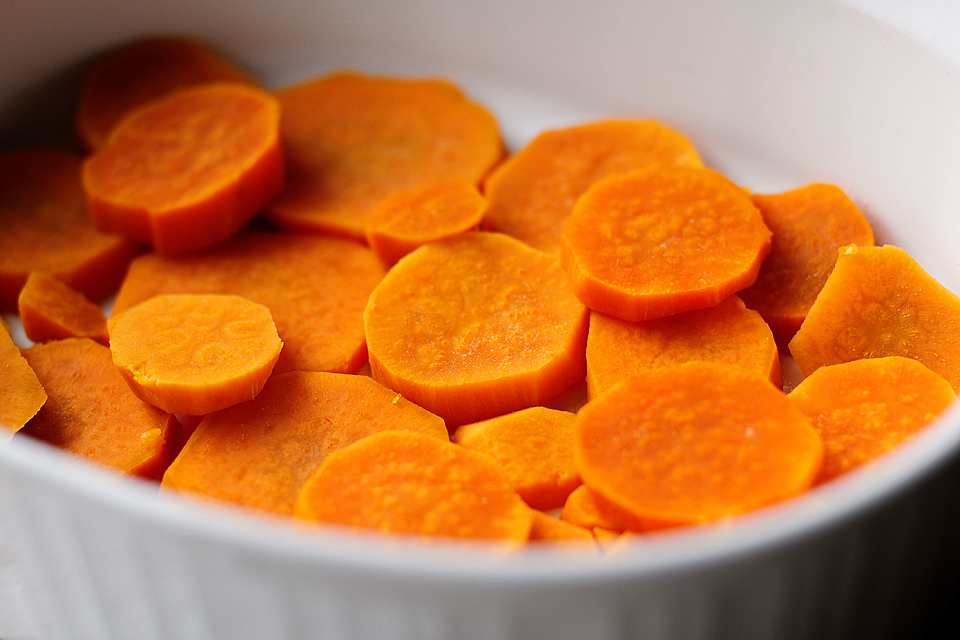
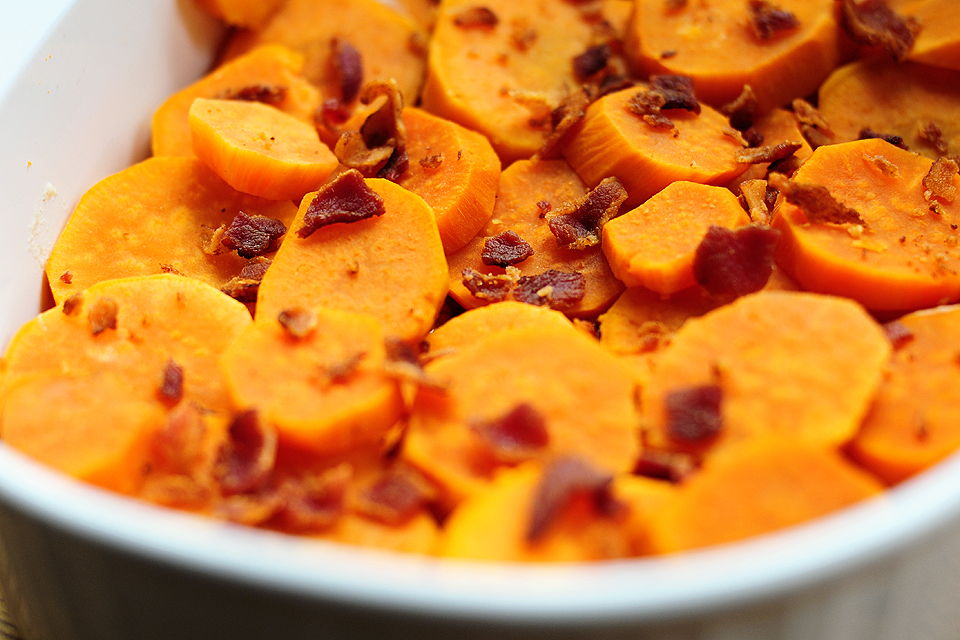
Now begins the assembly of the dish. Layer the bottom of a 11×7″ baking dish with sweet potatoes.


Tasty Kitchen Blog: Scalloped Sweet Potatoes. Guest post by Amy Johnson of She Wears Many Hats, recipe submitted by TK member quincyskeeper.

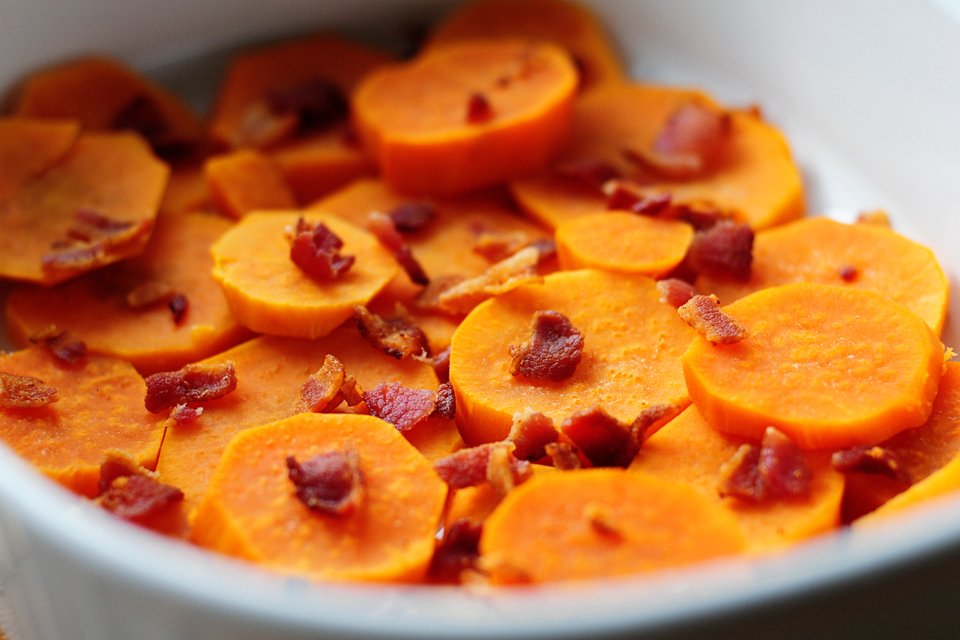
Half of the crumbled bacon goes on next.


Tasty Kitchen Blog: Scalloped Sweet Potatoes. Guest post by Amy Johnson of She Wears Many Hats, recipe submitted by TK member quincyskeeper.

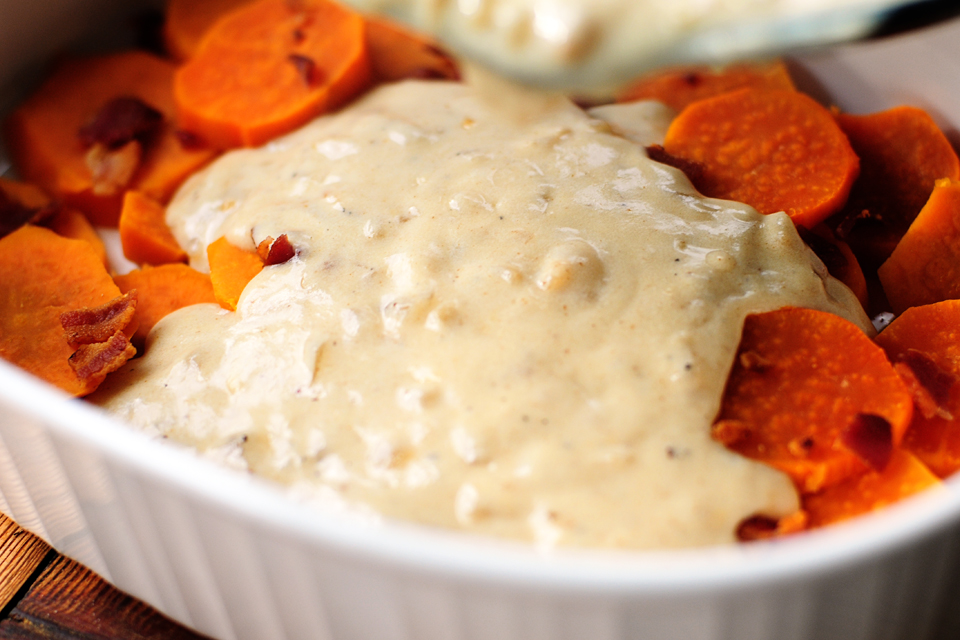
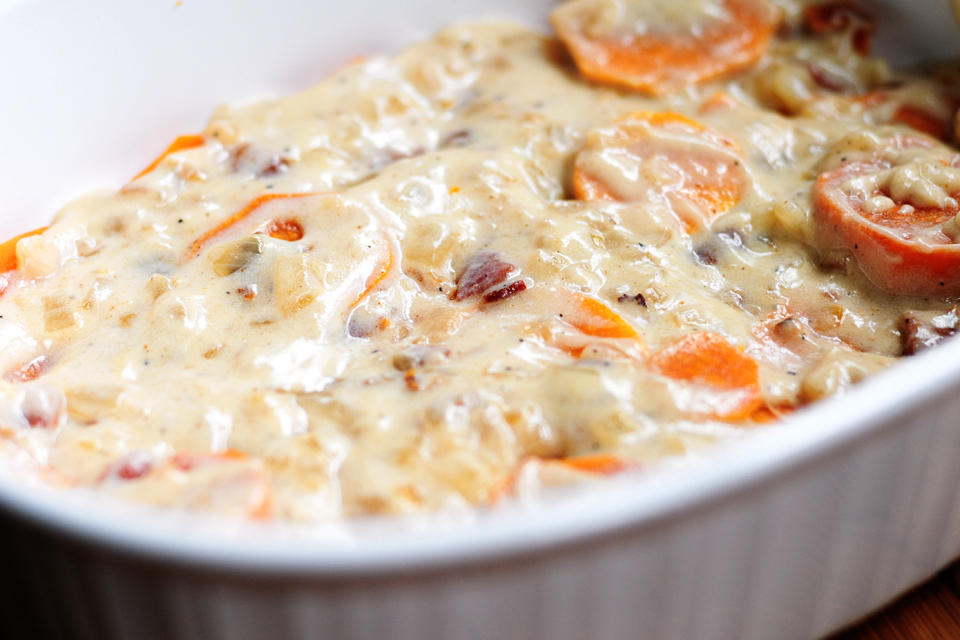
The yummy gravy mixture goes on now.


Tasty Kitchen Blog: Scalloped Sweet Potatoes. Guest post by Amy Johnson of She Wears Many Hats, recipe submitted by TK member quincyskeeper.

Spread out half of the gravy mixture.


Tasty Kitchen Blog: Scalloped Sweet Potatoes. Guest post by Amy Johnson of She Wears Many Hats, recipe submitted by TK member quincyskeeper.

After that, arrange a layer of the remaining sweet potatoes and the crumbled bacon. It’s all about the layering folks.


Tasty Kitchen Blog: Scalloped Sweet Potatoes. Guest post by Amy Johnson of She Wears Many Hats, recipe submitted by TK member quincyskeeper.

Next goes another layer of the rest of the gravy mixture.


Tasty Kitchen Blog: Scalloped Sweet Potatoes. Guest post by Amy Johnson of She Wears Many Hats, recipe submitted by TK member quincyskeeper.

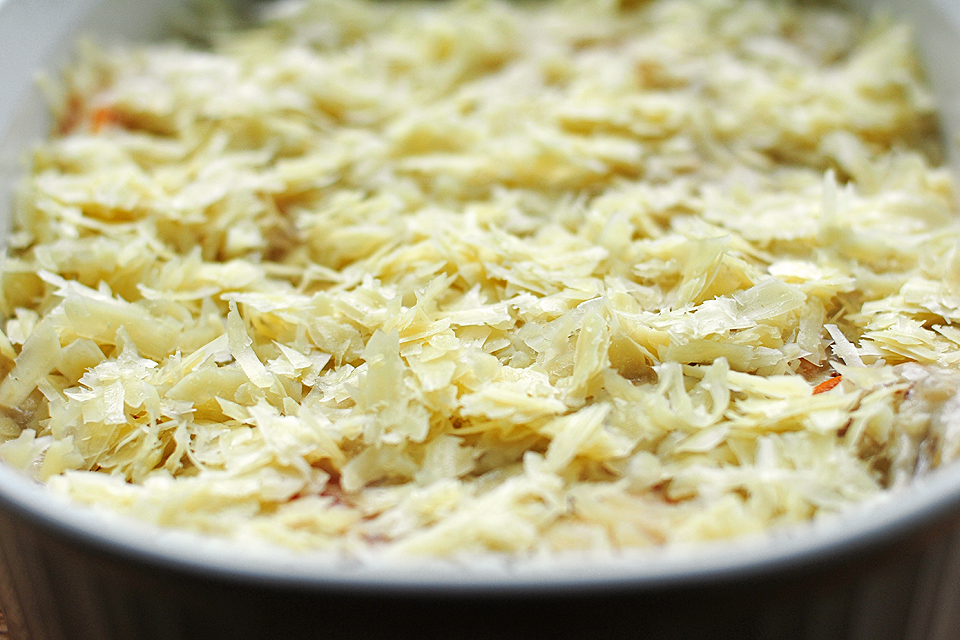
Top everything off with the grated cheese.


Tasty Kitchen Blog: Scalloped Sweet Potatoes. Guest post by Amy Johnson of She Wears Many Hats, recipe submitted by TK member quincyskeeper.

Bake for about 20 minutes, plus another 2-5 minutes under the broiler to brown the cheese if desired.


Tasty Kitchen Blog: Scalloped Sweet Potatoes. Guest post by Amy Johnson of She Wears Many Hats, recipe submitted by TK member quincyskeeper.

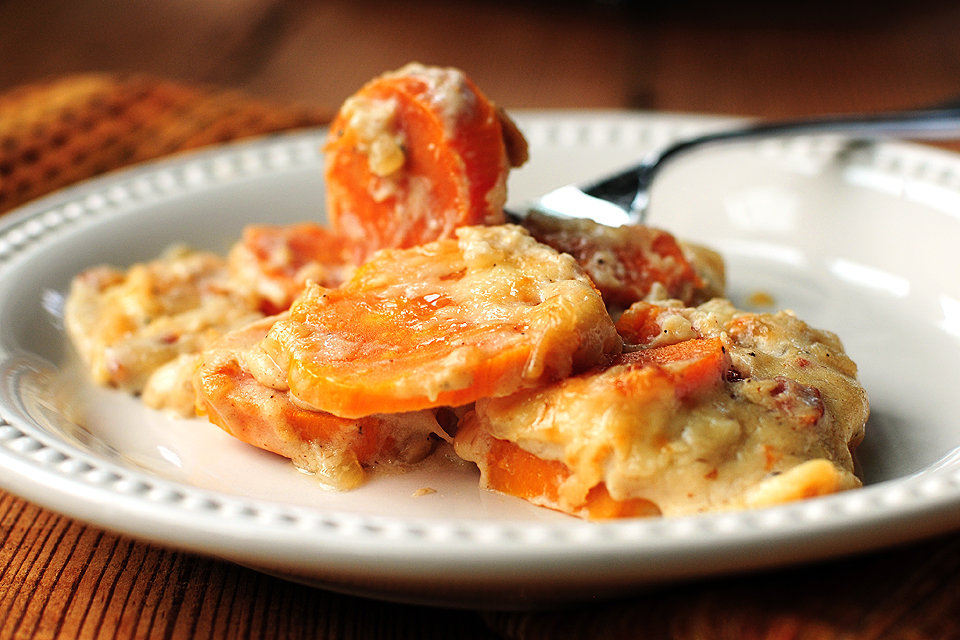
Yum!


Tasty Kitchen Blog: Scalloped Sweet Potatoes. Guest post by Amy Johnson of She Wears Many Hats, recipe submitted by TK member quincyskeeper.

This is a nice change of pace to the regular sweet potato casserole or sweet potato pie. Try it. I bet you’ll like it!

Thanks again to quincyskeeper for submitting this delicious recipe.


Printable Recipe

Scalloped Sweet Potatoes

4.61 Mitt(s) 13 Rating(s)13 votes, average: 4.61 out of 513 votes, average: 4.61 out of 513 votes, average: 4.61 out of 513 votes, average: 4.61 out of 513 votes, average: 4.61 out of 5

Prep Time:

Cook Time:

Difficulty: Easy

Servings: 8

8
x

Print Options

Page size Letter 3x5 4x6
Text Size Small Medium Large
Content Include description
Include prep time, etc.
Show image

Description

These will change your mind about sweet potatoes forever.

Ingredients

  • 2 pounds Sweet Potatoes
  • 4 strips Bacon
  • 1 whole Onion, Chopped
  • 2-½ Tablespoons All-purpose Flour
  • ½ teaspoons Salt
  • ¼ teaspoons Black Pepper
  • 2 cups Reduced-fat Milk
  • 1-¼ cup Grated Parmesan Cheese

Preparation Instructions

Potluck tip: if prepared in advance, bake as directed, cover and refrigerate for up to one day. Reheat at 325 degrees for 15 minutes covered, then remove cover and continue heating until warm.

1. Preheat oven to 325 degrees. Peel potatoes; cut into 1/4 inch slices. Place potatoes in a large pot of boiling water. Cook for 5-10 minutes or until just tender. Drain well and set aside.
2. Meanwhile, fry bacon in a large skillet over medium-high heat until crisp. Drain on a paper towel, crumble and set aside.
3. Add chopped onion to bacon drippings and cook until tender. Stir in flour over low heat and cook to a paste. Add salt and pepper. Add milk and cook until mixture thickens slightly.
4. Arrange half of the sweet potatoes in the bottom of an 11×7 inch baking dish. Sprinkle on half of the crumbled bacon. Pour on half of the milk mixture. Arrange remaining potatoes, sprinkle with remaining bacon and pour the rest of the milk mixture over the top. Sprinkle with cheese. Bake for 20 minutes or until potatoes are tender. If desired, brown cheese for 1-2 minutes under the broiler.


_______________________________________

Amy Johnson is a blogger who writes about food, travel, the home (both inside and out), and various observations and random musings about anything and everything. Visit her blog She Wears Many Hats for a dose of deliciousness, practicality, hilarity, or just plain fun. She lives in South Carolina with her husband and two children.
 

Profile photo of missamy

Pumpkin Creme Pies

Posted by in Baking, Step-by-Step Recipes

Tasty Kitchen Blog: Pumpkin Creme Pies. Guest post by Amy Johnson of She Wears Many Hats, recipe submitted by TK member The Deutsch Girl.

 
While searching for some goodies to bake during the upcoming holidays, I stumbled across this yummy recipe submitted by TK member The Deutsch Girl for Pumpkin Creme Pies, the perfect portable fall treat. I grew up eating Oatmeal Creme Pies, but never enjoyed a pumpkin version. This time of the year, pumpkin anything is good with me, but soft pumpkin cookies filled with a yummy cream cheese filling sounded over-the-top yum!

Now before we get started, don’t let the long list of ingredients and process scare you off from making these tasty pies. The ingredients are basic, most of which you probably have on hand. And the process may seem complicated, but it’s all very simple.

Here, let me show you.


Tasty Kitchen Blog: Pumpkin Creme Pies. Guest post by Amy Johnson of She Wears Many Hats, recipe submitted by TK member The Deutsch Girl.

For the pies, you’ll need brown sugar, sugar, vegetable oil, eggs, vanilla extract, baking soda, and baking powder.


Tasty Kitchen Blog: Pumpkin Creme Pies. Guest post by Amy Johnson of She Wears Many Hats, recipe submitted by TK member The Deutsch Girl.

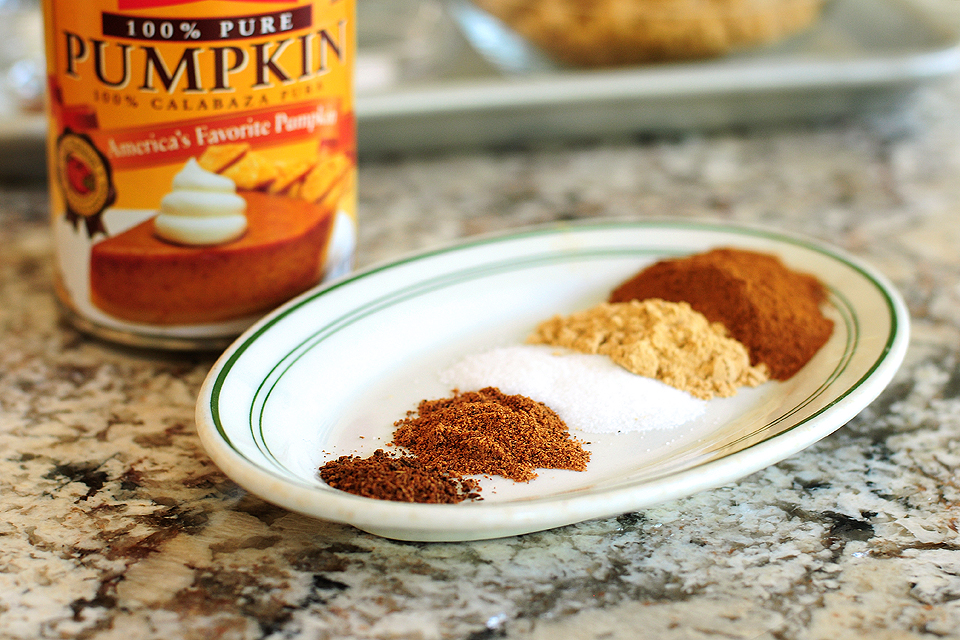
You’ll also need canned pumpkin, cinnamon, ginger, salt, ground nutmeg, and ground cloves.

(Remember: you can find the full recipe at the end of the post, with all ingredient measurements and instructions listed. And it’s printable too!)


Tasty Kitchen Blog: Pumpkin Creme Pies. Guest post by Amy Johnson of She Wears Many Hats, recipe submitted by TK member The Deutsch Girl.

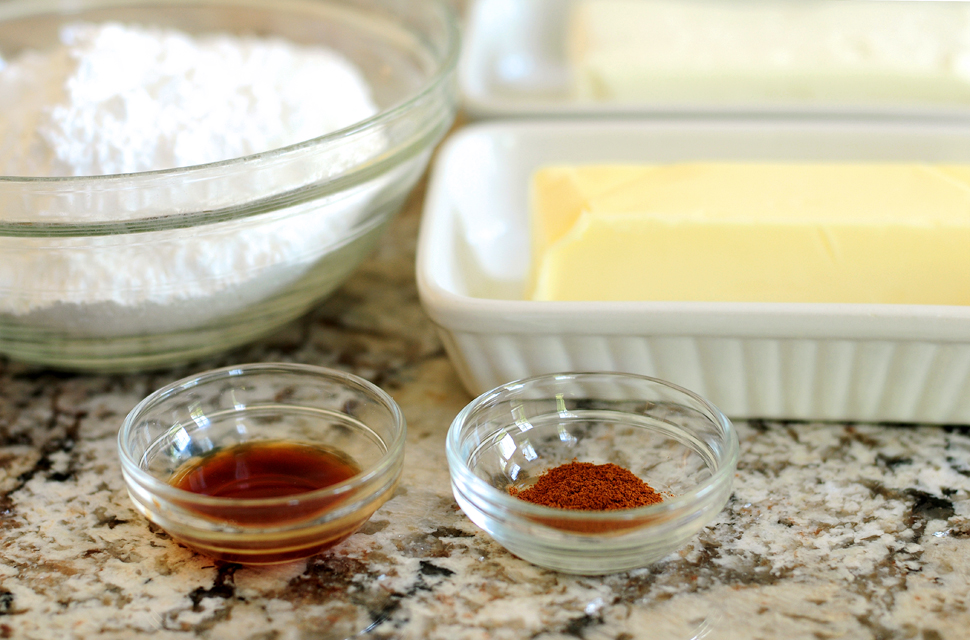
The creme filling ingredients are simple: cream cheese, butter, powdered sugar, vanilla extract and cinnamon.

Preheat your oven to 350° F.


Tasty Kitchen Blog: Pumpkin Creme Pies. Guest post by Amy Johnson of She Wears Many Hats, recipe submitted by TK member The Deutsch Girl.

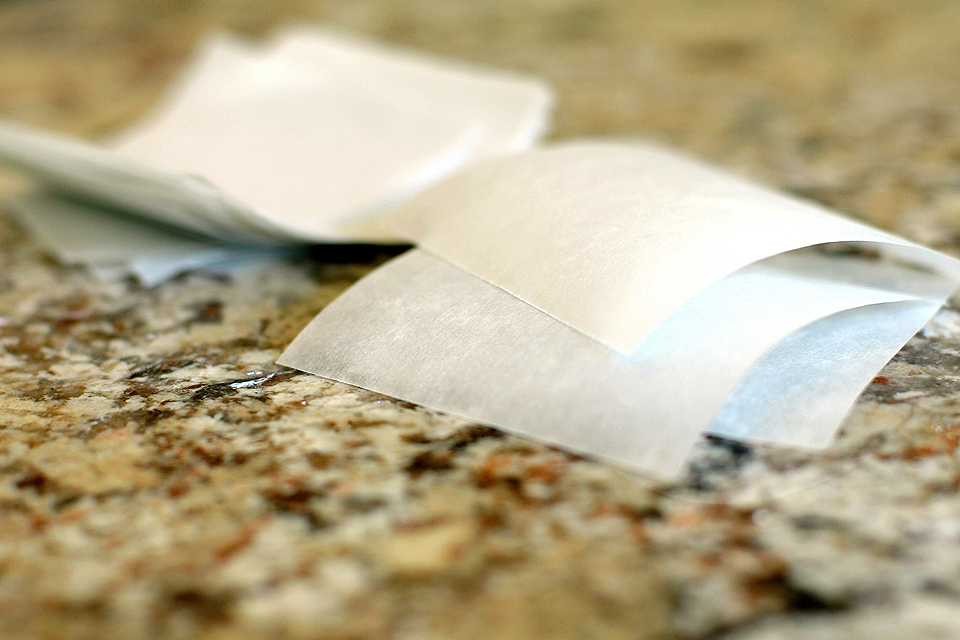
To make the job a little easier later on, individual parchment paper squares will come in handy. Go ahead and cut out 48 squares about 3″ wide. Line your baking sheet(s) so they’ll be ready when you need them.


Tasty Kitchen Blog: Pumpkin Creme Pies. Guest post by Amy Johnson of She Wears Many Hats, recipe submitted by TK member The Deutsch Girl.

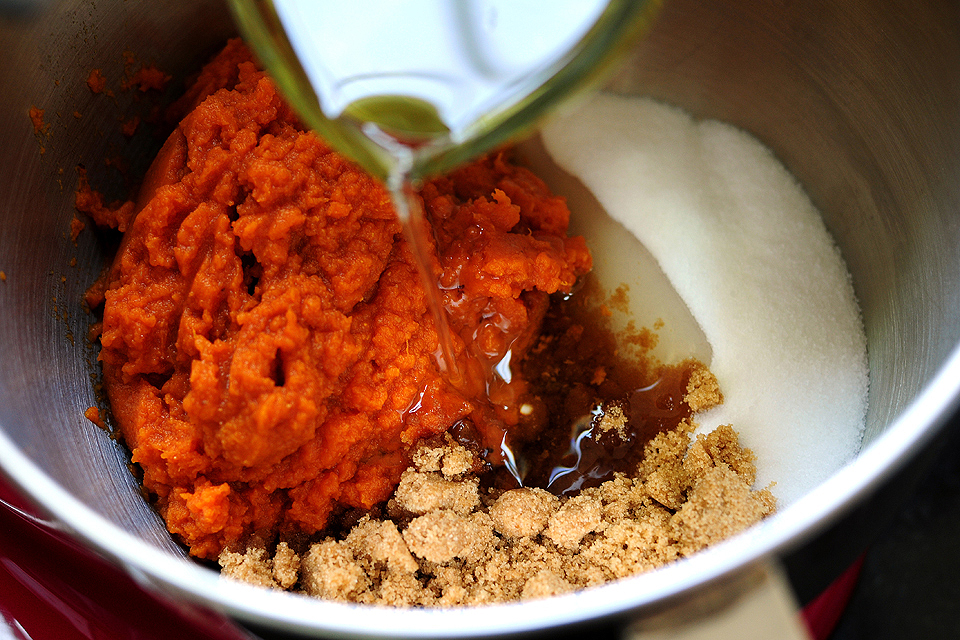
For the pumpkin pies, in a mixer bowl add the brown sugar, sugar, oil, and pumpkin.


Tasty Kitchen Blog: Pumpkin Creme Pies. Guest post by Amy Johnson of She Wears Many Hats, recipe submitted by TK member The Deutsch Girl.

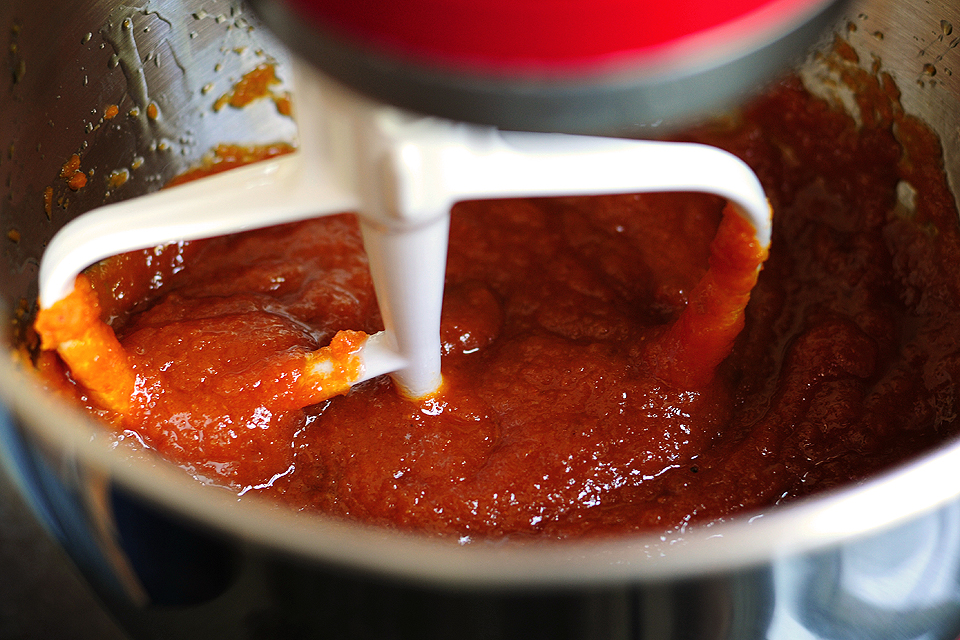
Beat together well.


Tasty Kitchen Blog: Pumpkin Creme Pies. Guest post by Amy Johnson of She Wears Many Hats, recipe submitted by TK member The Deutsch Girl.

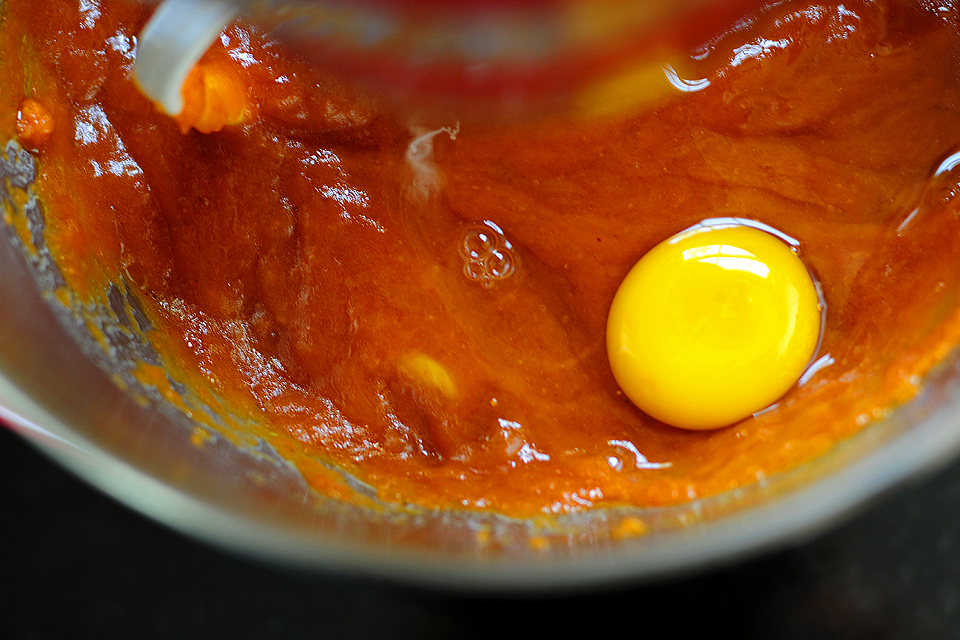
Then add eggs one at a time. Be sure to combine well after each egg is added.


Tasty Kitchen Blog: Pumpkin Creme Pies. Guest post by Amy Johnson of She Wears Many Hats, recipe submitted by TK member The Deutsch Girl.

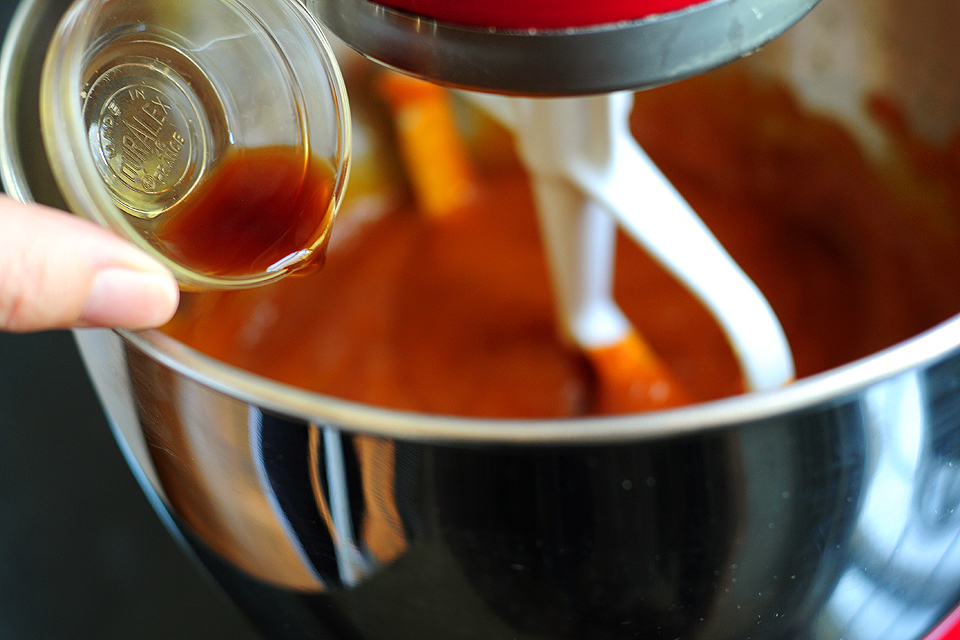
The vanilla goes in next. Mix it all up. Pretty color huh?


Tasty Kitchen Blog: Pumpkin Creme Pies. Guest post by Amy Johnson of She Wears Many Hats, recipe submitted by TK member The Deutsch Girl.

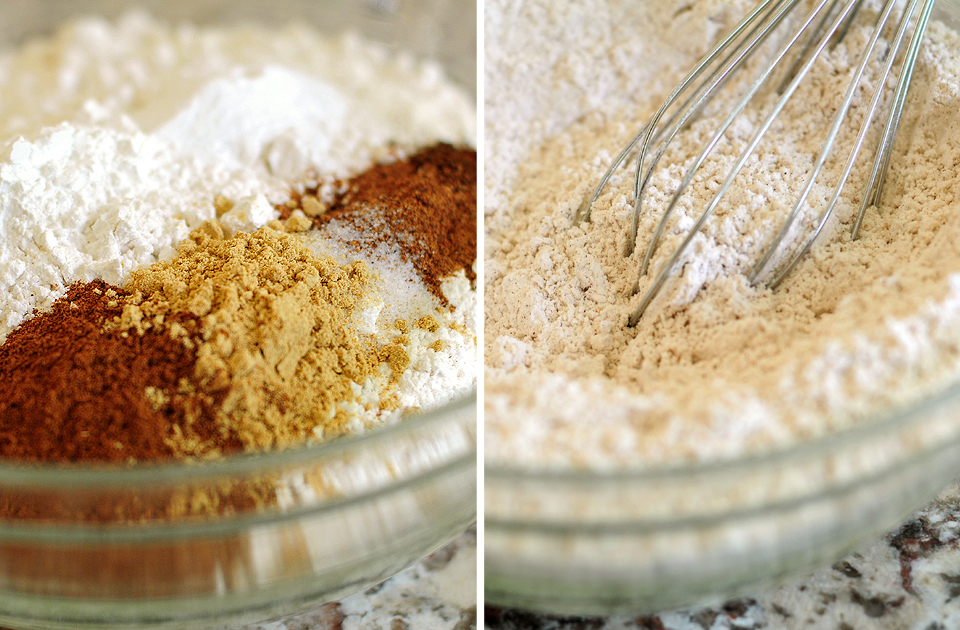
Now for the dry ingredients. In a separate bowl, mix together the flour, baking soda, baking powder, cinnamon, ground ginger, salt, ground nutmeg, and ground cloves. A whisk helps to incorporate the ingredients without compacting them.


Tasty Kitchen Blog: Pumpkin Creme Pies. Guest post by Amy Johnson of She Wears Many Hats, recipe submitted by TK member The Deutsch Girl.

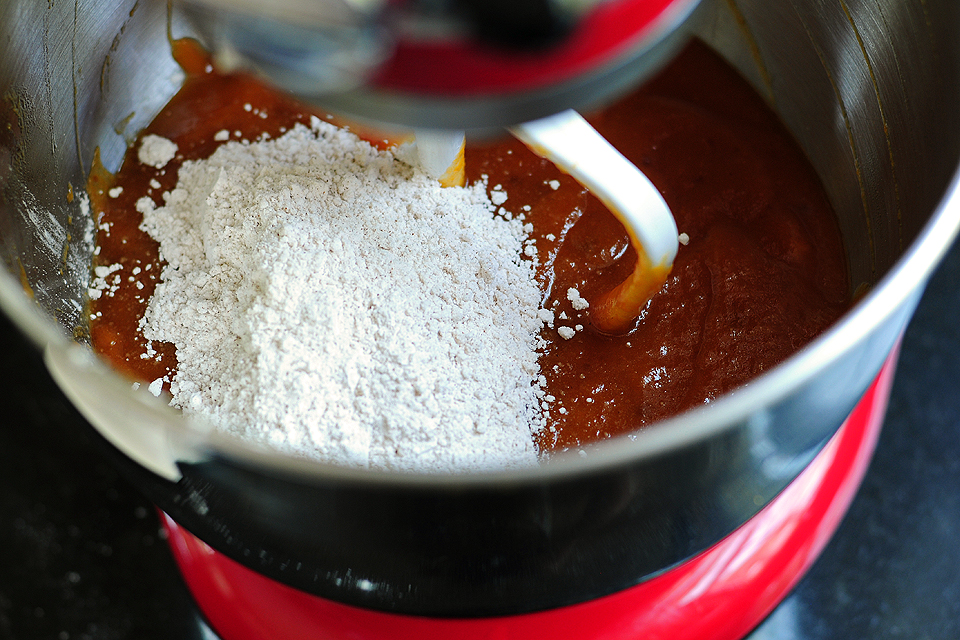
Add the dry ingredients into the wet pumpkin mixture.


Tasty Kitchen Blog: Pumpkin Creme Pies. Guest post by Amy Johnson of She Wears Many Hats, recipe submitted by TK member The Deutsch Girl.

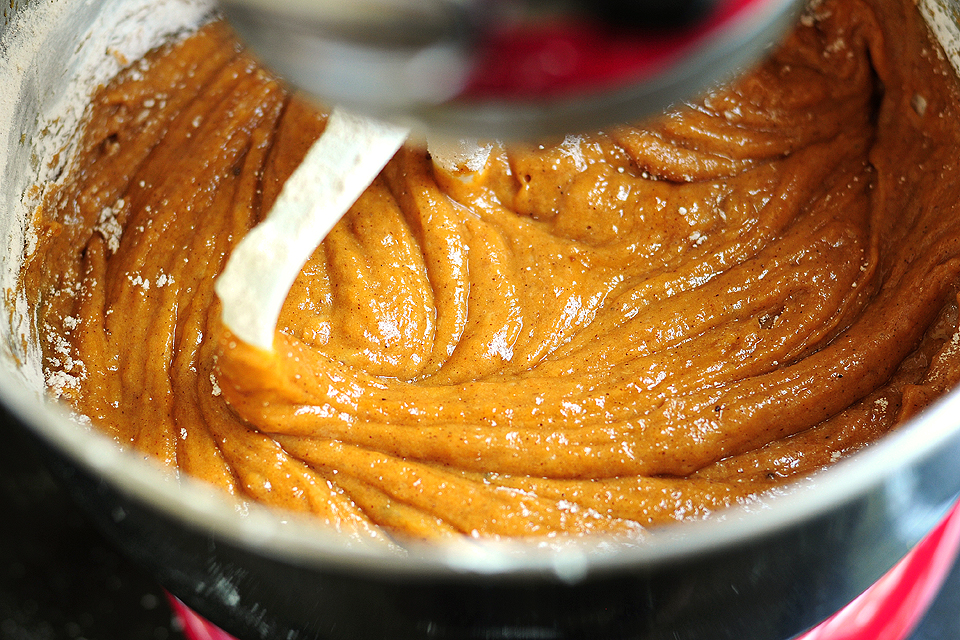
Mix together until just combined. Be sure not to over-mix. Scrape down the sides of the bowl when needed. Things should be starting to smell all warm and cozy and mouth-watery good right about now.

Okay, now for the part that may turn some of you off, but don’t go! Stick around. It’s not that difficult. It only looks like a pain. But it’s fun. Promise.

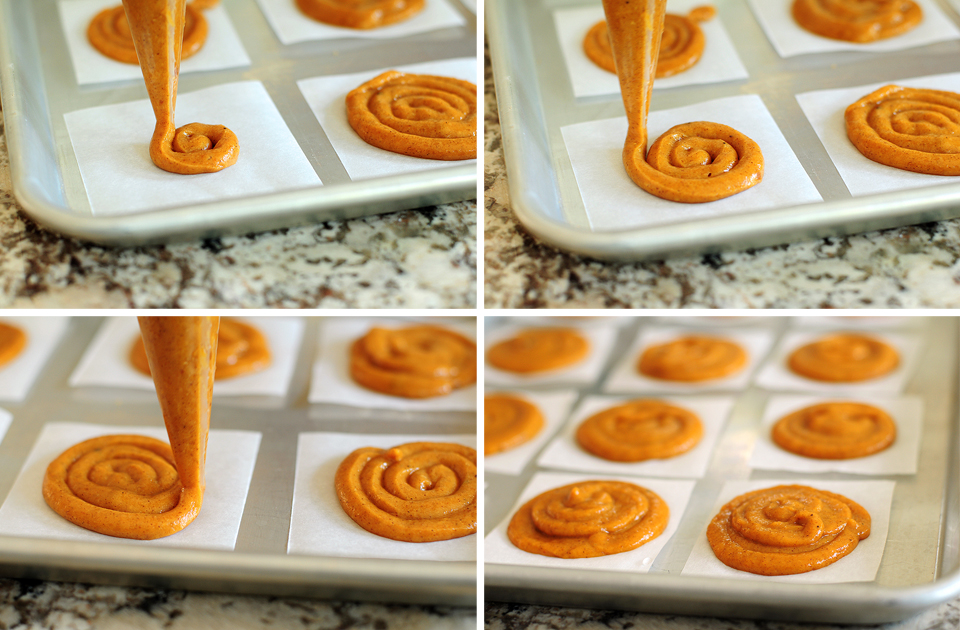
Using a pastry bag or large zipper plastic bag, the pumpkin pies will be piped out onto the parchment squares. It only looks tedious. It goes very quickly, or I would’ve dropped the whole thing and headed for the box of Little Debbies.


Tasty Kitchen Blog: Pumpkin Creme Pies. Guest post by Amy Johnson of She Wears Many Hats, recipe submitted by TK member The Deutsch Girl.

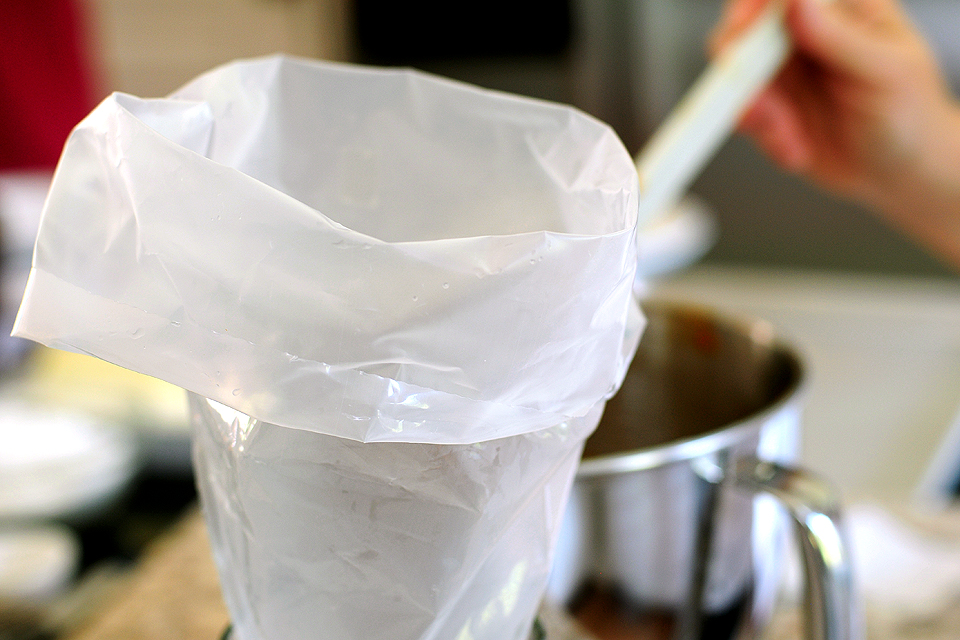
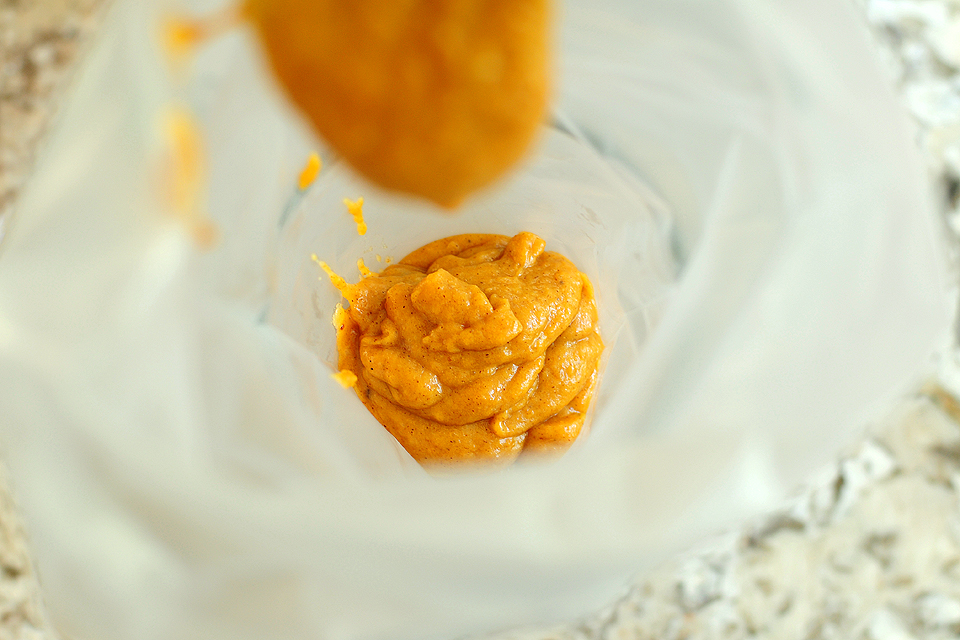
This is how I do it; stand the pastry bag (or plastic zip top bag) in a tall sturdy glass, and fold the sides down a bit.


Tasty Kitchen Blog: Pumpkin Creme Pies. Guest post by Amy Johnson of She Wears Many Hats, recipe submitted by TK member The Deutsch Girl.

Then fill the bag with a portion of the batter. Roll the sides of the bag back up and twist closed, to keep batter from coming out. Snip about 3/8-1/2″ off the end of the bag. Once the end is clipped, the batter will be ready to flow, so be careful to keep bag tip pinched closed until ready to pipe.

Now, let the piping begin. This is the fun part—the ultimate in kitchen play. Easy stuff y’all.


Tasty Kitchen Blog: Pumpkin Creme Pies. Guest post by Amy Johnson of She Wears Many Hats, recipe submitted by TK member The Deutsch Girl.

Begin in the middle of the 3″ square and pipe a spiral. Go around … and around … and around until you make a circle about 2″ wide. You’ll notice in order to make the pies turn out a little mounded, instead of totally flat, I went back and topped the spiral circles with some extra batter. Just a little, not too much.

Bake the pies for about 11 minutes, or until firm.


Tasty Kitchen Blog: Pumpkin Creme Pies. Guest post by Amy Johnson of She Wears Many Hats, recipe submitted by TK member The Deutsch Girl.

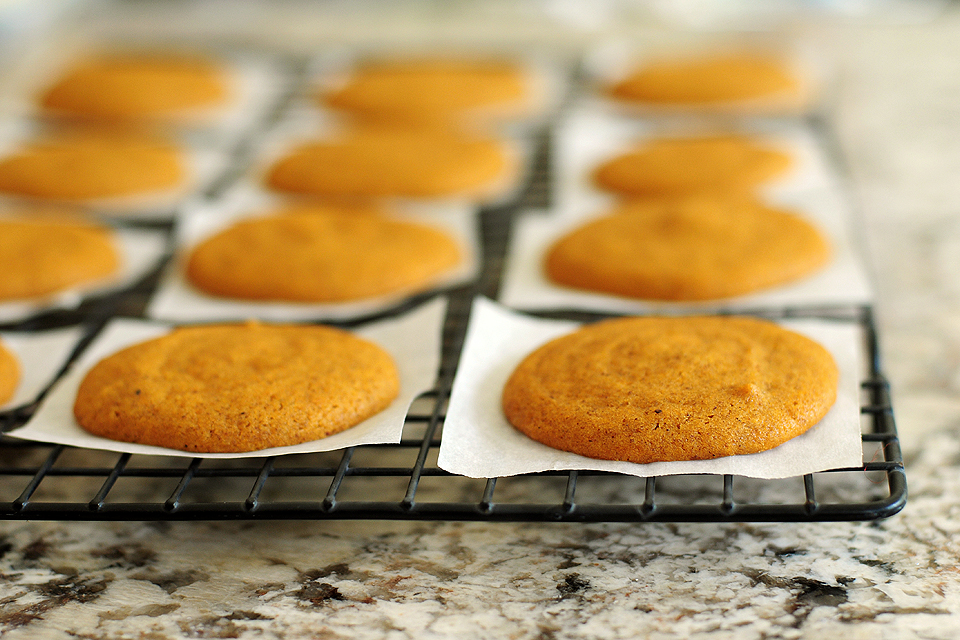
When they’re done baking, carefully transfer the parchment squares to a cooling rack to let the pies completely cool.

Here’s where I think the parchment helped the most: when the pies are cool, you can peel the parchment off the back of each pie. The pies are a little soft, so trying to lift them with a spatula could mess them up. The parchment paper works like a charm.

Now for the cream cheese filling.


Tasty Kitchen Blog: Pumpkin Creme Pies. Guest post by Amy Johnson of She Wears Many Hats, recipe submitted by TK member The Deutsch Girl.

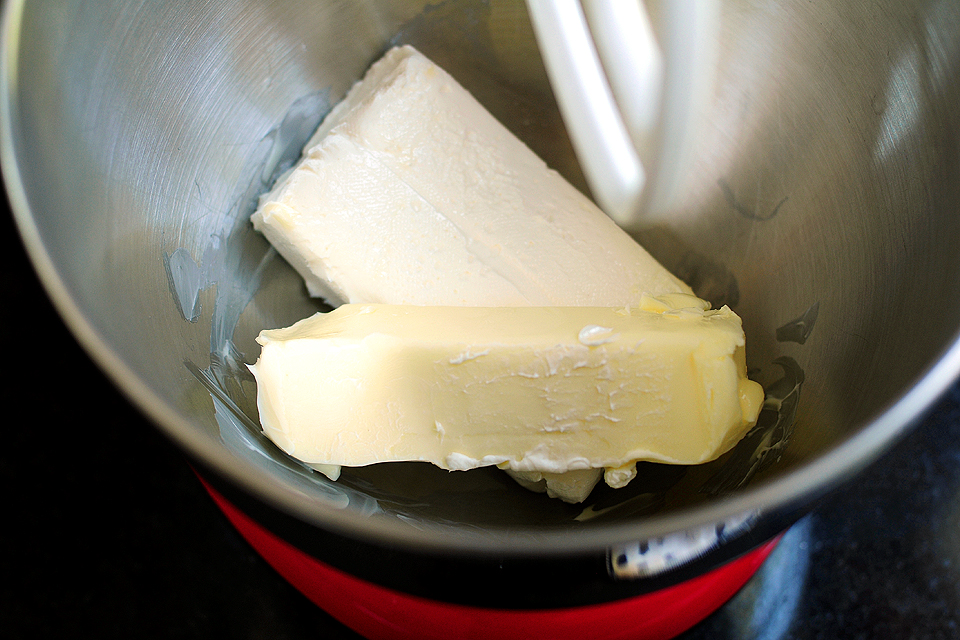
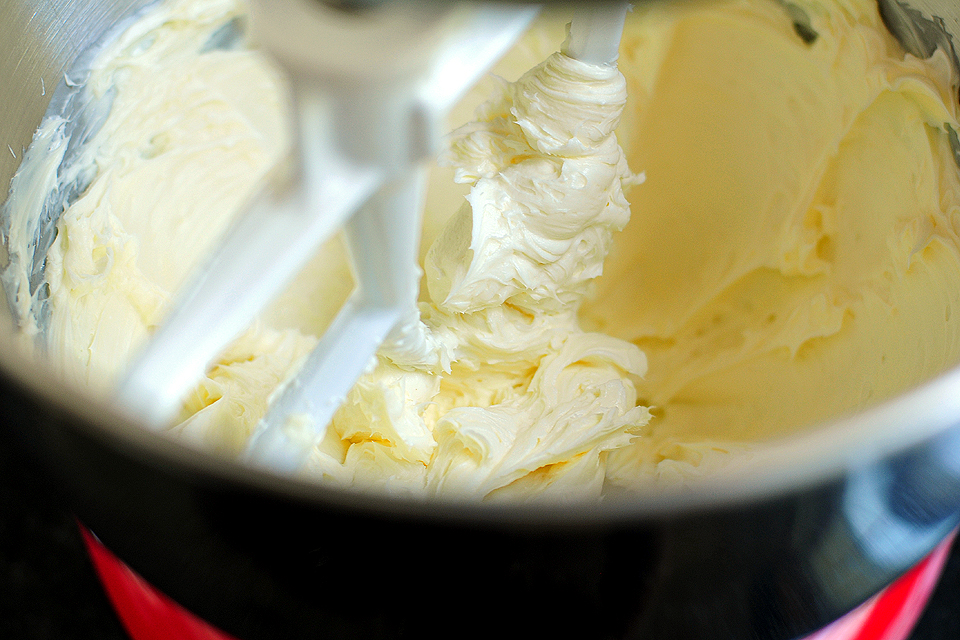
Add the cream cheese and butter to a mixing bowl.


Tasty Kitchen Blog: Pumpkin Creme Pies. Guest post by Amy Johnson of She Wears Many Hats, recipe submitted by TK member The Deutsch Girl.

Beat together the cream cheese and butter until well incorporated.


Tasty Kitchen Blog: Pumpkin Creme Pies. Guest post by Amy Johnson of She Wears Many Hats, recipe submitted by TK member The Deutsch Girl.

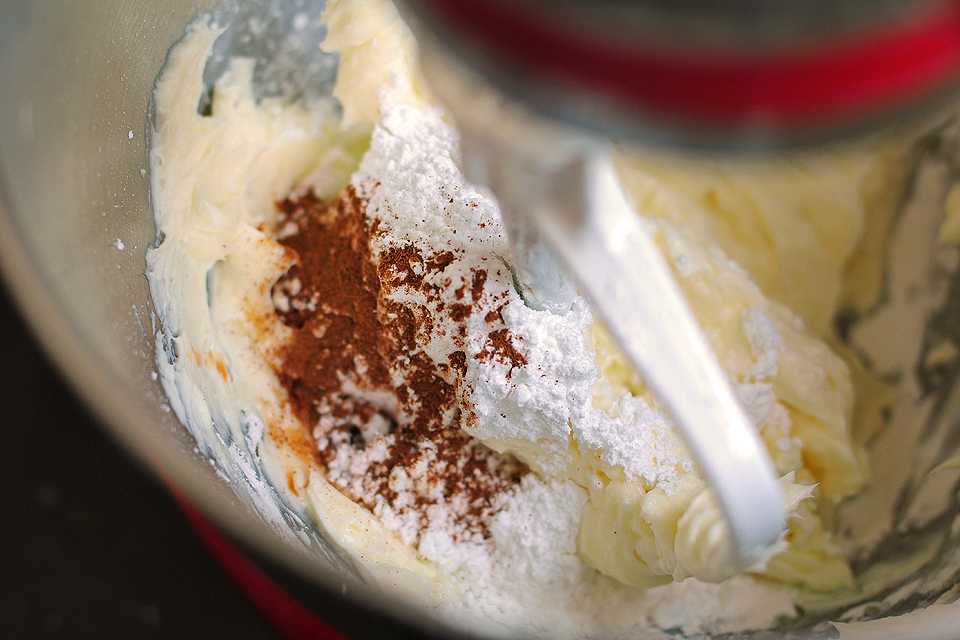
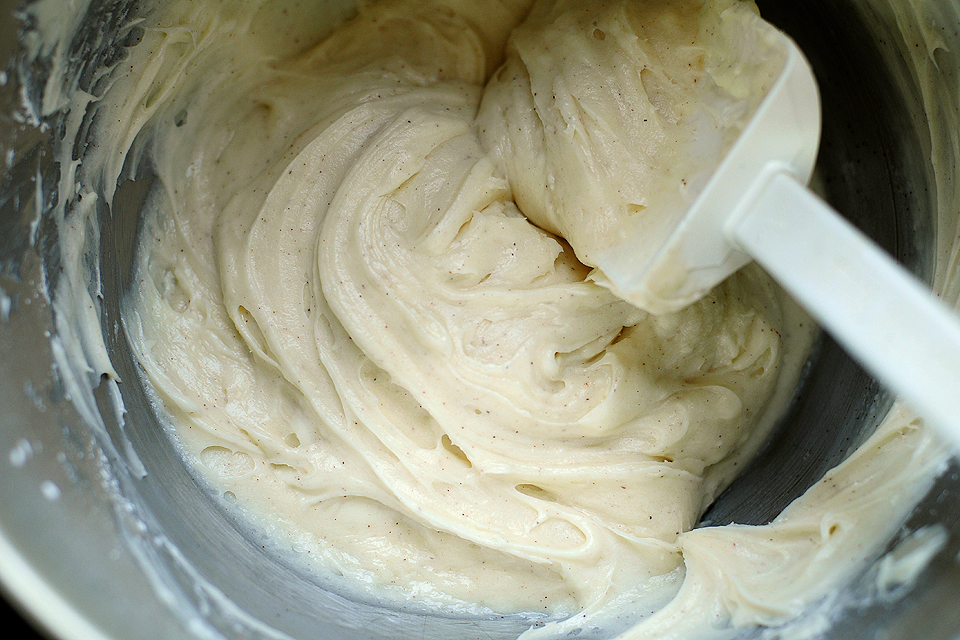
Next add the powdered sugar, vanilla and cinnamon and mix well.


Tasty Kitchen Blog: Pumpkin Creme Pies. Guest post by Amy Johnson of She Wears Many Hats, recipe submitted by TK member The Deutsch Girl.

Please note: this filling is the bomb. It just is. It should definitely be kept in your arsenal for other baked goods.

Yum. Yum. Yum.

Enough of that. Moving right along.

But don’t forget that y’all.

Don’t. It’s good stuff.

For realz.

Okay, really. I’m finished now. Now for building the finished product.


Tasty Kitchen Blog: Pumpkin Creme Pies. Guest post by Amy Johnson of She Wears Many Hats, recipe submitted by TK member The Deutsch Girl.

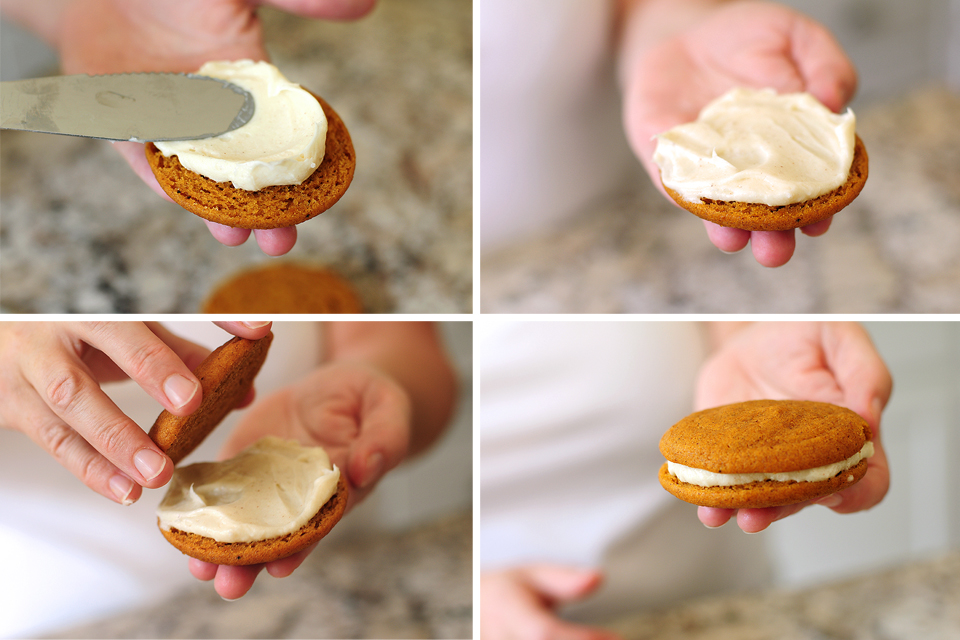
Frost the flat side of a pie with the yummy, delicious, make-you-drool filling. Top with another pie, flat side down.

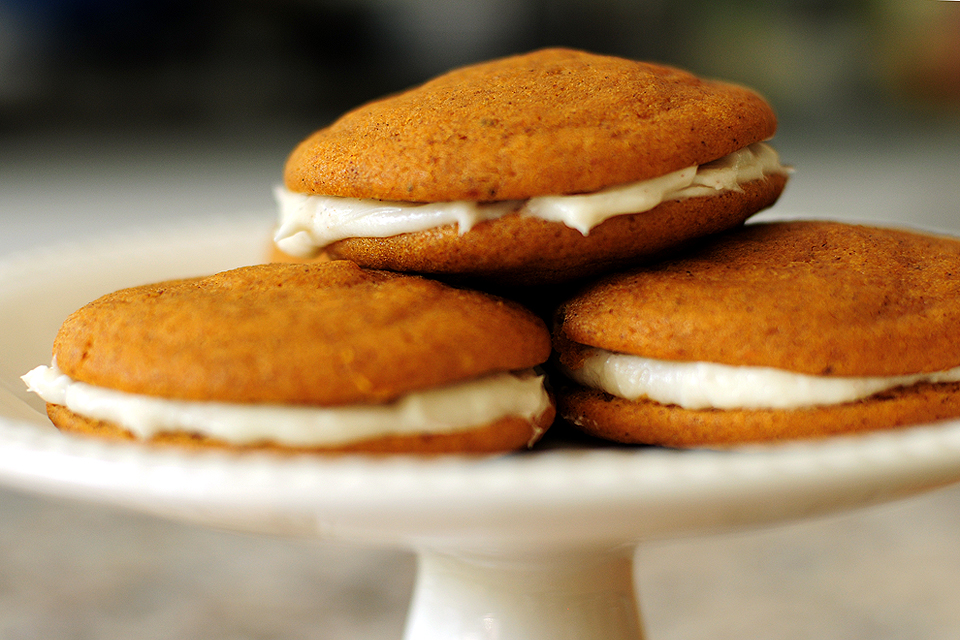
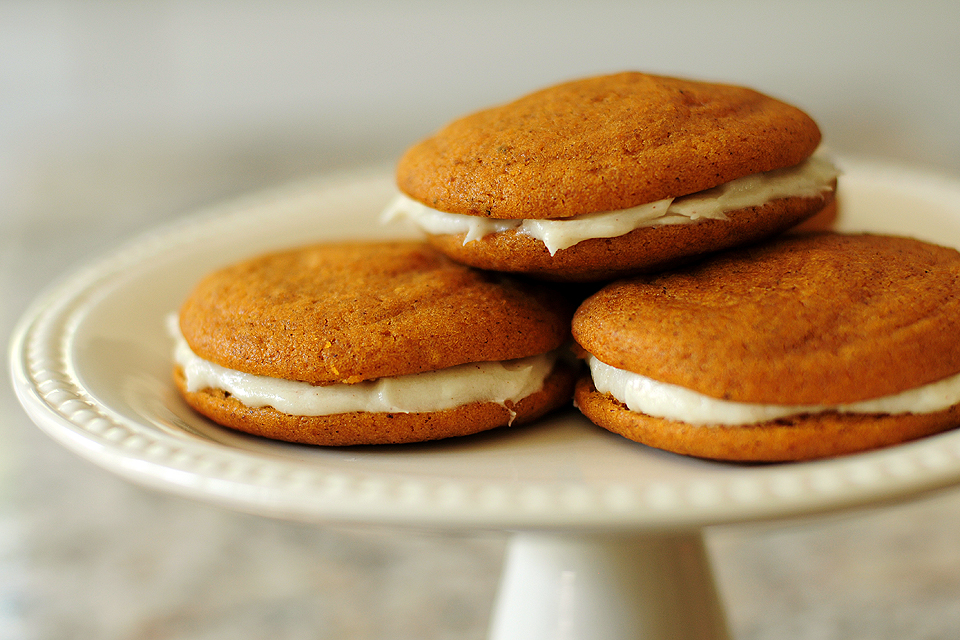
And there you have it. A cute, tasty Pumpkin Creme Pie.


Tasty Kitchen Blog: Pumpkin Creme Pies. Guest post by Amy Johnson of She Wears Many Hats, recipe submitted by TK member The Deutsch Girl.

You’ll want to enjoy right away or chill, up to a couple of days, covered on parchment or waxed paper. The pies can be a tad bit sticky so the parchment paper or waxed paper is definitely recommended. These are such a treat and didn’t last long around here. This recipe makes about 24 finished Pumpkin Creme Pies. Mini versions of these would be so cute, wouldn’t they?

Enjoy! And again, a big thanks to The Deutsch Girl for sharing this one. Mighty fine indeed.


Printable Recipe

Pumpkin Creme Pies

4.86 Mitt(s) 52 Rating(s)52 votes, average: 4.86 out of 552 votes, average: 4.86 out of 552 votes, average: 4.86 out of 552 votes, average: 4.86 out of 552 votes, average: 4.86 out of 5

Prep Time:

Cook Time:

Difficulty: Easy

Servings: 12

12
x

Print Options

Page size Letter 3x5 4x6
Text Size Small Medium Large
Content Include description
Include prep time, etc.
Show image

Description

A delicious twist on the traditional oatmeal creme pie. Very easy to make, looks professional, and has the perfect amount of pumpkin flavor without overpowering. Add to your Thanksgiving dinner for a non-traditional pumpkin flavored dessert!

Ingredients

  • For Creme Pies
  • 1 cup Brown Sugar
  • 1 cup Sugar
  • 1 cup Vegetable Oil
  • 1 can Pumpkin (15 Oz.)
  • 2 whole Eggs
  • 1 teaspoon Vanilla Extract
  • 3 cups All-purpose Flour
  • 1 teaspoon Baking Soda
  • 1 teaspoon Baking Powder
  • 1 Tablespoon Cinnamon
  • 1 teaspoon Ground Ginger
  • ½ teaspoons Salt
  • ½ teaspoons Ground Nutmeg
  • ¼ teaspoons Ground Cloves
  • _____
  • FOR FILLING:
  • 1 package Cream Cheese Softened (8 Oz.)
  • 1 stick Unsalted Butter, Room Temperature
  • 1 package Powdered Sugar (16 Oz.)
  • 3 drops Vanilla Extract
  • 2 dashes Cinnamon

Preparation Instructions

Preheat oven to 350 degrees.

Pumpkin Creme Pies: Beat together brown sugar, sugar, oil and pumpkin. Add eggs one at time, mixing well after each addition, followed by the vanilla.

In a separate bowl, mix together the dry ingredients.

Slowly incorporate the dry ingredients into the wet until just combined.

Cut 3 inch squares of parchment paper, about 24. Using a pastry bag with a round tip, or a big zip top plastic bag with one corner snipped, squeeze out concentric circles of batter, starting from the middle and working outward until the circles are about 2 inches in diameter. (Note that the squares allow the baker to move the square while keeping the bag in the same spot. Just squeeze for easy circle making!)

Transfer each square to a baking sheet. Bake for 11 minutes, or until firm, and cool on a rack.

Cream Cheese Filling: Beat together cream cheese and butter. Add powdered sugar, vanilla and cinnamon. Frost flat side of half the pies and top with another piece.

Enjoy right away, or chill overnight. These keep very nicely in the fridge for at least a few days.


_______________________________________

Amy Johnson is a blogger who writes about food, travel, the home (both inside and out), and various observations and random musings about anything and everything. Visit her blog She Wears Many Hats for a dose of deliciousness, practicality, hilarity, or just plain fun. She lives in South Carolina with her husband and two children.
 

Profile photo of missamy

Pecan Pie Muffins

Posted by in Baking, Step-by-Step Recipes

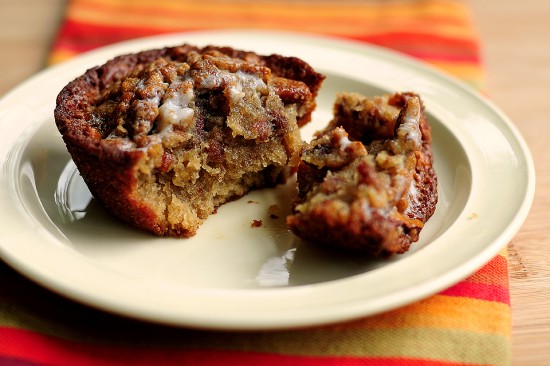
  Your attention please … Your attention please … This is a public service announcement. Make these Pecan Pie Muffins. You will be glad you did. Your friends and family will thank you. That is all. I’m sure glad I ran across this Tasty Kitchen recipe submitted by blackhawkwife. Between the butter and the pecans, […]

Profile photo of missamy

Bacon Tomato Capellini

Posted by in Step-by-Step Recipes

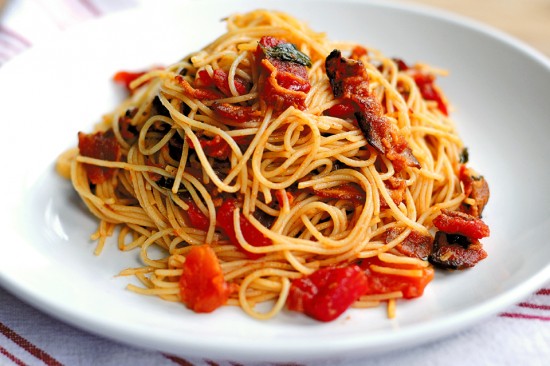
  As I was perusing the Tasty Kitchen offerings, this Bacon Tomato Capellini recipe jumped out at me. It actually jumped out of the screen, grabbed me by the neck, and forced me to make it. Bacon has that way about it, a mysterious, addicting, intoxicating way that grips you at the core and won’t […]

Profile photo of missamy

Lazy Chicken

Posted by in Step-by-Step Recipes

Today’s post comes from Amy of She Wears Many Hats and she’s doing a recipe from Tasty Kitchen member sweepea for us. Thanks, ladies!   Strolling through the Tasty Kitchen recipes a few weeks ago, I ran across this recipe titled Lazy Chicken. Of course I had to take a peek. Not that I have […]
Profile photo of missamy

My Granny’s Chocolate Cobbler

Posted by in Baking, Step-by-Step Recipes

This week, Ree’s in Orlando, ditching the boots for a pair of flip flops. Right now, she’s either lost in Wally World, hiding in the bathroom, or clutching the bars of some insane ride and crying for her mommy. So we have another special guest filling in for this week’s Tasty Recipe post! Today, missamy […]