The Pioneer Woman Tasty Kitchen
Profile photo of georgiapellegrini

Chipotle and Lime Roasted Potatoes

Posted by in Step-by-Step Recipes

Tasty Kitchen Blog: Chipotle and Lime Roasted Potatoes. Guest post by Georgia Pellegrini, recipe submitted by TK member Meredith of Cooking In Sock Monkey Slippers.

 
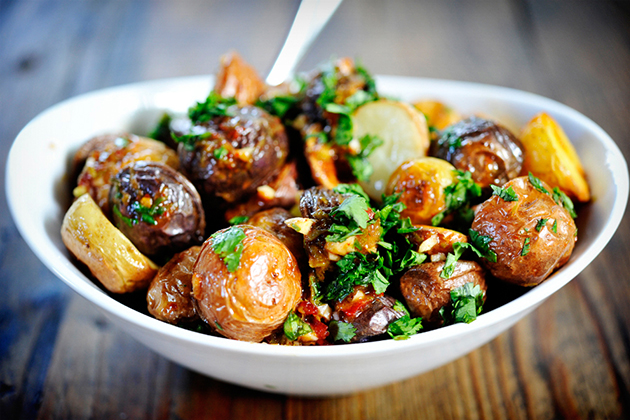
In summertime, when the temperatures are especially hot, I’m always looking for dishes that work well at room temperature, as well as recipes that offer a twist on your classic summer dishes. This bowl of Chipotle and Lime Roasted Potatoes from Tasty Kitchen member Meredith of Cooking In Sock Monkey Slippers was just that. It was great hot or warm or room temperature and the dressing was addictive and could work well on many other summer salads.


Tasty Kitchen Blog: Chipotle and Lime Roasted Potatoes. Guest post by Georgia Pellegrini, recipe submitted by TK member Meredith of Cooking In Sock Monkey Slippers.

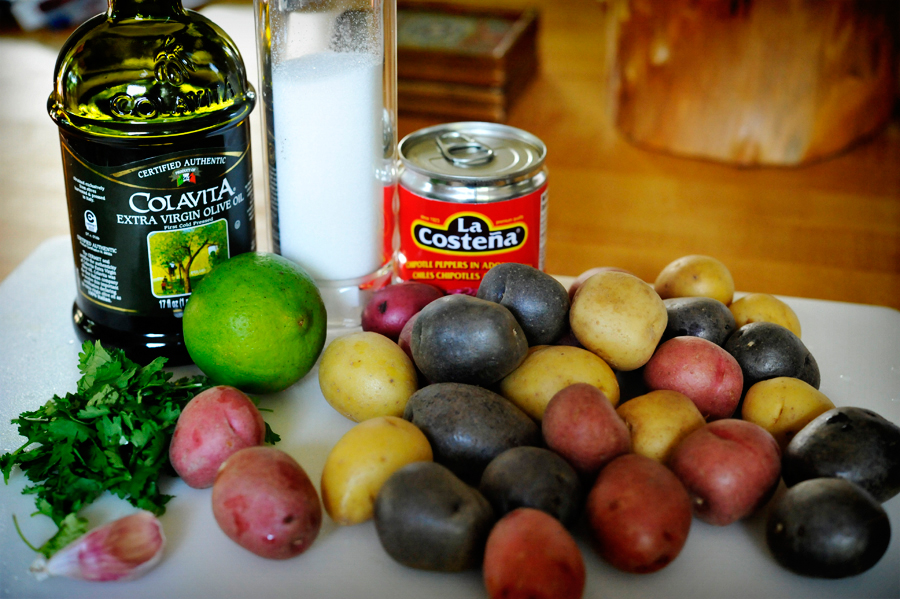
You will need: new potatoes or a combination of small roasting potatoes, olive oil, salt, chipotle pepper in adobo sauce, garlic, lime zest, lime juice, and cilantro.


Tasty Kitchen Blog: Chipotle and Lime Roasted Potatoes. Guest post by Georgia Pellegrini, recipe submitted by TK member Meredith of Cooking In Sock Monkey Slippers.

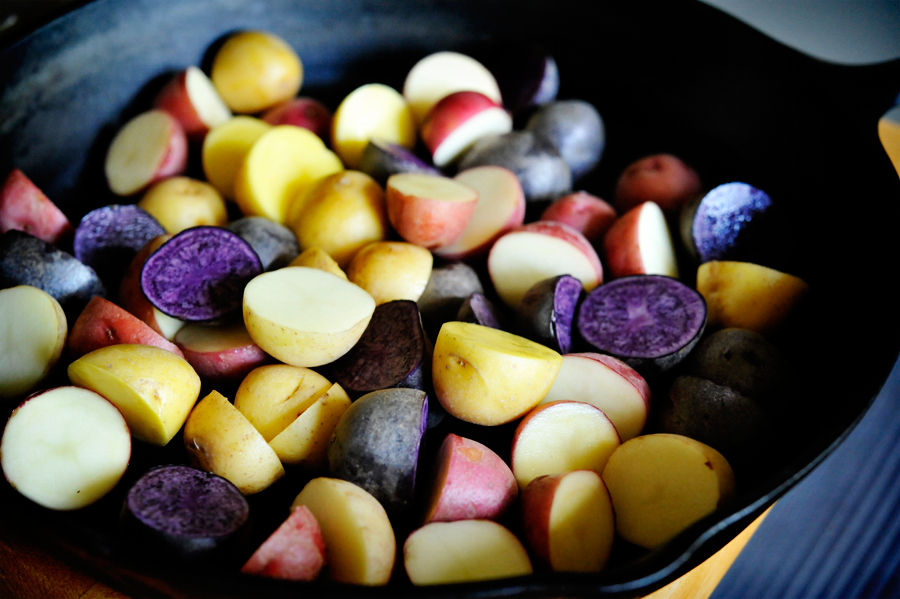
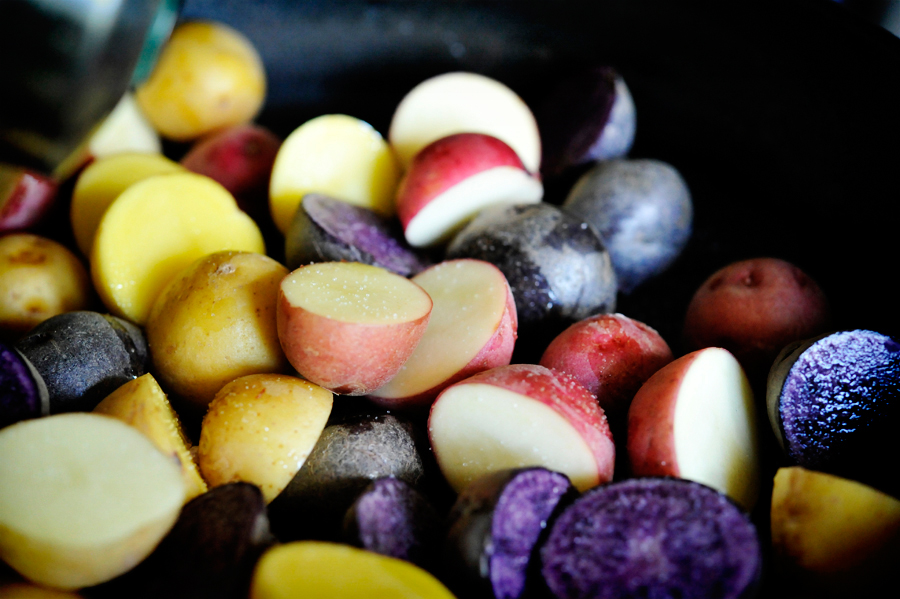
Cut your potatoes in half and drop them in your roasting dish.


Tasty Kitchen Blog: Chipotle and Lime Roasted Potatoes. Guest post by Georgia Pellegrini, recipe submitted by TK member Meredith of Cooking In Sock Monkey Slippers.

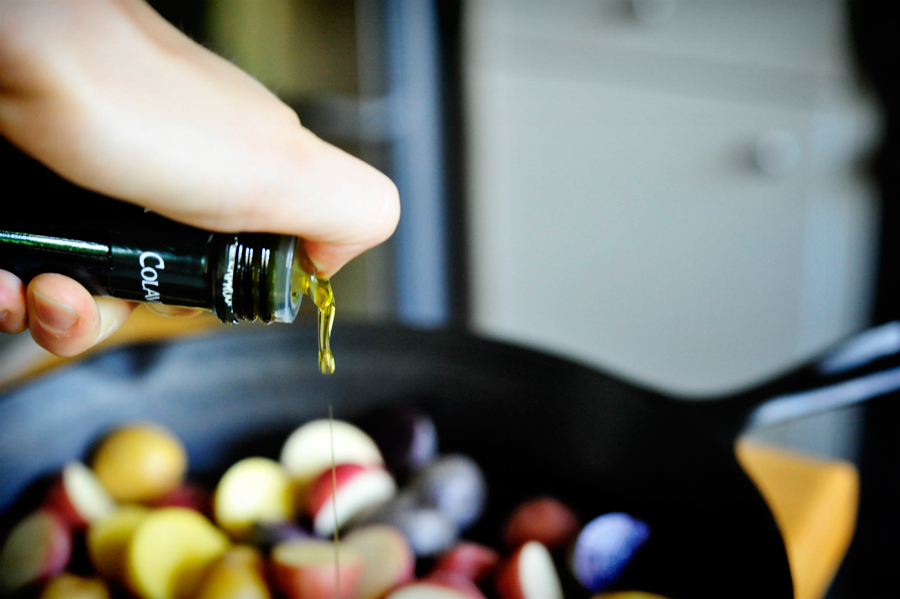
Drizzle in the olive oil and toss them about with a spoon.


Tasty Kitchen Blog: Chipotle and Lime Roasted Potatoes. Guest post by Georgia Pellegrini, recipe submitted by TK member Meredith of Cooking In Sock Monkey Slippers.

Season with salt and toss them about with a spoon some more. Place them in an oven to roast while you prepare your dressing.


Tasty Kitchen Blog: Chipotle and Lime Roasted Potatoes. Guest post by Georgia Pellegrini, recipe submitted by TK member Meredith of Cooking In Sock Monkey Slippers.

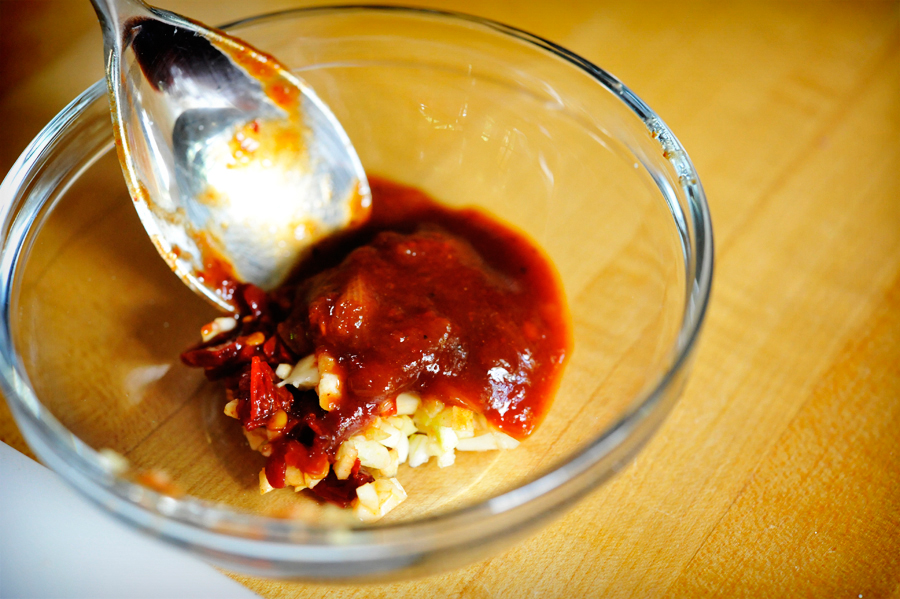
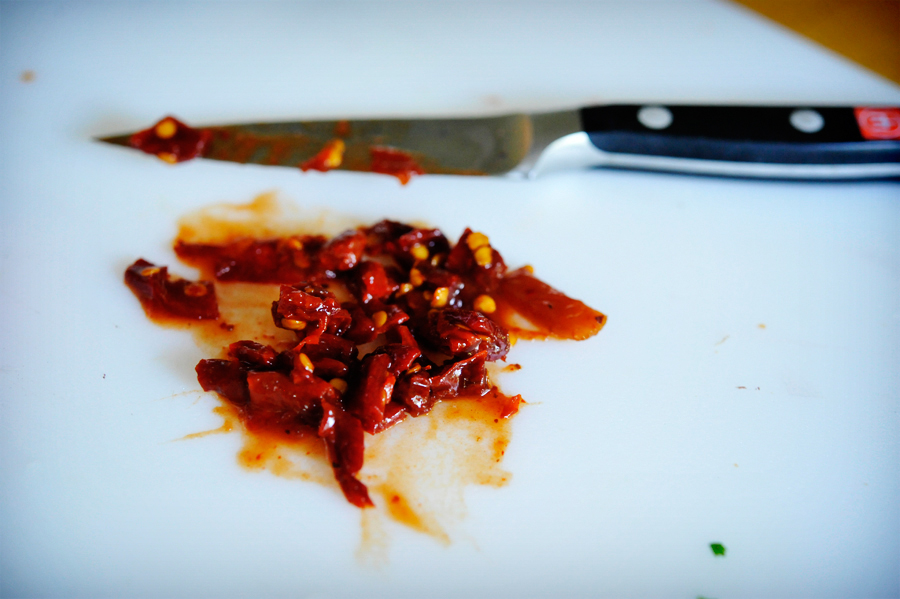
To prepare the dressing, chop up some chipotle peppers …


Tasty Kitchen Blog: Chipotle and Lime Roasted Potatoes. Guest post by Georgia Pellegrini, recipe submitted by TK member Meredith of Cooking In Sock Monkey Slippers.

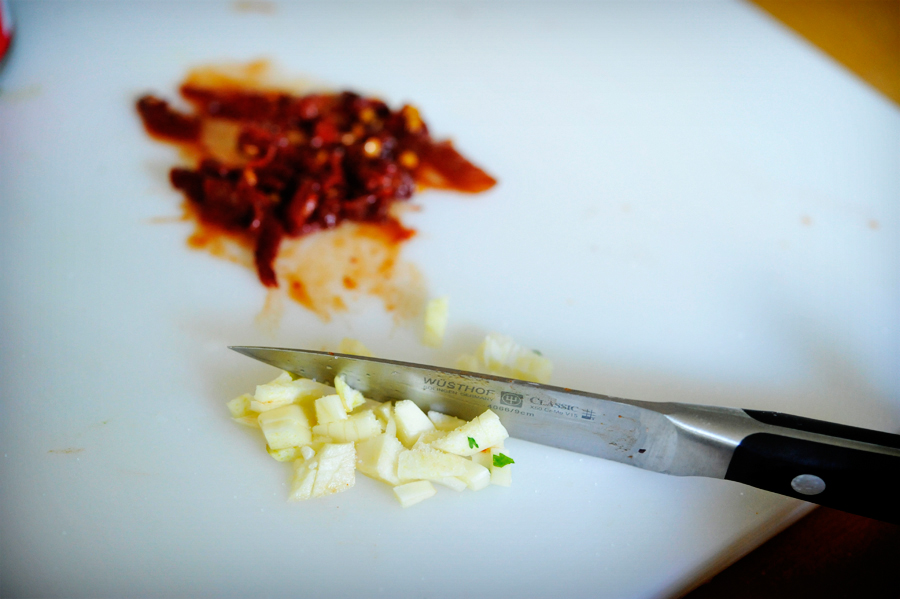
And some garlic.


Tasty Kitchen Blog: Chipotle and Lime Roasted Potatoes. Guest post by Georgia Pellegrini, recipe submitted by TK member Meredith of Cooking In Sock Monkey Slippers.

Place them in a small bowl and stir.


Tasty Kitchen Blog: Chipotle and Lime Roasted Potatoes. Guest post by Georgia Pellegrini, recipe submitted by TK member Meredith of Cooking In Sock Monkey Slippers.

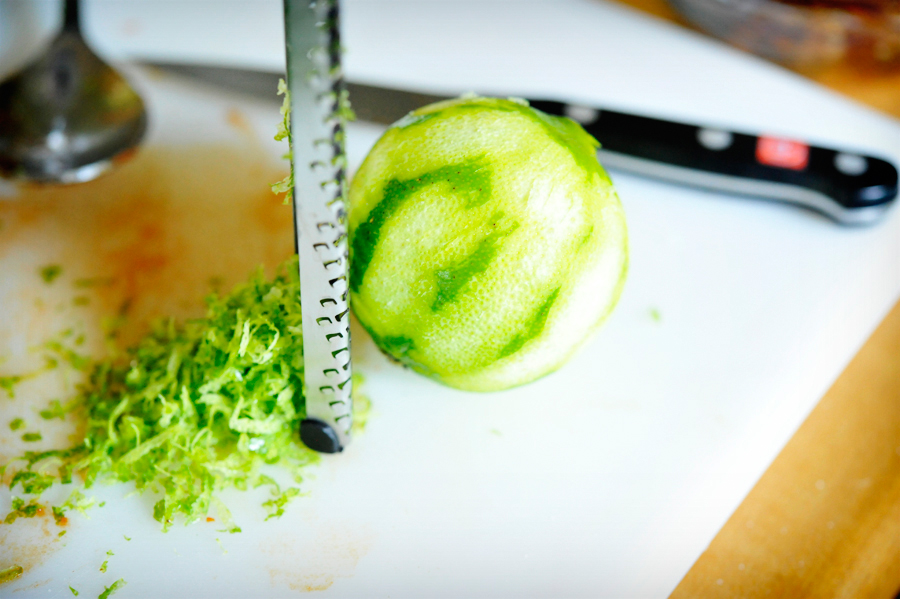
Next zest your lime and add that to the small bowl.


Tasty Kitchen Blog: Chipotle and Lime Roasted Potatoes. Guest post by Georgia Pellegrini, recipe submitted by TK member Meredith of Cooking In Sock Monkey Slippers.

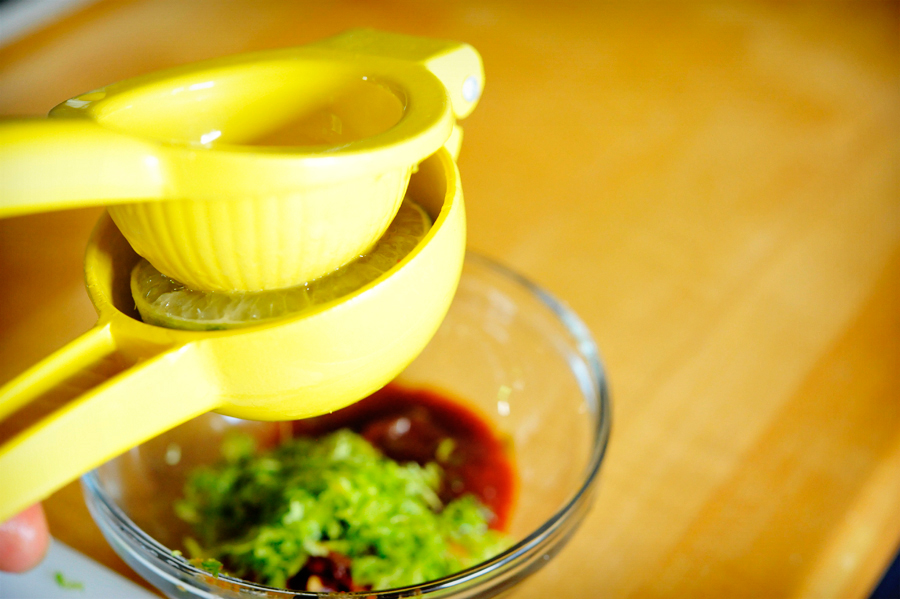
Then squeeze in the juice.


Tasty Kitchen Blog: Chipotle and Lime Roasted Potatoes. Guest post by Georgia Pellegrini, recipe submitted by TK member Meredith of Cooking In Sock Monkey Slippers.

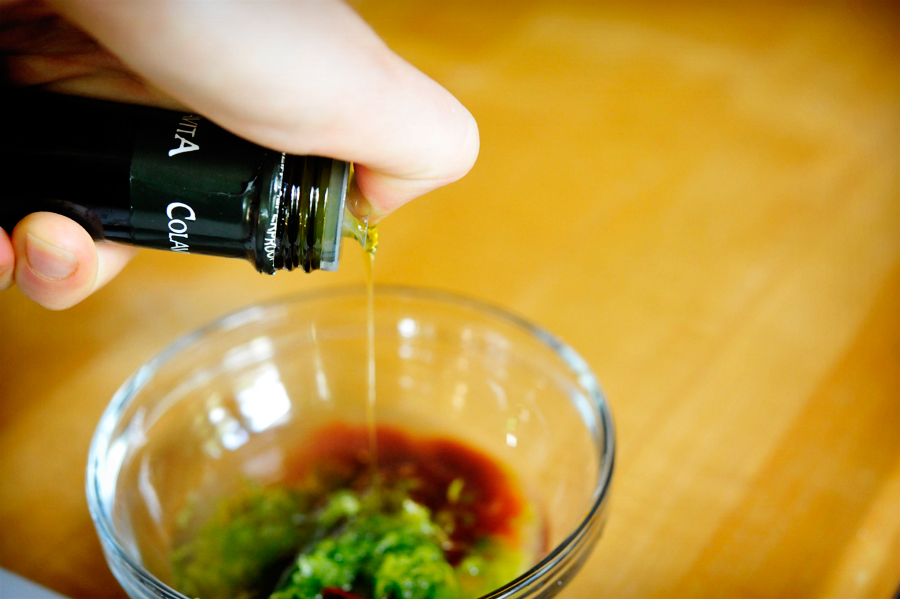
Drizzle in some olive oil last …


Tasty Kitchen Blog: Chipotle and Lime Roasted Potatoes. Guest post by Georgia Pellegrini, recipe submitted by TK member Meredith of Cooking In Sock Monkey Slippers.

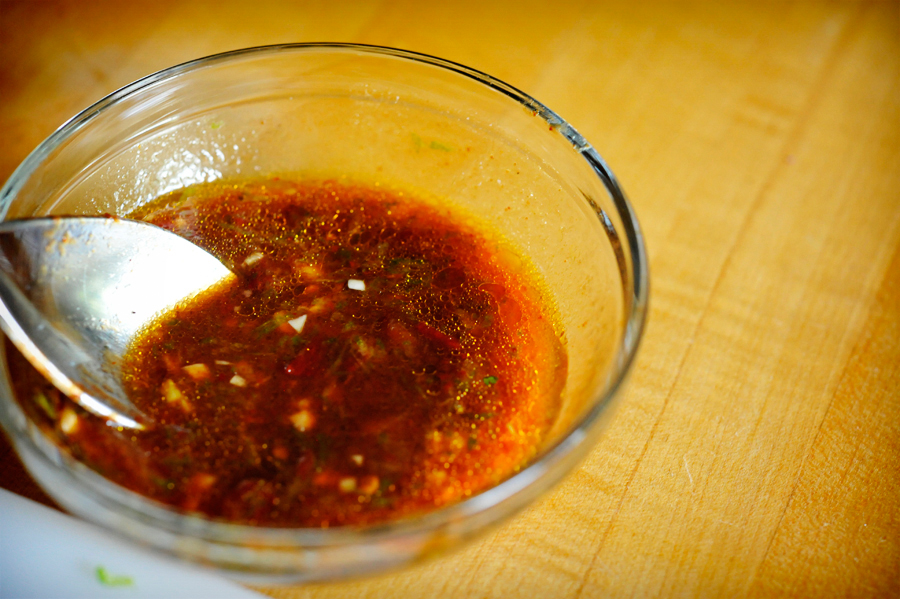
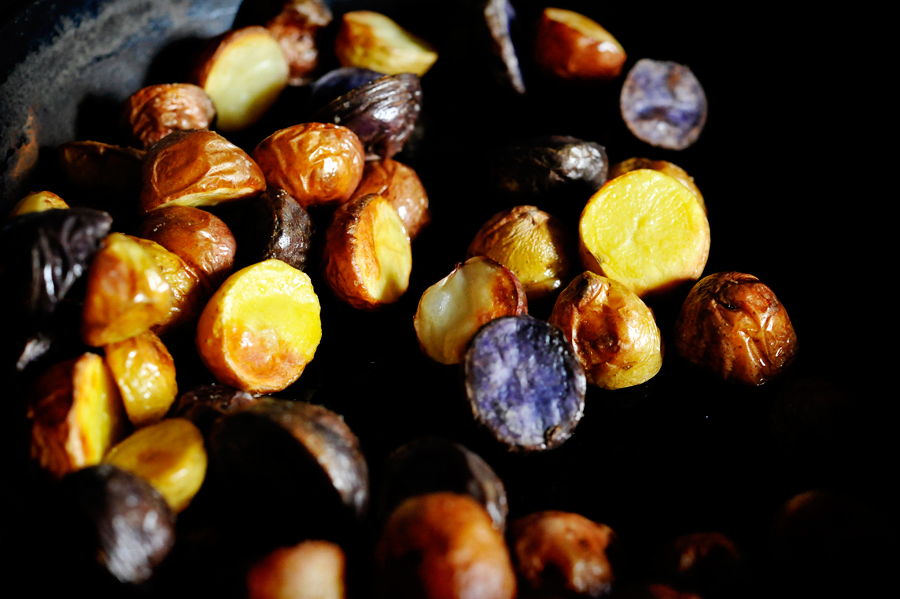
And mix it all together. Let it sit and macerate while your potatoes finish roasting.


Tasty Kitchen Blog: Chipotle and Lime Roasted Potatoes. Guest post by Georgia Pellegrini, recipe submitted by TK member Meredith of Cooking In Sock Monkey Slippers.

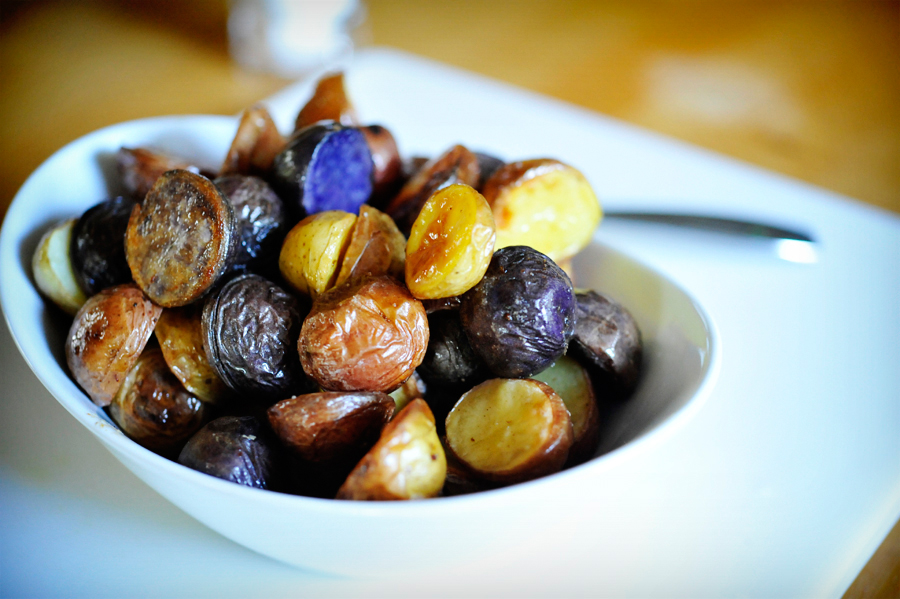
Your potatoes will be golden brown and tender when they’re ready.


Tasty Kitchen Blog: Chipotle and Lime Roasted Potatoes. Guest post by Georgia Pellegrini, recipe submitted by TK member Meredith of Cooking In Sock Monkey Slippers.

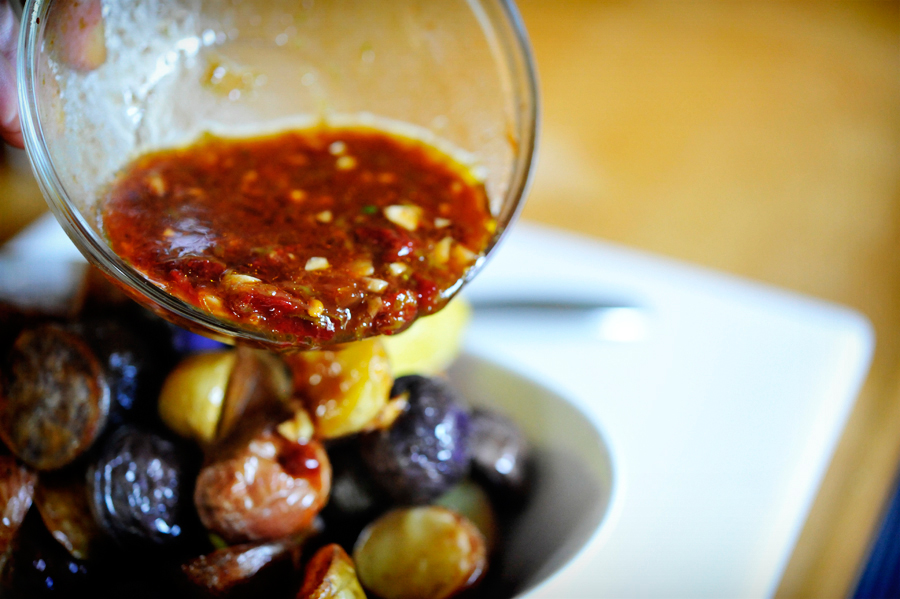
Let them cool slightly so that they don’t cook the dressing.


Tasty Kitchen Blog: Chipotle and Lime Roasted Potatoes. Guest post by Georgia Pellegrini, recipe submitted by TK member Meredith of Cooking In Sock Monkey Slippers.

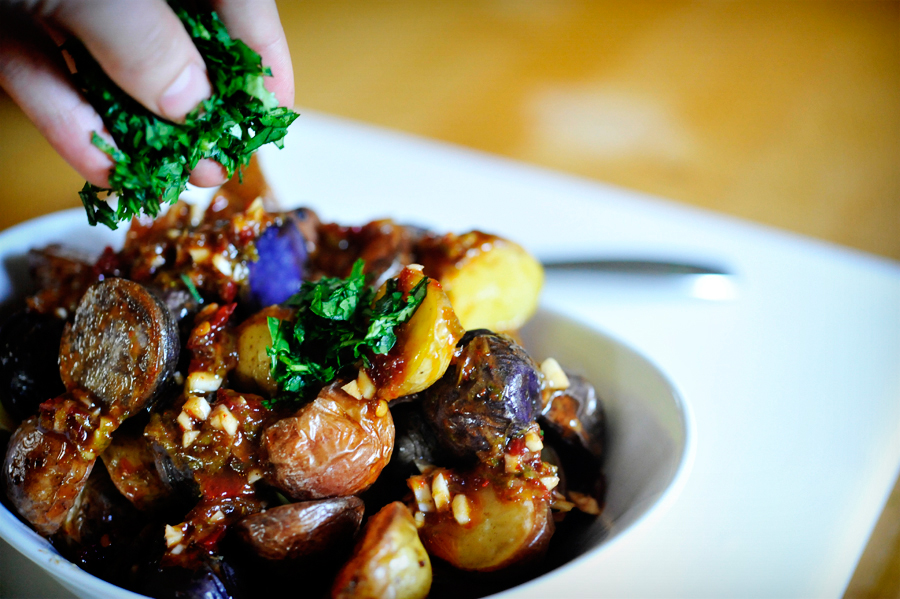
Then pour the dressing over it generously and stir it all together well.


Tasty Kitchen Blog: Chipotle and Lime Roasted Potatoes. Guest post by Georgia Pellegrini, recipe submitted by TK member Meredith of Cooking In Sock Monkey Slippers.

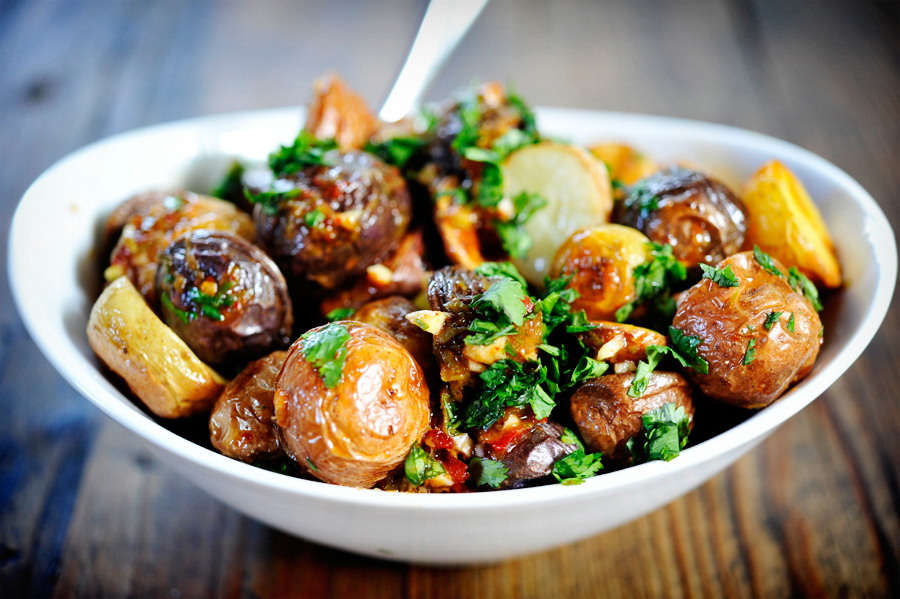
Sprinkle in the freshly chopped cilantro last for some extra flavor and freshness.


Tasty Kitchen Blog: Chipotle and Lime Roasted Potatoes. Guest post by Georgia Pellegrini, recipe submitted by TK member Meredith of Cooking In Sock Monkey Slippers.

This will be your new summer potato dish, cross my heart! And be sure to make this dressing on its own and experiment, it is so delectable. Thanks Meredith for sharing this recipe! Head over to her blog In Sock Monkey Slippers for more of great recipes and incredible photography.


Printable Recipe
Chipotle and Lime Roasted Potatoes

See post on Meredith {In Sock Monkey Slippers}’s site!
5.00 Mitt(s) 10 Rating(s)10 votes, average: 5.00 out of 510 votes, average: 5.00 out of 510 votes, average: 5.00 out of 510 votes, average: 5.00 out of 510 votes, average: 5.00 out of 5

Prep Time:

Cook Time:

Difficulty: Easy

Servings: 6

6
x

Print Options

Page size Letter 3x5 4x6
Text Size Small Medium Large
Content Include description
Include prep time, etc.
Show image

Description

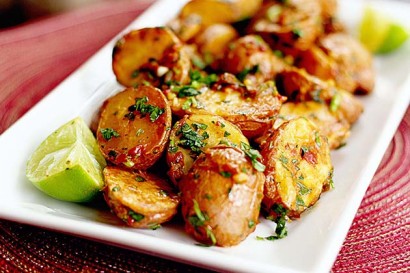
Smoky and spicy with just a flash of fresh lime creates a side dish perfect for any summer meal.

Ingredients

  • 2 pounds Small New Potatoes
  • 1 Tablespoon Extra Virgin Olive Oil
  • ½ teaspoons Kosher Salt
  • 1 whole Chipotle Pepper Packed In Adobo Sauce
  • 2 teaspoons Adobo Sauce
  • 1 clove Garlic
  • 1 Tablespoon Grated Lime Zest
  • 1 Tablespoon Fresh Lime Juice
  • 2 teaspoons Extra Virgin Olive Oil
  • 2 Tablespoons Fresh Chopped Cilantro

Preparation Instructions

Note: Chipotle peppers in adobo sauce can be found canned in most major grocery stores (typically in the Mexican food section).

1. Preheat oven to 400°F. With a knife, slice the potatoes in half. Place the halved potatoes on a baking sheet. Drizzle 1 tablespoon of olive oil over the potatoes. Add salt and toss with your hands until the potatoes are thoroughly coated with oil and salt. Place in the oven for 30 to 35 minutes, stirring once, until golden and the potatoes can be easily pierced with a fork.

2. While the potatoes are cooking: Remove one chipotle pepper from the can and mince it (chop into small pieces). Place it in a large bowl. Using the adobo sauce that the peppers are packaged in, add 2 teaspoons of sauce to the minced pepper in the bowl.

3. Peel and mince the garlic clove. Add it to the bowl as well.

4. Next, add the lime zest, lime juice and 2 teaspoons of olive oil.

5. Whisk everything together until combined.

6. Once the potatoes are done and still hot, pour them into the chipotle lime dressing. Add cilantro and gently stir to combine, making sure every potato is covered. Plate and serve.


_______________________________________

There’s so much to say about Georgia, we don’t know where to start. Leaving Wall Street for the French Culinary Institute, followed by a stint at the Gramercy Tavern and La Chassagnette in France, her passion for food and food traditions are evident and inspiring. Visit her site at Georgia Pellegrini, where you’ll find more recipes, photos, learn all about her wonderful books Girl Hunter and Food Heroes, and enjoy her latest adventures.



Profile photo of georgiapellegrini

Raw Vegan Chocolate Mousse

Posted by in Step-by-Step Recipes

Tasty Kitchen Blog: Raw Vegan Chocolate Mousse. Guest post by Georgia Pellegrini, recipe submitted by TK member Sally of Spontaneous Hausfrau.

 
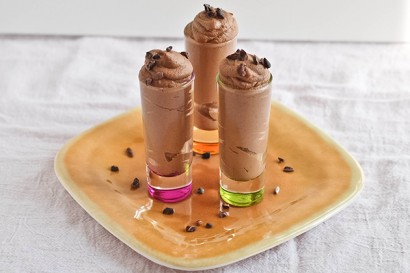
I’m making a national appeal to everyone to make this pudding as soon as possible. It really has something for everyone—it’s beyond delicious, but is also perfect for anyone trying to curb their sweet tooth. I’m so, so glad I stumbled upon this Raw Vegan Chocolate Mousserecipe from Spontaneous Hausfrau and had the opportunity to make it.


Tasty Kitchen Blog: Raw Vegan Chocolate Mousse. Guest post by Georgia Pellegrini, recipe submitted by TK member Sally of Spontaneous Hausfrau.

It requires a little planning ahead because the cashews will need to be soaked in water, but after that, there is no cooking required and it will be ready to eat in a jiffy.

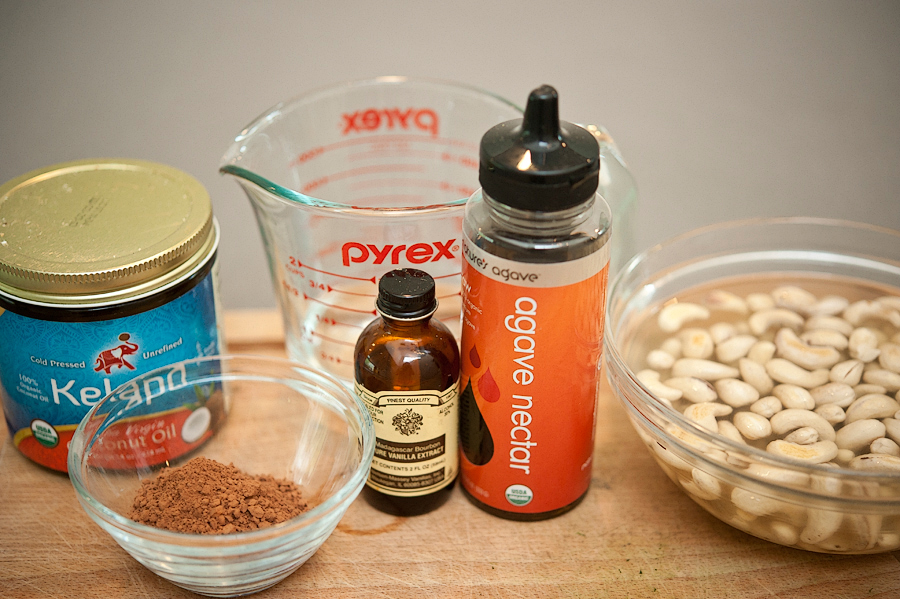
You will need: raw unsalted cashews that have been soaked in water for six hours, agave, vanilla, unsweetened cocoa powder, coconut oil, water.


Tasty Kitchen Blog: Raw Vegan Chocolate Mousse. Guest post by Georgia Pellegrini, recipe submitted by TK member Sally of Spontaneous Hausfrau.

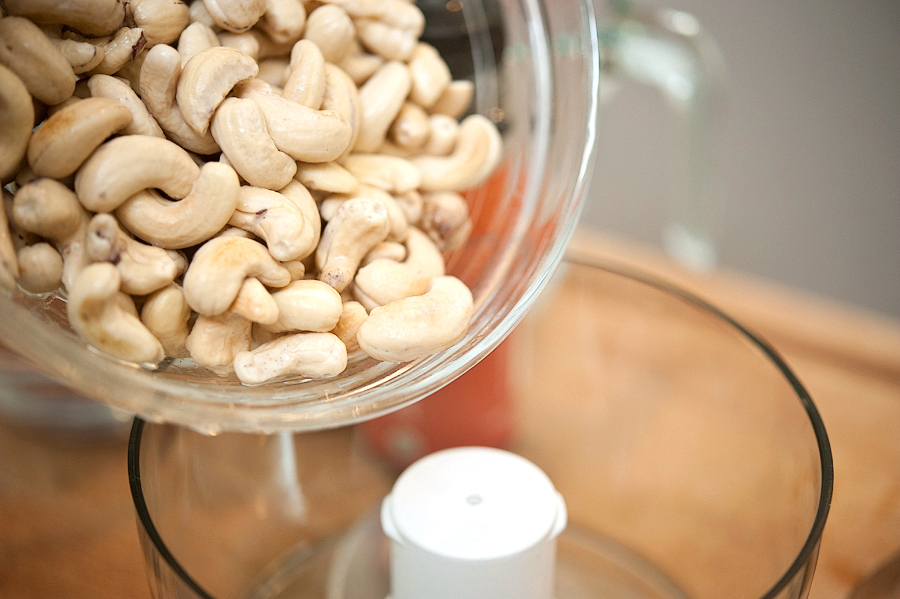
Drain the cashews and put them in a food processor.


Tasty Kitchen Blog: Raw Vegan Chocolate Mousse. Guest post by Georgia Pellegrini, recipe submitted by TK member Sally of Spontaneous Hausfrau.

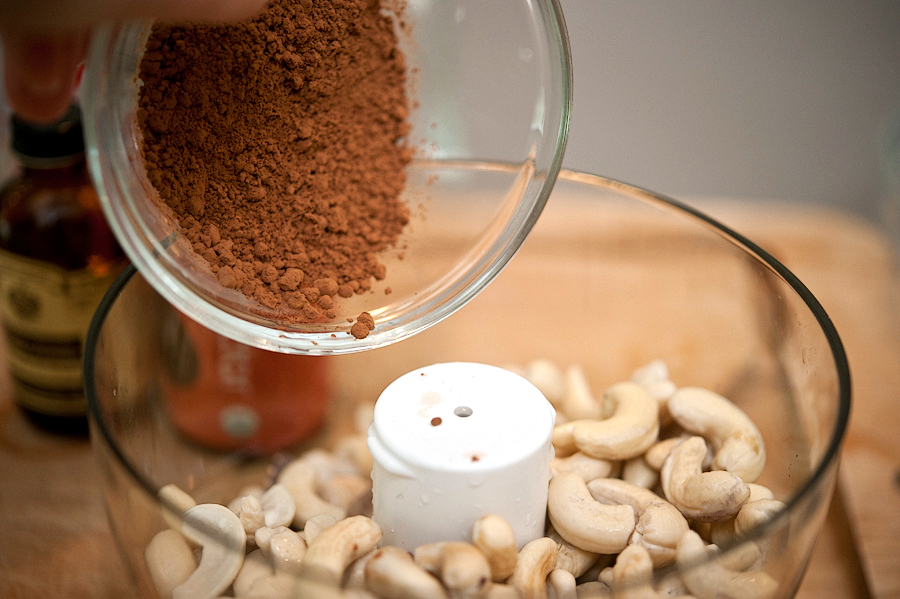
Next add the unsweetened cocoa powder …


Tasty Kitchen Blog: Raw Vegan Chocolate Mousse. Guest post by Georgia Pellegrini, recipe submitted by TK member Sally of Spontaneous Hausfrau.

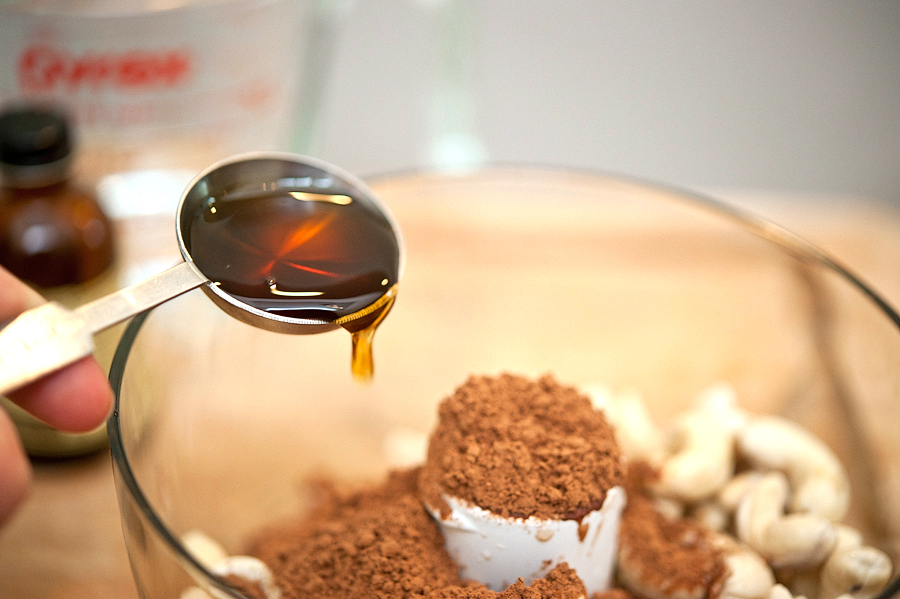
The agave …


Tasty Kitchen Blog: Raw Vegan Chocolate Mousse. Guest post by Georgia Pellegrini, recipe submitted by TK member Sally of Spontaneous Hausfrau.

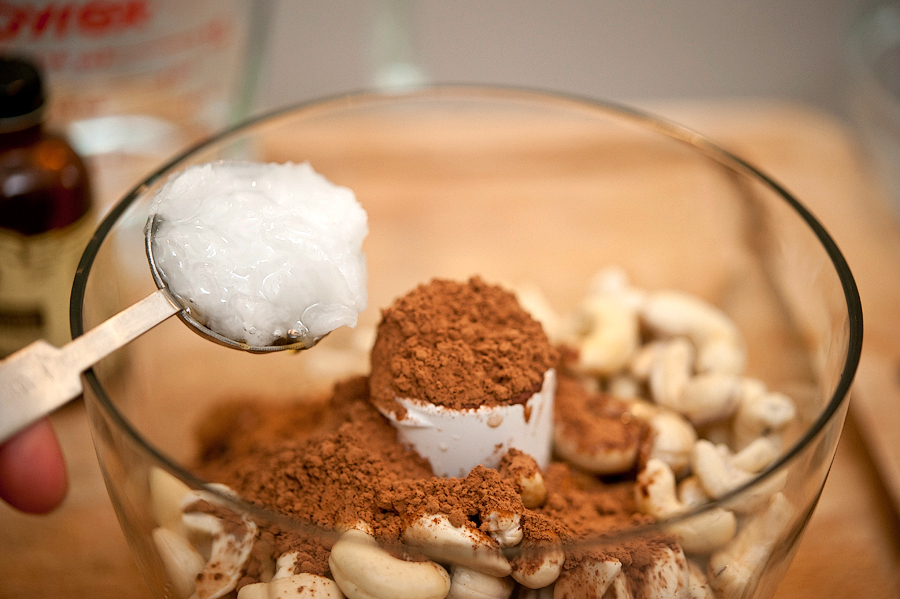
The coconut oil, which adds an amazing creaminess …


Tasty Kitchen Blog: Raw Vegan Chocolate Mousse. Guest post by Georgia Pellegrini, recipe submitted by TK member Sally of Spontaneous Hausfrau.

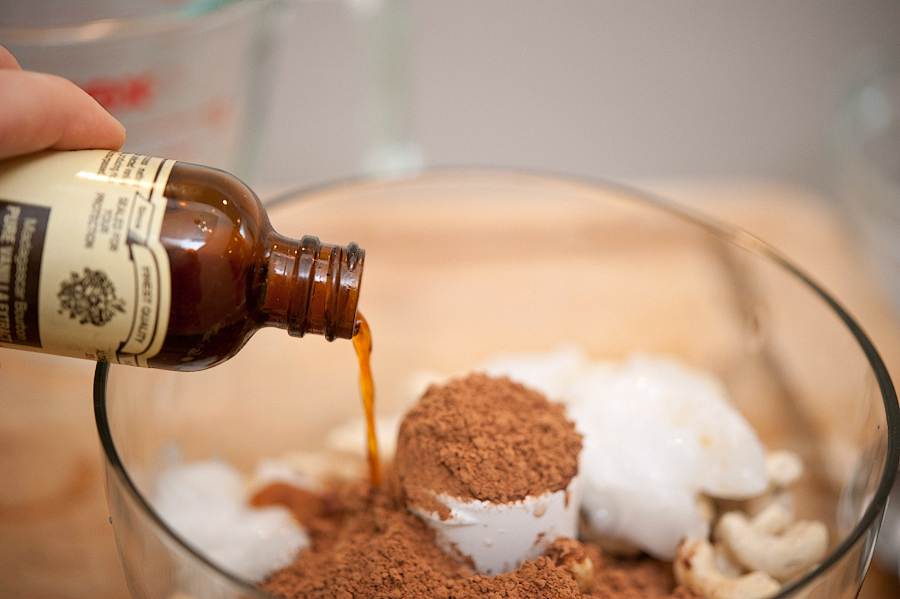
Vanilla …


Tasty Kitchen Blog: Raw Vegan Chocolate Mousse. Guest post by Georgia Pellegrini, recipe submitted by TK member Sally of Spontaneous Hausfrau.

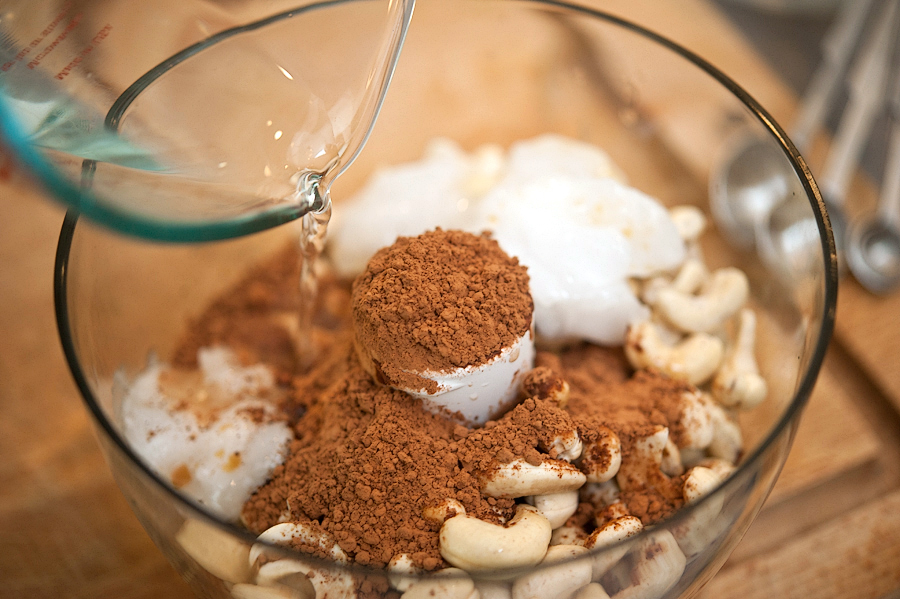
And a bit of water.


Tasty Kitchen Blog: Raw Vegan Chocolate Mousse. Guest post by Georgia Pellegrini, recipe submitted by TK member Sally of Spontaneous Hausfrau.

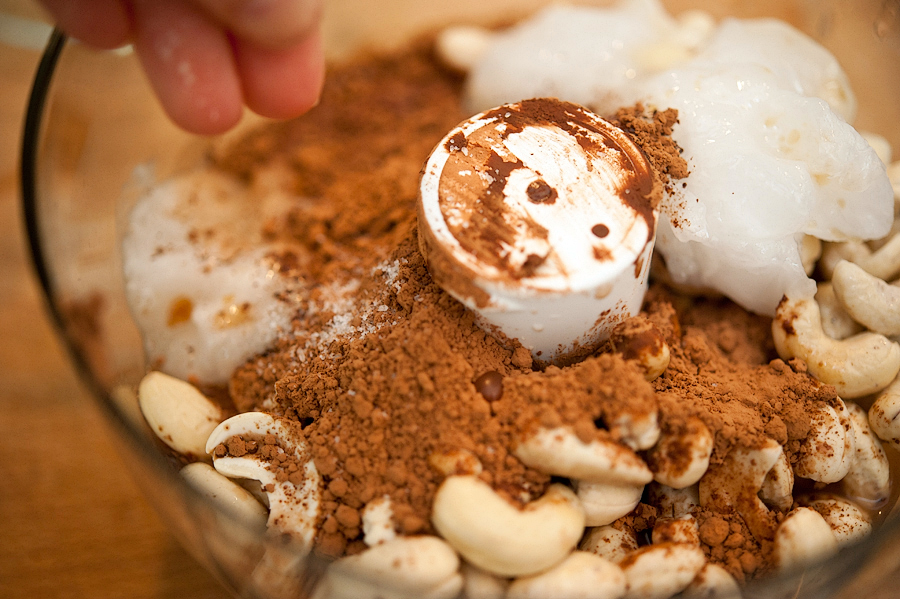
I also added a pinch of sea salt to give it some brightness. You could also add any other flavorings you please. Cinnamon would be nice, for example.


Tasty Kitchen Blog: Raw Vegan Chocolate Mousse. Guest post by Georgia Pellegrini, recipe submitted by TK member Sally of Spontaneous Hausfrau.

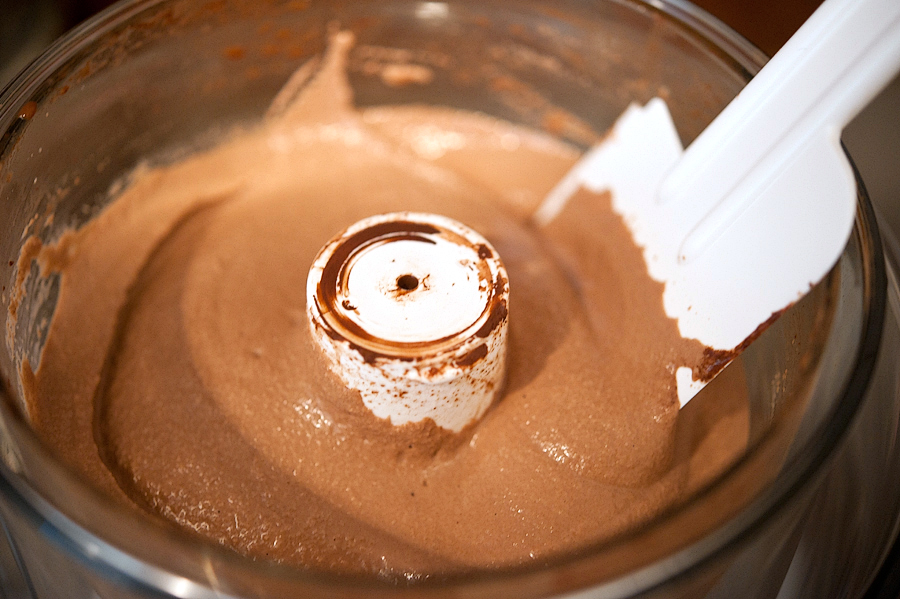
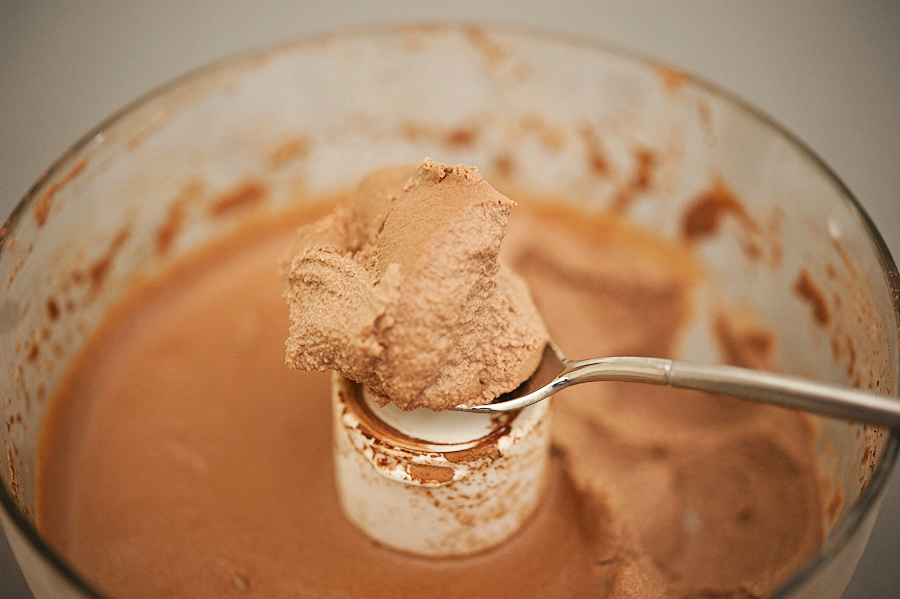
Puree the mixture in the food processor for about three minutes, being sure to scrape down the sides every minute or so. The mixture will become fluffy and creamy as the cashews break down and emulsify with the other ingredients.


Tasty Kitchen Blog: Raw Vegan Chocolate Mousse. Guest post by Georgia Pellegrini, recipe submitted by TK member Sally of Spontaneous Hausfrau.

You can eat it at this point, or even better you can pop it in the refrigerator for an hour until it firms up and becomes even more amazing.


Tasty Kitchen Blog: Raw Vegan Chocolate Mousse. Guest post by Georgia Pellegrini, recipe submitted by TK member Sally of Spontaneous Hausfrau.

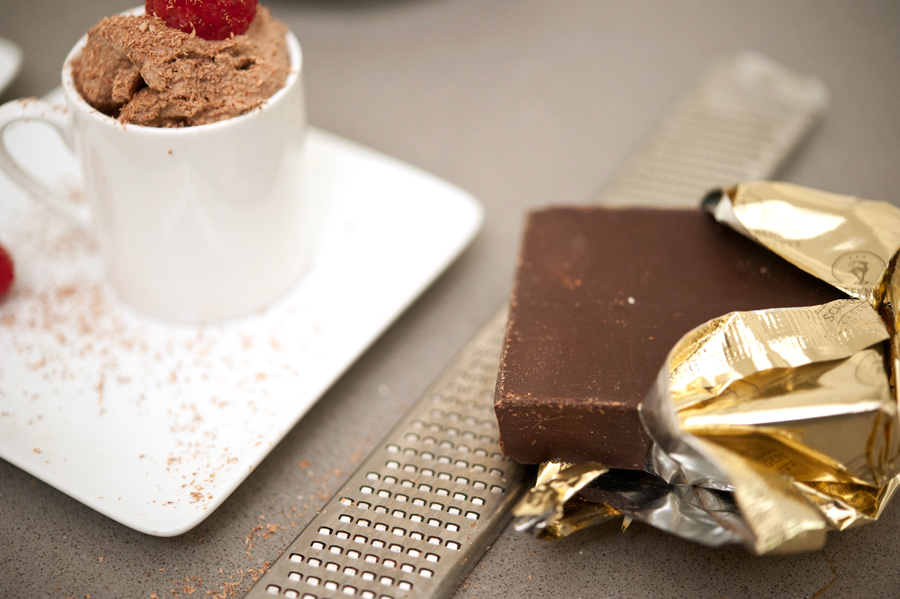
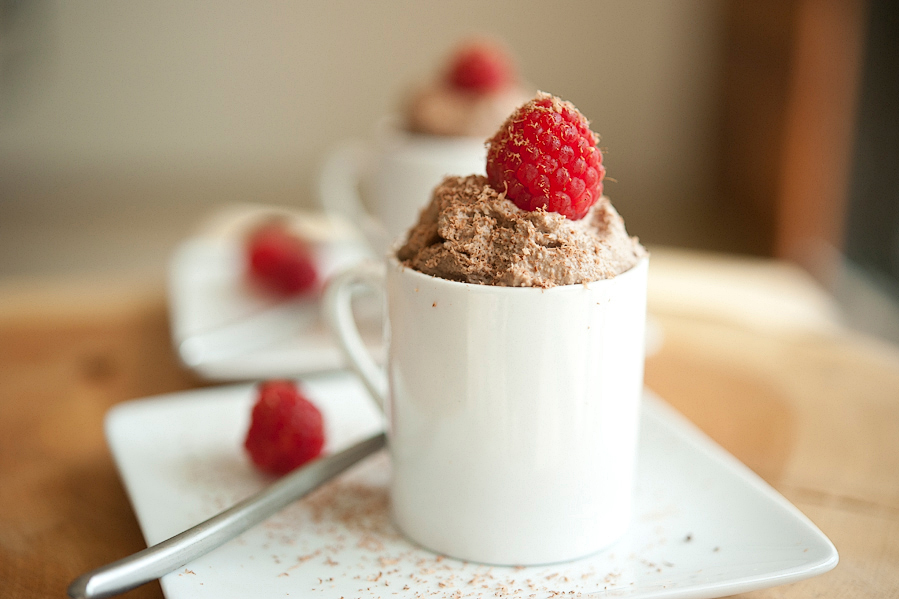
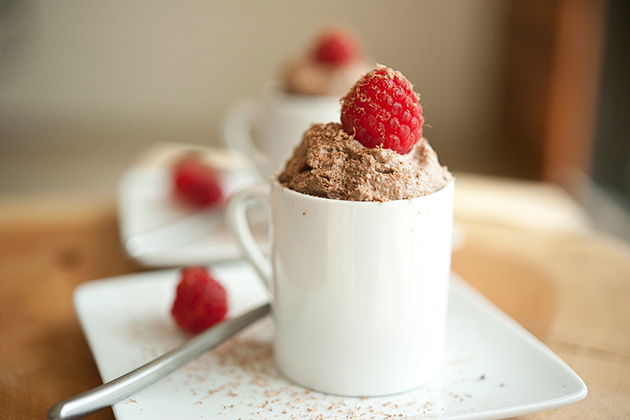
Serve it up in little glasses or bowls. And if you’re feeling fancy, grate a bit of dark chocolate over the top and pop on a raspberry or your other favorite fruit.


Tasty Kitchen Blog: Raw Vegan Chocolate Mousse. Guest post by Georgia Pellegrini, recipe submitted by TK member Sally of Spontaneous Hausfrau.

You will love, love, love this. I served it to friends and one of them asked if they could lick the bowl. I said yes of course, it was the only logical thing to do.

Thanks so much to Sally for this wonderful recipe. Check out her website The Spontaneous Hausfrau for other great finds!


Printable Recipe

Raw Vegan Chocolate Mousse

See post on Spontaneous Hausfrau’s site!
3.00 Mitt(s) 1 Rating(s)1 vote, average: 3.00 out of 51 vote, average: 3.00 out of 51 vote, average: 3.00 out of 51 vote, average: 3.00 out of 51 vote, average: 3.00 out of 5

Prep Time:

Cook Time:

Difficulty: Easy

Servings: 3

3
x

Print Options

Page size Letter 3x5 4x6
Text Size Small Medium Large
Content Include description
Include prep time, etc.
Show image

Description

This creamy, intense mousse is healthy and crave-worthy.

Ingredients

  • 1 cup Raw Cashews, Soaked 6 Hours
  • 2 Tablespoons Agave Syrup
  • 4 teaspoons Coconut Oil
  • 1 whole Vanilla Bean, Scraped
  • ½ cups Water
  • 2 Tablespoons Raw Cacao Powder

Preparation Instructions

Combine all the ingredients in the bowl of a food processor and puree for 3-4 minutes, periodically scraping the bowl, until the mixture is creamy and fluffy. Chill 1 hour to further thicken the mousse. Serve garnished with raw cacao nibs.


_______________________________________

There’s so much to say about Georgia, we don’t know where to start. Leaving Wall Street for the French Culinary Institute, followed by a stint at the Gramercy Tavern and La Chassagnette in France, her passion for food and food traditions are evident and inspiring. Visit her site at Georgia Pellegrini, where you’ll find more recipes, photos, learn all about her wonderful books Girl Hunter and Food Heroes, and enjoy her latest adventures.


Profile photo of georgiapellegrini

Kung Pao Chicken

Posted by in Step-by-Step Recipes

Tasty Kitchen Blog: Authentic Kung Pao Chicken. Guest post by Georgia Pellegrini, recipe submitted by TK member Becky of The Vintage Mixer.

 
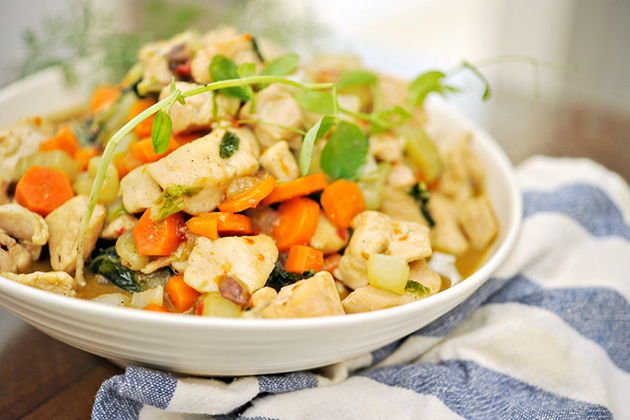
I never imagined myself making Authentic Kung Pao Chicken with such ease in my home kitchen. But I did, thanks to Becky (The Vintage Mixer) and this delicious yet easy recipe.


Tasty Kitchen Blog: Authentic Kung Pao Chicken. Guest post by Georgia Pellegrini, recipe submitted by TK member Becky of The Vintage Mixer.

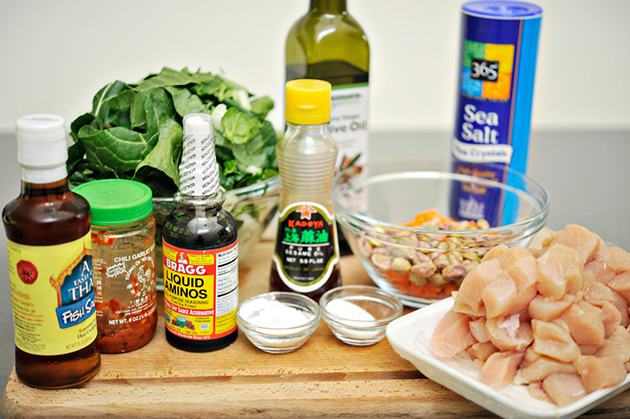
To stir this up, you will need: chicken breasts, salt, cornstarch, soy sauce (I used liquid aminos), peanuts, cooking oil, carrot, Chinese lettuce root or celery (I used bok choy), Chinese oyster sauce or fish sauce, sugar, sesame oil, and Sichuan hot pepper paste.


Tasty Kitchen Blog: Authentic Kung Pao Chicken. Guest post by Georgia Pellegrini, recipe submitted by TK member Becky of The Vintage Mixer.

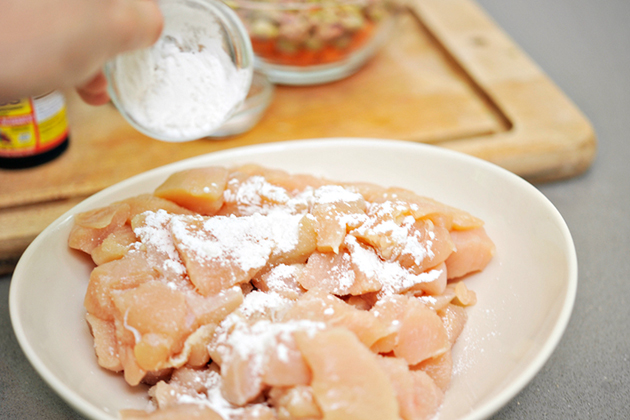
Once the chicken has been diced, sprinkle it with a bit of cornstarch or flour, which will help it brown and thicken the sauce.


Tasty Kitchen Blog: Authentic Kung Pao Chicken. Guest post by Georgia Pellegrini, recipe submitted by TK member Becky of The Vintage Mixer.

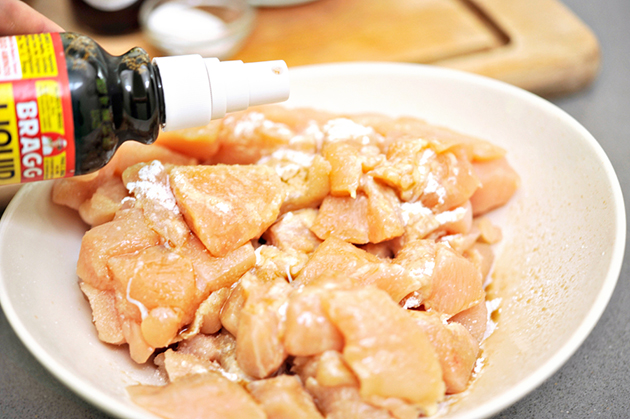
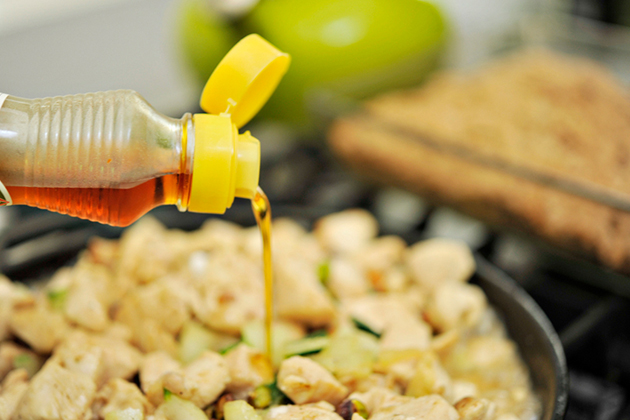
Add the soy sauce next to give it some flavor.


Tasty Kitchen Blog: Authentic Kung Pao Chicken. Guest post by Georgia Pellegrini, recipe submitted by TK member Becky of The Vintage Mixer.

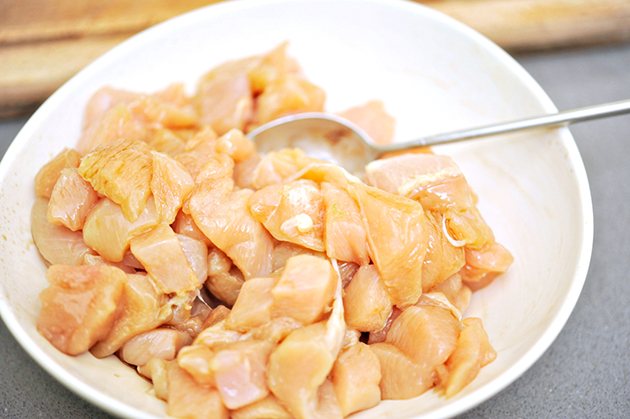
Stir it and let it marinate.


Tasty Kitchen Blog: Authentic Kung Pao Chicken. Guest post by Georgia Pellegrini, recipe submitted by TK member Becky of The Vintage Mixer.

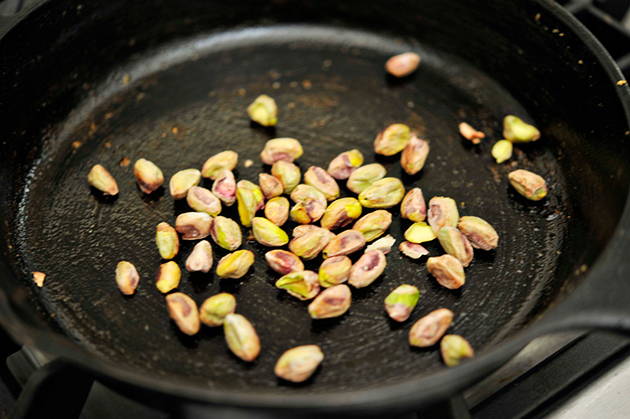
Meanwhile, toast your peanuts, or in my case, pistachios! That’s what I had on hand and I love ‘em so I went for it.


Tasty Kitchen Blog: Authentic Kung Pao Chicken. Guest post by Georgia Pellegrini, recipe submitted by TK member Becky of The Vintage Mixer.

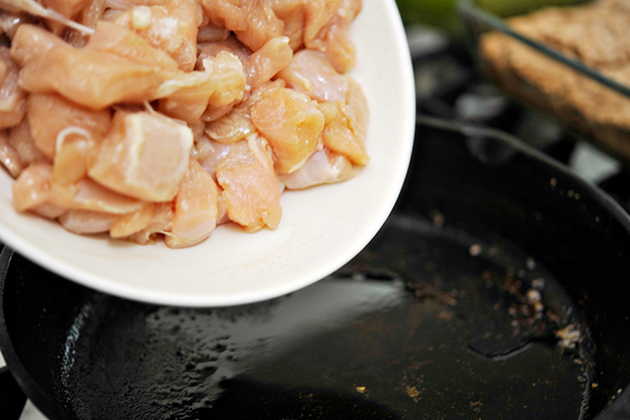
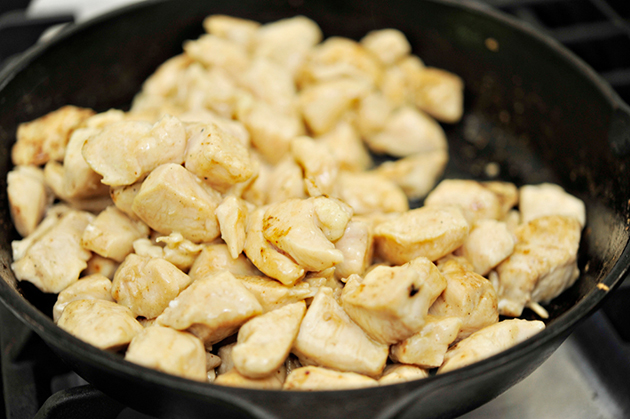
Once the nuts have been browned, remove them from the heat and brown the chicken in the skillet.


Tasty Kitchen Blog: Authentic Kung Pao Chicken. Guest post by Georgia Pellegrini, recipe submitted by TK member Becky of The Vintage Mixer.

Cook and turn until browned on all sides, then remove to a plate with a slotted spoon.


Tasty Kitchen Blog: Authentic Kung Pao Chicken. Guest post by Georgia Pellegrini, recipe submitted by TK member Becky of The Vintage Mixer.

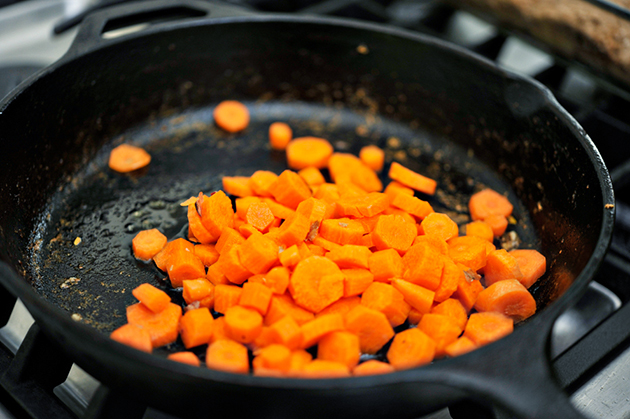
Next add the carrots until they are browned.


Tasty Kitchen Blog: Authentic Kung Pao Chicken. Guest post by Georgia Pellegrini, recipe submitted by TK member Becky of The Vintage Mixer.

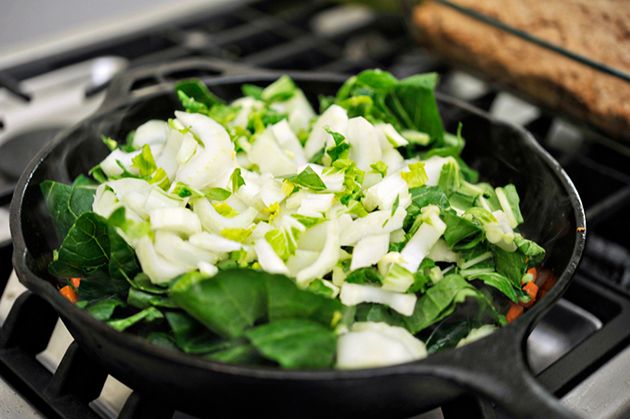
Then toss in your celery, lettuce root, or in my case, sliced bok choy!


Tasty Kitchen Blog: Authentic Kung Pao Chicken. Guest post by Georgia Pellegrini, recipe submitted by TK member Becky of The Vintage Mixer.

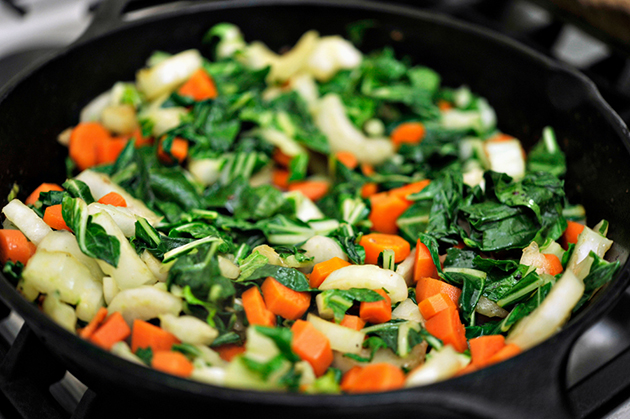
Saute them well on high heat.


Tasty Kitchen Blog: Authentic Kung Pao Chicken. Guest post by Georgia Pellegrini, recipe submitted by TK member Becky of The Vintage Mixer.

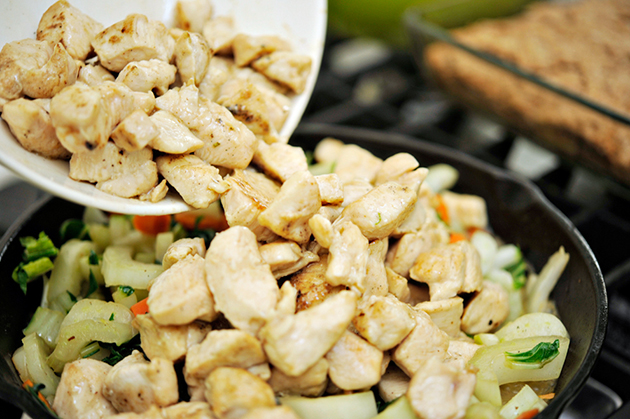
Return the chicken to the pan and stir it together.


Tasty Kitchen Blog: Authentic Kung Pao Chicken. Guest post by Georgia Pellegrini, recipe submitted by TK member Becky of The Vintage Mixer.

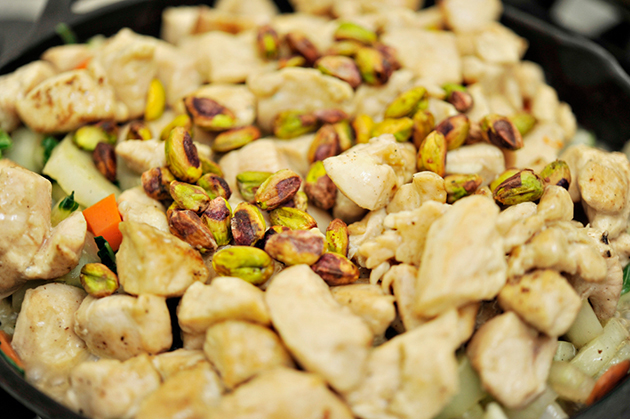
Add the pistachios and stir them in as well.


Tasty Kitchen Blog: Authentic Kung Pao Chicken. Guest post by Georgia Pellegrini, recipe submitted by TK member Becky of The Vintage Mixer.

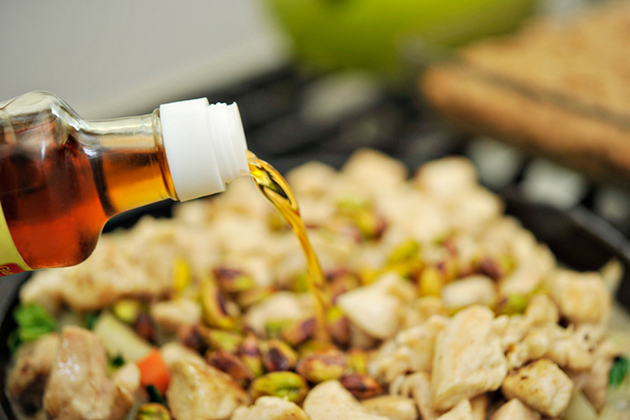
Then add the flavorings: oyster or fish sauce …


Tasty Kitchen Blog: Authentic Kung Pao Chicken. Guest post by Georgia Pellegrini, recipe submitted by TK member Becky of The Vintage Mixer.

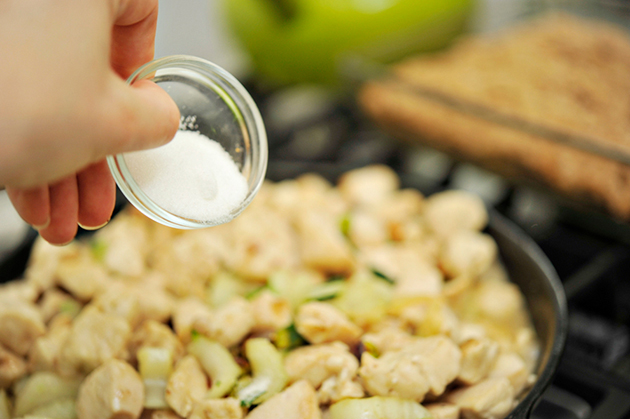
A dash of sugar …


Tasty Kitchen Blog: Authentic Kung Pao Chicken. Guest post by Georgia Pellegrini, recipe submitted by TK member Becky of The Vintage Mixer.

Sesame oil …


Tasty Kitchen Blog: Authentic Kung Pao Chicken. Guest post by Georgia Pellegrini, recipe submitted by TK member Becky of The Vintage Mixer.

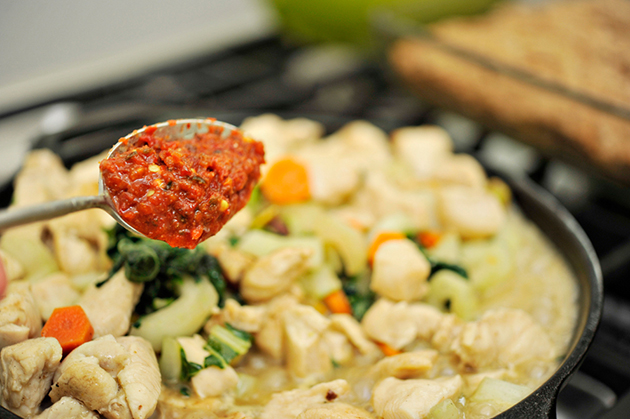
Garlic chili paste …


Tasty Kitchen Blog: Authentic Kung Pao Chicken. Guest post by Georgia Pellegrini, recipe submitted by TK member Becky of The Vintage Mixer.

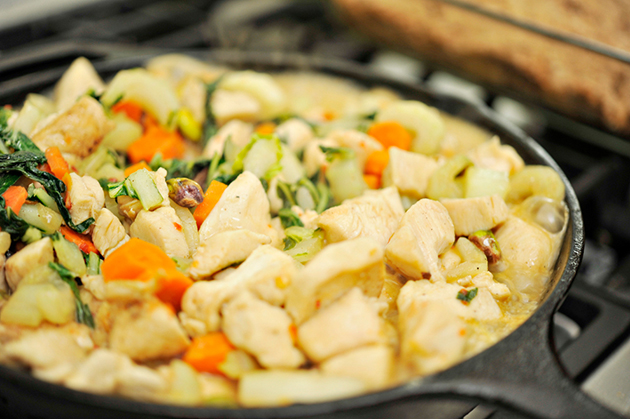
And let it all simmer so that the flavors combine.


Tasty Kitchen Blog: Authentic Kung Pao Chicken. Guest post by Georgia Pellegrini, recipe submitted by TK member Becky of The Vintage Mixer.

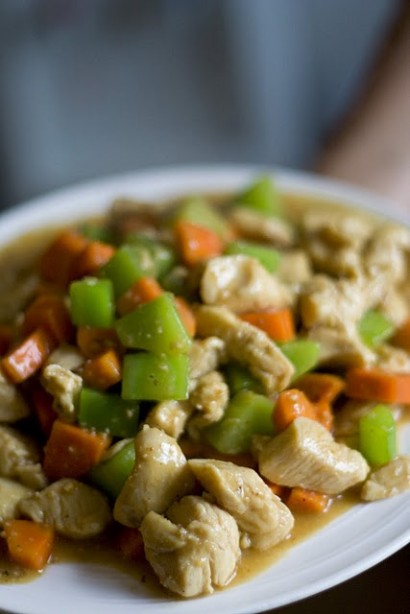
You will love this dish! It was just as tasty as takeout.

Thank you Becky for this glorious dish! Be sure to check out her website Vintage Mixer for some more beautiful looking recipes.


Printable Recipe

Authentic Kung Pao Chicken

See post on The Vintage Mixer’s site!
4.00 Mitt(s) 2 Rating(s)2 votes, average: 4.00 out of 52 votes, average: 4.00 out of 52 votes, average: 4.00 out of 52 votes, average: 4.00 out of 52 votes, average: 4.00 out of 5

Prep Time:

Cook Time:

Difficulty: Easy

Servings: 4

4
x

Print Options

Page size Letter 3x5 4x6
Text Size Small Medium Large
Content Include description
Include prep time, etc.
Show image

Description

After my recent adventure traveling to China, I brought back one of America’s favorite Chinese recipes that I’m excited to share with you. It was taught to me by a local Chinese chef in the city of Kunming.

Ingredients

  • 3 whole Chicken Breasts, Diced
  • 1 teaspoon Salt
  • 1 teaspoon Cornstarch
  • 1 dash Soy Sauce
  • ½ cups Peanuts
  • 1 whole Carrot
  • ¼ cups Cooking Oil
  • 1 whole Carrot, Diced
  • 1 stalk Chinese Lettuce Root Or Celery
  • 3 Tablespoons Chinese Oyster Sauce
  • 1 Tablespoon Sugar
  • ½ teaspoons Sesame Oil
  • 1 teaspoon Sichuan Hot Pepper Paste

Preparation Instructions

In a small bowl, combine diced chicken, salt, cornstarch, and soy sauce. Mix thoroughly and let sit a few minutes. Meanwhile, dry-roast the peanuts. Heat a wok or skillet to medium high heat and add peanuts, tossing occasionally till peanuts begin to “pop.” Reduce heat to medium/low and continue to roast 3-4 more minutes. These peanuts can be crushed or added whole to the stir-fry (later).

Heat cooking oil in the wok or skillet over medium/ high heat till oil begins to ripple or shimmer. Add chicken and stir-fry 2-3 minutes, then remove chicken only using a slotted spoon so the oil stays in wok. Add carrots and lettuce root and stir-fry 1-2 minutes till just beginning to turn tender-crisp. Return chicken to the pot and add peanuts (crushed or whole), oyster sauce, sugar, sesame oil, and hot pepper paste if you want the dish to be spicy. Add a little water to thin the sauce if desired. Stir to mix, then allow sauce to come to a boil. Stir again and serve.


_______________________________________

There’s so much to say about Georgia, we don’t know where to start. Leaving Wall Street for the French Culinary Institute, followed by a stint at the Gramercy Tavern and La Chassagnette in France, her passion for food and food traditions are evident and inspiring. Visit her site at Georgia Pellegrini, where you’ll find more recipes, photos, learn all about her wonderful books Girl Hunter and Food Heroes, and enjoy her latest adventures.


Profile photo of georgiapellegrini

Onion Ring Eggs

Posted by in Step-by-Step Recipes

Tasty Kitchen Blog: Onion Ring Eggs. Guest post by Georgia Pellegrini, recipe submitted by TK member Carrie of Kiss My Whisk.

 
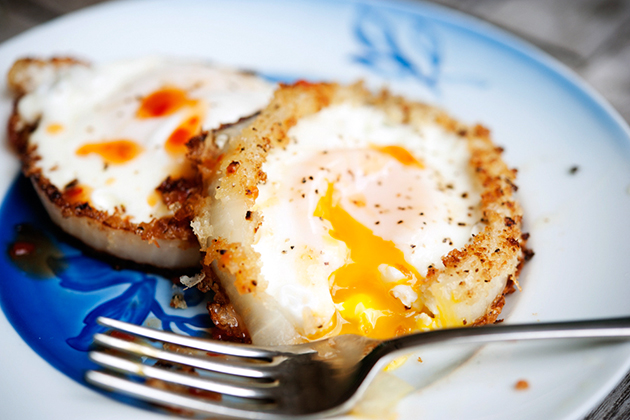
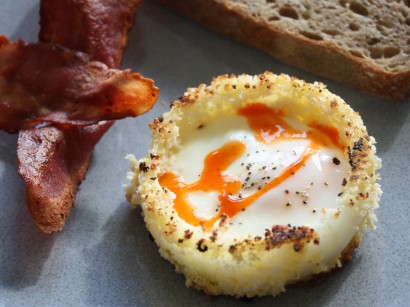
Seeing as I grew up with chickens roaming around the back yard, I eat eggs most mornings for breakfast. It’s just what I enjoy and I’m a creature of habit. So I’m always seeking new ways to prepare them in the mornings and these Onion Ring Eggs shared by kissmywhisk was one that I definitely had never tried before.

The recipe was inspired by a post on Apron Strings (mom Donna is a Tasty Kitchen member, too!) that used a sautéed onion as a ring mold for eggs (they’re Tasty Kitchen members too!), but Carrie added the extra crunch of panko. It was so delicious that I also made it for dinner one night.


Tasty Kitchen Blog: Onion Ring Eggs. Guest post by Georgia Pellegrini, recipe submitted by TK member Carrie of Kiss My Whisk.

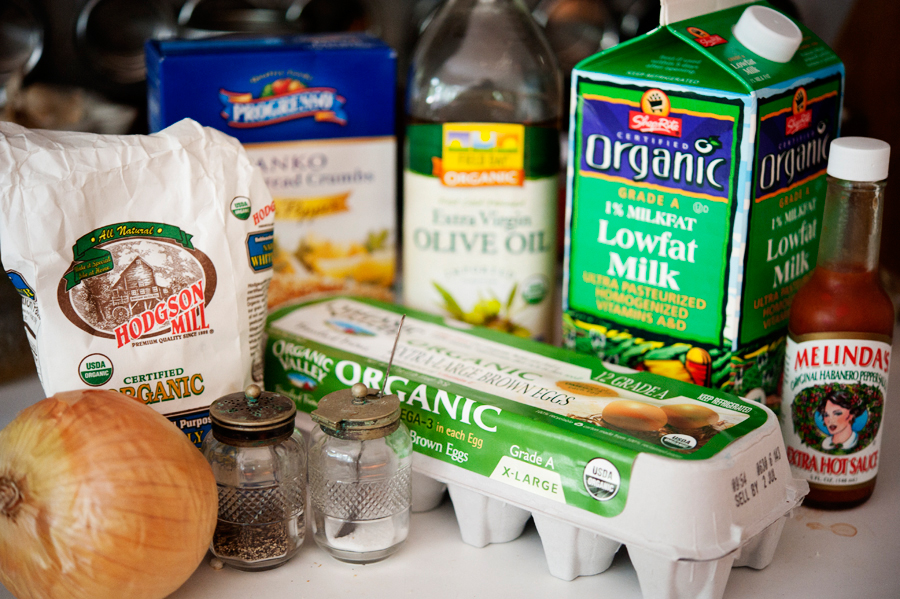
You will need: a large onion, flour, panko bread crumbs, oil, milk, hot sauce (for garnish), eggs, salt and pepper.


Tasty Kitchen Blog: Onion Ring Eggs. Guest post by Georgia Pellegrini, recipe submitted by TK member Carrie of Kiss My Whisk.

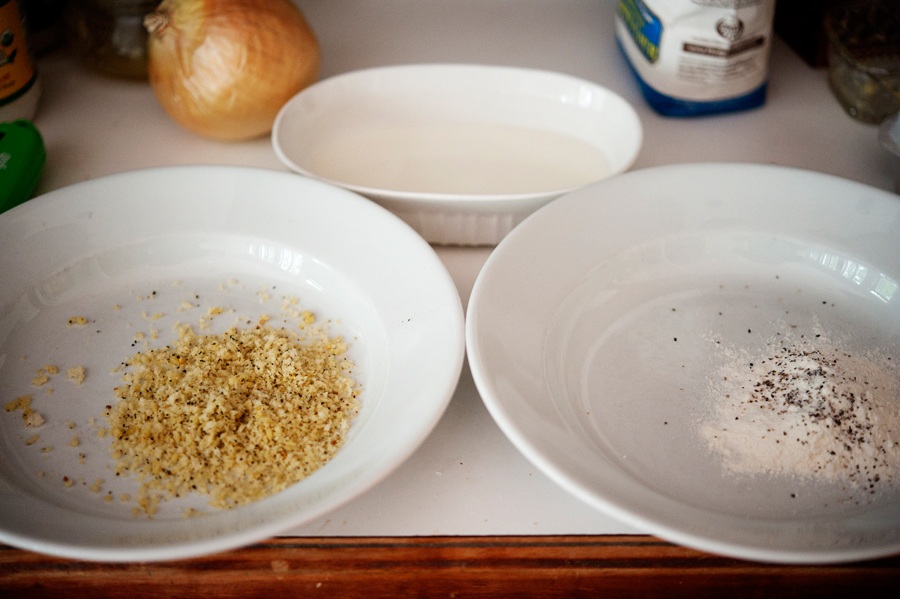
Begin by distributing the flour, breadcrumbs and milk into three bowls. Season the flour with salt and pepper while you’re at it.


Tasty Kitchen Blog: Onion Ring Eggs. Guest post by Georgia Pellegrini, recipe submitted by TK member Carrie of Kiss My Whisk.

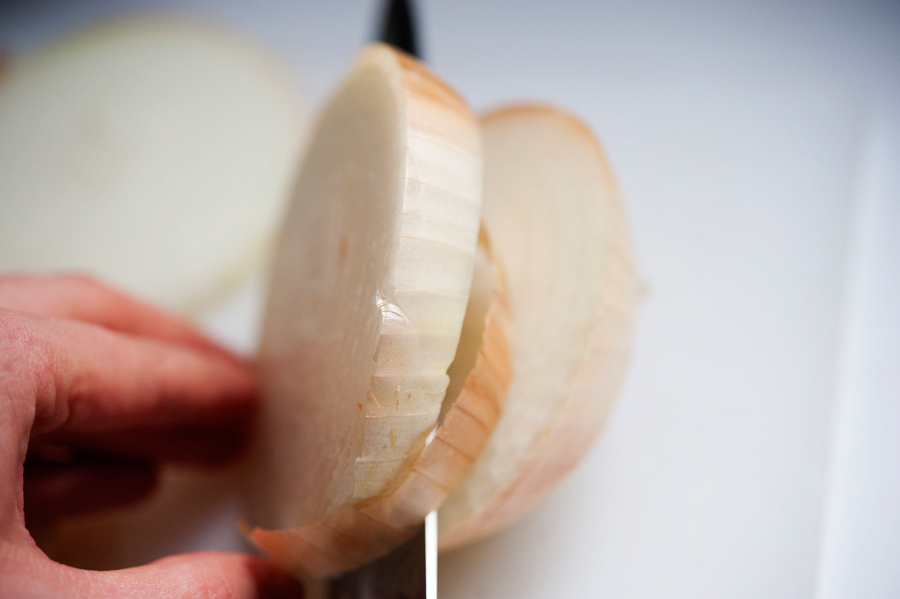
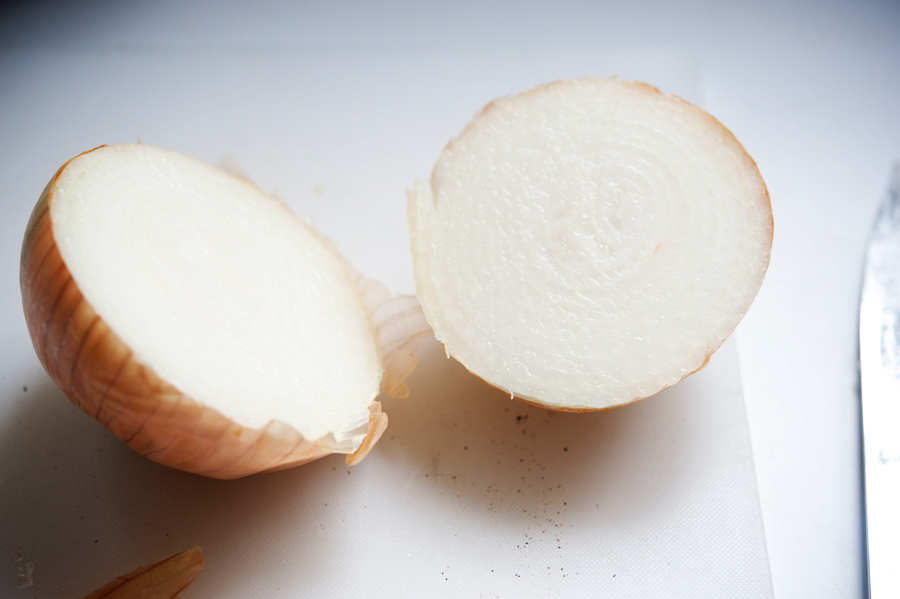
Cut an onion in half in the center where it is widest.


Tasty Kitchen Blog: Onion Ring Eggs. Guest post by Georgia Pellegrini, recipe submitted by TK member Carrie of Kiss My Whisk.

Then cut a thick slice, about ¼-inch.


Tasty Kitchen Blog: Onion Ring Eggs. Guest post by Georgia Pellegrini, recipe submitted by TK member Carrie of Kiss My Whisk.

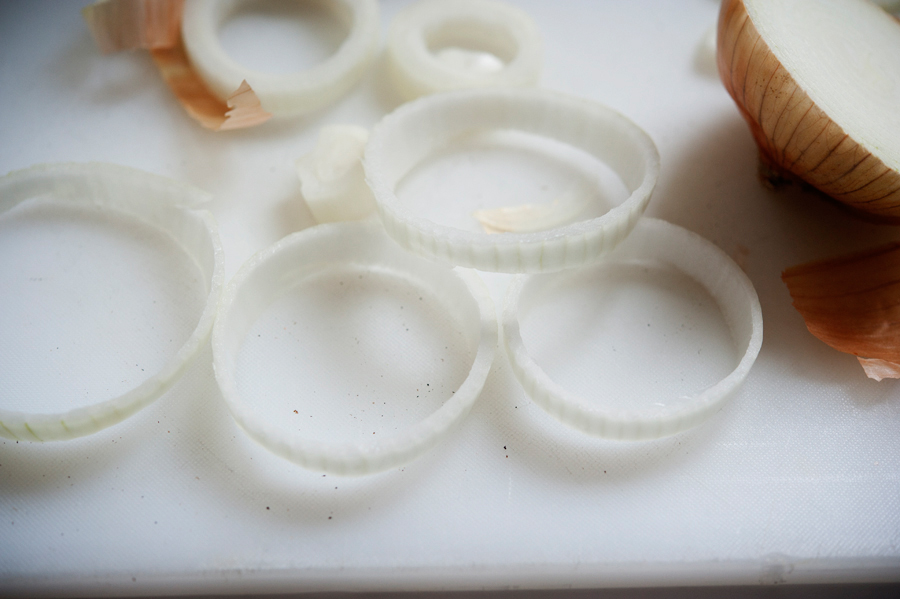
Separate the rings and set aside the biggest ones.


Tasty Kitchen Blog: Onion Ring Eggs. Guest post by Georgia Pellegrini, recipe submitted by TK member Carrie of Kiss My Whisk.

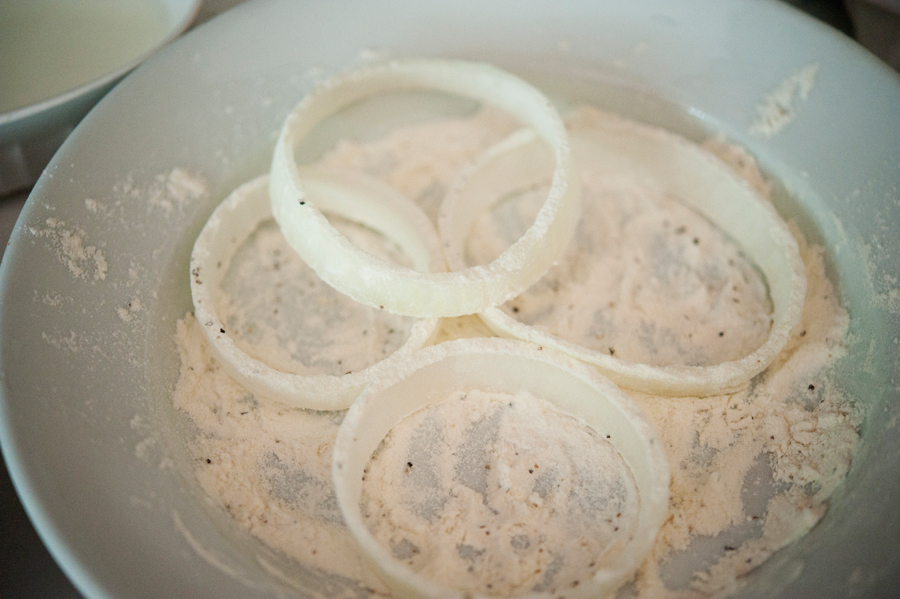
Dust them in flour.


Tasty Kitchen Blog: Onion Ring Eggs. Guest post by Georgia Pellegrini, recipe submitted by TK member Carrie of Kiss My Whisk.

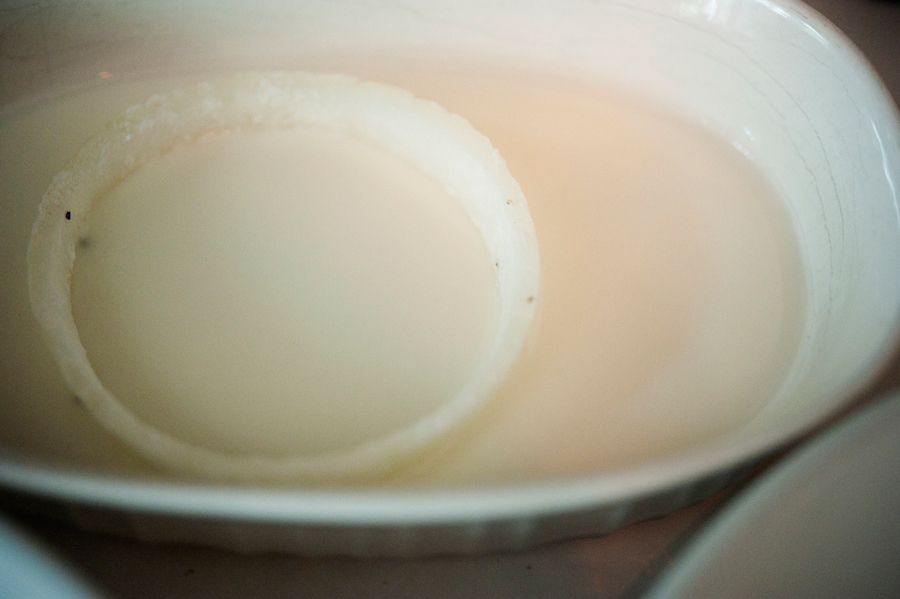
Then in some milk.


Tasty Kitchen Blog: Onion Ring Eggs. Guest post by Georgia Pellegrini, recipe submitted by TK member Carrie of Kiss My Whisk.

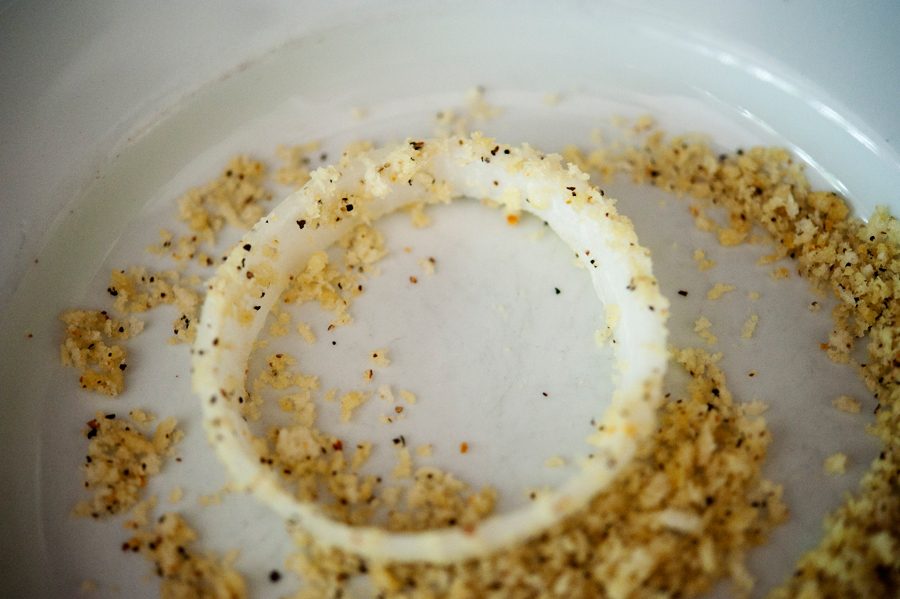
Then in some panko. You won’t get a full coating this way, but it doesn’t really need it. If you’re looking for more of a true onion ring style, you could combine flour, and a dash of salt, and then whisk in beer until you get a pancake batter consistency. That will give you a heavy-duty coating. But this was lovely for a breakfast.


Tasty Kitchen Blog: Onion Ring Eggs. Guest post by Georgia Pellegrini, recipe submitted by TK member Carrie of Kiss My Whisk.

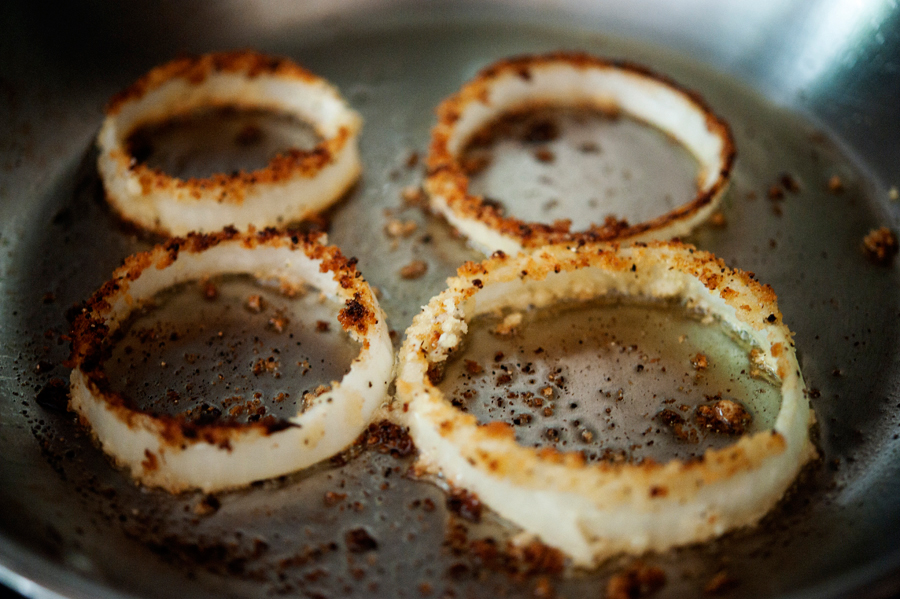
Brown the onions on all sides in the pan. They will become soft.


Tasty Kitchen Blog: Onion Ring Eggs. Guest post by Georgia Pellegrini, recipe submitted by TK member Carrie of Kiss My Whisk.

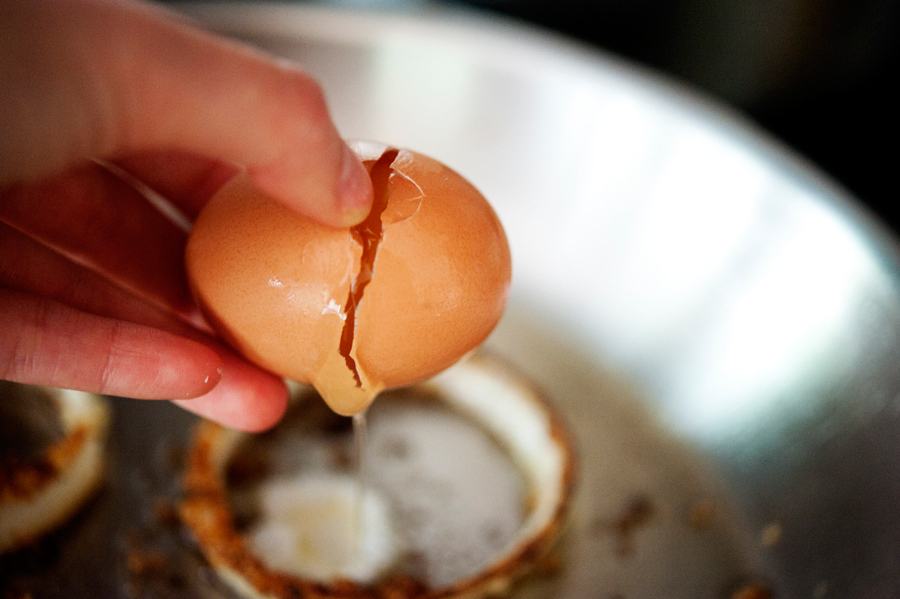
Crack your eggs one at a time and drop them in the center of the onion ring.


Tasty Kitchen Blog: Onion Ring Eggs. Guest post by Georgia Pellegrini, recipe submitted by TK member Carrie of Kiss My Whisk.

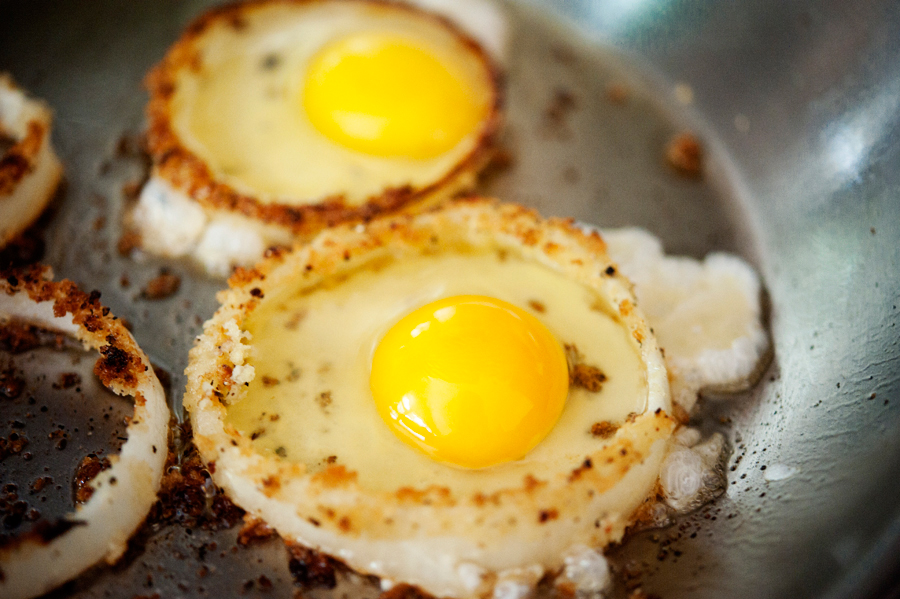
Let them cook on one side until the whites firm up.


Tasty Kitchen Blog: Onion Ring Eggs. Guest post by Georgia Pellegrini, recipe submitted by TK member Carrie of Kiss My Whisk.

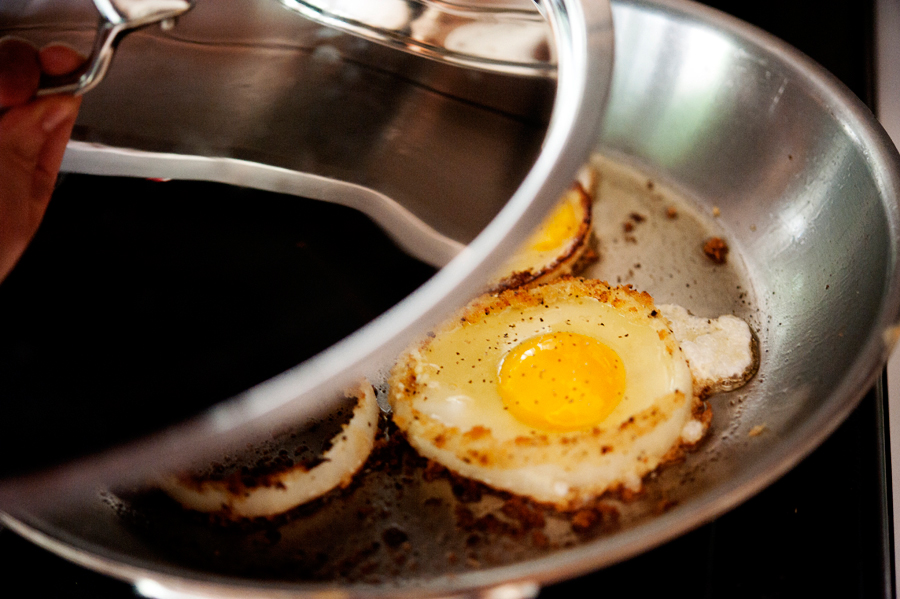
Then add a bit of salt and pepper to the top and cover them to help the tops finish cooking.

You could also go wild here and add cheese, herbs or anything else you’d like on the top.


Tasty Kitchen Blog: Onion Ring Eggs. Guest post by Georgia Pellegrini, recipe submitted by TK member Carrie of Kiss My Whisk.

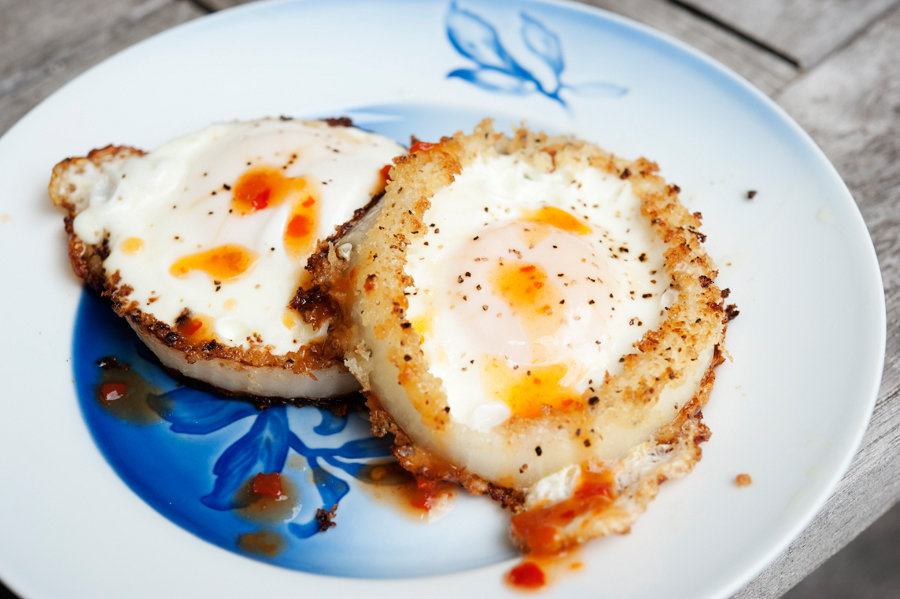
Garnish with a few good dashes of your favorite hot sauce.


Tasty Kitchen Blog: Onion Ring Eggs. Guest post by Georgia Pellegrini, recipe submitted by TK member Carrie of Kiss My Whisk.

And dig in! This was heavenly. They are now officially in my breakfast repertoire. Check out all of Carrie’s fabulous recipes on her blog Kiss My Whisk!


Printable Recipe

Onion Ring Eggs

See post on Kiss My Whisk’s site!
5.00 Mitt(s) 3 Rating(s)3 votes, average: 5.00 out of 53 votes, average: 5.00 out of 53 votes, average: 5.00 out of 53 votes, average: 5.00 out of 53 votes, average: 5.00 out of 5

Prep Time:

Cook Time:

Difficulty: Easy

Servings: 2

2
x

Print Options

Page size Letter 3x5 4x6
Text Size Small Medium Large
Content Include description
Include prep time, etc.
Show image

Description

A fun twist on egg-in-the-hole and a great excuse to have onion rings for breakfast!

Ingredients

  • 2 whole Large Onion Rings, Sliced Thick From A Large Onion
  • ½ cups Flour
  • 1 teaspoon Salt, Divided
  • 1 teaspoon Ground Black Pepper, Divided
  • ½ cups Milk Or Buttermilk
  • ¾ cups Panko Crumbs
  • ¾ cups Olive Oil
  • 2 whole Eggs
  • Hot Sauce, To Serve

Preparation Instructions

Use the largest 2 outside ring layers of a large onion.

Combine flour, 1/2 teaspoon of salt and 1/2 teaspoon of pepper in a small bowl. Add milk to a second small bowl and panko to a third.

Add olive oil to non stick pan, so there is about 1/4 inch of oil in the pan and preheat over medium high to high heat.

Dredge onions in flour, then dip in milk and coat with panko. Add breaded onions to hot oil; once the bottom side browns, flip over. You can use tongs to brown thick sides of onions as well. Just do the best you can, that’s what I did!

Once onions are browned on all sides, reduce heat to medium and carefully crack eggs into the center of the onion. Sprinkle eggs with remaining salt and pepper and then cover. Cook for about 4 to 6 minutes, until egg is cooked and yolk is still runny (cook longer if you don’t want an over-easy egg).

Carefully use spatula to remove from pan and place on a plate. Garnish with a sprinkle or drizzle of hot sauce and enjoy!

Recipe inspired by Donna and Anne of Apron Strings.


_______________________________________

There’s so much to say about Georgia, we don’t know where to start. Leaving Wall Street for the French Culinary Institute, followed by a stint at the Gramercy Tavern and La Chassagnette in France, her passion for food and food traditions are evident and inspiring. Visit her site at Georgia Pellegrini, where you’ll find more recipes, photos, learn all about her wonderful books Girl Hunter and Food Heroes, and enjoy her latest adventures.


Profile photo of georgiapellegrini

Wedge Salad

Posted by in Step-by-Step Recipes

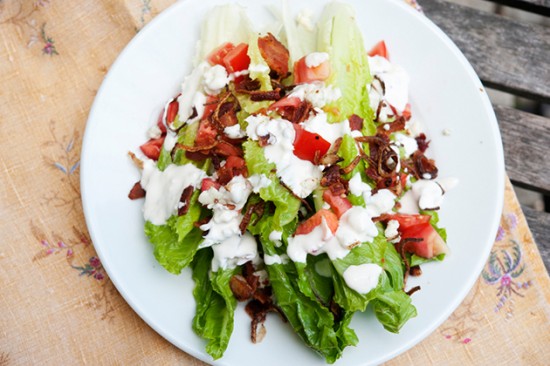
  If I were to choose only one meal I could have forever it would probably be a salad with all the toppings that I want. This Wedge Salad by Tasty Kitchen member Lindsay was just that: lovely greens topped with crunchy, salty, sweet, creamy goodness.       To make it you will need: […]
Profile photo of georgiapellegrini

Barbecued Shrimp, New Orleans Style

Posted by in Step-by-Step Recipes

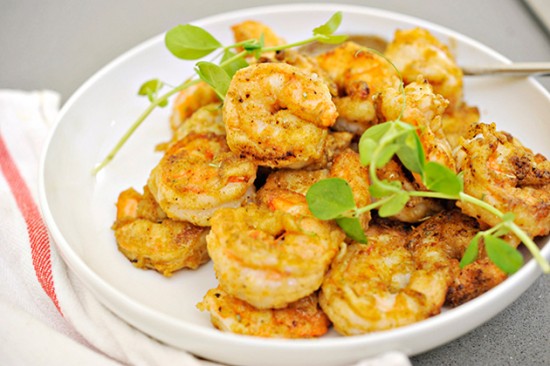
  This barbecued shrimp recipe from Food Orleans was utterly wonderful. There was just enough breading and seasoning without it dominating the flavor of the shrimp, but enough to give it a great texture. Jennifer explains that New Orleans style barbecued shrimp is buttered, not barbecued. I’m down with that.       Here is […]
Profile photo of georgiapellegrini

Homemade Grape Nuts

Posted by in Step-by-Step Recipes

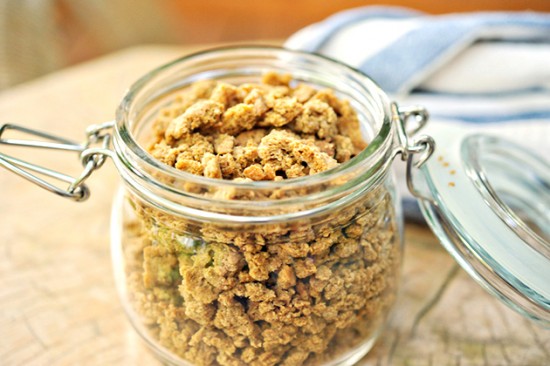
  Homemade cereal, what a revelation! Zoe Dawn’s recipe for homemade grape nuts thrilled me. I’ve made homemade granola before, but never grape nuts. So I was excited to give this a try. And I have to say, I liked it even more than the kind you get in the store.       You […]

Profile photo of georgiapellegrini

Coconut Honey Rice Pudding

Posted by in Step-by-Step Recipes

  This dairy-free Coconut Honey Rice Pudding from Fuji Mama rocked my world. It had the traditional creaminess of rice pudding but with the extra richness that only coconut milk can offer. My kitchen also smelled amazing for many hours, which was an added bonus.       To make it, you will need: soy […]