The Pioneer Woman Tasty Kitchen
Profile photo of EatLiveRun

BBQ Chicken, Brie and Plantain Wraps

Posted by in Step-by-Step Recipes

Tasty Kitchen Blog: BBQ Chicken, Brie and Plantain Wraps. Guest post by Jenna Weber of Eat, Live, Run; recipe submitted by TK member Tina of My Life as a Mrs.

 
I have a thing for plantains. Specifically, crunchy fried, golden sweet plantains that are just dripping with caramelized brown sugar. Just hand me a plate of sweet plantains and I’m in heaven. So, when I saw Tina’s recipe for BBQ Chicken, Brie and Plantain Wraps I knew it would be a winner. Spicy barbecue chicken with gooey brie cheese and sweet crunchy plantains? Sign me up!


Tasty Kitchen Blog: BBQ Chicken, Brie and Plantain Wraps. Guest post by Jenna Weber of Eat, Live, Run; recipe submitted by TK member Tina of My Life as a Mrs.

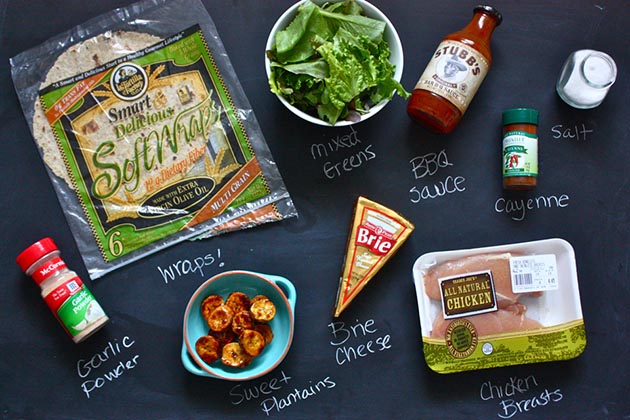
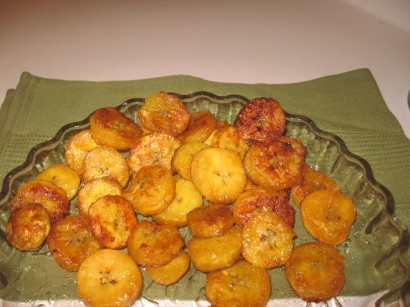
Tina’s recipe calls for a box of frozen sweet plantains, but after searching five grocery stores to no avail, I decided to take matters into my own hands and make my own. I found this easy Tasty Kitchen recipe for Sweet Plantains submitted by Stephanie. It only took about ten minutes and the end result was delicious! (I’ll include that recipe at the bottom of this post.)


Tasty Kitchen Blog: BBQ Chicken, Brie and Plantain Wraps. Guest post by Jenna Weber of Eat, Live, Run; recipe submitted by TK member Tina of My Life as a Mrs.

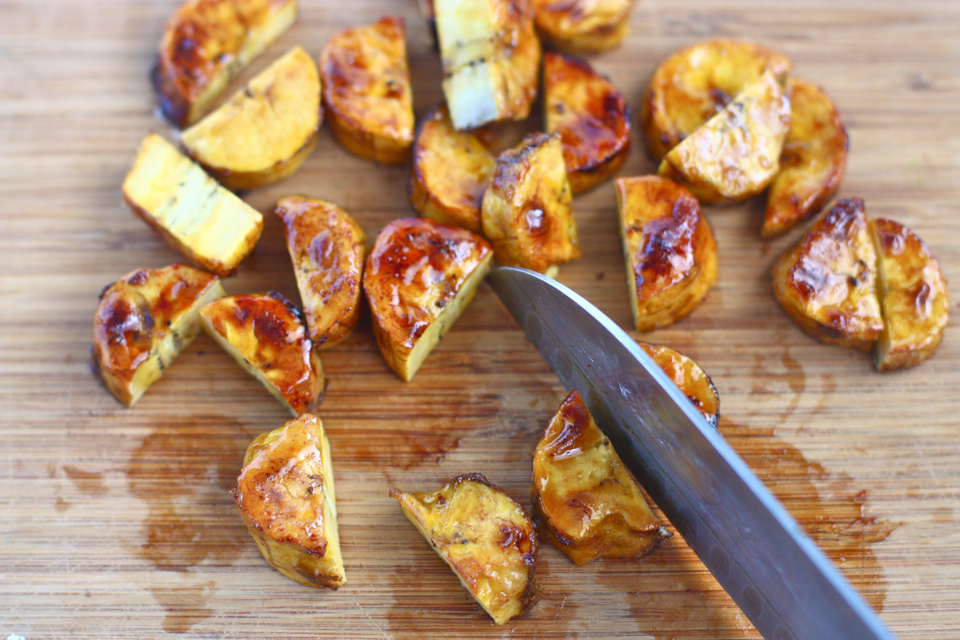
Since I skipped a step by not getting packaged plantains, after frying them I sliced them in half to prep them for my yummy wrap!


Tasty Kitchen Blog: BBQ Chicken, Brie and Plantain Wraps. Guest post by Jenna Weber of Eat, Live, Run; recipe submitted by TK member Tina of My Life as a Mrs.

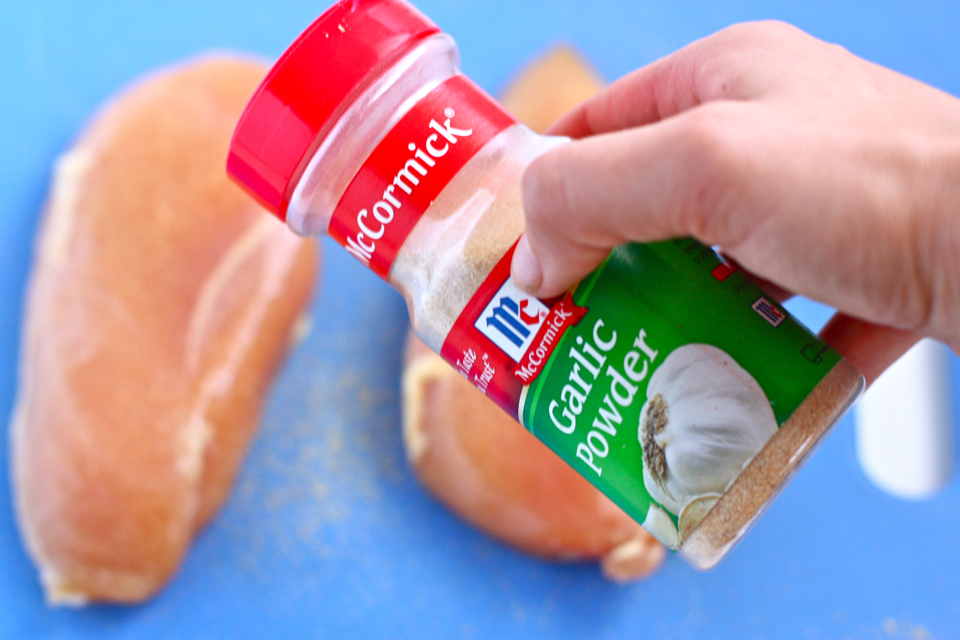
Then, I set the plantains aside and got to work on my barbecue chicken! Tina used a grill, but I decided to go the grill pan route in my oven instead for convenience. I also used garlic powder plus salt instead of garlic salt. So I sprinkled these guys with a little garlic powder first…


Tasty Kitchen Blog: BBQ Chicken, Brie and Plantain Wraps. Guest post by Jenna Weber of Eat, Live, Run; recipe submitted by TK member Tina of My Life as a Mrs.

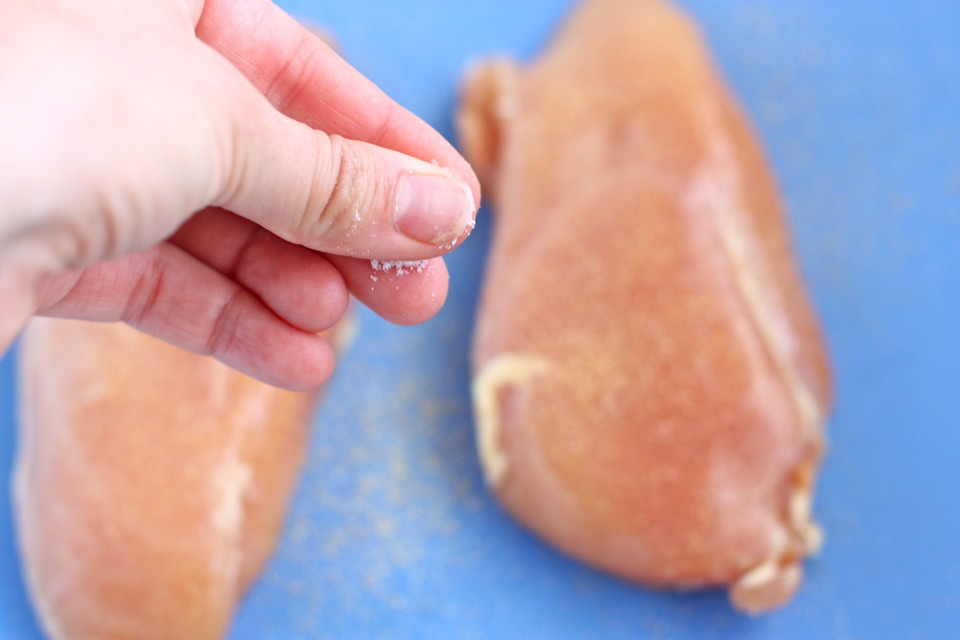
Then I gave them a good pinch of sea salt.


Tasty Kitchen Blog: BBQ Chicken, Brie and Plantain Wraps. Guest post by Jenna Weber of Eat, Live, Run; recipe submitted by TK member Tina of My Life as a Mrs.

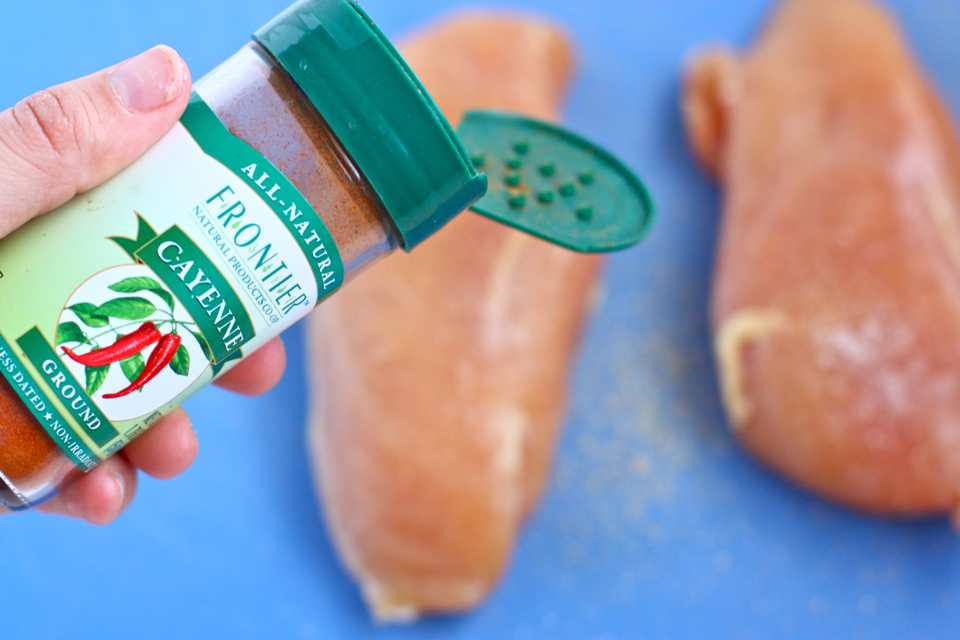
Followed by a healthy dash of cayenne—my favorite!


Tasty Kitchen Blog: BBQ Chicken, Brie and Plantain Wraps. Guest post by Jenna Weber of Eat, Live, Run; recipe submitted by TK member Tina of My Life as a Mrs.

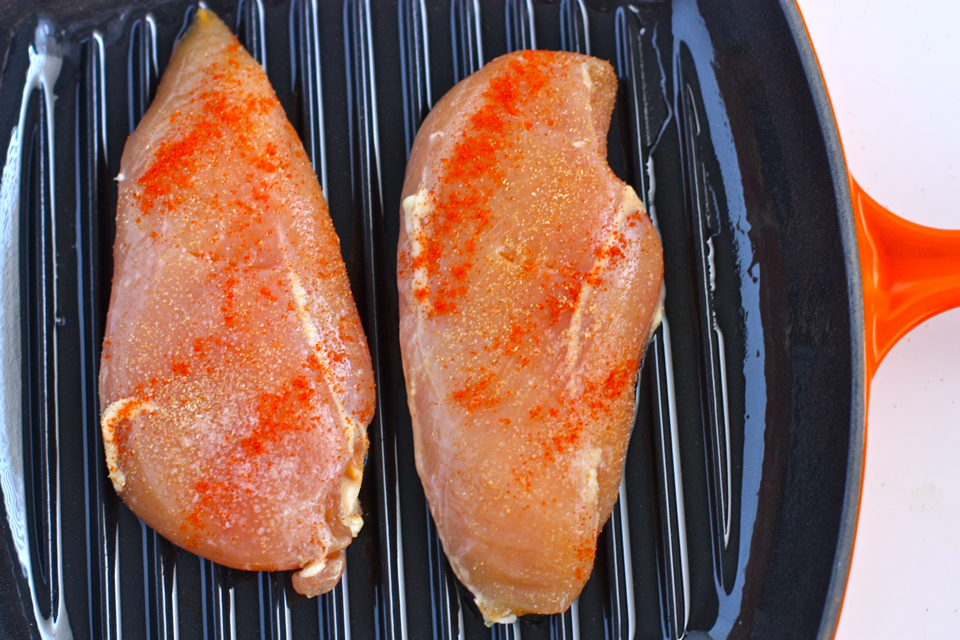
I cooked my chicken breasts for 25 minutes at 375ºF.


Tasty Kitchen Blog: BBQ Chicken, Brie and Plantain Wraps. Guest post by Jenna Weber of Eat, Live, Run; recipe submitted by TK member Tina of My Life as a Mrs.

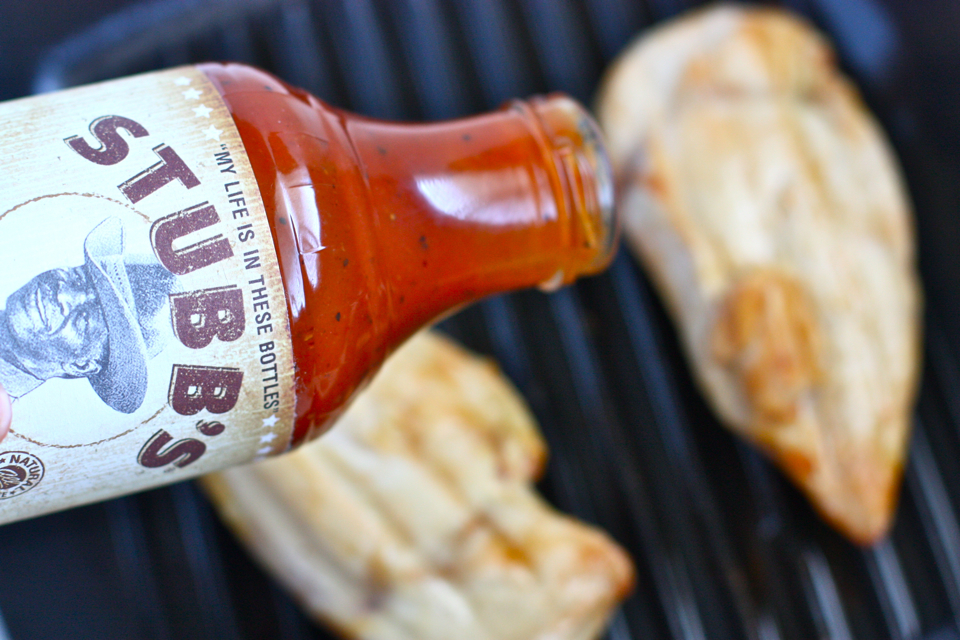
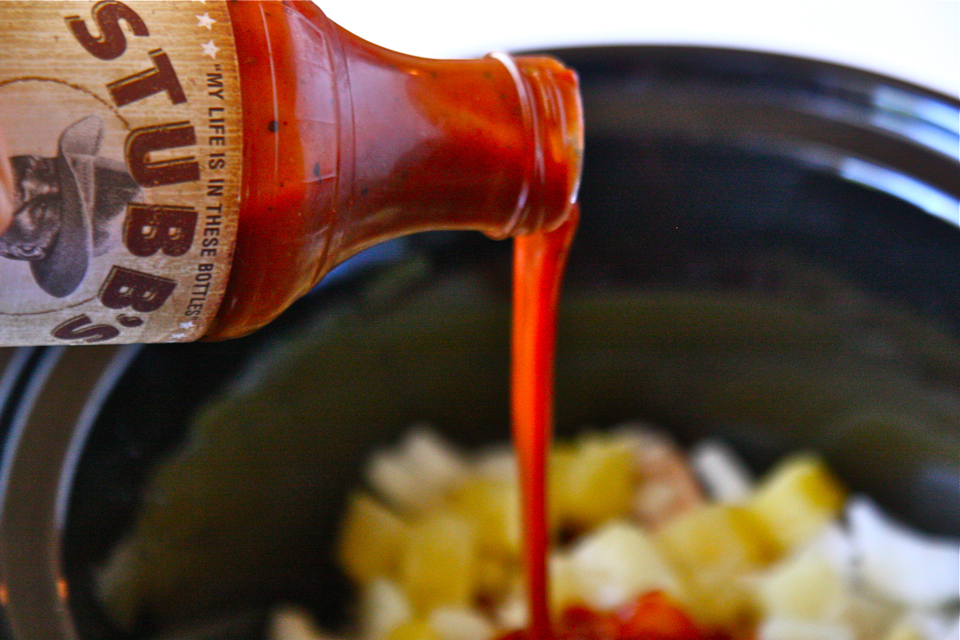
Then poured on my favorite BBQ sauce during the last five minutes of the cooking process.


Tasty Kitchen Blog: BBQ Chicken, Brie and Plantain Wraps. Guest post by Jenna Weber of Eat, Live, Run; recipe submitted by TK member Tina of My Life as a Mrs.

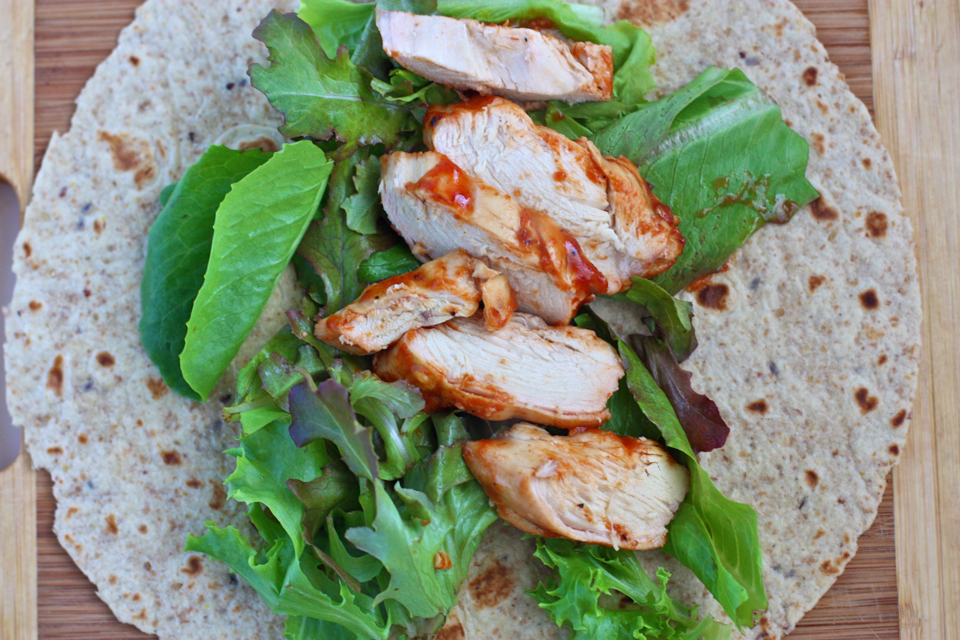
Once the chicken was done and juicy, it was time to assemble the wraps! I thinly sliced my barbecue sauce-laden chicken breast and placed it on top of my wrap and mixed greens.


Tasty Kitchen Blog: BBQ Chicken, Brie and Plantain Wraps. Guest post by Jenna Weber of Eat, Live, Run; recipe submitted by TK member Tina of My Life as a Mrs.

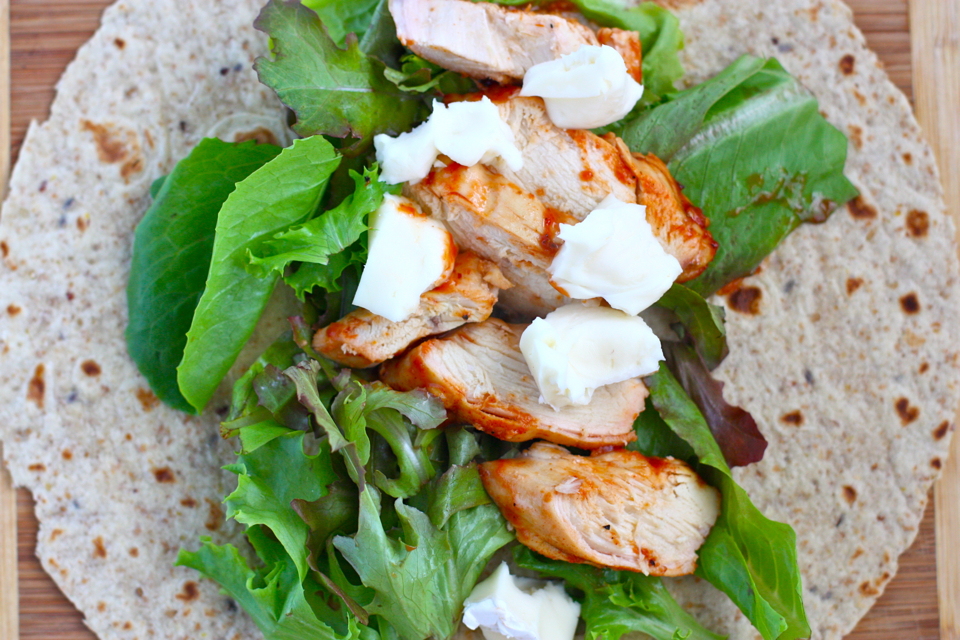
Followed by chunks of brie cheese. Doesn’t that look delicious?! Just you wait.


Tasty Kitchen Blog: BBQ Chicken, Brie and Plantain Wraps. Guest post by Jenna Weber of Eat, Live, Run; recipe submitted by TK member Tina of My Life as a Mrs.

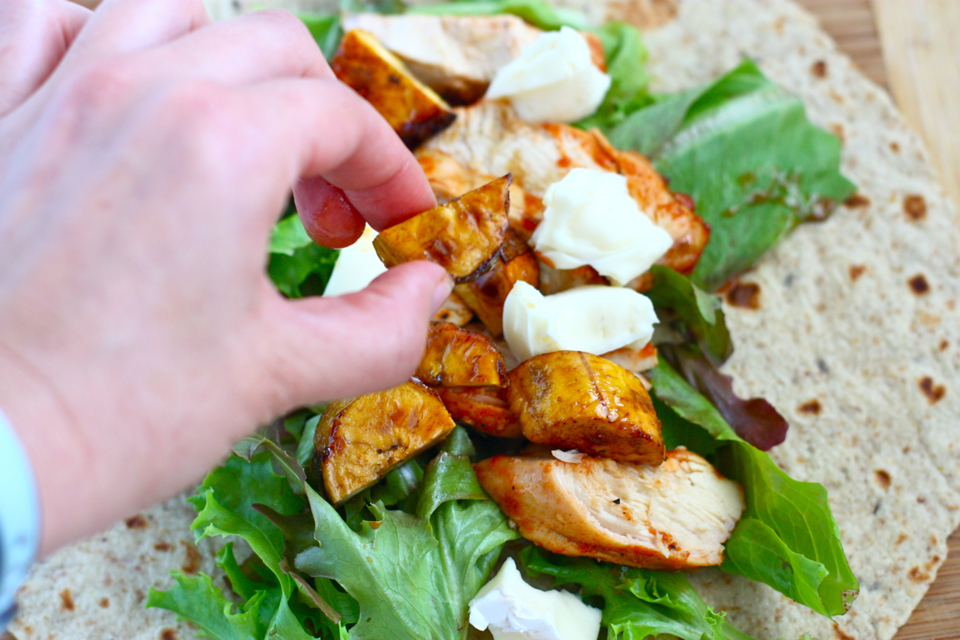
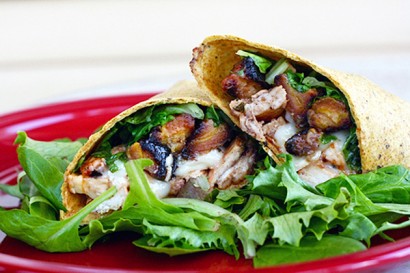
Lastly, I scattered my sweet plantains on top of everything. I’m getting hungry again just looking at this!


Tasty Kitchen Blog: BBQ Chicken, Brie and Plantain Wraps. Guest post by Jenna Weber of Eat, Live, Run; recipe submitted by TK member Tina of My Life as a Mrs.

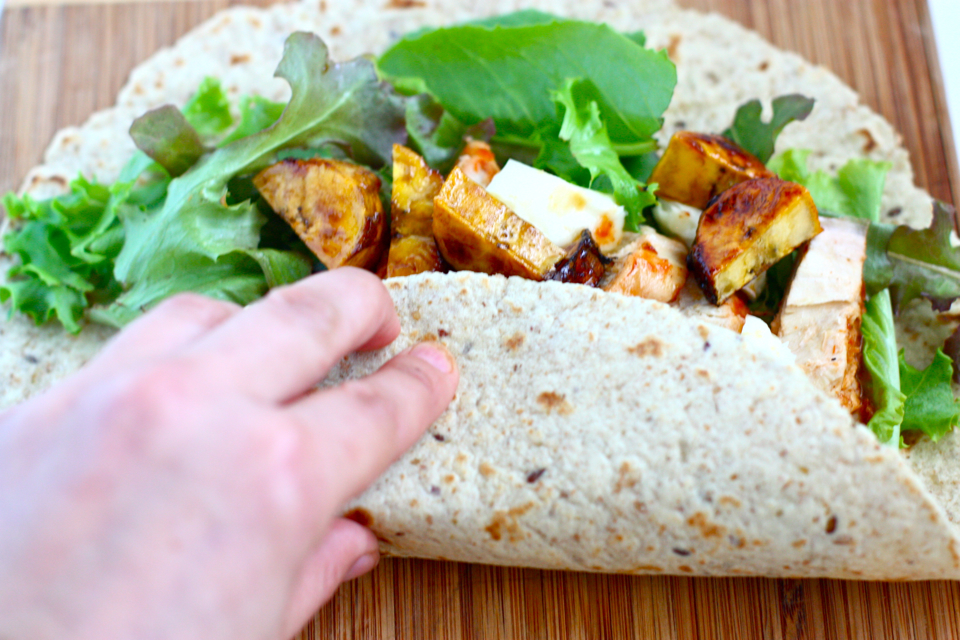
The hardest part of the whole thing was rolling the wrap up! But that’s probably just because I have a history of overstuffing my tortillas.


Tasty Kitchen Blog: BBQ Chicken, Brie and Plantain Wraps. Guest post by Jenna Weber of Eat, Live, Run; recipe submitted by TK member Tina of My Life as a Mrs.

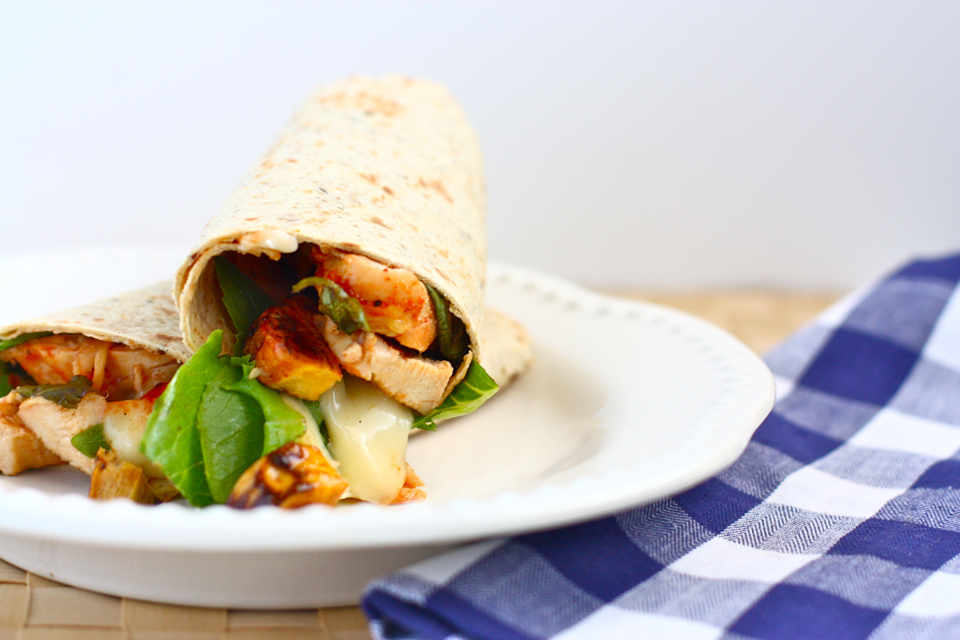
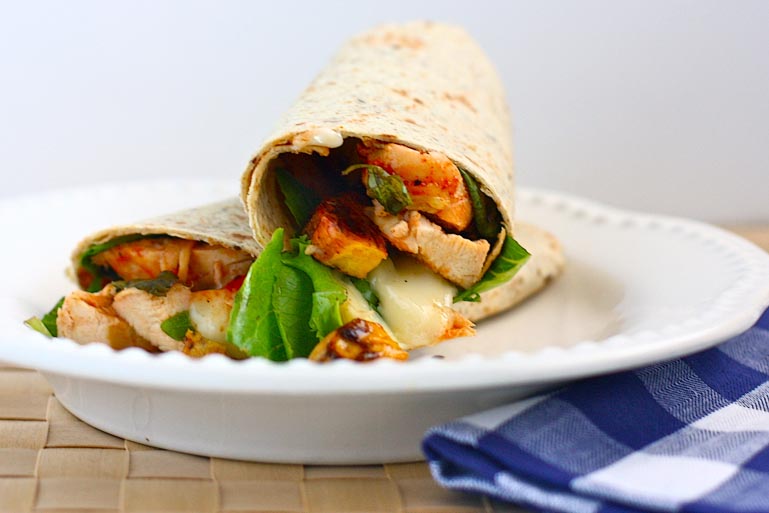
There you have it—lunch is served! I absolutely loved the flavor combination here and have a feeling these will now be my go-to lunch. Thanks, Tina, for this awesome recipe! It was cheesy, smoky, sweet and delicious! (Check out Tina’s blog My Life As A Mrs. for more of her delicious recipes!)


Printable Recipe

BBQ Chicken, Brie, and Plantain Wraps

See post on Tina (My Life as a Mrs)’s site!
5.00 Mitt(s) 2 Rating(s)2 votes, average: 5.00 out of 52 votes, average: 5.00 out of 52 votes, average: 5.00 out of 52 votes, average: 5.00 out of 52 votes, average: 5.00 out of 5

Prep Time:

Cook Time:

Difficulty: Easy

Servings: 4

4
x

Print Options

Page size Letter 3x5 4x6
Text Size Small Medium Large
Content Include description
Include prep time, etc.
Show image

Description

Smokey BBQ, creamy brie, and sweet plantain wrap = party in your mouth!

Ingredients

  • 1 box (about 11 Oz.. Size) Frozen Sweet Plantains
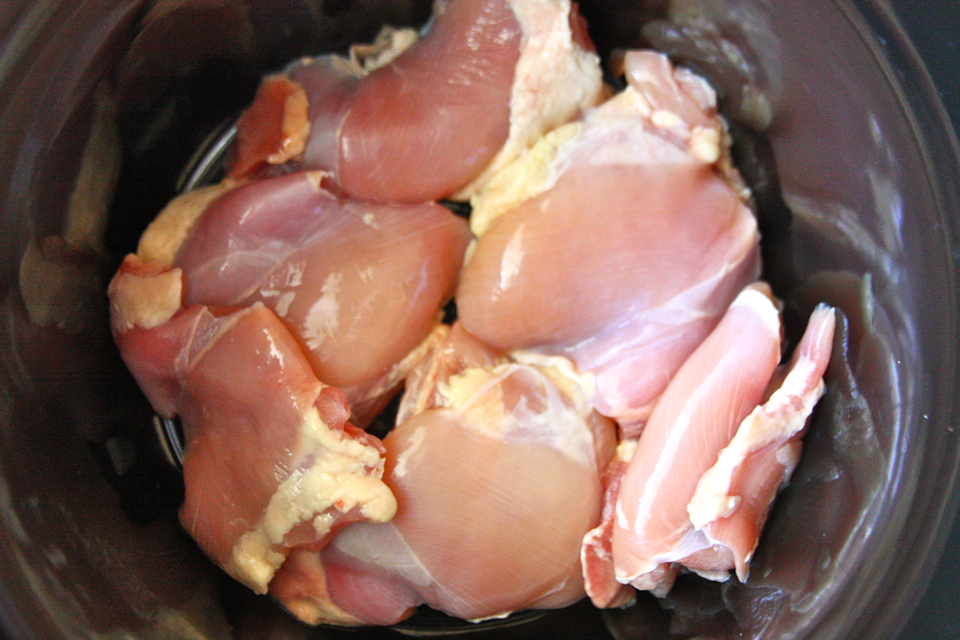
  • 4 whole Boneless, Skinless Chicken Breasts
  • 1 teaspoon Garlic Salt
  • ½ teaspoons Cayenne
  • ¾ cups BBQ Sauce Of Choice
  • 4 whole Spinach Wraps
  • 1 cup Mixed Greens
  • 6 ounces, weight Brie Cheese

Preparation Instructions

Ignore the cooking instructions on the box/bag your plantains. Preheat oven to 400°F. Line a baking sheet with foil and spray with nonstick cooking spray. Lay frozen plantains out in a single layer (make sure none of them are overlapping).

Bake for a good 20–30 minutes, allowing them to caramalize and get that gorgeous chewy edge! They are done when they are nice and golden with dark brown edges. Remove from the oven and allow to cool slightly. When cool enough to handle, slice each piece in half lengthwise, and set aside until ready to use.

Season each piece of chicken with a sprinkling of garlic salt and cayenne pepper on both sides and throw them on the grill until cooked completely through (flipping halfway through). Baste both sides with BBQ sauce in the last 5 minutes or so of cooking. Remove from the grill and slice into thin strips.

To assemble, lay a wrap flat and add a small amount of mixed greens. Top with a few slices of chicken, some brie, and a some of the plantains (I like mine with lots of plantains!). If you want to get REALLY crazy, go ahead and add an extra drizzle of BBQ!

Carefully wrap the wrap up (burrito style), place on a baking sheet (seam side down), and put back into the 400°F oven for just a few minutes (3–5 minutes). This allows the cheese to melt a little and the outside of the tortilla to crisp up slightly. Remove from the oven, slice in half, and serve!


Printable Recipe

Sweet Plantains

See post on Stephanie Deal’s site!
5.00 Mitt(s) 2 Rating(s)2 votes, average: 5.00 out of 52 votes, average: 5.00 out of 52 votes, average: 5.00 out of 52 votes, average: 5.00 out of 52 votes, average: 5.00 out of 5

Prep Time:

Cook Time:

Difficulty: Easy

Servings: 4

4
x

Print Options

Page size Letter 3x5 4x6
Text Size Small Medium Large
Content Include description
Include prep time, etc.
Show image

Description

This tasty dish is really easy to prepare and tastes great with pork chops, etc. It can also just be eaten as a snack.

Ingredients

  • 3 whole Plantains, Very Ripe
  • 3 Tablespoons Brown Sugar
  • ¼ cups Peanut Oil
  • 2 Tablespoons Butter
  • ¼ teaspoons Salt

Preparation Instructions

Slice plantains into 1-inch slices, put in a bowl and gently toss plantain slices with brown sugar.

Heat peanut oil and butter in a large skillet over medium-high heat until the butter begins to sizzle. Put plaintain slices into the skillet and fry until the plantains begin to turn golden brown, then turn over, and continue frying until they have caramelized, about 2–3 minutes per side.

Remove slices from the skillet and dab onto paper towels. Do not put slices onto paper towels as they will stick to the paper due to the caramelization. Put on a plate and sprinkle with salt before serving.


_______________________________________

Jenna is a food writer who has worked as a pastry chef and bread baker. Her blog Eat, Live, Run has great recipes, travel stories, and the perfect slogan: “Celebrating life, one crumb at a time.”


Profile photo of EatLiveRun

Beet Risotto with Goat Cheese

Posted by in Step-by-Step Recipes

Tasty Kitchen Blog: Beet Risotto with Goat Cheese. Guest post by Jenna Weber of Eat, Live, Run; recipe submitted by TK member Amanda of Once Upon a Recipe.

Hi, my names Jenna and I love beets. Like, I really love beets. When I was little, I remember going to visit my grandma and she would boil beets for me then sprinkle them with sugar for an afternoon treat. I must have been one of the only six-year-olds that actually asked for beets. Then, I grew up and discovered beet and goat cheese salads. Beets and soft, creamy goat cheese? A match made in heaven. That’s why, when I saw Tasty Kitchen member Amanda’s recipe for Beet Risotto with Goat Cheese (adapted from Bon Appetit), I knew I had to make it as soon as humanely possible.

The end result was absolutely fantastic! Imagine super creamy, jewel-colored risotto studded with beets and big chunks of melting goat cheese. I think the day I made it, I ate a bowl for lunch and dinner. I just couldn’t get enough—and neither will you!

 
Tasty Kitchen Blog: Beet Risotto with Goat Cheese. Guest post by Jenna Weber of Eat, Live, Run; recipe submitted by TK member Amanda of Once Upon a Recipe.

Amanda doesn’t specify if you can use canned beets for this (I’m sure you can), but since beets are in season right now anyway, I grabbed two bushy ones from the produce section of my local grocery store.


Tasty Kitchen Blog: Beet Risotto with Goat Cheese. Guest post by Jenna Weber of Eat, Live, Run; recipe submitted by TK member Amanda of Once Upon a Recipe.

So, first things first: dice your beets. I didn’t peel these—I just scrubbed them under cold water.


Tasty Kitchen Blog: Beet Risotto with Goat Cheese. Guest post by Jenna Weber of Eat, Live, Run; recipe submitted by TK member Amanda of Once Upon a Recipe.

Look ma! Red hands!


Tasty Kitchen Blog: Beet Risotto with Goat Cheese. Guest post by Jenna Weber of Eat, Live, Run; recipe submitted by TK member Amanda of Once Upon a Recipe.

Next, melt four tablespoons of butter in a heavy-bottomed pot.


Tasty Kitchen Blog: Beet Risotto with Goat Cheese. Guest post by Jenna Weber of Eat, Live, Run; recipe submitted by TK member Amanda of Once Upon a Recipe.

Then, add your diced beets and onion.


Tasty Kitchen Blog: Beet Risotto with Goat Cheese. Guest post by Jenna Weber of Eat, Live, Run; recipe submitted by TK member Amanda of Once Upon a Recipe.

Sauté for about eight minutes, until both beets and onions are tender.


Tasty Kitchen Blog: Beet Risotto with Goat Cheese. Guest post by Jenna Weber of Eat, Live, Run; recipe submitted by TK member Amanda of Once Upon a Recipe.

Add your arborio rice (risotto rice!). You can find arborio rice in the rice section of your local store. It’s super yummy and creamy!


Tasty Kitchen Blog: Beet Risotto with Goat Cheese. Guest post by Jenna Weber of Eat, Live, Run; recipe submitted by TK member Amanda of Once Upon a Recipe.

Pour in three cups of chicken stock. In most traditional risotto recipes, you’ll gradually add the hot stock over a period of about 45 minutes, but in this recipe you just add it all at once … and it works! How awesome and easy is that?


Tasty Kitchen Blog: Beet Risotto with Goat Cheese. Guest post by Jenna Weber of Eat, Live, Run; recipe submitted by TK member Amanda of Once Upon a Recipe.

Finally, drizzle in a little balsamic vinegar.


Tasty Kitchen Blog: Beet Risotto with Goat Cheese. Guest post by Jenna Weber of Eat, Live, Run; recipe submitted by TK member Amanda of Once Upon a Recipe.

Bring risotto to a boil then cover, reduce heat and simmer for about 15 minutes. You’ll want to stir this occasionally. The risotto is done when the rice has soaked up all the stock.


Tasty Kitchen Blog: Beet Risotto with Goat Cheese. Guest post by Jenna Weber of Eat, Live, Run; recipe submitted by TK member Amanda of Once Upon a Recipe.

Season with salt and pepper and add the goat cheese—the best part!

Just look at those huge melting chunks of cheese. Are you drooling yet?


Tasty Kitchen Blog: Beet Risotto with Goat Cheese. Guest post by Jenna Weber of Eat, Live, Run; recipe submitted by TK member Amanda of Once Upon a Recipe.

This would be the perfect side dish to a roast chicken (I especially love TK member Nicole’s Best Roast Chicken. Period.). It’s creamy, hearty and delicious! A big thank you to Amanda for providing such an easy recipe. Visit her blog Once Upon a Recipe for more of her creations!


Printable Recipe

Beet Risotto with Goat Cheese

See post on Amanda (onceuponarecipe)’s site!
4.87 Mitt(s) 8 Rating(s)8 votes, average: 4.87 out of 58 votes, average: 4.87 out of 58 votes, average: 4.87 out of 58 votes, average: 4.87 out of 58 votes, average: 4.87 out of 5

Prep Time:

Cook Time:

Difficulty: Easy

Servings: 6

6
x

Print Options

Page size Letter 3x5 4x6
Text Size Small Medium Large
Content Include description
Include prep time, etc.
Show image

Description

Creamy beet risotto topped with goat cheese makes for a delicious and gourmet accompaniment to a meal!

Ingredients

  • ¼ cups Butter
  • 2 whole Beets, Chopped Small
  • 1 whole Onion, Chopped Small
  • 1 cup Arborio Rice
  • 3 cups Stock (Chicken Or Vegetable)
  • 1 Tablespoon Balsamic Vinegar
  • Salt And Pepper, to taste
  • ½ cups Goat Cheese

Preparation Instructions

Melt the butter over medium heat in a heavy-bottomed saucepan. Add the beets and onion, and cook for 8 minutes (stir to allow the onion to caramelize). Mix in the rice, broth, and balsamic vinegar. Increase the heat. Bring to a boil, and then reduce the heat to medium-low. Cover and simmer until the rice is tender and the risotto is creamy, stirring occasionally (about 15 minutes). Season with salt and pepper. Sprinkle with the goat cheese. If you are not a goat cheese fan, you could substitute feta cheese, but trust me, the goat cheese really enhances the flavor of the beets. Enjoy!


_______________________________________

Jenna is a food writer who has worked as a pastry chef and bread baker. Her blog Eat, Live, Run has great recipes, travel stories, and the perfect slogan: “Celebrating life, one crumb at a time.”


Profile photo of EatLiveRun

Hawaiian BBQ Pulled Chicken Sandwiches

Posted by in Step-by-Step Recipes

Tasty Kitchen Blog: Hawaiian Pulled BBQ Chicken Sandwiches. Guest post by Jenna Weber of Eat, Live, Run; recipe submitted by TK member Amie of My Retro Kitchen.

 
A couple months back, I finally caved and bought my first slow cooker. It was only twenty dollars at Target and I couldn’t wait to get home and start making delicious barbecue and one-pot meals with it that I didn’t have to worry about during the day. Well, typical me only made one meal with it (the day I bought it) and then promptly forgot about my shiny new Crock Pot.

That is, until I came across this recipe for Hawaiian BBQ Pulled Chicken Sandwiches by Tasty Kitchen member myretrokitchen. The recipe was incredibly simple (basically just dump everything together in the crock pot, turn it on and six hours later you have dinner!) and turned out to be absolutely delicious. The pineapple chunks give the barbecue a delightful sweet surprise and using chicken was a nice change of pace from typical pulled pork.

Here’s what you need!


Tasty Kitchen Blog: Hawaiian Pulled BBQ Chicken Sandwiches. Guest post by Jenna Weber of Eat, Live, Run; recipe submitted by TK member Amie of My Retro Kitchen.

Simple, right? Just chicken (I used thighs for more flavor), your favorite barbecue sauce, a can of pineapple and an onion. Love it.


Tasty Kitchen Blog: Hawaiian Pulled BBQ Chicken Sandwiches. Guest post by Jenna Weber of Eat, Live, Run; recipe submitted by TK member Amie of My Retro Kitchen.

The recipe says to first put the chicken at the bottom of the Crock Pot…


Tasty Kitchen Blog: Hawaiian Pulled BBQ Chicken Sandwiches. Guest post by Jenna Weber of Eat, Live, Run; recipe submitted by TK member Amie of My Retro Kitchen.

Then, cover it with diced onion.


Tasty Kitchen Blog: Hawaiian Pulled BBQ Chicken Sandwiches. Guest post by Jenna Weber of Eat, Live, Run; recipe submitted by TK member Amie of My Retro Kitchen.

Followed by a can of pineapple chunks.


Tasty Kitchen Blog: Hawaiian Pulled BBQ Chicken Sandwiches. Guest post by Jenna Weber of Eat, Live, Run; recipe submitted by TK member Amie of My Retro Kitchen.

Amie says you can either save the pineapple juice to add to the sauce at the end for sweetness, but I prefer a more savory barbecue sauce so I tossed mine.


Tasty Kitchen Blog: Hawaiian Pulled BBQ Chicken Sandwiches. Guest post by Jenna Weber of Eat, Live, Run; recipe submitted by TK member Amie of My Retro Kitchen.

Next comes my favorite part: adding the sauce! Coming from the South, I love me some tangy vinegar based barbecue sauce, but for this recipe I chose my tomato-based favorite—Stubb’s.


Tasty Kitchen Blog: Hawaiian Pulled BBQ Chicken Sandwiches. Guest post by Jenna Weber of Eat, Live, Run; recipe submitted by TK member Amie of My Retro Kitchen.

You can never have too much barbecue sauce, no matter what anyone tells you.


Tasty Kitchen Blog: Hawaiian Pulled BBQ Chicken Sandwiches. Guest post by Jenna Weber of Eat, Live, Run; recipe submitted by TK member Amie of My Retro Kitchen.

All that only took about four minutes and now all there was left to do was turn the slow cooker on low and let ‘er stew!


Tasty Kitchen Blog: Hawaiian Pulled BBQ Chicken Sandwiches. Guest post by Jenna Weber of Eat, Live, Run; recipe submitted by TK member Amie of My Retro Kitchen.

At the end of the day, after the chicken had been slowly cooking for about seven hours, I removed the meat from the sauce and shredded it before adding it back in to soak up all the yummy barbecue goodness.


Tasty Kitchen Blog: Hawaiian Pulled BBQ Chicken Sandwiches. Guest post by Jenna Weber of Eat, Live, Run; recipe submitted by TK member Amie of My Retro Kitchen.

Delicious! I ate barbecue for dinner and then lunch the next day. Even my boyfriend, who claims to hate pineapple, absolutely loved this meal and devoured two sandwiches in the speed of light.

Thank you to Amie for providing such an easy and delicious weeknight dinner! Visit her blog, My Retro Kitchen, for more home-cooked, sit-down family dinners.


Printable Recipe

Hawaiian BBQ Pulled Chicken Sandwiches

See post on myretrokitchen’s site!
4.62 Mitt(s) 35 Rating(s)35 votes, average: 4.62 out of 535 votes, average: 4.62 out of 535 votes, average: 4.62 out of 535 votes, average: 4.62 out of 535 votes, average: 4.62 out of 5

Prep Time:

Cook Time:

Difficulty: Easy

Servings: 12

12
x

Print Options

Page size Letter 3x5 4x6
Text Size Small Medium Large
Content Include description
Include prep time, etc.
Show image

Description

This is easily my most requested recipe. Each time I make it, I am always asked to provide the recipe so friends can make it themselves at home. It really is yummy, and the best part is it takes about 3 minutes to prepare, a couple additional minutes to shred the chicken once cooked and then back in the crock pot it goes to finish soaking up the goodness! Easy-peasy, but oh sooo good!

Ingredients

  • 3 pounds Boneless Chicken Breast, Thighs Or A Combo Of The Two
  • 1 whole Onion (large), Sliced Into Chunks
  • 1 can (20 Oz. Size) Pineapple, I Recommend Nibblits Or Crushed, Drained But Reserve The Juice If Using (See Note)
  • 1 bottle (18 To 20 Oz. Size) BBQ Sauce Of Your Choice (Our Favorites Are Sweet Baby Ray's Or Open Pit If We Want To Give It A Little More Of A Kick)
  • Hamburger Buns Or Kaiser Rolls

Preparation Instructions

If you use frozen chicken, make sure it is completely defrosted. If you cook it frozen, it will indeed cook but it will make a very “wet” sauce. Place your chicken in the bottom of the crock pot. Top with onions, then pineapple. Pour the entire bottle of BBQ sauce over the whole thing.

Note: If you want a sweeter BBQ, add up to half a cup of the pineapple juice you drained, depending on how sweet you want it. This is optional.

Turn your crock pot on LOW and cook for 8–10 hours (or on HIGH for 4–6).

An hour or two before it is finished cooking, carefully remove the chicken from the crock pot and shred it using two forks. Watch out, it will be hot! Place chicken back in the crock pot and stir well to combine. Finish cooking an additional hour or two so the chicken can absorb most of the sauce. Serve on hamburger buns and top with coleslaw if desired.

Note: When I had made it with Sweet Baby Ray’s and pineapple juice, it was a very sweet Pulled Chicken. It was great, and everyone loved it. But I have to say, using Open Pit BBQ Sauce and no pineapple juice was hands down our favorite! It had just the right amount of sweet and vinegar that we love in a good BBQ.

If you are making this for kids, children tend to like the sweeter variety.


_______________________________________

Jenna is a food writer who has worked as a pastry chef and bread baker. Her blog Eat, Live, Run has great recipes, travel stories, and the perfect slogan: “Celebrating life, one crumb at a time.”


Profile photo of EatLiveRun

Salted Chocolate and Pecan Cake Bars

Posted by in Baking, Step-by-Step Recipes

Tasty Kitchen Blog: Salted Chocolate Chip Pecan Bars. Guest post by Jenna Weber of Eat, Live, Run; recipe submitted by TK member Claire (claireg12) of The Realistic Nutritionist.

 
If you haven’t noticed yet, I really have a thing for sweet and savory baked goods. I’m of the firm belief that a little sea salt sprinkled on top of a piece of cake or a brownie makes everything better, and for that reason, was incredibly excited when I found these Salted Chocolate and Pecan Cake Bars from Tasty Kitchen member Claireg12. The recipe seemed simple enough and didn’t even contain any butter, a typical cake staple. Needless to say, I was intrigued so I got in my kitchen and whipped up a batch!

I’m very glad I did. These bars were delicious and just as easy as the recipe claims!


Tasty Kitchen Blog: Salted Chocolate Chip Pecan Bars. Guest post by Jenna Weber of Eat, Live, Run; recipe submitted by TK member Claire (claireg12) of The Realistic Nutritionist.

See? No butter! I, too, was a little skeptical going in (apparently I’m used to using at least two sticks of butter in my own cakes and bars!) but very glad I kept at it. Claire is an aspiring nutritionist who blogs at The Realistic Nutritionist, so I listened to her. Her recipe calls for vanilla extract but I was out so I substituted one whole vanilla bean instead. Delicious!


Tasty Kitchen Blog: Salted Chocolate Chip Pecan Bars. Guest post by Jenna Weber of Eat, Live, Run; recipe submitted by TK member Claire (claireg12) of The Realistic Nutritionist.

Now, first things first: you gotta grease your pan. The recipe called for an eight-inch square pan so that’s what I used!


Tasty Kitchen Blog: Salted Chocolate Chip Pecan Bars. Guest post by Jenna Weber of Eat, Live, Run; recipe submitted by TK member Claire (claireg12) of The Realistic Nutritionist.

Next, I mixed together my dry ingredients: flour, baking powder and sea salt.


Tasty Kitchen Blog: Salted Chocolate Chip Pecan Bars. Guest post by Jenna Weber of Eat, Live, Run; recipe submitted by TK member Claire (claireg12) of The Realistic Nutritionist.

And then in another bowl, I whisked together my four eggs, brown sugar and vanilla.


Tasty Kitchen Blog: Salted Chocolate Chip Pecan Bars. Guest post by Jenna Weber of Eat, Live, Run; recipe submitted by TK member Claire (claireg12) of The Realistic Nutritionist.

Sick of the gym? Try whisking! You’ll get both strong triceps and a delicious treat with one simple exercise.


Tasty Kitchen Blog: Salted Chocolate Chip Pecan Bars. Guest post by Jenna Weber of Eat, Live, Run; recipe submitted by TK member Claire (claireg12) of The Realistic Nutritionist.

Once the egg and sugar mixture was smooth with no bumps, I added the dry ingredients and mixed well.


Tasty Kitchen Blog: Salted Chocolate Chip Pecan Bars. Guest post by Jenna Weber of Eat, Live, Run; recipe submitted by TK member Claire (claireg12) of The Realistic Nutritionist.

Followed by a cup and a half of dark chocolate chips…


Tasty Kitchen Blog: Salted Chocolate Chip Pecan Bars. Guest post by Jenna Weber of Eat, Live, Run; recipe submitted by TK member Claire (claireg12) of The Realistic Nutritionist.

And then the pecan pieces! The original recipe didn’t say that the pecans should be toasted, although I can’t imagine it would hurt. I just used raw pecan pieces from Trader Joe’s.


Tasty Kitchen Blog: Salted Chocolate Chip Pecan Bars. Guest post by Jenna Weber of Eat, Live, Run; recipe submitted by TK member Claire (claireg12) of The Realistic Nutritionist.

After everything was combined, I poured my batter into my greased pan and baked it for half an hour in a 350ºF oven.


Tasty Kitchen Blog: Salted Chocolate Chip Pecan Bars. Guest post by Jenna Weber of Eat, Live, Run; recipe submitted by TK member Claire (claireg12) of The Realistic Nutritionist.

The cake bars took me a little longer to bake than the recipe predicted, and were finally done after almost 50 minutes. I didn’t mind though; they smelled amazing!


Tasty Kitchen Blog: Salted Chocolate Chip Pecan Bars. Guest post by Jenna Weber of Eat, Live, Run; recipe submitted by TK member Claire (claireg12) of The Realistic Nutritionist.

 
Only by the grace of God was I able to let the bars cool completely before cutting into one. The chocolate chips and pecans had sunk to the bottom and formed a delicious fudge-like layer topped with vanilla cake. The only thing that would make these bars better would be another sprinkle of sea salt and a big scoop of Blue Bell vanilla ice cream!

Thanks, Claireg12 for this easy yummy dessert recipe! (See her original blog post for these incredible bars. You’ll discover that these bars have less than 7 grams of fat. Score!)


Printable Recipe

Salted Chocolate and Pecan Cake Bars

See post on claireg12’s site!
3.71 Mitt(s) 7 Rating(s)7 votes, average: 3.71 out of 57 votes, average: 3.71 out of 57 votes, average: 3.71 out of 57 votes, average: 3.71 out of 57 votes, average: 3.71 out of 5

Prep Time:

Cook Time:

Difficulty: Easy

Servings: 20

20
x

Print Options

Page size Letter 3x5 4x6
Text Size Small Medium Large
Content Include description
Include prep time, etc.
Show image

Description

A perfect dessert for people who are craving something salty and sweet!

Ingredients

  • 1 cup Flour
  • ½ teaspoons Baking Powder
  • 1 teaspoon Sea Salt
  • 4 whole Eggs
  • 2 teaspoons Vanilla Extract
  • 2 cups Light Brown Sugar
  • 1-½ cup Semi-Sweet Chocolate Chips
  • 1 cup Crushed Pecans

Preparation Instructions

Preheat oven to 350ºF. Lightly grease an 8-inch square baking pan with cooking spray.

In a small bowl, mix flour, baking powder and salt. Set aside.

In a larger bowl, mix eggs, vanilla and brown sugar until lumps are gone.

Mix flour and sugar/egg mixture together. Stir in chocolate chips and pecans.

Pour batter into the greased 8-inch pan. Bake at 350ºF for 25–30 minutes until cake is soft. Sprinkle with powdered sugar and extra sea salt and enjoy!


_______________________________________

Jenna is a food writer who has worked as a pastry chef and bread baker. Her blog Eat, Live, Run has great recipes, travel stories, and the perfect slogan: “Celebrating life, one crumb at a time.”


Profile photo of EatLiveRun

Chicken Noodle Soup Casserole

Posted by in Step-by-Step Recipes

  When I stumbled upon 4littlefergusons’ comforting recipe for Chicken Noodle Soup Casserole I knew I had to make it, especially since I was nursing my boyfriend back to health after a ski accident-induced shoulder surgery. Nothing says “get well soon” like a big pot of chicken noodle soup, and this casserole piqued my interest […]

Profile photo of EatLiveRun

Salted Fudge Brownies

Posted by in Baking, Step-by-Step Recipes

I’m so excited to introduce Jenna of Eat, Live, Run as our newest contributor here at the Tasty Kitchen Blog. She’s a doll who dearly loves the TK community. She also has quite the recipe box and it just keeps growing every day. We’re absolutely thrilled to have her! –Ree     The first moment […]