The Pioneer Woman Tasty Kitchen
Profile photo of Betsy (TK)

Cinco de Mayo!

Posted by in Kitchen Talk

Tasty Kitchen Blog: Cinco de Mayo! (Chicken Enchiladas, submitted by TK member Mrs. Schwartz)

 
Let’s face it. We would eat Mexican food every day of the year if we could. It’s just all-around yummy. Tortillas, cheese, savory slow-cooked meats and margaritas. What more does anyone need in life?

We look forward to Cinco de Mayo every year, not because we need an excuse to eat Mexican food (we do plenty of that anyway), but to celebrate the variety of great flavors in Mexican dishes you all share with us. It’s easy to get into a rut with the Mexican food we make at home, and we love adding new recipes to the mix, like Krysten’s Chicken Enchiladas in the photo above. We’ll share some of our favorites later this week, but today we want to hear from you about your go-to meals. So, whether it’s a new recipe or an old standby, tell us:

What is your favorite Mexican dish?

Enchiladas always top the charts in our house, and we love changing up fillings and sauces to vary the results. Also, Mexican chorizo is just one of our favorite ingredients to use. It’s darn amazing in breakfast tacos.

So let’s celebrate Mexican cuisine and get hungry chatting about it!


Profile photo of Erica Lea

Shrimp Spring Rolls with Sweet and Spicy Peanut Dipping Sauce

Posted by in Step-by-Step Recipes

Tasty Kitchen Blog: Shrimp Spring Rolls with Sweet and Spicy Peanut Dipping Sauce. Guest post by Erica Kastner of Buttered Side Up, recipe submitted by TK member Lauren of Lauren's Latest.

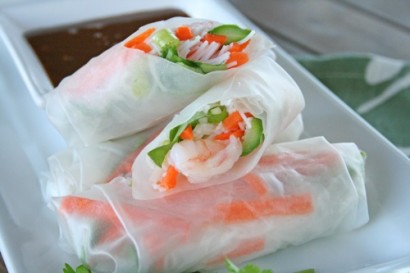
Sometimes, the mere fact that I’ve never tried a recipe before inspires me to make it. I see a fancy recipe and it gets my creativity going. But an unfamiliar recipe can also be quite intimidating. Take spring rolls as an example. A year ago, I saw a recipe that sounded delicious. I knew one day I needed to try my hand at them. I even bought the rice wrappers. But it all seemed very daunting, so I could never quite take the plunge.

Then I saw Lauren’s recipe for Shrimp Spring Rolls with Sweet and Spicy Peanut Dipping Sauce, which included lovely spring vegetables. Erika encouraged me to make them and show you guys how they come together. Seeing step-by-step photos can sometimes open your eyes and explain a process in a way that words never quite can. That’s what we’re all about here on the Tasty Kitchen blog—empowering you to try delicious new recipes.

Let me take you through the steps of making spring rolls!


Tasty Kitchen Blog: Shrimp Spring Rolls with Sweet and Spicy Peanut Dipping Sauce. Guest post by Erica Kastner of Buttered Side Up, recipe submitted by TK member Lauren of Lauren's Latest.

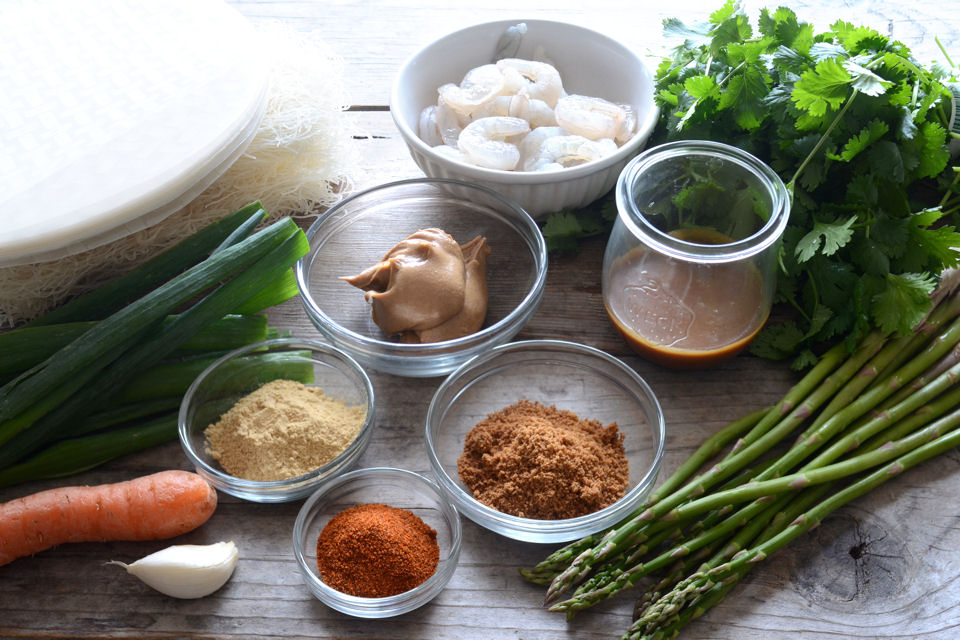
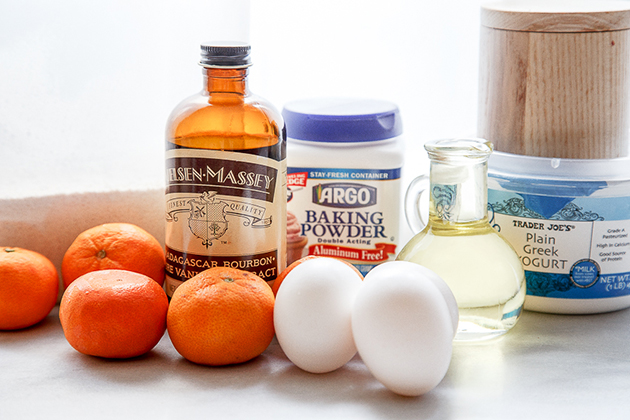
First of all, here are the ingredients that you’ll need:

For the rolls: rice noodles, shrimp, asparagus, spring roll wrappers, green onions, carrot, and cilantro.

For the sauce: smooth peanut butter, brown sugar (I used coconut sugar), dried ginger, garlic, Hoisin sauce (I used Julia’s recipe for homemade Hoisin sauce), cayenne pepper, and hot water (not shown).


Tasty Kitchen Blog: Shrimp Spring Rolls with Sweet and Spicy Peanut Dipping Sauce. Guest post by Erica Kastner of Buttered Side Up, recipe submitted by TK member Lauren of Lauren's Latest.

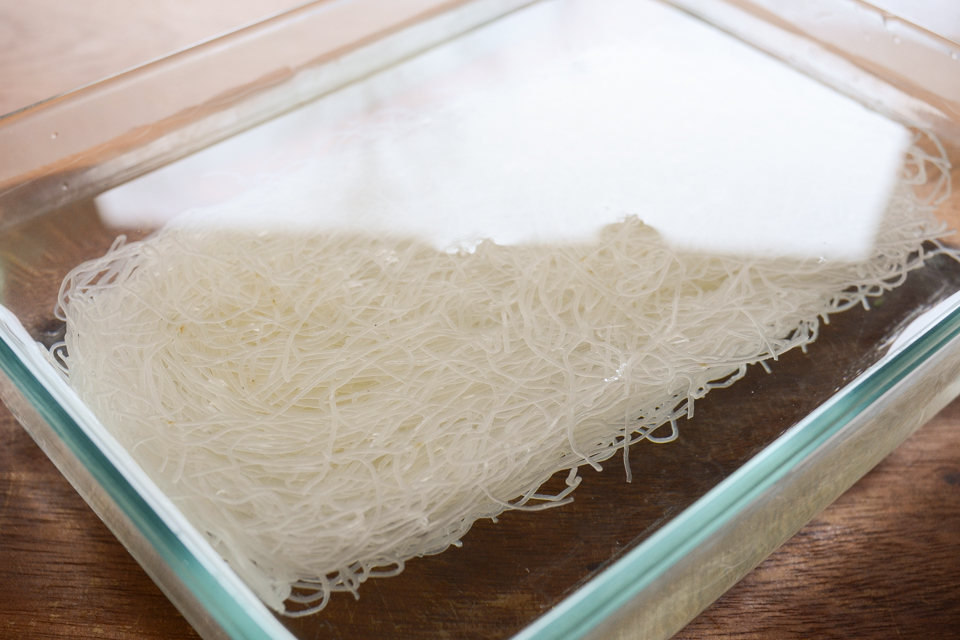
Begin by soaking the rice noodles in cold water. Place a small pot of water on the stove to boil.


Tasty Kitchen Blog: Shrimp Spring Rolls with Sweet and Spicy Peanut Dipping Sauce. Guest post by Erica Kastner of Buttered Side Up, recipe submitted by TK member Lauren of Lauren's Latest.

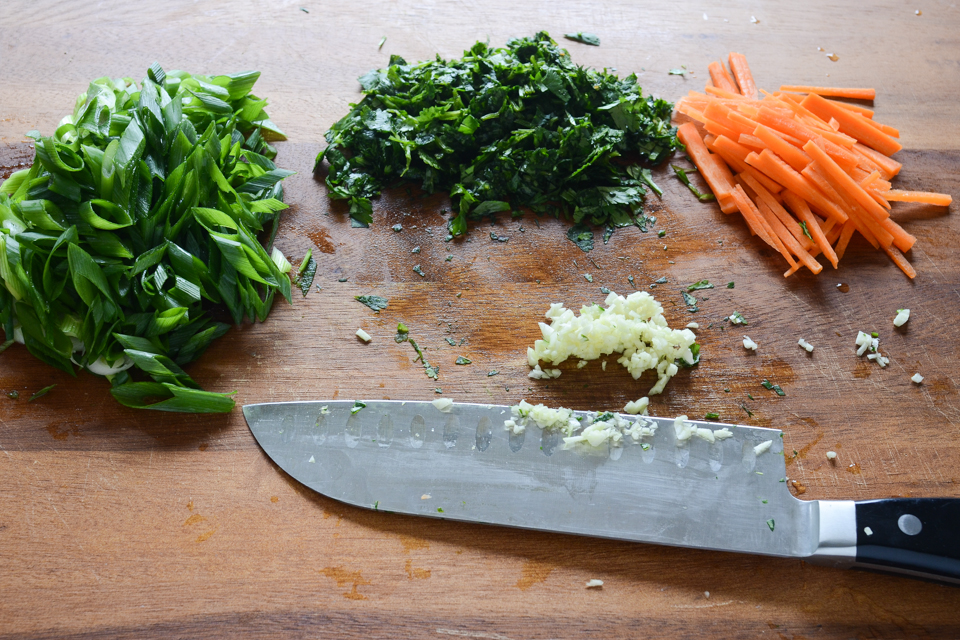
Now it’s time to prep your veggies! Slice the green onions, chop the cilantro, julienne the carrot (don’t laugh at my julienning skills), and mince the garlic.


Tasty Kitchen Blog: Shrimp Spring Rolls with Sweet and Spicy Peanut Dipping Sauce. Guest post by Erica Kastner of Buttered Side Up, recipe submitted by TK member Lauren of Lauren's Latest.

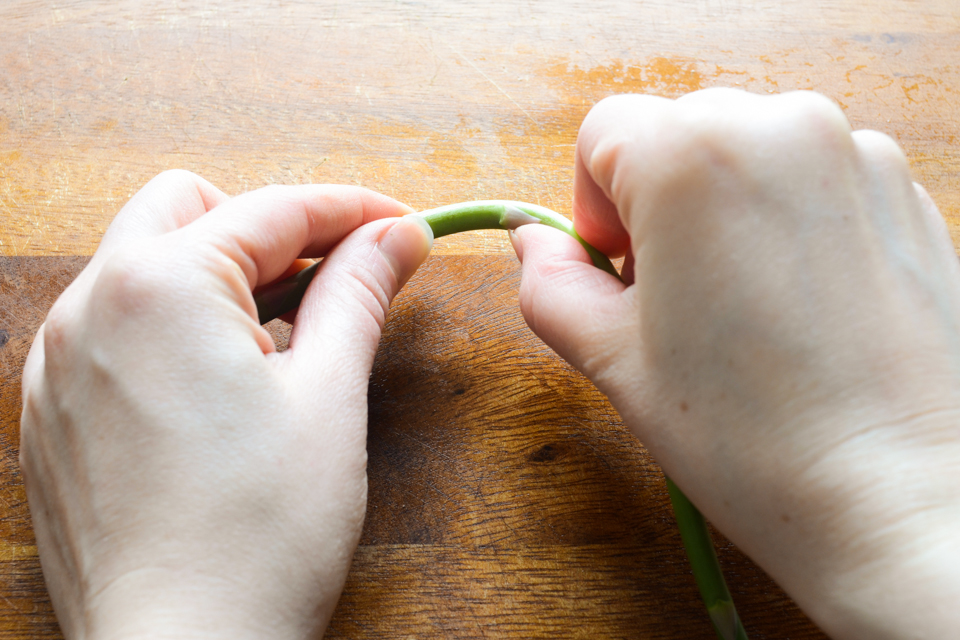
To prep the asparagus, start by bending them in half. The woody end should snap right off! This makes me happy for some reason.


Tasty Kitchen Blog: Shrimp Spring Rolls with Sweet and Spicy Peanut Dipping Sauce. Guest post by Erica Kastner of Buttered Side Up, recipe submitted by TK member Lauren of Lauren's Latest.

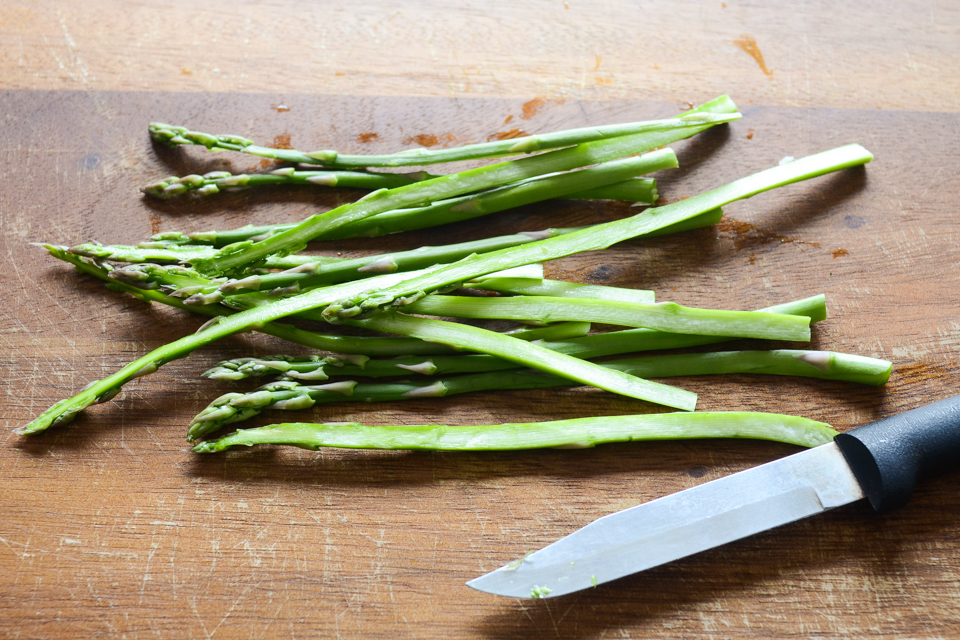
Slice the spears in half lengthwise. I found that a paring knife worked well for this job.


Tasty Kitchen Blog: Shrimp Spring Rolls with Sweet and Spicy Peanut Dipping Sauce. Guest post by Erica Kastner of Buttered Side Up, recipe submitted by TK member Lauren of Lauren's Latest.

Once the water is boiling, salt it generously.


Tasty Kitchen Blog: Shrimp Spring Rolls with Sweet and Spicy Peanut Dipping Sauce. Guest post by Erica Kastner of Buttered Side Up, recipe submitted by TK member Lauren of Lauren's Latest.

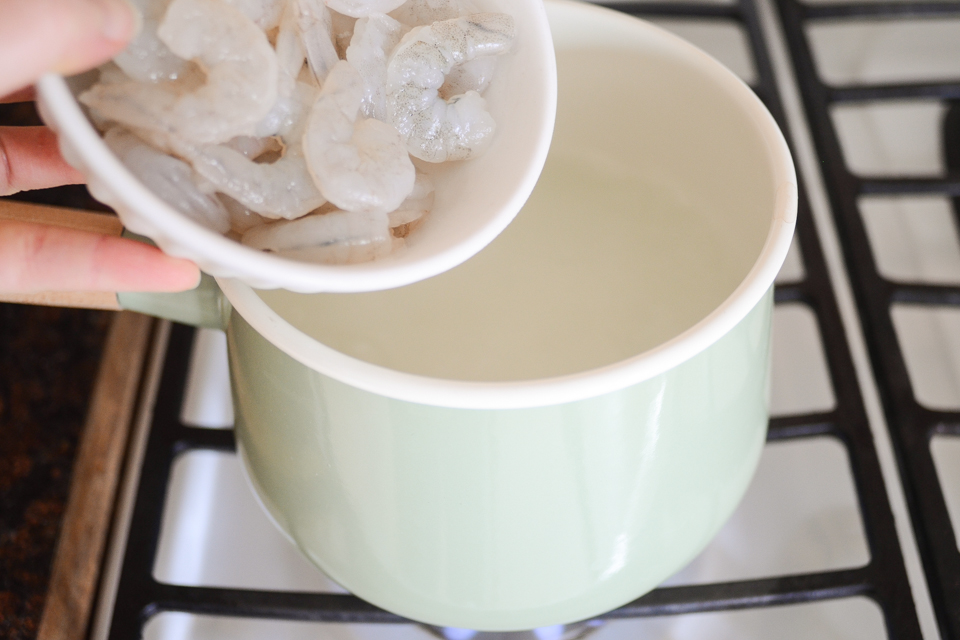
Add the shrimp to the boiling water. It will only take about a minute for them to cook! You’ll know they’re done when they’re pink and opaque.


Tasty Kitchen Blog: Shrimp Spring Rolls with Sweet and Spicy Peanut Dipping Sauce. Guest post by Erica Kastner of Buttered Side Up, recipe submitted by TK member Lauren of Lauren's Latest.

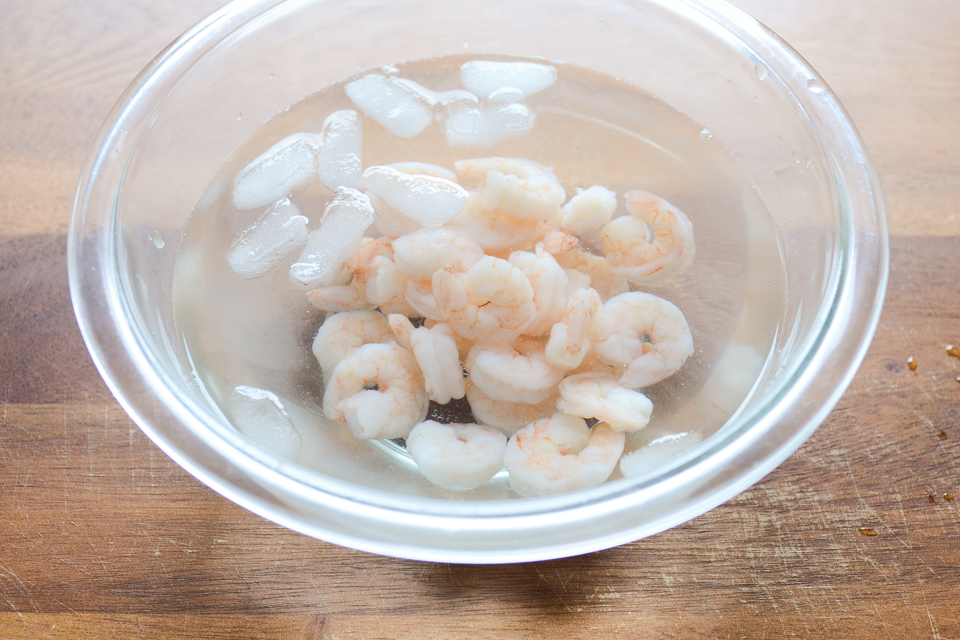
Remove the shrimp to a bowl of ice water.


Tasty Kitchen Blog: Shrimp Spring Rolls with Sweet and Spicy Peanut Dipping Sauce. Guest post by Erica Kastner of Buttered Side Up, recipe submitted by TK member Lauren of Lauren's Latest.

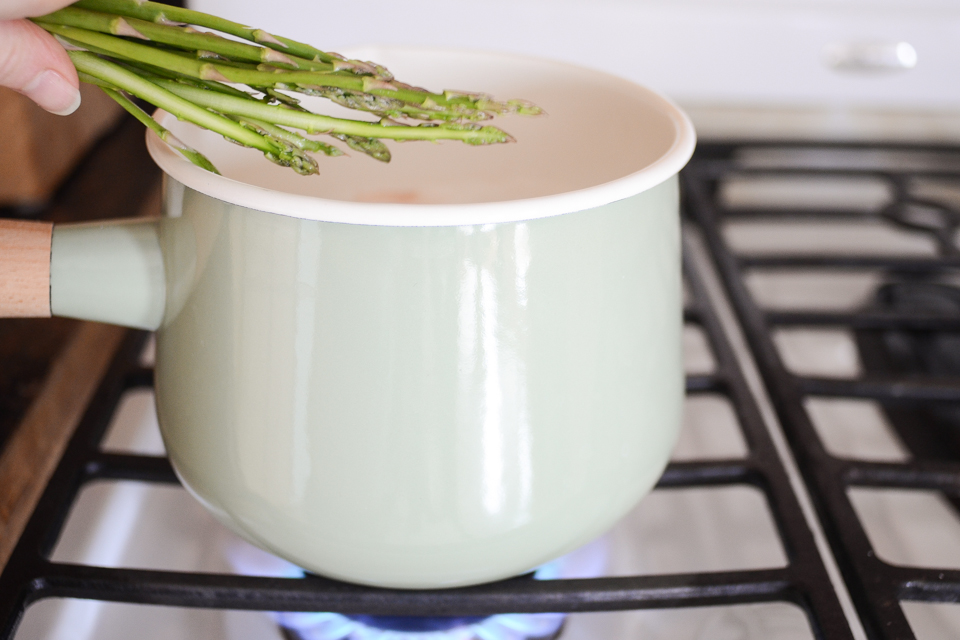
Add the asparagus to the now-empty pot. Cook until crisp-tender, about 2 minutes.


Tasty Kitchen Blog: Shrimp Spring Rolls with Sweet and Spicy Peanut Dipping Sauce. Guest post by Erica Kastner of Buttered Side Up, recipe submitted by TK member Lauren of Lauren's Latest.

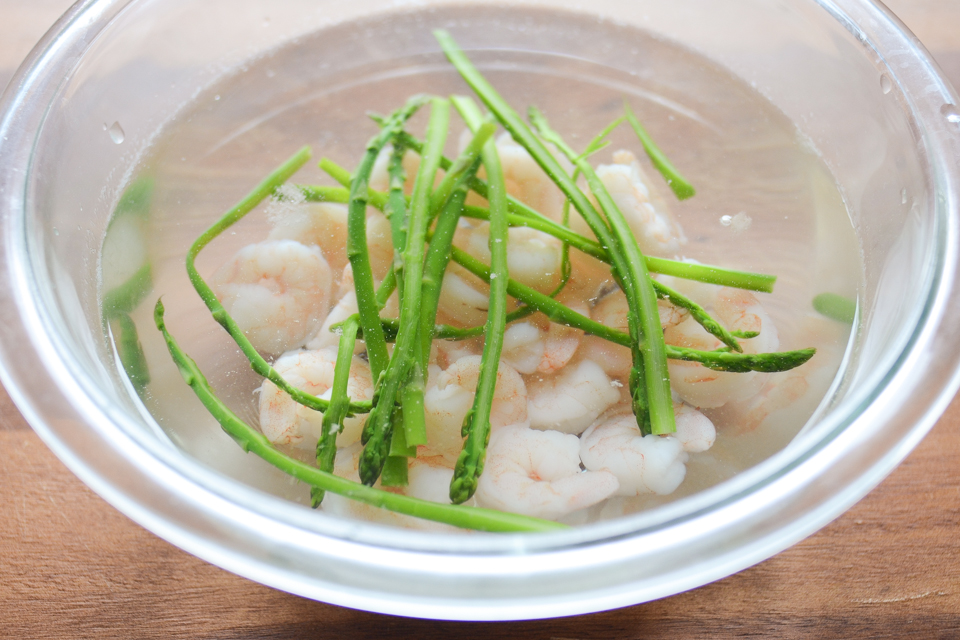
Add the asparagus to the bowl of ice water along with the shrimp.


Tasty Kitchen Blog: Shrimp Spring Rolls with Sweet and Spicy Peanut Dipping Sauce. Guest post by Erica Kastner of Buttered Side Up, recipe submitted by TK member Lauren of Lauren's Latest.

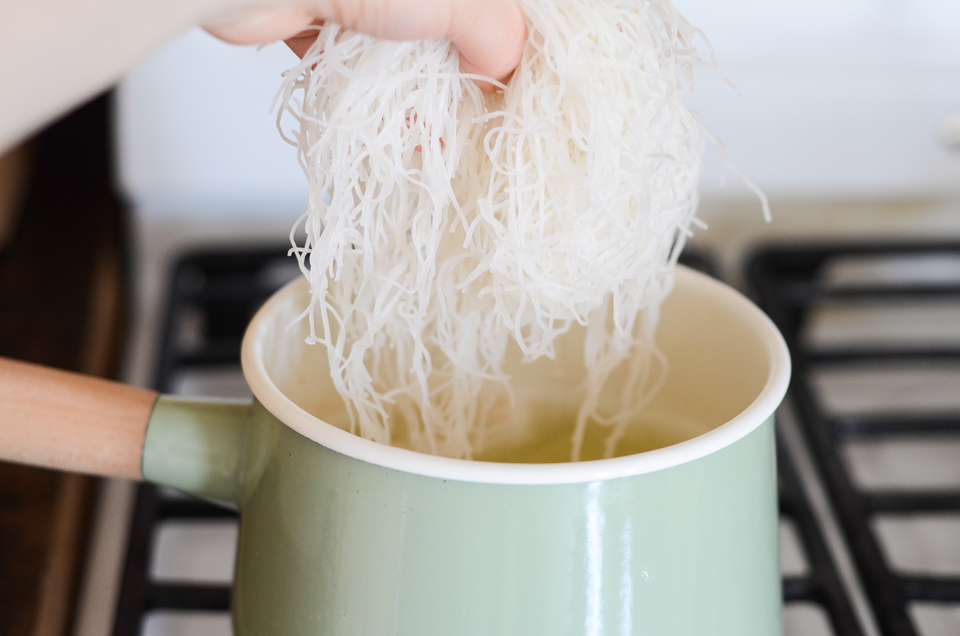
Now put the rice noodles into the boiling water and cook until tender, about 7 minutes. Drain.


Tasty Kitchen Blog: Shrimp Spring Rolls with Sweet and Spicy Peanut Dipping Sauce. Guest post by Erica Kastner of Buttered Side Up, recipe submitted by TK member Lauren of Lauren's Latest.

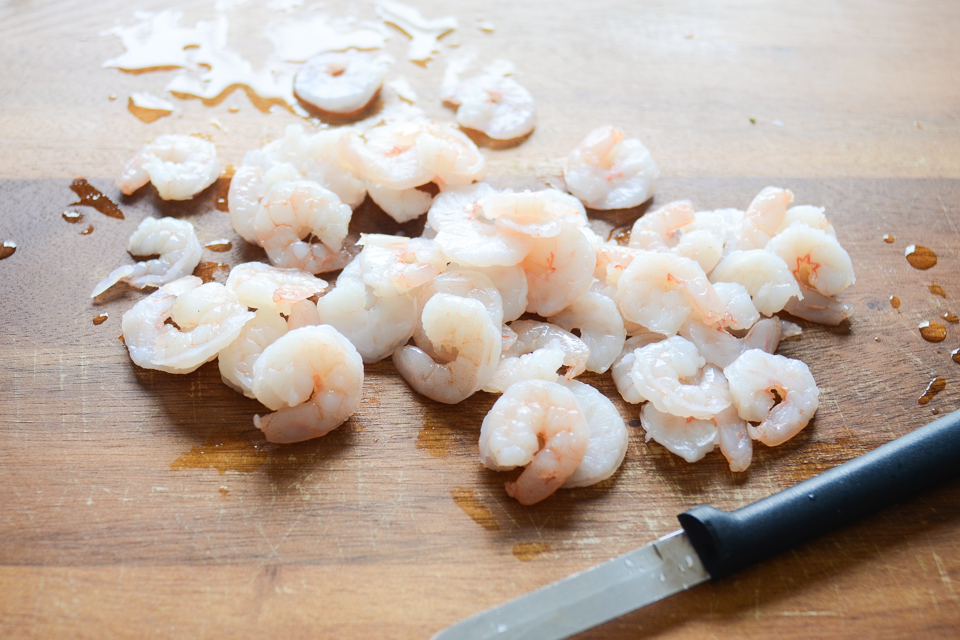
Meanwhile, slice the shrimp in half lengthwise. I used my trusty paring knife for this job as well.


Tasty Kitchen Blog: Shrimp Spring Rolls with Sweet and Spicy Peanut Dipping Sauce. Guest post by Erica Kastner of Buttered Side Up, recipe submitted by TK member Lauren of Lauren's Latest.

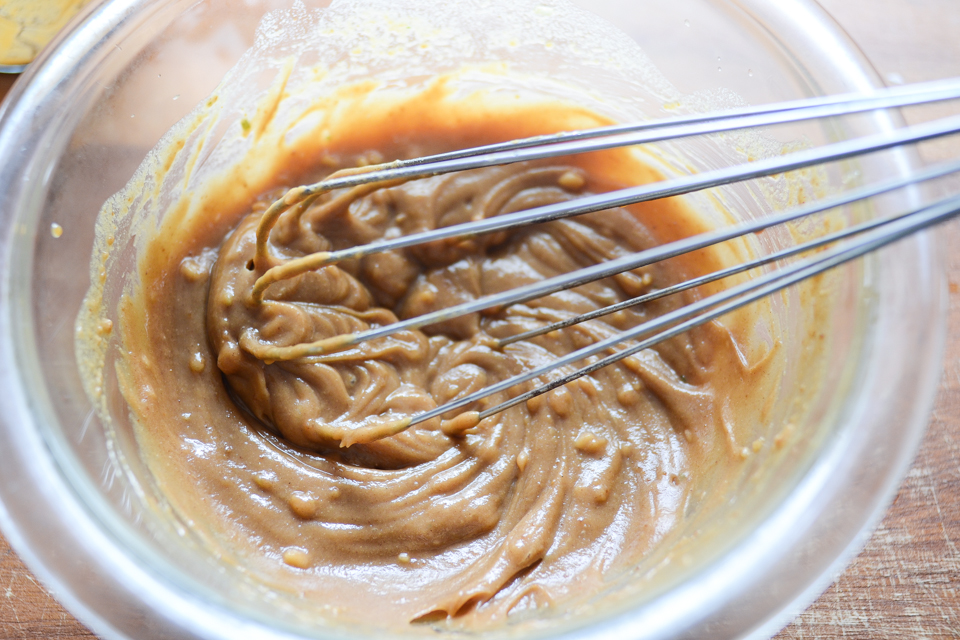
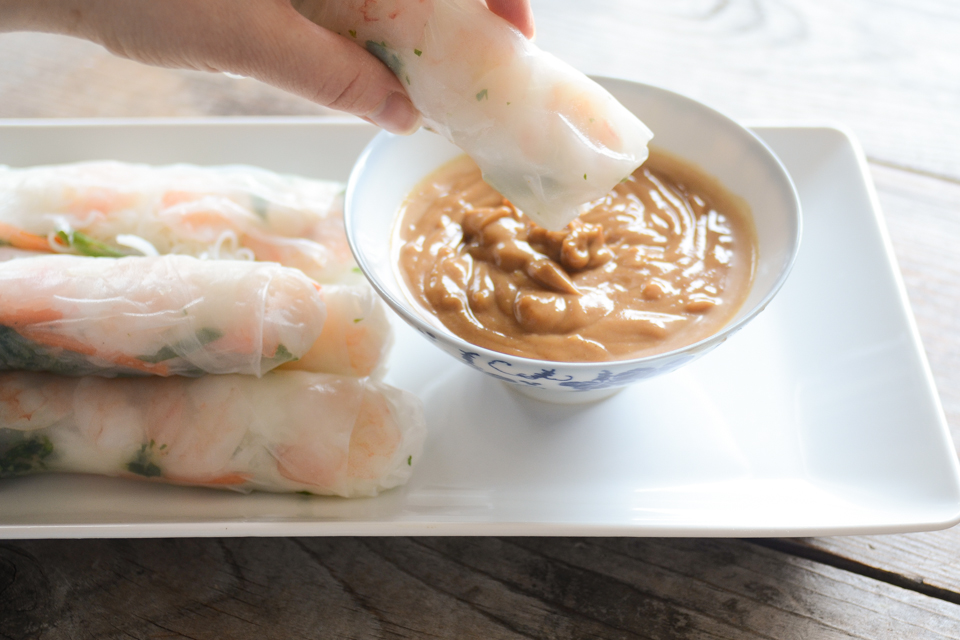
Whisk together all of the sauce ingredients. If it’s too thick you can always add more hot water. This peanut sauce is amazing. I would make these rolls just to have an excuse to dip something in it.


Tasty Kitchen Blog: Shrimp Spring Rolls with Sweet and Spicy Peanut Dipping Sauce. Guest post by Erica Kastner of Buttered Side Up, recipe submitted by TK member Lauren of Lauren's Latest.

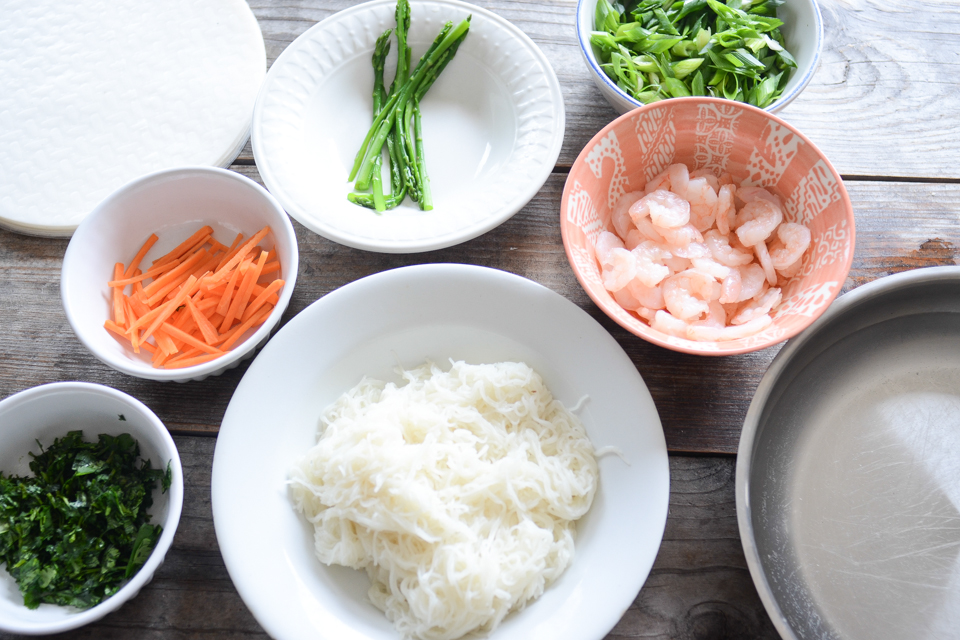
Have all of your ingredients at the ready.


Tasty Kitchen Blog: Shrimp Spring Rolls with Sweet and Spicy Peanut Dipping Sauce. Guest post by Erica Kastner of Buttered Side Up, recipe submitted by TK member Lauren of Lauren's Latest.

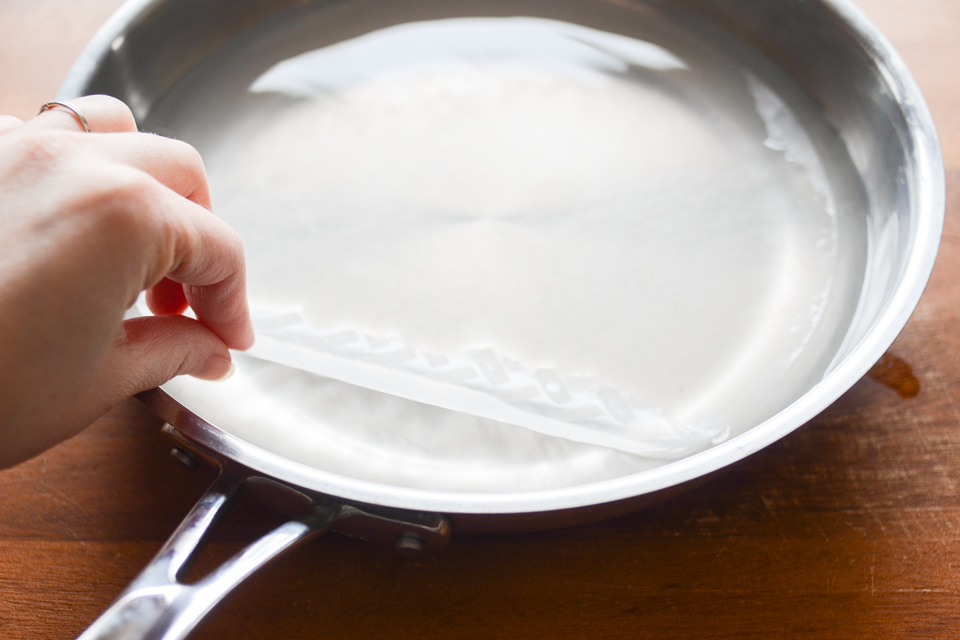
Dip a spring roll wrapper into warm water. I like to use a skillet for this since it’s the right shape and diameter for the rice papers.

It takes a bit of practice to figure out how long to soak the wrappers. There’s a fine line between workable and so soft that it falls apart. Remember that it will continue to soften after you take it out of the water. Some advise you to dip it in the water very briefly, and others suggest going for about a minute. You’ll have to experiment to find what works for you.


Tasty Kitchen Blog: Shrimp Spring Rolls with Sweet and Spicy Peanut Dipping Sauce. Guest post by Erica Kastner of Buttered Side Up, recipe submitted by TK member Lauren of Lauren's Latest.

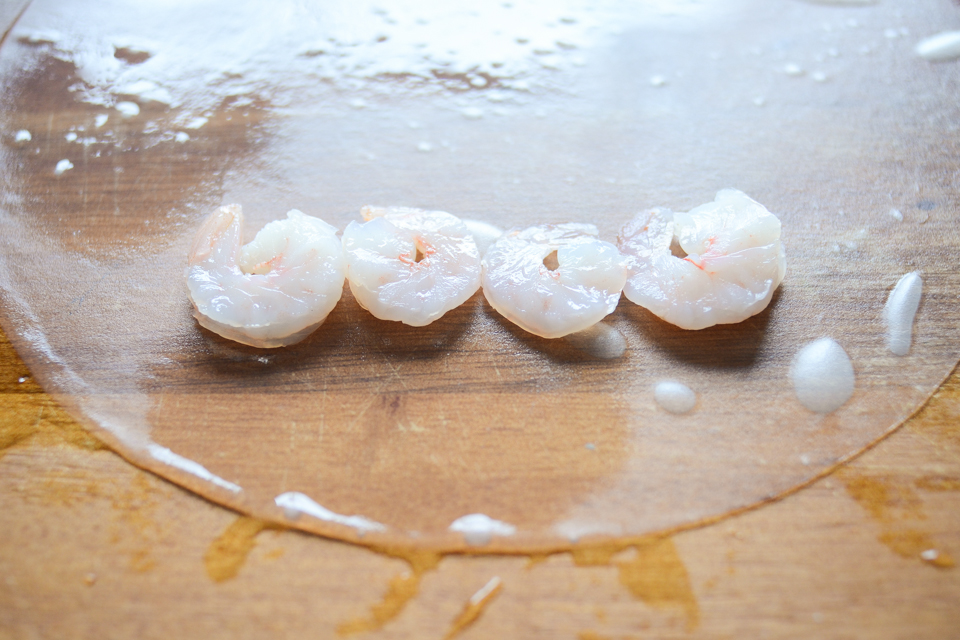
Place the softened wrapper on a work surface. If you’re working on a porous surface (like a wood cutting board), I find that it’s easier to work with the rolls if the surface is a tad wet.

Lay the shrimp, pink side down, on the end of the wrapper nearest to you.


Tasty Kitchen Blog: Shrimp Spring Rolls with Sweet and Spicy Peanut Dipping Sauce. Guest post by Erica Kastner of Buttered Side Up, recipe submitted by TK member Lauren of Lauren's Latest.

Place the noodles and then the asparagus on top of the shrimp.


Tasty Kitchen Blog: Shrimp Spring Rolls with Sweet and Spicy Peanut Dipping Sauce. Guest post by Erica Kastner of Buttered Side Up, recipe submitted by TK member Lauren of Lauren's Latest.

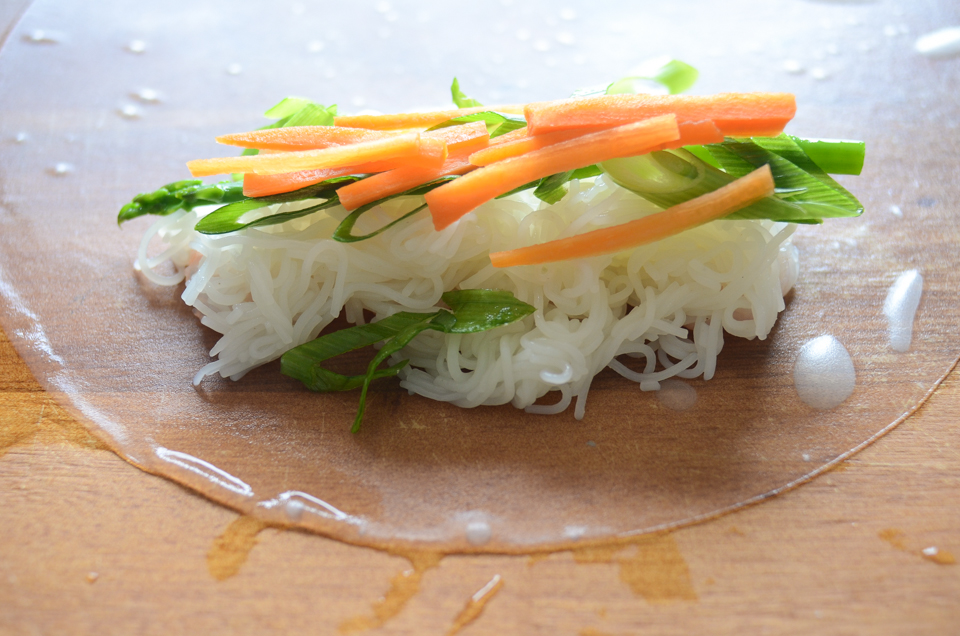
Stack the green onions and carrots on top.


Tasty Kitchen Blog: Shrimp Spring Rolls with Sweet and Spicy Peanut Dipping Sauce. Guest post by Erica Kastner of Buttered Side Up, recipe submitted by TK member Lauren of Lauren's Latest.

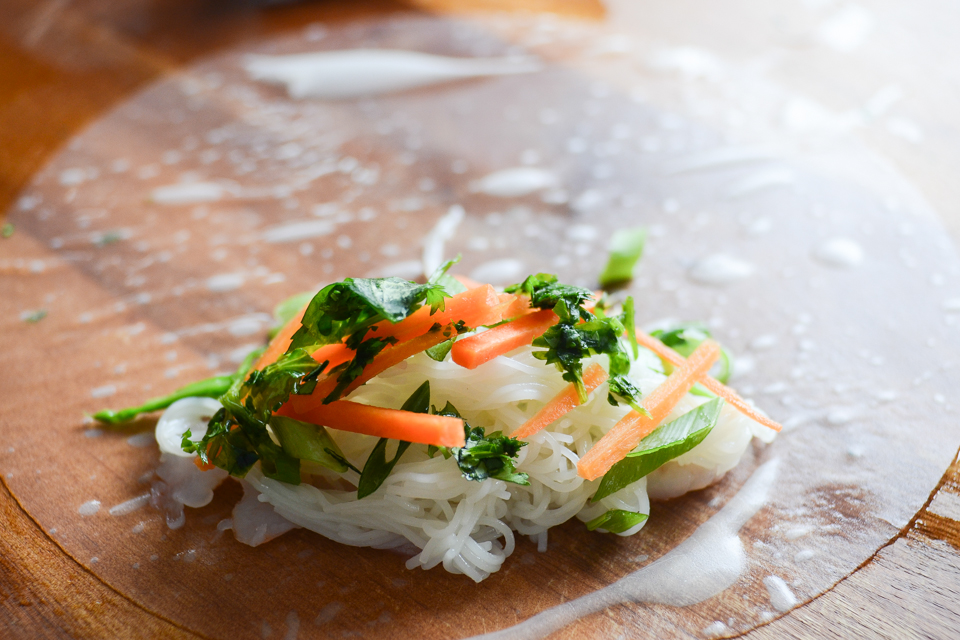
Add the cilantro on top of the stack.


Tasty Kitchen Blog: Shrimp Spring Rolls with Sweet and Spicy Peanut Dipping Sauce. Guest post by Erica Kastner of Buttered Side Up, recipe submitted by TK member Lauren of Lauren's Latest.

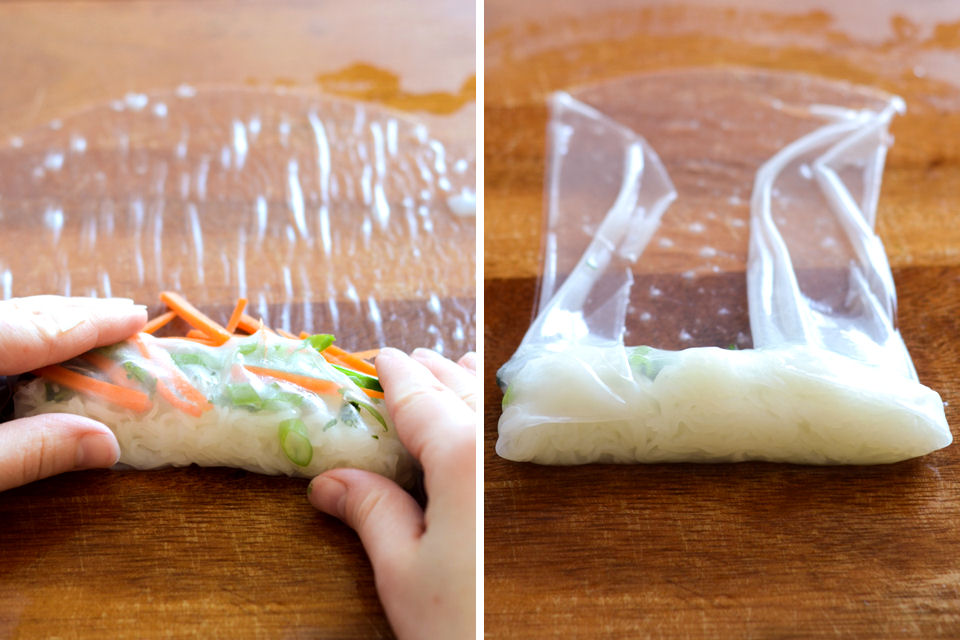
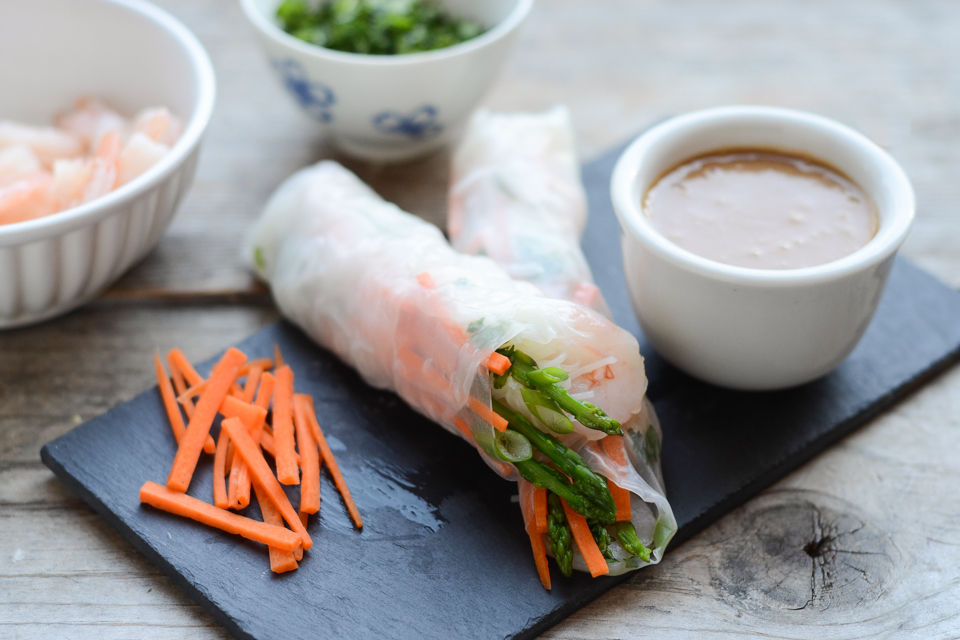
Roll the end of the wrapper nearest to you upwards, like you’re rolling up a taco. Fold the sides in and finish rolling up the spring roll.
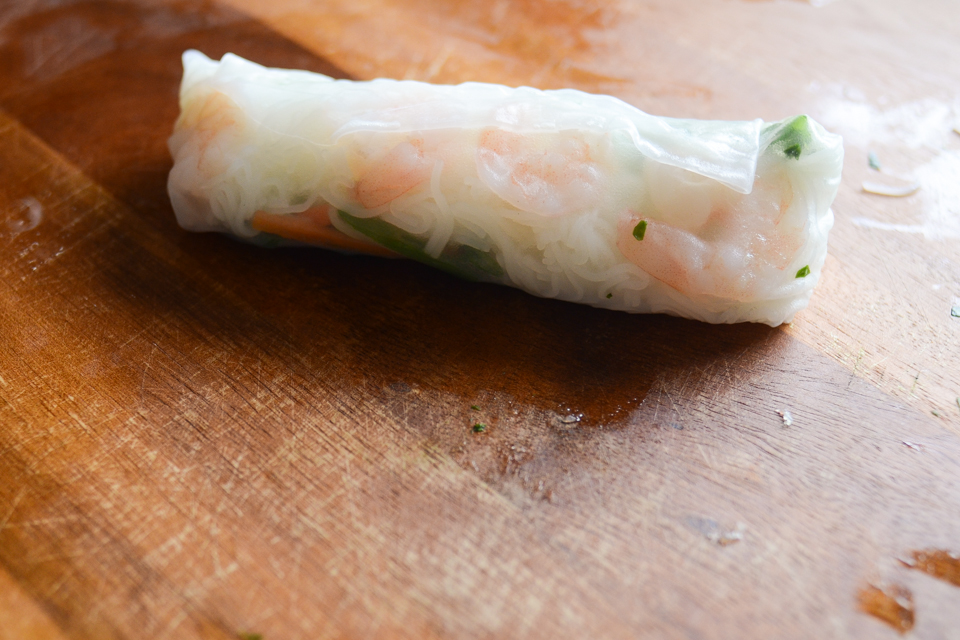


Tasty Kitchen Blog: Shrimp Spring Rolls with Sweet and Spicy Peanut Dipping Sauce. Guest post by Erica Kastner of Buttered Side Up, recipe submitted by TK member Lauren of Lauren's Latest.

Isn’t it lovely?


Tasty Kitchen Blog: Shrimp Spring Rolls with Sweet and Spicy Peanut Dipping Sauce. Guest post by Erica Kastner of Buttered Side Up, recipe submitted by TK member Lauren of Lauren's Latest.

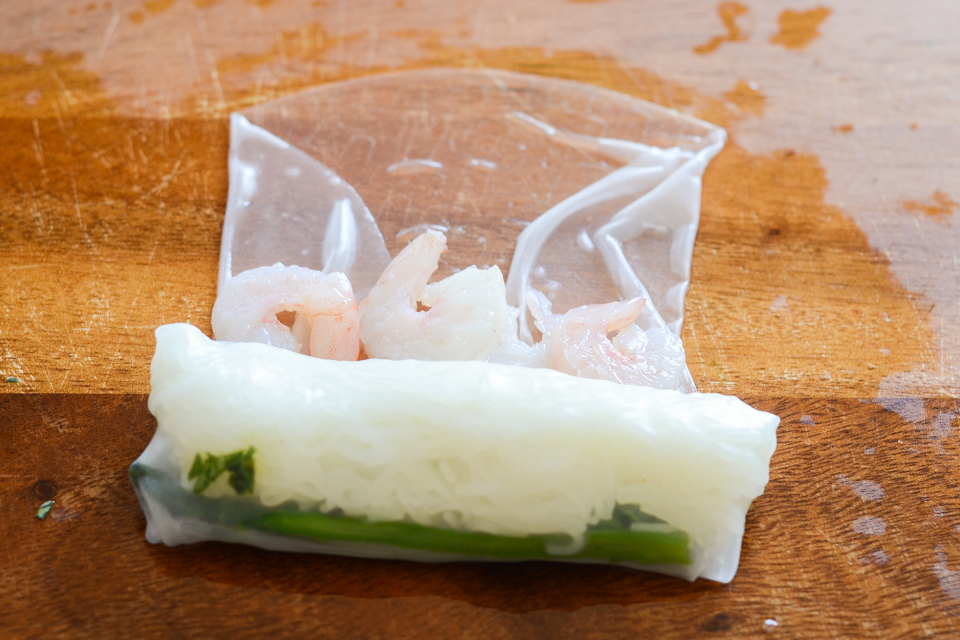
If you’d like the shrimp to really show through the wrapper you can wait to add them until you’ve folded in the sides.


Tasty Kitchen Blog: Shrimp Spring Rolls with Sweet and Spicy Peanut Dipping Sauce. Guest post by Erica Kastner of Buttered Side Up, recipe submitted by TK member Lauren of Lauren's Latest.

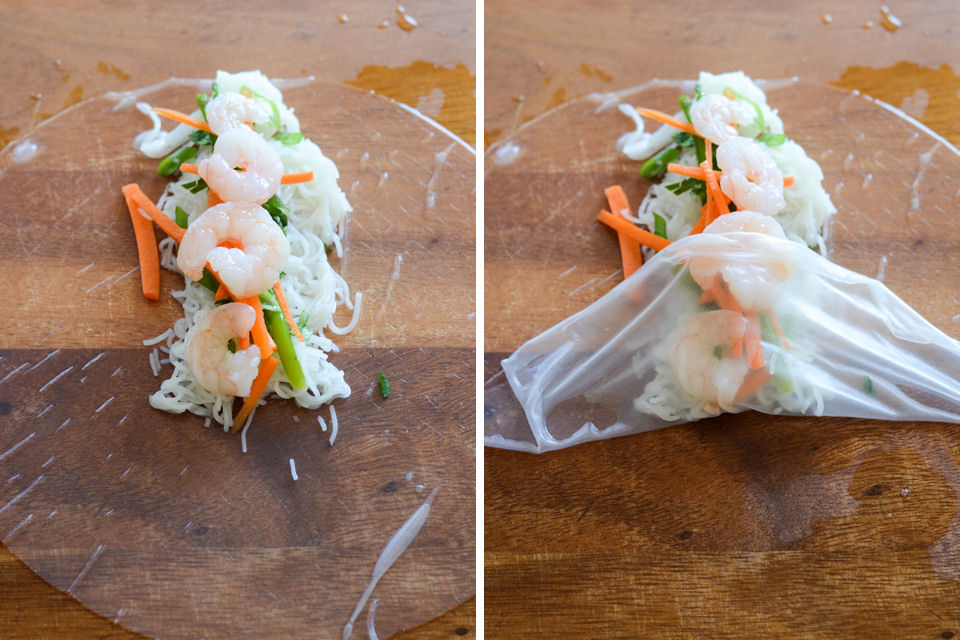
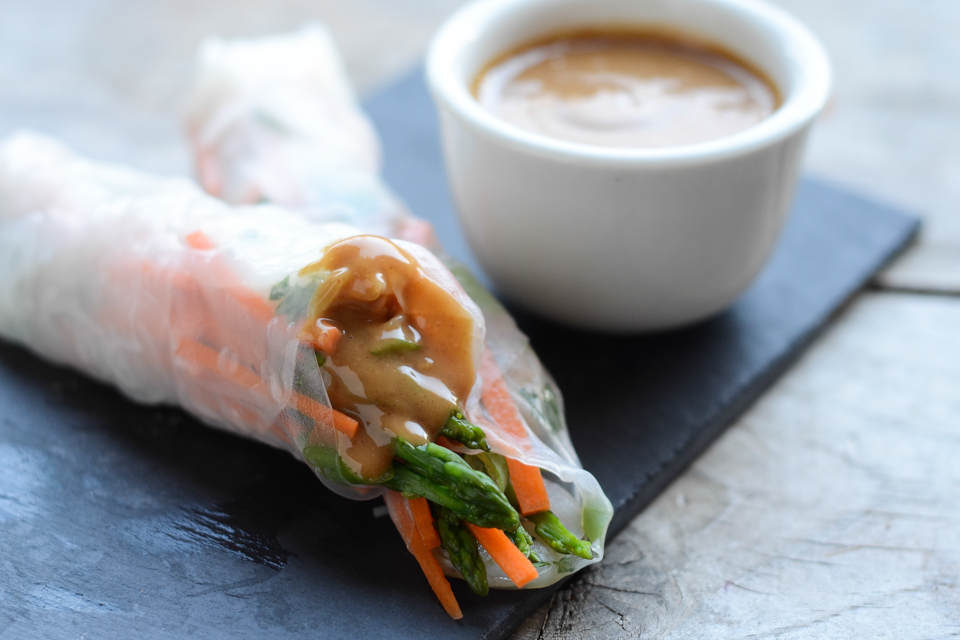
If you want to make an open-ended roll, place the ingredients on the wrapper vertically instead of horizontally. Then fold up the bottom of the spring roll. Finish by folding over one side and rolling it up.


Tasty Kitchen Blog: Shrimp Spring Rolls with Sweet and Spicy Peanut Dipping Sauce. Guest post by Erica Kastner of Buttered Side Up, recipe submitted by TK member Lauren of Lauren's Latest.

Notes:
1) These spring rolls can easily be made gluten free if you make sure to use a GF Hoisin sauce.
2) Make sure you salt the boiling water very generously. When I made these a second time, I definitely added more salt.
3) I find it’s helpful to have a towel handy to wipe your hands on while you’re working with the rolls. This way the ingredients don’t get everywhere and the roll looks less messy.
4) These rolls can be quite sticky. I think it would be a good idea to have a bowl of water to dip your fingers in while you’re eating so your hands don’t stick to them. They’ll also stick to each other, so it’s best to leave some space between them on your serving tray.
5) To make these come together more quickly, you can prep your veggies, cook the shrimp and asparagus, and make the sauce ahead of time.
6) If you have leftovers, you can always make a salad. The peanut sauce is a delicious dressing.


Tasty Kitchen Blog: Shrimp Spring Rolls with Sweet and Spicy Peanut Dipping Sauce. Guest post by Erica Kastner of Buttered Side Up, recipe submitted by TK member Lauren of Lauren's Latest.

Thanks so much to Lauren for sharing this recipe with us! I’m sure you’ve heard of her lovely blog, Lauren’s Latest. If not, make sure to give her a visit! Her Sweet Chili Hoisin Glazed Drumsticks look amazing.

Also, I am still learning the art of spring rolls. If you have any tips or tricks, please share in the comments!


Printable Recipe

Shrimp Spring Rolls with Sweet & Spicy Peanut Dipping Sauce

See post on Lauren's Latest’s site!
0.00 Mitt(s) 0 Rating(s)0 votes, average: 0.00 out of 50 votes, average: 0.00 out of 50 votes, average: 0.00 out of 50 votes, average: 0.00 out of 50 votes, average: 0.00 out of 5

Prep Time:

Cook Time:

Difficulty: Easy

Servings: 4

4
x

Print Options

Page size Letter 3x5 4x6
Text Size Small Medium Large
Content Include description
Include prep time, etc.
Show image

Description

A yummy and healthy snack, appetizer or light lunch.

Ingredients

  • FOR THE SPRING ROLLS:
  • 2 ounces, weight Rice Noodles
  • 12 whole Shrimp, Peeled And Deveined (51-60 Count)
  • 6 whole Asparagus Spears
  • 12 whole Round Rice Spring Roll Wrappers
  • 4 whole Green Onions, Sliced
  • 1 whole Carrot, Peeled And Finely Julienned
  • ½ bunches Cilantro, Chopped
  • FOR THE SAUCE:
  • 2 Tablespoons Smooth Peanut Butter
  • 1-½ Tablespoon Brown Sugar
  • ⅛ teaspoons Dried Ginger
  • 1 clove Garlic, Finely Minced
  • 2 Tablespoons Hoisin Sauce
  • 2 Tablespoons Hot Water
  • 2 pinches Cayenne Pepper (adjust To Your Heat Level)

Preparation Instructions

Place rice noodles in a bowl and cover with cold water. Set aside.

Bring a small pot of water to boil. Salt water generously, drop shrimp in and cook until pink and opaque, about 1 minute. Remove them from the water (keep the pot of water – you’ll use it in a second) and place shrimp into a bowl of ice water.

Bend asparagus in half until the bottom woody end snaps off. Discard the woody end. Slice down the center of the remaining spear vertically to get 2 very skinny spears. Drop them into the boiling water and boil until crisp-tender, 2 minutes. Remove them from the water and place into the ice water with shrimp.

Drain the soaking rice noodles and place them into the boiling water. Cook until tender, about 7 minutes and then drain.

While noodles are cooking, slice shrimp in half lengthwise.

To assemble spring rolls, place one spring roll wrapper into very warm water until it softens up. Remove it from the water and place onto a work surface. Stack up shrimp, noodles, asparagus, green onions, carrot and cilantro on the bottom half of the wrapper. Then roll it up tightly, burrito-style and place on serving platter. Repeat until all wrappers have been filled.

For the sauce, mix all ingredients together until smooth in consistency. If the hot water doesn’t dissolve the sugar or create a smooth sauce, microwave the sauce for 30 seconds. Pour into a serving dish and place along side spring rolls. Serve cold.


_______________________________________

Erica Kastner has always been one of our most cherished members of the Tasty Kitchen community. She shares her wonderful recipes and amazing food photography on her blog, Buttered Side Up, and she also writes about crafts and posts more of her beautiful photography in her personal blog, Simple Days. There really isn’t much that this amazing young wife and mother can’t do, and we’re thrilled she does some of it here.


Profile photo of Erika (TK)

Share Your Stories!

Posted by in Kitchen Talk

Tasty Kitchen Blog: Kitchen Talk (Three Many Cooks and Stories of Food, Faith, and Family)

 
Pam Anderson, Maggy Keet and Sharon Damelio aren’t just the voices behind the blog Three Many Cooks, Tasty Kitchen members, and occasional TK Blog contributors. They also happen to be close personal friends of ours. In fact, in internet years, you could say we’ve known each other for centuries. Our long digital history is also peppered with extended periods of actual face-to-face, bunking-together-with-late-night-marathon-conversations time.

So you would think there wouldn’t be much about them that’d be new to us. And yet the collection of stories from their new book offered even old friends like us a new and intimate look into their lives, their family, and their wild culinary journey. The title says it all: Three Many Cooks: One Mom, Two Daughters: Their Shared Stories of Food, Faith & Family. This book is a clear representation of who they are, kitchen scars and all. Amid all the drama, hilarity, epiphanies, tragedies and celebrations that come with family life, there is the unmistakable undercurrent of staunch loyalty and unbreakable love. And always present—as a centerpiece, backdrop, preamble, or something joyfully anticipated—was food. In their words:

Glorious food is sometimes the most important aspect of an experience. More often it’s little more than the catalyst for the really good stuff—great laughs, long talks, strong relationships.

 
We couldn’t agree more.

To kick off our celebration of the Three Many Cooks book, we’d like to hear all about your “really good stuff”.

Share your favorite story about food and family.

And by “family” we include friends who have made themselves part of our family. We know you have those stories. The ones you love telling and re-telling when everyone gathers at the table, laughing just as hard each time. Or the one that you can’t share without a break in your voice because it’s just that powerful, moving, heartbreaking, life-changing. We want to hear them all, and share our own stories below, too.

We’ll also have a very special giveaway this Friday that you won’t want to miss, so make sure you come back for that. But first, it’s story time. So pull up a chair, make yourself comfortable, and let’s get started.


Profile photo of DessertForTwo

Whole Wheat Clementine Yogurt Cake

Posted by in Baking

Tasty Kitchen Blog: Whole Wheat Clementine Yogurt Cake. Guest post by Christina of Dessert for Two, recipe submitted by TK member Stephanie of Girl Versus Dough.

When someone says “healthy dessert,” I immediately grab two forks. To me, a healthy dessert means I can eat double the servings! Wait, is that not the point? It’s funny what a little whole wheat flour and yogurt in a cake will make you do.

This Whole Wheat Clementine Yogurt Cake by Tasty Kitchen member Stephanie was a must-make for me. I think I grabbed the last bag of clementines for the season last week, and I saved 4 little clementines for this cake. It was so worth it, too!


Tasty Kitchen Blog: Whole Wheat Clementine Yogurt Cake. Guest post by Christina of Dessert for Two, recipe submitted by TK member Stephanie of Girl Versus Dough.

First up, our simple, couldn’t-be-easier ingredients that you probably already have in your pantry: whole wheat flour, regular all-purpose flour, granulated sugar, Greek yogurt, vanilla, vegetable oil, eggs, salt and baking powder. Oh, and clementines! Pretty standard cake stuff, right?


Tasty Kitchen Blog: Whole Wheat Clementine Yogurt Cake. Guest post by Christina of Dessert for Two, recipe submitted by TK member Stephanie of Girl Versus Dough.

Stephanie recommends spraying and lining your pan with parchment paper. I say good call, Steph. When a recipe calls for the extra step of lining the pan, don’t ignore it. It could be the difference between a pretty cake that releases perfectly from the pan and a cake that comes out in pieces!


Tasty Kitchen Blog: Whole Wheat Clementine Yogurt Cake. Guest post by Christina of Dessert for Two, recipe submitted by TK member Stephanie of Girl Versus Dough.

Now we can get to work on the cake. First, we combine the dry ingredients: both flours, salt, and baking powder. Whisking it together helps break up the clumps and eliminates the pesky step of sifting.


Tasty Kitchen Blog: Whole Wheat Clementine Yogurt Cake. Guest post by Christina of Dessert for Two, recipe submitted by TK member Stephanie of Girl Versus Dough.

Once the dry ingredients are combined, it’s time to mix the wet ingredients together: combine the sugar, eggs, clementine zest, and vegetable oil. Anytime a recipe calls for citrus zest I get excited, because I know it’s going to be delicious. The zest is where all the flavors of the fruit hide. It’s full of oils that will perfume your whole cake.

I use a microplane grater to get as much zest off each clementine as possible. I only scraped my knuckles twice doing this. Totally worth it, though.


Tasty Kitchen Blog: Whole Wheat Clementine Yogurt Cake. Guest post by Christina of Dessert for Two, recipe submitted by TK member Stephanie of Girl Versus Dough.

After folding together the wet and dry ingredients until no streaks of flour remain, I scraped the batter into the pan. Off it went into a 350ºF oven for 45 minutes. Steph recommends 40-50 minutes, which means you should start checking on the cake at 40 minutes. Increase the baking time by a few minutes until the cake starts to pull away from the edges of the pan, and a toothpick inserted comes out clean with only moist crumbs clinging to it. For me, 45 minutes was the magic number, but every oven is different, so be patient!

Now we’re getting to the good part: after a 10 minute cool-off session, the cake comes out of the pan. Remember those clementines that we scraped bald for their zest? It’s time to juice them into a pan with some sugar! We’re going to poke holes all over the cake and pour this warm, sugary juice on top. Yep. It’s exactly as good as it sounds.


Tasty Kitchen Blog: Whole Wheat Clementine Yogurt Cake. Guest post by Christina of Dessert for Two, recipe submitted by TK member Stephanie of Girl Versus Dough.

I ate a slice of this cake warm, and then another slice cool. And then another slice warm again just to figure out my preference. Before I could have another slice cool, the cake was gone. I guess we’ll never know the best way to serve it, but one thing is for sure: this cake is delicious! Thanks for a great lightened-up cake recipe that I can feel good about eating at snack time, Steph! Check out her TK recipe box and visit her beautiful blog, Girl Versus Dough, for more of her masterpieces!


Tasty Kitchen Blog: Whole Wheat Clementine Yogurt Cake. Guest post by Christina of Dessert for Two, recipe submitted by TK member Stephanie of Girl Versus Dough.


Printable Recipe

Whole Wheat Clementine Yogurt Cake

See post on Stephanie | Girl Versus Dough’s site!
4.00 Mitt(s) 1 Rating(s)1 vote, average: 4.00 out of 51 vote, average: 4.00 out of 51 vote, average: 4.00 out of 51 vote, average: 4.00 out of 51 vote, average: 4.00 out of 5

Prep Time:

Cook Time:

Difficulty: Easy

Servings: 12

12
x

Print Options

Page size Letter 3x5 4x6
Text Size Small Medium Large
Content Include description
Include prep time, etc.
Show image

Description

A tangy, sweet, moist and citrus-y cake for breakfast, dessert, snacking or all of the above.

Ingredients

  • ¾ cups Unbleached All-purpose Flour
  • ¾ cups Whole Wheat Flour
  • 2 teaspoons Baking Powder
  • ½ teaspoons Salt
  • 1 cup Plain Greek Yogurt
  • 1-⅓ cup Granulated Sugar, Divided
  • 3  Eggs
  • 2 teaspoons Grated Clementine Zest (from About 2 Clementines)
  • ½ teaspoons Vanilla
  • ½ cups Vegetable Oil
  • ⅓ cups Fresh-Squeezed Clementine Juice
  • Powdered Sugar, For Sprinkling (optional)

Preparation Instructions

Heat oven to 350F. Grease bottom and sides of a 9-inch round cake pan with baking spray with flour; line bottom with parchment paper and spray paper.

In a large bowl, whisk together flours, baking powder and salt until combined. In a separate large bowl, whisk together yogurt, 1 cup sugar, eggs, clementine zest and vanilla until combined.

Slowly stir wet ingredients into dry ingredients until just combined. Stir in oil. Pour batter into prepared pan.

Bake 40 to 50 minutes until a toothpick inserted in the center comes out clean. Cool 10 minutes in pan, then carefully remove from cake pan and transfer to a cooling rack with a rimmed baking sheet or clean sheet of parchment or wax paper underneath.

Meanwhile, cook the clementine juice and remaining ⅓ cup sugar in a saucepan over medium heat, stirring until sugar is dissolved. Carefully pour evenly over warm cake on cooling rack. Cool completely.

Sprinkle top with powdered sugar before serving, if desired.

Recipe adapted from Ina Garten.


_______________________________________

Growing up in a food-obsessed family and spending a lot of time in her Aunt Rose’s restaurant as a child, Christina was destined to be a fantastic cook. She’s a private chef during the day, but cooks for two at home. Like all of us, she has a sweet tooth that needs indulging after dinner. After becoming frustrated with the lack of recipes made for two, especially in the dessert category, she took matters into her own hands and started her blog, Dessert for Two, to share how she takes Southern classics (and a few surprises) and turns them into recipes that are perfect for just a few people. Her first cookbook, Dessert for Two, is now available at your favorite bookstore.


Profile photo of Erika (TK)

Mac and Cheese Time!

Posted by in The Theme Is...

Mac and cheese is high up on the list of most folks' comfort food list, and for a reason. It's warm and filling, and fairly simple, too. Just good old pasta, bathed in a creamy rich cheese sauce. It doesn't get much better than that.

Profile photo of Erika (TK)

Let’s Talk Spinach

Posted by in Kitchen Talk

Spinach is such a versatile vegetable, enjoyed cooked or raw, and is packed with so many things that are good for you. It's usually available all year, but its peak season is right about now, when beautiful bundles of these green leaves adorn tables at many local farmers markets.

Profile photo of Erika (TK)

Looks Delicious! Easy Caper Tomato Bruschetta

Posted by in Looks Delicious!

Here's a delicious vegetarian appetizer that takes almost no time to make, using ingredients you likely already have in your pantry. Simple yet elegant, serve it at your next dinner party!

Profile photo of Erika (TK)

Looks Delicious! Simple Spaghetti with Garlic, Peas & Parmesan

Posted by in Looks Delicious!

Here's a 20-minute dinner for those busy weeknights, or when you've been playing and shopping and cleaning all day and find yourself without a game plan for dinner.