The Pioneer Woman Tasty Kitchen
Profile photo of Faith (An Edible Mosaic)

Espresso Mini Muffins with Chocolate Ganache

Posted by in Baking, Step-by-Step Recipes

Tasty Kitchen Blog: Espresso Mini Muffins with Chocolate Ganache. Guest post by Faith Gorsky of An Edible Mosaic, recipe submitted by TK member Michelle of The Lucky Penny Blog.

 
Some days a girl just needs a little something chocolaty. And most days a girl needs coffee. Put the two together into one sweet treat like this and now you’re really talking. The fact that this treat is pretty healthy just sweetens the deal (pun intended).

When I saw Tasty Kitchen member Michelle’s recipe for Espresso Mini Muffins with Chocolate Ganache, I was intrigued. And if I’m being honest, by intrigued I mean practically drooling and dying to make them first chance I got, which, incidentally, happened to be for breakfast. I don’t feel guilty though; these are legitimate muffins, not cupcakes masquerading as muffins (they are grain-free and refined-sugar-free, to name a couple of their perks!). The biggest perk of all is that I get to eat chocolate for breakfast and not feel bad about it.

But if you decide to make them for dessert I won’t tell—they’re good like that too. Ok, and while I’m at it, they’d make a happy snacker out of just about anyone.

To get started, get out your ingredients.


Tasty Kitchen Blog: Espresso Mini Muffins with Chocolate Ganache. Guest post by Faith Gorsky of An Edible Mosaic, recipe submitted by TK member Michelle of The Lucky Penny Blog.

You’ll need: coconut milk, baking soda, dark chocolate, an egg, vanilla extract, coconut oil, maple syrup, espresso powder, almond meal, nutmeg, and salt.

You are just 11 ingredients away from chocolate-coffee bliss.


Tasty Kitchen Blog: Espresso Mini Muffins with Chocolate Ganache. Guest post by Faith Gorsky of An Edible Mosaic, recipe submitted by TK member Michelle of The Lucky Penny Blog.

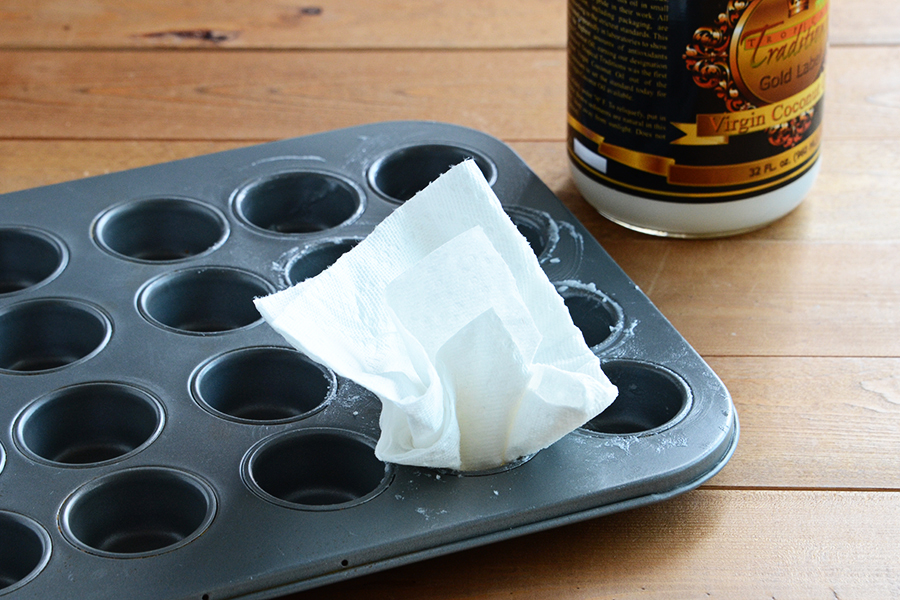
Generously grease a muffin tray with coconut oil. Love the paper towel method, but a pastry brush works well too. And if I’m feeling really crazy, sometimes I’ll just use my fingers. Whatever works, right?


Tasty Kitchen Blog: Espresso Mini Muffins with Chocolate Ganache. Guest post by Faith Gorsky of An Edible Mosaic, recipe submitted by TK member Michelle of The Lucky Penny Blog.

Depending on the temperature of your kitchen, your coconut oil might already be softened. Mine wasn’t, so I softened it briefly in the microwave, trying not to melt it fully (literally just a couple seconds and then a good stir).

Part of what I love about this recipe (in addition to the fact that it’s incredibly delicious) is the fact that it whips up in just a couple minutes right in the food processor.


Tasty Kitchen Blog: Espresso Mini Muffins with Chocolate Ganache. Guest post by Faith Gorsky of An Edible Mosaic, recipe submitted by TK member Michelle of The Lucky Penny Blog.

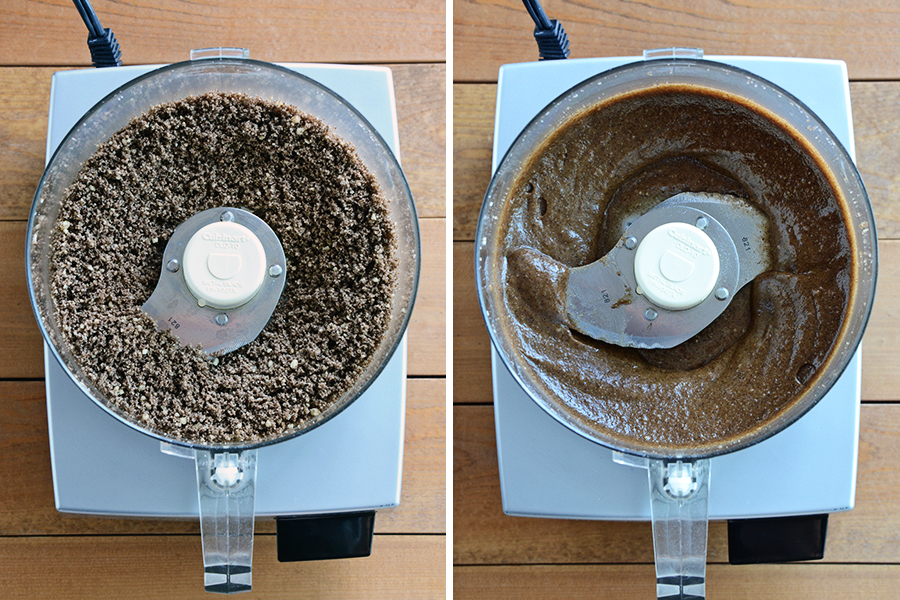
First pulse together the dry ingredients to combine: almond meal, espresso powder, baking soda, nutmeg, and salt. Don’t over-process it; the mixture should look like wet sand. Next add the egg, coconut oil, maple syrup, and vanilla and process until smooth.


Tasty Kitchen Blog: Espresso Mini Muffins with Chocolate Ganache. Guest post by Faith Gorsky of An Edible Mosaic, recipe submitted by TK member Michelle of The Lucky Penny Blog.

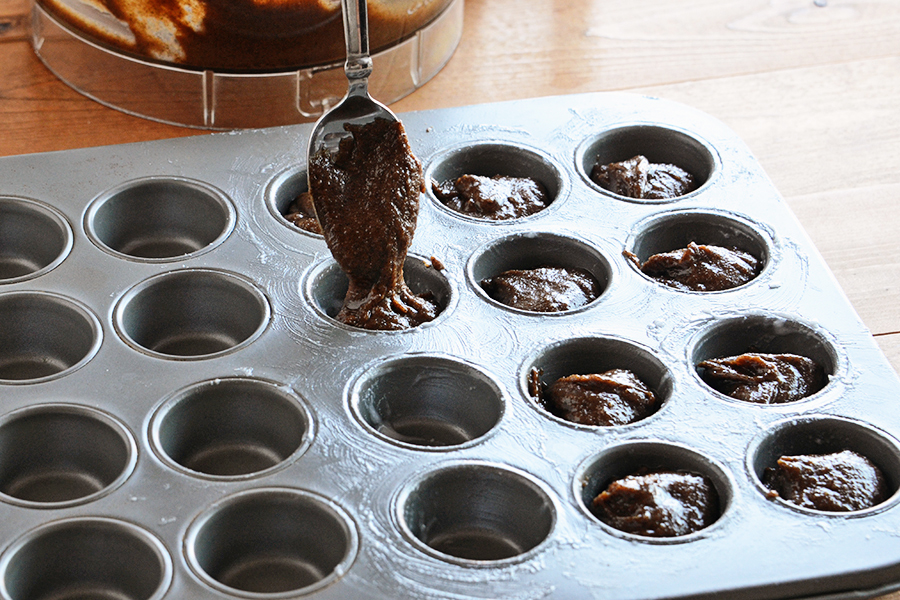
Spoon the batter into the prepared muffin tray. It’ll be thick, almost like brownie batter. You should get around 12 mini muffins; I think I actually could have gotten a couple more. But I might have licked the bowl.

Cook ‘em up! Be careful not to overcook them so they don’t dry out. Mine took ever-so-slightly longer than the recommended time, about 9 to 10 minutes instead of 8 to 9. Use the toothpick test to see if they’re done!


Tasty Kitchen Blog: Espresso Mini Muffins with Chocolate Ganache. Guest post by Faith Gorsky of An Edible Mosaic, recipe submitted by TK member Michelle of The Lucky Penny Blog.

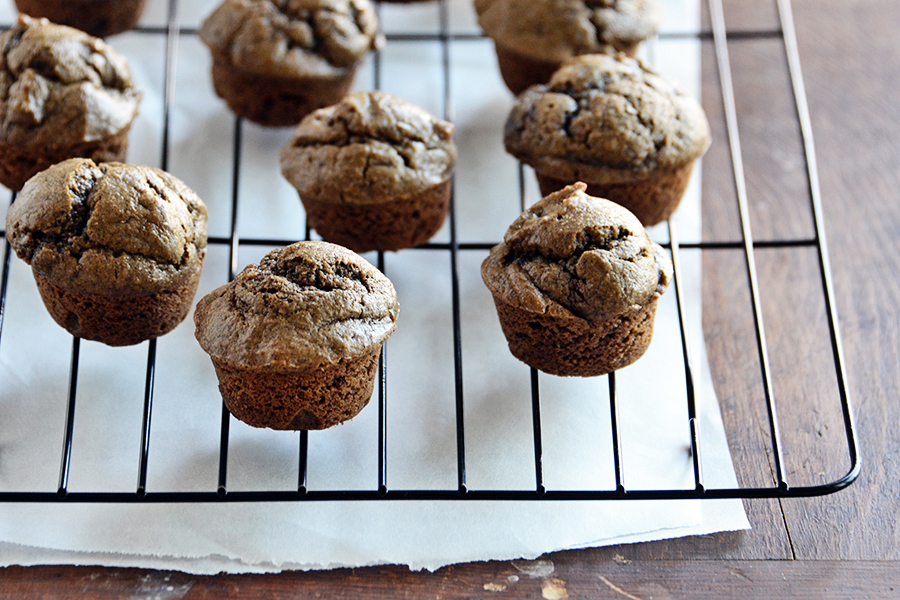
They should come right out of the tray, but if they don’t, let them cool a couple minutes in the tray and then transfer them to a wire rack to finish cooling.

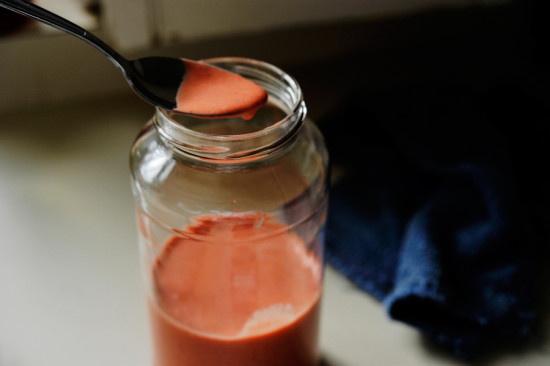
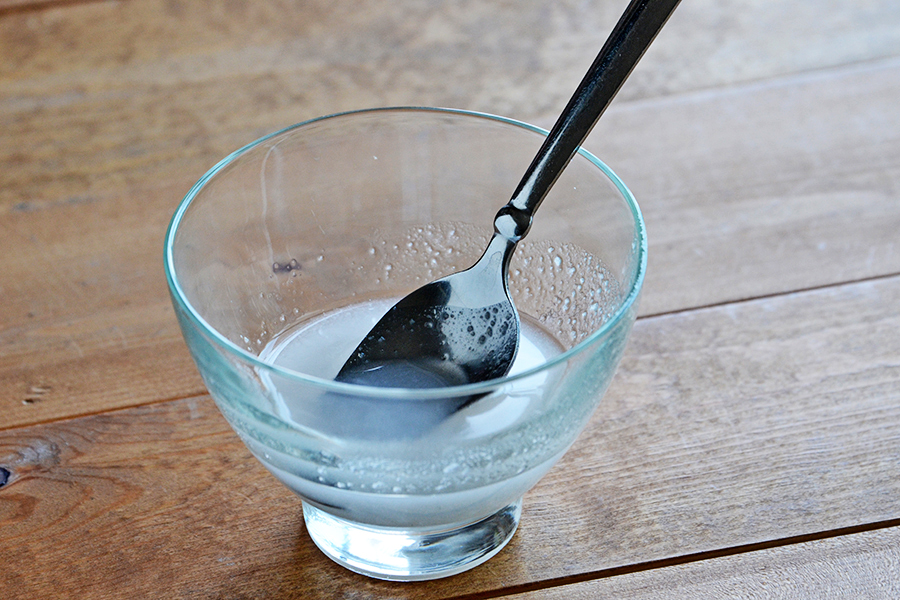
Now it’s time to whip up a quick little ganache. It’s just 2 ingredients.


Tasty Kitchen Blog: Espresso Mini Muffins with Chocolate Ganache. Guest post by Faith Gorsky of An Edible Mosaic, recipe submitted by TK member Michelle of The Lucky Penny Blog.

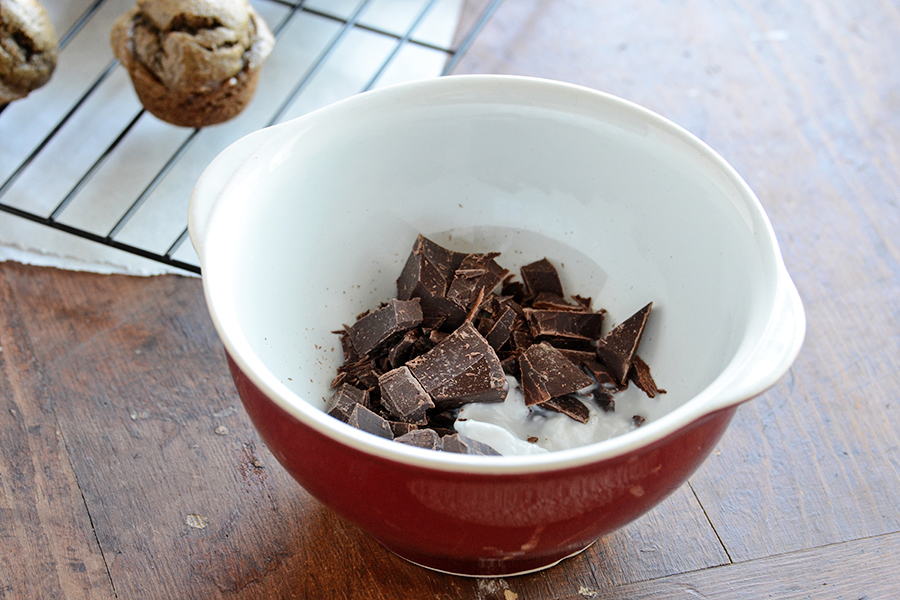
Dark chocolate and coconut milk! I used 62% cacao, but by all means go darker if you like. I’m a big fan of the 70% too.

You can either melt it in the microwave or on a double boiler.


Tasty Kitchen Blog: Espresso Mini Muffins with Chocolate Ganache. Guest post by Faith Gorsky of An Edible Mosaic, recipe submitted by TK member Michelle of The Lucky Penny Blog.

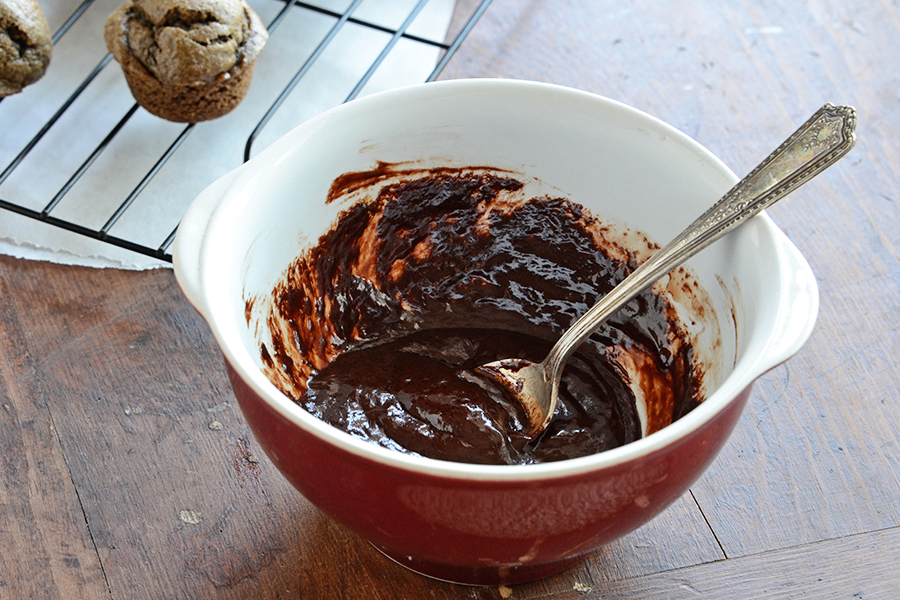
And here it is melted together.

The recipe didn’t say what kind of coconut milk to use, so I used full-fat canned coconut milk because that’s what I keep in my pantry. My ganache was super thick and looked quite a bit different from Michelle’s ganache, so she might have used light coconut milk or even the coconut milk from the carton. I’m not sure, but either way, it was delicious this way—and hers looks delicious too!


Tasty Kitchen Blog: Espresso Mini Muffins with Chocolate Ganache. Guest post by Faith Gorsky of An Edible Mosaic, recipe submitted by TK member Michelle of The Lucky Penny Blog.

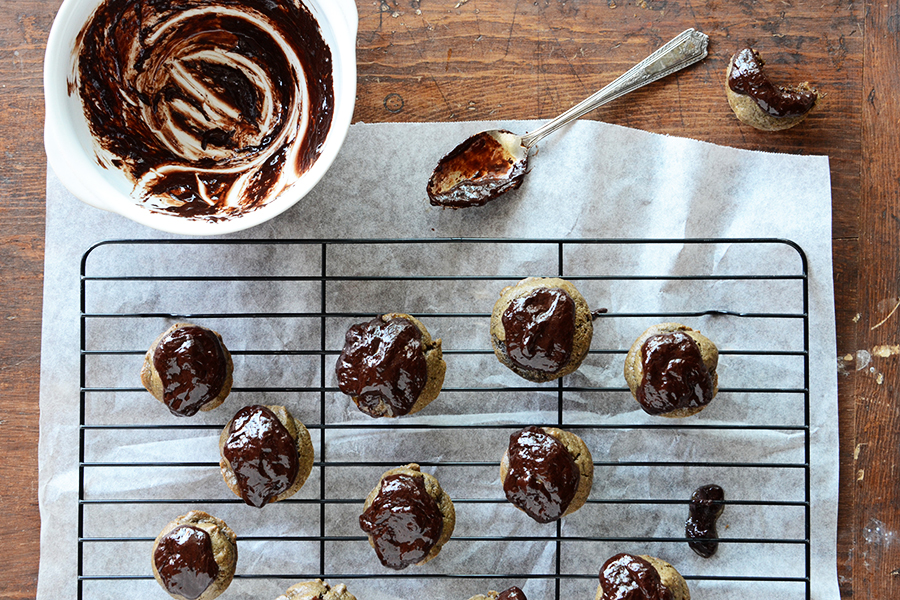
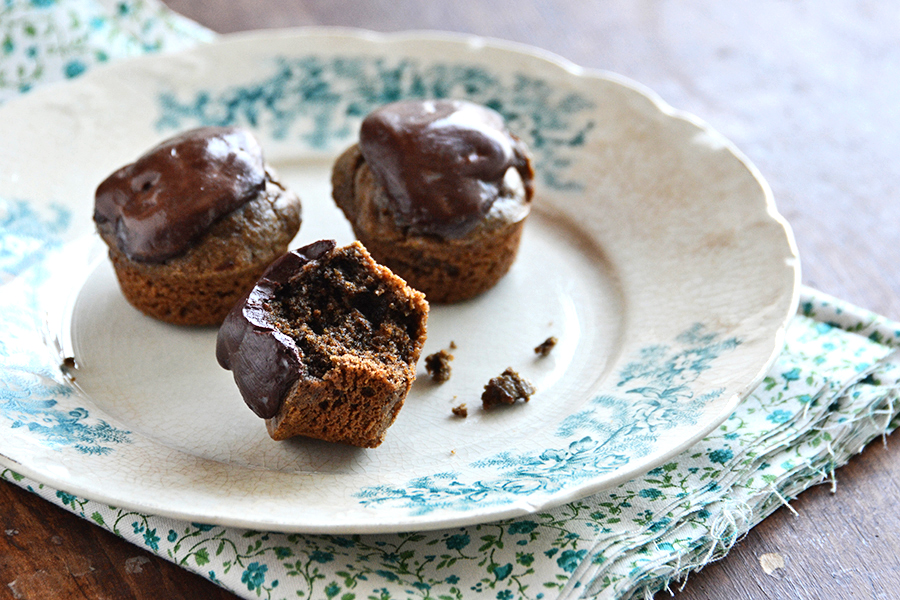
Spoon the ganache on top of the muffins. I had enough for a thick layer on each.

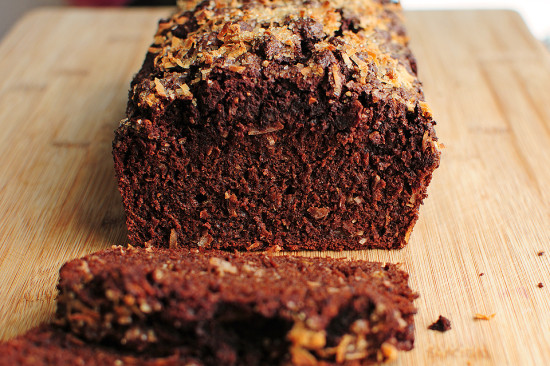
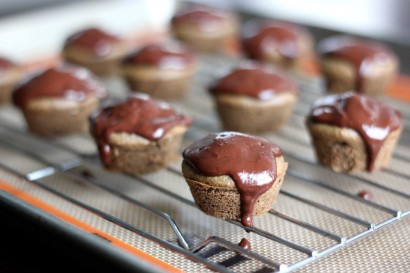
And that’s it! You can dive into them now (recommended drink: an espresso, of course), or enjoy them later. I like to refrigerate them if I’m saving them for later because the ganache sets nicely into a truffle-like consistency. And the muffins themselves are incredible—they’re not too heavy and they have a nice moist crumb, almost like a brownie but not as dense. Are you convinced yet?


Tasty Kitchen Blog: Espresso Mini Muffins with Chocolate Ganache. Guest post by Faith Gorsky of An Edible Mosaic, recipe submitted by TK member Michelle of The Lucky Penny Blog.

Thanks to Michelle for a fantastic recipe! Be sure to check out The Lucky Penny Blog for more of her delicious creations.


Printable Recipe

Espresso Mini Muffins with Chocolate Ganache

See post on The Lucky Penny Blog’s site!
4.00 Mitt(s) 2 Rating(s)2 votes, average: 4.00 out of 52 votes, average: 4.00 out of 52 votes, average: 4.00 out of 52 votes, average: 4.00 out of 52 votes, average: 4.00 out of 5

Prep Time:

Cook Time:

Difficulty: Easy

Servings: 12

12
x

Print Options

Page size Letter 3x5 4x6
Text Size Small Medium Large
Content Include description
Include prep time, etc.
Show image

Description

Delicious gluten and grain-free espresso mini muffins topped with chocolate ganache.

Ingredients

  • FOR THE MUFFINS:
  • ¾ cups Almond Meal Or Almond Flour
  • 1 Tablespoon Ground Espresso Beans
  • ¼ teaspoons Baking Soda
  • ¼ teaspoons Ground Nutmeg
  • 1 pinch Salt
  • 1 whole Egg
  • 2 Tablespoons Coconut Oil
  • 2 Tablespoons Maple Syrup
  • ½ teaspoons Vanilla
  • FOR THE GANACHE:
  • 2 ounces, fluid Dark Chocolate
  • 2 Tablespoons Coconut Milk

Preparation Instructions

Preheat oven to 350ºF. Grease a mini muffin tin well with coconut oil or greasing method of your choice.

In a food processor, combine all the dry ingredients for the muffins: almond meal, ground espresso beans, baking soda, nutmeg, and salt. Pulse to combine.

Add in the wet ingredients for the muffins: egg, coconut oil, maple syrup, and vanilla. Mix on high until everything is nice and smooth.

Fill greased muffin tins 3/4 of the way full. You should have just enough to make 12, if you really scrape the bowl clean.

Bake for 8-9 minutes until a toothpick comes out clean. Do not over bake!

Allow muffins to cool.

Make the ganache. In a microwave safe bowl, combine the coconut milk and chocolate, microwave for 30 seconds, stir, microwave for 15 more seconds if it is not melted. Be careful not to burn it.

Top muffins with desired amount of ganache. Enjoy!


_______________________________________

Faith Gorsky is the writer, recipe developer, photographer, and food stylist behind the blog An Edible Mosaic. She lives in Upstate New York and loves to travel, especially to places steeped in rich culture and history. She also enjoys reading, vintage shopping, watching movies, and is enamored with ancient cultures. She just released her first cookbook, “An Edible Mosaic: Middle Eastern Fare with Extraordinary Flair” (Tuttle Publishing), a collection of authentic Middle Eastern recipes handed down to her from her husband’s family.


Profile photo of Erika (TK)

Looks Delicious! Meat Lovers’ Black Bean Soup

Posted by in Looks Delicious!

Tasty Kitchen Blog: Looks Delicious! Black Bean Soup with Chorizo, Ham, and Bacon submitted by TK member Terri of That's Some Good Cookin'.

 
So, how was your Cinco de Mayo? Did it involve lots of burritos and margaritas? Tacos and tequila shots? Nachos and Coronas? I hope it was better than mine because my Cinco de Mayo consisted of double doses of antihistamines and three full kettles of hot tea. Ah, spring. I love you so. Why won’t you love me back?

Because I’m not one to squander an excuse to gorge on Mexican food, I’m determined to make this Black Bean Soup With Chorizo, Ham, and Bacon today. It has just enough Mex in it, three kinds of meat for the carnivores in my house, and lots of heat to fight off spring allergies. This recipe is from TK member Terri, who blogs at the That’s Some Good Cookin’ (and I definitely second that!). Have you seen her recipe box? If you haven’t yet, go. Just go.

And now you know what I’ll be doing this afternoon! How about you? What’s on your menu today? Have enough leftovers from the weekend? If so, can I come over? I’d gladly trade you some allergy pills for a taquito or two.

Oh, and Happy Monday, everyone! (Except you, pollen. I’m not talking to you.)


Profile photo of missamy

Zhong-Xi Breakfast

Posted by in Step-by-Step Recipes

Tasty Kitchen Blog: Zhong-Xi Breakfast. Guest post by Amy Johnson of She Wears Many Hats, recipe submitted by TK member Dani of Expat Cucina.

 
Most mornings around here begin with an egg of some form. I’m pretty spoiled with a husband who cooks a mean omelet. It’s not something I take for granted. It’s a mighty nice way to start the day. We’re always trying to mix things up by trying different cheeses and toppings. Omelets are flexible that way. So my interest was piqued when I ran across this recipe for Zhong-Xi Breakfast here from Tasty Kitchen member Dani a few weeks ago. I actually made it for lunch to try out before introducing it into our breakfast mix. It’s a simple mix of ingredients which honestly I didn’t expect much from, but the flavor created by the ginger and garlic, combined with the oh-my-word-tasty cooking oil is quite satisfying. The hubby will be pleased when I surprise him with breakfast for a change with this one. It’s quick and easy. Let me show you how.


Tasty Kitchen Blog: Zhong-Xi Breakfast. Guest post by Amy Johnson of She Wears Many Hats, recipe submitted by TK member Dani of Expat Cucina.

You’ll need eggs, salt, peanut oil, chopped garlic and ginger, brown sugar, red and yellow cherry tomatoes, soy sauce, rice vinegar, sesame oil, and chopped parsley (not shown—oops!).


Tasty Kitchen Blog: Zhong-Xi Breakfast. Guest post by Amy Johnson of She Wears Many Hats, recipe submitted by TK member Dani of Expat Cucina.

Begin by beating the eggs with the salt.


Tasty Kitchen Blog: Zhong-Xi Breakfast. Guest post by Amy Johnson of She Wears Many Hats, recipe submitted by TK member Dani of Expat Cucina.

The omelet portion moves really quick. Heat a portion of the peanut oil in a skillet. Once the oil is hot, pour in the beaten eggs. Let cook for about a minute (see note below). Pull one edge of the omelet to the side so the uncooked eggs can reach the pan. When eggs are almost cooked but center is still soft, fold omelet in half and place on a plate to wait for the yummy toppings.

(Note: My favorite egg-cooking skillet cooks quickly so I should’ve let it go less than a minute. Adjust the cooking time for your stove and skillet.)


Tasty Kitchen Blog: Zhong-Xi Breakfast. Guest post by Amy Johnson of She Wears Many Hats, recipe submitted by TK member Dani of Expat Cucina.

Don’t wash that skillet just yet! Add the remaining peanut oil and heat until hot.


Tasty Kitchen Blog: Zhong-Xi Breakfast. Guest post by Amy Johnson of She Wears Many Hats, recipe submitted by TK member Dani of Expat Cucina.

Add in the garlic and ginger and sauté for about a minute, stirring constantly.


Tasty Kitchen Blog: Zhong-Xi Breakfast. Guest post by Amy Johnson of She Wears Many Hats, recipe submitted by TK member Dani of Expat Cucina.

Garlic can burn very quickly at high heat, so be careful to watch for the garlic burning. Mine got a bit on the dark side, but it was still nice.


Tasty Kitchen Blog: Zhong-Xi Breakfast. Guest post by Amy Johnson of She Wears Many Hats, recipe submitted by TK member Dani of Expat Cucina.

The brown sugar goes in next. Mix together.


Tasty Kitchen Blog: Zhong-Xi Breakfast. Guest post by Amy Johnson of She Wears Many Hats, recipe submitted by TK member Dani of Expat Cucina.

Next, the tomatoes. So much happy color to start the day with! Cook the tomatoes for about a minute or so, until they start getting soft.


Tasty Kitchen Blog: Zhong-Xi Breakfast. Guest post by Amy Johnson of She Wears Many Hats, recipe submitted by TK member Dani of Expat Cucina.

Now pull it altogether with the soy sauce, rice vinegar, and sesame oil. Can you smell it? Oh my. Stir all together.


Tasty Kitchen Blog: Zhong-Xi Breakfast. Guest post by Amy Johnson of She Wears Many Hats, recipe submitted by TK member Dani of Expat Cucina.

Remove from heat and pour the tomatoes with the cooking oil on top of the patiently waiting omelet. Garnish with freshly chopped parsley and enjoy!

If you prep the ingredients the night before, chopping the garlic and ginger and tomatoes, you can have this omelet done in no time. Such a great way to dress up a simple omelet.

Many thanks to Dani of the blog Expat Cucina for sharing this flavorful way to start the day.


Printable Recipe

Zhong-Xi Breakfast

5.00 Mitt(s) 1 Rating(s)1 vote, average: 5.00 out of 51 vote, average: 5.00 out of 51 vote, average: 5.00 out of 51 vote, average: 5.00 out of 51 vote, average: 5.00 out of 5

Prep Time:

Cook Time:

Difficulty: Easy

Servings: 1

1
x

Print Options

Page size Letter 3x5 4x6
Text Size Small Medium Large
Content Include description
Include prep time, etc.
Show image

Description

Zhong-Xi in Chinese means East-West. This recipe takes a bit from the East (in the soy sauce, sesame oil and ginger) and a bit from the West. Try these eggs tomorrow for breakfast!

Ingredients

  • 2 whole Eggs
  • 1 pinch Salt
  • 3 Tablespoons Peanut Oil
  • 1 clove Garlic, Finely Chopped
  • 1 teaspoon Finely Chopped Ginger
  • 1 teaspoon Brown Sugar
  • 3 whole Red Cherry Tomatoes, Washed And Cut In Half
  • 1 teaspoon Soy Sauce
  • 1 teaspoon Rice Vinegar
  • 1 teaspoon Sesame Oil
  • 4 whole Yellow Cherry Tomatoes
  • 1 Tablespoon Chopped Parsley

Preparation Instructions

In a bowl, lightly beat eggs with a pinch of salt.

In a skillet, heat 1 tablespoon of peanut oil. When hot, pour in the eggs.Let cook for a minute or so, till the eggs start solidifying. Then with a wooden spoon, push the edge in so that the soggy, uncooked eggs can touch the pan. When the eggs are almost cooked but the center is still soft, fold your omelet in half and place it on a plate.

In the same skillet (don’t wash it), add the remaining 2 tablespoons of peanut oil and heat till really hot. Throw in chopped garlic and ginger, stir for a minute or so. Then add the sugar and let it caramelize. Add in the tomatoes and cook till they start getting soft (about 1 minute). Pour in soy sauce, rice vinegar and sesame oil; stir all the ingredients together. Remove from heat and pour the tomatoes with its cooking oil on top of your omelet.

Garnish with freshly chopped parsley.


_______________________________________

Amy Johnson is a blogger who writes about food, travel, the home (both inside and out), and various observations and random musings about anything and everything. Visit her blog She Wears Many Hats for a dose of deliciousness, practicality, hilarity, or just plain fun. She lives in South Carolina with her husband and two children.


Profile photo of georgiapellegrini

Garlic Wasabi and Sage Green Beans

Posted by in Step-by-Step Recipes

Tasty Kitchen Blog: Garlic Wasabi and Sage Green Beans. Guest post by Georgia Pellegrini, recipe submitted by TK member Nancy of The Coupon Clipping Cook.

 
Green bean salads are one of my favorite, especially in the warmer months for a picnic, served room temperature with a tangy vinaigrette. Tasty Kitchen member Nancy’s version caught me eye because of the wasabi spice and browned garlic. It was absolutely delicious! And a great dish to make ahead for the week.


Tasty Kitchen Blog: Garlic Wasabi and Sage Green Beans. Guest post by Georgia Pellegrini, recipe submitted by TK member Nancy of The Coupon Clipping Cook.

You will need: butter, dried sage, garlic powder, olive oil, salt, garlic, wasabi powder and green beans.


Tasty Kitchen Blog: Garlic Wasabi and Sage Green Beans. Guest post by Georgia Pellegrini, recipe submitted by TK member Nancy of The Coupon Clipping Cook.

Rinse the green beans and snap off the ends if need be. Then add them to a medium-sized bowl. Add the olive oil and toss, then set aside to marinate.


Tasty Kitchen Blog: Garlic Wasabi and Sage Green Beans. Guest post by Georgia Pellegrini, recipe submitted by TK member Nancy of The Coupon Clipping Cook.

Add the garlic powder …


Tasty Kitchen Blog: Garlic Wasabi and Sage Green Beans. Guest post by Georgia Pellegrini, recipe submitted by TK member Nancy of The Coupon Clipping Cook.

And the crushed sage …


Tasty Kitchen Blog: Garlic Wasabi and Sage Green Beans. Guest post by Georgia Pellegrini, recipe submitted by TK member Nancy of The Coupon Clipping Cook.

And the wasabi powder.


Tasty Kitchen Blog: Garlic Wasabi and Sage Green Beans. Guest post by Georgia Pellegrini, recipe submitted by TK member Nancy of The Coupon Clipping Cook.

Toss it about well until evenly incorporated.


Tasty Kitchen Blog: Garlic Wasabi and Sage Green Beans. Guest post by Georgia Pellegrini, recipe submitted by TK member Nancy of The Coupon Clipping Cook.

Cut the garlic into ¼-inch pieces and set aside.


Tasty Kitchen Blog: Garlic Wasabi and Sage Green Beans. Guest post by Georgia Pellegrini, recipe submitted by TK member Nancy of The Coupon Clipping Cook.

Heat a skillet over medium-high heat and add the green beans. Cook them for 5 minutes or so, tossing every so often.


Tasty Kitchen Blog: Garlic Wasabi and Sage Green Beans. Guest post by Georgia Pellegrini, recipe submitted by TK member Nancy of The Coupon Clipping Cook.

Add the butter and garlic and toss well to ensure the garlic doesn’t burn.


Tasty Kitchen Blog: Garlic Wasabi and Sage Green Beans. Guest post by Georgia Pellegrini, recipe submitted by TK member Nancy of The Coupon Clipping Cook.

Transfer to a plate and serve. This dish stored well for a week and was delicious when served cold or room temperature. It can be reinvented several times as well with the addition of cherry tomatoes, crumbled cheese or whatever other extras are in your refrigerator.

Thanks to Nancy for this delicious recipe. Visit her website Coupon Clipping Cook for other wonderful treats!


Printable Recipe

Garlic Wasabi and Sage Green Beans

See post on Nancy @ Coupon Clipping Cook’s site!
0.00 Mitt(s) 0 Rating(s)0 votes, average: 0.00 out of 50 votes, average: 0.00 out of 50 votes, average: 0.00 out of 50 votes, average: 0.00 out of 50 votes, average: 0.00 out of 5

Prep Time:

Cook Time:

Difficulty: Easy

Servings: 3

3
x

Print Options

Page size Letter 3x5 4x6
Text Size Small Medium Large
Content Include description
Include prep time, etc.
Show image

Description

A delicious side dish with an earthy flavor.

Ingredients

  • ½ pounds Fresh Fine French Green Beans (Or Regular Green Beans)
  • 2 Tablespoons Olive Oil, Divided
  • ½ teaspoons Garlic Powder
  • ½ teaspoons Ground Sage
  • ½ teaspoons Wasabi Powder
  • ¼ teaspoons Sea Salt
  • 4 cloves Garlic
  • 1 Tablespoon Butter

Preparation Instructions

Snap or cut the stem ends off the green beans, rinse them off and add to a medium size bowl. Add the olive oil (reserving about 2 teaspoons of olive oil for the skillet), garlic powder, sage, wasabi powder, and sea salt.

Toss the green beans until coated. Set aside. Slice the garlic into pieces about ¼-inch thick and set aside for a moment.

Heat a large skillet on medium heat. Add the green beans to the skillet and the reserved 2 teaspoons olive oil. Add the butter and garlic and stir (if using regular green beans, let them sauté in the pan for about 6 minutes before adding the butter and garlic). Continue stirring.

Keep stirring until the garlic starts to turn a light brown or golden color (about 6 minutes) which is about the time when the green beans should be done. If the garlic is cooking too fast and starting to turn a dark brown color, turn the heat down just a bit. Some of the thinner green beans should be a little soft while others should be a bit crisp. Try a quick sample and salt to taste.

Serve hot right out of the skillet as a side dish.


_______________________________________

There’s so much to say about Georgia, we don’t know where to start. Leaving Wall Street for the French Culinary Institute, followed by a stint at the Gramercy Tavern and La Chassagnette in France, her passion for food and food traditions are evident and inspiring. Visit her site at Georgia Pellegrini, where you’ll find more recipes, photos, learn all about her wonderful books Girl Hunter and Food Heroes, and enjoy her latest adventures.


Profile photo of missamy

Dark Chocolate Banana Bread (with Coconut)

Posted by in Baking, Step-by-Step Recipes

  Combinations of chocolate and coconut hardly go unnoticed around here, so when I saw this recipe for Dark Chocolate Banana Bread (with Coconut) from Tasty Kitchen members Chrissy and Lauren, I just had to try it. I had to. The line between “need” and “want” gets kind of blurred when chocolate is involved. And […]

Profile photo of georgiapellegrini

Strawberry Balsamic Vinaigrette

Posted by in Step-by-Step Recipes

  Spring seems to finally be here, and with that comes strawberry season! This recipe for a Strawberry Balsamic Vinaigrette from Tasty Kitchen member Jamie Levine caught my eye for its beautiful color and creamy texture. It will brighten up even the simplest of salads.       To make her recipe, you will need: […]

Profile photo of Faith (An Edible Mosaic)

Vietnamese Summer Roll Salad

Posted by in Step-by-Step Recipes

  Even though I’m a winter-loving girl, I’m secretly longing for summer’s arrival. Which is pretty much blasphemy around these parts; I’m in snow-country, just about as north as a girl can go. Although spring has just arrived, I’m ready to welcome summer. In fact, I’ll take summer in any form I can get. Even […]

Profile photo of georgiapellegrini

Spinach, Scallion and Feta Frittata

Posted by in Step-by-Step Recipes

  I love a good frittata; it reminds me of my grandmother who always made them full of fresh herbs, and had them sitting on the counter as a snack. She added a dollop of plain yogurt to hers for an extra fluffy version. So of course, when Kristi posted this recipe for this Spinach, […]