The Pioneer Woman Tasty Kitchen
Profile photo of ThreeManyCooks

Shamrock Blizzard

Posted by in Step-by-Step Recipes

Tasty Kitchen Blog: Shamrock Blizzard. Guest post by Maggy Keet of Three Many Cooks, recipe by Three Many Cooks.

 
Since its debut in the 1970s, McDonald’s Shamrock Shake has garnered something of a cult following. I’m certain part of its popularity stems from very limited availability. You might be interested to know the Shamrock Shake has its own website pointing devoted fans to selected serving locations. I love a good milkshake, but this seems a little crazy. Me? I prefer a blizzard. It’s got all the goodness of a milkshake with something delicious stirred in.

In honor of St. Patrick’s Day, we created a Shamrock Blizzard you can make in your own kitchen without having to track down the elusive green drink. To make it even more fun and festive, we’ve added Irish whiskey to the mix (McDonald’s can’t do that!). If you’d like a “potent” blizzard, make it with straight whiskey. But if you want to serve these to a gaggle of kids, make sure to use milk instead! For something in between, use half whiskey, half milk.

Happy St. Patrick’s Day!


Tasty Kitchen Blog: Shamrock Blizzard. Guest post by Maggy Keet of Three Many Cooks, recipe by Three Many Cooks.

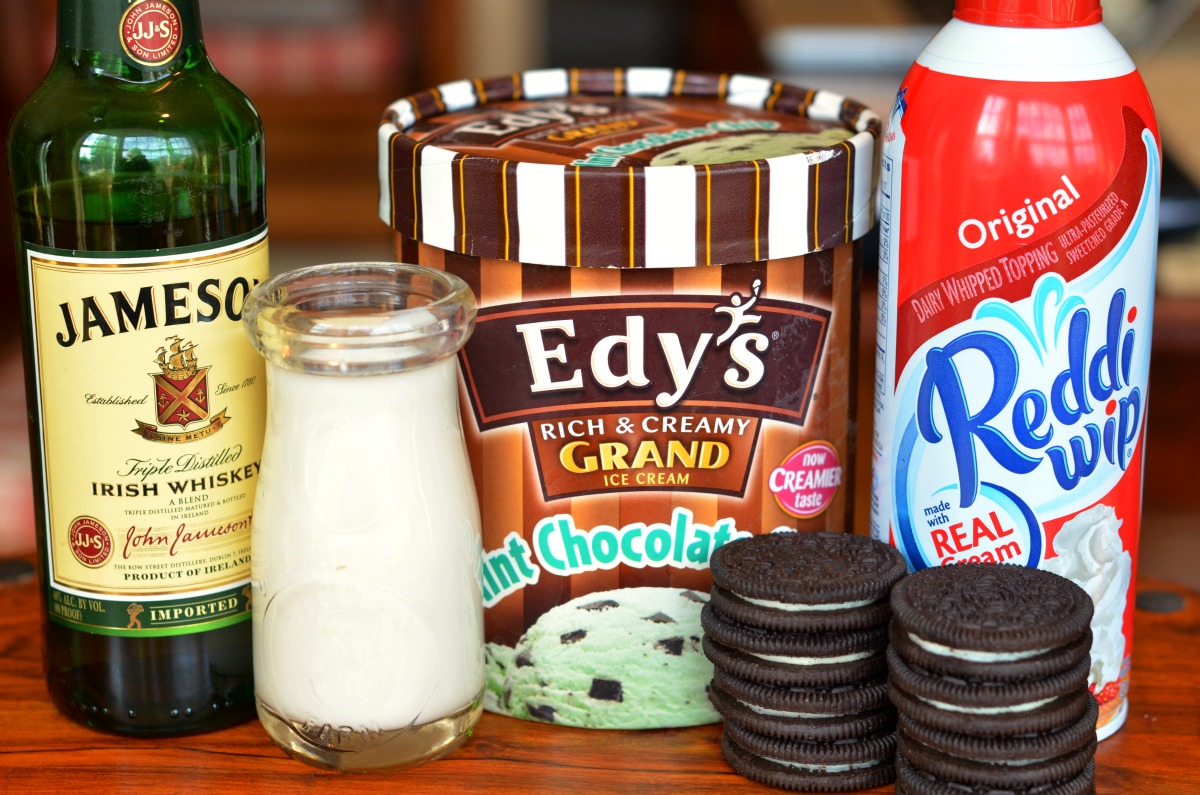
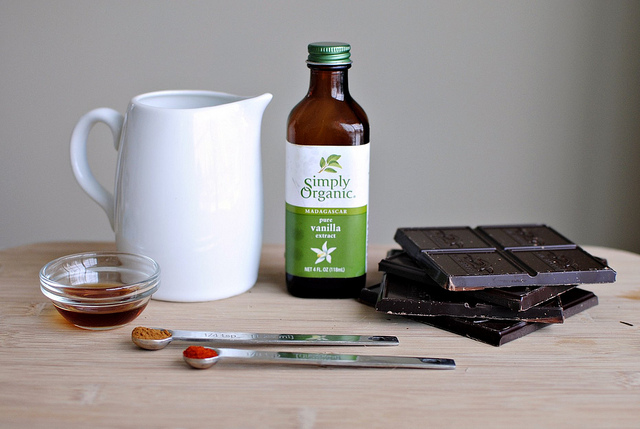
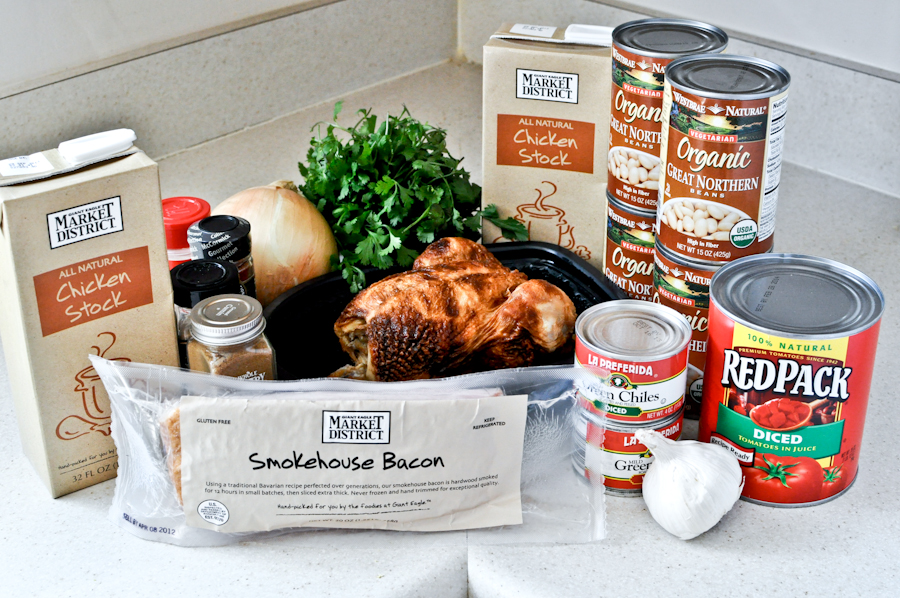
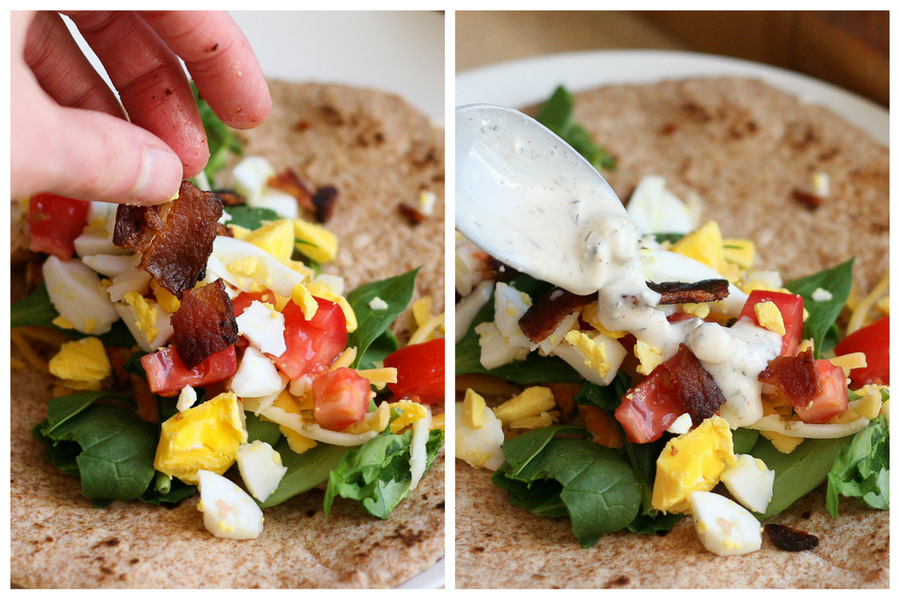
For this recipe, you need these delicious ingredients: mint chocolate chip ice cream, whole milk, Irish whiskey (optional), chocolate cookies (such as Oreos or Famous Chocolate Wafers), and whipped cream.


Tasty Kitchen Blog: Shamrock Blizzard. Guest post by Maggy Keet of Three Many Cooks, recipe by Three Many Cooks.

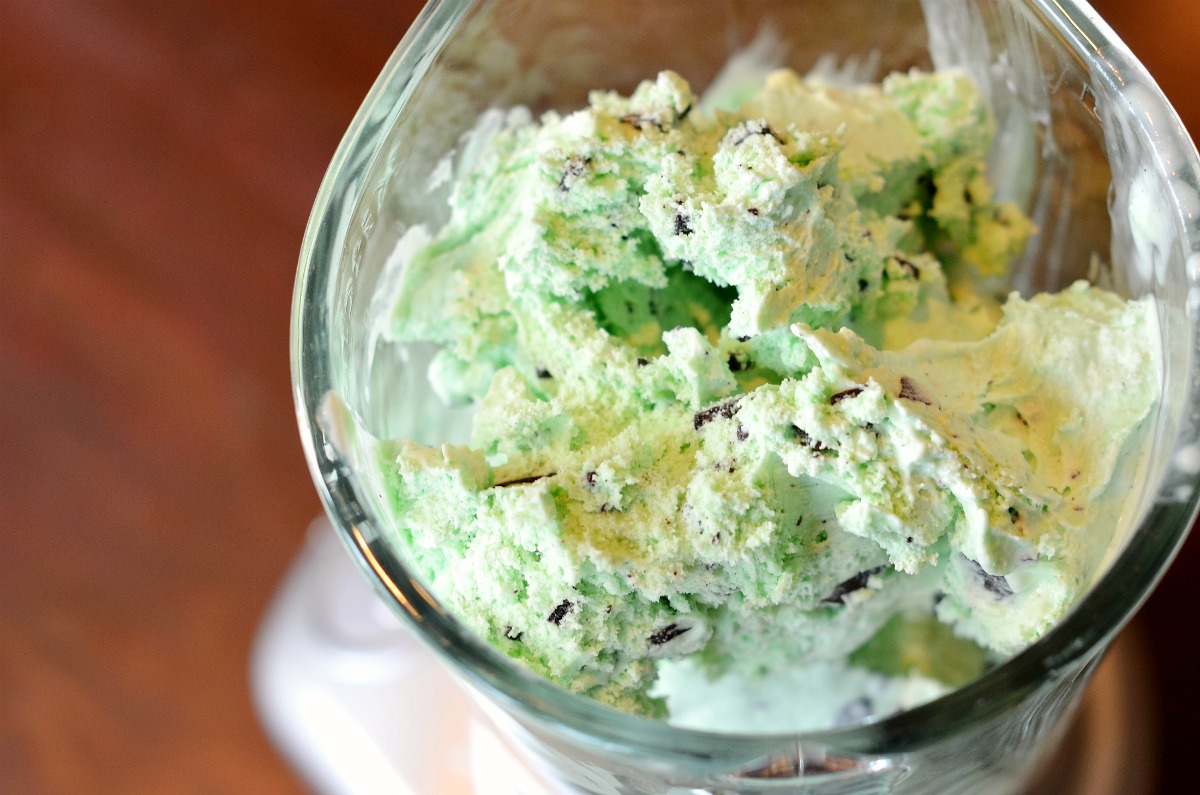
Start by putting the entire container of ice cream in the blender. Yes, the entire container. Hey, I never said this was a diet recipe.


Tasty Kitchen Blog: Shamrock Blizzard. Guest post by Maggy Keet of Three Many Cooks, recipe by Three Many Cooks.

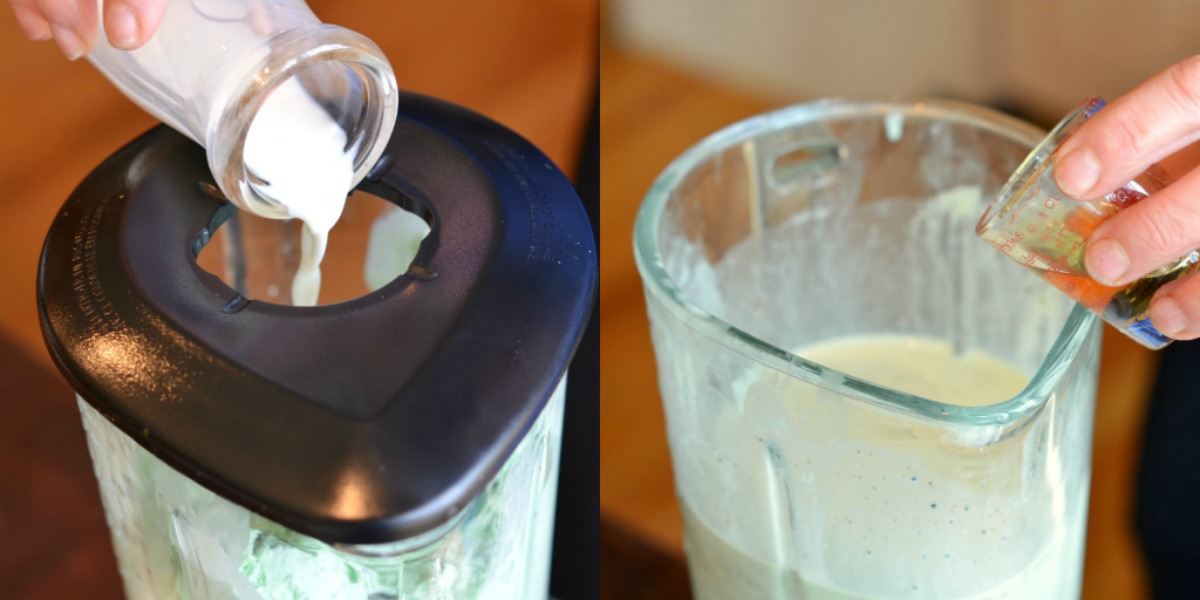
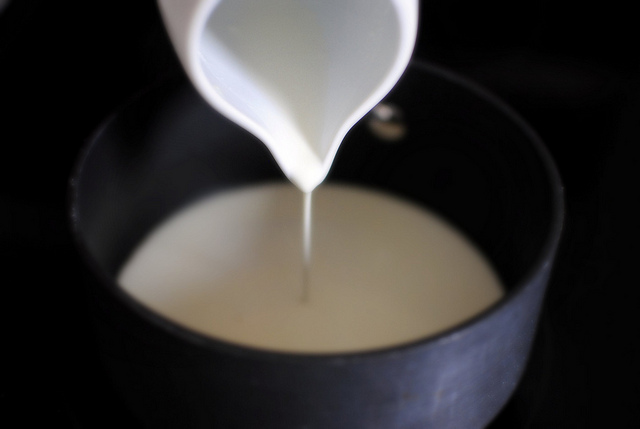
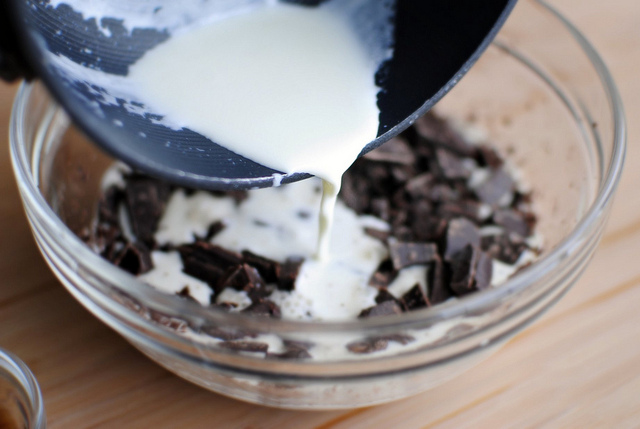
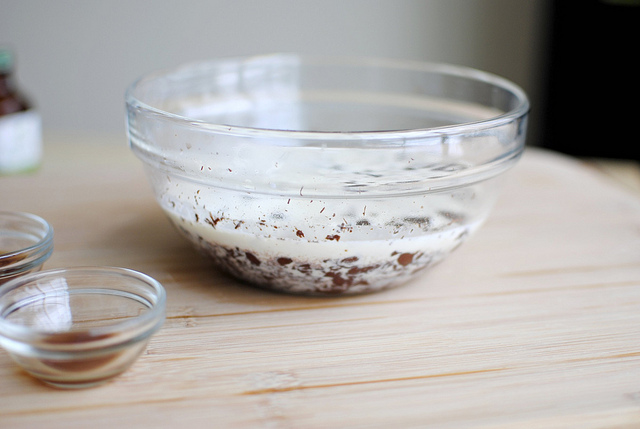
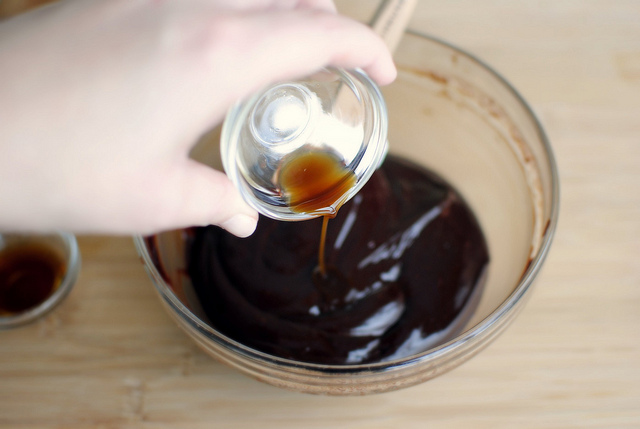
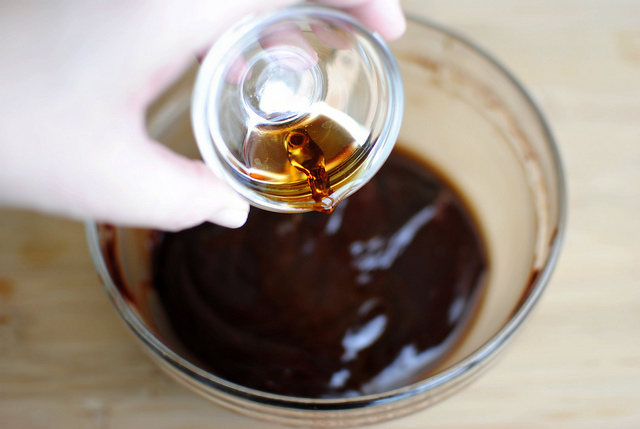
Add the milk and/or whiskey.


Tasty Kitchen Blog: Shamrock Blizzard. Guest post by Maggy Keet of Three Many Cooks, recipe by Three Many Cooks.

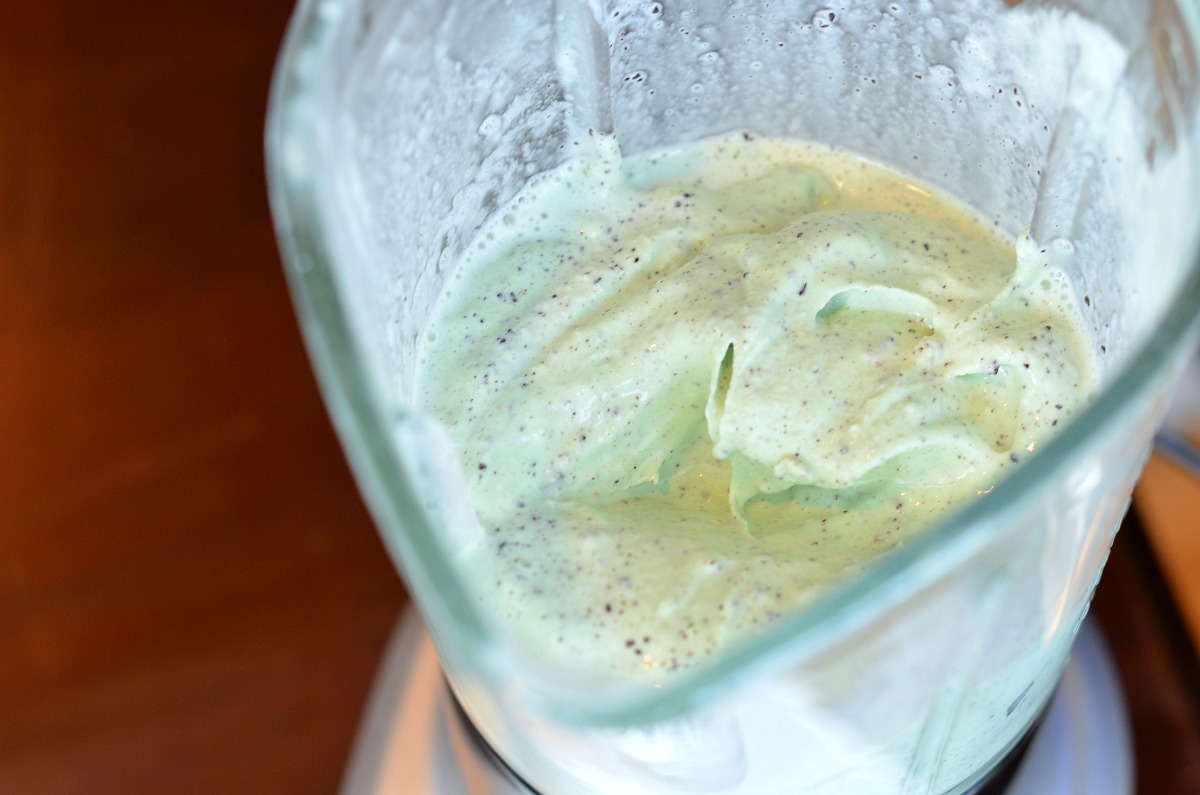
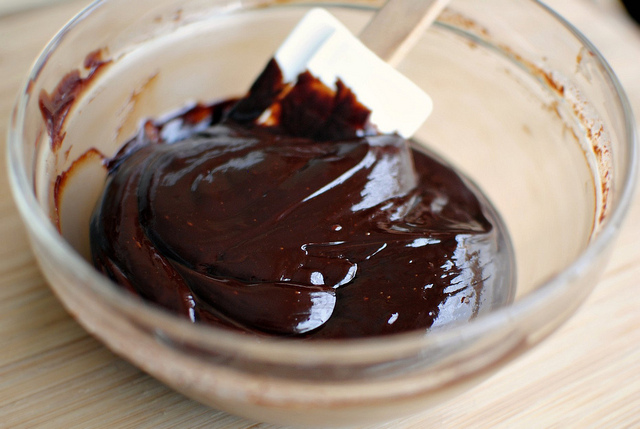
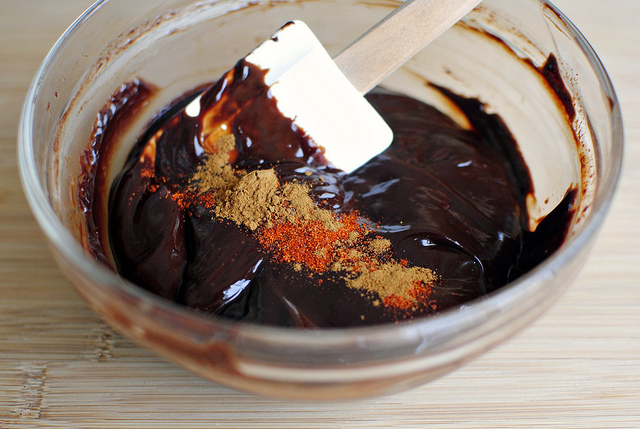
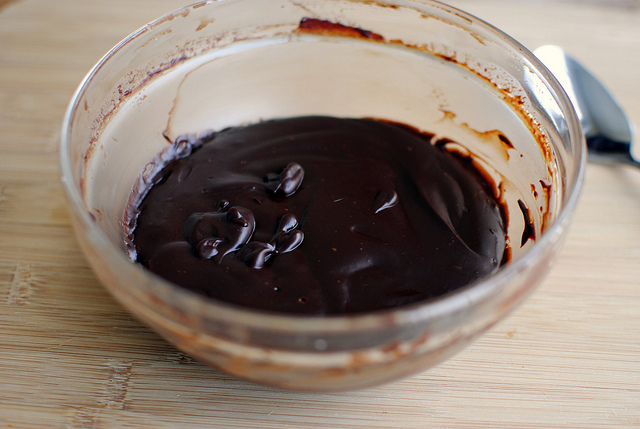
Blend until the ice cream takes on this consistency.


Tasty Kitchen Blog: Shamrock Blizzard. Guest post by Maggy Keet of Three Many Cooks, recipe by Three Many Cooks.

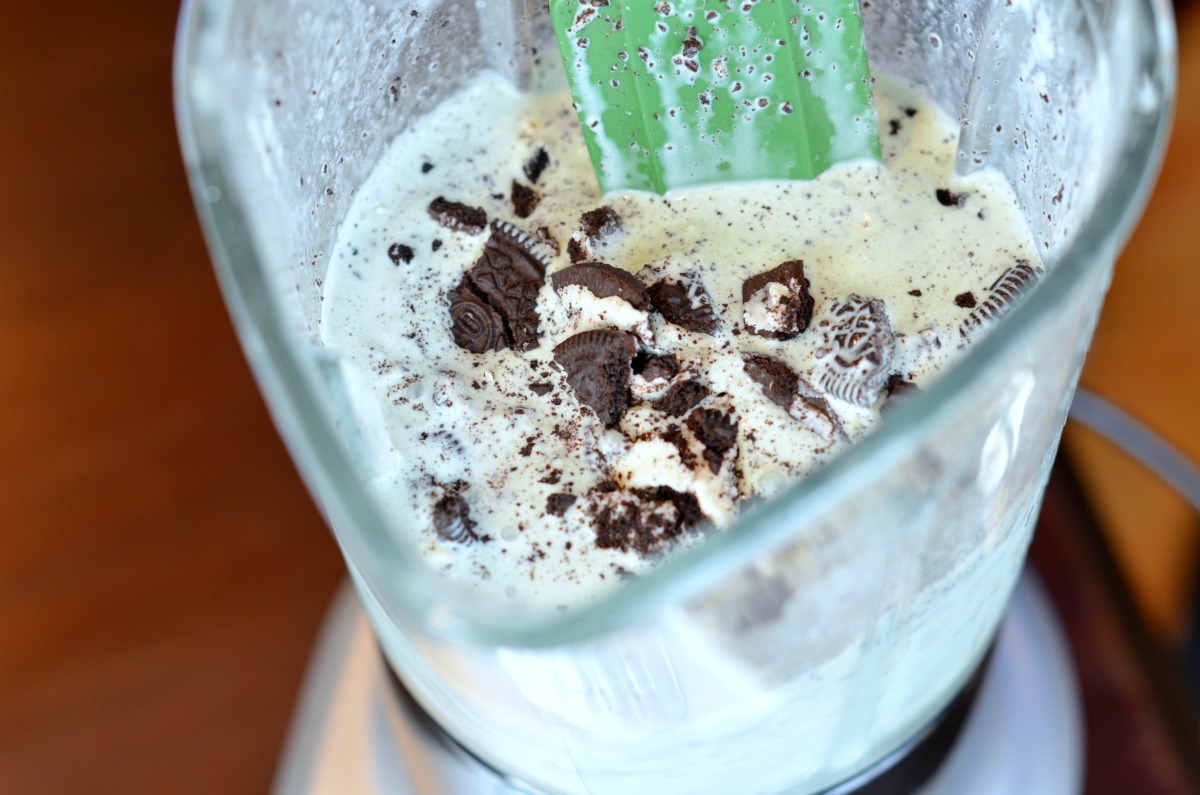
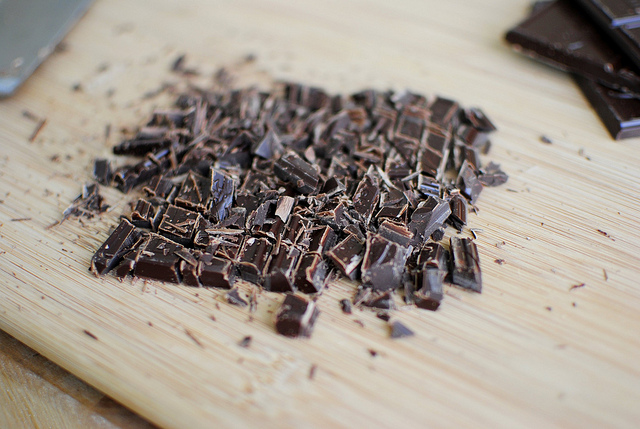
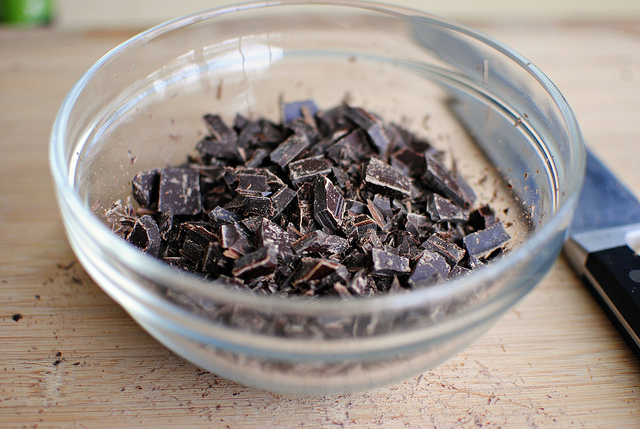
Crumble 7 of the chocolate cookies with your hands and stir them into the blizzard. I’m always guilty of digging around in the ice cream to find the big chunks of cookie dough or brownie, so I prefer to leave my cookie bits big (and easy to find!).


Tasty Kitchen Blog: Shamrock Blizzard. Guest post by Maggy Keet of Three Many Cooks, recipe by Three Many Cooks.

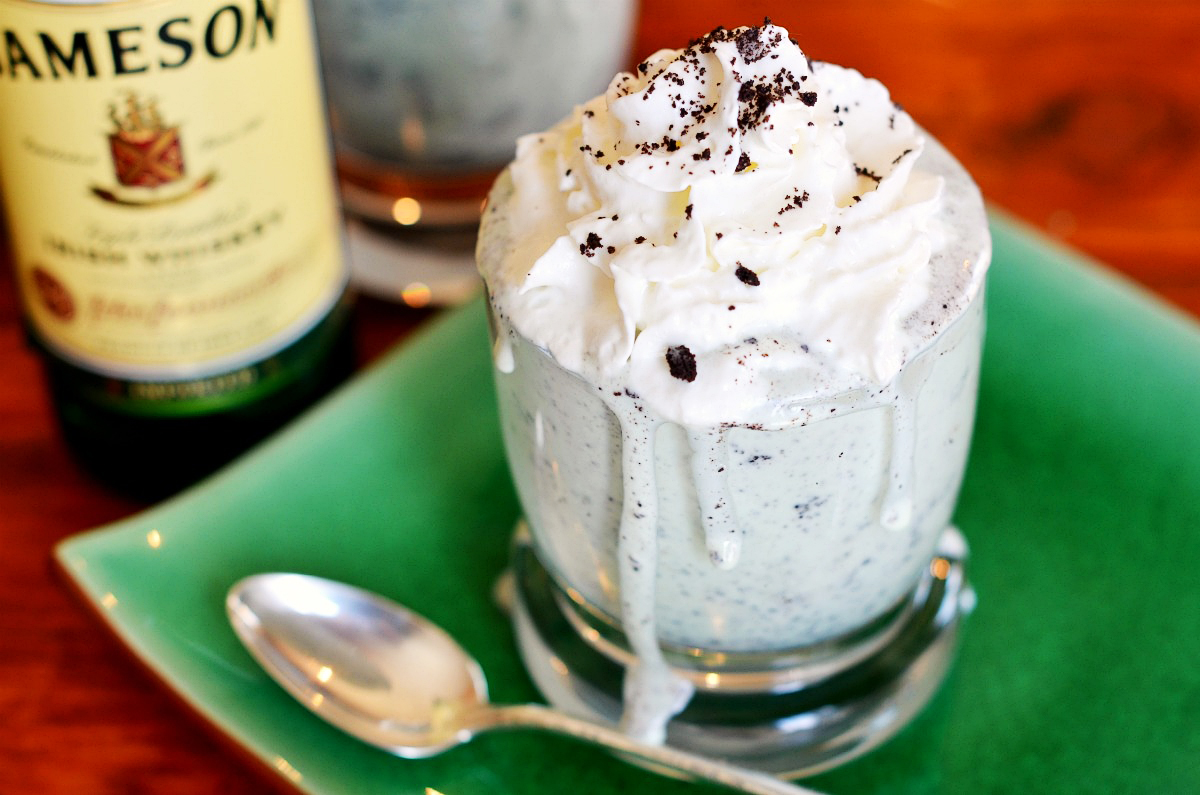
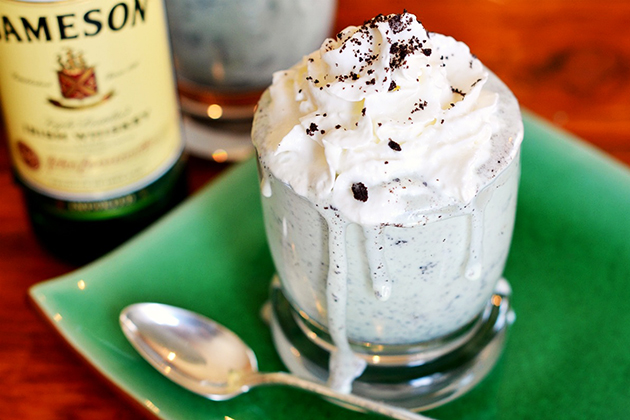
Pour a portion of the blizzard into 6 glasses, top with whipped cream, and sprinkle with crumbs from the remaining cookie.


Tasty Kitchen Blog: Shamrock Blizzard. Guest post by Maggy Keet of Three Many Cooks, recipe by Three Many Cooks.

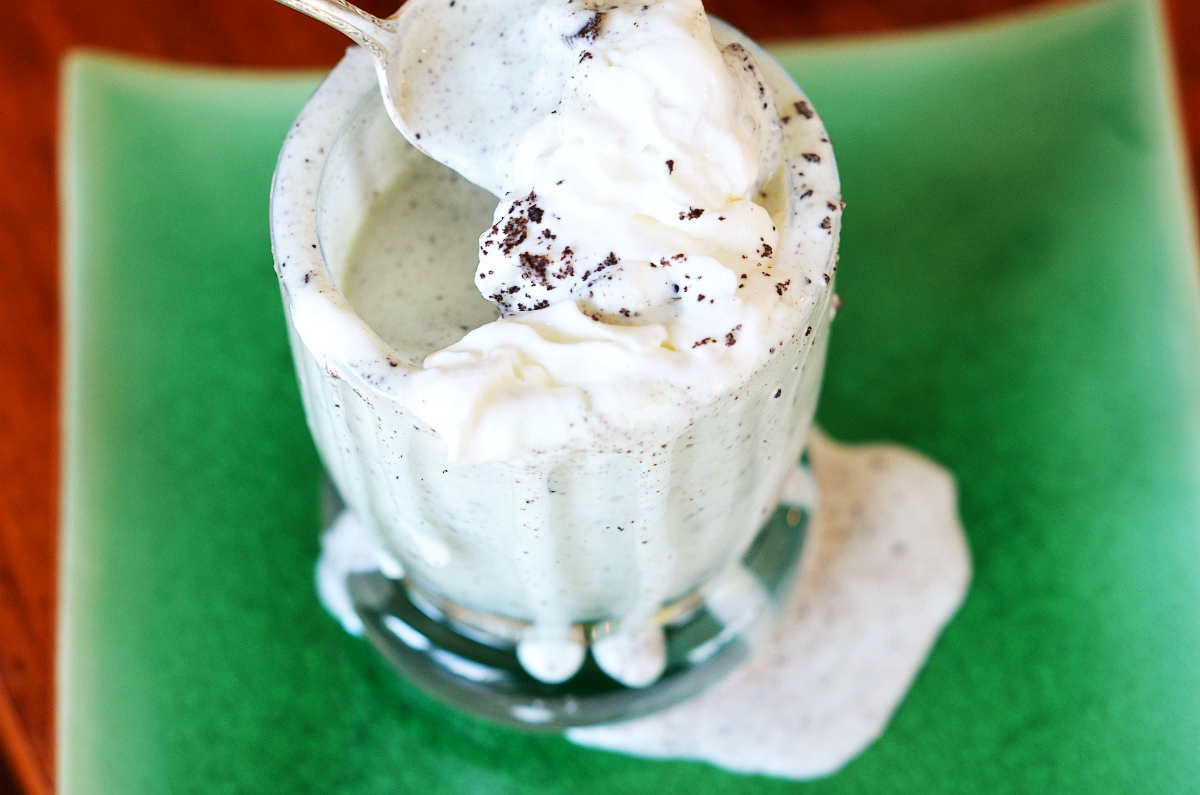
These blizzards are so good they’ll be gone in seconds.


Printable Recipe

Shamrock Blizzard

5.00 Mitt(s) 3 Rating(s)3 votes, average: 5.00 out of 53 votes, average: 5.00 out of 53 votes, average: 5.00 out of 53 votes, average: 5.00 out of 53 votes, average: 5.00 out of 5

Prep Time:

Cook Time:

Difficulty: Easy

Servings: 6

6
x

Print Options

Page size Letter 3x5 4x6
Text Size Small Medium Large
Content Include description
Include prep time, etc.
Show image

Description

Like the Shamrock Shake? You’re going to love this Shamrock Blizzard!

Ingredients

  • 1 container (48 Oz. Size) Mint Chocolate Chip Ice Cream, Softened (We Used Edy's Brand)
  • ½ cups Irish Whiskey Or Milk
  • 8 whole Chocolate Sandwich Cookies, Such As Oreos, Crumbled, Divided
  • 1 can (6.5 Oz. Size) Whipped Cream

Preparation Instructions

Headnote: For a potent shake, use all whiskey. For a virgin version, use the milk. For something in between, use 1/4 cup each: milk and whiskey.

In a blender, process ice cream and whiskey until smooth. Stir in 7 of the crumbled cookies. Pour into tumblers, top with whipped cream, and sprinkle with remaining crumbled cookie.


_______________________________________

Three Many Cooks is the always-entertaining food blog of Pam Anderson and her two daughters, Maggy and Sharon. Pam is a well-known and much-respected food writer and author, Maggy is a “hippy adventurer meets 1950s housewife,” and Sharon refers to herself as a recovering food snob learning to survive on a graduate student’s budget. Theirs is a strong relationship both inside and outside the kitchen, and it shows in the food they create and the stories they tell.


Profile photo of Laurie - Simply Scratch

Mayan Chocolate Truffles

Posted by in Step-by-Step Recipes

Tasty Kitchen Blog: Mayan Chocolate Truffles. Guest post by Laurie McNamara of Simply Scratch, recipe submitted by TK member Kari of The Craftinomicon.

 
Mayan Chocolate Truffles. Oh my heavens. Just the name alone gets me excited all over again. These chocolaty delights have a little sweet, a little spice and a whole lot of sass. When I saw Kari’s recipe, I found myself suddenly craving chocolate in truffle form.  
 
Kari a.k.a. Craftinomicon probably doesn’t realize the phenomenon her recipe created in my household. My children were actually campaigning to clean their rooms for more truffles! I was promised back rubs and washed dishes, too. All of this just to get their little mitts on more! Needless to say the truffles only lasted a whole twenty-four hours—but most definitely the best chocolate-filled twenty-four hours of my life. Amen.


Tasty Kitchen Blog: Mayan Chocolate Truffles. Guest post by Laurie McNamara of Simply Scratch, recipe submitted by TK member Kari of The Craftinomicon.

These truffles are actually pretty darn simple to make, and yet they taste as if you purchased them from a fancy-schmancy chocolate shop!


Tasty Kitchen Blog: Mayan Chocolate Truffles. Guest post by Laurie McNamara of Simply Scratch, recipe submitted by TK member Kari of The Craftinomicon.

Start by finely chopping up eight ounces of dark chocolate. For this recipe, I used the sixty percent cocoa bars by Ghirardelli. 


Tasty Kitchen Blog: Mayan Chocolate Truffles. Guest post by Laurie McNamara of Simply Scratch, recipe submitted by TK member Kari of The Craftinomicon.

Keep the size pretty uniform so they melt easily. Now just toss the chocolate bits into a small heat-safe bowl.


Tasty Kitchen Blog: Mayan Chocolate Truffles. Guest post by Laurie McNamara of Simply Scratch, recipe submitted by TK member Kari of The Craftinomicon.

Next add a half cup of heavy cream to a small sauce pan. Heat the cream until tiny little bubbles start to form around the edge of the pot. 


Tasty Kitchen Blog: Mayan Chocolate Truffles. Guest post by Laurie McNamara of Simply Scratch, recipe submitted by TK member Kari of The Craftinomicon.

Then immediately pour the hot cream over top of the chopped chocolate.


Tasty Kitchen Blog: Mayan Chocolate Truffles. Guest post by Laurie McNamara of Simply Scratch, recipe submitted by TK member Kari of The Craftinomicon. 

Let it sit for a few minutes. The warm cream is working its magic, softening up the chocolate.


Tasty Kitchen Blog: Mayan Chocolate Truffles. Guest post by Laurie McNamara of Simply Scratch, recipe submitted by TK member Kari of The Craftinomicon. 

After a few minutes have passed; slowly stir and combine the two together.


Tasty Kitchen Blog: Mayan Chocolate Truffles. Guest post by Laurie McNamara of Simply Scratch, recipe submitted by TK member Kari of The Craftinomicon. 

Add in a quarter teaspoon of vanilla.


Tasty Kitchen Blog: Mayan Chocolate Truffles. Guest post by Laurie McNamara of Simply Scratch, recipe submitted by TK member Kari of The Craftinomicon.

Then a tablespoon of strong brewed coffee. Kari also suggests trying a coffee flavored liqueur. Oh man, I bet that would be lovely, too!


Tasty Kitchen Blog: Mayan Chocolate Truffles. Guest post by Laurie McNamara of Simply Scratch, recipe submitted by TK member Kari of The Craftinomicon.

Measure and add in a quarter an eighth of a teaspoon of cayenne. It’s enough to give these truffles some heat without knocking your socks off. 


Tasty Kitchen Blog: Mayan Chocolate Truffles. Guest post by Laurie McNamara of Simply Scratch, recipe submitted by TK member Kari of The Craftinomicon.

A quarter teaspoon of cinnamon is next. This definitely complements not only the chocolate but the cayenne. It smells pretty darn heavenly, too.


Tasty Kitchen Blog: Mayan Chocolate Truffles. Guest post by Laurie McNamara of Simply Scratch, recipe submitted by TK member Kari of The Craftinomicon. 

Stir and let this sit at room temperature for at least one hour. It’s hard but you can do it! I then popped the mixture into the fridge for about 15 minutes to firm up a tad.


Tasty Kitchen Blog: Mayan Chocolate Truffles. Guest post by Laurie McNamara of Simply Scratch, recipe submitted by TK member Kari of The Craftinomicon. 

With a spoon, scoop and shape into haphazardly-shaped balls. This will get messy, so heads up! They don’t have to be perfect because they go back into the fridge for thirty more minutes to completely firm up.


Tasty Kitchen Blog: Mayan Chocolate Truffles. Guest post by Laurie McNamara of Simply Scratch, recipe submitted by TK member Kari of The Craftinomicon.

Next, just re-roll and scoot them around in some sweetened cocoa powder. Some other coating suggestions are powdered sugar, toasted coconut and candy melts. The options are really endless. 


Tasty Kitchen Blog: Mayan Chocolate Truffles. Guest post by Laurie McNamara of Simply Scratch, recipe submitted by TK member Kari of The Craftinomicon.

Keep repeating until all truffles are coated. 


Tasty Kitchen Blog: Mayan Chocolate Truffles. Guest post by Laurie McNamara of Simply Scratch, recipe submitted by TK member Kari of The Craftinomicon.

Like magic, I guarantee these will disappear right in front of your eyes. So decadent and rich but it’s that subtle kick of cayenne and cinnamon that makes these truffles absolute perfection.


Tasty Kitchen Blog: Mayan Chocolate Truffles. Guest post by Laurie McNamara of Simply Scratch, recipe submitted by TK member Kari of The Craftinomicon. 

You guys really need to try these, I promise you they are truly exceptional! You can find more of Kari’s recipes in her recipe box here on Tasty Kitchen. And if you’re looking for fun and innovative craft ideas, be sure to stop by Kari’s website The Craftinomicon
 
Thanks so much for sharing this recipe Kari! 


Printable Recipe

Mayan Chocolate Truffles

See post on craftinomicon’s site!
5.00 Mitt(s) 1 Rating(s)1 vote, average: 5.00 out of 51 vote, average: 5.00 out of 51 vote, average: 5.00 out of 51 vote, average: 5.00 out of 51 vote, average: 5.00 out of 5

Prep Time:

Cook Time:

Difficulty: Easy

Servings: 20

20
x

Print Options

Page size Letter 3x5 4x6
Text Size Small Medium Large
Content Include description
Include prep time, etc.
Show image

Description

Dark Chocolate truffles with some kick!

Ingredients

  • 8 ounces, weight Dark Chocolate
  • ½ cups Heavy Cream
  • ¼ teaspoons Vanilla Extract
  • ¼ teaspoons Cinnamon
  • ⅛ teaspoons Cayenne Pepper
  • 1 Tablespoon Coffee Or Coffee Flavored Liqueur
  • Optional Coatings: Powdered Sugar, Cocoa Powder, Toasted Coconut, Etc

Preparation Instructions

Cut up your chocolate as finely as you can (try to get uniform pieces so they will all melt the same, or you will be left with little chunks in the truffles). Place the chocolate into a heat safe bowl (I use a glass mixing bowl).

In a small saucepan, heat your cream just until it comes to a boil (bubbles will begin forming around the edges). Add the heated cream to the chocolate and allow to sit a few minutes.

Add in your vanilla, cinnamon, cayenne and coffee flavored liqueur (you could also use just a Tablespoon of regular fresh brewed coffee). * You do not have to add the cinnamon and cayenne, but I find it adds a nice flavor to the truffles.

Whisk everything together until it is smooth. If you happen to have a few larger chunks, do not fear, you can place the bowl into the microwave for 10 seconds, then remove and stir again. Do this until your mixture is smooth, then allow the bowl to sit at room temperature for 1 hour (and good luck not “tasting” it every time you walk past for that hour).

With a small spoon or cookie scoop, scoop out small balls of the truffle mixture and place on a cookie sheet (to avoid a huge mess I generally line my sheet with parchment or wax paper) and place these into the fridge for 30 minutes to set.

Take out and gently roll to form round balls, then roll these into any coating you want (toasted coconut, powdered sugar, cocoa, roasted almonds, candy melts, etc.) If you want a hard outer coating I highly recommend the candy melts–you can get them in several colors as well. You could also fancy it up with a sprinkling of some sea salt if you are into the sweet and salty flavor. I have made these several different ways and no one has ever complained.


_______________________________________

Laurie is the force behind Simply Scratch, a blog that documents her efforts to find and create recipes that are made simply from scratch. (We think it’s sweet that her mother-in-law helped her set up her blog and get started.) We love her recipes; they’re not just tried and true, but they look gorgeous as well. Check out her blog and you’ll become a fan too.


Profile photo of HowSweetEats

Smoky White Bean Chicken Chili

Posted by in Step-by-Step Recipes

Tasty Kitchen Blog: Smoky White Bean Chicken Chili. Guest post by Jessica Merchant of How Sweet It Is, recipe submitted by TK member Terri of That's Some Good Cookin'.

 
With spring quickly approaching in the next few weeks, I fear my warm and comforting soups may be on their way out. I easily love a bowl of soup no matter the season, but sometimes the thought of standing over a large stock pot for a few hours just isn’t as appealing as laying outside in the green grass. Especially when you sweat like a man.

However! This year I’m saved. I ran across this Smoky White Bean Chicken Chili from Tasty Kitchen member Terri, and the moment I spied bacon and smoked paprika in the recipe, I was sold. To my surprise, this soup was completed in just a little over an hour and packed more flavor that I ever could have imagined. It’s pretty healthy too—bonus points!

The ease of this soup is a huge plus. It calls for a store-bought rotisserie chicken, but feel free to roast your own and use your own stock if you have some on hand. It also makes a pretty large pot of chili, so if you’re cooking for one or two, you’ll have lots of leftovers to freeze for those super busy nights. Let’s get started!


Tasty Kitchen Blog: Smoky White Bean Chicken Chili. Guest post by Jessica Merchant of How Sweet It Is, recipe submitted by TK member Terri of That's Some Good Cookin'.

Here’s what you need: a rotisserie chicken, chicken stock, cannellini beans, diced tomatoes, diced green chilis, bacon, a large onion, garlic, smoked paprika, cumin, garlic powder, onion powder, chipotle chili powder, fresh cilantro and some cheese for topping if you wish. Also have some salt and pepper on hand for seasoning. If you can’t find chipotle chili powder, the regular stuff should do just fine.

As a note, the first thing I did before beginning was to prepare all my ingredients. I opened all the cans, I stripped the meat from the chicken, chopped my bacon, onion and garlic and combined all my spices. This makes the process much, much easier.


Tasty Kitchen Blog: Smoky White Bean Chicken Chili. Guest post by Jessica Merchant of How Sweet It Is, recipe submitted by TK member Terri of That's Some Good Cookin'.

First up, add the chopped bacon to a hot pot and let sizzle away! Mmmm. Definitely my favorite part. I need a bacon candle.


Tasty Kitchen Blog: Smoky White Bean Chicken Chili. Guest post by Jessica Merchant of How Sweet It Is, recipe submitted by TK member Terri of That's Some Good Cookin'.

After the bacon has crisped a bit and rendered some fat, throw in the diced onion. Give the mixture a good stir to coat, then cover and let cook over medium-low heat for about 20 minutes, stirring occasionally, while the onions get all caramelly. If you have not taken the meat off your chicken or opened your cans, now is a great time to do so. If you have, now is a great time to clean up your kitchen. I just wish I would take my own advice.


Tasty Kitchen Blog: Smoky White Bean Chicken Chili. Guest post by Jessica Merchant of How Sweet It Is, recipe submitted by TK member Terri of That's Some Good Cookin'.

After about 20 minutes, the onions should be soft and look like this. And in that pot of heaven you have two of the most delicious building blocks of flavor. Inhale.


Tasty Kitchen Blog: Smoky White Bean Chicken Chili. Guest post by Jessica Merchant of How Sweet It Is, recipe submitted by TK member Terri of That's Some Good Cookin'.

Next up, add your spices and your chicken. Don’t leave out the dark meat! So. Much. Flavor. I wish I could go back in time to all the Thanksgivings I spent shunning dark meat and eat my way to the present day.


Tasty Kitchen Blog: Smoky White Bean Chicken Chili. Guest post by Jessica Merchant of How Sweet It Is, recipe submitted by TK member Terri of That's Some Good Cookin'.

Stir the whole mixture to coat, and let it cook (with the lid on) for another 10 minutes so the flavors can mesh.


Tasty Kitchen Blog: Smoky White Bean Chicken Chili. Guest post by Jessica Merchant of How Sweet It Is, recipe submitted by TK member Terri of That's Some Good Cookin'.

The only thing left to do is add everything else to the pot. Super simple, right? Throw in the tomatoes, beans, green chilis and chicken stock. Give the soup a good stir and bring to a boil.


Tasty Kitchen Blog: Smoky White Bean Chicken Chili. Guest post by Jessica Merchant of How Sweet It Is, recipe submitted by TK member Terri of That's Some Good Cookin'.

Once boiling, reduce heat to a simmer and let cook uncovered, stirring occasionally, until the liquid has reduced to your preference. I let mine simmer for about 20 minutes, then it was good to go. I also couldn’t take it anymore and was starving. The smell is intoxicating!


Tasty Kitchen Blog: Smoky White Bean Chicken Chili. Guest post by Jessica Merchant of How Sweet It Is, recipe submitted by TK member Terri of That's Some Good Cookin'.

Serve it up in a big bowl, topped with your favorite cheese (the recipe calls for cotija; I used Monterey Jack) and a bunch of fresh cilantro. I also suggest a few handfuls of blue corn chips on the side for dipping and crunching over top. Trust me on this.


Tasty Kitchen Blog: Smoky White Bean Chicken Chili. Guest post by Jessica Merchant of How Sweet It Is, recipe submitted by TK member Terri of That's Some Good Cookin'.

I still can’t get over how much flavor this chili has for being a fairly simple recipe. It was one of the most delicious versions of chicken chili we have tried in quite a while, and I just couldn’t get enough. It’s been the star of our lunches and dinners for days and I’m ready to make another batch.

Thanks so much to Terri for the fabulous recipe. Be sure to check out her great blog, That’s Some Good Cookin’, for more incredibly delicious and comforting dishes.


Printable Recipe

Smoky White Bean Chicken Chili

See post on Terri @ that's some good cookin'’s site!
4.87 Mitt(s) 15 Rating(s)15 votes, average: 4.87 out of 515 votes, average: 4.87 out of 515 votes, average: 4.87 out of 515 votes, average: 4.87 out of 515 votes, average: 4.87 out of 5

Prep Time:

Cook Time:

Difficulty: Easy

Servings: 8

8
x

Print Options

Page size Letter 3x5 4x6
Text Size Small Medium Large
Content Include description
Include prep time, etc.
Show image

Description

The smoky flavors of bacon, chipotle chili powder, smoky paprika, cumin, and roasted tomatoes bring depth to this super easy and healthy chili.

Ingredients

  • 4 slices Bacon, Chopped
  • 1 whole Large Onion, Diced
  • 3 cloves Garlic, Chopped
  • 1 whole Rotisserie Chicken, Shredded Or Diced
  • 1 teaspoon Smoky Paprika
  • 1 teaspoon Ground Cumin
  • 1 teaspoon Onion Powder Or Granulated Onion
  • ½ teaspoons Garlic Powder Or Granulated Garlic
  • ½ teaspoons Chipotle Chile Powder, Or To Taste
  • 6 cups Chicken Stock Or Broth
  • 1 can (28-ounce Size) Roasted, Diced Tomatoes
  • 4 cans (14.5 Ounce Size) White Beans, Cannelini Or Great Northern
  • 2 cans (4 Ounce Size) Diced Green Chiles
  • Salt And Pepper, to taste
  • ½ cups Grated Cotija Cheese, Optional For Topping
  • ¼ cups Chopped Fresh Cilantro, For Topping (optional)

Preparation Instructions

In a hot Dutch oven, cook bacon for about 3 minutes.

Add the onion and garlic to the bacon. Lower the heat to medium low and cover pot. Cook, stirring as needed until the onions are translucent and just starting to caramelize. This takes about 30 minutes.

Add the chicken, smoky paprika, ground cumin, onion powder, garlic powder, and chipotle to the pot and continue to cook for an additional 10 minutes (covered) so that the chicken gets infused with the aromatics and the spices.

Stir in the chicken stock, diced tomatoes, white beans, and green chiles. Add salt and pepper to taste. Bring to a slow boil and cook, uncovered, stirring as needed until the liquid has reduced to your level of preference.

For serving, pass the cotija cheese and chopped cilantro for topping as desired.

This is great with cornbread or a crusty bread and a salad.

Note: a can of the white beans can be reserved, pureed or well mashed, and then added to chili for thickening at the same time as the other beans are added to the chili.


_______________________________________

Jessica Merchant is a personal trainer turned food writer and blogger. Her blog, How Sweet Eats, is where she proclaims her love for all things sweet, all things bacon, and everything else in between. She works her magic in her Pittsburgh kitchen, which she shares with her husband of 2 years.


Profile photo of Natalie | Perry's Plate

Buffalo Chicken Wraps

Posted by in Step-by-Step Recipes

Tasty Kitchen Blog: Buffalo Chicken Wraps. Guest post by Natalie Perry of Perry's Plate, recipe submitted by TK member Bev Weidner of Bev Cooks.

 
Although I’m not a hot wing person, I like “Buffalo” flavored things. So, when I saw these Buffalo Chicken Wraps from the lovely and hilarious Bev Weidner, I about fell out of my chair. Not only are there Buffalo-flavored chicken tenders (much easier to eat than wings) in these wraps, but some of my favorite things: fresh tomatoes, hard-boiled eggs, BACON, and an easy ranch dressing-blue cheese mix.

These came together quickly for a great weekend lunch!


Tasty Kitchen Blog: Buffalo Chicken Wraps. Guest post by Natalie Perry of Perry's Plate, recipe submitted by TK member Bev Weidner of Bev Cooks.

First, get the chicken spicy and happy. You’ll need a pound or so of chicken tenders, but I just sliced up a really large chicken breast. You’ll also need a little butter, salt, cayenne pepper, black pepper, and wing sauce. Bev recommends Frank’s, and because I know almost nothing about wing sauce, I decided to trust her.


Tasty Kitchen Blog: Buffalo Chicken Wraps. Guest post by Natalie Perry of Perry's Plate, recipe submitted by TK member Bev Weidner of Bev Cooks.

Melt the butter and add the salt, pepper, cayenne, and wing sauce. Give it a good whisk.


Tasty Kitchen Blog: Buffalo Chicken Wraps. Guest post by Natalie Perry of Perry's Plate, recipe submitted by TK member Bev Weidner of Bev Cooks.

Throw the chicken tenders in the bowl and mix it well. Use your hands. You know you want to.

Let the chicken marinate for however long you want. I let it sit about an hour in the refrigerator. After that you’ll want to grill or broil it. We don’t have an outdoor grill, and because we just moved into a house with an electric stove top, I haven’t decided that using my stove top cast-iron grill pan is a good idea. So I cooked them on my preheated grill pan in the oven. Because I like to complicate things. You can also broil them for a few minutes if grilling isn’t an option.


Tasty Kitchen Blog: Buffalo Chicken Wraps. Guest post by Natalie Perry of Perry's Plate, recipe submitted by TK member Bev Weidner of Bev Cooks.

While the chicken is doing its thing, prepare the other wrap ingredients. Chop the tomatoes, grate the cheese, cook the bacon, hard-boil and chop the eggs, and blend the blue cheese with the ranch dressing. (If you have blue cheese dressing, just use that.)


Tasty Kitchen Blog: Buffalo Chicken Wraps. Guest post by Natalie Perry of Perry's Plate, recipe submitted by TK member Bev Weidner of Bev Cooks.

After the chicken has cooked and rested, chop it up into bite-sized pieces and assemble your cast. I decided to use fresh baby spinach instead of romaine. Any type of salad green would work here. You’ll also need some tortillas. (And if you check out the previous post, you can even make your own flour tortillas!)


Tasty Kitchen Blog: Buffalo Chicken Wraps. Guest post by Natalie Perry of Perry's Plate, recipe submitted by TK member Bev Weidner of Bev Cooks.

Start assembling your wraps. I put some chicken on the bottom, followed by the cheese (so it would melt a little), then layered the rest of the ingredients. Don’t skimp on the bacon. Or the dressing. At this point I wasn’t sure how spicy these would be, so I didn’t add anymore wing sauce. In my … ahem … second wrap I decided I could handle a drizzle of sauce. Best decision I made all day.


Tasty Kitchen Blog: Buffalo Chicken Wraps. Guest post by Natalie Perry of Perry's Plate, recipe submitted by TK member Bev Weidner of Bev Cooks.

Here we have the classic “too much filling in a too-small tortilla” syndrome. Bev used the burrito-sized jalapeno cheddar wraps. You should listen to her. Or buy some toothpicks.


Tasty Kitchen Blog: Buffalo Chicken Wraps. Guest post by Natalie Perry of Perry's Plate, recipe submitted by TK member Bev Weidner of Bev Cooks.

My husband and I adored these! Bev is a prolific Tasty Kitchen contributor, so go poke around her recipe box. Or her blog, Bev Cooks. You’re guaranteed some good grub. And a few giggles.


Printable Recipe

Buffalo Chicken Wraps

See post on Bev Weidner’s site!
5.00 Mitt(s) 1 Rating(s)1 vote, average: 5.00 out of 51 vote, average: 5.00 out of 51 vote, average: 5.00 out of 51 vote, average: 5.00 out of 51 vote, average: 5.00 out of 5

Prep Time:

Cook Time:

Difficulty: Easy

Servings: 4

4
x

Print Options

Page size Letter 3x5 4x6
Text Size Small Medium Large
Content Include description
Include prep time, etc.
Show image

Description

I’d pay rent to live inside this wrap.

Ingredients

  • 1 Tablespoon Butter, Melted
  • 1 pinch Cayenne Pepper
  • 1 pinch Freshly Ground Pepper
  • 1 pinch Coarse Salt
  • ½ cups Hot Pepper Sauce, Divided (I Used Frank's)
  • 1 pound Chicken Tenders
  • ¼ cups Ranch Dressing
  • ½ cups Crumbled Blue Cheese, Divided
  • 4 whole Large Jalapeno Cheddar Tortillas
  • 4 slices Bacon, Cooked And Coarsely Chopped
  • 2 whole Eggs, Hardboiled And Roughly Chopped
  • 2 cups Shredded Romaine Lettuce
  • 1 cup Shredded Cheddar Cheese
  • 1 whole Roma Tomato, Diced

Preparation Instructions

Combine the butter, cayenne pepper, black pepper, salt and 1/4 cup of the hot pepper sauce in a bowl. Whisk to combine. Add the chicken and toss to coat. Cover the bowl and marinate the chicken in the refrigerator for however long you want to. An hour or more.

Heat an indoor grill (or outdoor, whatevs) over medium-high and coat the grates with cooking spray. Add the chicken tenders and grill until cooked through with nice grill marks on both sides, about 8 minutes total. Remove chicken from the grill and roughly chop it.

In a small bowl, whisk the ranch dressing with 1/4 cup of the blue cheese crumbles. Or buy blue cheese dressing.

Heat up the tortillas in the oven or microwave and start crafting your wraps. Layer some chicken in the center of a tortilla, followed by bacon, eggs, romaine, tomatoes, blue cheese crumbles, cheddar, the dressing and a few more good glugs of hot pepper sauce. With your fingers, mix up the filling so the dressing evenly coats all of the ingredients.

Roll up the burrito and tuck in the corners. You can throw it back on the grill if you want, or if you’re a ravenous freak, go ahead and slice it in half and demolish.

OMG.


_______________________________________

Be sure to check out Natalie’s own beautiful food blog, Perrys’ Plate, where you can see her growing collection of lovely recipes. There’s always something new to see there. Go visit now!


Profile photo of ThreeManyCooks

Homemade Tortillas

Posted by in Step-by-Step Recipes

  I know what you’re thinking, and I’m going to answer your question right up front. Yes, making flour tortillas from scratch is worth it. It was certainly my question before making them the first time. But here’s why it’s worth it: the ones at the store are uniform, bland, and blonde. The ones you […]