The Pioneer Woman Tasty Kitchen
Profile photo of Natalie | Perry's Plate

Scalloped Hasselback Sweet Potatoes

Posted by in Holidays

Tasty Kitchen Blog: Scalloped Hasselback Sweet Potatoes. Guest post by Natalie Perry of Perry's Plate, recipe submitted by TK member Tove of Sweet Sour Savory.

I’m a big fan of cheese. Especially smoked cheeses. I also love sweet potatoes in savory dishes—especially those with smoky flavors. Clearly this recipe was meant for me.

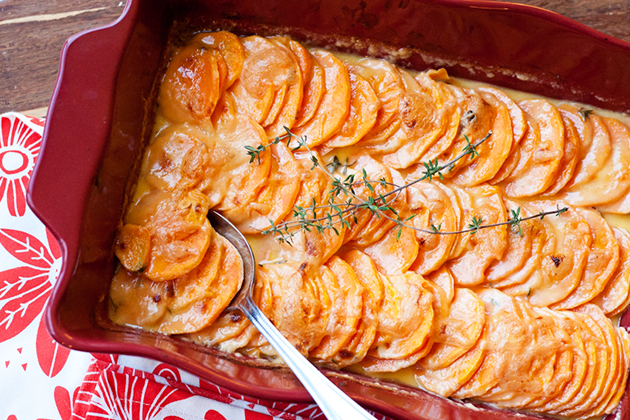
This Scalloped Hasselback Sweet Potatoes recipe submitted by TK member Tove is the newest addition to my special occasion recipe file. I paired these with some spice-crusted steaks for dinner, but it would also play well with just about any roasted meat or bring a smoky-sweet addition to a potluck spread. 

By the way, if you’re a bit of a geek like me, you may be thinking these don’t look like Hasselback potatoes. And you’d get extra points for that. Hasselback potatoes are usually left whole, sliced but with the bottoms attached so the slices stay upright when cooked (like this). This dish is more like a Hasselback Potato Gratin: the potatoes are sliced, but stacked tightly in the dish so they stand upright. I used a larger dish, so my potato slices look like they’re taking a nap, not unlike me after a long day spent running after toddlers.

Culinary terms aside, this dish is delicious any way you slice it. And there are only five ingredients! Fabulous!


Tasty Kitchen Blog: Scalloped Hasselback Sweet Potatoes. Guest post by Natalie Perry of Perry's Plate, recipe submitted by TK member Tove of Sweet Sour Savory.

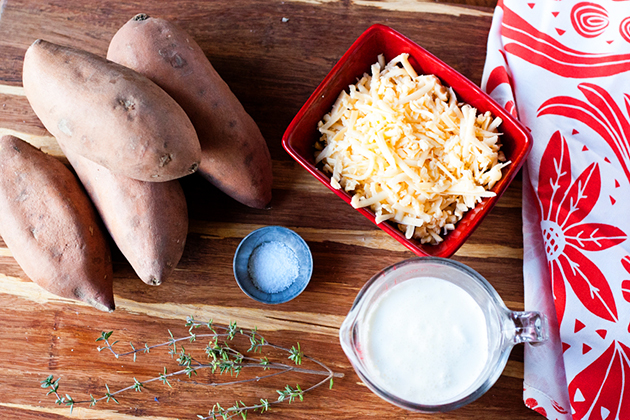
You’ll only need sweet potatoes, shredded smoked gouda, heavy cream, fresh thyme, and salt.


Tasty Kitchen Blog: Scalloped Hasselback Sweet Potatoes. Guest post by Natalie Perry of Perry's Plate, recipe submitted by TK member Tove of Sweet Sour Savory.

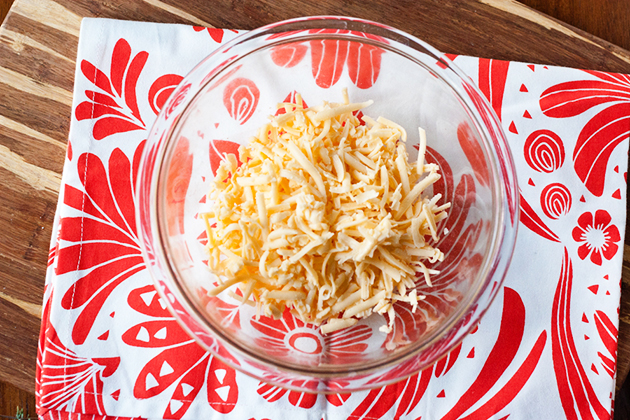
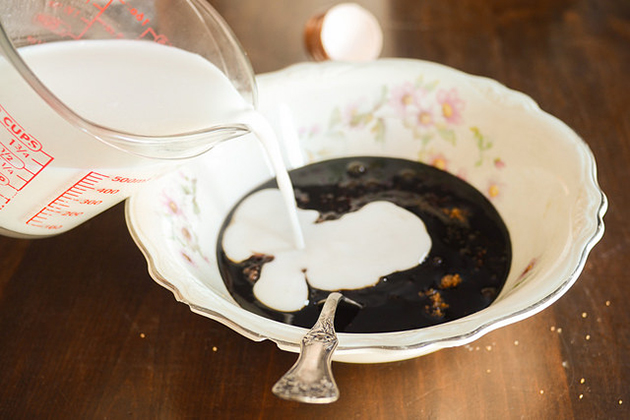
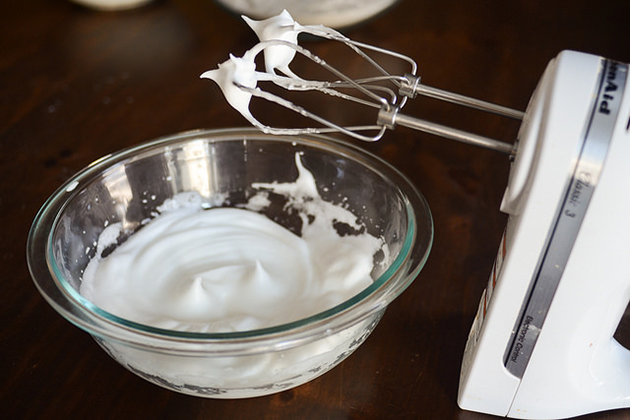
Put the cheese in a medium-sized bowl.

While making this recipe I discovered that my kids don’t like smoked gouda. I was shocked and questioned our biological relationship. They love fresh Parmesan, Romano, goat cheese, feta, and even Dubliner. But not smoked gouda? My mind is still reeling.


Tasty Kitchen Blog: Scalloped Hasselback Sweet Potatoes. Guest post by Natalie Perry of Perry's Plate, recipe submitted by TK member Tove of Sweet Sour Savory.

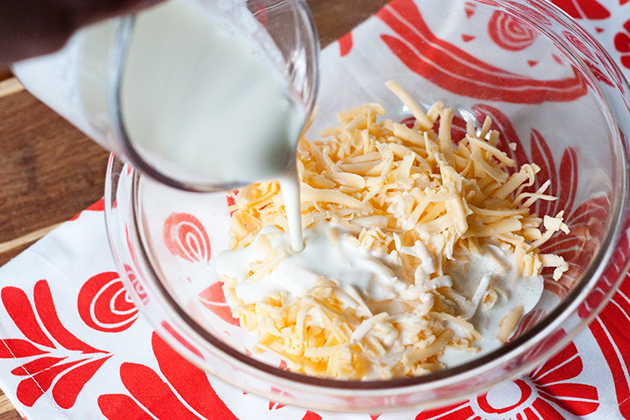
Anyway, back to the recipe. Add the cream to the cheese.


Tasty Kitchen Blog: Scalloped Hasselback Sweet Potatoes. Guest post by Natalie Perry of Perry's Plate, recipe submitted by TK member Tove of Sweet Sour Savory.

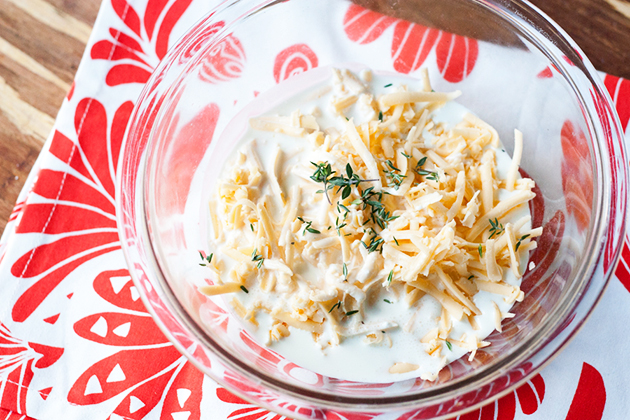
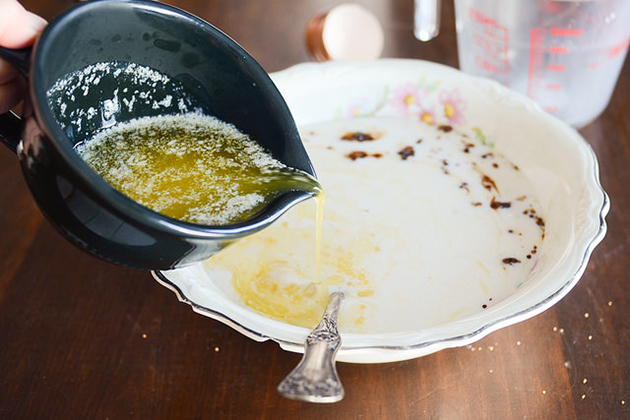
Sprinkle on the thyme leaves. You can also use dried thyme if you like, probably about 1/4 teaspoon.


Tasty Kitchen Blog: Scalloped Hasselback Sweet Potatoes. Guest post by Natalie Perry of Perry's Plate, recipe submitted by TK member Tove of Sweet Sour Savory.

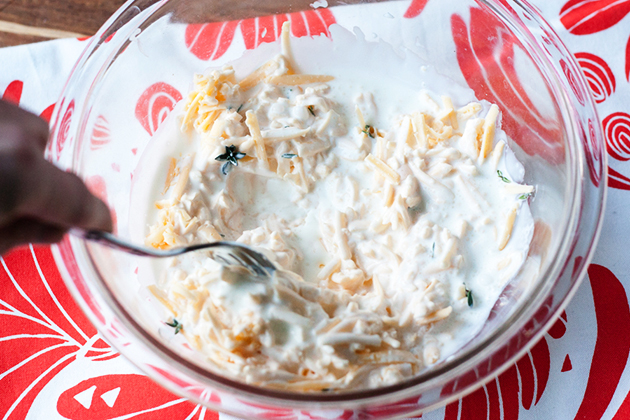
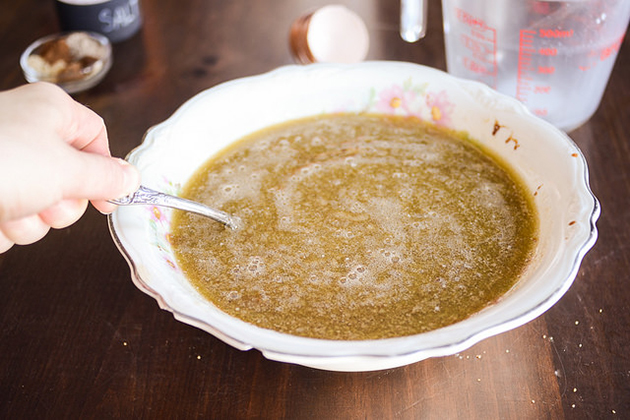
Add in the salt and give it a quick stir to combine.


Tasty Kitchen Blog: Scalloped Hasselback Sweet Potatoes. Guest post by Natalie Perry of Perry's Plate, recipe submitted by TK member Tove of Sweet Sour Savory.

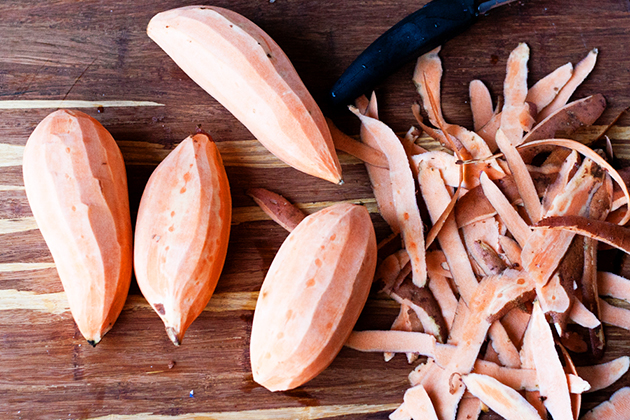
Now for the sweet potatoes. Peel them!

Do you know the difference between a sweet potato and a yam?

My inner food geek is about to come out in full force now. Just a warning.

The ones we see in the grocery stores labeled as “yams” are actually orange sweet potatoes. The lighter ones are simply white sweet potatoes. True yams are native to the Caribbean and are white and very starchy. Unless you shop at an extremely diverse market or spend a lot of time in the Caribbean, you’ll probably never encounter a true yam in your life. 

This information makes me want to take a Sharpie to the signs in the grocery store. (That’s my inner perfectionist coming out.)


Tasty Kitchen Blog: Scalloped Hasselback Sweet Potatoes. Guest post by Natalie Perry of Perry's Plate, recipe submitted by TK member Tove of Sweet Sour Savory.

This is when you’ll be so glad you have a mandoline slicer! I love mine and use it often. For this, I used the “thin” blade, just slightly thicker than the “thinnest” blade.


Tasty Kitchen Blog: Scalloped Hasselback Sweet Potatoes. Guest post by Natalie Perry of Perry's Plate, recipe submitted by TK member Tove of Sweet Sour Savory.

Here’s the messy, fun part. Dip the potato slices in the cream/cheese mixture and lay them in a baking dish. I did them a handful at a time. Try to get them to stand upright if you can for that Hasselback look. As I mentioned earlier, my dish was a little large for that so they’re sort of lounging on each other. 


Tasty Kitchen Blog: Scalloped Hasselback Sweet Potatoes. Guest post by Natalie Perry of Perry's Plate, recipe submitted by TK member Tove of Sweet Sour Savory.

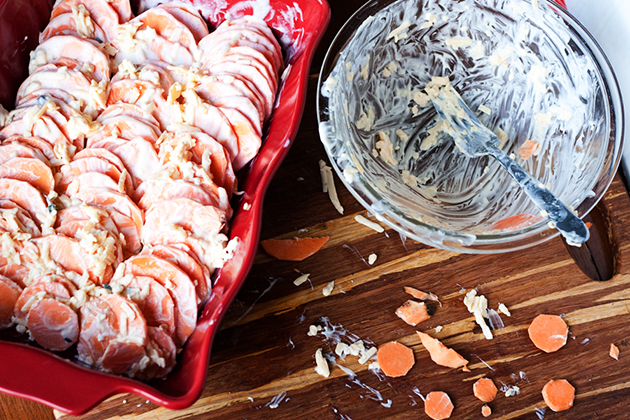
When you’re finished, spread the remaining cream/cheese mixture over the top. I only had a few chunks of cheese left.


Tasty Kitchen Blog: Scalloped Hasselback Sweet Potatoes. Guest post by Natalie Perry of Perry's Plate, recipe submitted by TK member Tove of Sweet Sour Savory.

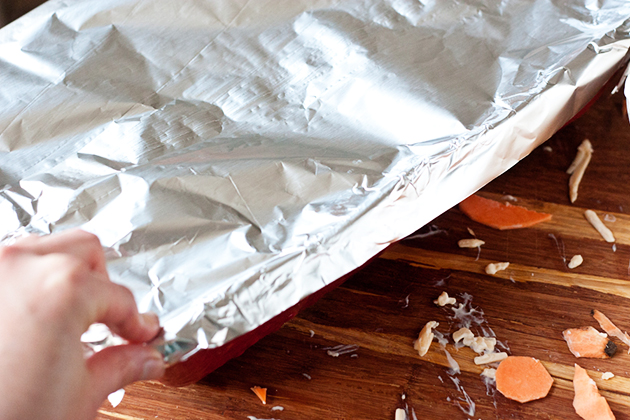
Cover the dish with aluminum foil and bake for about 35 minutes. 


Tasty Kitchen Blog: Scalloped Hasselback Sweet Potatoes. Guest post by Natalie Perry of Perry's Plate, recipe submitted by TK member Tove of Sweet Sour Savory.

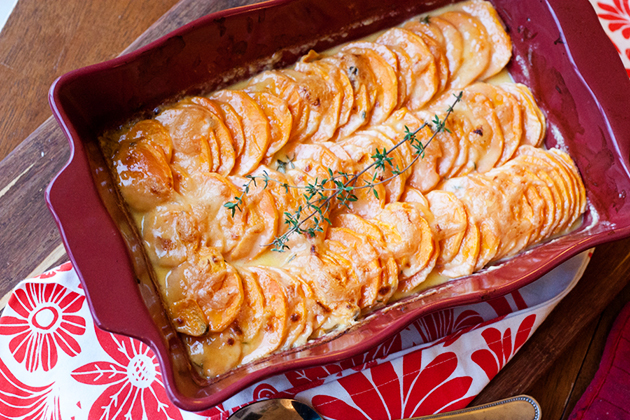
Tove suggests sprinkling brown sugar over the top and returning the pan to the oven, uncovered, for 10 more minutes. Just out of personal preference, I just sprinkled more cheese to keep the flavors in the dish more savory. 

Now, eat! I made a double batch of these for a church potluck (after we devoured the first pan) and I came home without leftovers! If you love smoked gouda, you’ll love these. The cheese plays so nicely with the sweetness from the potatoes. And the cream … well, cream makes everything nicer. 

Thank you, Tove, for a fantastic holiday side dish recipe! 

Be sure to check out Tove’s TK recipe box and her blog, Sweet Sour Savory, for some Scandinavian-inspired recipes! 

Recipe adaptations:
When I made this recipe, I used 1 1/2 pounds of potatoes and 1 1/2 cups of cheese and liked that ratio. I also left off the brown sugar topping and added a little more cheese. 


Printable Recipe

Scalloped Hasselback Sweet Potatoes

See post on sweetsoursavory’s site!
5.00 Mitt(s) 1 Rating(s)1 vote, average: 5.00 out of 51 vote, average: 5.00 out of 51 vote, average: 5.00 out of 51 vote, average: 5.00 out of 51 vote, average: 5.00 out of 5

Prep Time:

Cook Time:

Difficulty: Easy

Servings: 6

6
x

Print Options

Page size Letter 3x5 4x6
Text Size Small Medium Large
Content Include description
Include prep time, etc.
Show image

Description

The smoked gouda and the sweet potatoes and with the caramelized crunch works perfect.

These sweet potatoes are very addictive.

Ingredients

  • ½ cups Grated Smoked Gouda
  • 6 ounces, fluid Heavy Whipping Cream
  • 2 sprigs Thyme Leaves, Leaves Only
  • ¼ teaspoons Salt
  • 2 pounds Sweet Potatoes

Preparation Instructions

Preheat the oven to 400℉ (200℃).

Grate the cheese, and mix it with cream, thyme and some salt.

Peel the potatoes and slice them thinly on a mandoline. Toss the potato slices in the cream/cheese mixture, making sure to cover each slice.

Stack the potato slices and lay them in ovenproof dish with their edges aligned vertically. Continue to fill the dish with the potatoes until the dish is filled. Pour excess cream/cheese mixture evenly over potatoes.

Cover dish with tin foil, and bake the potatoes for about 35 minutes until the potatoes are tender when pierced with a knife

Take off the foil and sprinkle the brown sugar on top, and continue to bake for another 5–10 minutes until the sugar has caramelized.

When the potatoes is done, take the dish out of the oven and let the potatoes rest for a few minutes, before serving. Enjoy!


_______________________________________

Be sure to check out Natalie’s own beautiful food blog, Perrys’ Plate, where you can see her growing collection of lovely recipes. There’s always something new to see there. Go visit now!


Profile photo of Erica Lea

Gingerbread Waffles

Posted by in Holidays

Tasty Kitchen Blog: Gingerbread Waffles. Guest post by Erica Kastner of Buttered Side Up, recipe submitted by TK member Emily of One Lovely Life.

“I’m making waffles for lunch. Would you and the kids like to have some?”

I basically knew the answer before my sister replied. Who in their right mind would refuse waffles for lunch?

My sister (who lives in the upstairs portion of our house with her hubby and kiddos) graciously offered to watch my little girl while I cooked. It’s a bit difficult to take photos while your toddler is wiggling your tripod. I whipped up a batch as quickly as I could (it takes a little time when you’re documenting each step) and called my sister and her kids downstairs to taste my creation.

We quickly devoured most of waffles. When I asked the kids if they liked them, they readily agreed.

This Gingerbread Waffle recipe, brought to us by the lovely Emily, is basically an excuse to eat dessert for breakfast (or any meal of the day). And I’m very much okay with that. But they aren’t sickeningly sweet. There’s plenty of wiggle room to customize the sweetness with syrup or powdered sugar.

Let me show you how I made them!


Tasty Kitchen Blog: Gingerbread Waffles. Guest post by Erica Kastner of Buttered Side Up, recipe submitted by TK member Emily of One Lovely Life.

Look at these lovely ingredients: brown sugar (I used Sucanat), eggs, buttermilk (I used milk mixed with vinegar), molasses, butter, flour, baking powder, baking soda, ground ginger, cinnamon, cloves, nutmeg, cardamom, and salt.


Tasty Kitchen Blog: Gingerbread Waffles. Guest post by Erica Kastner of Buttered Side Up, recipe submitted by TK member Emily of One Lovely Life.

Begin by separating your eggs.


Tasty Kitchen Blog: Gingerbread Waffles. Guest post by Erica Kastner of Buttered Side Up, recipe submitted by TK member Emily of One Lovely Life.

Mix the brown sugar and egg yolks together until smooth. Mine wasn’t very smooth since I used Sucanat.


Tasty Kitchen Blog: Gingerbread Waffles. Guest post by Erica Kastner of Buttered Side Up, recipe submitted by TK member Emily of One Lovely Life.

Pour in the molasses …


Tasty Kitchen Blog: Gingerbread Waffles. Guest post by Erica Kastner of Buttered Side Up, recipe submitted by TK member Emily of One Lovely Life.

Then the buttermilk …


Tasty Kitchen Blog: Gingerbread Waffles. Guest post by Erica Kastner of Buttered Side Up, recipe submitted by TK member Emily of One Lovely Life.

… and finish off with the (melted) butter.


Tasty Kitchen Blog: Gingerbread Waffles. Guest post by Erica Kastner of Buttered Side Up, recipe submitted by TK member Emily of One Lovely Life.

Stir it all together until it’s well combined.


Tasty Kitchen Blog: Gingerbread Waffles. Guest post by Erica Kastner of Buttered Side Up, recipe submitted by TK member Emily of One Lovely Life.

In a large bowl, whisk together the dry ingredients and set aside.


Tasty Kitchen Blog: Gingerbread Waffles. Guest post by Erica Kastner of Buttered Side Up, recipe submitted by TK member Emily of One Lovely Life.

Beat your egg whites until stiff peaks form. I’m pretty sure I went a little too far. I would suggest stopping on the softer side of stiff.


Tasty Kitchen Blog: Gingerbread Waffles. Guest post by Erica Kastner of Buttered Side Up, recipe submitted by TK member Emily of One Lovely Life.

Gently stir the wet ingredients into the dry ingredients.


Tasty Kitchen Blog: Gingerbread Waffles. Guest post by Erica Kastner of Buttered Side Up, recipe submitted by TK member Emily of One Lovely Life.

Softly fold the egg whites into the batter.


Tasty Kitchen Blog: Gingerbread Waffles. Guest post by Erica Kastner of Buttered Side Up, recipe submitted by TK member Emily of One Lovely Life.

Preheat your waffle iron. Scoop about a third of a cup of batter onto each section (the amount of batter needed will depend on the size of your waffle maker).


Tasty Kitchen Blog: Gingerbread Waffles. Guest post by Erica Kastner of Buttered Side Up, recipe submitted by TK member Emily of One Lovely Life.

Cook according to the manufacturer’s instructions. It took about 2 1/2 minutes to cook mine.


Tasty Kitchen Blog: Gingerbread Waffles. Guest post by Erica Kastner of Buttered Side Up, recipe submitted by TK member Emily of One Lovely Life.

Serve hot with butter (duh) and maple syrup and/or a sprinkling of powdered sugar.

Notes:
1. If there was one thing (slightly) lacking in these waffles, it was the texture. I’m pretty sure it was because I beat the egg whites too long. I would definitely suggest erring on the softer side.
2. The texture and the taste actually improved as these sat. I reheated my waffles in a toaster.
3. I think whipped cream would be a lovely addition. I’m kicking myself for not thinking of it sooner. Oh well, guess I’ll have to make another batch.

Many thanks to Emily for sharing this recipe with us. I have been following her blog, One Lovely Life, for quite some time. There she shares more recipes and bits of her family life. Make sure you check it out!


Printable Recipe

Gingerbread Waffles

See post on emily {onelovelylife}’s site!
4.60 Mitt(s) 5 Rating(s)5 votes, average: 4.60 out of 55 votes, average: 4.60 out of 55 votes, average: 4.60 out of 55 votes, average: 4.60 out of 55 votes, average: 4.60 out of 5

Prep Time:

Cook Time:

Difficulty: Easy

Servings: 8

8
x

Print Options

Page size Letter 3x5 4x6
Text Size Small Medium Large
Content Include description
Include prep time, etc.
Show image

Description

Just like eating Christmas for breakfast. They’re even better with buttermilk syrup.

Ingredients

  • ⅔ cups Brown Sugar
  • 2 whole Large Eggs, Yolks And Whites Separated
  • 1-½ cup Buttermilk (or Regular Milk Plus 1 1/2 Tablespoons Vinegar)
  • ½ cups Molasses
  • 6 Tablespoons Butter
  • 2 cups Flour
  • 3 teaspoons Baking Powder
  • 1 teaspoon Baking Soda
  • 2 teaspoons Ground Ginger
  • 1-½ teaspoon Ground Cinnamon
  • ½ teaspoons Salt
  • ¼ teaspoons Ground Cloves
  • ¼ teaspoons Ground Nutmeg
  • ¼ teaspoons Ground Cardamom (optional, But Recommended)

Preparation Instructions

In a small bowl, mix brown sugar and egg yolks until smooth and creamy. Stir in buttermilk, molasses, and butter.

Into a large bowl, sift together flour, baking powder, baking soda, ginger, cinnamon, salt, cloves, nutmeg, and cardamom.

In a glass or metal bowl, whip egg whites with an electric mixer until stiff peaks have formed.

Add liquid mixture into sifted dry ingredients and stir together. Fold in egg whites.

Cook according to waffle iron instructions.

(In my waffle iron, using 1/3-cup scoops, I made 16 waffles.)


_______________________________________

Erica Kastner has always been one of our most cherished members of the Tasty Kitchen community. She shares her wonderful recipes and amazing food photography on her blog, Buttered Side Up, and she also writes about crafts and posts more of her beautiful photography in her personal blog, Simple Days. There really isn’t much that this amazing young wife and mother can’t do, and we’re thrilled she does some of it here.


Caramel Apple Bread and Butter Pudding

Profile photo of Erika (TK)

Looks Delicious! Hot Buttered Rum Nog

Posted by in Looks Delicious!

Tasty Kitchen Blog: Looks Delicious! (Hot Buttered Rum Nog, submitted by Anita of Hungry Couple)

Here’s a warm, comforting drink for you to enjoy as soon as you get a chance to sit down, put your feet up, and rest after all the hustle and bustle of your day. Most folks probably already have their evening plans set, but whether you’re staying in or heading out, there’s always room for a special treat before bed. This Hot Buttered Rum Nog from TK member Anita is just the reward you need after a long day.

Have a great day, friends!

Profile photo of DessertForTwo

World’s Best Chocolate Chip Cookies

Posted by in Baking

Please join us in welcoming Tina from Dessert for Two to the Tasty Kitchen Blog! She’s tempted us for years with all kinds of sweet and savory creations, and what better way to start things off than with these cookies from Sarah. They look perfect! Welcome to the TK Blog, Tina, and thanks for the recipe, Sarah!

 
Tasty Kitchen Blog: World's Best Chocolate Chip Cookies. Guest post by Christina of Dessert for Two, recipe submitted by TK member Sarah of Simple & Sweets.

When Sarah submitted this recipe to Tasty Kitchen and called it World’s Best Chocolate Chip Cookies, you know I’m going to check her. I just appointed myself the official tester of all “world’s best recipes.” Life is pretty sweet.

So, girlfriend claimed world’s best, and I claim she’s right. Sarah’s chocolate chip cookie recipe has a few unusual ingredients, and it has very specific instructions. I love a recipe with very strict instructions. It doesn’t mean I always follow them, but it does mean that I try it exactly as written the first time around. In this case, I tested the recipe with a 2-hour freezing period, like Sarah recommends, and without a freezing period. Sarah was right, again. Girlfriend knows her cookies! Let’s all tip our hats to Sarah for bringing the world dense, thick chocolate chip cookies the size of scones!


Tasty Kitchen Blog: World's Best Chocolate Chip Cookies. Guest post by Christina of Dessert for Two, recipe submitted by TK member Sarah of Simple & Sweets.

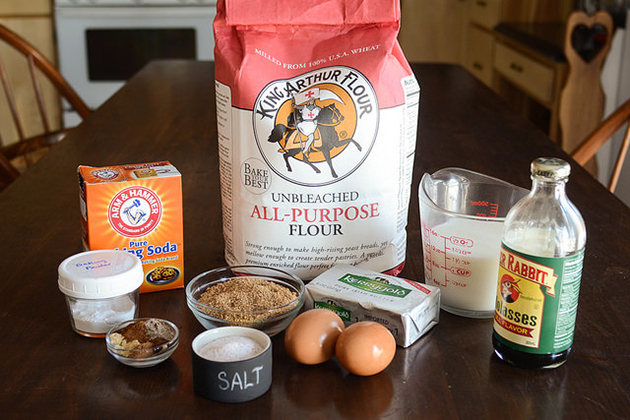
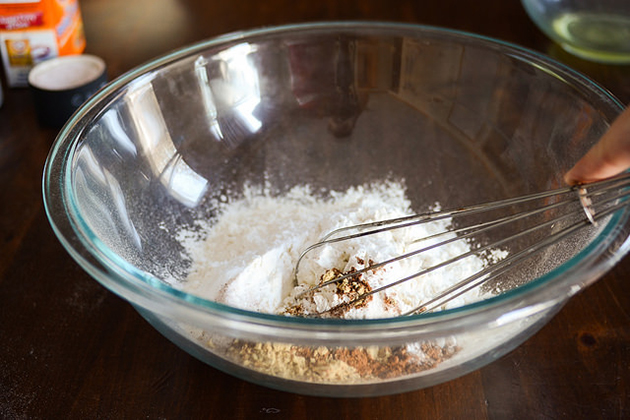
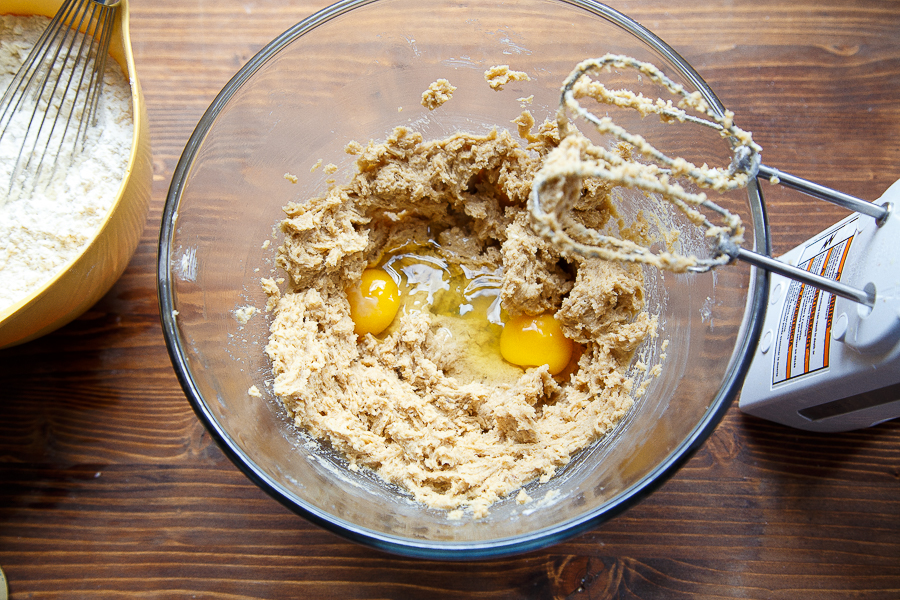
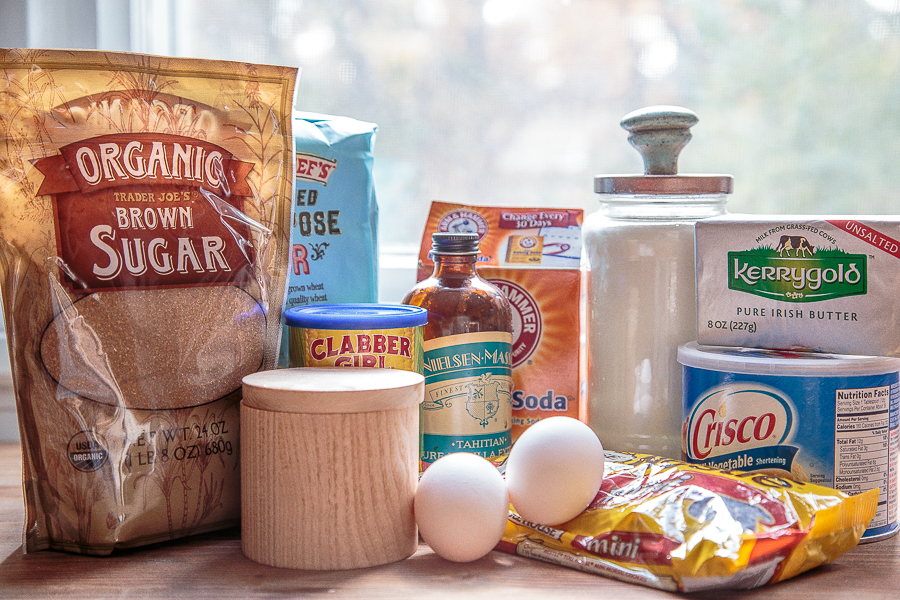
Here’s your lineup of ingredients. Pretty standard for CCC (chocolate chip cookies, if you didn’t know), but that corn starch is catching your eye isn’t it? Are we making pudding or cookies? Definitely cookies. Make sure all ingredients are at room temperature.


Tasty Kitchen Blog: World's Best Chocolate Chip Cookies. Guest post by Christina of Dessert for Two, recipe submitted by TK member Sarah of Simple & Sweets.

It all starts out innocently enough (doesn’t it always?)—cream the butter, shortening and two types of sugar together. After about 2 minutes, the mixture is fluffy and has slightly lightened in color. That’s how you know it’s time to add the eggs. Don’t skimp on creaming!

These cookies have quite a bit more brown sugar than granulated white sugar. I think this is key to their soft, chewy flavor. I’m not complaining one bit!


Tasty Kitchen Blog: World's Best Chocolate Chip Cookies. Guest post by Christina of Dessert for Two, recipe submitted by TK member Sarah of Simple & Sweets.

After the eggs and 1 whole tablespoon of vanilla (definitely not a typo!) are incorporated, it’s time to add the dry ingredients, which includes flour, cornstarch, baking soda, and coarse salt. What does cornstarch do for cookies? I’m so glad you asked! Cornstarch makes cookies chewy. It softens the cookies and allows for that soft and chewy inside while the edges of the cookie stay crisp. Good call, Sarah. Good call.


Tasty Kitchen Blog: World's Best Chocolate Chip Cookies. Guest post by Christina of Dessert for Two, recipe submitted by TK member Sarah of Simple & Sweets.

Sarah calls for mini chocolate chips. At first, I had my doubts. But I soon realized that mini chocolate chips mean I’m guaranteed a chocolate chunk in every single bite. I love the way this girl thinks!


Tasty Kitchen Blog: World's Best Chocolate Chip Cookies. Guest post by Christina of Dessert for Two, recipe submitted by TK member Sarah of Simple & Sweets.

The most important part of this recipe is to make 1/4 cup scoops of the dough and freeze them for at least 2 hours, but preferably overnight. The first time I made this recipe, I wanted cookies right away. So, I baked off 6 real quick without freezing. The cookies worked just fine, but the ones I baked the following day that had a nap in the freezer held together better and had a denser crumb. My best advice when making this recipe is to make the full batch for the freezer, but it’s okay to make just a few cookies right away, too. I’m the last person to tell you to hold off on your cookie craving.


Tasty Kitchen Blog: World's Best Chocolate Chip Cookies. Guest post by Christina of Dessert for Two, recipe submitted by TK member Sarah of Simple & Sweets.

There you have it! The world’s best chocolate chip cookies, if you like thick, large and dense cookies chock full of chocolate. Thanks for a great recipe, Sarah! Check out her blog, Simple & Sweets. I’m sure it’s packed with more great recipes like this.

Recipe notes: The original recipe calls for salted butter, but I almost always bake with unsalted butter. I used it out of habit. Next time I bake these, I’ll use salted butter, and I’m sure they’ll be just as delicious.


Printable Recipe

World’s Best Chocolate Chip Cookies

See post on Sarah’s site!
5.00 Mitt(s) 2 Rating(s)2 votes, average: 5.00 out of 52 votes, average: 5.00 out of 52 votes, average: 5.00 out of 52 votes, average: 5.00 out of 52 votes, average: 5.00 out of 5

Prep Time:

Cook Time:

Difficulty: Easy

Servings: 12

12
x

Print Options

Page size Letter 3x5 4x6
Text Size Small Medium Large
Content Include description
Include prep time, etc.
Show image

Description

The thickest and chewiest chocolate chip cookies. Hands down the best chocolate chip cookie I have ever had! This is my most requested recipe!

Ingredients

  • 4-½ cups All-purpose Flour
  • 2 Tablespoons Cornstarch
  • 2 teaspoons Baking Soda
  • 1 teaspoon Coarse Sea Salt
  • 2 sticks Butter, Softened
  • ½ cups Shortening
  • 1-½ cup Brown Sugar
  • ½ cups Granulated Sugar
  • 2 whole Eggs
  • 1 Tablespoon Vanilla Extract
  • 1 bag Mini Semi-sweet Chocolate Chips, 10-12 Ounce Bag

Preparation Instructions

1. In a large bowl mix together flour, cornstarch, baking soda, and salt. Set aside.

2. In the bowl of an electric mixer, cream butter, shortening, and sugars until light and fluffy. Add eggs and vanilla and stir to combine.

3. Add your dry ingredients into the wet ones and stir just until everything is combined. Do not over mix. Mix in the mini chocolate chips.

4. Using a ¼ cup measuring cup, scoop dough into rounded discs and place on a plate that’s small enough to fit into your freezer. Freeze for at least 2 hours or up to 3 months.

5. If you’re not going to use the dough right away, transfer the frozen dough to a freezer bag to keep them fresh.

6. Preheat the oven to 350ºF.

7. Place frozen dough directly onto a greased cookie sheet leaving about 2 inches between each.

8. Bake for about 15 minutes or until you see golden brown spots form on top. Remove from oven and allow to cool a bit before serving.


_______________________________________

Growing up in a food-obsessed family and spending a lot of time in her Aunt Rose’s restaurant as a child, Christina was destined to be a fantastic cook. She’s a private chef during the day, but cooks for two at home. Like all of us, she has a sweet tooth that needs indulging after dinner. After becoming frustrated with the lack of recipes made for two, especially in the dessert category, she took matters into her own hands and started her blog, Dessert for Two, to share how she takes Southern classics (and a few surprises) and turns them into recipes that are perfect for just a few people. Her first cookbook is due out in February 2015.


Profile photo of Erika (TK)

Let’s Talk Last-Minute Meals

Posted by in Kitchen Talk

We've all had to scramble to pull together a meal in a hurry, so I know you have some last-minute tricks up your sleeve that you pull together out of whatever you usually have in your fridge or pantry. So let's all help each other deal with these occasional crises!

Profile photo of cookincanuck

Lemon and Garlic Drenched Brussels Sprouts

Posted by in Step-by-Step Recipes

Looking for a side dish that you can make throughout the fall and winter? These Lemon and Garlic Drenched Brussels Sprouts by Tasty Kitchen member Gaby will fit the bill.

Profile photo of Erika (TK)

Looks Delicious! Sausage and Corn Chowder

Posted by in Looks Delicious!

When the temperatures start dropping, nothing battles the chilly weather quite like a big bowl of soup. Chowder, to be exact.

Profile photo of Erika (TK)

Coffee Talk

Posted by in Kitchen Talk

There are so many different gadgets, contraptions, and machines dedicated to coffee, and we want to know what you use, how you use it, and how you make each cup just so, perfectly perfect for you.