The Pioneer Woman Tasty Kitchen
Profile photo of georgiapellegrini

Tomato Basil Soup with Cheesy Bread

Posted by in Step-by-Step Recipes

Tasty Kitchen Blog: Tomato Basil Soup with Cheesy Bread. Guest post by Georgia Pellegrini, recipe submitted by TK member Serena of Serena Bakes Simply from Scratch.

 
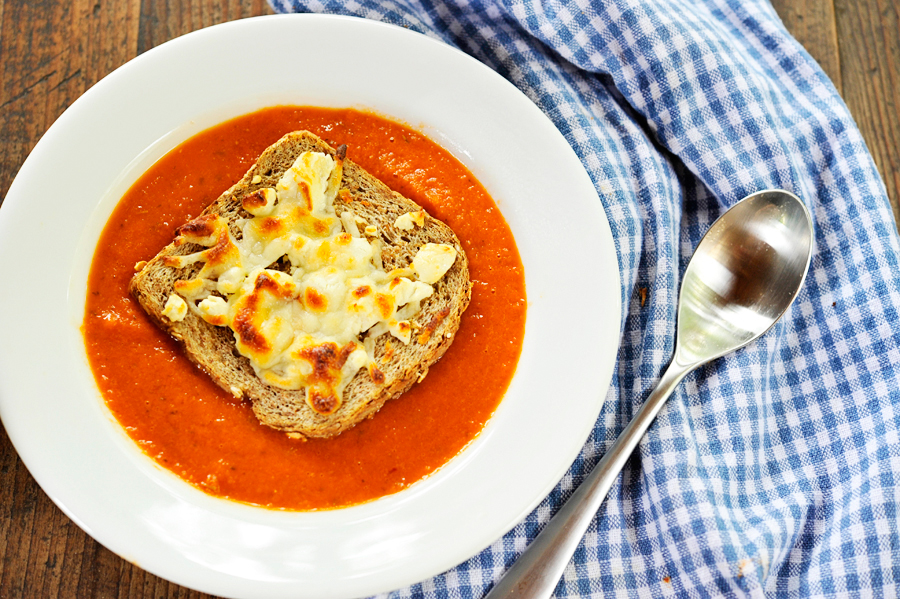
This Tomato Basil Soup with Cheesy Bread from Tasty Kitchen member Serena was so divine. The texture is silky, the color is beautiful, and it is full of robust flavor. The cheesy bread can be left out or swapped for crumbled crackers or straight up cheese. There are so many tasty options.


Tasty Kitchen Blog: Tomato Basil Soup with Cheesy Bread. Guest post by Georgia Pellegrini, recipe submitted by TK member Serena of Serena Bakes Simply from Scratch.

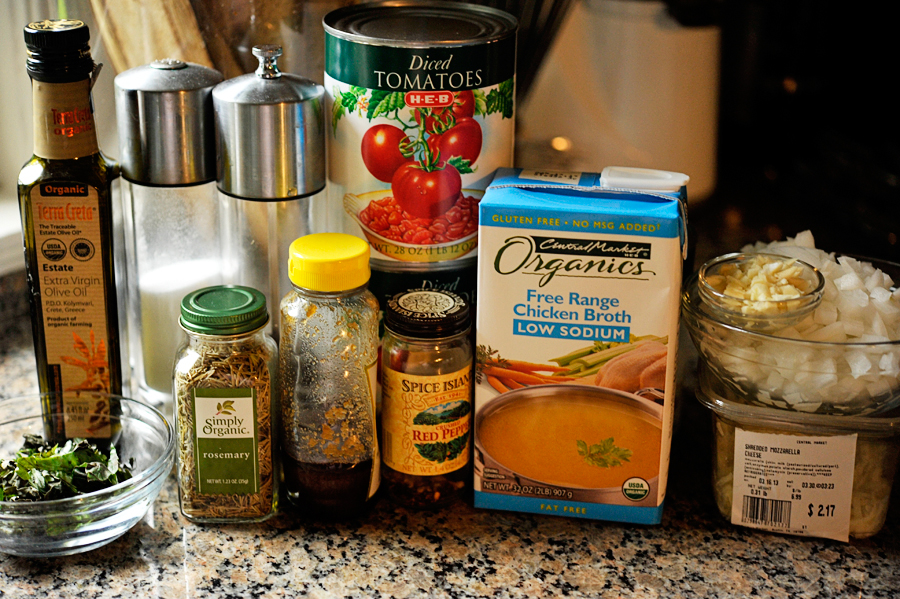
To make it you will need: olive oil, salt, pepper, diced canned tomatoes, vegetable or chicken stock, onion, garlic, red pepper flakes, honey, rosemary, and basil. For the cheesy bread you’ll need your favorite bread and cheese.


Tasty Kitchen Blog: Tomato Basil Soup with Cheesy Bread. Guest post by Georgia Pellegrini, recipe submitted by TK member Serena of Serena Bakes Simply from Scratch.

Begin by sweating the onions in some olive oil in a pot.


Tasty Kitchen Blog: Tomato Basil Soup with Cheesy Bread. Guest post by Georgia Pellegrini, recipe submitted by TK member Serena of Serena Bakes Simply from Scratch.

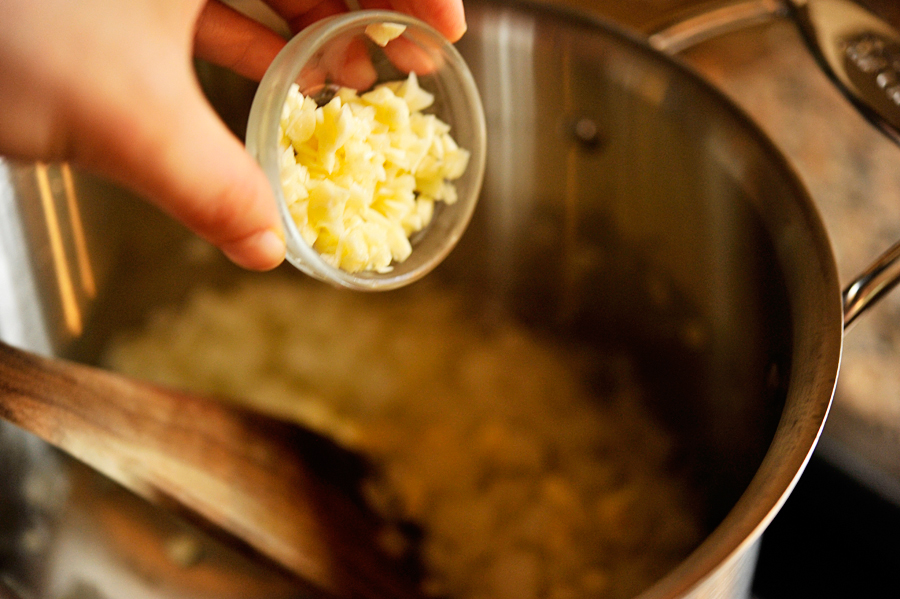
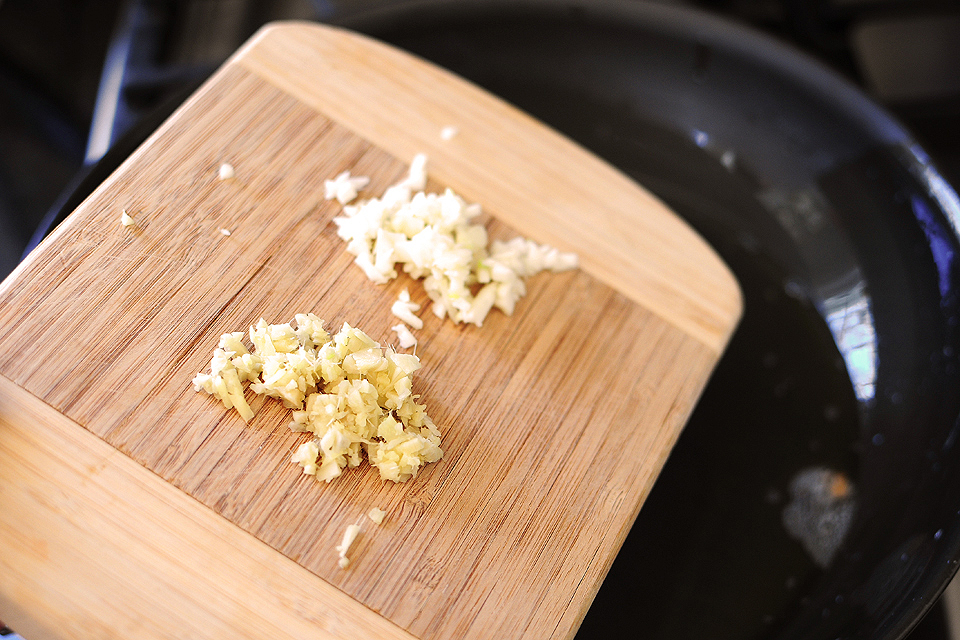
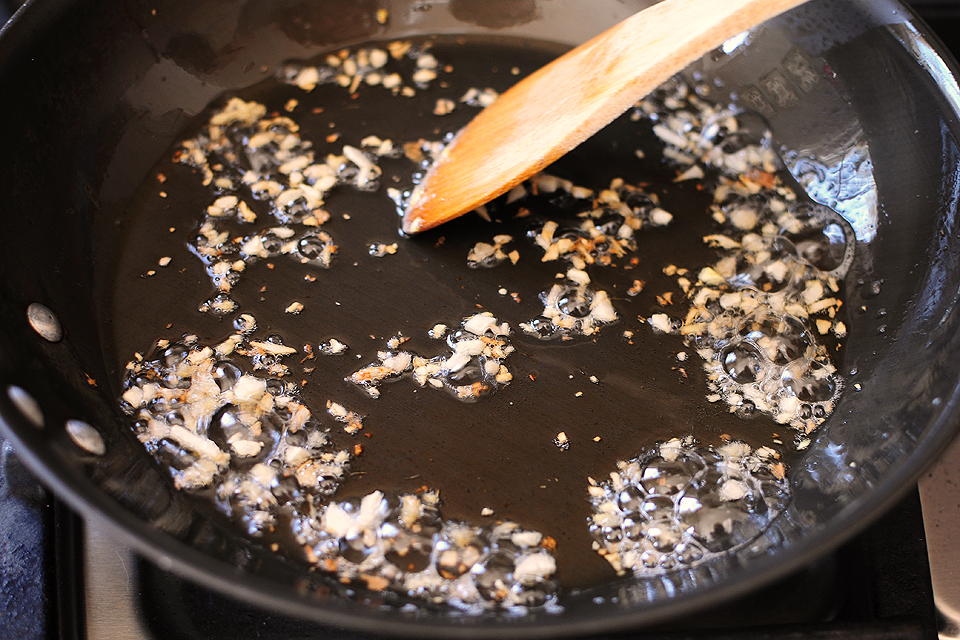
Once they are nice and translucent, add in the garlic and sweat some more. The room will smell amazing!


Tasty Kitchen Blog: Tomato Basil Soup with Cheesy Bread. Guest post by Georgia Pellegrini, recipe submitted by TK member Serena of Serena Bakes Simply from Scratch.

Add the red pepper flakes …
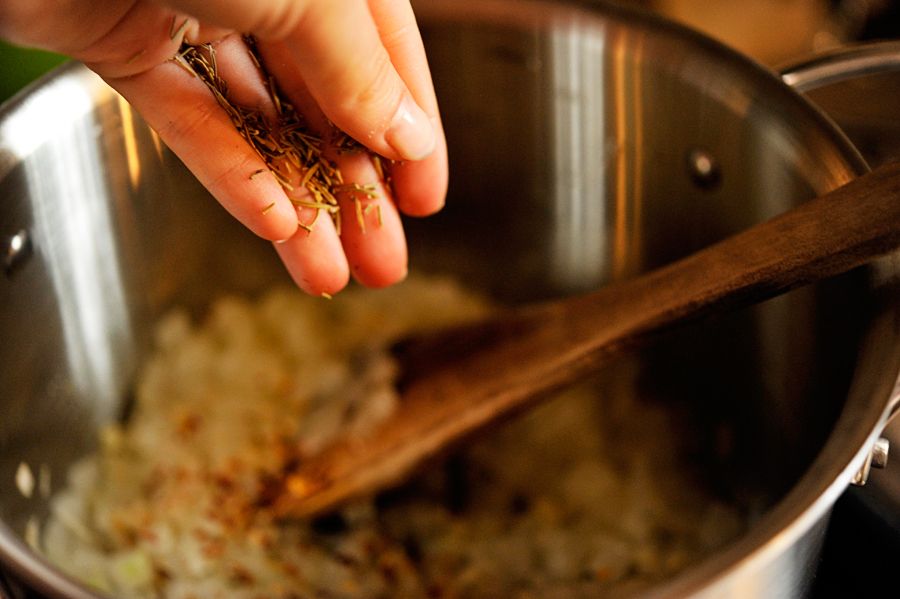
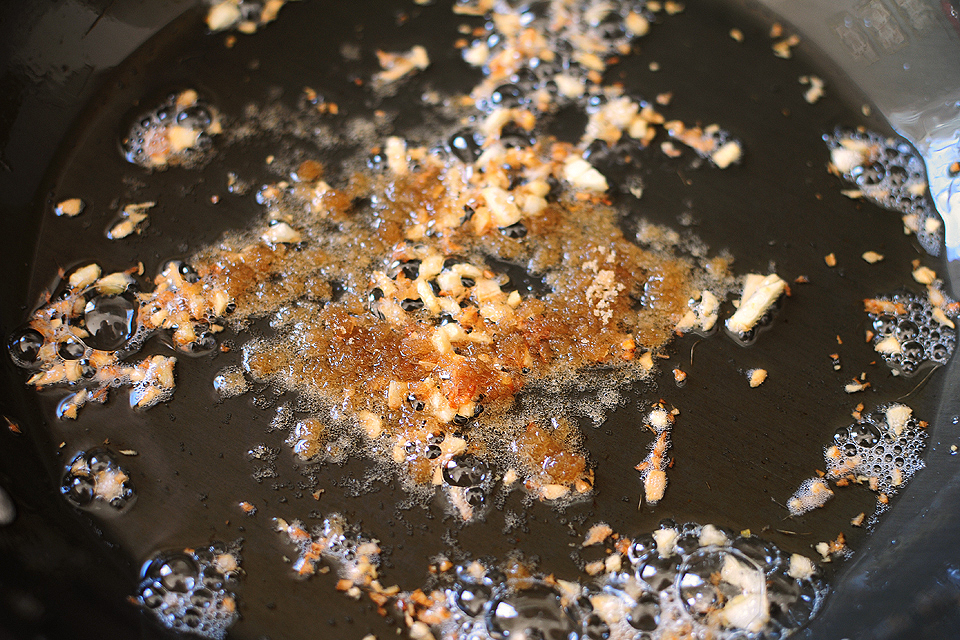


Tasty Kitchen Blog: Tomato Basil Soup with Cheesy Bread. Guest post by Georgia Pellegrini, recipe submitted by TK member Serena of Serena Bakes Simply from Scratch.

And the rosemary …


Tasty Kitchen Blog: Tomato Basil Soup with Cheesy Bread. Guest post by Georgia Pellegrini, recipe submitted by TK member Serena of Serena Bakes Simply from Scratch.

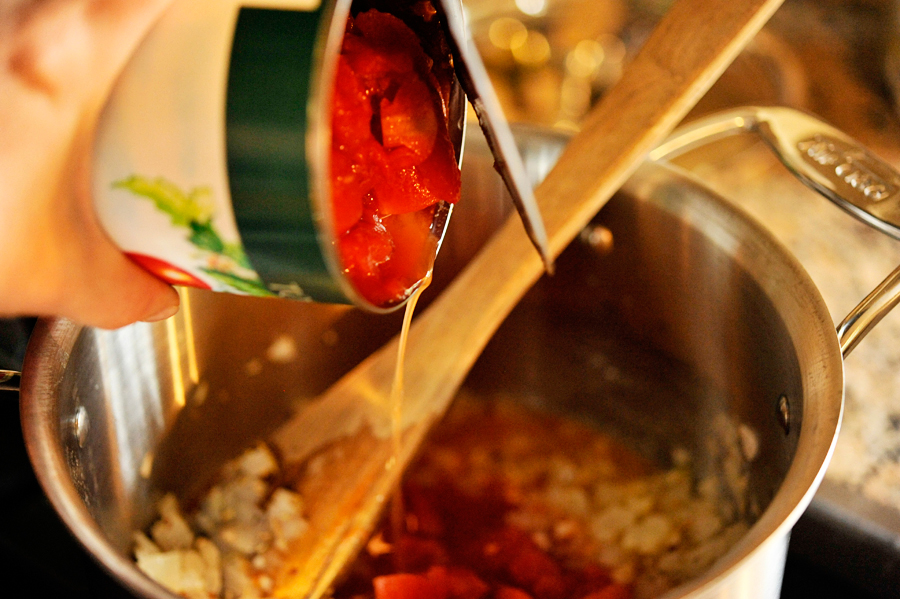
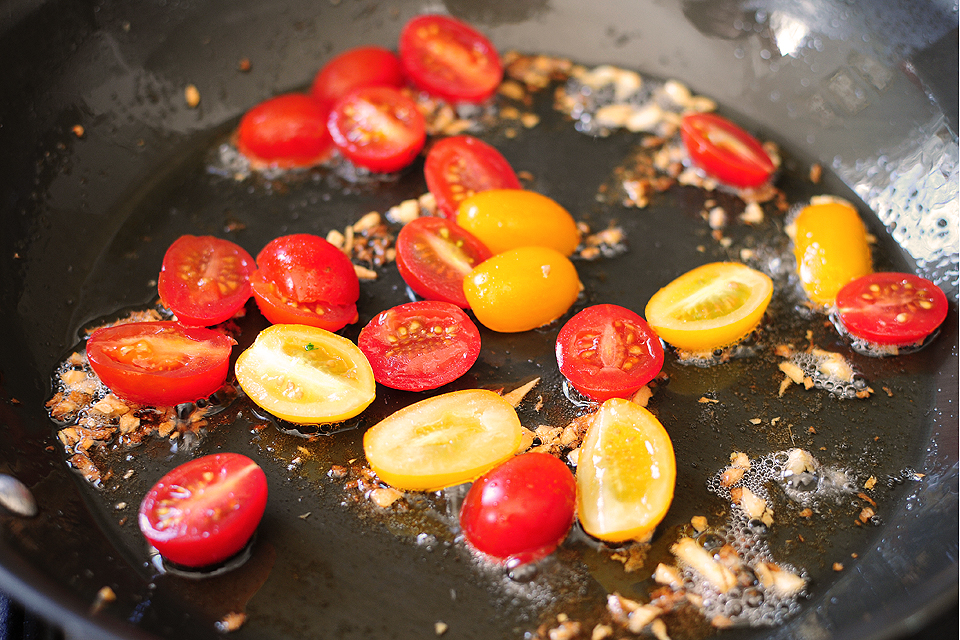
Then pour in the tomatoes.


Tasty Kitchen Blog: Tomato Basil Soup with Cheesy Bread. Guest post by Georgia Pellegrini, recipe submitted by TK member Serena of Serena Bakes Simply from Scratch.

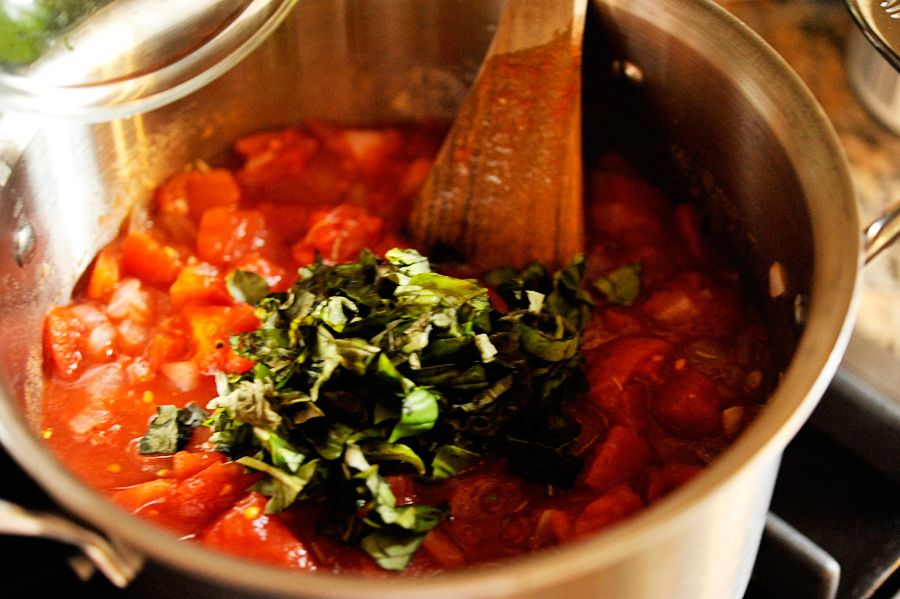
Add your basil and stir it in. Other fresh herbs would also be nice here—go wild!


Tasty Kitchen Blog: Tomato Basil Soup with Cheesy Bread. Guest post by Georgia Pellegrini, recipe submitted by TK member Serena of Serena Bakes Simply from Scratch.

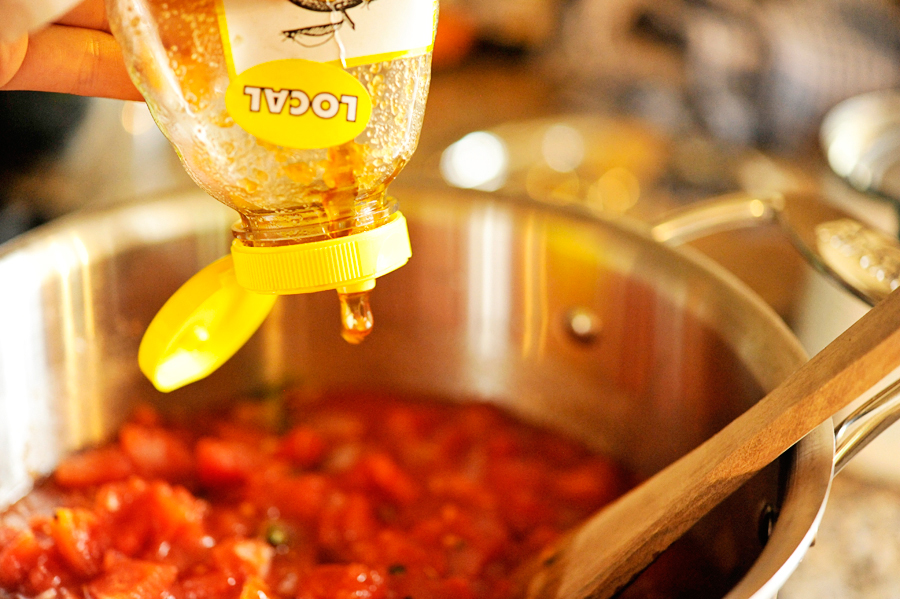
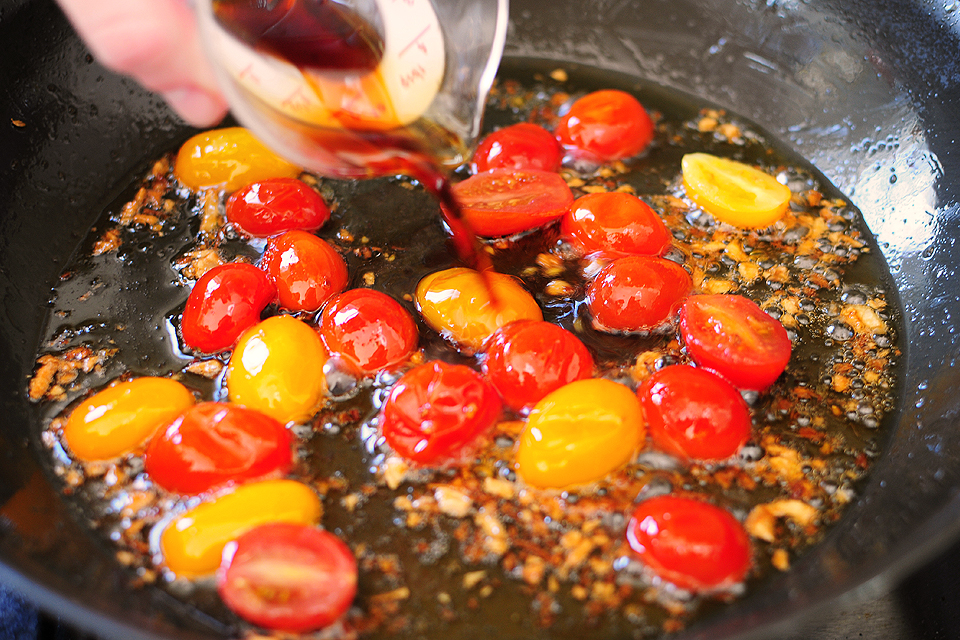
Add a drizzle of honey. This really balances the acidity of the tomatoes.


Tasty Kitchen Blog: Tomato Basil Soup with Cheesy Bread. Guest post by Georgia Pellegrini, recipe submitted by TK member Serena of Serena Bakes Simply from Scratch.

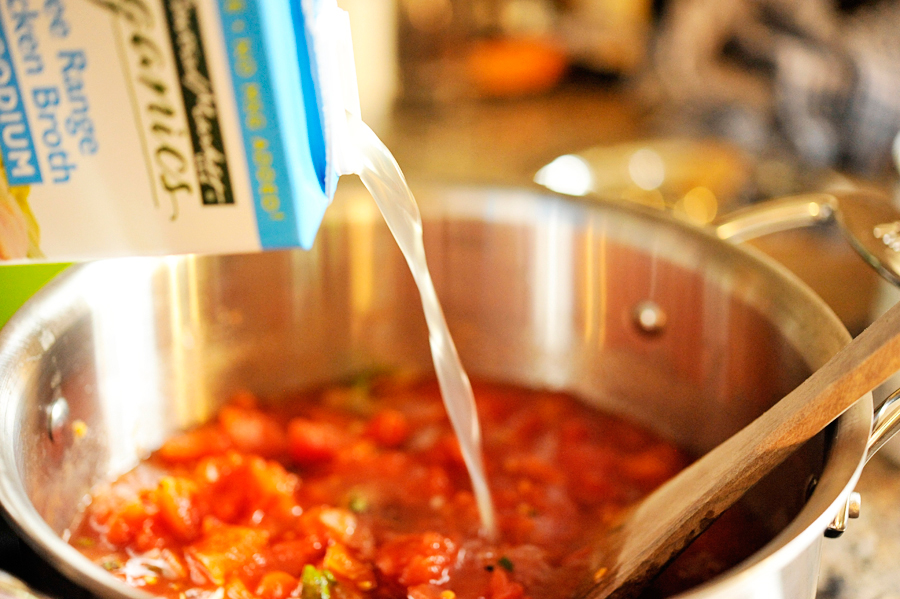
Pour in the stock to cover and let simmer away partly covered.


Tasty Kitchen Blog: Tomato Basil Soup with Cheesy Bread. Guest post by Georgia Pellegrini, recipe submitted by TK member Serena of Serena Bakes Simply from Scratch.

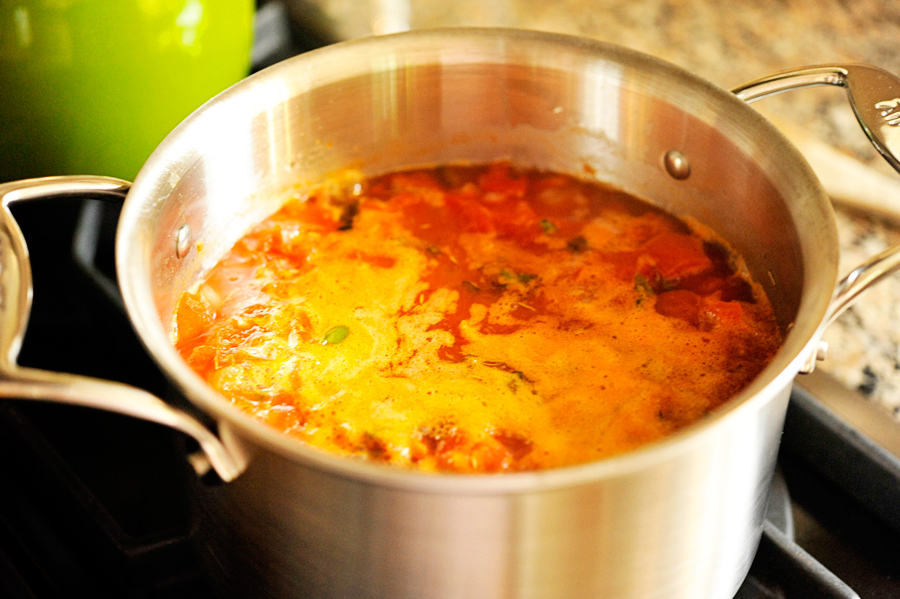
After about 30 minutes, turn off the heat and let it cool slightly.


Tasty Kitchen Blog: Tomato Basil Soup with Cheesy Bread. Guest post by Georgia Pellegrini, recipe submitted by TK member Serena of Serena Bakes Simply from Scratch.

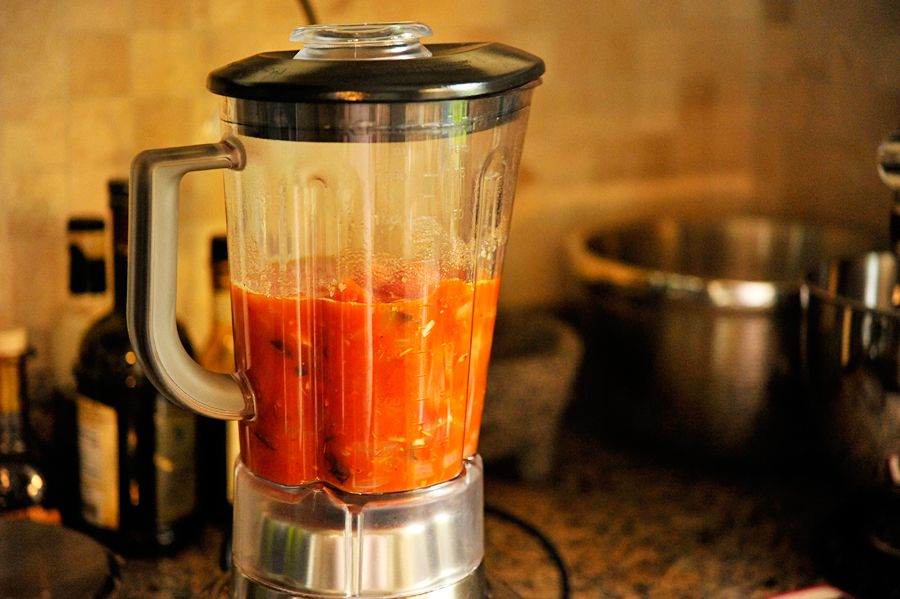
Puree in a blender in batches, making sure to keep a dishtowel over the top to protect your hands just in case. An immersion blender would also work directly in the pot.


Tasty Kitchen Blog: Tomato Basil Soup with Cheesy Bread. Guest post by Georgia Pellegrini, recipe submitted by TK member Serena of Serena Bakes Simply from Scratch.

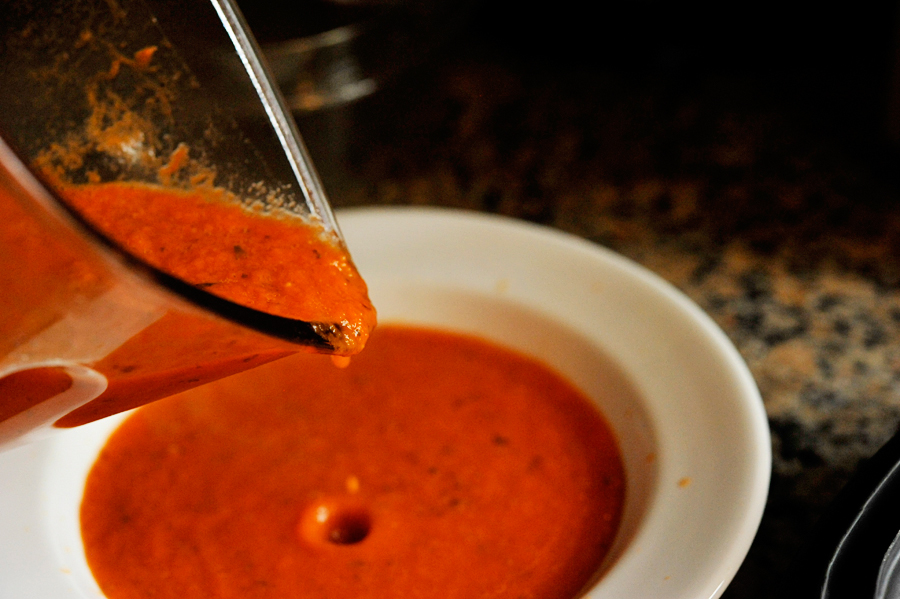
Transfer the soup to a bowl and sprinkle with some fresh chopped basil if you wish or some bread toasted with your favorite cheese.


Tasty Kitchen Blog: Tomato Basil Soup with Cheesy Bread. Guest post by Georgia Pellegrini, recipe submitted by TK member Serena of Serena Bakes Simply from Scratch.

This is hearty and satisfying and quite healthy. I could eat it every day of the week. Thank you Serena for sharing this with us! Visit her website Serena Bakes Simply From Scratchfor other wonderful treats!


Printable Recipe

Tomato Basil Soup With Cheesy Bread

See post on serenabakessimplyfromscratch’s site!
5.00 Mitt(s) 2 Rating(s)2 votes, average: 5.00 out of 52 votes, average: 5.00 out of 52 votes, average: 5.00 out of 52 votes, average: 5.00 out of 52 votes, average: 5.00 out of 5

Prep Time:

Cook Time:

Difficulty: Easy

Servings: 5

5
x

Print Options

Page size Letter 3x5 4x6
Text Size Small Medium Large
Content Include description
Include prep time, etc.
Show image

Description

Tomato Basil Soup With Cheesy Bread. A delicious easy weeknight meal.

Ingredients

  • 1 Tablespoon Olive Oil
  • ½ whole Onion, Diced
  • 3 cloves Garlic, Minced
  • 1 pinch Red Pepper Flakes (optional)
  • 1 teaspoon Rosemary
  • 84 ounces, weight Canned Diced Tomatoes
  • 2 cups Chicken Or Vegetable Stock
  • 1 Tablespoon Honey
  • ½ teaspoons Sea Salt (or To Taste)
  • ½ teaspoons Pepper Or To Taste
  • ½ cups Fresh Basil, Chopped
  • 1 whole Baguette, Sliced
  • 1 cup Mozzarella Cheese, Grated
  • 1 cup Cheddar Cheese, Grated

Preparation Instructions

Heat olive oil in a stock pot over medium-high heat and add onion. Saute onion until softened. Add garlic, red pepper flakes and rosemary and mix to combine. Add canned tomatoes with juice, stock and honey. Bring to a simmer then reduce heat to low and cook for 15-20 minutes.
Season soup to taste with sea salt and pepper.

If using an emulsion blender blend soup in the pot until smooth. If using a blender, remove soup from heat and allow it to allow to cool for 5-10 minutes. Then blend the soup in the blender, making sure to only fill the blender 1/4-1/3 full and work in small batches. Hold lid tight on the blender using a kitchen towel but be careful. If the blender is too full the hot soup will expand and force the lid off causing a mess. Pulse blender until soup is smooth then pour the pureed soup back into the pot. Repeat with remaining soup until all soup is pureed. Return soup pan over low heat and heat until warm.

Remove soup from heat and stir in basil.

Preheat oven to 450 F.

Place sliced baguette on cookie sheet. Spread mozzarella cheese and cheddar cheese evenly over baguette.

Place baguette in preheated oven and bake for 3-5 minutes or until cheese is bubbly and light brown.

Place soup in bowls and top with cheesy bread or serve bread on the side for dipping.


_______________________________________

There’s so much to say about Georgia, we don’t know where to start. Leaving Wall Street for the French Culinary Institute, followed by a stint at the Gramercy Tavern and La Chassagnette in France, her passion for food and food traditions are evident and inspiring. Visit her site at Georgia Pellegrini, where you’ll find more recipes, photos, learn all about her wonderful books Girl Hunter and Food Heroes, and enjoy her latest adventures.


Profile photo of Faith (An Edible Mosaic)

Espresso Mini Muffins with Chocolate Ganache

Posted by in Baking, Step-by-Step Recipes

Tasty Kitchen Blog: Espresso Mini Muffins with Chocolate Ganache. Guest post by Faith Gorsky of An Edible Mosaic, recipe submitted by TK member Michelle of The Lucky Penny Blog.

 
Some days a girl just needs a little something chocolaty. And most days a girl needs coffee. Put the two together into one sweet treat like this and now you’re really talking. The fact that this treat is pretty healthy just sweetens the deal (pun intended).

When I saw Tasty Kitchen member Michelle’s recipe for Espresso Mini Muffins with Chocolate Ganache, I was intrigued. And if I’m being honest, by intrigued I mean practically drooling and dying to make them first chance I got, which, incidentally, happened to be for breakfast. I don’t feel guilty though; these are legitimate muffins, not cupcakes masquerading as muffins (they are grain-free and refined-sugar-free, to name a couple of their perks!). The biggest perk of all is that I get to eat chocolate for breakfast and not feel bad about it.

But if you decide to make them for dessert I won’t tell—they’re good like that too. Ok, and while I’m at it, they’d make a happy snacker out of just about anyone.

To get started, get out your ingredients.


Tasty Kitchen Blog: Espresso Mini Muffins with Chocolate Ganache. Guest post by Faith Gorsky of An Edible Mosaic, recipe submitted by TK member Michelle of The Lucky Penny Blog.

You’ll need: coconut milk, baking soda, dark chocolate, an egg, vanilla extract, coconut oil, maple syrup, espresso powder, almond meal, nutmeg, and salt.

You are just 11 ingredients away from chocolate-coffee bliss.


Tasty Kitchen Blog: Espresso Mini Muffins with Chocolate Ganache. Guest post by Faith Gorsky of An Edible Mosaic, recipe submitted by TK member Michelle of The Lucky Penny Blog.

Generously grease a muffin tray with coconut oil. Love the paper towel method, but a pastry brush works well too. And if I’m feeling really crazy, sometimes I’ll just use my fingers. Whatever works, right?


Tasty Kitchen Blog: Espresso Mini Muffins with Chocolate Ganache. Guest post by Faith Gorsky of An Edible Mosaic, recipe submitted by TK member Michelle of The Lucky Penny Blog.

Depending on the temperature of your kitchen, your coconut oil might already be softened. Mine wasn’t, so I softened it briefly in the microwave, trying not to melt it fully (literally just a couple seconds and then a good stir).

Part of what I love about this recipe (in addition to the fact that it’s incredibly delicious) is the fact that it whips up in just a couple minutes right in the food processor.


Tasty Kitchen Blog: Espresso Mini Muffins with Chocolate Ganache. Guest post by Faith Gorsky of An Edible Mosaic, recipe submitted by TK member Michelle of The Lucky Penny Blog.

First pulse together the dry ingredients to combine: almond meal, espresso powder, baking soda, nutmeg, and salt. Don’t over-process it; the mixture should look like wet sand. Next add the egg, coconut oil, maple syrup, and vanilla and process until smooth.


Tasty Kitchen Blog: Espresso Mini Muffins with Chocolate Ganache. Guest post by Faith Gorsky of An Edible Mosaic, recipe submitted by TK member Michelle of The Lucky Penny Blog.

Spoon the batter into the prepared muffin tray. It’ll be thick, almost like brownie batter. You should get around 12 mini muffins; I think I actually could have gotten a couple more. But I might have licked the bowl.

Cook ‘em up! Be careful not to overcook them so they don’t dry out. Mine took ever-so-slightly longer than the recommended time, about 9 to 10 minutes instead of 8 to 9. Use the toothpick test to see if they’re done!


Tasty Kitchen Blog: Espresso Mini Muffins with Chocolate Ganache. Guest post by Faith Gorsky of An Edible Mosaic, recipe submitted by TK member Michelle of The Lucky Penny Blog.

They should come right out of the tray, but if they don’t, let them cool a couple minutes in the tray and then transfer them to a wire rack to finish cooling.

Now it’s time to whip up a quick little ganache. It’s just 2 ingredients.


Tasty Kitchen Blog: Espresso Mini Muffins with Chocolate Ganache. Guest post by Faith Gorsky of An Edible Mosaic, recipe submitted by TK member Michelle of The Lucky Penny Blog.

Dark chocolate and coconut milk! I used 62% cacao, but by all means go darker if you like. I’m a big fan of the 70% too.

You can either melt it in the microwave or on a double boiler.


Tasty Kitchen Blog: Espresso Mini Muffins with Chocolate Ganache. Guest post by Faith Gorsky of An Edible Mosaic, recipe submitted by TK member Michelle of The Lucky Penny Blog.

And here it is melted together.

The recipe didn’t say what kind of coconut milk to use, so I used full-fat canned coconut milk because that’s what I keep in my pantry. My ganache was super thick and looked quite a bit different from Michelle’s ganache, so she might have used light coconut milk or even the coconut milk from the carton. I’m not sure, but either way, it was delicious this way—and hers looks delicious too!


Tasty Kitchen Blog: Espresso Mini Muffins with Chocolate Ganache. Guest post by Faith Gorsky of An Edible Mosaic, recipe submitted by TK member Michelle of The Lucky Penny Blog.

Spoon the ganache on top of the muffins. I had enough for a thick layer on each.

And that’s it! You can dive into them now (recommended drink: an espresso, of course), or enjoy them later. I like to refrigerate them if I’m saving them for later because the ganache sets nicely into a truffle-like consistency. And the muffins themselves are incredible—they’re not too heavy and they have a nice moist crumb, almost like a brownie but not as dense. Are you convinced yet?


Tasty Kitchen Blog: Espresso Mini Muffins with Chocolate Ganache. Guest post by Faith Gorsky of An Edible Mosaic, recipe submitted by TK member Michelle of The Lucky Penny Blog.

Thanks to Michelle for a fantastic recipe! Be sure to check out The Lucky Penny Blog for more of her delicious creations.


Printable Recipe

Espresso Mini Muffins with Chocolate Ganache

See post on The Lucky Penny Blog’s site!
4.00 Mitt(s) 2 Rating(s)2 votes, average: 4.00 out of 52 votes, average: 4.00 out of 52 votes, average: 4.00 out of 52 votes, average: 4.00 out of 52 votes, average: 4.00 out of 5

Prep Time:

Cook Time:

Difficulty: Easy

Servings: 12

12
x

Print Options

Page size Letter 3x5 4x6
Text Size Small Medium Large
Content Include description
Include prep time, etc.
Show image

Description

Delicious gluten and grain-free espresso mini muffins topped with chocolate ganache.

Ingredients

  • FOR THE MUFFINS:
  • ¾ cups Almond Meal Or Almond Flour
  • 1 Tablespoon Ground Espresso Beans
  • ¼ teaspoons Baking Soda
  • ¼ teaspoons Ground Nutmeg
  • 1 pinch Salt
  • 1 whole Egg
  • 2 Tablespoons Coconut Oil
  • 2 Tablespoons Maple Syrup
  • ½ teaspoons Vanilla
  • FOR THE GANACHE:
  • 2 ounces, fluid Dark Chocolate
  • 2 Tablespoons Coconut Milk

Preparation Instructions

Preheat oven to 350ºF. Grease a mini muffin tin well with coconut oil or greasing method of your choice.

In a food processor, combine all the dry ingredients for the muffins: almond meal, ground espresso beans, baking soda, nutmeg, and salt. Pulse to combine.

Add in the wet ingredients for the muffins: egg, coconut oil, maple syrup, and vanilla. Mix on high until everything is nice and smooth.

Fill greased muffin tins 3/4 of the way full. You should have just enough to make 12, if you really scrape the bowl clean.

Bake for 8-9 minutes until a toothpick comes out clean. Do not over bake!

Allow muffins to cool.

Make the ganache. In a microwave safe bowl, combine the coconut milk and chocolate, microwave for 30 seconds, stir, microwave for 15 more seconds if it is not melted. Be careful not to burn it.

Top muffins with desired amount of ganache. Enjoy!


_______________________________________

Faith Gorsky is the writer, recipe developer, photographer, and food stylist behind the blog An Edible Mosaic. She lives in Upstate New York and loves to travel, especially to places steeped in rich culture and history. She also enjoys reading, vintage shopping, watching movies, and is enamored with ancient cultures. She just released her first cookbook, “An Edible Mosaic: Middle Eastern Fare with Extraordinary Flair” (Tuttle Publishing), a collection of authentic Middle Eastern recipes handed down to her from her husband’s family.


Profile photo of Erika (TK)

Looks Delicious! Meat Lovers’ Black Bean Soup

Posted by in Looks Delicious!

Tasty Kitchen Blog: Looks Delicious! Black Bean Soup with Chorizo, Ham, and Bacon submitted by TK member Terri of That's Some Good Cookin'.

 
So, how was your Cinco de Mayo? Did it involve lots of burritos and margaritas? Tacos and tequila shots? Nachos and Coronas? I hope it was better than mine because my Cinco de Mayo consisted of double doses of antihistamines and three full kettles of hot tea. Ah, spring. I love you so. Why won’t you love me back?

Because I’m not one to squander an excuse to gorge on Mexican food, I’m determined to make this Black Bean Soup With Chorizo, Ham, and Bacon today. It has just enough Mex in it, three kinds of meat for the carnivores in my house, and lots of heat to fight off spring allergies. This recipe is from TK member Terri, who blogs at the That’s Some Good Cookin’ (and I definitely second that!). Have you seen her recipe box? If you haven’t yet, go. Just go.

And now you know what I’ll be doing this afternoon! How about you? What’s on your menu today? Have enough leftovers from the weekend? If so, can I come over? I’d gladly trade you some allergy pills for a taquito or two.

Oh, and Happy Monday, everyone! (Except you, pollen. I’m not talking to you.)


Profile photo of missamy

Zhong-Xi Breakfast

Posted by in Step-by-Step Recipes

Tasty Kitchen Blog: Zhong-Xi Breakfast. Guest post by Amy Johnson of She Wears Many Hats, recipe submitted by TK member Dani of Expat Cucina.

 
Most mornings around here begin with an egg of some form. I’m pretty spoiled with a husband who cooks a mean omelet. It’s not something I take for granted. It’s a mighty nice way to start the day. We’re always trying to mix things up by trying different cheeses and toppings. Omelets are flexible that way. So my interest was piqued when I ran across this recipe for Zhong-Xi Breakfast here from Tasty Kitchen member Dani a few weeks ago. I actually made it for lunch to try out before introducing it into our breakfast mix. It’s a simple mix of ingredients which honestly I didn’t expect much from, but the flavor created by the ginger and garlic, combined with the oh-my-word-tasty cooking oil is quite satisfying. The hubby will be pleased when I surprise him with breakfast for a change with this one. It’s quick and easy. Let me show you how.


Tasty Kitchen Blog: Zhong-Xi Breakfast. Guest post by Amy Johnson of She Wears Many Hats, recipe submitted by TK member Dani of Expat Cucina.

You’ll need eggs, salt, peanut oil, chopped garlic and ginger, brown sugar, red and yellow cherry tomatoes, soy sauce, rice vinegar, sesame oil, and chopped parsley (not shown—oops!).


Tasty Kitchen Blog: Zhong-Xi Breakfast. Guest post by Amy Johnson of She Wears Many Hats, recipe submitted by TK member Dani of Expat Cucina.

Begin by beating the eggs with the salt.


Tasty Kitchen Blog: Zhong-Xi Breakfast. Guest post by Amy Johnson of She Wears Many Hats, recipe submitted by TK member Dani of Expat Cucina.

The omelet portion moves really quick. Heat a portion of the peanut oil in a skillet. Once the oil is hot, pour in the beaten eggs. Let cook for about a minute (see note below). Pull one edge of the omelet to the side so the uncooked eggs can reach the pan. When eggs are almost cooked but center is still soft, fold omelet in half and place on a plate to wait for the yummy toppings.

(Note: My favorite egg-cooking skillet cooks quickly so I should’ve let it go less than a minute. Adjust the cooking time for your stove and skillet.)


Tasty Kitchen Blog: Zhong-Xi Breakfast. Guest post by Amy Johnson of She Wears Many Hats, recipe submitted by TK member Dani of Expat Cucina.

Don’t wash that skillet just yet! Add the remaining peanut oil and heat until hot.


Tasty Kitchen Blog: Zhong-Xi Breakfast. Guest post by Amy Johnson of She Wears Many Hats, recipe submitted by TK member Dani of Expat Cucina.

Add in the garlic and ginger and sauté for about a minute, stirring constantly.


Tasty Kitchen Blog: Zhong-Xi Breakfast. Guest post by Amy Johnson of She Wears Many Hats, recipe submitted by TK member Dani of Expat Cucina.

Garlic can burn very quickly at high heat, so be careful to watch for the garlic burning. Mine got a bit on the dark side, but it was still nice.


Tasty Kitchen Blog: Zhong-Xi Breakfast. Guest post by Amy Johnson of She Wears Many Hats, recipe submitted by TK member Dani of Expat Cucina.

The brown sugar goes in next. Mix together.


Tasty Kitchen Blog: Zhong-Xi Breakfast. Guest post by Amy Johnson of She Wears Many Hats, recipe submitted by TK member Dani of Expat Cucina.

Next, the tomatoes. So much happy color to start the day with! Cook the tomatoes for about a minute or so, until they start getting soft.


Tasty Kitchen Blog: Zhong-Xi Breakfast. Guest post by Amy Johnson of She Wears Many Hats, recipe submitted by TK member Dani of Expat Cucina.

Now pull it altogether with the soy sauce, rice vinegar, and sesame oil. Can you smell it? Oh my. Stir all together.


Tasty Kitchen Blog: Zhong-Xi Breakfast. Guest post by Amy Johnson of She Wears Many Hats, recipe submitted by TK member Dani of Expat Cucina.

Remove from heat and pour the tomatoes with the cooking oil on top of the patiently waiting omelet. Garnish with freshly chopped parsley and enjoy!

If you prep the ingredients the night before, chopping the garlic and ginger and tomatoes, you can have this omelet done in no time. Such a great way to dress up a simple omelet.

Many thanks to Dani of the blog Expat Cucina for sharing this flavorful way to start the day.


Printable Recipe

Zhong-Xi Breakfast

5.00 Mitt(s) 1 Rating(s)1 vote, average: 5.00 out of 51 vote, average: 5.00 out of 51 vote, average: 5.00 out of 51 vote, average: 5.00 out of 51 vote, average: 5.00 out of 5

Prep Time:

Cook Time:

Difficulty: Easy

Servings: 1

1
x

Print Options

Page size Letter 3x5 4x6
Text Size Small Medium Large
Content Include description
Include prep time, etc.
Show image

Description

Zhong-Xi in Chinese means East-West. This recipe takes a bit from the East (in the soy sauce, sesame oil and ginger) and a bit from the West. Try these eggs tomorrow for breakfast!

Ingredients

  • 2 whole Eggs
  • 1 pinch Salt
  • 3 Tablespoons Peanut Oil
  • 1 clove Garlic, Finely Chopped
  • 1 teaspoon Finely Chopped Ginger
  • 1 teaspoon Brown Sugar
  • 3 whole Red Cherry Tomatoes, Washed And Cut In Half
  • 1 teaspoon Soy Sauce
  • 1 teaspoon Rice Vinegar
  • 1 teaspoon Sesame Oil
  • 4 whole Yellow Cherry Tomatoes
  • 1 Tablespoon Chopped Parsley

Preparation Instructions

In a bowl, lightly beat eggs with a pinch of salt.

In a skillet, heat 1 tablespoon of peanut oil. When hot, pour in the eggs.Let cook for a minute or so, till the eggs start solidifying. Then with a wooden spoon, push the edge in so that the soggy, uncooked eggs can touch the pan. When the eggs are almost cooked but the center is still soft, fold your omelet in half and place it on a plate.

In the same skillet (don’t wash it), add the remaining 2 tablespoons of peanut oil and heat till really hot. Throw in chopped garlic and ginger, stir for a minute or so. Then add the sugar and let it caramelize. Add in the tomatoes and cook till they start getting soft (about 1 minute). Pour in soy sauce, rice vinegar and sesame oil; stir all the ingredients together. Remove from heat and pour the tomatoes with its cooking oil on top of your omelet.

Garnish with freshly chopped parsley.


_______________________________________

Amy Johnson is a blogger who writes about food, travel, the home (both inside and out), and various observations and random musings about anything and everything. Visit her blog She Wears Many Hats for a dose of deliciousness, practicality, hilarity, or just plain fun. She lives in South Carolina with her husband and two children.