The Pioneer Woman Tasty Kitchen
Profile photo of missamy

Blueberry Lemon Buttermilk Cake

Posted by in Baking, Step-by-Step Recipes

Tasty Kitchen Blog: Blueberry Lemon Buttermilk Cake. Guest post by Amy Johnson of She Wears Many Hats, recipe submitted by TK member Valery Bunnell (valery).

 
Signs of spring are popping up all around. There aren’t many thing that say “spring” to me more than lemon and blueberry flavor combos. While looking for something fresh and springy to make for an upcoming baby shower, I ran across Blueberry Lemon Buttermilk Cake from Tasty Kitchen member vbunnell. The cake is quick to put together, full of fresh lemon and blueberry flavor. And I think will be just perfect for a springtime baby shower.


Tasty Kitchen Blog: Blueberry Lemon Buttermilk Cake. Guest post by Amy Johnson of She Wears Many Hats, recipe submitted by TK member Valery Bunnell (valery).

Let’s get started. You’ll need basic ingredients: flour, baking powder, baking soda, salt, butter, sugar, vanilla extract, lemon juice and zest, an egg, buttermilk, and fresh blueberries.


Tasty Kitchen Blog: Blueberry Lemon Buttermilk Cake. Guest post by Amy Johnson of She Wears Many Hats, recipe submitted by TK member Valery Bunnell (valery).

Begin by whisking together the flour, baking powder, baking soda and salt. Set aside.


Tasty Kitchen Blog: Blueberry Lemon Buttermilk Cake. Guest post by Amy Johnson of She Wears Many Hats, recipe submitted by TK member Valery Bunnell (valery).

In a separate bowl beat together the butter and 2/3 cup sugar for about 2–3 minutes, until light and fluffy.


Tasty Kitchen Blog: Blueberry Lemon Buttermilk Cake. Guest post by Amy Johnson of She Wears Many Hats, recipe submitted by TK member Valery Bunnell (valery).

Add vanilla extract, lemon juice and zest, egg, and beat well.


Tasty Kitchen Blog: Blueberry Lemon Buttermilk Cake. Guest post by Amy Johnson of She Wears Many Hats, recipe submitted by TK member Valery Bunnell (valery).

On low speed, alternate adding flour mixture in three batches, with two batches of buttermilk, until just combined.


Tasty Kitchen Blog: Blueberry Lemon Buttermilk Cake. Guest post by Amy Johnson of She Wears Many Hats, recipe submitted by TK member Valery Bunnell (valery).

Right about now it should be smelling like lemon fresh springtime.


Tasty Kitchen Blog: Blueberry Lemon Buttermilk Cake. Guest post by Amy Johnson of She Wears Many Hats, recipe submitted by TK member Valery Bunnell (valery).

Time for the berries! Fold in the blueberries.


Tasty Kitchen Blog: Blueberry Lemon Buttermilk Cake. Guest post by Amy Johnson of She Wears Many Hats, recipe submitted by TK member Valery Bunnell (valery).

Pour batter into a sprayed and lined cake pan. Spread batter evenly in the pan and smooth. Sprinkle the top with the remaining sugar.


Tasty Kitchen Blog: Blueberry Lemon Buttermilk Cake. Guest post by Amy Johnson of She Wears Many Hats, recipe submitted by TK member Valery Bunnell (valery).

Bake until golden and a cake tester or toothpick inserted in the center of the cake comes out clean. I baked the cake a little longer than the time called for in the recipe, about 30 minutes. Cool in the pan, then invert onto a cooling rack and continue to cool for another 10–15 minutes.


Tasty Kitchen Blog: Blueberry Lemon Buttermilk Cake. Guest post by Amy Johnson of She Wears Many Hats, recipe submitted by TK member Valery Bunnell (valery).

When cooled (if you can wait that long), invert onto a plate, cut and serve.


Tasty Kitchen Blog: Blueberry Lemon Buttermilk Cake. Guest post by Amy Johnson of She Wears Many Hats, recipe submitted by TK member Valery Bunnell (valery).

What a delightful dessert! It disappeared quickly.


Tasty Kitchen Blog: Blueberry Lemon Buttermilk Cake. Guest post by Amy Johnson of She Wears Many Hats, recipe submitted by TK member Valery Bunnell (valery).

I think we need to make another.

 
Enjoy! And thanks so much to Valery for sharing the perfect dessert to welcome spring! Valery is an amazing photographer, and if you like beautiful babies and adorable family portraits, you should go visit her photography site.


Printable Recipe

Blueberry Lemon Buttermilk Cake

5.00 Mitt(s) 27 Rating(s)27 votes, average: 5.00 out of 527 votes, average: 5.00 out of 527 votes, average: 5.00 out of 527 votes, average: 5.00 out of 527 votes, average: 5.00 out of 5

Prep Time:

Cook Time:

Difficulty: Easy

Servings: 8

8
x

Print Options

Page size Letter 3x5 4x6
Text Size Small Medium Large
Content Include description
Include prep time, etc.
Show image

Description

So delicious! This is perfect for a brunch, party or weekend breakfast side.

Ingredients

  • 1 cup All-purpose Flour
  • ½ teaspoons Baking Powder
  • ½ teaspoons Baking Soda
  • ¼ teaspoons Salt
  • ½ sticks Butter, Softened
  • ⅔ cups Sugar Plus 1 1/2 Tablespoons For Sprinkling On Top
  • ¼ teaspoons Vanilla Extract
  • 1 Tablespoon Lemon Juice
  • 1 teaspoon Lemon Zest
  • 1 whole Egg
  • ½ cups Buttermilk, Well Shaken
  • 5 ounces, weight Fresh Blueberries

Preparation Instructions

Preheat oven to 400 degrees with the rack in the middle of oven. Spray an 8-inch round cake pan and line with waxed paper. Spray the waxed paper.

Whisk together flour, baking powder, baking soda and salt; set aside. Beat butter and 2/3 cup sugar on medium-high until pale and fluffy, about 2-3 minutes. Add vanilla extract, lemon juice and lemon zest. Add egg and beat well.

At low speed, mix in flour mixture in three batches, alternating with the buttermilk in two batches, mixing until just combined. Add berries and fold in with a spoon. Pour batter into cake pan, spreading and smoothing the top. Sprinkle with 1 1/2 tablespoons sugar (this makes it a little crispy on the top)

Bake until cake is golden and a toothpick inserted into the center comes out clean, 20 to 25 minutes. Cool in the pan for 10 minutes then turn out onto a rack and cool to warm, 10 to 15 minutes more. Invert onto a plate and cut into 8 slices.

Serve plain or with a dollop of fresh whipped cream.


_______________________________________

Amy Johnson is a blogger who writes about food, travel, the home (both inside and out), and various observations and random musings about anything and everything. Visit her blog She Wears Many Hats for a dose of deliciousness, practicality, hilarity, or just plain fun. She lives in South Carolina with her husband and two children.


Profile photo of savorysweetlife

Rocky Road Rice Krispie Treats

Posted by in Step-by-Step Recipes

We’re so happy to have our good friend Alice back on the Tasty Kitchen Blog. She couldn’t have picked a more delicious recipe to prepare than Chrissy and Lauren’s Rocky Road Rice Krispie Treats. Great to see you, Alice!


Tasty Kitchen Blog: Rocky Road Rice Krispie Treats. Guest post by Alice Currah of Savory Sweet Life, recipe submitted by TK members Chrissy and Lauren of From the Yellow Kitchen.

 
Just when I thought I had seen every variation of Rice Krispie treats, Tasty Kitchen members Chrissy/Lauren (Chrissy and Lauren of From the Yellow Kitchen) delightfully prove me wrong with their fun and creative Rocky Road Rice Krispie Treats made with chocolate, Nutella, peanut butter, marshmallows, pecans, and rice cereal. These bars are a chocolate lover’s best friend, especially since no baking is required and they only take minutes to prepare. For the record, I’m partial to these types of recipes because of the “easy factor” with a huge chocolate payoff. Who is with me?!

Let us begin.


Tasty Kitchen Blog: Rocky Road Rice Krispie Treats. Guest post by Alice Currah of Savory Sweet Life, recipe submitted by TK members Chrissy and Lauren of From the Yellow Kitchen.

First you’ll need the following ingredients: chocolate chips, peanut butter, Nutella, mini marshmallows, pecans, and Rice Krispies. The recipe calls for semi-sweet chocolate, but you could easily substitute milk bittersweet, or dark chocolate depending on your personal preferences.


Tasty Kitchen Blog: Rocky Road Rice Krispie Treats. Guest post by Alice Currah of Savory Sweet Life, recipe submitted by TK members Chrissy and Lauren of From the Yellow Kitchen.

Mix the chocolate chips, peanut butter, and Nutella together in a microwave safe bowl. Heat the mixture in the microwave by cooking it in 30-second intervals, making sure to stir the mixture immediately after every interval until the chocolate chips have melted and the mixture is completely smooth.


Tasty Kitchen Blog: Rocky Road Rice Krispie Treats. Guest post by Alice Currah of Savory Sweet Life, recipe submitted by TK members Chrissy and Lauren of From the Yellow Kitchen.

Stir in the pecans, marshmallows, and rice cereal until all the ingredients are well coated with chocolate.


Tasty Kitchen Blog: Rocky Road Rice Krispie Treats. Guest post by Alice Currah of Savory Sweet Life, recipe submitted by TK members Chrissy and Lauren of From the Yellow Kitchen.

I added an additional cup of cereal to mine because I thought it could use a bit more. Use your own judgment in deciding to add more cereal, pecans, or marshmallows.


Tasty Kitchen Blog: Rocky Road Rice Krispie Treats. Guest post by Alice Currah of Savory Sweet Life, recipe submitted by TK members Chrissy and Lauren of From the Yellow Kitchen.

Transfer the mixture to an 8×8 pan or small baking dish coated in non-stick spray.


Tasty Kitchen Blog: Rocky Road Rice Krispie Treats. Guest post by Alice Currah of Savory Sweet Life, recipe submitted by TK members Chrissy and Lauren of From the Yellow Kitchen.

Spread the mixture until it is evenly distributed.


Tasty Kitchen Blog: Rocky Road Rice Krispie Treats. Guest post by Alice Currah of Savory Sweet Life, recipe submitted by TK members Chrissy and Lauren of From the Yellow Kitchen.

Add more pecans and marshmallows on the top and press down.


Tasty Kitchen Blog: Rocky Road Rice Krispie Treats. Guest post by Alice Currah of Savory Sweet Life, recipe submitted by TK members Chrissy and Lauren of From the Yellow Kitchen.

Place the pan in the refrigerator for one hour before cutting into squares. Tip: Forty minutes in the freezer works nicely, too!


Tasty Kitchen Blog: Rocky Road Rice Krispie Treats. Guest post by Alice Currah of Savory Sweet Life, recipe submitted by TK members Chrissy and Lauren of From the Yellow Kitchen.

The texture on these bars is not like a traditional rice cereal treat. It is more on par with a yummy chocolate bar somewhere between fudge and a haystack. I would also recommend allowing the chocolate mixture to cool to room temperature before adding marshmallows, otherwise they melt and you don’t get those gorgeous (whole) marshmallow chunks in the middle of each bar.


Tasty Kitchen Blog: Rocky Road Rice Krispie Treats. Guest post by Alice Currah of Savory Sweet Life, recipe submitted by TK members Chrissy and Lauren of From the Yellow Kitchen.

My suggestions and tips are slightly different than the original recipe (based on my preferences). The original recipe is a good base which can easily handle more amounts of the listed ingredients based on your own personal preferences. Check out their original blog post too, for suggested variations.

Thanks ladies!


Printable Recipe

Rocky Road Rice Krispie Treats

See post on LittleYellowKitchen’s site!
4.86 Mitt(s) 7 Rating(s)7 votes, average: 4.86 out of 57 votes, average: 4.86 out of 57 votes, average: 4.86 out of 57 votes, average: 4.86 out of 57 votes, average: 4.86 out of 5

Prep Time:

Cook Time:

Difficulty: Easy

Servings: 9

9
x

Print Options

Page size Letter 3x5 4x6
Text Size Small Medium Large
Content Include description
Include prep time, etc.
Show image

Description

All the ingredients for a sweet and crispy Rocky Road treat with a little peanut butter and Nutella to top it all off.

Ingredients

  • 1 cup Semi-Sweet Chocolate Chips
  • ½ cups Peanut Butter
  • ½ cups Nutella
  • ½ cups Mini Marshmallows
  • ¼ cups Pecans
  • ¾ cups Rice Krispies

Preparation Instructions

Melt the chocolate chips, peanut butter and nutella for 2 minutes in the microwave. Stir.

Mix in the marshmallows and pecans. Fold in the Rice Krispies.

Pour mixture into a well-greased 8×8 glass baking dish. Refrigerate for 1 hour.

Optional: top with extra pecan pieces and marshmallows.


_______________________________________

Alice Currah is the force behind Sweet Savory Life and Everyday Alice. She and her husband Rob are the proud parents of three children: Abbi, Mimi, and Elli. Alice is the winner of Saveur’s Cover Contest and is on the Forbes.com list of Eight of The Very Best Food Bloggers. She’s also a weekly writer for PBS Parents’ Kitchen Explorers. She’s the best-est.


Profile photo of HowSweetEats

Homemade Fruit Leather

Posted by in Step-by-Step Recipes

Tasty Kitchen Blog: Homemade Fruit Leather. Guest post by Jessica Merchant of How Sweet It Is, recipe submitted by TK member Georgia Pellegrini.

 
When it comes to making homemade fruit leather, I will confess that I have been totally and completely intimidated. I mean, how does one even accomplish such a task? How does fruit go from actual fruit to … leather?

With that being said, I spent half of my youth chewing fruit roll-ups and consequently trying to rot my teeth, so I knew that this fruit leather had to be mastered. My mom would stock up on different flavors of fruit leather and it would often disappear within the week. When I came across Georgia’s recipe for Homemade Fruit Leather, I just couldn’t resist. It seemed foolproof. And delicious. And so enticing that I immediately bought more strawberries than one should ever need and got to work.

While the entire recipe is a bit time-consuming, it is quite easy. The majority of the time is downtime anyway. You can make this while you sleep!


Tasty Kitchen Blog: Homemade Fruit Leather. Guest post by Jessica Merchant of How Sweet It Is, recipe submitted by TK member Georgia Pellegrini.

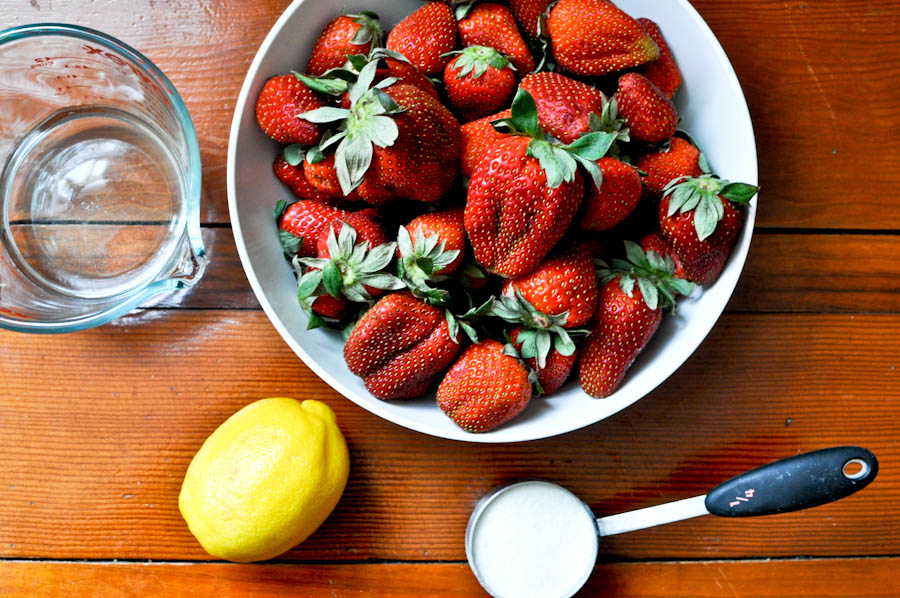
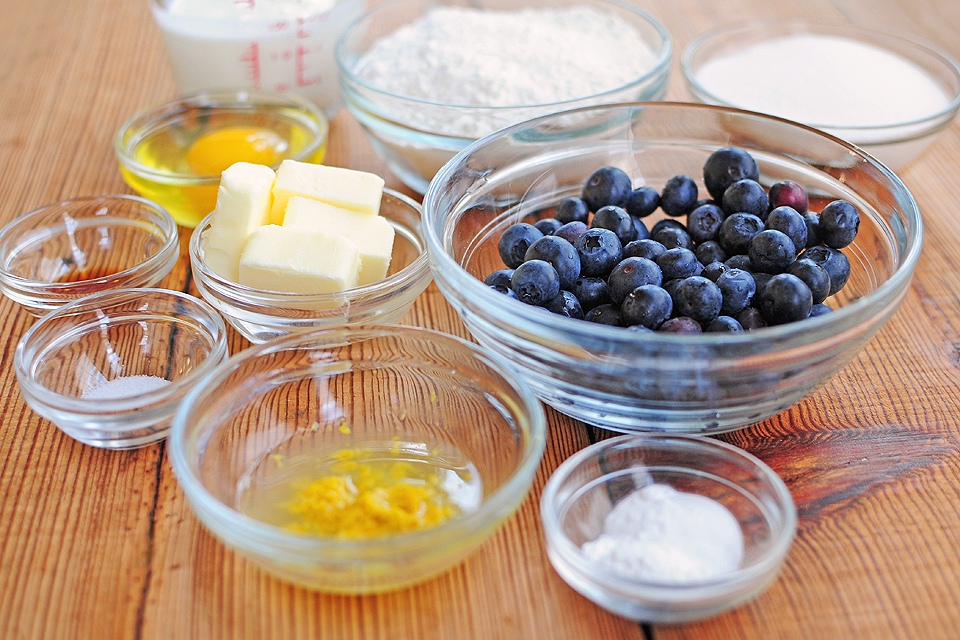
These are the only ingredients you need: strawberries (or fruit of your choice), a lemon, water and sugar. Yes, it’s that simple!


Tasty Kitchen Blog: Homemade Fruit Leather. Guest post by Jessica Merchant of How Sweet It Is, recipe submitted by TK member Georgia Pellegrini.

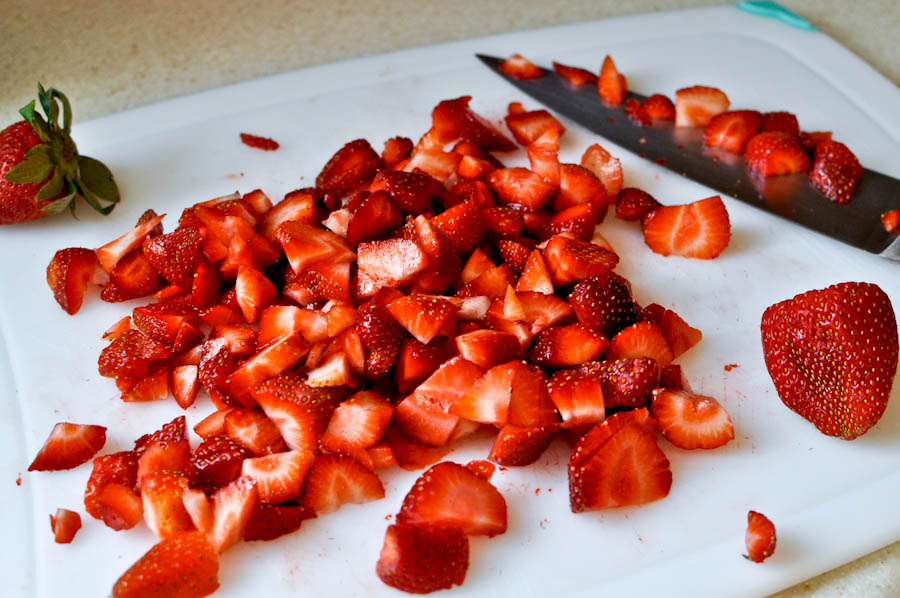
The first step is to cut the fruit into small pieces. Don’t be concerned about them being uniform in size. Just do a rough chop so we can add them to a saucepan. I ended up with 2 1/2 cups of strawberries.


Tasty Kitchen Blog: Homemade Fruit Leather. Guest post by Jessica Merchant of How Sweet It Is, recipe submitted by TK member Georgia Pellegrini.

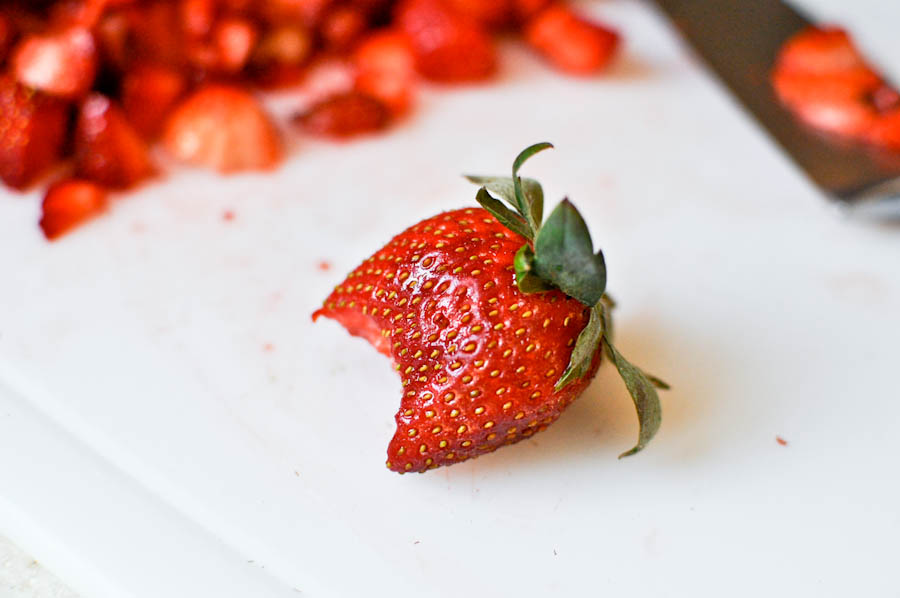
Make sure you taste test your fruit to see how sweet it is. This will give you a rough idea of how much sugar you need or want to add.


Tasty Kitchen Blog: Homemade Fruit Leather. Guest post by Jessica Merchant of How Sweet It Is, recipe submitted by TK member Georgia Pellegrini.

Slice your lemon and grab a bowl for juicing purposes.


Tasty Kitchen Blog: Homemade Fruit Leather. Guest post by Jessica Merchant of How Sweet It Is, recipe submitted by TK member Georgia Pellegrini.

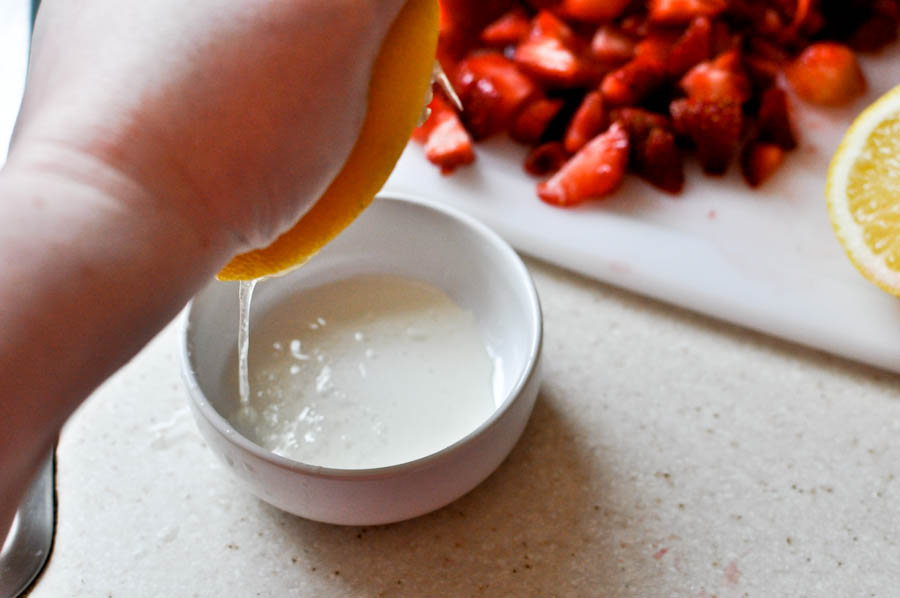
Squeeze your lemon to extract the juice. You only need about one tablespoon. Fresh is best!


Tasty Kitchen Blog: Homemade Fruit Leather. Guest post by Jessica Merchant of How Sweet It Is, recipe submitted by TK member Georgia Pellegrini.

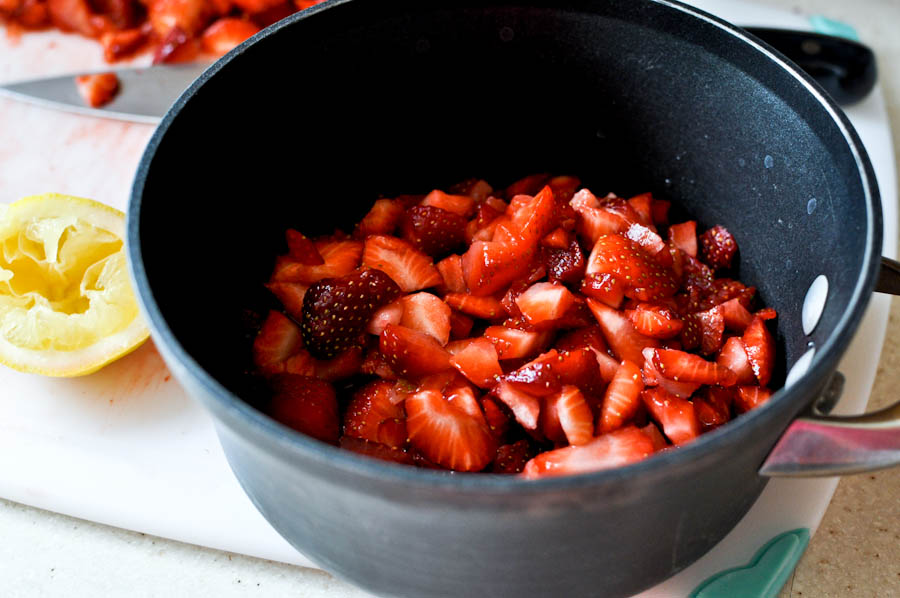
In a small saucepan, combine the chopped fruit, water and lemon juice. Heat it over medium heat and stir, then cover. Let the fruit stew for a few minutes until the berries begin to break down. I let mine go for about 5–6 minutes.


Tasty Kitchen Blog: Homemade Fruit Leather. Guest post by Jessica Merchant of How Sweet It Is, recipe submitted by TK member Georgia Pellegrini.

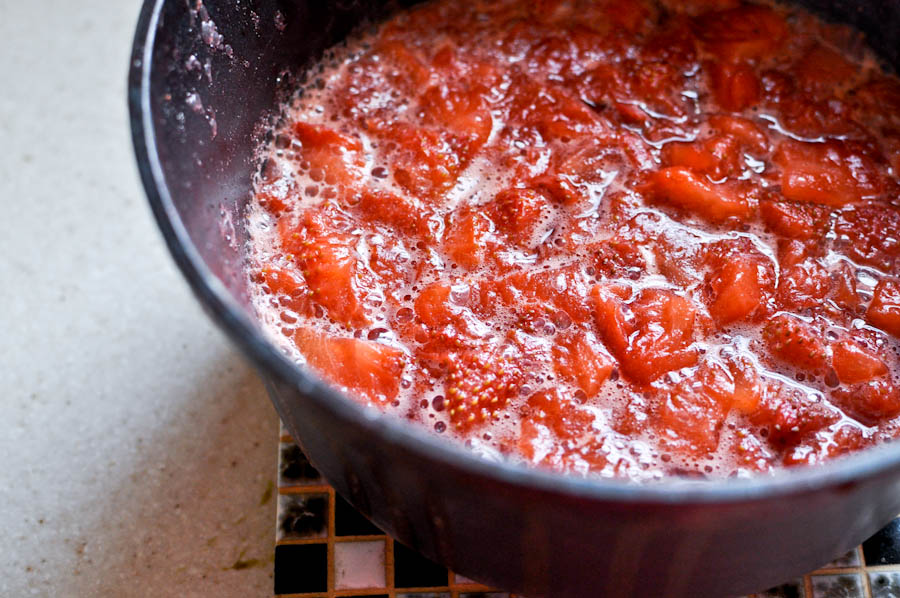
It should come out looking saucy. Now would be a good time to preheat your oven, so turn it on to 170 degrees F, or the lowest temperature it will go. It should heat up quickly.


Tasty Kitchen Blog: Homemade Fruit Leather. Guest post by Jessica Merchant of How Sweet It Is, recipe submitted by TK member Georgia Pellegrini.

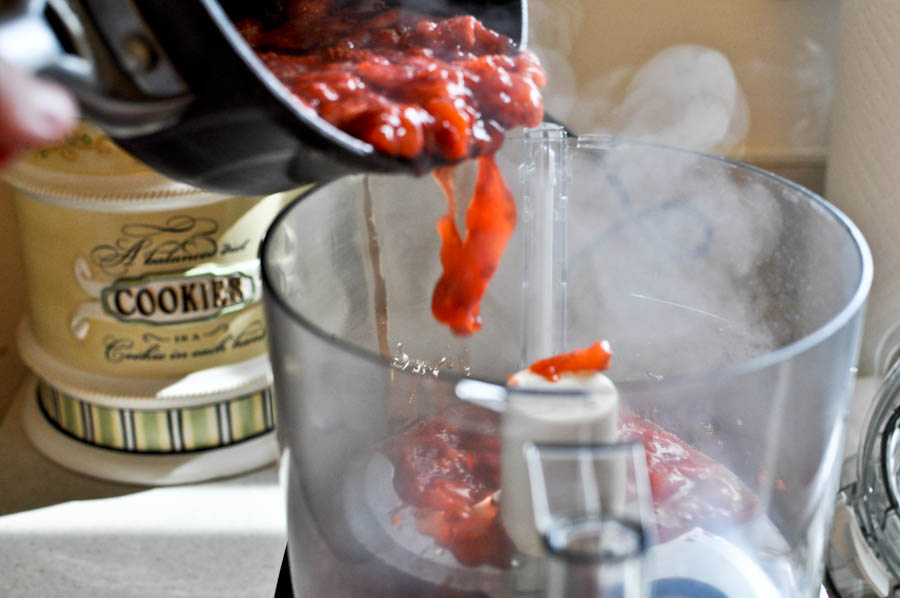
Now it’s time to add the pureed fruit to the food processor. You can see that I lack patience judging from the steam rising out of the saucepan. Notice the cookie jar in the back. Sometimes (read: every single day) I get distracted by that (full) jar.


Tasty Kitchen Blog: Homemade Fruit Leather. Guest post by Jessica Merchant of How Sweet It Is, recipe submitted by TK member Georgia Pellegrini.

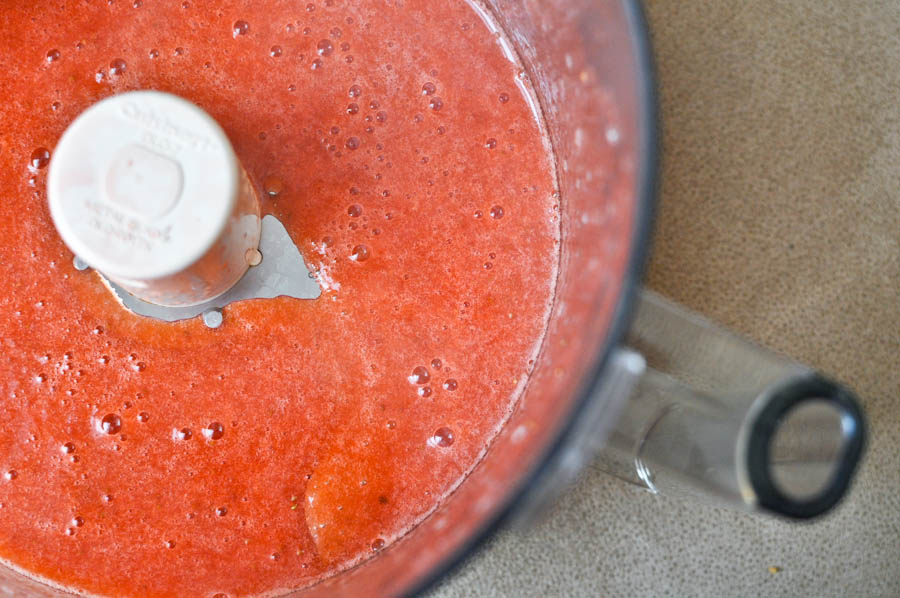
Give the fruit mixture a good whirl. You want it completely blended. Speaking of blended, you can also use a blender if you do not have a food processor. (In Georgia’s blog post, she uses a blender.)


Tasty Kitchen Blog: Homemade Fruit Leather. Guest post by Jessica Merchant of How Sweet It Is, recipe submitted by TK member Georgia Pellegrini.

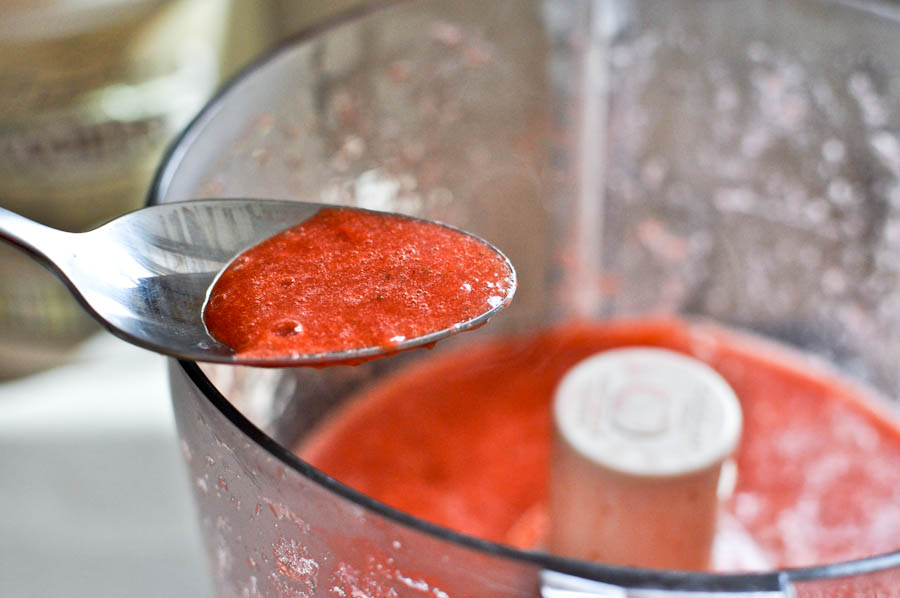
Taste testing time! Try a bit more of the pulp before adding the sugar. I am warning you: this stuff is good to enough to drink. I nearly slurped it all up and had to start over.


Tasty Kitchen Blog: Homemade Fruit Leather. Guest post by Jessica Merchant of How Sweet It Is, recipe submitted by TK member Georgia Pellegrini.

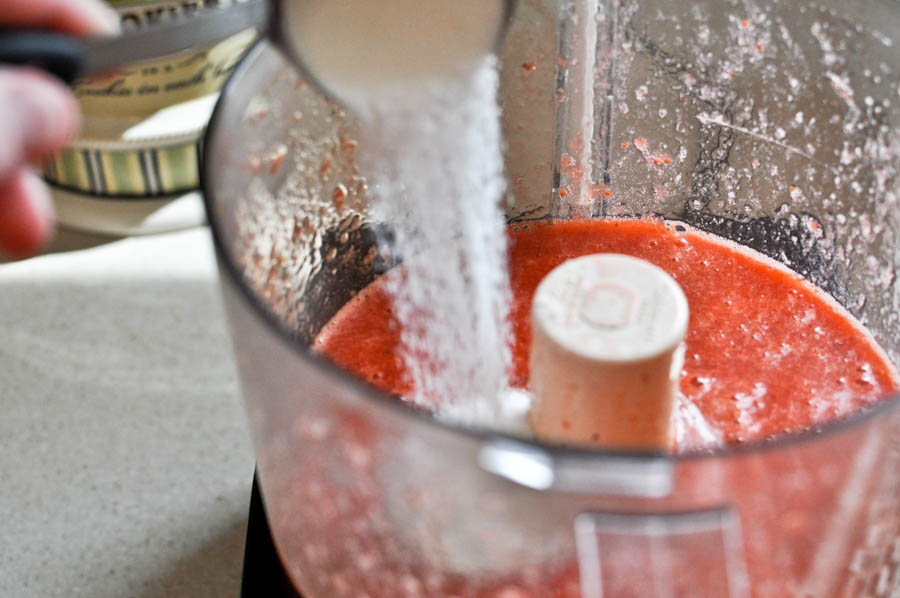
Add your sugar. I’m assuming that you could also make this recipe sugar-free if you’d like. I went with the entire 1/4 cup of sugar because I have very sweet teeth. If you have extraordinarily sweet fruit or would like it mild in sweetness, add the sugar one teaspoon at a time, blend, then taste test and go from there. Easy as pie.


Tasty Kitchen Blog: Homemade Fruit Leather. Guest post by Jessica Merchant of How Sweet It Is, recipe submitted by TK member Georgia Pellegrini.

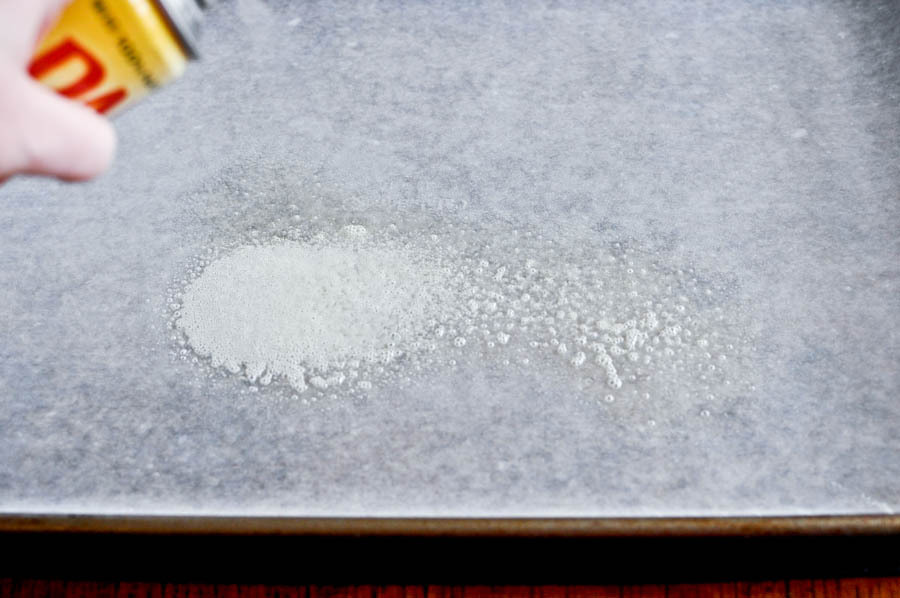
Lay some parchment paper on a sheet pan, and give it a very thorough coating of non-stick spray. Don’t miss any spots! You can also brush the paper with vegetable oil. Whatever works for you.


Tasty Kitchen Blog: Homemade Fruit Leather. Guest post by Jessica Merchant of How Sweet It Is, recipe submitted by TK member Georgia Pellegrini.

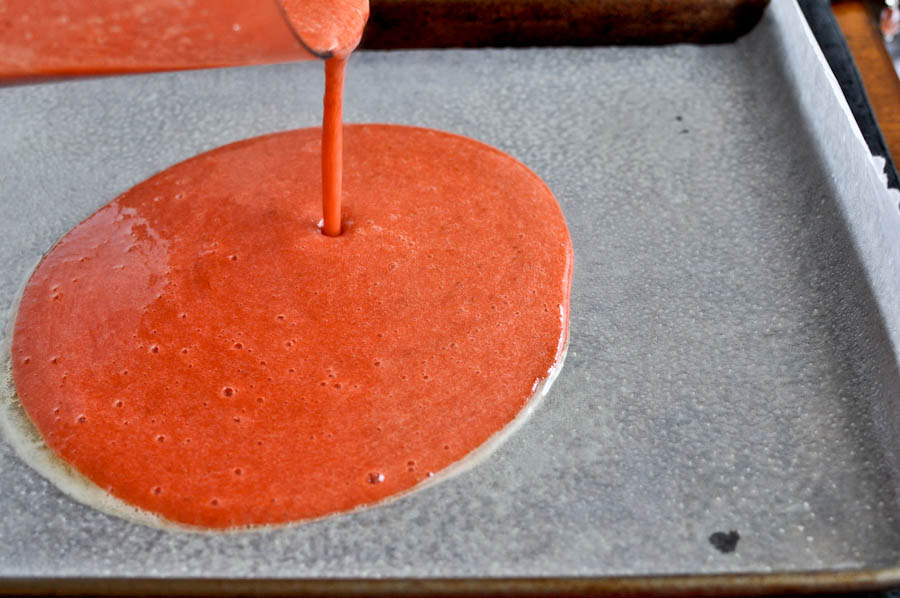
Pour the fruit mixture onto the paper-lined sheet pan. Try not to drool.


Tasty Kitchen Blog: Homemade Fruit Leather. Guest post by Jessica Merchant of How Sweet It Is, recipe submitted by TK member Georgia Pellegrini.

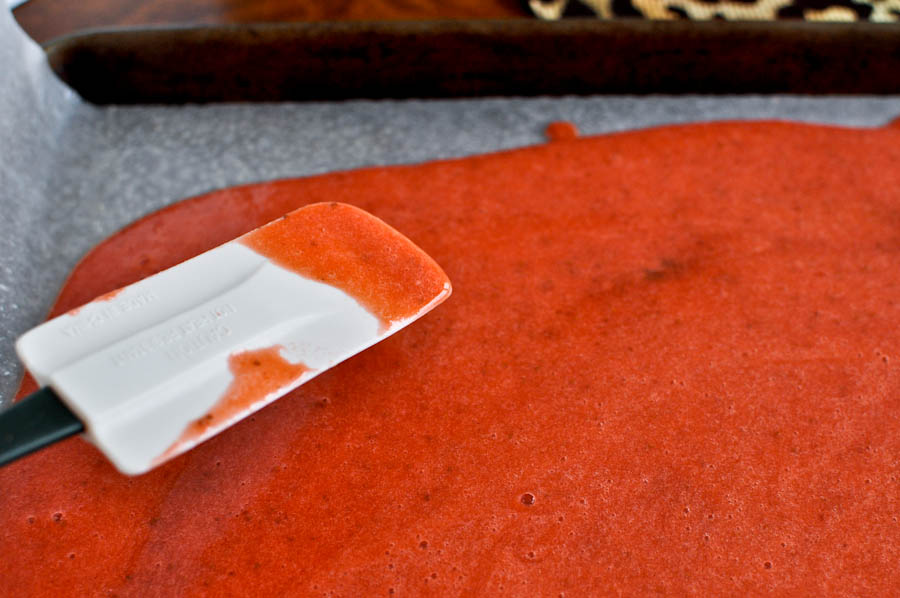
Spread it out with a spatula so it is evenly distributed. Then place it in the oven.

Now it’s time to wait! And wait … and wait … and wait. This recipe takes about 12–15 hours total. Don’t fret—I was concerned too! But I am convinced that it is completely worth it now. If you do not have 15 consecutive hours to be at home with the oven on, you can also sit the fruit mixture near a sunny window where it will be warm. I first stuck mine in the oven at 3 pm. I let it go for 7 hours, checking it occasionally. The only downside is that I realized halfway in that I could not use my oven for dinner! Oh well. Pizza it was.

During the “dehydrating” process, I did notice the mixture was getting a bit brittle. I followed Georgia’s instructions and brushed the leather with some water using a pastry brush. It worked like a charm! At 10 pm, I inverted the leather onto another oiled, paper-lined baking sheet. I gave it a good brushing of water since I would not be checking it for 6-7 hours. I also left the oven open a crack to ensure it would not get too warm. Then I went to bed dreaming of homemade strawberry fruit roll-ups. It was like Christmas Eve!


Tasty Kitchen Blog: Homemade Fruit Leather. Guest post by Jessica Merchant of How Sweet It Is, recipe submitted by TK member Georgia Pellegrini.

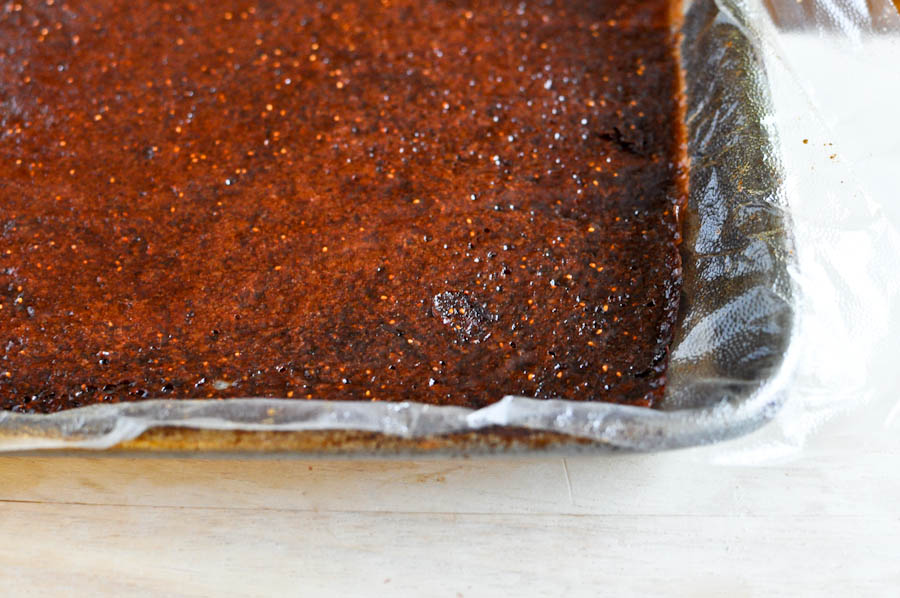
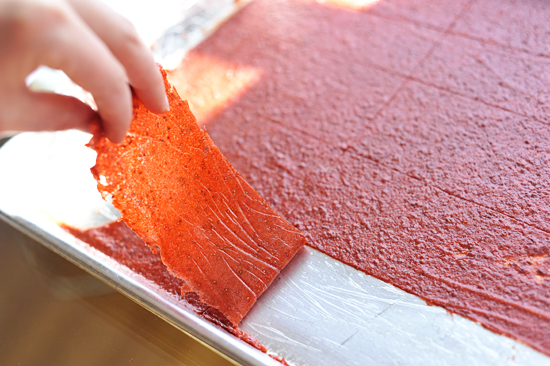
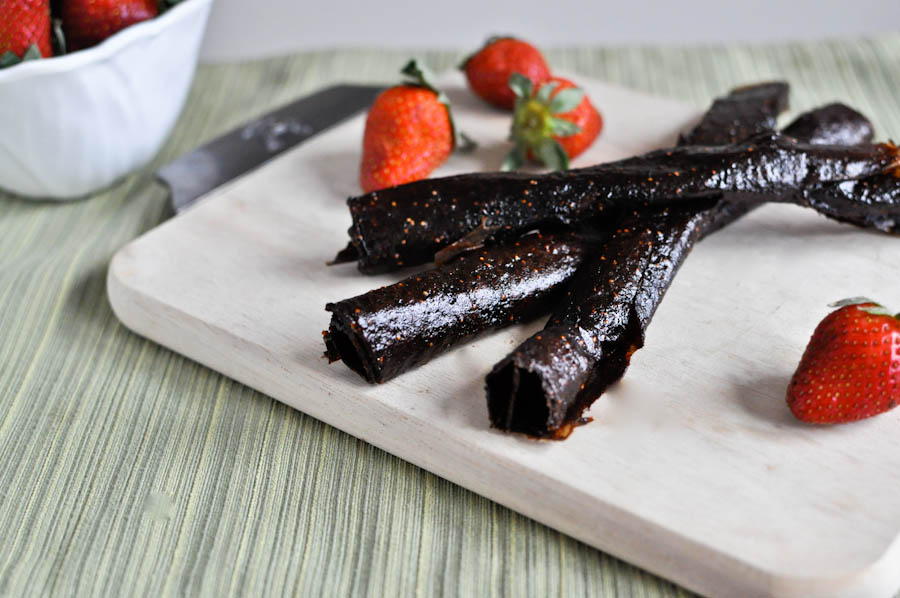
In the morning, the fruit leather looked like this. I love the little seeds.


Tasty Kitchen Blog: Homemade Fruit Leather. Guest post by Jessica Merchant of How Sweet It Is, recipe submitted by TK member Georgia Pellegrini.

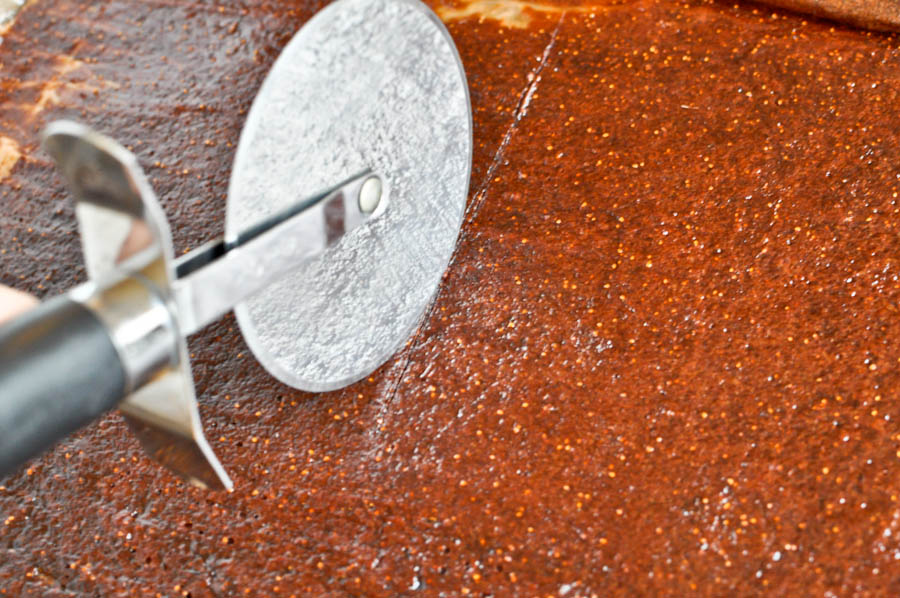
Using a pizza cutter, I cut it into strips.


Tasty Kitchen Blog: Homemade Fruit Leather. Guest post by Jessica Merchant of How Sweet It Is, recipe submitted by TK member Georgia Pellegrini.

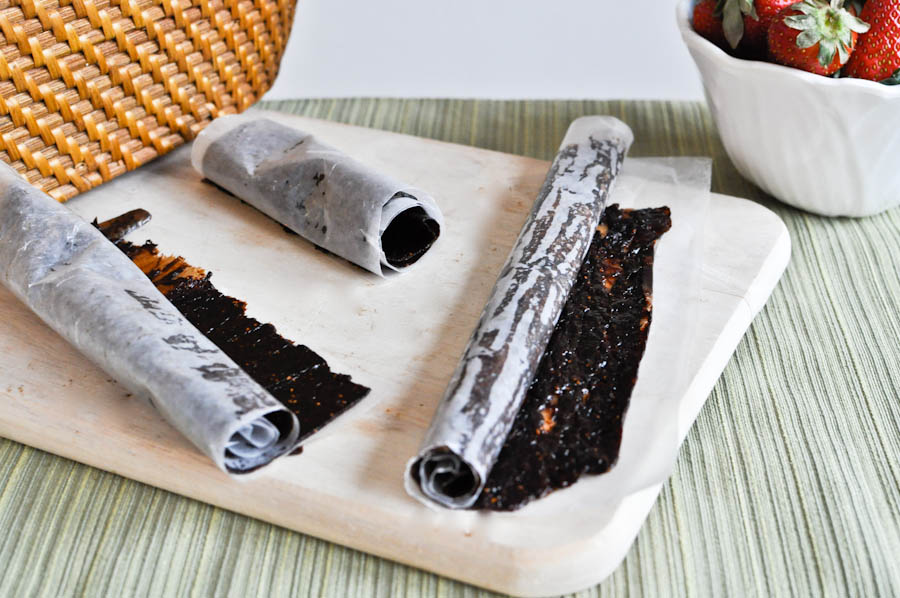
Like a kid in a candy store, I couldn’t stop tasting it. It was so delicious. And so easy! I couldn’t believe that I could make fruit leather at home. I rolled it up just like the old school fruit roll-ups.

I sense a new obsession coming on. Since last week, I’ve been envisioning every flavor of fruit leather known to man. I am quite anxious to try peach leather. And how about fig leather? Or mango leather? Kiwi leather? I would love those crunchy little seeds. Or how about this kumquat and tangerine fruit leather by acharlestonkitchen? Could one make a cantaloupe and fresh mint leather? I think we all know what I’m going to be doing for the next 3 months.


Tasty Kitchen Blog: Homemade Fruit Leather. Guest post by Jessica Merchant of How Sweet It Is, recipe submitted by TK member Georgia Pellegrini.

 
This is probably one of my favorite recipes to date. It’s delicious and makes for a perfect snack. It’s much healthier than the processed fruit leather since you can determine exactly what goes into it. And it is so much easier than I previously thought. Thanks so much for the recipe, Georgia! (If you don’t know her yet, you should! Visit her blog, Georgia Pellegrini and enjoy all her other wonderful recipes and posts.)


Printable Recipe

Homemade Fruit Leather

See post on georgiapellegrini’s site!
3.25 Mitt(s) 4 Rating(s)4 votes, average: 3.25 out of 54 votes, average: 3.25 out of 54 votes, average: 3.25 out of 54 votes, average: 3.25 out of 54 votes, average: 3.25 out of 5

Prep Time:

Cook Time:

Difficulty: Easy

Servings: 15

15
x

Print Options

Page size Letter 3x5 4x6
Text Size Small Medium Large
Content Include description
Include prep time, etc.
Show image

Description

An easy way to make dried fruit leather at home with any fresh fruit.

Ingredients

  • 2 cups Strawberries Or Other Fresh Fruit, Chopped Into Small Pieces
  • ¼ cups Water
  • 1 Tablespoon Lemon Juice
  • ¼ cups Sugar (optional, Depending On The Sweetness Of Your Fruit)
  • 1 Tablespoon Vegetable Oil

Preparation Instructions

1. Preheat the oven to 150 -170 degrees F.

2. Place the fruit in a medium saucepan with the water and lemon juice. Simmer on medium heat, mostly covered, until they are very soft and mushy. Stewing the fruit helps it retain its color.

3.Transfer the fruit pulp mixture to a food processor or blender and blend until smooth. If it is a fruit with seeds, a food mill will remove the seeds more easily than a food processor and strainer. Taste the fruit at this point, and add the sugar if it is not sweet enough. Keep in mind that as the fruit leather dries, it will concentrate the natural sugars in the fruit and become sweeter on its own. Add a small amount of water to the mixture if necessary so that it has a pourable consistency.

4. Cover a baking sheet with plastic or a silicon baking pad. The temperature of the oven is low enough not to affect the plastic.

5. Spray or brush your baking sheet with the vegetable oil, then spread the fruit puree onto the sheet tray with an offset spatula or knife to 1/8-1/4 inch thickness. Place it in the oven for 6-8 hours. Make sure there is air circulating to prevent scorching. Alternatively place it in the sun for 6-8 hours.

6. Invert the fruit leather onto another baking sheet that has been covered in plastic or silicon baking pad and oiled, and remove the first lining. Place in the oven or sun for another 6-8 hours. If it becomes too brittle at any point, simply brush on water with a pastry brush to rehydrate it.

7. Cool the sheet tray and cut the fruit leather into desired sizes. Dust with corn starch to prevent sticking, cover in plastic and store in a cool place in a sealed container.


_______________________________________

Jessica Merchant is a personal trainer turned food writer and blogger. Her blog, How Sweet Eats, is where she proclaims her love for all things sweet, all things bacon, and everything else in between. She works her magic in her Pittsburgh kitchen, which she shares with her husband of 2 years.


Profile photo of Erika (TK)

Put Some Irish In Your Dessert!

Posted by in Holidays, Looks Delicious!

Tasty Kitchen Blog: Irish Cream in Desserts!

 
Looking for ways to celebrate today’s holiday without wearing green from head to toe? (Did you know that originally, blue was the color associated with St. Patrick?) If you’re up for a blast from the past, here’s an Irish food theme post we put up last time. Spoiler alert: Chocolate Stout Cupcakes. That’s all I’m saying.

Today, I thought we’d look at a few ways to put some Irish in your treats. Specifically, Irish cream. (And I mean the kind of cream that comes with whisky.) Oh, how I love Irish cream. It’s like drinking your dessert. And you don’t have to share it with the kids either.

Sorry. A nice glass of Irish cream on ice makes me a wee bit selfish.

That’s why when I saw these cookies from Jessica, I wanted to march into the kitchen immediately and make them.


Tasty Kitchen Blog: Looks Delicious! Irish Cream in Desserts (Double Fudge Irish Cream Cookies, submitted by TK member Jessica Merchant of How Sweet Eats)

These Double Fudge Irish Cream Cookies are soft, spiked, and chocolaty. All the things I like in a cookie. Please bake these. Then do like she does in her blog post: pour yourself a cup of coffee, use more Irish cream as your creamer, dunk the cookies and go to town with your decadent adult snack.


Tasty Kitchen Blog: Looks Delicious! Irish Cream in Desserts (Irish Cream Cupcakes, submitted by TK member Erica of Sweet Tooth)

Or make some of these beautiful Irish Cream Cupcakes from Tasty Kitchen member Erica, who blogs at Sweet Tooth. Bailey’s cupcakes with Bailey’s buttercream? Oh yes, please. The cupcakes have a hint of cinnamon and vanilla, which go wonderfully with the Irish cream.

Who am I kidding? Everything goes wonderfully with Irish cream. Especially more cream.

(Can you tell I really like my Irish cream?)


Tasty Kitchen Blog: Looks Delicious! Irish Cream in Desserts (Bailey's Ice Cream with Chocolate Shavings, submitted by TK member Gwen Pratesi of Bunky Cooks)

And finally, if you already have your dessert menu ready to go, consider adding Bailey’s Ice Cream with Chocolate Shavings from the lovely bunkycooks. In her blog post, she hails its big boozy flavor and rich chocolate flavor from the dark chocolate shavings. Lady knows how do ice cream, that’s for sure.

 
So, you do have any special plans for today? Maybe you already have an Irish menu ready to go, and if so, just tell me where and when to show up.

I’ll even bring my own spoon. And lots of napkins.


Profile photo of Natalie | Perry's Plate

Pepitas Shrimp Skewers

Posted by in Step-by-Step Recipes

  The sun seems to be shining more lately, and after all of the freezing cold weather most of us here in the US have been experiencing (snow in San Francisco?!) I’m definitely ready for warmer weather. And flip flops. And throwing everything we eat on the grill. I was drawn to this recipe for […]

Profile photo of twopeasandtheirpod

Snickerdoodle Muffins

Posted by in Baking, Step-by-Step Recipes

  Snickerdoodles have always been one of my favorite cookies. First of all, I love the name. I bet you can’t say snickerdoodle without smiling. It’s such a fun word. I also enjoy eating the sweet, buttery cookies that have a cinnamon sugar crust. When I saw this recipe submitted by Heather Christo for Snickerdoodle Muffins on […]

Profile photo of In Good Taste

Chipotle-Spiced Sweet Potato Chili

Posted by in Looks Delicious!

  I have a theory that the only people who don’t like sweet potatoes haven’t tried them. Or maybe they have tried them but they’ve tried them plain, cooked half-heartedly in a microwave and topped with something lackluster, like fat-free sour cream or worse: fake butter. 
Sweet potatoes also take a lot of flack when […]

Profile photo of Erika (TK)

Looks Delicious! Roasted Salmon

Posted by in Looks Delicious!

  Now that Tuesday’s revelry is behind us, it’s time to slow it down a bit. Gastronomically speaking, that is. Today marks the day that many begin a period of fasting and sacrifice. Most choose to give up the one thing they enjoy the most: chocolate, cheese, alcohol, bacon (say it isn’t so), red meat […]