The Pioneer Woman Tasty Kitchen
Profile photo of Erika (TK)

Looks Delicious! Apple Cider Doughnut Holes

Posted by in Looks Delicious!

Tasty Kitchen Blog: Looks Delicious! (Apple Cider Doughnut Holes, submitted by TK member Tracy of Sugarcrafter)

 
It’s apple-picking time again and Tasty Kitchen has been getting so many wonderful apple recipes. We’re loving it! Know what else we love? Apple cider. Cold, hot, spiced … it’s all good.

Apple cider in doughnuts? Even better.

As soon as I saw these little devils from Tracy (Sugarcrafter), I’ve been wanting doughnut holes pretty much every day. You remember Tracy, don’t you? We featured her here before, and she’s been busy adding even more deliciousness to her recipe box. We love her.

Thanks, Tracy!

Do visit her food blog, Sugarcrafter, for more recipes from this lovely lady. Then prepare yourself for the onslaught of yumminess!

(Sorry. I get a bit carried away when doughnuts are involved.)


Profile photo of Natalie | Perry's Plate

Stuffed Acorn Squash with Cranberry Cornbread Stuffing

Posted by in Step-by-Step Recipes

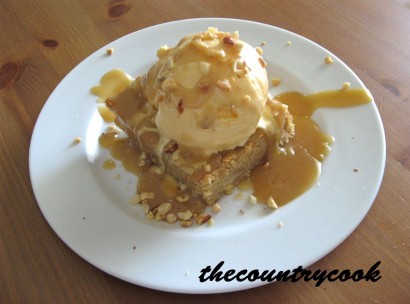
We’re so excited to have a growing group of fantastic contributors here on Tasty Kitchen. Today I’d like to welcome Natalie (Perry’s Plate), who has contributed nearly sixty scrumptious dishes to Tasty Kitchen over the past year. We’ve featured so many of Natalie’s recipes on Tasty Kitchen, many of them are permanently committed to my memory. For her inaugural post, Natalie shares a delicious Thanksgiving-friendly recipe from Tasty Kitchen member kvmolen. Thank you to Natalie and kvmolen for bringing us this yummy dish! –PW

 
Tasty Kitchen Blog: Stuffed Acorn Squash with Cranberry Cornbread Stuffing. Guest post by Natalie Perry of Perry's Plate, recipe submitted by TK member kvmolen.

 
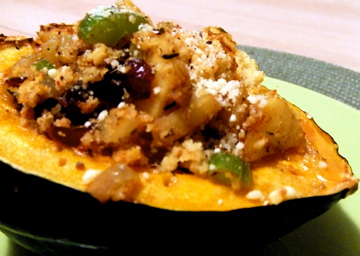
As a reformed squash hater, it still surprises me when a squash recipe gets lodged in my head and won’t leave until I’ve prepared it. That’s how I felt when I ran across this Acorn Squash with Cranberry-Cornbread Stuffing from TK member kvmolen. It didn’t help that I’d picked up a couple of gorgeous golden acorn squashes at a farm stand on the way home from the beach the day before.

(Doesn’t that sound like a lovely place to live? I never thought in a million years I’d say anything like that, hating squash all my life and growing up in Idaho, which has a severe shortage of beaches. We’re really enjoying the coast right now!)

This squash is a cinch to prepare and the stuffing has a lot of great flavors. I was surprised by how not-sweet it was, despite the many ingredients that impart a sweeter flavor. Like apples. And corn muffins. Oh yeah, and sugar.


Tasty Kitchen Blog: Stuffed Acorn Squash with Cranberry Cornbread Stuffing. Guest post by Natalie Perry of Perry's Plate, recipe submitted by TK member kvmolen.

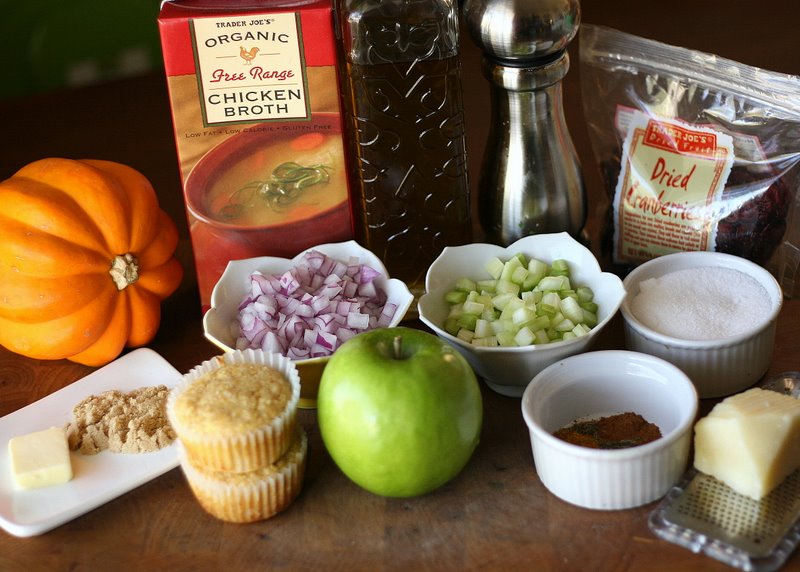
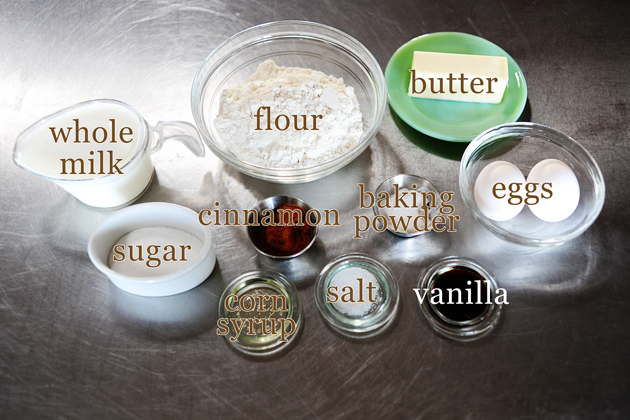
Here’s what you’ll need: one beautiful acorn squash (usually dark green—the one above is a golden acorn), chicken broth, olive oil, salt, pepper, dried cranberries, fresh Parmesan cheese, spices (curry powder, cinnamon, and thyme), celery, onion (the recipe says yellow, but my cupboard said red), one tart apple, a couple of corn muffins leftover from chili night, a touch of brown sugar and some butter.


Tasty Kitchen Blog: Stuffed Acorn Squash with Cranberry Cornbread Stuffing. Guest post by Natalie Perry of Perry's Plate, recipe submitted by TK member kvmolen.

First preheat your oven to 400 degrees F.

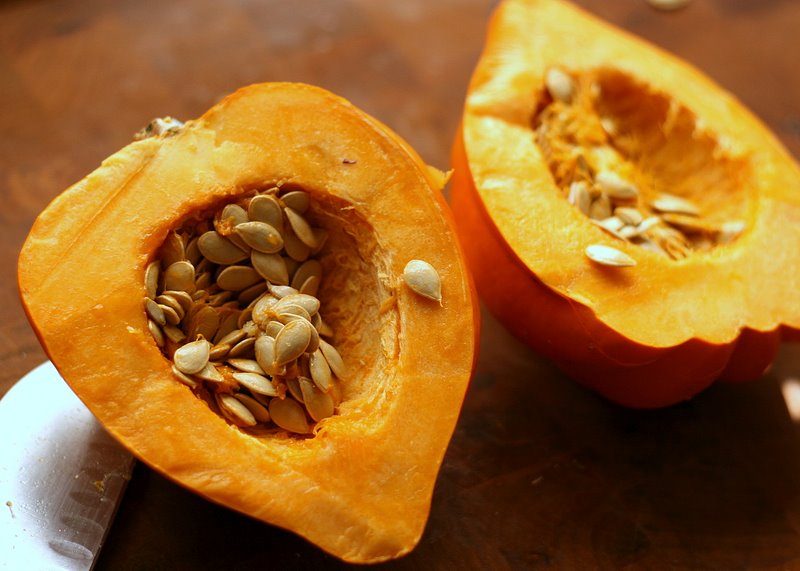
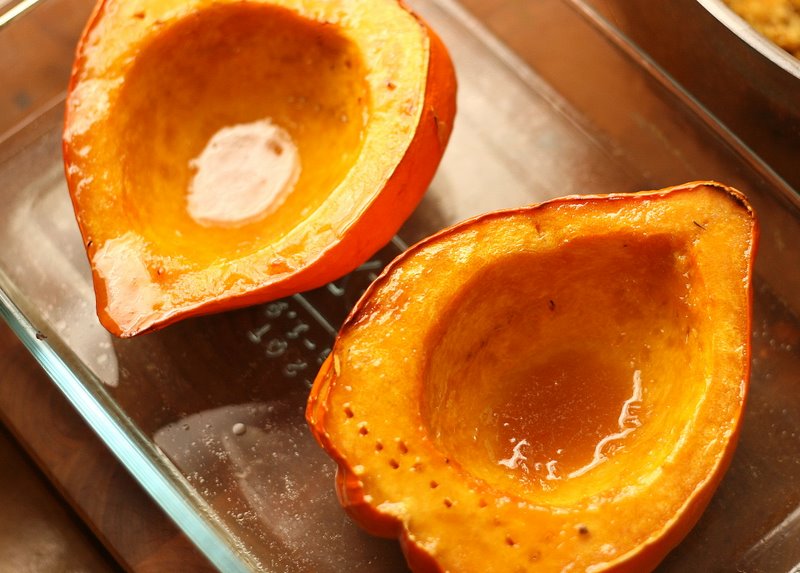
Alright folks, here’s the hardest part of the entire process: opening that blasted squash. Acorn squashes are pretty hard, so you’ll need a nice, sharp knife and some triceps. Stick the knife in it and work your way down, turning the squash and reinserting the knife as needed.


Tasty Kitchen Blog: Stuffed Acorn Squash with Cranberry Cornbread Stuffing. Guest post by Natalie Perry of Perry's Plate, recipe submitted by TK member kvmolen.

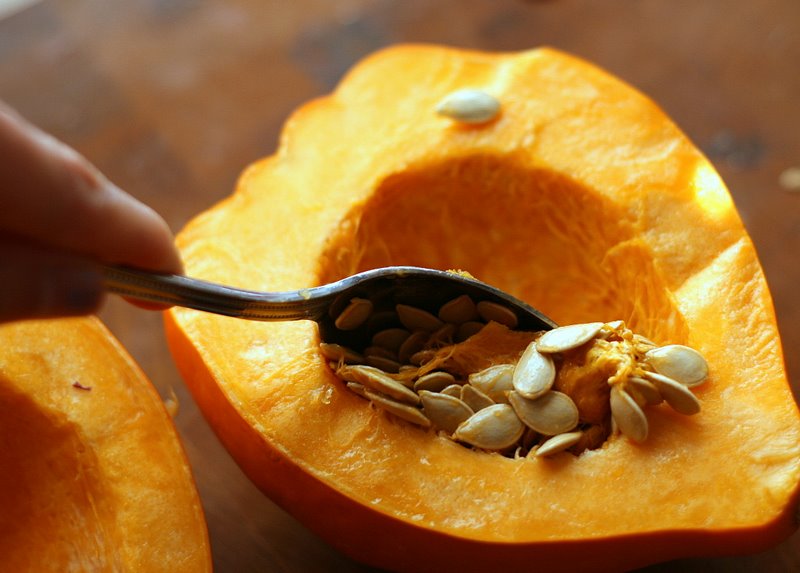
Just scoop out the seeds with a spoon and try to get most of the stringy bits out as well. Once you get it cleaned out, run and grab a small baking dish. I used an 11×7 glass one.


Tasty Kitchen Blog: Stuffed Acorn Squash with Cranberry Cornbread Stuffing. Guest post by Natalie Perry of Perry's Plate, recipe submitted by TK member kvmolen.

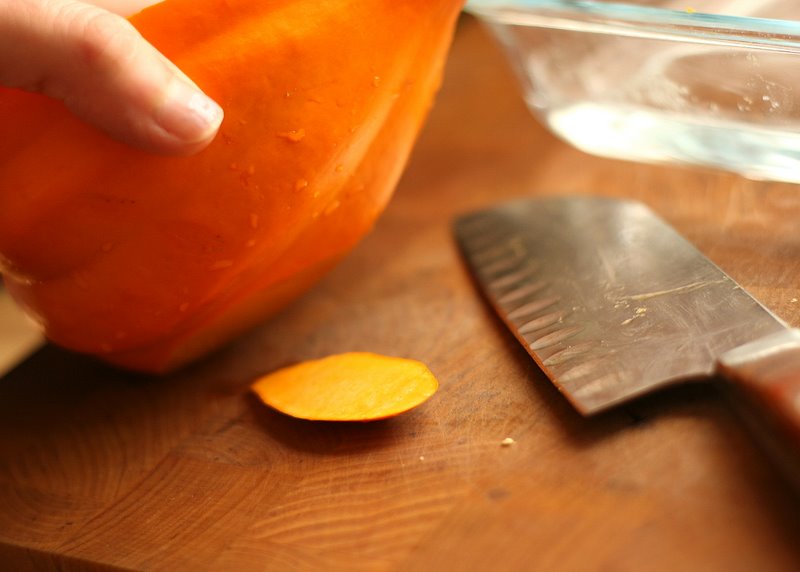
Lay the squash halves cut-side up in the baking dish. If you find that they roll around, just slice a small piece off the bottom (shown above) to create a flat surface.


Tasty Kitchen Blog: Stuffed Acorn Squash with Cranberry Cornbread Stuffing. Guest post by Natalie Perry of Perry's Plate, recipe submitted by TK member kvmolen.

Put a little butter and brown sugar in each half, fill the dish with about an inch of water and bake for 15 minutes. (No, you don’t have to melt the butter and sugar before they go in the squash.)


Tasty Kitchen Blog: Stuffed Acorn Squash with Cranberry Cornbread Stuffing. Guest post by Natalie Perry of Perry's Plate, recipe submitted by TK member kvmolen.

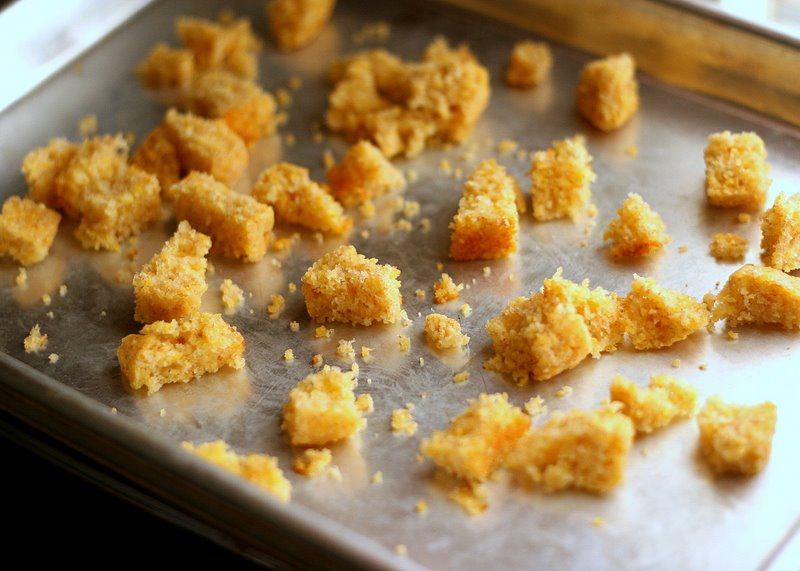
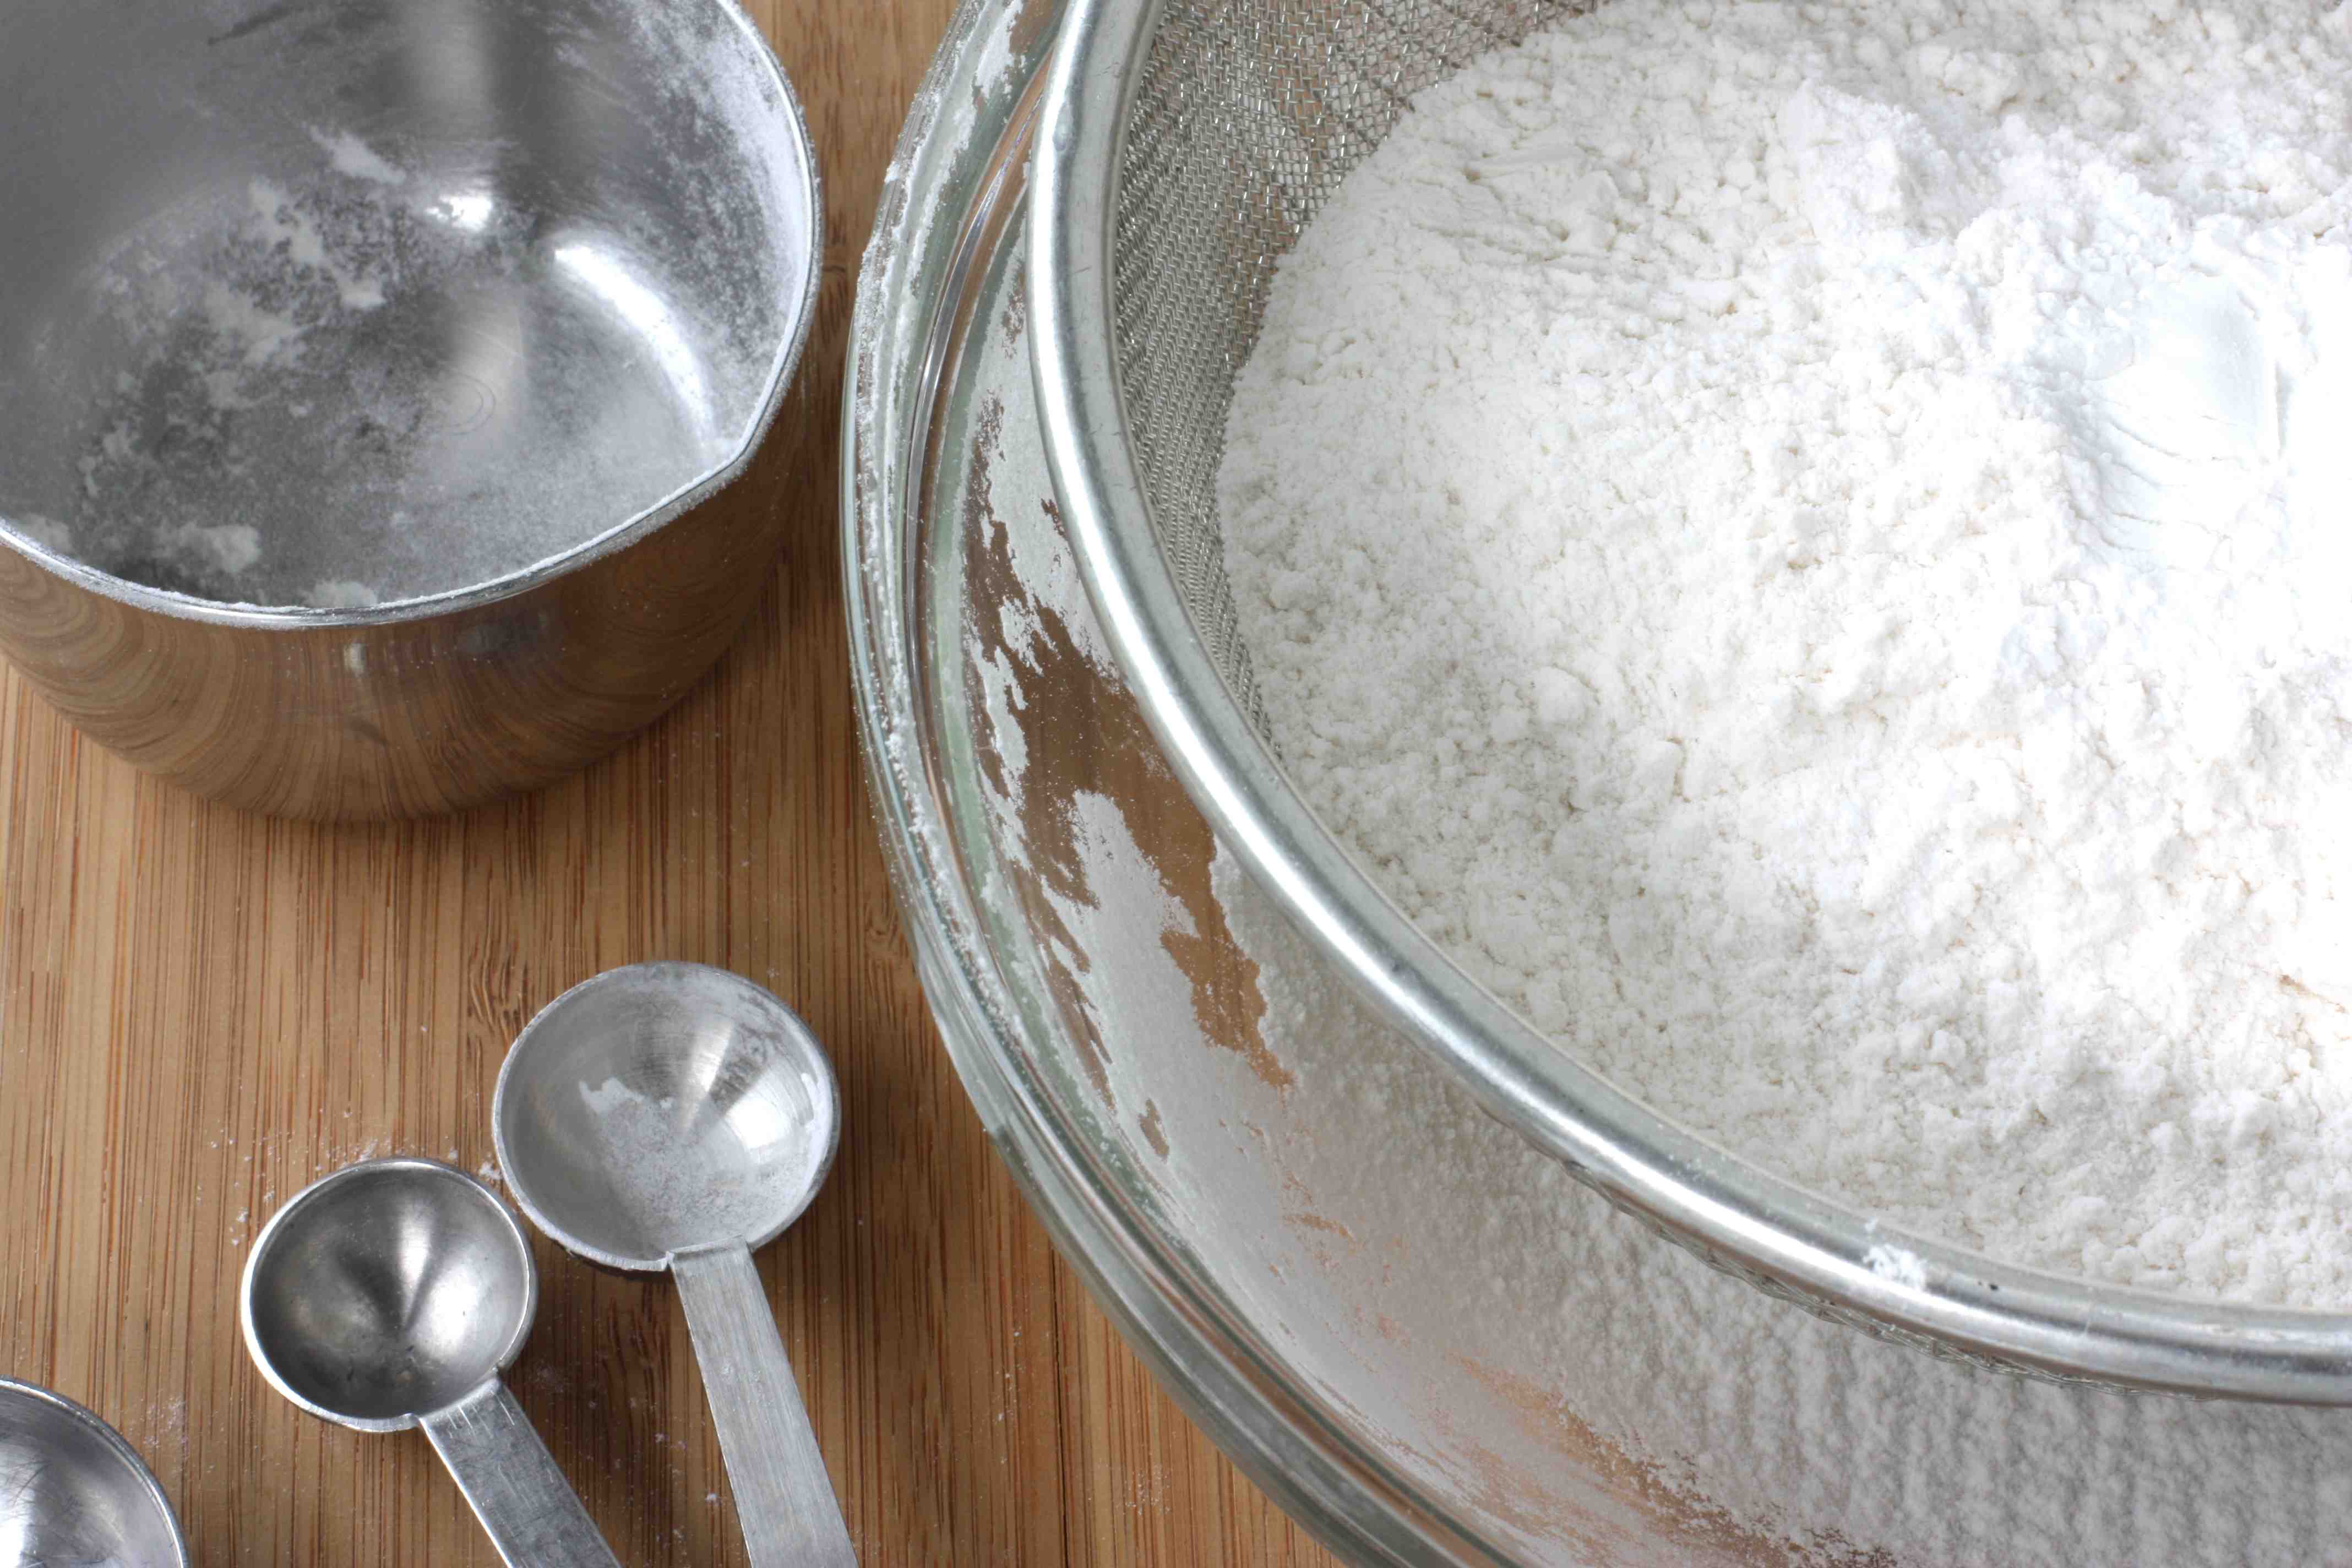
Meanwhile, cut the corn muffins into bite-sized pieces and lay them on a small baking sheet. I used a quarter sheet pan. I love those.


Tasty Kitchen Blog: Stuffed Acorn Squash with Cranberry Cornbread Stuffing. Guest post by Natalie Perry of Perry's Plate, recipe submitted by TK member kvmolen.

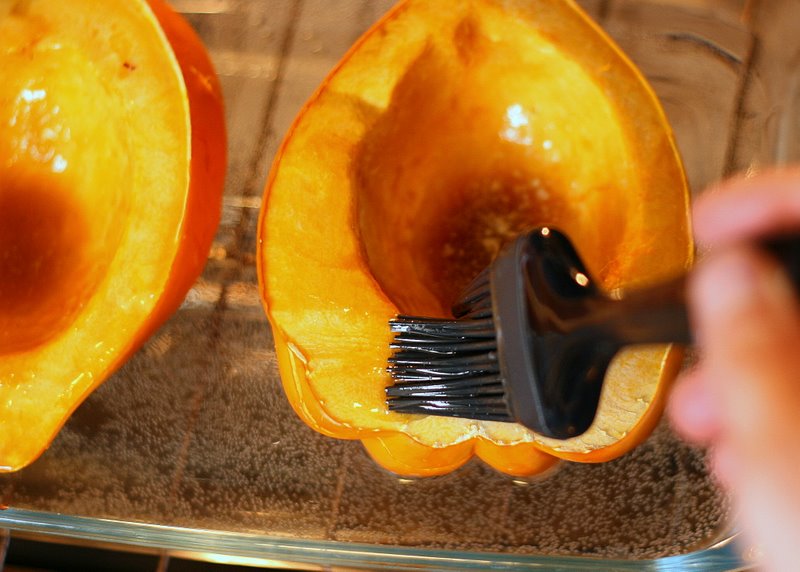
After the squash has baked for 15 minutes, pull it from the oven and baste the top with the melted butter and sugar from the center. Mmm.


Tasty Kitchen Blog: Stuffed Acorn Squash with Cranberry Cornbread Stuffing. Guest post by Natalie Perry of Perry's Plate, recipe submitted by TK member kvmolen.

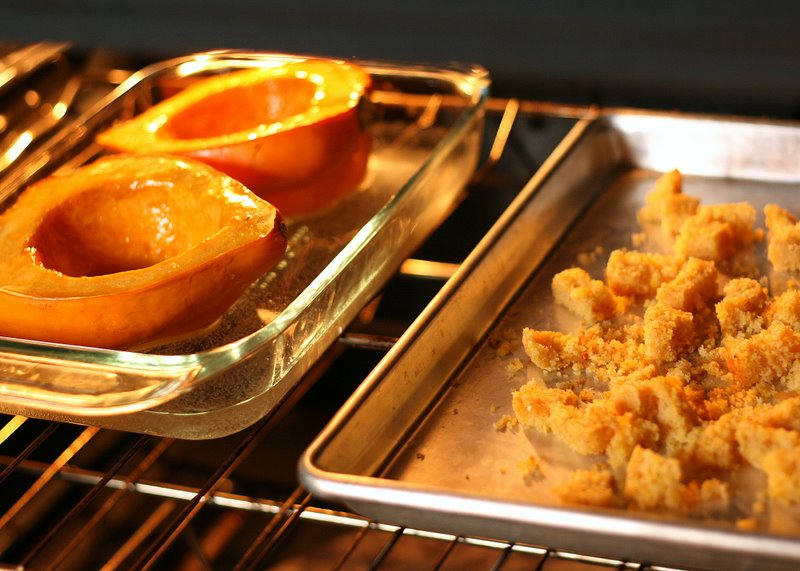
Return the squash to the oven and place the pan with the cornmeal right next to it. Take the cornmeal out after about 10 minutes or so or until it gets golden and a little crunchy. Leave the squash in for 35-40 minutes or until fork-tender.


Tasty Kitchen Blog: Stuffed Acorn Squash with Cranberry Cornbread Stuffing. Guest post by Natalie Perry of Perry's Plate, recipe submitted by TK member kvmolen.

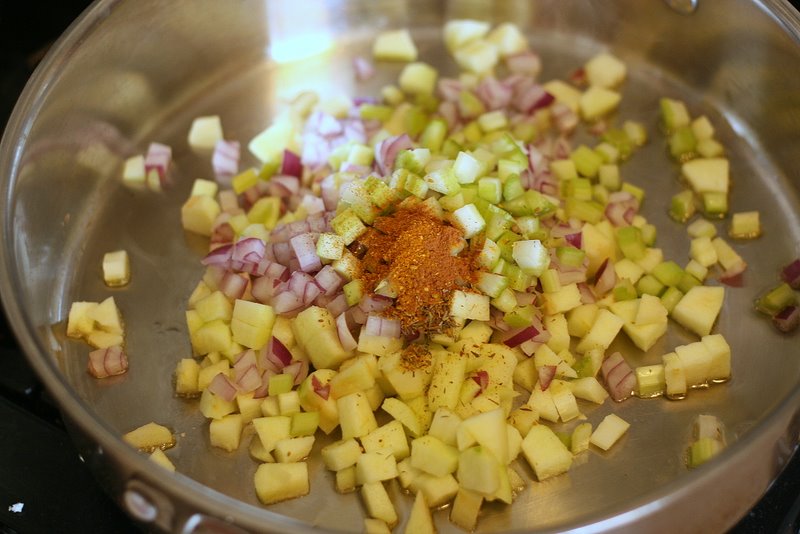
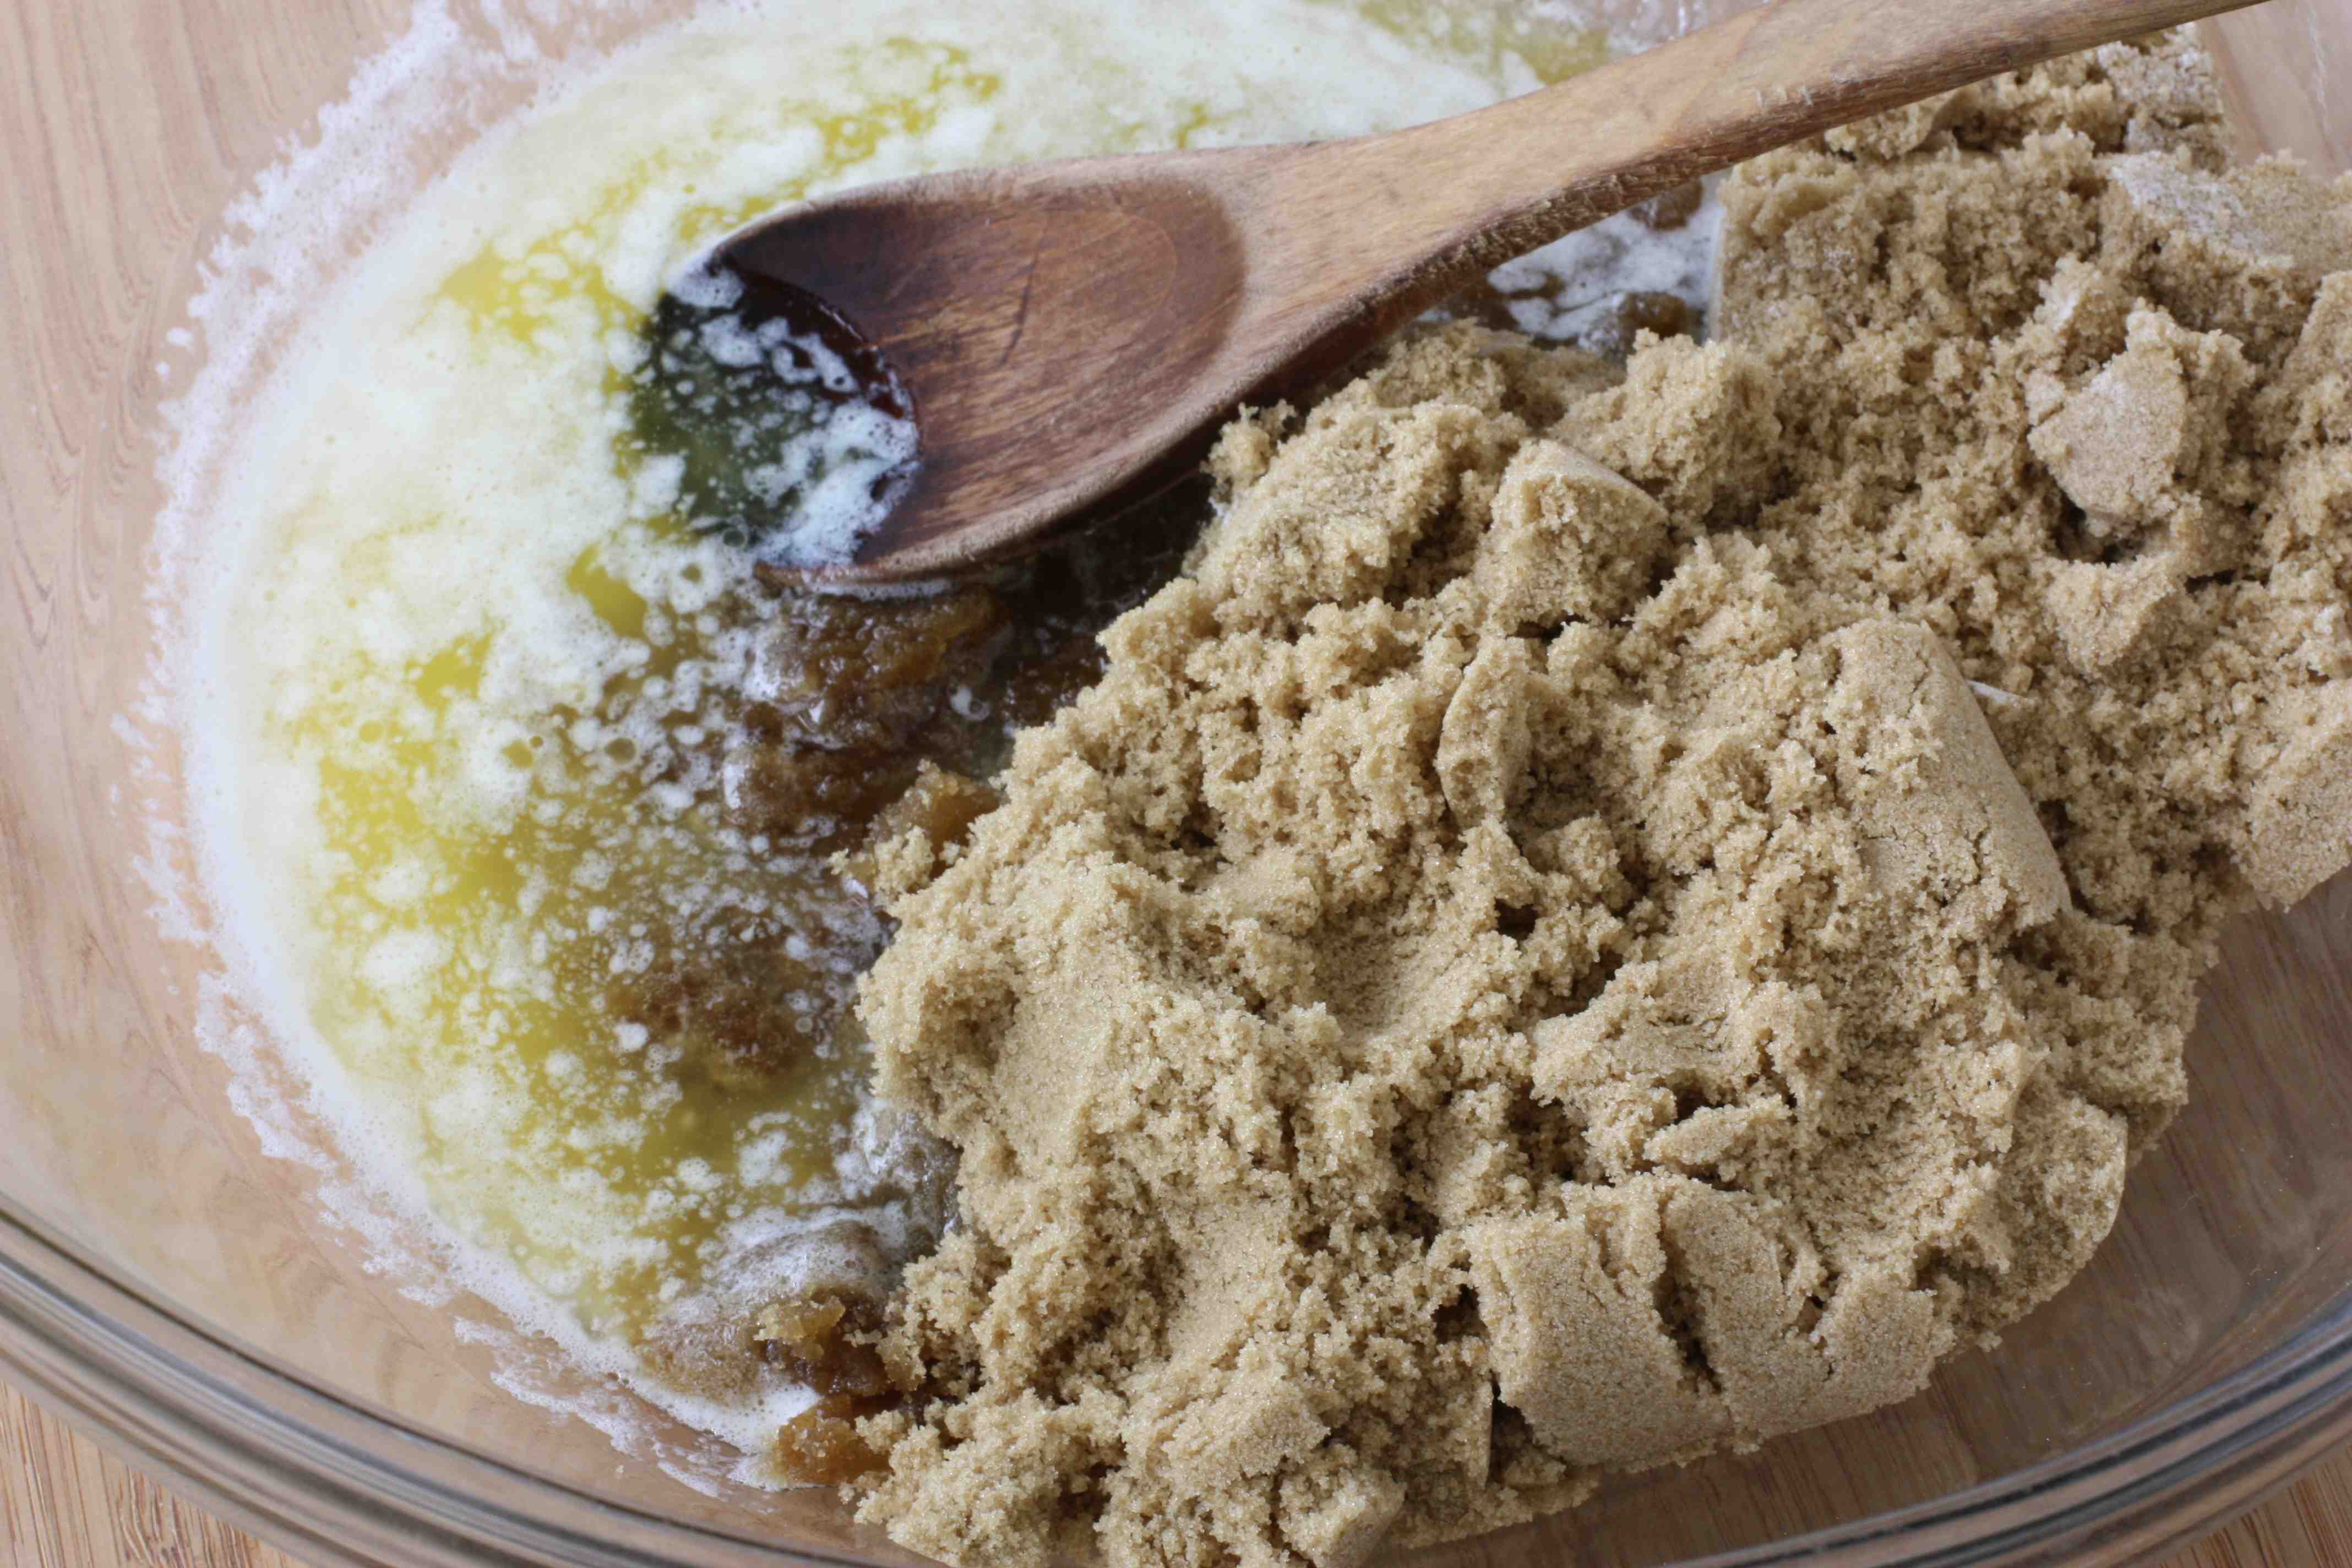
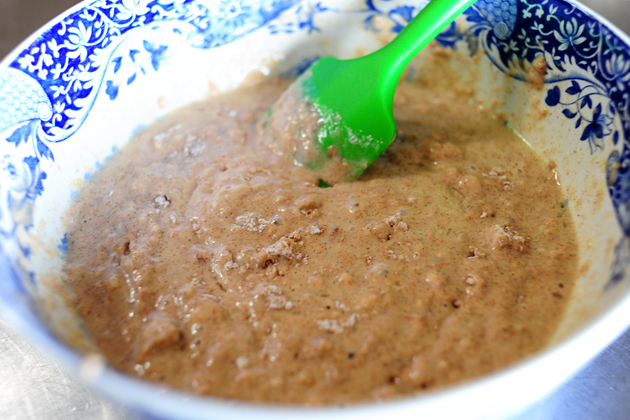
While the squash and the cornbread are hanging out in the oven, start on the stuffing. Grab a skillet or saute pan and heat the olive oil over medium-high heat. Add the apples, celery, onion, and spices. All at once.


Tasty Kitchen Blog: Stuffed Acorn Squash with Cranberry Cornbread Stuffing. Guest post by Natalie Perry of Perry's Plate, recipe submitted by TK member kvmolen.

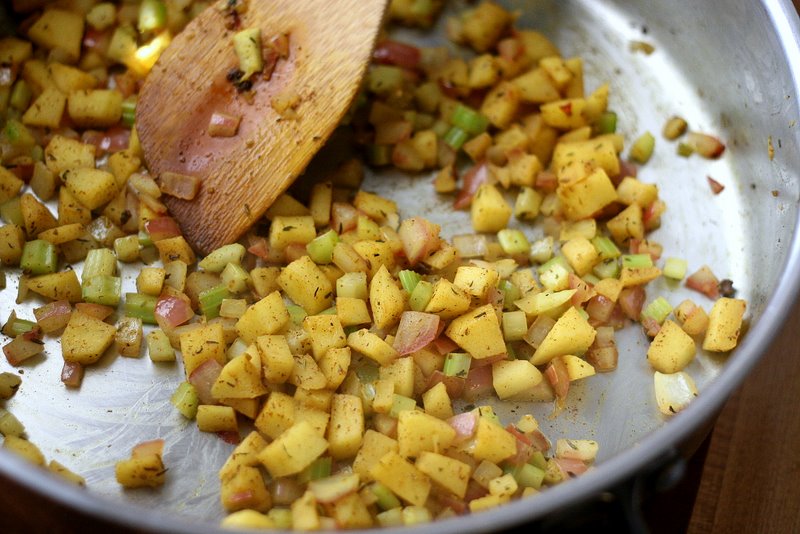
Cook, stirring occasionally, for about 8-10 minutes or until everything is softened. (I needed to add a couple splashes of chicken broth to keep it from sticking.) Remove from the heat and set aside until the cornmeal is finished baking, then bring the skillet back up to medium-high heat.


Tasty Kitchen Blog: Stuffed Acorn Squash with Cranberry Cornbread Stuffing. Guest post by Natalie Perry of Perry's Plate, recipe submitted by TK member kvmolen.

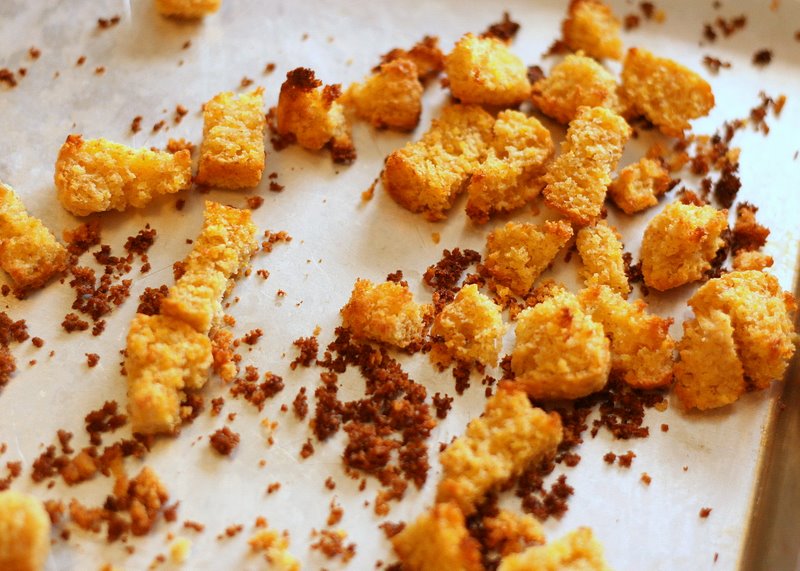
Here are the finished cornmeal bits. You’ll want to take these …
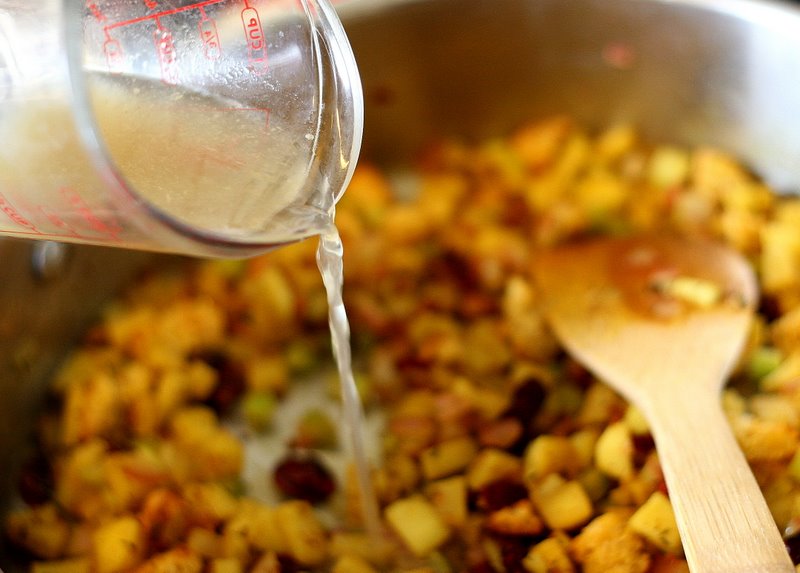


Tasty Kitchen Blog: Stuffed Acorn Squash with Cranberry Cornbread Stuffing. Guest post by Natalie Perry of Perry's Plate, recipe submitted by TK member kvmolen.

The chicken broth …


Tasty Kitchen Blog: Stuffed Acorn Squash with Cranberry Cornbread Stuffing. Guest post by Natalie Perry of Perry's Plate, recipe submitted by TK member kvmolen.

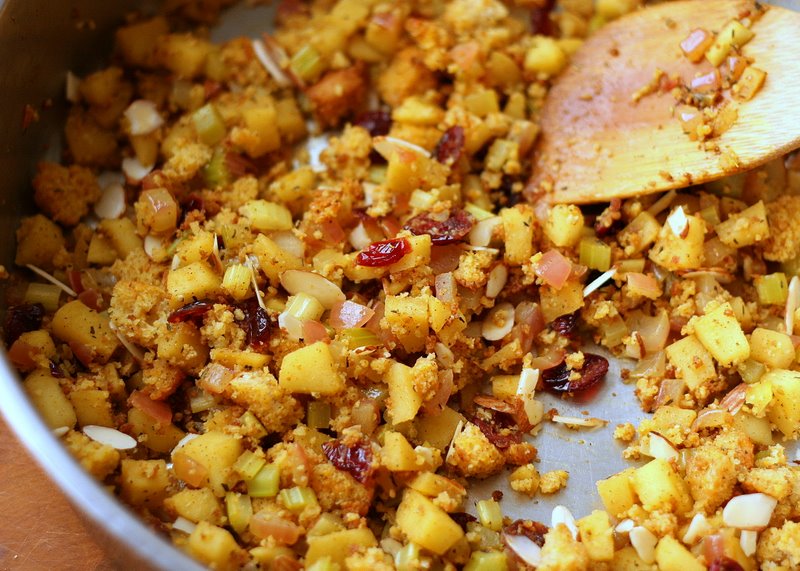
And the cranberries. Add them to the skillet. Cook until the chicken broth is all soaked up and the cornmeal is soft. This wasn’t in the recipe, but I threw in a handful of sliced almonds for kicks. Salt and pepper to taste.


Tasty Kitchen Blog: Stuffed Acorn Squash with Cranberry Cornbread Stuffing. Guest post by Natalie Perry of Perry's Plate, recipe submitted by TK member kvmolen.

When you think the squash may be done, stick a fork in it to see if it’s tender. You can do it about eight times like I did. Just to be sure.


Tasty Kitchen Blog: Stuffed Acorn Squash with Cranberry Cornbread Stuffing. Guest post by Natalie Perry of Perry's Plate, recipe submitted by TK member kvmolen.

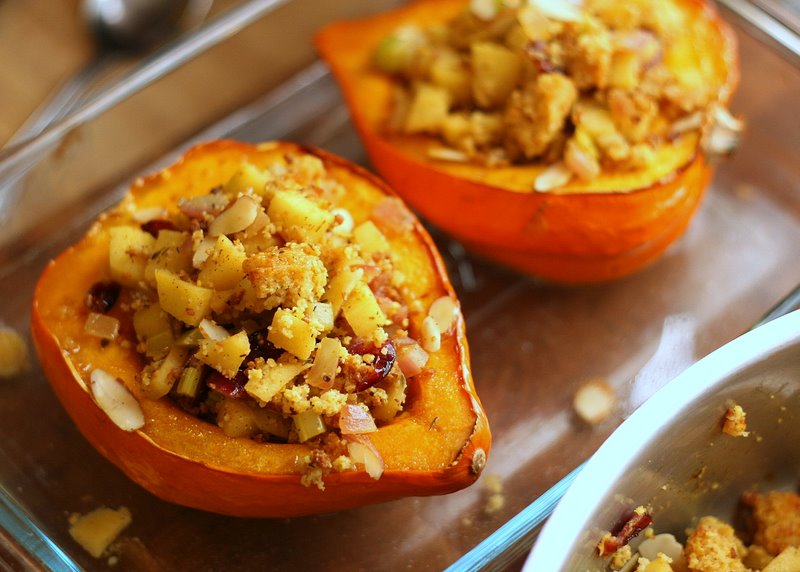
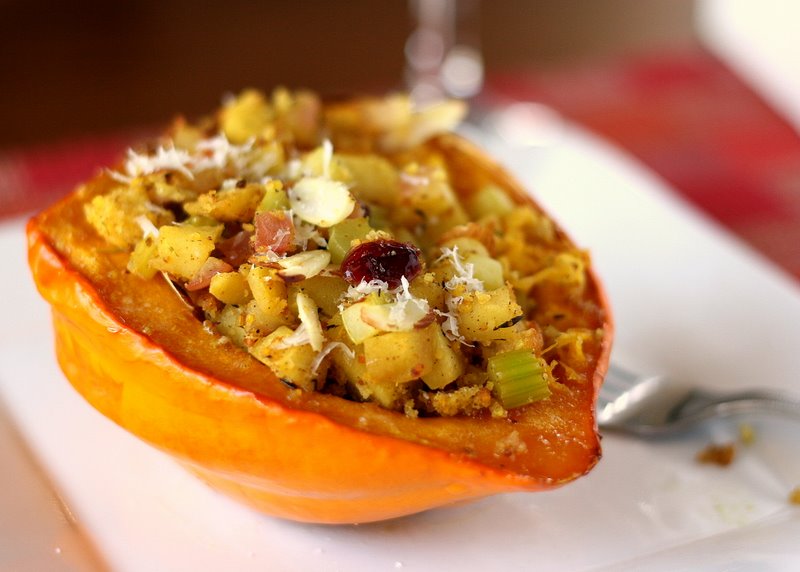
Leave the squash in the pan and spoon some stuffing into each cavity. You’ll have some stuffing leftover. I had enough leftover for two more squash halves! It’s nice to go back for refills, though, so maybe you’d be better off with just two halves. If your stuffing has cooled of completely, return the pan to the oven for 5 minutes or so to heat through.


Tasty Kitchen Blog: Stuffed Acorn Squash with Cranberry Cornbread Stuffing. Guest post by Natalie Perry of Perry's Plate, recipe submitted by TK member kvmolen.

If everything’s ready to go, take a pair of sturdy metal tongs (or pansy plastic ones at your own risk—these things are heavy) and transfer to a plate. Top with a little grated Parmesan cheese if you feel so inclined.
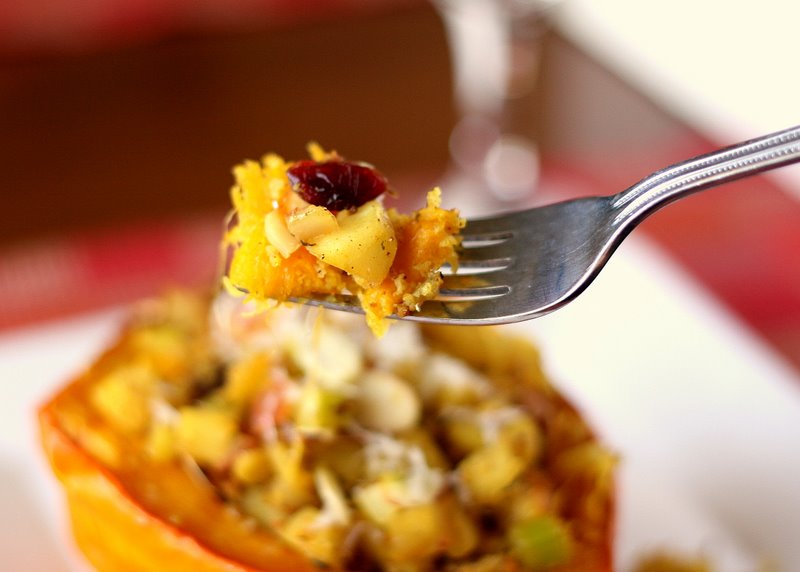


Tasty Kitchen Blog: Stuffed Acorn Squash with Cranberry Cornbread Stuffing. Guest post by Natalie Perry of Perry's Plate, recipe submitted by TK member kvmolen.

And dig in.

Squash, apples, cranberries … doesn’t that just scream autumn? We really enjoyed these, and thought it was a solid vegetarian dish with a lot of fun flavors. The stuffing would also be great with some chicken-apple sausage in place of half the apple to satisfy your inner carnivore.


Tasty Kitchen Blog: Stuffed Acorn Squash with Cranberry Cornbread Stuffing. Guest post by Natalie Perry of Perry's Plate, recipe submitted by TK member kvmolen.

Thanks for posting such a wonderful recipe Katie!


Printable Recipe

Acorn Squash with Cranberry-Cornbread Stuffing

4.81 Mitt(s) 11 Rating(s)11 votes, average: 4.81 out of 511 votes, average: 4.81 out of 511 votes, average: 4.81 out of 511 votes, average: 4.81 out of 511 votes, average: 4.81 out of 5

Prep Time:

Cook Time:

Difficulty: Intermediate

Servings: 2

2
x

Print Options

Page size Letter 3x5 4x6
Text Size Small Medium Large
Content Include description
Include prep time, etc.
Show image

Description

Great fall flavors packed into one tasty dish!

Ingredients

  • 1 whole Acorn Squash, Cut In Half Lengthwise
  • 2 teaspoons Brown Sugar
  • 2 teaspoons Butter
  • 1 Tablespoon Extra Virgin Olive Oil
  • ½ cups Celery, Diced
  • ½ whole Yellow Onion, Diced
  • 1 whole Tart Apple, Peeled, Cored, And Diced
  • ½ teaspoons Dried Thyme
  • ½ teaspoons Curry Powder
  • ¼ teaspoons Cinnamon
  • 2 whole Cornbread Muffins, Cut Into Bite-sized Pieces
  • ¼ cups Dried Cranberries
  • ½ cups Chicken Stock
  • Salt To Taste
  • Freshly Ground Pepper, to taste
  • Sprinkle Of Parmesan Cheese (optional)

Preparation Instructions

1. Preheat oven to 400 degrees.
2. Scrape seeds and stringy flesh from squash. Place squash in a baking dish, cut sides up. Pour about an inch of water in the bottom of the dish. Put one teaspoon butter and one teaspoon brown sugar in each half.
3. Place in the oven for 15 minutes. Baste squash with the butter and sugar mixture after the 15-minute mark to prevent drying. Put back in the oven for another 30 to 45 minutes, or until fork tender.
4. Meanwhile, heat olive oil in a skillet and add the celery, onion, apples, thyme, curry, and cinnamon. Cook until softened. Remove skillet from heat and set aside.
5. Place cubed cornbread on a baking sheet and set next to the squash in the oven. Bake for about 10 minutes, or until golden and crunchy.
6. Add cranberries and the toasted cornbread to the skillet mixture and gently stir to combine. While stirring, slowly add the chicken broth. Season with salt and pepper.
7. Fill the fork-tender squash with cornbread stuffing and place back into oven until heated through.


_______________________________________

Be sure to check out Natalie’s own beautiful food blog, Perrys’ Plate, where you can see her growing collection of lovely recipes. There’s always something new to see there. Go visit now!


Profile photo of cookincanuck

White Chocolate Walnut Blondies with Maple Butter Sauce

Posted by in Baking, Step-by-Step Recipes

I’m so excited to welcome Dara, also known as prolific Tasty Kitchen contributor Cookin’ Canuck, as a new contributor to the Tasty Kitchen Blog. I’ve been loving Dara’s recipes, both on Tasty Kitchen and on her own food blog, Cookin’ Canuck, for quite some time, so meeting her in person recently was a real treat for me. She’s as sweet as the recipe she’s sharing with us today—a sweet treat from Tasty Kitchen member Brandie (thecountrycook). Welcome, Dara and thank you, Brandie! –Ree

 
Tasty Kitchen Blog: White Chocolate Walnut Blondies with Maple Butter Sauce. Guest post by Dara Michalski of Cookin' Canuck, recipe submitted by TK member Brandie of The Country Cook.

 
As fall seeps in through the seams of summer, all I want to do is pull on my fleece pants, sit on the couch in front of a good chick flick (okay, a rousing football or hockey game will do, too), and eat foods that will test the resolve of the elastic on my waistband. When the siren call of this recipe by TK member thecountrycook reached my ears, I simply could not resist.

These White Chocolate Walnut Blondies are not just about the brownie, though the rich chewy bar filled with white chocolate and walnuts could certainly stand on its own. This dessert is made even more alluring by the maple butter sauce drizzled—or generously poured—over the top. Think warm, sticky caramel melting a scoop of ice cream down the sides of a tender brownie.

That siren call is getting louder.


Tasty Kitchen Blog: White Chocolate Walnut Blondies with Maple Butter Sauce. Guest post by Dara Michalski of Cookin' Canuck, recipe submitted by TK member Brandie of The Country Cook.

Preheat oven to 350 degrees. In a medium bowl, sift together flour, baking powder, and salt.


Tasty Kitchen Blog: White Chocolate Walnut Blondies with Maple Butter Sauce. Guest post by Dara Michalski of Cookin' Canuck, recipe submitted by TK member Brandie of The Country Cook.

In a large bowl, combine melted butter and brown sugar. (Those are words that make me sigh with pleasure.)


Tasty Kitchen Blog: White Chocolate Walnut Blondies with Maple Butter Sauce. Guest post by Dara Michalski of Cookin' Canuck, recipe submitted by TK member Brandie of The Country Cook.

Stir together until combined. (I mean, really, who can resist dipping their finger into this?) Beat eggs and add them, along with a little vanilla, to the brown sugar mixture.


Tasty Kitchen Blog: White Chocolate Walnut Blondies with Maple Butter Sauce. Guest post by Dara Michalski of Cookin' Canuck, recipe submitted by TK member Brandie of The Country Cook.

Gradually add the flour mixture and stir thoroughly. Be careful not to overmix the batter or the brownies will become tough. That would be sacreligious.


Tasty Kitchen Blog: White Chocolate Walnut Blondies with Maple Butter Sauce. Guest post by Dara Michalski of Cookin' Canuck, recipe submitted by TK member Brandie of The Country Cook.

Chop some walnuts.


Tasty Kitchen Blog: White Chocolate Walnut Blondies with Maple Butter Sauce. Guest post by Dara Michalski of Cookin' Canuck, recipe submitted by TK member Brandie of The Country Cook.

Add the walnuts and white chocolate chips to the batter. Stir them into the batter, which takes a bit of muscle. This workout is how you will justify eating three brownies later.


Tasty Kitchen Blog: White Chocolate Walnut Blondies with Maple Butter Sauce. Guest post by Dara Michalski of Cookin' Canuck, recipe submitted by TK member Brandie of The Country Cook.

Spray a 9- by 13-inch baking pan with cooking spray. The recipe did not actually state this, but I did not want to risk any of these brownies sticking to the bottom. Press the brownie mixture into the pan.

If you are using your fingers to do this, coat them with some butter first to help with sticking. Of course, any morsels sticking to your fingers should be consumed immediately.


Tasty Kitchen Blog: White Chocolate Walnut Blondies with Maple Butter Sauce. Guest post by Dara Michalski of Cookin' Canuck, recipe submitted by TK member Brandie of The Country Cook.

Bake until a toothpick inserted in the center comes out clean, about 25 to 30 minutes. Remove from the oven and allow the brownies to cool on a wire rack.

Here comes the good part: the sauce. The maple butter sauce. Need I say more?


Tasty Kitchen Blog: White Chocolate Walnut Blondies with Maple Butter Sauce. Guest post by Dara Michalski of Cookin' Canuck, recipe submitted by TK member Brandie of The Country Cook.

In a medium saucepan set over medium heat, melt the butter. Be certain the butter does not burn. Add heavy cream, maple syrup, and corn syrup.

Bring the mixture to a gentle simmer, adjusting the heat, if necessary. Allow the mixture to simmer for 20-30 minutes, stirring occasionally. Remember when your parents told you that good things come to those who wait? Well, this wait will be torture but oh, so worth it.

The sauce is done when it is reduced by about one-third and turns a light caramel brown.


Tasty Kitchen Blog: White Chocolate Walnut Blondies with Maple Butter Sauce. Guest post by Dara Michalski of Cookin' Canuck, recipe submitted by TK member Brandie of The Country Cook.

If you want to serve warm brownies (and, really, who doesn’t), warm them in the microwave for about 30 seconds or in a cast iron skillet. These brownies are just begging for ice cream and you do not want to disappoint them. Drizzle the sauce over top and garnish with more chopped walnuts.

Brandie suggests doubling the sauce and I would have to agree. There is no need to skimp on this buttery goodness.

Thank you to Brandie for this decadent, irresistible recipe. Visit her blog, The Country Cook, for more of her recipes!


Printable Recipe

White Chocolate Walnut Blondies with Maple Butter Sauce

4.80 Mitt(s) 15 Rating(s)15 votes, average: 4.80 out of 515 votes, average: 4.80 out of 515 votes, average: 4.80 out of 515 votes, average: 4.80 out of 515 votes, average: 4.80 out of 5

Prep Time:

Cook Time:

Difficulty: Easy

Servings: 12

12
x

Print Options

Page size Letter 3x5 4x6
Text Size Small Medium Large
Content Include description
Include prep time, etc.
Show image

Description

Similar to my favorite Applebee’s dessert. Not an exact copy…but it is still pretty dang good!

Ingredients

  • FOR THE BLONDIES:
  • 3 cups All-purpose Flour
  • ¼ teaspoons Salt
  • 1 teaspoon Baking Powder
  • 10 Tablespoons Unsalted Butter, melted
  • 2 cups Light Brown Sugar
  • 3 whole Eggs, Lightly Beaten
  • 1 teaspoon Vanilla Extract
  • ½ cups Chopped Walnuts
  • 1 cup White Chocolate Chips
  • _____
  • FOR THE SAUCE:
  • 2 Tablespoons Unsalted Butter
  • 1-½ cup Heavy Cream
  • 6 Tablespoons Maple Syrup
  • 3 Tablespoons Light Corn Syrup
  • Optional Garnish: Vanilla Ice Cream, Chopped Walnuts

Preparation Instructions

Preheat oven to 350 degrees F.

In a medium bowl, sift together flour, salt & baking powder. Set aside.

In another large mixing bowl, mix melted butter with brown sugar until well-blended. Add in beaten eggs and vanilla. Stir well.

Slowly add flour mixture to butter/sugar/egg mixture. Stir thoroughly but take care not to overmix your batter. Fold in nuts and chocolate. Batter will be thick.

Spray pan with nonstick cooking spray, then pour batter into 9 x 13 baking pan. Bake for about 25-30 minutes (until a toothpick inserted comes out clean).

For the sauce:
Melt butter in a medium sauce pan over medium heat (do not allow butter to burn). Then add heavy cream, maple syrup and corn syrup. Allow this mixture to simmer over medium heat for about 20-30 minutes. This is the hard part: waiting for the mixture to reduce and thicken. You don’t want to bring this to a boil, just a nice, slightly bubbly simmer. Stir it occasionally. Once it has reduced by about a 1/3, it’s ready.

To serve: you can heat up blondie on a cast iron skillet and serve with a scoop of vanilla ice cream or you can just heat a slice of blondie on a plate in your microwave for about 25 seconds. Add a scoop of ice cream on top then pour the warm maple butter sauce on top and sprinkle with chopped walnuts.

Cook’s note: if using a glass pan, adjust heat to 325 degrees F. You may have to bake slightly longer than given time. Also, you may want to double up the maple butter sauce recipe. It really is the best part. We love a lot of sauce on ours (as you can tell from the picture!).


_______________________________________

Dara Michalski is a doll and a sweetheart who clearly knows her way around the kitchen. She blogs at Cookin’ Canuck, where she shares her flavor-packed recipes and fun, engaging writing. The photography’s pretty incredible, too.


Profile photo of Ree | The Pioneer Woman

Mixer Winners – And Pancake Redux

Posted by in Step-by-Step Recipes

Here are the winners of the KitchenAid mixers.

I can’t thank you all enough for your great feedback; I’ve been reading and taking notes!

Winner #1: Shawn “Tasty Kitchen has been a wonderful resource for finding good recipes to make for our family and for special occasions. It’s very helpful having photos of the recipes for reference. I’m always looking for quick and healthy family meals that everyone in the family will eat.”

Winner #2 Kara: “I heart TK and rely on it more than my cookbooks. If possible, it would be cool if we could have an online recipe box or some way to bookmark. I love the unique names of recipes, but unless you have a better memory than me, they are hard to find again unless you print them right then. An ingredient match would be cool too. Say you enter (chicken, mushrooms, heavy cream) and it matches your ingredients with a recipe that includes those. Hey you said bells and whistles, a girl can dream! Ha, it is already an awesome site!”

Winner #3 Elly: “I am not sure this will help you, but I LOVE the replies from people that have used the recipe and tips given for alternate ways to adjust the recipe. Participation is a great part of this site.”

Congrats, winners! Contact [email protected] to claim your loot.

Here’s a redux of a pancake recipe from last spring. Perfect for Saturday morning!

***********


Here’s what you’ll need. Nothin’ difficult here!


First combine all the dry ingredients in a bowl.


Then whisk it together until totally combined.


Next, combine the remaining ingredients in a separate bowl…


And whisk them together to combine.


Next, combine the wet ingredients with the dry ingredients.


Stir gently to combine.


Heat a skillet over medium-low heat, then smear butter over the surface.


Use a 1/4 cup measure to drop batter onto the skillet.


Cook until you start to see bubbles. Then flip ‘em over and cook on the other side!


Now, we’ll serve this first batch with butter and maple syrup, of course. Of course.


And when I say butter…I mean butter.


And when I say syrup…


I mean syrup, baby.


Okay, that’s the traditional route. You could stop here and be happy forever and ever.

 
But “happy forever and ever” isn’t enough for me.

 
In her recipe, sapeylissy suggests serving these pancakes with icing, recreating the true “cinnamon bun” effect. So I decided to whip up a little bit of a butter/syrup icing.


Throw some butter into a bowl…


Melt it for about 30 seconds…


Then dump in some powdered sugar.


Now throw in some maple syrup. Maple extract would be okay, too.


And some milk.


Then just whisk it together until it’s perfectly smooth and combined. You could also warm this up a little bit before serving.


So ideally, one would place the pancakes on a plate and gingerly drizzle this buttery/mapley icing lightly over the top. But I sorta got carried away and poured a whole tankload on there.


Sorry.


Oops! Sorry again.

I don’t know what came over me.

I really loved both approaches—the maple syrup/butter approach AND the icing approach. I think there wouldn’t be anything wrong with serving both.

Thank you to sapeylissy for the yummy recipe!

Here’s the printable for the pancakes:

Cinnamon Bun Pancakes

Here’s the simple icing recipe:

Maple-Butter Icing for Pancakes

And in case you missed it, here’s Erika’s post on Pancakes, which includes links to many different pancake recipes here on Tasty Kitchen.

The Theme is…Pancakes!

Enjoy!

Profile photo of missamy

Pumpkin Creme Pies

Posted by in Baking, Step-by-Step Recipes

  While searching for some goodies to bake during the upcoming holidays, I stumbled across this yummy recipe submitted by TK member The Deutsch Girl for Pumpkin Creme Pies, the perfect portable fall treat. I grew up eating Oatmeal Creme Pies, but never enjoyed a pumpkin version. This time of the year, pumpkin anything is […]

Profile photo of Ree | The Pioneer Woman

That’s STILL the Best Frosting I’ve Ever Had

Posted by in Baking, Step-by-Step Recipes

The mixer giveaway is still going on through noon today and winners will be announced Friday. Meanwhile, I wanted to re-post this recipe again for a slightly controversial frosting that I love so much I just made it again this week. And I realize it’s strange to call frosting controversial, but the comments on the […]

Profile photo of Erica Lea

Outrageous Garlic Soup

Posted by in Step-by-Step Recipes

  Are you ready for this? Garlic. Onions. Cream. White wine. Oh, yes. These are just a few of the ingredients that combine to make this wonderful, creamy soup, brought to us by n8tivenyer. I made this soup for our family. It was a big hit. Dad loved it—had several bowls of it. Even Grandma […]

Profile photo of Ree | The Pioneer Woman

Looks Delicious! Roasted Cinnamon Pear Bruschetta

Posted by in Looks Delicious!

  This recipe, submitted by Tasty Kitchen member HowSweetEats, caught my eye for many reasons. The roasted cinnamon pears. The mascarpone. The word “bruschetta,” which only evokes lovely thoughts for me. This would be such a winning appetizer for a holiday party! Thank you, Jessica! Check out Jessica’s food blog, How Sweet It Is. So […]