The Pioneer Woman Tasty Kitchen
Profile photo of georgiapellegrini

Zucchini Blossom Fritters

Posted by in Step-by-Step Recipes

Tasty Kitchen Blog: Zucchini Blossom Fritters. Guest post by Georgia Pellegrini, recipe submitted by TK member Katie of The Parsley Thief.

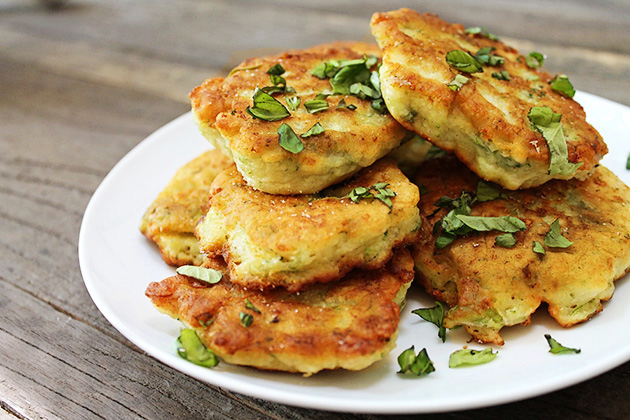
These Zucchini Blossom Fritters are a family recipe shared by TK member Katie. They are wonderfully unique, and contain the delicious flowers that bloom from a zucchini plant before the fruit forms. We’re coming up to zucchini season, so if you can find the blooms in your market or your own garden, you should definitely try this using fresh zucchini blossoms! Since the blossoms can be difficult to find in some locales, we were inspired to use grated zucchini instead. With this slightly modified dish, you can now now enjoy a batch of fritters anywhere and any time of the year!


Tasty Kitchen Blog: Zucchini Blossom Fritters. Guest post by Georgia Pellegrini, recipe submitted by TK member Katie of The Parsley Thief.

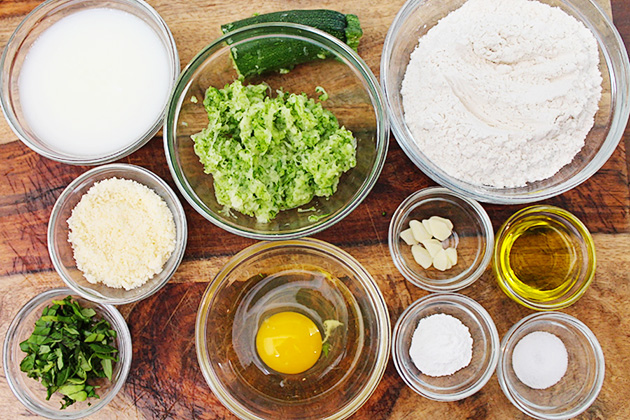
To make the fritters you will need: extra virgin olive oil, grated Parmesan cheese, flour, milk, a whole egg, sliced garlic, baking powder, fresh basil, Salt, ½ cup grated zucchini (or 7-8 squash blossoms if you can get them), and cooking oil for frying. Try your best to drain the zucchini of excess moisture.


Tasty Kitchen Blog: Zucchini Blossom Fritters. Guest post by Georgia Pellegrini, recipe submitted by TK member Katie of The Parsley Thief.

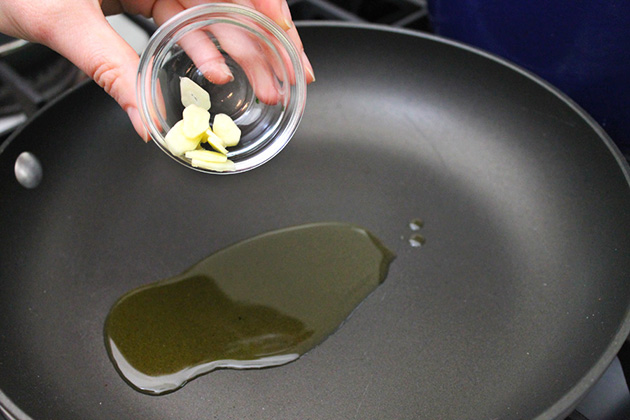
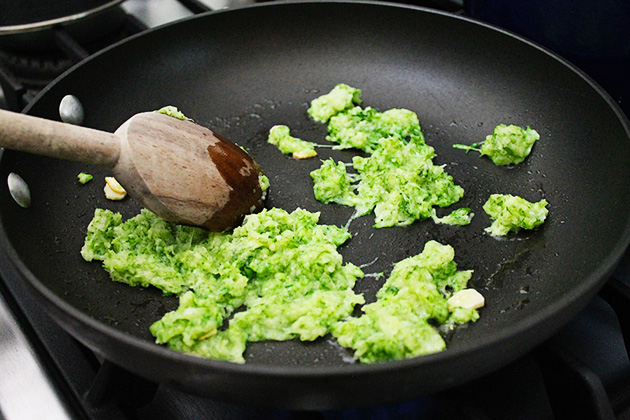
Heat the olive oil in a pan and sauté the garlic over medium high heat until lightly browned.


Tasty Kitchen Blog: Zucchini Blossom Fritters. Guest post by Georgia Pellegrini, recipe submitted by TK member Katie of The Parsley Thief.

Add the grated zucchini and continue to sauté until cooked through and most of the watery liquid has cooked off.


Tasty Kitchen Blog: Zucchini Blossom Fritters. Guest post by Georgia Pellegrini, recipe submitted by TK member Katie of The Parsley Thief.

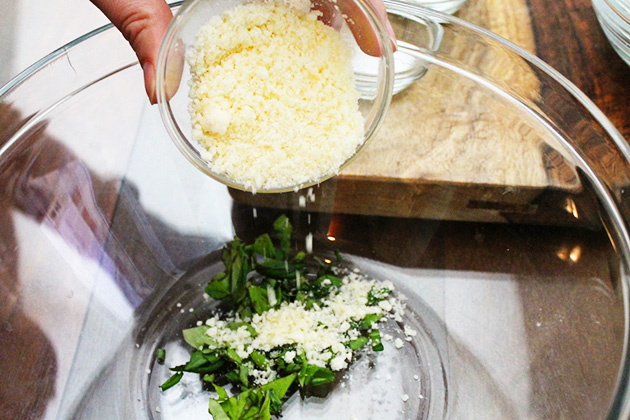
Next, in a large bowl add 1 tablespoon of freshly chopped basil and 3 tablespoons of grated parmesan cheese.


Tasty Kitchen Blog: Zucchini Blossom Fritters. Guest post by Georgia Pellegrini, recipe submitted by TK member Katie of The Parsley Thief.

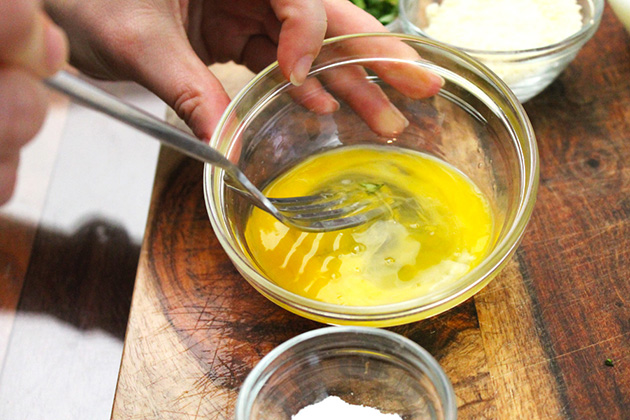
Whisk the egg, and then add it to the large bowl.


Tasty Kitchen Blog: Zucchini Blossom Fritters. Guest post by Georgia Pellegrini, recipe submitted by TK member Katie of The Parsley Thief.

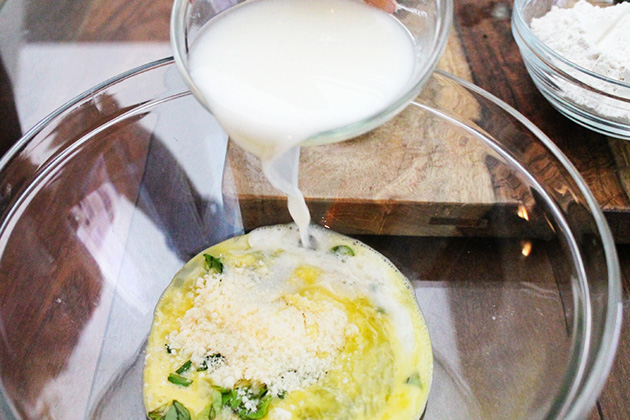
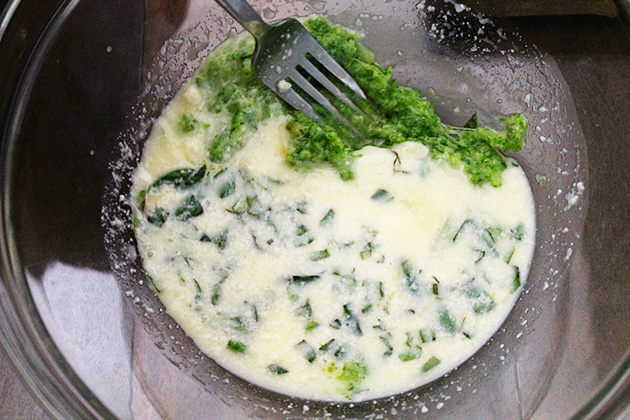
Pour ½ cup milk into the large bowl as well. Start whisking all of these ingredients together.


Tasty Kitchen Blog: Zucchini Blossom Fritters. Guest post by Georgia Pellegrini, recipe submitted by TK member Katie of The Parsley Thief.

Add the zucchini mixture and give it a stir.


Tasty Kitchen Blog: Zucchini Blossom Fritters. Guest post by Georgia Pellegrini, recipe submitted by TK member Katie of The Parsley Thief.

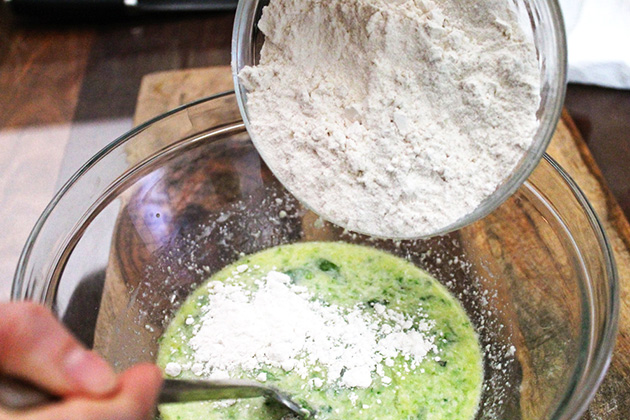
In a separate bowl, combine 1 cup flour, 1 teaspoon baking powder, and ½ teaspoons salt.

Combine the dry ingredients into the wet ingredients.


Tasty Kitchen Blog: Zucchini Blossom Fritters. Guest post by Georgia Pellegrini, recipe submitted by TK member Katie of The Parsley Thief.

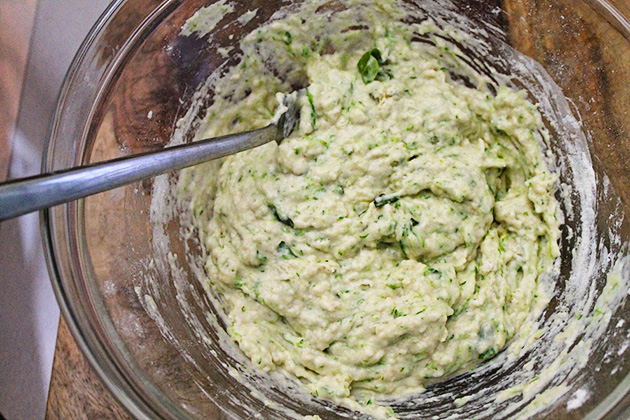
Mix everything together until it is a little thicker than pancake batter.


Tasty Kitchen Blog: Zucchini Blossom Fritters. Guest post by Georgia Pellegrini, recipe submitted by TK member Katie of The Parsley Thief.

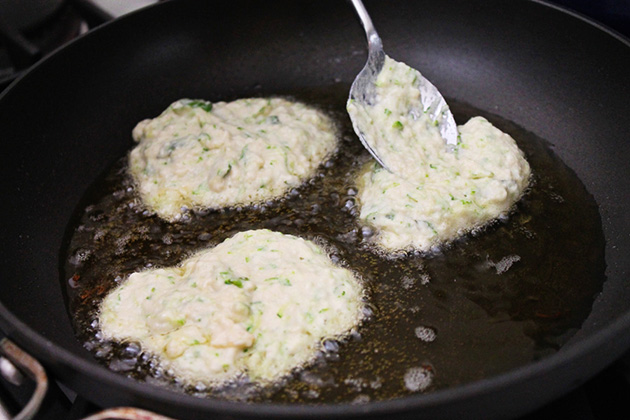
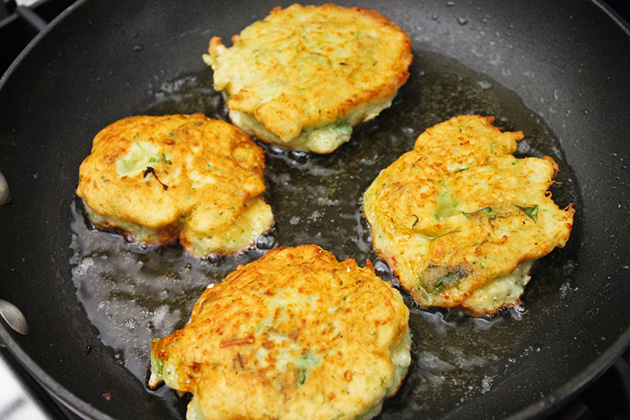
Pour about ¼ inch of oil into a skillet; heat over medium high heat. Scoop the batter (a full tablespoon) and drop it into the hot oil. Gently press down on the top of the fritter with a spoon to flatten.


Tasty Kitchen Blog: Zucchini Blossom Fritters. Guest post by Georgia Pellegrini, recipe submitted by TK member Katie of The Parsley Thief.

Once you have placed a few in the pan, fry the fritters until golden brown on one side, about 3–4 minutes. Flip them over and continue to fry for an additional 3-4 minutes.

Remove from the pan and place onto a plate covered with paper towels (the towels soak up the excess oil). Let cool.


Tasty Kitchen Blog: Zucchini Blossom Fritters. Guest post by Georgia Pellegrini, recipe submitted by TK member Katie of The Parsley Thief.

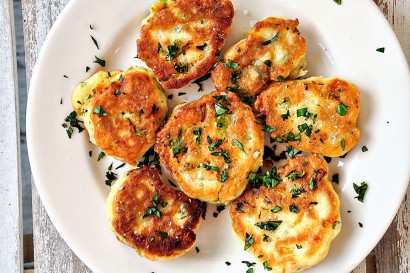
All golden brown and delicious, your fritters are now complete. Top with additional chopped basil or brush the tops with butter. Enjoy them while they are still warm, crispy, and full of goodness. They make the perfect appetizer, party food, or afternoon lunch and would work well with all kinds of condiments, from crème fraiche to diced ham.

Go check out more recipes from Katie in her TK recipe box or the recipe index of her blog, The Parsley Thief!


Printable Recipe
Zucchini Blossom Fritters

See post on theparsleythief’s site!
0.00 Mitt(s) 0 Rating(s)0 votes, average: 0.00 out of 50 votes, average: 0.00 out of 50 votes, average: 0.00 out of 50 votes, average: 0.00 out of 50 votes, average: 0.00 out of 5

Prep Time:

Cook Time:

Difficulty: Easy

Servings: 4

4
x

Print Options

Page size Letter 3x5 4x6
Text Size Small Medium Large
Content Include description
Include prep time, etc.
Show image

Description

Zucchini blossoms are the edible flowers that grow from a zucchini plant. In this family recipe, the flowers are lightly sauteed in garlic, then chopped and used as the base for a fritter batter, along with fresh basil and Parmesan cheese. They’re delicious!

Ingredients

  • 8 whole Squash Blossoms
  • 1 clove Garlic, Sliced
  • 1 Tablespoon Olive Oil
  • 1 Tablespoon Chopped Fresh Basil Leaves, Plus More For Optional Garnish
  • 3 Tablespoons Freshly Grated Parmesan Cheese
  • 1 whole Egg
  • ½ cups Milk
  • 1 cup Flour
  • 1 teaspoon Baking Powder
  • ½ teaspoons Kosher Salt
  • Vegetable Oil, For Frying

Preparation Instructions

Prepare the squash blossoms by inspecting each flower for dirt, or bugs (little critters do like to hide inside them). Give them a gentle rinse with water and dry with paper towels. Remove the pistil from inside each flower. Note: For this application, it’s fine to cut a slit alongside the length of each flower, to make removal easier. You wouldn’t want to do this if you were stuffing the blossoms. I also like to remove the little green spikes from around the stem of the flowers.

Saute the blossoms with the garlic and olive oil, in a skillet over medium high heat until softened and lightly browned. Remove from the skillet and coarsely chop. Transfer to a bowl and add in the chopped basil leaves, Parmesan cheese, egg, and milk. Use a fork to gently beat the ingredients together. In a separate bowl, whisk together the flour, baking powder, and salt. Pour the wet ingredients into the bowl and stir to combine. The mixture should be slightly thicker than pancake batter. If needed, add in a bit more milk.

Pour enough vegetable oil into a skillet to coat the bottom by about a 1/4″; heat over medium high heat. Scoop the batter by the heaping tablespoonful and drop into the hot oil. Use the back of a spoon to flatten each fritter slightly. Cook until golden brown, about 3 minutes. Flip the fritter over and brown the other side. Transfer to a paper towel-lined plate. Sprinkle lightly with some coarse salt and chopped fresh basil. Serve while hot.


_______________________________________

There’s so much to say about Georgia, we don’t know where to start. Leaving Wall Street for the French Culinary Institute, followed by a stint at the Gramercy Tavern and La Chassagnette in France, her passion for food and food traditions are evident and inspiring. Visit her site at Georgia Pellegrini, where you’ll find more recipes, photos, learn all about her wonderful books (including her latest one, Modern Pioneering, and enjoy her latest adventures.

 

Profile photo of georgiapellegrini

Crustless Spinach Quiche

Posted by in Step-by-Step Recipes

Tasty Kitchen Blog: Crustless Spinach Quiche. Guest post by Georgia Pellegrini, recipe submitted by TK member Ali of Gimme Some Oven.
Photo from Ali of Gimme Some Oven.

 
The beautiful thing about a quiche is that you can throw many ingredients into one dish and all of the flavors complement one another. Since the traditional quiche is baked in a buttery crust, we are going to lighten it up with this Crustless Spinach Quiche from TK member Ali. This recipe will work not only with spinach but also with any of your favorite vegetables. Let the flavors unfold during your first bite of this hearty breakfast dish.


Tasty Kitchen Blog: Crustless Spinach Quiche. Guest post by Georgia Pellegrini, recipe submitted by TK member Ali of Gimme Some Oven.

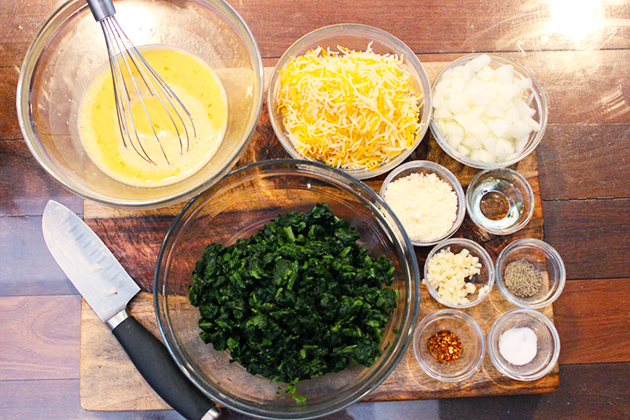
For this recipe you’ll need the following ingredients: vegetable oil, garlic, onion,
chopped spinach (frozen then thawed and drained), 6 eggs, Muenster cheese, Parmesan cheese, salt, black pepper, and crushed red pepper.


Tasty Kitchen Blog: Crustless Spinach Quiche. Guest post by Georgia Pellegrini, recipe submitted by TK member Ali of Gimme Some Oven.

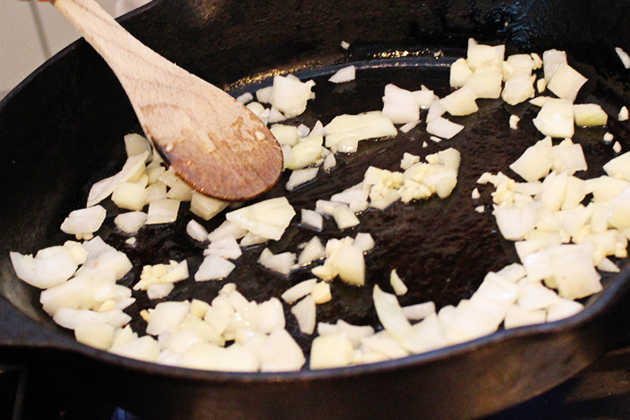
To start, drizzle olive oil over a hot skillet. Add the garlic and chopped onion, sautéing until they are nice and soft.


Tasty Kitchen Blog: Crustless Spinach Quiche. Guest post by Georgia Pellegrini, recipe submitted by TK member Ali of Gimme Some Oven.

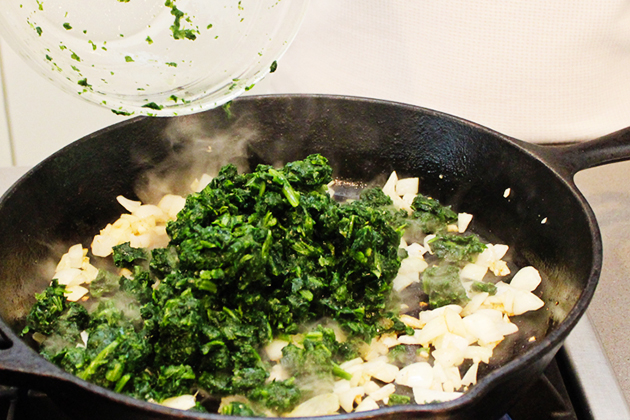
Next, add the spinach and cook until the excess moisture has evaporated.


Tasty Kitchen Blog: Crustless Spinach Quiche. Guest post by Georgia Pellegrini, recipe submitted by TK member Ali of Gimme Some Oven.

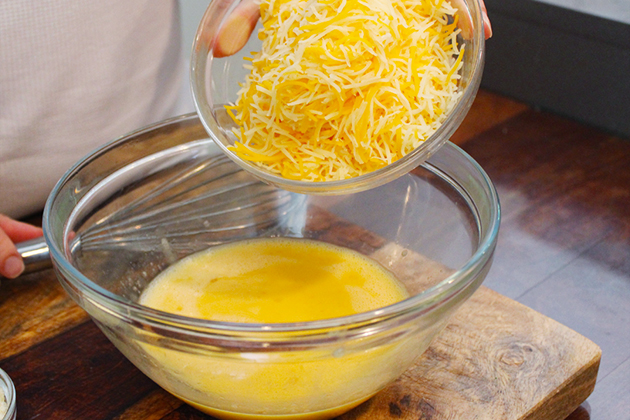
In a large bowl, beat the eggs and then add in the Muenster cheese.


Tasty Kitchen Blog: Crustless Spinach Quiche. Guest post by Georgia Pellegrini, recipe submitted by TK member Ali of Gimme Some Oven.

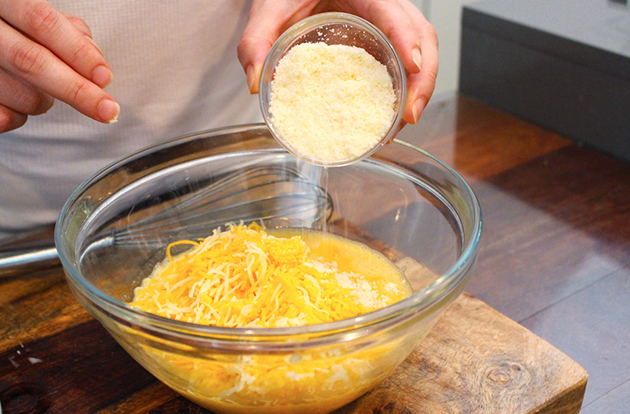
And the Parmesan cheese as well.


Tasty Kitchen Blog: Crustless Spinach Quiche. Guest post by Georgia Pellegrini, recipe submitted by TK member Ali of Gimme Some Oven.

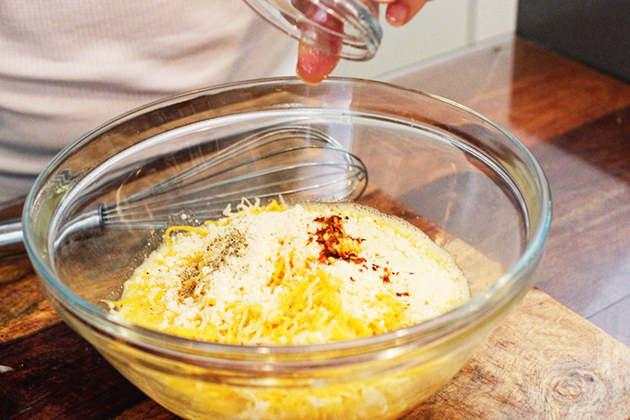
Go ahead and add the salt, black pepper, and red pepper. Lightly mix these ingredients together.


Tasty Kitchen Blog: Crustless Spinach Quiche. Guest post by Georgia Pellegrini, recipe submitted by TK member Ali of Gimme Some Oven.

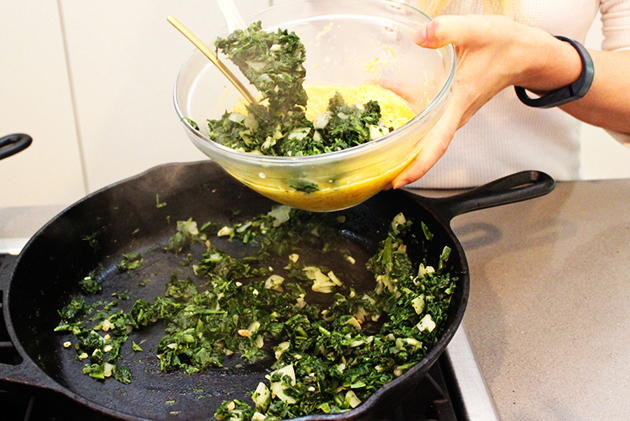
Then add the spinach mixture into the bowl with the egg mixture.

Stir all of the ingredients together. Be careful, you don’t want to overwork the eggs!


Tasty Kitchen Blog: Crustless Spinach Quiche. Guest post by Georgia Pellegrini, recipe submitted by TK member Ali of Gimme Some Oven.

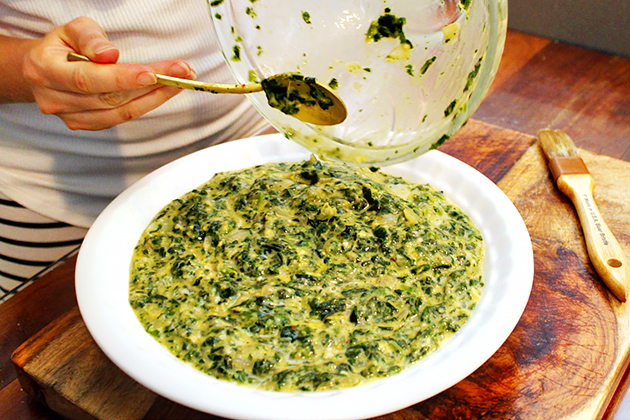
Evenly pour the mixture in a lightly greased pie dish. Bake in the oven at 350ºF for 25–30 minutes until the eggs have set, and the edges begin to brown.


Tasty Kitchen Blog: Crustless Spinach Quiche. Guest post by Georgia Pellegrini, recipe submitted by TK member Ali of Gimme Some Oven.

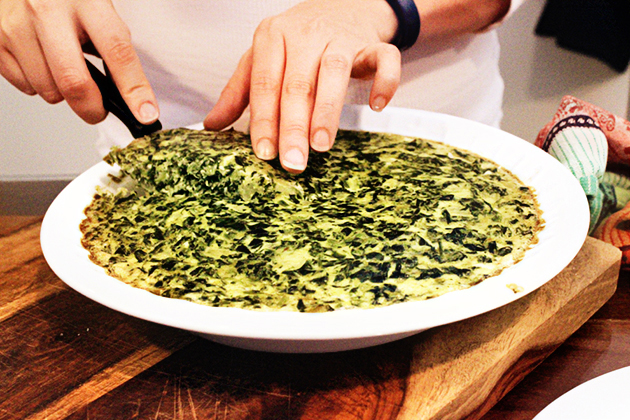
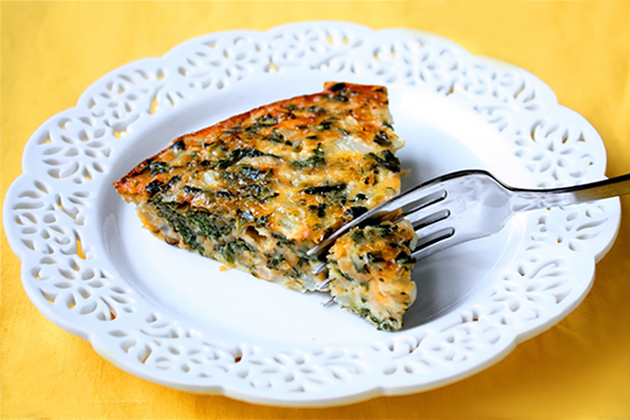
Once baked, take the quiche out of the oven and let cool 10 minutes before serving. While you wait, just inhale the aroma you’ve just created!

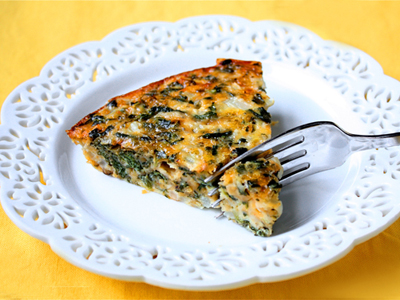
These simple ingredients make a quick and easy breakfast dish but it also is wonderful as an afternoon snack. If you make it in advance you’ll have a grab-and-go breakfast for several days. So cut a slice and dig in, it is wonderful even without that golden brown crust!


Tasty Kitchen Blog: Crustless Spinach Quiche. Guest post by Georgia Pellegrini, recipe submitted by TK member Ali of Gimme Some Oven.
Photo from Ali of Gimme Some Oven.

Visit Ali’s blog, Gimme Some Oven, for more tasty treats!


Printable Recipe

Crustless Spinach Quiche

See post on Ali @ gimmesomeoven’s site!
5.00 Mitt(s) 21 Rating(s)21 votes, average: 5.00 out of 521 votes, average: 5.00 out of 521 votes, average: 5.00 out of 521 votes, average: 5.00 out of 521 votes, average: 5.00 out of 5

Prep Time:

Cook Time:

Difficulty: Easy

Servings: 12

12
x

Print Options

Page size Letter 3x5 4x6
Text Size Small Medium Large
Content Include description
Include prep time, etc.
Show image

Description

This classic quiche is one of my favorites! Very simple to pull together, and the taste and texture are fantastic! Feel free to substitute in any other veggies, cheeses, or favorite seasonings you have on hand. This recipe is great for experimenting! :)

Ingredients

  • 1 Tablespoon Vegetable Oil
  • 1 teaspoon Minced Garlic
  • 1 cup Chopped Onion (about 1 Medium Onion)
  • 1 package (10 Oz) Frozen Chopped Spinach, Thawed And Drained
  • 5 whole Large Eggs, Beaten
  • 2-½ cups Shredded Muenster Cheese (or Whatever You Have On Hand - I Find That The Sharper The Cheese, The Better!)
  • ¼ cups Grated Parmesan Cheese (plus 2 Tbsp. For Garnish - Optional)
  • ¼ teaspoons Salt
  • ¼ teaspoons Freshly Ground Black Pepper
  • 1 pinch Crushed Red Pepper

Preparation Instructions

Preheat oven to 350 degrees F (175 degrees C). Lightly grease a 9 inch pie pan.

Heat oil in a large skillet over medium-high heat. Add garlic and onions and cook, stirring occasionally, until onions are soft. Stir in spinach and continue cooking until excess moisture has evaporated.

In a large bowl, combine eggs, cheeses, salt, pepper, and crushed red pepper. Add in spinach mixture and stir to blend. Pour into prepared pie pan.

Bake in preheated oven until eggs have set and the top is slightly browned, about 25-30 minutes. Remove and let cool for 10 minutes before serving. If you’d like, top with additional freshly grated Parmesan cheese.

*I also love using this recipe to make individual-sized little quiches. You can either use regular-sized muffin tins (15-20 minutes cook time), or the cute mini ones (about 10-15 minutes). Just be sure to prepare the tins well with cooking spray (or use muffin liners), and watch to be sure that they don’t get overcooked!

Recipe is adapted from www.allrecipes.com.

(Click “See Related Blog Post” for more pics and info!)


_______________________________________

There’s so much to say about Georgia, we don’t know where to start. Leaving Wall Street for the French Culinary Institute, followed by a stint at the Gramercy Tavern and La Chassagnette in France, her passion for food and food traditions are evident and inspiring. Visit her site at Georgia Pellegrini, where you’ll find more recipes, photos, learn all about her wonderful books (including her latest one, Modern Pioneering, and enjoy her latest adventures.
 

Profile photo of georgiapellegrini

Artichoke Bread Pudding with Bacon and Gorgonzola

Posted by in Step-by-Step Recipes

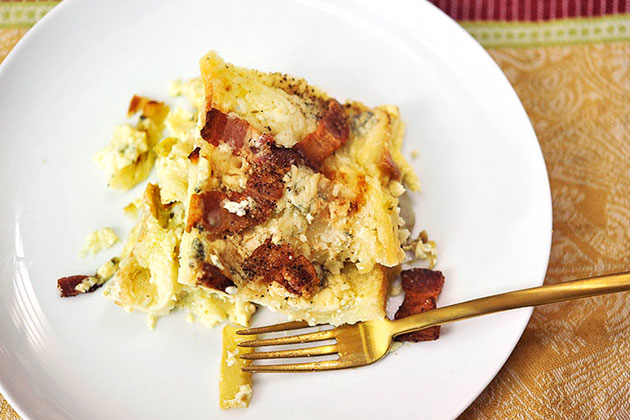
Tasty Kitchen Blog: Artichoke Bread Pudding with Bacon and Gorgonzola. Guest post by Georgia Pellegrini, recipe submitted by TK member Lauren of Climbing Grier Mountain.

I am always looking for new and interesting dishes to add to my lists of favorites. This creative recipe is full of bold and exciting flavors that work wonderfully together. Lauren’s recipe for a filling and satisfying Artichoke Bread Pudding from is inexpensive to make and leaves plenty to share with others.


Tasty Kitchen Blog: Artichoke Bread Pudding with Bacon and Gorgonzola. Guest post by Georgia Pellegrini, recipe submitted by TK member Lauren of Climbing Grier Mountain.

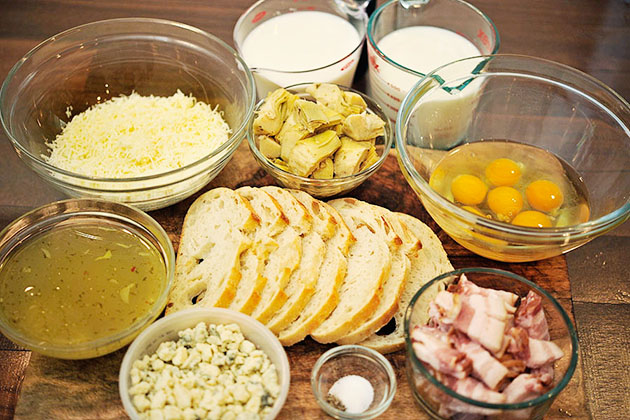
To create this delicious dish, you will need: brioche bread, jarred artichokes (in olive oil, drained and oil reserved), shredded mozzarella, Gorgonzola crumbles, bacon, eggs, and milk. (I didn’t have any brioche bread on hand and used what I had. It turned out great all the same!)


Tasty Kitchen Blog: Artichoke Bread Pudding with Bacon and Gorgonzola. Guest post by Georgia Pellegrini, recipe submitted by TK member Lauren of Climbing Grier Mountain.

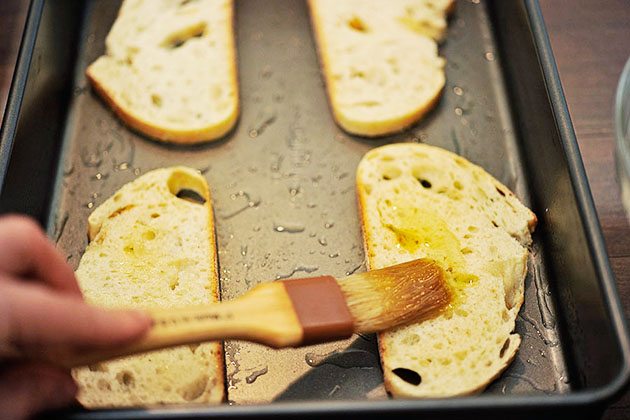
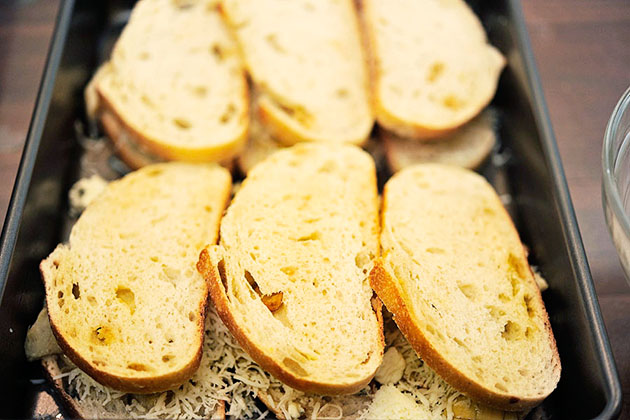
To start preparing, take non-stick cooking spray and evenly coat a 9 x 13 casserole dish. Evenly distribute the bread on the bottom of the dish. Lightly brush the tops of each slice with the artichoke oil that was reserved. (Tip: Make sure to lightly brush each slice. Using too much oil will make your bread soggy and your dish greasy.)


Tasty Kitchen Blog: Artichoke Bread Pudding with Bacon and Gorgonzola. Guest post by Georgia Pellegrini, recipe submitted by TK member Lauren of Climbing Grier Mountain.

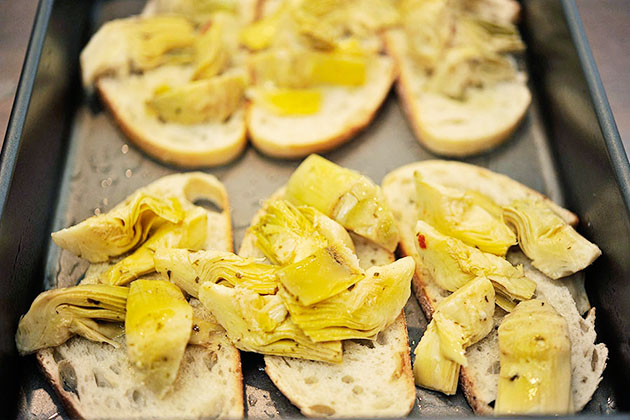
Next, just like you add toppings to a pizza, add artichokes on top of the bread.


Tasty Kitchen Blog: Artichoke Bread Pudding with Bacon and Gorgonzola. Guest post by Georgia Pellegrini, recipe submitted by TK member Lauren of Climbing Grier Mountain.

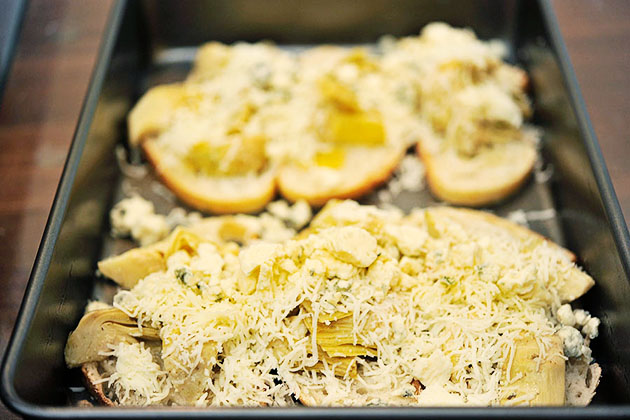
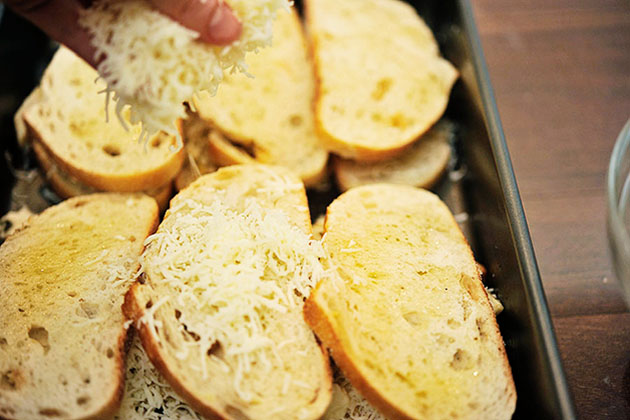
Sprinkle mozzarella cheese and Gorgonzola cheese on top.


Tasty Kitchen Blog: Artichoke Bread Pudding with Bacon and Gorgonzola. Guest post by Georgia Pellegrini, recipe submitted by TK member Lauren of Climbing Grier Mountain.

Sandwich your bottom layer by adding remaining slices of bread on top to create a second layer. Lightly brush the tops of each slice.


Tasty Kitchen Blog: Artichoke Bread Pudding with Bacon and Gorgonzola. Guest post by Georgia Pellegrini, recipe submitted by TK member Lauren of Climbing Grier Mountain.

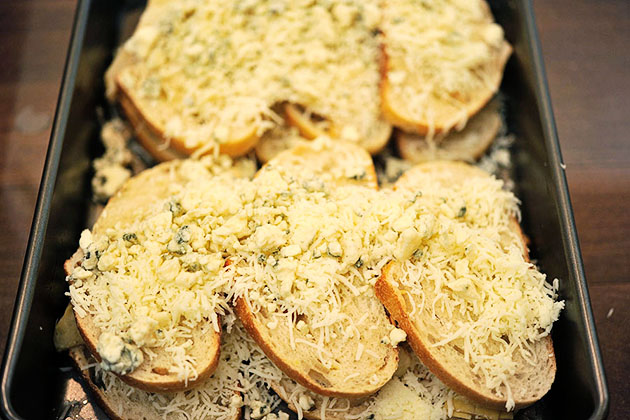
Add the remaining mozzarella on top …


Tasty Kitchen Blog: Artichoke Bread Pudding with Bacon and Gorgonzola. Guest post by Georgia Pellegrini, recipe submitted by TK member Lauren of Climbing Grier Mountain.

… and then add the Gorgonzola.


Tasty Kitchen Blog: Artichoke Bread Pudding with Bacon and Gorgonzola. Guest post by Georgia Pellegrini, recipe submitted by TK member Lauren of Climbing Grier Mountain.

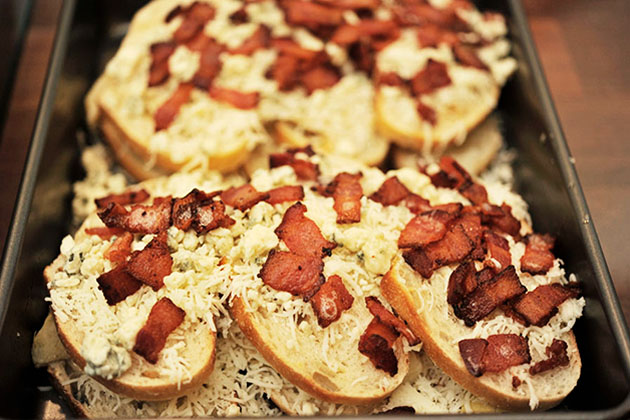
Take diced bacon (cooked) and sprinkle on top.


Tasty Kitchen Blog: Artichoke Bread Pudding with Bacon and Gorgonzola. Guest post by Georgia Pellegrini, recipe submitted by TK member Lauren of Climbing Grier Mountain.

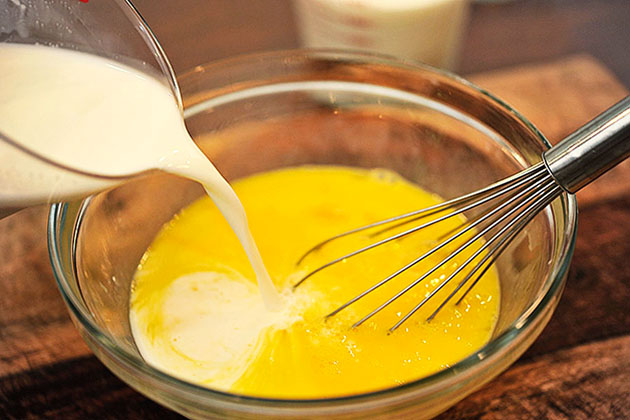
In a medium-sized mixing bowl, whisk eggs. Add milk to the whisked eggs.


Tasty Kitchen Blog: Artichoke Bread Pudding with Bacon and Gorgonzola. Guest post by Georgia Pellegrini, recipe submitted by TK member Lauren of Climbing Grier Mountain.

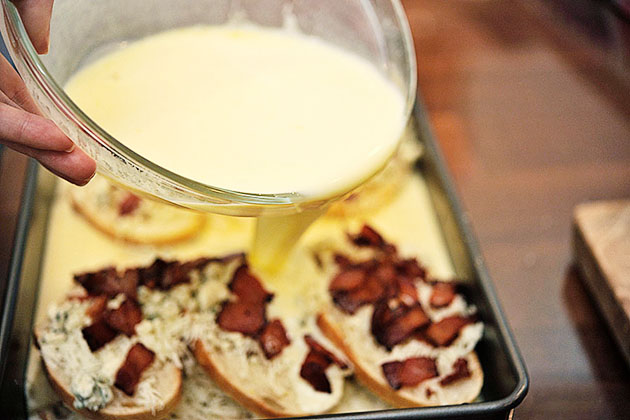
Take the egg mixture and pour it over the bread.


Tasty Kitchen Blog: Artichoke Bread Pudding with Bacon and Gorgonzola. Guest post by Georgia Pellegrini, recipe submitted by TK member Lauren of Climbing Grier Mountain.

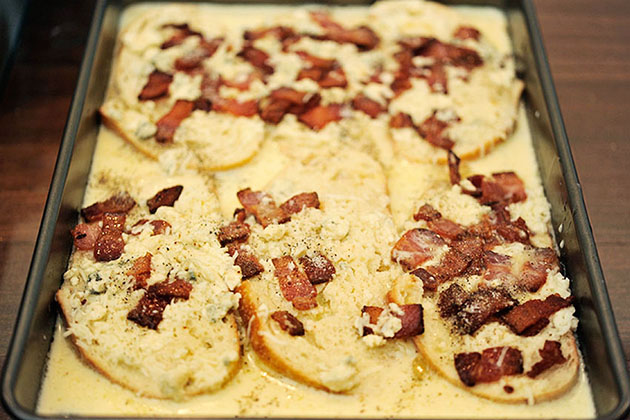
Let the pudding sit for 15 minutes, or until the bread slices are properly soaked.


Tasty Kitchen Blog: Artichoke Bread Pudding with Bacon and Gorgonzola. Guest post by Georgia Pellegrini, recipe submitted by TK member Lauren of Climbing Grier Mountain.

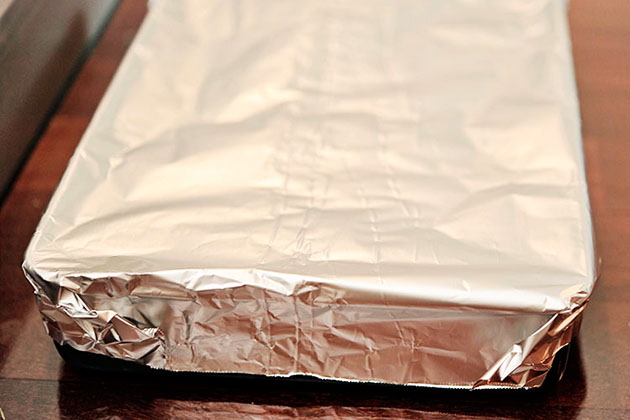
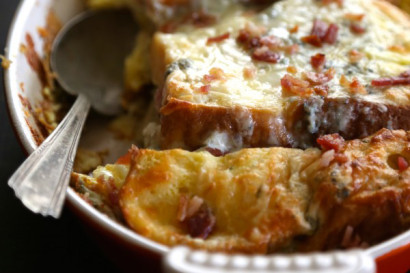
Cover the baking dish with foil and heat the oven to 375ºF. Bake for 30 minutes and then remove foil and continue to bake for 15 additional minutes, or until the top of the dish is golden brown and cheese is nice and hot.


Tasty Kitchen Blog: Artichoke Bread Pudding with Bacon and Gorgonzola. Guest post by Georgia Pellegrini, recipe submitted by TK member Lauren of Climbing Grier Mountain.

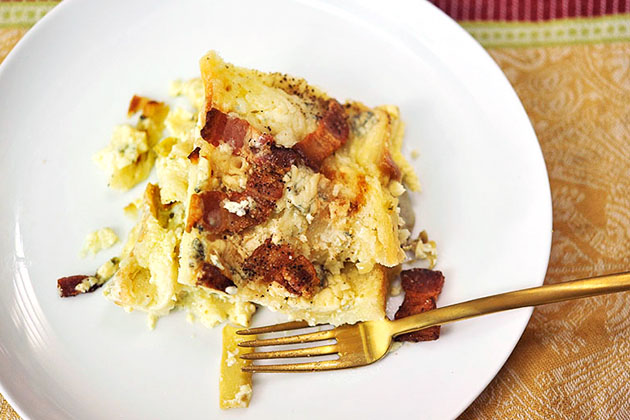
You are now ready to dig in!

Explore more uniquely wonderful dishes like this one at Climbing Grier Mountain!


Printable Recipe

Artichoke Bread Pudding with Bacon and Gorgonzola

See post on Climbing Grier Mountain’s site!
0.00 Mitt(s) 0 Rating(s)0 votes, average: 0.00 out of 50 votes, average: 0.00 out of 50 votes, average: 0.00 out of 50 votes, average: 0.00 out of 50 votes, average: 0.00 out of 5

Prep Time:

Cook Time:

Difficulty: Easy

Servings: 4

4
x

Print Options

Page size Letter 3x5 4x6
Text Size Small Medium Large
Content Include description
Include prep time, etc.
Show image

Description

A savory pudding for any occasion!

Ingredients

  • 8 whole 1/2 Inch Slices Brioche Bread
  • 2 cups Jarred Artichokes In Olive Oil, Drained, Oil Reserved
  • 1-½ cup Mozzarella, Shredded
  • 1 cup Gorgonzola Crumbles
  • 6 whole Pieces Bacon, Cooked, Diced
  • 6 whole Eggs
  • 4 cups Whole Milk
  • Salt And Pepper, to taste

Preparation Instructions

Preheat oven to 375 F. Spray a 9 x 13 casserole dish with non-stick cooking spray. Lay four slices of bread in the bottom of the baking dish. Brush the top of the bread slices with some of the leftover artichoke oil. Place the artichokes on top of the bread and sprinkle half of the mozzarella and half of the Gorgonzola over top. Lay the final four slices of the bread on top. Brush the tops with more of the artichoke oil. Sprinkle the tops with the remaining cheese and the bacon.

In a bowl, whisk eggs and milk together. Pour egg mixture over the bread and let the pudding soak for about 15 minutes. Put some foil over the top of the dish and bake for 30 minutes. Remove foil and continuing baking for another 15 minutes or until golden brown and bubbly.

Recipe adapted from bon appetit.


_______________________________________

There’s so much to say about Georgia, we don’t know where to start. Leaving Wall Street for the French Culinary Institute, followed by a stint at the Gramercy Tavern and La Chassagnette in France, her passion for food and food traditions are evident and inspiring. Visit her site at Georgia Pellegrini, where you’ll find more recipes, photos, learn all about her wonderful books (including her latest one, Modern Pioneering, and enjoy her latest adventures.
 

Profile photo of georgiapellegrini

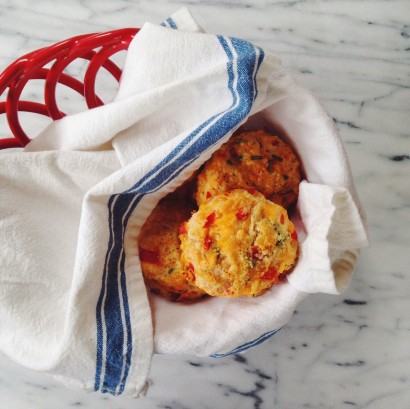
Pimento Cheese Biscuits

Posted by in Step-by-Step Recipes

Tasty Kitchen Blog: Pimento Cheese Biscuits. Guest post by Georgia Pellegrini, recipe submitted by TK member Marie of Little Kitchie.

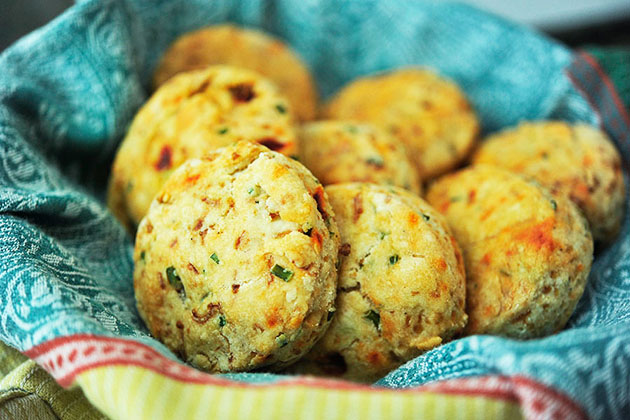
Now that we are in the hot months of summer, these Pimento Cheese Biscuits from TK member Marie will be the perfect picnic accompaniment. These tasty biscuits are just what you need to spice up any meal or to replace your typical piece of morning toast with something special!


Tasty Kitchen Blog: Pimento Cheese Biscuits. Guest post by Georgia Pellegrini, recipe submitted by TK member Marie of Little Kitchie.

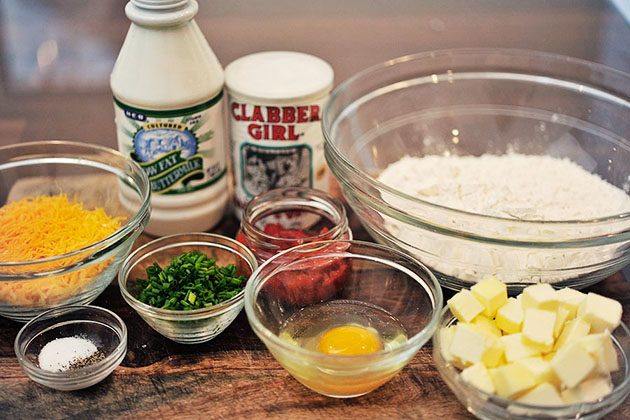
To make these savory biscuits, you will need: flour, baking powder, salt, black pepper, unsalted butter, sharp cheddar cheese, chives, sliced pimentos, buttermilk, and one egg. Go ahead and preheat the oven to 400 degrees. Line two baking sheets with parchment paper and set aside.


Tasty Kitchen Blog: Pimento Cheese Biscuits. Guest post by Georgia Pellegrini, recipe submitted by TK member Marie of Little Kitchie.

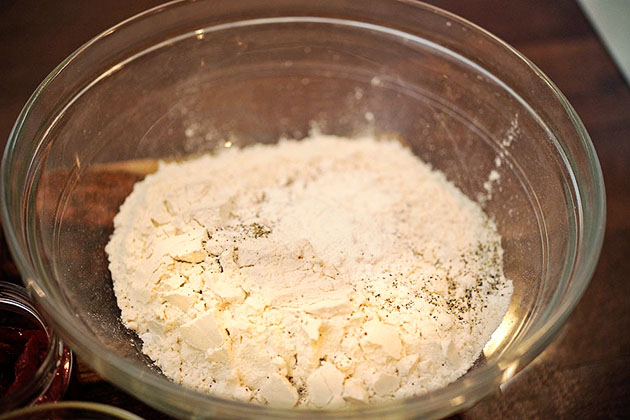
The first step is to add all of your dry ingredients together. In a large bowl, whisk the flour, baking powder, salt, and black pepper.


Tasty Kitchen Blog: Pimento Cheese Biscuits. Guest post by Georgia Pellegrini, recipe submitted by TK member Marie of Little Kitchie.

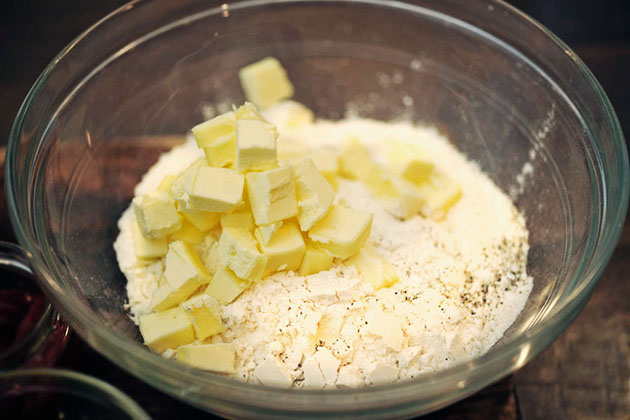
Next, add in the cold butter.


Tasty Kitchen Blog: Pimento Cheese Biscuits. Guest post by Georgia Pellegrini, recipe submitted by TK member Marie of Little Kitchie.

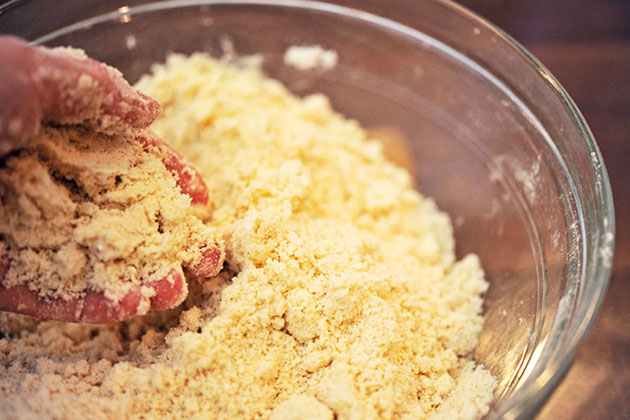
Now it’s time to get your hands dirty! You want to incorporate all of these ingredients together until they are coarse and crumbly. (You can also use a pastry cutter for this step.)


Tasty Kitchen Blog: Pimento Cheese Biscuits. Guest post by Georgia Pellegrini, recipe submitted by TK member Marie of Little Kitchie.

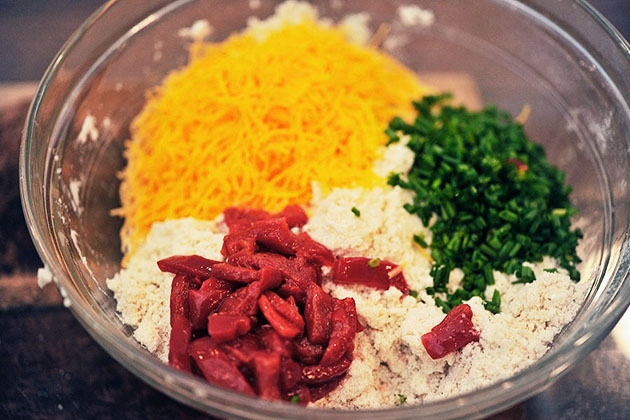
After your crumbly mixture is ready to go, stir in the cheese, chives, and pimentos.


Tasty Kitchen Blog: Pimento Cheese Biscuits. Guest post by Georgia Pellegrini, recipe submitted by TK member Marie of Little Kitchie.

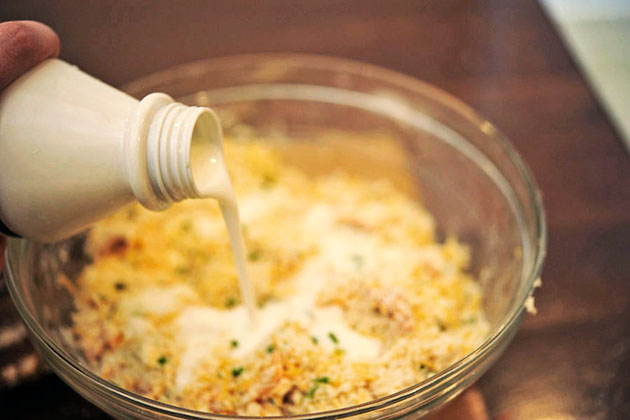
Stir in the buttermilk until just combined. Make sure your buttermilk is cold! This will ensure that your biscuits come out soft and flaky.


Tasty Kitchen Blog: Pimento Cheese Biscuits. Guest post by Georgia Pellegrini, recipe submitted by TK member Marie of Little Kitchie.

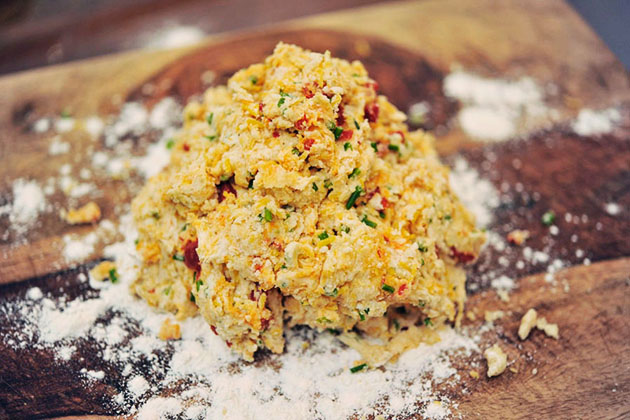
Next, knead the dough on a well-floured surface until it holds together.


Tasty Kitchen Blog: Pimento Cheese Biscuits. Guest post by Georgia Pellegrini, recipe submitted by TK member Marie of Little Kitchie.

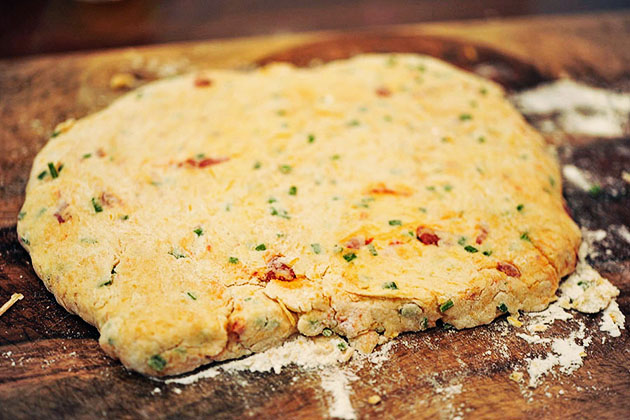
Shape the dough to about 1/2 inch thickness.


Tasty Kitchen Blog: Pimento Cheese Biscuits. Guest post by Georgia Pellegrini, recipe submitted by TK member Marie of Little Kitchie.

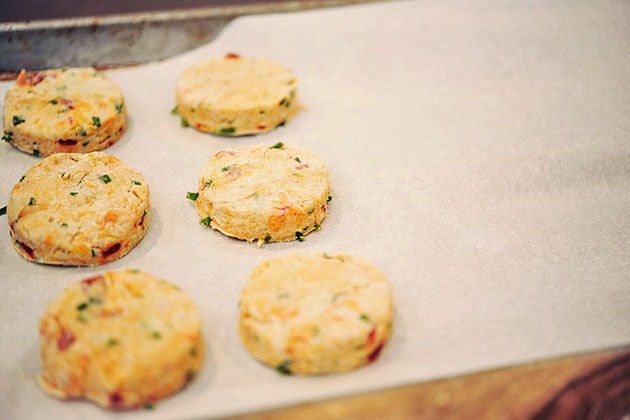
Use a floured biscuit cutter to cut out the dough and transfer the biscuits onto your lined baking sheet. Instead of throwing away the extra dough, just make additional biscuits with it!


Tasty Kitchen Blog: Pimento Cheese Biscuits. Guest post by Georgia Pellegrini, recipe submitted by TK member Marie of Little Kitchie.

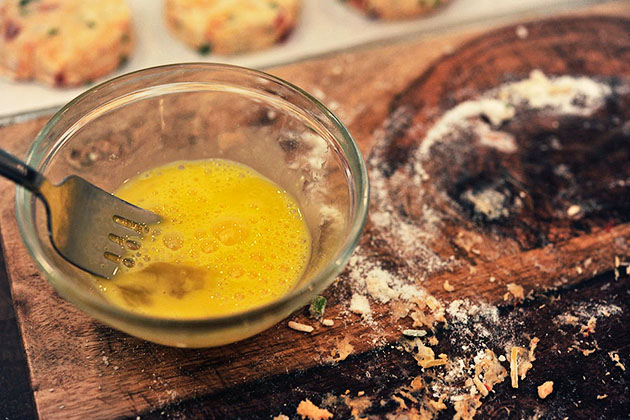
Take your egg and whisk it in a small bowl. You are going to use this egg mixture to brush the tops of each biscuit.


Tasty Kitchen Blog: Pimento Cheese Biscuits. Guest post by Georgia Pellegrini, recipe submitted by TK member Marie of Little Kitchie.

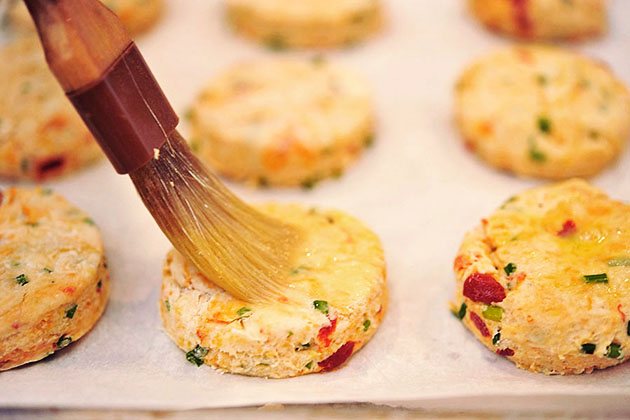
Go ahead and brush the egg onto each biscuit. If you want, you can add more black pepper to the tops of the biscuits as well.


Tasty Kitchen Blog: Pimento Cheese Biscuits. Guest post by Georgia Pellegrini, recipe submitted by TK member Marie of Little Kitchie.

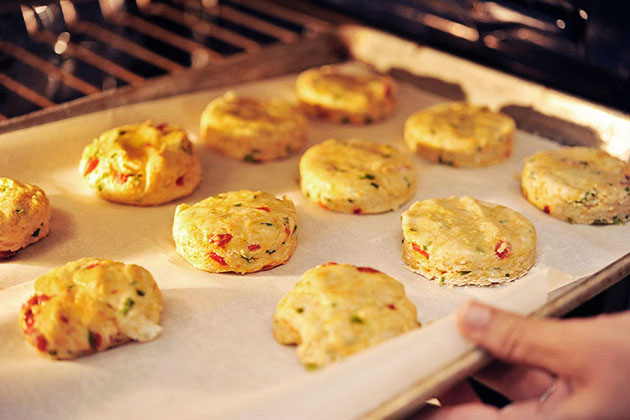
Pop them in the oven for 18-22 minutes, until the tops are golden brown.


Tasty Kitchen Blog: Pimento Cheese Biscuits. Guest post by Georgia Pellegrini, recipe submitted by TK member Marie of Little Kitchie.

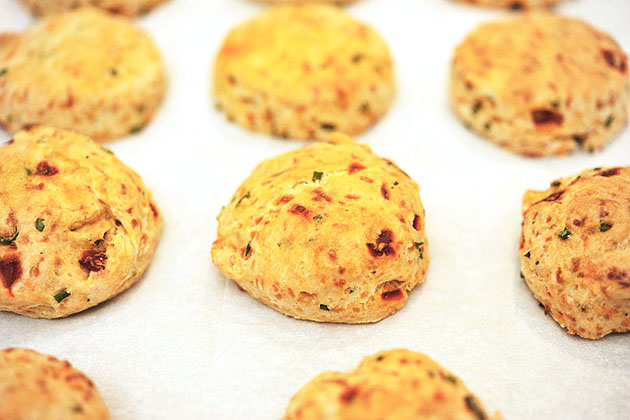
Cool them slightly before serving warm.


Tasty Kitchen Blog: Pimento Cheese Biscuits. Guest post by Georgia Pellegrini, recipe submitted by TK member Marie of Little Kitchie.

And there you have it! Pimento Cheese Biscuits—a savory, flaky treat that is a spicy twist on a typical dinner biscuit.

Check out more flavorful recipes from Marie at her blog, Little Kitchie!


Printable Recipe

Pimento Cheese Biscuits

See post on Marie @ Little Kitchie’s site!
0.00 Mitt(s) 0 Rating(s)0 votes, average: 0.00 out of 50 votes, average: 0.00 out of 50 votes, average: 0.00 out of 50 votes, average: 0.00 out of 50 votes, average: 0.00 out of 5

Prep Time:

Cook Time:

Difficulty: Easy

Servings: 12

12
x

Print Options

Page size Letter 3x5 4x6
Text Size Small Medium Large
Content Include description
Include prep time, etc.
Show image

Description

These biscuits have the flavor of classic pimento cheese. They are addicting!

Ingredients

  • 2 cups All-purpose Flour
  • 1 Tablespoon Baking Powder
  • ½ teaspoons Kosher Salt
  • ½ teaspoons Freshly Ground Black Pepper, Plus More For Topping
  • 8 Tablespoons Unsalted Butter, Cold And Cut Into Small Pieces
  • 1 cup Sharp Cheddar Cheese, Shredded
  • ¼ cups Chives, Chopped
  • 4 ounces, weight Jarred Sliced Pimentos, Drained And Chopped
  • 1 cup Buttermilk, Cold
  • 1 whole Egg, Beaten

Preparation Instructions

Preheat oven to 400ºF. Line 2 baking sheets with parchment paper and set aside.

Whisk flour, baking powder, salt, and pepper in a large bowl. Add the butter and use a pastry cutter or your fingers to incorporate it until the mixture is coarse and crumbly. Stir in the cheese, chives, and pimentos. Add the buttermilk and stir until just combined.

Turn the dough out onto a well-floured surface and knead a few times until it holds together. Shape the dough to about 1/2 inch thickness. Use a floured biscuit cutter to cut out the dough and transfer to the baking sheets. (Gather up the scraps to make more biscuits as needed.)

Brush the top of each biscuit with the beaten egg and top with a bit more black pepper. Bake for 18-20 minutes, until the tops are golden brown. Cool slightly on a wire rack before serving warm!


_______________________________________

There’s so much to say about Georgia, we don’t know where to start. Leaving Wall Street for the French Culinary Institute, followed by a stint at the Gramercy Tavern and La Chassagnette in France, her passion for food and food traditions are evident and inspiring. Visit her site at Georgia Pellegrini, where you’ll find more recipes, photos, learn all about her wonderful books (including her latest one, Modern Pioneering, and enjoy her latest adventures.
 

Profile photo of georgiapellegrini

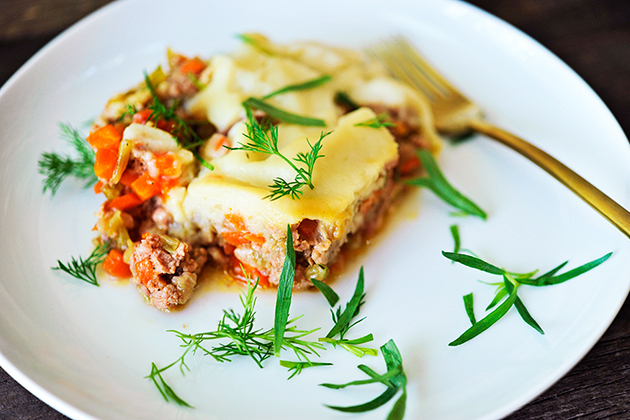
Paleo Shepherd’s Pie

Posted by in Step-by-Step Recipes

A Shepherd’s Pie is one of those classic dishes that makes you feel all warm and cozy when you dig in to it. A traditional English dish that is normally made with lamb or mutton, this Paleo Shepherd's Pie from Tk member

Profile photo of georgiapellegrini

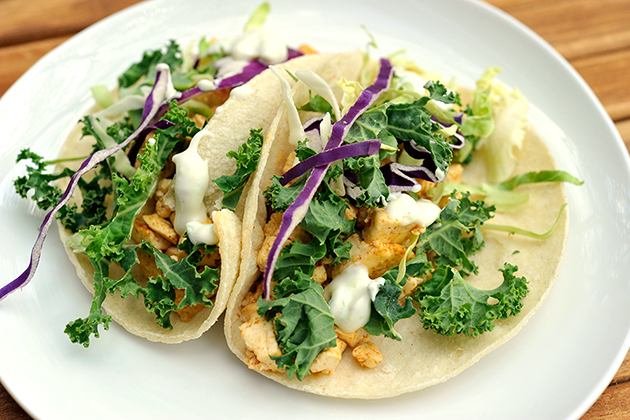
Crispy Tofu Tacos

Posted by in Step-by-Step Recipes

Now I know I’m the “meat girl,” but I do actually enjoy the versatility that tofu offers as an ingredient. Tofu will absorb any flavor you add to it, so an ingredient that most people may think is bland can actually be made to pack a powerful flavor punch when cooked right. One of my […]

Profile photo of georgiapellegrini

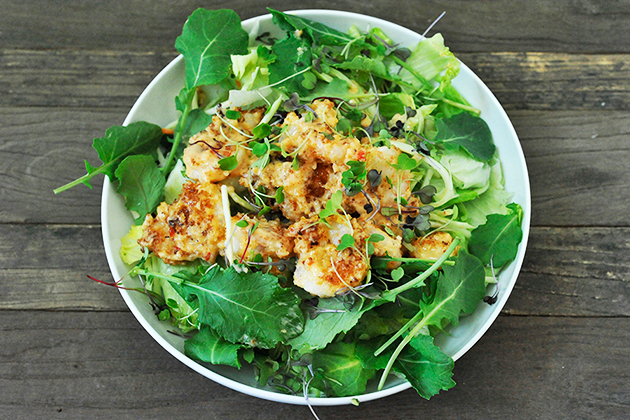
Lightened-Up Bang Bang Shrimp Salad

Posted by in Step-by-Step Recipes

Before you go back to Bonefish Grill and spend $5 on Bang Bang Wednesdays, take a look at how simply you can make Lightened-Up Bang Bang Shrimp at home! TK member Sarah adapted this…

Profile photo of georgiapellegrini

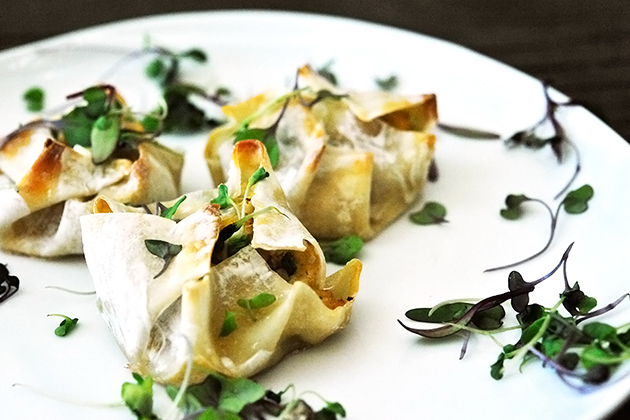
Skinny Crab Rangoon

Posted by in Step-by-Step Recipes

Ragoons, while always delicious, are not your typical go-to health snack. They are generally time-consuming and full of calories. This quick Skinny Crab Rangoon recipe by TK member Dara of Generation Y Foodie, however, takes about 15 minutes, and is only 41 calories per ragoon!       You’re going to start with wonton wrappers, […]