The Pioneer Woman Tasty Kitchen
Profile photo of missamy

Nutella Cookies

Posted by in Baking, Step-by-Step Recipes

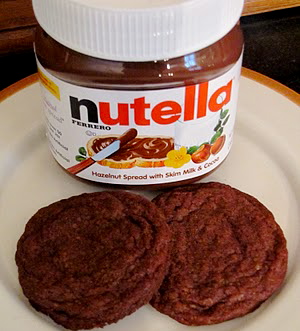
Tasty Kitchen Blog: Nutella Cookies. Guest post by Amy Johnson of She Wears Many Hats, recipe submitted by TK members Edie, Jennifer and Meredith of A Busy Nest.

 
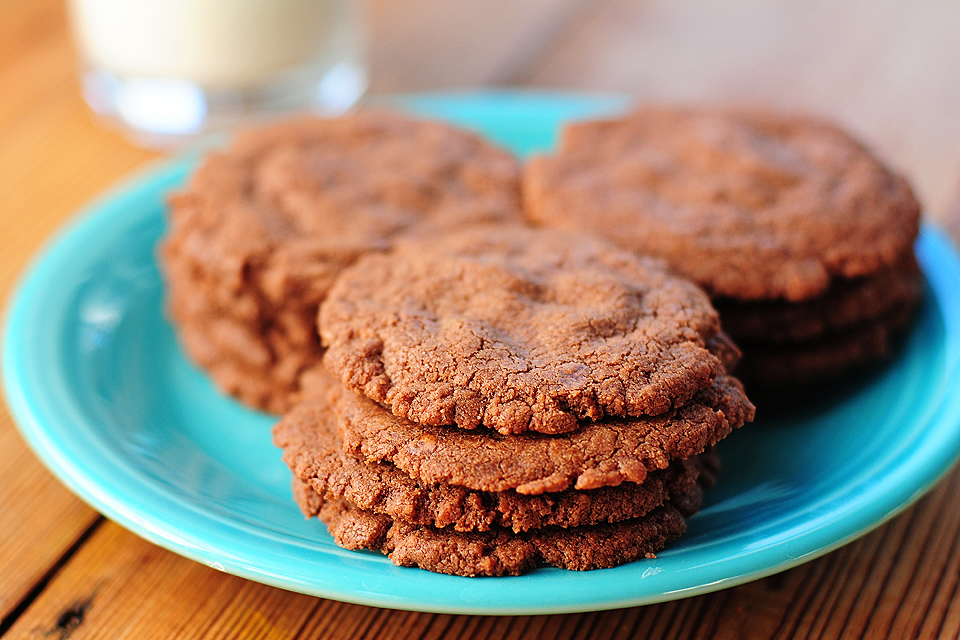
Who says great recipes have to have a gazillion ingredients, with complicated a process? Not me. Simple and tasty recipes are welcome any day around here. Less is best in my book. And these Nutella Cookies from Tasty Kitchen member ABusyNest are no exception. With only four ingredients, it’s easy to whip up a batch these crunchy, but chewy, sweet (but not too sweet), nutty-tasting cookies. No one needs to know how easy they are. It can be our little secret.

What are we waiting for? Let’s get started.


Tasty Kitchen Blog: Nutella Cookies. Guest post by Amy Johnson of She Wears Many Hats, recipe submitted by TK members Edie, Jennifer and Meredith of A Busy Nest.

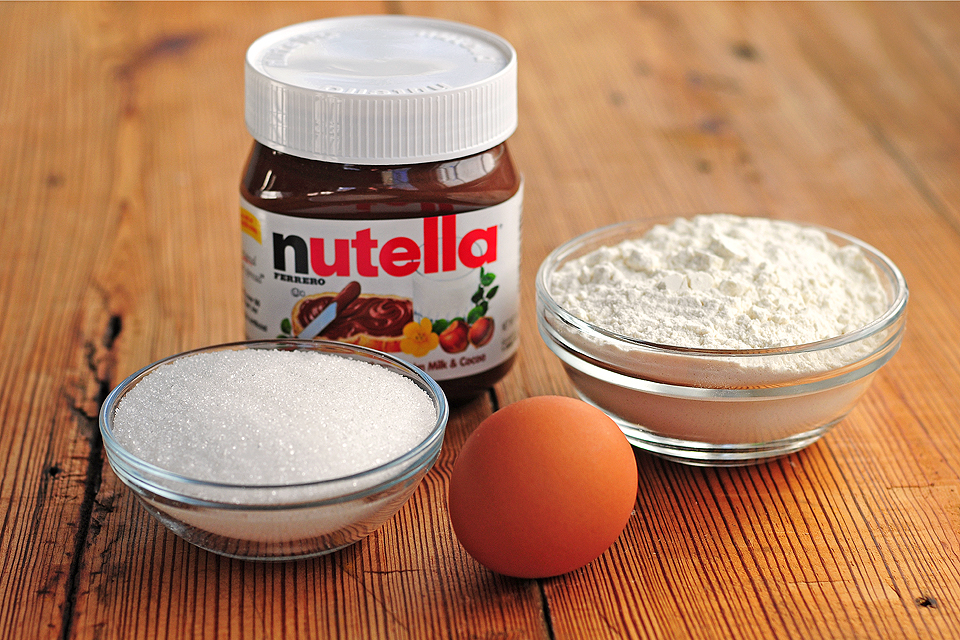
To get started you’ll need sugar, an egg, flour and Nutella. That’s it. Easy, huh?


Tasty Kitchen Blog: Nutella Cookies. Guest post by Amy Johnson of She Wears Many Hats, recipe submitted by TK members Edie, Jennifer and Meredith of A Busy Nest.

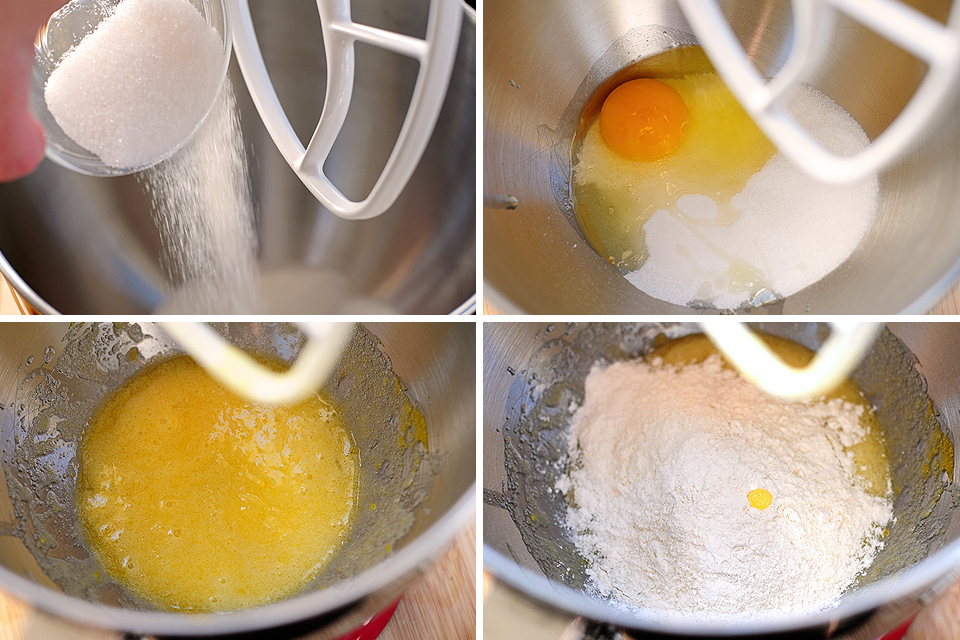
Begin by mixing together the sugar and egg. Next add in the flour.


Tasty Kitchen Blog: Nutella Cookies. Guest post by Amy Johnson of She Wears Many Hats, recipe submitted by TK members Edie, Jennifer and Meredith of A Busy Nest.

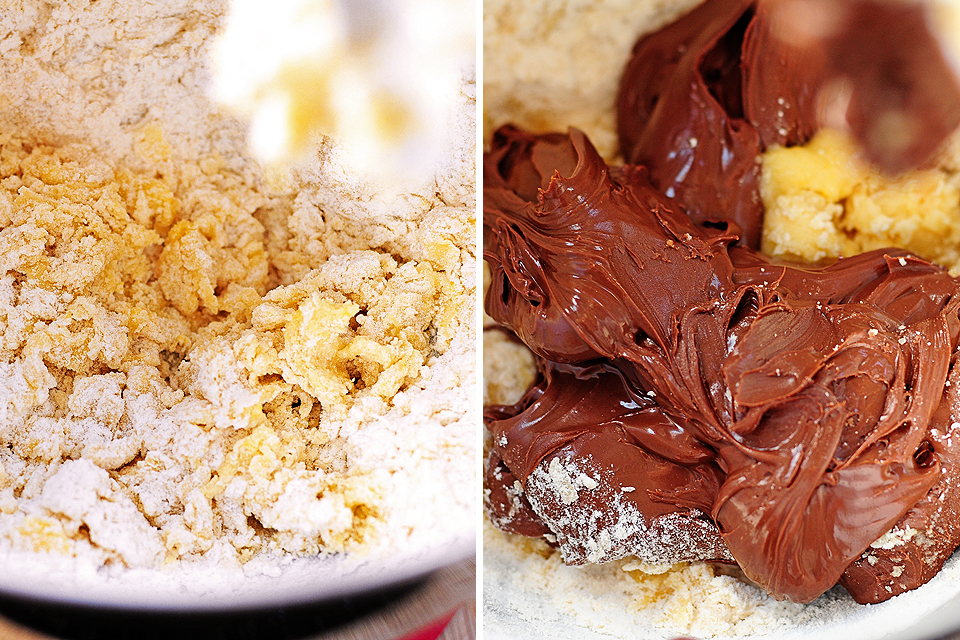
Mix together a tad. Finish up with the Nutella.

Oh Nutella, you are my friend. My sweet, sweet friend. I really like you.


Tasty Kitchen Blog: Nutella Cookies. Guest post by Amy Johnson of She Wears Many Hats, recipe submitted by TK members Edie, Jennifer and Meredith of A Busy Nest.

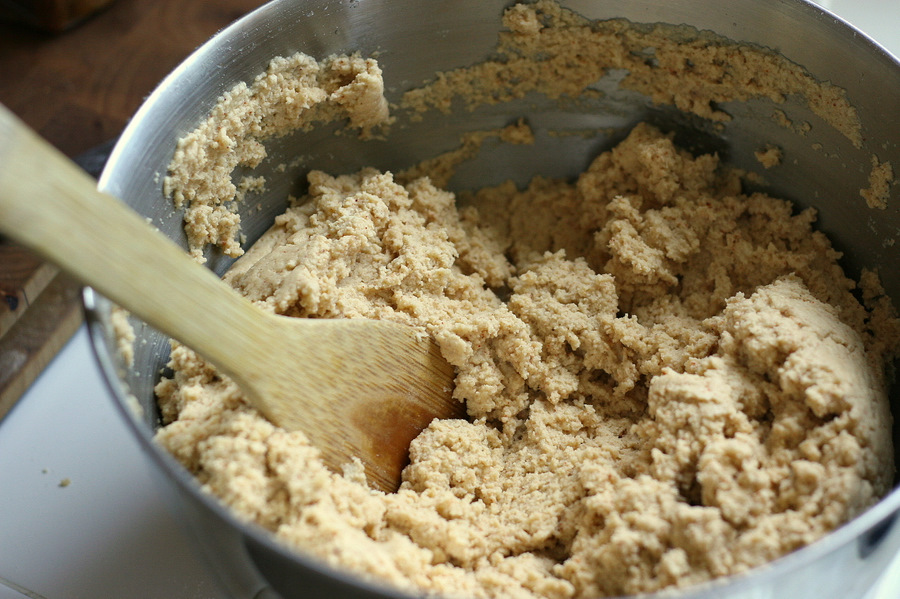
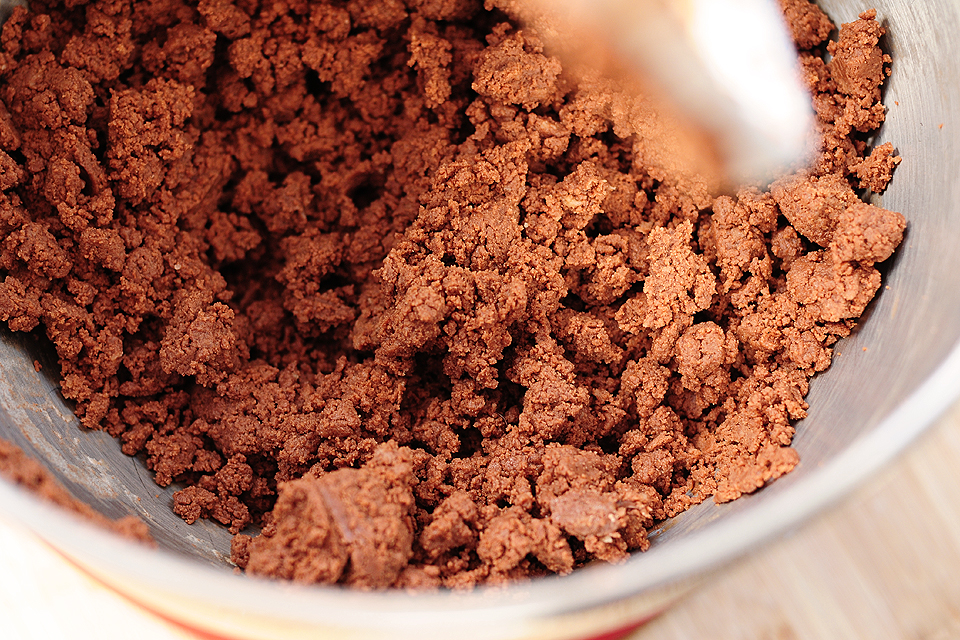
Combine well. The batter will be somewhat crumbly, like this.


Tasty Kitchen Blog: Nutella Cookies. Guest post by Amy Johnson of She Wears Many Hats, recipe submitted by TK members Edie, Jennifer and Meredith of A Busy Nest.

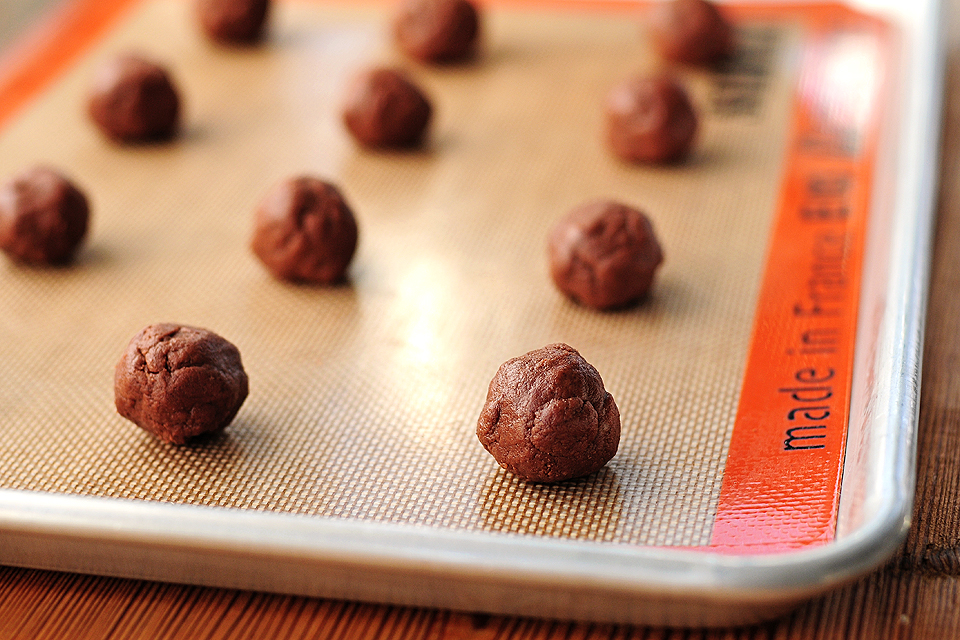
Using your hands, make approximately 1″ balls and place on a lined or greased cookie sheet.


Tasty Kitchen Blog: Nutella Cookies. Guest post by Amy Johnson of She Wears Many Hats, recipe submitted by TK members Edie, Jennifer and Meredith of A Busy Nest.

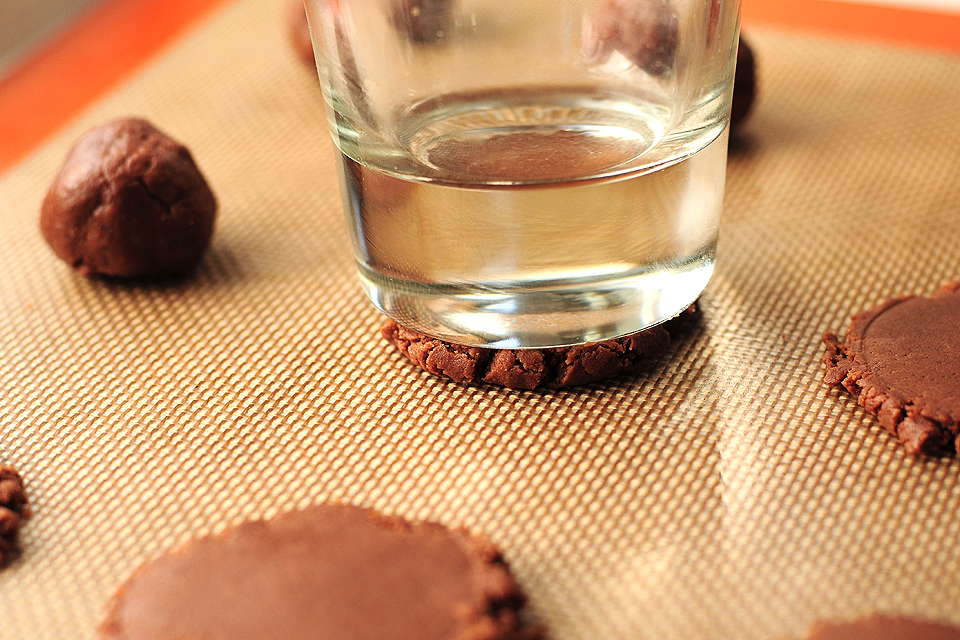
Flatten each cookie dough ball with a flat bottomed glass or your hand, if you prefer.


Tasty Kitchen Blog: Nutella Cookies. Guest post by Amy Johnson of She Wears Many Hats, recipe submitted by TK members Edie, Jennifer and Meredith of A Busy Nest.

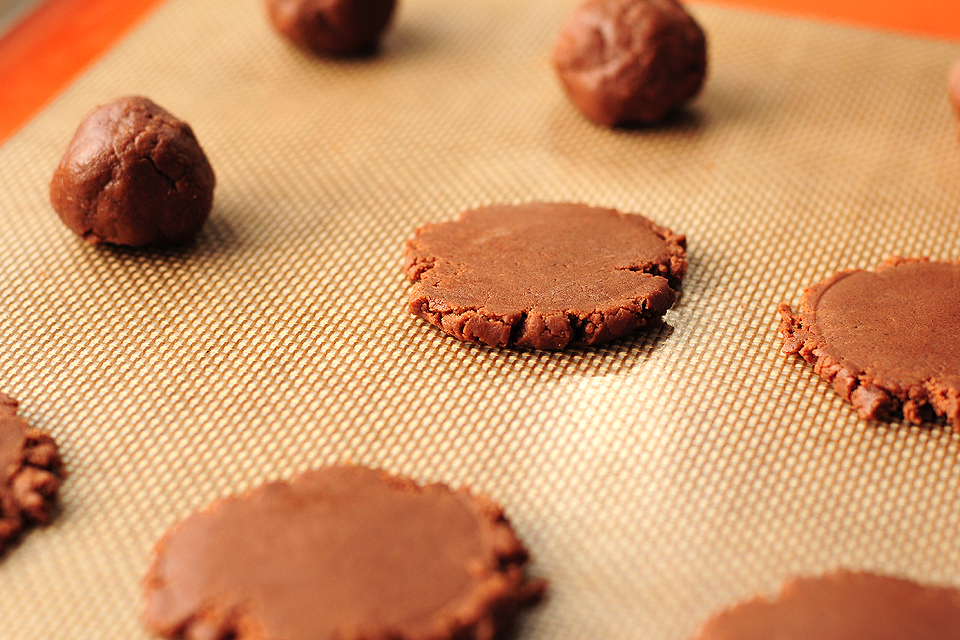
Flatten them out for a crunchy cookie, with a little bit of a chewy center, or flatten them only slightly for a chewier version.


Tasty Kitchen Blog: Nutella Cookies. Guest post by Amy Johnson of She Wears Many Hats, recipe submitted by TK members Edie, Jennifer and Meredith of A Busy Nest.

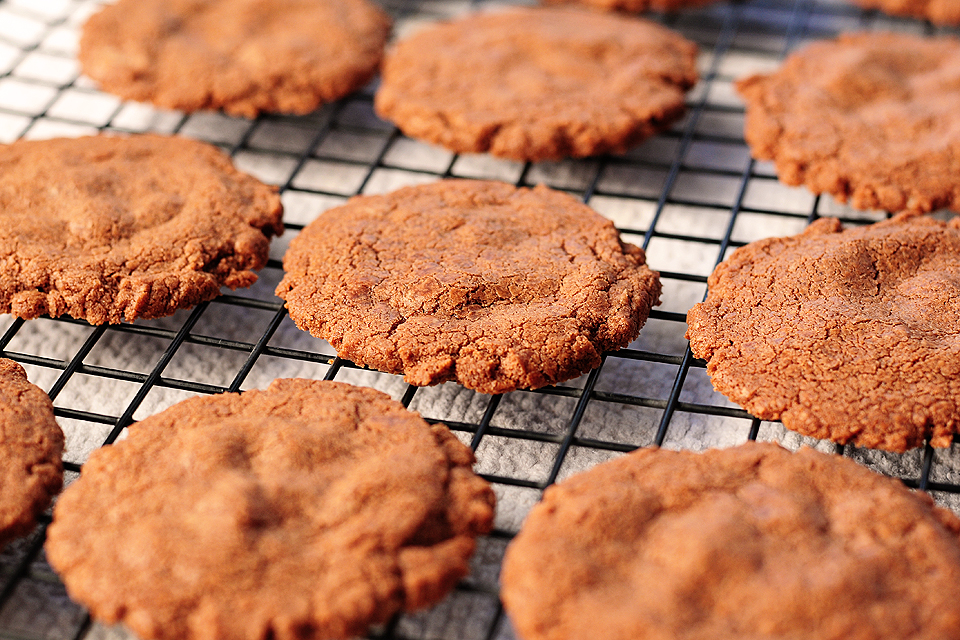
Bake at 350°F for 7-8 minutes or until set. Cool slightly, or snag one while still warm. Enjoy!


Tasty Kitchen Blog: Nutella Cookies. Guest post by Amy Johnson of She Wears Many Hats, recipe submitted by TK members Edie, Jennifer and Meredith of A Busy Nest.

After making the batch, and seeing it quickly disappear, I realized it would’ve made the perfect cookie for an ice cream sandwich, or crumbled up for an ice cream topping.

Big thanks to these ladies for a simple, yet tasty recipe. Their blog, A Busy Nest, is the recipe journal of Edie (mom), Jennifer and Meredith (two sisters) and you’ll find lots of great recipes in there.


Printable Recipe

Nutella Cookies

See post on ABusyNest’s site!
3.65 Mitt(s) 23 Rating(s)23 votes, average: 3.65 out of 523 votes, average: 3.65 out of 523 votes, average: 3.65 out of 523 votes, average: 3.65 out of 523 votes, average: 3.65 out of 5

Prep Time:

Cook Time:

Difficulty: Easy

Servings: 24

24
x

Print Options

Page size Letter 3x5 4x6
Text Size Small Medium Large
Content Include description
Include prep time, etc.
Show image

Description

The main ingredient is Nutella but there’s only 3 more ingredients in this recipe for a simple chocolate cookie.

Ingredients

  • 1 cup Nutella
  • ½ cups Sugar
  • 1 cup All-purpose Flour
  • 1 whole Egg

Preparation Instructions

Preheat oven to 350 F.

Blend all ingedients together well. Form into 1″ balls. Place on a cookie sheet. Press down firmly with the bottom of a glass. Bake 7-8 minutes or until set. Cool.


_______________________________________

Amy Johnson is a blogger who writes about food, travel, the home (both inside and out), and various observations and random musings about anything and everything. Visit her blog She Wears Many Hats for a dose of deliciousness, practicality, hilarity, or just plain fun. She lives in South Carolina with her husband and two children.


Profile photo of Natalie | Perry's Plate

Vegetarian Tamales

Posted by in Step-by-Step Recipes

Tasty Kitchen Blog: Vegetarian Tamales. Guest post by Natalie Perry of Perry's Plate, recipe submitted by TK member Julie of Mommie Cooks.

 
Everything you’ve heard about tamales is true, folks. Yes, these Mexican culinary wonders are a lot of work, and they take a lot of time. On the bright side, the work isn’t difficult and boy, is it worth it in the end. Eating one tamale after the other (after the other) makes you forget about your aching feet and back. Then when you run out, you’ll start craving more and begin the process all over again.

Kind of like having children. But most days I’d rather make tamales than give birth.

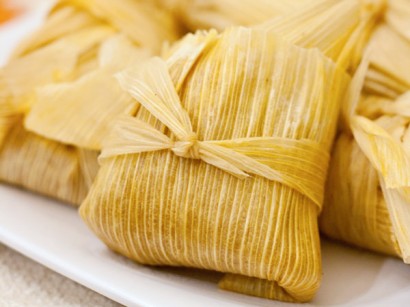
Never heard of tamales? They’re little corn husk packets of steamed dough made from corn flour, filled (usually) with different types of meat and vegetables.

For my first attempt at tamales I opted for these Vegetarian Tamales submitted by TK member mommiecooks (Julie) who blogs at Mommie Cooks! I’m sometimes hesitant to try new techniques with large cuts of meat and thought this vegetarian version would be a good one to get my feet wet. I was surprised how good these tasted. I’m not a vegetarian myself, but I didn’t miss the meat at all!

Before I begin, I need to remind you that I am not a Mexican grandmother who has made tamales for 40 years. I am a 30-year-old gringo who’s made tamales only a couple of times, but hopefully I can show you that you don’t have to be a Mexican grandmother to make some great ones. (But if you find one who can help you, you’ll be in excellent shape.)

One of the keys to making tamales (in my gringo opinion) is organization and time management. If you go from zero to tamale with no breaks, you’ll be exhausted. Luckily the filling and masa dough can be made several hours (or a couple of days) ahead of time. Take advantage of that. And make a lot of tamales while you’ve got everything prepped. The last time I made these, I doubled the masa and made two different fillings. I’ve got a freezer full of low-maintenance meals that I can whip out during the week!

Okay, now that you’ve got a plan and several hours set aside, let’s get going!


Tasty Kitchen Blog: Vegetarian Tamales. Guest post by Natalie Perry of Perry's Plate, recipe submitted by TK member Julie of Mommie Cooks.

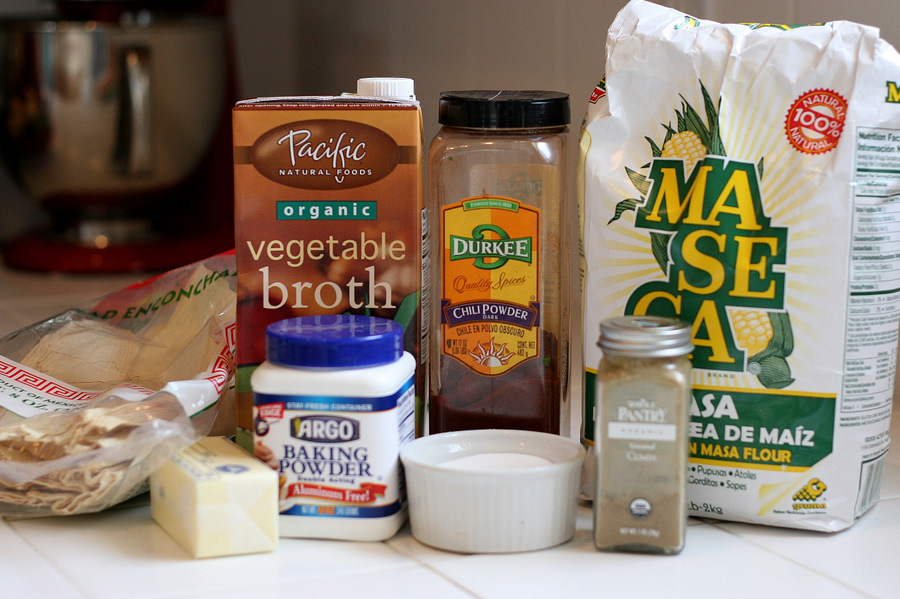
First, let’s make the masa. I loved Julie’s masa recipe. It was so flavorful! I think this will be my go-to recipe no matter what filling I make. You’ll need dried corn husks, vegetable broth, chili powder, corn masa flour, cumin, salt, baking powder, and a stick of butter. You can find the dried corn husks and corn masa flour in the Latin/ethnic aisle of a well-stocked grocery store. You could definitely find them at a Latin grocery store if your town happens to have one.

I also appreciated the use of butter in the masa dough as opposed to the traditional use of lard. Lard freaks me out. I wish they would call it something else. I’ll get over it eventually.


Tasty Kitchen Blog: Vegetarian Tamales. Guest post by Natalie Perry of Perry's Plate, recipe submitted by TK member Julie of Mommie Cooks.

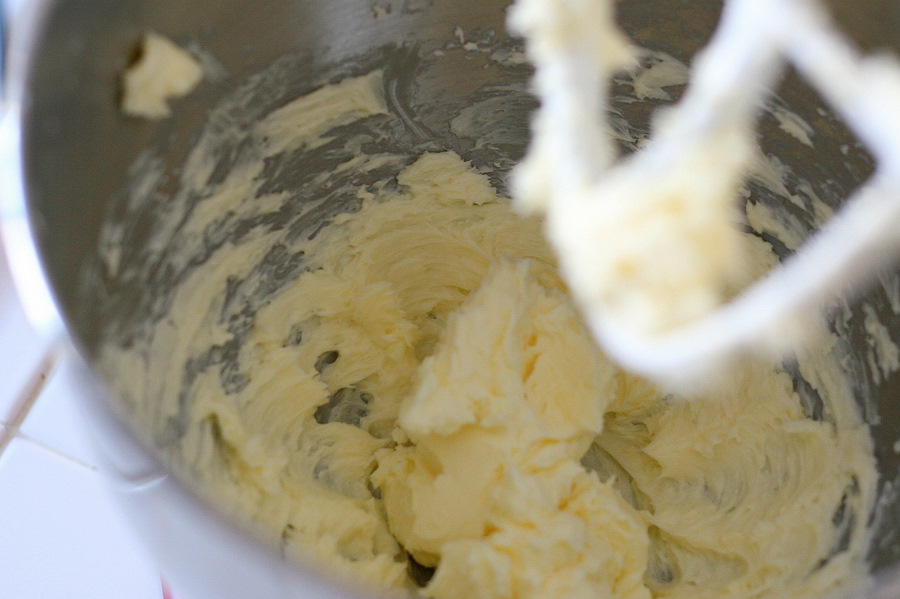
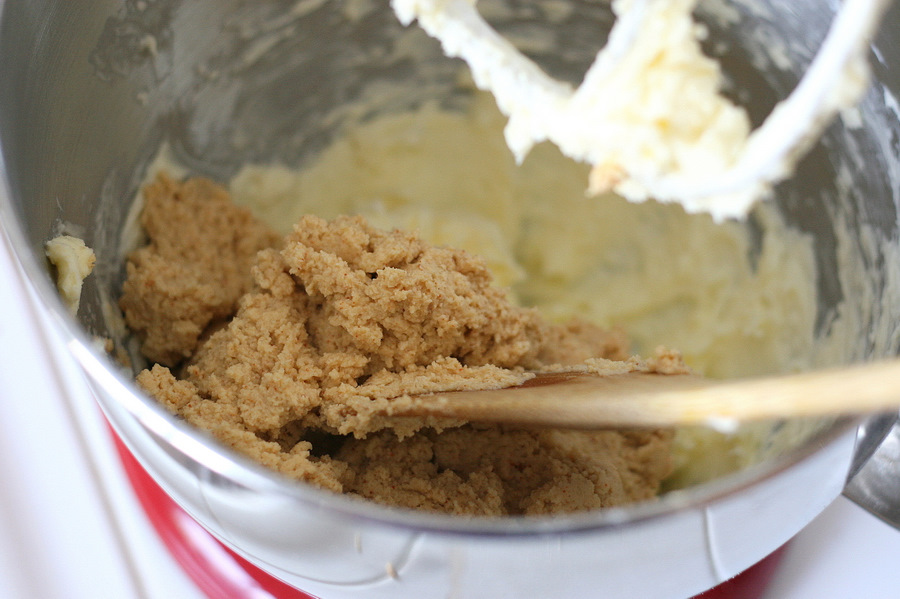
Cream the butter using an electric mixer or stand mixer.


Tasty Kitchen Blog: Vegetarian Tamales. Guest post by Natalie Perry of Perry's Plate, recipe submitted by TK member Julie of Mommie Cooks.

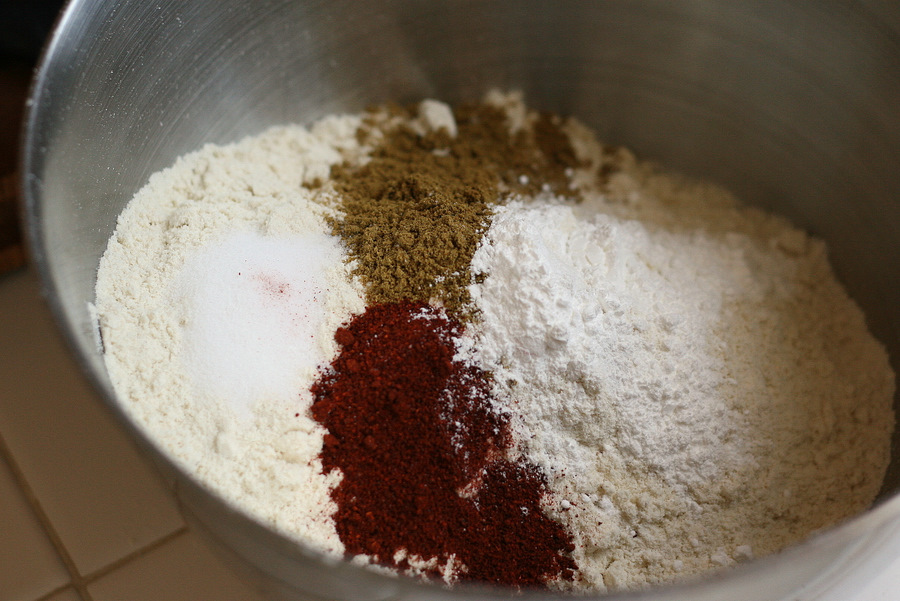
In a separate bowl, whisk together the masa flour, salt, baking powder, chili powder, and cumin.


Tasty Kitchen Blog: Vegetarian Tamales. Guest post by Natalie Perry of Perry's Plate, recipe submitted by TK member Julie of Mommie Cooks.

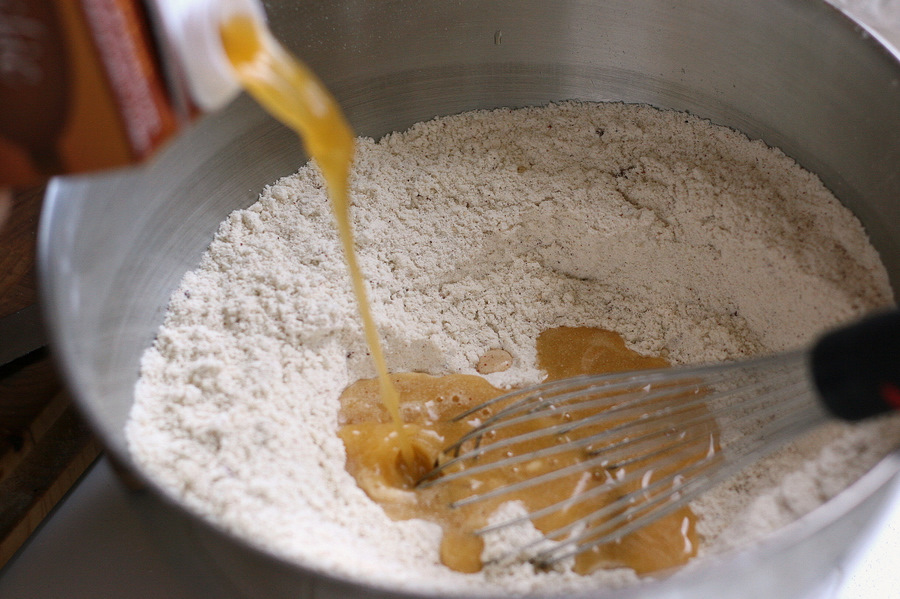
Add some of the vegetable broth.


Tasty Kitchen Blog: Vegetarian Tamales. Guest post by Natalie Perry of Perry's Plate, recipe submitted by TK member Julie of Mommie Cooks.

Stir well to form a fairly stiff, but sticky dough.


Tasty Kitchen Blog: Vegetarian Tamales. Guest post by Natalie Perry of Perry's Plate, recipe submitted by TK member Julie of Mommie Cooks.

Add this dough to the creamed butter.


Tasty Kitchen Blog: Vegetarian Tamales. Guest post by Natalie Perry of Perry's Plate, recipe submitted by TK member Julie of Mommie Cooks.

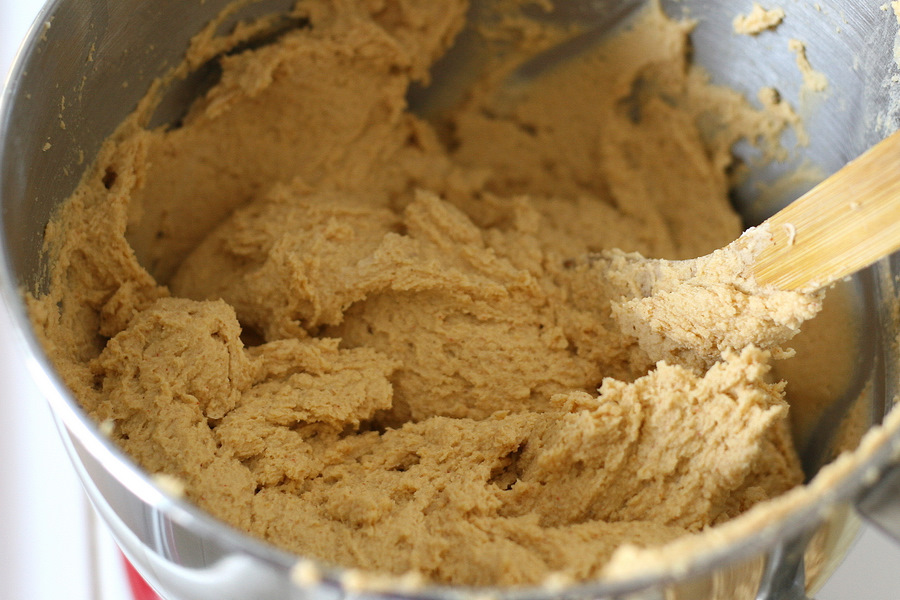
Cream everything together, scraping the sides of the bowl as necessary (the butter tends to stick to the sides and bottom), until you have a light, fluffy dough. Set this aside or cover and chill if you won’t be using it for more than a few hours.


Tasty Kitchen Blog: Vegetarian Tamales. Guest post by Natalie Perry of Perry's Plate, recipe submitted by TK member Julie of Mommie Cooks.

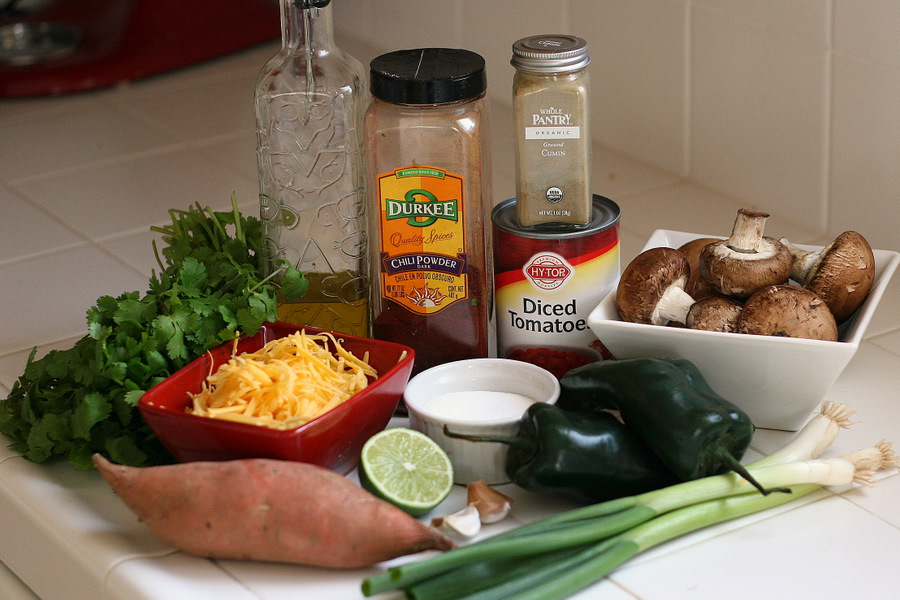
Now for the filling! I made a few changes to Julie’s recipe (noted at the bottom of this post) and quite liked this combination of vegetables. You’ll need a bunch of fresh cilantro, cooking oil, chili powder, cumin, diced tomatoes, a few brown mushrooms, green onions, poblano peppers, salt, fresh garlic, lime, a small potato, and some shredded cheddar cheese. (As well as 1/4 cup of vegetable broth. Just pretend it’s sitting next to the oil.)


Tasty Kitchen Blog: Vegetarian Tamales. Guest post by Natalie Perry of Perry's Plate, recipe submitted by TK member Julie of Mommie Cooks.

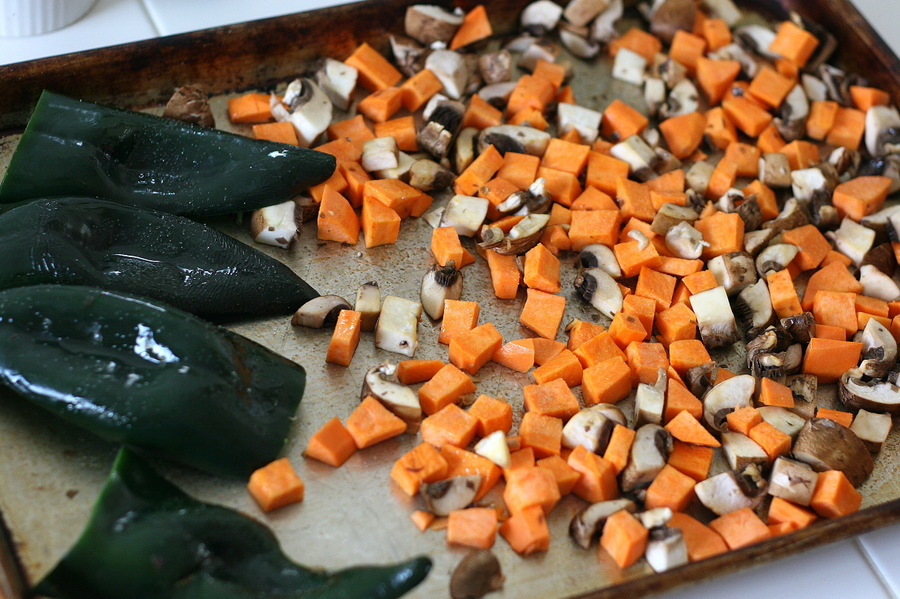
I’m mildly obsessed with roasting vegetables, so after I chopped the sweet potato and mushrooms and seeded and halved the peppers, I stuck them on a rimmed cookie sheet and roasted them at 425 degrees F for 30-35 minutes. (Peel the skin off the peppers and coarsely chop them after they’re roasted.) You could surely cook them in a skillet (per the original recipe), but if you’re using poblanos, you might want to reduce the amount. Roasting takes most of the heat out of them, and cooking them in a skillet may make the filling spicier than you anticipate.


Tasty Kitchen Blog: Vegetarian Tamales. Guest post by Natalie Perry of Perry's Plate, recipe submitted by TK member Julie of Mommie Cooks.

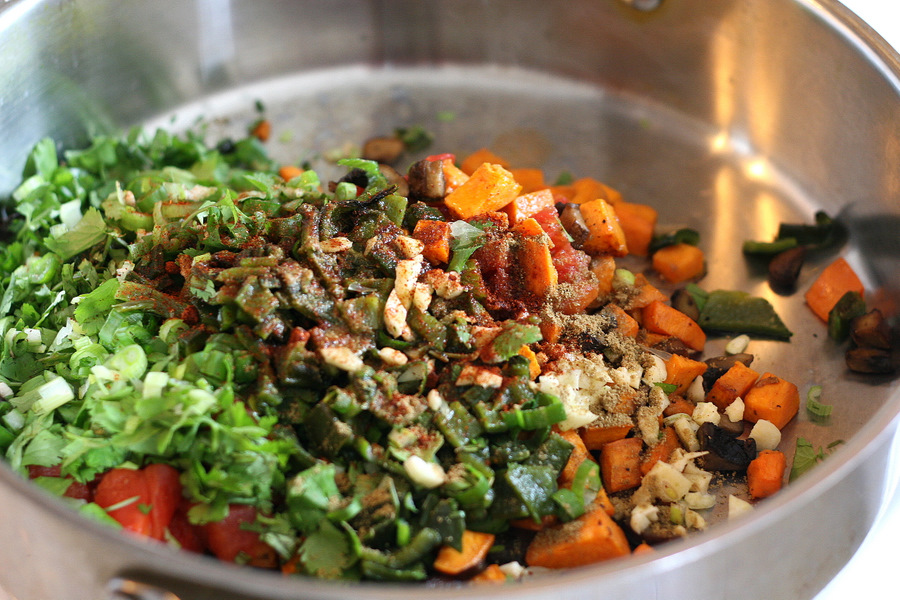
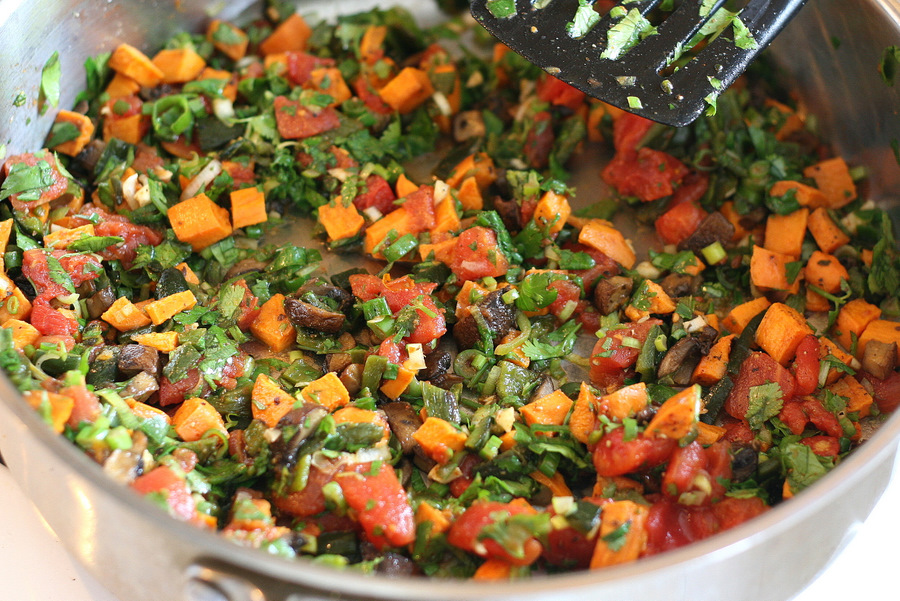
After they’re nice and roasted, throw them with the rest of the filling ingredients (except for the broth and cheese) into a large skillet and cook over medium heat until everything is heated through, about 2-3 minutes.


Tasty Kitchen Blog: Vegetarian Tamales. Guest post by Natalie Perry of Perry's Plate, recipe submitted by TK member Julie of Mommie Cooks.

Add the vegetable broth and scrape any bits that have stuck to the bottom of the skillet. Kill the heat, and stir in the cheese.
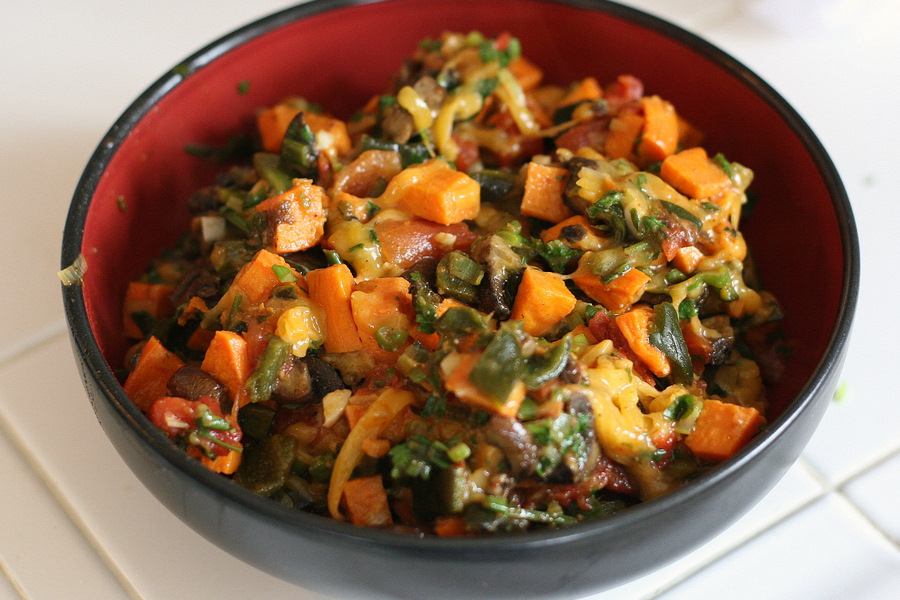


Tasty Kitchen Blog: Vegetarian Tamales. Guest post by Natalie Perry of Perry's Plate, recipe submitted by TK member Julie of Mommie Cooks.

Transfer to a bowl and set aside until ready to assemble the tamales. Cover and chill if it will be more than a few hours.
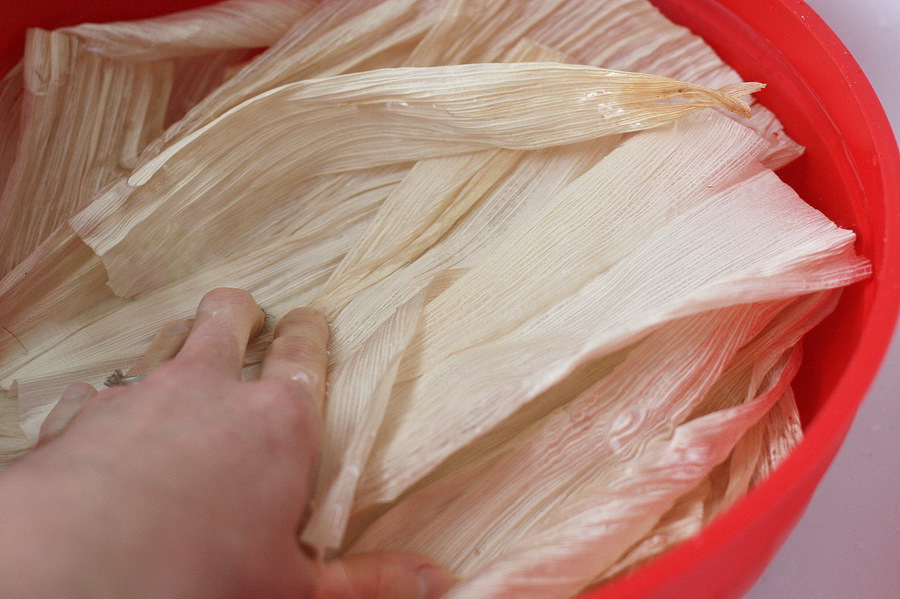


Tasty Kitchen Blog: Vegetarian Tamales. Guest post by Natalie Perry of Perry's Plate, recipe submitted by TK member Julie of Mommie Cooks.

At some point you’ll need to soak the corn husks. They need to be immersed in water for about 30 minutes so they’ll be flexible enough to work with. Because I made my masa dough and filling ahead of time, I soaked my husks 30 minutes before I started wrapping them. If you’re going from zero to tamale, you might want to do this first. My husks floated to the top of the bowl, so I used a large can of pumpkin to weigh them down. The original recipe only makes between 13 and 16 tamales, so don’t soak the whole bag. Be sure to throw in a few extras to tear up and use as ties and in case a few of them rip; 25 ought to suffice.
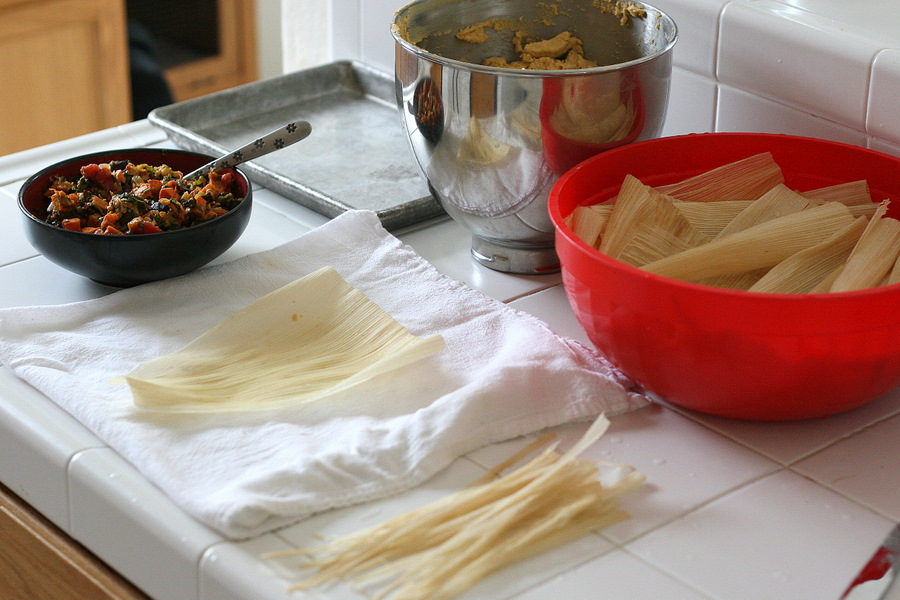


Tasty Kitchen Blog: Vegetarian Tamales. Guest post by Natalie Perry of Perry's Plate, recipe submitted by TK member Julie of Mommie Cooks.

When you’re ready to start the fun part (yes, it really is fun!), clean up your workstation and get everything organized. You’ll need the filling, the masa dough, the soaking husks, a place to put the finished tamales, and a few husks that have been torn into 1/2-inch strips to use as ties. I also used a towel to place the husks on and dry them off when they come out of the water bowl.


Tasty Kitchen Blog: Vegetarian Tamales. Guest post by Natalie Perry of Perry's Plate, recipe submitted by TK member Julie of Mommie Cooks.

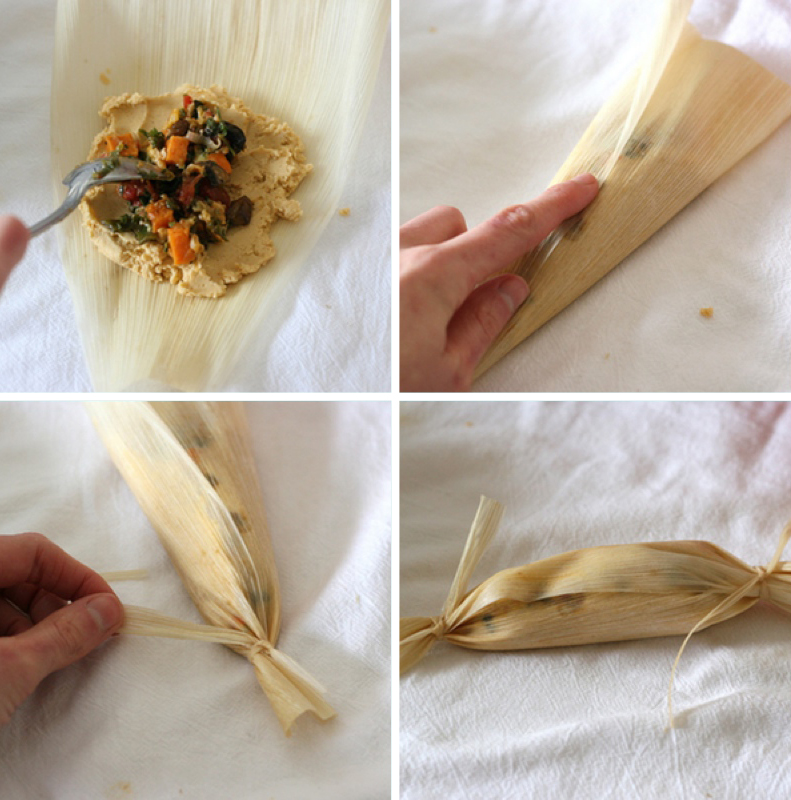
There are several ways to wrap tamales. I’ll show you two. This first way is definitely the easiest and the best way to use smaller husks that aren’t very wide or long. (You can also overlap husks if you don’t want to make really small tamales.)

First spread a 2 to 3 tablespoonfuls of masa dough in the center of the tamale, leaving a narrow border on each side. I found that using wet fingertips was the easiest way to spread the dough. It’s pretty sticky. Then put a spoonful of filling down the center of the dough. Fold the sides in (or roll like a burrito), then twist the ends and secure them with a husk tie or some kitchen twine.

See? Not so bad!


Tasty Kitchen Blog: Vegetarian Tamales. Guest post by Natalie Perry of Perry's Plate, recipe submitted by TK member Julie of Mommie Cooks.

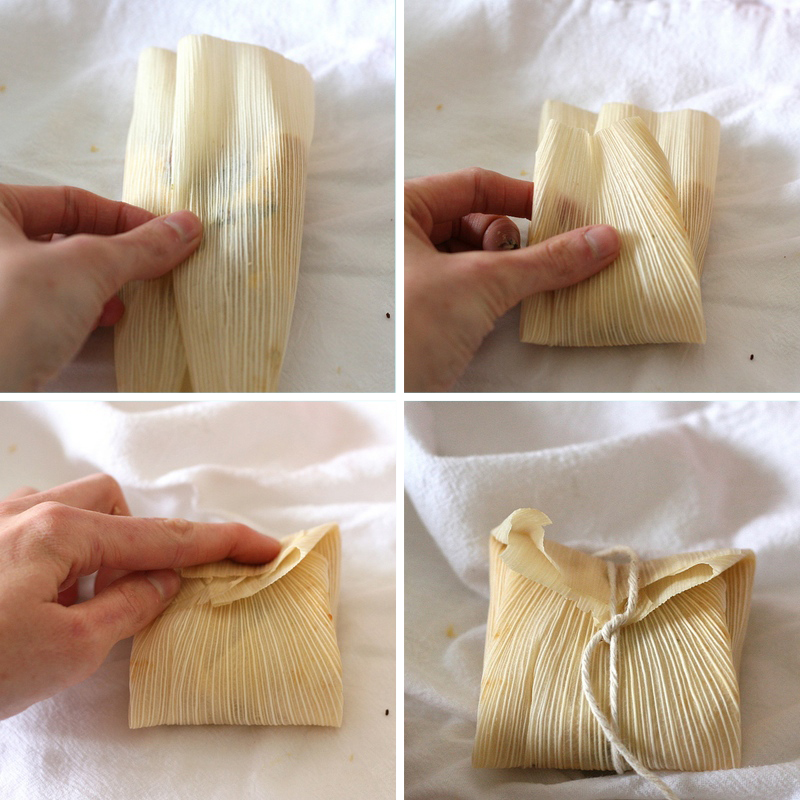
This next one was my favorite because they look like little packages when they’re tied. This method was much easier with large husks, but you could surely twist and tie the ends as well. First spread the masa and filling like the previous method, and bring the sides to the center. Then, fold the bottom of the husk to the center and fold down the top part of the husk to the center. Secure with a piece of kitchen twine from top to bottom or side to side, depending on your preference and the size of your husk.

Adorable.

Repeat, repeat, repeat! Now is the time to have some good music, your comfy crocs, and a few extra hands to help.


Tasty Kitchen Blog: Vegetarian Tamales. Guest post by Natalie Perry of Perry's Plate, recipe submitted by TK member Julie of Mommie Cooks.

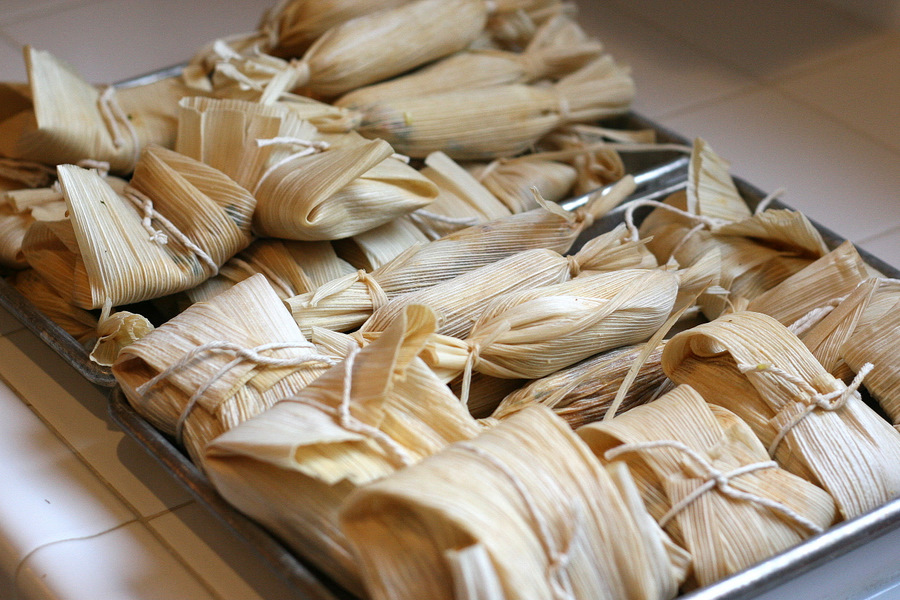
When you’re finished, you’ll have a tray (or two) of finished tamales. (I doubled the recipe, which is why I ended up with so many.) Some will be small, some will be big, some pretty, some will look like you had a toddler helping out. That’s perfectly fine. They’ll all taste great!

At this point you could stick them in a gallon-sized freezer bag and freeze them if you like.


Tasty Kitchen Blog: Vegetarian Tamales. Guest post by Natalie Perry of Perry's Plate, recipe submitted by TK member Julie of Mommie Cooks.

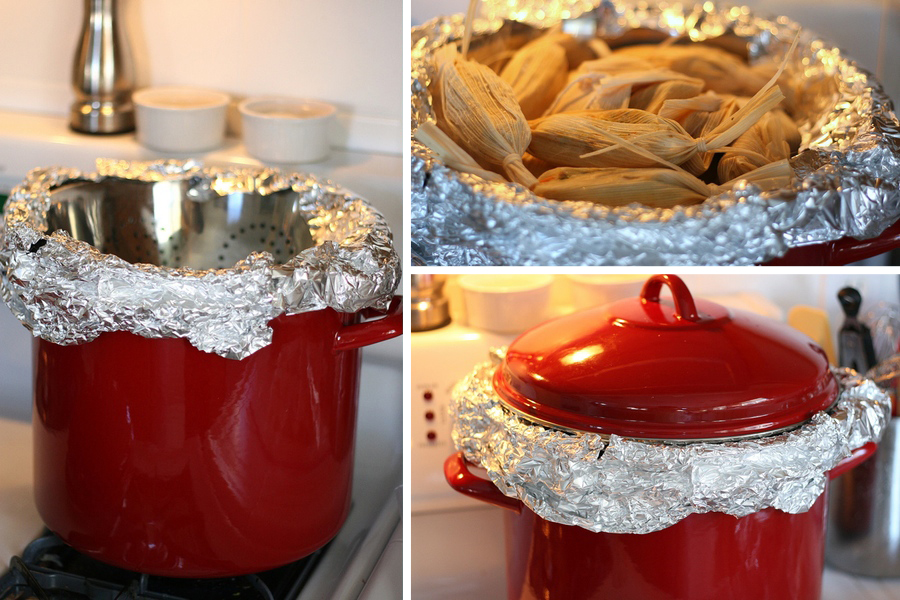
One of the reasons I never made tamales until now was because I don’t own a steamer. Julie suggested taking a big pot, adding a couple quarts of water and steam them in a metal colander nestled inside. Brilliant! My colander wasn’t wide enough, so I sealed the edges with aluminum foil to hold the steam in. It isn’t pretty, but it did the job.

Julie says to steam them for 90 minutes over medium-high heat, adding more water as necessary. If you have a proper steamer, I imagine they’d be finished in less time. Add an extra 15 minutes or so if they’re frozen. You don’t need to thaw them ahead of time.


Tasty Kitchen Blog: Vegetarian Tamales. Guest post by Natalie Perry of Perry's Plate, recipe submitted by TK member Julie of Mommie Cooks.

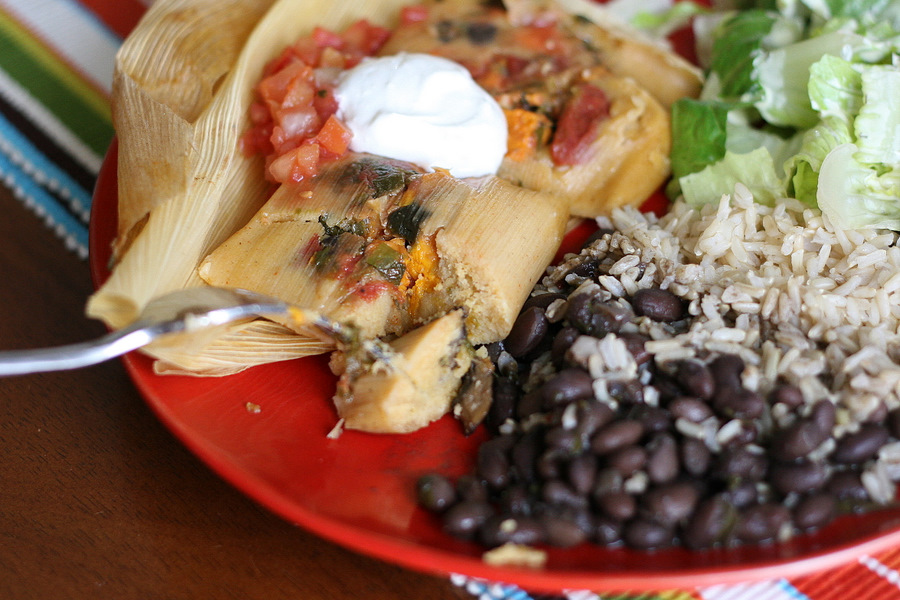
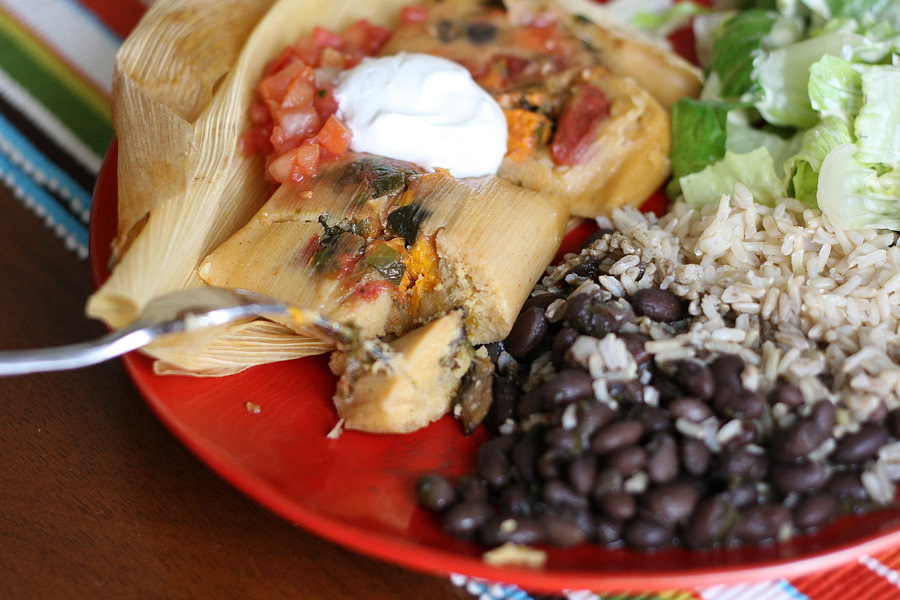
All your hard work will finally pay off as you bite into these tender, moist, flavorful little packets. Serve them with the traditional side of rice and beans, some salsa, and a dollop of sour cream, and you’ll wonder where this meal has been all your life. Seriously.

Julie, thank you for a great recipe and sharing your tamale wisdom! Visit her blog, Mommie Cooks, for more for her family-friendly recipes.

 
Recipe alterations: I omitted the zucchini and the fresh tomatoes and replaced it with 3-4 large brown mushrooms, 1 small sweet potato, 2 poblano peppers, and 1 can of diced tomatoes, drained. The altered filling made more than the original and needed 1 1/2 times the masa recipe.


Printable Recipe

Vegetarian Tamales

See post on mommiecooks’s site!
4.66 Mitt(s) 3 Rating(s)3 votes, average: 4.66 out of 53 votes, average: 4.66 out of 53 votes, average: 4.66 out of 53 votes, average: 4.66 out of 53 votes, average: 4.66 out of 5

Prep Time:

Cook Time:

Difficulty: Intermediate

Servings: 16

16
x

Print Options

Page size Letter 3x5 4x6
Text Size Small Medium Large
Content Include description
Include prep time, etc.
Show image

Description

A delicious vegetarian take on a Mexican classic.

Ingredients

  • 1 package Corn Husks (about 40-50 Husks)
  • _____
  • FOR THE DOUGH:
  • 2 cups Masa
  • 1 teaspoon Baking Powder
  • ¾ teaspoons Salt, Divided
  • 2 teaspoons Cumin, Divided Use
  • 2 teaspoons Chili Powder, Divided Use
  • 2-¼ cups Veggie Broth, Divided Use
  • 1 stick Butter
  • _____
  • FOR THE FILLING:
  • 1 whole Zucchini, Chopped
  • 3 whole Green Onions, Chopped
  • 2 cloves Garlic, Minced
  • 1 Tablespoon Oil
  • 1 bunch Cilantro, Chopped
  • 2 whole Roma Tomatoes, Chopped
  • ½ whole Lime, Juiced
  • ½ cups Shredded Cheddar Cheese

Preparation Instructions

Start off by soaking your corn husks in water for at least 30 minutes.

Grab a bowl and add in the masa, baking powder, 1/2 teaspoon of the salt, and 1 teaspoon of both the cumin, and chili powder.

Now add 2 cups of the veggie broth to your mixture and form a dough.

Pop your stick of butter into your mixer and whip it up for a minute or so. Add the masa dough in and mix it up well again. Set your finished dough aside and let’s move on to the filling.

Grab your saute pan and cook up your zucchini, green onions, and garlic on medium heat in the Tablespoon of oil for 2 to 3 minutes.

Now add in the rest of your broth (1/4 cup), the cilantro, tomatoes, lime juice, and the remaining cumin, chili powder (1 teaspoon each) and salt (1/4 teaspoon).

Stir it together and add in the shredded cheese.

Grab one of your soaked corn husks and slather a good amount of the masa mixture on top.

Now, take a spoonful of your veggie filling and place it down the middle third of your tamale. Make sure to leave a bit of space at the ends.

Wrap it up like you would a burrito and tie off the husk. I used another corn husk to tie it up.

Grab a big pot, add about 2 quarts of water and steam those beautiful rolled up veggie delights for about 90 minutes on medium high heat. I didn’t have a steamer that big, so I used my large stock pot and placed my noodle strainer inside of it with the pot cover over the top. Make sure that your tamales aren’t touching the water.

While the tamales are steaming, periodically check your water level to ensure you don’t boil it all away!

Pull one out after 90 minutes and unwrap it to see if it’s cooked through. The masa should be firm.


_______________________________________

Be sure to check out Natalie’s own beautiful food blog, Perrys’ Plate, where you can see her growing collection of lovely recipes. There’s always something new to see there. Go visit now!


Profile photo of Erica Lea

Thai Coconut Rice

Posted by in Step-by-Step Recipes

Tasty Kitchen Blog: Thai Coconut Rice. Guest post and recipe from Erica Kastner of Cooking for Seven.

 
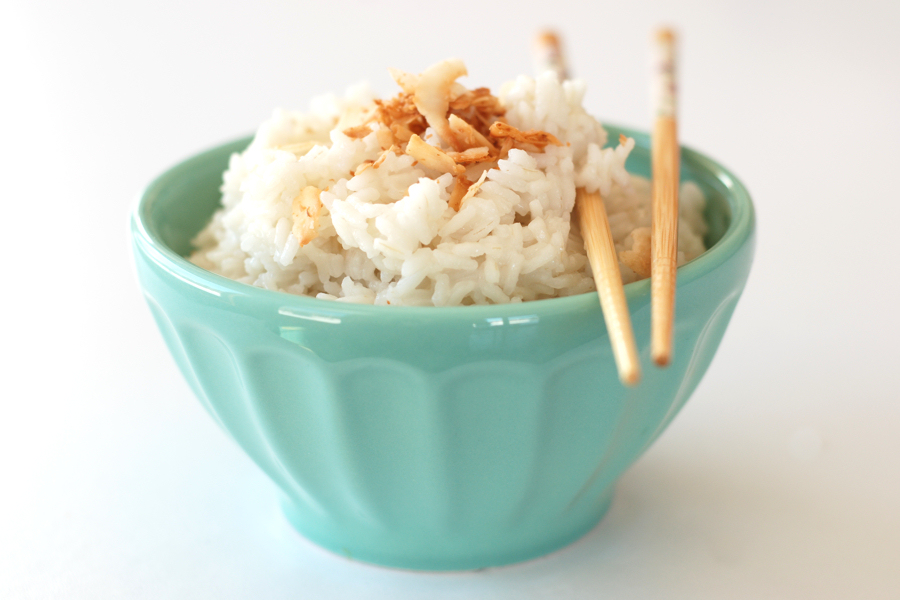
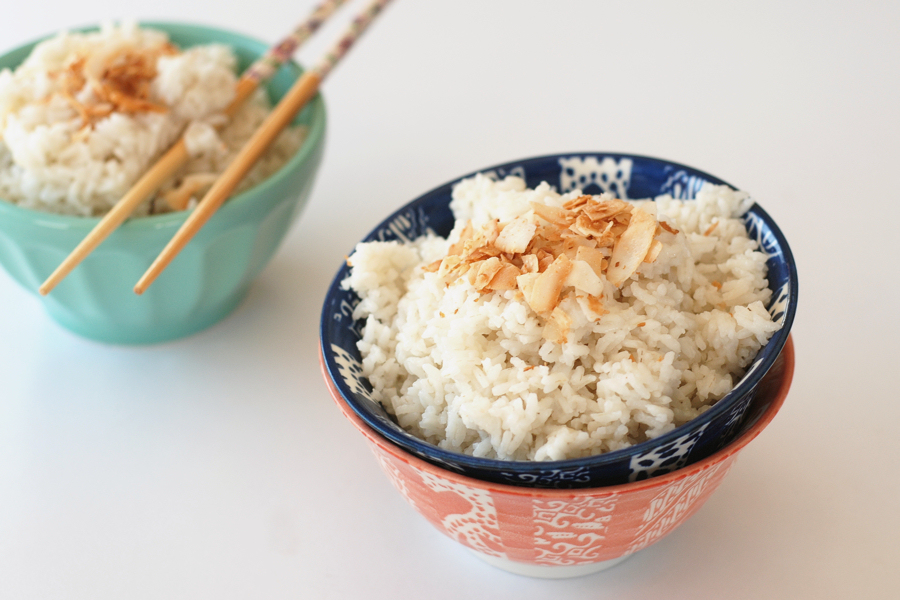
Soft, slightly sweet rice, infused with the flavor of coconut. The perfect accompaniment to any curry. It is also delicious all by itself, topped with a bit of crunchy toasted coconut. Add a bit of butter and cream, and you have a scrumptious dessert.

This recipe is hardly more difficult than cooking regular rice. It simply has a few more steps and ingredients:


Tasty Kitchen Blog: Thai Coconut Rice. Guest post and recipe from Erica Kastner of Cooking for Seven.

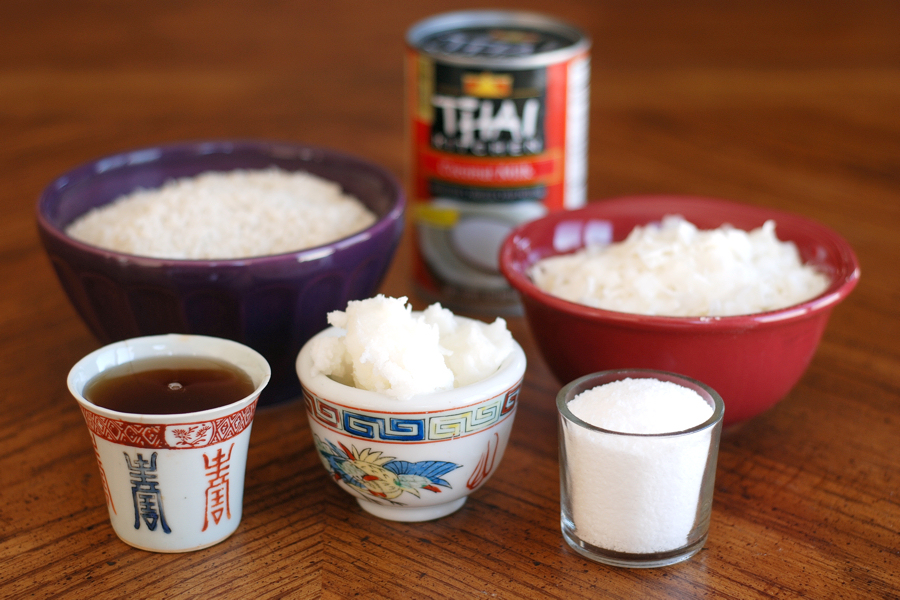
Here’s what you’ll need to make coconut rice: medium-grain rice, a can of coconut milk (Please use full fat. Thank you!), coconut oil, maple syrup (or sweetener of choice), Kosher salt, and large flaked coconut (optional but very good).


Tasty Kitchen Blog: Thai Coconut Rice. Guest post and recipe from Erica Kastner of Cooking for Seven.

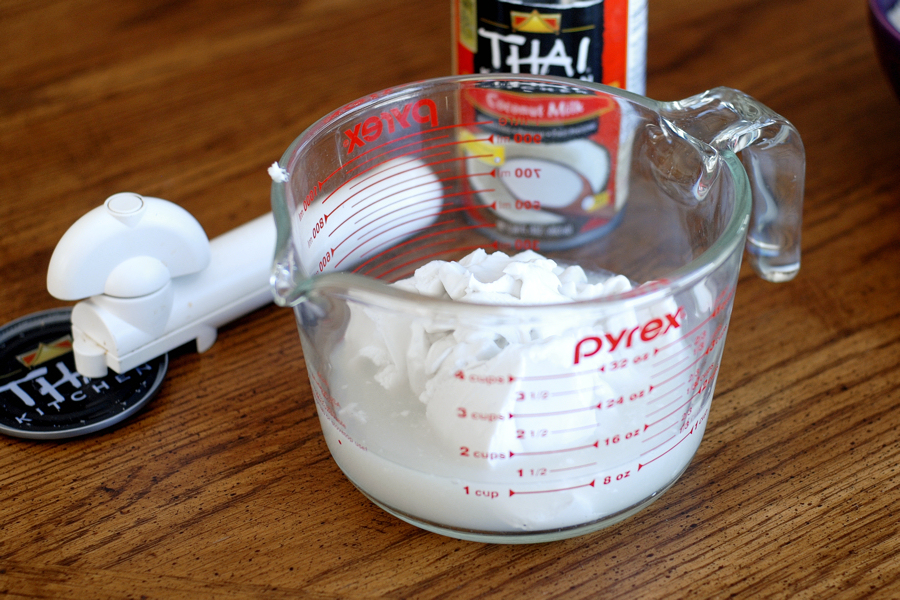
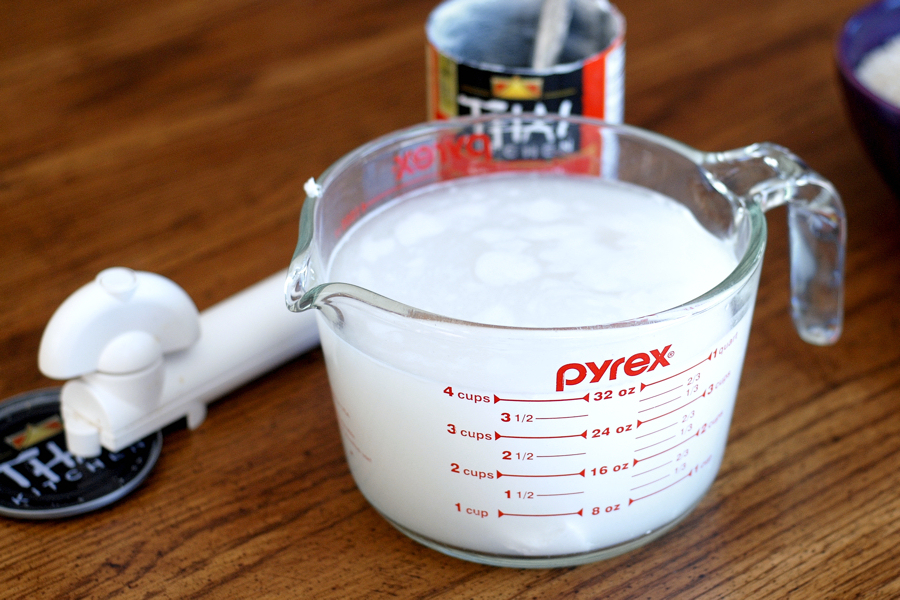
Open the can of coconut milk and dump the contents into a measuring cup.


Tasty Kitchen Blog: Thai Coconut Rice. Guest post and recipe from Erica Kastner of Cooking for Seven.

Add enough water to make 4 cups total liquid.


Tasty Kitchen Blog: Thai Coconut Rice. Guest post and recipe from Erica Kastner of Cooking for Seven.

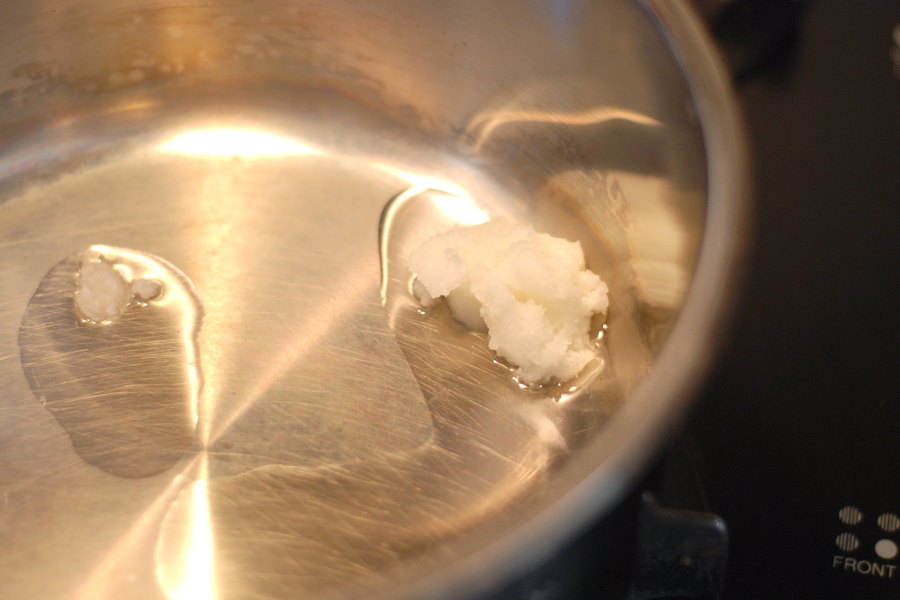
Melt the coconut oil over medium heat.


Tasty Kitchen Blog: Thai Coconut Rice. Guest post and recipe from Erica Kastner of Cooking for Seven.

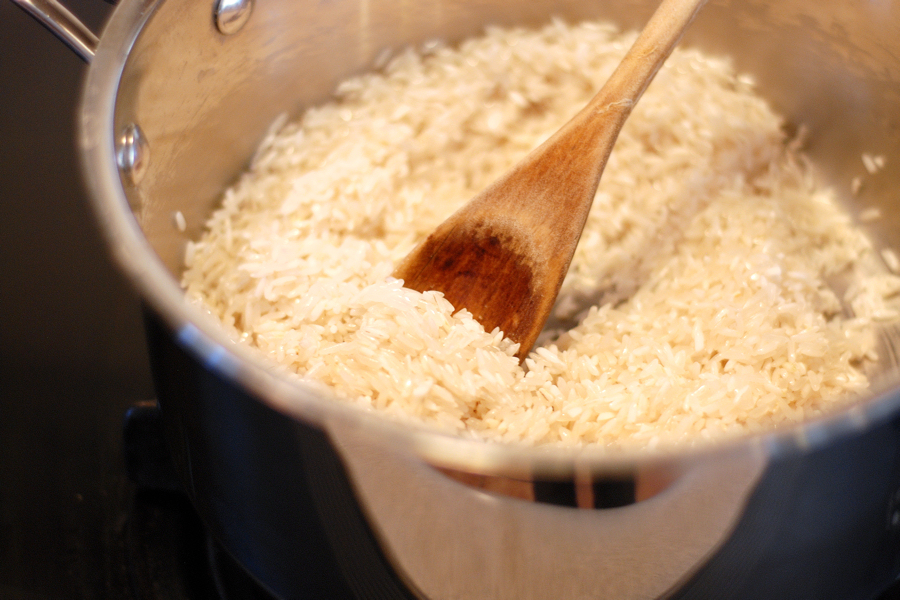
Add 2 cups rice and cook, stirring occasionally, for about 2 minutes. This will give the rice some nice flavor.


Tasty Kitchen Blog: Thai Coconut Rice. Guest post and recipe from Erica Kastner of Cooking for Seven.

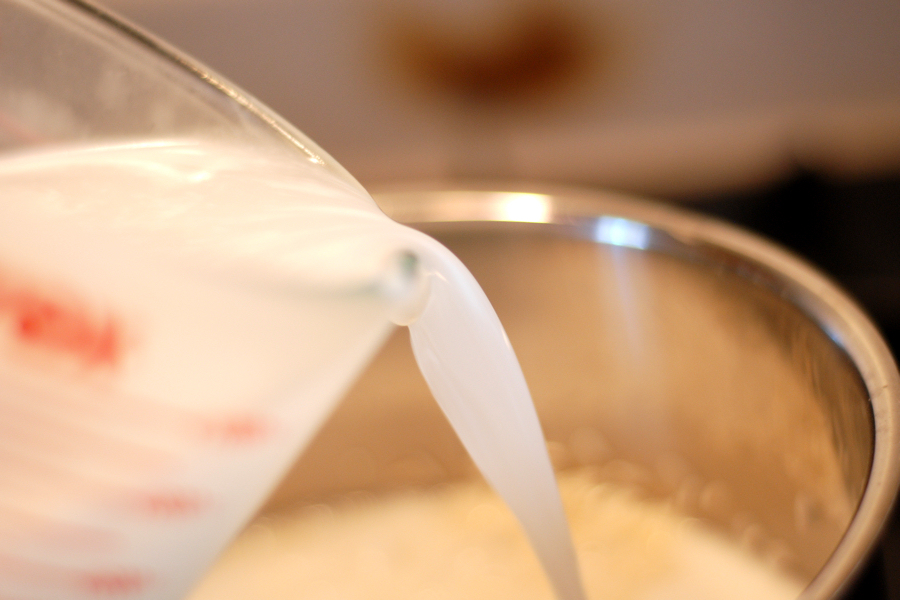
Add the coconut milk …


Tasty Kitchen Blog: Thai Coconut Rice. Guest post and recipe from Erica Kastner of Cooking for Seven.

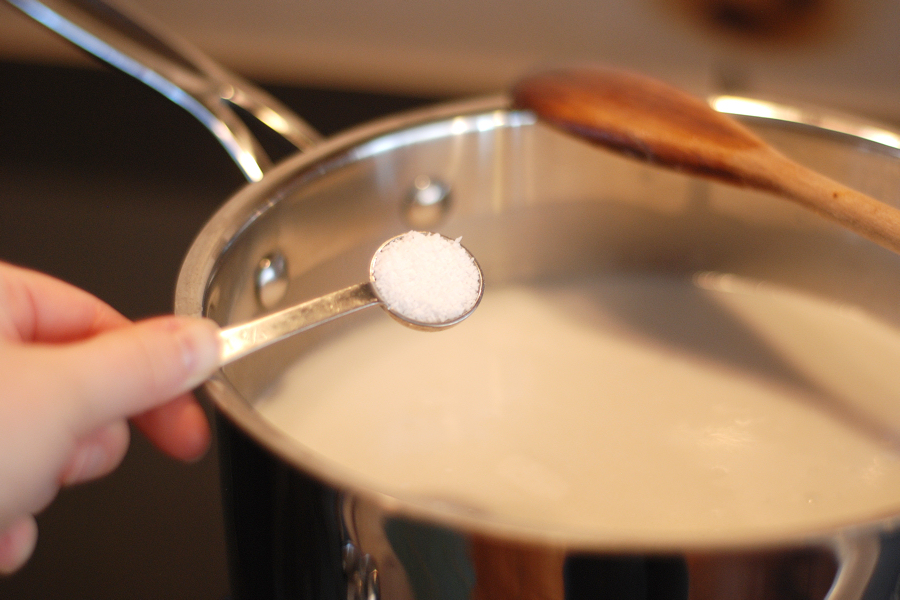
Salt …


Tasty Kitchen Blog: Thai Coconut Rice. Guest post and recipe from Erica Kastner of Cooking for Seven.

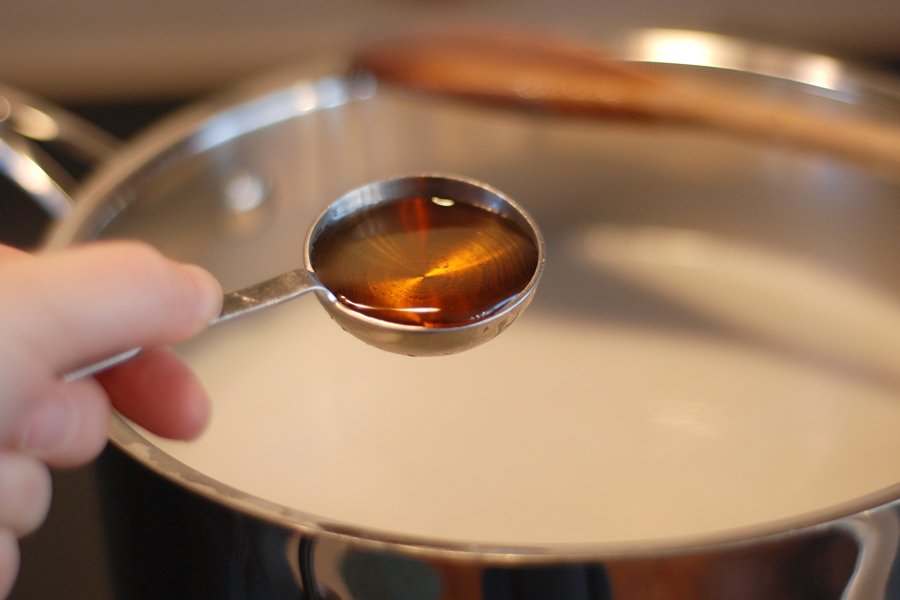
And maple syrup or sweetener of choice. You could also add a bit of coconut flavoring if desired.


Tasty Kitchen Blog: Thai Coconut Rice. Guest post and recipe from Erica Kastner of Cooking for Seven.

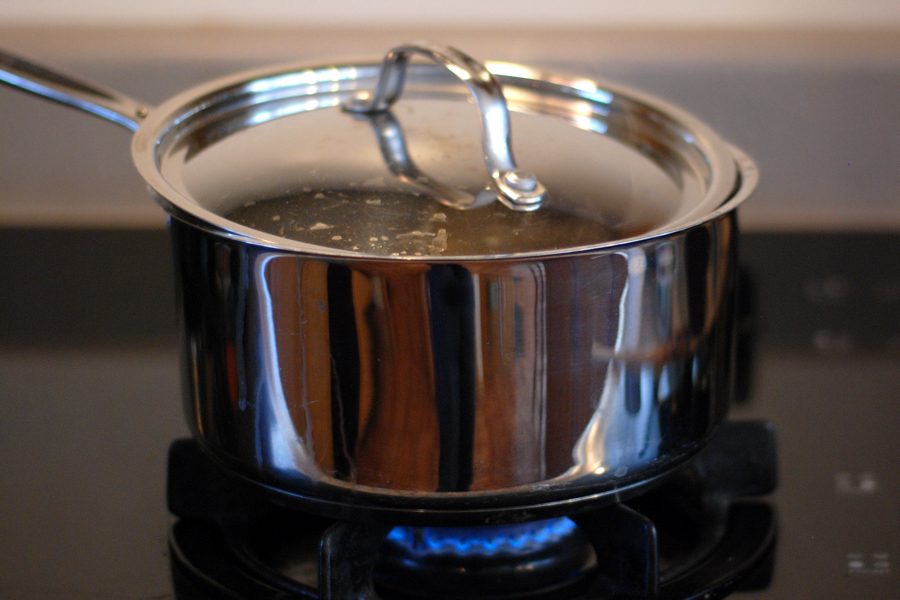
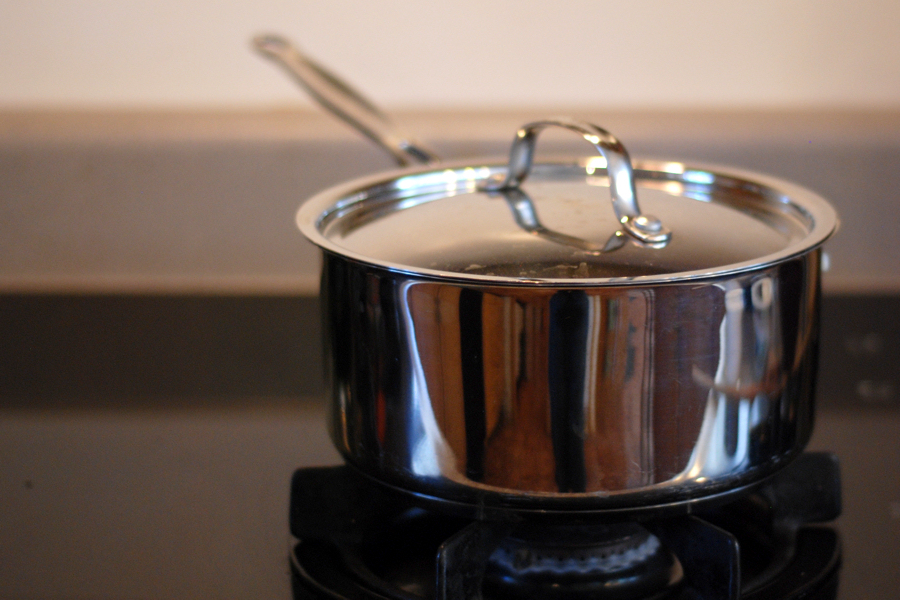
Bring to a boil, reduce heat, and place the lid askew on the pot to allow some of the steam to escape. Please don’t mind the water spots on my lid. Thank you!


Tasty Kitchen Blog: Thai Coconut Rice. Guest post and recipe from Erica Kastner of Cooking for Seven.

Cook until the rice has absorbed all (or nearly all) of the coconut milk/water, about 15-20 minutes.


Tasty Kitchen Blog: Thai Coconut Rice. Guest post and recipe from Erica Kastner of Cooking for Seven.

Turn off the heat. Cover the pot tightly and allow to rest for about 5-10 minutes.


Tasty Kitchen Blog: Thai Coconut Rice. Guest post and recipe from Erica Kastner of Cooking for Seven.

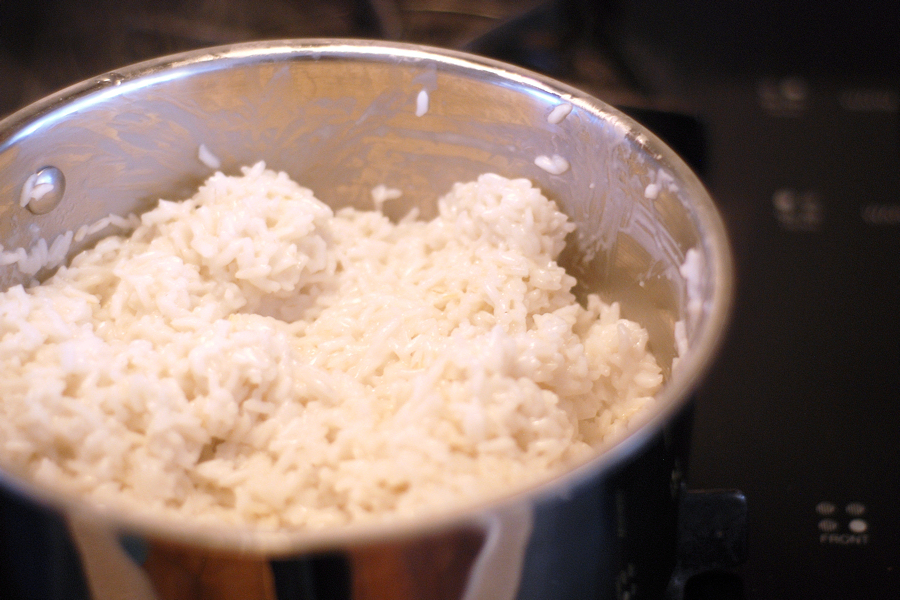
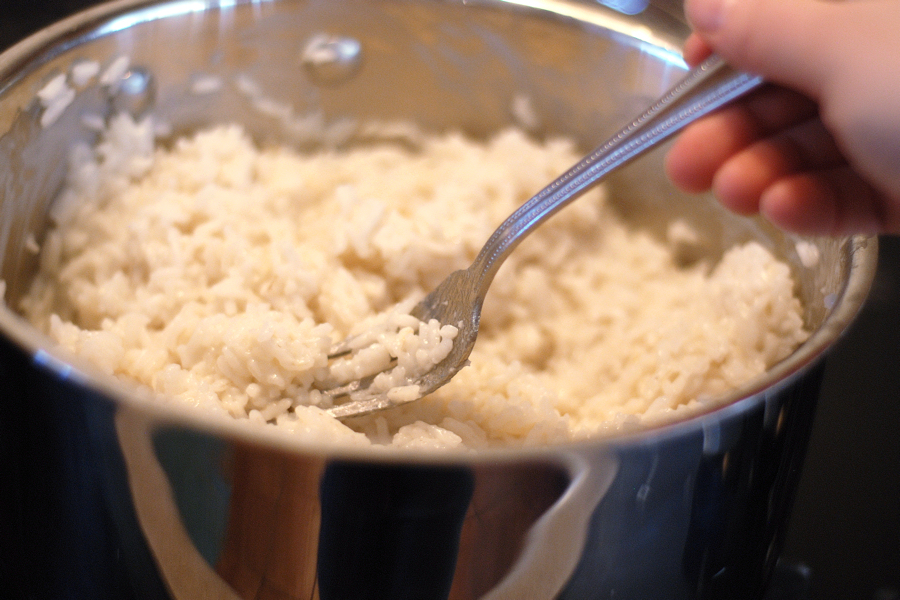
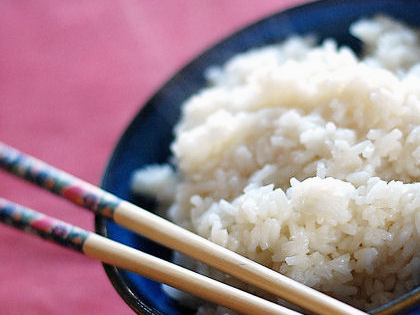
When you’re ready to serve, fluff the rice with a fork.


Tasty Kitchen Blog: Thai Coconut Rice. Guest post and recipe from Erica Kastner of Cooking for Seven.

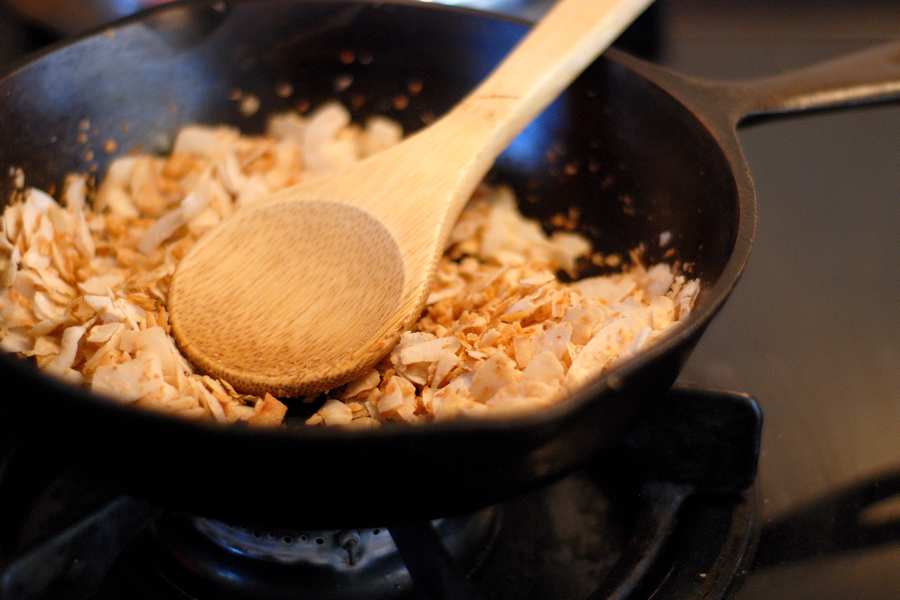
If desired, toast up a bit of coconut flakes.


Tasty Kitchen Blog: Thai Coconut Rice. Guest post and recipe from Erica Kastner of Cooking for Seven.

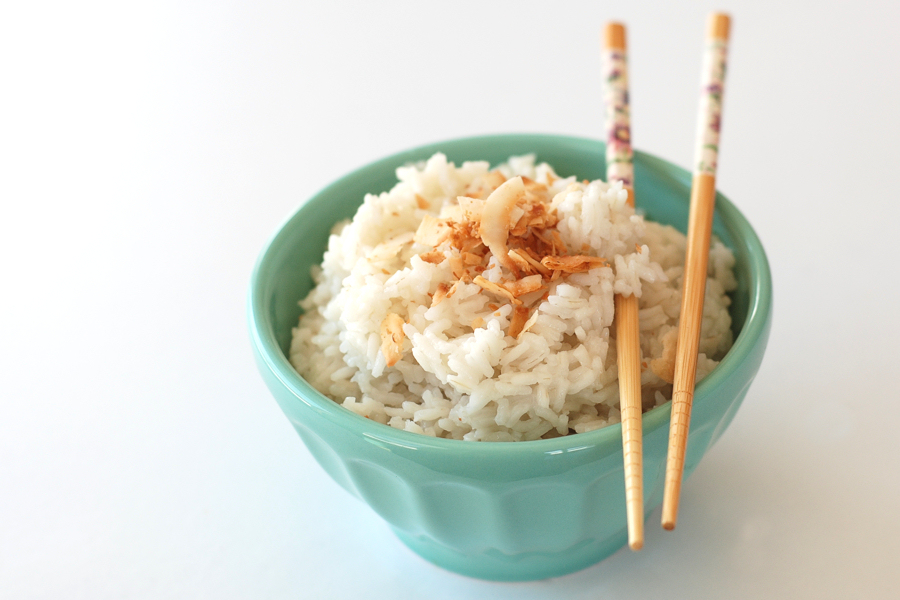
Serve the rice warm, topped with toasted coconut.


Tasty Kitchen Blog: Thai Coconut Rice. Guest post and recipe from Erica Kastner of Cooking for Seven.

This recipe turns an old curry standby into a special meal. It’s wonderful as a side dish for an Asian-themed meal as well. My sisters and I also enjoy it with a bit of extra maple syrup and butter as an after-dinner treat.


Printable Recipe

Thai Coconut Rice

See post on Erica Lea’s site!
5.00 Mitt(s) 2 Rating(s)2 votes, average: 5.00 out of 52 votes, average: 5.00 out of 52 votes, average: 5.00 out of 52 votes, average: 5.00 out of 52 votes, average: 5.00 out of 5

Prep Time:

Cook Time:

Difficulty: Easy

Servings: 6

6
x

Print Options

Page size Letter 3x5 4x6
Text Size Small Medium Large
Content Include description
Include prep time, etc.
Show image

Description

Coconut flavored rice, the perfect accompaniment to curry.

Ingredients

  • 2 cups Medium Grain Rice
  • 2 cups Regular Coconut Milk
  • 2 cups Water
  • ½ teaspoons Kosher Or Sea Salt
  • 1 Tablespoon Coconut Oil
  • 2 Tablespoons Maple Syrup, Sucanat, Brown Sugar, Or Sweetener Of Choice
  • ½ teaspoons Coconut Flavoring (optional)
  • 2 Tablespoons Tasted Coconut, Optional

Preparation Instructions

1. In a large, deep-sided pot, melt the coconut oil over medium heat. Add the rice and cook, stirring occasionally, for about 2 minutes.

2. Add the coconut milk, water, salt, sweetener, and flavoring if using. Stir well. Bring the rice to a boil, stirring occasionally to prevent the rice from burning.

3. When it comes to a boil, reduce the heat to medium-low. Place the lid askew on the pot, allowing some of the steam to escape. Cook for 15-20 minutes, or until the rice has absorbed all (or nearly all) of the coconut-water.

4. Turn off the heat. Cover the pot tightly with the lid and allow to rest for 5-10 minutes, or until you are ready to serve. When you are ready to serve, fluff the rice with a fork or chopsticks. Top with toasted coconut if desired.


_______________________________________

Erica Berge shares her wonderful recipes and amazing food photography on her blog, Cooking for Seven. She also writes about crafts and posts more of her beautiful photography in her personal blog, EricaLea.com. There really isn’t much that this amazing young lady can’t do, and we’re thrilled she does some of it here.


Profile photo of Erika (TK)

Chicken Soup. For Your Soul.

Posted by in The Theme Is...

Tasty Kitchen Blog: Chicken Soup!

 
Feeling a bit under the weather? Chicken soup will fix ya. At least, that’s what my mom says. Whenever I was down with a cold or just feeling achy all over, she’d make a nice pot of chicken and rice soup and nurse me back to health. Whether you swear by the curative powers of chicken soup or not, it’s hard to deny the comfort you get from a nice bowl of this simple yet flavorful soup, particularly if your mommy is sitting by your bed feeding you by the spoonful.

Moms are great like that. They can pretty much fix anything.

Rumor has it that lots of folks could use some old-fashioned comforting these days. Maybe you caught some bug from someone at work or in school, or maybe it’s just a case of too much winter already. Whatever it is, we’re here to help. And in true Tasty Kitchen style, we’re showing you a number of different ways to change up this tried-and-true classic.
 

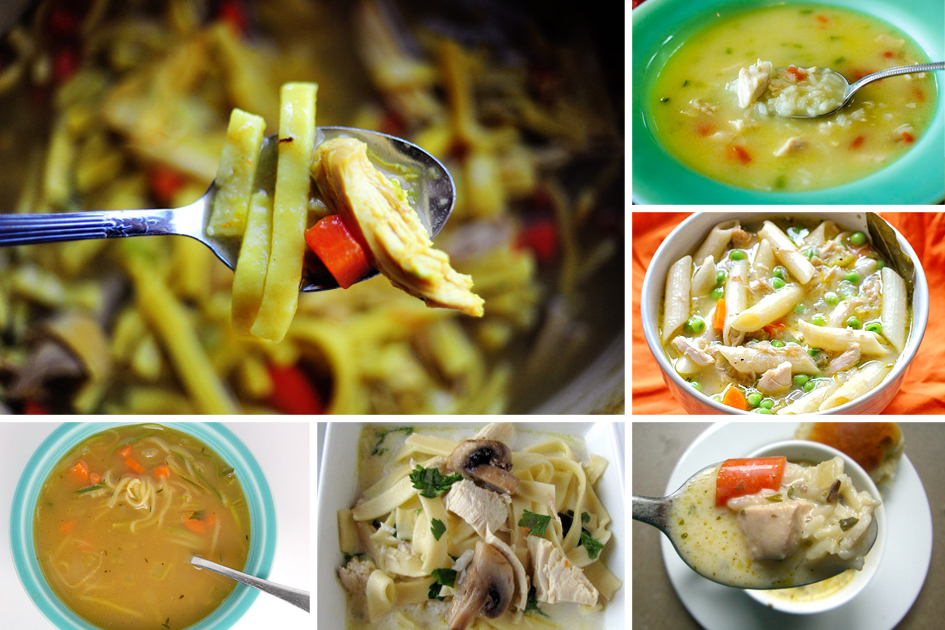
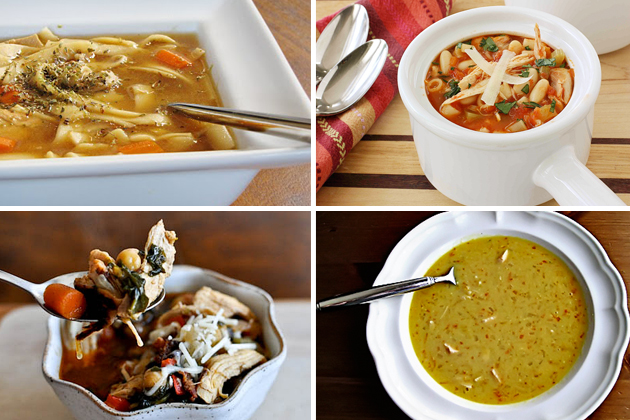
Tasty Kitchen Blog: Chicken Soup! (Classic)Clockwise from top left: Ree’s Homemade Chicken and Noodles and Simple, Hearty, Chicken and Rice Soup, Quick Hearty Chicken Noodle Soup from ThreeManyCooks, Creamy Chicken and Wild Rice Soup from Lauren’s Latest, Homestyle Creamy Chicken Noodle Soup from missinthekitchen, and Gluten Free Chicken “Noodle” Soup from elanaspantry.


You can even go across the border, borrow a few Tex-Mex flavors, and jazz up that pot of soup. Sometimes, the added spice can really perk you up inside, and many herbs and spices are touted to have additional anti-inflammatory properties. Plus, you get chips in your soup. Just the thought of it makes me feel better already.
 

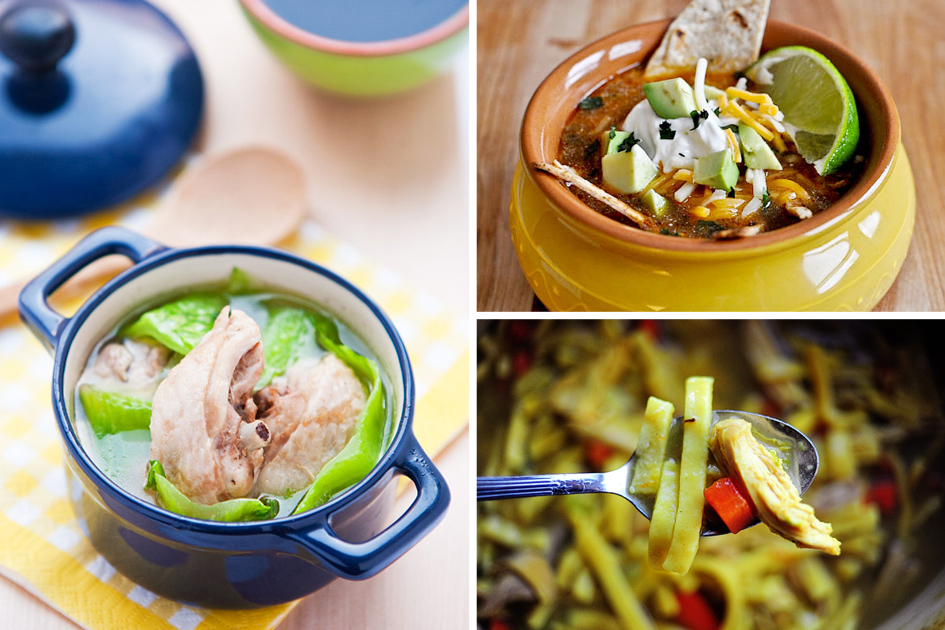
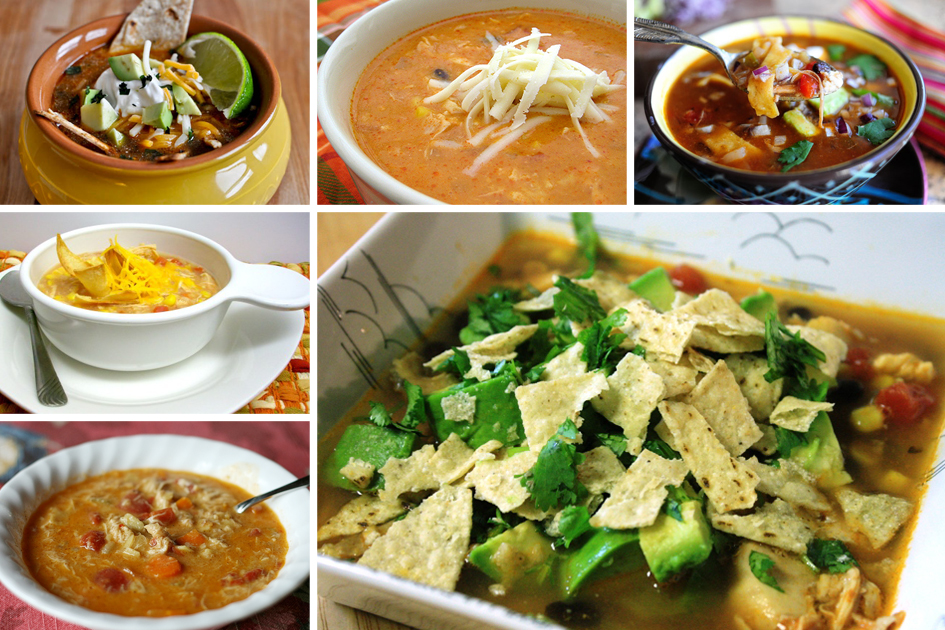
Tasty Kitchen Blog Chicken Soup! (Tex-Mex)Clockwise from top left: Easy One Pot Tortilla Soup from HowSweetEats, Chicken Enchilada Soup from realmomkitchen, Ree’s excellent Chicken Tortilla Soup (she didn’t pay me to say that), Chipotle Chicken Soup from bderas, Chicken Tortilla Soup from tadacreations, and Slow Cooker Chicken Tortilla Soup from mommyhatescooking.


Perhaps you’d rather travel over into the Mediterranean, where chicken soup commonly made with lemon (vitamin C!) and egg. Or you can add some beans to boost the protein content. I actually like soup with beans the day after, when some of the beans have dissolved into the soup, making it rich and creamy.
 

Tasty Kitchen Blog Chicken Soup! (Mediterranean)Clockwise from top left: Slow Cooker Lemony Chicken Noodle Soup from sweet anna’s, Mediterranean Chicken, Bean and Pasta Soup from cookincanuck, Easy Greek Lemon Chicken Soup from foodieq, and Chickpea Chicken Soup from HowSweetEats.


Finally, we can go clear across to the other side of the world, where they have everything from simple chicken soup with greens and ginger to Thailand’s classic chicken soup with coconut milk and lemongrass, one of my personal favorites. That is, until I spied ericalea’s Coconut & Chicken Curry Soup, which looks like it could become my new favorite.
 

Tasty Kitchen Blog Chicken Soup! (Asian)Clockwise from top left: Quick Thai Coconut Soup from EatLiveRun, Tom Ka Kai (Chicken Coconut and Mushroom Soup) from jlclawson, Mustard Green Chicken Soup from Liv Wan, Vietnamese Chicken Noodle Soup – Phở Gà from nancyvnjourney, Thai Chicken Soup with Cilantro-Infused Rice from thekitchenpixie, and Coconut & Chicken Curry Soup from ericalea.


Whether you need the comfort of a nice bowl of soup or just want a hearty, delicious meal, chicken soup is always a good choice.

Do you have a favorite cure for what ails you? Something your mom, dad, grandma or grandpa made for you that always made you feel better? Do share! (And if your mom made you chocolate cake whenever you were under the weather, can I come live with you?)


Profile photo of HowSweetEats

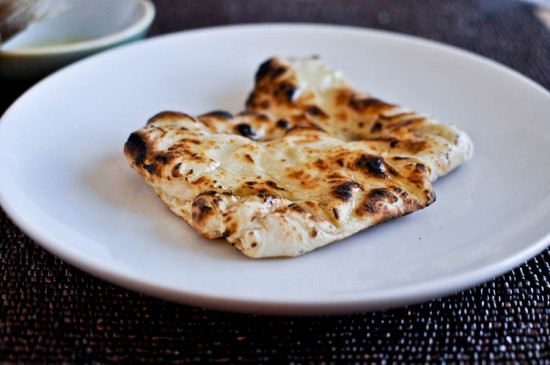
Homemade Naan

Posted by in Step-by-Step Recipes

  One of my resolutions for New Year was to make more homemade bread. I couldn’t think of a better place to begin than with one of my favorites: fluffy naan. To be honest, naan has always intimidated me a bit. It is so delicious that I assumed it must be complicated. Luckily, I stumbled […]

Profile photo of twopeasandtheirpod

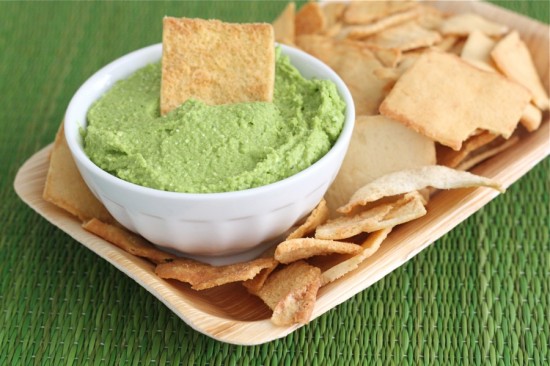
Spinach and Feta Hummus

Posted by in Step-by-Step Recipes

  One of my all-time favorite snacks is hummus. I love eating it with pita bread, cut up vegetables, or pita chips. I love original hummus, but sometimes I like to mix things up. Roasted red pepper and cilantro lime hummus are a few of my favorites, but I am currently obsessed with this Spinach […]

Profile photo of missamy

Chicken Satay with Peanut Sauce

Posted by in Step-by-Step Recipes

  Bored with the same old chicken dishes? We are. Around here we eat chicken often, and it certainly can get a little mundane after a while. Here’s a story that may give you an indication of how much chicken we eat. Years ago, during hunting season, my son showed a sudden interest in going […]

Profile photo of Ree | The Pioneer Woman

Mystery Mocha!

Posted by in Baking, Step-by-Step Recipes

Note: Since Valentine’s Day is just around the corner, I’m bringing up this chocolate wonder from the step-by-step archives. Serve this with your V-Day dinner! I absolutely loved it. –Ree     The second I read the name of this recipe, I just knew I had to make it. First of all, I love any […]