The Pioneer Woman Tasty Kitchen
Profile photo of Natalie | Perry's Plate

Pepitas Shrimp Skewers

Posted by in Step-by-Step Recipes

Tasty Kitchen Blog: Pepitas Shrimp Skewers. Guest post by Natalie Perry of Perry's Plate, recipe submitted by TK member Lindsay of Eat 80/20.

 
The sun seems to be shining more lately, and after all of the freezing cold weather most of us here in the US have been experiencing (snow in San Francisco?!) I’m definitely ready for warmer weather. And flip flops. And throwing everything we eat on the grill. I was drawn to this recipe for Pepitas Shrimp Skewers because I’m antsy to start grilling. And shrimp seems like a spring-y type of food, no?

TK member Eat 80/20 Dietitian (Lindsay) who blogs at Eighty Twenty is a registered dietitian and has put together some incredible shrimp skewers. My favorite part is how she incorporates ground pepitas (one of my favorite seeds) in the shrimp marinade. These skewers would be a flavorful, healthy addition to your next get-together, but they’ll go fast. It’s a good thing this recipe makes a lot!


Tasty Kitchen Blog: Pepitas Shrimp Skewers. Guest post by Natalie Perry of Perry's Plate, recipe submitted by TK member Lindsay of Eat 80/20.

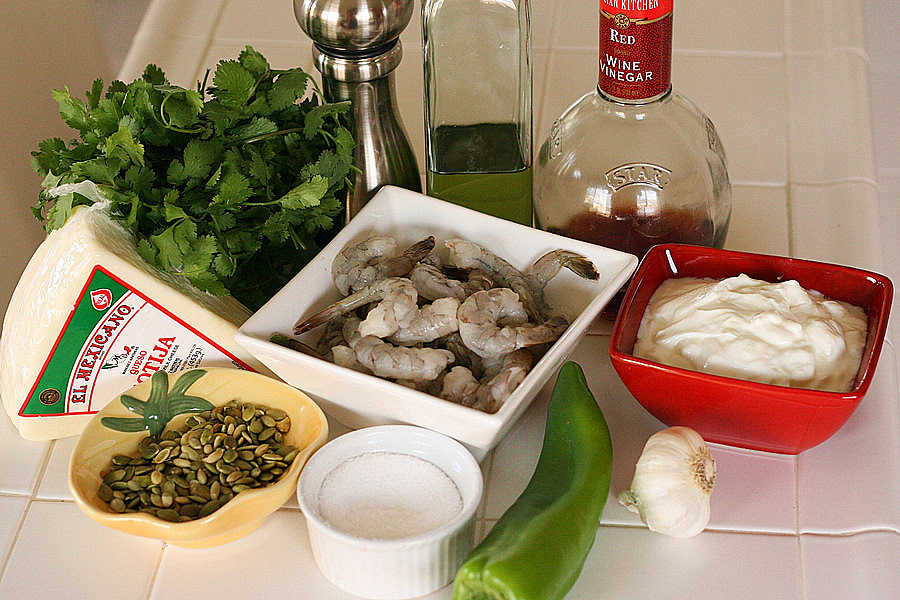
To make these skewers you’ll need 50 or up to 75 medium shrimp (peeled, tail-on), cotija or Parmesan cheese, roasted pepitas (shelled pumpkin seeds), salt, one anaheim pepper, some garlic, plain yogurt, red wine vinegar, heat-safe oil (I used grapeseed instead of canola), pepper, and bunch of fresh cilantro.


Tasty Kitchen Blog: Pepitas Shrimp Skewers. Guest post by Natalie Perry of Perry's Plate, recipe submitted by TK member Lindsay of Eat 80/20.

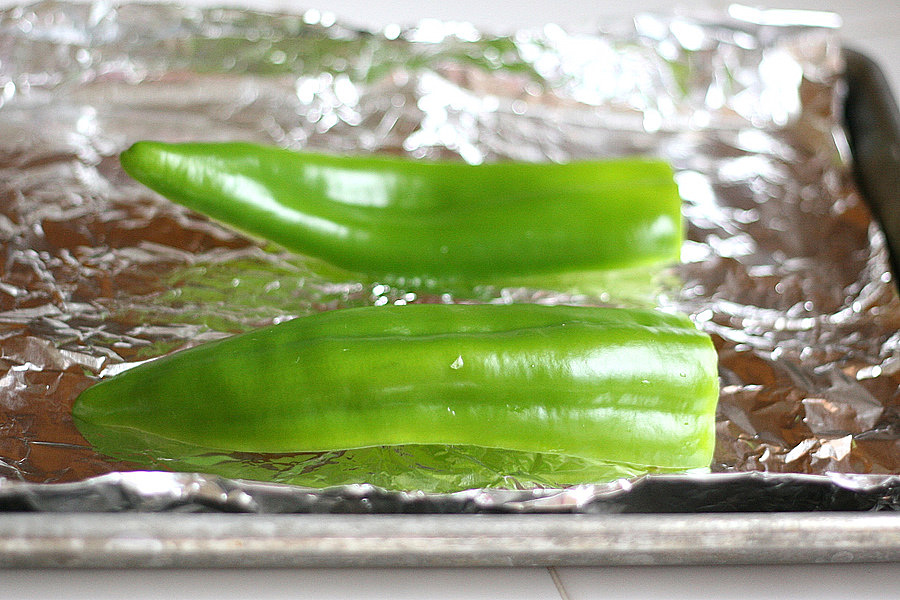
First you’ll need to roast the pepper. Anaheim peppers are longer and lighter in color than green bell peppers. They’re very mild, too. If you can’t find fresh Anaheim peppers in your grocery store, simply use a 4-ounce can of diced green chiles instead.

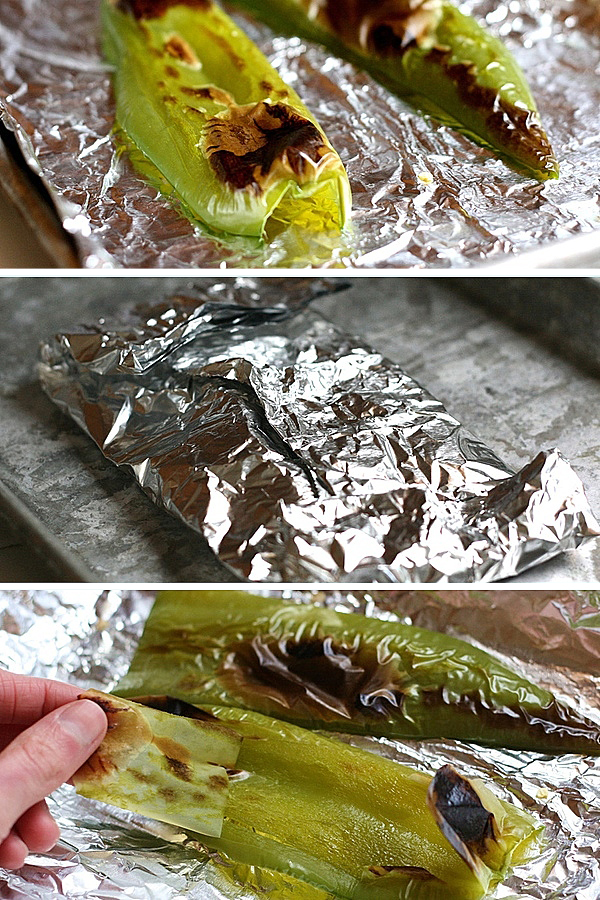
Slice the pepper in half, remove the seeds and white veins and place cut-side down on a foil lined baking sheet. Put it under the oven broiler for 8–10 minutes until the skins have large black spots.


Tasty Kitchen Blog: Pepitas Shrimp Skewers. Guest post by Natalie Perry of Perry's Plate, recipe submitted by TK member Lindsay of Eat 80/20.

When they come out of the oven, fold the foil around the peppers and let them sit for 5–10 minutes to steam. This should make the peel come off very easily. If you don’t get all the peel off, don’t sweat it.


Tasty Kitchen Blog: Pepitas Shrimp Skewers. Guest post by Natalie Perry of Perry's Plate, recipe submitted by TK member Lindsay of Eat 80/20.

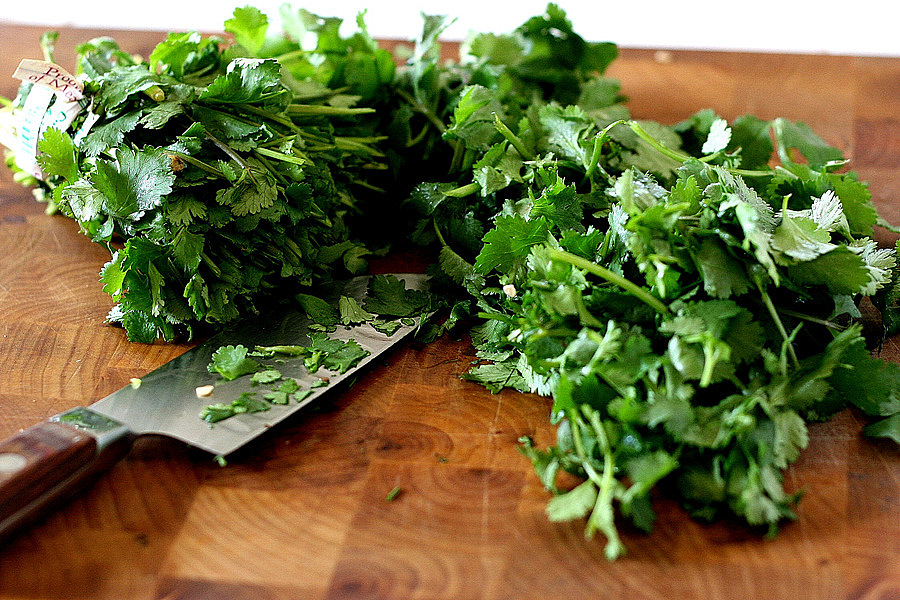
Get the cilantro ready by taking the bunch and slicing it off where the leaves start to get really dense, avoiding the thicker stems. Give the leaves a rough chop.


Tasty Kitchen Blog: Pepitas Shrimp Skewers. Guest post by Natalie Perry of Perry's Plate, recipe submitted by TK member Lindsay of Eat 80/20.

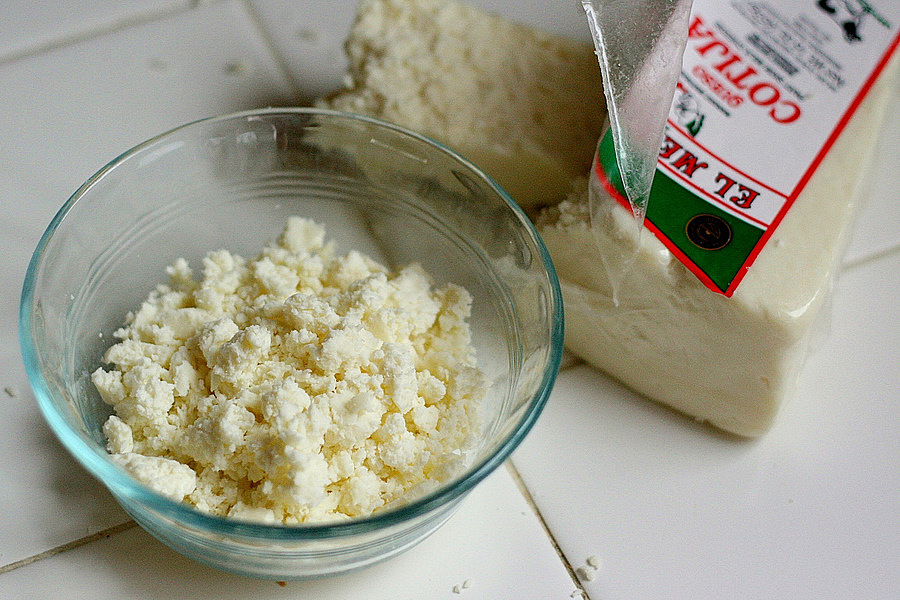
Get the cotija cheese ready by crumbling it with your fingers. Have you ever had cotija cheese? The first time I tried it I thought I’d died and gone to Mexican cheese heaven. I love this cheese. It’s salty and fairly dry like feta, but the taste isn’t quite as strong. You could use feta or even fresh Parmesan cheese if you can’t find cotija.


Tasty Kitchen Blog: Pepitas Shrimp Skewers. Guest post by Natalie Perry of Perry's Plate, recipe submitted by TK member Lindsay of Eat 80/20.

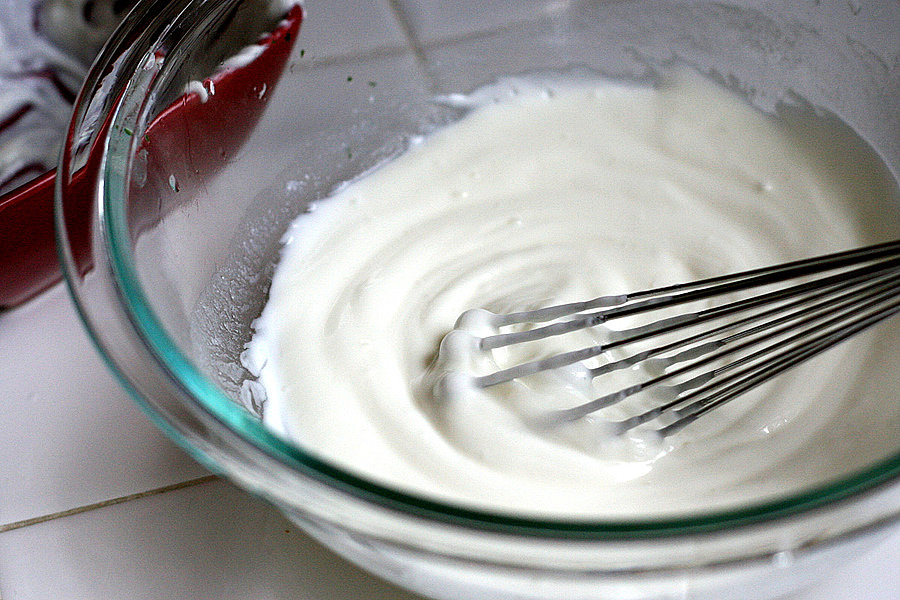
Pour the yogurt into a bowl and give it a whisk to loosen it up.


Tasty Kitchen Blog: Pepitas Shrimp Skewers. Guest post by Natalie Perry of Perry's Plate, recipe submitted by TK member Lindsay of Eat 80/20.

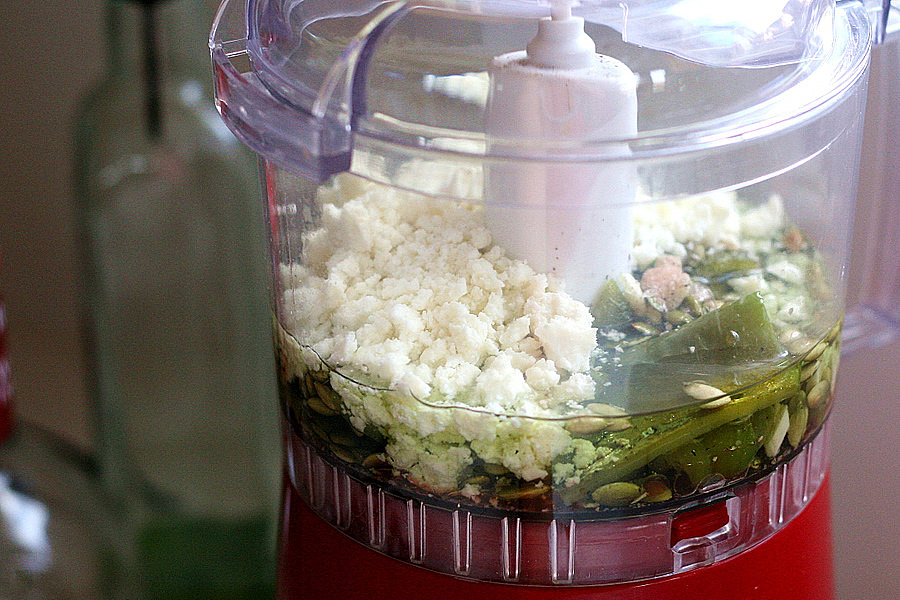
Grab your food processor or blender and add the roasted chile, pepitas, garlic, salt, pepper, oil, vinegar, and cheese.


Tasty Kitchen Blog: Pepitas Shrimp Skewers. Guest post by Natalie Perry of Perry's Plate, recipe submitted by TK member Lindsay of Eat 80/20.

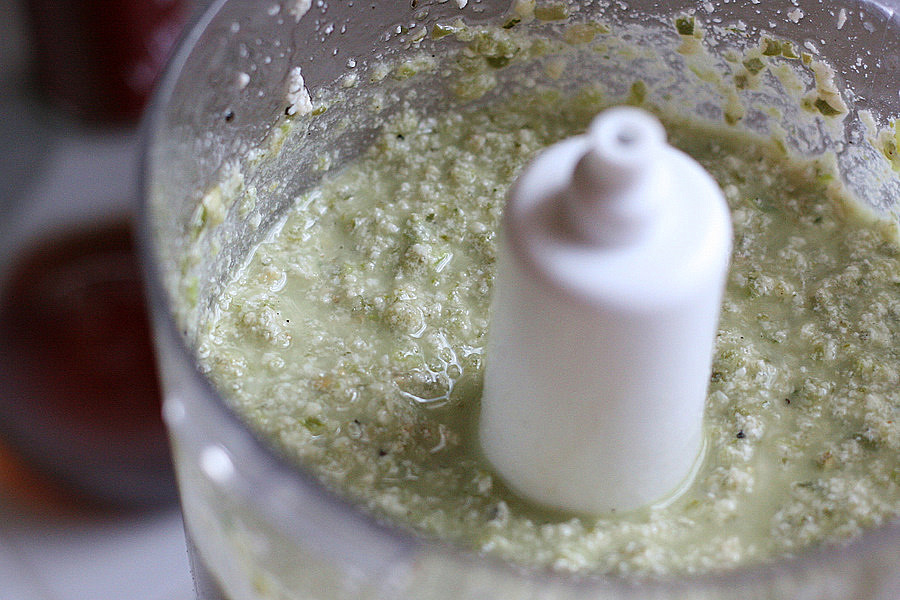
Blend or process until no large chunks remain. Doesn’t look so appetizing, but smells great already!


Tasty Kitchen Blog: Pepitas Shrimp Skewers. Guest post by Natalie Perry of Perry's Plate, recipe submitted by TK member Lindsay of Eat 80/20.

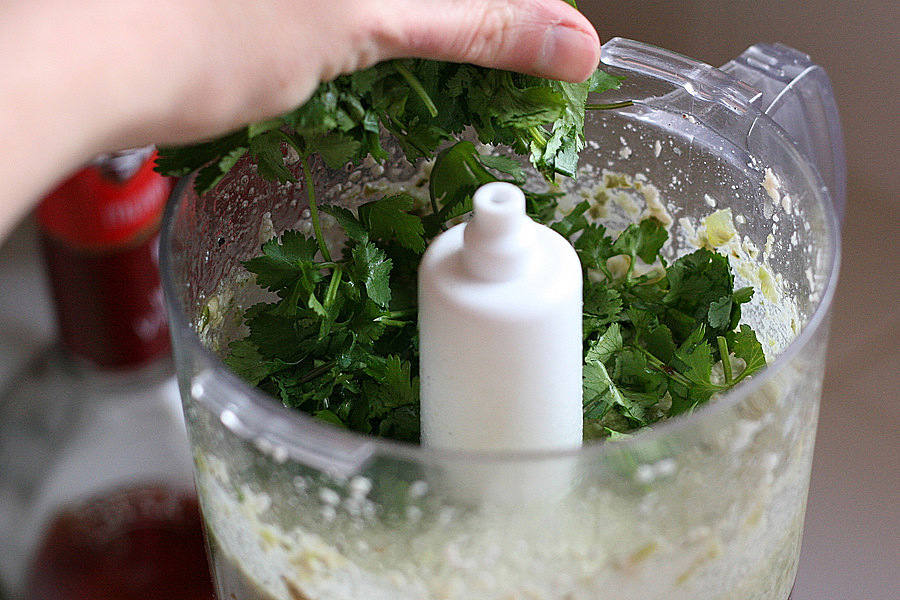
Add the cilantro and blend until smooth. At this point I really think you could use this as a salad dressing.


Tasty Kitchen Blog: Pepitas Shrimp Skewers. Guest post by Natalie Perry of Perry's Plate, recipe submitted by TK member Lindsay of Eat 80/20.

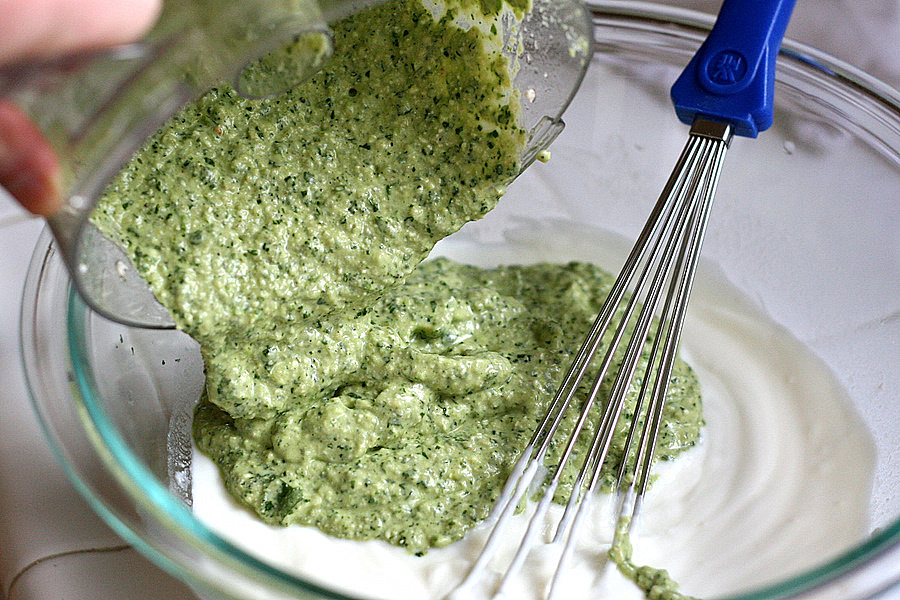
Dump the lovely green mixture into the bowl with the yogurt.


Tasty Kitchen Blog: Pepitas Shrimp Skewers. Guest post by Natalie Perry of Perry's Plate, recipe submitted by TK member Lindsay of Eat 80/20.

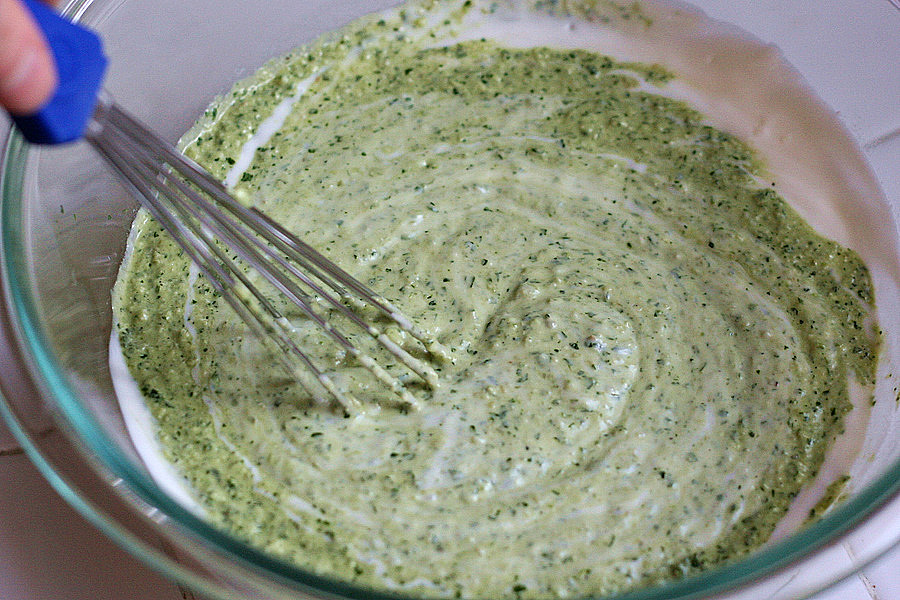
Whisk it together.


Tasty Kitchen Blog: Pepitas Shrimp Skewers. Guest post by Natalie Perry of Perry's Plate, recipe submitted by TK member Lindsay of Eat 80/20.

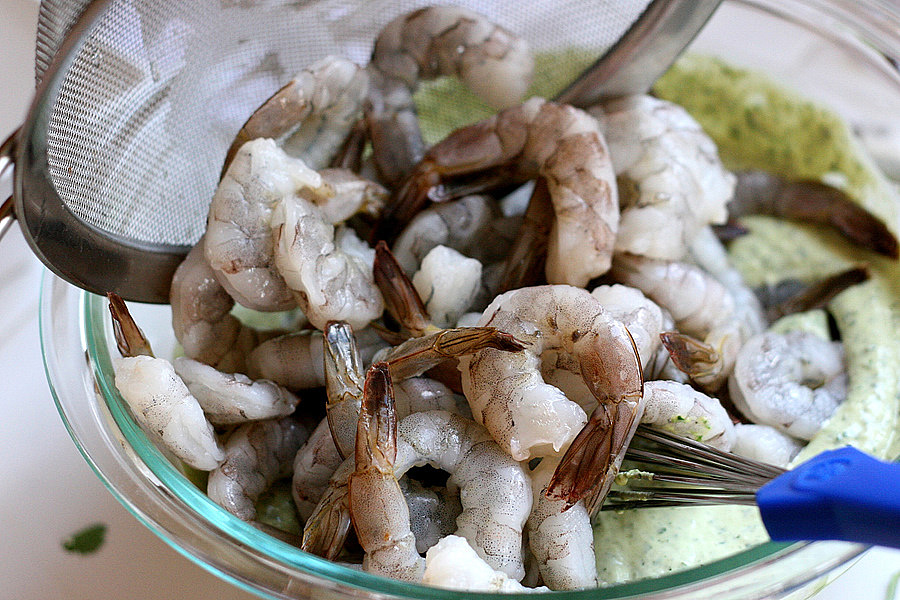
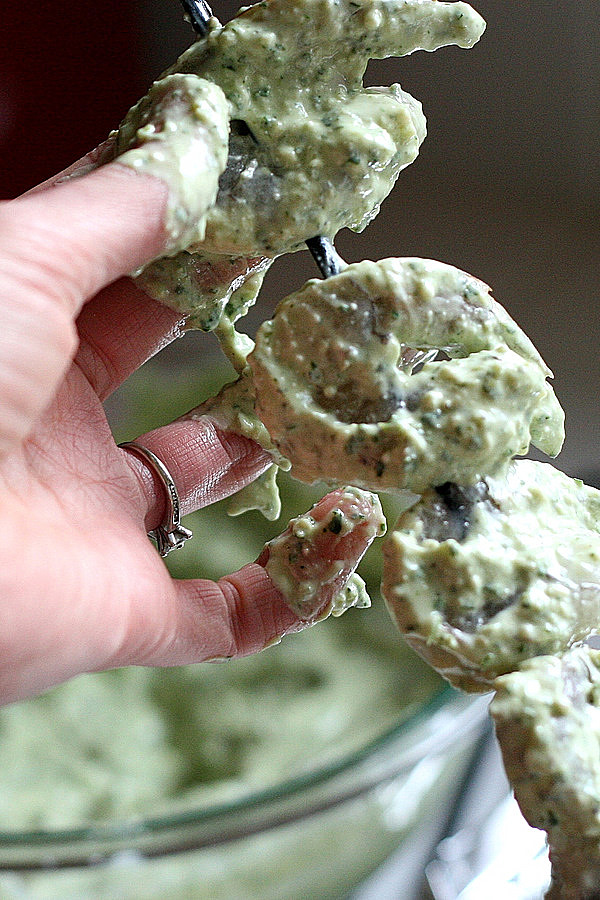
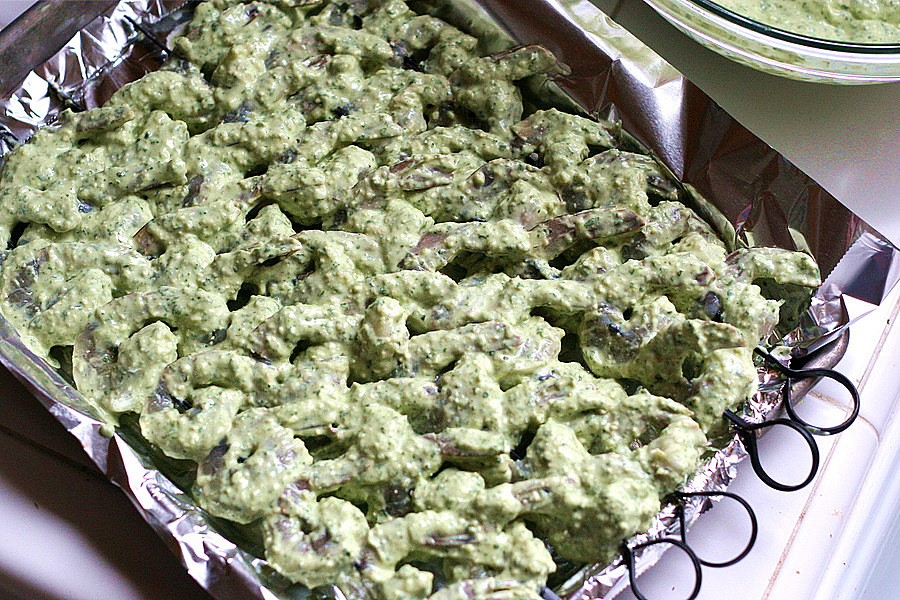
Now dump in all of the shrimp. (See how easy this is?) Stir to ensure the shrimp is coated. I used a little over 50 shrimp, but I think there is enough marinade for up to 75 shrimp.


Tasty Kitchen Blog: Pepitas Shrimp Skewers. Guest post by Natalie Perry of Perry's Plate, recipe submitted by TK member Lindsay of Eat 80/20.

Time to get your hands dirty! Thread shrimp carefully onto skewers. I like to skewer them in two places so they’re more secure and easier to flip on the grill. If you’re using bamboo skewers, make sure to soak them in water for 30 minutes so they don’t burn.


Tasty Kitchen Blog: Pepitas Shrimp Skewers. Guest post by Natalie Perry of Perry's Plate, recipe submitted by TK member Lindsay of Eat 80/20.

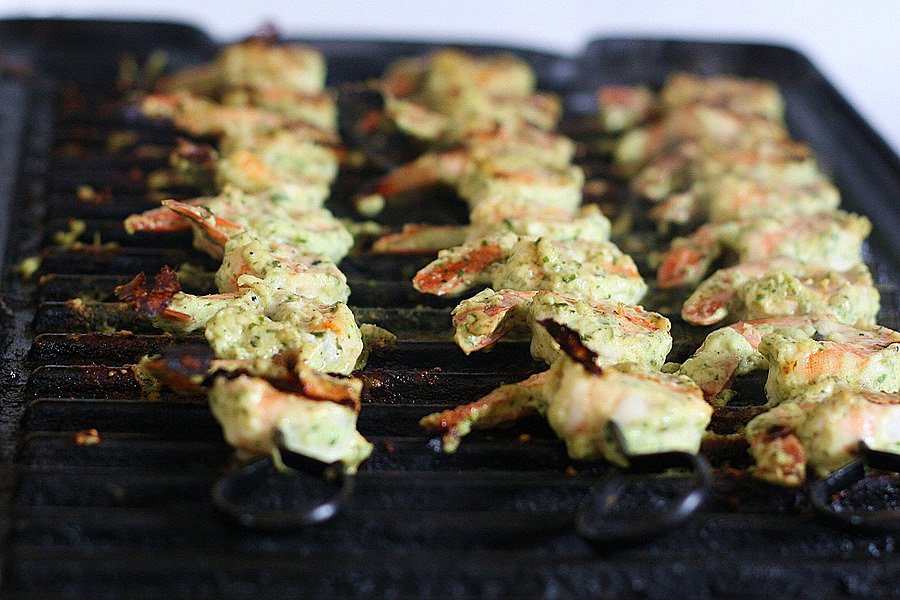
I ended up with 6 skewers with 8 shrimp per skewer, plus half of another skewer.


Tasty Kitchen Blog: Pepitas Shrimp Skewers. Guest post by Natalie Perry of Perry's Plate, recipe submitted by TK member Lindsay of Eat 80/20.

Heat your grill up to about medium heat and place skewers on the grates a few at a time. Grill for about 3-4 minutes per side or until the shrimp are no longer gray or translucent. Be careful not to overcook them or they’ll be rubbery. The recipe says 15 minutes total, but mine were done in about half that time. (My grill might have been on the hot side. So keep your eye on them.)

If you don’t have an outdoor BBQ grill, using a grill pan on the stove does a pretty good job. You don’t even have to wait for the snow to melt! I’ve got a cast-iron grill pan that I love and have been using for years. You could even broil them in the oven, turning them once during cooking.


Tasty Kitchen Blog: Pepitas Shrimp Skewers. Guest post by Natalie Perry of Perry's Plate, recipe submitted by TK member Lindsay of Eat 80/20.

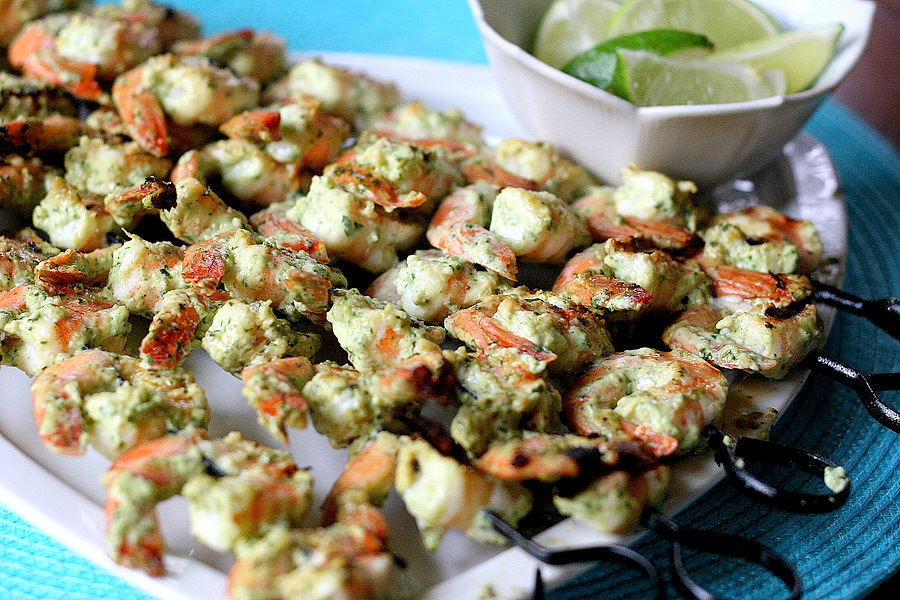
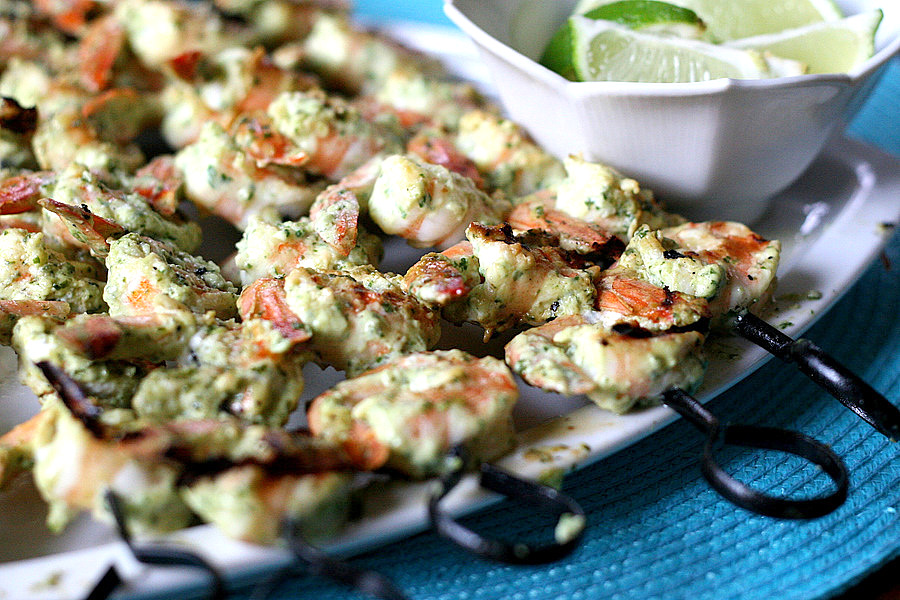
Put the skewers on a platter and serve with lime wedges. Y-U-M.

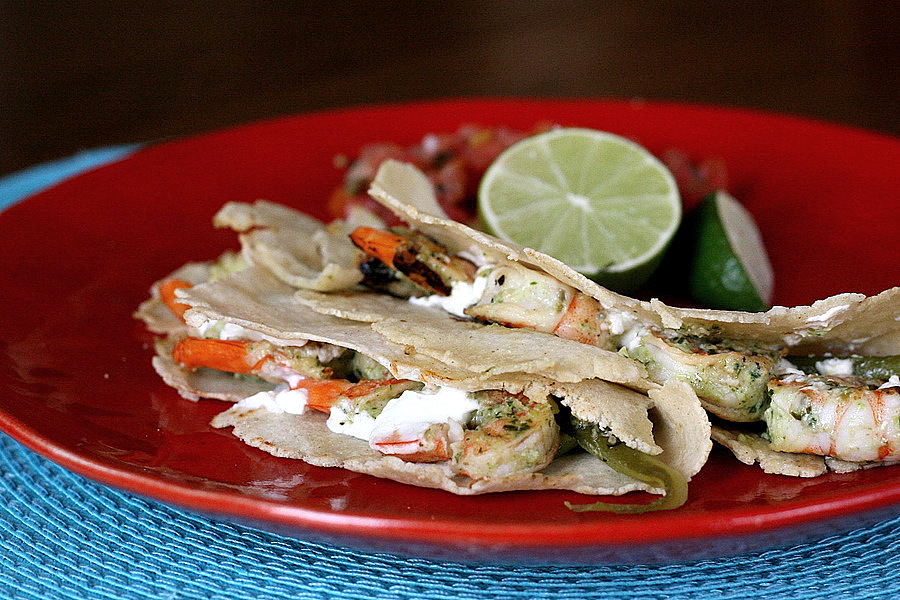
As I was thinking of something to serve these with I remembered a recipe I ran across in a book for roasted chile and goat cheese tacos. So I threw a few extra Anaheim chiles on the roasting pan, grabbed some goat cheese and homemade corn tortillas …


Tasty Kitchen Blog: Pepitas Shrimp Skewers. Guest post by Natalie Perry of Perry's Plate, recipe submitted by TK member Lindsay of Eat 80/20.

And ended up with one of the best tacos I’ve had in my life. These shrimp are fantastic by themselves, but whoa, nelly, are they great in tacos. Especially these ones.

Thanks Lindsay for a great new way to cook shrimp! Her blog, Eat 80/20, is all about balance—eating healthy 80% of the time lets you cheat a little for the remaining 20%. In there, you’ll find helpful nutrition tips in addition to a great collection of recipes.


Printable Recipe
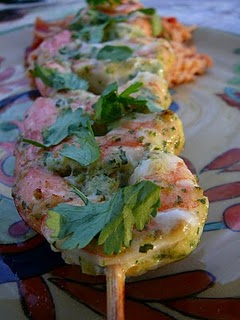
Pepitas Shrimp Skewers

See post on Lindsay {Eighty Twenty Dietitian}’s site!
5.00 Mitt(s) 1 Rating(s)1 vote, average: 5.00 out of 51 vote, average: 5.00 out of 51 vote, average: 5.00 out of 51 vote, average: 5.00 out of 51 vote, average: 5.00 out of 5

Prep Time:

Cook Time:

Difficulty: Easy

Servings: 6

6
x

Print Options

Page size Letter 3x5 4x6
Text Size Small Medium Large
Content Include description
Include prep time, etc.
Show image

Description

Pepitas are pumpkin seeds without the shell! You can roast and shell your own (maybe after a pumpkin carving?) or purchase them pre-roasted without shells (look in the bulk section of your grocery store). As with any seed or nut, they have lots of healthy fats and fiber!

Ingredients

  • 1 whole Anaheim Chile, Roasted, Peeled And Seeded
  • ¼ cups Roasted Pepitas
  • 1 whole Garlic Clove, Pressed And Minced
  • ¼ teaspoons Ground Black Pepper
  • 1 teaspoon Salt
  • ½ cups Canola Oil
  • 2 Tablespoons Red Wine Vinegar
  • 3 Tablespoons Grated Cotija Cheese (or Shredded Parmesan)
  • 1 bunch Cilantro, Stemmed
  • 1-½ cup Lowfat Yogurt
  • 50 whole Shrimp, Peeled, Deveined, Tail-on

Preparation Instructions

Place all ingredients except cilantro, yogurt and shrimp in a blender or food processor. Blend about 10 seconds, then add cilantro little by little until blended smooth (reserve some cilantro for garnish if desired). Place yogurt in a medium stainless steel bowl and mix with a wire whip until smooth. Add the blended ingredients and mix thoroughly.

Add shrimp to the mixture. Refrigerate at least 3 hours. Twenty minutes prior to cooking, soak bamboo skewers in water (to prevent burning).

Preheat grill. Skewer 5-6 shrimp on each stick. Cook over medium heat until done (about 10-15 minutes).

Nutrition info per 2 tablespoons pepitas dressing/marinade: 101 calories, 6 g fat, 3 g protein, 3 g carbohydrates

Nutrition info per 8-9 shrimp: 55 calories, 1 g fat, 11.5 g protein, 0 g carbohydrate, 107mg cholesterol


_______________________________________

Be sure to check out Natalie’s own beautiful food blog, Perrys’ Plate, where you can see her growing collection of lovely recipes. There’s always something new to see there. Go visit now!



Profile photo of Natalie | Perry's Plate

Vegetarian Tamales

Posted by in Step-by-Step Recipes

Tasty Kitchen Blog: Vegetarian Tamales. Guest post by Natalie Perry of Perry's Plate, recipe submitted by TK member Julie of Mommie Cooks.

 
Everything you’ve heard about tamales is true, folks. Yes, these Mexican culinary wonders are a lot of work, and they take a lot of time. On the bright side, the work isn’t difficult and boy, is it worth it in the end. Eating one tamale after the other (after the other) makes you forget about your aching feet and back. Then when you run out, you’ll start craving more and begin the process all over again.

Kind of like having children. But most days I’d rather make tamales than give birth.

Never heard of tamales? They’re little corn husk packets of steamed dough made from corn flour, filled (usually) with different types of meat and vegetables.

For my first attempt at tamales I opted for these Vegetarian Tamales submitted by TK member mommiecooks (Julie) who blogs at Mommie Cooks! I’m sometimes hesitant to try new techniques with large cuts of meat and thought this vegetarian version would be a good one to get my feet wet. I was surprised how good these tasted. I’m not a vegetarian myself, but I didn’t miss the meat at all!

Before I begin, I need to remind you that I am not a Mexican grandmother who has made tamales for 40 years. I am a 30-year-old gringo who’s made tamales only a couple of times, but hopefully I can show you that you don’t have to be a Mexican grandmother to make some great ones. (But if you find one who can help you, you’ll be in excellent shape.)

One of the keys to making tamales (in my gringo opinion) is organization and time management. If you go from zero to tamale with no breaks, you’ll be exhausted. Luckily the filling and masa dough can be made several hours (or a couple of days) ahead of time. Take advantage of that. And make a lot of tamales while you’ve got everything prepped. The last time I made these, I doubled the masa and made two different fillings. I’ve got a freezer full of low-maintenance meals that I can whip out during the week!

Okay, now that you’ve got a plan and several hours set aside, let’s get going!


Tasty Kitchen Blog: Vegetarian Tamales. Guest post by Natalie Perry of Perry's Plate, recipe submitted by TK member Julie of Mommie Cooks.

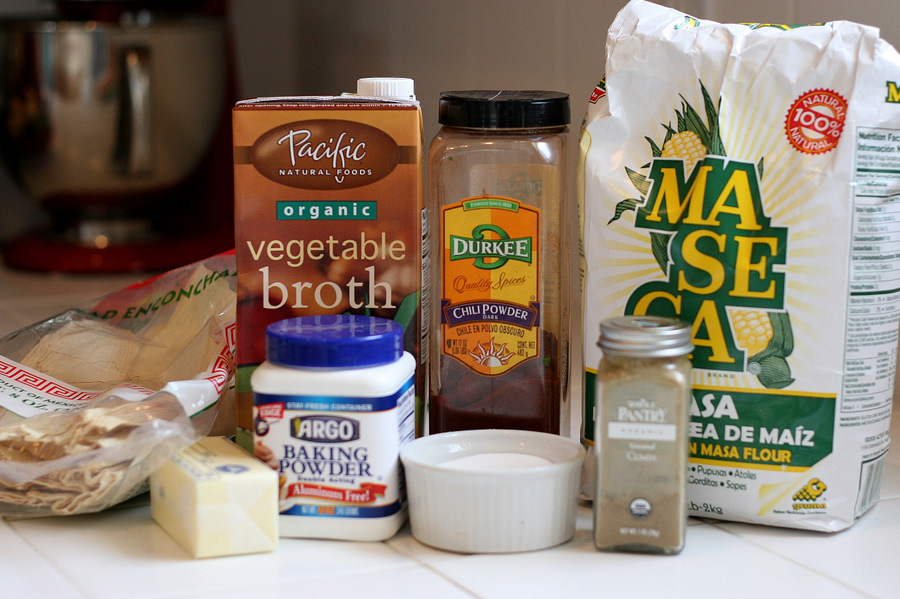
First, let’s make the masa. I loved Julie’s masa recipe. It was so flavorful! I think this will be my go-to recipe no matter what filling I make. You’ll need dried corn husks, vegetable broth, chili powder, corn masa flour, cumin, salt, baking powder, and a stick of butter. You can find the dried corn husks and corn masa flour in the Latin/ethnic aisle of a well-stocked grocery store. You could definitely find them at a Latin grocery store if your town happens to have one.

I also appreciated the use of butter in the masa dough as opposed to the traditional use of lard. Lard freaks me out. I wish they would call it something else. I’ll get over it eventually.


Tasty Kitchen Blog: Vegetarian Tamales. Guest post by Natalie Perry of Perry's Plate, recipe submitted by TK member Julie of Mommie Cooks.

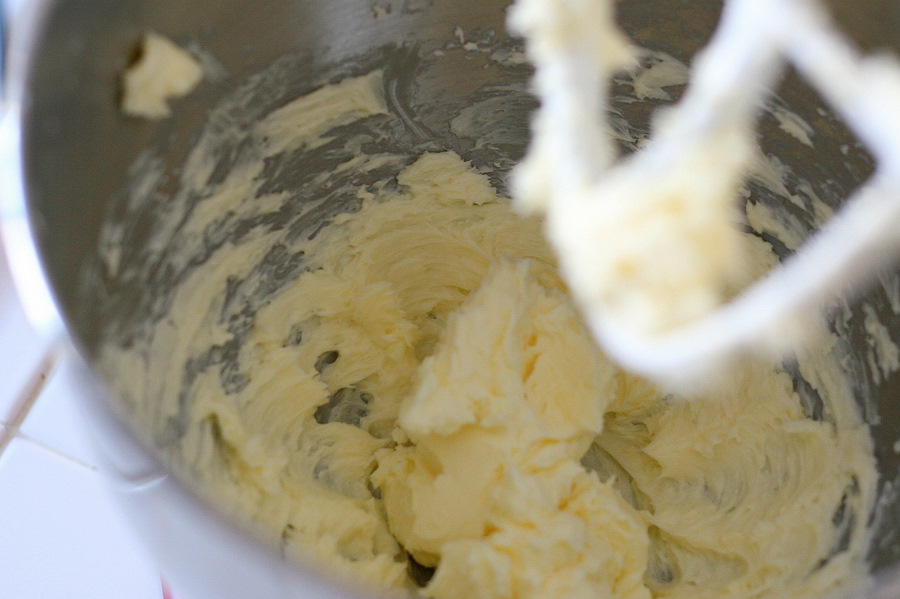
Cream the butter using an electric mixer or stand mixer.


Tasty Kitchen Blog: Vegetarian Tamales. Guest post by Natalie Perry of Perry's Plate, recipe submitted by TK member Julie of Mommie Cooks.

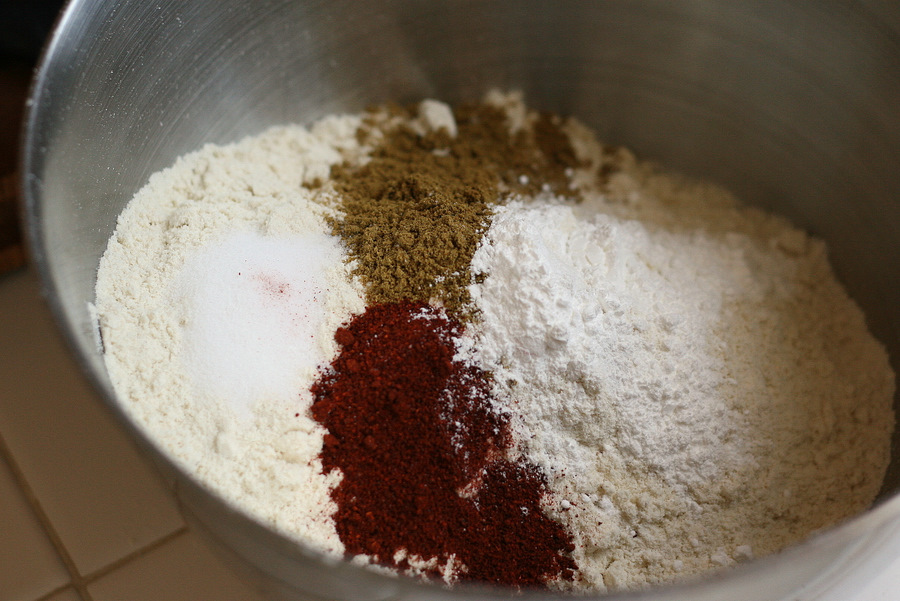
In a separate bowl, whisk together the masa flour, salt, baking powder, chili powder, and cumin.


Tasty Kitchen Blog: Vegetarian Tamales. Guest post by Natalie Perry of Perry's Plate, recipe submitted by TK member Julie of Mommie Cooks.

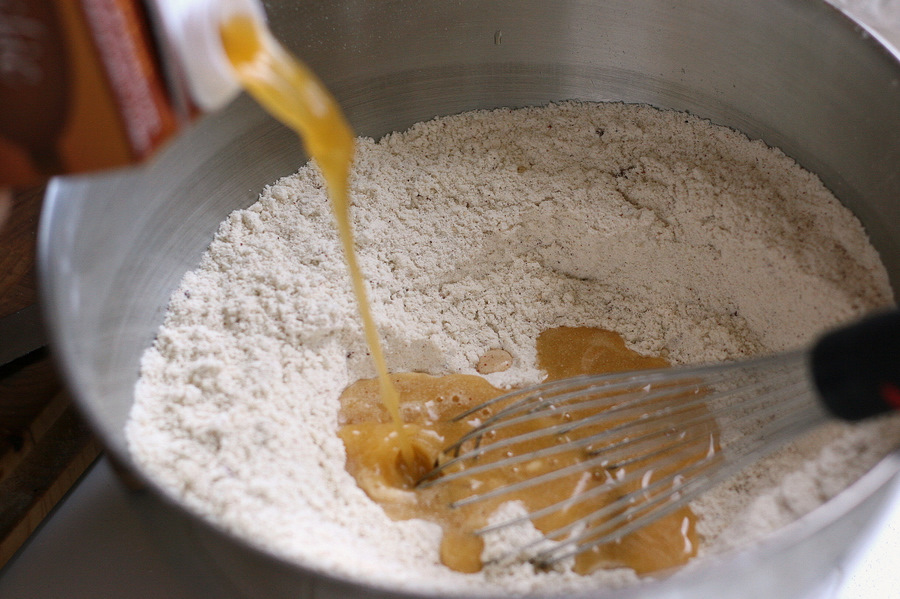
Add some of the vegetable broth.


Tasty Kitchen Blog: Vegetarian Tamales. Guest post by Natalie Perry of Perry's Plate, recipe submitted by TK member Julie of Mommie Cooks.

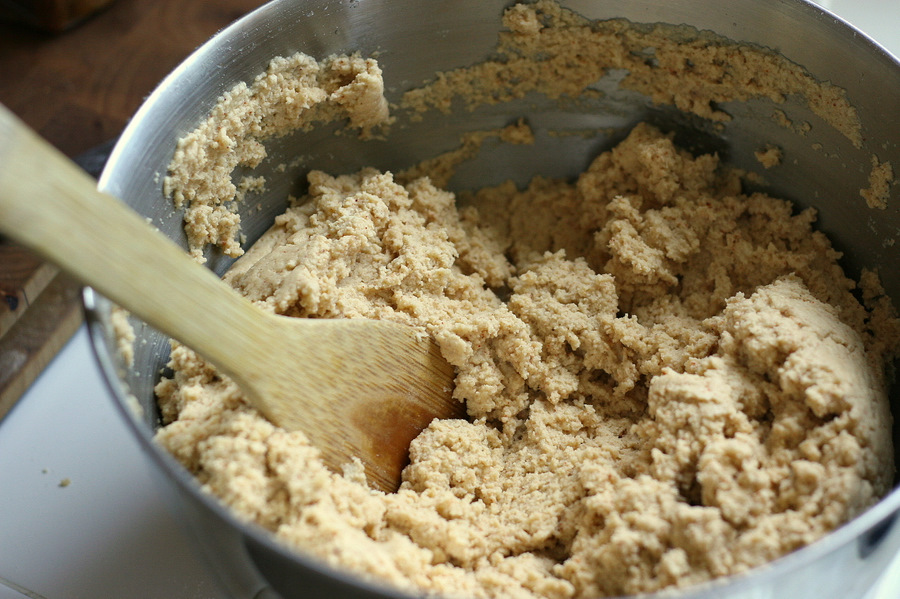
Stir well to form a fairly stiff, but sticky dough.


Tasty Kitchen Blog: Vegetarian Tamales. Guest post by Natalie Perry of Perry's Plate, recipe submitted by TK member Julie of Mommie Cooks.

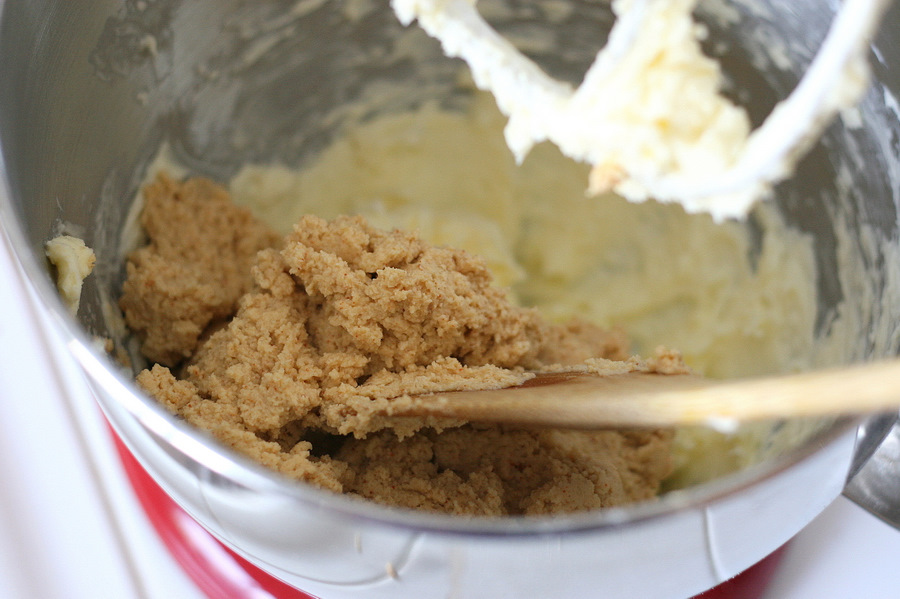
Add this dough to the creamed butter.


Tasty Kitchen Blog: Vegetarian Tamales. Guest post by Natalie Perry of Perry's Plate, recipe submitted by TK member Julie of Mommie Cooks.

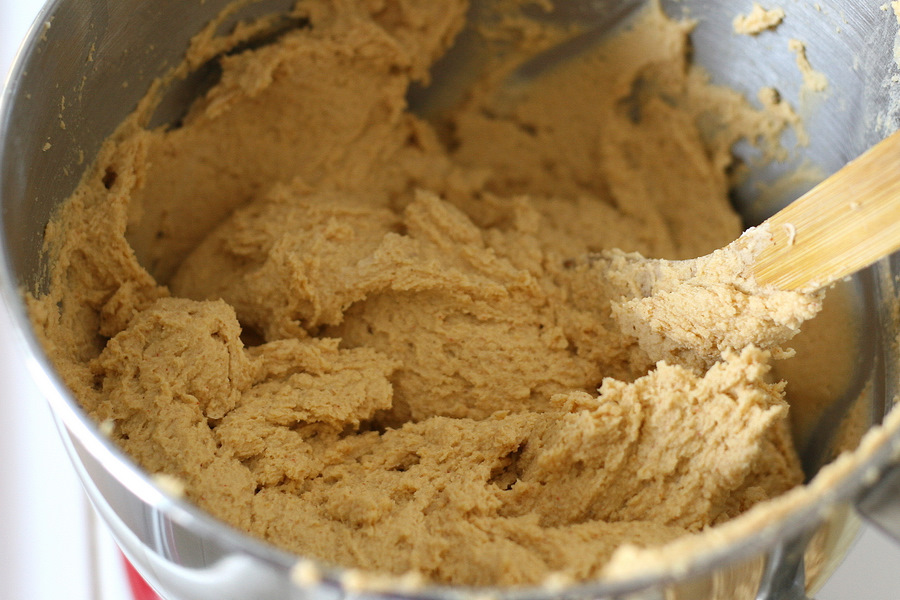
Cream everything together, scraping the sides of the bowl as necessary (the butter tends to stick to the sides and bottom), until you have a light, fluffy dough. Set this aside or cover and chill if you won’t be using it for more than a few hours.


Tasty Kitchen Blog: Vegetarian Tamales. Guest post by Natalie Perry of Perry's Plate, recipe submitted by TK member Julie of Mommie Cooks.

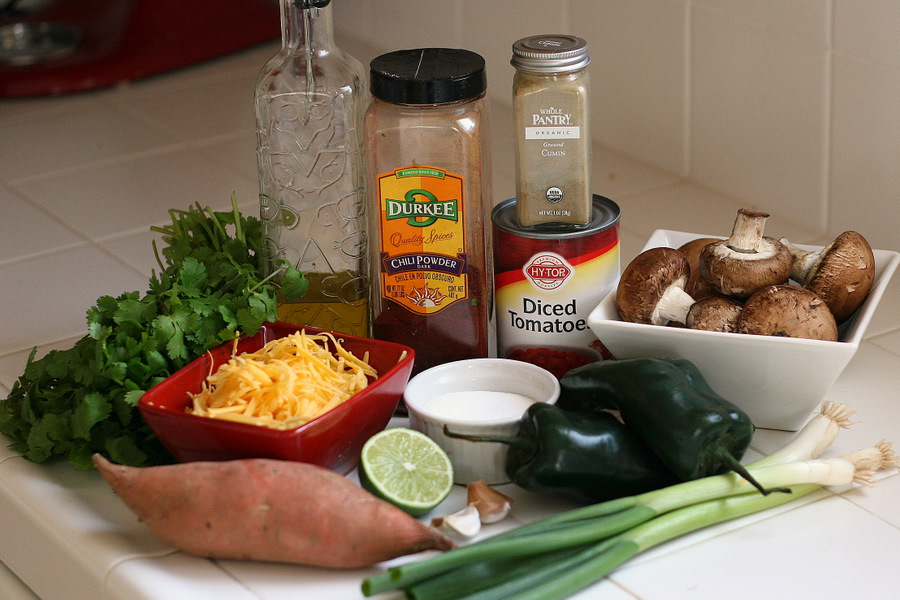
Now for the filling! I made a few changes to Julie’s recipe (noted at the bottom of this post) and quite liked this combination of vegetables. You’ll need a bunch of fresh cilantro, cooking oil, chili powder, cumin, diced tomatoes, a few brown mushrooms, green onions, poblano peppers, salt, fresh garlic, lime, a small potato, and some shredded cheddar cheese. (As well as 1/4 cup of vegetable broth. Just pretend it’s sitting next to the oil.)


Tasty Kitchen Blog: Vegetarian Tamales. Guest post by Natalie Perry of Perry's Plate, recipe submitted by TK member Julie of Mommie Cooks.

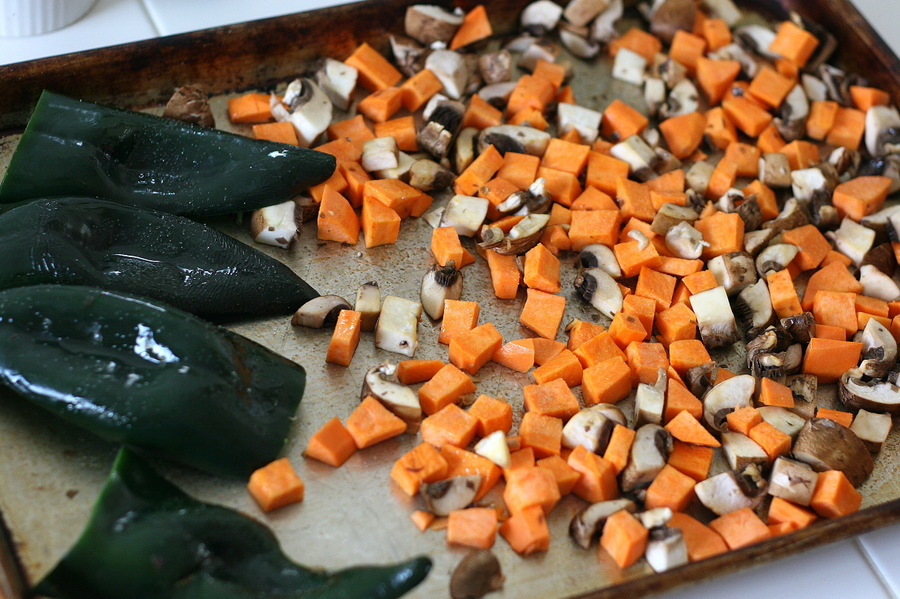
I’m mildly obsessed with roasting vegetables, so after I chopped the sweet potato and mushrooms and seeded and halved the peppers, I stuck them on a rimmed cookie sheet and roasted them at 425 degrees F for 30-35 minutes. (Peel the skin off the peppers and coarsely chop them after they’re roasted.) You could surely cook them in a skillet (per the original recipe), but if you’re using poblanos, you might want to reduce the amount. Roasting takes most of the heat out of them, and cooking them in a skillet may make the filling spicier than you anticipate.


Tasty Kitchen Blog: Vegetarian Tamales. Guest post by Natalie Perry of Perry's Plate, recipe submitted by TK member Julie of Mommie Cooks.

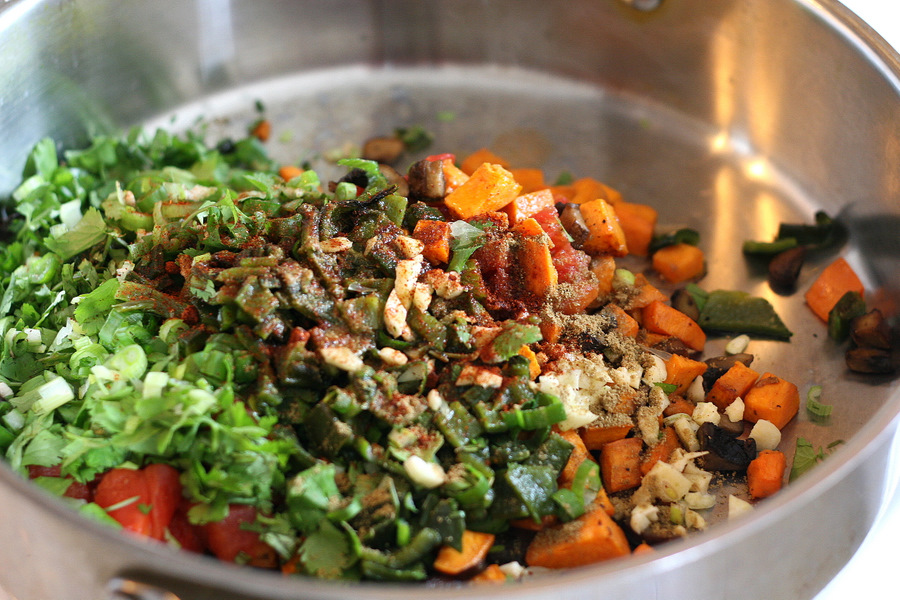
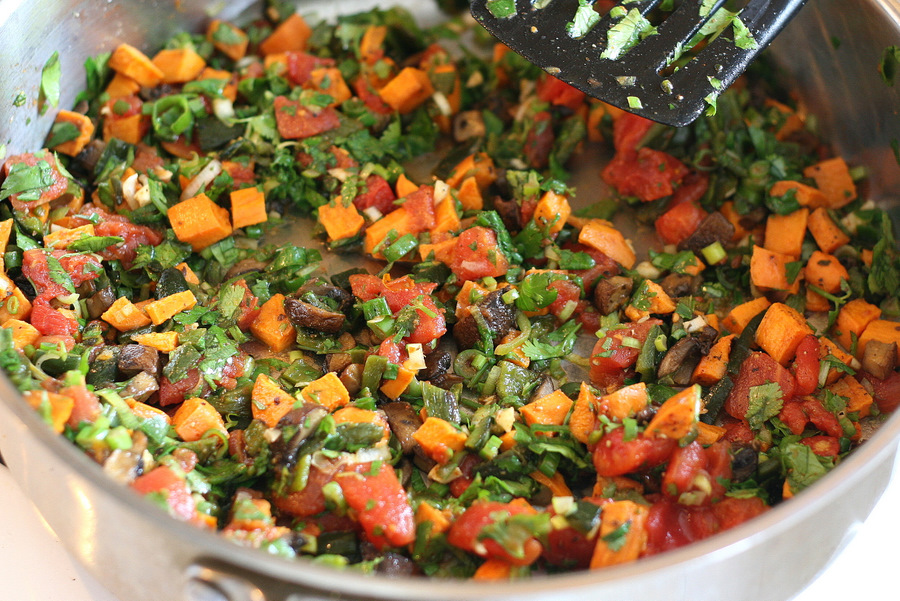
After they’re nice and roasted, throw them with the rest of the filling ingredients (except for the broth and cheese) into a large skillet and cook over medium heat until everything is heated through, about 2-3 minutes.


Tasty Kitchen Blog: Vegetarian Tamales. Guest post by Natalie Perry of Perry's Plate, recipe submitted by TK member Julie of Mommie Cooks.

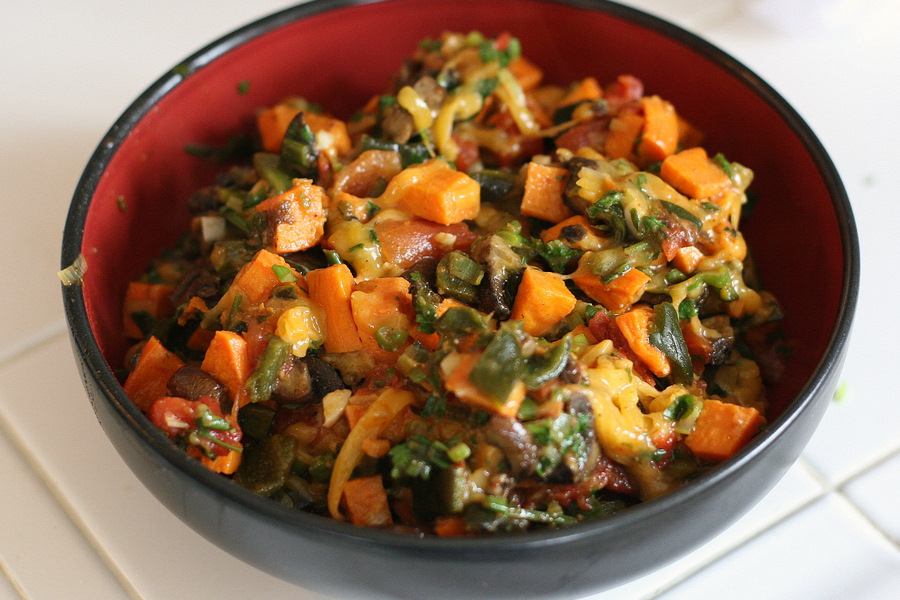
Add the vegetable broth and scrape any bits that have stuck to the bottom of the skillet. Kill the heat, and stir in the cheese.


Tasty Kitchen Blog: Vegetarian Tamales. Guest post by Natalie Perry of Perry's Plate, recipe submitted by TK member Julie of Mommie Cooks.

Transfer to a bowl and set aside until ready to assemble the tamales. Cover and chill if it will be more than a few hours.


Tasty Kitchen Blog: Vegetarian Tamales. Guest post by Natalie Perry of Perry's Plate, recipe submitted by TK member Julie of Mommie Cooks.

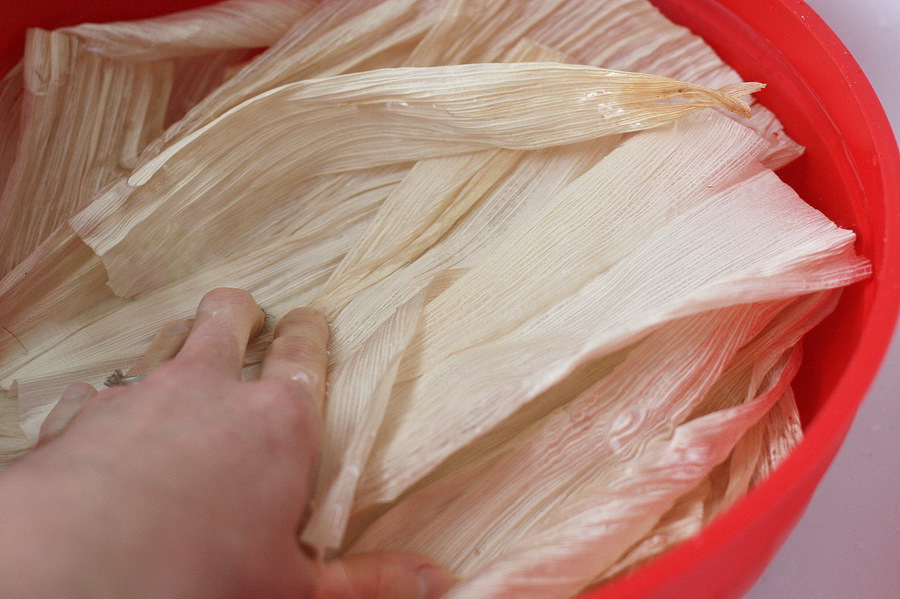
At some point you’ll need to soak the corn husks. They need to be immersed in water for about 30 minutes so they’ll be flexible enough to work with. Because I made my masa dough and filling ahead of time, I soaked my husks 30 minutes before I started wrapping them. If you’re going from zero to tamale, you might want to do this first. My husks floated to the top of the bowl, so I used a large can of pumpkin to weigh them down. The original recipe only makes between 13 and 16 tamales, so don’t soak the whole bag. Be sure to throw in a few extras to tear up and use as ties and in case a few of them rip; 25 ought to suffice.


Tasty Kitchen Blog: Vegetarian Tamales. Guest post by Natalie Perry of Perry's Plate, recipe submitted by TK member Julie of Mommie Cooks.

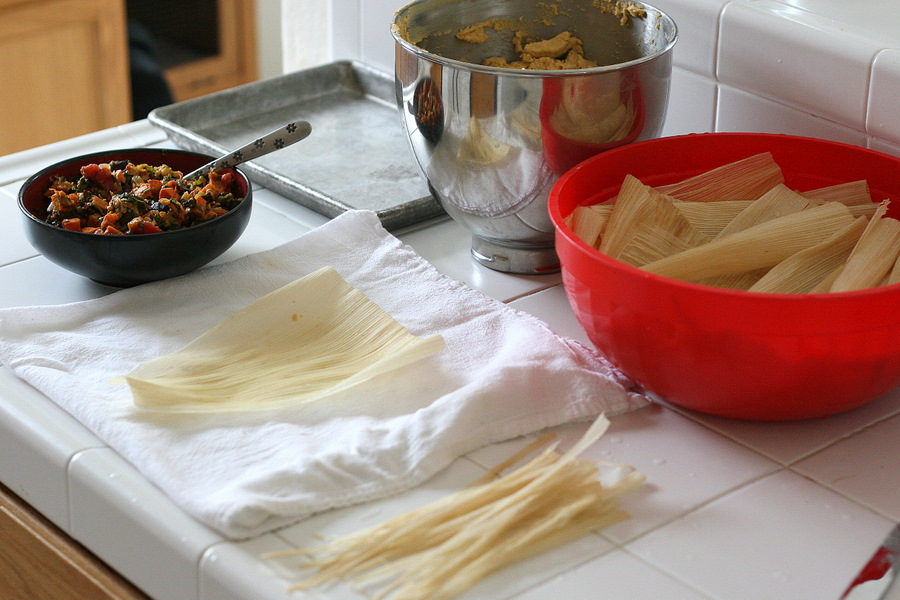
When you’re ready to start the fun part (yes, it really is fun!), clean up your workstation and get everything organized. You’ll need the filling, the masa dough, the soaking husks, a place to put the finished tamales, and a few husks that have been torn into 1/2-inch strips to use as ties. I also used a towel to place the husks on and dry them off when they come out of the water bowl.


Tasty Kitchen Blog: Vegetarian Tamales. Guest post by Natalie Perry of Perry's Plate, recipe submitted by TK member Julie of Mommie Cooks.

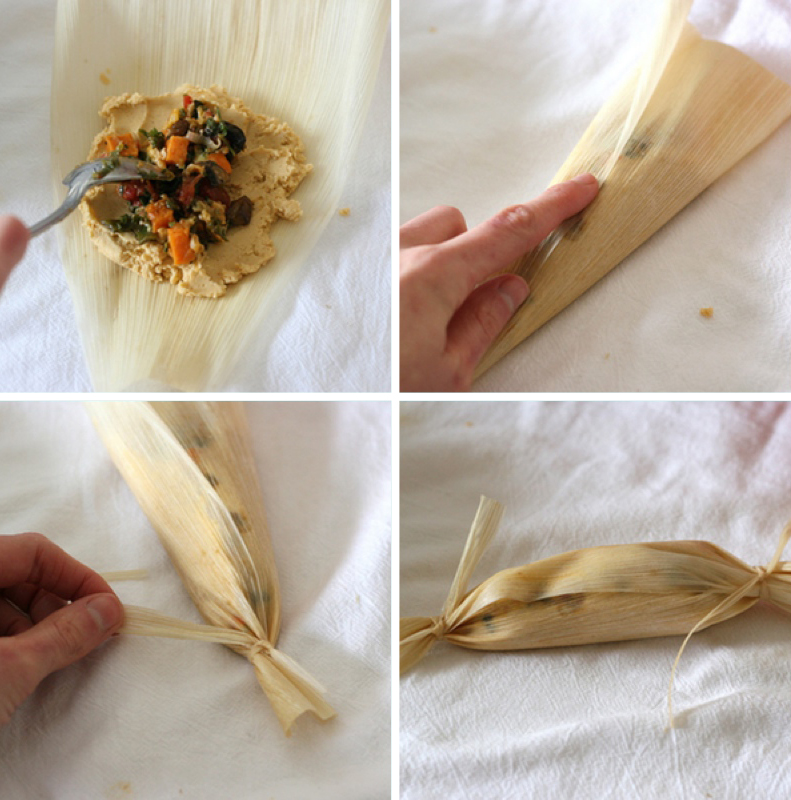
There are several ways to wrap tamales. I’ll show you two. This first way is definitely the easiest and the best way to use smaller husks that aren’t very wide or long. (You can also overlap husks if you don’t want to make really small tamales.)

First spread a 2 to 3 tablespoonfuls of masa dough in the center of the tamale, leaving a narrow border on each side. I found that using wet fingertips was the easiest way to spread the dough. It’s pretty sticky. Then put a spoonful of filling down the center of the dough. Fold the sides in (or roll like a burrito), then twist the ends and secure them with a husk tie or some kitchen twine.

See? Not so bad!


Tasty Kitchen Blog: Vegetarian Tamales. Guest post by Natalie Perry of Perry's Plate, recipe submitted by TK member Julie of Mommie Cooks.

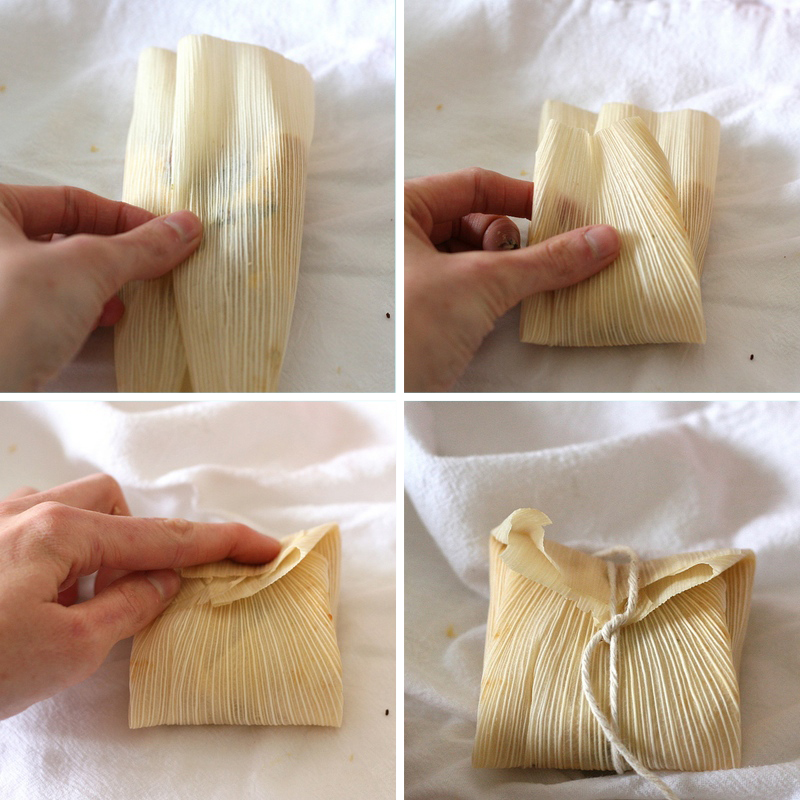
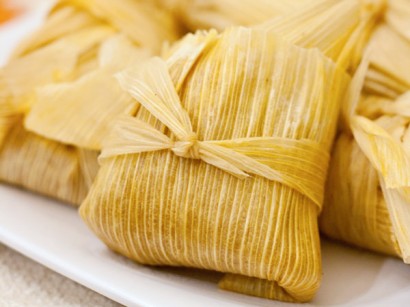
This next one was my favorite because they look like little packages when they’re tied. This method was much easier with large husks, but you could surely twist and tie the ends as well. First spread the masa and filling like the previous method, and bring the sides to the center. Then, fold the bottom of the husk to the center and fold down the top part of the husk to the center. Secure with a piece of kitchen twine from top to bottom or side to side, depending on your preference and the size of your husk.

Adorable.

Repeat, repeat, repeat! Now is the time to have some good music, your comfy crocs, and a few extra hands to help.


Tasty Kitchen Blog: Vegetarian Tamales. Guest post by Natalie Perry of Perry's Plate, recipe submitted by TK member Julie of Mommie Cooks.

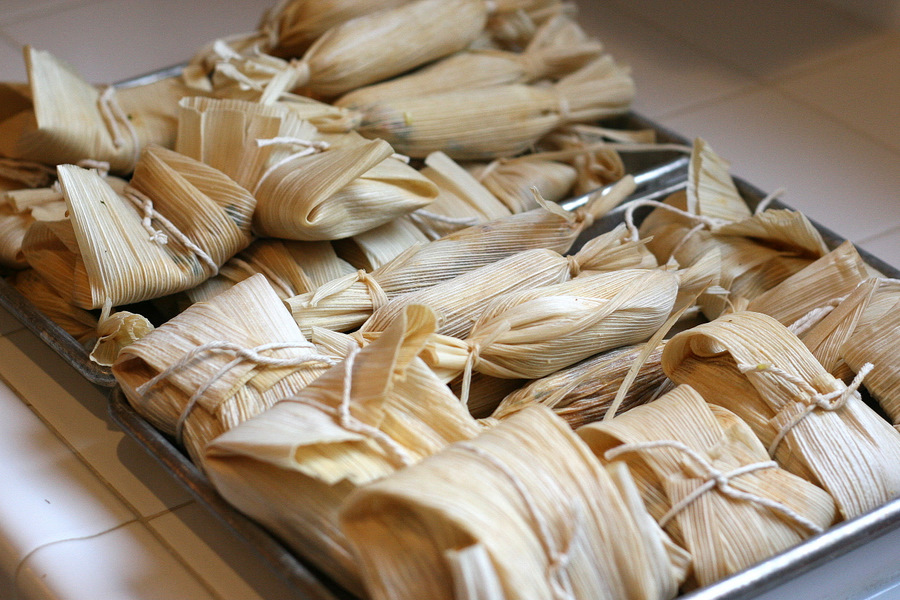
When you’re finished, you’ll have a tray (or two) of finished tamales. (I doubled the recipe, which is why I ended up with so many.) Some will be small, some will be big, some pretty, some will look like you had a toddler helping out. That’s perfectly fine. They’ll all taste great!

At this point you could stick them in a gallon-sized freezer bag and freeze them if you like.


Tasty Kitchen Blog: Vegetarian Tamales. Guest post by Natalie Perry of Perry's Plate, recipe submitted by TK member Julie of Mommie Cooks.

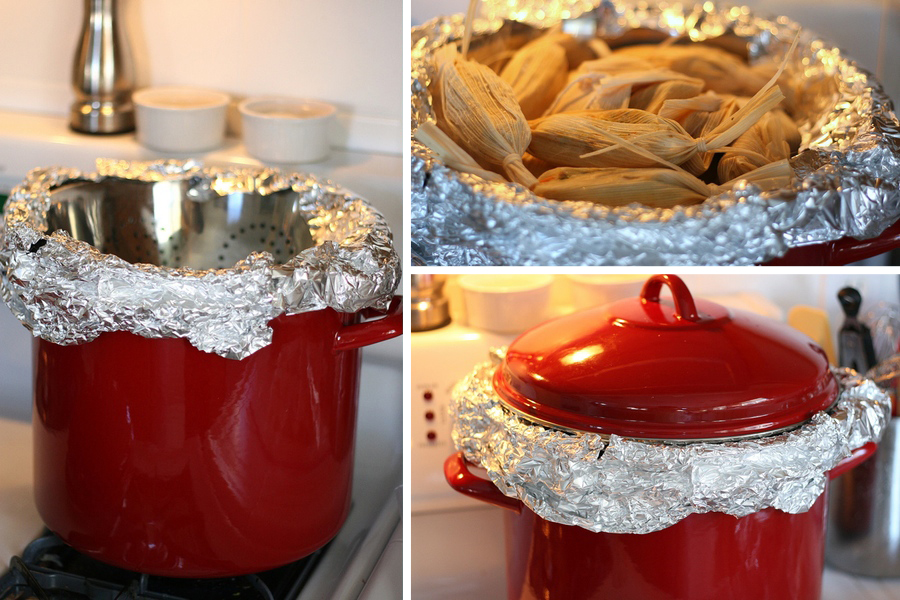
One of the reasons I never made tamales until now was because I don’t own a steamer. Julie suggested taking a big pot, adding a couple quarts of water and steam them in a metal colander nestled inside. Brilliant! My colander wasn’t wide enough, so I sealed the edges with aluminum foil to hold the steam in. It isn’t pretty, but it did the job.

Julie says to steam them for 90 minutes over medium-high heat, adding more water as necessary. If you have a proper steamer, I imagine they’d be finished in less time. Add an extra 15 minutes or so if they’re frozen. You don’t need to thaw them ahead of time.


Tasty Kitchen Blog: Vegetarian Tamales. Guest post by Natalie Perry of Perry's Plate, recipe submitted by TK member Julie of Mommie Cooks.

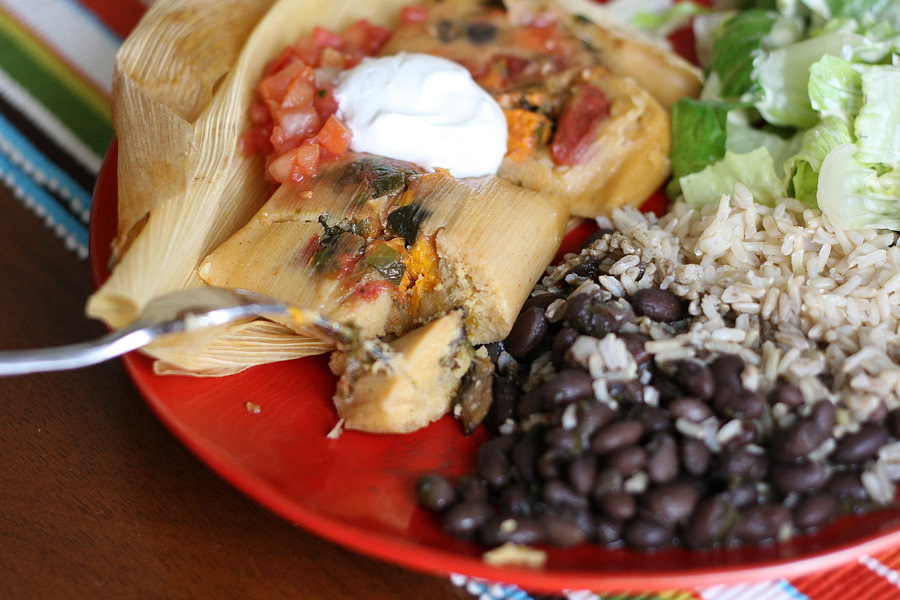
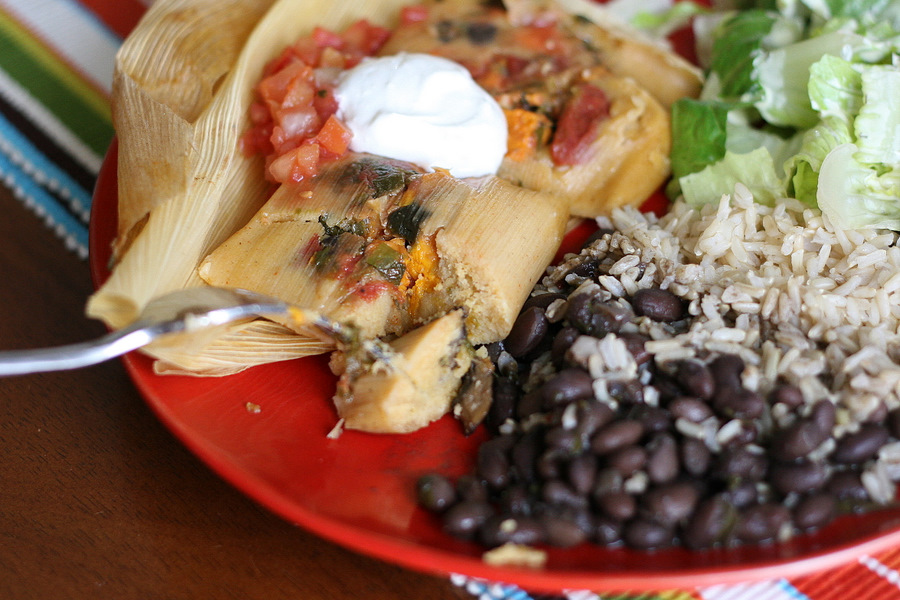
All your hard work will finally pay off as you bite into these tender, moist, flavorful little packets. Serve them with the traditional side of rice and beans, some salsa, and a dollop of sour cream, and you’ll wonder where this meal has been all your life. Seriously.

Julie, thank you for a great recipe and sharing your tamale wisdom! Visit her blog, Mommie Cooks, for more for her family-friendly recipes.

 
Recipe alterations: I omitted the zucchini and the fresh tomatoes and replaced it with 3-4 large brown mushrooms, 1 small sweet potato, 2 poblano peppers, and 1 can of diced tomatoes, drained. The altered filling made more than the original and needed 1 1/2 times the masa recipe.


Printable Recipe

Vegetarian Tamales

See post on mommiecooks’s site!
4.66 Mitt(s) 3 Rating(s)3 votes, average: 4.66 out of 53 votes, average: 4.66 out of 53 votes, average: 4.66 out of 53 votes, average: 4.66 out of 53 votes, average: 4.66 out of 5

Prep Time:

Cook Time:

Difficulty: Intermediate

Servings: 16

16
x

Print Options

Page size Letter 3x5 4x6
Text Size Small Medium Large
Content Include description
Include prep time, etc.
Show image

Description

A delicious vegetarian take on a Mexican classic.

Ingredients

  • 1 package Corn Husks (about 40-50 Husks)
  • _____
  • FOR THE DOUGH:
  • 2 cups Masa
  • 1 teaspoon Baking Powder
  • ¾ teaspoons Salt, Divided
  • 2 teaspoons Cumin, Divided Use
  • 2 teaspoons Chili Powder, Divided Use
  • 2-¼ cups Veggie Broth, Divided Use
  • 1 stick Butter
  • _____
  • FOR THE FILLING:
  • 1 whole Zucchini, Chopped
  • 3 whole Green Onions, Chopped
  • 2 cloves Garlic, Minced
  • 1 Tablespoon Oil
  • 1 bunch Cilantro, Chopped
  • 2 whole Roma Tomatoes, Chopped
  • ½ whole Lime, Juiced
  • ½ cups Shredded Cheddar Cheese

Preparation Instructions

Start off by soaking your corn husks in water for at least 30 minutes.

Grab a bowl and add in the masa, baking powder, 1/2 teaspoon of the salt, and 1 teaspoon of both the cumin, and chili powder.

Now add 2 cups of the veggie broth to your mixture and form a dough.

Pop your stick of butter into your mixer and whip it up for a minute or so. Add the masa dough in and mix it up well again. Set your finished dough aside and let’s move on to the filling.

Grab your saute pan and cook up your zucchini, green onions, and garlic on medium heat in the Tablespoon of oil for 2 to 3 minutes.

Now add in the rest of your broth (1/4 cup), the cilantro, tomatoes, lime juice, and the remaining cumin, chili powder (1 teaspoon each) and salt (1/4 teaspoon).

Stir it together and add in the shredded cheese.

Grab one of your soaked corn husks and slather a good amount of the masa mixture on top.

Now, take a spoonful of your veggie filling and place it down the middle third of your tamale. Make sure to leave a bit of space at the ends.

Wrap it up like you would a burrito and tie off the husk. I used another corn husk to tie it up.

Grab a big pot, add about 2 quarts of water and steam those beautiful rolled up veggie delights for about 90 minutes on medium high heat. I didn’t have a steamer that big, so I used my large stock pot and placed my noodle strainer inside of it with the pot cover over the top. Make sure that your tamales aren’t touching the water.

While the tamales are steaming, periodically check your water level to ensure you don’t boil it all away!

Pull one out after 90 minutes and unwrap it to see if it’s cooked through. The masa should be firm.


_______________________________________

Be sure to check out Natalie’s own beautiful food blog, Perrys’ Plate, where you can see her growing collection of lovely recipes. There’s always something new to see there. Go visit now!


Profile photo of Natalie | Perry's Plate

Grandma Inez’s Pineapple Pie

Posted by in Baking, Step-by-Step Recipes

Tasty Kitchen Blog: Pineapple Pie. Guest post and recipe from Natalie Perry of Perry's Plate.

 
I’m excited to share a recipe from my own box today because it’s one that’s close to my heart. I have a southern grandmother who cooks the best desserts. (I’m guessing many of you are nodding your heads and smiling. You know what I’m talking about, right?) Grandma Inez’s Pineapple Pie is my most favorite pie in the whole world and one of my favorites in her repertoire.

When I tell people my favorite pie is pineapple, I always wonder what kind of images their mind conjures up. A flaky pie crust filled with steaming pineapple rings? Ugh. No wonder they make faces at me. No steaming pineapple rings here. Think of this pie as a pineapple version of lemon meringue. Better now?

Let’s get started!


Tasty Kitchen Blog: Pineapple Pie. Guest post and recipe from Natalie Perry of Perry's Plate.

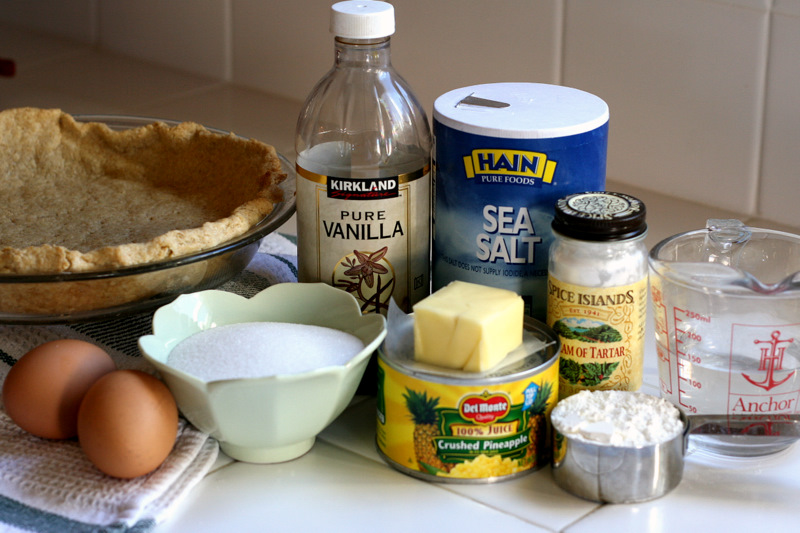
One of the things I love about this pie is that the ingredients are simple and the technique isn’t fussy. You’ll need eggs, sugar, butter, vanilla, salt, cream of tartar, corn starch, water, a can of crushed pineapple, and pre-baked pie crust. A pie crust from scratch is best, especially if it looks like it was made by a three-year-old. (Grandma, don’t look at my crust, please.)


Tasty Kitchen Blog: Pineapple Pie. Guest post and recipe from Natalie Perry of Perry's Plate.

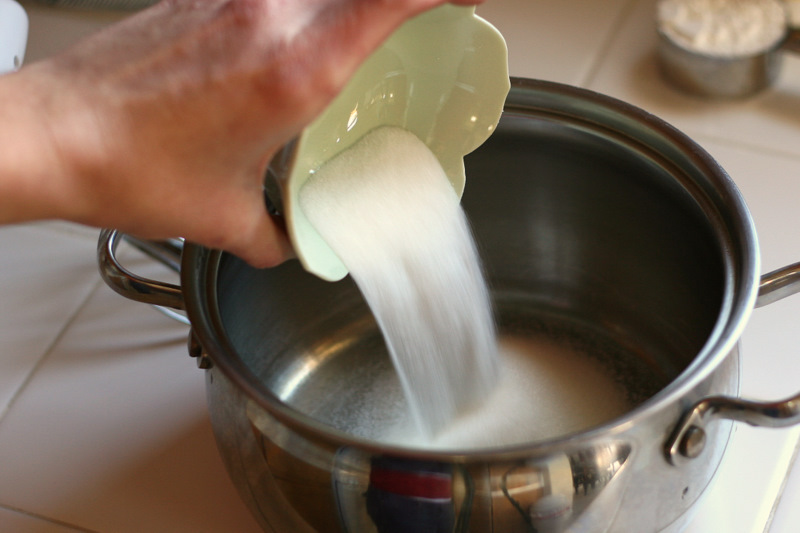
Get a medium saucepan and dump in 3/4 cup sugar …


Tasty Kitchen Blog: Pineapple Pie. Guest post and recipe from Natalie Perry of Perry's Plate.

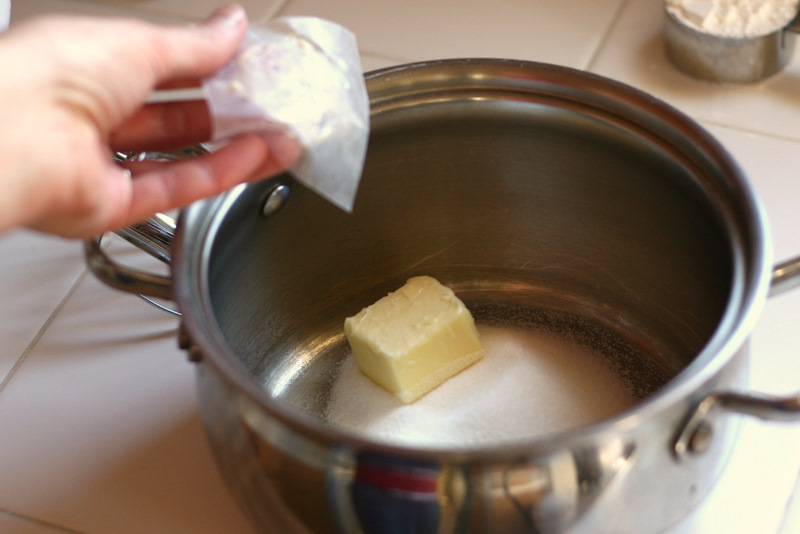
And the butter. Two tablespoons? I know. Pretty weak for a southern recipe, but I’m not going to argue with my grandma.


Tasty Kitchen Blog: Pineapple Pie. Guest post and recipe from Natalie Perry of Perry's Plate.

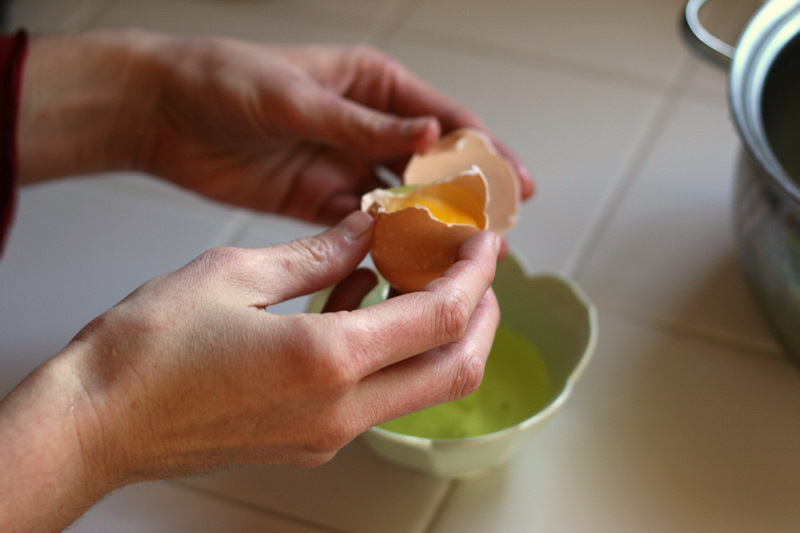
At this point you’ll need to separate the eggs if you haven’t already. Reserve the whites in a small bowl and set aside.


Tasty Kitchen Blog: Pineapple Pie. Guest post and recipe from Natalie Perry of Perry's Plate.

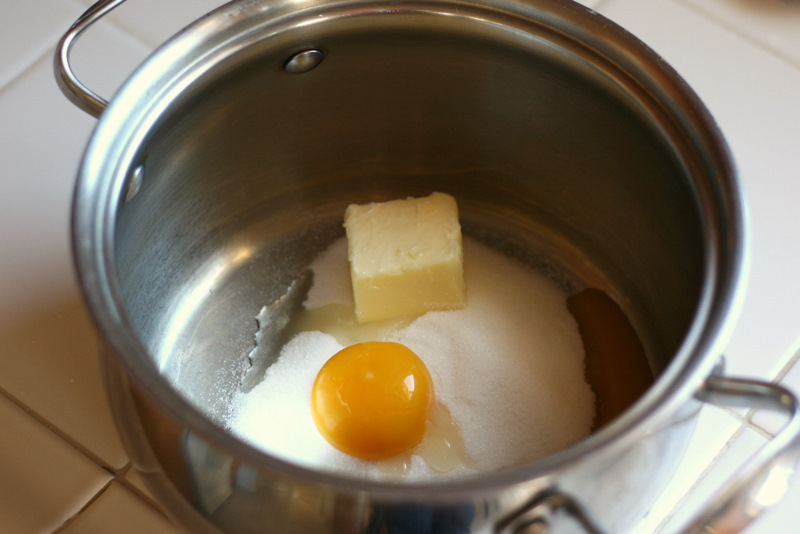
Place the yolks in the saucepan with the sugar and butter.


Tasty Kitchen Blog: Pineapple Pie. Guest post and recipe from Natalie Perry of Perry's Plate.

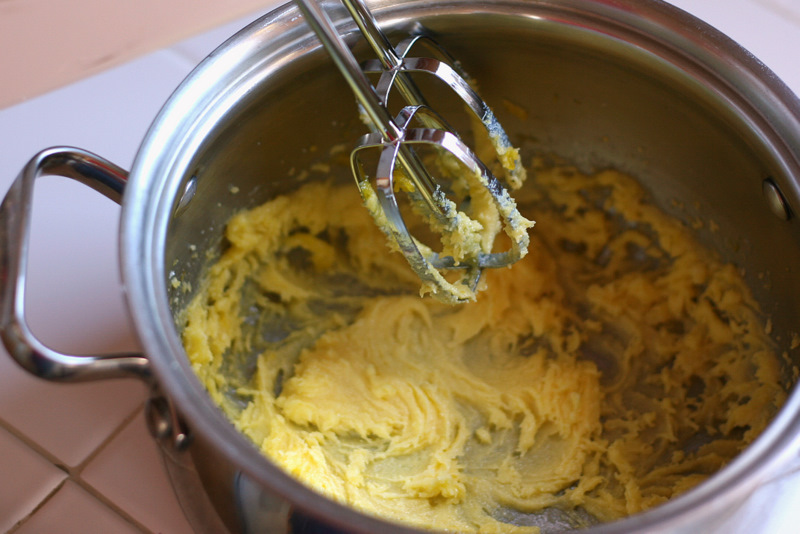
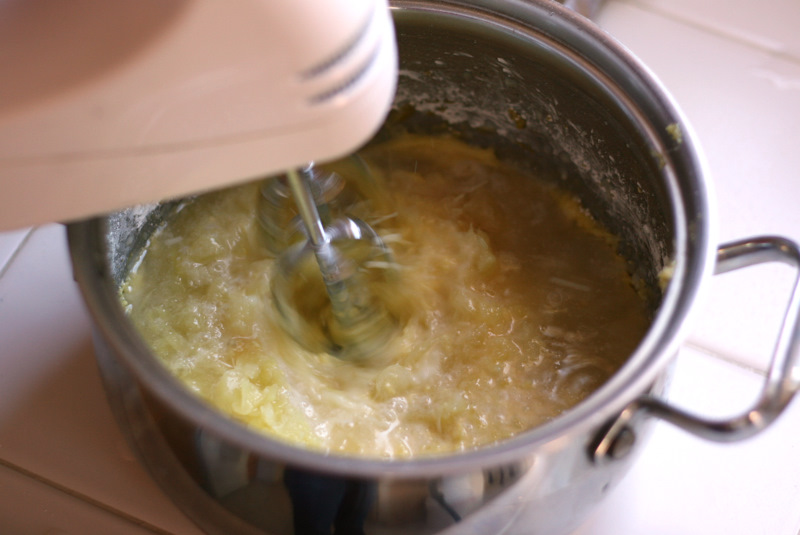
Get out your electric hand-held mixer and beat until everything’s mixed up nicely.


Tasty Kitchen Blog: Pineapple Pie. Guest post and recipe from Natalie Perry of Perry's Plate.

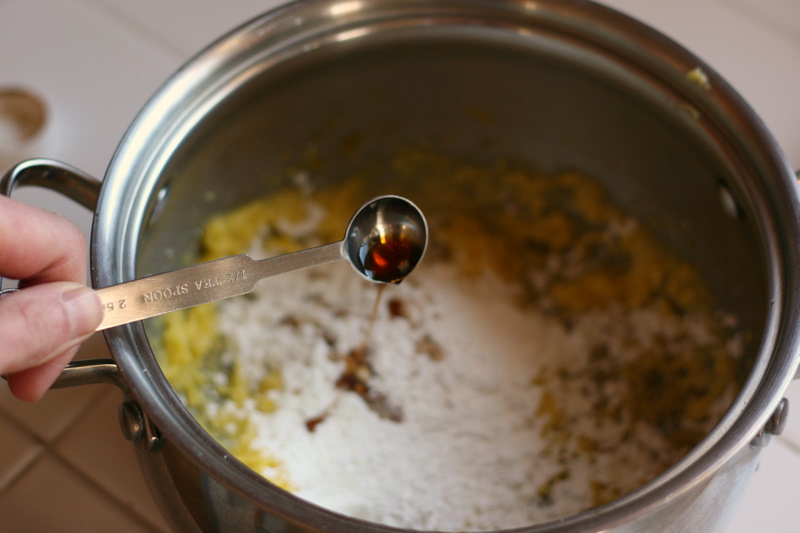
Add the cornstarch and vanilla.


Tasty Kitchen Blog: Pineapple Pie. Guest post and recipe from Natalie Perry of Perry's Plate.

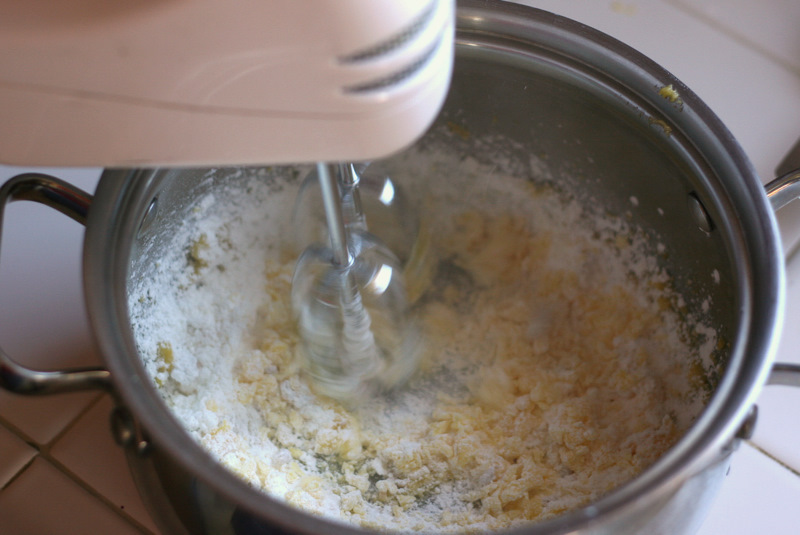
Give it another mix.


Tasty Kitchen Blog: Pineapple Pie. Guest post and recipe from Natalie Perry of Perry's Plate.

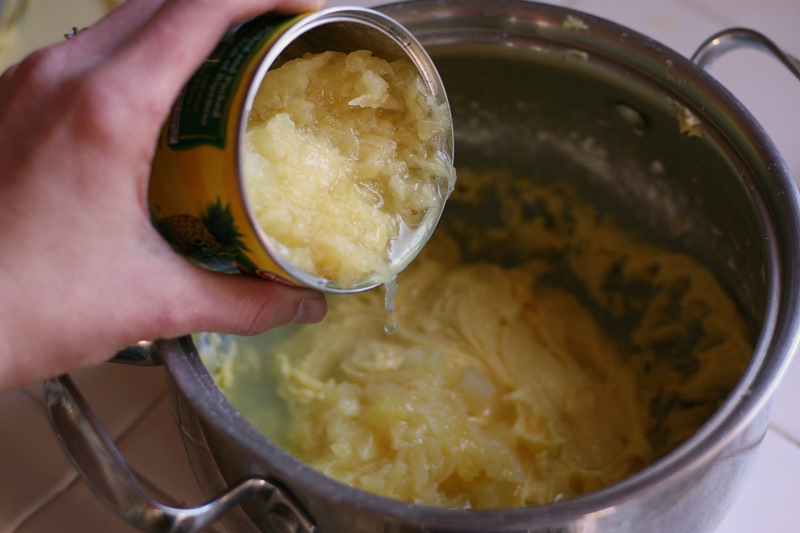
Then add the water and the crushed pineapple, juice and all.


Tasty Kitchen Blog: Pineapple Pie. Guest post and recipe from Natalie Perry of Perry's Plate.

Mix it again. (You could even use a spoon if you want.)


Tasty Kitchen Blog: Pineapple Pie. Guest post and recipe from Natalie Perry of Perry's Plate.

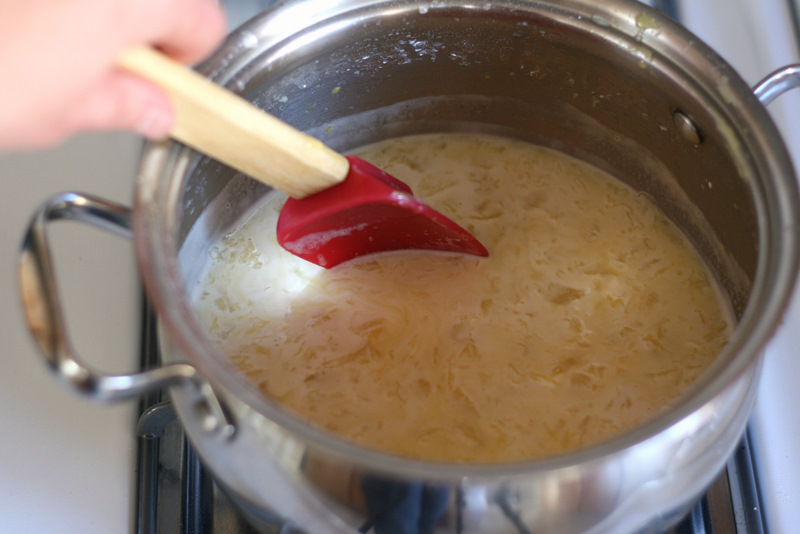
Move the saucepan over to the stove and place it over medium heat. You want it to heat up, but don’t let it boil. If it starts to bubble a lot, turn the heat down. Stir constantly for a few minutes until it starts to thicken.


Tasty Kitchen Blog: Pineapple Pie. Guest post and recipe from Natalie Perry of Perry's Plate.

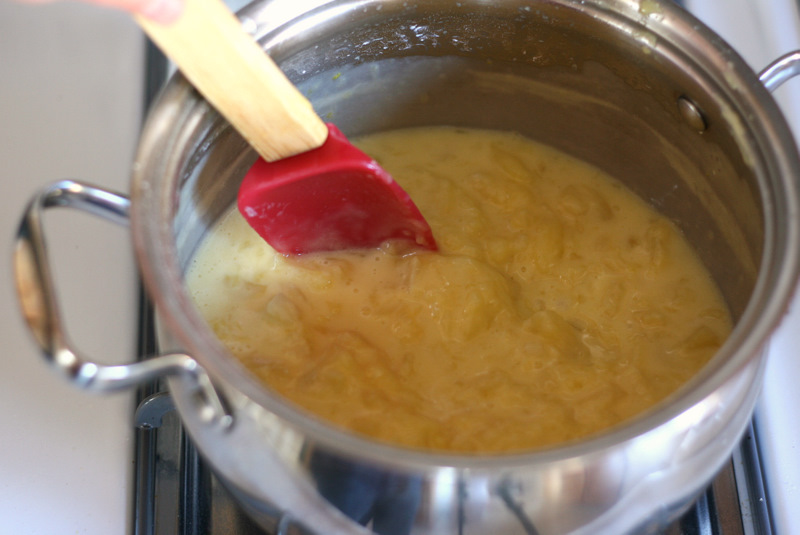
It’ll seem like nothing is happening, and then BAM it’ll thicken up really quickly. When it starts to get clumpy like this, remove it from the heat. Keep stirring.


Tasty Kitchen Blog: Pineapple Pie. Guest post and recipe from Natalie Perry of Perry's Plate.

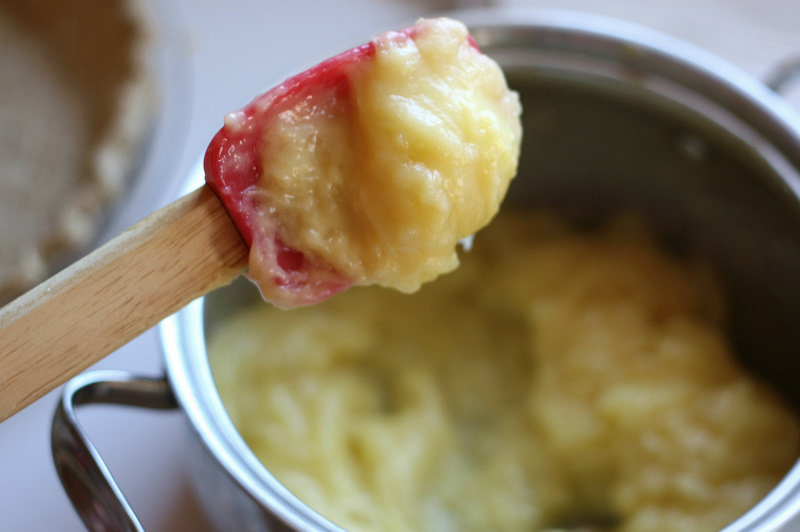
The filling should be really thick. Like this.


Tasty Kitchen Blog: Pineapple Pie. Guest post and recipe from Natalie Perry of Perry's Plate.

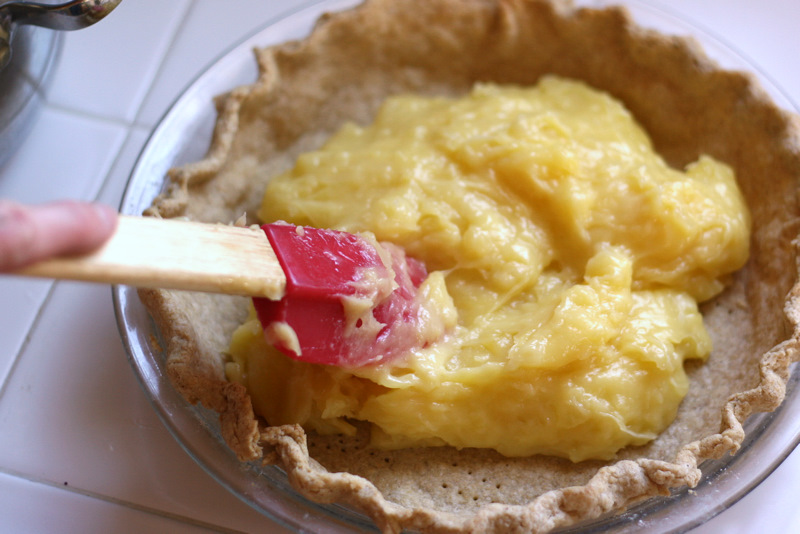
Bring out your perfectly fluted pie crust and dump all of the pineapple filling into it.


Tasty Kitchen Blog: Pineapple Pie. Guest post and recipe from Natalie Perry of Perry's Plate.

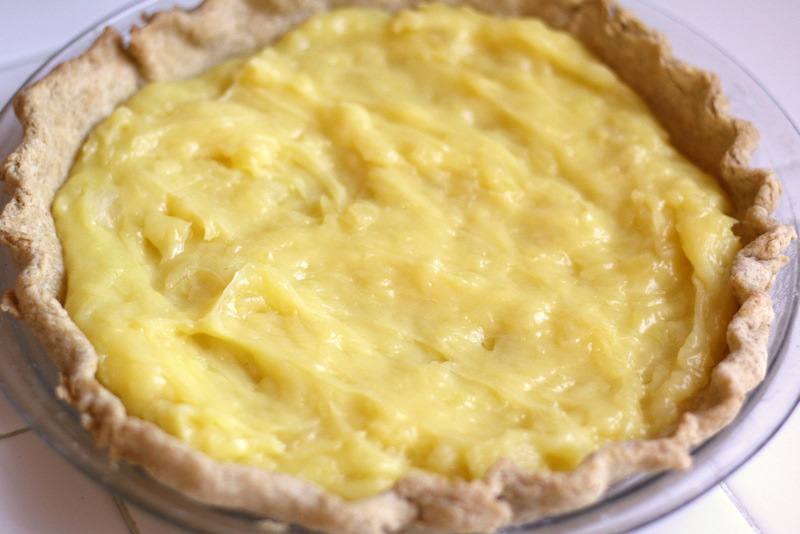
Spread it around evenly and set it aside. If you’re not going to make the meringue right away, you’ll need to cover this with some plastic wrap and put it in the refrigerator.


Tasty Kitchen Blog: Pineapple Pie. Guest post and recipe from Natalie Perry of Perry's Plate.

Preheat your oven to 400 degrees F.

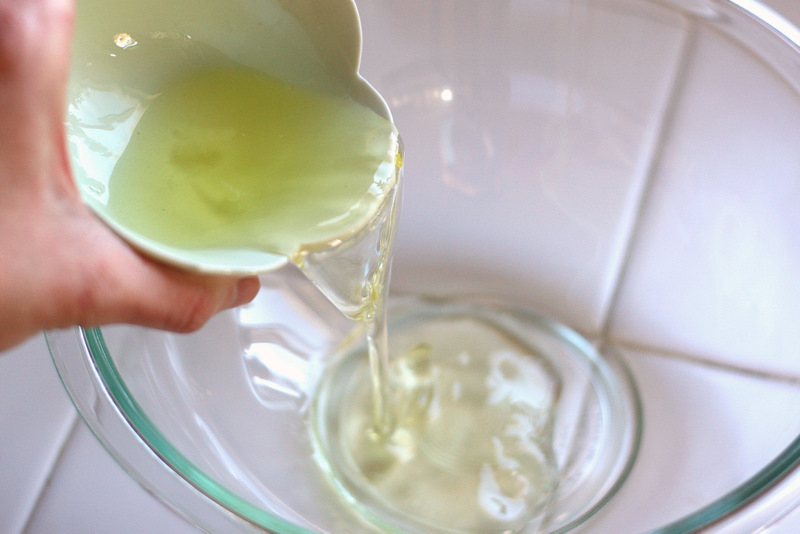
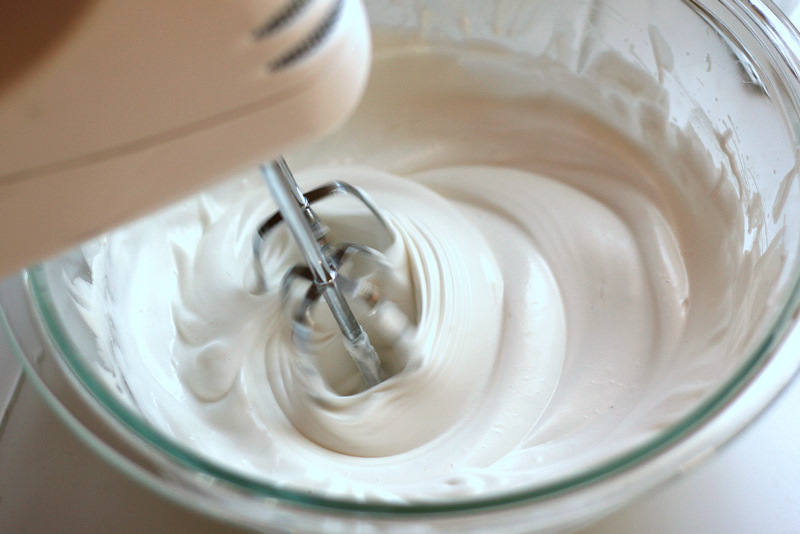
Now for the meringue. Grab a clean, medium-sized mixing bowl and add the egg whites.


Tasty Kitchen Blog: Pineapple Pie. Guest post and recipe from Natalie Perry of Perry's Plate.

Okay, y’all, I have a confession to make. (I like saying “y’all”. And I like people who say “y’all”. But that’s not my confession.)

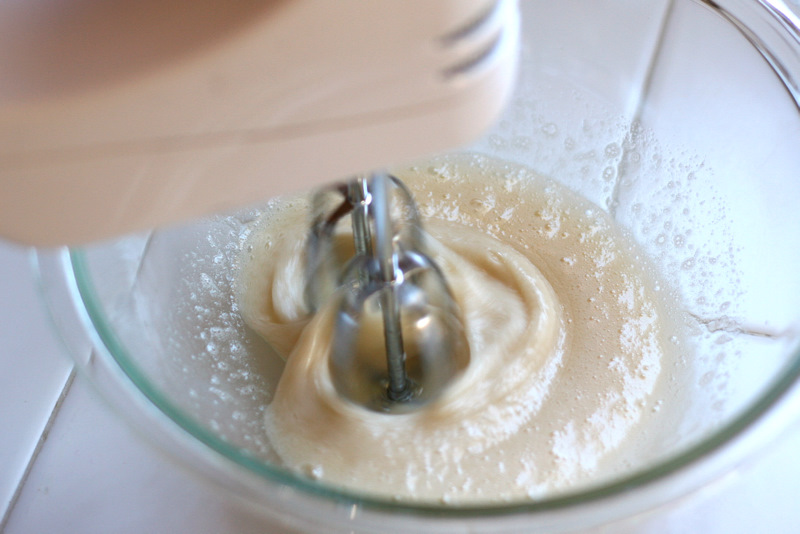
When I made this meringue for this blog post, I was following my recipe card that I copied from my grandma. She says to put all the meringue ingredients into the bowl at once and beat them. Other meringue recipes will tell you to beat the egg whites for a minute or two before adding in anything else, which is how I wrote the directions when I submitted this recipe to Tasty Kitchen.

Is there a difference? I think so. I think it takes a lot longer for the whites to whip up if you add everything at the beginning. I swore I’d lost my meringue mojo while I was standing there whipping this. It took FOREVER (forever = about 7 minutes) and there were a few times I was tempted to toss the whole thing and start over.

But …


Tasty Kitchen Blog: Pineapple Pie. Guest post and recipe from Natalie Perry of Perry's Plate.

It worked anyway.


Tasty Kitchen Blog: Pineapple Pie. Guest post and recipe from Natalie Perry of Perry's Plate.

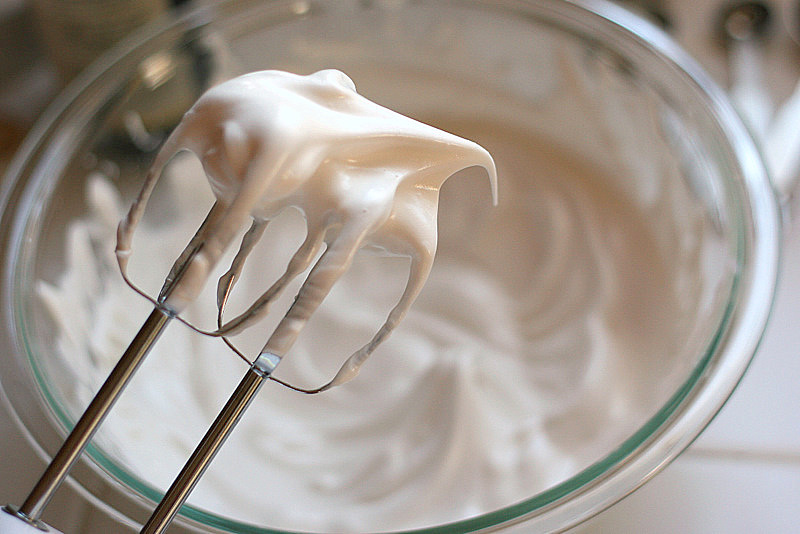
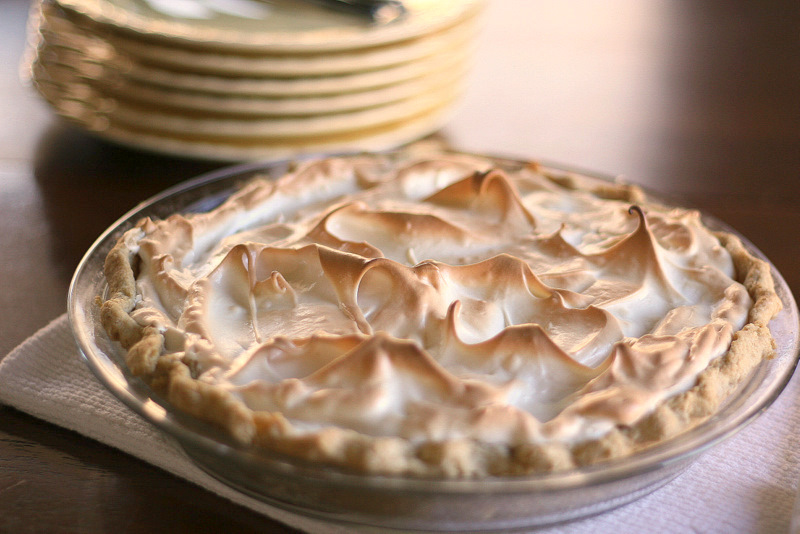
And I ended up with smooth, fluffy, glossy meringue. You can whip this until it reaches stiff peaks (peaks standing straight up), but I like it when they sort of flop over. I think it’s cute.


Tasty Kitchen Blog: Pineapple Pie. Guest post and recipe from Natalie Perry of Perry's Plate.

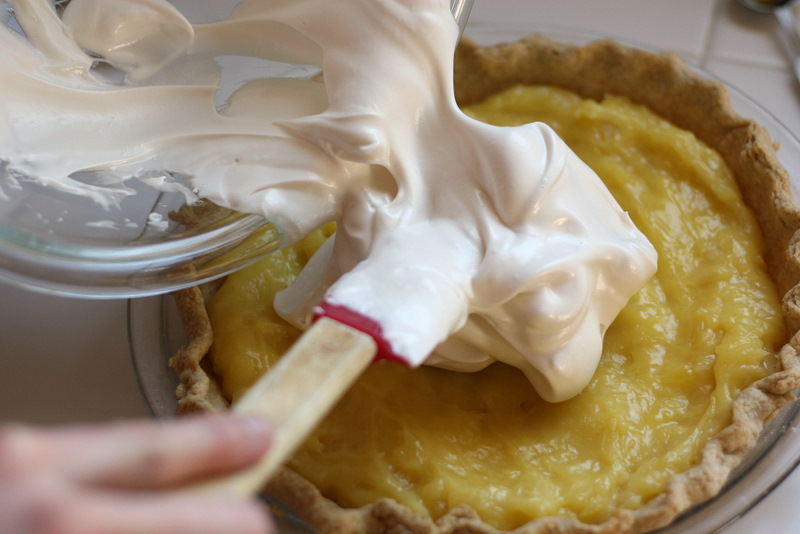
Spread all the meringue over the pineapple filling.


Tasty Kitchen Blog: Pineapple Pie. Guest post and recipe from Natalie Perry of Perry's Plate.

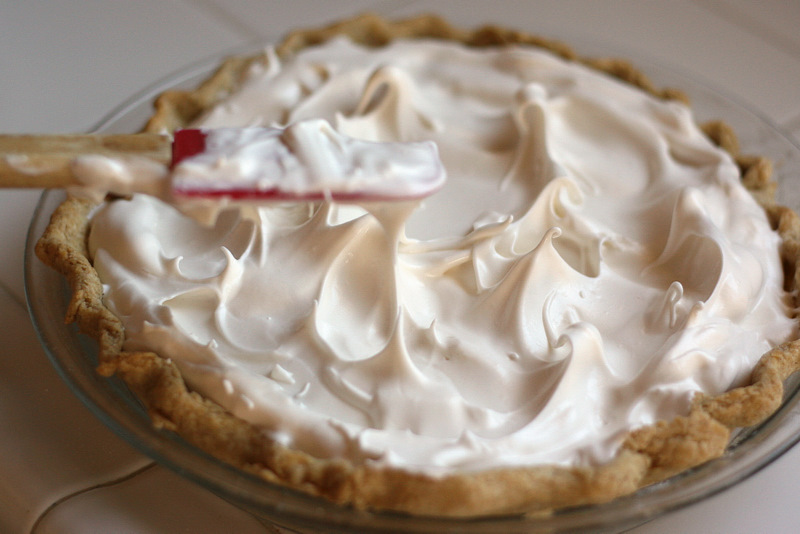
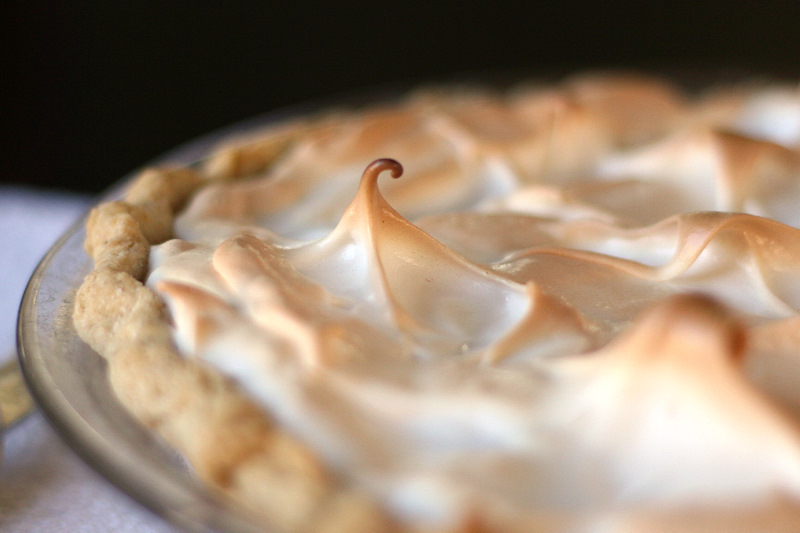
If you want to, make a few little peaks to give the pie some texture. Then put it in your preheated oven for 5-8 minutes or so until it’s golden brown. Keep an eye on it so it doesn’t burn!


Tasty Kitchen Blog: Pineapple Pie. Guest post and recipe from Natalie Perry of Perry's Plate.

See why I like to make little swirlies on the top? How gorgeous is that?


Tasty Kitchen Blog: Pineapple Pie. Guest post and recipe from Natalie Perry of Perry's Plate.

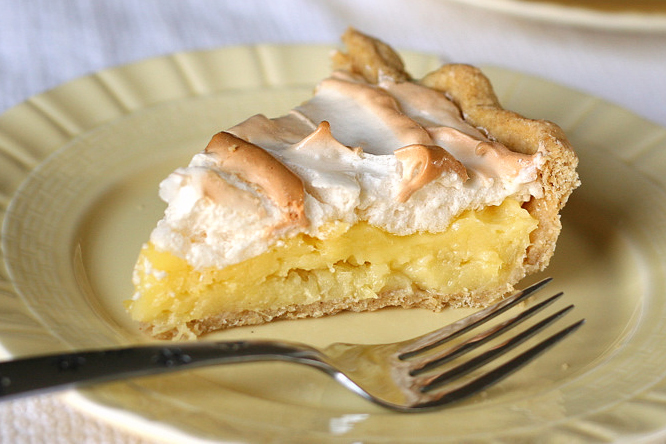
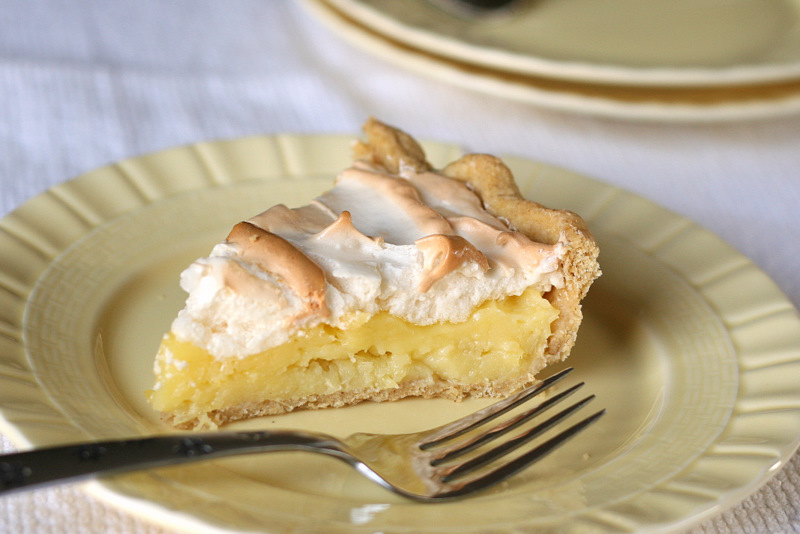
My favorite was this little guy right here. My three-year-old called dibs on him when I was slicing it up.


Tasty Kitchen Blog: Pineapple Pie. Guest post and recipe from Natalie Perry of Perry's Plate.

 
And that, my friends, is a pineapple pie. It’s delicious when it’s still a bit warm from the oven. Or when it’s ice cold. Or when it’s 4 AM. The recipe easily doubles, and making more than one is definitely a good idea. I hope you enjoy this as much as I do!

(And thanks, Grandma! This pie rules.)


Printable Recipe

Grandma Inez’s Pineapple Pie

See post on Natalie | Perry's Plate’s site!
4.75 Mitt(s) 20 Rating(s)20 votes, average: 4.75 out of 520 votes, average: 4.75 out of 520 votes, average: 4.75 out of 520 votes, average: 4.75 out of 520 votes, average: 4.75 out of 5

Prep Time:

Cook Time:

Difficulty: Easy

Servings: 6

6
x

Print Options

Page size Letter 3x5 4x6
Text Size Small Medium Large
Content Include description
Include prep time, etc.
Show image

Description

Similar to lemon meringue, this unique pie features a creamy pineapple filling. It’s also my favorite pie in the whole world. My grandma quit asking me what dessert I want her to make when we visit. She just makes one of these. Sometimes two. One for me and my grandpa and the other one for everyone else.

Ingredients

  • FOR THE PIE:
  • ¾ cups Sugar
  • 2 Tablespoons Butter
  • 2 whole Eggs, Separated
  • ⅓ cups Cornstarch
  • ½ teaspoons Vanilla Extract
  • ½ cups Plus 2 Tablespoons Of Water
  • 8 ounces, weight Canned Crushed Pineapple
  • 1 whole 9-inch Pre-baked Pie Crust
  • _____
  • FOR THE MERINGUE:
  • 2 whole Egg Whites (From Separated Eggs Above)
  • ⅛ teaspoons Salt
  • ¼ teaspoons Cream Of Tartar
  • 6 Tablespoons Sugar
  • 1 teaspoon Vanilla

Preparation Instructions

For the pie, cream sugar, butter, and egg yolks in a saucepan. Add cornstarch and vanilla. Add water and crushed pineapple. Cook over medium heat, stirring constantly until thick. Pour into a 9″ baked pastry.

For the meringue, whip egg whites until they begin to get foamy. Add the remaining ingredients and continue to whip until the meringue has reached soft peak stage and is smooth and glossy. Place the meringue over the cooled pie. Brown at 400ºF for just a few minutes. Store in the fridge until ready to serve. Tastes great warm or cold.


_______________________________________

Be sure to check out Natalie’s own beautiful food blog, Perrys’ Plate, where you can see her growing collection of lovely recipes. There’s always something new to see there. Go visit now!


Profile photo of Natalie | Perry's Plate

Roasted Cauliflower Soup

Posted by in Step-by-Step Recipes

Tasty Kitchen Blog: Roasted Cauliflower Soup. Guest post by Natalie Perry of Perry's Plate, recipe submitted by TK member Hailey of Hail's Kitchen.

 
Cauliflower, to me, is a humble vegetable. It’s rarely the star of the meal, it doesn’t have a flashy color or a strong flavor, and let’s face it—its complexion could use some work. Despite its frumpy characteristics, cauliflower has a few tricks up its sleeve. Case in point: this Roasted Cauliflower Soup with White Cheddar Cheese recipe submitted by TK member hailskitchen. Pureeing the cauliflower creates the illusion of a creamy soup without the added richness from cream. Not only did this soup taste great, it was simultaneously light yet rich tasting.

Okay, it does have cheese, too. But if you use a sharp white cheddar, you might not need as much. (If you’re concerned with such things. I wasn’t one of those who swore off cheese-laden foods this year.)


Tasty Kitchen Blog: Roasted Cauliflower Soup. Guest post by Natalie Perry of Perry's Plate, recipe submitted by TK member Hailey of Hail's Kitchen.

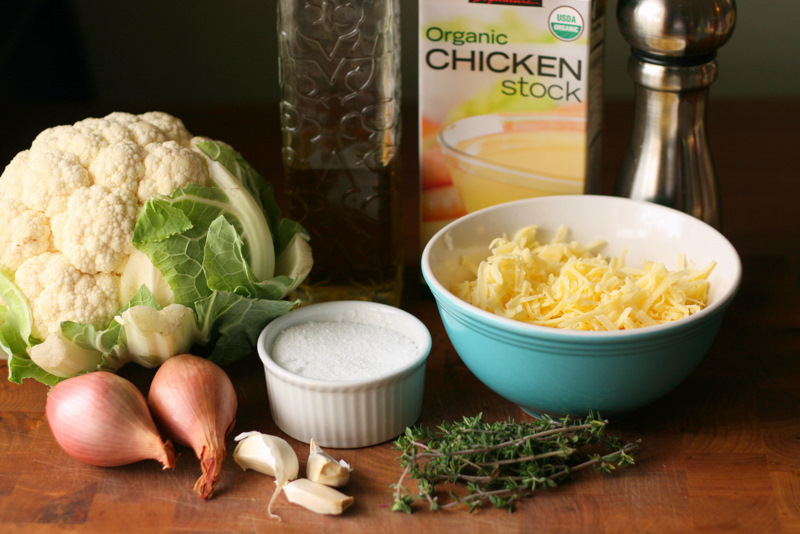
For the soup you’ll need a nice, big head of cauliflower, shallots, fresh garlic, fresh thyme, shredded white cheddar cheese, salt, pepper, olive oil, and chicken (or vegetable) broth.


Tasty Kitchen Blog: Roasted Cauliflower Soup. Guest post by Natalie Perry of Perry's Plate, recipe submitted by TK member Hailey of Hail's Kitchen.

First, preheat your oven to 400 degrees F.

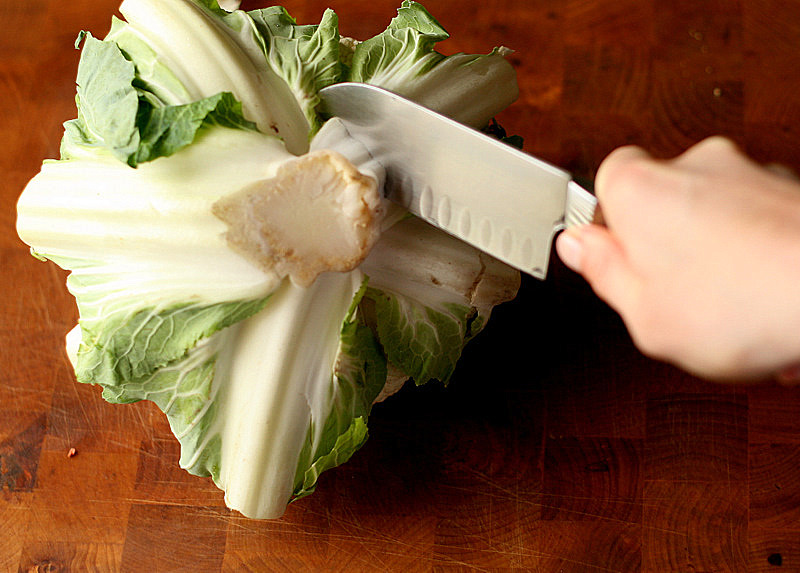
Then prep the cauliflower. I like to turn it upside down and make a few slashes in the bottom to get the tough stem out and remove the leaves.


Tasty Kitchen Blog: Roasted Cauliflower Soup. Guest post by Natalie Perry of Perry's Plate, recipe submitted by TK member Hailey of Hail's Kitchen.

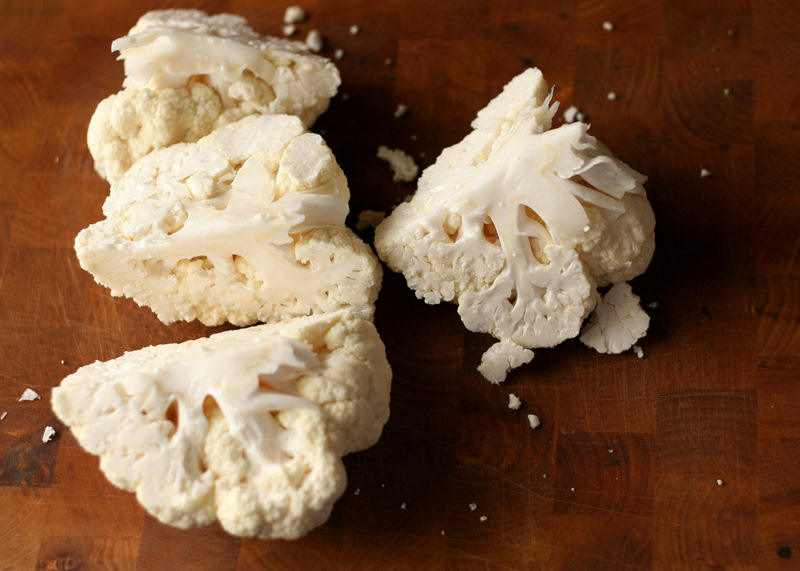
I also like to quarter the head before breaking it down into florets. It’s easier to manage than a giant head.


Tasty Kitchen Blog: Roasted Cauliflower Soup. Guest post by Natalie Perry of Perry's Plate, recipe submitted by TK member Hailey of Hail's Kitchen.

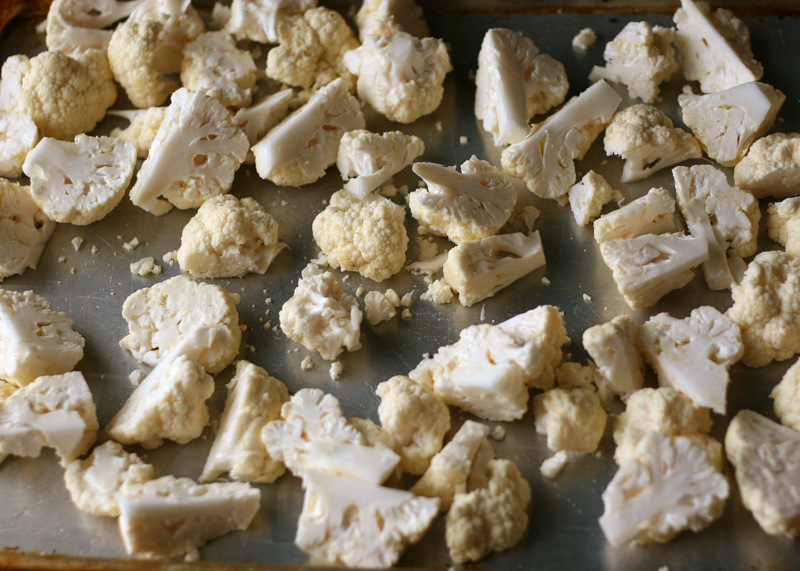
Once you have it broken down, toss it onto a large rimmed baking sheet.


Tasty Kitchen Blog: Roasted Cauliflower Soup. Guest post by Natalie Perry of Perry's Plate, recipe submitted by TK member Hailey of Hail's Kitchen.

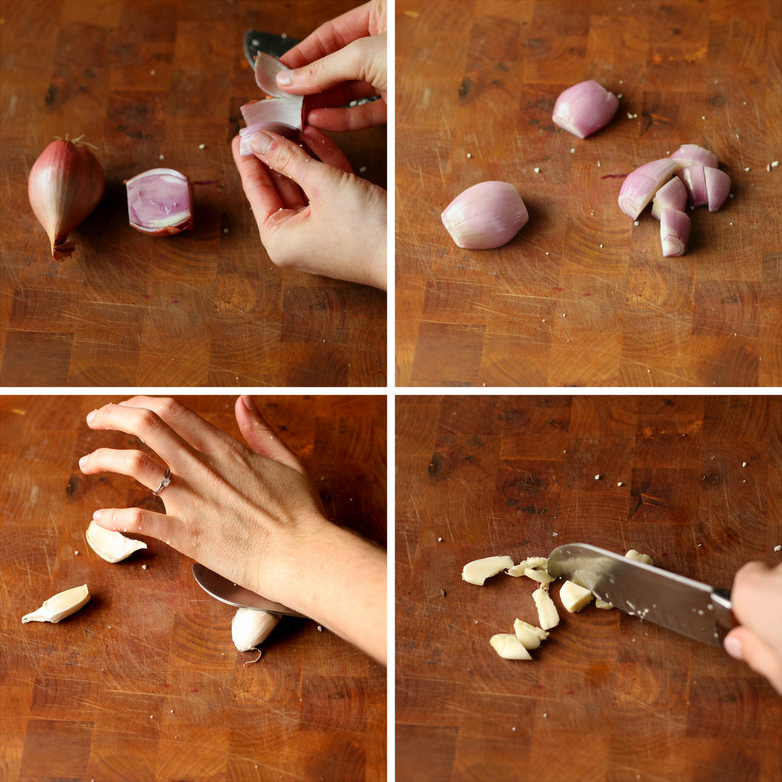
Next, peel the shallots and garlic. If you lay your knife on the garlic and give it a whack with the palm of your hand, the peel comes right off. Don’t chop them too small. Quartering the shallots and cutting the garlic in half ought to do it.


Tasty Kitchen Blog: Roasted Cauliflower Soup. Guest post by Natalie Perry of Perry's Plate, recipe submitted by TK member Hailey of Hail's Kitchen.

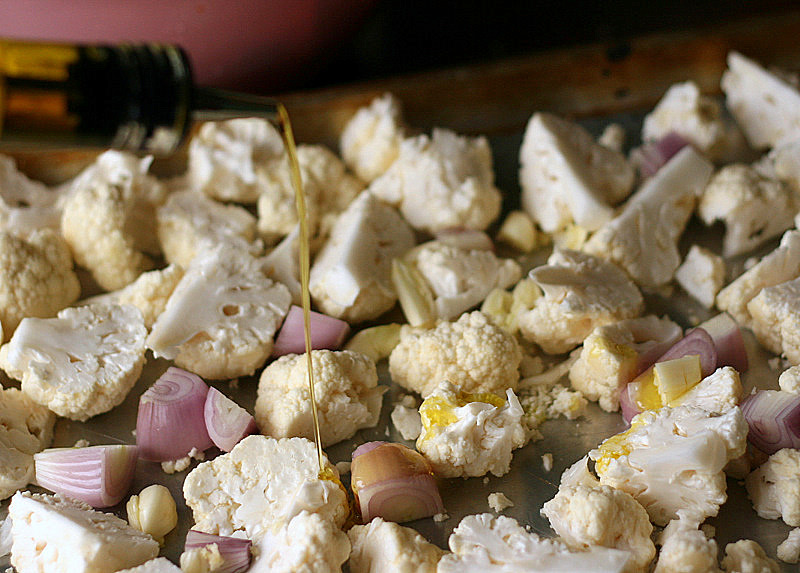
Add the prepped shallots and garlic to the cauliflower on the baking sheet. Drizzle liberally with olive oil, sprinkle with salt, and stick it in that screaming hot oven.


Tasty Kitchen Blog: Roasted Cauliflower Soup. Guest post by Natalie Perry of Perry's Plate, recipe submitted by TK member Hailey of Hail's Kitchen.

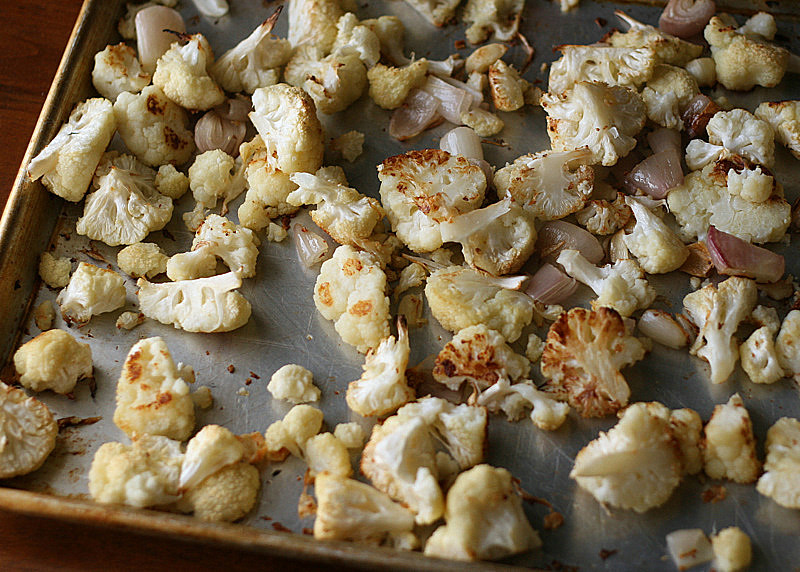
After 40-50 minutes it should look like this. See those dark, caramelized pieces? Roasting should be a part of all vegetable preparation, in my opinion. That’s how I got myself to like Brussels sprouts. Try it.


Tasty Kitchen Blog: Roasted Cauliflower Soup. Guest post by Natalie Perry of Perry's Plate, recipe submitted by TK member Hailey of Hail's Kitchen.

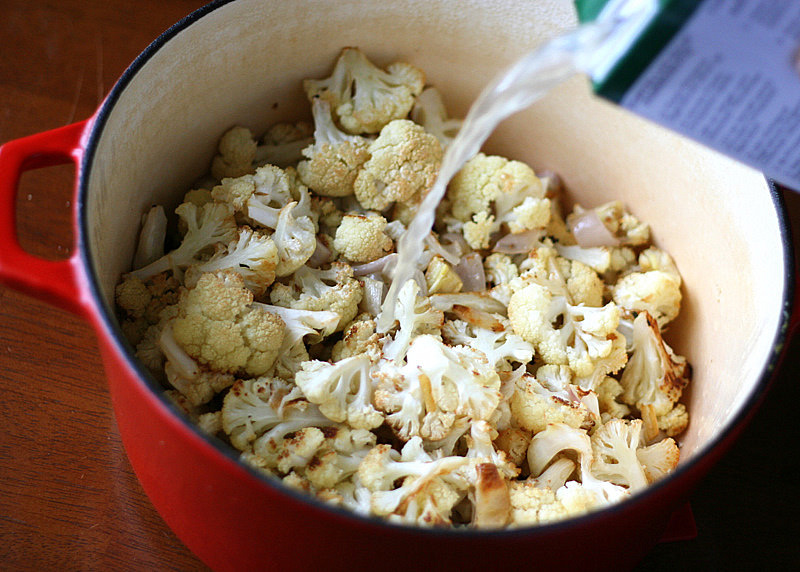
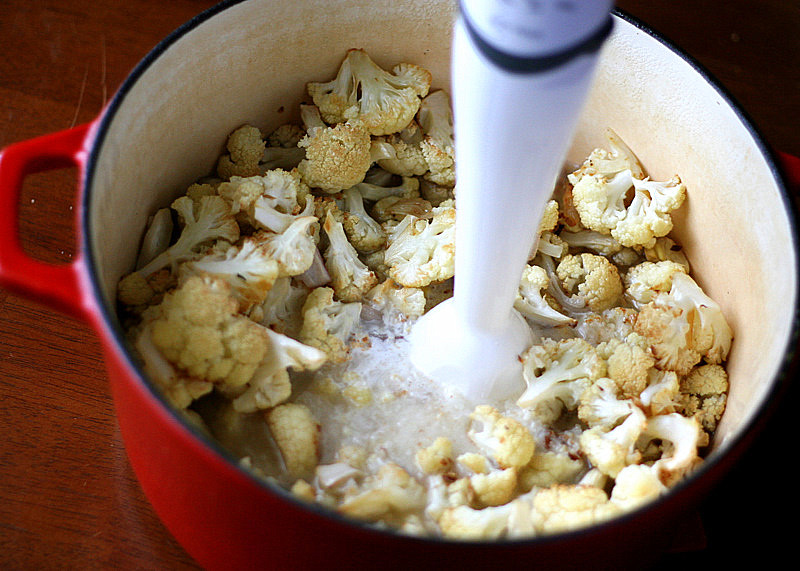
Transfer all of that roasted goodness to a big pot. (I doubled the batch, which is why it looks like my cauliflower suddenly reproduced.) Pour in half of the chicken broth—it makes pureeing much easier.


Tasty Kitchen Blog: Roasted Cauliflower Soup. Guest post by Natalie Perry of Perry's Plate, recipe submitted by TK member Hailey of Hail's Kitchen.

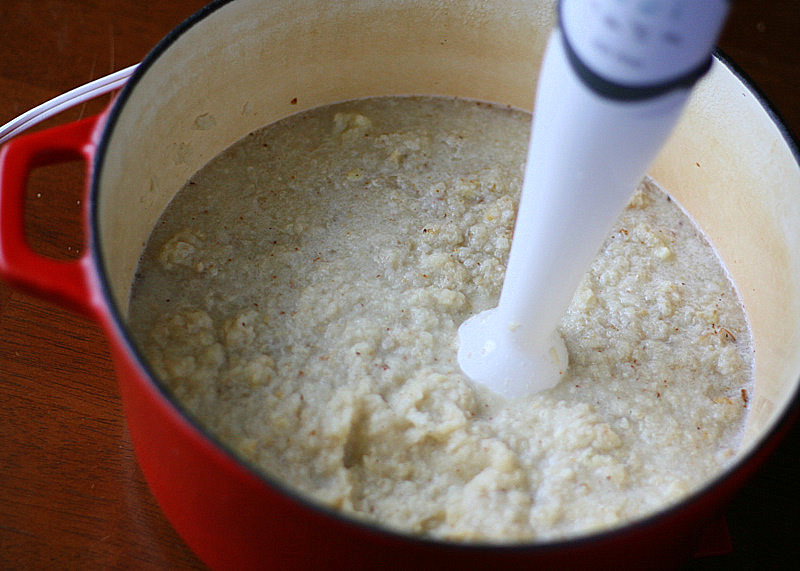
If you have an immersion or stick blender, this will be a snap. Just stick it in and start buzzing it around. If you don’t have one, go buy one. If you can’t go buy one, you can ladle the mixture into a blender and process in batches, returning it back into the pot when you’re finished.


Tasty Kitchen Blog: Roasted Cauliflower Soup. Guest post by Natalie Perry of Perry's Plate, recipe submitted by TK member Hailey of Hail's Kitchen.

Back to blending. You can leave it a bit chunky if you like. I made it this way the first time and I liked a few chunks. But I found that the texture was really odd.


Tasty Kitchen Blog: Roasted Cauliflower Soup. Guest post by Natalie Perry of Perry's Plate, recipe submitted by TK member Hailey of Hail's Kitchen.

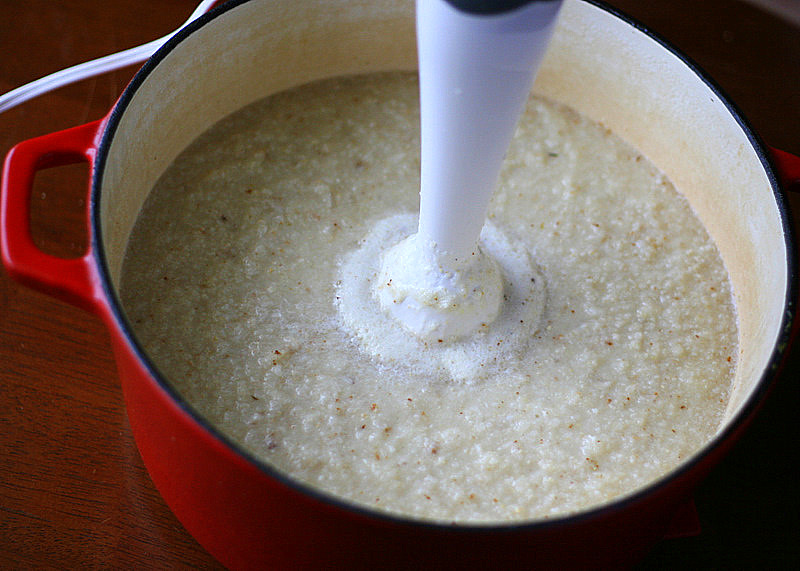
So this time I blended it even more until it was smoother. I liked it better that way.

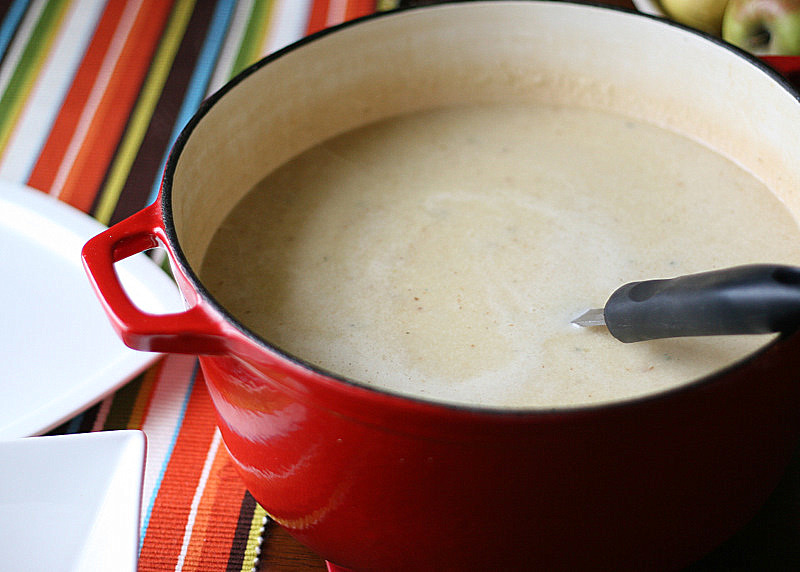
Place the pot on the stove and bring it to a boil. Reduce the heat and let it simmer for 10 minutes.


Tasty Kitchen Blog: Roasted Cauliflower Soup. Guest post by Natalie Perry of Perry's Plate, recipe submitted by TK member Hailey of Hail's Kitchen.

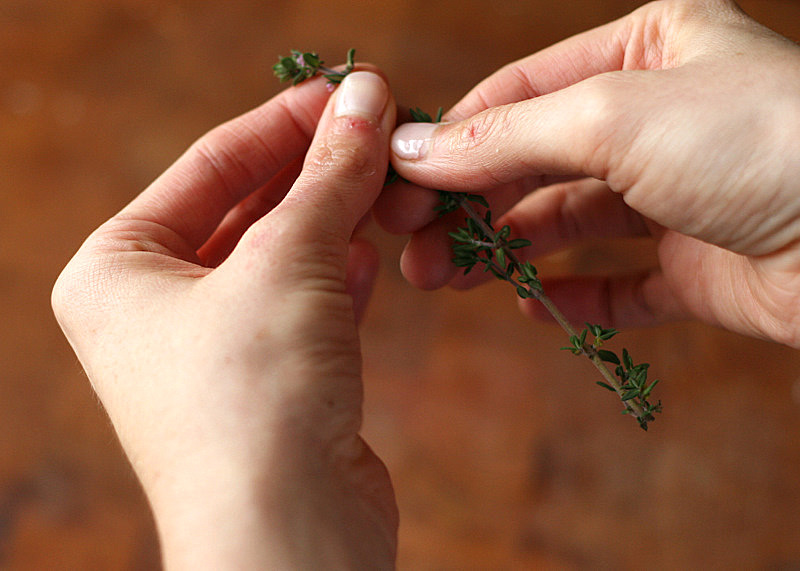
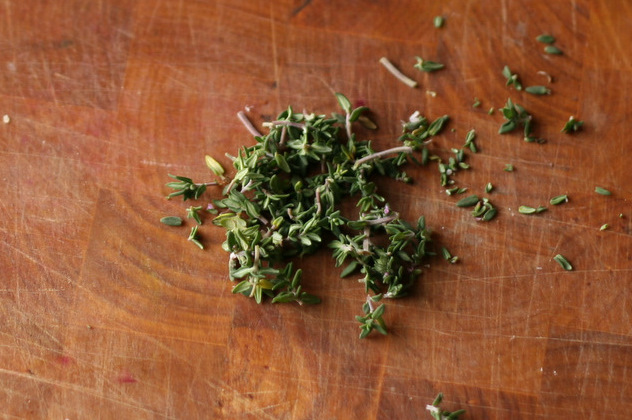
While the soup simmers away, get your thyme ready. Grab it at the top with one hand, and with the other hand, pinch toward the top and pull down the stem to remove leaves.


Tasty Kitchen Blog: Roasted Cauliflower Soup. Guest post by Natalie Perry of Perry's Plate, recipe submitted by TK member Hailey of Hail's Kitchen.

Give them a quick chop if you like. This is just my personal preference, but I found the soup to be really “thyme-y”, so I reduced the measurement by half the second time I made it. The thyme really sings in this soup.


Tasty Kitchen Blog: Roasted Cauliflower Soup. Guest post by Natalie Perry of Perry's Plate, recipe submitted by TK member Hailey of Hail's Kitchen.

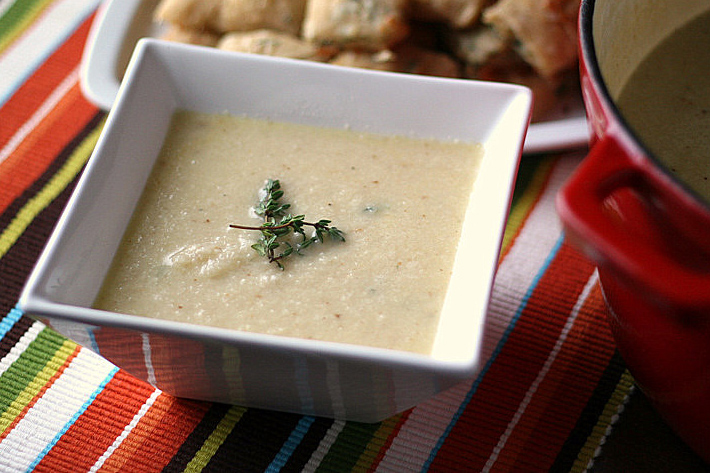
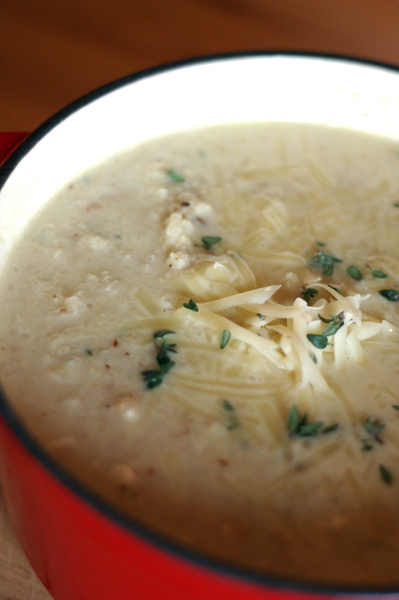
When the soup is done simmering, cut the heat and add the thyme and shredded cheese. Season to taste with a generous dose of salt and black pepper.


Tasty Kitchen Blog: Roasted Cauliflower Soup. Guest post by Natalie Perry of Perry's Plate, recipe submitted by TK member Hailey of Hail's Kitchen.

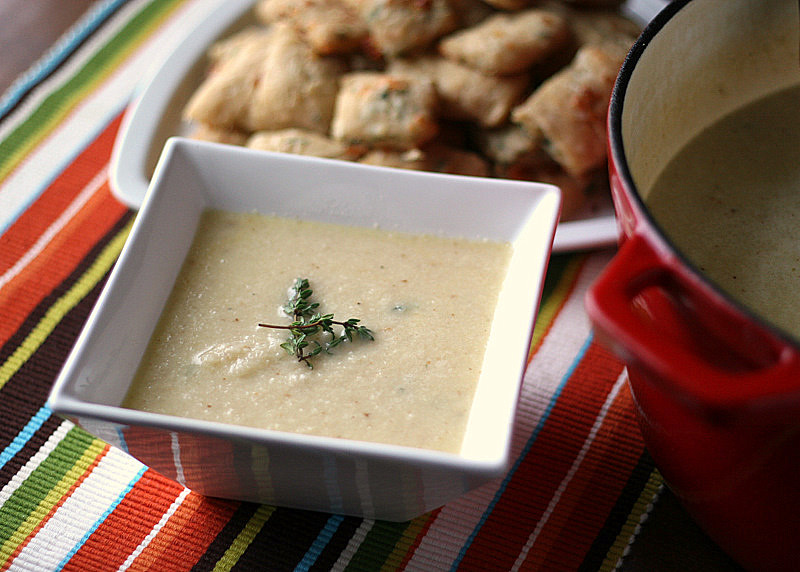
Time to serve it up with crusty bread or biscuits and a fresh salad! One of my favorite things about this recipe is that the steps can be broken up to accommodate your schedule. Roast the vegetables a day or two ahead and when you’re ready to prepare the soup, it’ll be ready in under 30 minutes.

 
Thanks Hailey for a unique and delicious soup! Visit her beautiful blog, Hail’s Kitchen, for more of her great recipes.


Printable Recipe

Roasted Cauliflower Soup with White Cheddar Cheese

See post on hailskitchen’s site!
4.40 Mitt(s) 5 Rating(s)5 votes, average: 4.40 out of 55 votes, average: 4.40 out of 55 votes, average: 4.40 out of 55 votes, average: 4.40 out of 55 votes, average: 4.40 out of 5

Prep Time:

Cook Time:

Difficulty: Easy

Servings: 4

4
x

Print Options

Page size Letter 3x5 4x6
Text Size Small Medium Large
Content Include description
Include prep time, etc.
Show image

Description

This light soup is surprisingly rich and hearty. Perfect for the change in the weather!

Ingredients

  • 1 head Cauliflower, Roughly Chopped
  • 2 whole Shallots, Roughly Chopped
  • 3 cloves Garlic, Roughly Chopped
  • 1 Tablespoon Olive Oil
  • 4 cups Chicken Broth
  • 1-½ cup White Cheddar Cheese, Shredded
  • 1 Tablespoon Fresh Thyme, Chopped
  • 1 Tablespoon Coarse Salt

Preparation Instructions

Preheat your oven to 400 degrees. On a cookie sheet, drizzle the cauliflower, shallots and garlic with the olive oil and season with coarse salt. Roast for about 40 minutes or until the cauliflower is fork-tender.

Carefully place the vegetables in a food processor or blender and roughly puree. Texture is good, large chunks are not so good. Place the vegetables in a pot along with the chicken broth. Bring to a boil. Reduce heat and simmer for about ten minutes. Add the cheese, thyme and a good dose of black pepper. Season to taste with salt. Serve with warm, crusty bread and enjoy!


_______________________________________

Be sure to check out Natalie’s own beautiful food blog, Perrys’ Plate, where you can see her growing collection of lovely recipes. There’s always something new to see there. Go visit now!


Profile photo of Natalie | Perry's Plate

Bakery Style Rosemary Flatbread

Posted by in Baking, Step-by-Step Recipes

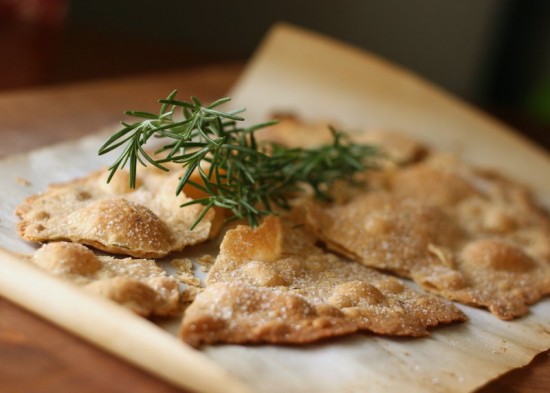
  We’re big hummus eaters at our house. Sometimes the only way I can get my little girls to eat raw vegetables is to place a bowl full of hummus in front of them. Lately I’ve grown weary of carrot sticks and cucumber slices and wanted to find something healthier to dip than a store-bought […]

Profile photo of Natalie | Perry's Plate

Burnt Sugar Almonds

Posted by in Holidays, Step-by-Step Recipes

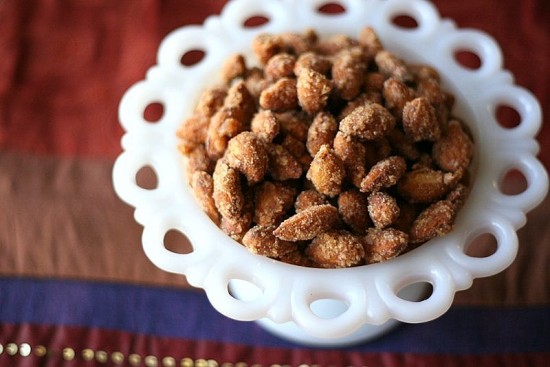
  These Burnt Sugar Almonds (Gebrannte Mandeln), in my opinion, are the only redeeming quality of a crowded shopping mall during the holidays. Luckily, they’re a cinch to make at home and will put all of your scented candles to shame. This recipe was submitted by Tasty Kitchen member Birgit Kerr, who is originally from […]

Profile photo of Natalie | Perry's Plate

Stuffed Acorn Squash with Cranberry Cornbread Stuffing

Posted by in Step-by-Step Recipes

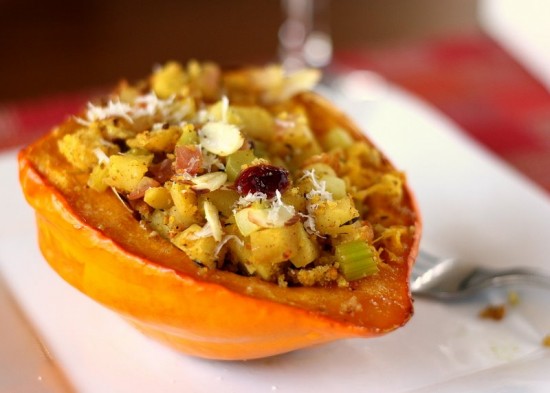
We’re so excited to have a growing group of fantastic contributors here on Tasty Kitchen. Today I’d like to welcome Natalie (Perry’s Plate), who has contributed nearly sixty scrumptious dishes to Tasty Kitchen over the past year. We’ve featured so many of Natalie’s recipes on Tasty Kitchen, many of them are permanently committed to my…