The Pioneer Woman Tasty Kitchen
Profile photo of Natalie | Perry's Plate

Paleo Brownies

Posted by in Baking

Tasty Kitchen Blog: Paleo Brownies. Guest post by Natalie Perry of Perry's Plate, recipe submitted by TK member Elana of Elana's Pantry.

Some days I really want a brownie. Okay, most days I really want a brownie, but making brownies all the time would be a dangerous thing for me. I have very little self-control when there are baked goods sitting on my counter, and I end up eating them for breakfast.

No bueno.

Enter: Paleo Brownies by TK member elanaspantry. Elana is known for her almond flour recipes and paleo-focused blog and cookbooks. I’ve been reading her blog for several years and have had a lot of luck with her recipes. I think she has magical powers.

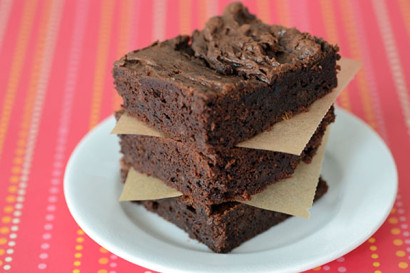
These chocolatey bites were just the thing to curb my brownie cravings without completely falling off the healthy wagon. They’re naturally sweetened, grain-free, and dairy-free. Can’t get much better than that.

Plus, they have a rich, dark, chocolate flavor. I like my chocolate (and my brownies) dark.

Let’s get started!


Tasty Kitchen Blog: Paleo Brownies. Guest post by Natalie Perry of Perry's Plate, recipe submitted by TK member Elana of Elana's Pantry.

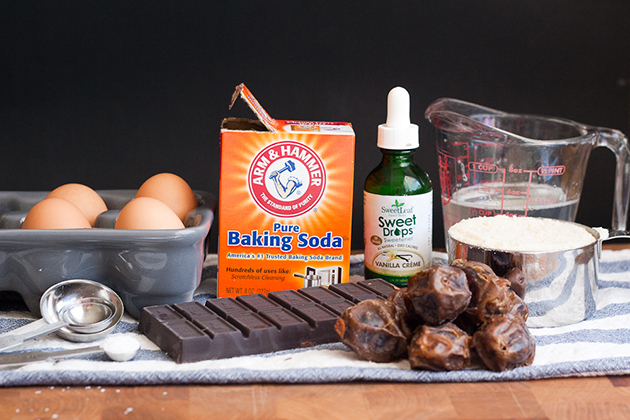
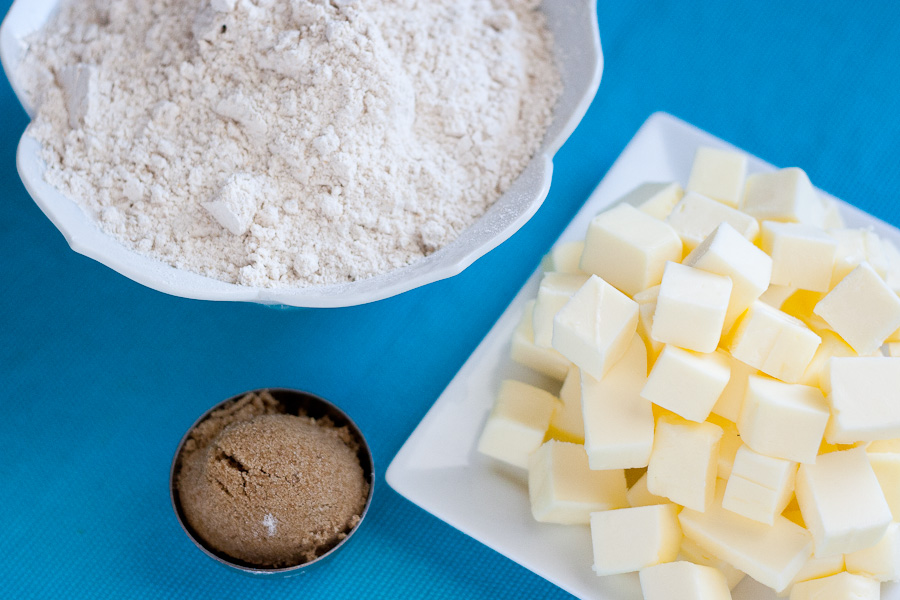
You’ll need eggs, baking soda, vanilla stevia, coconut oil, blanched almond flour, dates, 100% cacao baking chocolate, and salt.


Tasty Kitchen Blog: Paleo Brownies. Guest post by Natalie Perry of Perry's Plate, recipe submitted by TK member Elana of Elana's Pantry.

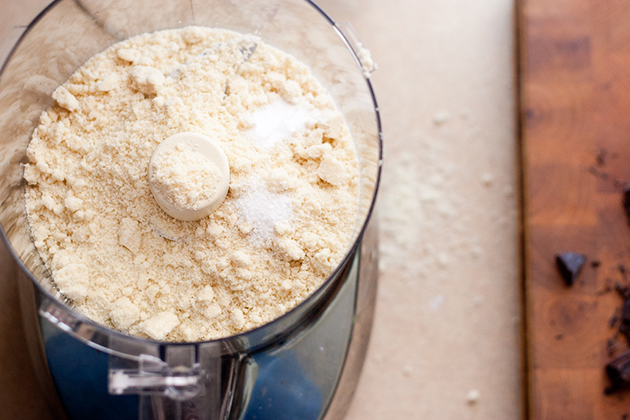
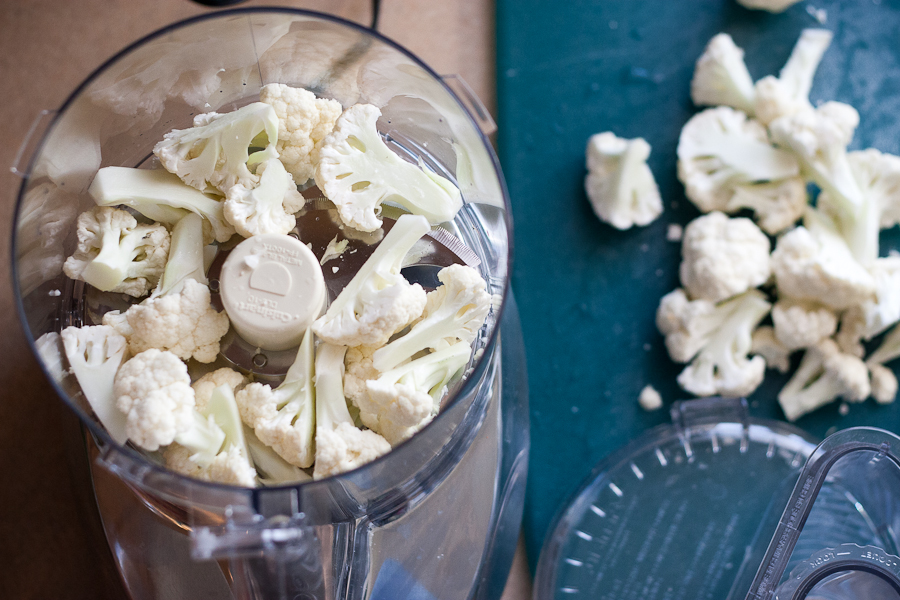
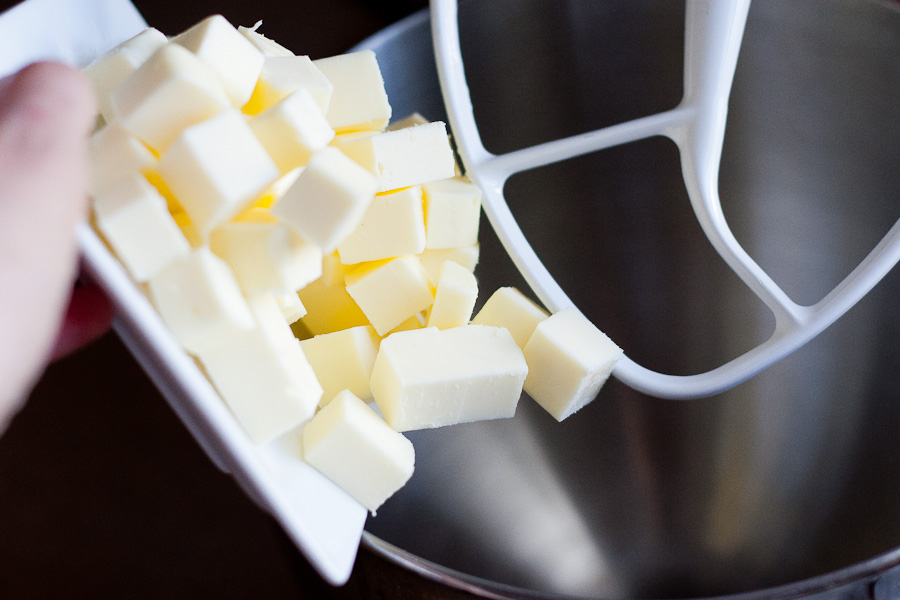
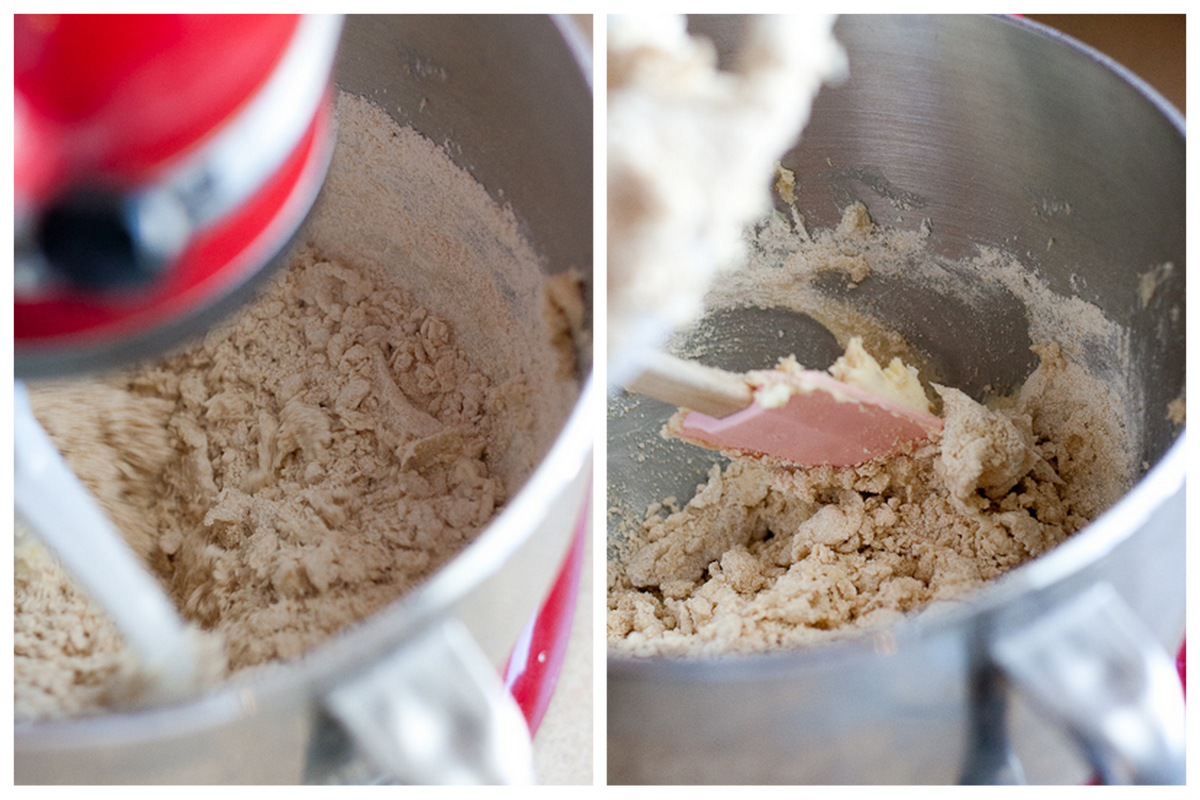
First, put the almond flour, salt, and baking soda in the work bowl of a food processor. My food processor has a 9-cup bowl. You may be able to get away with a 7-cup bowl but I wouldn’t go smaller than that.

Did I mention all of this is done in a food processor? No other dishes or pots and pans needed! If you don’t have a food processor, go buy one.

Joking. (Kinda.)

You can make it without a food processor, but you’ll have to tweak the instructions a bit. I’ll help you out when we get to that point.


Tasty Kitchen Blog: Paleo Brownies. Guest post by Natalie Perry of Perry's Plate, recipe submitted by TK member Elana of Elana's Pantry.

Chop the chocolate into smaller pieces and add them to the food processor.

If you don’t have a food processor, melt the chocolate over low heat and stir it into the almond flour mixture.


Tasty Kitchen Blog: Paleo Brownies. Guest post by Natalie Perry of Perry's Plate, recipe submitted by TK member Elana of Elana's Pantry.

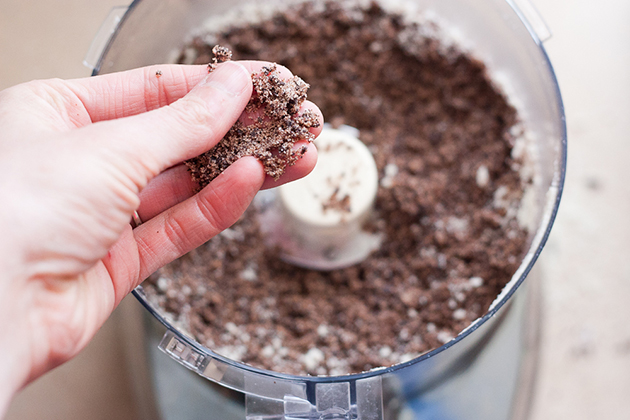
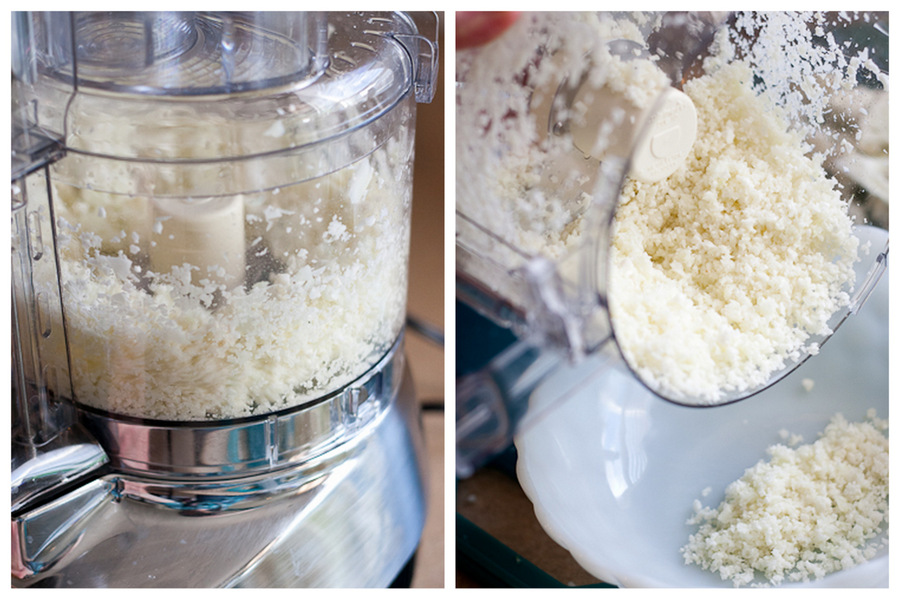
Pulse the mixture until it resembles wet sand and all of the large chocolate chunks have been broken down.


Tasty Kitchen Blog: Paleo Brownies. Guest post by Natalie Perry of Perry's Plate, recipe submitted by TK member Elana of Elana's Pantry.

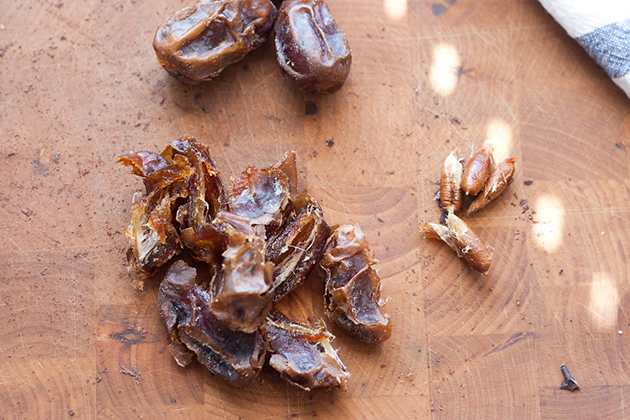
Now for the dates. If your dates aren’t pitted, you’ll need to remove the pits. It’s super easy. Just rip them in half and pull the pits out.


Tasty Kitchen Blog: Paleo Brownies. Guest post by Natalie Perry of Perry's Plate, recipe submitted by TK member Elana of Elana's Pantry.

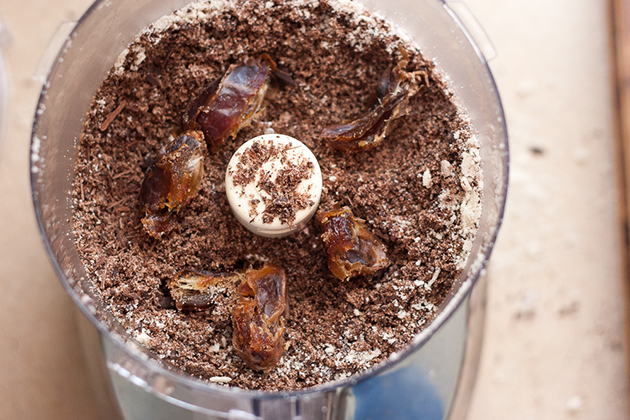
Add the date halves to the food processor.

If you (still) don’t have a food processor, jump in your car and grab one. I’ll wait.


Tasty Kitchen Blog: Paleo Brownies. Guest post by Natalie Perry of Perry's Plate, recipe submitted by TK member Elana of Elana's Pantry.

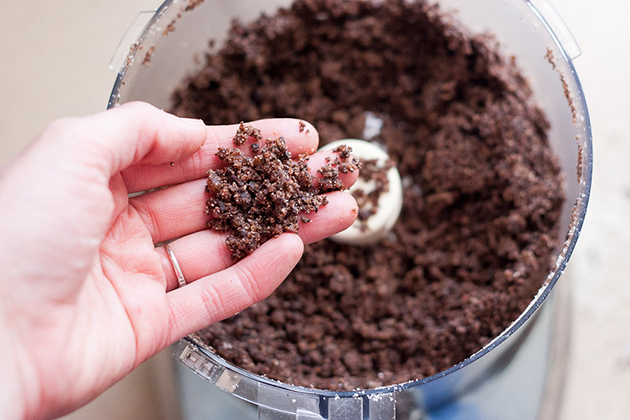
Pulse the mixture until (again) it looks like wet sand and the dates are broken up well.

No processor, still? You’ll need to chop those babies up really small. As in, mince. Then stir them into the mixture.


Tasty Kitchen Blog: Paleo Brownies. Guest post by Natalie Perry of Perry's Plate, recipe submitted by TK member Elana of Elana's Pantry.

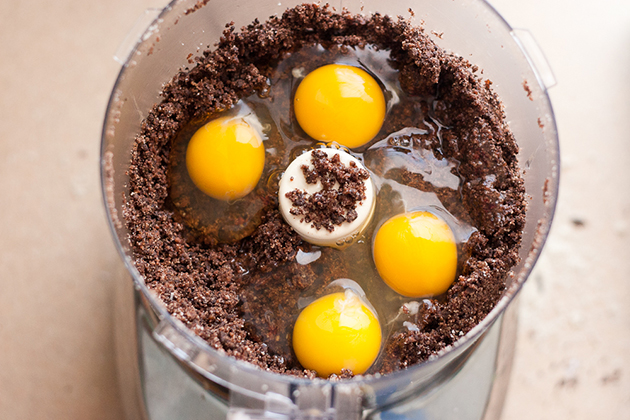
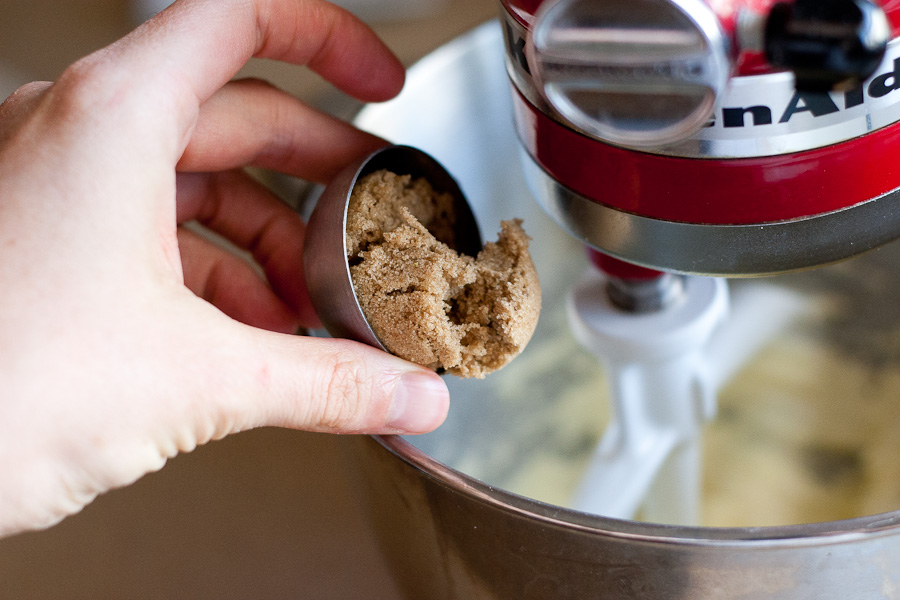
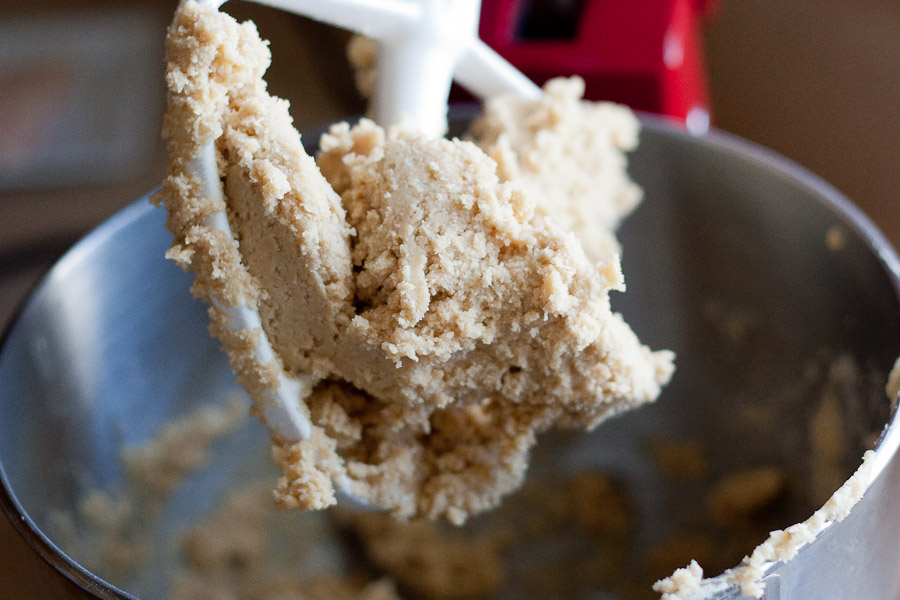
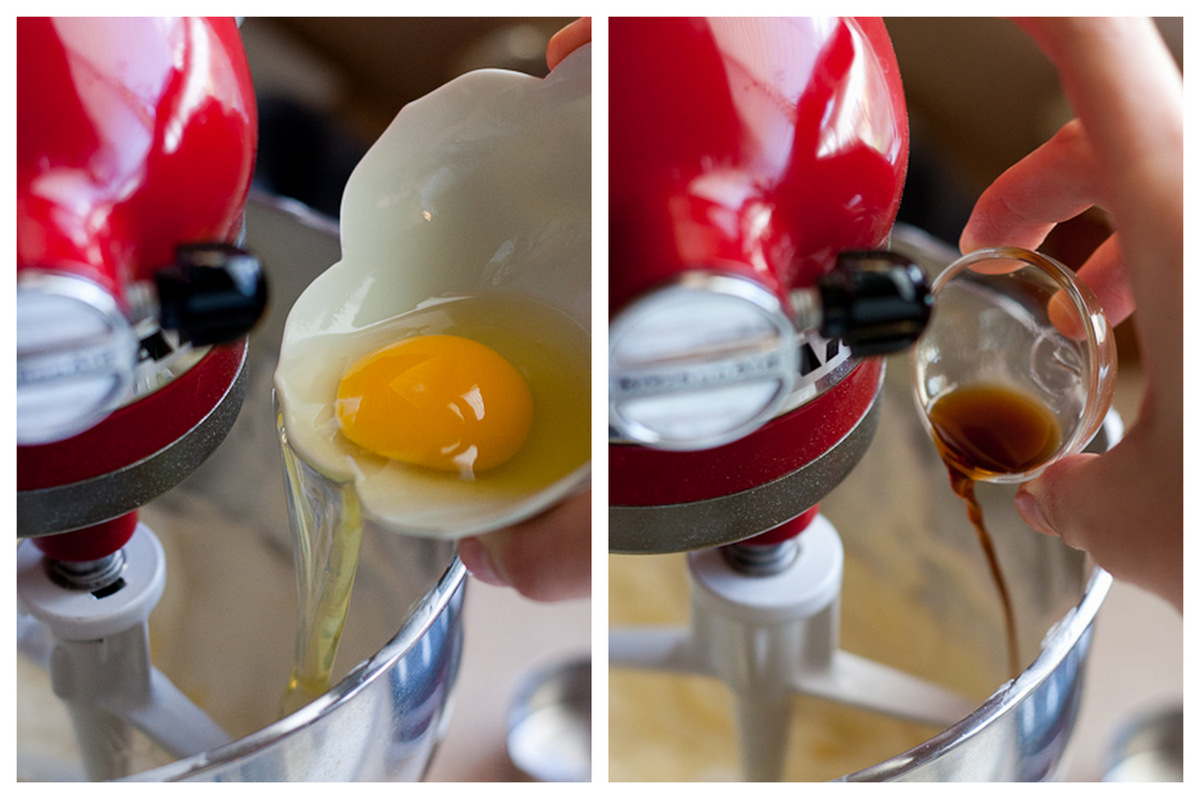
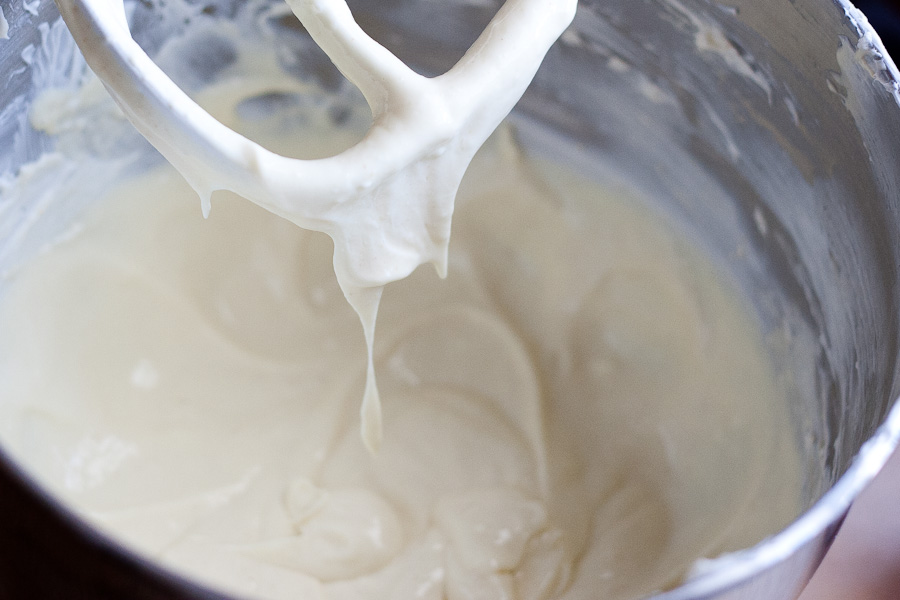
Time for eggs! The recipe suggested three eggs, but my eggs were on the small side, so I used four. Blend the mixture again!


Tasty Kitchen Blog: Paleo Brownies. Guest post by Natalie Perry of Perry's Plate, recipe submitted by TK member Elana of Elana's Pantry.

Add the vanilla stevia.


Tasty Kitchen Blog: Paleo Brownies. Guest post by Natalie Perry of Perry's Plate, recipe submitted by TK member Elana of Elana's Pantry.

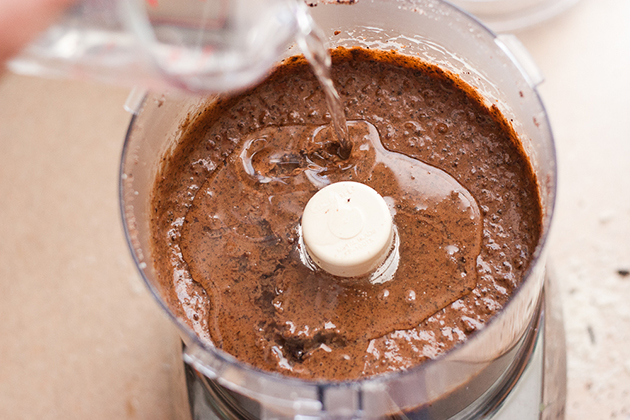
And coconut oil. I’ve made this with coconut oil in both liquid and solid form. It didn’t make a difference in the end.


Tasty Kitchen Blog: Paleo Brownies. Guest post by Natalie Perry of Perry's Plate, recipe submitted by TK member Elana of Elana's Pantry.

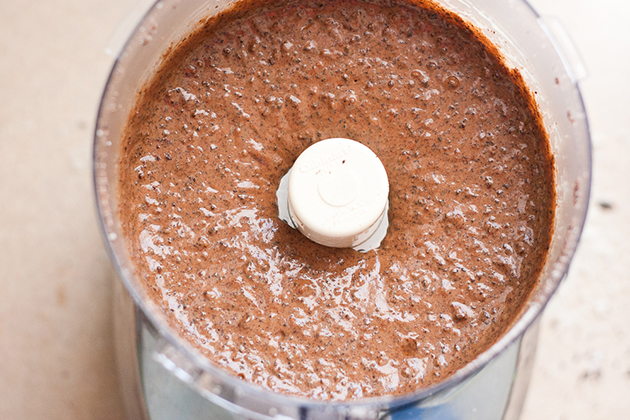
After the last blend, it should be thick and look something like this.


Tasty Kitchen Blog: Paleo Brownies. Guest post by Natalie Perry of Perry's Plate, recipe submitted by TK member Elana of Elana's Pantry.

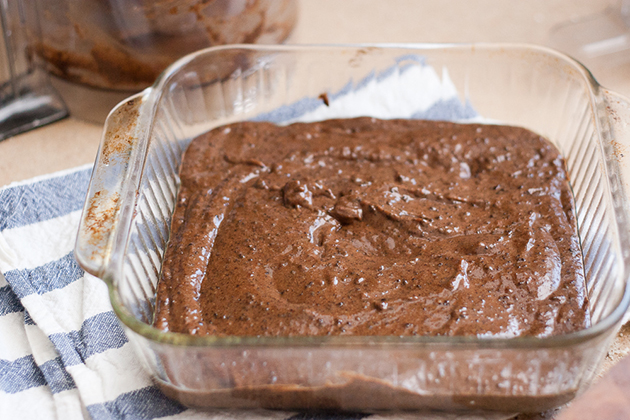
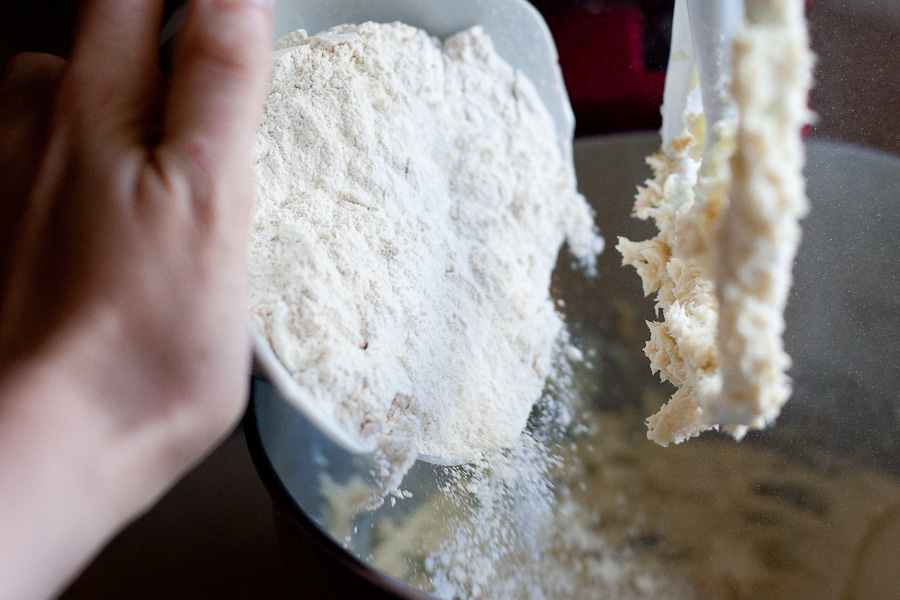
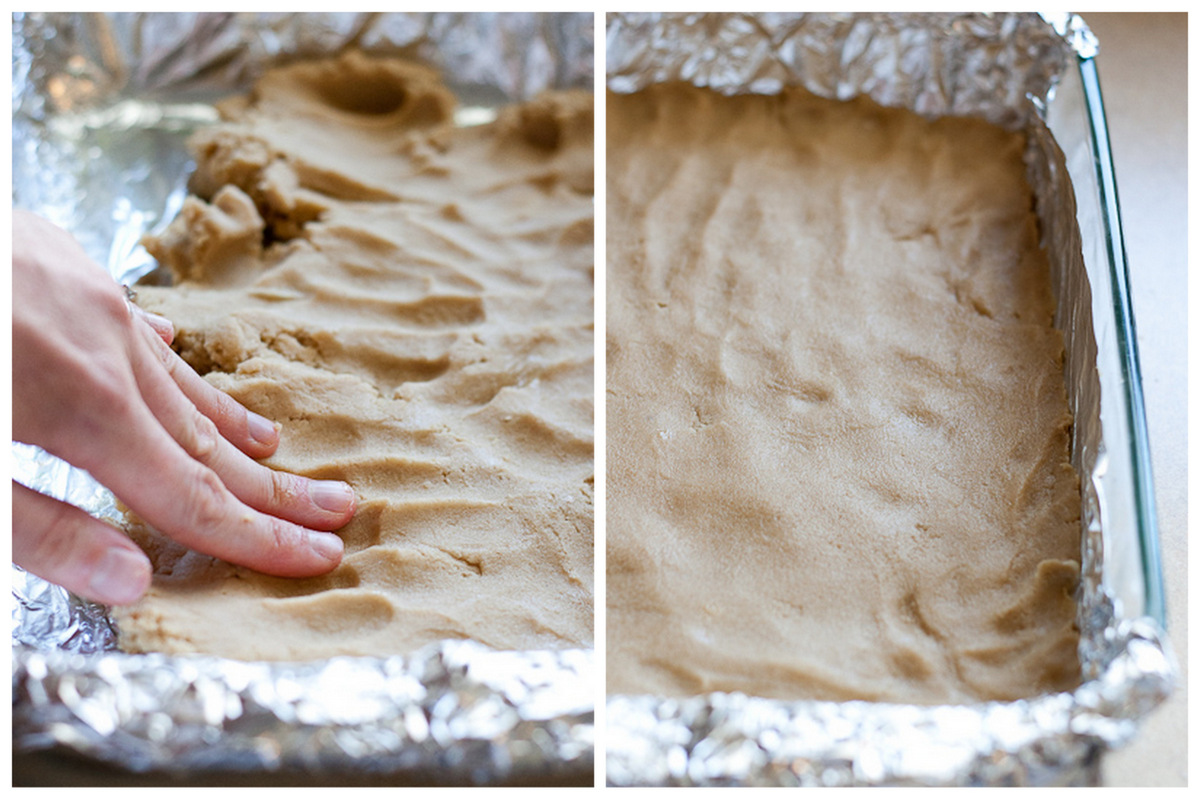
Transfer the mixture into a greased 8 or 9-inch square baking pan. I used coconut oil spray to grease my pan.

Bake as directed in the recipe until an inserted toothpick comes out clean.


Tasty Kitchen Blog: Paleo Brownies. Guest post by Natalie Perry of Perry's Plate, recipe submitted by TK member Elana of Elana's Pantry.

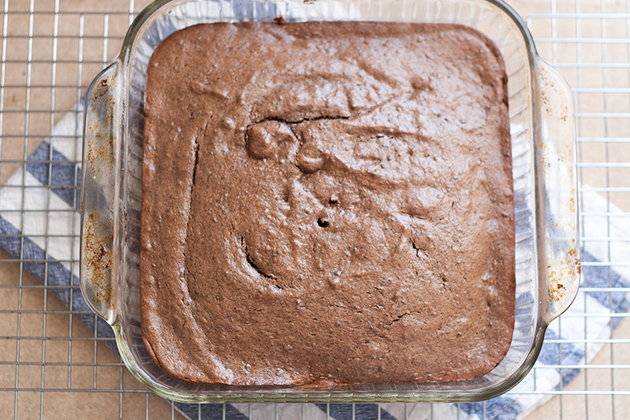
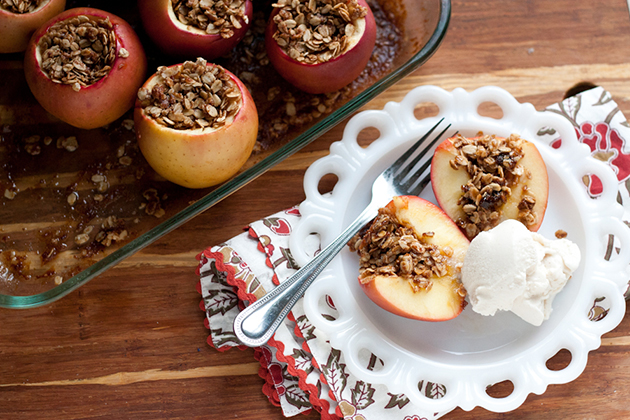
Here they are after baking! I was ready to dive into these when I read, “Allow brownies to cool for 2 hours, then serve.”

DEVASTATION.

After making these a few times, I trust Elana. They taste much better after they’ve been sitting around a while. I thought the flavor was even better the next day. So wait, if you can. If you can’t, I won’t judge.


Tasty Kitchen Blog: Paleo Brownies. Guest post by Natalie Perry of Perry's Plate, recipe submitted by TK member Elana of Elana's Pantry.

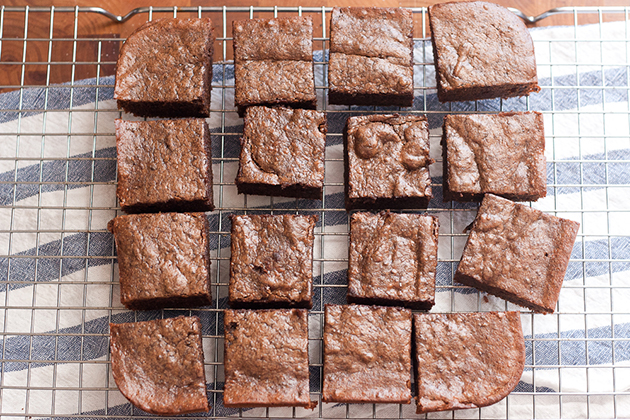
They come out of the pan and slice so well, too!


Tasty Kitchen Blog: Paleo Brownies. Guest post by Natalie Perry of Perry's Plate, recipe submitted by TK member Elana of Elana's Pantry.

Thanks so much, Elana, for a healthier alternative to one of my favorite treats!

Go check out Elana’s TK Recipe Box as well as her blog, Elana’s Pantry for more paleo recipes and naturally-sweetened grain-free treats!

Notes:
These were slightly more cakey than I like my brownies to be, so I decided three eggs was better, even if said eggs were small. Also, if you reduce the baking time by a few minutes the texture is even more fudgy—which is my favorite.


Printable Recipe

Paleo Brownies

See post on elanaspantry’s site!
5.00 Mitt(s) 1 Rating(s)1 vote, average: 5.00 out of 51 vote, average: 5.00 out of 51 vote, average: 5.00 out of 51 vote, average: 5.00 out of 51 vote, average: 5.00 out of 5

Prep Time:

Cook Time:

Difficulty: Easy

Servings: 16

16
x

Print Options

Page size Letter 3x5 4x6
Text Size Small Medium Large
Content Include description
Include prep time, etc.
Show image

Description

These dark chocolate brownies are lightly-sweetened with dates and packed with other Paleo perks such as coconut oil.

Ingredients

  • 1 cup Blanched Almond Flour
  • ¼ teaspoons Celtic Sea Salt
  • ¼ teaspoons Baking Soda
  • 4 ounces, weight Baking Chocolate, 100% Cacao
  • 7  Medjool Dates
  • 3  Eggs
  • ½ cups Coconut Oil
  • ½ teaspoons Vanilla Stevia

Preparation Instructions

Preheat oven to 350°.

In a food processor, pulse together almond flour, salt and baking soda. Add the squares of dark chocolate and pulse until you reach the texture of coarse sand. Add the dates and pulse until you reach the texture of coarse sand. Add eggs and pulse to combine. Add coconut oil and stevia and pulse until mixture is smooth.

Transfer mixture to a greased 8 x 8 inch baking dish. Mixture will be very thick so you’ll need to smooth it with a spatula.

Bake at 350°F for 18-22 minutes. Remove from oven and set dish on a rack. Allow brownies to cool for 2 hours, then serve.


_______________________________________

Be sure to check out Natalie’s own beautiful food blog, Perrys’ Plate, where you can see her growing collection of lovely recipes. There’s always something new to see there. Go visit now!


Profile photo of Natalie | Perry's Plate

Paleo-friendly Cauliflower Fried Rice

Posted by in Step-by-Step Recipes

Tasty Kitchen Blog: Paleo-friendly Cauliflower Fried Rice. Guest post by Natalie Perry of Perry's Plate, recipe submitted by TK member Dani of Expat Cucina.

If you’re familiar with the paleo lifestyle, you might know that this dish doesn’t actually have rice in it. 

The first time I saw cauliflower used as rice, it blew my mind a little. Cauliflower is one of the darlings of the paleo world because it can be manipulated to replace grains in a lot of meals. I’ve used it in place of rice, pureed it to thicken soups, seasoned and roasted it as a vegetarian “steak”, mashed it in place of potatoes, and my favorite, used it as a base for a pizza crust.

No, I’m not joking. And it was all delicious.

Even if you’re not a paleo eater and avoiding grains, dairy, legumes, and sugar for various reasons, replacing grains with vegetables (particularly refined grains) can be a great way to increase nutrient density in a recipe. 

This Paleo-friendly Cauliflower Fried Rice recipe submitted by TK member Dani is a perfect example of grain-swapping. I’m excited to share it with you!

So is the cauliflower. It likes to show off.


Tasty Kitchen Blog: Paleo-friendly Cauliflower Fried Rice. Guest post by Natalie Perry of Perry's Plate, recipe submitted by TK member Dani of Expat Cucina.

I adapted this recipe slightly, adding a few more things (notes below), so you’ll need a whole head of cauliflower, salt, pepper, soy sauce (or tamari), mushrooms, coconut oil, an egg, fresh ginger, garlic, onion, green onion, a tomato, and cilantro.

If you’re a nit-picky paleo, you may not use soy sauce or tamari. I don’t mind it in very small amounts occasionally, but you can also use coconut aminos which is a good substitute. You may be able to find it at Whole Foods or other natural grocery stores.


Tasty Kitchen Blog: Paleo-friendly Cauliflower Fried Rice. Guest post by Natalie Perry of Perry's Plate, recipe submitted by TK member Dani of Expat Cucina.

First, dismantle the cauliflower, and cut it into fairly uniform pieces.


Tasty Kitchen Blog: Paleo-friendly Cauliflower Fried Rice. Guest post by Natalie Perry of Perry's Plate, recipe submitted by TK member Dani of Expat Cucina.

My food processor holds 9 cupd, so I did half the head at a time to ensure even chopping. If you have a larger one you may be able to do it all in one batch.


Tasty Kitchen Blog: Paleo-friendly Cauliflower Fried Rice. Guest post by Natalie Perry of Perry's Plate, recipe submitted by TK member Dani of Expat Cucina.

Pulse several times until the cauliflower is about the size of rice grains. Transfer to a bowl and set aside. 


Tasty Kitchen Blog: Paleo-friendly Cauliflower Fried Rice. Guest post by Natalie Perry of Perry's Plate, recipe submitted by TK member Dani of Expat Cucina.

Next, get the mushrooms prepped by wiping any dirt off with a paper towel, breaking off the stems, and quartering them. I used baby portabellas but any type of mushroom would do. Pulse the mushroom quarters in the food processor like you did the rice and transfer to a separate bowl.

You could just slice them into larger pieces and leave them big, but my little picky eaters aren’t into mushrooms, and I didn’t want to start a dinnertime battle. I minced mine out of survival. 


Tasty Kitchen Blog: Paleo-friendly Cauliflower Fried Rice. Guest post by Natalie Perry of Perry's Plate, recipe submitted by TK member Dani of Expat Cucina.

Next, prep the onion, ginger, and garlic. Peel them all, then cut them into chunks. 


Tasty Kitchen Blog: Paleo-friendly Cauliflower Fried Rice. Guest post by Natalie Perry of Perry's Plate, recipe submitted by TK member Dani of Expat Cucina.

Throw the ginger, garlic, and onion into the food processor and pulse to mince. That machine is going to earn its counterspace today. You could also use a knife. If you wanted. (I didn’t.)


Tasty Kitchen Blog: Paleo-friendly Cauliflower Fried Rice. Guest post by Natalie Perry of Perry's Plate, recipe submitted by TK member Dani of Expat Cucina.

Now you have three bowls of minced ingredients ready to go!

Yes, there is quite a bit of chopping in this recipe (and we’re not quite finished yet), but the dish comes together really easily and quickly. You could do all of the prep a day or two ahead as well.


Tasty Kitchen Blog: Paleo-friendly Cauliflower Fried Rice. Guest post by Natalie Perry of Perry's Plate, recipe submitted by TK member Dani of Expat Cucina.

Alright, time for some heat. In a large saute pan, heat the coconut oil to medium-high heat. 


Tasty Kitchen Blog: Paleo-friendly Cauliflower Fried Rice. Guest post by Natalie Perry of Perry's Plate, recipe submitted by TK member Dani of Expat Cucina.

Add the onion-ginger-garlic mixture and cook it for a minute or two.


Tasty Kitchen Blog: Paleo-friendly Cauliflower Fried Rice. Guest post by Natalie Perry of Perry's Plate, recipe submitted by TK member Dani of Expat Cucina.

Add the mushrooms and cook those for a few minutes as well.


Tasty Kitchen Blog: Paleo-friendly Cauliflower Fried Rice. Guest post by Natalie Perry of Perry's Plate, recipe submitted by TK member Dani of Expat Cucina.

Now for the cauliflower!


Tasty Kitchen Blog: Paleo-friendly Cauliflower Fried Rice. Guest post by Natalie Perry of Perry's Plate, recipe submitted by TK member Dani of Expat Cucina.

Add salt, pepper, and a splash of soy sauce (or tamari). 


Tasty Kitchen Blog: Paleo-friendly Cauliflower Fried Rice. Guest post by Natalie Perry of Perry's Plate, recipe submitted by TK member Dani of Expat Cucina.

Put the lid on, reduce the heat a bit, and let it steam for a few minutes while you finish up the mix-ins.

While the “rice” is finishing up, dice the tomato, and chop the green onion and cilantro. If you hate cilantro, just leave it out. (And then seek help. Ok, not really. But maybe.)


Tasty Kitchen Blog: Paleo-friendly Cauliflower Fried Rice. Guest post by Natalie Perry of Perry's Plate, recipe submitted by TK member Dani of Expat Cucina.

Remember that egg? Well now’s the time to pull it out. Beat it with a fork and cook it in a pan.

You can scramble it if you like, or you can make a flat omelet out of it and slice it up. Your choice.

You could also do it in the saute pan before you throw the vegetables in, but I have emotional meltdowns when I clean eggs out of stainless steel pans. So I do it in a small nonstick skillet. 


Tasty Kitchen Blog: Paleo-friendly Cauliflower Fried Rice. Guest post by Natalie Perry of Perry's Plate, recipe submitted by TK member Dani of Expat Cucina.

I made a flat omelet, rolled it up, then sliced it into ribbons. They’re much prettier than scrambles, but scrambles are perfectly fine.


Tasty Kitchen Blog: Paleo-friendly Cauliflower Fried Rice. Guest post by Natalie Perry of Perry's Plate, recipe submitted by TK member Dani of Expat Cucina.

By now the cauliflower should be finished, so go ahead and drop in the tomato and green onions …


Tasty Kitchen Blog: Paleo-friendly Cauliflower Fried Rice. Guest post by Natalie Perry of Perry's Plate, recipe submitted by TK member Dani of Expat Cucina.

And the cilantro and eggs.


Tasty Kitchen Blog: Paleo-friendly Cauliflower Fried Rice. Guest post by Natalie Perry of Perry's Plate, recipe submitted by TK member Dani of Expat Cucina.

Stir everything gently, and done!

If you want to add more protein, you could stir in some pre-cooked shrimp, chicken, or steak. 


Tasty Kitchen Blog: Paleo-friendly Cauliflower Fried Rice. Guest post by Natalie Perry of Perry's Plate, recipe submitted by TK member Dani of Expat Cucina.

Like I mentioned earlier, you could have dinner on the table in 15 minutes if you prep everything beforehand. I love quick meals like this! 

Thank you, Dani! Be sure to check out Dani’s TK Recipe Box and her blog Expat Cucina for more dinner inspiration!

Recipe notes:
1. I used brown mushrooms, but if that “dirty rice” look bothers you, just use white mushrooms.
2. I added two cloves of garlic, an inch of ginger, and one green onion to boost the flavor of the dish and substituted cilantro for the basil and mint out of personal preference. 
3. I doubled the recipe, but left the mushroom quantity the same.


Printable Recipe

Paleo-friendly Fried Rice (With Cauliflower)

See post on ExpatCucina’s site!
0.00 Mitt(s) 0 Rating(s)0 votes, average: 0.00 out of 50 votes, average: 0.00 out of 50 votes, average: 0.00 out of 50 votes, average: 0.00 out of 50 votes, average: 0.00 out of 5

Prep Time:

Cook Time:

Difficulty: Easy

Servings: 1

1
x

Print Options

Page size Letter 3x5 4x6
Text Size Small Medium Large
Content Include description
Include prep time, etc.
Show image

Description

If you are a paleo-diet person or just on a low-carb diet, this recipe is perfect for you!

Ingredients

  • ⅔ pounds Cauliflower
  • 7 ounces, weight White Mushrooms
  • 2 Tablespoons Chopped Onion
  • ¼ cups Chopped Tomatoes
  • 1 whole Egg
  • 1 whole Egg White
  • 1 teaspoon Coconut Oil
  • 1 dash Soy Sauce
  • 1 pinch Salt And Pepper
  • 1 Tablespoon Chopped Basil And Mint

Preparation Instructions

Wash the cauliflower and place it into your food processor. Pulse it until pieces are the size of rice.

Wash and slice up the mushrooms, chop up onion and tomatoes.

Beat the egg and egg white with a pinch of salt and cook on a hot nonstick skillet (like an omelet). Remove and slice it up.

In the same skillet, heat p the coconut oil. Add the chopped onion and cook until soft. Add the mushrooms and stir around until browned. Next, add the minced cauliflower, a splash of soy sauce and salt and pepper. Cover with a lid and cook for about 5 minutes.

Remove skillet from heat and add the tomatoes. Stir around. Chop up some fresh mint and basil and add it to the pot together with the eggs. Stir everything together and serve immediately. You can garnish the dish with more chopped herbs if desired.


_______________________________________

Be sure to check out Natalie’s own beautiful food blog, Perrys’ Plate, where you can see her growing collection of lovely recipes. There’s always something new to see there. Go visit now!


Profile photo of Natalie | Perry's Plate

Peaches and Cream Crumble Bars

Posted by in Baking, Step-by-Step Recipes

Tasty Kitchen Blog: Peaches and Cream Crumble Bars. Guest post by Natalie Perry of Perry's Plate, recipe submitted by TK member Courtney of Bake, Eat, Repeat.

 
I think I should come clean before I start telling you about this recipe.

Confession: I really don’t like peaches. Like, despise them. I like peaches about as much as Ree likes bananas.

What business did I have making a dessert with peaches? Well, it was all about love, people. The rest of my family loves peaches, and I love my family. I had a few peaches from my last farmers’ market trip that needed to be used ASAP on a day when I needed to make a potluck dessert. It was destiny, I suppose.

This recipe is a combination of a cheesecake and a crumble, and I think you may even substitute a different kind of fruit for the peaches (pears, apples, berries, etc.). Thank you TK member Courtney (who blogs at Bake, Eat, Repeat) for posting these Peaches and Cream Crumble Bars!


Tasty Kitchen Blog: Peaches and Cream Crumble Bars. Guest post by Natalie Perry of Perry's Plate, recipe submitted by TK member Courtney of Bake, Eat, Repeat.

Let’s begin by making a few preparations. Oven at 350ºF? Check. Baking dish lined with foil and greased? Check.


Tasty Kitchen Blog: Peaches and Cream Crumble Bars. Guest post by Natalie Perry of Perry's Plate, recipe submitted by TK member Courtney of Bake, Eat, Repeat.

To make the crust you only need three things: flour, brown sugar, and butter. (If you use unsalted butter, you’ll need to add a bit of salt.)


Tasty Kitchen Blog: Peaches and Cream Crumble Bars. Guest post by Natalie Perry of Perry's Plate, recipe submitted by TK member Courtney of Bake, Eat, Repeat.

Add the butter to a medium-sized mixing bowl. (Or the work bowl of your best friend—er, I mean stand mixer. Please tell me you named yours, too?)


Tasty Kitchen Blog: Peaches and Cream Crumble Bars. Guest post by Natalie Perry of Perry's Plate, recipe submitted by TK member Courtney of Bake, Eat, Repeat.

Add the brown sugar, then beat it to soften the butter and incorporate the sugar.


Tasty Kitchen Blog: Peaches and Cream Crumble Bars. Guest post by Natalie Perry of Perry's Plate, recipe submitted by TK member Courtney of Bake, Eat, Repeat.

Add the flour.


Tasty Kitchen Blog: Peaches and Cream Crumble Bars. Guest post by Natalie Perry of Perry's Plate, recipe submitted by TK member Courtney of Bake, Eat, Repeat.

Mix well, scraping down the sides. At first it’ll look really crumbly. Then it will look like …


Tasty Kitchen Blog: Peaches and Cream Crumble Bars. Guest post by Natalie Perry of Perry's Plate, recipe submitted by TK member Courtney of Bake, Eat, Repeat.

This. A beautiful, somewhat-sticky mass about the consistency of cookie dough.


Tasty Kitchen Blog: Peaches and Cream Crumble Bars. Guest post by Natalie Perry of Perry's Plate, recipe submitted by TK member Courtney of Bake, Eat, Repeat.

Press the dough evenly into the prepared baking dish and bake it for about 20 minutes. It should begin to turn golden brown on the edges and the middle should be set.


Tasty Kitchen Blog: Peaches and Cream Crumble Bars. Guest post by Natalie Perry of Perry's Plate, recipe submitted by TK member Courtney of Bake, Eat, Repeat.

Meanwhile you can start on the other components. First, the filling. You’ll need three ripe peaches, eggs, peach jam (thanks Grandma!), cream cheese, sour cream, flour, and vanilla.

You’ll need some sugar, too. Just pretend it’s in the photo, snuggled in between the sour cream and cream cheese. Yep, right there.


Tasty Kitchen Blog: Peaches and Cream Crumble Bars. Guest post by Natalie Perry of Perry's Plate, recipe submitted by TK member Courtney of Bake, Eat, Repeat.

Put the cream cheese and sour cream into a mixing bowl.


Tasty Kitchen Blog: Peaches and Cream Crumble Bars. Guest post by Natalie Perry of Perry's Plate, recipe submitted by TK member Courtney of Bake, Eat, Repeat.

Beat the daylights out of it until you have a relatively lump-free mixture. Be sure to scrape down the sides a few times to get those tricky parts in the bottom.


Tasty Kitchen Blog: Peaches and Cream Crumble Bars. Guest post by Natalie Perry of Perry's Plate, recipe submitted by TK member Courtney of Bake, Eat, Repeat.

Add the sugar and the flour …


Tasty Kitchen Blog: Peaches and Cream Crumble Bars. Guest post by Natalie Perry of Perry's Plate, recipe submitted by TK member Courtney of Bake, Eat, Repeat.

And the eggs and vanilla.


Tasty Kitchen Blog: Peaches and Cream Crumble Bars. Guest post by Natalie Perry of Perry's Plate, recipe submitted by TK member Courtney of Bake, Eat, Repeat.

Like before, beat the daylights out of it until you have a silky-smooth batter. (Scrape down the sides again!)


Tasty Kitchen Blog: Peaches and Cream Crumble Bars. Guest post by Natalie Perry of Perry's Plate, recipe submitted by TK member Courtney of Bake, Eat, Repeat.

Next, let’s get the topping done. In a small bowl, add the flour, brown sugar, cinnamon, and ginger. (If you use unsalted butter, add 1/4 teaspoon of salt.)


Tasty Kitchen Blog: Peaches and Cream Crumble Bars. Guest post by Natalie Perry of Perry's Plate, recipe submitted by TK member Courtney of Bake, Eat, Repeat.

You’ll need to add a stick of melted butter to this mixture, but you might want to whisk it together first. I didn’t. My daughters (3 and 5) were glued to me asking, “CAN I HELP NOW?” “CAN I TASTE IT?” “CAN I STIR IT UP?” “WHEN ARE YOU GOING TO BE DONE?!” “CAN I HELP NOW?” And somehow I forgot to whisk it. It happens.

I think they have a built-in radar that tells them I’m making a dessert. They usually aren’t glued to me when I make dinner.


Tasty Kitchen Blog: Peaches and Cream Crumble Bars. Guest post by Natalie Perry of Perry's Plate, recipe submitted by TK member Courtney of Bake, Eat, Repeat.

But, see? It all turned out well in the end. The crumble was wetter than I anticipated, but it was easily broken apart with my fingers.


Tasty Kitchen Blog: Peaches and Cream Crumble Bars. Guest post by Natalie Perry of Perry's Plate, recipe submitted by TK member Courtney of Bake, Eat, Repeat.

One last thing: Slice up the peaches. Aren’t they pretty?


Tasty Kitchen Blog: Peaches and Cream Crumble Bars. Guest post by Natalie Perry of Perry's Plate, recipe submitted by TK member Courtney of Bake, Eat, Repeat.

Alright. Assembly time. Grab the baked crust and smear some peach jam over it.


Tasty Kitchen Blog: Peaches and Cream Crumble Bars. Guest post by Natalie Perry of Perry's Plate, recipe submitted by TK member Courtney of Bake, Eat, Repeat.

Grab some helpers (or your own two hands) and lay the peaches on top.


Tasty Kitchen Blog: Peaches and Cream Crumble Bars. Guest post by Natalie Perry of Perry's Plate, recipe submitted by TK member Courtney of Bake, Eat, Repeat.

My 5-year-old enjoys lining things up in nice, even rows. (Ahem. She gets that from her mother.) This is how ours turned out. We used two yellow peaches and one white one.


Tasty Kitchen Blog: Peaches and Cream Crumble Bars. Guest post by Natalie Perry of Perry's Plate, recipe submitted by TK member Courtney of Bake, Eat, Repeat.

You know that batter you’d like to put your face in? Pour that over the peaches. Then lick that bowl clean. I didn’t make it into the closet in time so I had to share with my minions.


Tasty Kitchen Blog: Peaches and Cream Crumble Bars. Guest post by Natalie Perry of Perry's Plate, recipe submitted by TK member Courtney of Bake, Eat, Repeat.

Speaking of minions, they’re awfully good at sprinkling the crumble mixture over the cheesecake batter.


Tasty Kitchen Blog: Peaches and Cream Crumble Bars. Guest post by Natalie Perry of Perry's Plate, recipe submitted by TK member Courtney of Bake, Eat, Repeat.

My younger one ate more than she sprinkled, but we had enough to cover the whole thing.

Time to bake! Throw it in the oven for 30-40 minutes or until the middle sets up.


Tasty Kitchen Blog: Peaches and Cream Crumble Bars. Guest post by Natalie Perry of Perry's Plate, recipe submitted by TK member Courtney of Bake, Eat, Repeat.

Let it cool for 15-20 minutes before you dig in. I was able to lift the foil and slide the whole thing onto a cutting board.


Tasty Kitchen Blog: Peaches and Cream Crumble Bars. Guest post by Natalie Perry of Perry's Plate, recipe submitted by TK member Courtney of Bake, Eat, Repeat.

I love how beautiful the layers are in these!


Tasty Kitchen Blog: Peaches and Cream Crumble Bars. Guest post by Natalie Perry of Perry's Plate, recipe submitted by TK member Courtney of Bake, Eat, Repeat.

And I even liked how they tasted. Yes, even the peach-hater liked them! Like cheesecake, they get even better when they sit in the fridge and cool for several hours.

Thanks again Courtney! Be sure to check out Courtney’s TK recipe box and her recipes over on her blog, Bake, Eat, Repeat.

Recipe alterations: I replaced all of the flour with whole wheat pastry flour, reduced all of the sugars by half, used salted butter and omitted the added salt, and omitted the step of brushing the crust with melted butter. (I didn’t think that last one was necessary.)


Printable Recipe

Peaches and Cream Crumble Bars

See post on Courtney’s site!
4.75 Mitt(s) 4 Rating(s)4 votes, average: 4.75 out of 54 votes, average: 4.75 out of 54 votes, average: 4.75 out of 54 votes, average: 4.75 out of 54 votes, average: 4.75 out of 5

Prep Time:

Cook Time:

Difficulty: Easy

Servings: 24

24
x

Print Options

Page size Letter 3x5 4x6
Text Size Small Medium Large
Content Include description
Include prep time, etc.
Show image

Description

Sweet juicy peaches paired with tender shortbread, rich custard and spiced crumble. It’s summer in a bar.

Ingredients

  • FOR THE SHORTBREAD:
  • 2 sticks Unsalted Butter, Cut Into Small Chunks
  • ¼ cups Brown Sugar
  • ½ teaspoons Kosher Salt
  • 2 cups Flour
  • FOR THE FILLING:
  • 1 Tablespoon Butter
  • ½ cups Peach Jam
  • 3  Large Peaches, Pitted And Thinly Sliced
  • 12 ounces, weight Cream Cheese, Softened
  • ¼ cups Sour Cream
  • ½ cups Sugar
  • 1 Tablespoon Flour
  • 2  Eggs
  • 1 teaspoon Vanilla
  • FOR THE CRUMB TOPPING:
  • 1 cup Flour
  • ¼ cups Sugar
  • ¼ cups Brown Sugar
  • ½ teaspoons Ginger
  • 1 teaspoon Cinnamon
  • ¼ teaspoons Salt
  • 1 stick Unsalted Butter, melted

Preparation Instructions

1. For the shortbread crust: Preheat the oven to 350 F. Line a 13 x 9 inch baking dish with foil, then grease the foil on all sides. Set the dish aside. In the bowl of an electric mixer, beat the butter until it begins to soften, about 30 seconds. Add sugar and salt and beat on low speed until just combined. Add the flour and beat on low speed until incorporated then increase to high speed and beat until a cohesive dough is formed. Using your fingers, press the dough into the baking dish and bake for 20 minutes or until puffy and golden brown. When it’s done remove it from the oven and start the next step.

2. For the filling: Brush shortbread crust with 1 tablespoon of melted butter. Spread peach jam evenly over the crust, then layer with sliced peaches. To make the cream layer, put the cream cheese and sour cream in a bowl and beat on high speed until smooth. Add sugar and 1 tablespoon flour and beat another 30 seconds. Add eggs and vanilla and beat until smooth and thoroughly combined. Pour cheesecake mixture over peach slices. Set aside.

3. For the topping: In a small bowl, combine flour, sugars, ginger, cinnamon, and salt. Pour melted butter over all of it and use your fingers to mix everything together until coarse crumbles form. Sprinkle over the top of the cheesecake layer. Bake again at 350 F for 30 minutes or until crumbles are golden brown and center is set.


_______________________________________

Be sure to check out Natalie’s own beautiful food blog, Perrys’ Plate, where you can see her growing collection of lovely recipes. There’s always something new to see there. Go visit now!


Profile photo of Natalie | Perry's Plate

Pepitas Shrimp Skewers

Posted by in Step-by-Step Recipes

Tasty Kitchen Blog: Pepitas Shrimp Skewers. Guest post by Natalie Perry of Perry's Plate, recipe submitted by TK member Lindsay of Eat 80/20.

 
The sun seems to be shining more lately, and after all of the freezing cold weather most of us here in the US have been experiencing (snow in San Francisco?!) I’m definitely ready for warmer weather. And flip flops. And throwing everything we eat on the grill. I was drawn to this recipe for Pepitas Shrimp Skewers because I’m antsy to start grilling. And shrimp seems like a spring-y type of food, no?

TK member Eat 80/20 Dietitian (Lindsay) who blogs at Eighty Twenty is a registered dietitian and has put together some incredible shrimp skewers. My favorite part is how she incorporates ground pepitas (one of my favorite seeds) in the shrimp marinade. These skewers would be a flavorful, healthy addition to your next get-together, but they’ll go fast. It’s a good thing this recipe makes a lot!


Tasty Kitchen Blog: Pepitas Shrimp Skewers. Guest post by Natalie Perry of Perry's Plate, recipe submitted by TK member Lindsay of Eat 80/20.

To make these skewers you’ll need 50 or up to 75 medium shrimp (peeled, tail-on), cotija or Parmesan cheese, roasted pepitas (shelled pumpkin seeds), salt, one anaheim pepper, some garlic, plain yogurt, red wine vinegar, heat-safe oil (I used grapeseed instead of canola), pepper, and bunch of fresh cilantro.


Tasty Kitchen Blog: Pepitas Shrimp Skewers. Guest post by Natalie Perry of Perry's Plate, recipe submitted by TK member Lindsay of Eat 80/20.

First you’ll need to roast the pepper. Anaheim peppers are longer and lighter in color than green bell peppers. They’re very mild, too. If you can’t find fresh Anaheim peppers in your grocery store, simply use a 4-ounce can of diced green chiles instead.

Slice the pepper in half, remove the seeds and white veins and place cut-side down on a foil lined baking sheet. Put it under the oven broiler for 8–10 minutes until the skins have large black spots.


Tasty Kitchen Blog: Pepitas Shrimp Skewers. Guest post by Natalie Perry of Perry's Plate, recipe submitted by TK member Lindsay of Eat 80/20.

When they come out of the oven, fold the foil around the peppers and let them sit for 5–10 minutes to steam. This should make the peel come off very easily. If you don’t get all the peel off, don’t sweat it.


Tasty Kitchen Blog: Pepitas Shrimp Skewers. Guest post by Natalie Perry of Perry's Plate, recipe submitted by TK member Lindsay of Eat 80/20.

Get the cilantro ready by taking the bunch and slicing it off where the leaves start to get really dense, avoiding the thicker stems. Give the leaves a rough chop.


Tasty Kitchen Blog: Pepitas Shrimp Skewers. Guest post by Natalie Perry of Perry's Plate, recipe submitted by TK member Lindsay of Eat 80/20.

Get the cotija cheese ready by crumbling it with your fingers. Have you ever had cotija cheese? The first time I tried it I thought I’d died and gone to Mexican cheese heaven. I love this cheese. It’s salty and fairly dry like feta, but the taste isn’t quite as strong. You could use feta or even fresh Parmesan cheese if you can’t find cotija.


Tasty Kitchen Blog: Pepitas Shrimp Skewers. Guest post by Natalie Perry of Perry's Plate, recipe submitted by TK member Lindsay of Eat 80/20.

Pour the yogurt into a bowl and give it a whisk to loosen it up.


Tasty Kitchen Blog: Pepitas Shrimp Skewers. Guest post by Natalie Perry of Perry's Plate, recipe submitted by TK member Lindsay of Eat 80/20.

Grab your food processor or blender and add the roasted chile, pepitas, garlic, salt, pepper, oil, vinegar, and cheese.


Tasty Kitchen Blog: Pepitas Shrimp Skewers. Guest post by Natalie Perry of Perry's Plate, recipe submitted by TK member Lindsay of Eat 80/20.

Blend or process until no large chunks remain. Doesn’t look so appetizing, but smells great already!


Tasty Kitchen Blog: Pepitas Shrimp Skewers. Guest post by Natalie Perry of Perry's Plate, recipe submitted by TK member Lindsay of Eat 80/20.

Add the cilantro and blend until smooth. At this point I really think you could use this as a salad dressing.


Tasty Kitchen Blog: Pepitas Shrimp Skewers. Guest post by Natalie Perry of Perry's Plate, recipe submitted by TK member Lindsay of Eat 80/20.

Dump the lovely green mixture into the bowl with the yogurt.


Tasty Kitchen Blog: Pepitas Shrimp Skewers. Guest post by Natalie Perry of Perry's Plate, recipe submitted by TK member Lindsay of Eat 80/20.

Whisk it together.


Tasty Kitchen Blog: Pepitas Shrimp Skewers. Guest post by Natalie Perry of Perry's Plate, recipe submitted by TK member Lindsay of Eat 80/20.

Now dump in all of the shrimp. (See how easy this is?) Stir to ensure the shrimp is coated. I used a little over 50 shrimp, but I think there is enough marinade for up to 75 shrimp.


Tasty Kitchen Blog: Pepitas Shrimp Skewers. Guest post by Natalie Perry of Perry's Plate, recipe submitted by TK member Lindsay of Eat 80/20.

Time to get your hands dirty! Thread shrimp carefully onto skewers. I like to skewer them in two places so they’re more secure and easier to flip on the grill. If you’re using bamboo skewers, make sure to soak them in water for 30 minutes so they don’t burn.


Tasty Kitchen Blog: Pepitas Shrimp Skewers. Guest post by Natalie Perry of Perry's Plate, recipe submitted by TK member Lindsay of Eat 80/20.

I ended up with 6 skewers with 8 shrimp per skewer, plus half of another skewer.


Tasty Kitchen Blog: Pepitas Shrimp Skewers. Guest post by Natalie Perry of Perry's Plate, recipe submitted by TK member Lindsay of Eat 80/20.

Heat your grill up to about medium heat and place skewers on the grates a few at a time. Grill for about 3-4 minutes per side or until the shrimp are no longer gray or translucent. Be careful not to overcook them or they’ll be rubbery. The recipe says 15 minutes total, but mine were done in about half that time. (My grill might have been on the hot side. So keep your eye on them.)

If you don’t have an outdoor BBQ grill, using a grill pan on the stove does a pretty good job. You don’t even have to wait for the snow to melt! I’ve got a cast-iron grill pan that I love and have been using for years. You could even broil them in the oven, turning them once during cooking.


Tasty Kitchen Blog: Pepitas Shrimp Skewers. Guest post by Natalie Perry of Perry's Plate, recipe submitted by TK member Lindsay of Eat 80/20.

Put the skewers on a platter and serve with lime wedges. Y-U-M.

As I was thinking of something to serve these with I remembered a recipe I ran across in a book for roasted chile and goat cheese tacos. So I threw a few extra Anaheim chiles on the roasting pan, grabbed some goat cheese and homemade corn tortillas …


Tasty Kitchen Blog: Pepitas Shrimp Skewers. Guest post by Natalie Perry of Perry's Plate, recipe submitted by TK member Lindsay of Eat 80/20.

And ended up with one of the best tacos I’ve had in my life. These shrimp are fantastic by themselves, but whoa, nelly, are they great in tacos. Especially these ones.

Thanks Lindsay for a great new way to cook shrimp! Her blog, Eat 80/20, is all about balance—eating healthy 80% of the time lets you cheat a little for the remaining 20%. In there, you’ll find helpful nutrition tips in addition to a great collection of recipes.


Printable Recipe

Pepitas Shrimp Skewers

See post on Lindsay {Eighty Twenty Dietitian}’s site!
5.00 Mitt(s) 1 Rating(s)1 vote, average: 5.00 out of 51 vote, average: 5.00 out of 51 vote, average: 5.00 out of 51 vote, average: 5.00 out of 51 vote, average: 5.00 out of 5

Prep Time:

Cook Time:

Difficulty: Easy

Servings: 6

6
x

Print Options

Page size Letter 3x5 4x6
Text Size Small Medium Large
Content Include description
Include prep time, etc.
Show image

Description

Pepitas are pumpkin seeds without the shell! You can roast and shell your own (maybe after a pumpkin carving?) or purchase them pre-roasted without shells (look in the bulk section of your grocery store). As with any seed or nut, they have lots of healthy fats and fiber!

Ingredients

  • 1 whole Anaheim Chile, Roasted, Peeled And Seeded
  • ¼ cups Roasted Pepitas
  • 1 whole Garlic Clove, Pressed And Minced
  • ¼ teaspoons Ground Black Pepper
  • 1 teaspoon Salt
  • ½ cups Canola Oil
  • 2 Tablespoons Red Wine Vinegar
  • 3 Tablespoons Grated Cotija Cheese (or Shredded Parmesan)
  • 1 bunch Cilantro, Stemmed
  • 1-½ cup Lowfat Yogurt
  • 50 whole Shrimp, Peeled, Deveined, Tail-on

Preparation Instructions

Place all ingredients except cilantro, yogurt and shrimp in a blender or food processor. Blend about 10 seconds, then add cilantro little by little until blended smooth (reserve some cilantro for garnish if desired). Place yogurt in a medium stainless steel bowl and mix with a wire whip until smooth. Add the blended ingredients and mix thoroughly.

Add shrimp to the mixture. Refrigerate at least 3 hours. Twenty minutes prior to cooking, soak bamboo skewers in water (to prevent burning).

Preheat grill. Skewer 5-6 shrimp on each stick. Cook over medium heat until done (about 10-15 minutes).

Nutrition info per 2 tablespoons pepitas dressing/marinade: 101 calories, 6 g fat, 3 g protein, 3 g carbohydrates

Nutrition info per 8-9 shrimp: 55 calories, 1 g fat, 11.5 g protein, 0 g carbohydrate, 107mg cholesterol


_______________________________________

Be sure to check out Natalie’s own beautiful food blog, Perrys’ Plate, where you can see her growing collection of lovely recipes. There’s always something new to see there. Go visit now!


Profile photo of Natalie | Perry's Plate

Quick and Easy Baked Apples

Posted by in Baking

We had some friends over for dinner recently, and I searched for a simple and delicious dessert to make. I also wanted something that screamed fall.

Profile photo of Natalie | Perry's Plate

Quick and Easy Gyros

Posted by in Step-by-Step Recipes

  If there is such a thing as an easy gyro, it must mean that some shortcuts have been made. I’m willing to bet very few of you own a vertical gyro grill. I do not. And if you glanced at the recipe, you might notice that instead of lamb, these gyros are made with […]

Profile photo of Natalie | Perry's Plate

Roasted Cauliflower Soup

Posted by in Step-by-Step Recipes

  Cauliflower, to me, is a humble vegetable. It’s rarely the star of the meal, it doesn’t have a flashy color or a strong flavor, and let’s face it—its complexion could use some work. Despite its frumpy characteristics, cauliflower has a few tricks up its sleeve. Case in point: this Roasted Cauliflower Soup with White […]

Profile photo of Natalie | Perry's Plate

Scalloped Hasselback Sweet Potatoes

Posted by in Holidays

This Scalloped Hasselback Sweet Potatoes recipe submitted by TK member Tove is the newest addition to my special occasion recipe file.