The Pioneer Woman Tasty Kitchen
Profile photo of Erica Lea

Outrageous Garlic Soup

Posted by in Step-by-Step Recipes

Tasty Kitchen Blog: Outrageous Garlic Soup. Guest post by Erica Kastner of Cooking for Seven, recipe submitted by TK member n8tivenyer.

 
Are you ready for this?

Garlic. Onions. Cream. White wine. Oh, yes. These are just a few of the ingredients that combine to make this wonderful, creamy soup, brought to us by n8tivenyer.

I made this soup for our family. It was a big hit. Dad loved it—had several bowls of it. Even Grandma said it was very good.


Tasty Kitchen Blog: Outrageous Garlic Soup. Guest post by Erica Kastner of Cooking for Seven, recipe submitted by TK member n8tivenyer.

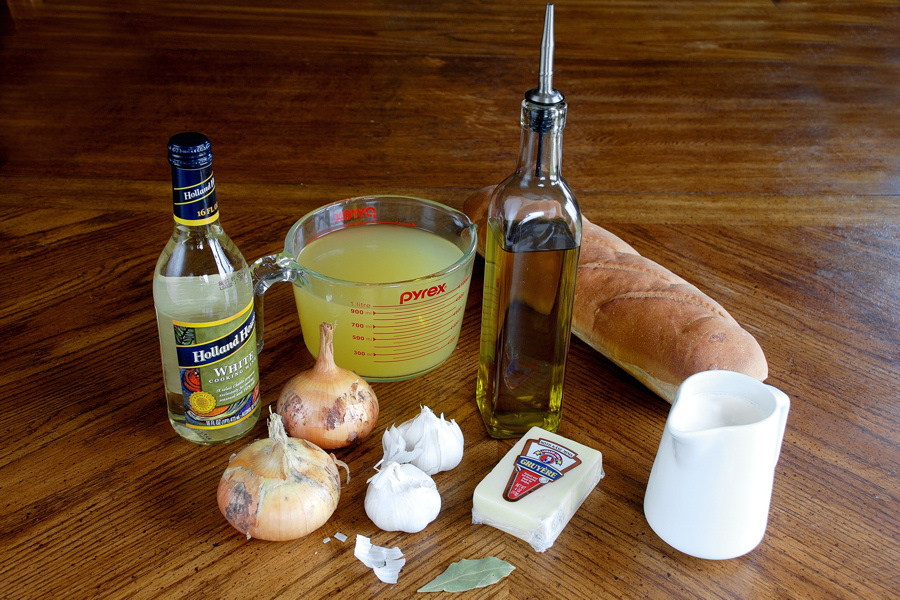
Here’s what you’ll need: white wine, chicken stock, olive oil, French bread, heavy cream, Gruyère cheese, garlic, onions, and a bay leaf.


Tasty Kitchen Blog: Outrageous Garlic Soup. Guest post by Erica Kastner of Cooking for Seven, recipe submitted by TK member n8tivenyer.

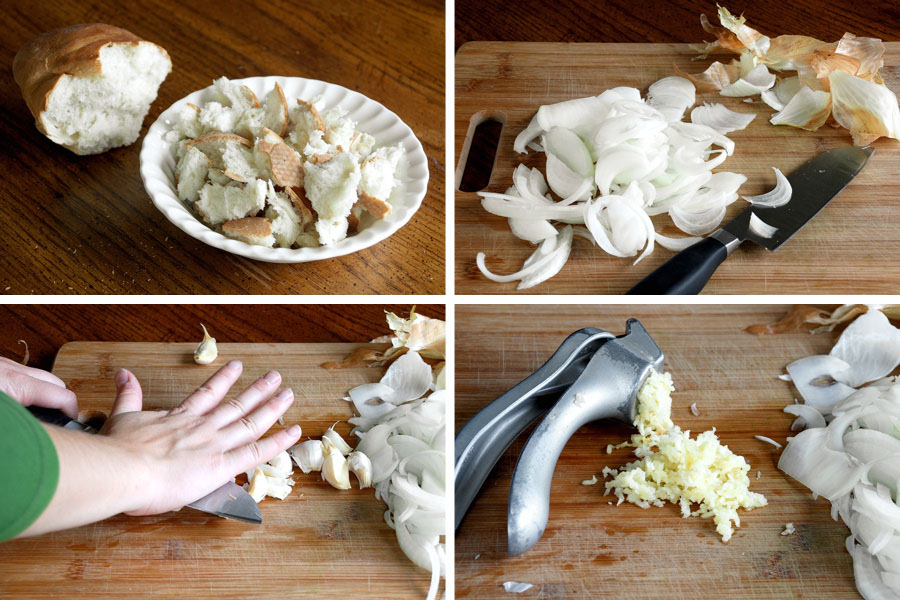
Begin by prepping your ingredients. Tear the bread into small pieces. Slice the onion thinly. Smash the garlic, peel, and crush with a garlic press.


Tasty Kitchen Blog: Outrageous Garlic Soup. Guest post by Erica Kastner of Cooking for Seven, recipe submitted by TK member n8tivenyer.

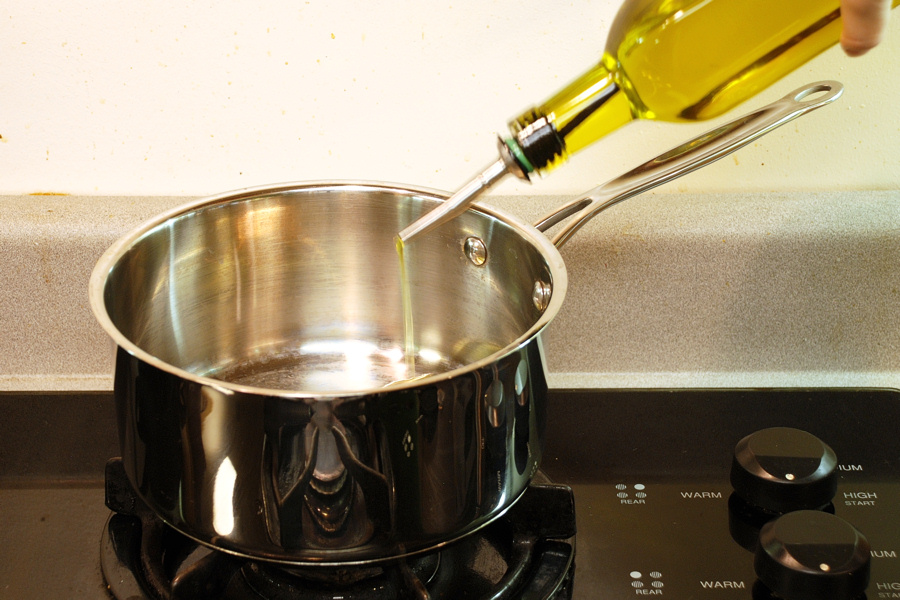
Heat the olive oil in a pan set over medium heat.


Tasty Kitchen Blog: Outrageous Garlic Soup. Guest post by Erica Kastner of Cooking for Seven, recipe submitted by TK member n8tivenyer.

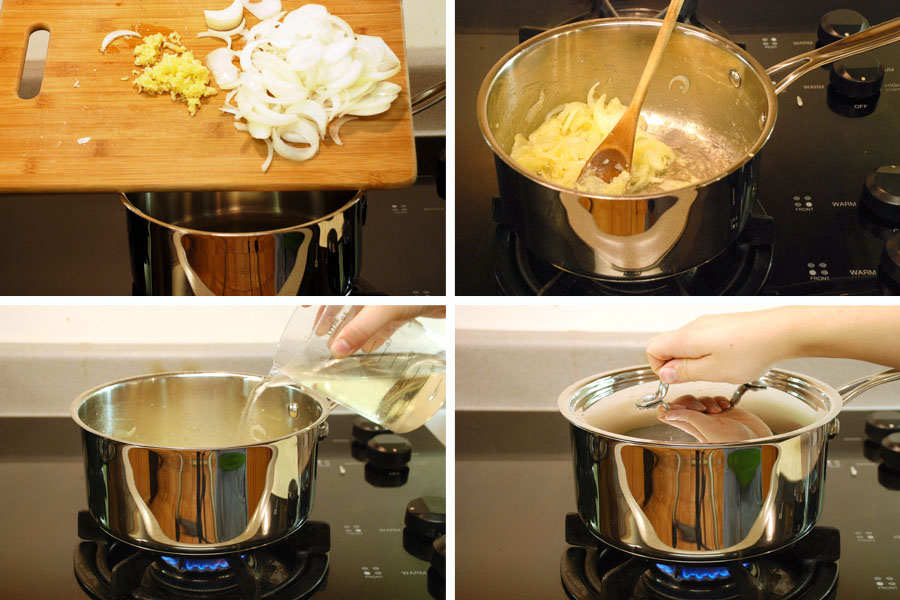
Add the onions and garlic. Cook until the garlic and onions begin to caramelize, about 10-12 minutes. Add the wine, cover, reduce heat, and cook, stirring occasionally, for 10 minutes.


Tasty Kitchen Blog: Outrageous Garlic Soup. Guest post by Erica Kastner of Cooking for Seven, recipe submitted by TK member n8tivenyer.

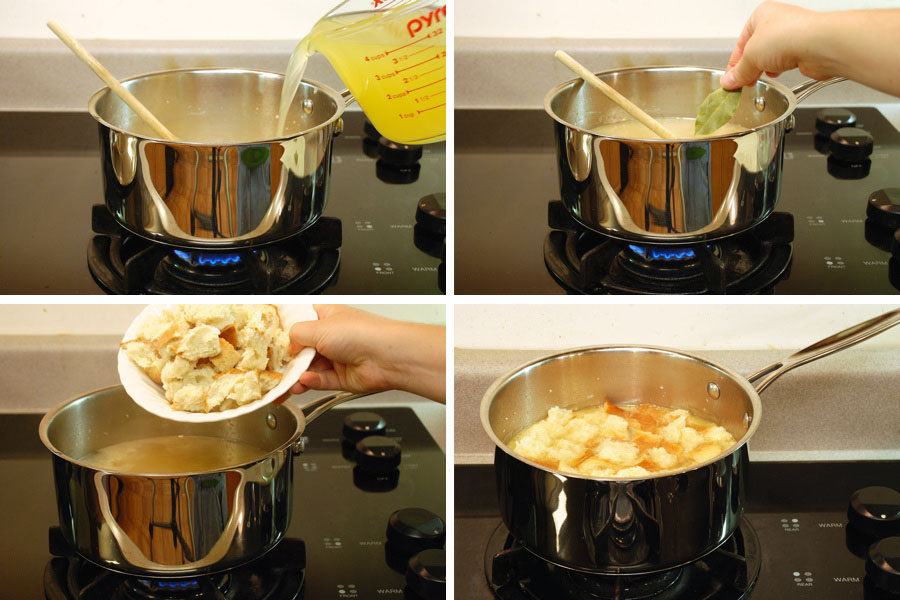
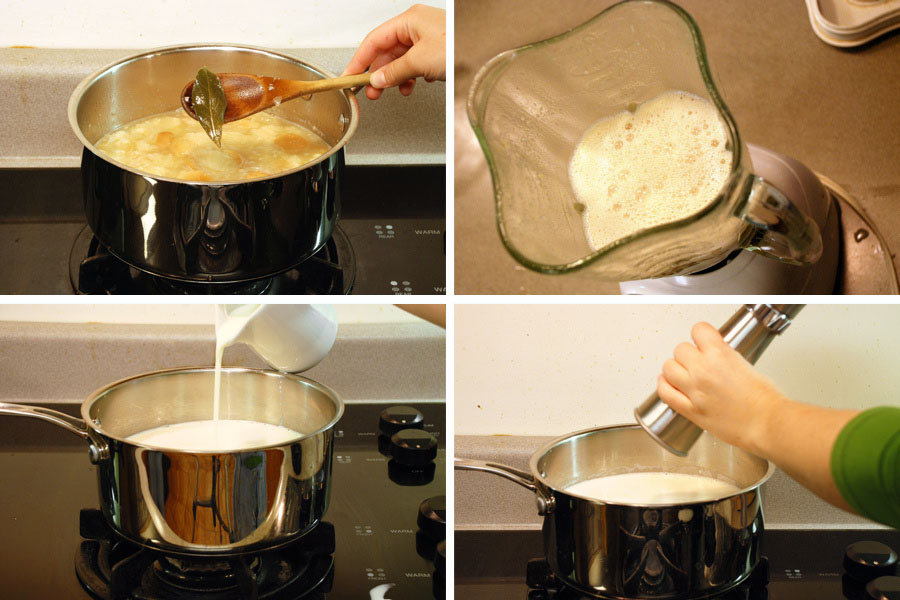
Add the chicken stock and bay leaf. Bring to boil, reduce heat, and simmer for 30 minutes. Now for some magic: add the bread, remove from heat, and allow to soak for 10 minutes.


Tasty Kitchen Blog: Outrageous Garlic Soup. Guest post by Erica Kastner of Cooking for Seven, recipe submitted by TK member n8tivenyer.

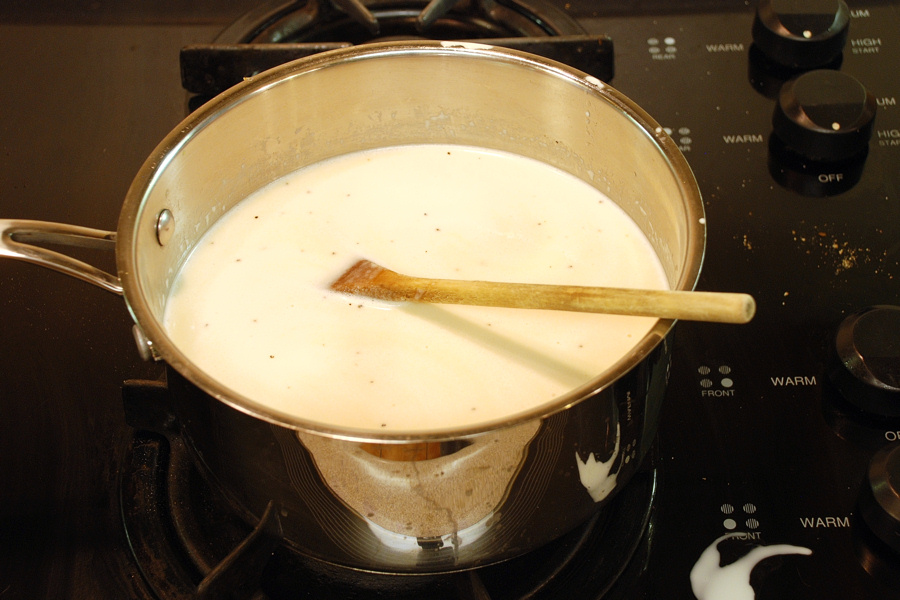
Remove the bay leaf. Using a blender, puree the soup, in batches, until smooth. Return to the pot. Add the cream and salt and pepper to taste.


Tasty Kitchen Blog: Outrageous Garlic Soup. Guest post by Erica Kastner of Cooking for Seven, recipe submitted by TK member n8tivenyer.

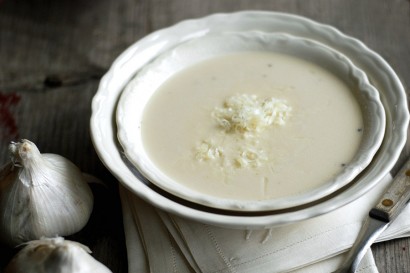
Deliciously smooth and creamy.


Tasty Kitchen Blog: Outrageous Garlic Soup. Guest post by Erica Kastner of Cooking for Seven, recipe submitted by TK member n8tivenyer.

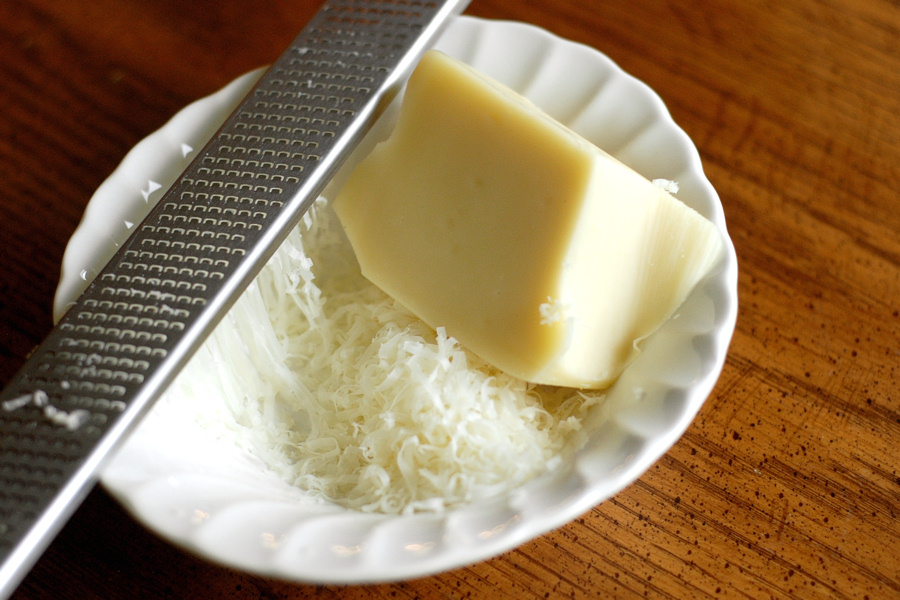
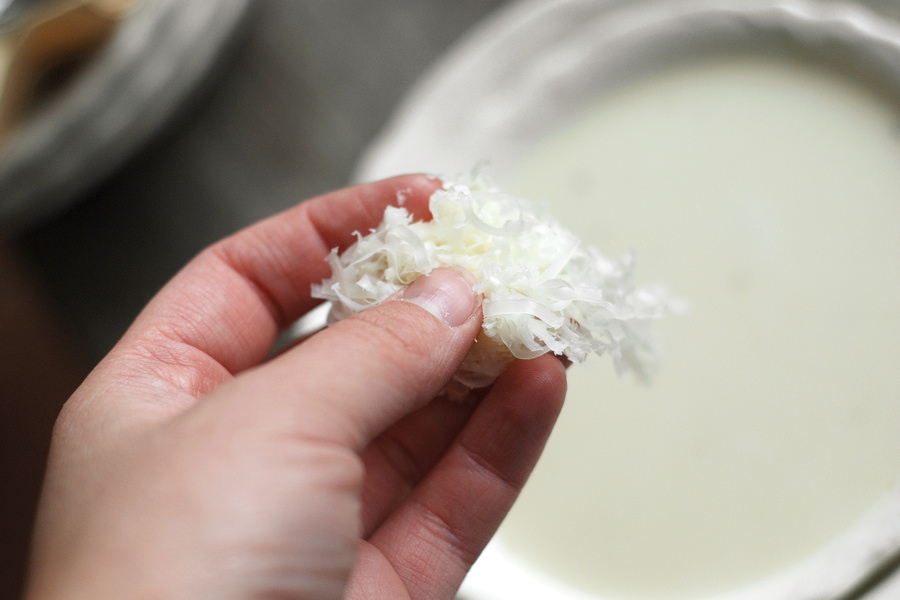
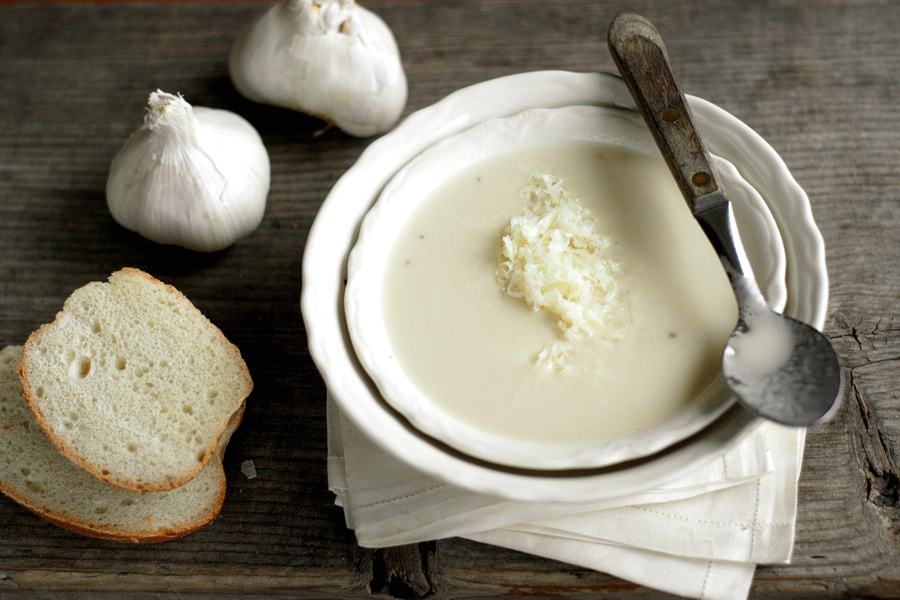
Grate some Gruyère cheese.


Tasty Kitchen Blog: Outrageous Garlic Soup. Guest post by Erica Kastner of Cooking for Seven, recipe submitted by TK member n8tivenyer.

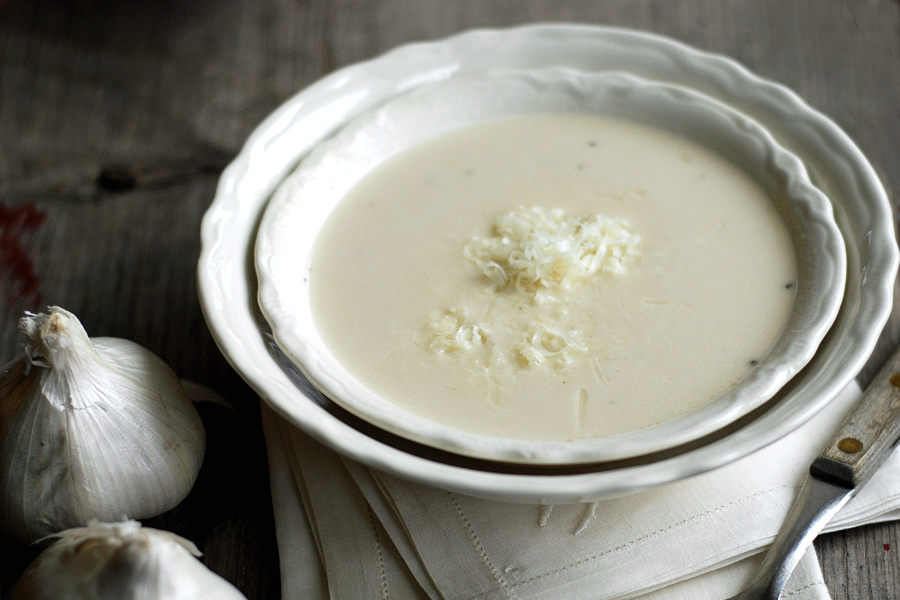
Sprinkle over a bowl of soup and serve.


Tasty Kitchen Blog: Outrageous Garlic Soup. Guest post by Erica Kastner of Cooking for Seven, recipe submitted by TK member n8tivenyer.

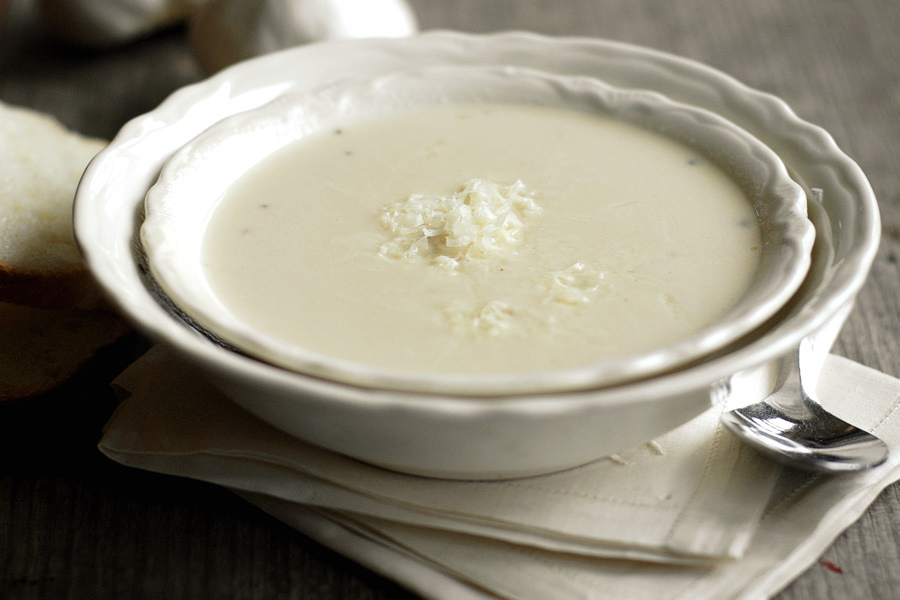
It’s delicious served with French bread for dipping.


Tasty Kitchen Blog: Outrageous Garlic Soup. Guest post by Erica Kastner of Cooking for Seven, recipe submitted by TK member n8tivenyer.

Thank you so much, n8tivenyer, for sharing this recipe with us!


Printable Recipe
Outrageous Garlic Soup

4.82 Mitt(s) 11 Rating(s)11 votes, average: 4.82 out of 511 votes, average: 4.82 out of 511 votes, average: 4.82 out of 511 votes, average: 4.82 out of 511 votes, average: 4.82 out of 5

Prep Time:

Cook Time:

Difficulty: Easy

Servings: 4

4
x

Print Options

Page size Letter 3x5 4x6
Text Size Small Medium Large
Content Include description
Include prep time, etc.
Show image

Description

Creamy, subtle flavor.

Ingredients

  • 1 Tablespoon Olive Oil
  • 1 cup Onions, Thinly Sliced
  • 12 cloves Peeled Garlic, Smashed
  • 1 cup Dry White Wine
  • 1 quart Chicken Stock
  • 1 leaf Bay
  • 2 cups French Bread, Torn Into Pieces
  • ¾ cups Heavy Cream
  • ½ cups Shredded Gruyere

Preparation Instructions

Heat the oil in a large pot. Add onion and garlic. Cook over medium heat for 10 -12 minutes; the onion and garlic will begin to caramelize. Add the wine, cover, reduce heat, and cook for 10 minutes, stirring occasionally. Add the stock and bay leaf.

Bring to a boil; reduce heat; cover and simmer for 30 minutes. Add the bread and allow the soup to sit without heat for 10 minutes. Remove the bay leaf.

In batches, pour the soup into the blender and puree until smooth. Add the cream and salt and pepper to taste. As each batch is pureed, pour into another pot. Keep warm over low heat. Garnish with the cheese (if desired).


_______________________________________

Erica Berge shares her wonderful recipes and amazing food photography on her blog, Cooking for Seven. She also writes about crafts and posts more of her beautiful photography in her personal blog, EricaLea.com. There really isn’t much that this amazing young lady can’t do, and we’re thrilled she does some of it here.


Profile photo of Erica Lea

Fruit on the Bottom Baked Oatmeal

Posted by in Baking, Step-by-Step Recipes

Tasty Kitchen Blog: Fruit on the Bottom Baked Oatmeal. Guest post and recipe from Erica Kastner of Cooking for Seven.

 
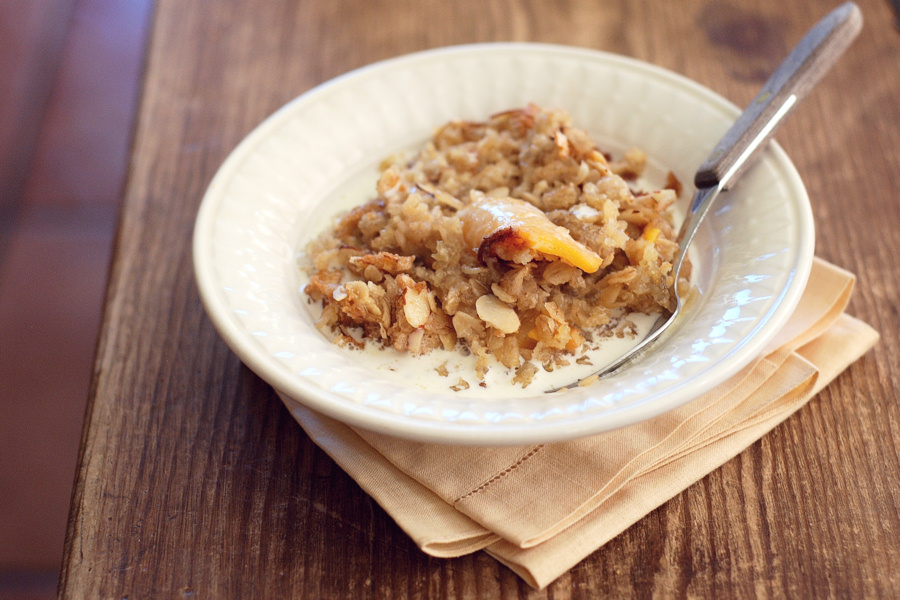
This recipe was one of those lucky, spur-of-the-moment creations. We had some very ripe peaches that desperately needed to be used. However, there weren’t nearly enough to go into a pie or a crisp. Thus, Fruit-on-the-Bottom Baked Oatmeal was born of necessity.

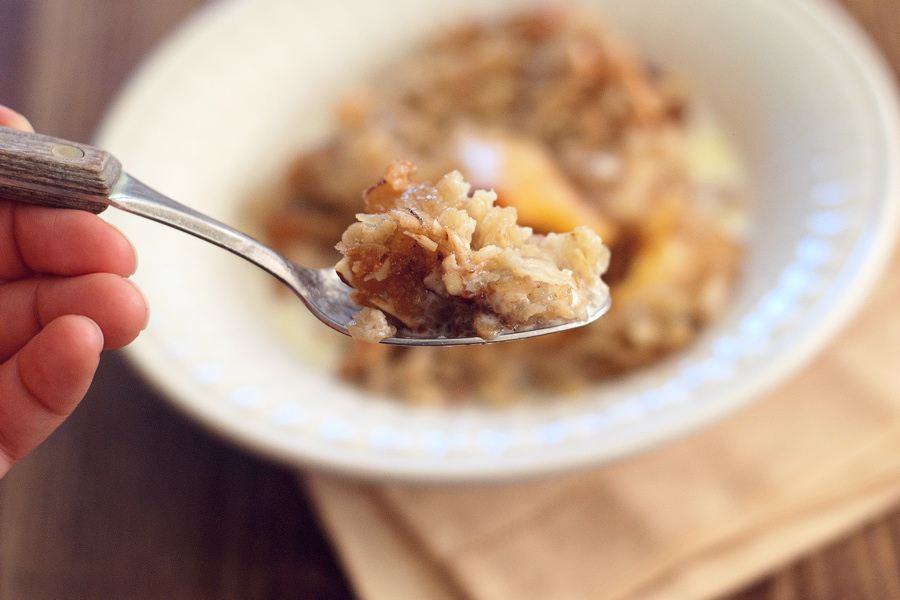
In all honesty, I did not expect it to turn out. I shoved the pan into the oven and wondered if the fruit would finish cooking by the time the oatmeal was golden. To my surprise, I had created something utterly scrumptious. Warm fruit on the bottom, sweet, hearty oatmeal in the middle, crunchy almonds on top. The perfect breakfast treat for a chilly fall or cold winter morning. Served with good vanilla ice cream, this could easily be a dessert.


Tasty Kitchen Blog: Fruit on the Bottom Baked Oatmeal. Guest post and recipe from Erica Kastner of Cooking for Seven.

Here’s what you’ll need: fruit of choice (apples, pears, and peaches are good choices), whole milk, maple syrup, eggs, vanilla extract, butter, rolled oats, baking powder, baking soda, salt, sweetener of choice (I like maple sugar or demerara), and sliced almonds.


Tasty Kitchen Blog: Fruit on the Bottom Baked Oatmeal. Guest post and recipe from Erica Kastner of Cooking for Seven.

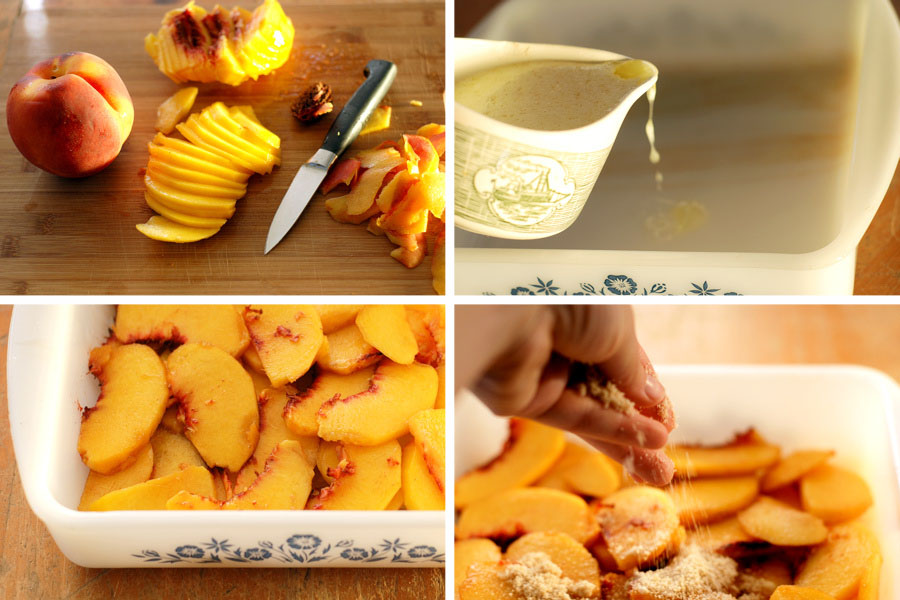
Peel and slice your fruit. I love perfectly ripe peaches. Pour 1/4 cup butter into the bottom of a square baking dish. Arrange the fruit on the bottom. Sprinkle with a couple tablespoons of sugar. Set aside.


Tasty Kitchen Blog: Fruit on the Bottom Baked Oatmeal. Guest post and recipe from Erica Kastner of Cooking for Seven.

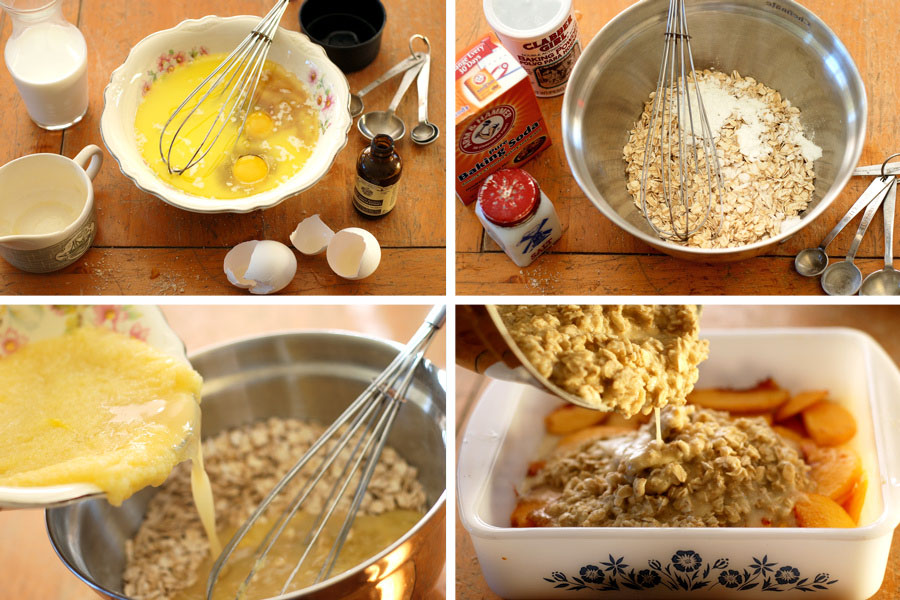
In a medium bowl, mix together milk, maple syrup, eggs, remaining butter and vanilla extract. In a large bowl, whisk together oats, baking powder, baking soda and salt. Add the wet ingredients to the dry and mix very well. Pour over the fruit and smooth the top.


Tasty Kitchen Blog: Fruit on the Bottom Baked Oatmeal. Guest post and recipe from Erica Kastner of Cooking for Seven.

Sprinkle some almonds on top.


Tasty Kitchen Blog: Fruit on the Bottom Baked Oatmeal. Guest post and recipe from Erica Kastner of Cooking for Seven.

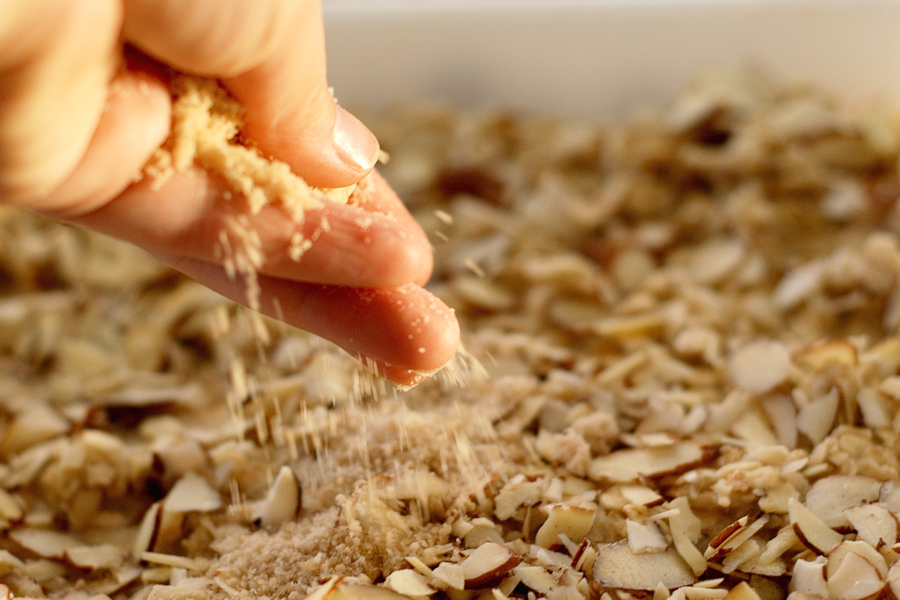
Sprinkle the almonds with a couple tablespoons of sugar.


Tasty Kitchen Blog: Fruit on the Bottom Baked Oatmeal. Guest post and recipe from Erica Kastner of Cooking for Seven.

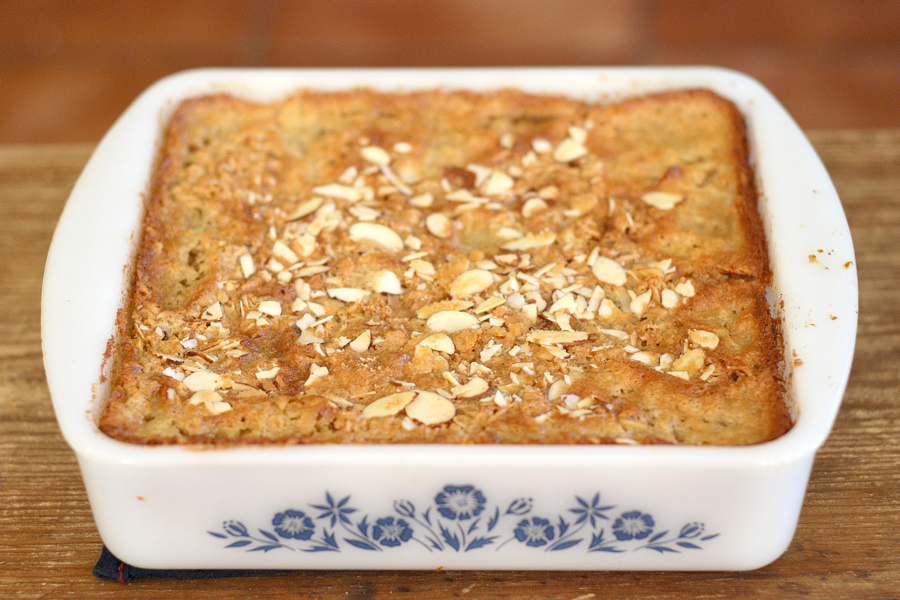
Bake at 350°F for 40-50 minutes or until the top is golden and the fruit is bubbly. Let cool for a few minutes before serving.


Tasty Kitchen Blog: Fruit on the Bottom Baked Oatmeal. Guest post and recipe from Erica Kastner of Cooking for Seven.

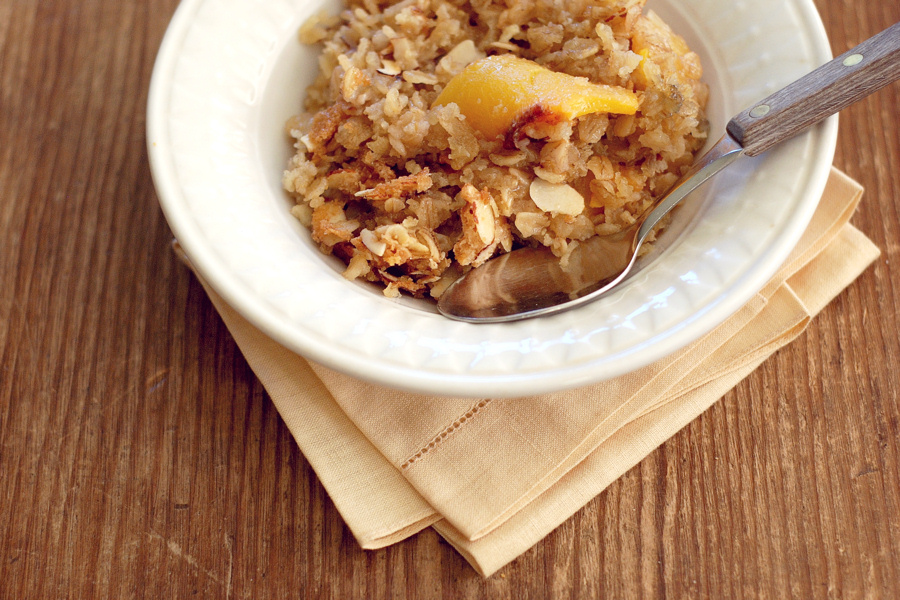
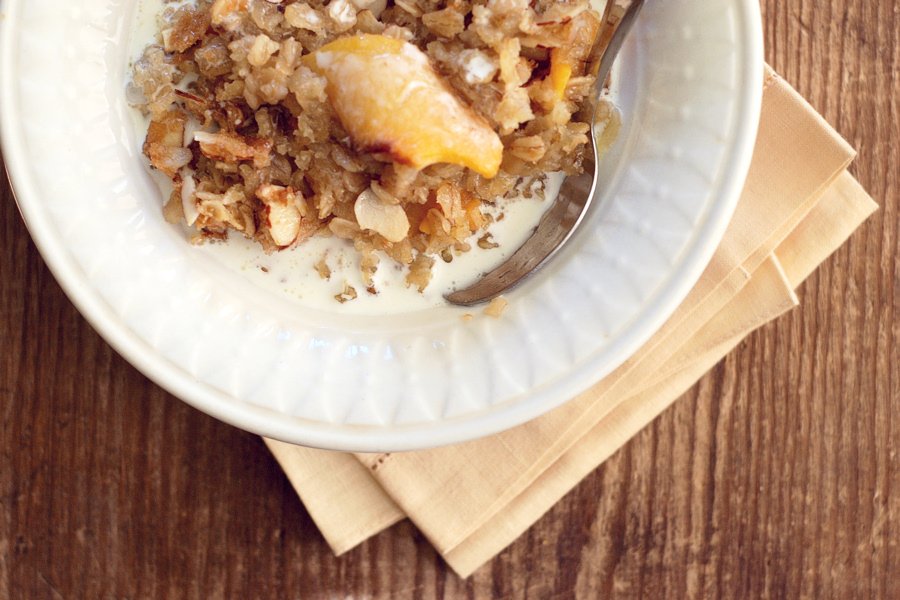
Don’t you want to dig in? But wait. It gets better:


Tasty Kitchen Blog: Fruit on the Bottom Baked Oatmeal. Guest post and recipe from Erica Kastner of Cooking for Seven.

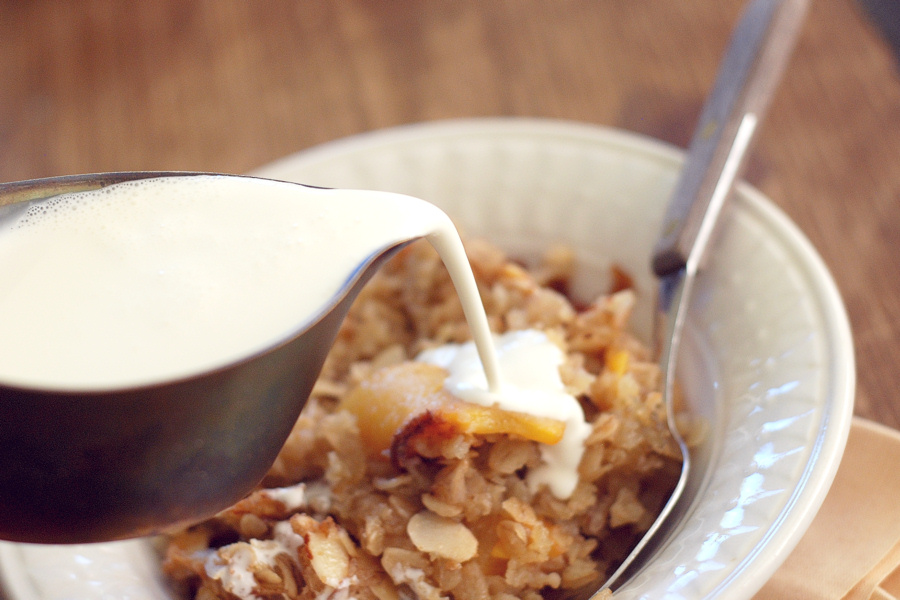
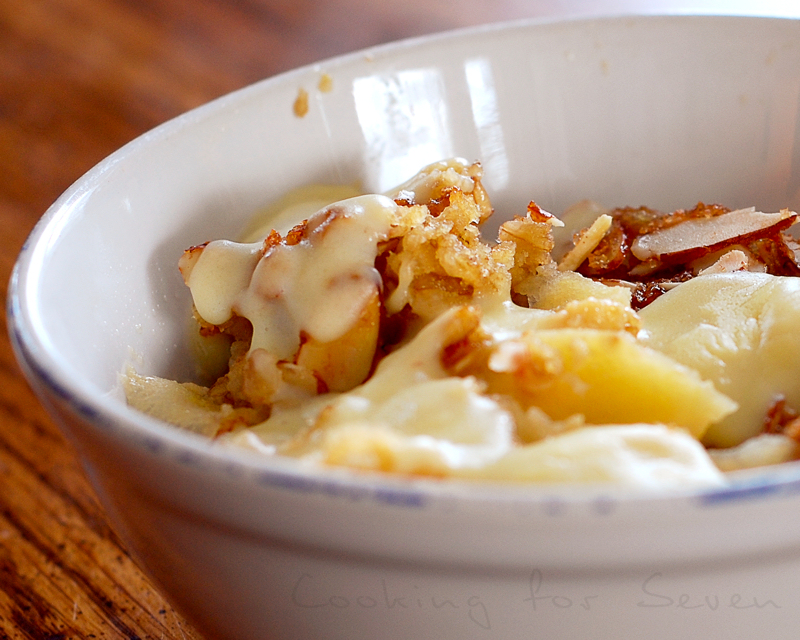
Serve with heavy whipping cream, milk, or (my personal favorite) a vanilla sauce.


Tasty Kitchen Blog: Fruit on the Bottom Baked Oatmeal. Guest post and recipe from Erica Kastner of Cooking for Seven.

Delicious.


Tasty Kitchen Blog: Fruit on the Bottom Baked Oatmeal. Guest post and recipe from Erica Kastner of Cooking for Seven.

Notes: You can customize this recipe in many ways. Use pecans or walnuts instead of almonds. Use almond extract instead of vanilla. Switch up the fruit. Pears are wonderful. If using apples, make sure to slice them very thinly or they will be crunchy. I have never tried berries, but I’m sure they’d be splendid.


Printable Recipe

Fruit-on-the-Bottom Baked Oatmeal

See post on Erica Lea’s site!
4.80 Mitt(s) 15 Rating(s)15 votes, average: 4.80 out of 515 votes, average: 4.80 out of 515 votes, average: 4.80 out of 515 votes, average: 4.80 out of 515 votes, average: 4.80 out of 5

Prep Time:

Cook Time:

Difficulty: Easy

Servings: 7

7
x

Print Options

Page size Letter 3x5 4x6
Text Size Small Medium Large
Content Include description
Include prep time, etc.
Show image

Description

A delicious breakfast treat composed of fruit on the bottom, oatmeal in the middle, and crunchy nuts on top.

Ingredients

  • ¾ cups Butter, Divided
  • 1-½ cup Thinly Sliced Fruit
  • 4 Tablespoons Demerara Sugar Or Sucanat, Divided
  • ½ cups Whole Milk
  • ⅔ cups Pure Maple Syrup
  • 2 whole Large Eggs
  • 1 teaspoon Vanilla Extract
  • 2 cups Old Fashioned Rolled Oats
  • 2-½ teaspoons Baking Powder
  • ¼ teaspoons Baking Soda
  • ½ teaspoons Salt
  • ⅓ cups Sliced Almonds

Preparation Instructions

*Peaches, pears and apples are good choices. If using apples, make sure to slice them thinly or they will be crunchy.

1. Preheat oven to 350° F. Melt butter; pour 1/4 cup into the bottom of a 9-inch square baking dish. Arrange sliced fruit on top of the butter and sprinkle with 2 tablespoons demerara. Set aside.
2. In a medium bowl, mix together milk, maple syrup, eggs, remaining 1/2 cup butter and vanilla.
3. In a large bowl, whisk together oats, baking powder, baking soda and salt. Stir the wet ingredients into the dry ingredients and mix well. Pour over the fruit and smooth the top. Sprinkle with almonds and remaining 2 tablespoons demerara.
4. Bake at 350°F for 40 to 50 minutes, or until browned on top and fruit is bubbly. Allow to cool slightly. Serve with milk, cream or vanilla sauce.


_______________________________________

Erica Berge shares her wonderful recipes and amazing food photography on her blog, Cooking for Seven. She also writes about crafts and posts more of her beautiful photography in her personal blog, EricaLea.com. There really isn’t much that this amazing young lady can’t do, and we’re thrilled she does some of it here.
 

Profile photo of Erica Lea

Zand Gebak

Posted by in Baking, Step-by-Step Recipes

Today, Erica Lea will share with us this incredible Tasty Kitchen recipe she found. The name may sound funny and strange to some of you, but oh my. It’s absolutely beautiful. Let’s watch as Erica walks us through it!

 
Tasty Kitchen Blog: Zand Gebak. Guest post by Erica Kastner of Cooking for Seven, recipe submitted by TK member emmyd.

 
I know what you’re thinking, because I thought it as well:

“Zand what?!”

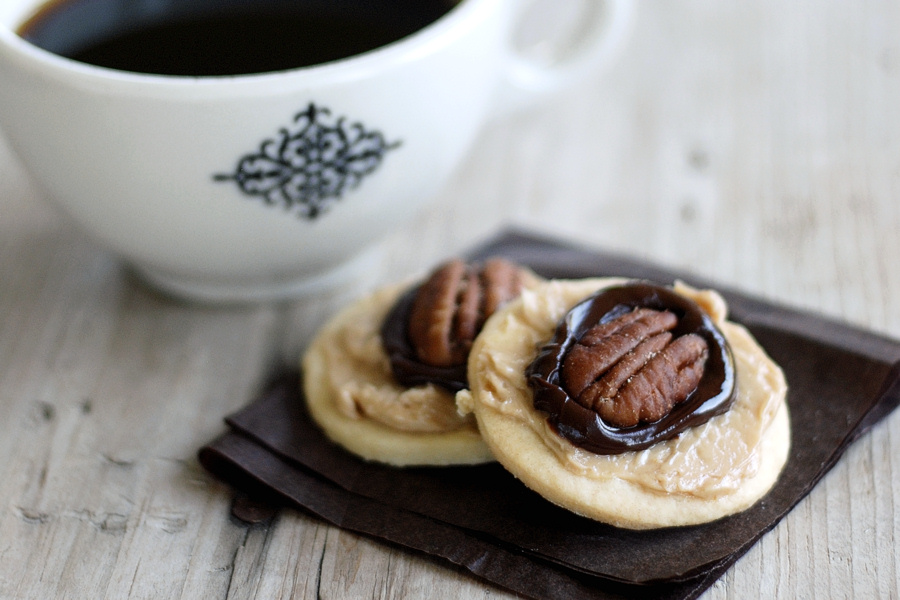
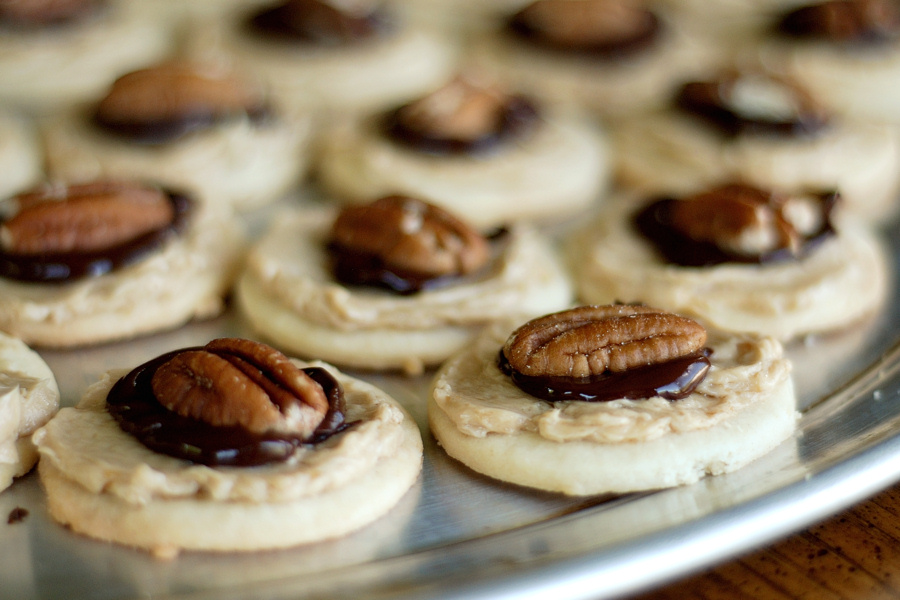
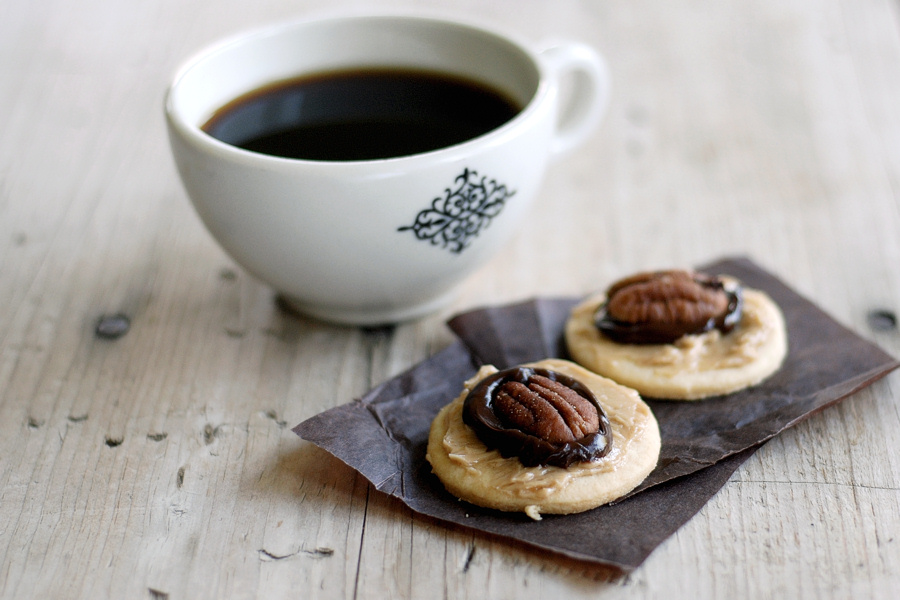
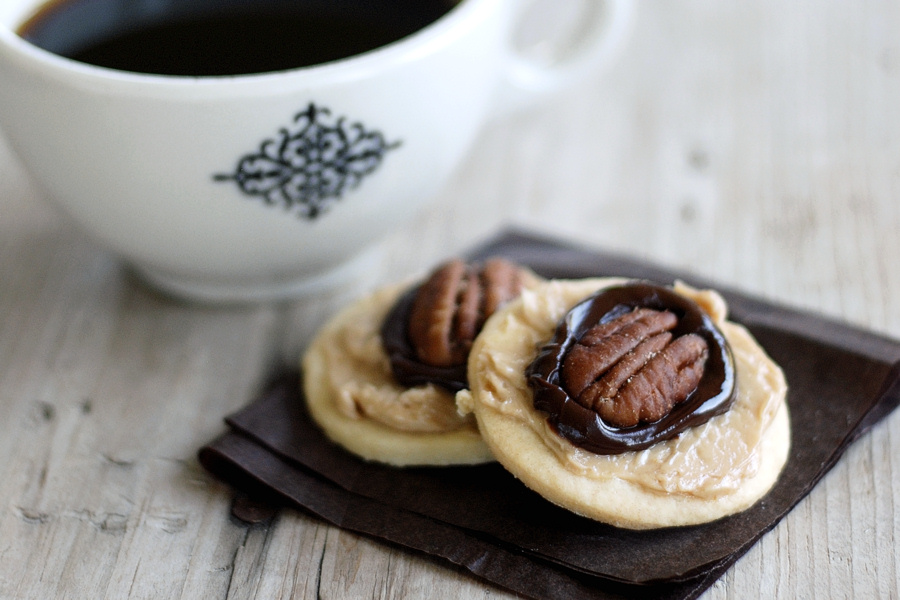
Then I read the description: shortbread cookies topped with mocha butter topped with chocolate topped with pecans/almonds. Irresistible. A little research revealed that zandgebak is just Dutch for shortbread.

This recipe, brought to us by emmyd, is surprisingly easy and forgiving. Confession: I (accidentally) halved the butter in this recipe. I read “1 cup of butter,” and my mind said “1 stick of butter.” Oddly enough, the cookies still turned out delicious. However, they were more like sugar cookies than shortbread.

Warning: Zand Gebak cookies are potentially addictive. It will be hard to eat just one. Proceed with caution.


Tasty Kitchen Blog: Zand Gebak. Guest post by Erica Kastner of Cooking for Seven, recipe submitted by TK member emmyd.

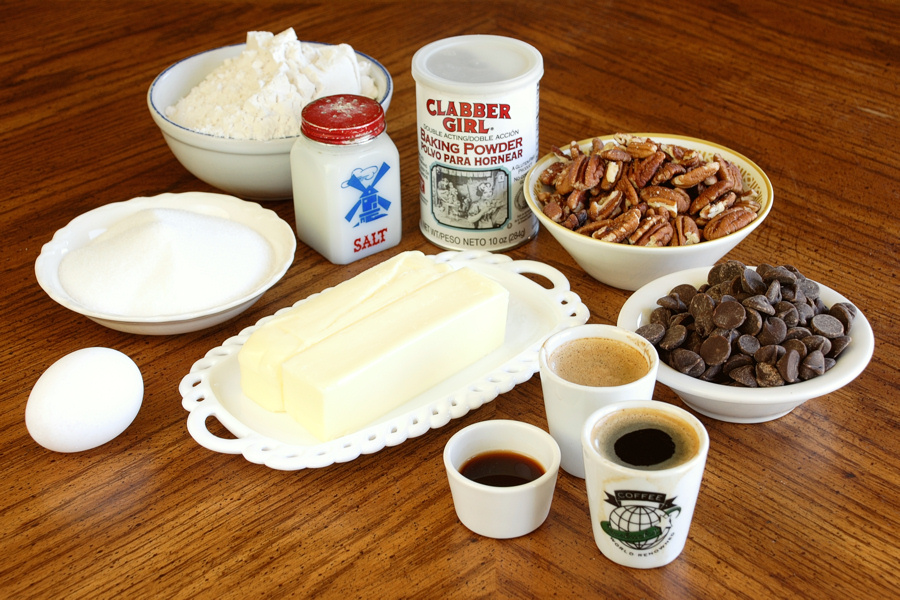
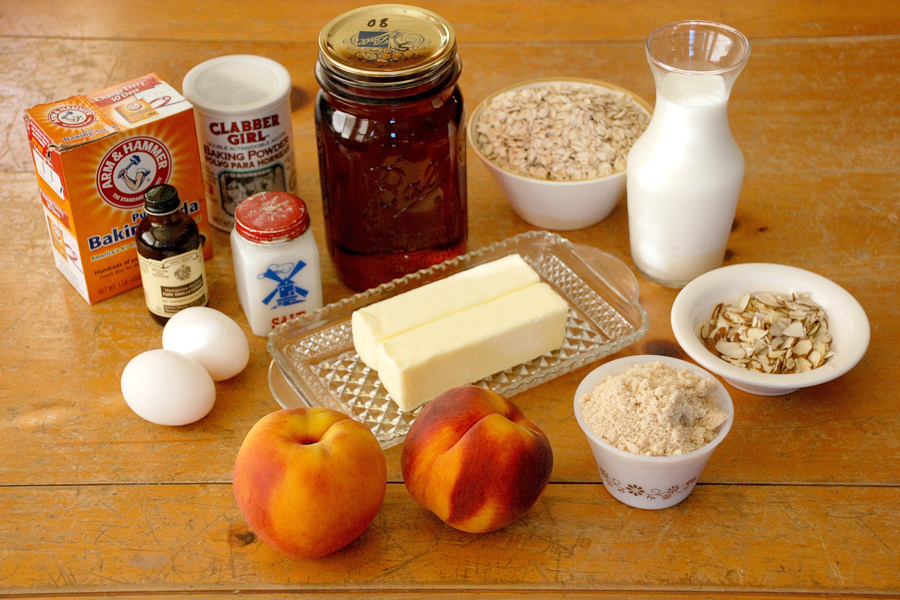
Here’s what you’ll need: butter (twice as much as I have pictured), sugar, vanilla, salt, an egg, baking powder, flour, strong coffee (I used espresso), chocolate chips (I like bittersweet), and pecans or almonds.


Tasty Kitchen Blog: Zand Gebak. Guest post by Erica Kastner of Cooking for Seven, recipe submitted by TK member emmyd.

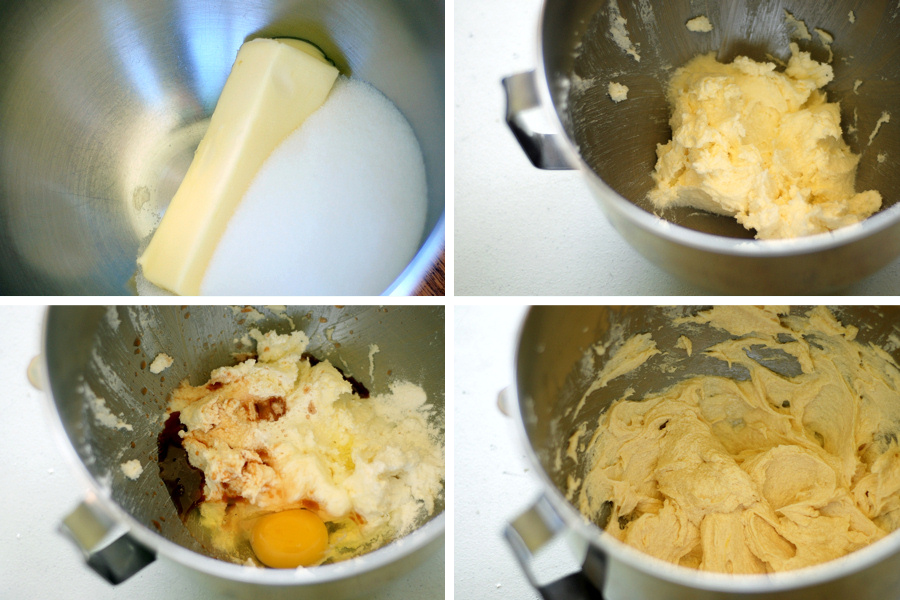
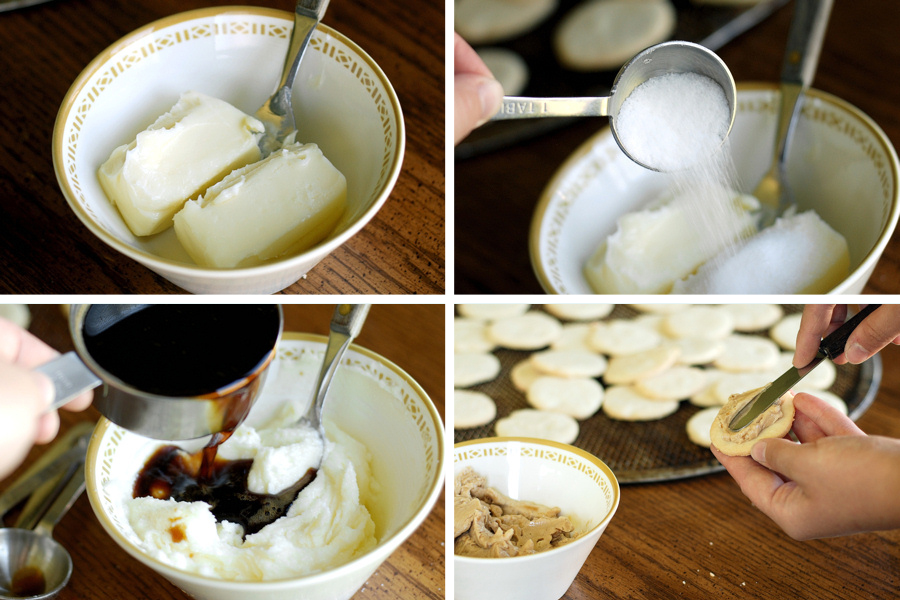
Place your butter and sugar in a bowl. Just image there’s another stick of butter in there. Cream the butter and sugar. Add the vanilla, salt, egg and baking powder and mix.


Tasty Kitchen Blog: Zand Gebak. Guest post by Erica Kastner of Cooking for Seven, recipe submitted by TK member emmyd.

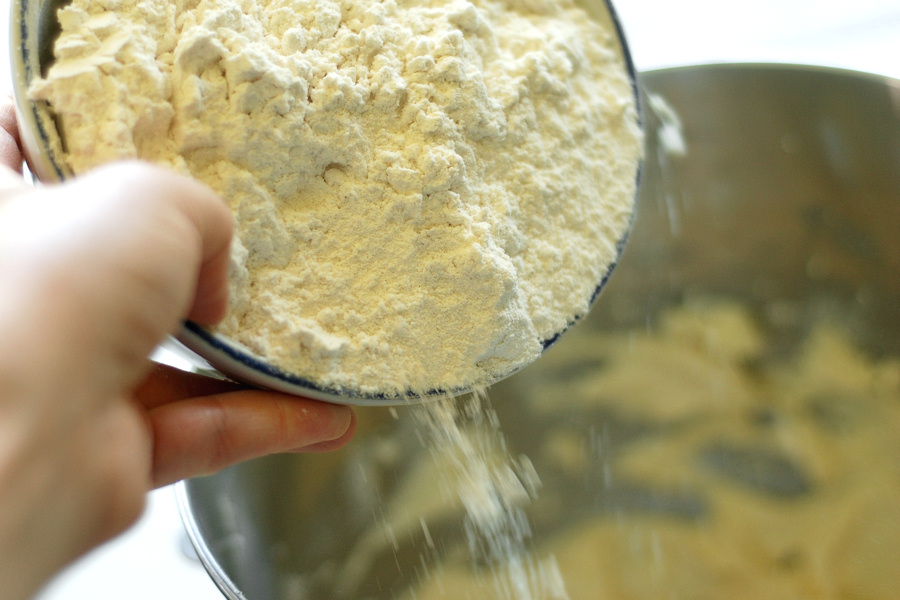
Dump in the flour.


Tasty Kitchen Blog: Zand Gebak. Guest post by Erica Kastner of Cooking for Seven, recipe submitted by TK member emmyd.

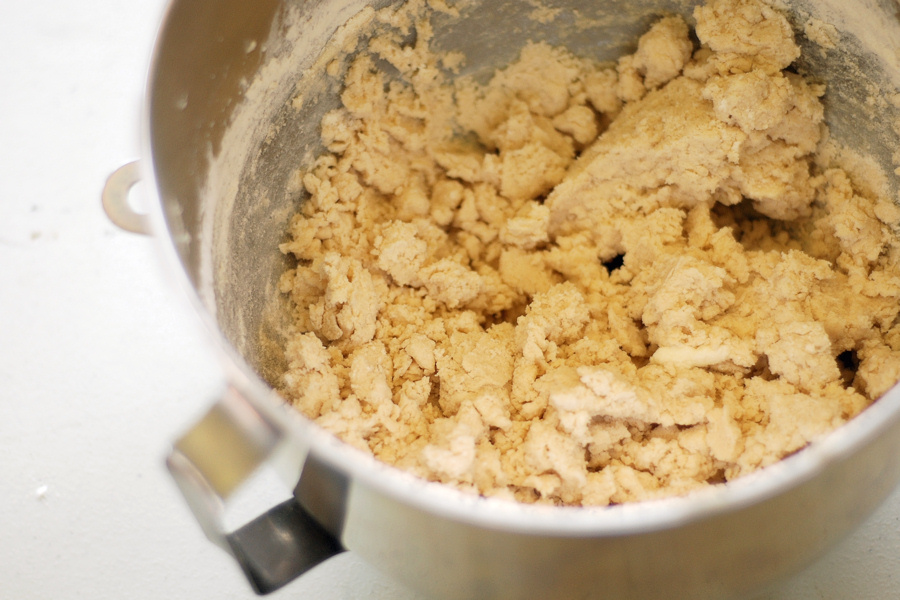
Mix until you have a rollable dough, adding more flour if necessary.


Tasty Kitchen Blog: Zand Gebak. Guest post by Erica Kastner of Cooking for Seven, recipe submitted by TK member emmyd.

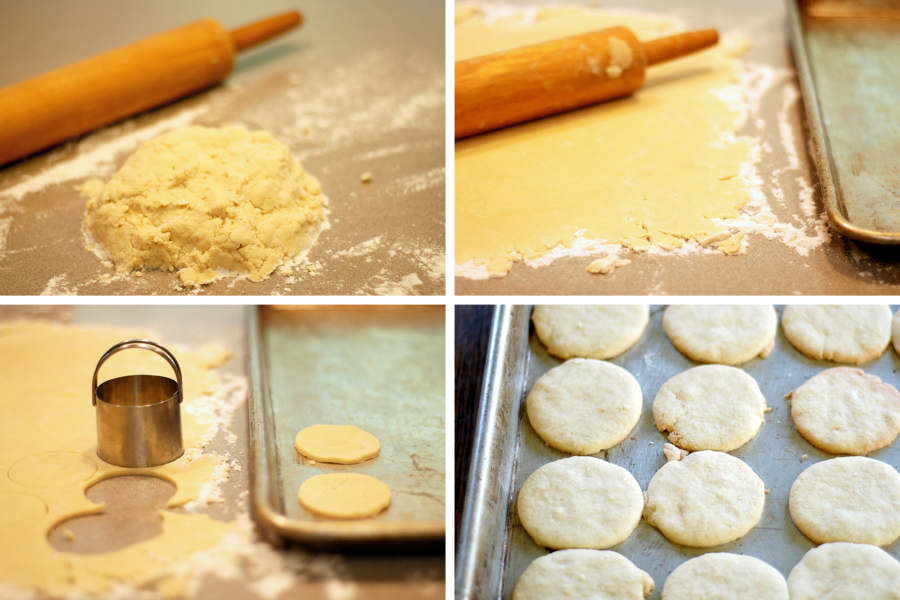
Place dough on a lightly floured surface. Roll out thinly and cut with a 2-inch cookie cutter. Place on an ungreased cookie sheet and bake at 350°F for about 10-15 minutes. Do not let the cookies brown. They should be a cream color. Remove to a wire rack to cool.


Tasty Kitchen Blog: Zand Gebak. Guest post by Erica Kastner of Cooking for Seven, recipe submitted by TK member emmyd.

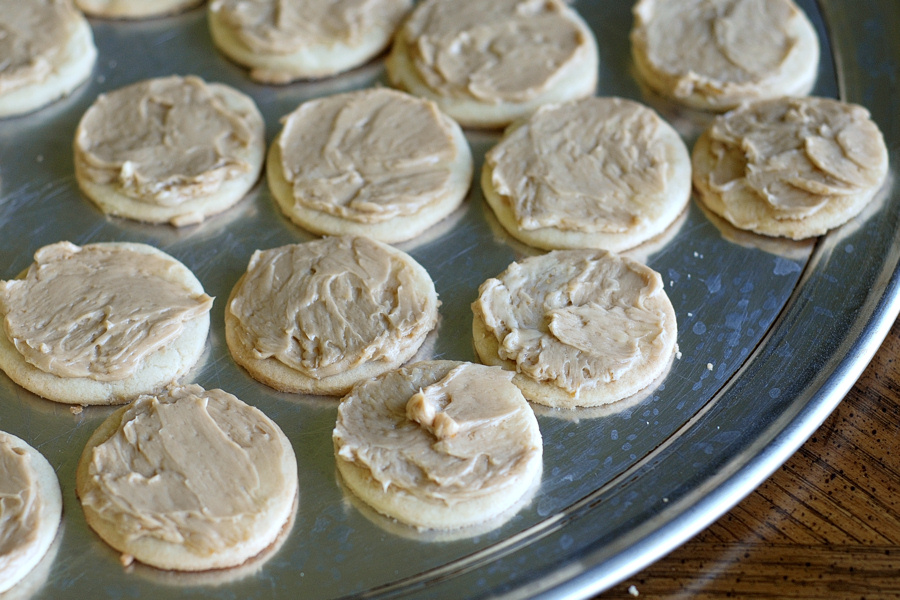
Now for my favorite part: the mocha butter! Place the butter in a bowl (again, imagine another stick of butter). Add the sugar and coffee. Beat until well blended. I used an immersion blender. Spread each cookie with about a teaspoon of the mocha butter.


Tasty Kitchen Blog: Zand Gebak. Guest post by Erica Kastner of Cooking for Seven, recipe submitted by TK member emmyd.

Put the cookies on a tray and place in the freezer until firm.


Tasty Kitchen Blog: Zand Gebak. Guest post by Erica Kastner of Cooking for Seven, recipe submitted by TK member emmyd.

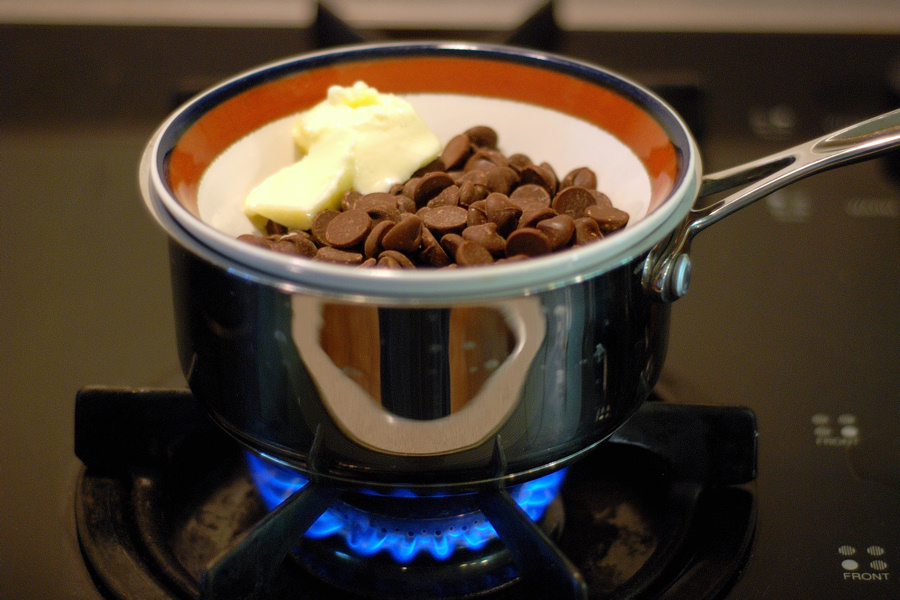
Meanwhile, melt the chocolate with a little butter. Allow to cool slightly.


Tasty Kitchen Blog: Zand Gebak. Guest post by Erica Kastner of Cooking for Seven, recipe submitted by TK member emmyd.

Drop a little chocolate on each cookie and spread out a bit.


Tasty Kitchen Blog: Zand Gebak. Guest post by Erica Kastner of Cooking for Seven, recipe submitted by TK member emmyd.

While the chocolate is still soft, add a pecan or almond to each cookie.


Tasty Kitchen Blog: Zand Gebak. Guest post by Erica Kastner of Cooking for Seven, recipe submitted by TK member emmyd.

Store in the freezer or refrigerator. I doubt if you’ll need to store them for long.


Tasty Kitchen Blog: Zand Gebak. Guest post by Erica Kastner of Cooking for Seven, recipe submitted by TK member emmyd.

Notes: Even though these cookies were wonderful with half of the butter, I wish to make them again with the proper amount. Also, I will add more coffee to the mocha butter. It was delicious, but not strong enough. Perhaps I will try toasting or candying the nuts as well.

We polished off these cookies in two days. I will consider making a double batch next time.

Thank you, emmyd, for sharing this scrumptious recipe with us!


Printable Recipe

Zand Gebak

4.80 Mitt(s) 5 Rating(s)5 votes, average: 4.80 out of 55 votes, average: 4.80 out of 55 votes, average: 4.80 out of 55 votes, average: 4.80 out of 55 votes, average: 4.80 out of 5

Prep Time:

Cook Time:

Difficulty: Easy

Servings: 36

36
x

Print Options

Page size Letter 3x5 4x6
Text Size Small Medium Large
Content Include description
Include prep time, etc.
Show image

Description

Shortbread cookie + mocha butter + chocolate + pecan/almond = the very best cookie … ever!

Ingredients

  • FOR THE COOKIE DOUGH:
  • 1 cup Butter
  • ¾ cups Sugar
  • 1 teaspoon Vanilla
  • 1 pinch Salt
  • 1 whole Egg
  • 1 teaspoon Baking Powder
  • 2 cups Flour, Or More As Needed
  • _____
  • FOR THE MOCHA BUTTER:
  • 1 cup Butter
  • 3 Tablespoons Sugar
  • ½ cups Strong Coffee
  • _____
  • FOR THE TOPPING:
  • ¾ cups Chocolate Chips
  • 2 Tablespoons Butter
  • 1 bag (about 6 Oz. Bag) Pecans Or Almonds

Preparation Instructions

To make the cookie dough, cream the butter and sugar with a pastry cutter. Then add the vanilla, salt, egg and baking powder, and then the flour. Start with 2 cups of flour, and add more if you need it. Knead for a couple of minutes. Dough should be rollable. On a floured surface, roll the dough out thinly (about 1/8 to 1/4 of an inch) and cut into 2-inch circles. Place on an ungreased cookie sheet. Bake at 350F for 10-15 minutes, but don’t let them brown. They should just be a cream colour.

To prepare the mocha butter, put the butter in a bowl. This works best if it’s softened (NOT MELTED). Then, while beating the butter, slowly add the sugar and coffee. I make strong coffee with 2 heaping teaspoons instant coffee in 1/2 cup of hot water. Test it every once in a while to get the mocha flavour you like. To get a stronger flavour, add more instant coffee to the water. Don’t let the sweetness overpower the mocha flavour, or they’ll end up way too sweet.

Take the baked cookie and top it with the mocha butter. Spread approximately 1 teaspoon on each cookie. Then, stick the cookies somewhere cold (in the coldroom, or the porch if it’s winter, or the fridge or freezer) until the mocha part is hard.

Then, melt the chocolate chips with a little bit of butter, let it cool a little bit, and drip it over the mocha (I usually spread it out a tiny bit). Then, while the chocolate is still soft, stick a pecan or almond on top. I usually store these in the freezer, or they get too soft. They can be eaten straight from the freezer; they don’t have to thaw.


_______________________________________

Erica Berge shares her wonderful recipes and amazing food photography on her blog, Cooking for Seven. She also writes about crafts and posts more of her beautiful photography in her personal blog, EricaLea.com. There really isn’t much that this amazing young lady can’t do, and we’re thrilled she does some of it here.
 

Profile photo of Erica Lea

Red Curry Coconut Noodles

Posted by in Step-by-Step Recipes

Rounding up our Terrific Threesome of guest posts is Erica Lea, who brings us a yummy dish that she saved in her recipe box as soon as she saw it. If you’ve read the Tasty Kitchen blog post last month when we featured Erica, then you know you’re in for some good food that’s beautifully photographed. We’re all ears (and eyes), Erica!

Tasty Kitchen Blog: Red Curry Coconut Noodles. Guest post by Erica Kastner of Cooking for Seven, recipe submitted by TK member nika.

 
Red Curry Coconut Noodles. Just the name sent my imagination spinning. As I glanced at the ingredient list, I knew I wanted to make this recipe.

This dish, brought to us by nika, is a glorious explosion of flavors. Don’t be intimidated if some of the ingredients seem exotic. You should be able to find most of them at your local grocery store or an Asian market.


Tasty Kitchen Blog: Red Curry Coconut Noodles. Guest post by Erica Kastner of Cooking for Seven, recipe submitted by TK member nika.

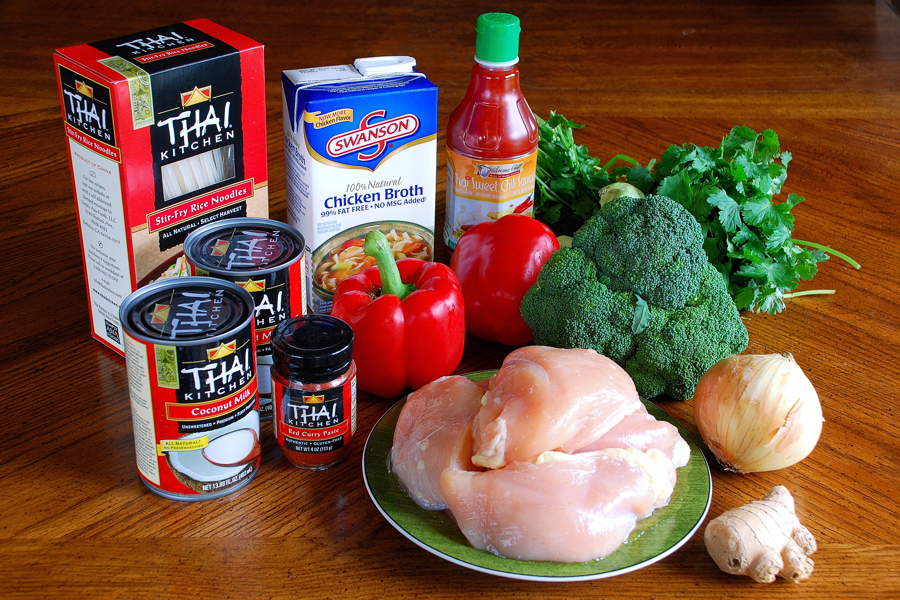
Here’s what you’ll need: boneless, skinless chicken breasts, coconut milk, red curry paste, fresh ginger, cilantro, Thai sweet chili sauce, chicken broth, rice noodles (I used the flat kind), an onion, two red bell peppers, and two heads of broccoli.


Tasty Kitchen Blog: Red Curry Coconut Noodles. Guest post by Erica Kastner of Cooking for Seven, recipe submitted by TK member nika.

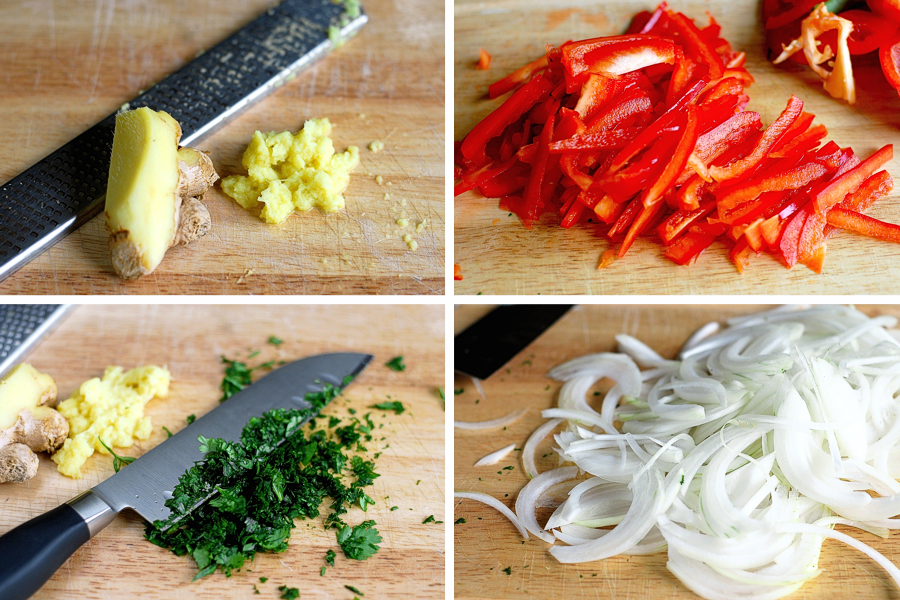
Start by prepping your ingredients. Grate enough ginger to make about 1 tablespoon. Chop up enough cilantro to make a tablespoon or so. I went heavy on the cilantro. Next, julienne your veggies. Julienne is just another way of saying “cut into long, thin slices.”


Tasty Kitchen Blog: Red Curry Coconut Noodles. Guest post by Erica Kastner of Cooking for Seven, recipe submitted by TK member nika.

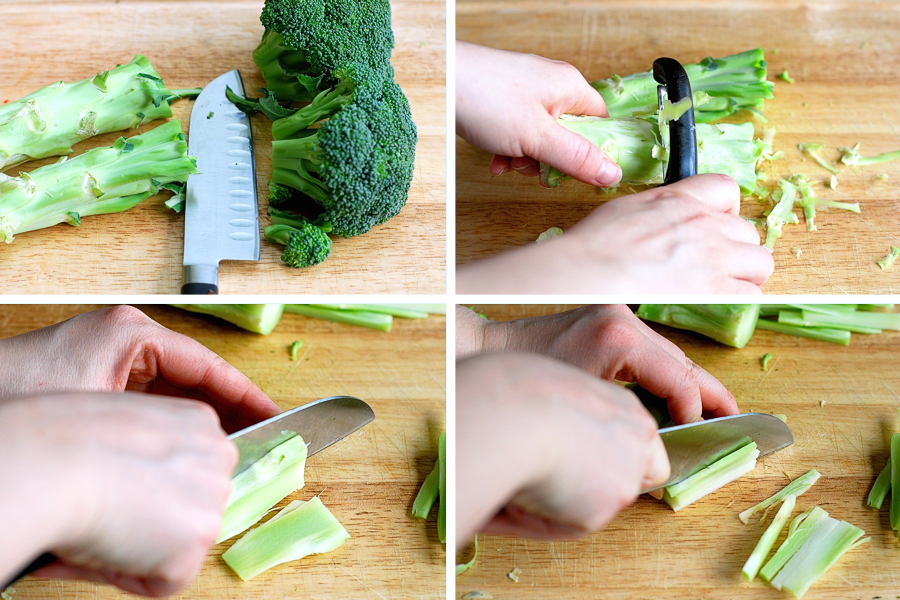
To make this recipe easier, you can use prepackaged broccoli slaw in place of the broccoli stems. But I like to do things the hard way.

Remove the broccoli heads (reserve for a later use), cut off the hard bottoms, and carefully peel the stem. Chop the broccoli stems into pieces about 2-3 inches long, cut into thin slices, stack the slices, and cut across the slices. Now you have little matchstick-sized broccoli pieces.


Tasty Kitchen Blog: Red Curry Coconut Noodles. Guest post by Erica Kastner of Cooking for Seven, recipe submitted by TK member nika.

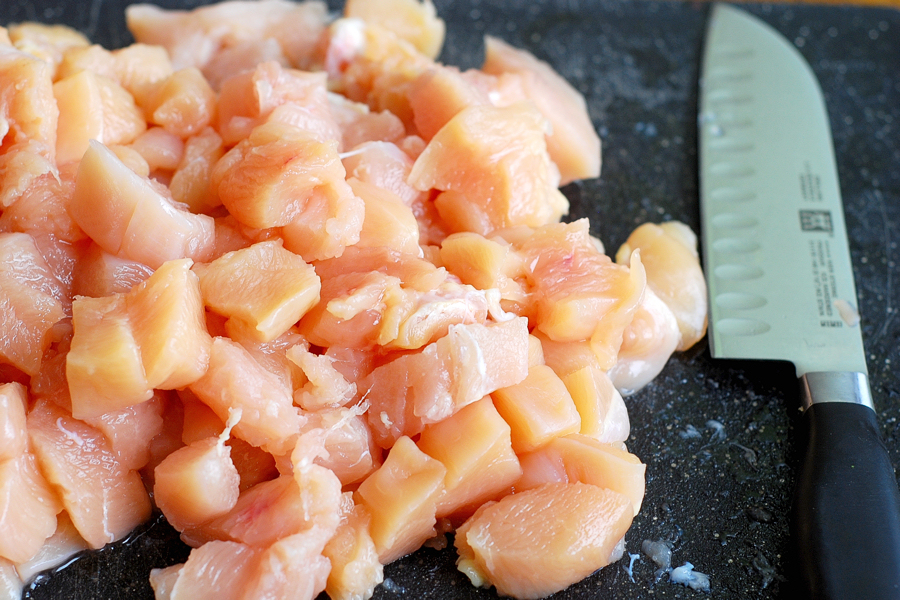
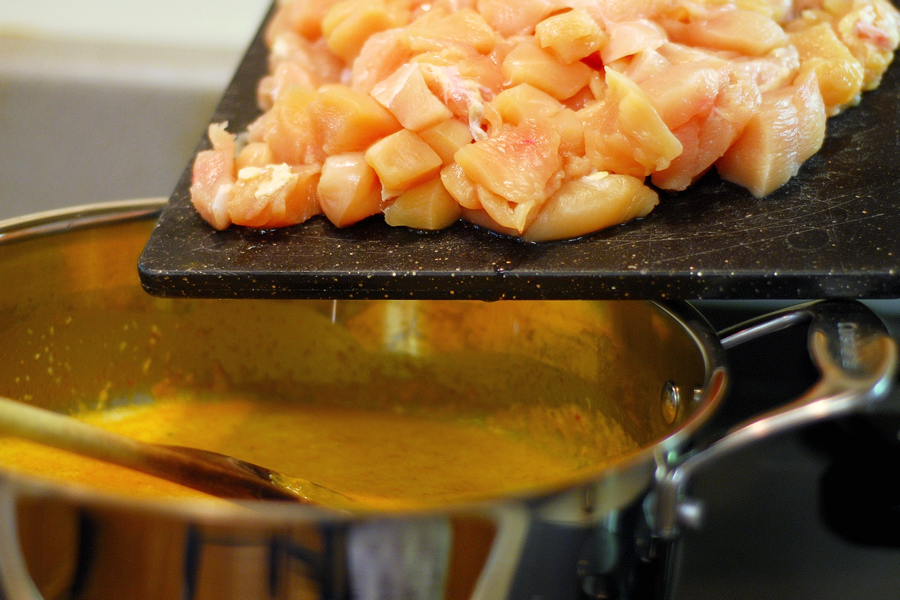
Cut the chicken into bite-sized cubes.


Tasty Kitchen Blog: Red Curry Coconut Noodles. Guest post by Erica Kastner of Cooking for Seven, recipe submitted by TK member nika.

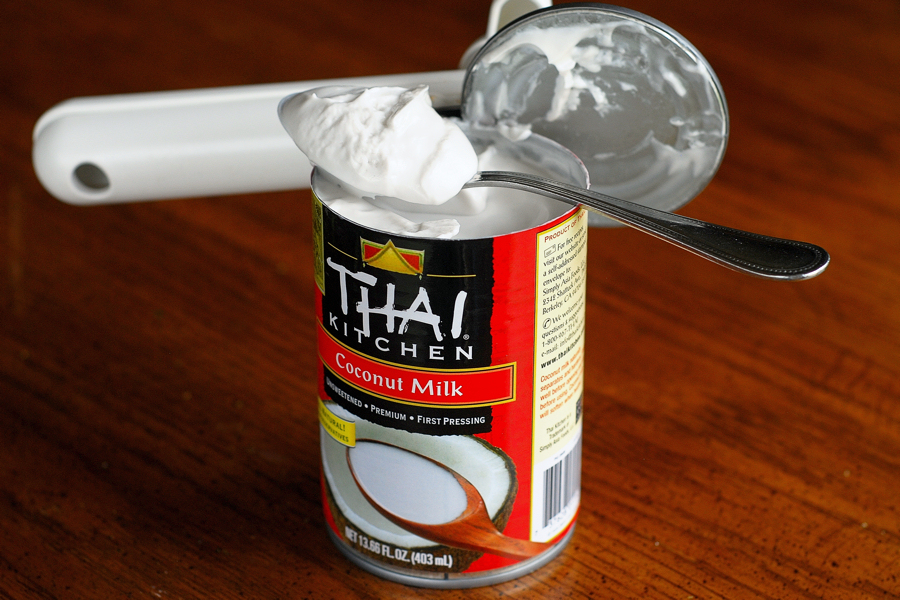
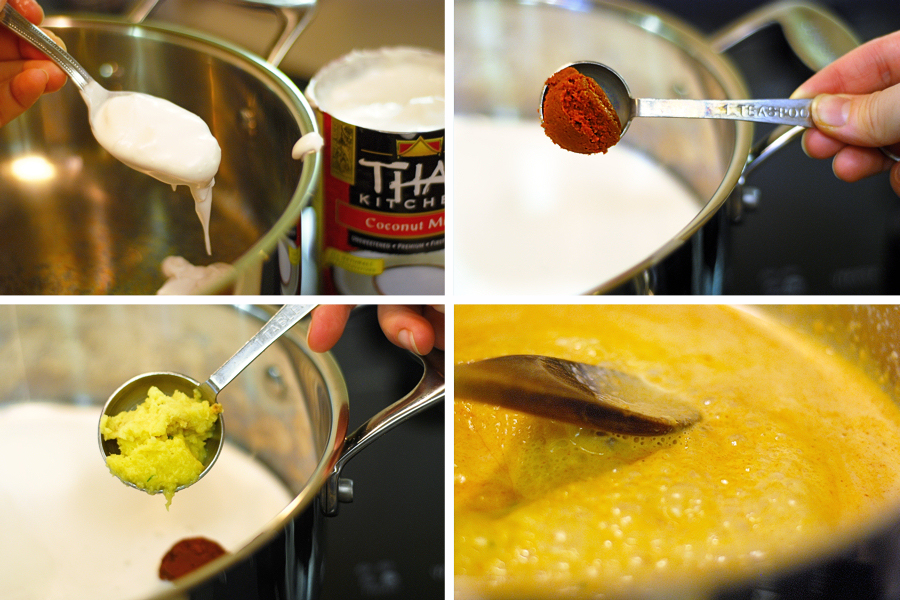
Scoop the thick cream off the top of the coconut milk. This will be your “oil” for frying the chicken and vegetables.


Tasty Kitchen Blog: Red Curry Coconut Noodles. Guest post by Erica Kastner of Cooking for Seven, recipe submitted by TK member nika.

Plop the coconut cream into a large pot set over medium-high heat. Add the curry paste and ginger and let simmer for one minute. Your kitchen will begin to smell lovely.


Tasty Kitchen Blog: Red Curry Coconut Noodles. Guest post by Erica Kastner of Cooking for Seven, recipe submitted by TK member nika.

Add the chicken pieces and cook, stirring occasionally, until the chicken is cooked through.


Tasty Kitchen Blog: Red Curry Coconut Noodles. Guest post by Erica Kastner of Cooking for Seven, recipe submitted by TK member nika.

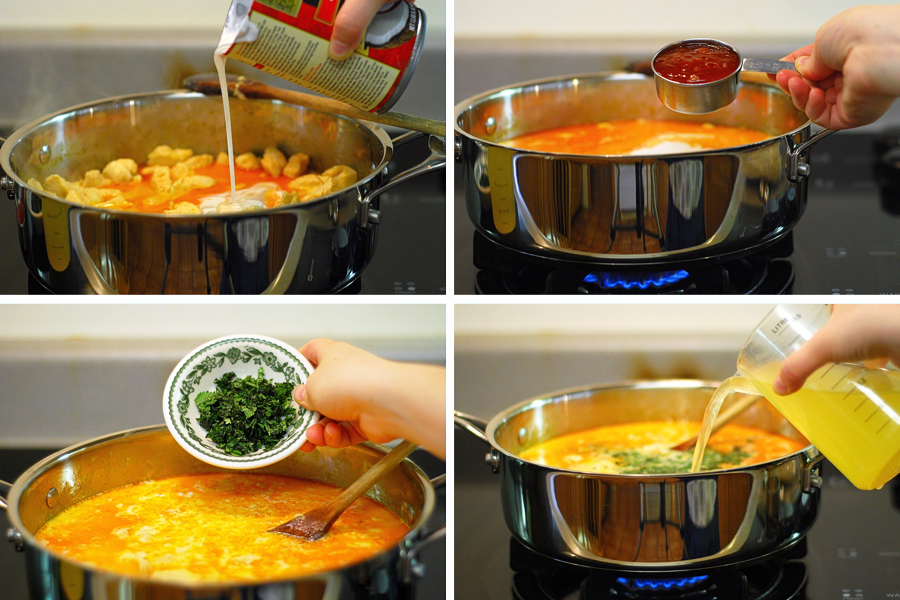
Once the chicken is completely cooked, add the rest of the coconut milk, chili sauce, cilantro, and chicken broth. Bring to a simmer.


Tasty Kitchen Blog: Red Curry Coconut Noodles. Guest post by Erica Kastner of Cooking for Seven, recipe submitted by TK member nika.

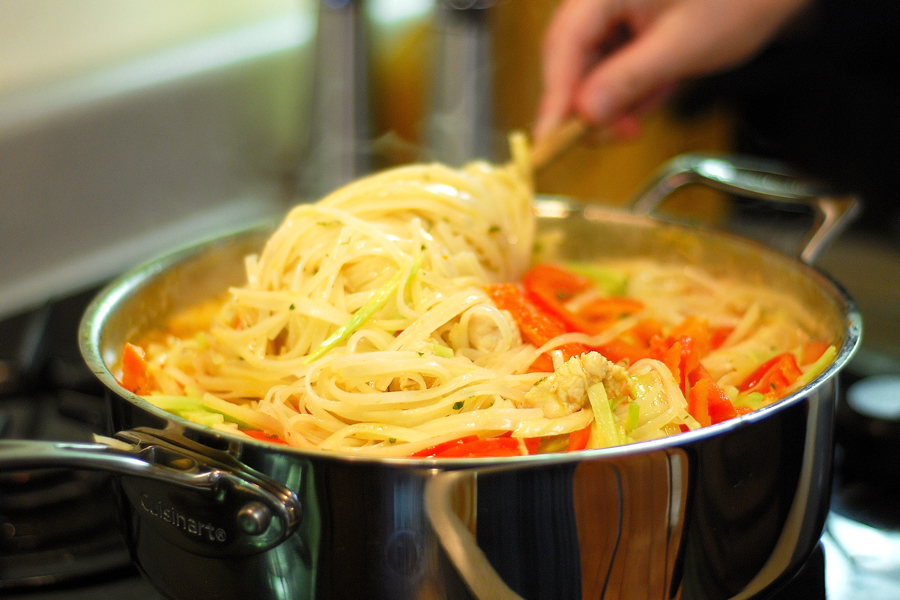
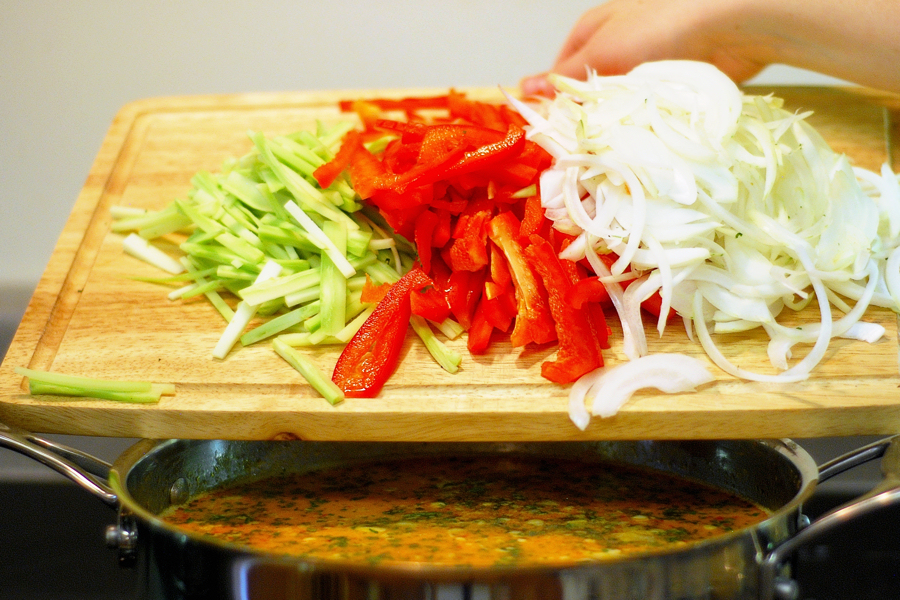
Shove the veggies into the pot.


Tasty Kitchen Blog: Red Curry Coconut Noodles. Guest post by Erica Kastner of Cooking for Seven, recipe submitted by TK member nika.

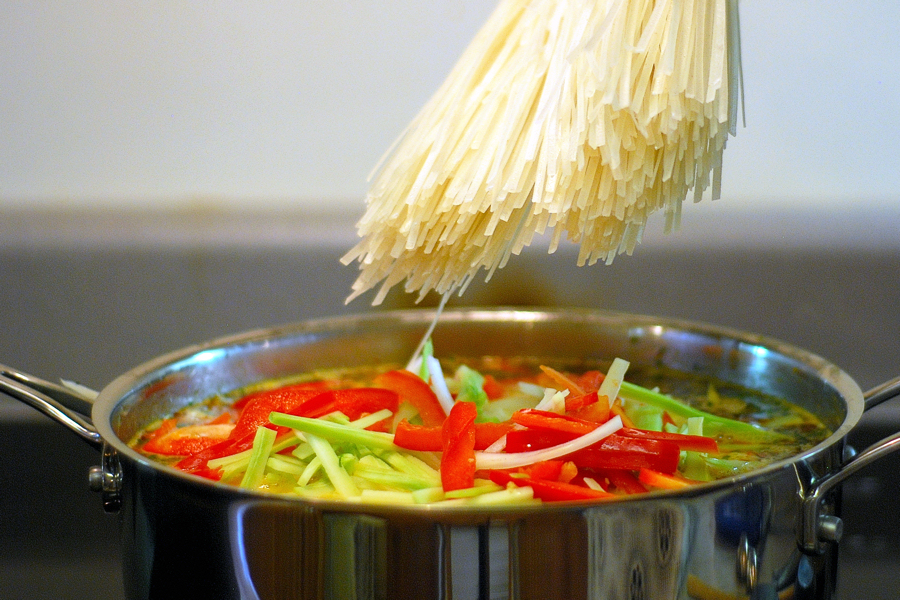
Now it’s time for a bit of magic. Poke the rice noodles into the pot and stir.


Tasty Kitchen Blog: Red Curry Coconut Noodles. Guest post by Erica Kastner of Cooking for Seven, recipe submitted by TK member nika.

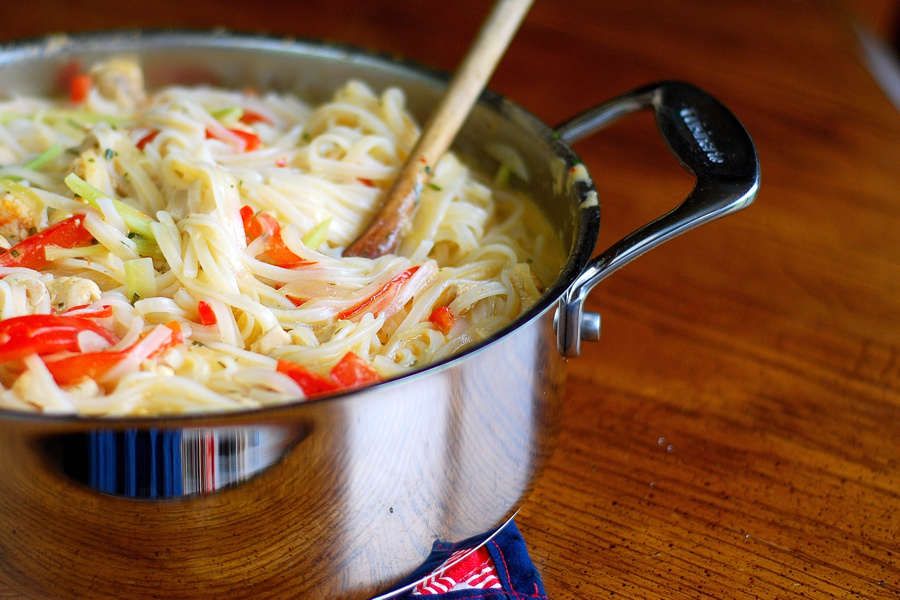
Return to a simmer and cook until the noodles are done, about 5 minutes. The sauce should begin to thicken.


Tasty Kitchen Blog: Red Curry Coconut Noodles. Guest post by Erica Kastner of Cooking for Seven, recipe submitted by TK member nika.

Remove from the heat and let sit for about five minutes. This allows the sauce to thicken even more.


Tasty Kitchen Blog: Red Curry Coconut Noodles. Guest post by Erica Kastner of Cooking for Seven, recipe submitted by TK member nika.

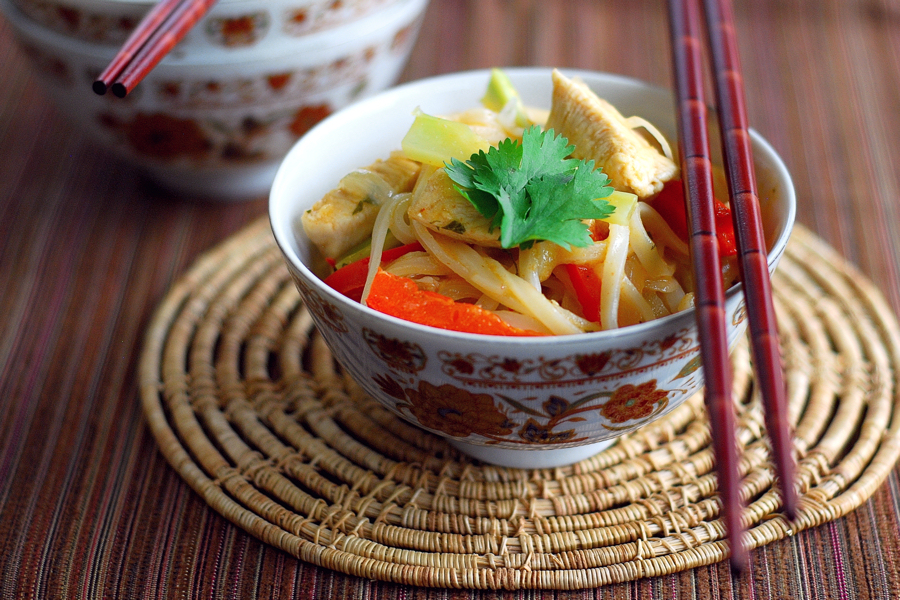
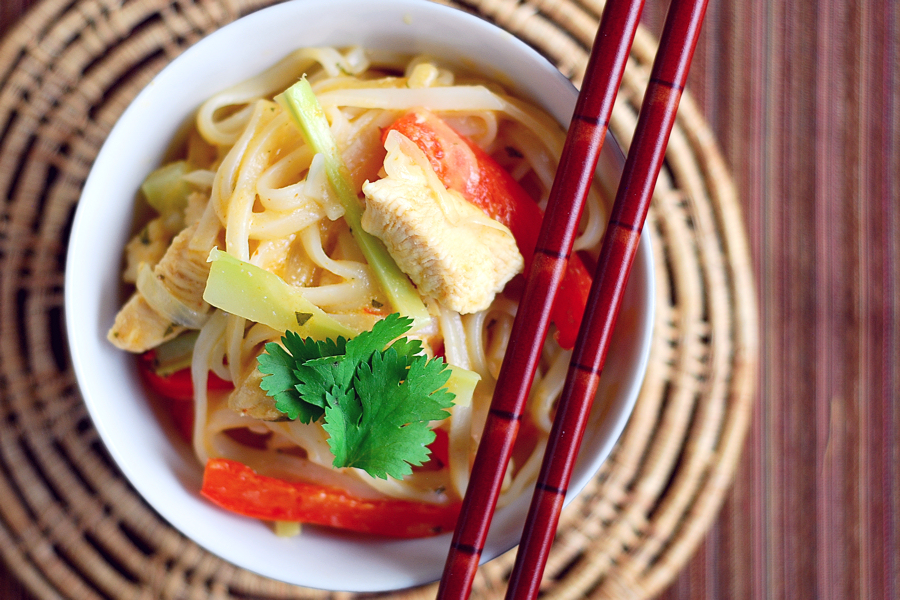
Serve in bowls and garnish with extra cilantro.


Tasty Kitchen Blog: Red Curry Coconut Noodles. Guest post by Erica Kastner of Cooking for Seven, recipe submitted by TK member nika.

Notes: I was very pleased with this recipe and hope to make it again! Another time, I might add more curry paste and less noodles. The noodles really soaked up the sauce, and I ended up pouring the whole package of chicken broth into the pot. This recipe is so forgiving and versatile.
I served the noodles with many sides and sauces: yogurt, sweet chili sauce, curry paste, peanut butter, and toasted coconut. Use your imagination!
Thank you, Nikki (nika), for sharing this recipe and for answering all my questions about your recipe.


Printable Recipe

Red Curry Coconut Noodles

See post on nika’s site!
4.38 Mitt(s) 21 Rating(s)21 votes, average: 4.38 out of 521 votes, average: 4.38 out of 521 votes, average: 4.38 out of 521 votes, average: 4.38 out of 521 votes, average: 4.38 out of 5

Prep Time:

Cook Time:

Difficulty: Easy

Servings: 8

8
x

Print Options

Page size Letter 3x5 4x6
Text Size Small Medium Large
Content Include description
Include prep time, etc.
Show image

Description

This has become a family favourite! I love that it never tastes exactly the same, and it is easy to add in other flavours that you might like in your coconut curry.

Ingredients

  • 6 whole Chicken, Boneless, Skinless Breasts, Cubed
  • 2 cans Coconut Milk
  • 2 teaspoons Red Curry Paste
  • 1 Tablespoon Ginger (fresh, Grated)
  • 1 Tablespoon Cilantro (fresh, Chopped)
  • ¼ cups Sweet Thai Chili Sauce
  • 2 cups, 1 tablespoon, 2 teaspoons, 7-⅛ pinches Chicken Or Vegetable Broth
  • 1 package Rice Noodles
  • 1 whole Onion (julienne)
  • 2 whole Red Peppers (julienne)
  • 1 cup Broccoli Slaw
  • 1 Tablespoon Salt To Taste

Preparation Instructions

Start with a large pot over medium-high heat. Scoop the cream off the top of the coconut milk, and put into the pot. The cream will be used as the “fat” instead of oil or butter. Along with the cream, add the curry paste and ginger. Let this simmer for 1 minute.

Then add the chicken. Cook the chicken through.
Then add the rest of what is in the coconut milk cans, sweet Thai chili sauce, cilantro, and chicken broth. Bring this to a simmer.

Then add your julienned veggies and rice noodles. Simmer this. You will see the broth slowly thicken as the rice noodles absorb it. It should only take about 5 minutes for the rice noodles to be cooked through.

Pull the pot off the heat, and let sit for about 5 minutes. It will thicken during this time. Then, it’s done. Slurp these noodles out of big noodle bowls! Garnish it with a bit more cilantro.

* I have also added peanut butter to this recipe, and a bit of honey if you want a less savoury/spicy version.


_______________________________________

Erica Berge shares her wonderful recipes and amazing food photography on her blog, Cooking for Seven. She also writes about crafts and posts more of her beautiful photography in her personal blog, EricaLea.com. There really isn’t much that this amazing young lady can’t do, and we’re thrilled she does some of it here.