The Pioneer Woman Tasty Kitchen
Profile photo of georgiapellegrini

Zucchini Blossom Fritters

Posted by in Step-by-Step Recipes

Tasty Kitchen Blog: Zucchini Blossom Fritters. Guest post by Georgia Pellegrini, recipe submitted by TK member Katie of The Parsley Thief.

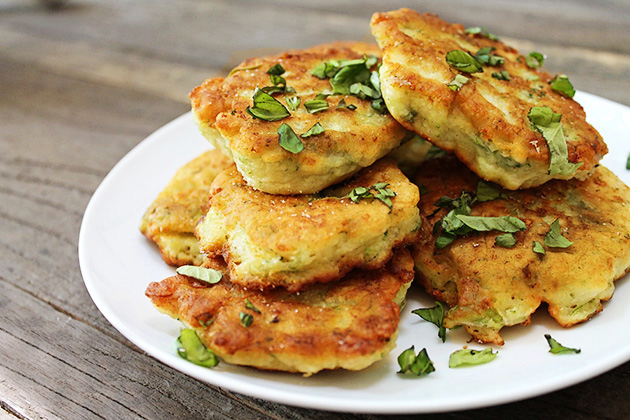
These Zucchini Blossom Fritters are a family recipe shared by TK member Katie. They are wonderfully unique, and contain the delicious flowers that bloom from a zucchini plant before the fruit forms. We’re coming up to zucchini season, so if you can find the blooms in your market or your own garden, you should definitely try this using fresh zucchini blossoms! Since the blossoms can be difficult to find in some locales, we were inspired to use grated zucchini instead. With this slightly modified dish, you can now now enjoy a batch of fritters anywhere and any time of the year!


Tasty Kitchen Blog: Zucchini Blossom Fritters. Guest post by Georgia Pellegrini, recipe submitted by TK member Katie of The Parsley Thief.

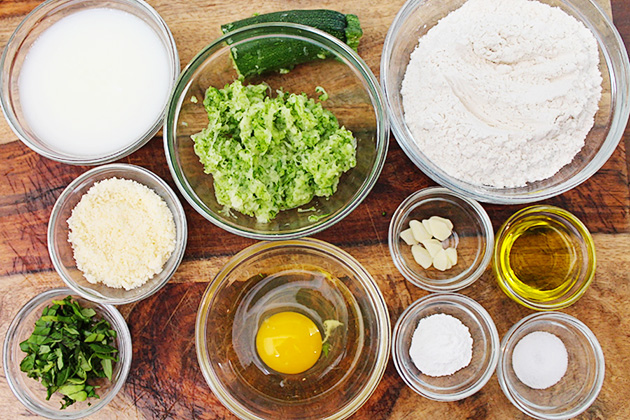
To make the fritters you will need: extra virgin olive oil, grated Parmesan cheese, flour, milk, a whole egg, sliced garlic, baking powder, fresh basil, Salt, ½ cup grated zucchini (or 7-8 squash blossoms if you can get them), and cooking oil for frying. Try your best to drain the zucchini of excess moisture.


Tasty Kitchen Blog: Zucchini Blossom Fritters. Guest post by Georgia Pellegrini, recipe submitted by TK member Katie of The Parsley Thief.

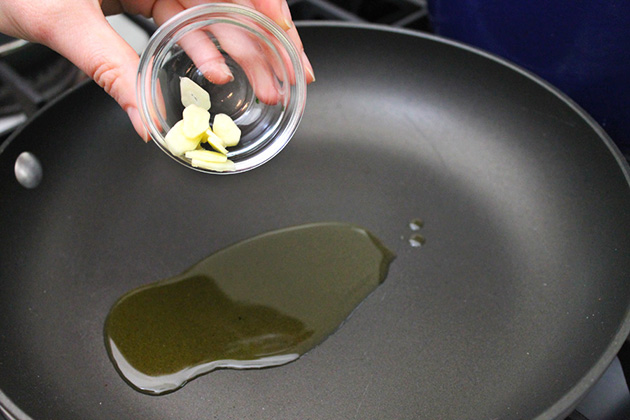
Heat the olive oil in a pan and sauté the garlic over medium high heat until lightly browned.


Tasty Kitchen Blog: Zucchini Blossom Fritters. Guest post by Georgia Pellegrini, recipe submitted by TK member Katie of The Parsley Thief.

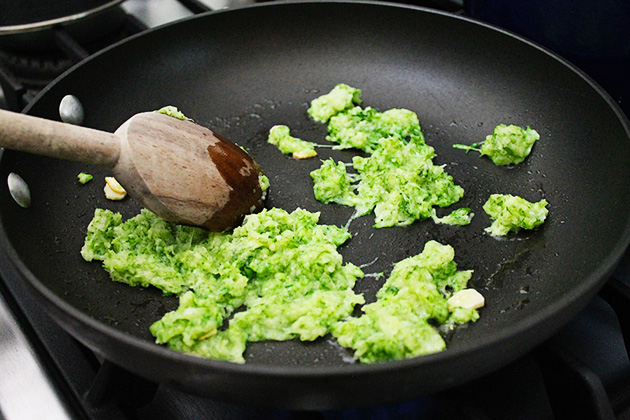
Add the grated zucchini and continue to sauté until cooked through and most of the watery liquid has cooked off.


Tasty Kitchen Blog: Zucchini Blossom Fritters. Guest post by Georgia Pellegrini, recipe submitted by TK member Katie of The Parsley Thief.

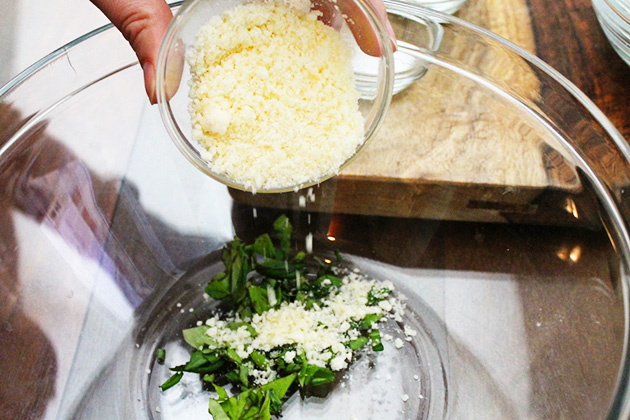
Next, in a large bowl add 1 tablespoon of freshly chopped basil and 3 tablespoons of grated parmesan cheese.


Tasty Kitchen Blog: Zucchini Blossom Fritters. Guest post by Georgia Pellegrini, recipe submitted by TK member Katie of The Parsley Thief.

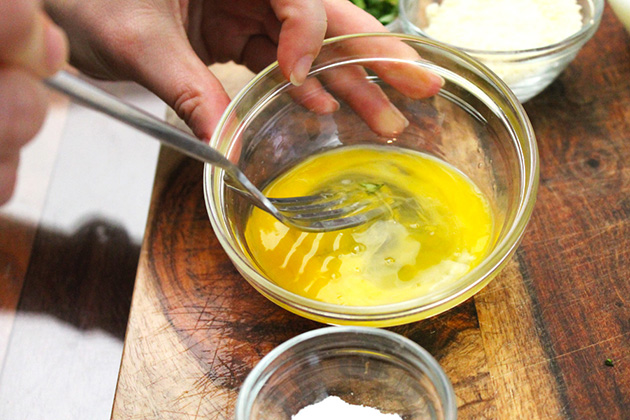
Whisk the egg, and then add it to the large bowl.


Tasty Kitchen Blog: Zucchini Blossom Fritters. Guest post by Georgia Pellegrini, recipe submitted by TK member Katie of The Parsley Thief.

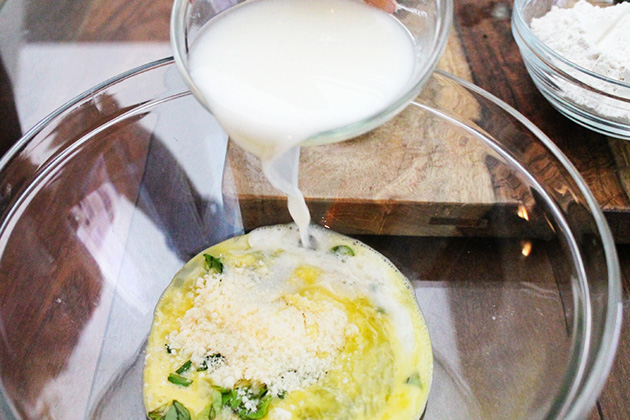
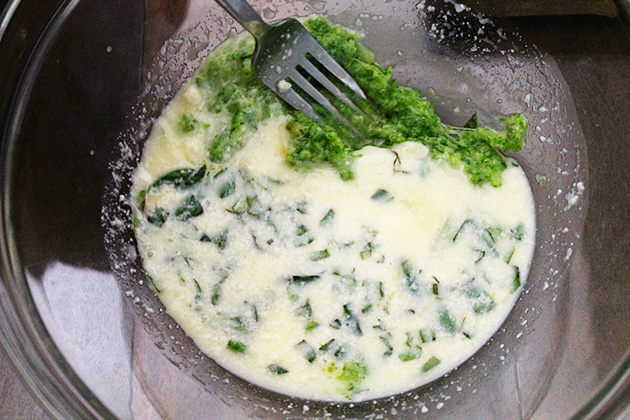
Pour ½ cup milk into the large bowl as well. Start whisking all of these ingredients together.


Tasty Kitchen Blog: Zucchini Blossom Fritters. Guest post by Georgia Pellegrini, recipe submitted by TK member Katie of The Parsley Thief.

Add the zucchini mixture and give it a stir.


Tasty Kitchen Blog: Zucchini Blossom Fritters. Guest post by Georgia Pellegrini, recipe submitted by TK member Katie of The Parsley Thief.

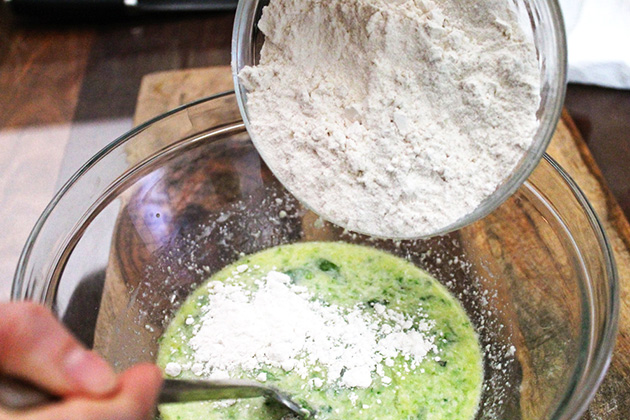
In a separate bowl, combine 1 cup flour, 1 teaspoon baking powder, and ½ teaspoons salt.

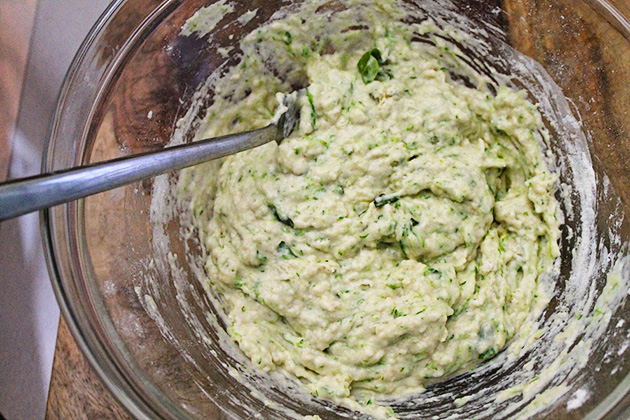
Combine the dry ingredients into the wet ingredients.


Tasty Kitchen Blog: Zucchini Blossom Fritters. Guest post by Georgia Pellegrini, recipe submitted by TK member Katie of The Parsley Thief.

Mix everything together until it is a little thicker than pancake batter.


Tasty Kitchen Blog: Zucchini Blossom Fritters. Guest post by Georgia Pellegrini, recipe submitted by TK member Katie of The Parsley Thief.

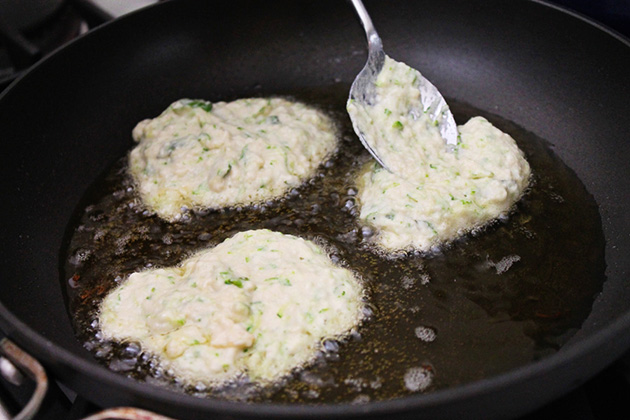
Pour about ¼ inch of oil into a skillet; heat over medium high heat. Scoop the batter (a full tablespoon) and drop it into the hot oil. Gently press down on the top of the fritter with a spoon to flatten.


Tasty Kitchen Blog: Zucchini Blossom Fritters. Guest post by Georgia Pellegrini, recipe submitted by TK member Katie of The Parsley Thief.

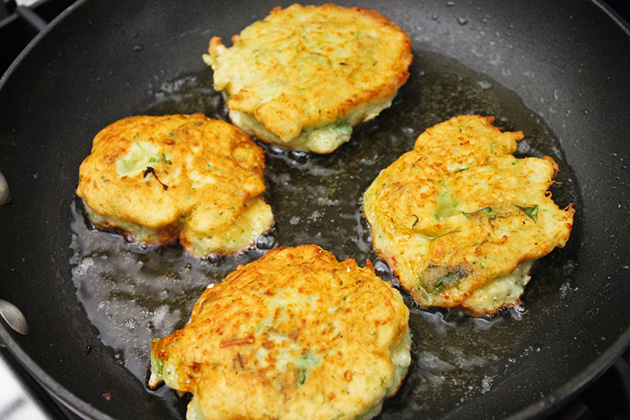
Once you have placed a few in the pan, fry the fritters until golden brown on one side, about 3–4 minutes. Flip them over and continue to fry for an additional 3-4 minutes.

Remove from the pan and place onto a plate covered with paper towels (the towels soak up the excess oil). Let cool.


Tasty Kitchen Blog: Zucchini Blossom Fritters. Guest post by Georgia Pellegrini, recipe submitted by TK member Katie of The Parsley Thief.

All golden brown and delicious, your fritters are now complete. Top with additional chopped basil or brush the tops with butter. Enjoy them while they are still warm, crispy, and full of goodness. They make the perfect appetizer, party food, or afternoon lunch and would work well with all kinds of condiments, from crème fraiche to diced ham.

Go check out more recipes from Katie in her TK recipe box or the recipe index of her blog, The Parsley Thief!


Printable Recipe
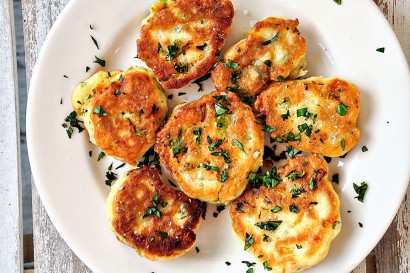
Zucchini Blossom Fritters

See post on theparsleythief’s site!
0.00 Mitt(s) 0 Rating(s)0 votes, average: 0.00 out of 50 votes, average: 0.00 out of 50 votes, average: 0.00 out of 50 votes, average: 0.00 out of 50 votes, average: 0.00 out of 5

Prep Time:

Cook Time:

Difficulty: Easy

Servings: 4

4
x

Print Options

Page size Letter 3x5 4x6
Text Size Small Medium Large
Content Include description
Include prep time, etc.
Show image

Description

Zucchini blossoms are the edible flowers that grow from a zucchini plant. In this family recipe, the flowers are lightly sauteed in garlic, then chopped and used as the base for a fritter batter, along with fresh basil and Parmesan cheese. They’re delicious!

Ingredients

  • 8 whole Squash Blossoms
  • 1 clove Garlic, Sliced
  • 1 Tablespoon Olive Oil
  • 1 Tablespoon Chopped Fresh Basil Leaves, Plus More For Optional Garnish
  • 3 Tablespoons Freshly Grated Parmesan Cheese
  • 1 whole Egg
  • ½ cups Milk
  • 1 cup Flour
  • 1 teaspoon Baking Powder
  • ½ teaspoons Kosher Salt
  • Vegetable Oil, For Frying

Preparation Instructions

Prepare the squash blossoms by inspecting each flower for dirt, or bugs (little critters do like to hide inside them). Give them a gentle rinse with water and dry with paper towels. Remove the pistil from inside each flower. Note: For this application, it’s fine to cut a slit alongside the length of each flower, to make removal easier. You wouldn’t want to do this if you were stuffing the blossoms. I also like to remove the little green spikes from around the stem of the flowers.

Saute the blossoms with the garlic and olive oil, in a skillet over medium high heat until softened and lightly browned. Remove from the skillet and coarsely chop. Transfer to a bowl and add in the chopped basil leaves, Parmesan cheese, egg, and milk. Use a fork to gently beat the ingredients together. In a separate bowl, whisk together the flour, baking powder, and salt. Pour the wet ingredients into the bowl and stir to combine. The mixture should be slightly thicker than pancake batter. If needed, add in a bit more milk.

Pour enough vegetable oil into a skillet to coat the bottom by about a 1/4″; heat over medium high heat. Scoop the batter by the heaping tablespoonful and drop into the hot oil. Use the back of a spoon to flatten each fritter slightly. Cook until golden brown, about 3 minutes. Flip the fritter over and brown the other side. Transfer to a paper towel-lined plate. Sprinkle lightly with some coarse salt and chopped fresh basil. Serve while hot.


_______________________________________

There’s so much to say about Georgia, we don’t know where to start. Leaving Wall Street for the French Culinary Institute, followed by a stint at the Gramercy Tavern and La Chassagnette in France, her passion for food and food traditions are evident and inspiring. Visit her site at Georgia Pellegrini, where you’ll find more recipes, photos, learn all about her wonderful books (including her latest one, Modern Pioneering, and enjoy her latest adventures.

 

Profile photo of Erika (TK)

Growing Vegetables

Posted by in Kitchen Talk

Tasty Kitchen Blog: Kitchen Talk (Growing Vegetables)

The other day, my breakfast consisted of fried eggs with a dash of hot sauce, and freshly squeezed orange juice. The eggs were from a friend’s chicken, the oranges from her tree, and the hot sauce was homemade using Meyer lemons and hot peppers grown by my brother-in-law. Knowing that just about every item came from someone’s garden made it that much more special to me.

That’s one of the reasons I keep trying—despite repeated failure—to grow stuff to eat in my garden. Sure, it takes time and work and patience, but the payoff is worth it. Not only are you rewarded with produce that’s often superior in freshness and flavor but you also enjoy the sense of accomplishment that comes from pulling off a “garden to table” meal. If you share that sentiment, then this post is for you!

We’ve talked about growing herbs before, so now let’s talk about veggies. Tell us:

Do you have any tips for growing vegetables?

I’m not much of a gardener. Oh, I love plants—flowers, vegetables, herbs, fruit trees, shrubs, majestic oaks and diminutive crocuses, willowy bamboo, stubby succulents, ornamental grasses … I love them all. My father has the heart and the hands of a farmer, but with the way things have been going for me, I suspect it might skip a generation. I’m still trying though!

In an attempt to make me look good, my friend Lacey shared a few tips for me to pass on. She just planted 839 vegetable plants, so she knows her beez-neez. (And okay, I think it was more like 52, but in my book, that’s just like 839.) She’s been doing it for some years now, planting corn, peppers, snow peas, beans, cabbage, you name it. She starts all her vegetables from seed, and this is what she does:

1. Plant 2 to 3 seeds in a little peat pot. Water well and put in a sealable bag.
2. Seal bag and keep in a place where it won’t get too cold. Keep the bag sealed, almost like a mini greenhouse, and don’t open it or even water it until seeds begin to germinate.
3. When shoots are about 2 inches high, take the peat pot out of the bag and transfer to your vegetable garden or a larger container with soil.

It sounds easy enough that even I can’t mess it up. Seriously, how badly can I mess up instructions that mostly involve keeping a bag in one place and doing and touching nothing? I can’t wait to try her method out! Of course, it goes without saying that you should always check for any special instructions specific to the variety of vegetable you’re planting. The method above seems to work well for the Southern California climate; you may have to vary it depending on where you are.

How about you? Do you have any tips for growing vegetables? Favorite veggies you like to plant each year? Any particular challenges planting specific varieties? Any questions that other gardeners here may be able to answer? Come share below!


Profile photo of DessertForTwo

Fudgy Black Bean Brownies

Posted by in Baking

Tasty Kitchen Blog: Fudgy Black Bean Brownies. Guest post by Christina of Dessert for Two, recipe submitted by TK member Sarah of Simple and Sweets.

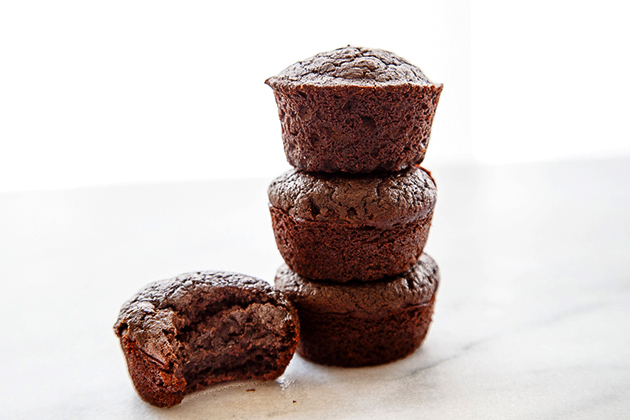
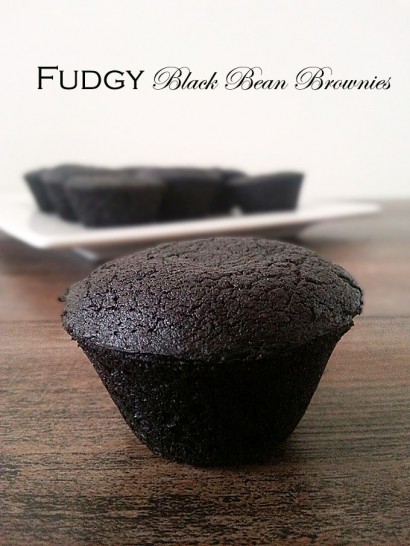
I just now noticed that this is the second recipe I’ve pulled from Sarah’s recipe box to share here on the Tasty Kitchen Blog. It was pure coincidence, but after these Fudgy Black Bean Brownies, I’ll be pulling from her TK recipe box even more. Sarah knows her chocolate desserts, and these brownies are no exception.

These brownies are made in the bowl of the food processor entirely (no cleanup!), and they’re also relatively healthy with a gluten-free option. I didn’t think all of my chocolate dreams were going to come true with this recipe, but they really did. You might be discouraged by the recipe title, but don’t be. If the black beans are pureed very, very well, they are completely indistinguishable. I promise. Cross my heart. I wouldn’t tell a lie here on the Tasty Kitchen Blog!


Tasty Kitchen Blog: Fudgy Black Bean Brownies. Guest post by Christina of Dessert for Two, recipe submitted by TK member Sarah of Simple and Sweets.

So yes, we’re really making brownies with black beans. Embrace it. They’re good for you!


Tasty Kitchen Blog: Fudgy Black Bean Brownies. Guest post by Christina of Dessert for Two, recipe submitted by TK member Sarah of Simple and Sweets.

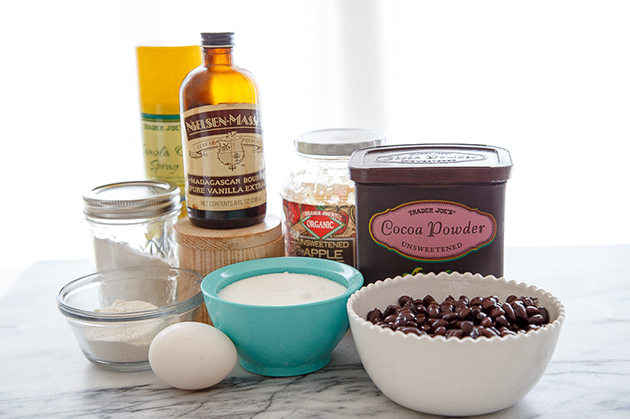
Let’s start with our lineup of ingredients: black beans, cocoa powder, applesauce, sugar, vanilla, salt, almond flour, an egg, baking soda, and cooking spray. I used regular flour in place of the almond flour successfully, but Sarah’s original recipe is gluten-free with almond flour.


Tasty Kitchen Blog: Fudgy Black Bean Brownies. Guest post by Christina of Dessert for Two, recipe submitted by TK member Sarah of Simple and Sweets.

You’re going to need a food processor for this recipe. I’m worried if you just hand-mashed the beans, you would have bean skins in the final product. I don’t think you want that, so use a food processor, my dears.

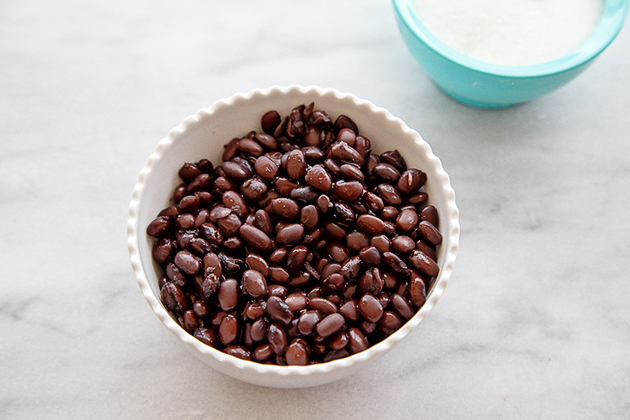
Into the bowl of the food processor goes the beans first. Puree them very, very well. Stop and scrape the sides several times to ensure everything is well blended.

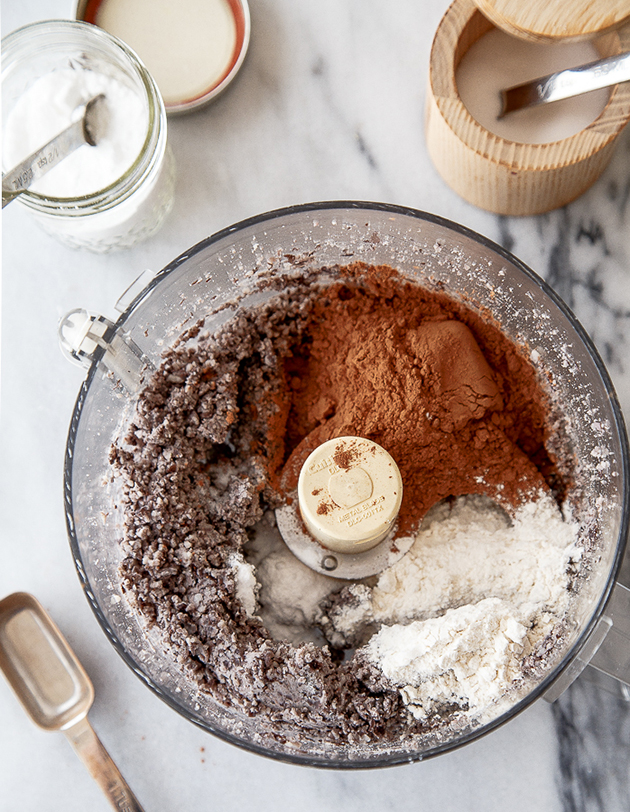
Next, Sarah says to add all the dry ingredients: cocoa powder, baking soda, almond flour, and salt.


Tasty Kitchen Blog: Fudgy Black Bean Brownies. Guest post by Christina of Dessert for Two, recipe submitted by TK member Sarah of Simple and Sweets.

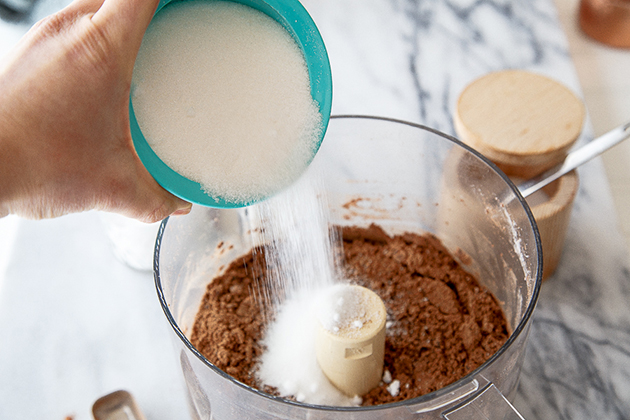
Add the wet ingredients: sugar, applesauce …


Tasty Kitchen Blog: Fudgy Black Bean Brownies. Guest post by Christina of Dessert for Two, recipe submitted by TK member Sarah of Simple and Sweets.

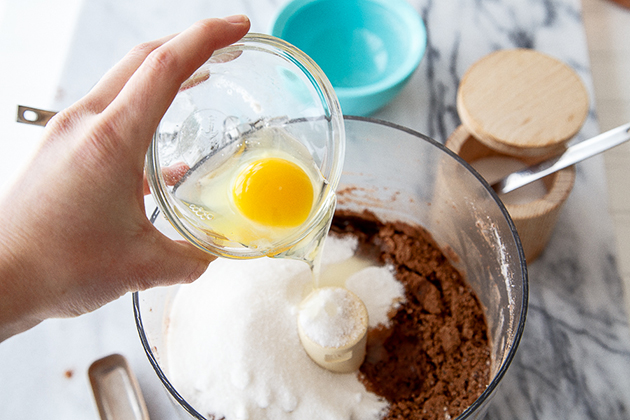
… egg, and vanilla.


Tasty Kitchen Blog: Fudgy Black Bean Brownies. Guest post by Christina of Dessert for Two, recipe submitted by TK member Sarah of Simple and Sweets.

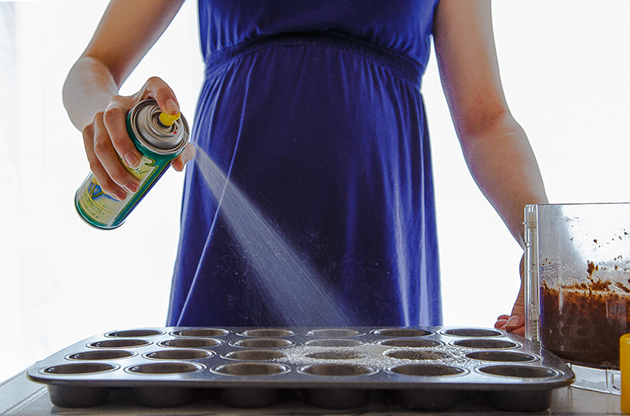
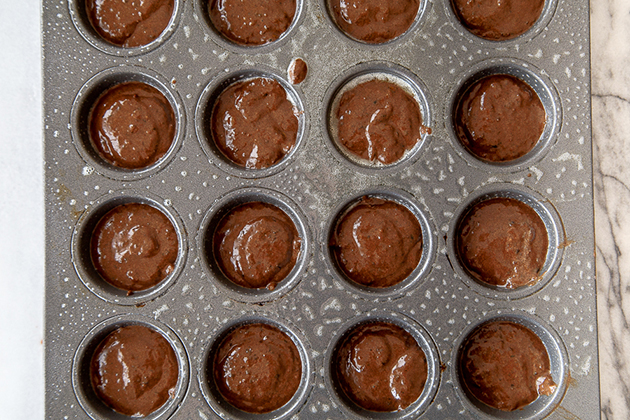
Spray a mini muffin pan with 24 cups with cooking spray very well. This is something originally omitted in the recipe, but when I reached out to Sarah, she definitely recommended it.


Tasty Kitchen Blog: Fudgy Black Bean Brownies. Guest post by Christina of Dessert for Two, recipe submitted by TK member Sarah of Simple and Sweets.

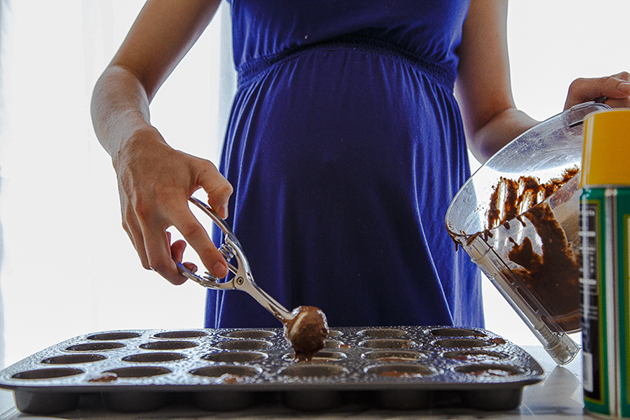
Then, use a cookie scoop to make quick work of the batter. You will get 24 mini fudgy brownies. That’s a lot of brownies for not a lot of work. Sarah makes me one happy pregnant lady!


Tasty Kitchen Blog: Fudgy Black Bean Brownies. Guest post by Christina of Dessert for Two, recipe submitted by TK member Sarah of Simple and Sweets.

Here’s what it looks like before baking.


Tasty Kitchen Blog: Fudgy Black Bean Brownies. Guest post by Christina of Dessert for Two, recipe submitted by TK member Sarah of Simple and Sweets.

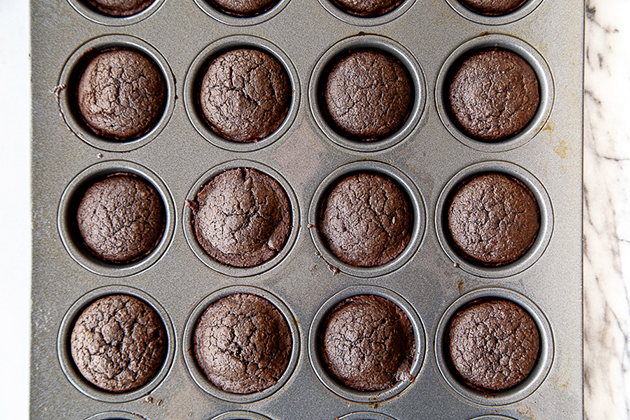
And this is after the brownies have baked.


Tasty Kitchen Blog: Fudgy Black Bean Brownies. Guest post by Christina of Dessert for Two, recipe submitted by TK member Sarah of Simple and Sweets.

Thanks again, Ms. Sarah! Your blog Simple and Sweets continues to inspire me in the kitchen, and keeps me very well fed!


Printable Recipe

Fudgy Black Bean Brownies

See post on Sarah’s site!
5.00 Mitt(s) 2 Rating(s)2 votes, average: 5.00 out of 52 votes, average: 5.00 out of 52 votes, average: 5.00 out of 52 votes, average: 5.00 out of 52 votes, average: 5.00 out of 5

Prep Time:

Cook Time:

Difficulty: Easy

Servings: 24

24
x

Print Options

Page size Letter 3x5 4x6
Text Size Small Medium Large
Content Include description
Include prep time, etc.
Show image

Description

Obviously, using black beans makes these brownies way healthier, but I’m not even focusing on that fact right now.

These are probably some of the best brownies I have ever made. They are thick, with soft centers, a crunchy top, and fudgy. They melt in your mouth.

Ingredients

  • 15 ounces, fluid Canned Black Beans, Drained And Rinsed
  • 9 Tablespoons Unsweetened Cocoa Powder
  • ¼ cups Almond Flour
  • 1 teaspoon Baking Soda
  • ⅛ teaspoons Salt
  • 1 cup Sugar
  • 1 whole Egg
  • 4 ounces, fluid Applesauce
  • 1 teaspoon Vanilla Extract

Preparation Instructions

Preheat oven to 350ºF.

In a food processor, blend black beans until they form into a smooth paste. You don’t want any chunks of black beans in your brownies.

Add in cocoa powder, almond flour, baking soda, and salt. Pulse the food process a couple more times to combine.

Add in sugar, egg, applesauce and vanilla. Run the food processor until everything is completely mixed together.

Spoon mixture into a mini muffin pan, filling each ¾ full. Bake for 15–20 minutes, or until the brownies are set, pull away from the side of the pan, and a toothpick inserted in the center comes out clean.


_______________________________________

Growing up in a food-obsessed family and spending a lot of time in her Aunt Rose’s restaurant as a child, Christina was destined to be a fantastic cook. She’s a private chef during the day, but cooks for two at home. Like all of us, she has a sweet tooth that needs indulging after dinner. After becoming frustrated with the lack of recipes made for two, especially in the dessert category, she took matters into her own hands and started her blog, Dessert for Two, to share how she takes Southern classics (and a few surprises) and turns them into recipes that are perfect for just a few people. Her first cookbook is due out in February 2015.


Profile photo of Erika (TK)

Looks Delicious! Chicken Shawarma

Posted by in Looks Delicious!

Tasty Kitchen Blog: Looks Delicious! (Chicken Shawarma with Hummus and Pita, submitted by TK member Julie of The Gourmet RD)

Have you ever had shawarma?

“There’s a shawarma joint about two blocks from here. I don’t know what it is but I want to try it.”

Iron Man may not know have known shawarma then but he quickly remedied that. And I don’t blame him. Shawarma is very similar to a gyro or doner kebab, and many years ago, I was fortunate enough to live in a place where I had easy access to it. It’s one of my all-time favorite street foods, so imagine my excitement when I saw a home-kitchen-friendly version here on Tasty Kitchen!

I say “home-kitchen-friendly” because, like gyros, shawarma meat is usually roasted on a vertical rotating spit, preferably over a wood fire. I don’t know many home kitchens equipped with one, but Julie’s recipe for Chicken Shawarma with Hummus and Pita only needs a hot oven. And she makes chili hummus to go with it. (Click the photo above to get the printable!)

Ah, chicken shawarma. Luscious chicken full of earthy flavors, roasted in the oven, served on toasted pita bread spread with chili hummus and topped with fresh veggies and some tzatziki or tahini sauce. It’s no wonder even superheroes who just spent a few hard days saving the world make time to kick back and polish off one or two (or twenty—I’m looking at you, Hulk) of these.

Thanks for sharing, Julie! Chicken shawarma is definitely happening in my kitchen soon, and you can bet I’m going to have fun saying “shawarma” over and over again until someone tells me to quit it already.

Have a great weekend, friends!


Profile photo of Erika (TK)

Corned Beef Ideas

Posted by in Holidays

Every time I prepare corned beef, I always end up with a lot left over. If you find yourself in that same predicament, we thought we'd help you out with a few ideas for those corned beef leftovers.

Profile photo of Erica Lea

Korean Shrimp and Rice Porridge (Saewoojuk)

Posted by in Step-by-Step Recipes

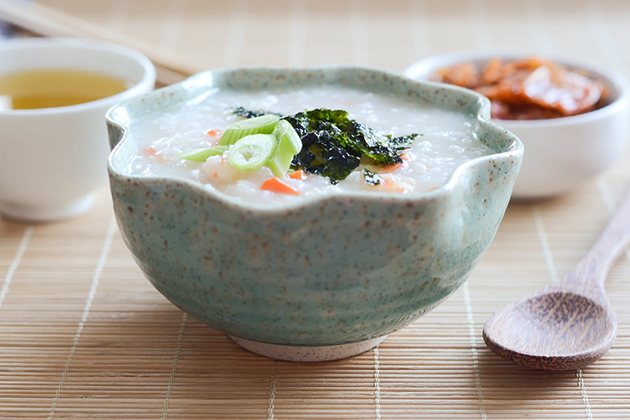
Juk is basically the Korean version of congee or rice porridge. Saewoo means shrimp. All of the flavors are simply delightful, and the possibilities for add-ons are endless.

Profile photo of Erika (TK)

Looks Delicious! Cajun Eggs Benedict

Posted by in Looks Delicious!

It's Friday! You know what that means. It means the weekend is almost upon us, giving us two days to sleep in a little bit, and the luxury of spending a little more time enjoying a sit-down breakfast instead of just the usual grab-and-go weekday fare.

Profile photo of Erika (TK)

Quick Dinner Options

Posted by in Kitchen Talk

Many things can interfere with our daily schedule and we sometimes find ourselves scrambling to put together that last meal of the day. So let's put our heads together and gather ideas to help each other out when we find ourselves in that predicament!