The Pioneer Woman Tasty Kitchen
Profile photo of Natalie | Perry's Plate

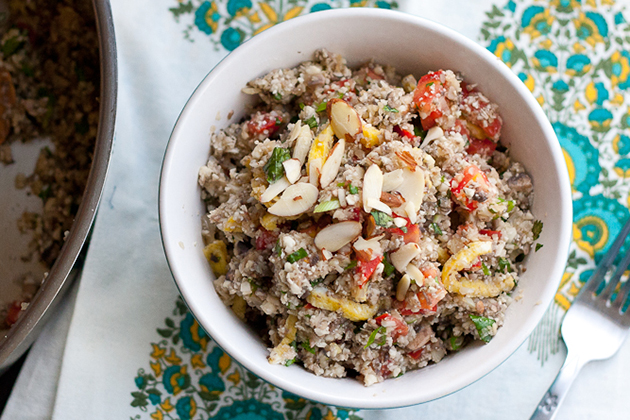
Paleo-friendly Cauliflower Fried Rice

Posted by in Step-by-Step Recipes

Tasty Kitchen Blog: Paleo-friendly Cauliflower Fried Rice. Guest post by Natalie Perry of Perry's Plate, recipe submitted by TK member Dani of Expat Cucina.

If you’re familiar with the paleo lifestyle, you might know that this dish doesn’t actually have rice in it. 

The first time I saw cauliflower used as rice, it blew my mind a little. Cauliflower is one of the darlings of the paleo world because it can be manipulated to replace grains in a lot of meals. I’ve used it in place of rice, pureed it to thicken soups, seasoned and roasted it as a vegetarian “steak”, mashed it in place of potatoes, and my favorite, used it as a base for a pizza crust.

No, I’m not joking. And it was all delicious.

Even if you’re not a paleo eater and avoiding grains, dairy, legumes, and sugar for various reasons, replacing grains with vegetables (particularly refined grains) can be a great way to increase nutrient density in a recipe. 

This Paleo-friendly Cauliflower Fried Rice recipe submitted by TK member Dani is a perfect example of grain-swapping. I’m excited to share it with you!

So is the cauliflower. It likes to show off.


Tasty Kitchen Blog: Paleo-friendly Cauliflower Fried Rice. Guest post by Natalie Perry of Perry's Plate, recipe submitted by TK member Dani of Expat Cucina.

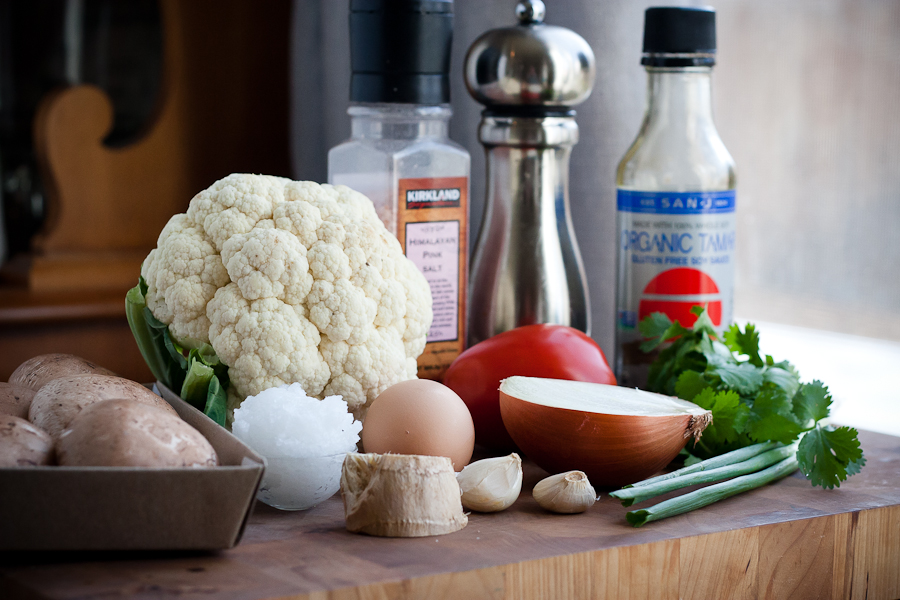
I adapted this recipe slightly, adding a few more things (notes below), so you’ll need a whole head of cauliflower, salt, pepper, soy sauce (or tamari), mushrooms, coconut oil, an egg, fresh ginger, garlic, onion, green onion, a tomato, and cilantro.

If you’re a nit-picky paleo, you may not use soy sauce or tamari. I don’t mind it in very small amounts occasionally, but you can also use coconut aminos which is a good substitute. You may be able to find it at Whole Foods or other natural grocery stores.


Tasty Kitchen Blog: Paleo-friendly Cauliflower Fried Rice. Guest post by Natalie Perry of Perry's Plate, recipe submitted by TK member Dani of Expat Cucina.

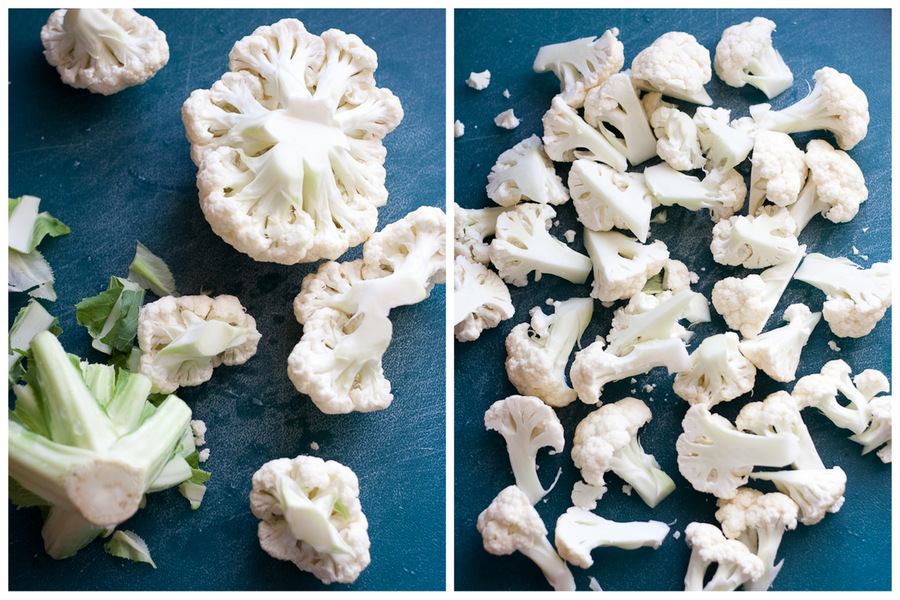
First, dismantle the cauliflower, and cut it into fairly uniform pieces.


Tasty Kitchen Blog: Paleo-friendly Cauliflower Fried Rice. Guest post by Natalie Perry of Perry's Plate, recipe submitted by TK member Dani of Expat Cucina.

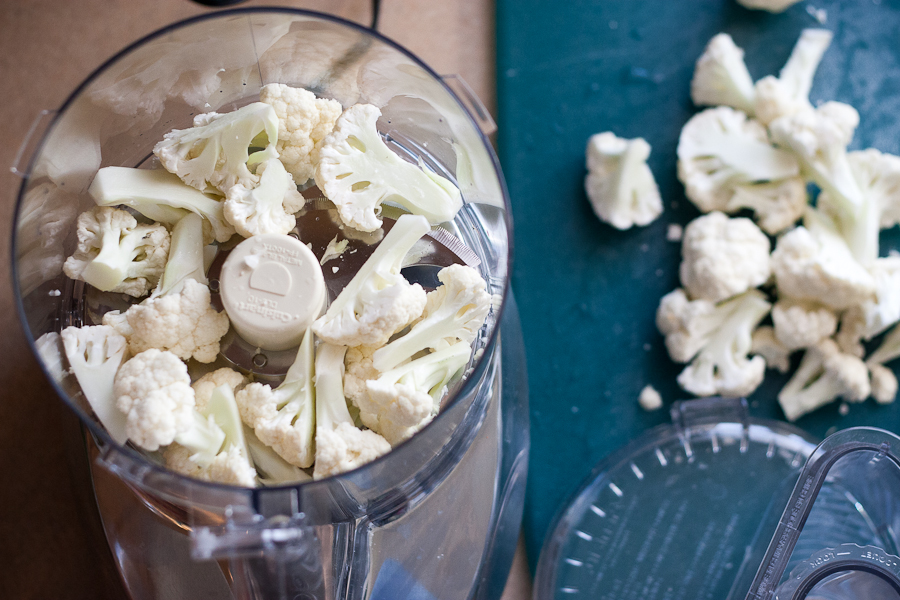
My food processor holds 9 cupd, so I did half the head at a time to ensure even chopping. If you have a larger one you may be able to do it all in one batch.


Tasty Kitchen Blog: Paleo-friendly Cauliflower Fried Rice. Guest post by Natalie Perry of Perry's Plate, recipe submitted by TK member Dani of Expat Cucina.

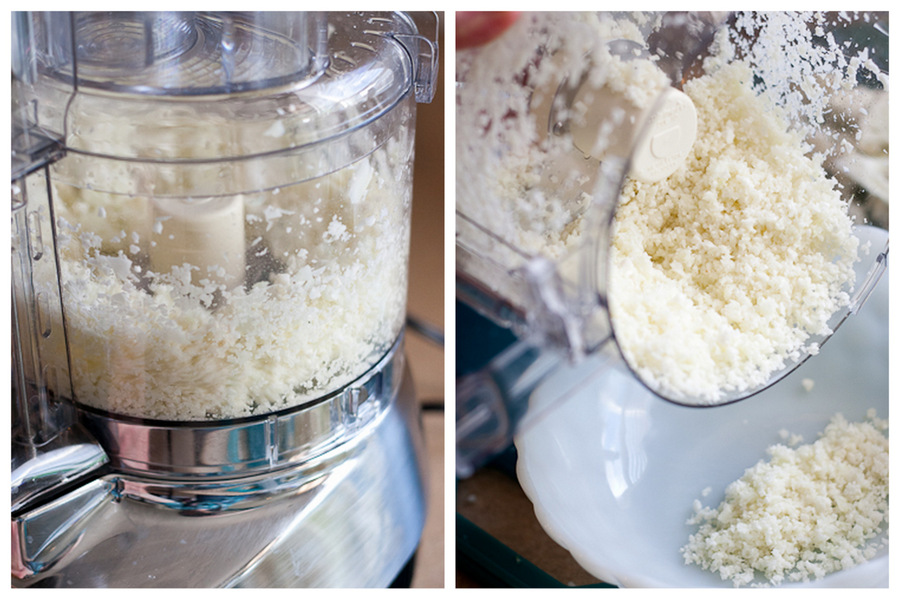
Pulse several times until the cauliflower is about the size of rice grains. Transfer to a bowl and set aside. 


Tasty Kitchen Blog: Paleo-friendly Cauliflower Fried Rice. Guest post by Natalie Perry of Perry's Plate, recipe submitted by TK member Dani of Expat Cucina.

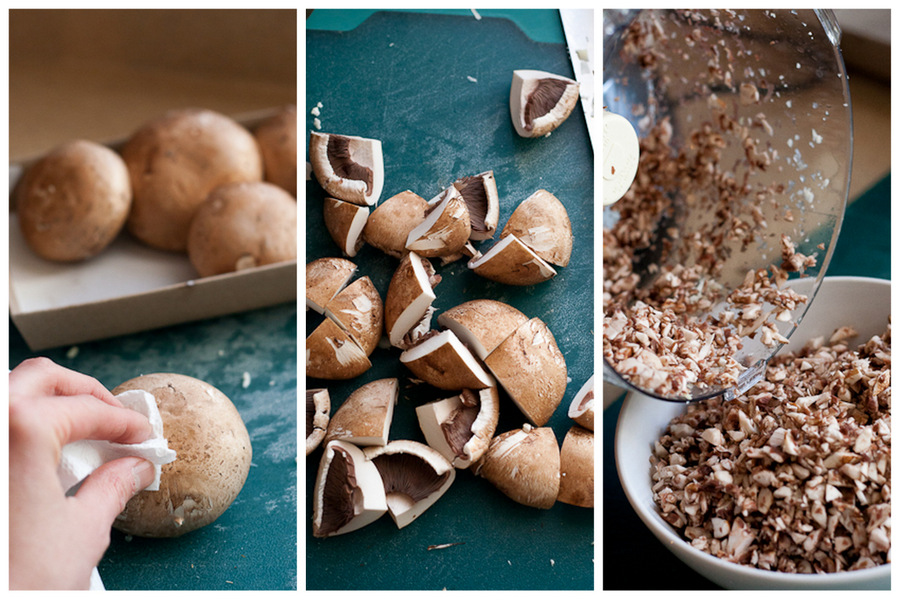
Next, get the mushrooms prepped by wiping any dirt off with a paper towel, breaking off the stems, and quartering them. I used baby portabellas but any type of mushroom would do. Pulse the mushroom quarters in the food processor like you did the rice and transfer to a separate bowl.

You could just slice them into larger pieces and leave them big, but my little picky eaters aren’t into mushrooms, and I didn’t want to start a dinnertime battle. I minced mine out of survival. 


Tasty Kitchen Blog: Paleo-friendly Cauliflower Fried Rice. Guest post by Natalie Perry of Perry's Plate, recipe submitted by TK member Dani of Expat Cucina.

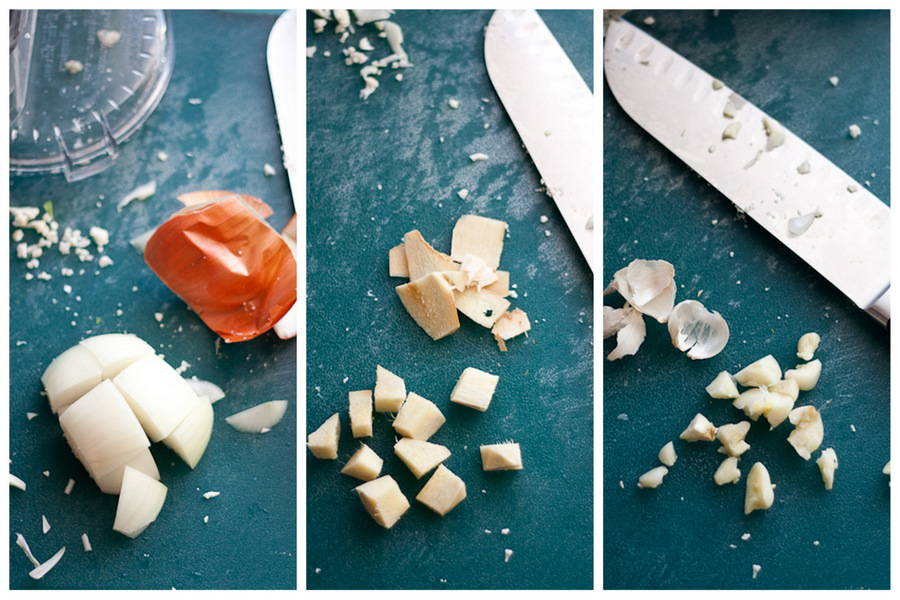
Next, prep the onion, ginger, and garlic. Peel them all, then cut them into chunks. 


Tasty Kitchen Blog: Paleo-friendly Cauliflower Fried Rice. Guest post by Natalie Perry of Perry's Plate, recipe submitted by TK member Dani of Expat Cucina.

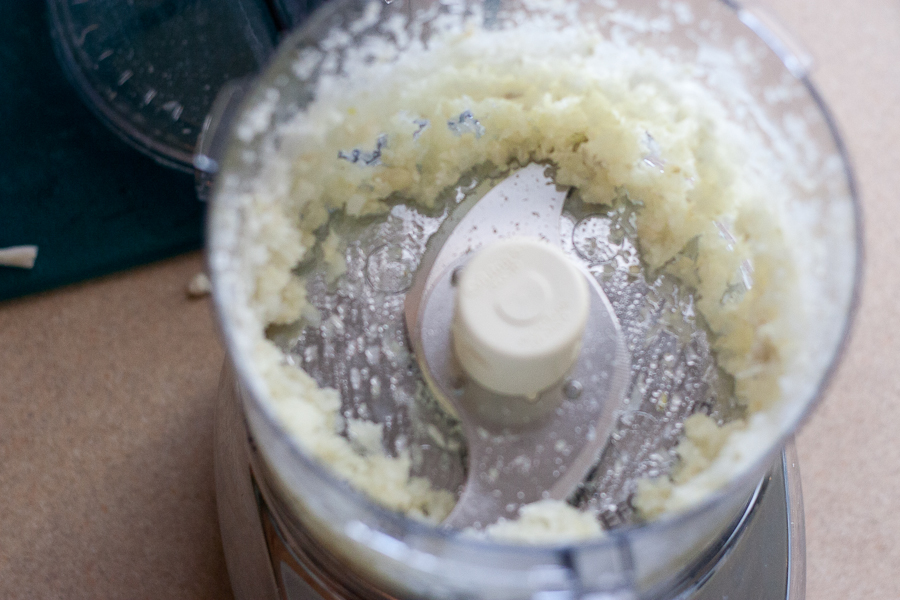
Throw the ginger, garlic, and onion into the food processor and pulse to mince. That machine is going to earn its counterspace today. You could also use a knife. If you wanted. (I didn’t.)


Tasty Kitchen Blog: Paleo-friendly Cauliflower Fried Rice. Guest post by Natalie Perry of Perry's Plate, recipe submitted by TK member Dani of Expat Cucina.

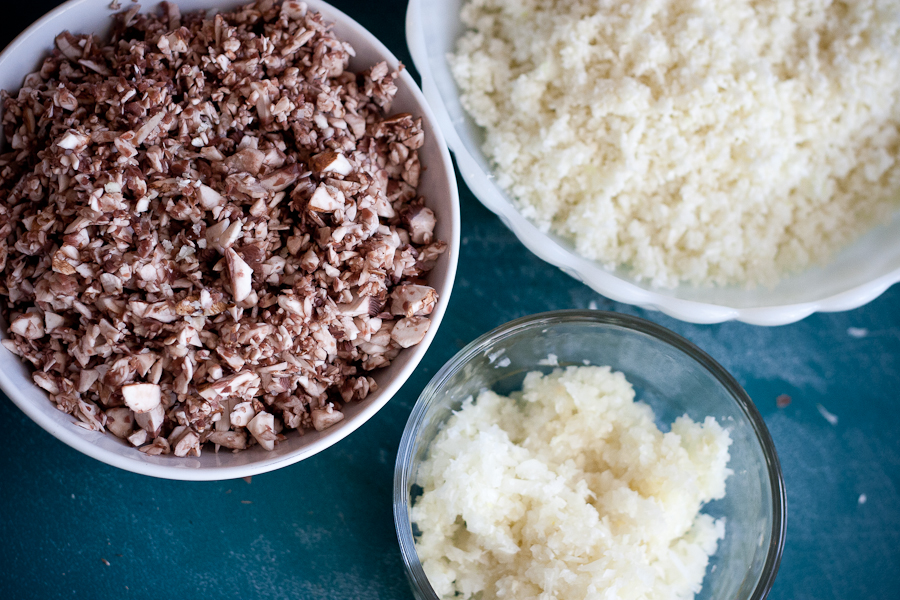
Now you have three bowls of minced ingredients ready to go!

Yes, there is quite a bit of chopping in this recipe (and we’re not quite finished yet), but the dish comes together really easily and quickly. You could do all of the prep a day or two ahead as well.


Tasty Kitchen Blog: Paleo-friendly Cauliflower Fried Rice. Guest post by Natalie Perry of Perry's Plate, recipe submitted by TK member Dani of Expat Cucina.

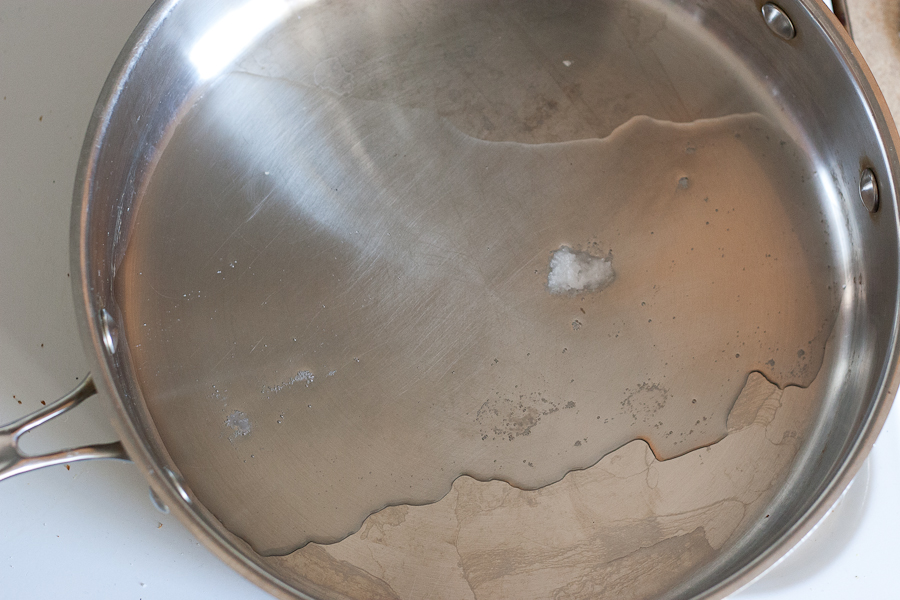
Alright, time for some heat. In a large saute pan, heat the coconut oil to medium-high heat. 


Tasty Kitchen Blog: Paleo-friendly Cauliflower Fried Rice. Guest post by Natalie Perry of Perry's Plate, recipe submitted by TK member Dani of Expat Cucina.

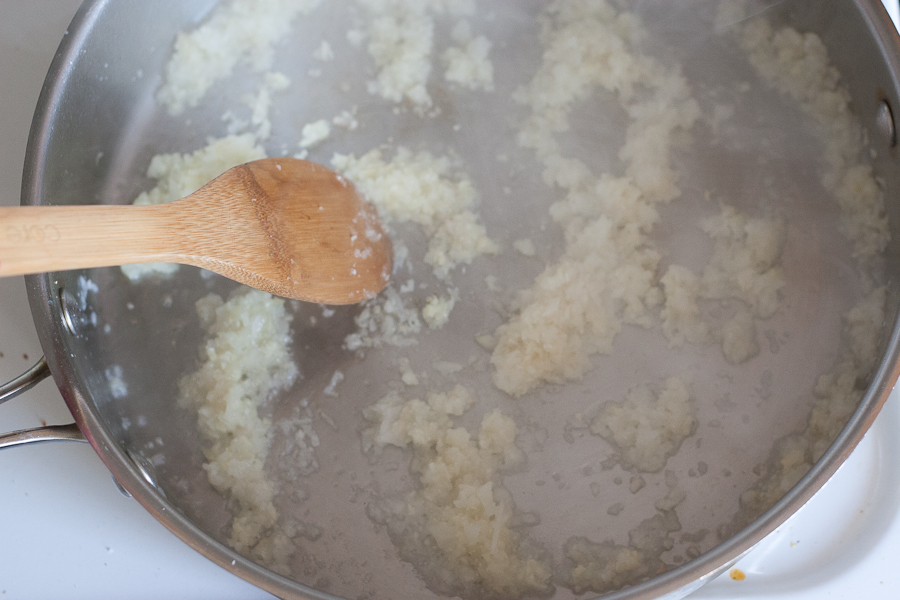
Add the onion-ginger-garlic mixture and cook it for a minute or two.


Tasty Kitchen Blog: Paleo-friendly Cauliflower Fried Rice. Guest post by Natalie Perry of Perry's Plate, recipe submitted by TK member Dani of Expat Cucina.

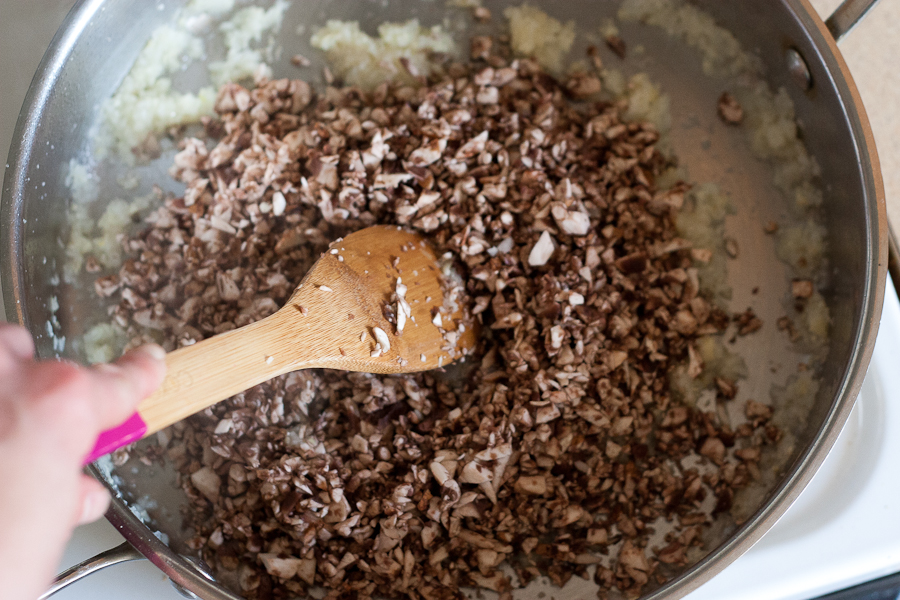
Add the mushrooms and cook those for a few minutes as well.


Tasty Kitchen Blog: Paleo-friendly Cauliflower Fried Rice. Guest post by Natalie Perry of Perry's Plate, recipe submitted by TK member Dani of Expat Cucina.

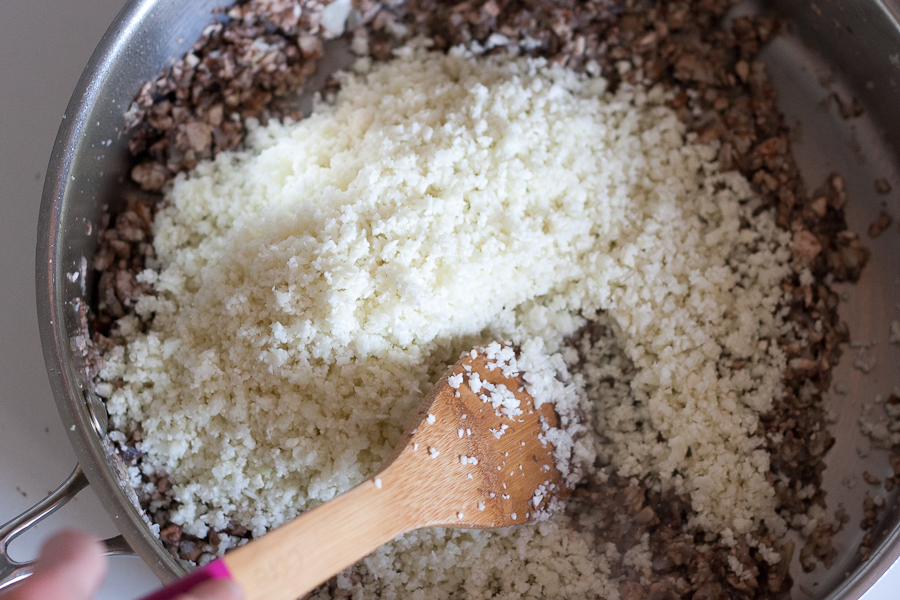
Now for the cauliflower!


Tasty Kitchen Blog: Paleo-friendly Cauliflower Fried Rice. Guest post by Natalie Perry of Perry's Plate, recipe submitted by TK member Dani of Expat Cucina.

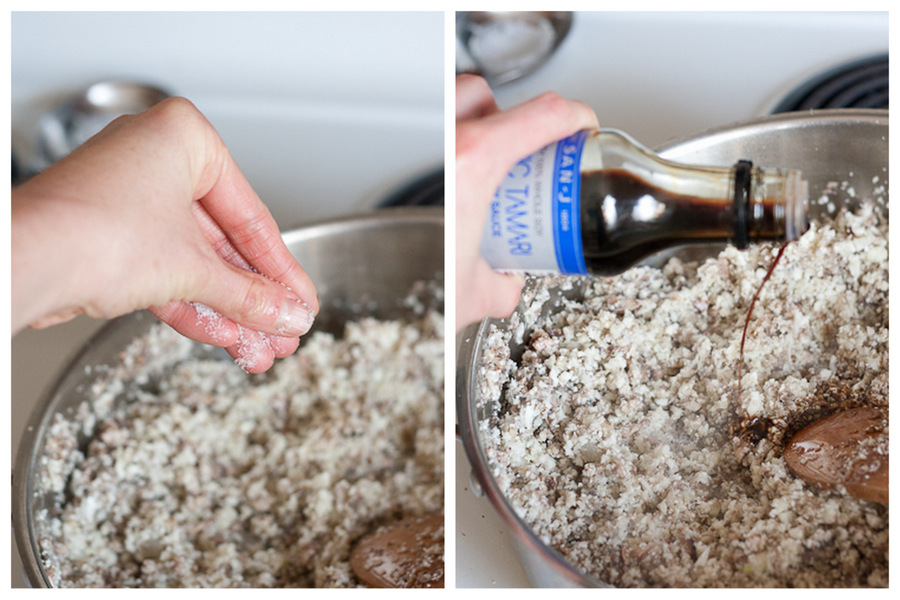
Add salt, pepper, and a splash of soy sauce (or tamari). 
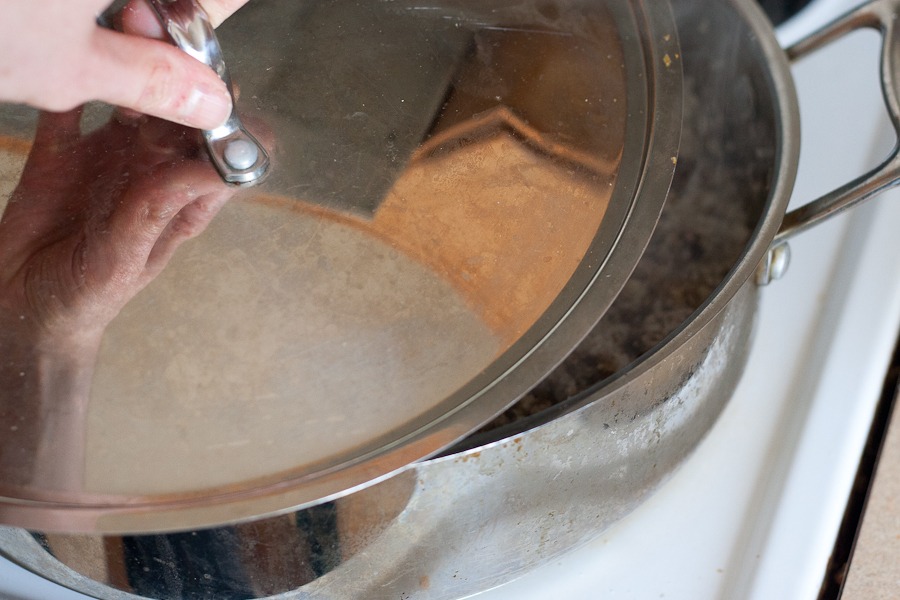


Tasty Kitchen Blog: Paleo-friendly Cauliflower Fried Rice. Guest post by Natalie Perry of Perry's Plate, recipe submitted by TK member Dani of Expat Cucina.

Put the lid on, reduce the heat a bit, and let it steam for a few minutes while you finish up the mix-ins.

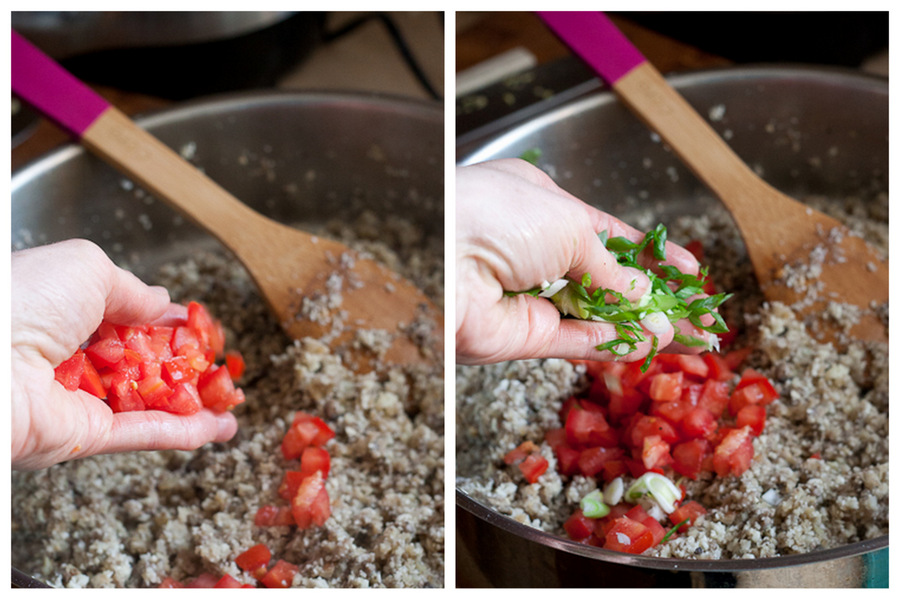
While the “rice” is finishing up, dice the tomato, and chop the green onion and cilantro. If you hate cilantro, just leave it out. (And then seek help. Ok, not really. But maybe.)


Tasty Kitchen Blog: Paleo-friendly Cauliflower Fried Rice. Guest post by Natalie Perry of Perry's Plate, recipe submitted by TK member Dani of Expat Cucina.

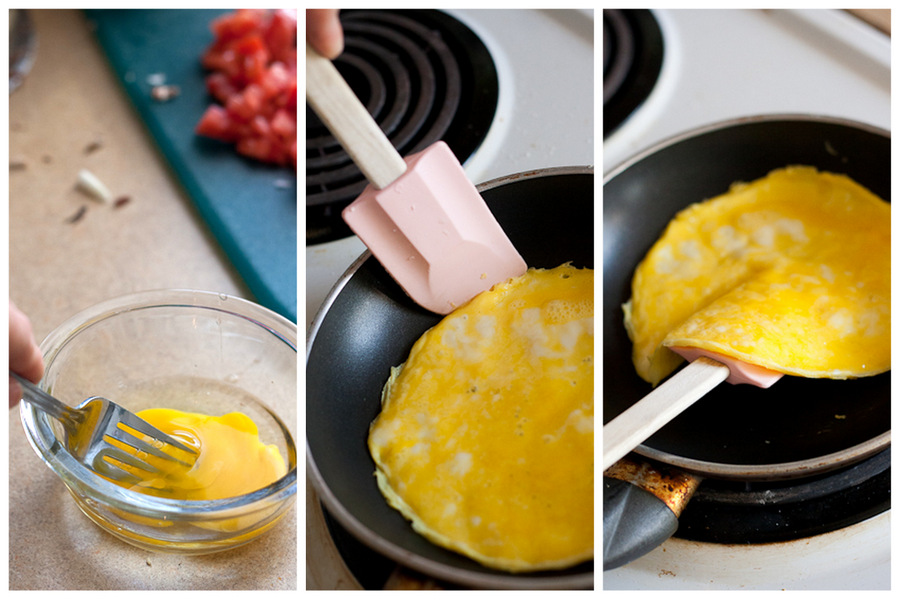
Remember that egg? Well now’s the time to pull it out. Beat it with a fork and cook it in a pan.

You can scramble it if you like, or you can make a flat omelet out of it and slice it up. Your choice.

You could also do it in the saute pan before you throw the vegetables in, but I have emotional meltdowns when I clean eggs out of stainless steel pans. So I do it in a small nonstick skillet. 
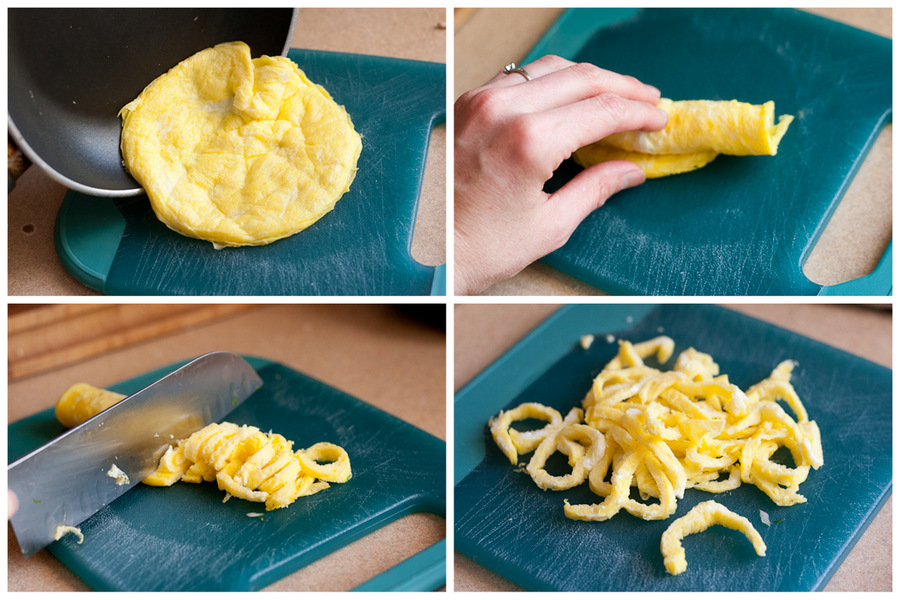


Tasty Kitchen Blog: Paleo-friendly Cauliflower Fried Rice. Guest post by Natalie Perry of Perry's Plate, recipe submitted by TK member Dani of Expat Cucina.

I made a flat omelet, rolled it up, then sliced it into ribbons. They’re much prettier than scrambles, but scrambles are perfectly fine.


Tasty Kitchen Blog: Paleo-friendly Cauliflower Fried Rice. Guest post by Natalie Perry of Perry's Plate, recipe submitted by TK member Dani of Expat Cucina.

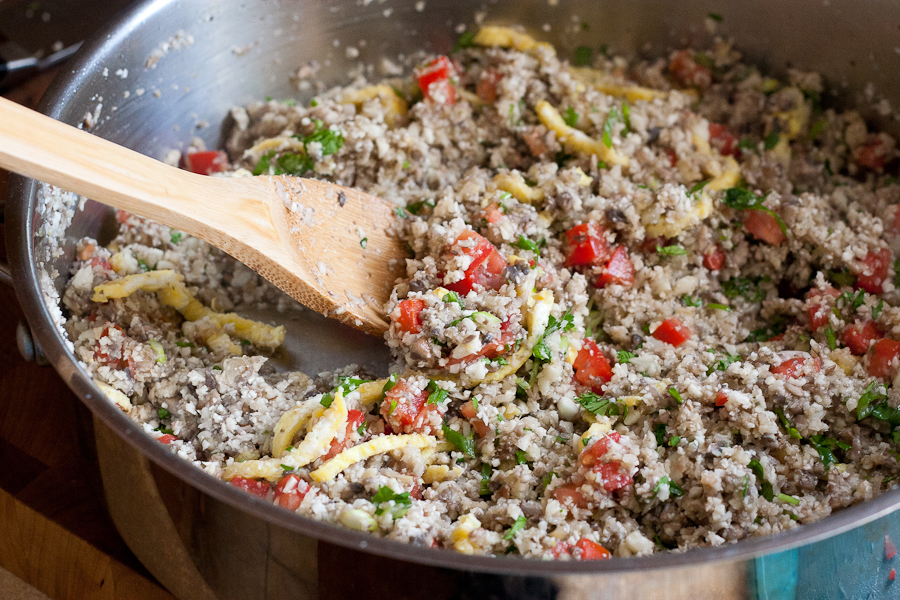
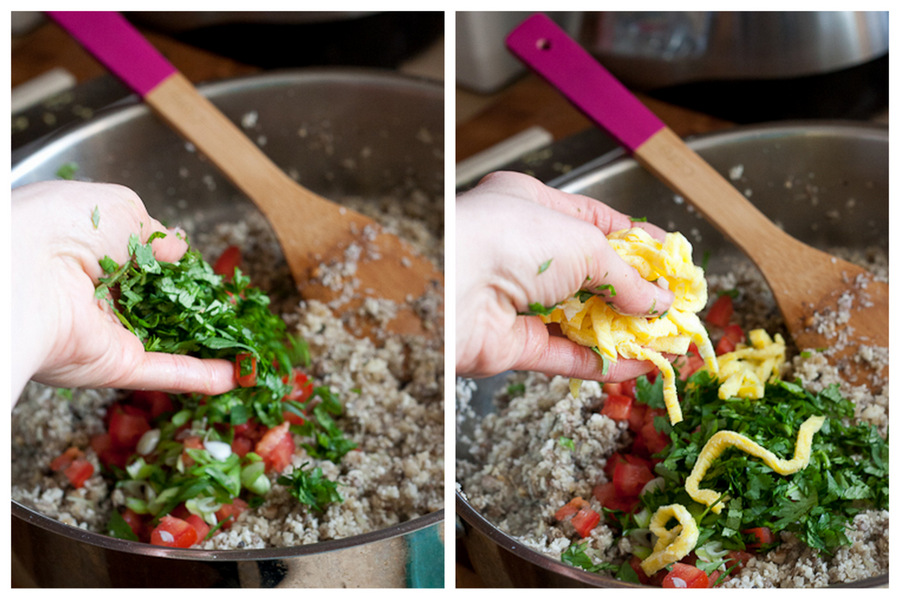
By now the cauliflower should be finished, so go ahead and drop in the tomato and green onions …


Tasty Kitchen Blog: Paleo-friendly Cauliflower Fried Rice. Guest post by Natalie Perry of Perry's Plate, recipe submitted by TK member Dani of Expat Cucina.

And the cilantro and eggs.


Tasty Kitchen Blog: Paleo-friendly Cauliflower Fried Rice. Guest post by Natalie Perry of Perry's Plate, recipe submitted by TK member Dani of Expat Cucina.

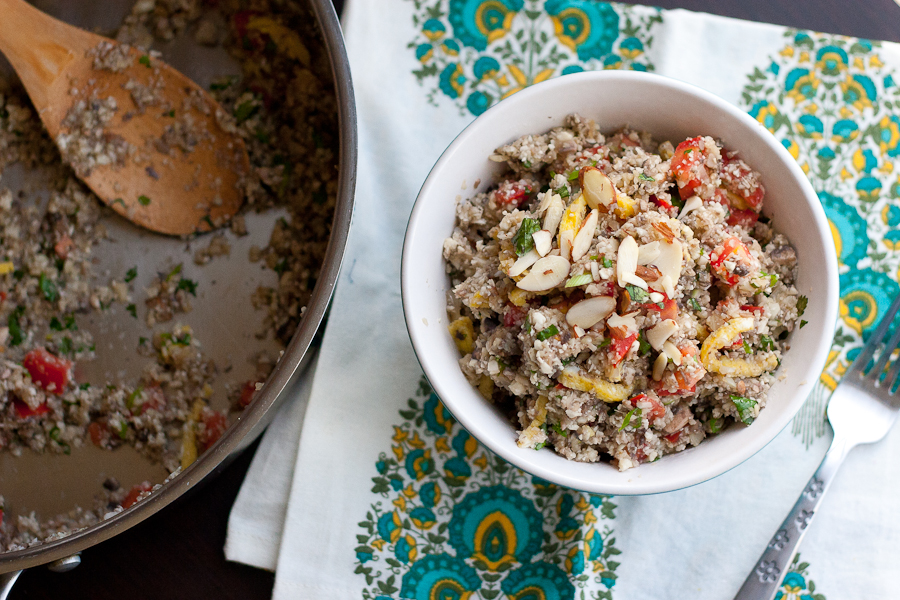
Stir everything gently, and done!

If you want to add more protein, you could stir in some pre-cooked shrimp, chicken, or steak. 


Tasty Kitchen Blog: Paleo-friendly Cauliflower Fried Rice. Guest post by Natalie Perry of Perry's Plate, recipe submitted by TK member Dani of Expat Cucina.

Like I mentioned earlier, you could have dinner on the table in 15 minutes if you prep everything beforehand. I love quick meals like this! 

Thank you, Dani! Be sure to check out Dani’s TK Recipe Box and her blog Expat Cucina for more dinner inspiration!

Recipe notes:
1. I used brown mushrooms, but if that “dirty rice” look bothers you, just use white mushrooms.
2. I added two cloves of garlic, an inch of ginger, and one green onion to boost the flavor of the dish and substituted cilantro for the basil and mint out of personal preference. 
3. I doubled the recipe, but left the mushroom quantity the same.


Printable Recipe
Paleo-friendly Fried Rice (With Cauliflower)

See post on ExpatCucina’s site!
0.00 Mitt(s) 0 Rating(s)0 votes, average: 0.00 out of 50 votes, average: 0.00 out of 50 votes, average: 0.00 out of 50 votes, average: 0.00 out of 50 votes, average: 0.00 out of 5

Prep Time:

Cook Time:

Difficulty: Easy

Servings: 1

1
x

Print Options

Page size Letter 3x5 4x6
Text Size Small Medium Large
Content Include description
Include prep time, etc.
Show image

Description

If you are a paleo-diet person or just on a low-carb diet, this recipe is perfect for you!

Ingredients

  • ⅔ pounds Cauliflower
  • 7 ounces, weight White Mushrooms
  • 2 Tablespoons Chopped Onion
  • ¼ cups Chopped Tomatoes
  • 1 whole Egg
  • 1 whole Egg White
  • 1 teaspoon Coconut Oil
  • 1 dash Soy Sauce
  • 1 pinch Salt And Pepper
  • 1 Tablespoon Chopped Basil And Mint

Preparation Instructions

Wash the cauliflower and place it into your food processor. Pulse it until pieces are the size of rice.

Wash and slice up the mushrooms, chop up onion and tomatoes.

Beat the egg and egg white with a pinch of salt and cook on a hot nonstick skillet (like an omelet). Remove and slice it up.

In the same skillet, heat p the coconut oil. Add the chopped onion and cook until soft. Add the mushrooms and stir around until browned. Next, add the minced cauliflower, a splash of soy sauce and salt and pepper. Cover with a lid and cook for about 5 minutes.

Remove skillet from heat and add the tomatoes. Stir around. Chop up some fresh mint and basil and add it to the pot together with the eggs. Stir everything together and serve immediately. You can garnish the dish with more chopped herbs if desired.


_______________________________________

Be sure to check out Natalie’s own beautiful food blog, Perrys’ Plate, where you can see her growing collection of lovely recipes. There’s always something new to see there. Go visit now!


Profile photo of EatLiveRun

Tiramisu Sandwich Cookies

Posted by in Baking

Tasty Kitchen Blog: Tiramisu Sandwich Cookies. Guest post by Jenna Beaugh of Eat, Live, Run, recipe submitted by TK member Tanya Schroeder of Lemons for Lulu.

Tiramisu is our favorite dessert to order out at a restaurant. Whenever we see it on a menu, we always have to get it! No self-control there. I rarely make it at home because it’s pretty time consuming and, let’s be honest, a little complicated. That being said, when I saw these mouth-watering Tiramisu Sandwich Cookies from Tanya, I knew I had to make them as soon as possible. What a fun treat! Two super fudgy double chocolate cookies sandwiched with creamy tiramisu filling? Sign me up.

I was so happy with the way these sandwich cookies turned out and know I’ll make them over and over again for special occasions. The cookies were soft and cake-like and the filling was just sweet enough, with a hint of Kahlua. My husband went absolutely crazy over them and already requested that I make them again so he can share with his office. I took that to be a very good sign!


Tasty Kitchen Blog: Tiramisu Sandwich Cookies. Guest post by Jenna Beaugh of Eat, Live, Run, recipe submitted by TK member Tanya Schroeder of Lemons for Lulu.

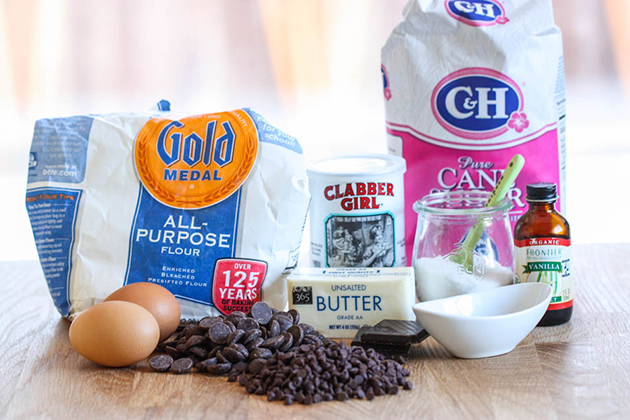
Here’s what you need to get started! These are just the ingredients for the cookies. As you can see, lots of chocolate goes into these bad boys! Not that I’m complaining! We’ve got semisweet, unsweetened and mini chocolate chips. Amen to that.


Tasty Kitchen Blog: Tiramisu Sandwich Cookies. Guest post by Jenna Beaugh of Eat, Live, Run, recipe submitted by TK member Tanya Schroeder of Lemons for Lulu.

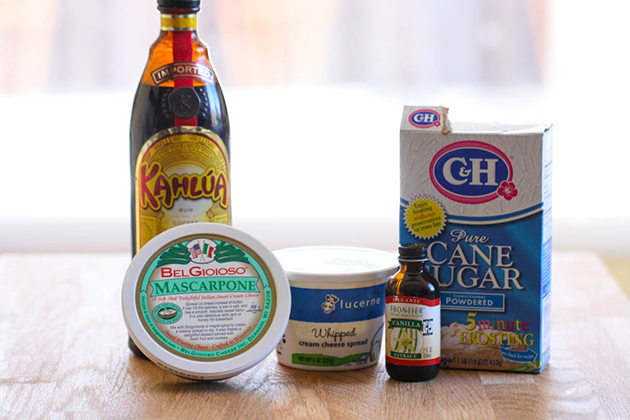
And here are the ingredients for the creamy tiramisu filling. All the good stuff right here. Marscapone cheese, cream cheese, powdered sugar, vanilla, and let’s not forget the Kahlua. It really puts these over the edge!


Tasty Kitchen Blog: Tiramisu Sandwich Cookies. Guest post by Jenna Beaugh of Eat, Live, Run, recipe submitted by TK member Tanya Schroeder of Lemons for Lulu.

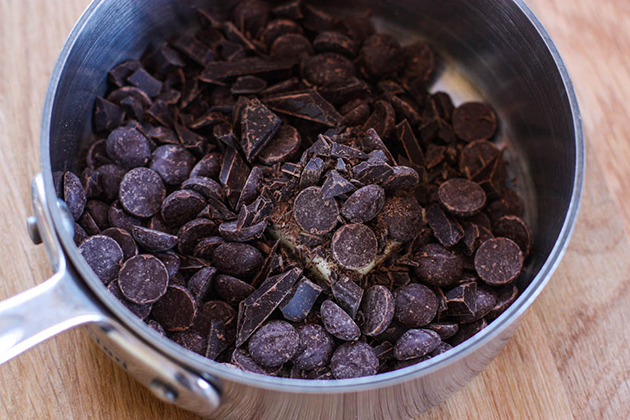
First things first: let’s melt that chocolate. Combine the semisweet chocolate, the unsweetened chocolate and the butter in a small saucepan over low heat. Be sure to keep stirring this once it starts to melt so that the chocolate doesn’t burn. Is there anything better than the scent of chocolate melting on your stove? I think not, friends. I think not.


Tasty Kitchen Blog: Tiramisu Sandwich Cookies. Guest post by Jenna Beaugh of Eat, Live, Run, recipe submitted by TK member Tanya Schroeder of Lemons for Lulu.

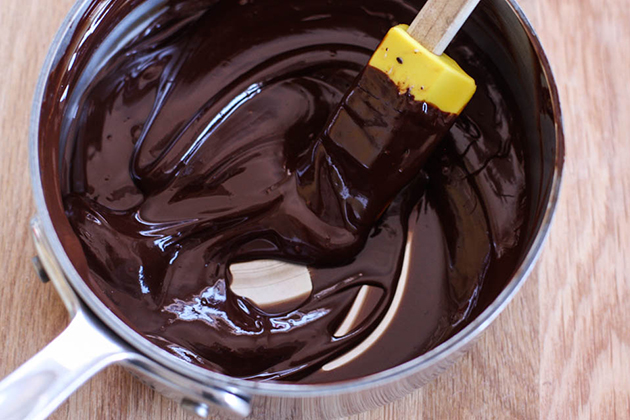
After about six minutes, you’ll have something that looks like this. Make sure there are no little lumps remaining! Just smooth, creamy melted chocolate. Heavens.


Tasty Kitchen Blog: Tiramisu Sandwich Cookies. Guest post by Jenna Beaugh of Eat, Live, Run, recipe submitted by TK member Tanya Schroeder of Lemons for Lulu.

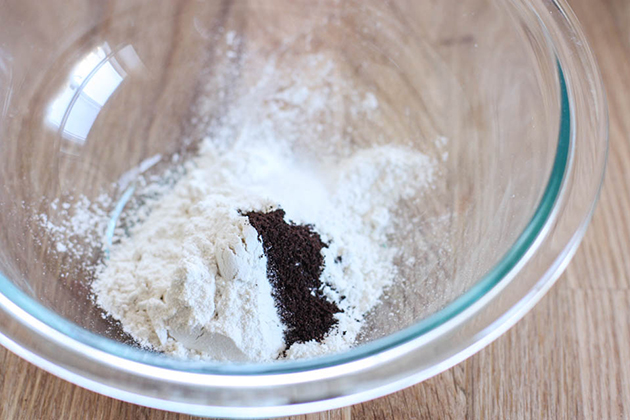
Now is the time to prep the rest of your ingredients. In a small bowl, whisk together the flour, baking powder, salt and instant espresso. Set this aside.


Tasty Kitchen Blog: Tiramisu Sandwich Cookies. Guest post by Jenna Beaugh of Eat, Live, Run, recipe submitted by TK member Tanya Schroeder of Lemons for Lulu.

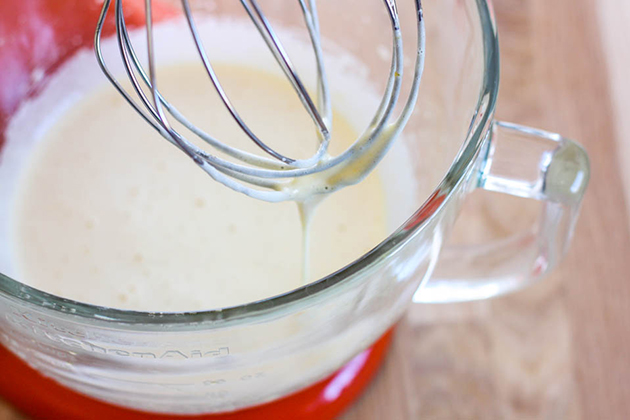
Beat the eggs with the sugar and vanilla until thick and pale in color. I used an electric mixer for this but you don’t have to—a good old fashioned wooden spoon would be just fine here. Keep beating or mixing until the mixture is pretty thick. When you pull up the spoon or whisk attachment, “ribbons” of batter should fall back into the bowl.


Tasty Kitchen Blog: Tiramisu Sandwich Cookies. Guest post by Jenna Beaugh of Eat, Live, Run, recipe submitted by TK member Tanya Schroeder of Lemons for Lulu.

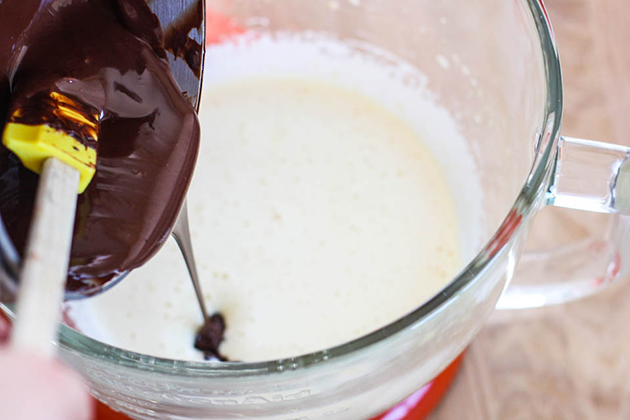
Once you’ve got that going, drizzle in the melted chocolate from before.


Tasty Kitchen Blog: Tiramisu Sandwich Cookies. Guest post by Jenna Beaugh of Eat, Live, Run, recipe submitted by TK member Tanya Schroeder of Lemons for Lulu.

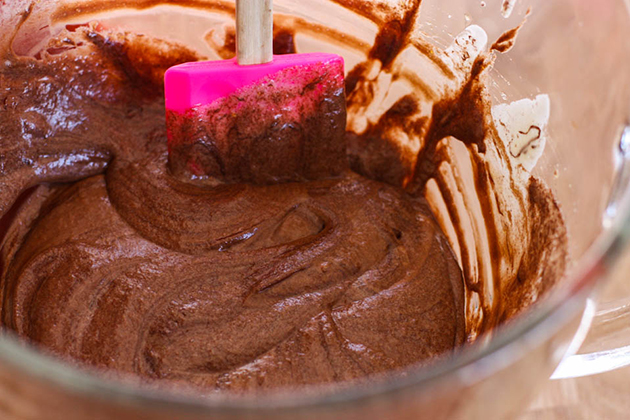
I like to use a rubber spatula here to really get everything from the bottom of the bowl. Plus, a rubber spatula makes it easy to fold the batter as opposed to mixing it, which results in flatter cookies. No one likes flat cookies!


Tasty Kitchen Blog: Tiramisu Sandwich Cookies. Guest post by Jenna Beaugh of Eat, Live, Run, recipe submitted by TK member Tanya Schroeder of Lemons for Lulu.

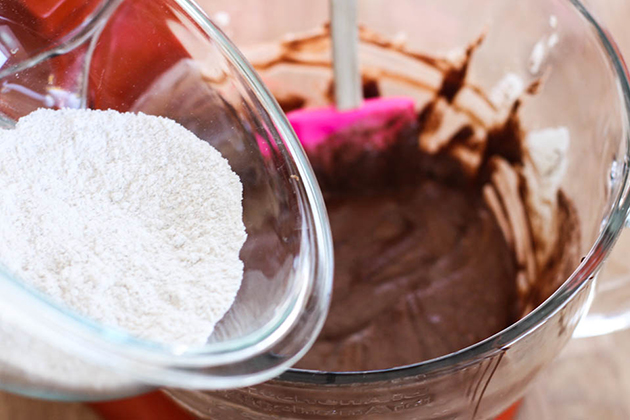
You can add the dry ingredients now.


Tasty Kitchen Blog: Tiramisu Sandwich Cookies. Guest post by Jenna Beaugh of Eat, Live, Run, recipe submitted by TK member Tanya Schroeder of Lemons for Lulu.

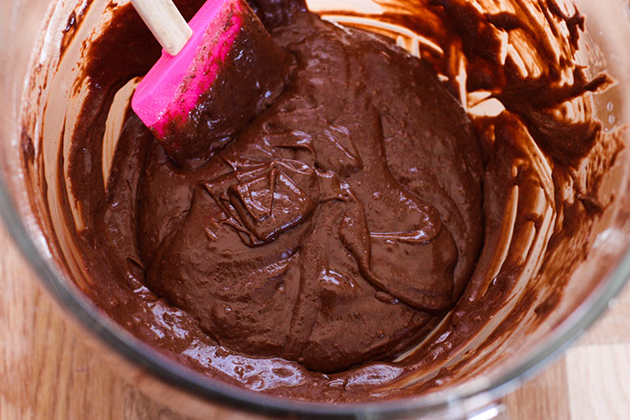
Fold them in like we just talked about. The batter will thicken up a lot!


Tasty Kitchen Blog: Tiramisu Sandwich Cookies. Guest post by Jenna Beaugh of Eat, Live, Run, recipe submitted by TK member Tanya Schroeder of Lemons for Lulu.

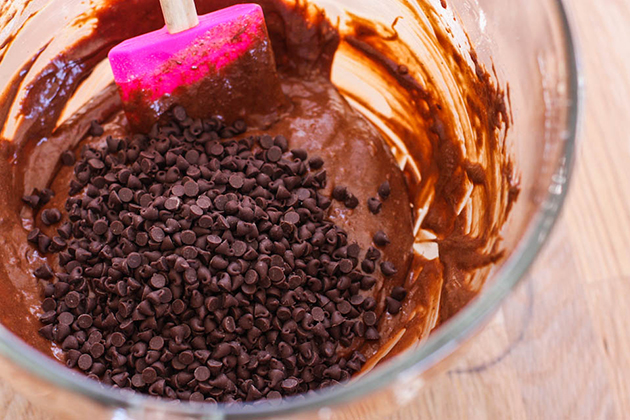
Finally, my favorite part: the mini chocolate chips. Yum. Just look at how cute they are! Fold those in as well then let the batter sit for about 10 minutes while you preheat the oven and prep your cookie sheets with either a Silpat or parchment paper.


Tasty Kitchen Blog: Tiramisu Sandwich Cookies. Guest post by Jenna Beaugh of Eat, Live, Run, recipe submitted by TK member Tanya Schroeder of Lemons for Lulu.

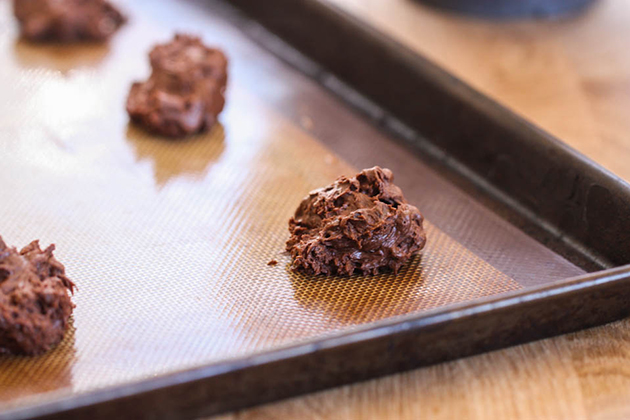
Drop big ol’ spoonfuls of cookie dough onto your prepared sheets about two inches apart. Resist the urge to lick the spoon here!


Tasty Kitchen Blog: Tiramisu Sandwich Cookies. Guest post by Jenna Beaugh of Eat, Live, Run, recipe submitted by TK member Tanya Schroeder of Lemons for Lulu.

Bake the cookies at 375ºF for just eight minutes. When done, the center of the cookies should still feel slightly soft but the edges should be set. Let ‘em cool while you make the yummy filling!


Tasty Kitchen Blog: Tiramisu Sandwich Cookies. Guest post by Jenna Beaugh of Eat, Live, Run, recipe submitted by TK member Tanya Schroeder of Lemons for Lulu.

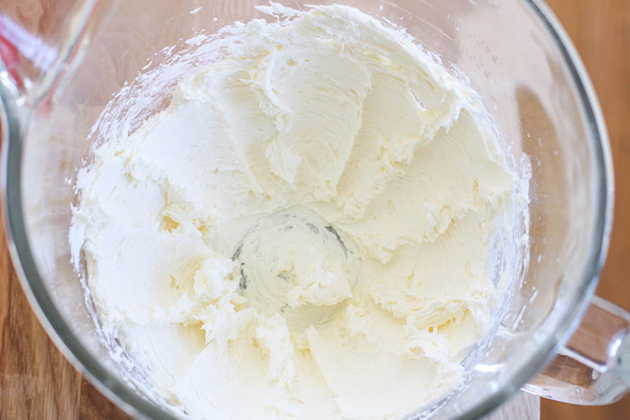
To make the filling, beat together the marscapone cheese and the cream cheese. Then, add the powdered sugar and keep beating until smooth. Sort of like cream cheese frosting without the butter!


Tasty Kitchen Blog: Tiramisu Sandwich Cookies. Guest post by Jenna Beaugh of Eat, Live, Run, recipe submitted by TK member Tanya Schroeder of Lemons for Lulu.

Then, add the special ingredient. Just two tablespoons of the good stuff. It goes a long way. Also add the vanilla extract here and continue beating until smooth. Drool.


Tasty Kitchen Blog: Tiramisu Sandwich Cookies. Guest post by Jenna Beaugh of Eat, Live, Run, recipe submitted by TK member Tanya Schroeder of Lemons for Lulu.

Sandwich the cooled cookies together with the filling and voila! You’re done. These are great freshly made, but I found that I liked them even better after a few hours in the fridge—if you can wait that long, that is. Seriously delicious!

Thank you Tanya for providing the recipe for this treat! We thoroughly enjoyed every last crumb and I can’t wait to make them again soon. Visit her blog Lemons for Lulu for more of her creations!


Printable Recipe

Tiramisu Sandwich Cookies

See post on Tanya Schroeder @lemonsforlulu’s site!
0.00 Mitt(s) 0 Rating(s)0 votes, average: 0.00 out of 50 votes, average: 0.00 out of 50 votes, average: 0.00 out of 50 votes, average: 0.00 out of 50 votes, average: 0.00 out of 5

Prep Time:

Cook Time:

Difficulty: Easy

Servings: 12

12
x

Print Options

Page size Letter 3x5 4x6
Text Size Small Medium Large
Content Include description
Include prep time, etc.
Show image

Description

Espresso chocolate cookies hugging a creamy Kahlua and mascarpone filling.

Ingredients

  • FOR THE COOKIES:
  • 5 ounces, weight Semi-sweet Chocolate, Chopped
  • 2 ounces, weight Unsweetened Chocolate, Chopped
  • 2 Tablespoons Butter
  • ¼ cups Flour
  • ¼ teaspoons Baking Powder
  • ¼ teaspoons Salt
  • ¼ teaspoons Espresso Powder
  • 2 whole Eggs
  • ⅔ cups Sugar
  • 1 teaspoon Vanilla
  • ¾ cups Mini Chocolate Chips
  • FOR THE FILLING:
  • 8 ounces, weight Mascarpone Cheese Softened
  • 2 ounces, weight Cream Cheese, Softened
  • ¼ cups Powdered Sugar
  • ½ teaspoons Vanilla
  • 2 Tablespoons Kahlua Liqueur

Preparation Instructions

For the cookies:
In a small saucepan, combine chocolates and butter. Heat over low heat until both have melted. Stir until smooth then remove from heat and set aside.

In a small bowl, combine flour, baking powder, salt and espresso powder. Set aside.

In a mixing bowl, beat together eggs, sugar and vanilla until mixture begins to thicken. Stir in cooled chocolate mixture followed by flour mixture. Beat until combined. Fold in chocolate chips. Let batter stand for 10 minutes in order to thicken up.

Preheat oven to 375 F. Drop dough by the tablespoon full onto a parchment paper- or Silpat-lined baking sheet, keeping each cookie about 2 inches apart.

Bake for 8 minutes or until edges are set and cookies are slightly cracked. Remove pan from oven and set it on a rack. Let cookies cool for 1 minute before removing them from the pan to a cooling rack.

For the filling:
In a medium sized bowl beat together mascarpone and cream cheese. Add in powdered sugar, vanilla and liqueur and mix until combined.

Spread a healthy tablespoon of filling on the flat side of one cookie then top with another cookie. Repeat until you’ve used all of the cookies.

Makes 12 sandwich cookies. Store assembled cookies in an airtight container.

Recipe adapted from Better Homes and Gardens.


_______________________________________

Jenna is a food writer who has worked as a pastry chef and bread baker. Her blog Eat, Live, Run has great recipes, travel stories, and the perfect slogan: “Celebrating life, one crumb at a time.”


Profile photo of Erika (TK)

Let’s Talk Cookbooks

Posted by in Kitchen Talk

Tasty Kitchen Blog: Kitchen Talk (Cookbooks)

The other day, I decided to tackle the task of organizing my bookshelf. Growing up, my shelves used to be filled with all kinds of books on philosophy, theology, military intelligence groups, and every single one of Gabriel Garcia Marquez’s novels. Strange child, I was. Fast forward a few decades and now my shelves contain books covering only two major topics, with more than half of the shelves dedicated to cookbooks.

Discovering a great cookbook is, for me, like finding treasure you never even knew was out there. Some of my most loved cookbooks are the ones recommended by friends, and a few are even written by friends.

Finding treasure is always a fun activity, even better when we all can share the rewards. So let’s go hunting! Tell us:

What are some of your favorite cookbooks?

And by favorite, I mean the ones with the dog-eared pages, or with 36 makeshift bookmarks sticking out of the edges. The ones with pages wrinkled from water splashes, translucent blobs from oil spills, and hazy colored spots from “something or other, just please let it be clean.” The ones with creased spines from repeated photocopying because you just had to share a copy of it with your mom, sister, aunt, and that nice lady you always see at the library who said you had a lovely smile.

The books on my shelf are always happy to welcome new friends. So come share your favorites in the comments below!
 

Profile photo of halfbakedharvest

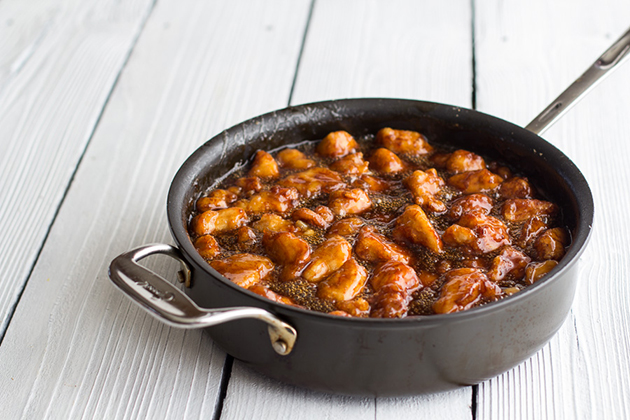
Chinese Orange Chicken

Posted by in Step-by-Step Recipes

 
Please join us in welcoming the lovely Tieghan of Half Baked Harvest! She’s young and talented and kinda a whiz in the kitchen. For her first post, she picked a perfect weeknight dinner recipe that will satisfy any sudden Chinese takeout craving. We’re so excited to have Tieghan join us here and we look forward to more of her lovely posts. And thank you, Kimberly, for the scrumptious recipe!
 
Tasty Kitchen Blog: Chinese Orange Chicken. Guest post by Tieghan Gerard of Half Baked Harvest, recipe submitted by TK member Kimberly of The Daring Gourmet.

Some of my favorite foods to re-create at home are the ones you would normally order from your favorite carryout restaurants. Some people call it fake-out take-out but I just like to think of it as making good food healthier, quicker and tastier at home. My family loves Orange Chicken, and back when we lived in Cleveland, we had a favorite Chinese restaurant where we would often order carry out. Our order was usually the same: steamed white rice, egg rolls, fried rice and orange chicken with more steamed rice (obviously, we like our rice around here).

It was so good, but since we moved to a small mountain town in Colorado, we have yet to find a good Chinese place. As a result, I learned to make my own, thanks to Kimberly, who submitted this amazing recipe for Chinese Orange Chicken. And I do mean amazing! It is so good.


Tasty Kitchen Blog: Chinese Orange Chicken. Guest post by Tieghan Gerard of Half Baked Harvest, recipe submitted by TK member Kimberly of The Daring Gourmet.

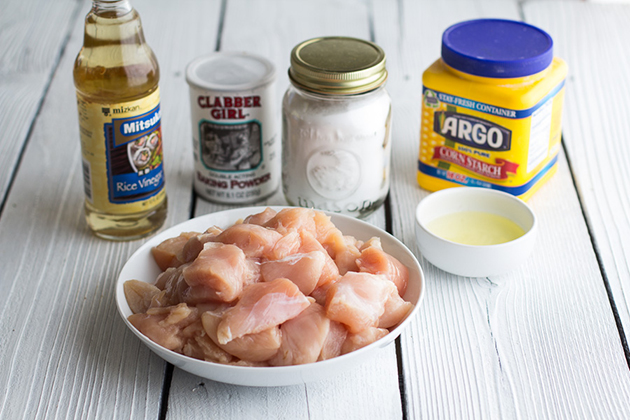
Gather up your ingredients for the chicken. You will need egg whites, cornstarch, salt, sherry (or rice) vinegar, baking powder, baking soda and diced chicken.


Tasty Kitchen Blog: Chinese Orange Chicken. Guest post by Tieghan Gerard of Half Baked Harvest, recipe submitted by TK member Kimberly of The Daring Gourmet.

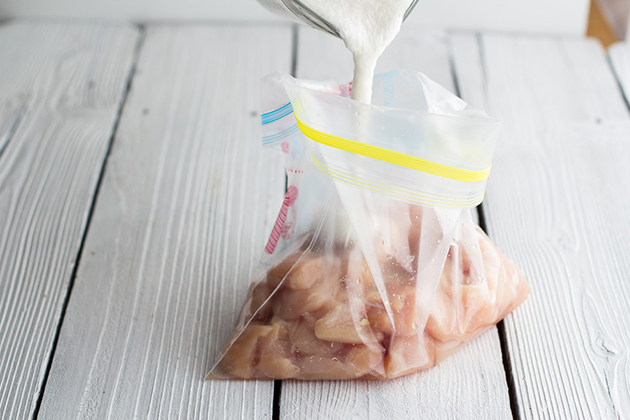
Combine the egg whites, cornstarch, salt, sherry, baking powder and baking soda in a medium bowl and stir to combine. Add the chicken to a sealable bag and pour the cornstarch mixture over the chicken.


Tasty Kitchen Blog: Chinese Orange Chicken. Guest post by Tieghan Gerard of Half Baked Harvest, recipe submitted by TK member Kimberly of The Daring Gourmet.

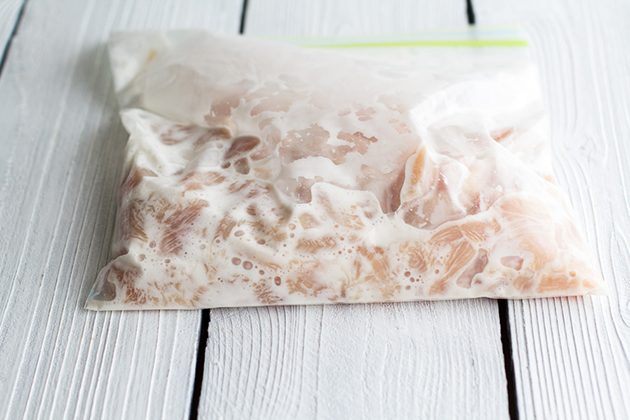
Seal the bag and refrigerate for at least 30 minutes (during this time I got started on the sauce).


Tasty Kitchen Blog: Chinese Orange Chicken. Guest post by Tieghan Gerard of Half Baked Harvest, recipe submitted by TK member Kimberly of The Daring Gourmet.

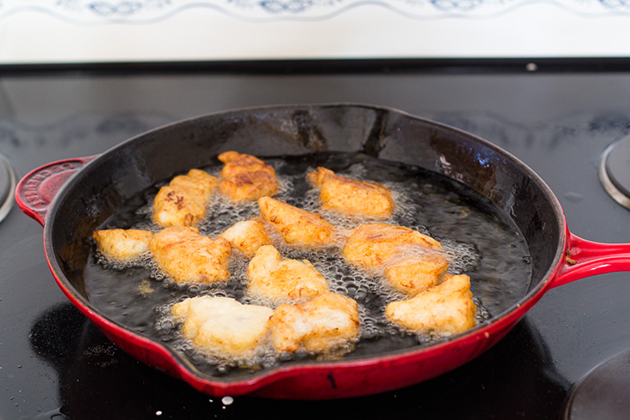
After 30 minutes heat some vegetable or peanut oil on high in a wok, deep fryer, or heavy skillet. Carefully lower the chicken into the oil. Fry until crispy golden brown on all sides. Using a slotted spoon, transfer the chicken pieces to paper towels to absorb the oil. Set aside.


Tasty Kitchen Blog: Chinese Orange Chicken. Guest post by Tieghan Gerard of Half Baked Harvest, recipe submitted by TK member Kimberly of The Daring Gourmet.

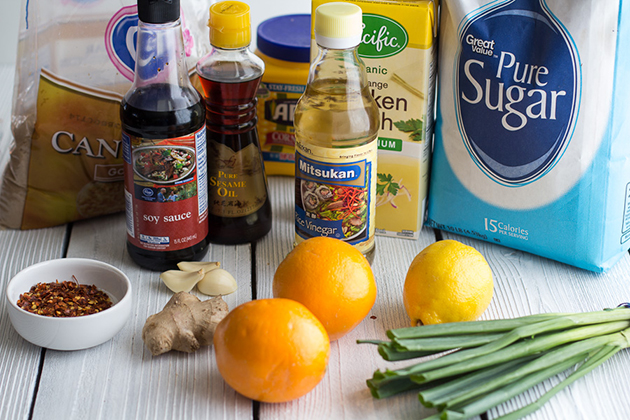
Now gather up the ingredients for the sauce. You will need vegetable oil, fresh ginger, garlic, chicken broth, oranges, soy sauce, lemon juice, rice vinegar, sugar, chili flakes, cornstarch, water and sesame oil.


Tasty Kitchen Blog: Chinese Orange Chicken. Guest post by Tieghan Gerard of Half Baked Harvest, recipe submitted by TK member Kimberly of The Daring Gourmet.

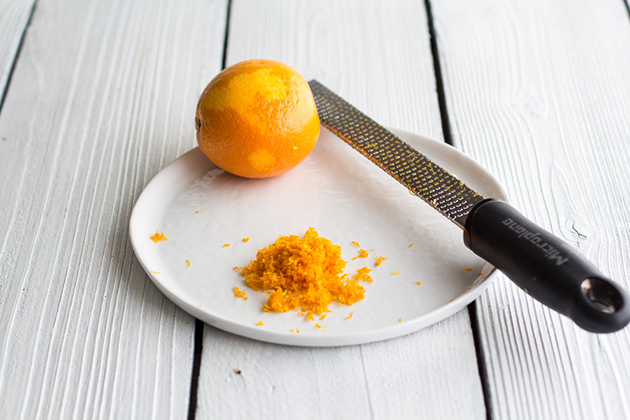
Zest the orange.


Tasty Kitchen Blog: Chinese Orange Chicken. Guest post by Tieghan Gerard of Half Baked Harvest, recipe submitted by TK member Kimberly of The Daring Gourmet.

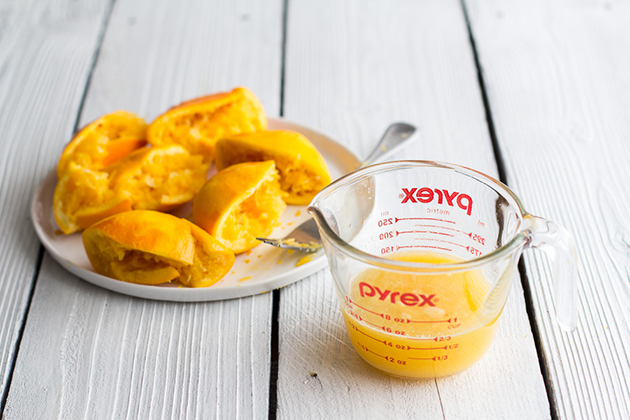
Juice the orange.


Tasty Kitchen Blog: Chinese Orange Chicken. Guest post by Tieghan Gerard of Half Baked Harvest, recipe submitted by TK member Kimberly of The Daring Gourmet.

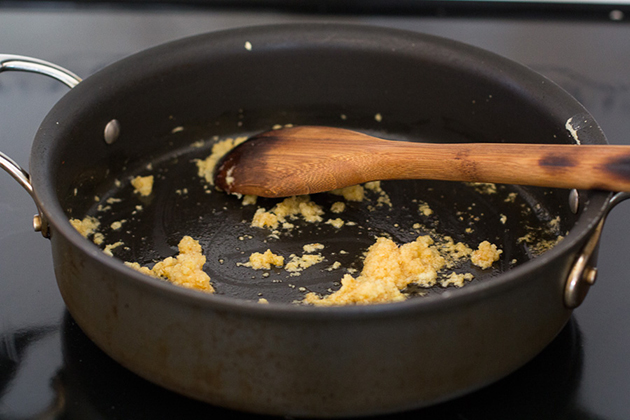
Heat some vegetable oil over medium-high heat in a large saucepan or wok. Sauté the ginger, then add all the remaining ingredients except for the green onions.


Tasty Kitchen Blog: Chinese Orange Chicken. Guest post by Tieghan Gerard of Half Baked Harvest, recipe submitted by TK member Kimberly of The Daring Gourmet.

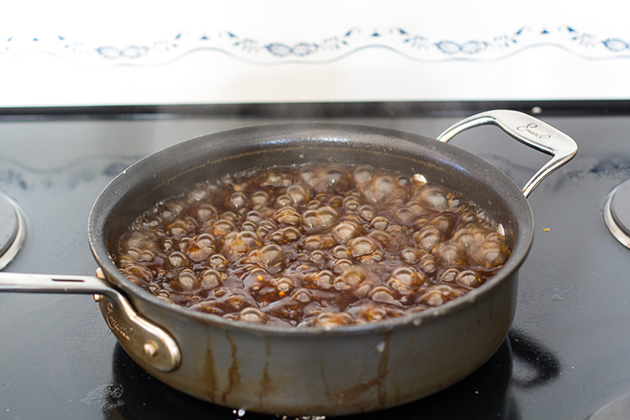
Bring the sauce to a boil and let simmer until the sauce has thickened.


Tasty Kitchen Blog: Chinese Orange Chicken. Guest post by Tieghan Gerard of Half Baked Harvest, recipe submitted by TK member Kimberly of The Daring Gourmet.

Add the chicken and toss in the green onions.


Tasty Kitchen Blog: Chinese Orange Chicken. Guest post by Tieghan Gerard of Half Baked Harvest, recipe submitted by TK member Kimberly of The Daring Gourmet.

Serve the chicken immediately with any extra sauce that is in the pan.


Tasty Kitchen Blog: Chinese Orange Chicken. Guest post by Tieghan Gerard of Half Baked Harvest, recipe submitted by TK member Kimberly of The Daring Gourmet.

I love to serve the chicken with some basmati rice, orange wedges and roasted broccoli. It’s the perfect meal for any night of the week.

A huge thank you to Kimberly Killebrew for this recipe. Be sure to check out her blog The Daring Gourmet. Every last one of her recipes is delicious!


Printable Recipe

Chinese Orange Chicken

See post on Kimberly @ The Daring Gourmet’s site!
4.50 Mitt(s) 2 Rating(s)2 votes, average: 4.50 out of 52 votes, average: 4.50 out of 52 votes, average: 4.50 out of 52 votes, average: 4.50 out of 52 votes, average: 4.50 out of 5

Prep Time:

Cook Time:

Difficulty: Easy

Servings: 4

4
x

Print Options

Page size Letter 3x5 4x6
Text Size Small Medium Large
Content Include description
Include prep time, etc.
Show image

Description

Tender, crispy battered chicken in a rich and flavorful orange sauce. This Daring Gourmet recipe rivals your favorite Chinese restaurant version.

See the related blog post for a vegetarian/vegan version.

Ingredients

  • FOR THE CHICKEN:
  • 2  Egg Whites
  • ¼ cups Cornstarch
  • ½ teaspoons Salt
  • 2 teaspoons Sherry Or Rice Vinegar
  • ¼ teaspoons Baking Powder
  • ⅛ teaspoons Baking Soda
  • 2  Chicken Breasts, Cut Into 1/2 Inch Cubes
  • Oil, For Frying
  • FOR THE ORANGE SAUCE:
  • 1 teaspoon Vegetable Oil
  • 1 teaspoon Fresh Ginger, Minced
  • 1 teaspoon Garlic, Minced
  • 1-½ cup Strong Chicken Broth
  • 2 Tablespoons Freshly Squeezed Orange Juice
  • 1 Tablespoon Orange Zest
  • 2-½ Tablespoons Soy Sauce
  • ¼ cups Freshly Squeezed Lemon Juice
  • ⅓ cups Rice Vinegar
  • ½ cups Granulated Sugar
  • ½ cups Brown Sugar
  • 2  Red Chiles, Broken In Pieces And Seeds Discarded (or 1/4 Teaspoon Red Chile Flakes)
  • 3 Tablespoons Cornstarch
  • 2 Tablespoons Water
  • ½ teaspoons Sesame Oil
  • ¼ cups Green Onions, Sliced
  • Fresh Orange Slices For Garnishing (optional)

Preparation Instructions

For the chicken:
Combine the egg whites, cornstarch, salt, sherry, baking powder and baking soda in a medium bowl and stir to combine. Pour over chicken in a sealable plastic bag and refrigerate for at least 30 minutes.

If you prefer a thicker coating, remove the chicken pieces from the baggie and roll them in some extra cornstarch. Heat some vegetable or peanut oil on high in a wok, deep fryer, or heavy skillet and carefully lower the chicken into the oil. Fry until crispy golden brown on all sides. Using a slotted spoon, transfer the chicken pieces to paper towels to absorb the oil.

For the sauce:
Heat vegetable oil over medium-high heat in a large saucepan or wok. Saute the ginger and garlic for 30 seconds, then add all remaining ingredients, except for the green onions. Bring the sauce to a boil. Decrease the heat to low and simmer for 15 minutes, stirring occasionally.

Add the chicken pieces and green onions to the sauce, stir to coat, and bring the sauce to a low simmer and cook for 5 minutes. Serve immediately with steamed rice and fresh orange slices.


_______________________________________

Tieghan has always been a creative person, but one day just before her 19th birthday, her very shy and quiet self bit the bullet and started setting up her blog, Half Baked Harvest. She never looked back. Her life is now consumed by cooking food, photographing food and writing about food—and eating it, too! She uses everything around her as inspiration and never stops thinking of new ways to step outside the box and create easy and unique recipes that everyone can love.


Profile photo of Megan {Country Cleaver}

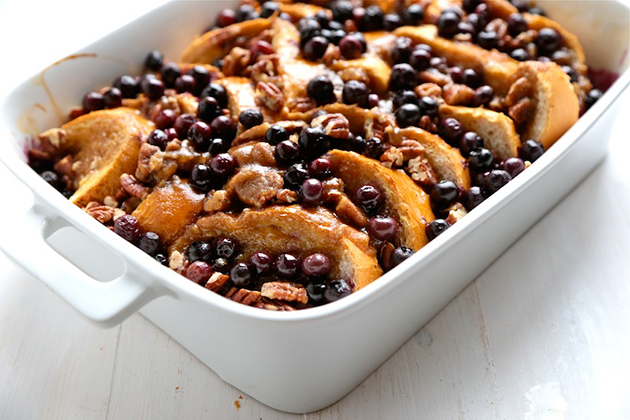
Baked Blueberry Pecan French Toast

Posted by in Baking

Baked French toast, or bread pudding, always reminds me of my mom. She loves it. And so do I! It’s comforting, warm, and best of all, full of carbs. When I found Mel’s recipe for Baked…

Profile photo of Erika (TK)

Share Your Cast Iron Tips

Posted by in Kitchen Talk

What are some of your favorite cast iron tips? We'd love to hear your tips or even your challenges when it comes to cast iron cookware. Share your thoughts and let's help each other out!

Profile photo of georgiapellegrini

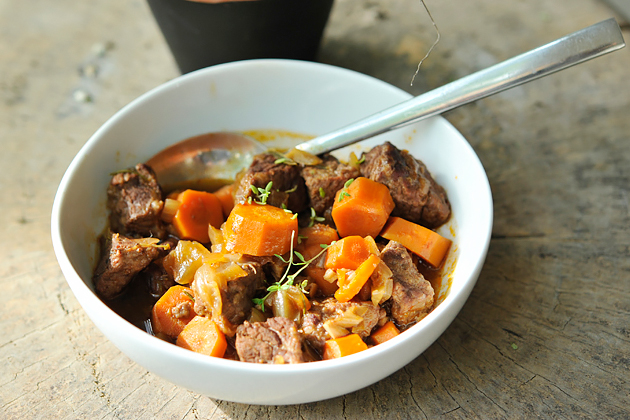
Red Wine and Herb Beef Stew

Posted by in Step-by-Step Recipes

  This hearty Red Wine and Herb Beef Stew recipe from TK member Anita is comforting and rich with fresh herbs and red wine. The sauce is delicious poured over polenta, rice, pasta or simple on its own. It would also lend itself well to the addition of other types of root vegetables.     […]

Profile photo of Erika (TK)

Let’s Get Organized

Posted by in Kitchen Talk

Spring is in the air, which means my cabin fever will soon be replaced with spring cleaning fever. And I think it already started the other day, when I spent 2 hours freshening up our laundry room, followed by another 3 hours rearranging things in the closet that houses all our cleaning stuff. (And now […]