The Pioneer Woman Tasty Kitchen
Profile photo of fujimama

Itadakimasu! Okinawan Takoraisu (Taco Rice)

Posted by in Step-by-Step Recipes

Welcome to Fujimama, longtime Tasty Kitchen member and new contributor to the TK Blog. So happy to see you here! (And I’ve never wanted taco rice as much as I do right now. And it’s 6:53 am.) Take it away, Fujimama! –PW

 
Tasty Kitchen Blog: Tasty Kitchen Blog: Okinawan Takoraisu (Taco Rice). Guest post and recipe from Rachael of La Fuji Mama.

 
When you hear the words “Taco Rice” I suspect that Japan is not the first country that pops into your mind. But Taco Rice, or Takoraisu as it’s called in Japan, is a popular Okinawan dish invented in the 1960s by a Japanese chef who took the idea of tacos, so popular among the American military stationed on Okinawa, and combined it with rice, a staple item in the Okinawan diet. The dish has since become, ironically enough, one of the most well-known Okinawan dishes. Its popularity has also spread into other parts of Japan.

 
Tasty Kitchen Blog: Okinawan Takoraisu (Taco Rice). Guest post and recipe from Rachael of La Fuji Mama.

When I lived in Tokyo there were many cafes that offered it on their lunch menus. One of the last meals I ate before moving back to the US was takoraisu. I was pregnant with my second child and takoraisu totally hit the spot. I’m not surprised, as takoraisu is total comfort food. Not only do you not have to worry about handling any awkward taco shells or worry about them going soggy, but takoraisu is traditionally eaten with a spoon, so all you have to do is shovel it in.

Even better? Takoraisu is so easy to make.


Tasty Kitchen Blog: Okinawan Takoraisu (Taco Rice). Guest post and recipe from Rachael of La Fuji Mama.

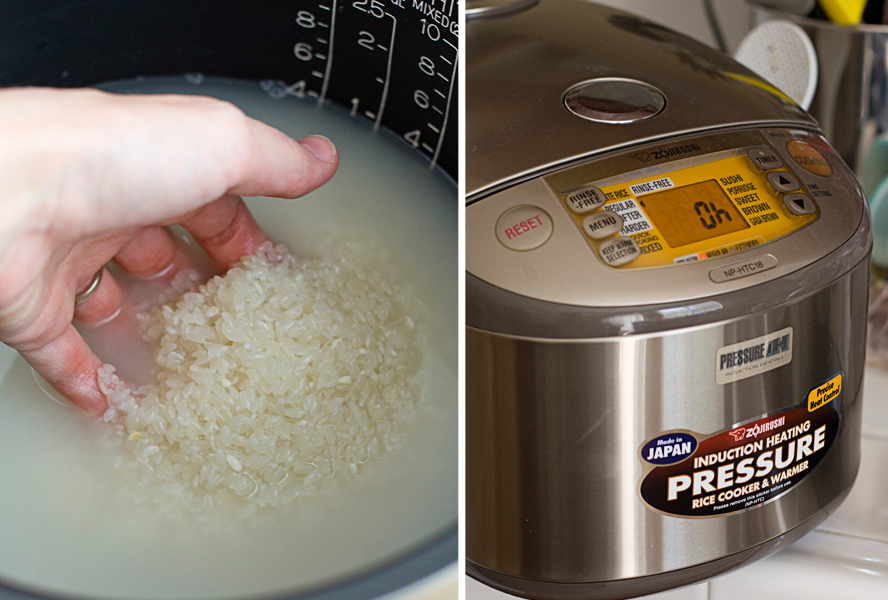
You start by steaming some Japanese white rice (a short grain rice, often labeled as “sushi rice” here in the US). If you want your rice to be less sticky, you will need to rinse it before cooking it. This removes the powdery starch that builds up around the grains during transport. To rinse rice, put the rice in a bowl, fill it with cold water, and swish the rice gently around with your fingers. Pour the water out (keeping the rice in the pan with your hand), and repeat the process until the water is clear.

I make things even easier by cooking my rice in a rice cooker. (I’m lazy, what can I say?)


Tasty Kitchen Blog: Okinawan Takoraisu (Taco Rice). Guest post and recipe from Rachael of La Fuji Mama.

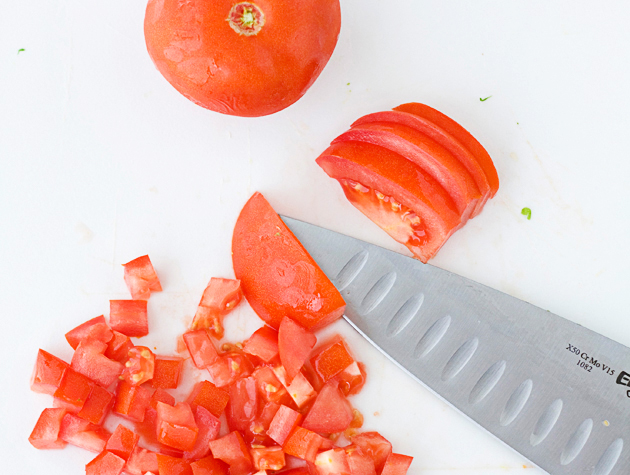
Once you’ve got your rice cooking, chop some tomatoes …


Tasty Kitchen Blog: Okinawan Takoraisu (Taco Rice). Guest post and recipe from Rachael of La Fuji Mama.

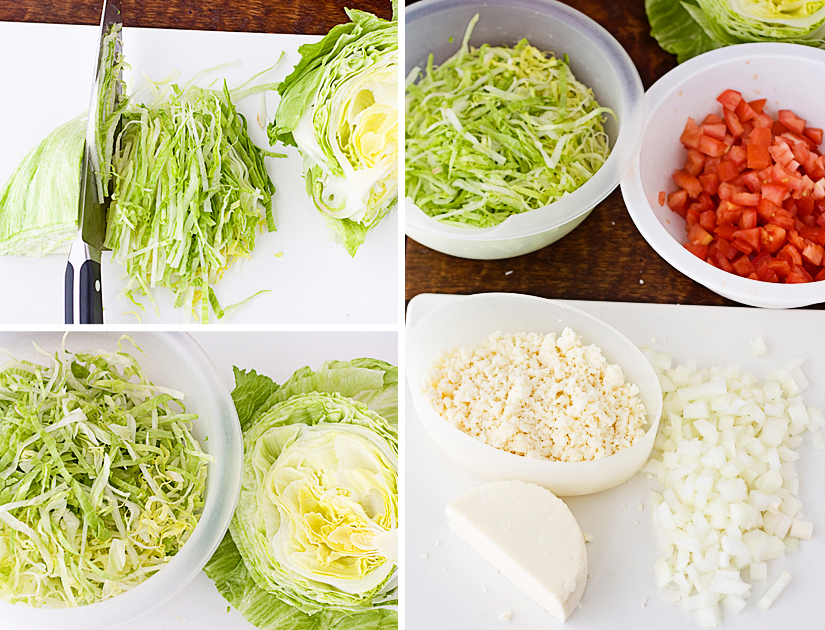
And shred some lettuce.

Then prepare your cheese. In Japan, recipes for takoraisu usually call for “pizza cheese,” a mild white cheese similar to mozzarella. You can use shredded mozzarella, but I like using crumbled queso blanco, a delicious and affordable Mexican cheese.


Tasty Kitchen Blog: Okinawan Takoraisu (Taco Rice). Guest post and recipe from Rachael of La Fuji Mama.

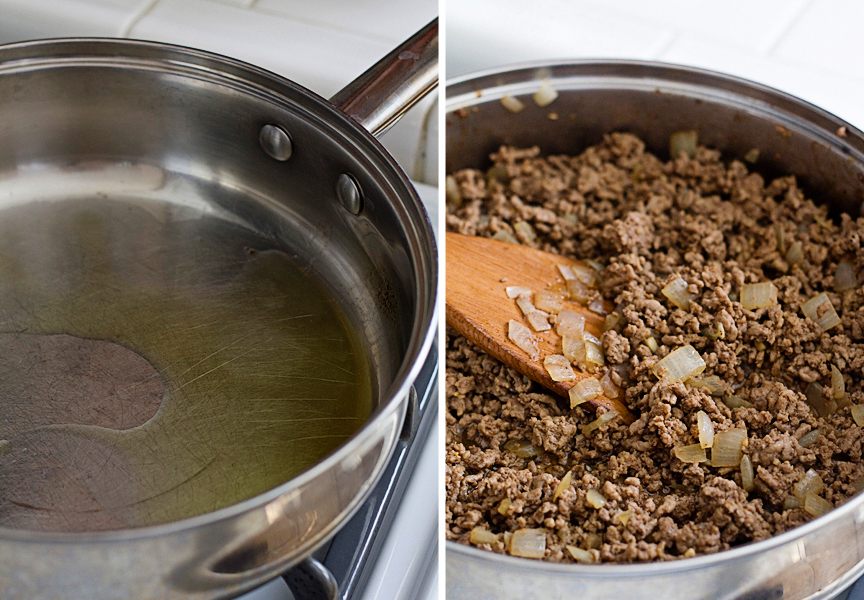
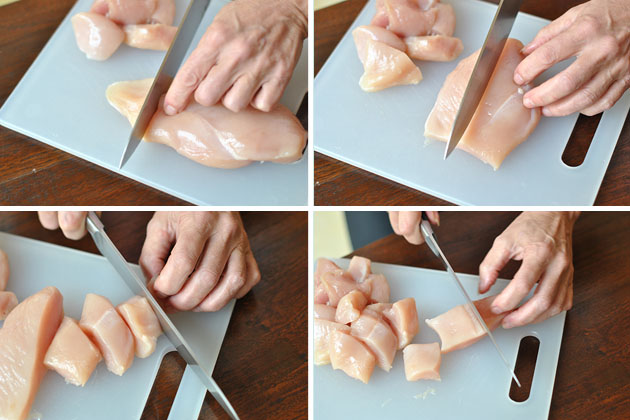
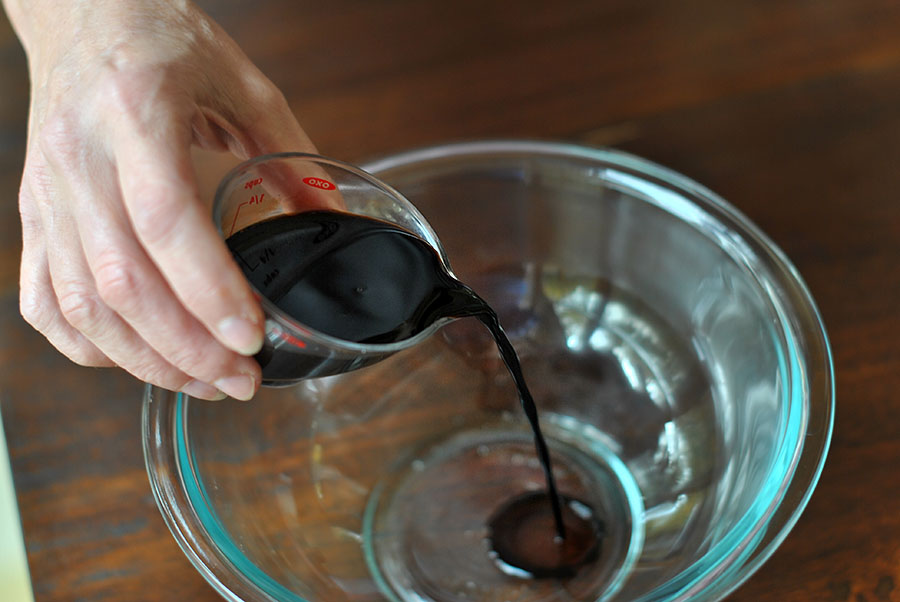
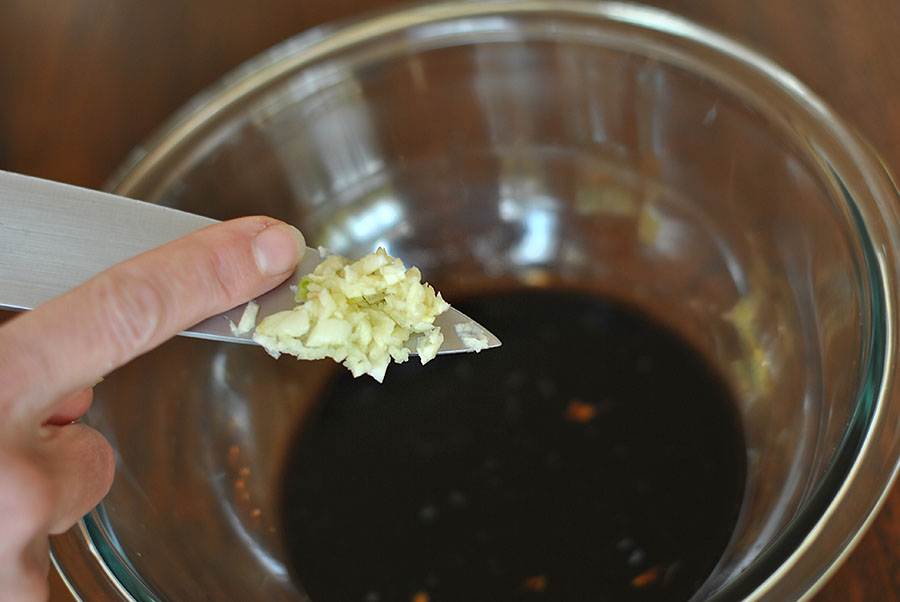
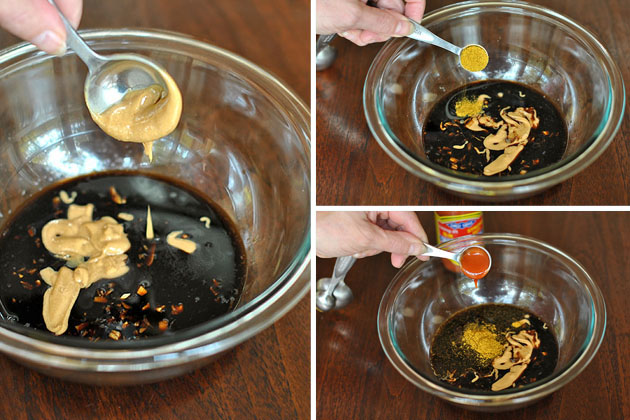
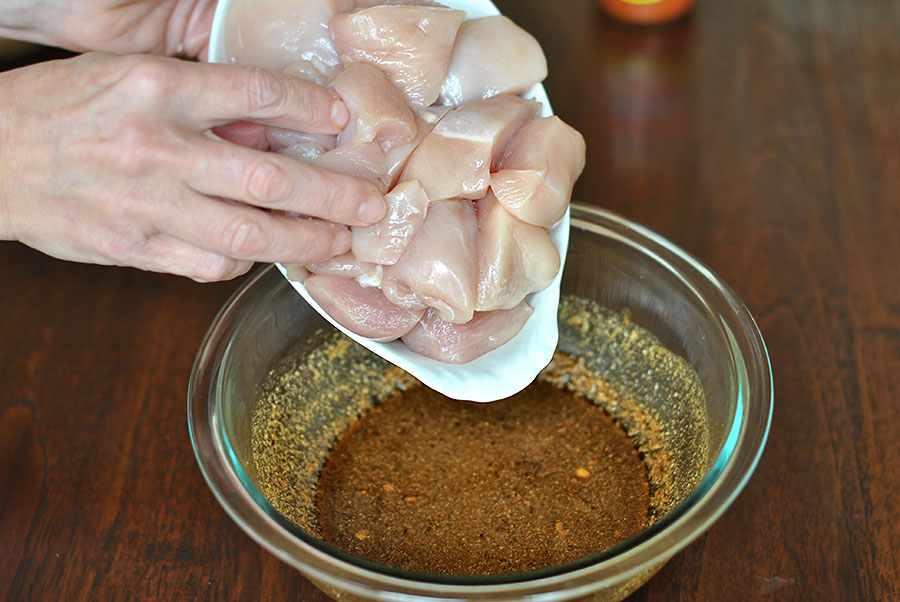
Then you make some seasoned beef by first heating some oil in a saute pan. Sauté onions, garlic, ground beef, and seasonings until everything is cooked through and fragrant.


Tasty Kitchen Blog: Okinawan Takoraisu (Taco Rice). Guest post and recipe from Rachael of La Fuji Mama.

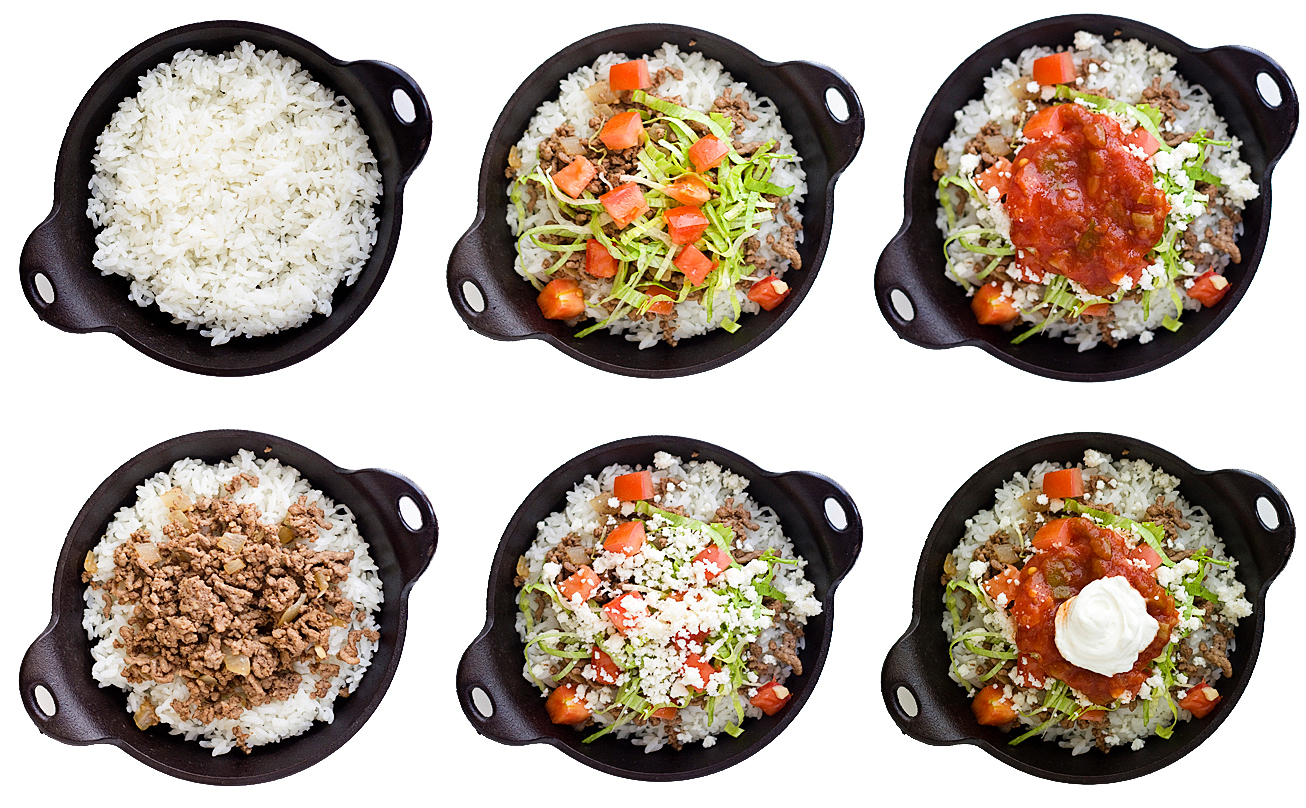
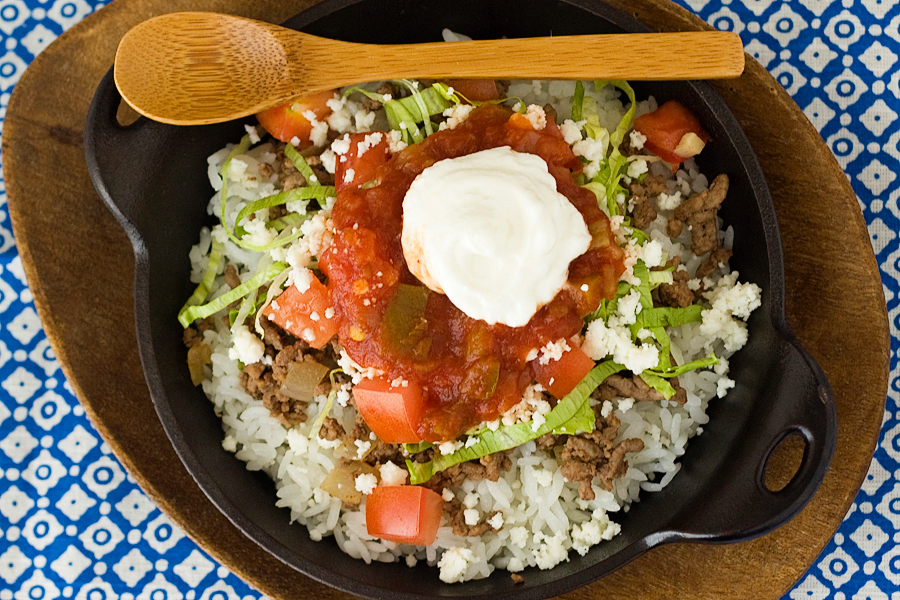
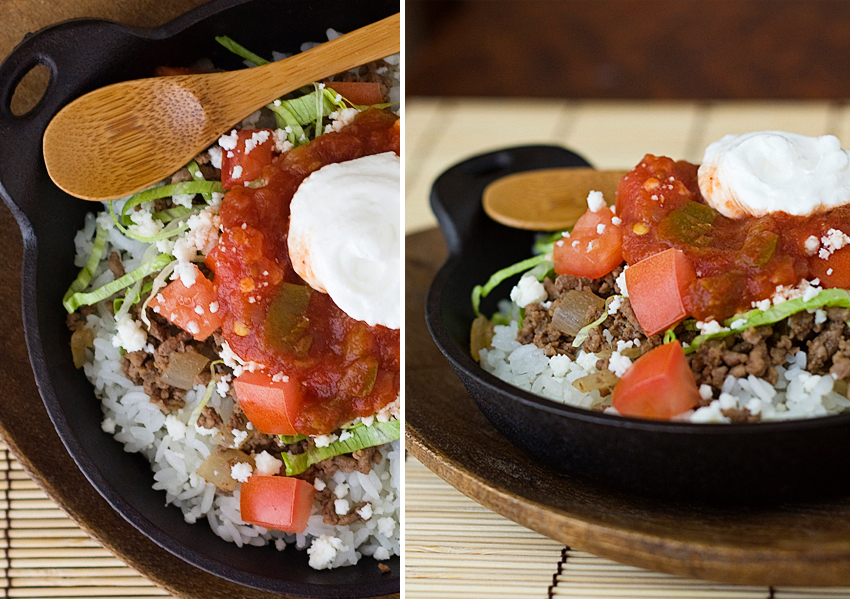
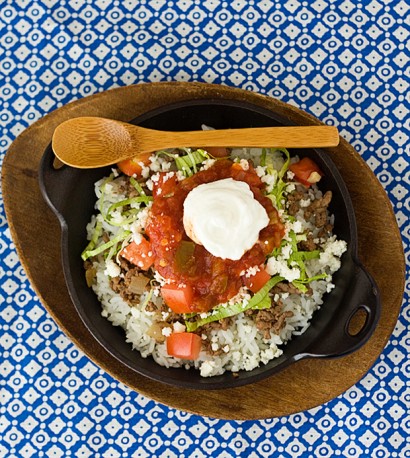
All that’s left to do is build your takoraisu! Start with a bed of hot steamed rice, and layer the seasoned beef, shredded lettuce, chopped tomatoes, cheese, some salsa, and a dollop of sour cream on top.


Tasty Kitchen Blog: Okinawan Takoraisu (Taco Rice). Guest post and recipe from Rachael of La Fuji Mama.

Now comes the best part: EATING!
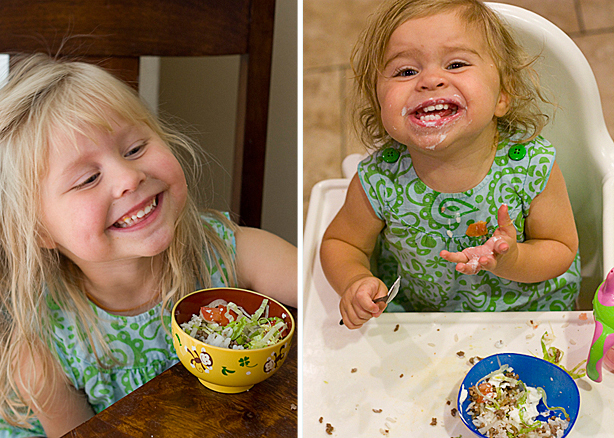


Tasty Kitchen Blog: Okinawan Takoraisu (Taco Rice). Guest post and recipe from Rachael of La Fuji Mama.

Itadakimasu!


Printable Recipe

Okinawan Takoraisu (aka “Taco Rice”)

4.94 Mitt(s) 32 Rating(s)32 votes, average: 4.94 out of 532 votes, average: 4.94 out of 532 votes, average: 4.94 out of 532 votes, average: 4.94 out of 532 votes, average: 4.94 out of 5

Prep Time:

Cook Time:

Difficulty: Easy

Servings: 5

5
x

Print Options

Page size Letter 3x5 4x6
Text Size Small Medium Large
Content Include description
Include prep time, etc.
Show image

Description

Taco Rice, or “Takoraisu” as it’s called in Japan, is a popular Okinawan dish invented in the 1960s by a Japanese chef who took the idea of tacos, so popular among the American military stationed on Okinawa, and combined it with rice, a staple item in the Okinawan diet. The dish has since become, ironically enough, one of the most well-known Okinawan dishes.

Ingredients

  • 1 Tablespoon Vegetable Oil
  • 3 cloves Garlic, Minced
  • 1 cup Onion, Chopped
  • 1 pound Ground Beef
  • 3 Tablespoons Soy Sauce
  • 1 Tablespoon Chili Powder
  • 1 teaspoon Ground Cumin
  • 1 teaspoon Table Salt
  • 1 teaspoon Freshly Ground Black Pepper
  • 4 cups Steamed Japanese Rice (sometimes Labeled "sushi Rice")
  • 2 cups Lettuce, Shredded
  • 2 cups Tomatoes, Chopped
  • 12 ounces, weight Queso Blanco, Crumbled OR 2 Cups Shredded Mozzarella Cheese
  • 1 cup Salsa
  • 4 Tablespoons Sour Cream

Preparation Instructions

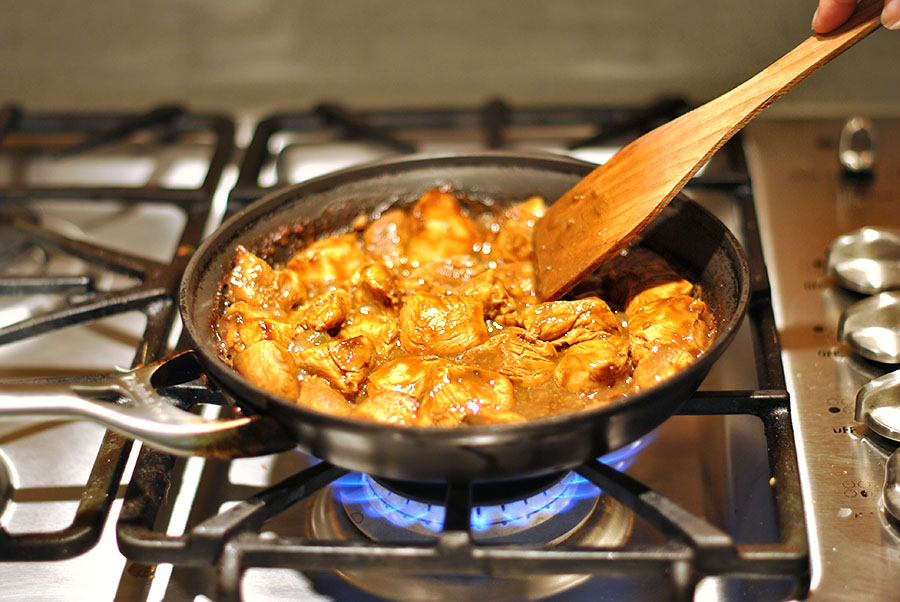
1. Heat the vegetable oil in a saute pan over medium heat. Add the garlic and onion and saute until the onions are barely soft. Add the ground beef and break it into small chunks. Once the meat is cooked, add the soy sauce, chili powder, cumin, salt, and pepper. Let this simmer until the liquid reduces.

2. Spread 1/2 to 1 cup of the steamed rice on each plate. Top with the seasoned beef.

3. Then top with the shredded lettuce, tomatoes, queso blanco (or mozzarella), and salsa, and finish it off with a dollop of sour cream.


_______________________________________

Visit Rachael’s blog, La Fuji Mama, where she shares more than just her vast knowledge of Japanese cuisine. She has great travel photos, product reviews, and all sorts of food ninja-ness. You’ll also enjoy seeing more photos of her adorable girls, Squirrel and Bug. (And no, those aren’t their real names.)


Profile photo of Erica Lea

A Family Recipe: Yankee Cornbread

Posted by in Baking, Step-by-Step Recipes

Tasty Kitchen Blog: Yankee Cornbread. Guest post and recipe from Erica Kastner of Cooking for Seven.

 
Ever since I can remember, I have eaten my cornbread like a Yank: generously spread with butter and drizzled with maple syrup. You southerners may disagree, but that’s the way I like it. Slightly sweet, barely savory.

This is the recipe that our family loves and uses again and again.


Tasty Kitchen Blog: Yankee Cornbread. Guest post and recipe from Erica Kastner of Cooking for Seven.

You only need eight ingredients: whole wheat flour, cornmeal (stone ground or yellow), baking powder, salt, milk, butter, eggs, and maple syrup.


Tasty Kitchen Blog: Yankee Cornbread. Guest post and recipe from Erica Kastner of Cooking for Seven.

Start by preheating your oven to 425° F. Put the butter in a square baking dish and place in the oven until the butter has melted.


Tasty Kitchen Blog: Yankee Cornbread. Guest post and recipe from Erica Kastner of Cooking for Seven.

In a large bowl, whisk together the whole wheat flour, cornmeal, baking powder, and salt.


Tasty Kitchen Blog: Yankee Cornbread. Guest post and recipe from Erica Kastner of Cooking for Seven.

In a medium bowl, lightly beat the eggs. Add the milk and maple syrup. Pour all but a few tablespoons of the melted butter into the bowl. You want to leave some in the pan to grease it.


Tasty Kitchen Blog: Yankee Cornbread. Guest post and recipe from Erica Kastner of Cooking for Seven.

Add the wet ingredients to the dry ingredients and whisk just until moistened.


Tasty Kitchen Blog: Yankee Cornbread. Guest post and recipe from Erica Kastner of Cooking for Seven.

Pour into the prepared pan.


Tasty Kitchen Blog: Yankee Cornbread. Guest post and recipe from Erica Kastner of Cooking for Seven.

Bake in the preheated oven for 20-25 minutes or until golden brown and a toothpick inserted in the center comes out clean.


Tasty Kitchen Blog: Yankee Cornbread. Guest post and recipe from Erica Kastner of Cooking for Seven.

Look at that crunchy golden goodness.


Tasty Kitchen Blog: Yankee Cornbread. Guest post and recipe from Erica Kastner of Cooking for Seven.

At this point you could do whatever you want with this cornbread: crumble into chili, spread with jam, drizzle with honey, etc. Here’s the way we like our cornbread:


Tasty Kitchen Blog: Yankee Cornbread. Guest post and recipe from Erica Kastner of Cooking for Seven.

Slice a square in half horizontally.


Tasty Kitchen Blog: Yankee Cornbread. Guest post and recipe from Erica Kastner of Cooking for Seven.

Spread (read: slather) with butter. Wait for it to melt a little.


Tasty Kitchen Blog: Yankee Cornbread. Guest post and recipe from Erica Kastner of Cooking for Seven.

Now for my favorite part: pour maple syrup over all.


Tasty Kitchen Blog: Yankee Cornbread. Guest post and recipe from Erica Kastner of Cooking for Seven.

The cornbread will soak up the syrup and become saturated with buttery sweet goodness. And that’s how a Yankee eats cornbread. As my southern mom would say: larrupin’.


Printable Recipe

Maple Cornbread

See post on Erica Lea’s site!
4.40 Mitt(s) 5 Rating(s)5 votes, average: 4.40 out of 55 votes, average: 4.40 out of 55 votes, average: 4.40 out of 55 votes, average: 4.40 out of 55 votes, average: 4.40 out of 5

Prep Time:

Cook Time:

Difficulty: Easy

Servings: 9

9
x

Print Options

Page size Letter 3x5 4x6
Text Size Small Medium Large
Content Include description
Include prep time, etc.
Show image

Description

Sweet Yankee cornbread made with the goodness of whole wheat and pure maple syrup.

Ingredients

  • 1 cup Whole Wheat Pastry Flour
  • 1 cup Stone Ground Or Yellow Cornmeal
  • 1 Tablespoon Baking Powder
  • ½ teaspoons Salt
  • 1 cup Whole Milk
  • ¼ cups Maple Syrup
  • 6 Tablespoons Butter, Melted
  • 2 whole Eggs, Lightly Beaten

Preparation Instructions

1. Preheat the oven to 425° F. Pour 2 tablespoons of the melted butter into an 8 or 9-inch square or round baking pan.

2. In a medium mixing bowl, whisk the flour, cornmeal, baking powder, and salt. In a small bowl, whisk the milk, maple syrup, remaining butter, and eggs. Add the liquid ingredients to the dry ingredients and gently stir together just until moistened.

3. Pour the batter into the prepared pan and bake for 20-25 minutes, or until golden brown and a toothpick inserted in the middle comes out clean. Serve warm with butter and maple syrup.

Makes 9 servings.


_______________________________________

Erica Berge shares her wonderful recipes and amazing food photography on her blog, Cooking for Seven. She also writes about crafts and posts more of her beautiful photography in her personal blog, EricaLea.com. There really isn’t much that this amazing young lady can’t do, and we’re thrilled she does some of it here.


Profile photo of twopeasandtheirpod

Oreo Cheesecake Cookies

Posted by in Baking, Step-by-Step Recipes

I first met Maria at Two Peas and Their Pod in Salt Lake City about a year ago, and she’s as lovely in person as she is on her blog. Since then, she’s been a prolific contributor on Tasty Kitchen and I’m so excited to have her join the ranks as a contributor here on the Tasty Kitchen Blog. This inaugural recipe, which comes from multiplydelicious, has definitely captured my attention this morning. I want one! –Ree

 
Tasty Kitchen Blog: Oreo Cheesecake Cookies. Guest post by Maria Lichty of Two Peas and Their Pod, recipe submitted by TK member Heather of Multiply Delicious.

 
The weather has been cold, gloomy, and rainy lately. I don’t mind days like this, as long as I can stay inside and bake. I love heating up the house with the warmth of our oven. And let’s be honest, I also enjoy sampling what comes out of the oven.

I was in the mood to bake cookies, so I turned to Tasty Kitchen for a little help. I stumbled upon Oreo Cheesecake Cookies from multiplydelicious and knew I needed to preheat the oven right away. Oreo cheesecake in cookie form with a drizzle of white chocolate? Yes, please! These cookies sounded too good to be true. Let’s get baking!

 
Here is what you will need to bake these delightful cookies:


Tasty Kitchen Blog: Oreo Cheesecake Cookies. Guest post by Maria Lichty of Two Peas and Their Pod, recipe submitted by TK member Heather of Multiply Delicious.

For a complete list of ingredients, measurements, and instructions, see the recipe link below.

Preheat the oven to 375 degrees and line two baking sheets with parchment paper. Set aside.


Tasty Kitchen Blog: Oreo Cheesecake Cookies. Guest post by Maria Lichty of Two Peas and Their Pod, recipe submitted by TK member Heather of Multiply Delicious.

In the bowl of a stand mixer, cream together the butter and cream cheese until they are creamy and smooth. You can also use a hand mixer for this step.


Tasty Kitchen Blog: Oreo Cheesecake Cookies. Guest post by Maria Lichty of Two Peas and Their Pod, recipe submitted by TK member Heather of Multiply Delicious.

Add the sugar and vanilla extract.


Tasty Kitchen Blog: Oreo Cheesecake Cookies. Guest post by Maria Lichty of Two Peas and Their Pod, recipe submitted by TK member Heather of Multiply Delicious.

Mix until ingredients are well combined.


Tasty Kitchen Blog: Oreo Cheesecake Cookies. Guest post by Maria Lichty of Two Peas and Their Pod, recipe submitted by TK member Heather of Multiply Delicious.

Slowly add the flour and mix on low speed, just until the flour is incorporated.


Tasty Kitchen Blog: Oreo Cheesecake Cookies. Guest post by Maria Lichty of Two Peas and Their Pod, recipe submitted by TK member Heather of Multiply Delicious.

Stir in the mini chocolate chips.


Tasty Kitchen Blog: Oreo Cheesecake Cookies. Guest post by Maria Lichty of Two Peas and Their Pod, recipe submitted by TK member Heather of Multiply Delicious.

Using a cookie scoop, scoop dough into one-inch balls.


Tasty Kitchen Blog: Oreo Cheesecake Cookies. Guest post by Maria Lichty of Two Peas and Their Pod, recipe submitted by TK member Heather of Multiply Delicious.

Put Oreo cookie crumbs on a plate and roll the dough balls around in the crumbs. Make sure the dough balls are completely covered.


Tasty Kitchen Blog: Oreo Cheesecake Cookies. Guest post by Maria Lichty of Two Peas and Their Pod, recipe submitted by TK member Heather of Multiply Delicious.

Place covered cookie dough balls onto prepared baking sheets, about two inches apart. Bake cookies for 12-15 minutes, or until the edges are golden and the cookies are slightly puffed.


Tasty Kitchen Blog: Oreo Cheesecake Cookies. Guest post by Maria Lichty of Two Peas and Their Pod, recipe submitted by TK member Heather of Multiply Delicious.

Remove cookies from the oven and cool on baking sheets for two minutes. Transfer cookies to a wire rack and cool completely.


Tasty Kitchen Blog: Oreo Cheesecake Cookies. Guest post by Maria Lichty of Two Peas and Their Pod, recipe submitted by TK member Heather of Multiply Delicious.

Melt the white chocolate in the microwave and drizzle over cooled cookies. Let the cookies sit until the chocolate hardens, about five minutes. (The white chocolate drizzle is optional, but if there is an opportunity to add chocolate, I always go for it.)


Tasty Kitchen Blog: Oreo Cheesecake Cookies. Guest post by Maria Lichty of Two Peas and Their Pod, recipe submitted by TK member Heather of Multiply Delicious.

Grab a glass of milk and enjoy these rich and tasty cookies.

Visit Heather’s blog, Multiply Delicious, for the original post of this recipe and a lot of other great goodies. Thanks Heather for sharing your recipe. I will be baking these cookies often!


Printable Recipe

Oreo Cheesecake Cookies

See post on multiplydelicious’s site!
3.42 Mitt(s) 21 Rating(s)21 votes, average: 3.42 out of 521 votes, average: 3.42 out of 521 votes, average: 3.42 out of 521 votes, average: 3.42 out of 521 votes, average: 3.42 out of 5

Prep Time:

Cook Time:

Difficulty: Easy

Servings: 20

20
x

Print Options

Page size Letter 3x5 4x6
Text Size Small Medium Large
Content Include description
Include prep time, etc.
Show image

Description

A Oreo cheesecake, but in cookie form. A favorite for those Oreo cheesecake lovers out there.

Ingredients

  • ½ cups Unsalted Butter, Softened
  • 3 ounces, weight Cream Cheese, Softened
  • 1 cup Sugar
  • 1 teaspoon Vanilla Extract
  • 1 cup All-purpose Flour
  • ½ cups Mini Chocolate Chips
  • 1 cup Oreo Cookie Crumbs
  • ½ cups White Chocolate Chips, Melted (optional)

Preparation Instructions

Preheat oven to 375 degrees and line two baking sheets with parchment paper. Set aside.

In a large bowl, cream together the butter and cream cheese using a hand mixer until they are well combined.

Add the sugar and vanilla and mix until ingredients are well combined. Add the flour and mix on low until the flour is incorporated. Stir in the mini chocolate chips.

Scoop the dough into 1″ balls (I used a scoop to insure all measured the same) and roll in Oreo cookie crumbs so cookie is covered. Place covered cookie balls onto the prepared baking sheet. Bake for 12 to 15 minutes, or until the edges are golden and the tops are slightly puffed.

Cool on the pan for two minutes before transferring to a wire rack to cool. Once cool, drizzle cookies with melted white chocolate. Enjoy!


_______________________________________

Maria and her husband Josh (who she affectionately refers to as her “dough boy”) blog at Two Peas and Their Pod. They’ve been featured on Saveur, Eatocracy, Gourmet Live, Glamour, and the Los Angeles Times, to name just a few. We’re so glad to have them here!


Profile photo of ThreeManyCooks

Thai Honey Peanut Chicken

Posted by in Step-by-Step Recipes

Tasty Kitchen Blog: Thai Honey Peanut Chicken. Guest post by Maggy Keet of Three Many Cooks, recipe submitted by TK member spygirl.

 
Getting dinner on the table can be a royal struggle. Sometimes it’s exhaustion and an empty fridge, other times it’s a lack of inspiration or time. In any event, one hand starts gravitating towards the phone and the other starts reaching for the take-out menu drawer. Then come the pangs of guilt. It’s expensive. Not as healthy. I should really make my husband a home cooked meal. He’s worth it. So am I.

Beaten by my conscience, I open my fridge and stare at the contents hoping a dinner idea will jump out at me. Languishing vegetables, milk, pickles, chocolate, condiments and a Tupperware filled with long-forgotten leftovers. Not promising. When that fails, I close the fridge and open the freezer hoping I’ll find dinner there. Ice cubes, peas, ice cream, unidentifiable thing in a Ziploc bag, chicken breasts. I nearly close the freezer, but stop myself: “Chicken breasts. OK, that’s a start.”

But a chicken breast is a blank canvas, so all home cooks need a few good chicken breast recipes in their arsenal. That’s why this Tasty Kitchen submission by spygirl jumped out at me. I’m always looking for a weeknight dinner that starts with chicken breasts, and Thai Honey Peanut Chicken sounded mighty good.


Tasty Kitchen Blog: Thai Honey Peanut Chicken. Guest post by Maggy Keet of Three Many Cooks, recipe submitted by TK member spygirl.

This recipe was particularly attractive not only because Thai food is my absolute favorite, but also because I had everything else for the recipe in my pantry or fridge.


Tasty Kitchen Blog: Thai Honey Peanut Chicken. Guest post by Maggy Keet of Three Many Cooks, recipe submitted by TK member spygirl.

First cut your chicken into pieces. Here’s a neat little trick: Cut off the tip of the chicken breast, then cut the breast down the middle, making it easier to cut even, square pieces.


Tasty Kitchen Blog: Thai Honey Peanut Chicken. Guest post by Maggy Keet of Three Many Cooks, recipe submitted by TK member spygirl.

In a medium bowl add the soy sauce. This is Filipino soy sauce, which I think is superior to all other soy sauces, thanks to a friend of mine. She’s got me hooked. But all soy sauces will work just fine.


Tasty Kitchen Blog: Thai Honey Peanut Chicken. Guest post by Maggy Keet of Three Many Cooks, recipe submitted by TK member spygirl.

Then add the honey. Spray your measuring cup or spoon with vegetable cooking spray before you squeeze in the honey and it will slide right out instead of sticking to the cup.


Tasty Kitchen Blog: Thai Honey Peanut Chicken. Guest post by Maggy Keet of Three Many Cooks, recipe submitted by TK member spygirl.

Add the lime juice next. If you don’t have a juicer, use a whisk to get the juice out of your lime.


Tasty Kitchen Blog: Thai Honey Peanut Chicken. Guest post by Maggy Keet of Three Many Cooks, recipe submitted by TK member spygirl.

Then add the minced garlic. (Here is a quick tutorial on how to mince garlic like my Mom does. You want to learn. It’s like magic).


Tasty Kitchen Blog: Thai Honey Peanut Chicken. Guest post by Maggy Keet of Three Many Cooks, recipe submitted by TK member spygirl.

Add the peanut butter and curry powder, then finally the Sriracha. The latter is optional, but I promise it doesn’t make the dish too spicy.


Tasty Kitchen Blog: Thai Honey Peanut Chicken. Guest post by Maggy Keet of Three Many Cooks, recipe submitted by TK member spygirl.

Whisk the ingredients together. Add the chicken pieces and then marinate for 2-3 hours.


Tasty Kitchen Blog: Thai Honey Peanut Chicken. Guest post by Maggy Keet of Three Many Cooks, recipe submitted by TK member spygirl.

Heat a large skillet over medium-high heat, add the chicken (along with all that good sauce) for 7-8 minutes or until the chicken is done.


Tasty Kitchen Blog: Thai Honey Peanut Chicken. Guest post by Maggy Keet of Three Many Cooks, recipe submitted by TK member spygirl.

Serve with rice and top with sesame seeds. We added chopped cilantro too because we love it and it adds some color to the plate.

I made this dish in about 30 minutes, and it didn’t disappoint. As long as I keep a spare chicken breast or two in my freezer, I know I’ll be pulling this recipe out whenever that I find my hands reaching for the phone and the take-out menu drawer.

Thank you spygirl for this lovely dish!


Printable Recipe

Thai Honey Peanut Chicken

4.27 Mitt(s) 33 Rating(s)33 votes, average: 4.27 out of 533 votes, average: 4.27 out of 533 votes, average: 4.27 out of 533 votes, average: 4.27 out of 533 votes, average: 4.27 out of 5

Prep Time:

Cook Time:

Difficulty: Easy

Servings: 3

3
x

Print Options

Page size Letter 3x5 4x6
Text Size Small Medium Large
Content Include description
Include prep time, etc.
Show image

Description

Quick, sweet, optionally spicy stir fry—scales up and down, accommodates veggies or tofu, and best with homemade peanut butter.

Ingredients

  • 1 pound Chicken, In Chunks
  • ¼ cups Soy Sauce
  • 2 Tablespoons Honey
  • 1 Tablespoon Lime Juice
  • 1 teaspoon Minced Garlic (approximately 1 Large Clove)
  • 1 Tablespoon Natural Peanut Butter (heaping Tablespoon Even Better)
  • ½ teaspoons Curry Powder
  • 1 teaspoon Sriracha (optional)

Preparation Instructions

Mix ingredients and marinate chicken for 2-3 hours.

Cook chicken in the sauce over medium-high heat for 7-8 minutes or until chicken is done. Reduce heat to medium-low and add precooked veggies if desired. Serve topped with sesame seeds.

To thicken sauce if needed: reduce heat to medium-low and add a cornstarch slurry (1 teaspoon cornstarch in 1 tablespoon water).

Substitutions: replace chicken with tofu; replace peanut butter with tahini or another nut butter; if using regular peanut butter (i.e. Skippy) instead of natural peanut butter, reduce honey by 1 tablespoon.


_______________________________________

Three Many Cooks is the always-entertaining food blog of Pam Anderson and her two daughters, Maggy and Sharon. Pam is a well-known and much-respected food writer and author, Maggy is a “hippy adventurer meets 1950s housewife,” and Sharon refers to herself as a recovering food snob learning to survive on a graduate student’s budget. Theirs is a strong relationship both inside and outside the kitchen, and it shows in the food they create and the stories they tell.


Profile photo of Ree | The Pioneer Woman

A Tasty Halloween

Posted by in Holidays, Looks Delicious!

When it comes to Halloween goodies, Tasty Kitchen members are coming through as usual. These miniature Oreo Pumpkin Cheesecakes from Lauren’s Latest look darling and delicious.         And these ginger sugar cookies from Heather Christo are precious, and sound absolutely yummy. (Love Heather’s blog!)         I love…

Profile photo of patiodaddio

Sauerkraut and Pork

Posted by in Step-by-Step Recipes

I’d like to welcome John Dawson, also known as Patio Daddio, as a new contributor to the Tasty Kitchen Blog. We’re happy to have a brave dude among our ranks. Welcome, John! –Ree     This is one of those recipes. There are certain family recipes that, by the mere smell of them cooking, bring […]

Profile photo of missamy

Scalloped Sweet Potatoes

Posted by in Step-by-Step Recipes

Amy does it again, bringing us beautiful step-by-step instructions for Scalloped Sweet Potatoes, submitted by Tasty Kitchen member quincyskeeper. Thank you, Amy! –PW     When I think of sweet potatoes, I think of the holidays—in particular, Thanksgiving. So when I stumbled across this recipe for Scalloped Sweet Potatoes, submitted by Tasty…

Profile photo of Ree | The Pioneer Woman

Looks Delicious! Chocolate Buttercream Frosting

Posted by in Looks Delicious!

  As soon as I saw this recipe on Tasty Kitchen this morning, I was completely smitten. How gorgeous does this look? Here’s the recipe: Chocolate Buttercream Frosting, submitted by Kay (The Church Cook). Not only do I think this buttercream frosting looks delicious, I also think it’s such a lovely food photo. It does […]