The Pioneer Woman Tasty Kitchen
Profile photo of steamykitchen

How to Flatten a Chicken for Grilling

Posted by in Kitchen Talk

Tasty Kitchen Blog: How To Flatten a Chicken for Grilling. Guest post by Jaden Hair of Steamy Kitchen.

 
It’s Memorial Weekend, and do you know what that means? Time to lounge at the pool and hang out by the BBQ. We’re grilling this entire weekend; the weather is perfectly straddling between warm and hot (when it gets hot we jump in the pool … when it gets warm, we EAT!).

This week, I asked my friend, Steve, to share a grilling tip and recipe. He’s the publisher of Grilling Companion recipe site and developer of the brand new iPad app. Steve is sharing a recipe for a Grilled Whole Chicken with Balsamic Glaze and will show us how to spatchcock a chicken (i.e. flatten that sucker for even cooking!).

 
Grilled Whole Chicken with Balsamic Glaze

I have nothing against a whole chicken. It still cracks me up when I open the lid of the grill and see a bird perched up on a beer can. I just find it easier to handle a flattened chicken on the grill. A flat chicken cooks quicker and more evenly, and has the added benefit of not rolling off the platter on your way to the table (yeah, been there and cleaned up the mess). So today’s recipe is a bonus, with equal parts Chicken Butchering 101 and recipe for a delicious and simple honey balsamic glazed whole chicken. Grab a bird and a cutting board and let’s get started!

 
Ingredients:

1 whole chicken (around 4 – 5 pounds)
1/2 cup honey
6 tablespoons balsamic vinegar
Kosher salt
Fresh ground black pepper

Directions:

1. Let’s disassemble a bird. Lay the whole chicken breast side down on your cutting board.

2. Feel around his (or her) back until you feel the backbone running straight down the middle. I haven’t read about any cases of scoliosis in chickens, so it should be straight down the center of the back.

3. Using kitchen shears or a knife, cut down both sides of the backbone. The bones are pretty thin in this area, so you should be able to cut through with little effort.
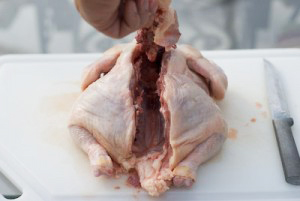
Tasty Kitchen Blog: How To Flatten a Chicken for Grilling. Guest post by Jaden Hair of Steamy Kitchen.

4. Remove the backbone completely and trim off any excess fat around where the tail used to be.

5. Ok, here’s where it’s a little tricky the first time. Spread the chicken open and locate the white piece of grissel you see here just to the right of my finger? Cut through it with the knife.
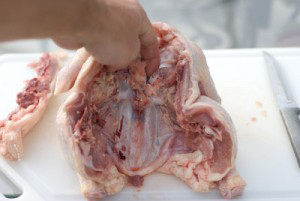
Tasty Kitchen Blog: How To Flatten a Chicken for Grilling. Guest post by Jaden Hair of Steamy Kitchen.

6. There is a bone starting under that piece of grissel called the keel bone and it runs down the length of the breasts. If you bend the chicken back a little farther, you’ll start to see the keel bone poke out between the breasts.
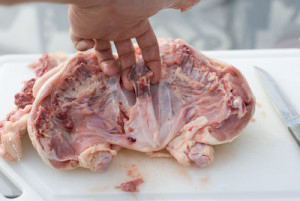
Tasty Kitchen Blog: How To Flatten a Chicken for Grilling. Guest post by Jaden Hair of Steamy Kitchen.

7. Work your fingers down each side of the keel bone to loosen and then pull it out. See why they call it a keel bone (boat reference)?
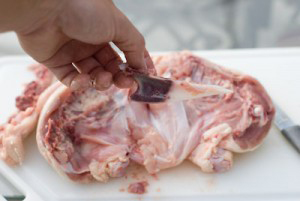
Tasty Kitchen Blog: How To Flatten a Chicken for Grilling. Guest post by Jaden Hair of Steamy Kitchen.

8. Now you can either leave the chicken flat or cut all the way through where the keel bone used to be to form two half chickens. I prefer to work with two halves; they’re easier to move around the grill.

9. Light your grill for a two zone, indirect grilling session. If you are using gas, you’ve got it easy—just light half of your burners to medium high and leave the other half off (preferably the center burners should be off). For you charcoal folks, pile up a chimney full of charcoal on one side of the grill.

10. Combine the honey and balsamic vinegar in a bowl and whisk thoroughly to form our glaze.

11. Generously salt and pepper both sides of your chicken.

12. Once the grill is ready, place the chicken skin side down on the hot side of the grill. Stay close by, the fat from the skin is going to flare up! When it does, just move your chicken off the flame until the flare up goes out.

13. Sear the chicken for 5 – 10 minutes (depending on the temperature of your grill). We are looking to crisp up the skin and create a little char, but not burn the entire skin.

14. Once you are done searing, flip the chicken over skin side up and move the chicken to the cool side of the grill.

15. Using a mop or brush, baste the chicken with the honey balsamic glaze and close the grill’s lid.
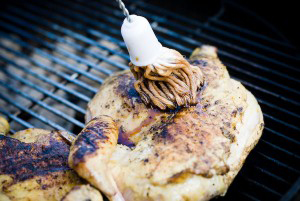
Tasty Kitchen Blog: How To Flatten a Chicken for Grilling. Guest post by Jaden Hair of Steamy Kitchen.

16. We want to keep the grill at as close to 350 degrees as possible and only open the lid to baste the chicken. Just like your oven, the grill loses all of the heat each time you open the lid.

17. Continue to baste the chicken with the glaze every 10 minutes or so and keep the lid closed in between basting.

18. Grill the chicken until a thermometer inserted into the deepest part of the breast reads around 160 degrees and the outside skin has darkened.
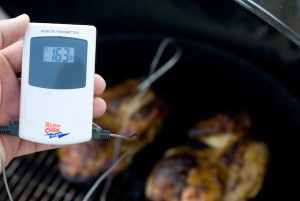
Tasty Kitchen Blog: How To Flatten a Chicken for Grilling. Guest post by Jaden Hair of Steamy Kitchen.

19. Hit the chicken with a little more glaze and place on a platter to serve.

20. Allow the chicken to rest for about 10 minutes before you carve.

Tasty Kitchen Blog: How To Flatten a Chicken for Grilling. Guest post by Jaden Hair of Steamy Kitchen.

See? Told you this was easy! Sure, you can buy half chickens, but they are little more expensive and you won’t be able to impress your family with your new butchering skills. With a little practice, you’ll disassemble that bird in no time flat. (Get it?)


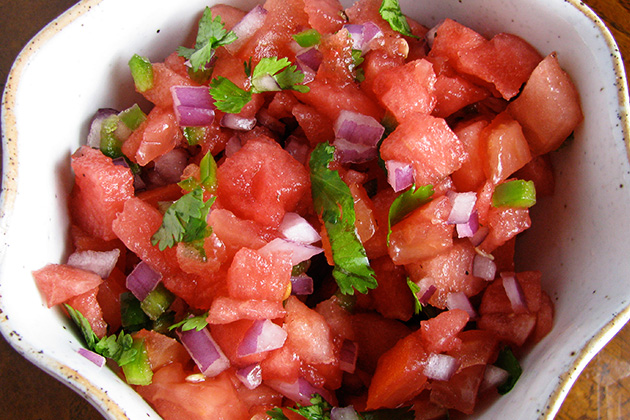
Along with that grilled chicken, I’d love to top it with some Fresh Watermelon Salsa from HowSweetEats.

Tasty Kitchen Blog: How To Flatten a Chicken for Grilling (Fresh Watermelon Salsa, recipe submitted by TK member Jessica of How Sweet It Is)


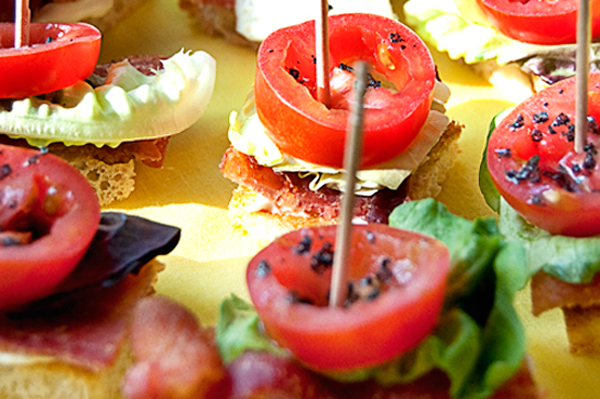
And then we move on to BLT Bites from LanaAnn. How cute are these! I’ll take 4 of them please!

Tasty Kitchen Blog: How To Flatten a Chicken for Grilling (BLT Bites, recipe submitted by TK member LanaAnn)


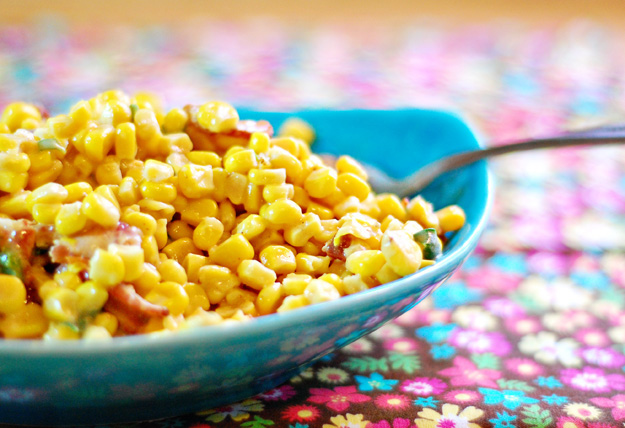
Another summery side perfect for this weekend is Karly’s Corn with Bacon and Green Onions. Because how can you have a celebration without bacon? Love it.

Tasty Kitchen Blog: How To Flatten a Chicken for Grilling (Corn with Bacon and Green Onions, recipe submitted by TK member Karly of Buns in My Oven)


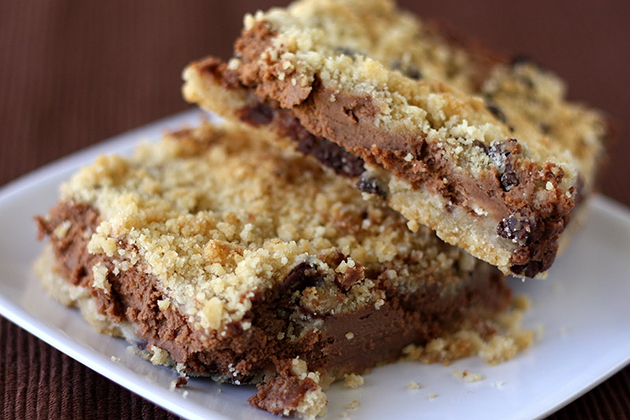
And for dessert, to top it all off, Mangiodasola’s Chocolate Crumb Cheesecake Bars. Truly decadent.

Tasty Kitchen Blog: How To Flatten a Chicken for Grilling (Chocolate Crumb Cheesecake Bars, recipe submitted by TK member Mangiodasola)


_______________________________________

Jaden Hair is a food writer, television personality, and food photographer based in Tampa Bay, Florida. Find more of her recipes in her blog, Steamy Kitchen, where you can also read more about Jaden’s new book, The Steamy Kitchen Cookbook, and the rave reviews it’s received!
 

Profile photo of Ree | The Pioneer Woman

Panko Mozzarella Sticks!

Posted by in Step-by-Step Recipes

I first discovered panko bread crumbs back in 1999. Please don’t ask me how I know that; I just do. I remember vividly reading a recipe that contained panko bread crumbs, and I remember vividly that I was nursing my second baby, and I remember vividly that I was hormonal and desperate, and the next thing I knew I was ordering panko bread crumbs from some market in Chelsea that the magazine recommended. On the phone, of course, because although I had a computer at the time, I certainly wouldn’t have been cool enough to use it to order panko bread crumbs. Plus, I was nursing. Not enough hands.

Panko bread crumbs, in a word, are delicious. They’re indispensable. They’ve saved the word. And they’ve really burst into the mainstream in the last few years, and are available in most larger supermarkets—even stores in my neck of the woods!

Panko are Japanese breadcrumbs, and are lighter and flakier than regular breadcrumbs. They absorb less oil, too, so after frying they result in an incredibly crunchy texture. I just love panko. They’re a wonderful creation!

When I set out to make a recipe with panko bread crumbs, I started in the direction of something Asian/exotic. But Erika set me straight and said, simply, “Why not just make something simple…like mozzarella sticks?”

So guess what I did? I made mozzarella sticks!

Let me back up: my family LOVES fried mozzarella sticks. Loves them. Even Marlboro Man. I make fried mozzarella quite a bit, but I’ll tell you that without fail, they love the panko version the best. The panko crumbs are so light and incredibly crispy, which is such a necessary contrast to the soft, melted mozzarella inside. Coating the mozzarella adequately is the key; I’ll show you the best way I’ve found to get it all to stay put. And the great thing is, you can use this same method—and same recipe—with lost of other fried items. Zucchini spears would be perfect. I’ll wait till my garden is exploding with them!

Here we go: Panko Mozzarella Sticks!

Grab the panko breadcrumbs.

 
TPW_8900

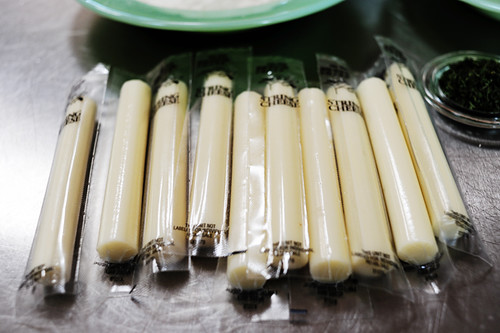
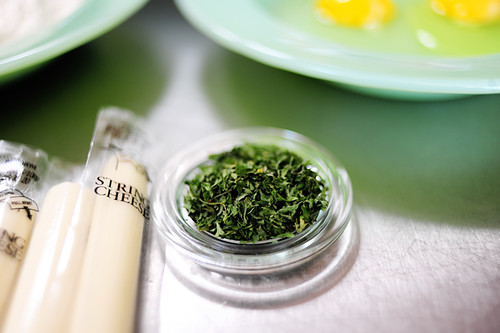
You’ll need a bunch of string cheese—one string cheese per two fried mozzarella sticks you’d like to make.


TPW_8897

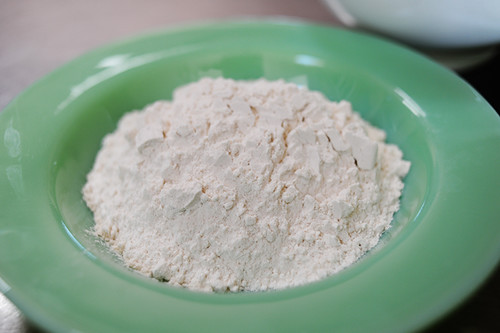
You’ll need a bowl of flour…


TPW_8896

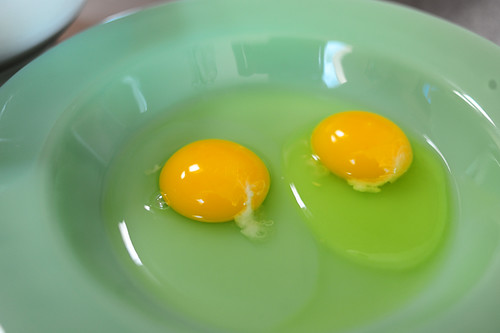
A couple of eggs…


TPW_8909

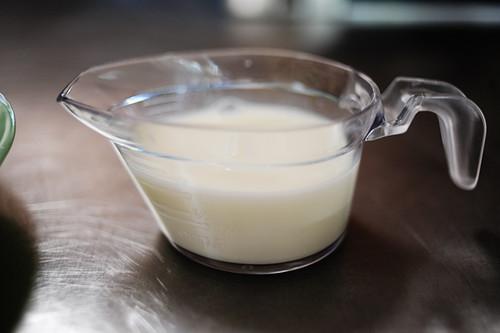
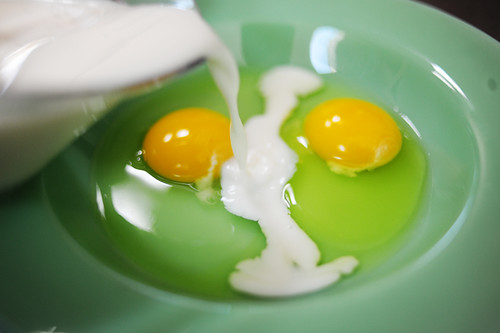
A little milk…


TPW_8903

And some dried parsley flakes.


TPW_8918

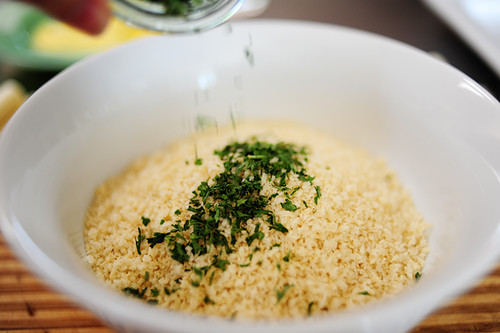
Add the parsley flakes to the panko crumbs…


TPW_8922

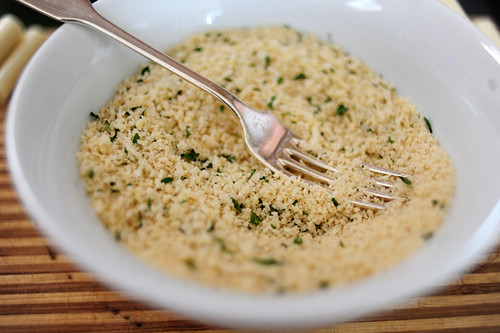
And stir them together with a fork. Now, you could certainly sprinkle in a little salt, garlic salt, or other seasoning mix—even a little cayenne pepper—but I wanted to keep things simple. I don’t think the crumbs really need much help.


TPW_8912

Next, splash a little milk into the eggs…


TPW_8914

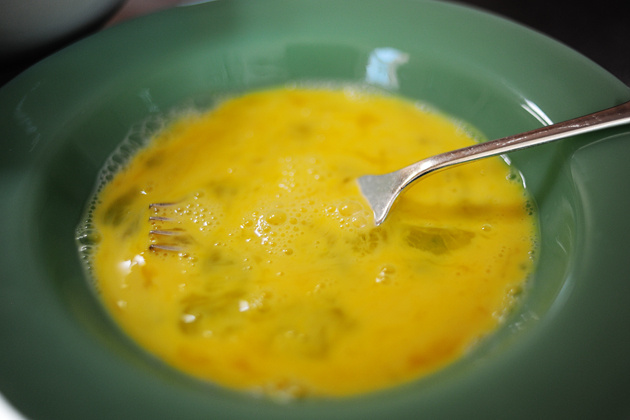
And whip it together with a fork.


TPW_8916

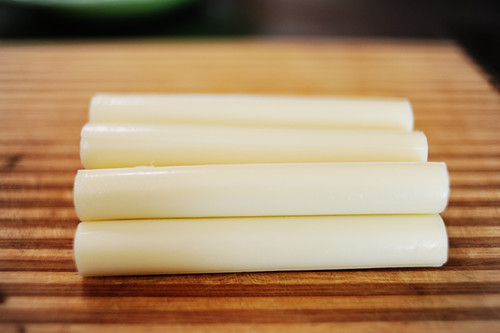
Finally, unwrap as many pieces of string cheese as you need…


TPW_8917

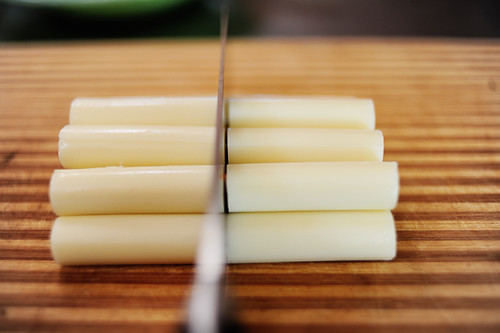
And just slice them in half with a sharp knife.


TPW_8924

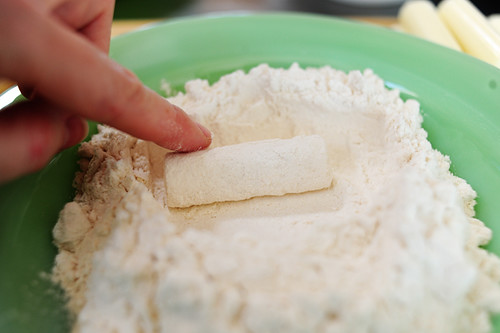
Now, this is just a great, basic way to bread basically anything with panko crumbs. Use this method for everything from chicken tenders to zucchini spears. In this case, just set one of the pieces of mozzarella in the bowl of flour…


TPW_8926

And roll it around to lightly coat.


TPW_8929

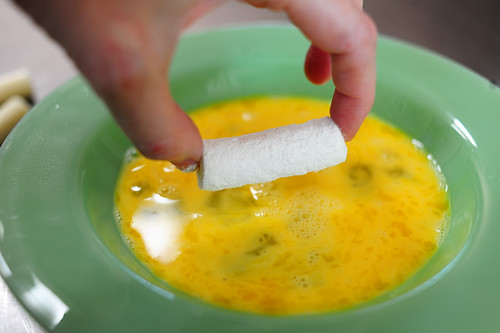
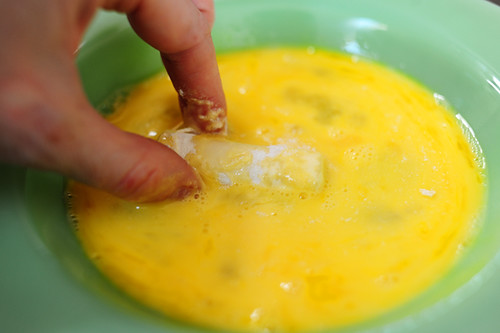
Next, dip the flour-coated mozzarella in the egg/milk mixture.


TPW_8930

Coat it completely…


TPW_8932

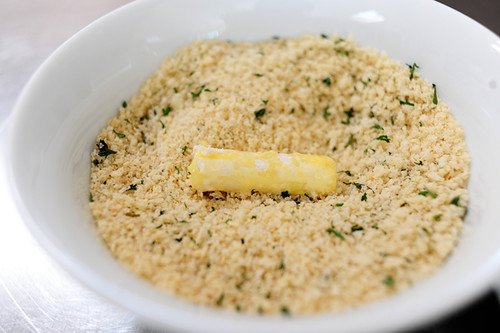
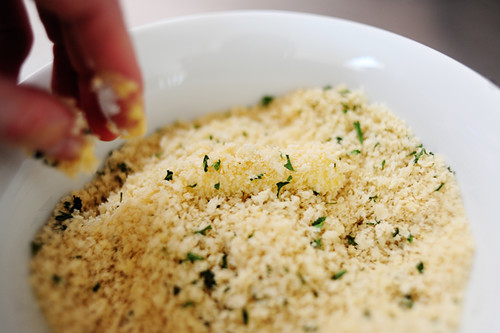
Then place it straight into the seasoned panko crumbs.


TPW_8934

Rather than roll it around and disturb the coating, I just use my hand to scoop panko crumbs on top of the mozzarella so that it’s adequately coated.


TPW_8935

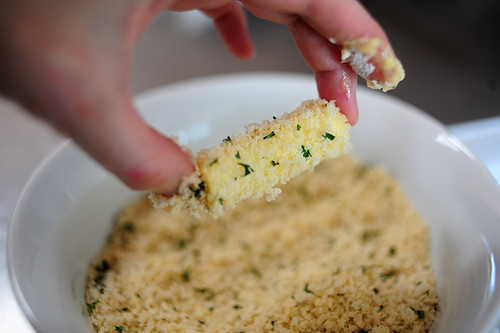
Pat it gently to make sure it’s all coated with crumbs, then gently remove from the crumbs…


TPW_8938

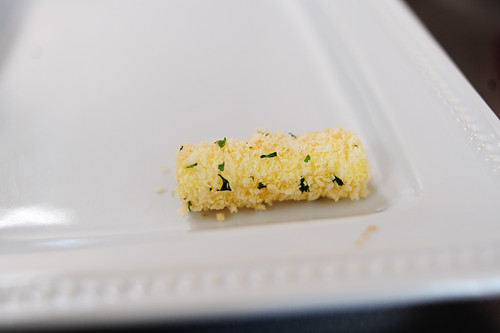
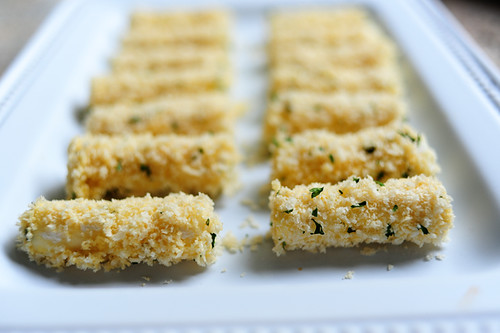
And place on a clean tray or cookie sheet.


TPW_8942

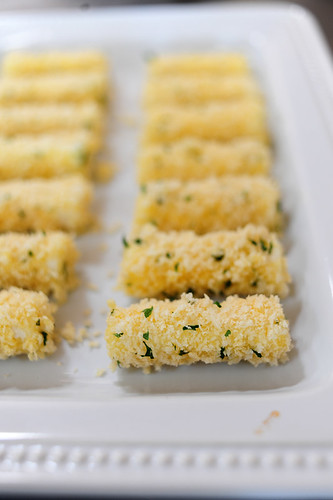
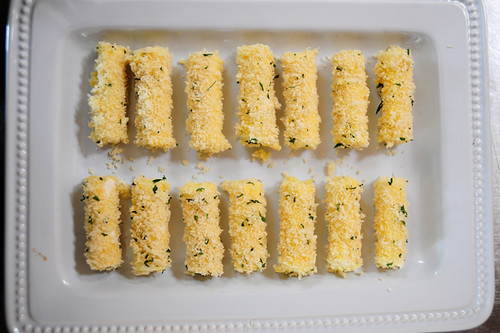
Repeat until all the pieces are coated.


TPW_8944

Now—this is an important step: Place the tray, uncovered, directly into the freezer for 20 to 30 minutes. This will flash freeze the mozzarella sticks (at least partly), which will help them stay together better when it’s time to fry, and will also keep the mozzarella from melted too quickly when it hits the hot oil.


TPW_8950

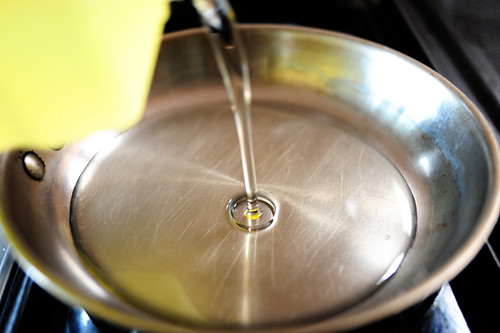
When you’re ready to fry ‘em up, heat a good inch to an inch-and-a-half of canola oil over medium heat. Medium high or high, at least on my stove, proves to be a little too hot for panko crumbs. Medium’s about right, but you can sort of gauge your stove and see what you need to do.


TPW_8955

Pull the frozen sticks out of the freezer…


TPW_8963

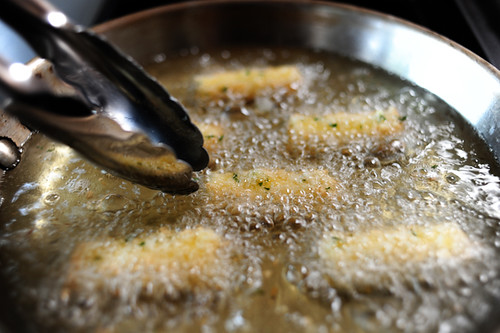
And carefully add a few to the hot oil.

Oh! And I always feel like saying this: be careful with pans of hot oil if you have cute little roly poly kids walking around the house. I always, out of habit—even now that my roly poly kids are getting bigger—keep pans on the back burner of the stove (handles far out of reach) if I’m going to fry with oil. It’s just one of those things that crawled into my brain at an early stage of parenting, and something I’m going to keep bugging you about anytime I share a recipe that involves frying with hot oil.

Hope you don’t mind.


TPW_8965

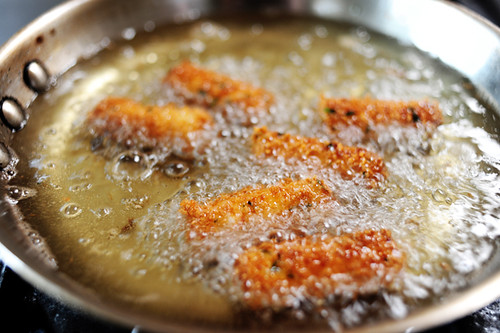
Things will move quickly—be ready to roll them over to the other side when the first side gets brown. The trickiest part of making these is getting the oil to just the right temp in order to melt the cheese without burning the crumbs, but it isn’t difficult to get the swing of it right away. Keep in mind that the cheese will continue to soften/melt after you remove them from the oil.


TPW_8973

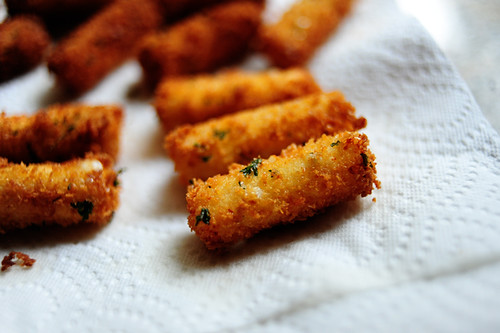
When they’re nice and golden, remove them to a paper towel-lined plate.


TPW_8975

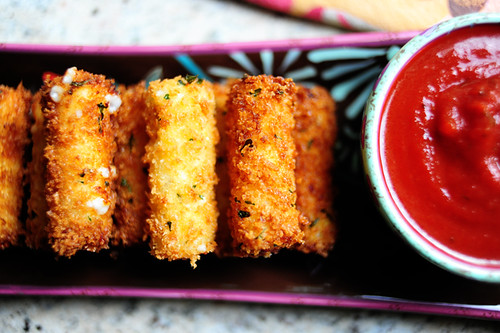
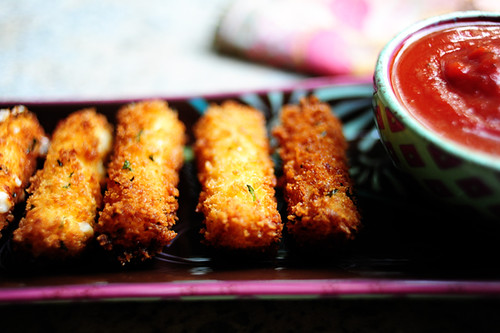
Yum! Look at the yummy panko breading. If I took a bite of this, you could hear the crispiness in Yonkers!


TPW_8959

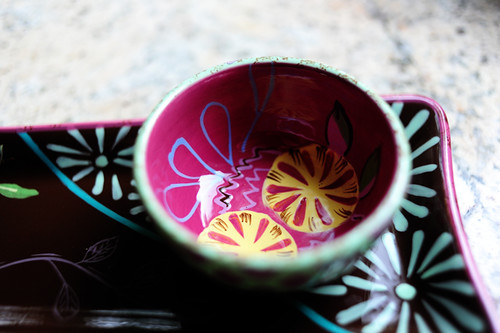
Pretty dish.


TPW_8961

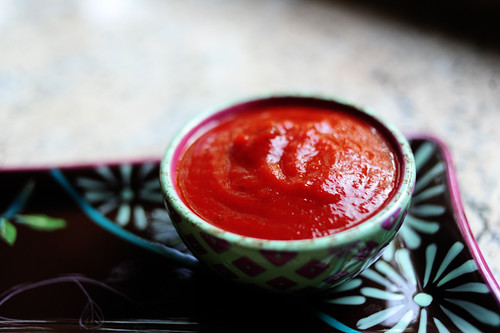
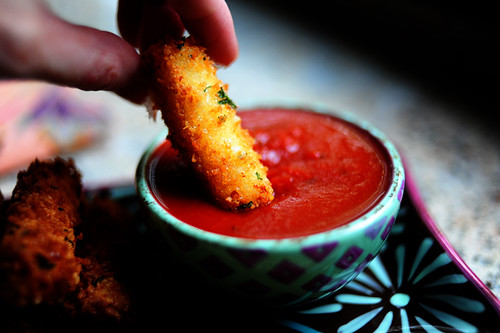
Pretty dish filled with marinara sauce.


TPW_8986

My kids and husband were gathered around as I was taking these photos. I had to beat them away with my tongs.


TPW_8993

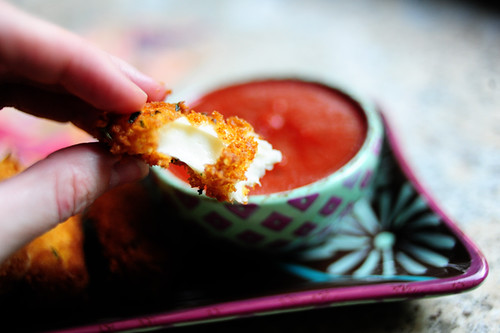
Because I wanted to try one first.


TPW_9004

The Verdict: Perfection. These are not your typical run-of-the-mill fried mozzarella sticks. The panko crumbs absolutely make them. They add a much-needed crispiness and texture to this widely loved (but sometimes tired) bar-and-grill food. You’ll love them!

Here’s the printable recipe:

Panko Mozzarella Sticks


TPW_8984

And remember: use this flour-egg/milk-panko breading process on any number of things:

chicken tenders
zucchini spears
raw, deveined shrimp
sweet potato sticks

The list goes on!

Profile photo of Erika (TK)

Meet Shaina

Posted by in Meet the Member!

Tasty Kitchen Blog: Meet Shaina of Food for My Family.

 
Shaina Olmanson, known to us here at Tasty Kitchen as foodformyfamily, is mother of four who knows a thing or two (or twelve) about cooking from scratch. Growing up very close to both sides of grandparents, she has many fond memories of watching her Yugoslavian-born grandmother work her magic in the kitchen. Her first foray into cooking was at the age of 6, when she used her mom’s cookbook to bake her first cake from scratch, and she hasn’t stopped cooking since.

Shaina is a freelance writer, editor and photographer. She is also an accomplished violinist, having played for 19 years, and she still gives violin lessons. Before starting her own business freelancing from home, she worked for non-profit organizations teaching daily living skills, work instruction, and doing case management with people with disabilities. She says she misses it to this day, which reveals the great generosity in this young woman’s heart. (Which is why it’s no surprise that one of her earlier, popular recipes in her recipe box is a delightful quick bread that she calls Orange Pecan Zucchini Bread for Doorsteps Everywhere.)

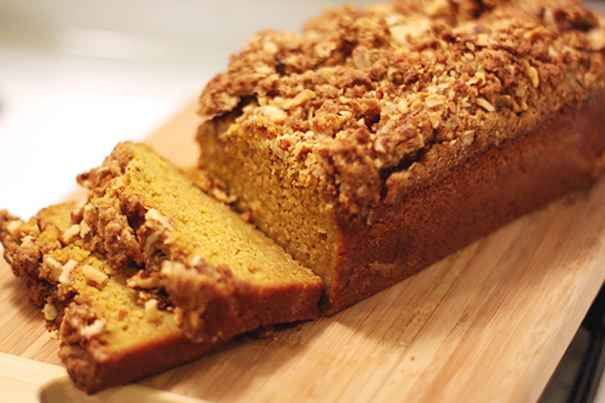
Speaking of quick breads, here is another one of her masterpieces: Streusel-Topped Pumpkin Bread. It’s enough to make me wish for pumpkin season to come sooner.

Tasty Kitchen Blog: Meet Shaina of Food for My Family (Streusel-Topped Pumpkin Bread)


Speaking more about her love for good old-fashioned cooking from scratch, Shaina explains: “With frugal health nuts for parents, we never ate processed food, fast food, and the like. When held up against my grandma’s food, there was never a comparison.” I think that, when held up against her food as well, there isn’t much of a comparison either.

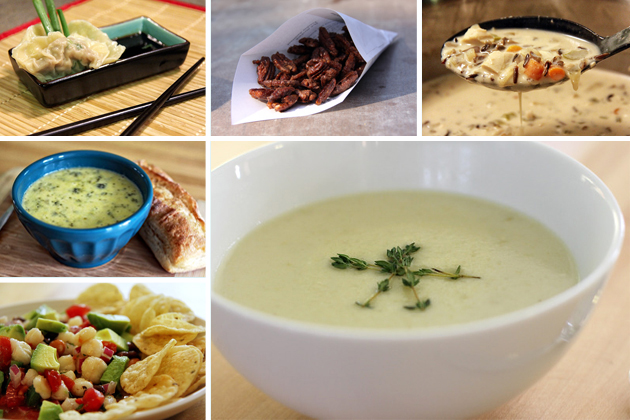
Tasty Kitchen Blog: Meet Shaina of Food for My Family.Clockwise from top left: Ahi Tuna Potstickers, Rum-Glazed Roasted Pecans, Creamy Turkey and Wild Rice Soup, Potato Leek Soup, Texas Caviar, Hold the Fish Eggs, and Gruyere and Cheddar Broccoli Soup.


Shaina’s blog, Food for My Family, is packed with recipes, time-saving secrets, budget tips, menu planning, and other valuable resources that any family can use. She has her family’s favorite recipes there too, which include such mouth-watering main course entries as the ones you see below.

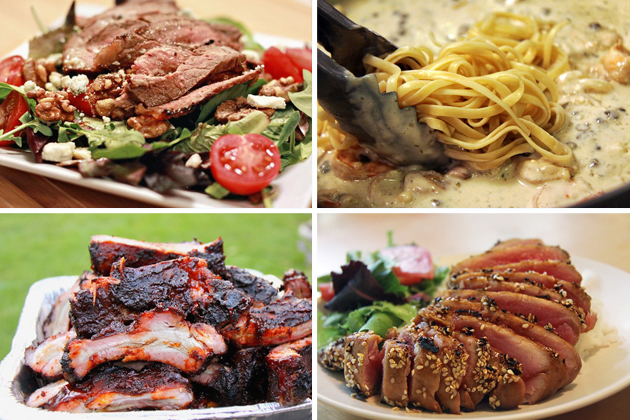
Tasty Kitchen Blog: Meet Shaina of Food for My Family.Clockwise from top left: Maple-Glazed Steak Salad with Blue Cheese, Lemon Cream Seafood Pasta, Spicy, Sweet and Savory Seared Ahi Tuna, and Smoked BBQ Ribs.


What Shaina enjoys most about cooking is that she gets to feed and teach others, including her children. She loves being able to share what she makes with anyone who will let her. (We’ll let you, Shaina!) Her blog gives her an opportunity to do that in a larger scale, and she confesses that she recently got teary-eyed when a reader commented on her kugelhopf post, thanking her for giving her a piece of her childhood back. You can see the kugelhopf below, along with a few other delectable desserts. They all look so good that I might get teary-eyed myself.

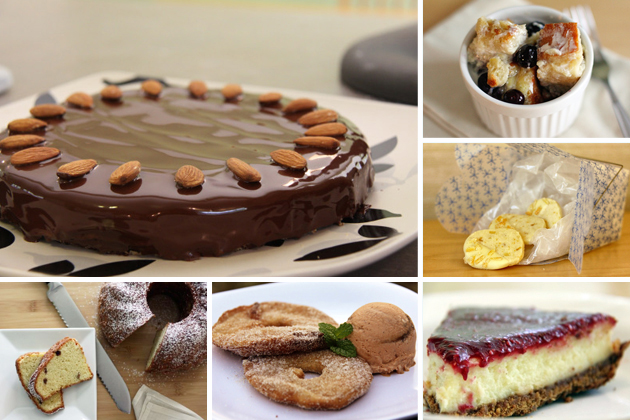
Tasty Kitchen Blog: Meet Shaina of Food for My Family.Clockwise from top left: Chocolate Gâteau Alice for Young and Old, Lemon Ricotta Blueberry Bread Pudding, Gingered Orange Shortbread, Cheesecake with Raspberry Sauce, My Grandma’s Brandy Apfelradln, and Kugelhopf, A German Coffee Cake.


There is so much that Shaina has to offer, and we’re happy to introduce her to you. So let’s get right into the interview part and hear even more from foodformyfamily!


Q: Do you have any favorite chefs or food celebrities? Who inspires you?
A: I have to go back to where my love for cooking started: my grandmother. With everything she’d been through in life, she took great pride in feeding and caring for her family.

 
Q: What are your favorite ingredients?
A: I really like working with vegetables I grow myself. Maybe it’s because I know how much hard work I’ve put in and how many times I’ve sent my kids out to water them, but they don’t compare to anything else I could use in a recipe. It makes me smile every time I can see the progression from seed to plant to fruit to plate.

 
Q: What is your go-to dish or meal?
A: On the savory front, I’d have to go with my Maple-Glazed Steak Salad with Blue Cheese. As far as baking is concerned, there are so many. Any one of my grandma’s recipes would be an obvious choice: kugelhopf, apfelradln, and the cookies. But they are followed closely by quick breads of all sorts: pumpkin streusel, banana chocolate chip, zucchini orange.

 
Q: Is there something that you always make at home and never buy at the store anymore?
A: Stocks and broths. I like having control over what is going into the broth, but what really gets me is making something from what would be kitchen scraps and waste.

 
Q: What gives you the most trouble in the kitchen?
A: Sushi rice. I really want to try to make my own sushi, but I’m intimidated by the rice and haven’t tried. I was excited to find out over Easter that my cousin’s wife just signed up for a sushi-making course. I completely intend on benefitting from that after the fact.

 
Q: What is your favorite kitchen tool?
A: A good pair of stainless tongs. They grab food, turn it over, stir, sauté, grill and more. We use tongs daily in our house, and they’re easy for the kids to use as well.

 
Q: Give us one of your favorite kitchen tips that you wish you’d always known.
A: Cooking is an art. Don’t be afraid to bend the rules and change the ingredients in the recipe. I was so much more satisfied in the kitchen once I allowed myself to do this.

_______________________________________

 
Thanks for answering our questions, Shaina!

 
Shaina’s recipe box is filled with many great meal ideas and snacks for your family. Her blog, Food for My Family, has a wealth of information, from make-ahead meals, nutrition, going green, menu planning, time-saving tips, and of course, more of her favorite recipes. Her husband Ole mans the grilling section, and even shows you how to make your own smoker. She warmly invites everyone: “Come share our food with us.” It’s an invitation you’ll want to accept.


Profile photo of steamykitchen

Naked or Dressed?

Posted by in Kitchen Talk

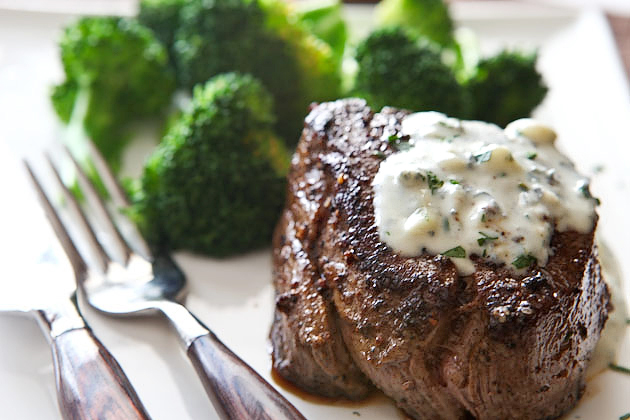
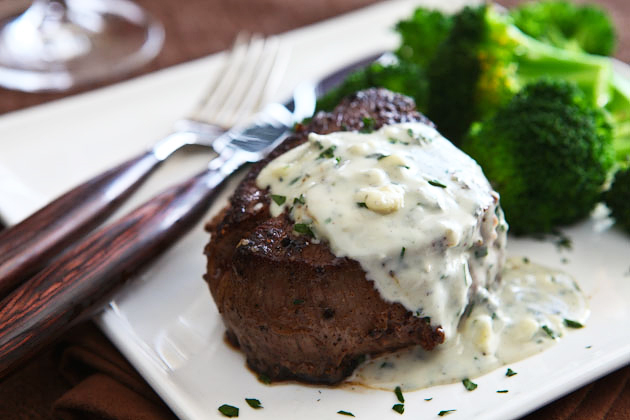
Tasty Kitchen Blog: Steak (Naked or Dressed). Guest post by Jaden Hair of Steamy Kitchen.

 
Well, that title caught your attention, I bet! The subject is steak and there are definitely 2 camps. The first is “Meat. Gimme only meat!” And the other is “Drizzle my meat with some luxurious sauce!”

Whether you’re in the nudist camp or love to be seduced by sauce, I’m sure you’ll agree that you can’t beat a well-cooked steak. Um … unless you’re a vegetarian and in that case, head on over here to Tasty Kitchen’s Salad Category!

So, if I was asked the question: How do you like your steak: naked or dressed? I would answer, “Naughtily half-dressed!” I love a creamy, cheesy sauce, just enough sauce to tease. But I also want my steak to show a little skin, baby!

What about you? Do you prefer your steaks Naked or Dressed?


Grilled Steaks with Gorgonzola Cream Sauce

4 steaks of your choice, 1 1/4″ thick (strip, ribeye, sirloin, filet etc.)
2 tablespoons cooking oil
salt and freshly ground black pepper
Gorgonzola Cream Sauce (see below)

1. Let steaks sit on the counter for 15 minutes to take off the chill. Pat the steaks very dry, brush each side with the oil and season with salt and pepper on both sides (go easy on seasoning the steak with salt—the gorgonzola is a salty cheese).

2. Heat a grill pan or frying pan over high heat. When very hot, add the steaks and cook 3 minutes. Flip the steaks, turn the heat to medium-high and cook for an additional 6 minutes or until you reach desired level of doneness. Let steaks rest. Top with the Gorgonzola Cream Sauce.

 
Gorgonzola Cream Sauce
Serves 4

1/2 cup heavy cream
1 tablespoon minced fresh parsley or chives
4 ounces crumbled gorgonzola
2 ounces grated parmesan
1/8 teaspoon ground nutmeg

In a small sauce pan over medium heat, stir in heavy cream, parsley or chives, gorgonzola and parmesan cheese. Season with nutmeg. Whisk and let simmer for 30 seconds or until the much of the cheese has melted. Serve the cream sauce over steaks.

 
Tasty Kitchen Blog: Steak (Naked or Dressed). Guest post by Jaden Hair of Steamy Kitchen.


_______________________________________

Jaden Hair is a food writer, television personality, and food photographer based in Tampa Bay, Florida. Find more of her recipes in her blog, Steamy Kitchen, where you can also read more about Jaden’s new book, The Steamy Kitchen Cookbook, and the rave reviews it’s received!
 

Profile photo of Erika (TK)

The Theme Is … The Top 40 Countdown!
Posted by in The Theme Is...

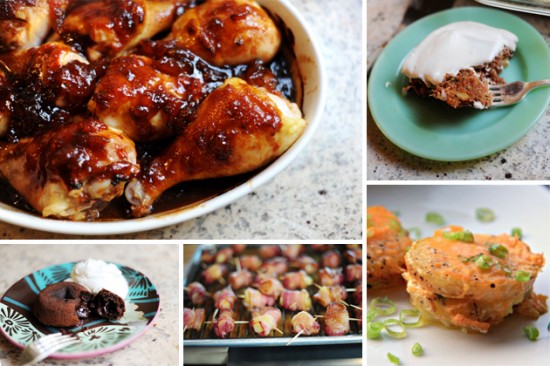
Clockwise from top left: Hot & Sweet Drumsticks from Teri L., Pineapple Zucchini Sheet Cake with Cream Cheese Frosting from lindainmo, Individual Scalloped Potatoes from The Noshery, Bacon Wrapped Pineapple Bites! from wendydarling, and Molten Chocolate Cake from brandielle.   (Cue my preppy Casey Kasem radio voice.) It’s the Tasty Kitchen Top 40!…

Profile photo of Erica Lea

Red Curry Coconut Noodles

Posted by in Step-by-Step Recipes

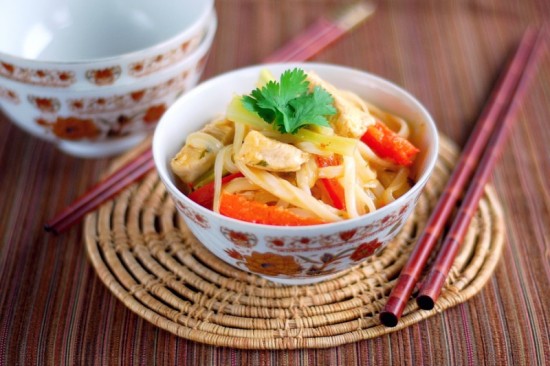
Rounding up our Terrific Threesome of guest posts is Erica Lea, who brings us a yummy dish that she saved in her recipe box as soon as she saw it. If you’ve read the Tasty Kitchen blog post last month when we featured Erica, then you know you’re in for some good food that’s beautifully […]

Profile photo of Ree | The Pioneer Woman

Wonderful (and Important!) Changes

Posted by in Miscellaneous

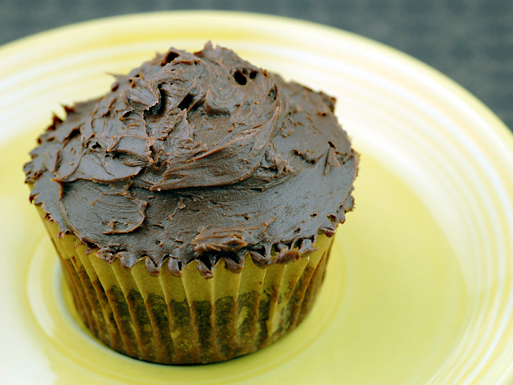
(Photo: Flourless Chocolate Cupcakes submitted by Elana’s Pantry.) Beginning today, we’ve made some important changes in the Review/Rating system here on Tasty Kitchen! As many of you know, Tasty Kitchen was launched less than a year ago. It’s been just wonderful watching so many of you join, participate, and share your best dishes with the…

Profile photo of steamykitchen

Taco-Mania!

Posted by in Looks Delicious!

  It’s taco time! We make tacos quite often for dinner, and I’m going to admit that sometimes when short on time, I’ll fill the tortilla with something a little unexpected but convenient. In a pinch, I’ll grab a cooked Mojo-seasoned rotisserie chicken from the deli department, a package of corn tortillas, shredded cheese and […]