


No Reviews
You must be logged in to post a review.
Makes one deep dish pizza or 2 regular sized crust pizzas. I make this recipe about once a week now!
My husband has a deep affection for pizza. I remember there were times when he ate pizza every day for a week straight. I was beyond myself when I discovered the following dough recipe. Of all places, I found the recipe in my KitchenAid food processer pamphlet.
The ingredients included basil and parmesan cheese. Basil and parmesan in dough? It had to be made, and I made it. I followed the directions precisely with one exception, instead of making the deep dish pizza the recipe called for, I always make two regular sized pizza, pizza and breadsticks or pizza or pepperoni twists.
Mix one package of yeast with warm (not hot) water. Then add two Tablespoons of olive oil and mix. Let stand about 5 minutes. The yeast should proof (foam up) by then. If yeast does not proof within the next couple minutes, your water was either too cool or too hot. Start the process over if that’s the case.
Add dry ingredients (everything else except for the corn meal) into your food processer. You can knead by hand, but boy is that a lot of work! Pulse dry ingredients a couple of times to mix. I also mixed it around with a fork afterwards to be safe.
Then, turn food processor on and slowly pour in the yeast mixture. After you pour the mixture in, a dough ball should start forming. If this does not happen, apply a small amount of water one Tablespoon at a time. Mix for about two minutes. I always keep a hand on my processer while it’s kneading. I have read stories of mixers and processers vibrating themselves off the counter. That would be a wierd situation.
Doctor: How did you child get this brain injury?
Me: Well umm, my food processor fell on him.
Doc probably wouldn’t believe me. I’d get taken to prison and my baby would have a brain injury. I think I will just keep a hand on my food processor.
Dough will be slightly sticky, but you can still work with it.
I tear my dough ball in half to make two dough balls. You don’t have to do this if you are making deep dish.
Smear remaining olive oil in two bowls.
Cover dough with a warm damp towel and store in a warm place. A trick I use is turning on my oven for a minute or two then turning it off. The goal is to be around 80°F. Then I shut the oven door and let it rise for about 40 minutes
I stored my second dough ball in the fridge. Just plastic wrap the bowl with oil and dough in it and store in the fridge. It will be good for up to 4-5 days. I love it at 4 days because the dough tastes extra yeasty. It will rise in the fridge.
It has been 40 minutes and the dough has risen. Now remove your dough from the oven (if that’s where you were letting it rise) and preheat your oven to 375°F.
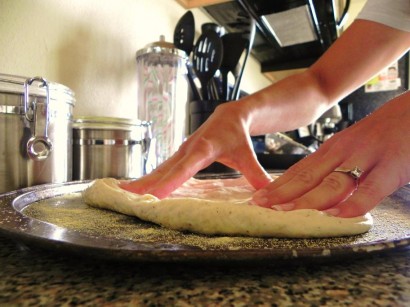
Sprinkle about a spoonful of corn meal on the pan and spread out that dough!
Get a fork and poke approximately 253 holes in the dough. Then, to the oven it goes for about 7 minutes.
Top it with whatever you wish.
*Note: adding too much sauce is not a great idea. It can make the dough really moist. No one likes a soggy pizza! Once you add the toppings, bake for an additional 10 minutes or until the cheese begins to turn slightly golden.
There ya go!
Prep: Cook:
Serves: 4 Level: Easy
Prep: Cook:
Serves: 4 Level: Easy

Prep: Cook:
Serves: 4 Level: Easy

Prep: Cook:
Serves: 12 Level: Easy
Prep: Cook:
Serves: 8 Level: Easy


No Comments
Leave a Comment!
You must be logged in to post a comment.