


As far as candy making goes, I pretty much stink. So when I stumbled across this recipe from Tasty Kitchen member mdatwell for Almond Roca, even though I was tempted by the short list of tasty ingredients, I was a bit hesitant knowing my lack of skilz in that department. For realz. I’ve gotz no candy making skilz.
Or at least I didn’t used to have any.
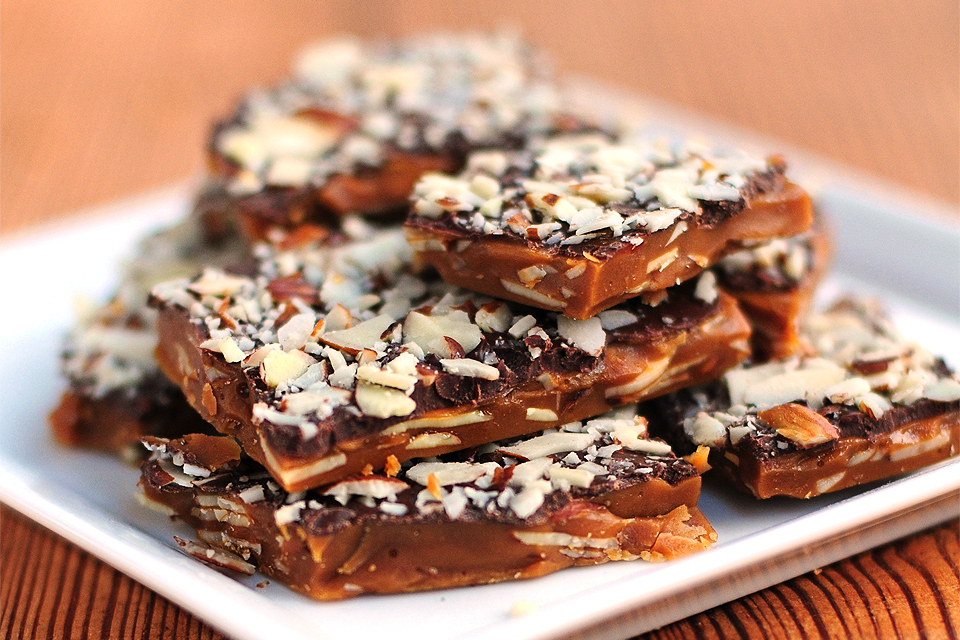
Now, I can attest that, with the help of mdatwell and her excellent directions, I rocked the roca. It was super easy and quick. In no time, and with only one pot and one pan dirty, there was Heath Bar-like goodness before me. Not that it lasted long. This Almond Roca is some mighty fine eats y’all.
So what are we waiting for? Let’s get started! Let’s rock the roca!
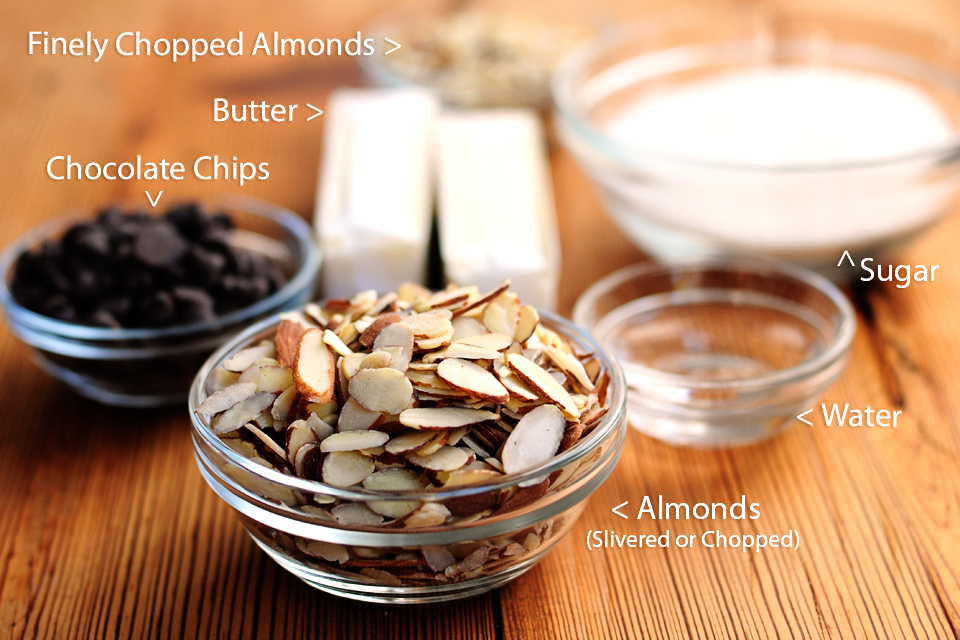
You’ll need butter, sugar, water, chopped or slivered almonds, chocolate chips, and more almonds, finely chopped. Simple.
(For this demonstration, I halved the ingredients. Be sure to check out the full recipe with ingredient amounts listed.)
Before starting, have a sheet pan(s) greased and ready to the side. For half the recipe, I used a quarter-size sheet pan (13″ x 9″), so the full recipe should call for a half-size sheet pan (18″ x 13″).
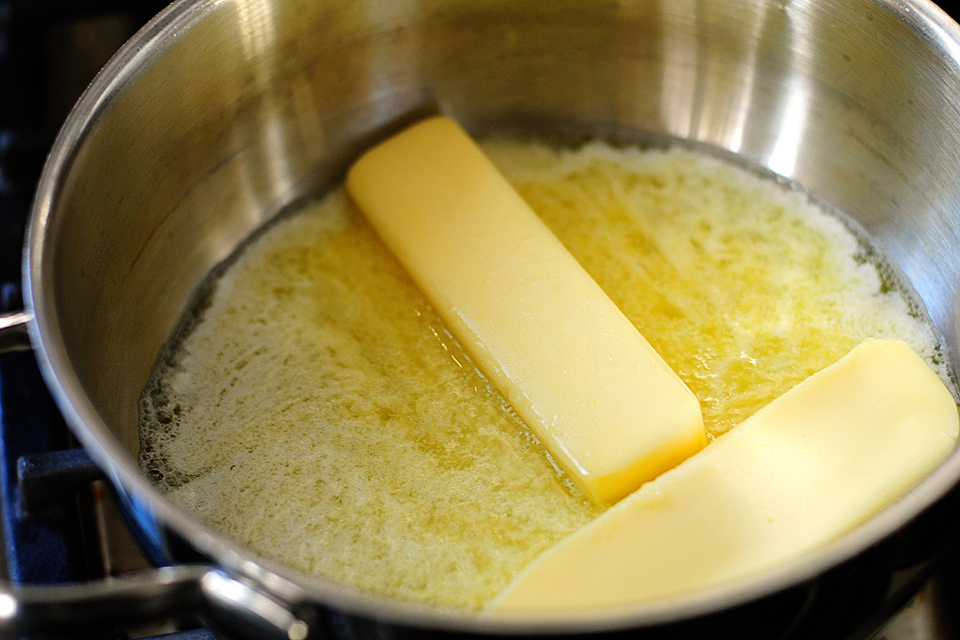
Begin by combining the first three ingredients—the butter, water and sugar—in a medium saucepan. I started by melting the butter first.
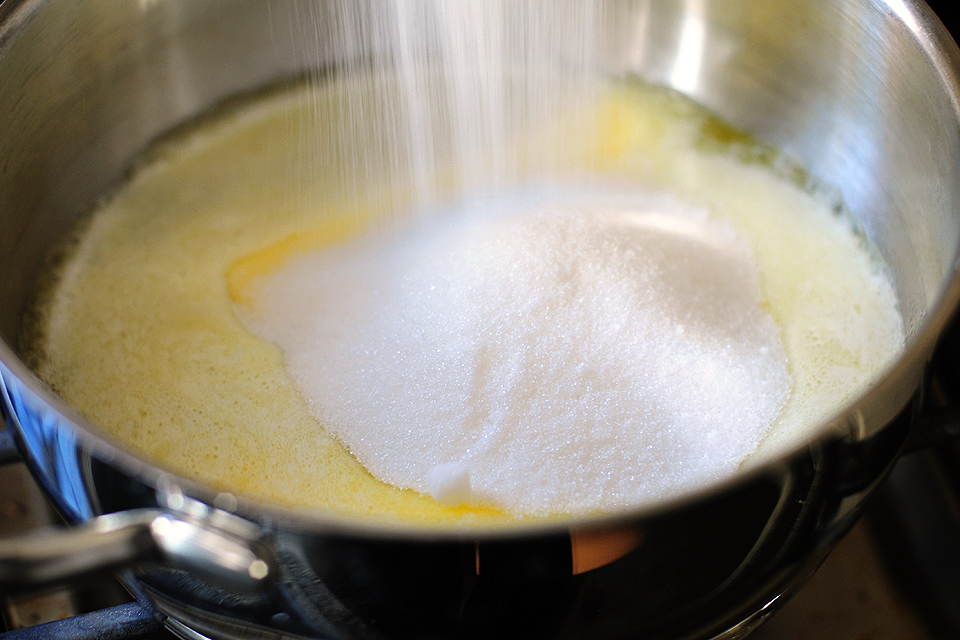
Add the sugar.
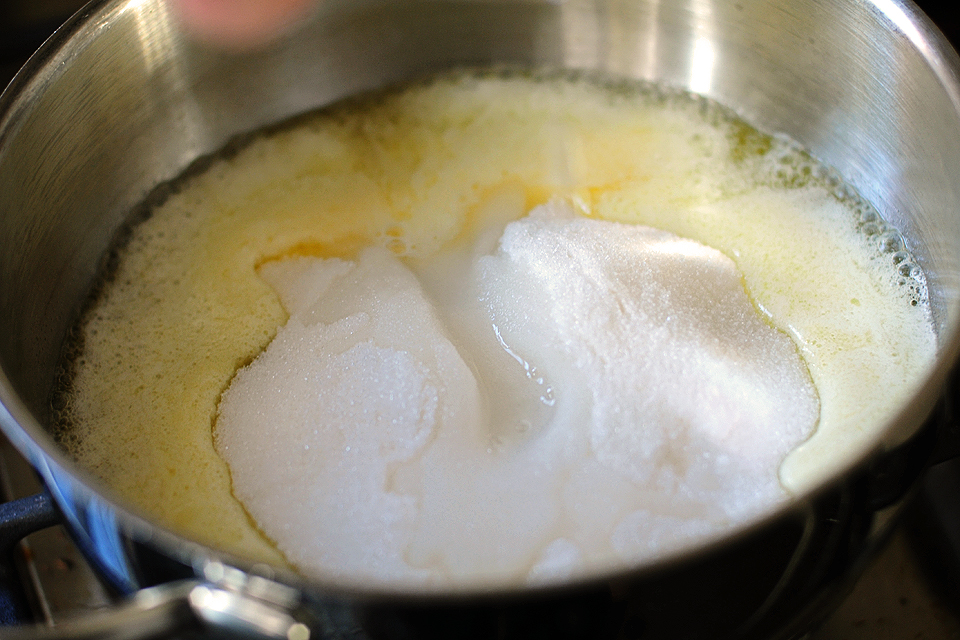
Then the water. What I liked about mdatwell’s instructions was the visual indicators she gave. I’m a visual person, so the three stages she described to watch for—runny, “cheesy” and runny/smooth—worked perfectly for me.
Here, I’ll show you.
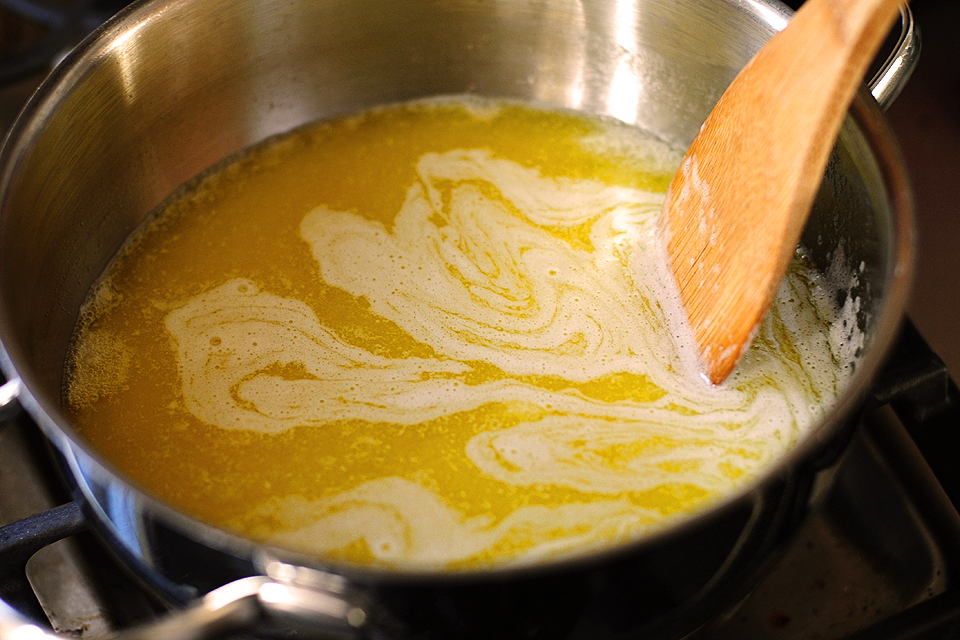
Once the first three ingredients are combined, cook on high, stirring constantly. This is what the first stage, the “runny” stage, looks like. Keep stirring. This takes a few minutes and will move right along into the second stage, the “cheesy” stage or what I like to call the “marshmallow” stage.
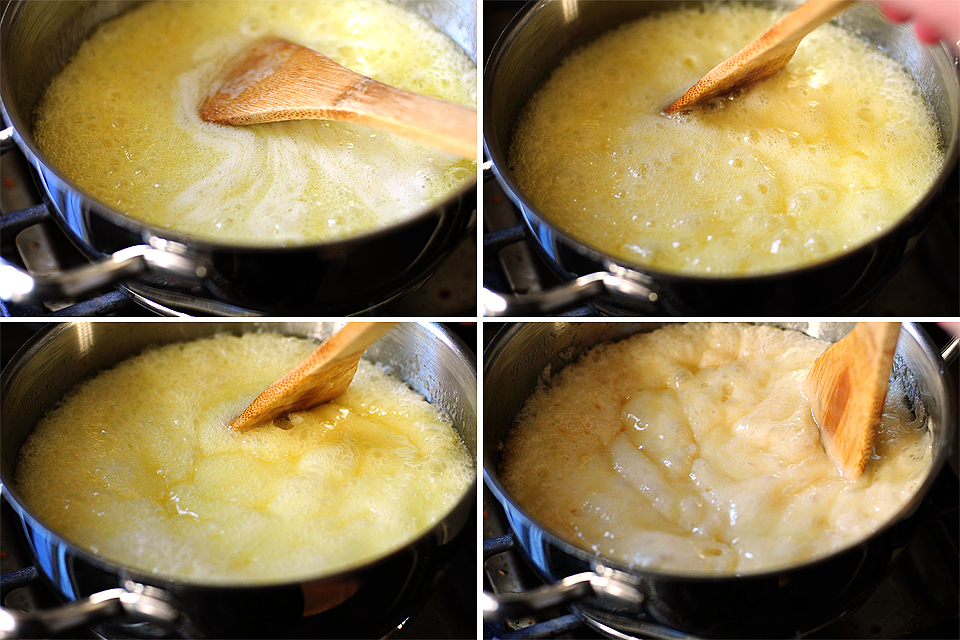
It kinda gets a little more gooey at first. Then it really does start looking like melted, bubbling cheese. Keep on stirring. Now is not the time to change your Facebook status, transfer the clothes from the washer to the dryer, or dust the ceiling fans. Change is a comin’. And it’s comin’ fast.

The next thing you’re looking for is the “runny, smooth, caramel brown color” stage. Like this.
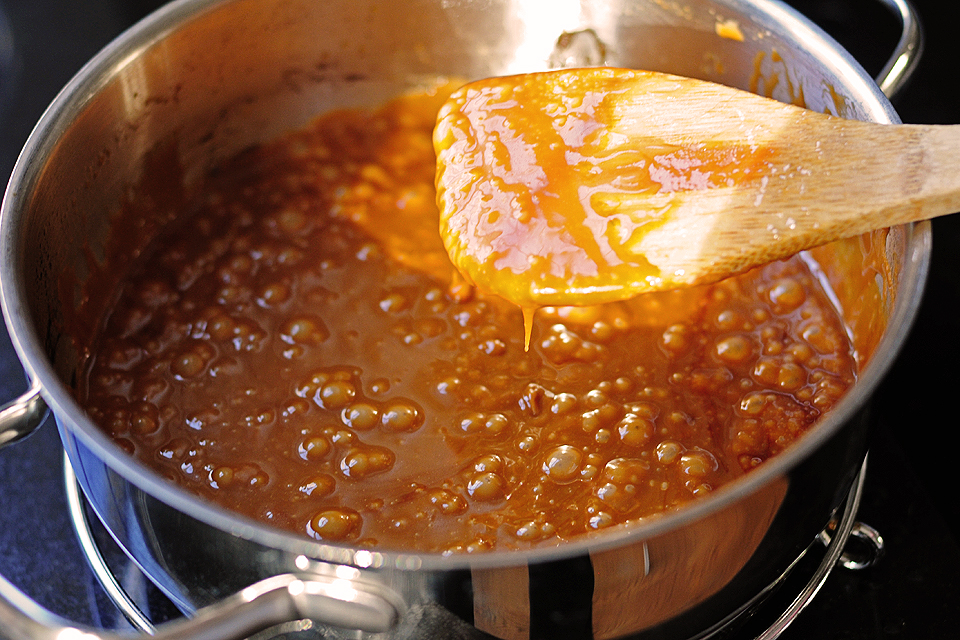
When it gets to this point, remove the pot from the heat. And be careful! The pot will be hot—way hot! Move quickly at this point as the caramel mixture will begin to cool.
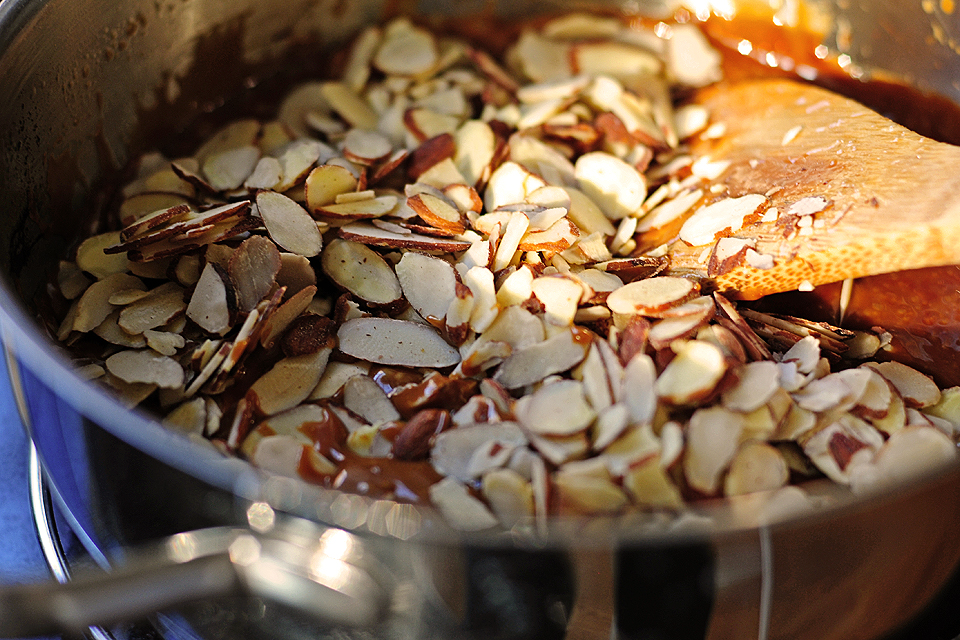
Now add the slivered/chopped almonds.
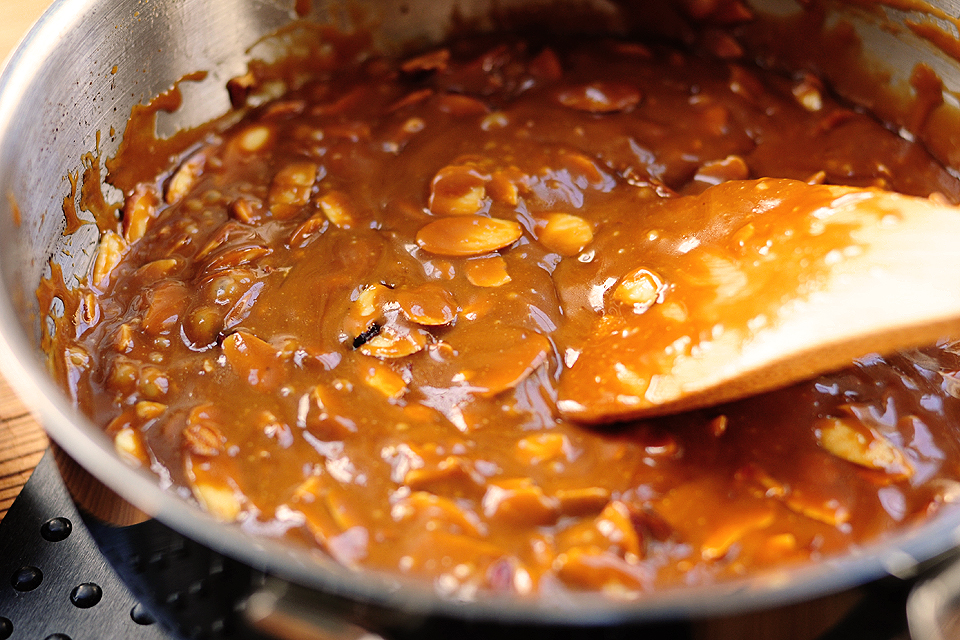
Combine the almonds and caramel mixture well.
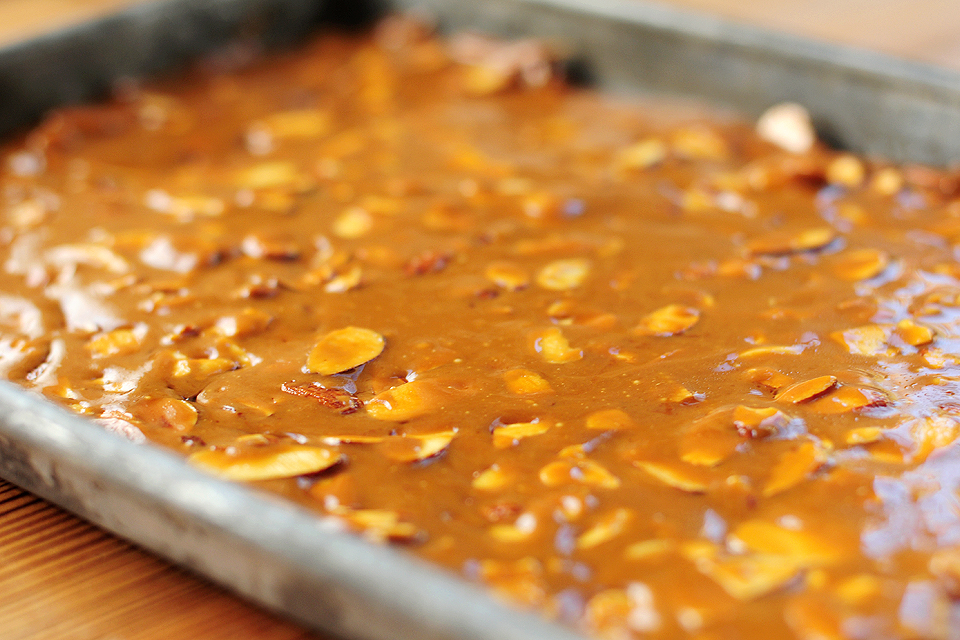
When the almonds are combined well with the caramel mixture, spread them out evenly on a rimmed, greased baking sheet pan (I mentioned pan sizes above). Look! You have toffee. You could stop right there, let it cool and enjoy, but we’re moving on to the chocolate.
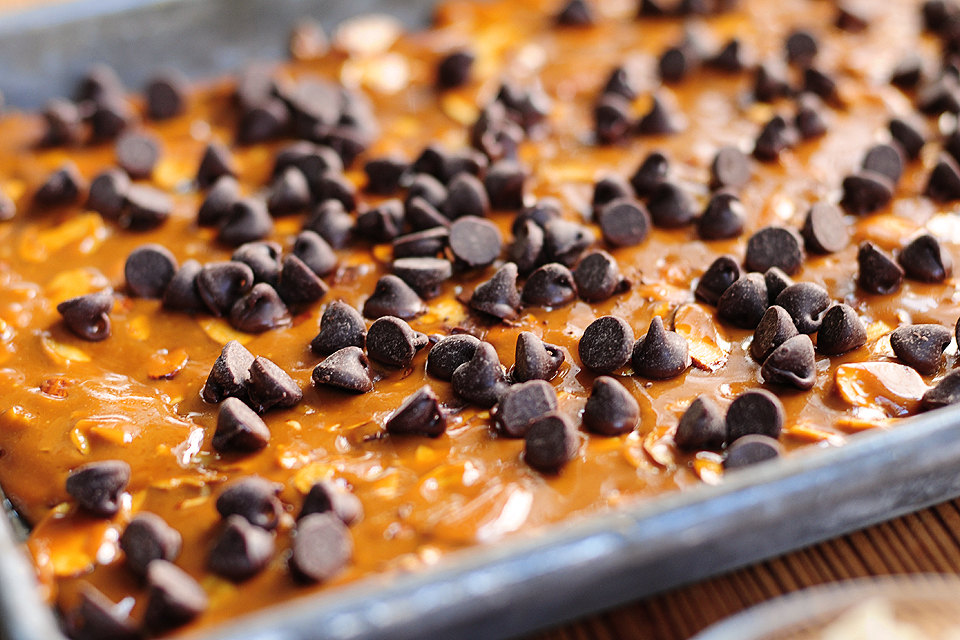
Next, sprinkle the chocolate chips across the top of the toffee. At this point I thought there was not enough chocolate chips and that I must’ve measured incorrectly. But wait just a few seconds. The chocolate chips will begin to melt and they spread a long way. I was surprised how much chocolate is packed in a chocolate chip.
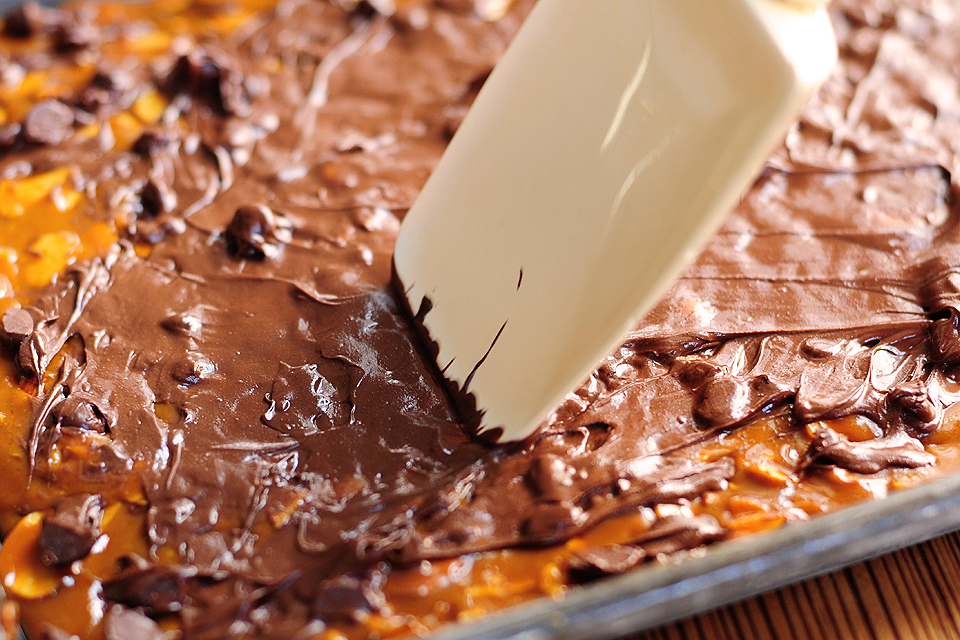
Using a rubber spatula, smooth out the chocolate across the top of the caramel/almond.
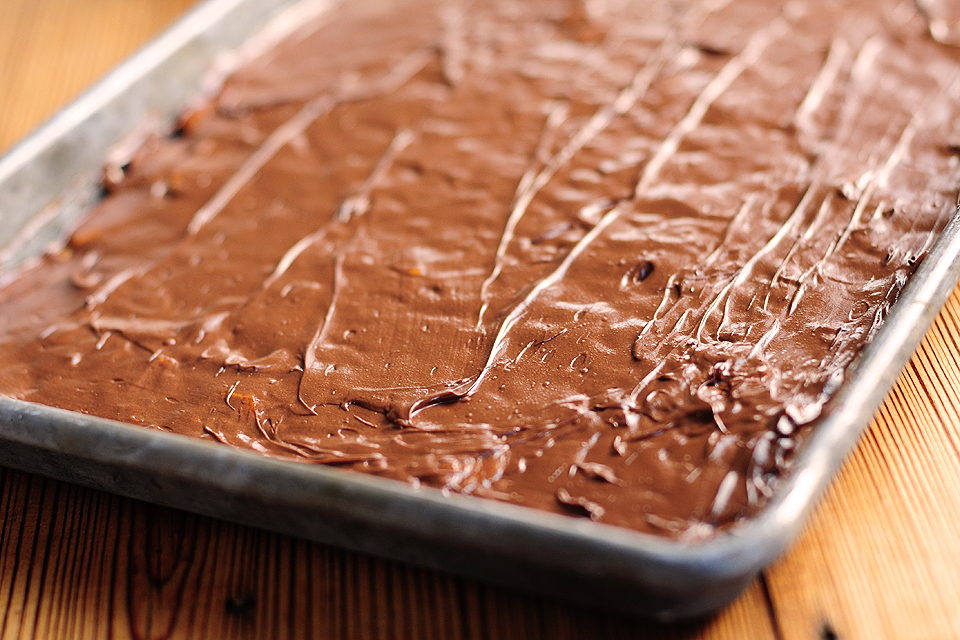
See how far that little bit of chocolate chips goes? Amazing.
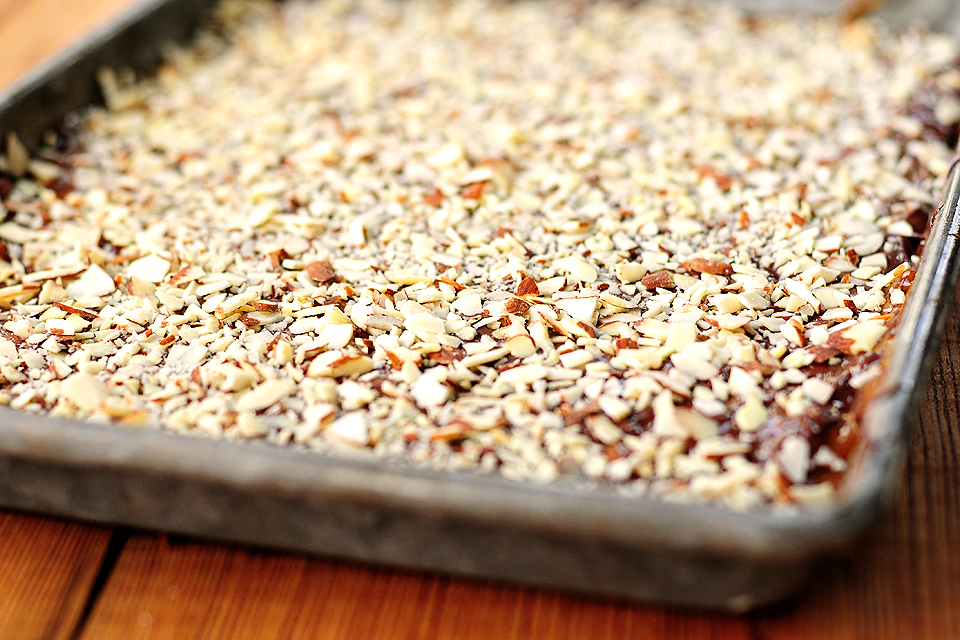
Top the melted chocolate with the finely chopped almonds. If you want even-sized Almond Roca pieces, score the candy with a knife while it’s still warm and soft. I’m all about the rustic look, so I let it be.
Now comes the hardest part: waiting. Wait until the roca has cooled. But after about 10 minutes, because I was impatient, I stuck my batch in the freezer for about 5-10 minutes to finish cooling. It worked fine.
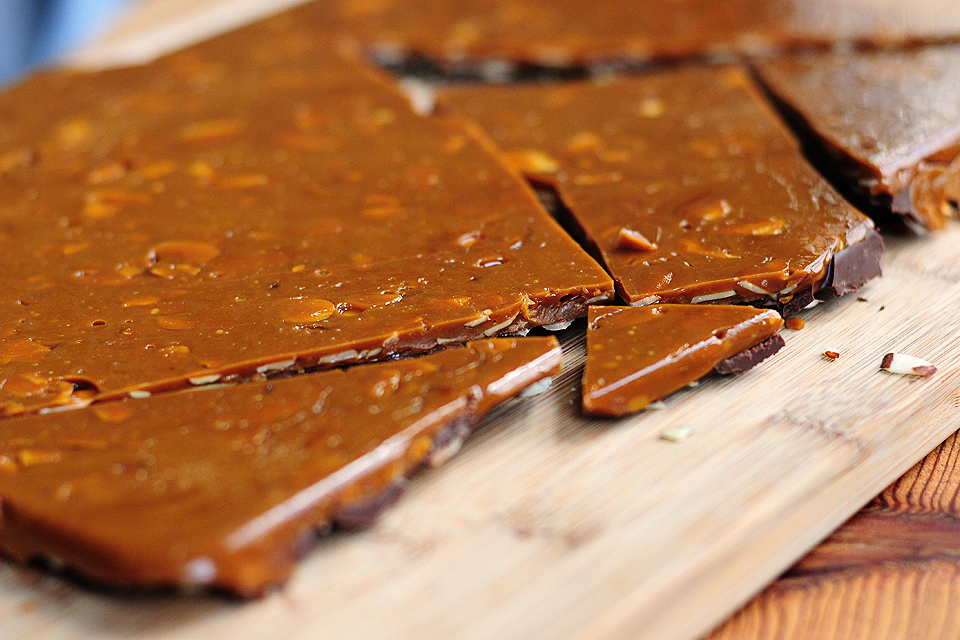
Once it’s cooled and the chocolate has solidified, if you’re going for the rustic look, flip the baking sheet upside down on a cutting board or surface.
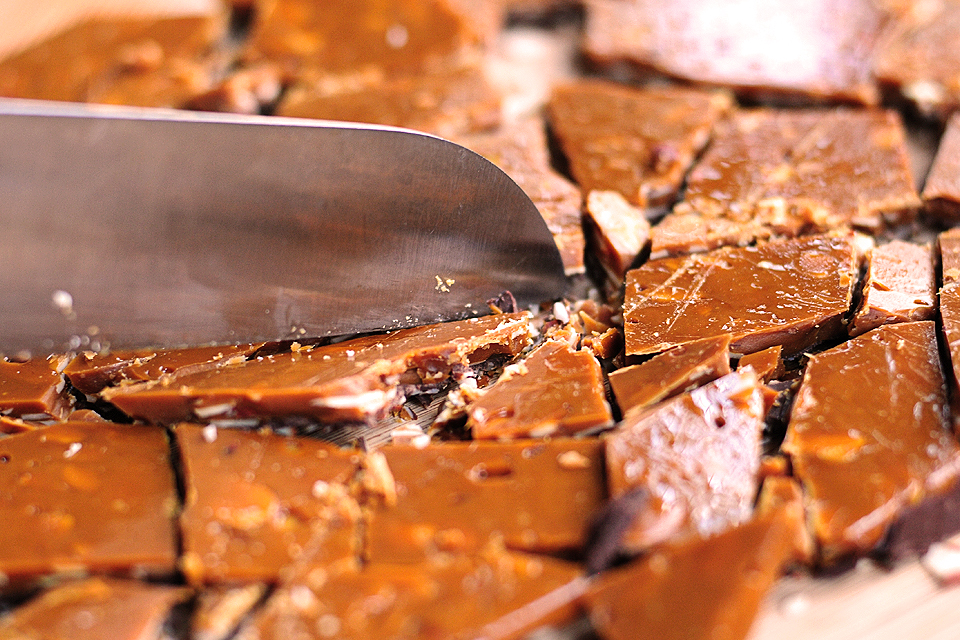
It will break apart some on its own but use a knife to break it into smaller pieces. If you’ve scored your candy, carefully separate the pieces. And you’re finished!

This piece is all I ate … that minute. We enjoyed our share, packed up the rest and sent it far and away. It’s dangerously delicious.

A big thanks to mdatwell for helping me get over my fear of candy making. I’ll definitely be making more batches of this over the holiday season. And maybe afterwards too! Happy cooking y’all!
Printable Recipe


Print Options
Description
This is a super easy, quick candy recipe I make every Christmas. It does contain a whole pound of butter, so I can’t make it too often. The recipe is easily halved or doubled for different occasions.
Ingredients
- 4 sticks Butter
- 2 cups Sugar (rounded)
- 4 Tablespoons Water
- 2 cups Almonds, Chopped
- 1 cup Chocolate Chips
- ½ cups Almonds, Finely Chopped, For Sprinkling
Preparation Instructions
Combine the first 3 ingredients and cook on high, stirring constantly through 3 stages:
1. Runny
2. “Cheesy”—it will look like melted white cheese
3. Runny and smooth, caramel brown color
Make sure you have the fan on your stove going, cause you’ll probably set off the smoke alarm towards the end. ![]()
When it is runny, smooth and caramel brown in color, remove it from the heat and add the almonds. Stir until combined and pour the mixture onto greased cookie sheets. Spread it into an even layer. It will harden as it cools.
While it is still warm, sprinkle chocolate chips on top and let them melt enough to get soft. Spread the chocolate in an even layer across the candy. While the chocolate is still “wet,” sprinkle the finely chopped almonds on top.
At this point, while it is still warm and soft, you can score the candy with a butter knife to make it break evenly, or just let it harden and break it into rustic pieces.
Store in airtight containers. Enjoy!
_______________________________________
Amy Johnson is a blogger who writes about food, travel, the home (both inside and out), and various observations and random musings about anything and everything. Visit her blog She Wears Many Hats for a dose of deliciousness, practicality, hilarity, or just plain fun. She lives in South Carolina with her husband and two children.

89 Comments
Comments are closed for this recipe.
Gloria on 2.22.2011
Late to the game, but better late than never. Just tried these tonight.
Easy and delicious. Your excellent pictures guided me to the right color so no need for a candy thermometer! I posted a picture of my toffee and linked back to you and Tasty Kitchen. Thanks!!!
Shaya on 2.18.2011
I’ve been making this for a few years, and a friend recently asked me for the recipe. I never wrote the instructions down, so I scoured the web for a recipe like mine and came across this post. You did a lovely job of describing and photographing every step – you really captured every stage of the bubbling process. I’m sure she is in good hands!
One question: have you tried it without water? My recipe differs from yours in that there is no water. I wonder if it changes the consistency.
mdatwell on 1.17.2011
I love how popular this recipe got! Honestly, my mom got a little mad for sharing… It’s such an easy, delicious candy recipe that should be shared.
Shelley on 12.23.2010
I made this yesterday and it’s fantastic!! Thanks so much for sharing this wonderful recipe with all of us. It will be a staple in my Christmas repetoire.
susiemw on 12.21.2010
I spent last summer out in Tacoma, Wa and a friend introduced me to Almond Roca from Brown & Haley. I’m not a big candy person but that stuff was addicting. I’m going to give this recipe a try to see if it’ll help with those roca cravings!
Thanks for posting this. The pictures are a great help.
Mary B on 12.20.2010
This was SO delicious! We used to get a box of this from some of my dad’s customers every year and my mom would hide it and distribute tiny portions through out the holidays. We made this together on Saturday and wanted to eat the entire batch. It was perfect and better than any other we’ve had!
beautifulheartache on 12.20.2010
I made it this weekend and it’s been SUCH a huge hit! The visual steps for the caramel were really helpful; my candy thermometer needs replacing (a botched fudge recipe this weekend was the final straw) so to have this turn out perfectly without watching temperatures was nice.
I used unsalted butter because that’s what I had on hand for Christmas cookies, but added about a scant teaspoon of finely ground sea salt to the caramel. Definitely a nice touch.
Lisa Masteller on 12.19.2010
OK!! I grew up begging my parents for Almond Roca for Christmas each year. Even if for some selfish reason, i didn’t enjoy my gifts, there was always Almond Roca! I am probably the least likely to succeed within the world of cooking, but I have to say, this was not only easy, I feel freakin’ amazing to have made this myself! Thank you for sharing this recipe. I will in turn make as many opportunities as possible to send this on to my friends
Niteowl Nancy on 12.17.2010
After going down in flames spectacularly with a family peanut brittle recipe last Christmas, I was so scared to try this. But I did it! I did it! And it turned out great! Thank you so much for this recipe and thank you SO MUCH to everyone who commented with helpful tips and suggestions!
nicole on 12.15.2010
Aaaaaaaaand i burned it. *sigh* just wish i could’ve noticed i burned it before i put the almonds and chocolate on it . Oh well, i’m now standing here scraping off all the still melted chocolate and licking the spoon while i can. tehe. wish me luck for next time
Diane Cooper on 12.14.2010
Well I just finished making it, and am testing my will power to allow it to cool before I eat some!!!
I am just wondering if I did it wrong though- I definitley hit the smooth/cheese/ caramel smooth- but not until passing through “browned ground beef in lots of oil” stage and natural peanutbutter stage!!! I switched to a whisk and that seemed to help get me to where I wanted to be- lets hope they taste ok!!!
Oh and it took me 30 min of stirring- alot longer than I thought!!!
Thanks for sharing!
Diane
lindsayq on 12.14.2010
i made this last night and was so shocked at how easy it was! i’ve never made candy before and had no idea what i was doing, but it was just so simple. and soooooooo tasty. this is the perfect gift for co-workers and neighbors who i want to include in my christmas cheer this season! thanks!!
jodi on 12.12.2010
I consider myself to be a competent candymaker. I did not rock the Roca! I used a cast iron pan because I was worried about cooking on high…oh my my my…..thankfully my son was home to douse the burner w/baking soda, the fan was not handling the amount of smoke being produced! Needless to say, the Roca is not edible, wasted a lot of money and time…will not be trying this again:(
Sdfoodie on 12.12.2010
Just made this….AMAZING!
Cassie on 12.10.2010
Oh, wow! I can’t wait to try this!
Anna on 12.10.2010
Can this be frozen? How long does it keep? Want to give this as Christmas gifts but need to know how long it will keep!
Thanks!!!!!
Melissa on 12.9.2010
Yum – I’m going to try it with cashews and white chocolate!
dearabbyleigh on 12.9.2010
just made some of this for our neighbors! what a great, confidence-boosting recipe
going to turn into willy wonka soon!
Barbara on 12.9.2010
Loved this recipe but, I had a question when the mixture was done and I pour it into the sheet pan there was a thin layer of butter. I waited until
it was cooled and laid it on paper towels to absorb the excess. What did I do wrong?
Amanda Merritt on 12.8.2010
I made this today and I can’t believe how easy it was!
So delicious. I have had three pieces already and I can’t wait until after dinner to have more.
mariafromiowa on 12.8.2010
I made this with toasted and salted almonds. It was a hit. I also did not let it get to hard crack stage – it is easier to eat. Instead of the rich dark brown color mine was tannish- it was a hit !!
downhomegirl on 12.7.2010
My ex husband of 18 years worked for Brown & Haley in Tacoma, WA for the whole time we were married, so we got Almond Roca free all the time-of course I never appreciated it and gave it away all the time since I got so tired of it! However, now that I am no longer married to him, I do miss those “Almond Roca” treats and will make this to satisfy my taste for it! Oh, Almond Roca, if candy could talk!
Jess on 12.7.2010
I making this today!!
nancy32408 on 12.6.2010
How do you spell “OMG”!! My house smells like a “Heath Bar” only better. It turned out perfectly and can’t wait to share it with my neighbors. Thank you for the recipe
Chris on 12.5.2010
Um, this is AMAZING. I’d never attempted to make candy before either, but it’s taking all I have not to shove every bit in my mouth. Thanks!
tracylynn on 12.5.2010
Going to the store NOW to get the sugar and almonds! heehee.. I have been looking for this receipe for hours and wah la! here it is before me!!! Thanks!
Andreahaha on 12.5.2010
Made it last night. The pictures here were really helpful when gauging the color/consistency of the candy and deciding when to remove from the heat. I did have to add more chocolate chips since mine didn’t spread quite as much. The candy was a huge success!
Caro on 12.5.2010
Wonderful! Thanks for the step by step. I was wondering if some vanilla should be added.
Nancy Allen on 12.4.2010
I am definitely planning on making this, but after reading other comments, I am totally confused. I always bake with unsalted butter, but some viewers say to use salted. Please tell me which butter to use.
Amanda on 12.4.2010
Rosie – you might try using a candy thermometer, it will help make sure you don’t overcook it. (we want this yummy goodness at 290)
The key to this candy is moving quickly. As soon as it reaches that temp/stage, stir in your almonds and dump it onto a prepared tray. When it’s spread out like this it cools down really quickly. Don’t let it stay in that pan for more than a few seconds once it’s reached the desired temperature! And don’t worry, believe it or not, getting that tar toffee off your pan is actually pretty easy. Just fill the pan with water, since the candy is mostly sugar, it will simply disolve.
Rosie on 12.4.2010
Okay I need help!! I tried this reciepe twice and when I removed the pot from the flame at the brown cheesy stage…it kept cooking and even after I transfered to a diffeent pot to add the almonds it kept cooking a looked more like tar. Now I have a pot caked in tar toffee and have no idea how to get it out or how to explain to my husband what that smell is in the house. PLEASE HELP, what am I doing wrong???
Melissa C on 12.3.2010
I just made these and they are AWESOME! Our oven is broken and I’ve been dying to make some Christmas goodies, so this was the perfect fix!!
Thank you Miss Amy!! Love your blog
Annie on 12.3.2010
@ Janine,
Grease the pan with butter! Silpat or something similar works nicely, too.
Celia Prosecchino on 12.3.2010
These look seriously wicked! I am glad you didn’t write how many calories they contain. The pictures are so good I can taste them.
Janine Smith on 12.3.2010
This sounds wonderful. It will be my first time attempting candy making. What do I use to grease the pan that won’t affect the taste? Help!
Annie on 12.3.2010
Our family makes these, but uses finely chopped walnuts on top of the chocolate instead of almonds. Yummy!
Katie on 12.3.2010
Yumm!!! Thank you for sharing this recipe! It brings back so many memories and your instructions are simple enough even for me. I think I can actually do this!
Suzanne on 12.2.2010
Dang! What a mean thing to do to me right before bed time…how can I possibly go to sleep when I have visions of Almond Roca dancing in my head…
Jeannine on 12.2.2010
Saw it! Made it! Except didn’t have almonds:) Used Peanut Butter Filled Pretzels instead! Yum!
Salt, Chocolate, Peanut Butter and Pretzel = Divine:)
Wenderly on 12.2.2010
I’ve never made a candy like that *there, I said it out loud* But I must say, thanks to you Miss Amy & mdatwell…I will be giving it the ole college try!
Amanda on 12.2.2010
This is a Christmas tradition in my family. Our recipe is almost exactly the same except we use 8 oz Hershey’s milk chocolate and a tablespoon more of water. Usually I’m a dark chocolate person, but for some reason I like milk better for this… go figure.
If specifics help you at all, the temperature you’re going for when cooking this candy is 290 (be careful, it changes quickly once you reach 280).
Debbie – use salted butter! (or add salt wit your unsalted) The flavor won’t be the same if you use unsalted, I’ve made that mistake before.
maryclaire on 12.2.2010
I could not wait to make this…I had 20 other things to do…but made this instead. But, I burned it :{ I’m so sad. It is really hard to tell when it is ‘ready’. I never took my eyes off of it while it was cooking…but it was hard to tell when it was just brown enough! I turned off the fire and stirred it for a minute or two more and that was too long. So, just some advice…don’t over cook it. I am going to try again…but not tonight. sad…
Kristie on 12.2.2010
This is my first attempt at making candy. Looks like it’s going to taste amazing, BUT my one suggestion to those new to candy making— DON”T use a plastic spoon to do the stirring. Mine melted a bit… Probably obvious to those more experience than I am.
D Cannon on 12.2.2010
mmmmmmmmmmm!
Mommom on 12.2.2010
Oh… I was just thinking about making this today…. now I’m going to have to do it for sure!
Holly on 12.2.2010
I’ve made this for years. For some reason, using unsalted butter does *not* work well. Not sure why but it tends to seize up and is all around more persnickety.
Hard for a tried & true baker like me to use salted butter in a recipe but for this, I break with tradition.
Clean up is easy. Fill the pot with water and boil for a few minutes. The cooked on toffee will melt right off and then you can wash as normal.
Debbie on 12.2.2010
This looks wonderful! Do you use salted or unsalted butter?
bellinghambelle on 12.2.2010
I think the right temp for people who have to use a thermometer (like me) is 300 degees F. Check out the sugar temperature chart at Baking 911 for a good explanation of sugar stages.
I’m definitely making this one this weekend!
Tanya J. on 12.2.2010
Can candy like this be frozen? Or does it store well?
wenders on 12.2.2010
This post comes at such a perfect time! Just found out my MIL LOVES Almond Roca. I too do not make candy, but I will have to try this!