No Reviews
You must be logged in to post a review.

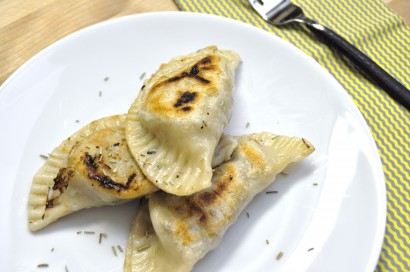
10 months after we had been together, B. told me he is going to make pierogi tonight. I mean, I have no clue what a pierogi is, can’t even pronounce it correctly. The result? I was impressed, very impressed. It was cripsy, and tangy. With the touch of bacon flavor, it’s the best snack when drinking a good dark beer. I didn’t even know how good fried pasta could taste!
1. This is the fun part. Making the dough. In a big mixing bowl, combine all purpose flour, eggs, salt, and 1.5 cups of water. Mix it with your hands or a spatula. We want to make a dry, thick dough. So adjust your water and flour amount as you go. Add in more water if it is not combining, or more flour if it is too wet.
2. With some flour on the table, we want to aerate it. Well, at least that is the technical term B. was telling me. We want to introduce air into the dough, so we need to knead and fold it over, repeat and repeat until it gets tight and firm. If you poke your finger into it, it should have enough elastic to bounce back.
3. Cut the dough into 4 equal portions, wrap it up with parchment paper, and let it rest in the fridge for about 20 minutes.
4. Meanwhile, prepare the filling. In a cast iron skillet (or a regular pan) over medium heat, saute bacon until crispy. B. wanted me to remind y’all how important it is to properly drain the sauerkraut. He separates them into a different batches and squeezes them into balls with his hands until they are pretty dry. Soggy sauerkraut will make soggy fillings, leading to soggy pierogis of course. Add the sauerkraut into the pan with the bacon, and cook until it is completely dry and brown. Leave any remaining grease in the skillet when you are done—you’ll use it later.
5. Retrieve your dough from the fridge. It should be nice and rested and soft to the touch. With a little extra flour on your working station, roll them out into pasta thin sheets. Cut them into rounds with the help of a coffee mug or can.
6. Use a tablespoon-full of filling in each pierogi. Place the filling in the middle of the dough, dip your finger into a bit of water and wet the edges of the dough. Pick up the bottom half of the dough and fold it over forming a half moon shape. Press gently on the edges to seal. Then use a fork to press down on the edges.
7. Bring a large pot of water to a boil. Separate them into batches of 8 to 10 each time. Don’t overcrowd them! Boil each batch for about 20 minutes. Then drain and ladle them directly into the greased skillet over medium heat. Cook until they are crispy on both sides. By cooking them over medium heat, it takes a little longer, but it dries them out better and gives you a crunchier pierogi.
Makes about 40 to 50 pierogi. B. said the best way to store them is to boil them first, then store them in the fridge or freezer. Leave the frying part until you are ready to eat them, that way they store better and longer!
No Comments
Leave a Comment!
You must be logged in to post a comment.