2 Reviews
You must be logged in to post a review.

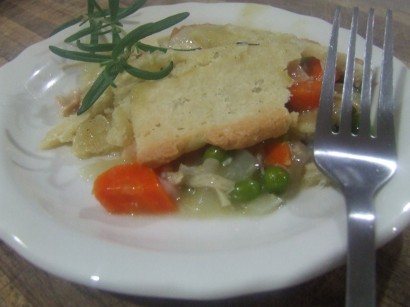
Gluten free pie crusts can be difficult to roll out and they break easily. That’s why I decided to make my chicken pot pie upside down. I pressed the crust into the pie pan, added the filling, then baked it. Which is weird because it looked like a regular pie that I served upside down. But it was actually a pot pie baked upside down then flipped over. Hummm… strange I know, but it worked like a charm.
FOR THE CRUST:
1. Combine the almond flour, tapioca flour, salt, and xanthan gum in a food processor. Give it a good whirl a few times until it’s one lovely flour.
2. Cut the butter into small cubes. Add it to the food processor and pulse until the flour resembles sand with small balls in it.
3. Add in the egg and vanilla. Pulse until combined
4. Pour the dough onto a clean work surface.
5. Knead until the dough comes together. Your dough should have the consistency of Play-Dough. You can add 1 Tablespoon of ice cold water if it’s too dry, or 1 Tablespoon of tapioca if it’s too wet.
6. Place dough in a Ziplock bag and let rest in refrigerator for 15 minutes.
7. Grease and sprinkle a pie pan with tapioca flour. Then, tear off small pieces of the dough and press into the bottom and sides of the pie pan until covered. Place the pie pan back in the refrigerator while you make the filling.
FOR THE FILLING:
1. Preheat oven to 350 degrees F.
2. Start by finely cutting up the celery, carrots, and onion.
3. In a large pan, melt the butter over medium heat. Add the veggies and saute about 5 minutes, or until veggies start to turn translucent.
4.Add the chicken, milk, chicken broth, salt, pepper, and thyme. Taste and adjust seasonings. Bring to boil.
5. In a small bowl, mix together the arrowroot flour and cold water until you have a paste. Pour the paste into the boiling pot pie filling and stir until thickened, about 1 minute. Remove from heat.
6. Pour the filling into the pie crust and bake 20-25 minutes, or until nicely browned.
6. Remove from oven and allow to slightly cool, then scoop out with a flexible spatula and flip upside down onto your serving plates so the crust is on top. Don’t worry if the crust breaks some, it’s more rustic that way.
No Comments
Leave a Comment!
You must be logged in to post a comment.