The Pioneer Woman Tasty Kitchen
Profile photo of Laurie - Simply Scratch

Homemade Ricotta with Lemon and Basil

Posted by in Step-by-Step Recipes

Tasty Kitchen Blog Homemade Ricotta with Lemon and Basil. Guest post by Laurie McNamara of Simply Scratch, recipe submitted by TK member Megan of Wanna Be A Country Cleaver.

 
Are you like me and have this forever growing “recipe bucket-list”? Things like homemade fruit leathers, giant cinnamon rolls have snuck their way onto my mile long list, but on the very tippy-top of that long list was to make my own ricotta cheese. It was when I saw Megan’s recipe for Lemon Basil Ricotta Cheese (courtesy of the fine folks of America’s Test Kitchen), I knew it was time to cross that recipe off of my list and get elbow deep into some ricotta cheese baby.
 
First of all I had no idea how easy it was, or else I would have made it a long time ago! You just need a few ingredients, cheesecloth and a trusty digital thermometer and poof, ricotta. This recipe is light and bright from the lemon and basil, which complements the ricotta’s smooth and creamy texture. But if you desire plain ricotta just simply leave out the lemon and basil.
 
This stuff is good. Reeeal good. It’s safe to say I won’t be buying store bought ricotta ever again. Period.


Tasty Kitchen Blog Homemade Ricotta with Lemon and Basil. Guest post by Laurie McNamara of Simply Scratch, recipe submitted by TK member Megan of Wanna Be A Country Cleaver.

The recipe calls for whole milk, I suppose you could try to make it with two percent or even skim, but whole milk is where it’s at. The creamy factor is out of this world!


Tasty Kitchen Blog Homemade Ricotta with Lemon and Basil. Guest post by Laurie McNamara of Simply Scratch, recipe submitted by TK member Megan of Wanna Be A Country Cleaver.

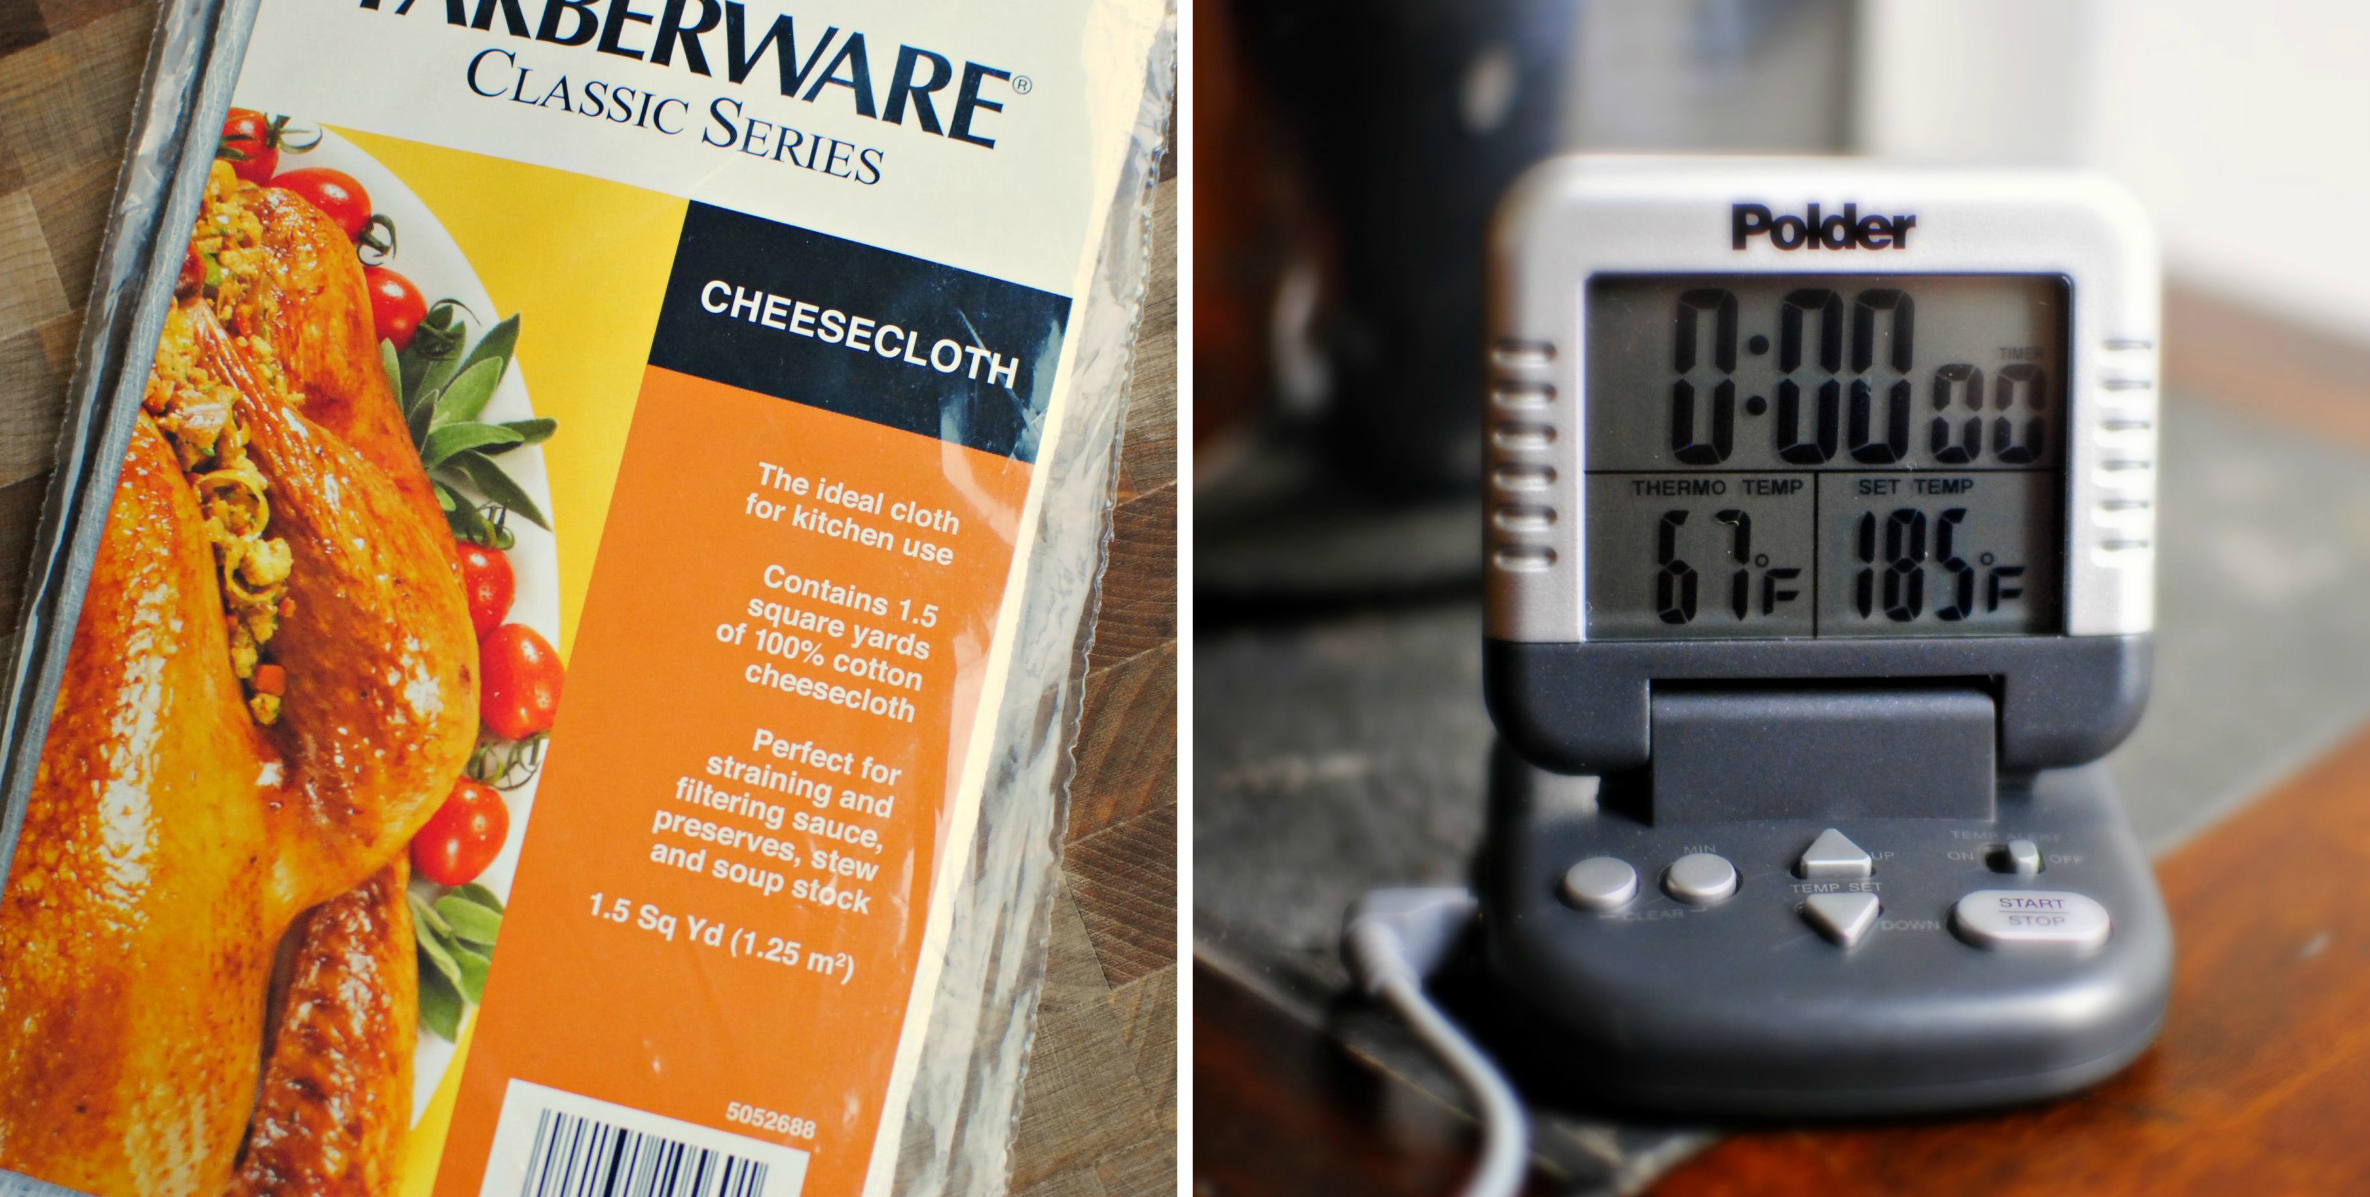
Make sure to place cheesecloth on your grocery list, along with a digital thermometer that clips to your pot, if you don’t already have one in your kitchen.


Tasty Kitchen Blog Homemade Ricotta with Lemon and Basil. Guest post by Laurie McNamara of Simply Scratch, recipe submitted by TK member Megan of Wanna Be A Country Cleaver.

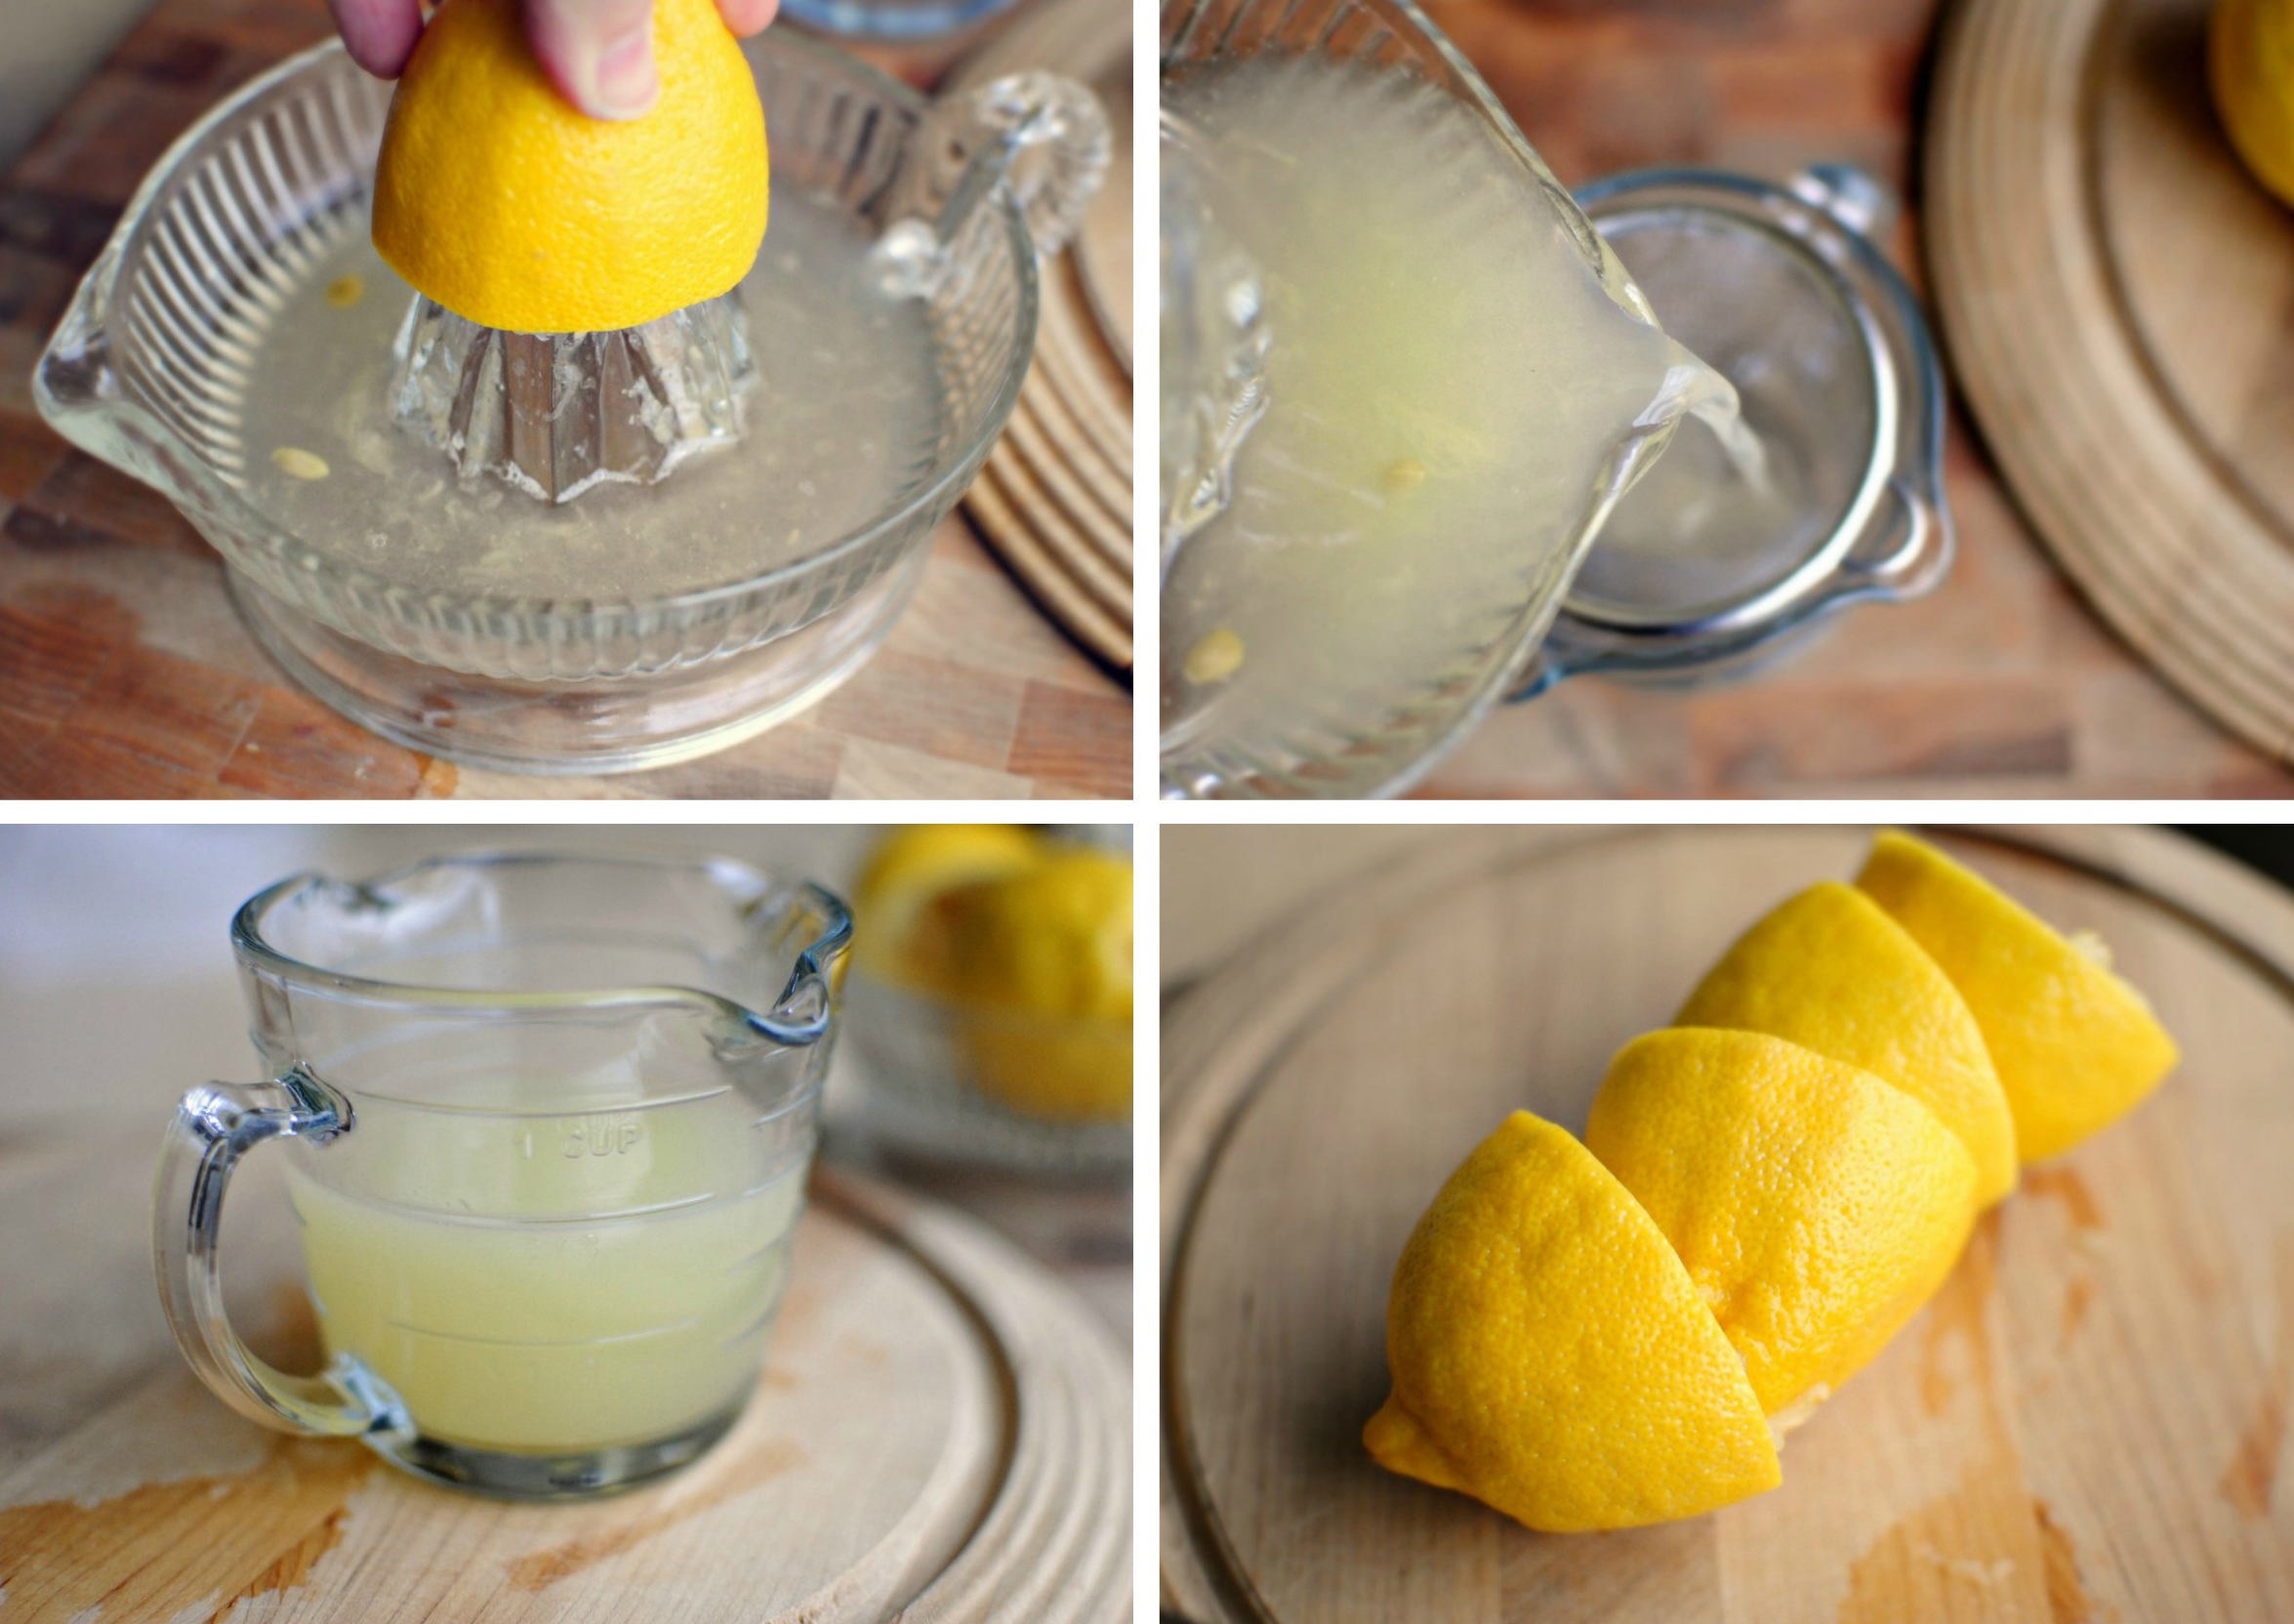
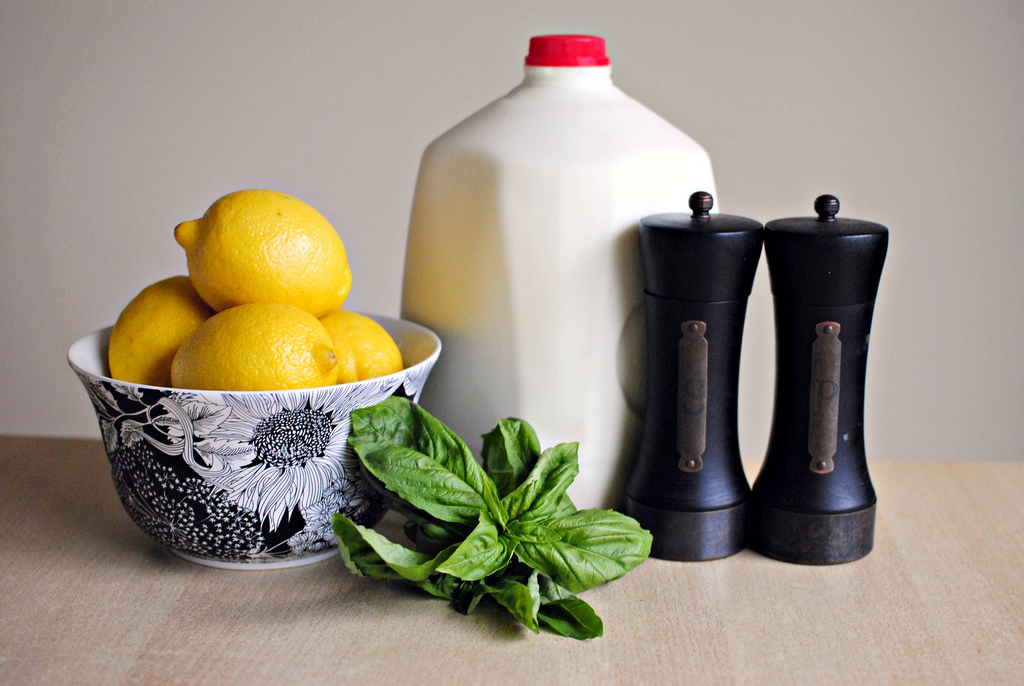
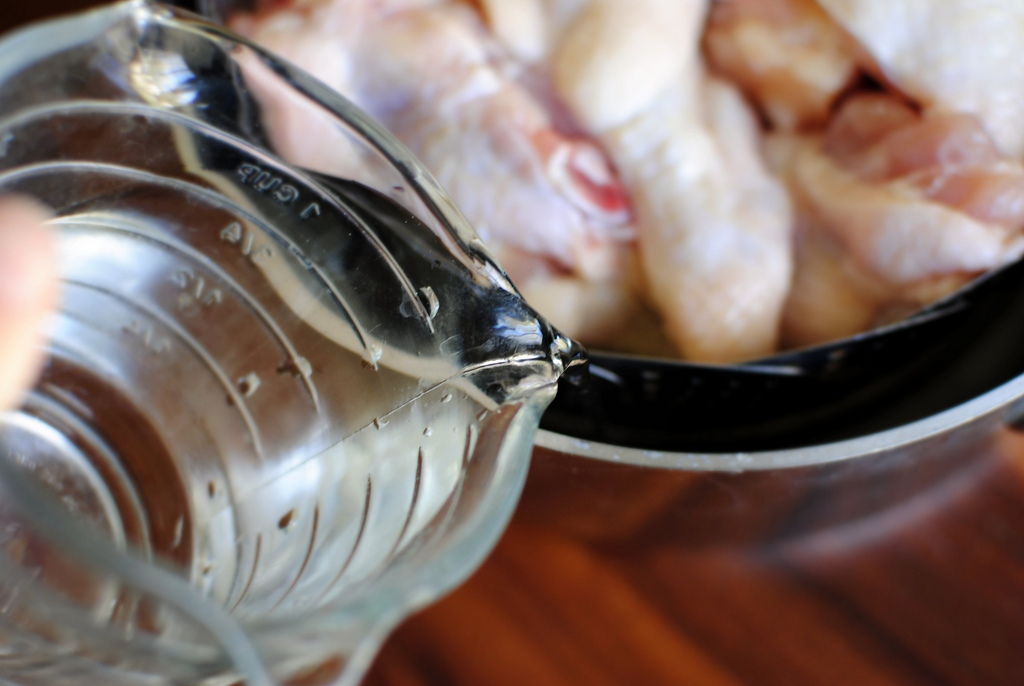
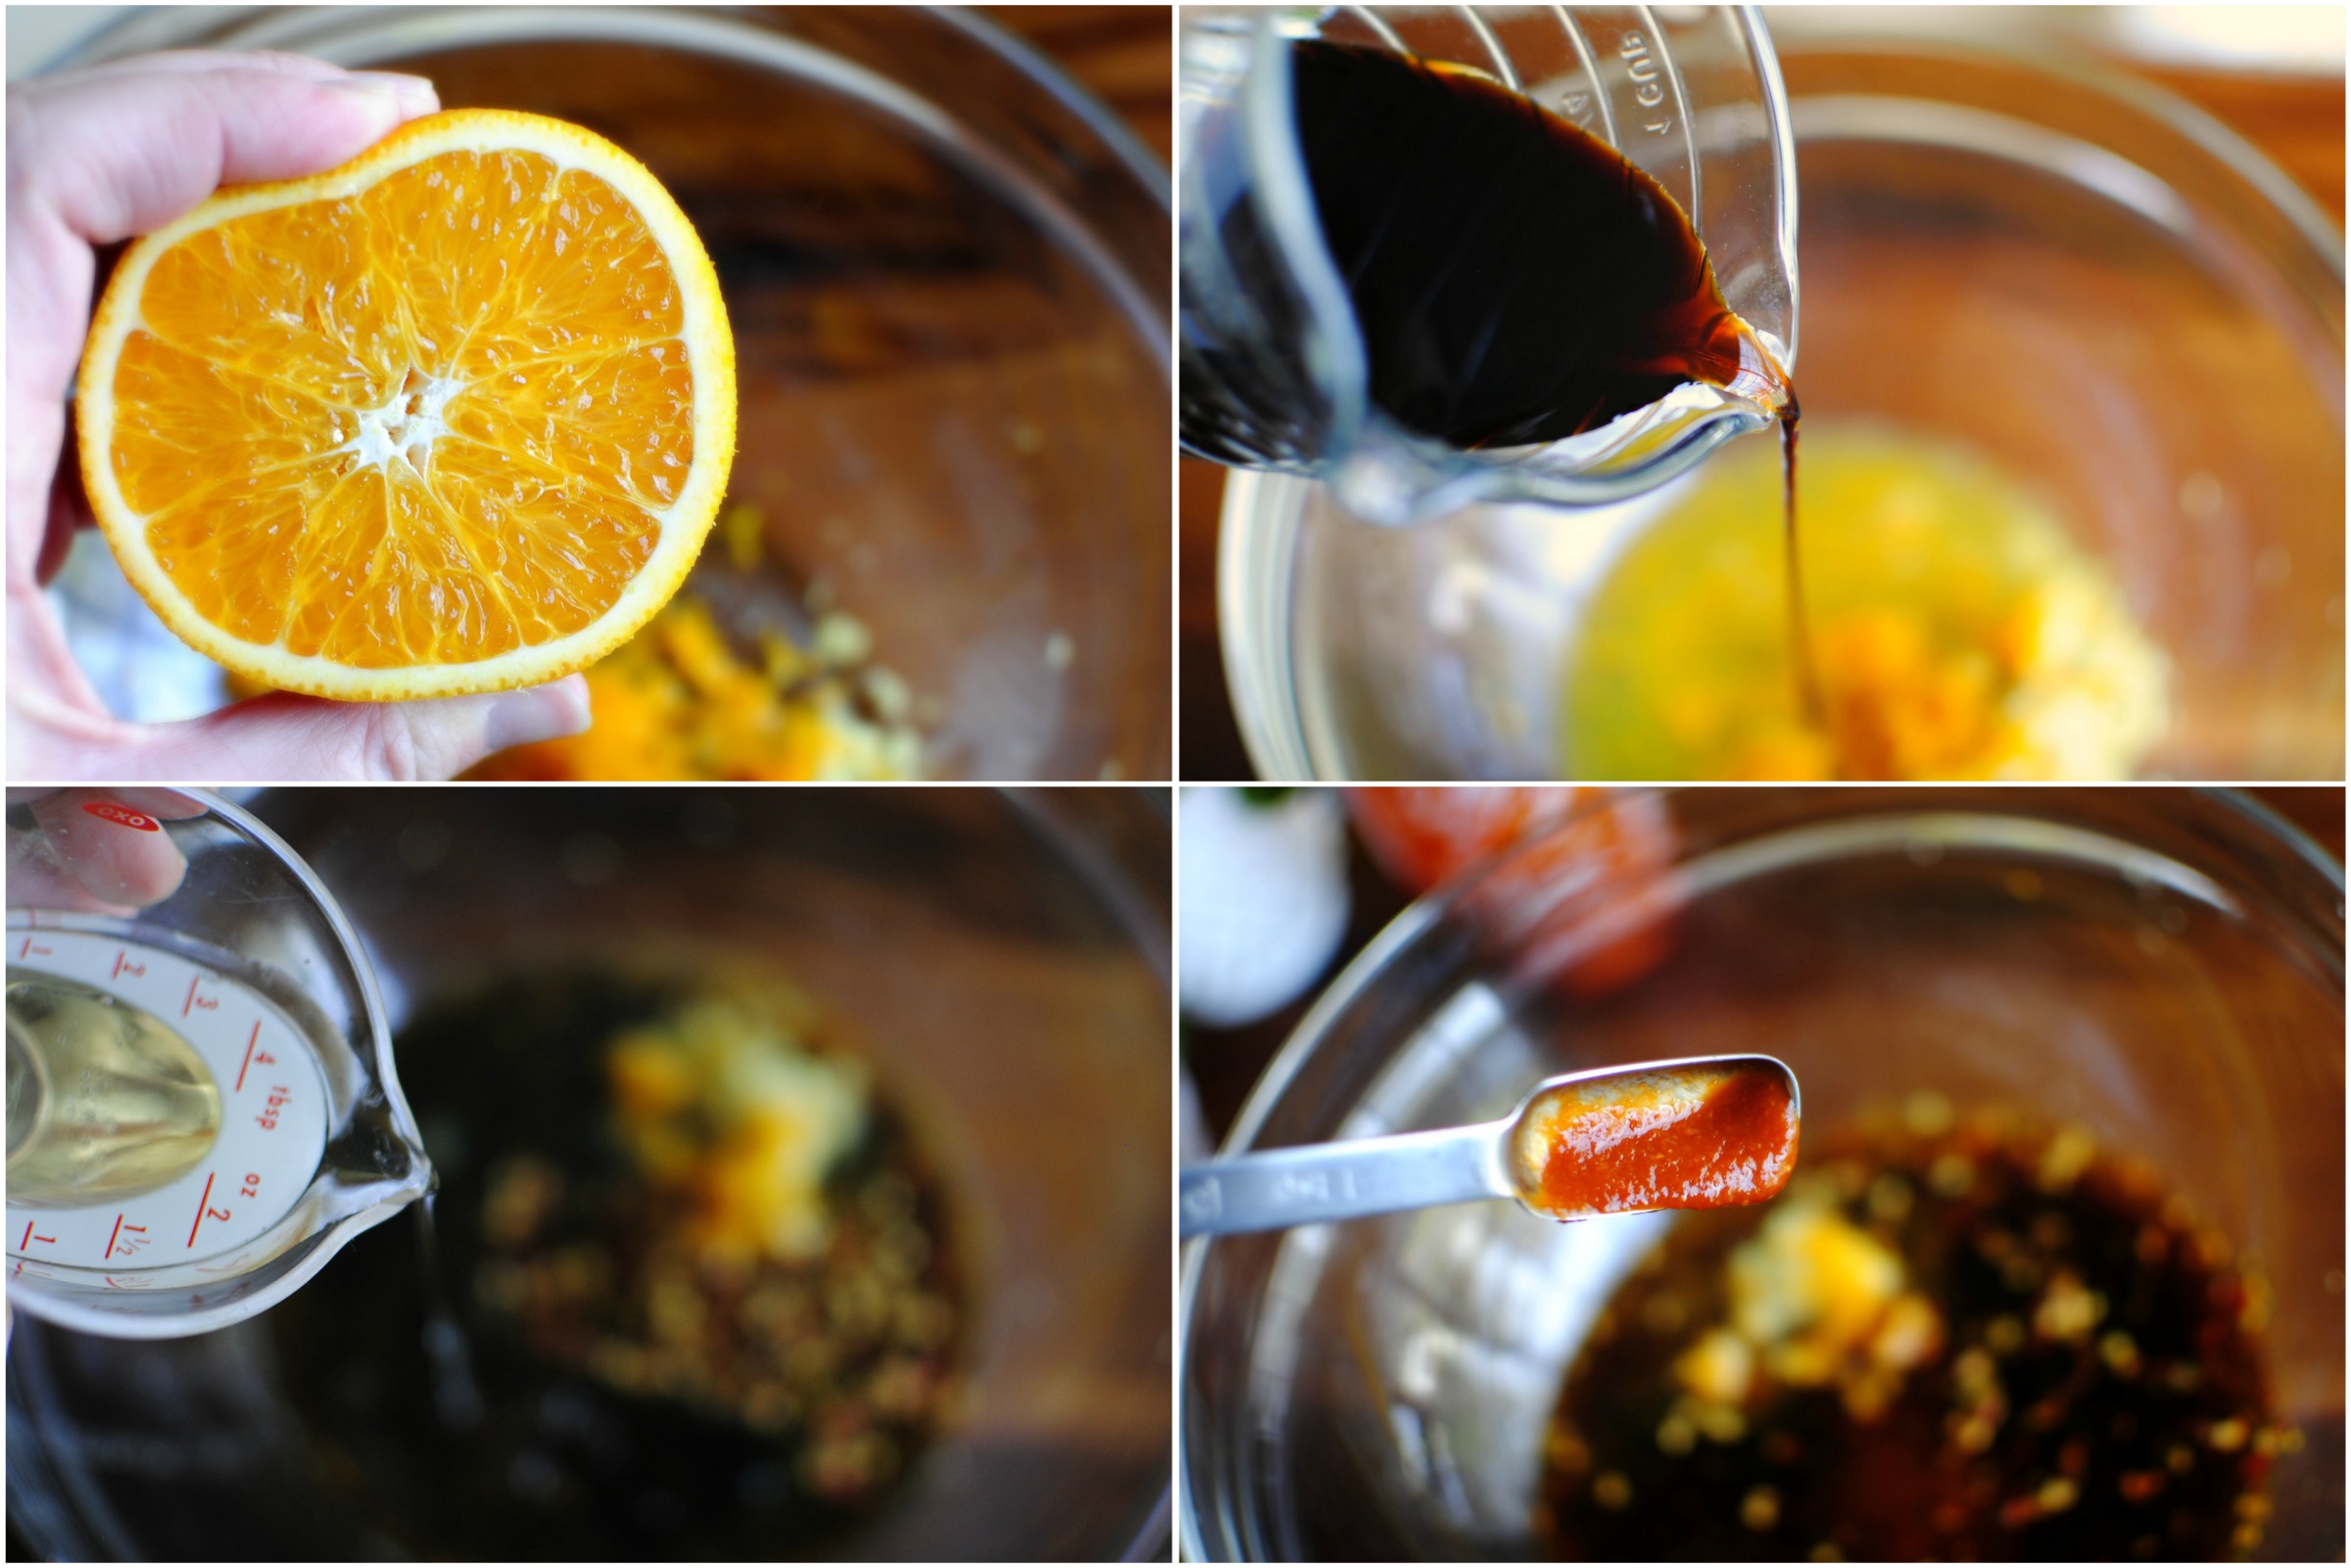
Start by squeezing a few lemons and straining out all the pulp and seeds. My lemons were mighty juicy, so it only took 2 to get 2/3 cup of lemon juice. But always buy a couple extra just in case.


Tasty Kitchen Blog Homemade Ricotta with Lemon and Basil. Guest post by Laurie McNamara of Simply Scratch, recipe submitted by TK member Megan of Wanna Be A Country Cleaver.

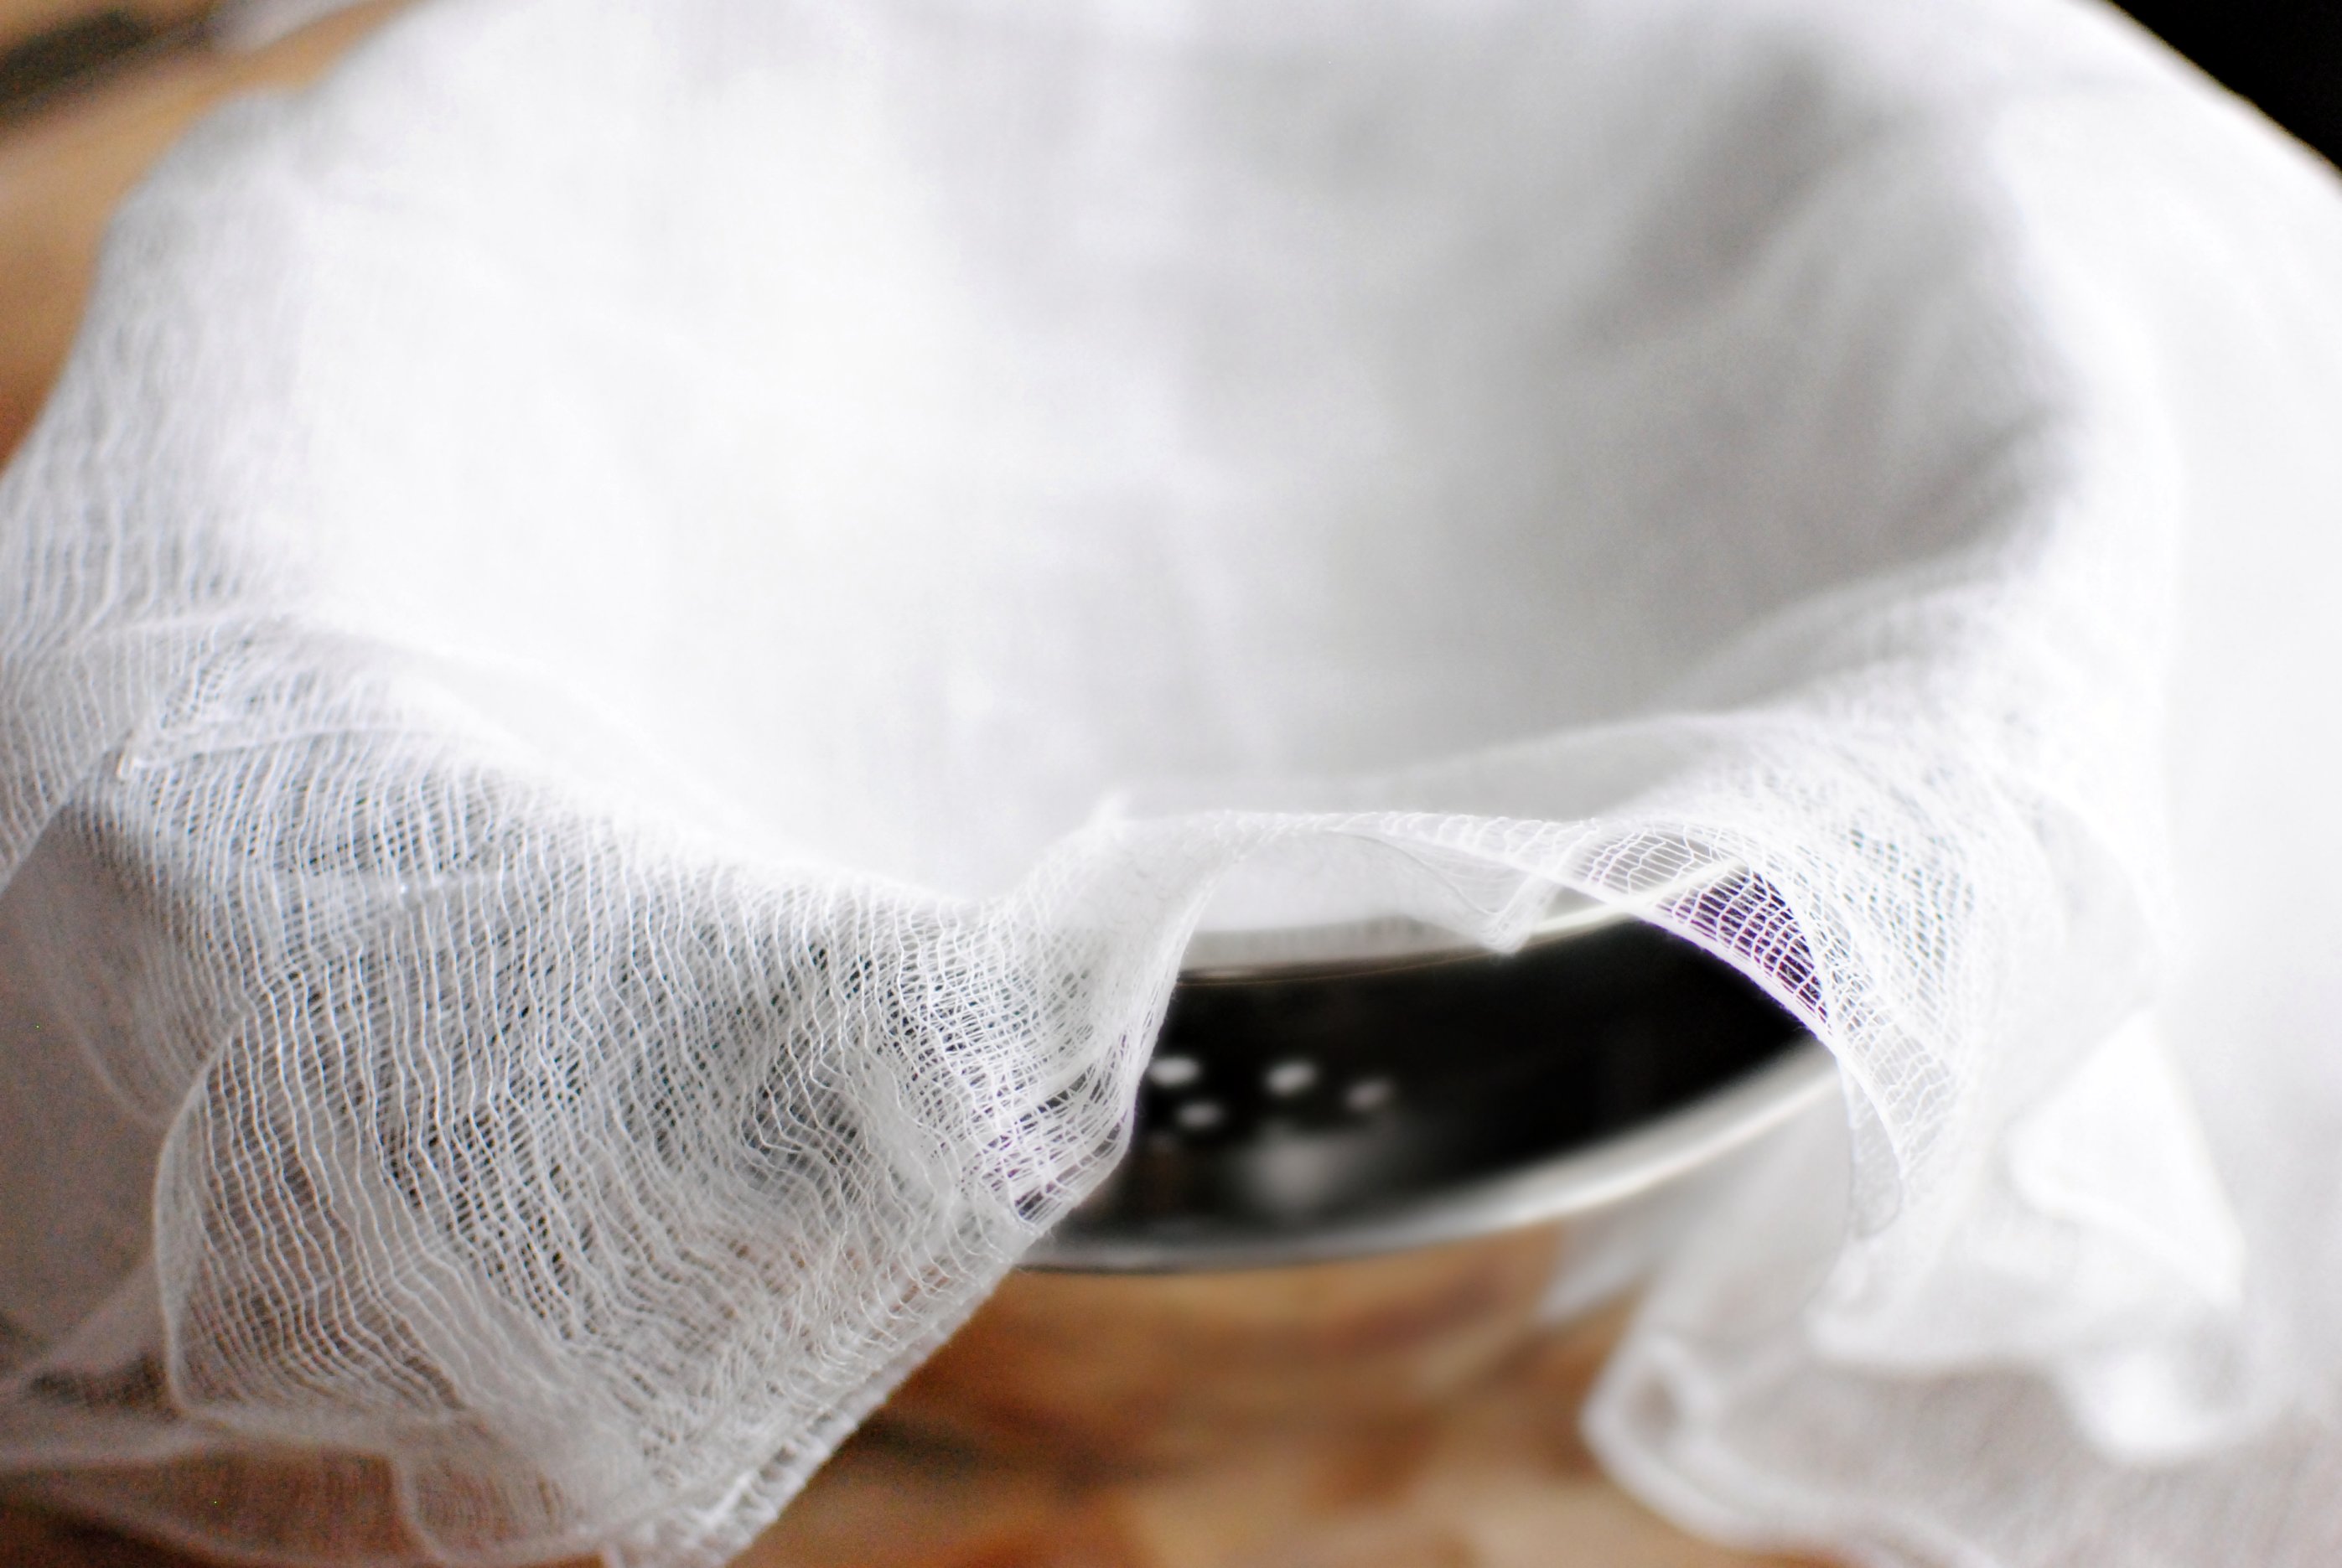
Line a mesh strainer or a colander with a few layers of cheesecloth and set it inside the deepest—and I mean deepest—bowl you have. 


Tasty Kitchen Blog Homemade Ricotta with Lemon and Basil. Guest post by Laurie McNamara of Simply Scratch, recipe submitted by TK member Megan of Wanna Be A Country Cleaver.

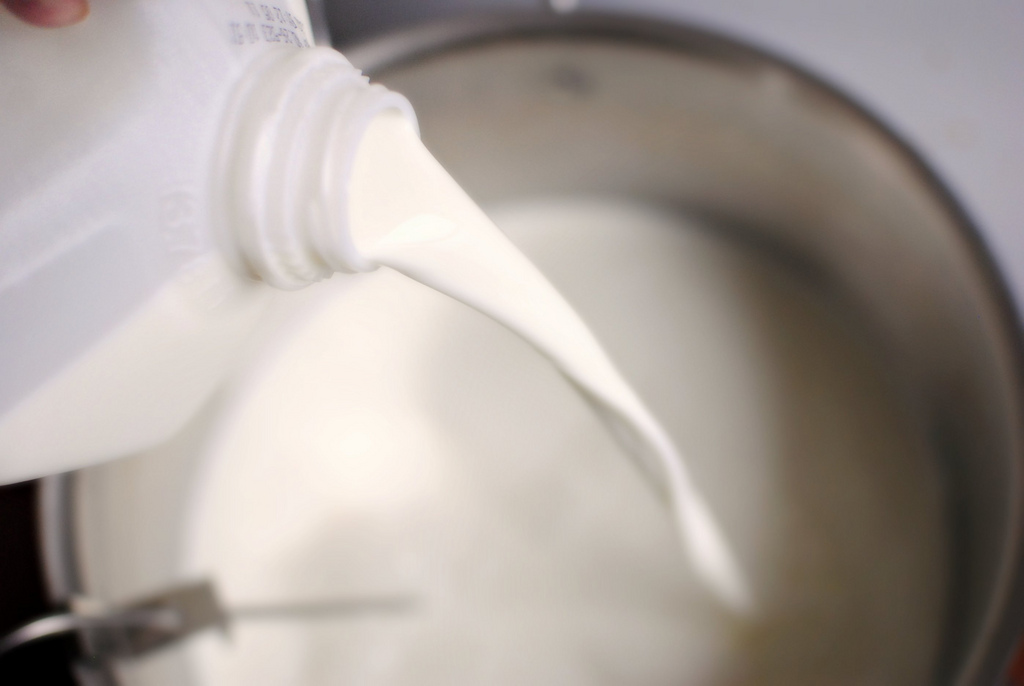
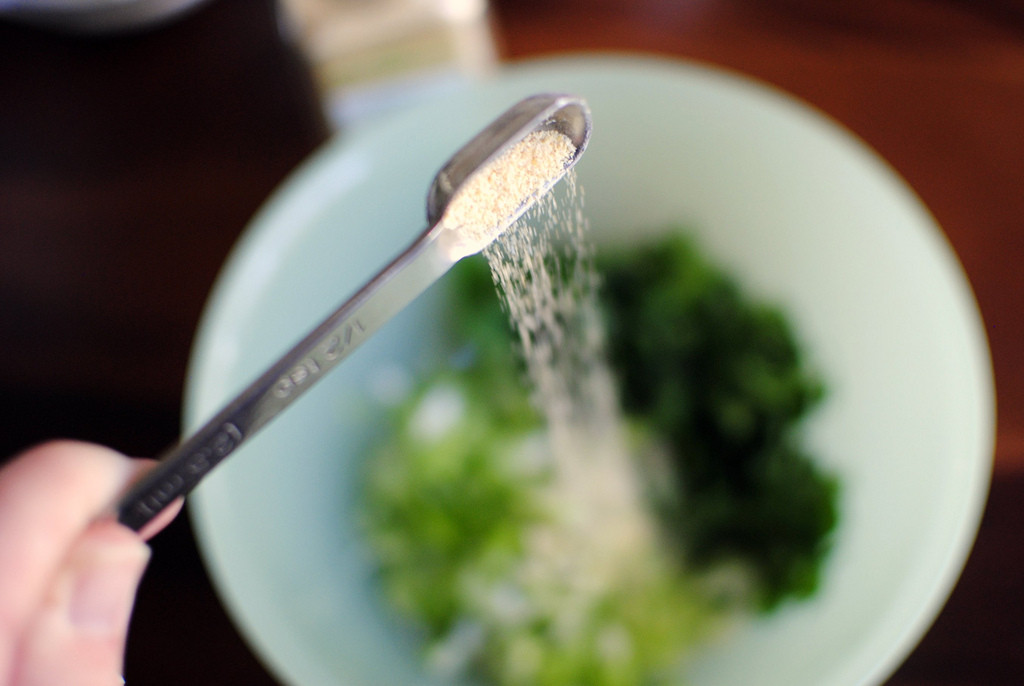
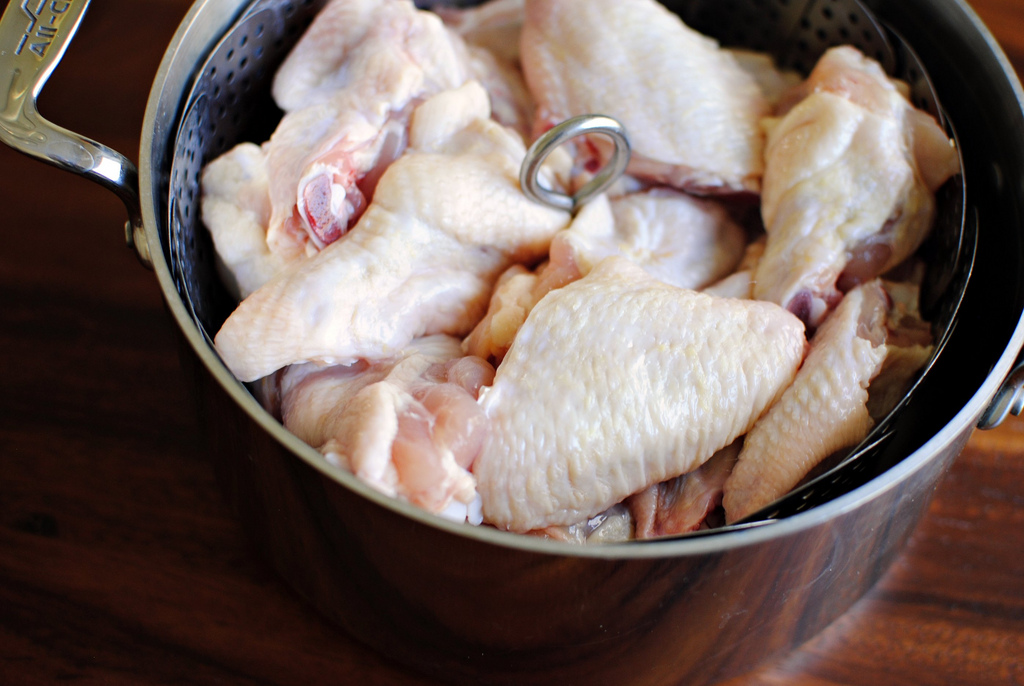
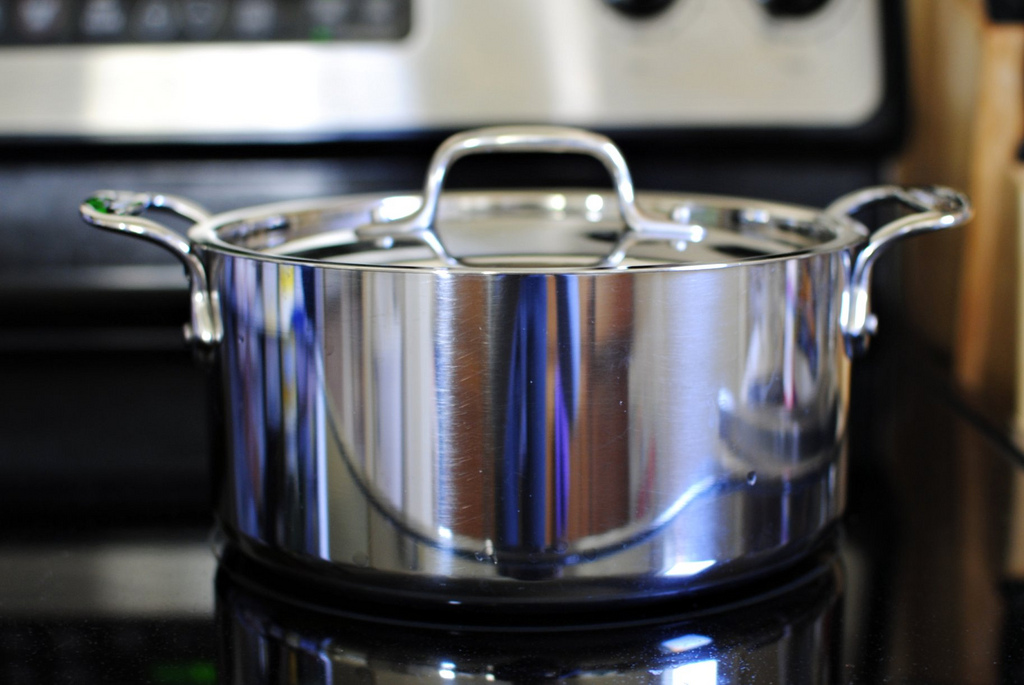
In a large stock pot or Dutch oven, pour in an entire gallon of milk.


Tasty Kitchen Blog Homemade Ricotta with Lemon and Basil. Guest post by Laurie McNamara of Simply Scratch, recipe submitted by TK member Megan of Wanna Be A Country Cleaver.

While you patiently wait for the milk to heat up to 185ºF, stir … stir … stir! It will help prevent the milk from scalding.


Tasty Kitchen Blog Homemade Ricotta with Lemon and Basil. Guest post by Laurie McNamara of Simply Scratch, recipe submitted by TK member Megan of Wanna Be A Country Cleaver.

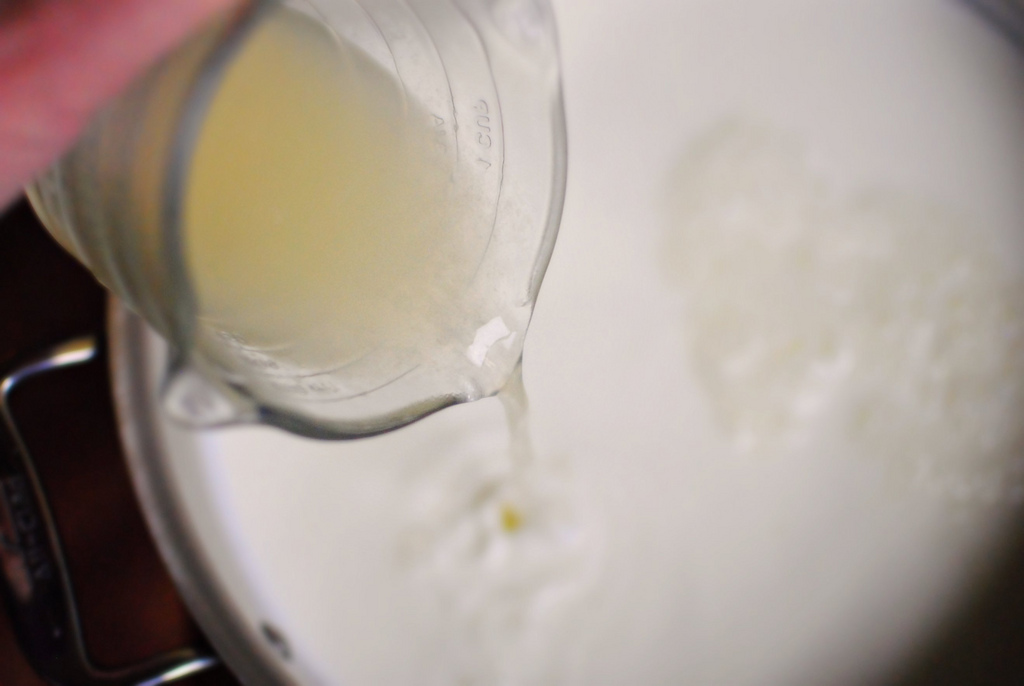
The moment the milk reaches 185ºF, remove the pot from the heat and pour in the lemon juice. Now we wait, and specifically directed, DO NOT DISTURB for 25 minutes! In this time the lemon juice will coagulate the milk to form the curds, which will be the ricotta!


Tasty Kitchen Blog Homemade Ricotta with Lemon and Basil. Guest post by Laurie McNamara of Simply Scratch, recipe submitted by TK member Megan of Wanna Be A Country Cleaver.

The moment the buzzer rings, pour the ricotta slowly into the cheesecloth-lined strainer. I recommend doing this step by a sink in case you need to drain out some liquid from the bowl.


Tasty Kitchen Blog Homemade Ricotta with Lemon and Basil. Guest post by Laurie McNamara of Simply Scratch, recipe submitted by TK member Megan of Wanna Be A Country Cleaver.

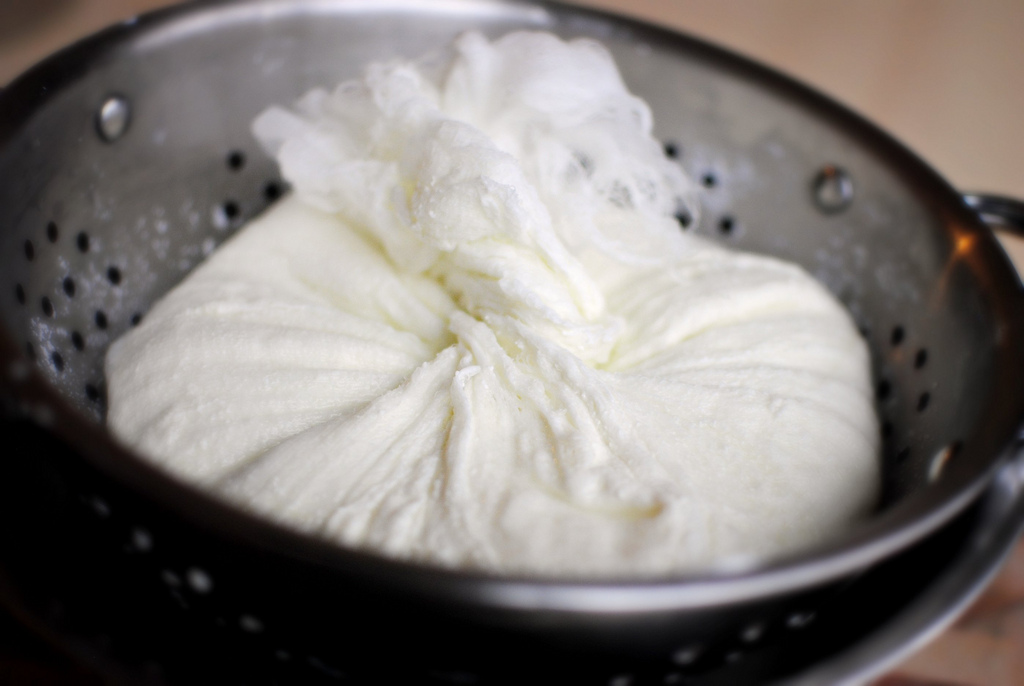
I twisted the cheesecloth and squeezed to get the most moisture out. 


Tasty Kitchen Blog Homemade Ricotta with Lemon and Basil. Guest post by Laurie McNamara of Simply Scratch, recipe submitted by TK member Megan of Wanna Be A Country Cleaver.

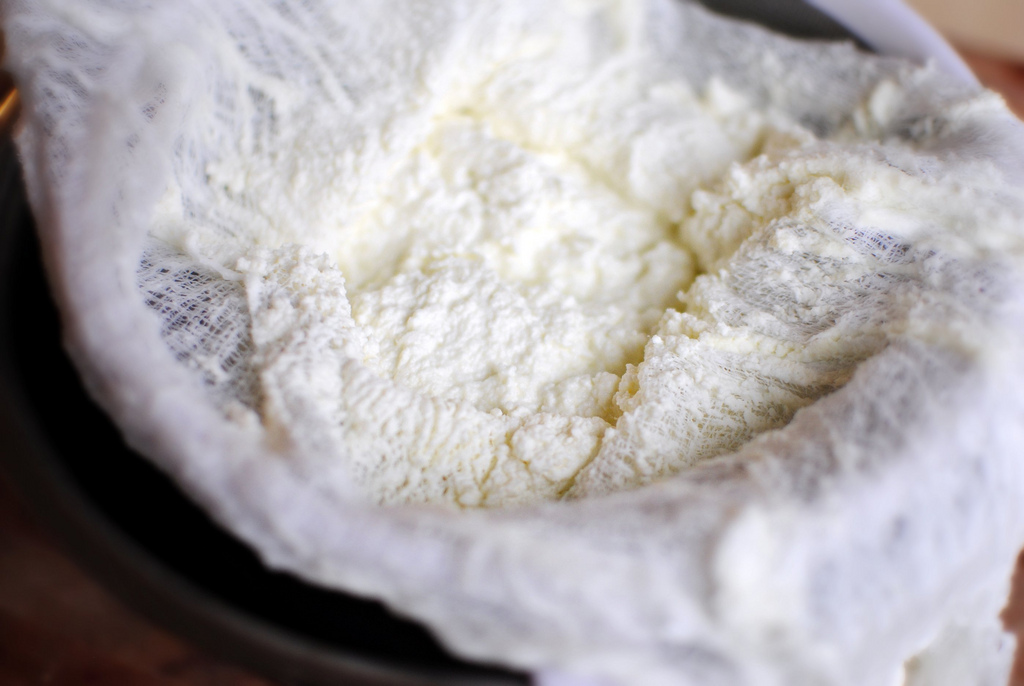
If you wanted more of a loose ricotta, don’t squeeze, just stop draining when the liquid stops flowing freely.


Tasty Kitchen Blog Homemade Ricotta with Lemon and Basil. Guest post by Laurie McNamara of Simply Scratch, recipe submitted by TK member Megan of Wanna Be A Country Cleaver.

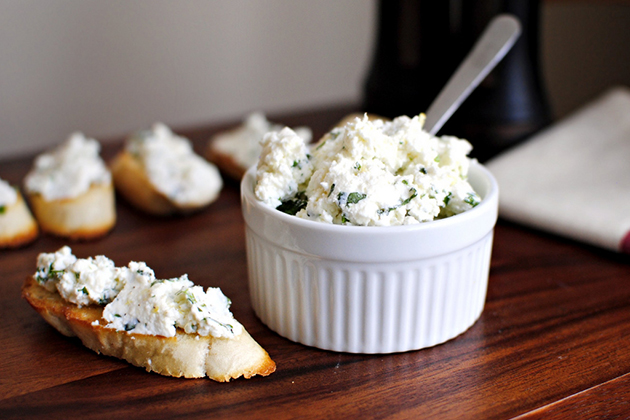
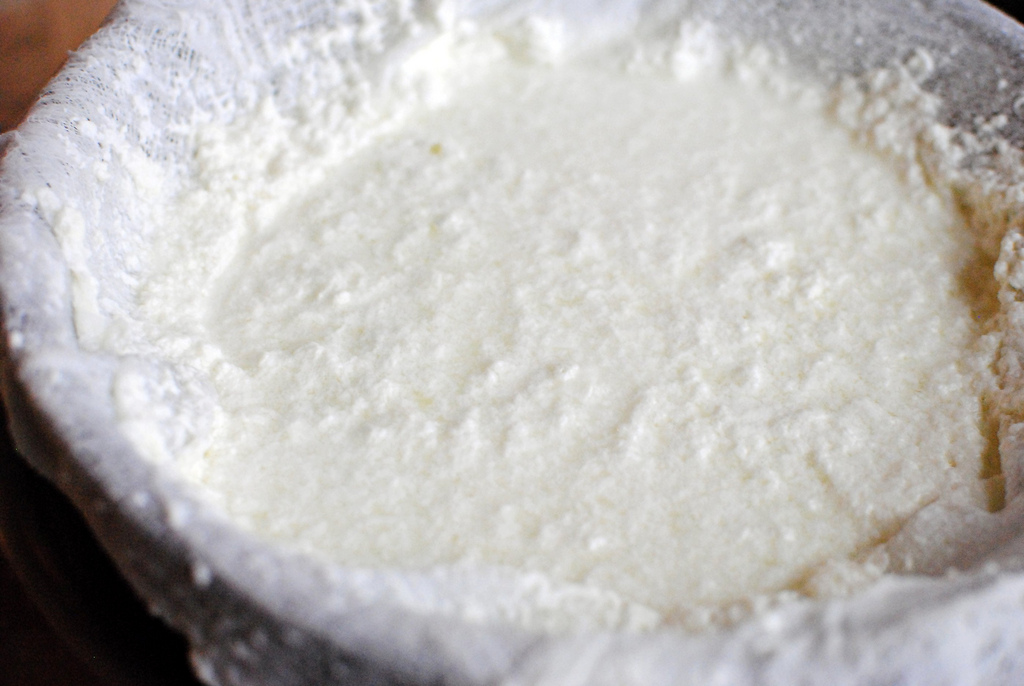
Just look at that cheese!


Tasty Kitchen Blog Homemade Ricotta with Lemon and Basil. Guest post by Laurie McNamara of Simply Scratch, recipe submitted by TK member Megan of Wanna Be A Country Cleaver.

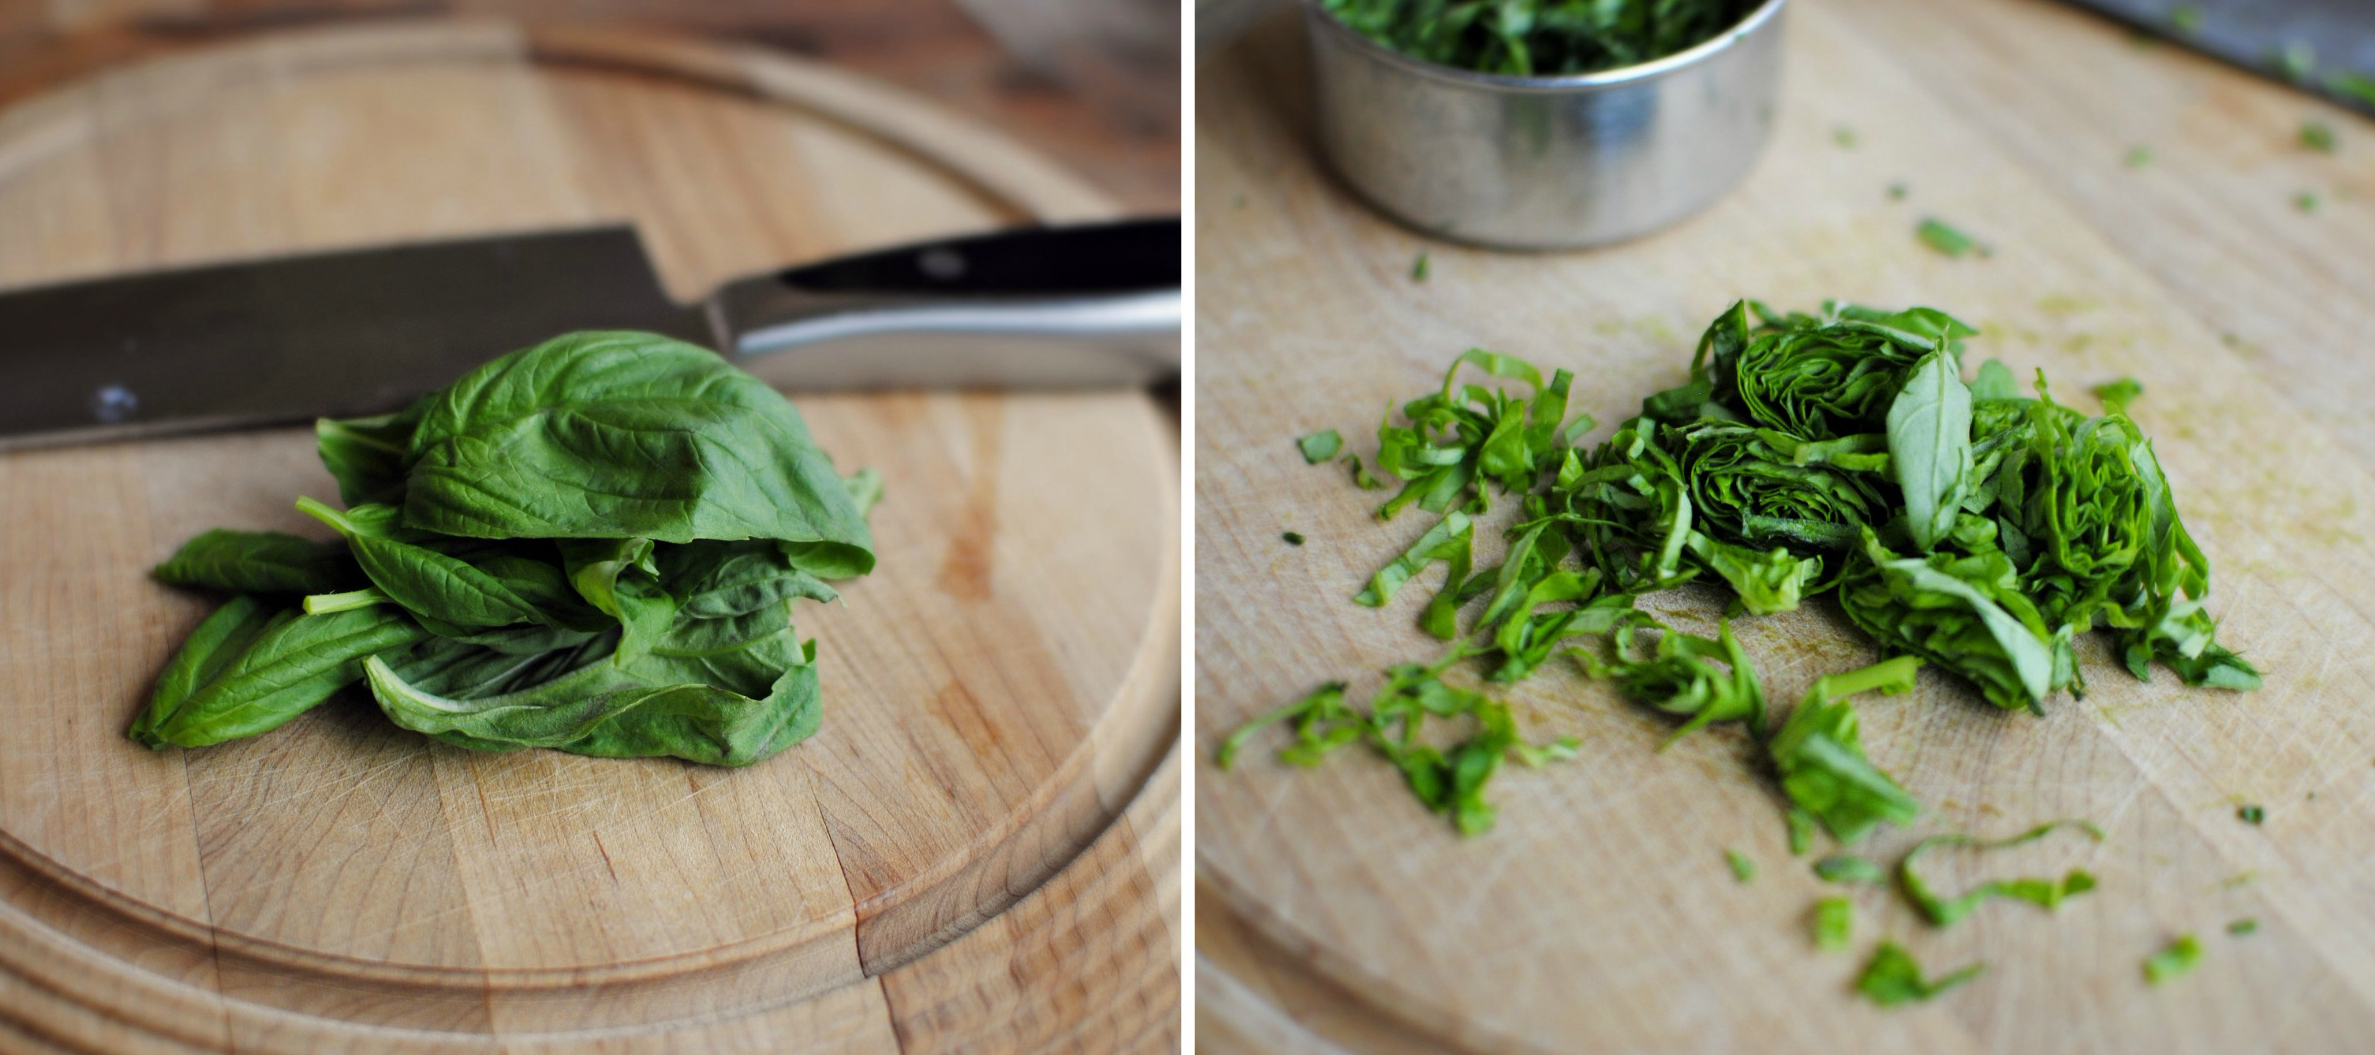
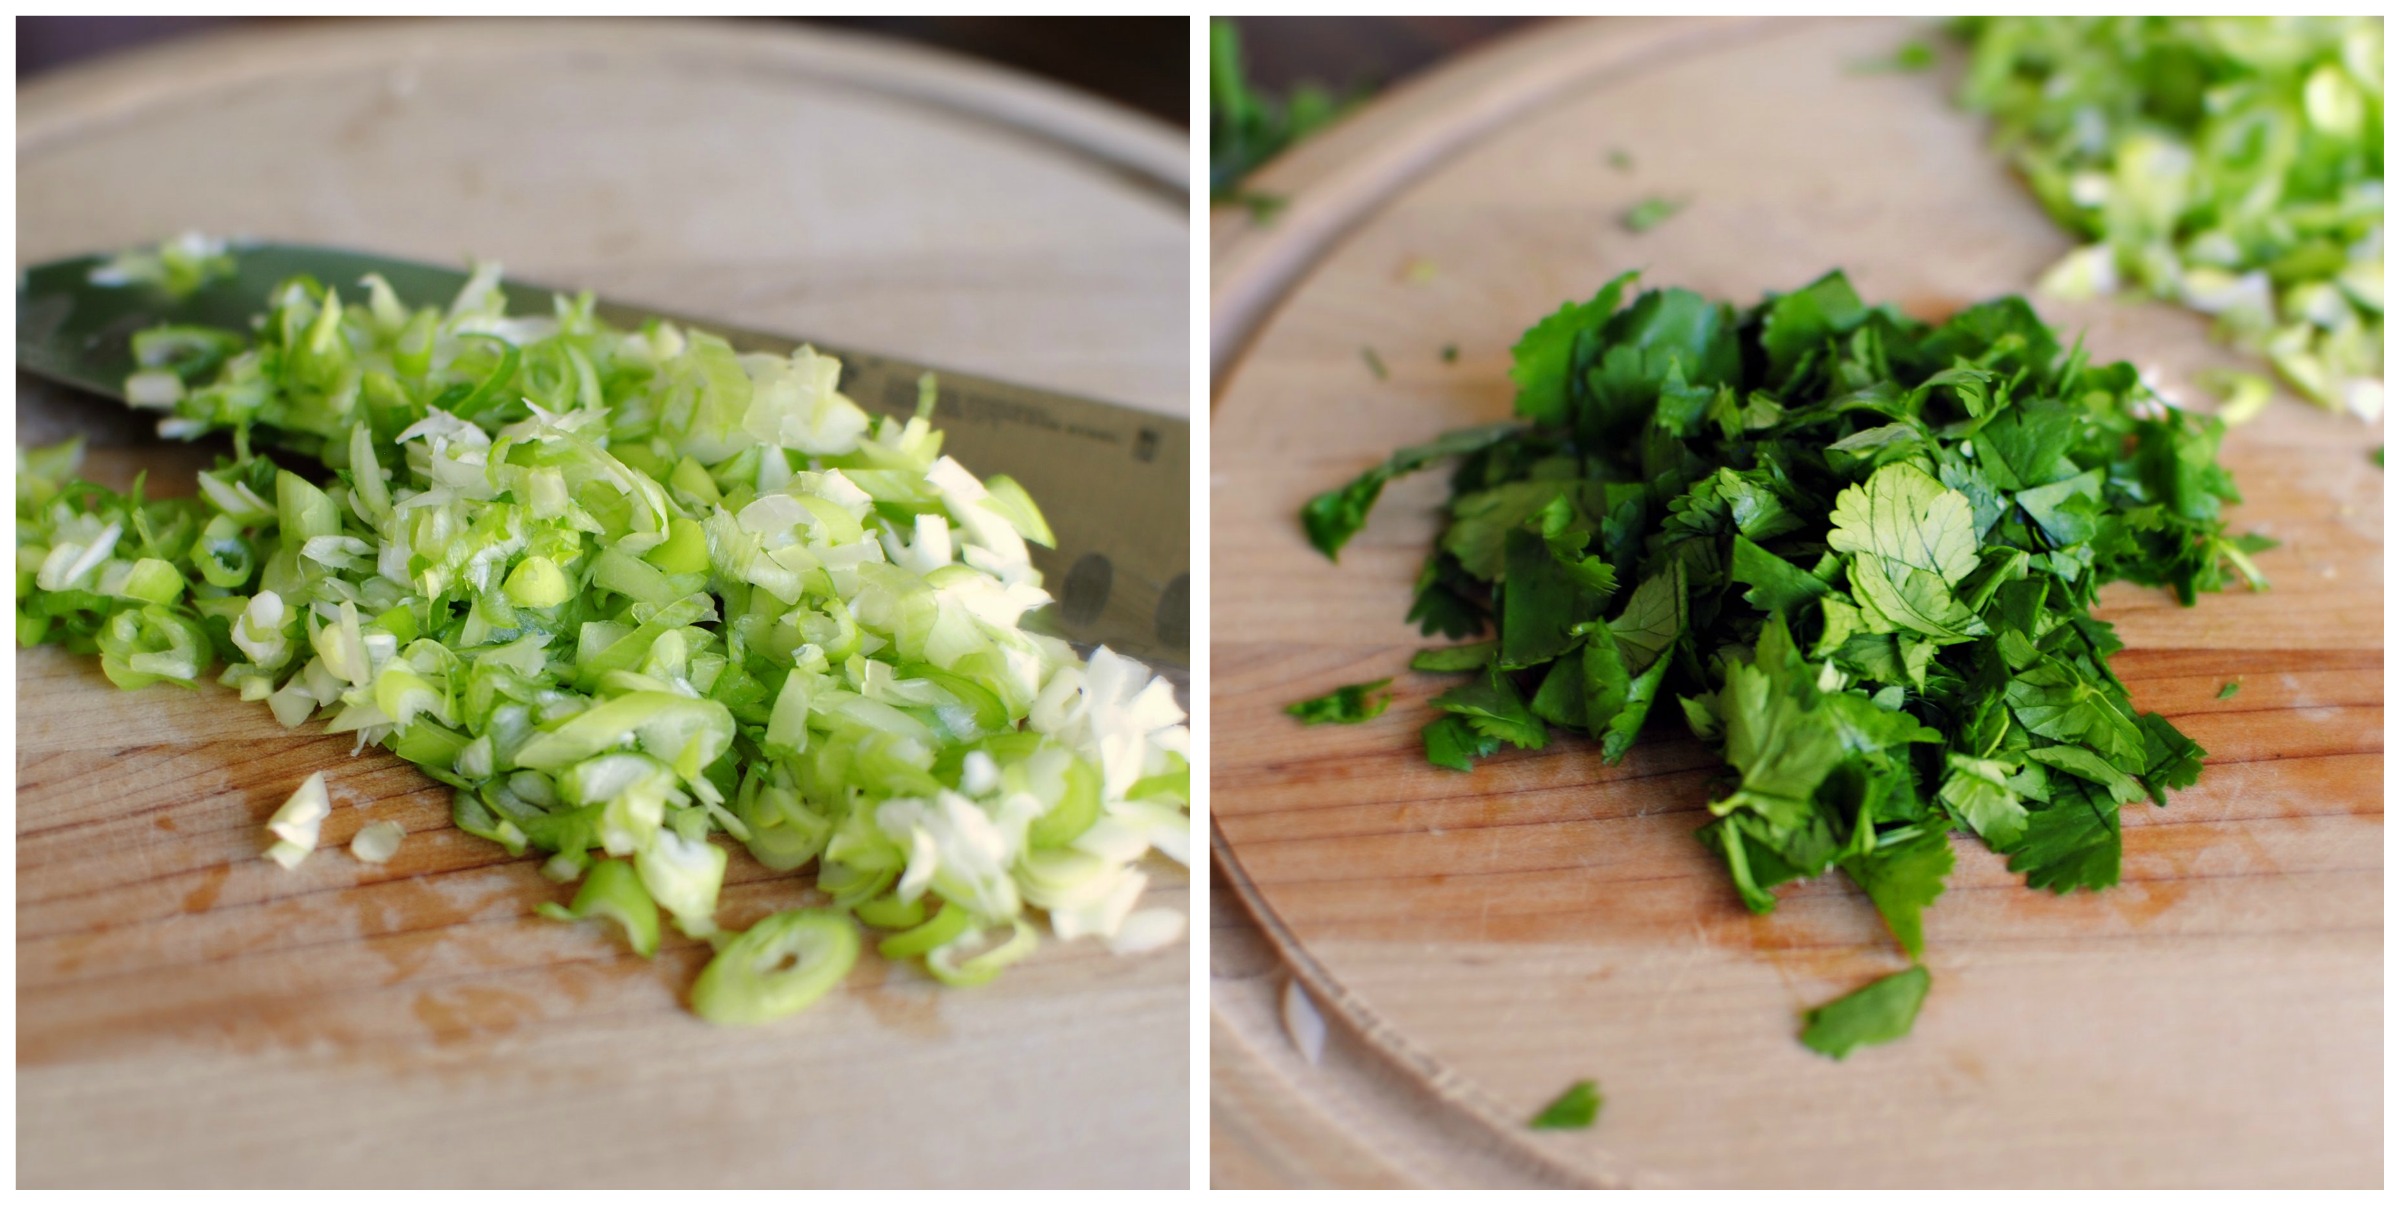
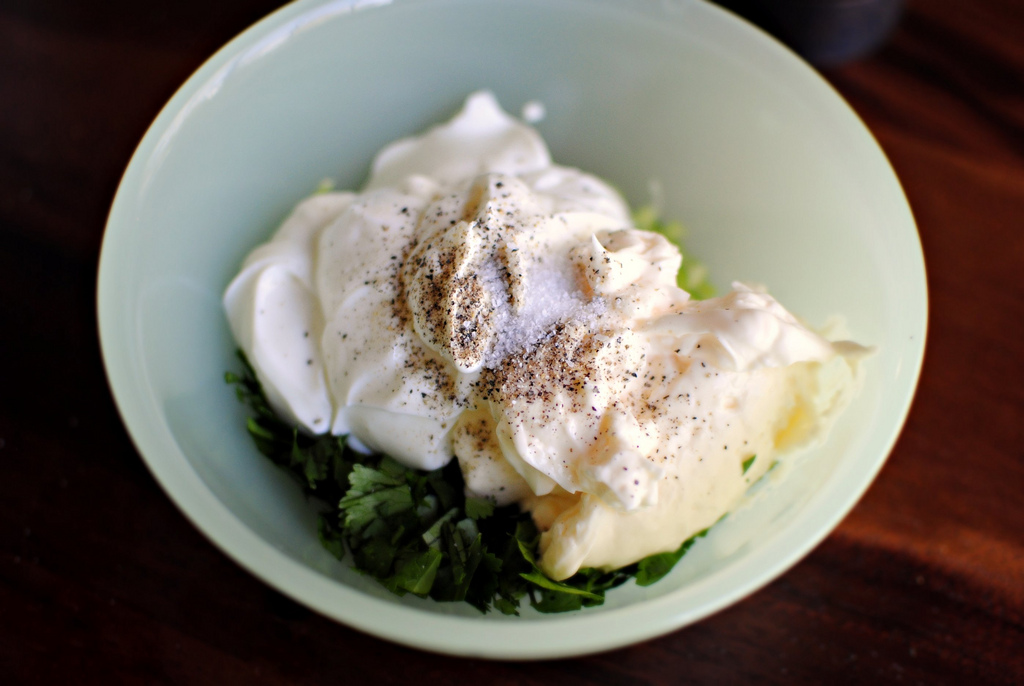
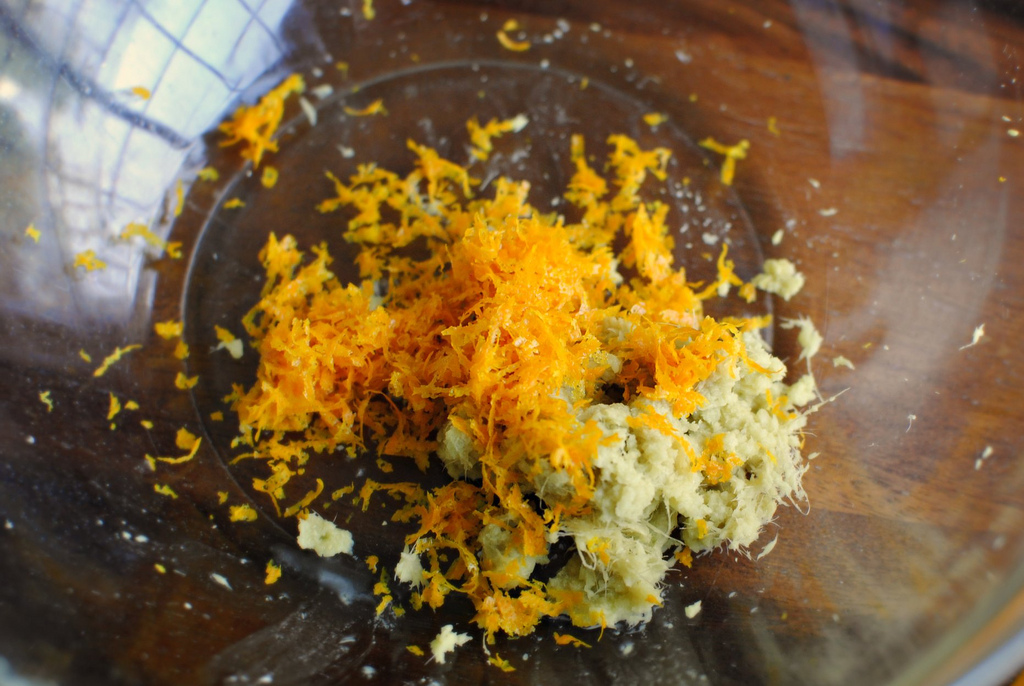
Grab a few fresh basil leaves, roll and mince the heck out of them until you get 1/3 cup.


Tasty Kitchen Blog Homemade Ricotta with Lemon and Basil. Guest post by Laurie McNamara of Simply Scratch, recipe submitted by TK member Megan of Wanna Be A Country Cleaver.

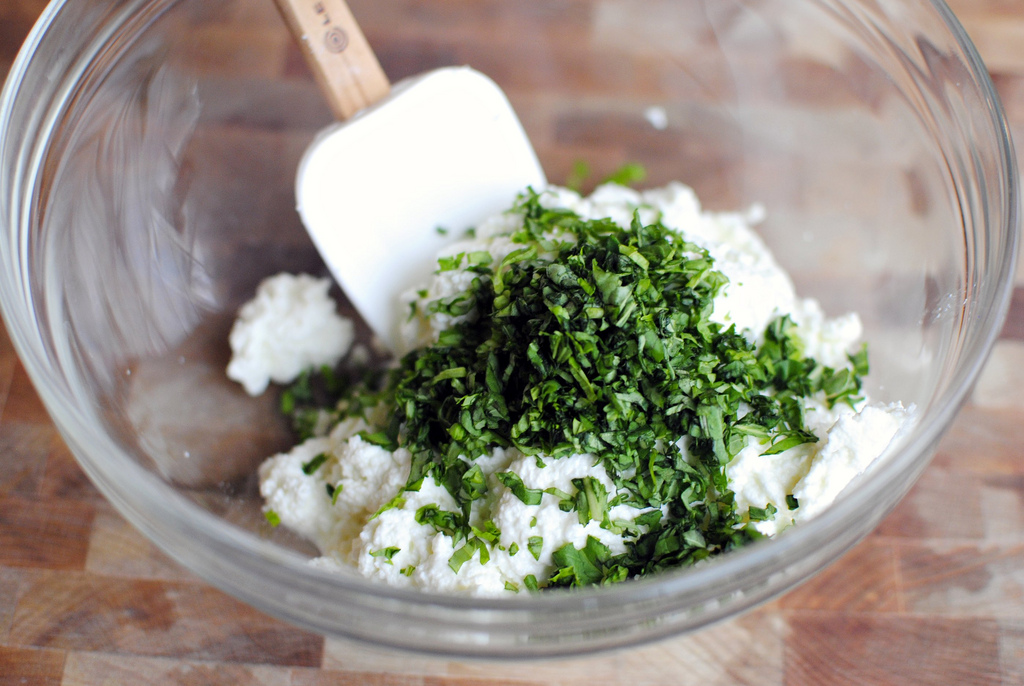
Throw the basil in with the fresh (and still warm) ricotta!


Tasty Kitchen Blog Homemade Ricotta with Lemon and Basil. Guest post by Laurie McNamara of Simply Scratch, recipe submitted by TK member Megan of Wanna Be A Country Cleaver.

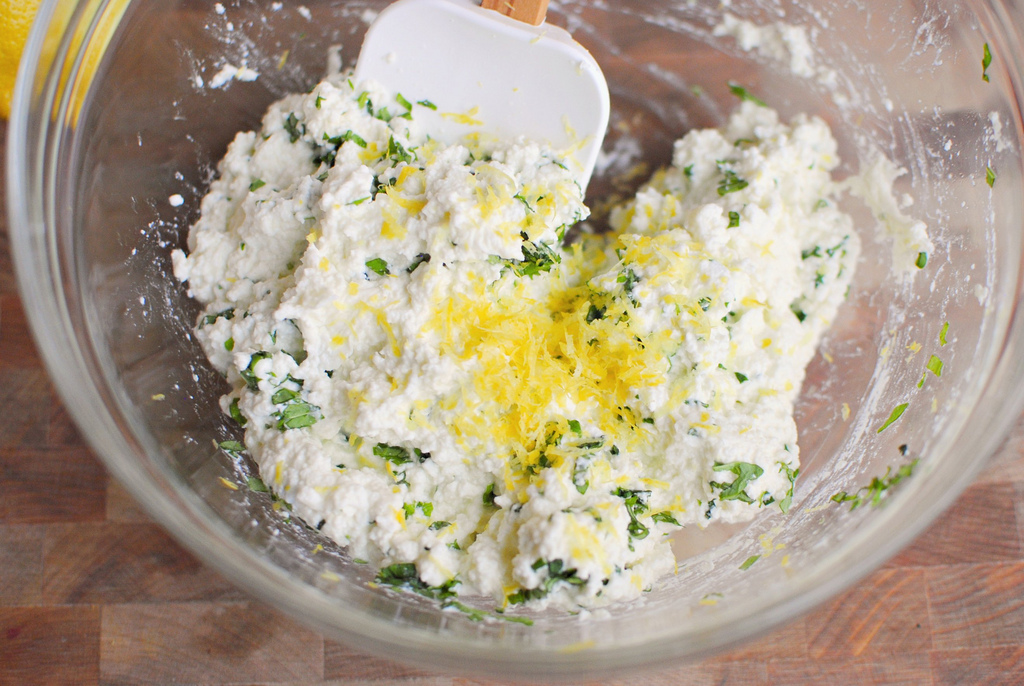
Zest in half a lemon.


Tasty Kitchen Blog Homemade Ricotta with Lemon and Basil. Guest post by Laurie McNamara of Simply Scratch, recipe submitted by TK member Megan of Wanna Be A Country Cleaver.

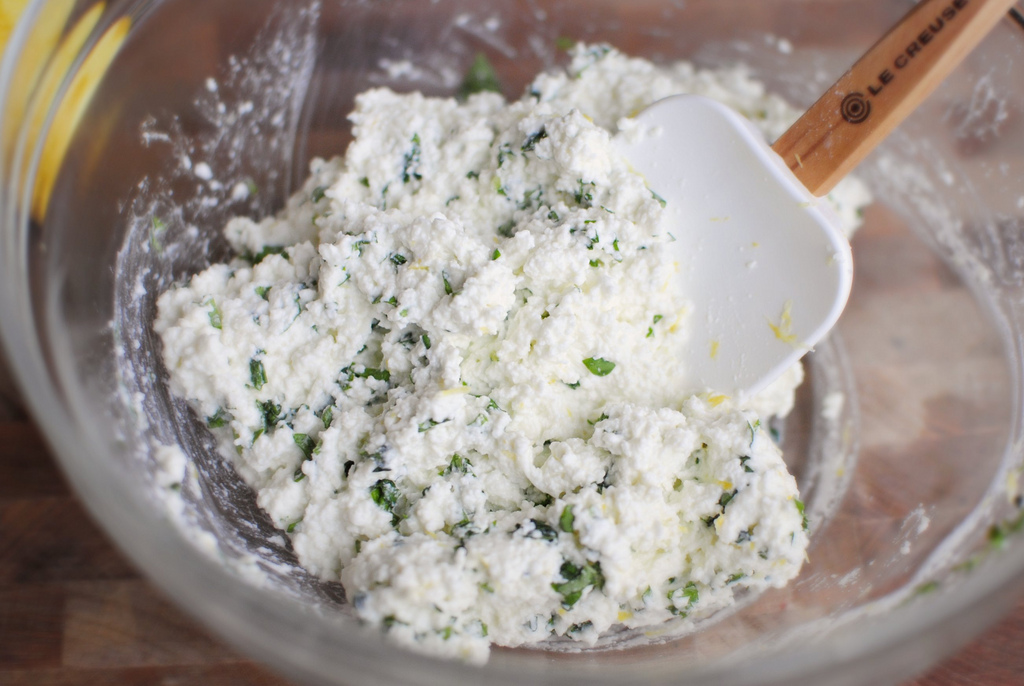
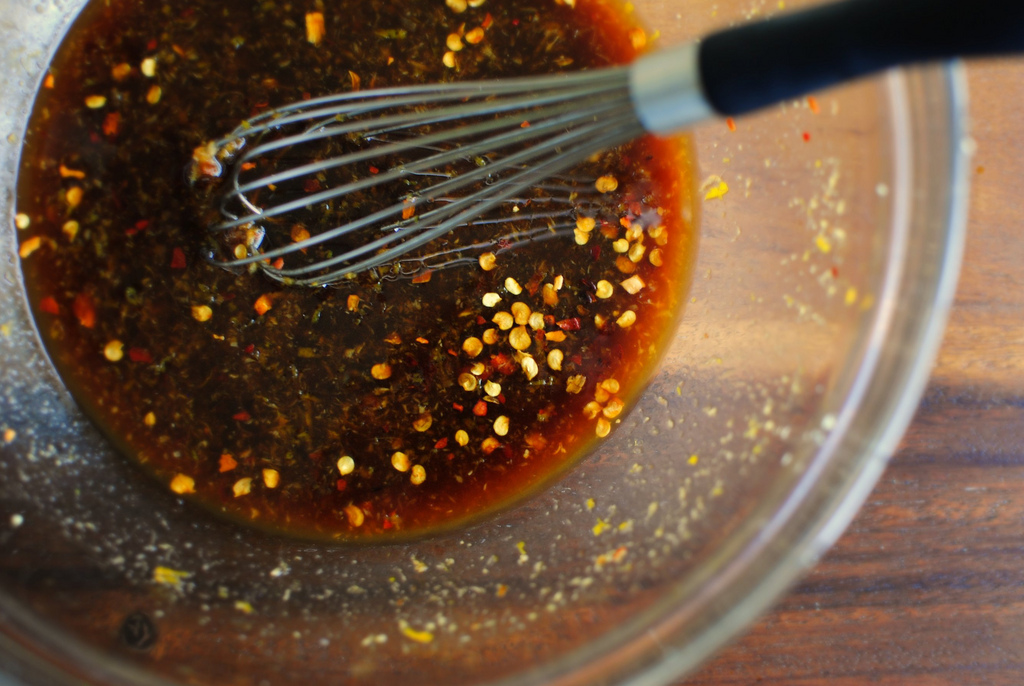
Season with some salt and black pepper, and then gently fold it all together until the lemon and basil are incorporated. 


Tasty Kitchen Blog Homemade Ricotta with Lemon and Basil. Guest post by Laurie McNamara of Simply Scratch, recipe submitted by TK member Megan of Wanna Be A Country Cleaver.

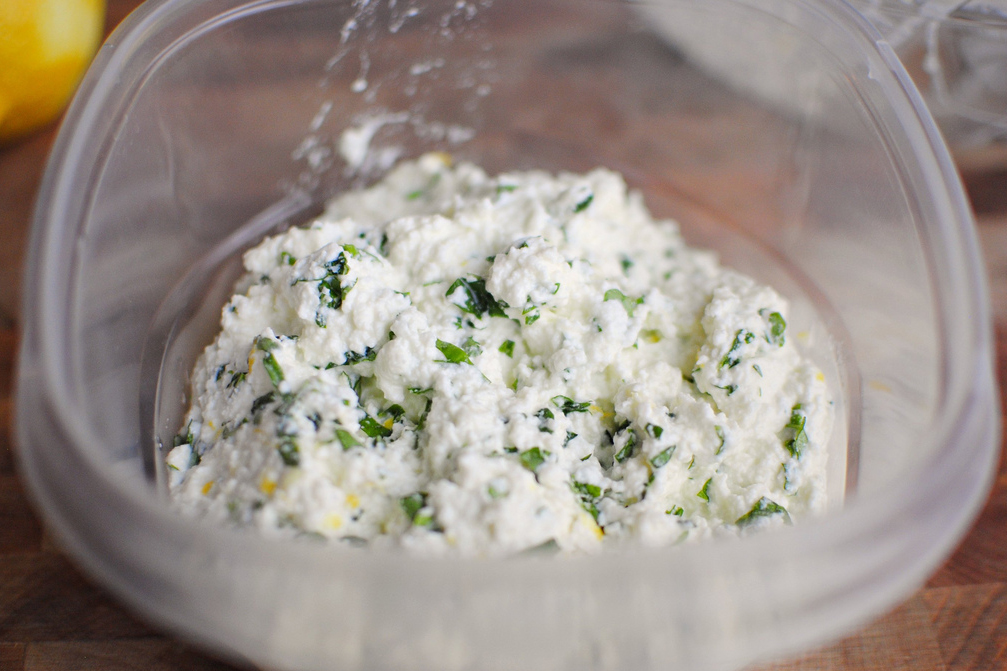
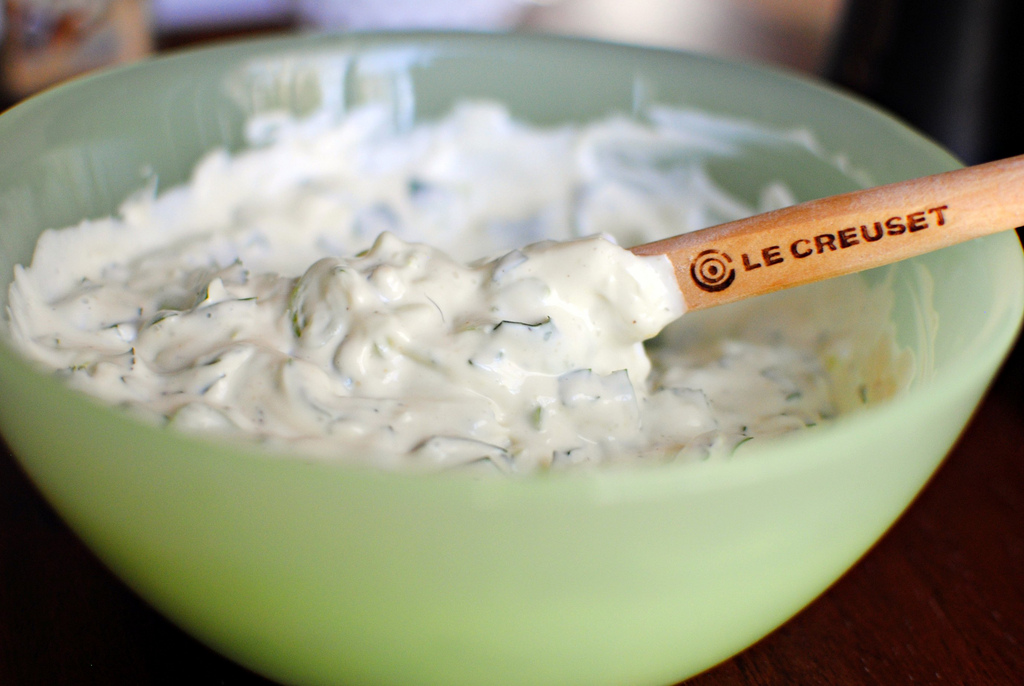
Transfer the ricotta to a container with a tight fitting lid and refrigerate for 2 hours or overnight.


Tasty Kitchen Blog Homemade Ricotta with Lemon and Basil. Guest post by Laurie McNamara of Simply Scratch, recipe submitted by TK member Megan of Wanna Be A Country Cleaver.

I literally can’t stop thinking about how delicious this cheese tasted and how easy it was to prepare! You can spread it on bread, bake it in pasta—the options are endless! Until you run out and that’s a total bummer deal. But now you know just how simple it is to whip up some ricotta in your very own kitchen! So go give it a try!
 
Be sure to stop by Megan’s newly revamped blog Wanna Be a Country Cleaver. It’s where she’s cooking her way through life, dishing up one after one fun and delicious recipes. You could also take a peek in her recipe box here on Tasty Kitchen and you’ll see what I mean! Thank you Megan for sharing this ricotta recipe with us. I know my life won’t be the same!


Printable Recipe

Homemade Ricotta with Lemon and Basil

5.00 Mitt(s) 1 Rating(s)1 vote, average: 5.00 out of 51 vote, average: 5.00 out of 51 vote, average: 5.00 out of 51 vote, average: 5.00 out of 51 vote, average: 5.00 out of 5

Prep Time:

Cook Time:

Difficulty: Easy

Servings: 12

12
x

Print Options

Page size Letter 3x5 4x6
Text Size Small Medium Large
Content Include description
Include prep time, etc.
Show image

Description

Fresh ricotta made at home. Better than anything in the store.

Ingredients

  • 1 gallon Whole Milk
  • 1 teaspoon Salt
  • ⅔ cups Lemon Juice
  • ⅓ cups Basil, Minced
  • 1 teaspoon Lemon Zest
  • ⅓ teaspoons Pepper

Preparation Instructions

Yields 3-4 cups of ricotta.

In a large Dutch oven or deep pot, heat milk and salt to 185ºF, stirring frequently to avoid scalding. Remove from heat and pour in lemon juice. Let sit for 25 minutes while curds separate and form. Do not disturb.

Line a large colander or strainer with a double layer of cheese cloth, placing them over a deep bowl. Slowly pour cheese mixture into the strainer lined with cheesecloth and allow to drain, about 10-15 minutes or until the liquid no longer strains freely.

Place in a large bowl. Fold in minced basil, lemon zest, and pepper if desired. Do not mix too much, just enough to incorporate.

Place in sealed containers and let chill for two hours. Serve with garlic toast and olive oil for drizzling.


_______________________________________

Laurie is the force behind Simply Scratch, a blog that documents her efforts to find and create recipes that are made simply from scratch. (We think it’s sweet that her mother-in-law helped her set up her blog and get started.) We love her recipes; they’re not just tried and true, but they look gorgeous as well. Check out her blog and you’ll become a fan too.


Profile photo of Laurie - Simply Scratch

Citrus Spicy Wings with Cilantro Dipping Sauce

Posted by in Step-by-Step Recipes

Tasty Kitchen Blog: Spicy Citrus Spicy Wings with Cilantro Dripping Sauce. Guest post by Laurie McNamara of Simply Scratch, recipe submitted by TK member Sarah of Life is Still Sweet.

 
Chicken wings are the quintessential football party food. They go well with just about any salty snack food, icy cold beer and they don’t require a fork (bonus!). Although I’m not an avid football fan, I am a huge wing fan! Whether it’s slathered in a spicy sauce or dunked into a cool and creamy dip, I’ve never met a wing I didn’t like.
 
I spied this recipe from TK member Sarah (tallmisto) earlier this year and immediately placed it in my Tasty Kitchen recipe box. What caught my attention first was combination of spicy and citrus which then triggered a salivary response in my mouth forcing me to click over to her website Life Is Still Sweet to read more about them. Doing so led me to find her cilantro scallion dip. Honestly, I’ve never been so excited about a single dip in my entire life. These wings and this dip is where it’s at! So make them for your next football party or get-together. I promise you won’t regret it.


Tasty Kitchen Blog: Spicy Citrus Spicy Wings with Cilantro Dripping Sauce. Guest post by Laurie McNamara of Simply Scratch, recipe submitted by TK member Sarah of Life is Still Sweet.

So I have a small, teensy-weensy confession to make. I’ve never made wings before. Never. Ever. I am, however, no stranger to chicken or sriracha, as you can see by the amount left in the bottle. These recipe instructions were so straightforward and it didn’t require any deep- frying on my part, which gave me total confidence that I could rock these wings out. And I did.  


Tasty Kitchen Blog: Spicy Citrus Spicy Wings with Cilantro Dripping Sauce. Guest post by Laurie McNamara of Simply Scratch, recipe submitted by TK member Sarah of Life is Still Sweet.

Slice and dice up two scallions and a bunch of cilantro.


Tasty Kitchen Blog: Spicy Citrus Spicy Wings with Cilantro Dripping Sauce. Guest post by Laurie McNamara of Simply Scratch, recipe submitted by TK member Sarah of Life is Still Sweet.

Throw the onions and cilantro into a small bowl and add a half teaspoon of garlic powder.


Tasty Kitchen Blog: Spicy Citrus Spicy Wings with Cilantro Dripping Sauce. Guest post by Laurie McNamara of Simply Scratch, recipe submitted by TK member Sarah of Life is Still Sweet.

Measure out the mayo and Greek yogurt, then season with kosher salt and black pepper. If you have sour cream on hand (in place of Greek yogurt), that would work too.


Tasty Kitchen Blog: Spicy Citrus Spicy Wings with Cilantro Dripping Sauce. Guest post by Laurie McNamara of Simply Scratch, recipe submitted by TK member Sarah of Life is Still Sweet.

Stir and taste (to check the seasoning of course), then wrap with plastic wrap and stick it in your fridge to get those flavors developing.


Tasty Kitchen Blog: Spicy Citrus Spicy Wings with Cilantro Dripping Sauce. Guest post by Laurie McNamara of Simply Scratch, recipe submitted by TK member Sarah of Life is Still Sweet.

These are whole chicken wings. You’ll need to break them down into three parts; the wingtip (which you’ll discard), the wing or “wingette”, and the classic drumette. 


Tasty Kitchen Blog: Spicy Citrus Spicy Wings with Cilantro Dripping Sauce. Guest post by Laurie McNamara of Simply Scratch, recipe submitted by TK member Sarah of Life is Still Sweet.

With your index finger. find each joint.


Tasty Kitchen Blog: Spicy Citrus Spicy Wings with Cilantro Dripping Sauce. Guest post by Laurie McNamara of Simply Scratch, recipe submitted by TK member Sarah of Life is Still Sweet.

With your sharpest knife, firmly cut into the center of each joint. It should only take a little pressure and your knife should do majority of the work to cut right through. I promise it’s actually not as hard as it looks.


Tasty Kitchen Blog: Spicy Citrus Spicy Wings with Cilantro Dripping Sauce. Guest post by Laurie McNamara of Simply Scratch, recipe submitted by TK member Sarah of Life is Still Sweet.

Discard the wing tips or save them for stock. Nestle the rest of the wing pieces into a large steamer basket, and place the basket into a good-sized pot.


Tasty Kitchen Blog: Spicy Citrus Spicy Wings with Cilantro Dripping Sauce. Guest post by Laurie McNamara of Simply Scratch, recipe submitted by TK member Sarah of Life is Still Sweet.

Fill the pot with water just until it reaches the bottom of the steamer basket.


Tasty Kitchen Blog: Spicy Citrus Spicy Wings with Cilantro Dripping Sauce. Guest post by Laurie McNamara of Simply Scratch, recipe submitted by TK member Sarah of Life is Still Sweet.

Place a tight-fitting lid or a heavy plate on top, bring to a simmer and steam for 18-20 minutes.


Tasty Kitchen Blog: Spicy Citrus Spicy Wings with Cilantro Dripping Sauce. Guest post by Laurie McNamara of Simply Scratch, recipe submitted by TK member Sarah of Life is Still Sweet.

While the wings are steaming, warm up your biceps and grate two tablespoons of ginger and the zest of an entire orange into a large bowl.


Tasty Kitchen Blog: Spicy Citrus Spicy Wings with Cilantro Dripping Sauce. Guest post by Laurie McNamara of Simply Scratch, recipe submitted by TK member Sarah of Life is Still Sweet.

Over the same bowl, put the squeeze on both orange halves to extract all that juice, then measure and pour in the soy sauce, rice vinegar and sriracha. These aren’t blow-your-mind spicy, so measure with a heavy hand if you want a lot of kick!


Tasty Kitchen Blog: Spicy Citrus Spicy Wings with Cilantro Dripping Sauce. Guest post by Laurie McNamara of Simply Scratch, recipe submitted by TK member Sarah of Life is Still Sweet.

Sprinkle in the red pepper flakes and whisk to combine.


Tasty Kitchen Blog: Spicy Citrus Spicy Wings with Cilantro Dripping Sauce. Guest post by Laurie McNamara of Simply Scratch, recipe submitted by TK member Sarah of Life is Still Sweet.

The wings by now should be done steaming and fully cooked. All you have to do now is crisp that glorious chicken skin. First, though, we must glaze!


Tasty Kitchen Blog: Spicy Citrus Spicy Wings with Cilantro Dripping Sauce. Guest post by Laurie McNamara of Simply Scratch, recipe submitted by TK member Sarah of Life is Still Sweet.

Add in all the chicken wings into the spicy orange glaze and toss gently to coat. Be careful not to tear or remove any of that skin.


Tasty Kitchen Blog: Spicy Citrus Spicy Wings with Cilantro Dripping Sauce. Guest post by Laurie McNamara of Simply Scratch, recipe submitted by TK member Sarah of Life is Still Sweet.

Place on a baking sheet (I lined mine with aluminum foil just to make sure things didn’t stick but I’m not sure that’s necessary), and place the pan-o-wings on the second notch under your preheated broiler and time it for 3-4 minutes. Watch carefully.


Tasty Kitchen Blog: Spicy Citrus Spicy Wings with Cilantro Dripping Sauce. Guest post by Laurie McNamara of Simply Scratch, recipe submitted by TK member Sarah of Life is Still Sweet.

The skin should start to color and begin to crisp up.


Tasty Kitchen Blog: Spicy Citrus Spicy Wings with Cilantro Dripping Sauce. Guest post by Laurie McNamara of Simply Scratch, recipe submitted by TK member Sarah of Life is Still Sweet.

Remove, turn the wings and brush again with the spicy citrus glaze.


Tasty Kitchen Blog: Spicy Citrus Spicy Wings with Cilantro Dripping Sauce. Guest post by Laurie McNamara of Simply Scratch, recipe submitted by TK member Sarah of Life is Still Sweet.

Place back under the broiler for another 3 to 4 minutes and repeat 2 more times on each side.


Tasty Kitchen Blog: Spicy Citrus Spicy Wings with Cilantro Dripping Sauce. Guest post by Laurie McNamara of Simply Scratch, recipe submitted by TK member Sarah of Life is Still Sweet.

Keep going until the skin is golden and brown. Feel free to toss these back in the glaze if you like them “wet,” but I enjoyed them just the way they were: sticky and scrumptious!


Tasty Kitchen Blog: Spicy Citrus Spicy Wings with Cilantro Dripping Sauce. Guest post by Laurie McNamara of Simply Scratch, recipe submitted by TK member Sarah of Life is Still Sweet.

Serve it up with that fabulous cilantro dip and call it a day. I highly recommend making a double batch of the wings. You probably won’t want to share these!


Tasty Kitchen Blog: Spicy Citrus Spicy Wings with Cilantro Dripping Sauce. Guest post by Laurie McNamara of Simply Scratch, recipe submitted by TK member Sarah of Life is Still Sweet.

I made these just before my girls hopped off the bus. They ran in the house and immediately went to town on these wings. They weren’t too spicy for them to enjoy, but every now and again I got a little heat. Thanks to that fantastic dip, it wasn’t too hard to handle.
 
Such an amazing combination of flavors! Thank you Sarah for sharing this delicious wing recipe. They were absolutely delicious! Visit her blog Life Is Still Sweet for more of her amazing creations.


Printable Recipe

Citrus Spicy Wings

See post on tallmisto’s site!
5.00 Mitt(s) 5 Rating(s)5 votes, average: 5.00 out of 55 votes, average: 5.00 out of 55 votes, average: 5.00 out of 55 votes, average: 5.00 out of 55 votes, average: 5.00 out of 5

Prep Time:

Cook Time:

Difficulty: Easy

Servings: 6

6
x

Print Options

Page size Letter 3x5 4x6
Text Size Small Medium Large
Content Include description
Include prep time, etc.
Show image

Description

Slightly sweet, a little spicy, a nice change for your wing enjoyment.

Ingredients

  • 2-½ pounds Chicken Drummets And Wings
  • 1 whole Orange, Zest And Juice
  • ⅓ cups Soy Sauce
  • 2 Tablespoons Fresh Ginger, Grated
  • 1 teaspoon Red Pepper Flakes
  • 1 Tablespoon Honey
  • 2 Tablespoons Rice Wine Vinegar
  • 2 teaspoons Sriracha Sauce
  • 1 Tablespoon Cilantro, Chopped
  • 1 whole Scallion, Chopped

Preparation Instructions

In a large soup pot that has a steamer, place water in the bottom until it hits the steamer basket. Add all the chicken pieces to the steamer and place over high heat and cover with a lid. Bring to a boil, then lower the heat to a gentle simmer to steam the wings. Steam for 15-18 minutes.

While the wings are steaming, add orange zest and juice, soy sauce, ginger, red pepper, honey, rice wine vinegar and Sriracha sauce into a large bowl and stir. Remove the wings from the steamer and place into the large bowl with the sauce and stir to coat.

Heat the oven to broil at around 425ºF and place the rack the second notch down. Now you want to crisp the skin and glaze the sauce over the top. Place the wings evenly on a baking sheet and place under the broiler. After 3-4 minutes, remove from the oven, flip over and brush more sauce over the top. Broil again and continue this process off flipping and brushing on sauce until the skin is crisp. Usually 2 times on each side does the trick.

I like to place all the wings back into the bowl of sauce and coat them before placing them on the serving tray, but this isn’t necessary. Sprinkle with chopped cilantro and scallions to garnish.


Printable Recipe

Cilantro Dipping Sauce

See post on tallmisto’s site!
5.00 Mitt(s) 1 Rating(s)1 vote, average: 5.00 out of 51 vote, average: 5.00 out of 51 vote, average: 5.00 out of 51 vote, average: 5.00 out of 51 vote, average: 5.00 out of 5

Prep Time:

Cook Time:

Difficulty: Easy

Servings: 10

10
x

Print Options

Page size Letter 3x5 4x6
Text Size Small Medium Large
Content Include description
Include prep time, etc.
Show image

Description

This sauce is perfect for dipping citrus wings or any other spicy chicken.

Ingredients

  • ½ cups Plain Yogurt
  • ½ cups Mayonnaise
  • ¼ cups Cilantro
  • 2 whole Scallions, Chopped
  • ½ teaspoons Garlic Powder
  • Salt And Pepper

Preparation Instructions

To make the dip, place all ingredients in a small bowl and stir. Taste for salt and pepper and add as desired.


_______________________________________

Laurie is the force behind Simply Scratch, a blog that documents her efforts to find and create recipes that are made simply from scratch. (We think it’s sweet that her mother-in-law helped her set up her blog and get started.) We love her recipes; they’re not just tried and true, but they look gorgeous as well. Check out her blog and you’ll become a fan too.


Profile photo of Laurie - Simply Scratch

Nutella Cheesecake Pumpkin Muffins

Posted by in Baking, Step-by-Step Recipes

Tasty Kitchen Blog: Nutella Cheesecake Pumpkin Muffins. Guest post by Laurie McNamara of Simply Scratch, recipe submitted by TK member Amy of My Name is Snickerdoodle.

 
I distinctly remember the moment I fell in love with Nutella. I was sold by its creamy texture, distinct hazelnut flavor, and how well it tasted spread over a banana, then sprinkled with coconut. Ever since that very moment, I knew if there was one thing I needed to always have in my pantry, that would be Nutella. It quickly became a pantry staple as would peanut butter or flour for that matter. Whatever you decide to do with it, you’re sure to love it. I’m pretty sure there is simply no way to ruin any recipe that has Nutella in it.
 
So when I came upon this recipe for Nutella Cheesecake Pumpkin Muffins from TK member (Amy) mynameissnickerdoodle, I instantly knew this recipe was going to be a keeper. I could hardly wait for the cold weather to really set in so I could curl up with a cup of coffee and a plate of these muffins. I mean, the thought of Nutella cheesecake alone sounds heavenly, but Nutella cheesecake in the center of a pumpkin muffin? Only one word comes to mind: magical. And that’s exactly what they are.


Tasty Kitchen Blog: Nutella Cheesecake Pumpkin Muffins. Guest post by Laurie McNamara of Simply Scratch, recipe submitted by TK member Amy of My Name is Snickerdoodle.

To make these delicious muffins, you’ll need eggs, sugar, pumpkin puree, oil, flour, cinnamon, nutmeg, baking soda, salt, Nutella and cream cheese. I didn’t have any vegetable oil so I just substituted 1 cup extra light olive oil and a half cup of unsweetened applesauce and it worked like a charm.


Tasty Kitchen Blog: Nutella Cheesecake Pumpkin Muffins. Guest post by Laurie McNamara of Simply Scratch, recipe submitted by TK member Amy of My Name is Snickerdoodle.

Preheat your oven to 375ºF and line a muffin tin with some baking liners. These days you can find liners in all sorts of different colors or designs, which can really add personality and dress up any cupcake or muffin.


Tasty Kitchen Blog: Nutella Cheesecake Pumpkin Muffins. Guest post by Laurie McNamara of Simply Scratch, recipe submitted by TK member Amy of My Name is Snickerdoodle.

Now let’s get going with the pumpkin batter. In a bowl, add the all-purpose flour, baking soda, salt, cinnamon and nutmeg. It should start to smell good already!


Tasty Kitchen Blog: Nutella Cheesecake Pumpkin Muffins. Guest post by Laurie McNamara of Simply Scratch, recipe submitted by TK member Amy of My Name is Snickerdoodle.

Whisk the dry ingredients together and set aside for just a moment.


Tasty Kitchen Blog: Nutella Cheesecake Pumpkin Muffins. Guest post by Laurie McNamara of Simply Scratch, recipe submitted by TK member Amy of My Name is Snickerdoodle.

In a large bowl, crack four eggs.


Tasty Kitchen Blog: Nutella Cheesecake Pumpkin Muffins. Guest post by Laurie McNamara of Simply Scratch, recipe submitted by TK member Amy of My Name is Snickerdoodle.

Gently whisk the eggs until they are slightly beaten.


Tasty Kitchen Blog: Nutella Cheesecake Pumpkin Muffins. Guest post by Laurie McNamara of Simply Scratch, recipe submitted by TK member Amy of My Name is Snickerdoodle.

Next add in the sugar, applesauce and pumpkin puree.


Tasty Kitchen Blog: Nutella Cheesecake Pumpkin Muffins. Guest post by Laurie McNamara of Simply Scratch, recipe submitted by TK member Amy of My Name is Snickerdoodle.

Lastly, add in the oil.


Tasty Kitchen Blog: Nutella Cheesecake Pumpkin Muffins. Guest post by Laurie McNamara of Simply Scratch, recipe submitted by TK member Amy of My Name is Snickerdoodle.

Stir until all the wet ingredients are thoroughly combined.


Tasty Kitchen Blog: Nutella Cheesecake Pumpkin Muffins. Guest post by Laurie McNamara of Simply Scratch, recipe submitted by TK member Amy of My Name is Snickerdoodle.

Working in batches, add a little of the flour mixture into the pumpkin batter.


Tasty Kitchen Blog: Nutella Cheesecake Pumpkin Muffins. Guest post by Laurie McNamara of Simply Scratch, recipe submitted by TK member Amy of My Name is Snickerdoodle.

Stir until all ingredients are incorporated.


Tasty Kitchen Blog: Nutella Cheesecake Pumpkin Muffins. Guest post by Laurie McNamara of Simply Scratch, recipe submitted by TK member Amy of My Name is Snickerdoodle.

The batter should be smooth yet slightly thick. My rule of thumb: if the batter tastes amazing, so will the final baked product. And let me just tell you, the batter is absolutely fantastic! Now, if you can help it, set it aside and get started with the cheesecake filling.


Tasty Kitchen Blog: Nutella Cheesecake Pumpkin Muffins. Guest post by Laurie McNamara of Simply Scratch, recipe submitted by TK member Amy of My Name is Snickerdoodle.

Measure out a half cup of Nutella.


Tasty Kitchen Blog: Nutella Cheesecake Pumpkin Muffins. Guest post by Laurie McNamara of Simply Scratch, recipe submitted by TK member Amy of My Name is Snickerdoodle.>

Add the Nutella, along with the 8 ounces of softened cream cheese and one whole egg into a medium bowl.


Tasty Kitchen Blog: Nutella Cheesecake Pumpkin Muffins. Guest post by Laurie McNamara of Simply Scratch, recipe submitted by TK member Amy of My Name is Snickerdoodle.

Using a hand mixer, blend until smooth.


Tasty Kitchen Blog: Nutella Cheesecake Pumpkin Muffins. Guest post by Laurie McNamara of Simply Scratch, recipe submitted by TK member Amy of My Name is Snickerdoodle.

Now comes the fun part! To the lined muffin tin, add two level tablespoons of the pumpkin batter.


Tasty Kitchen Blog: Nutella Cheesecake Pumpkin Muffins. Guest post by Laurie McNamara of Simply Scratch, recipe submitted by TK member Amy of My Name is Snickerdoodle.

Next place a tablespoon of the Nutella cheesecake mixture on top of that.


Tasty Kitchen Blog: Nutella Cheesecake Pumpkin Muffins. Guest post by Laurie McNamara of Simply Scratch, recipe submitted by TK member Amy of My Name is Snickerdoodle.

Lastly, top the Nutella mixture with two more tablespoons of the pumpkin batter. Place in your preheated oven for 18-20 minutes. See? So easy!


Tasty Kitchen Blog: Nutella Cheesecake Pumpkin Muffins. Guest post by Laurie McNamara of Simply Scratch, recipe submitted by TK member Amy of My Name is Snickerdoodle.

My muffins baked up perfectly in 18 minutes. They were light and fluffy and my home filled up with the smell of pumpkin. Here are some words of advice: let them cool slightly before removing from the pan and attempting to eat.


Tasty Kitchen Blog: Nutella Cheesecake Pumpkin Muffins. Guest post by Laurie McNamara of Simply Scratch, recipe submitted by TK member Amy of My Name is Snickerdoodle.

What I really liked about this recipe, besides the whole entire thing, was that the measurements are spot on. I didn’t have any leftover batter or cheesecake filling. And if you keep the muffins in an airtight container, they can last for up to a week. (If that’s even possible.)


Tasty Kitchen Blog: Nutella Cheesecake Pumpkin Muffins. Guest post by Laurie McNamara of Simply Scratch, recipe submitted by TK member Amy of My Name is Snickerdoodle.

It was pure genius of Amy to match this fluffy pumpkin cake with the silkiness of Nutella cheesecake. These muffins pack easily and are great afternoon snack or as an evening dessert. And as a Season Two Dessert Host for Real Women of Philadelphia, Amy is no stranger to creating fun and delicious treats. It’s obvious she knows her way around a kitchen. Just check out Amy’s Tasty Kitchen recipe box or stop by her fun and happy website My Name is Snickerdoodle and you’ll see just why. Thank you, Amy, for sharing such a scrumptious muffin recipe with us! This recipe will firmly hold a spot in my recipe box and I can’t wait to bake these again for the holidays.

Note: The only change to this recipe I made was to use 1 cup olive oil and a half cup unsweetened apple sauce instead of 1-1/2 cups vegetable oil.


Printable Recipe

Nutella Cheesecake Pumpkin Muffins

See post on mynameissnickerdoodle’s site!
4.60 Mitt(s) 15 Rating(s)15 votes, average: 4.60 out of 515 votes, average: 4.60 out of 515 votes, average: 4.60 out of 515 votes, average: 4.60 out of 515 votes, average: 4.60 out of 5

Prep Time:

Cook Time:

Difficulty: Easy

Servings: 20

20
x

Print Options

Page size Letter 3x5 4x6
Text Size Small Medium Large
Content Include description
Include prep time, etc.
Show image

Description

Pumpkin muffins just says fall. Adding a little Nutella cheesecake filling to pumpkin muffins just YELLS fall!

Ingredients

  • FOR THE PUMPKIN MUFFINS:
  • 4 whole Large Eggs
  • 1-½ cup Sugar
  • 1 can (15 Oz. Size) Pumpkin Puree
  • 1-½ cup Vegetable Oil
  • 3 cups All-purpose Flour
  • 2 teaspoons Cinnamon
  • 1 teaspoon Nutmeg
  • 2 teaspoons Baking Soda
  • 1 teaspoon Salt
  • FOR THE NUTELLA CHEECAKE FILLING:
  • 8 ounces, weight Cream Cheese, Softened
  • ½ cups Nutella
  • 1 whole Large Egg

Preparation Instructions

Preheat oven to 375°F. In a large bowl, beat eggs slightly. Add in sugar, pumpkin and oil and beat thoroughly. Add in remaining dry ingredients and mix until smooth.

In a small bowl, beat together cream cheese, Nutella and egg until smooth.

Place paper liners in a muffin tin. Place about 2 tablespoons of pumpkin batter into each liner, then 1 tablespoon of Nutella batter, then top with 2 more tablespoons of pumpkin batter. Bake for 18-22 minutes.

These are best served completely cooled. Makes 20 muffins.


_______________________________________

Laurie is the force behind Simply Scratch, a blog that documents her efforts to find and create recipes that are made simply from scratch. (We think it’s sweet that her mother-in-law helped her set up her blog and get started.) We love her recipes; they’re not just tried and true, but they look gorgeous as well. Check out her blog and you’ll become a fan too.


Profile photo of Laurie - Simply Scratch

Strawberry Streusel Bars with White Chocolate Drizzle

Posted by in Baking, Step-by-Step Recipes

Tasty Kitchen Blog: Strawberry White Chocolate Streusel Bars. Guest post by Laurie McNamara of Simply Scratch, recipe submitted by TK member Angela of Recipes from My Mom.

Help us welcome another guest contributor, Laurie of Simply Scratch, who is sharing a wonderfully easy and impressive recipe for Strawberry White Chocolate Streusel Bars from TK member angpritch. It’s a great dessert for your cookout today. Welcome, Laurie and thank you, Angela!

_______________________________________


Strawberries! Beautiful, juicy, red and sweet strawberries! I don’t think there’s a single soul who doesn’t love this delectable fruit. They are possibly the most loved berry of all berries, whether it’s for their bright red color, the distinct aroma or juicy seedy texture … seriously, what’s not to love?

I always get excited when I start seeing them arrive at my local farm stands and supermarkets, because that means spring is here and summer is not too far behind it! Aside from fruit salads, shortcakes and chocolate-covered strawberries, you can use strawberries in anything from sweet and savory jams and salsas to crisp, fresh salads or cold frozen treats. I really haven’t met a strawberry recipe I didn’t fall in love with and devour, including this recipe from TK member angpritch (Angela). I mean, c’mon— strawberries, streusel, and white chocolate, all atop a crispy oatmeal cookie bar. This recipe had me at strawberry, and sold me with the white chocolate drizzle!  


Tasty Kitchen Blog: Strawberry White Chocolate Streusel Bars. Guest post by Laurie McNamara of Simply Scratch, recipe submitted by TK member Angela of Recipes from My Mom.

To make these heavenly bars you will need old-fashioned oats, flour, sugar, brown sugar, baking soda, baking powder, salt, chilled butter, strawberries, strawberry jam, lemon zest, and white chocolate. I was surprised by how much of the ingredients I already had in my pantry!


Tasty Kitchen Blog: Strawberry White Chocolate Streusel Bars. Guest post by Laurie McNamara of Simply Scratch, recipe submitted by TK member Angela of Recipes from My Mom.

In a large bowl add the oats, flour and sugars. Make sure your oats are the old-fashioned kind and NOT quick oats, otherwise the oats will get mushy in the oven and not hold their shape.


Tasty Kitchen Blog: Strawberry White Chocolate Streusel Bars. Guest post by Laurie McNamara of Simply Scratch, recipe submitted by TK member Angela of Recipes from My Mom.

Add the baking soda, baking powder and salt to the bowl.


Tasty Kitchen Blog: Strawberry White Chocolate Streusel Bars. Guest post by Laurie McNamara of Simply Scratch, recipe submitted by TK member Angela of Recipes from My Mom.

Whisk the dry ingredients until combined.


Tasty Kitchen Blog: Strawberry White Chocolate Streusel Bars. Guest post by Laurie McNamara of Simply Scratch, recipe submitted by TK member Angela of Recipes from My Mom.

Cut the chilled butter into pieces and toss them into the bowl as well.


Tasty Kitchen Blog: Strawberry White Chocolate Streusel Bars. Guest post by Laurie McNamara of Simply Scratch, recipe submitted by TK member Angela of Recipes from My Mom.

With a pastry cutter or your fingers, cut the butter into the flour and oat mixture. I used my free hand to scrape down the sides of the bowl to better incorporate all of the dry ingredients with the butter.


Tasty Kitchen Blog: Strawberry White Chocolate Streusel Bars. Guest post by Laurie McNamara of Simply Scratch, recipe submitted by TK member Angela of Recipes from My Mom.

There are a few things that are certain when I’m cutting in butter. First, I will be flinging flour-coated butter crumbles everywhere and making somewhat of a mess. And the moment my arm becomes tired, I will want to throw in the towel because I’m starting to feel I can no longer do it. It’s just at this point that it becomes easier and starts coming together. So hang in there—you’re almost done!


Tasty Kitchen Blog: Strawberry White Chocolate Streusel Bars. Guest post by Laurie McNamara of Simply Scratch, recipe submitted by TK member Angela of Recipes from My Mom.

Stop once the crumbles are small and uniform, wipe your brow. Cutting in butter is no simple task!


Tasty Kitchen Blog: Strawberry White Chocolate Streusel Bars. Guest post by Laurie McNamara of Simply Scratch, recipe submitted by TK member Angela of Recipes from My Mom.

Be sure to reserve a cup of that crumble mixture and set it off to the side. You will need it later in this recipe.


Tasty Kitchen Blog: Strawberry White Chocolate Streusel Bars. Guest post by Laurie McNamara of Simply Scratch, recipe submitted by TK member Angela of Recipes from My Mom.

Pour the remaining crumble into an un-greased 10×15 jelly roll pan.


Tasty Kitchen Blog: Strawberry White Chocolate Streusel Bars. Guest post by Laurie McNamara of Simply Scratch, recipe submitted by TK member Angela of Recipes from My Mom.

Press it down firmly with your fingers to form the crust and then place into a preheated 350ºF oven for 12–13 minutes. You’re not looking for it to brown; you just want it to firm up a little. 


Tasty Kitchen Blog: Strawberry White Chocolate Streusel Bars. Guest post by Laurie McNamara of Simply Scratch, recipe submitted by TK member Angela of Recipes from My Mom.

While the crust is baking, hull and quarter about a pound of strawberries. You’ll need about two heaping cups of quartered strawberries. 


Tasty Kitchen Blog: Strawberry White Chocolate Streusel Bars. Guest post by Laurie McNamara of Simply Scratch, recipe submitted by TK member Angela of Recipes from My Mom.

Then zest your lemon and measure out a teaspoon of the fragrant zest.


Tasty Kitchen Blog: Strawberry White Chocolate Streusel Bars. Guest post by Laurie McNamara of Simply Scratch, recipe submitted by TK member Angela of Recipes from My Mom.

In a small sauce pan, heat a half cup of strawberry jam and the teaspoon of lemon zest over low heat until the jam is warm and spreadable. You could also warm the jam in the microwave for 30 seconds and then stir in the lemon zest, if you want fewer dirty dishes.


Tasty Kitchen Blog: Strawberry White Chocolate Streusel Bars. Guest post by Laurie McNamara of Simply Scratch, recipe submitted by TK member Angela of Recipes from My Mom.

Drizzle and brush with a pastry brush or a rubber spatula to spread the jam all over the warm crust. (Note: The preserves I used were a bit chunkier and I found that I needed a little extra of it to cover my bars, so I added two more heaping tablespoonfuls.)


Tasty Kitchen Blog: Strawberry White Chocolate Streusel Bars. Guest post by Laurie McNamara of Simply Scratch, recipe submitted by TK member Angela of Recipes from My Mom.

Then scatter the strawberries evenly on top of the jam.


Tasty Kitchen Blog: Strawberry White Chocolate Streusel Bars. Guest post by Laurie McNamara of Simply Scratch, recipe submitted by TK member Angela of Recipes from My Mom.

Sprinkle with the reserved cup of the crumb mixture, and then place the pan back into the oven for 20–25 more minutes or until the streusel topping is a light golden brown.


Tasty Kitchen Blog: Strawberry White Chocolate Streusel Bars. Guest post by Laurie McNamara of Simply Scratch, recipe submitted by TK member Angela of Recipes from My Mom.

Once baked, your home should smell amazing, but you’ll have to let the pan cool for one whole agonizing hour.


Tasty Kitchen Blog: Strawberry White Chocolate Streusel Bars. Guest post by Laurie McNamara of Simply Scratch, recipe submitted by TK member Angela of Recipes from My Mom.

Once the strawberry bars are cooled, it’s time to prepare the white chocolate drizzle. Place the white chocolate into a glass bowl and set over a pot of simmering water. Gently stir until completely melted.

Angela’s recipe calls for 3 fluid ounces of white chocolate. I had whit chocolate chip on hand, so I used half a cup of that and added a tablespoon of coconut oil to the chips to thin it out a tad.


Tasty Kitchen Blog: Strawberry White Chocolate Streusel Bars. Guest post by Laurie McNamara of Simply Scratch, recipe submitted by TK member Angela of Recipes from My Mom.

With a spoon, dip into the melted chocolate and drizzle across the tops of the bars. I cut my bars before drizzling, but you could also drizzle before cutting them. Whatever floats your boat!


Tasty Kitchen Blog: Strawberry White Chocolate Streusel Bars. Guest post by Laurie McNamara of Simply Scratch, recipe submitted by TK member Angela of Recipes from My Mom.

While the chocolate cools, maybe go brew some coffee or tea, or pour a tall glass of milk!


Tasty Kitchen Blog: Strawberry White Chocolate Streusel Bars. Guest post by Laurie McNamara of Simply Scratch, recipe submitted by TK member Angela of Recipes from My Mom.

Curl up in your favorite spot to enjoy every delicious morsel.


Tasty Kitchen Blog: Strawberry White Chocolate Streusel Bars. Guest post by Laurie McNamara of Simply Scratch, recipe submitted by TK member Angela of Recipes from My Mom.

 
Thank you Angela for sharing this delicious and extremely fun-to-make recipe! My family and I truly enjoyed every piece right down to the last oatmeal crumble—a definite keeper!

Please be sure to visit Angela over at her blog, Recipes from My Mom, where she honors her mother’s memory with heartwarming stories and delicious mouth-watering recipes.


Printable Recipe

Strawberry White Chocolate Streusel Bars

See post on angpritch’s site!
5.00 Mitt(s) 6 Rating(s)6 votes, average: 5.00 out of 56 votes, average: 5.00 out of 56 votes, average: 5.00 out of 56 votes, average: 5.00 out of 56 votes, average: 5.00 out of 5

Prep Time:

Cook Time:

Difficulty: Easy

Servings: 36

36
x

Print Options

Page size Letter 3x5 4x6
Text Size Small Medium Large
Content Include description
Include prep time, etc.
Show image

Description

If a granola bar and strawberry shortcake had babies!

Ingredients

  • 2 cups Old Fashioned Oats
  • 1-½ cup All-purpose Flour
  • ¾ cups White Sugar
  • ¾ cups Brown Sugar
  • 1 teaspoon Baking Powder
  • ½ teaspoons Baking Soda
  • ½ teaspoons Salt
  • 1 cup Cold Butter, Cut Into Small Pieces
  • 4 ounces, fluid Strawberry Jam
  • 1 teaspoon Lemon Zest
  • 2 cups Strawberries, Chopped Or Sliced
  • 3 ounces, fluid White Chocolate

Preparation Instructions

1. Preheat oven to 350 degrees F. In a large mixing bowl, whisk together the oats, flour, both sugars, baking powder, baking soda and salt.
2. Add the chopped up cold butter and work it into the dry ingredients with your fingers or a pastry blender until the mixture looks like small crumbles. Reserve 1 cup of this mixture.
3. Dump the remaining crumb mixture into an ungreased 15” x 10” pan (jellyroll pan) and press it into an even crust.
4. Bake in 350 degree oven for 12-13 minutes or until it is firm to touch. Do not brown.
5. Remove pan from oven. Warm the jam in the microwave for 30 seconds and then stir in the lemon zest. Drizzle the warm jam over the warm crust. Spread the chopped strawberries over the crust. Sprinkle on the reserved cup of crumb mixture.
6. Return pan to 350 degree F oven and bake for another 20-25 minutes or until the crumbs on top are lightly browned. Then remove it from the oven and let the pan cool for 1 hour.
7. Melt the white chocolate in microwave, following directions on package. Drizzle melted chocolate in thin lines over the streusel top. Cut into bars.


_______________________________________

Laurie is the food blogger behind Simply Scratch, a blog that documents her efforts to find and create recipes that are made simply from scratch. (We think it’s sweet that her mother-in-law helped her set up her blog and get started.) We love her recipes; they’re not just tried and true, but they look gorgeous as well. Check out her blog and you’ll become a fan too.