The Pioneer Woman Tasty Kitchen
Profile photo of georgiapellegrini

Garlicky Scalloped Tomatoes

Posted by in Step-by-Step Recipes

Tasty Kitchen Blog: Garlicky Scalloped Tomatoes. Guest post by Georgia Pellegrini, recipe submitted by TK member Riley of My Daily Morsel.

 
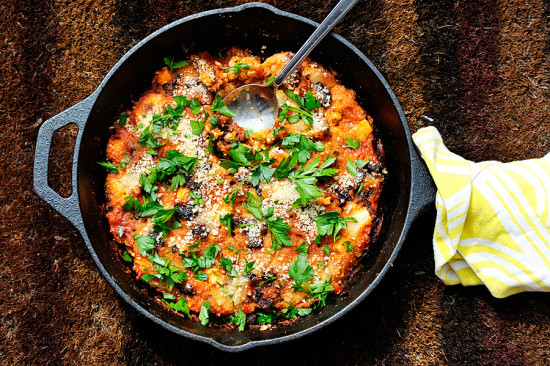
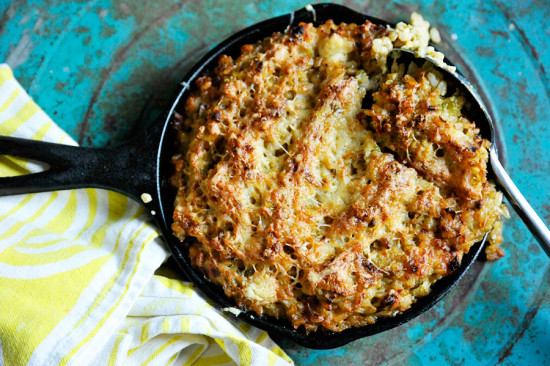
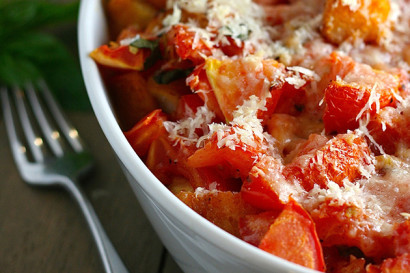
Riley shared these Garlicky Scalloped Tomatoes recently here on Tasty Kitchen and I am SO glad I made them! It is a perfect side to any meal but also delicious on its own by the spoonful. Make this for your next dinner! It’s such a crowd pleaser and you can even make it gluten-free with the right type of bread.


Tasty Kitchen Blog: Garlicky Scalloped Tomatoes. Guest post by Georgia Pellegrini, recipe submitted by TK member Riley of My Daily Morsel.

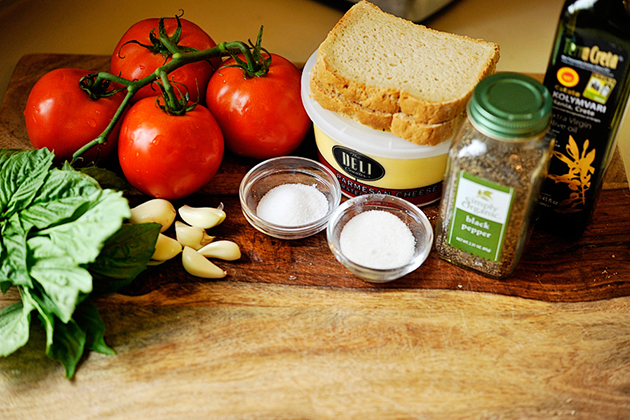
To make this dish you will need: garlic cloves, olive oil, cubed bread, roughly chopped tomatoes, sugar, salt, pepper, basil and Parmesan.


Tasty Kitchen Blog: Garlicky Scalloped Tomatoes. Guest post by Georgia Pellegrini, recipe submitted by TK member Riley of My Daily Morsel.

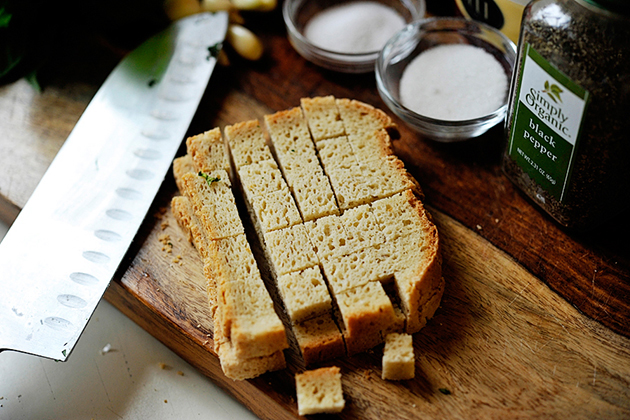
I used a brown rice bread which kept the dish gluten-free, and it was super delicious so that would be one good option if you have any gluten-free friends in your midst.


Tasty Kitchen Blog: Garlicky Scalloped Tomatoes. Guest post by Georgia Pellegrini, recipe submitted by TK member Riley of My Daily Morsel.

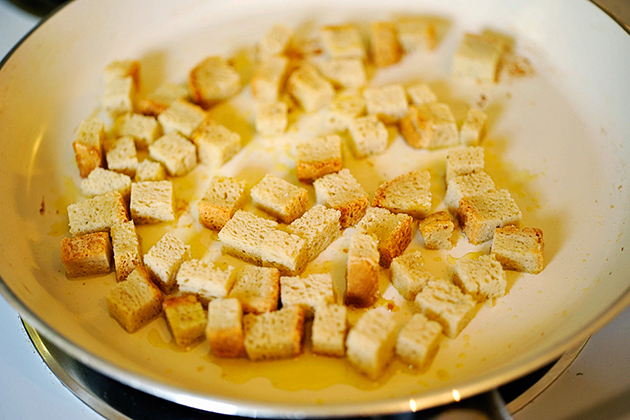
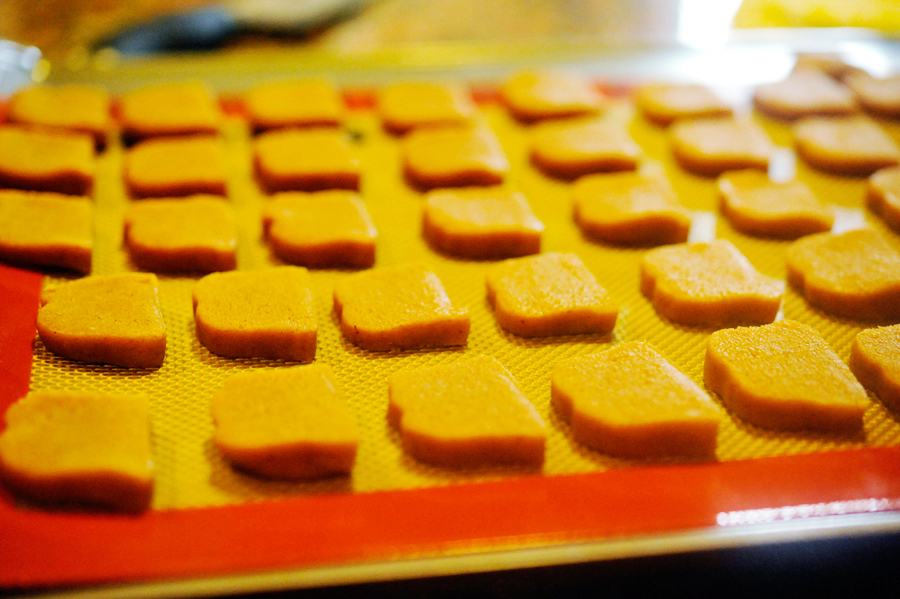
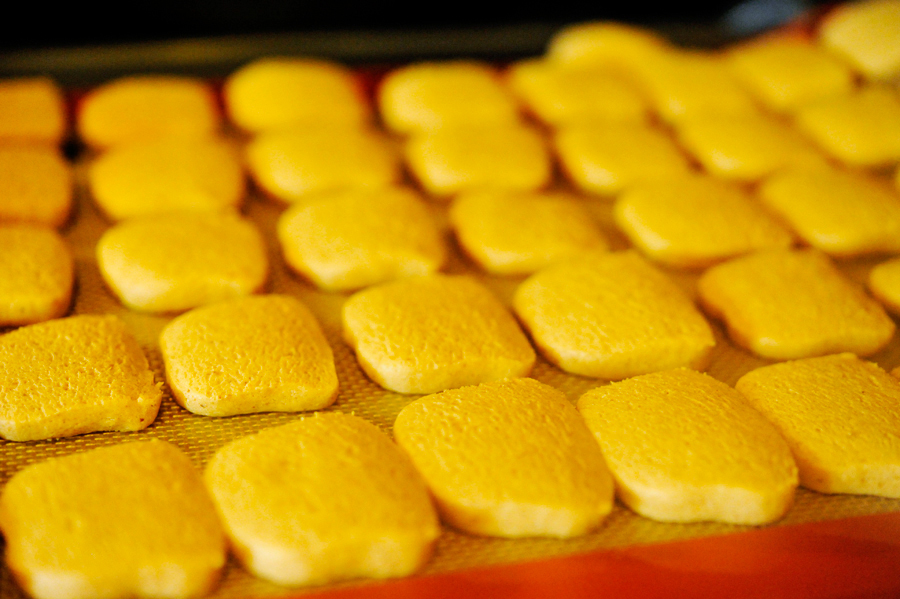
Heat the olive oil in a skillet over medium heat and toss the bread cubes about for 5 minutes …


Tasty Kitchen Blog: Garlicky Scalloped Tomatoes. Guest post by Georgia Pellegrini, recipe submitted by TK member Riley of My Daily Morsel.

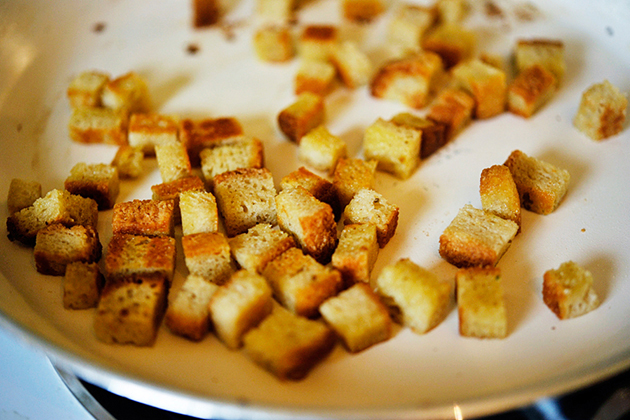
Until they become golden brown.


Tasty Kitchen Blog: Garlicky Scalloped Tomatoes. Guest post by Georgia Pellegrini, recipe submitted by TK member Riley of My Daily Morsel.

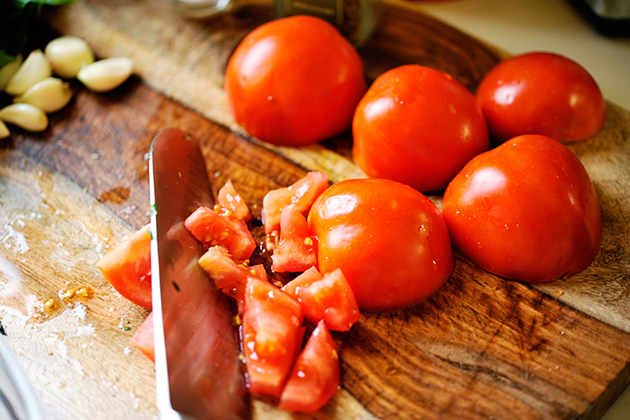
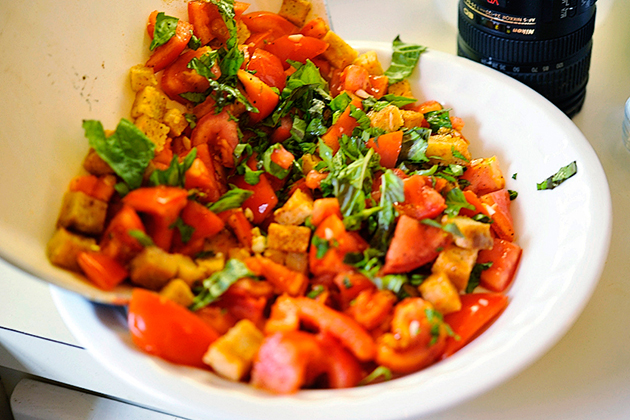
Roughly chop your tomatoes and add them to a bowl.


Tasty Kitchen Blog: Garlicky Scalloped Tomatoes. Guest post by Georgia Pellegrini, recipe submitted by TK member Riley of My Daily Morsel.

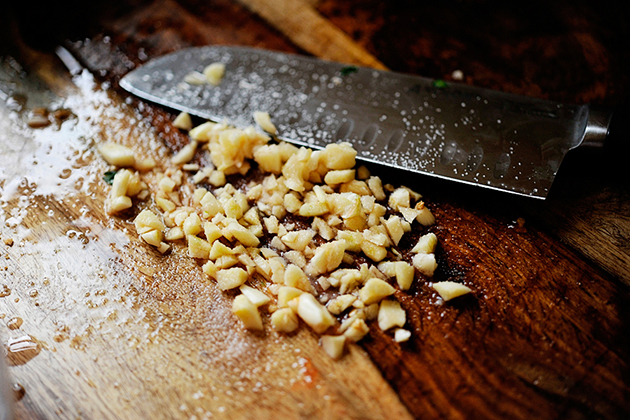
Then chop your garlic finely.


Tasty Kitchen Blog: Garlicky Scalloped Tomatoes. Guest post by Georgia Pellegrini, recipe submitted by TK member Riley of My Daily Morsel.

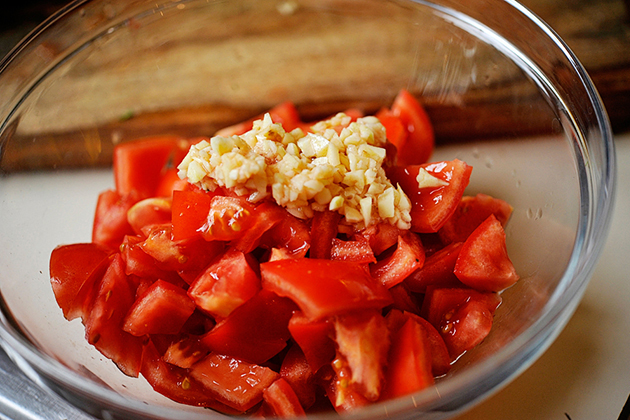
Add it to the bowl of tomatoes …


Tasty Kitchen Blog: Garlicky Scalloped Tomatoes. Guest post by Georgia Pellegrini, recipe submitted by TK member Riley of My Daily Morsel.

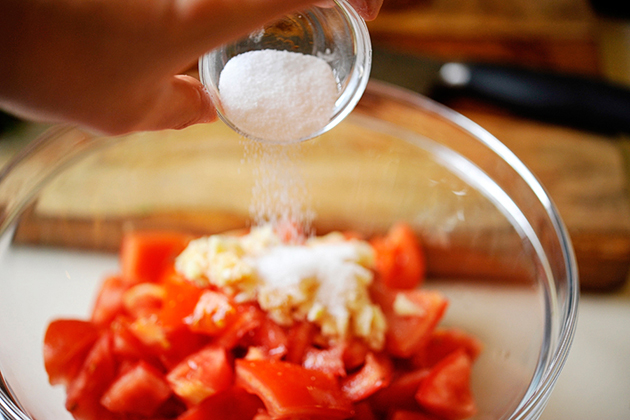
Along with the salt and sugar.


Tasty Kitchen Blog: Garlicky Scalloped Tomatoes. Guest post by Georgia Pellegrini, recipe submitted by TK member Riley of My Daily Morsel.

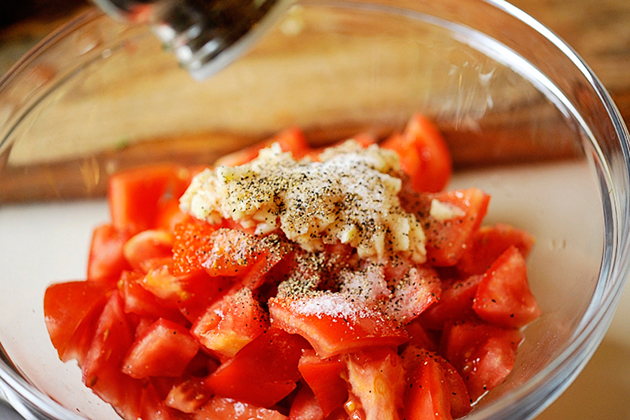
Add some pepper too …


Tasty Kitchen Blog: Garlicky Scalloped Tomatoes. Guest post by Georgia Pellegrini, recipe submitted by TK member Riley of My Daily Morsel.

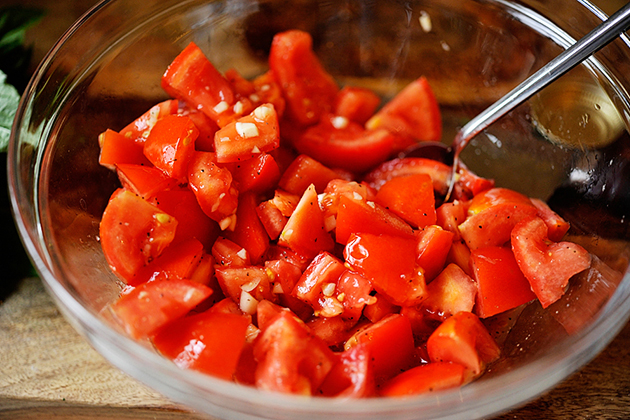
And toss it all together so that the flavors develop.


Tasty Kitchen Blog: Garlicky Scalloped Tomatoes. Guest post by Georgia Pellegrini, recipe submitted by TK member Riley of My Daily Morsel.

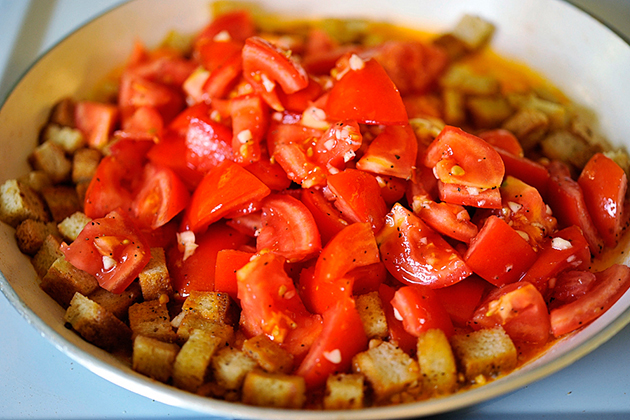
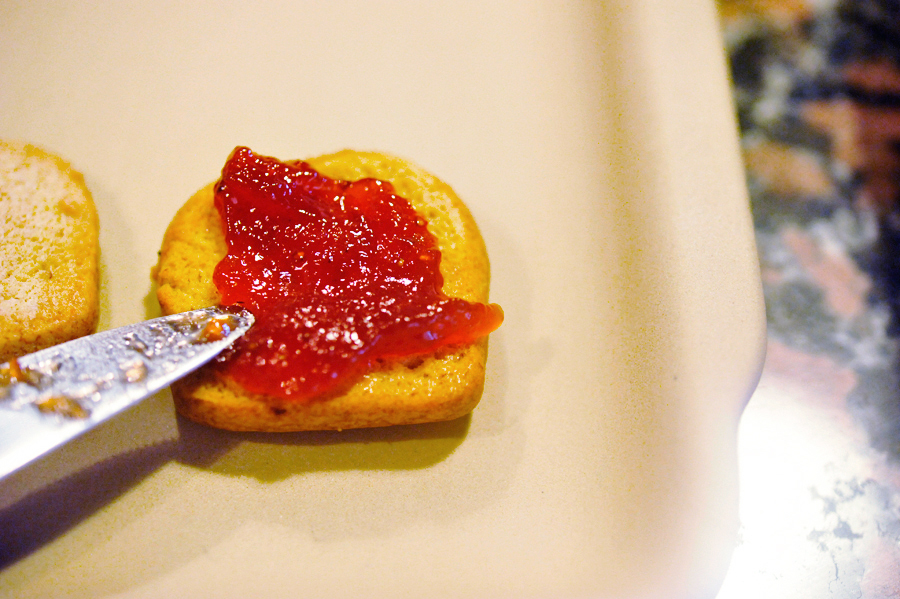
Pour the tomato mixture on top of the croutons and let simmer for 3-4 minutes until the tomatoes break down.


Tasty Kitchen Blog: Garlicky Scalloped Tomatoes. Guest post by Georgia Pellegrini, recipe submitted by TK member Riley of My Daily Morsel.

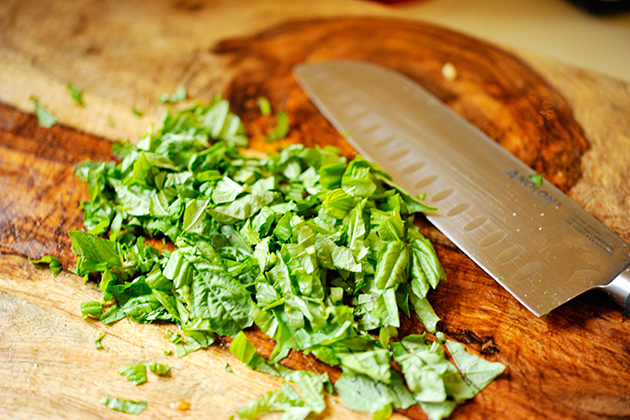
Chop your fresh basil …


Tasty Kitchen Blog: Garlicky Scalloped Tomatoes. Guest post by Georgia Pellegrini, recipe submitted by TK member Riley of My Daily Morsel.

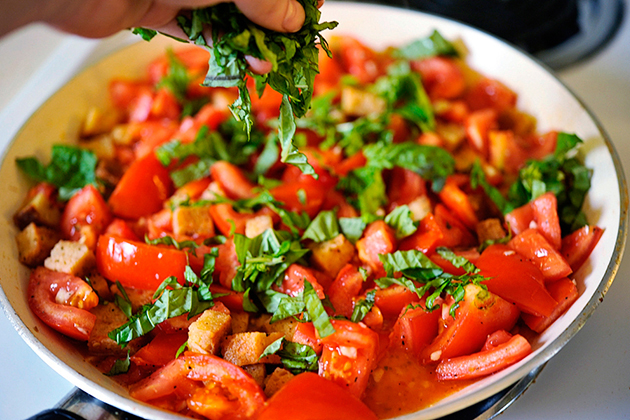
And sprinkle it on top once the tomatoes are ready and the pan is off the heat.


Tasty Kitchen Blog: Garlicky Scalloped Tomatoes. Guest post by Georgia Pellegrini, recipe submitted by TK member Riley of My Daily Morsel.

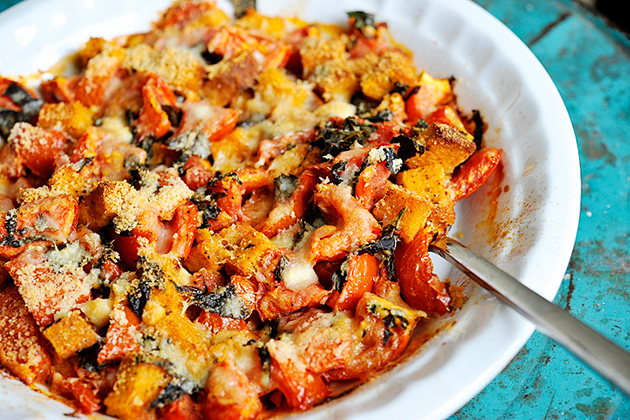
Transfer the mixture to a baking dish.


Tasty Kitchen Blog: Garlicky Scalloped Tomatoes. Guest post by Georgia Pellegrini, recipe submitted by TK member Riley of My Daily Morsel.

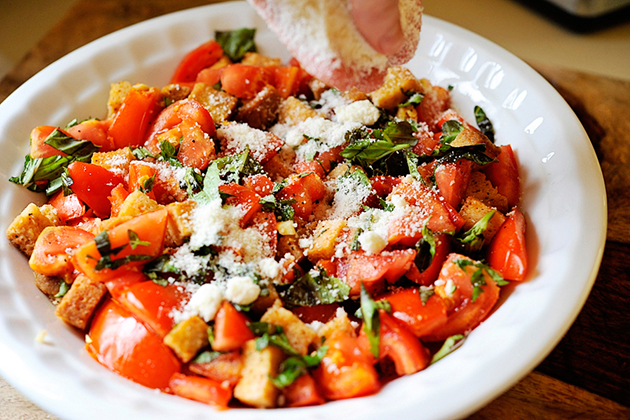
Sprinkle on a good dose of Parmesan …


Tasty Kitchen Blog: Garlicky Scalloped Tomatoes. Guest post by Georgia Pellegrini, recipe submitted by TK member Riley of My Daily Morsel.

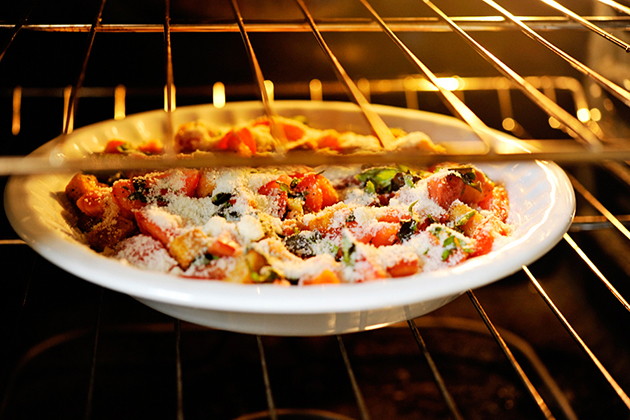
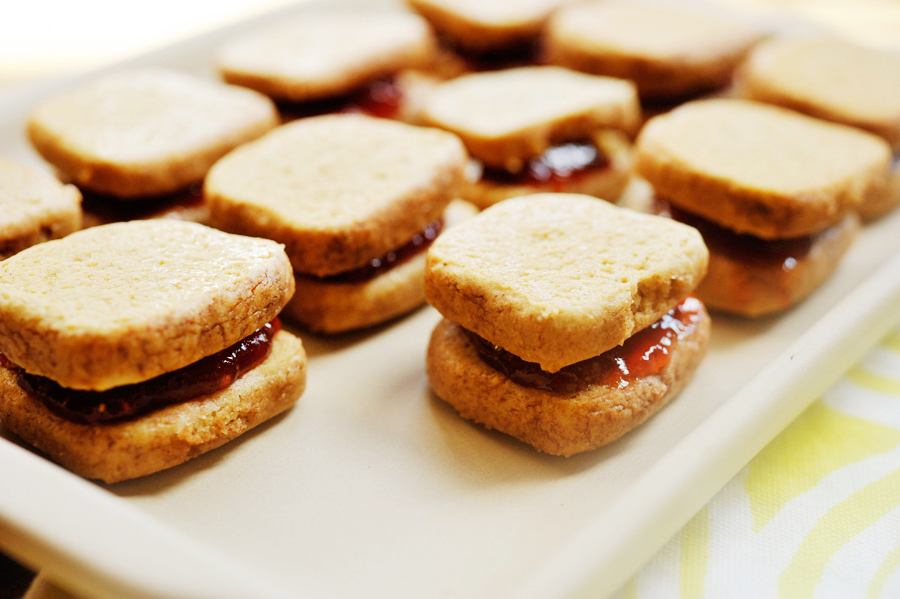
And pop it into a 350ºF oven. Bake for 35 to 40 minutes until the cheese is melted and the top is golden brown and bubbling.


Tasty Kitchen Blog: Garlicky Scalloped Tomatoes. Guest post by Georgia Pellegrini, recipe submitted by TK member Riley of My Daily Morsel.

Your house will smell amazing! Which makes it a particularly great dish to make when you have company coming over. Thank you to Riley for sharing this with us! Visit her website My Daily Morsel for other delicious treats.


Printable Recipe

Garlicky Scalloped Tomatoes

See post on Riley - My Daily Morsel’s site!
5.00 Mitt(s) 1 Rating(s)1 vote, average: 5.00 out of 51 vote, average: 5.00 out of 51 vote, average: 5.00 out of 51 vote, average: 5.00 out of 51 vote, average: 5.00 out of 5

Prep Time:

Cook Time:

Difficulty: Easy

Servings: 6

6
x

Print Options

Page size Letter 3x5 4x6
Text Size Small Medium Large
Content Include description
Include prep time, etc.
Show image

Description

Scalloped plum tomatoes baked with crushed garlic, fresh basil and Parmesan cheese.

Ingredients

  • 8 cloves Garlic, Peeled
  • 2 Tablespoons Olive Oil
  • 2 cups Cubed French Bread
  • 5-½ pounds Plum Tomatoes, Roughly Chopped
  • 2 Tablespoons Sugar
  • 2 teaspoons Kosher Salt
  • 1 teaspoon Freshly Ground Black Pepper
  • ½ cups Julienned Basil Leaves
  • 1 cup Grated Parmesan Cheese

Preparation Instructions

1. Preheat the oven to 350°F. Place the garlic cloves on a cutting board and mash the garlic with the side of the knife until it forms a smooth paste.

2. Heat the olive oil in a large skillet over medium heat. Add the bread cubes and cook for about 5 minutes, tossing often, until the bread is golden brown.

3. Meanwhile, stir together the tomatoes, sugar, salt, pepper, and garlic paste in a large bowl to combine. Add the tomato mixture into the skillet and cook for another 3 to 4 minutes, until the tomatoes begin to break down. Remove from the heat and stir in the basil.

4. Pour the tomato mixture into a large shallow baking dish (I used a large oval baker but a 9×13 dish should work as well) and sprinkle the cheese evenly over the top. Bake for 35 to 40 minutes, until the cheese is melted and golden brown and the tomatoes are bubbling.

Recipe adapted from Barefoot Contessa: Back to Basics.


_______________________________________

There’s so much to say about Georgia, we don’t know where to start. Leaving Wall Street for the French Culinary Institute, followed by a stint at the Gramercy Tavern and La Chassagnette in France, her passion for food and food traditions are evident and inspiring. Visit her site at Georgia Pellegrini, where you’ll find more recipes, photos, learn all about her wonderful books Girl Hunter and Food Heroes, and enjoy her latest adventures.


Profile photo of georgiapellegrini

Roasted Pepper Meatloaf

Posted by in Step-by-Step Recipes

Tasty Kitchen Blog: Roasted Red Pepper Meatloaf. Guest post by Georgia Pellegrini, recipe submitted by TK member Caressa of Cuddles, Crafts and Cupcakes.

 
I have a thing for meatloaf. My grandmother made it so well that it has always held a special place in my heart. I was so intrigued by the idea of using a meatloaf recipe to stuff into peppers, so I had to try this recipe for Roasted Red Pepper Meatloaf from Tasty Kitchen member Caressa immediately. I’m so glad I did.


Tasty Kitchen Blog: Roasted Red Pepper Meatloaf. Guest post by Georgia Pellegrini, recipe submitted by TK member Caressa of Cuddles, Crafts and Cupcakes.

To make it you will need: ground beef, milk, egg, bread crumbs, Worcestershire sauce, diced onion, minced garlic, salt, mustard powder, pepper, large red peppers (except I used green), ketchup, brown sugar, and the optional slices of bread which I didn’t use but you could if you wanted something crusty to soak up the meatloaf juice. (Caressa highly recommends it.)


Tasty Kitchen Blog: Roasted Red Pepper Meatloaf. Guest post by Georgia Pellegrini, recipe submitted by TK member Caressa of Cuddles, Crafts and Cupcakes.

Begin by combining the milk and ground beef in a large bowl.


Tasty Kitchen Blog: Roasted Red Pepper Meatloaf. Guest post by Georgia Pellegrini, recipe submitted by TK member Caressa of Cuddles, Crafts and Cupcakes.

Add the egg and bread crumbs …


Tasty Kitchen Blog: Roasted Red Pepper Meatloaf. Guest post by Georgia Pellegrini, recipe submitted by TK member Caressa of Cuddles, Crafts and Cupcakes.

Along with the Worcestershire sauce …


Tasty Kitchen Blog: Roasted Red Pepper Meatloaf. Guest post by Georgia Pellegrini, recipe submitted by TK member Caressa of Cuddles, Crafts and Cupcakes.

Onions and garlic …


Tasty Kitchen Blog: Roasted Red Pepper Meatloaf. Guest post by Georgia Pellegrini, recipe submitted by TK member Caressa of Cuddles, Crafts and Cupcakes.

Mustard powder and pepper.


Tasty Kitchen Blog: Roasted Red Pepper Meatloaf. Guest post by Georgia Pellegrini, recipe submitted by TK member Caressa of Cuddles, Crafts and Cupcakes.

Mix it all together with your hands until it is well combined.


Tasty Kitchen Blog: Roasted Red Pepper Meatloaf. Guest post by Georgia Pellegrini, recipe submitted by TK member Caressa of Cuddles, Crafts and Cupcakes.

Prepare your peppers by cutting off the tops and removing any seeds …


Tasty Kitchen Blog: Roasted Red Pepper Meatloaf. Guest post by Georgia Pellegrini, recipe submitted by TK member Caressa of Cuddles, Crafts and Cupcakes.

Including what’s on the top.


Tasty Kitchen Blog: Roasted Red Pepper Meatloaf. Guest post by Georgia Pellegrini, recipe submitted by TK member Caressa of Cuddles, Crafts and Cupcakes.

Like so.


Tasty Kitchen Blog: Roasted Red Pepper Meatloaf. Guest post by Georgia Pellegrini, recipe submitted by TK member Caressa of Cuddles, Crafts and Cupcakes.

Fill each pepper with the meat mixture so that it is well packed in there.


Tasty Kitchen Blog: Roasted Red Pepper Meatloaf. Guest post by Georgia Pellegrini, recipe submitted by TK member Caressa of Cuddles, Crafts and Cupcakes.

Make a glaze for the top in a small bowl by squirting in a bit of ketchup …


Tasty Kitchen Blog: Roasted Red Pepper Meatloaf. Guest post by Georgia Pellegrini, recipe submitted by TK member Caressa of Cuddles, Crafts and Cupcakes.

Along with brown sugar …


Tasty Kitchen Blog: Roasted Red Pepper Meatloaf. Guest post by Georgia Pellegrini, recipe submitted by TK member Caressa of Cuddles, Crafts and Cupcakes.

And giving it a stir.


Tasty Kitchen Blog: Roasted Red Pepper Meatloaf. Guest post by Georgia Pellegrini, recipe submitted by TK member Caressa of Cuddles, Crafts and Cupcakes.

Add it to the top of the peppers. Be generous, it’s delicious.


Tasty Kitchen Blog: Roasted Red Pepper Meatloaf. Guest post by Georgia Pellegrini, recipe submitted by TK member Caressa of Cuddles, Crafts and Cupcakes.

At the pepper tops and pop them all into a 350ºF oven. Bake for 35-40 minutes and let cool for 10 minutes before serving.


Tasty Kitchen Blog: Roasted Red Pepper Meatloaf. Guest post by Georgia Pellegrini, recipe submitted by TK member Caressa of Cuddles, Crafts and Cupcakes.

These are individually portioned meatloaves in beautiful packages! You’ll love them. Thank you Caressa for sharing this treat with us. It’s in my new meatloaf repertoire for sure. Check out her cute blog, Cuddles, Crafts & Cupcakes, where you can find more of her kid-friendly recipes!


Printable Recipe

Roasted Red Pepper Meatloaf

See post on iamcaressa’s site!
5.00 Mitt(s) 2 Rating(s)2 votes, average: 5.00 out of 52 votes, average: 5.00 out of 52 votes, average: 5.00 out of 52 votes, average: 5.00 out of 52 votes, average: 5.00 out of 5

Prep Time:

Cook Time:

Difficulty: Easy

Servings: 8

8
x

Print Options

Page size Letter 3x5 4x6
Text Size Small Medium Large
Content Include description
Include prep time, etc.
Show image

Description

Oh man. Can I just tell you how amazing this meal is? How great it smells? How wonderful it tastes? I love this dish.

Ingredients

  • 1 pound Ground Beef
  • ½ cups Milk
  • 1 whole Egg
  • ¾ cups Panko Bread Crumbs
  • 1 Tablespoon Worcestershire Sauce
  • ½ cups Finely Diced Onions
  • 2 cloves Garlic, Minced
  • ½ teaspoons Salt
  • ¾ teaspoons Dried Ground Mustard
  • ½ teaspoons Black Pepper
  • 3 whole Large Red Peppers, Cut Into 1.5" Rounds
  • 1 cup Ketchup Mixed
  • 1 Tablespoon Brown Sugar
  • 8 slices Bread (optional But Highly Recommended)

Preparation Instructions

Preheat oven to 350ºF.

Mix the beef, milk, egg, bread crumbs, Worcestershire sauce, onions, garlic, mustard, and black pepper with your hands in a bowl. Divide the mixture into eighths and fill into the pepper rounds. Make sure you smoosh (yes, smoosh) them down to completely fill them.

Mix the ketchup and the brown sugar. Top each pepper round with the ketchup mixture and place on top of a slice of bread.

Set each bread/pepper on top of a baking sheet and bake for 35-40 minutes or until a meat thermometer reads 160ºF. Cool for 10 minutes, serve and sigh with happiness.

I have to say, you can totally omit the bread, but it gets so fantastically toasty and crunchy and becomes the perfect way to enjoy this meatloaf.


_______________________________________

There’s so much to say about Georgia, we don’t know where to start. Leaving Wall Street for the French Culinary Institute, followed by a stint at the Gramercy Tavern and La Chassagnette in France, her passion for food and food traditions are evident and inspiring. Visit her site at Georgia Pellegrini, where you’ll find more recipes, photos, learn all about her wonderful books Girl Hunter and Food Heroes, and enjoy her latest adventures.


Profile photo of georgiapellegrini

Buffalo Chicken Flat Bread Pizzas

Posted by in Step-by-Step Recipes

Tasty Kitchen Blog: Buffalo Chicken Flat Bread Pizzas. Guest post by Georgia Pellegrini, recipe submitted by TK member Laurie of Simply Scratch.

 
I have a thing for Frank’s Red Hot sauce, so when I saw this Buffalo Chicken Flatbread Pizza from TK member (and fellow TK Blog contributor) Laurie, I knew this was a recipe for me. The combination of roasted chicken and salty tangy blue cheese along with this special sauce was heavenly. You really want to try this one! Especially if you have leftover roasted chicken or any other meat on hand.


Tasty Kitchen Blog: Buffalo Chicken Flat Bread Pizzas. Guest post by Georgia Pellegrini, recipe submitted by TK member Laurie of Simply Scratch.

To make it you will need: garlic naan, green onion, roasted chicken, butter, cayenne, Frank’s Red Hot, blue cheese and pepper jack cheese.


Tasty Kitchen Blog: Buffalo Chicken Flat Bread Pizzas. Guest post by Georgia Pellegrini, recipe submitted by TK member Laurie of Simply Scratch.

In a small saucepan over low heat, combine the Frank’s, butter, cayenne, salt and pepper. Whisk until combined and slightly bubbling and remove from the heat.


Tasty Kitchen Blog: Buffalo Chicken Flat Bread Pizzas. Guest post by Georgia Pellegrini, recipe submitted by TK member Laurie of Simply Scratch.

Meanwhile, shred your cheese!


Tasty Kitchen Blog: Buffalo Chicken Flat Bread Pizzas. Guest post by Georgia Pellegrini, recipe submitted by TK member Laurie of Simply Scratch.

And dice your green onion.


Tasty Kitchen Blog: Buffalo Chicken Flat Bread Pizzas. Guest post by Georgia Pellegrini, recipe submitted by TK member Laurie of Simply Scratch.

Preheat the oven to 425ºF and lay the naan on a baking sheet covered in foil or sprayed with cooking spray.


Tasty Kitchen Blog: Buffalo Chicken Flat Bread Pizzas. Guest post by Georgia Pellegrini, recipe submitted by TK member Laurie of Simply Scratch.

Spoon the Buffalo sauce all over the naan …


Tasty Kitchen Blog: Buffalo Chicken Flat Bread Pizzas. Guest post by Georgia Pellegrini, recipe submitted by TK member Laurie of Simply Scratch.

Pile on the roasted chicken …


Tasty Kitchen Blog: Buffalo Chicken Flat Bread Pizzas. Guest post by Georgia Pellegrini, recipe submitted by TK member Laurie of Simply Scratch.

Then the blue cheese and pepper jack. Pop it in the oven for 10-12 minutes, until the cheese is melted and the naan is browned and crispy.


Tasty Kitchen Blog: Buffalo Chicken Flat Bread Pizzas. Guest post by Georgia Pellegrini, recipe submitted by TK member Laurie of Simply Scratch.

Top it with green onions and slice it into pieces. Small sizes make it a great appetizer!


Tasty Kitchen Blog: Buffalo Chicken Flat Bread Pizzas. Guest post by Georgia Pellegrini, recipe submitted by TK member Laurie of Simply Scratch.

These delicious bites will not last; the salt and tang and crunch are oh-so-addictive. Thank you Laurie for another winner. Visit her website Simply Scratch for more delicious treats!


Printable Recipe

Buffalo Chicken Flat Bread Pizzas

See post on Laurie - Simply Scratch’s site!
4.50 Mitt(s) 2 Rating(s)2 votes, average: 4.50 out of 52 votes, average: 4.50 out of 52 votes, average: 4.50 out of 52 votes, average: 4.50 out of 52 votes, average: 4.50 out of 5

Prep Time:

Cook Time:

Difficulty: Easy

Servings: 2

2
x

Print Options

Page size Letter 3x5 4x6
Text Size Small Medium Large
Content Include description
Include prep time, etc.
Show image

Description

All things Buffalo, in pizza form.

Ingredients

  • 1 cup Frank's Red Hot Sauce
  • 4 Tablespoons Unsalted Butter
  • ½ teaspoons Cayenne Pepper, More Or Less To Taste
  • Kosher Salt And Black Pepper To Taste
  • 2 whole Garlic-flavored Naan
  • 2 cups Cooked And Shredded Chicken
  • 1 cup Grated Farmers Or Monterey Jack Cheese
  • 2 Tablespoons Blue Cheese, Crumbled
  • 2 whole Green Onions, Sliced And Roughly Chopped

Preparation Instructions

In a small saucepan over low heat combine the Frank’s hot sauce, butter, cayenne, salt and pepper. Whisk until combined then remove from heat.

Preheat your oven to 425 F and lightly spray a rimmed aluminum baking sheet with cooking spray.

Place the two naan on the sheet pan and then spoon the desired amount of Buffalo sauce onto both, spreading to cover most of the naan but leaving an uncovered space around the edge. Then top each with shredded cooked chicken, shredded farmers or monterey jack cheese and then sprinkle with the crumbled blue cheese. Drizzle a little bit more of the Buffalo sauce over the top and save the rest for a different recipe.

Bake in the oven for 10-12 minutes or until the naan is crispy and the cheese is melted and slightly golden brown in spots.

Remove it from the oven, let the pizzas cool before slicing and then top with sliced green onions.


_______________________________________

There’s so much to say about Georgia, we don’t know where to start. Leaving Wall Street for the French Culinary Institute, followed by a stint at the Gramercy Tavern and La Chassagnette in France, her passion for food and food traditions are evident and inspiring. Visit her site at Georgia Pellegrini, where you’ll find more recipes, photos, learn all about her wonderful books Girl Hunter and Food Heroes, and enjoy her latest adventures.


Profile photo of georgiapellegrini

PB&J Sandwich Cookies

Posted by in Baking, Step-by-Step Recipes

Tasty Kitchen Blog: Peanut Butter and Jelly Sandwich Cookies. Guest post by Georgia Pellegrini, recipe submitted by TK member Erica of Sweet Tooth.

 
I’m not much of a baker but these Peanut Butter and Jelly Sandwich Cookies made me smile when I saw them posted here by Erica.

I’ve seen a similar recipe posted in an Australian blog Raspberri Cupcakes that uses sugar cookie dough and peanut butter and jelly sandwiched in between; Erica’s recipe incorporates the peanut butter into the dough, making one delicious peanut butter sandwich cookie.

Peanut butter and jelly sandwich cookies are such a playful sweet treat to serve. They are delicious and, best of all, they are easy to make.


Tasty Kitchen Blog: Peanut Butter and Jelly Sandwich Cookies. Guest post by Georgia Pellegrini, recipe submitted by TK member Erica of Sweet Tooth.

You will need: peanut butter, granulated sugar, light brown sugar, an egg, milk, vanilla extract, flour, baking powder, baking soda, vodka (or some alcohol), brown food coloring (you can mix red, green, and yellow), and your favorite jelly.


Tasty Kitchen Blog: Peanut Butter and Jelly Sandwich Cookies. Guest post by Georgia Pellegrini, recipe submitted by TK member Erica of Sweet Tooth.

In an electric mixer, add the peanut butter.


Tasty Kitchen Blog: Peanut Butter and Jelly Sandwich Cookies. Guest post by Georgia Pellegrini, recipe submitted by TK member Erica of Sweet Tooth.

Next add the white sugar …


Tasty Kitchen Blog: Peanut Butter and Jelly Sandwich Cookies. Guest post by Georgia Pellegrini, recipe submitted by TK member Erica of Sweet Tooth.

Then the brown sugar.


Tasty Kitchen Blog: Peanut Butter and Jelly Sandwich Cookies. Guest post by Georgia Pellegrini, recipe submitted by TK member Erica of Sweet Tooth.

Then slowly add a combination of the milk and vanilla, along with the egg.


Tasty Kitchen Blog: Peanut Butter and Jelly Sandwich Cookies. Guest post by Georgia Pellegrini, recipe submitted by TK member Erica of Sweet Tooth.

While the wet ingredients mix together, combine your dry ingredients in a separate bowl: the flour, baking soda, and baking powder.


Tasty Kitchen Blog: Peanut Butter and Jelly Sandwich Cookies. Guest post by Georgia Pellegrini, recipe submitted by TK member Erica of Sweet Tooth.

Slowly add it to the mixer as it blends with the wet ingredients. Use a spatula to scrape the sides so that it mixes evenly until you have a uniform cookie dough.


Tasty Kitchen Blog: Peanut Butter and Jelly Sandwich Cookies. Guest post by Georgia Pellegrini, recipe submitted by TK member Erica of Sweet Tooth.

Divide the dough in half and roll it into logs. Make an indentation along the top as well as along the sides, so that it looks like a very long loaf of bread. Wrap it in plastic wrap and put it in the refrigerator for an hour or overnight.

Once it is cold, remove it from the plastic and with a sharp knife slice ¼-inch pieces of “bread.”


Tasty Kitchen Blog: Peanut Butter and Jelly Sandwich Cookies. Guest post by Georgia Pellegrini, recipe submitted by TK member Erica of Sweet Tooth.

Lay them on a silicone baking pad or greased parchment over a sheet tray. Bake them in the oven at 350 degrees F for 7-9 minutes.


Tasty Kitchen Blog: Peanut Butter and Jelly Sandwich Cookies. Guest post by Georgia Pellegrini, recipe submitted by TK member Erica of Sweet Tooth.

They will be slightly puffy when they first come out but will deflate as they cool.


Tasty Kitchen Blog: Peanut Butter and Jelly Sandwich Cookies. Guest post by Georgia Pellegrini, recipe submitted by TK member Erica of Sweet Tooth.

Meanwhile, mix your food coloring to make brown paint for the crust. I used 2 drops of red, 1 drop of green and 1 drop of yellow.

And then I mixed it with a touch of whiskey. You could also use any other alcohol. This works better than water because it evaporates rather than turns soggy the way water would!


Tasty Kitchen Blog: Peanut Butter and Jelly Sandwich Cookies. Guest post by Georgia Pellegrini, recipe submitted by TK member Erica of Sweet Tooth.

After you paint the edges of the cookies with brown food coloring, lay one piece on a dish and spread it with jelly. Then add another half on top.


Tasty Kitchen Blog: Peanut Butter and Jelly Sandwich Cookies. Guest post by Georgia Pellegrini, recipe submitted by TK member Erica of Sweet Tooth.

Keep making your cookie sandwiches until all of your pairs have been assembled.


Tasty Kitchen Blog: Peanut Butter and Jelly Sandwich Cookies. Guest post by Georgia Pellegrini, recipe submitted by TK member Erica of Sweet Tooth.

It will be a tray of beautiful sandwiches that may look like savory finger foods but are really sweet treats. These will trick your guests in a delightful way, and will thrill your kids when they see these in their lunch boxes.


Tasty Kitchen Blog: Peanut Butter and Jelly Sandwich Cookies. Guest post by Georgia Pellegrini, recipe submitted by TK member Erica of Sweet Tooth.

This was such an easy, whimsical, and delicious recipe. It made me happy. Thank you to Erica for sharing it with us! Be sure to check out her website Erica’s Sweet Tooth for other sweet treats.


Printable Recipe

Peanut Butter and Jelly Sandwich Cookies

See post on sweettooth’s site!
4.00 Mitt(s) 1 Rating(s)1 vote, average: 4.00 out of 51 vote, average: 4.00 out of 51 vote, average: 4.00 out of 51 vote, average: 4.00 out of 51 vote, average: 4.00 out of 5

Prep Time:

Cook Time:

Difficulty: Easy

Servings: 20

20
x

Print Options

Page size Letter 3x5 4x6
Text Size Small Medium Large
Content Include description
Include prep time, etc.
Show image

Description

Peanut butter sugar cookies made to look like slices of bread and filled with jelly—the perfect back to school treat!

Ingredients

  • FOR THE PEANUT BUTTER COOKIES:
  • ½ cups Creamy Peanut Butter
  • ¼ cups Plus 2 Tablespoons, Granulated Sugar
  • ¼ cups Plus 2 Tablespoons Light Brown Sugar
  • 1 whole Egg
  • 2-½ Tablespoons Milk
  • ½ teaspoons Vanilla Extract
  • 1-¼ cup All-purpose Flour
  • ¼ teaspoons Baking Powder
  • ¼ teaspoons Baking Soda
  • FOR THE CRUST:
  • 2 Tablespoons Vodka
  • 2 drops Brown Food Coloring
  • FOR THE FILLING:
  • ¼ cups Jelly (flavor Of Your Choice)

Preparation Instructions

In the bowl of an electric mixer, beat together the peanut butter and sugars until light and fluffy, 2-3 minutes. Beat in the egg, milk, and vanilla until well combined.

In a separate bowl, whisk together the flour, baking powder, and baking soda. With the mixer on low, gradually add the flour mixture to the peanut butter mixture and beat until just combined.

Divide dough in half and roll each half into a rectangular block. Using your fingers, pinch along the middle of the top and along the two sides to form indentations along the length of the block so the dough looks like a bread loaf. Wrap each half in Saran wrap and refrigerate at least 1 hour or overnight.

When dough is chilled, unwrap the dough and use a sharp knife to cut slices of “bread” in 1/4″ thickness. Place 1″ apart on a parchment paper or Silpat-lined cookie sheet and bake for 7-9 minutes, or until edges just begin to brown. Cool for 5 minutes on the pan, then transfer to a wire rack to cool completely.

To paint crusts onto the baked cookies, combine vodka and brown food coloring. Use a clean paint brush to brush mixture on the sides of all the cookies. Using vodka instead of water will prevent the cookies from getting soggy since the alcohol will evaporate!

To make the sandwiches, take one cookie slice and spread with jelly. Match cookie with another slice of similar size and make your PB&J sandwich!


_______________________________________

There’s so much to say about Georgia, we don’t know where to start. Leaving Wall Street for the French Culinary Institute, followed by a stint at the Gramercy Tavern and La Chassagnette in France, her passion for food and food traditions are evident and inspiring. Visit her site at Georgia Pellegrini, where you’ll find more recipes, photos, learn all about her wonderful books Girl Hunter and Food Heroes, and enjoy her latest adventures.


Profile photo of georgiapellegrini

Greek Roasted Shrimp with Olives and Feta

Posted by in Step-by-Step Recipes

  I love a good one dish meal—so many fewer dishes to clean! Plus there is something lovely about making something in a skillet and casserole and serving is tableside. This Greek Roasted Shrimp with Olives and Feta from TK member Marie was to die for. The tomatoes became richer and sweeter as they cooked […]

Profile photo of georgiapellegrini

Cheesy Baked Green Chile Rice

Posted by in Step-by-Step Recipes

  This recipe for Cheesy Baked Green Chile Rice from TK member Lindsay made my house smell so amazing that those passing by begged for a bite. It is a wonderful combination of cheesy, spicy, crunchy deliciousness. And you can make it in small or large skillets or a baking dish and serve it tableside. […]

Profile photo of georgiapellegrini

Spicy Margarita Shrimp

Posted by in Step-by-Step Recipes

  In this hot, hot weather, I rarely want to turn the oven on, so this Spicy Margarita Shrimp from TK member Damelio called my name because most of the cooking happens in the marinade. Plus I love a good margarita and was intrigued by the idea of using some of those same ingredients to […]

Profile photo of georgiapellegrini

Lemon Ricotta Blueberry Bread

Posted by in Baking, Step-by-Step Recipes

  I’m not a big baker; I prefer to improvise in the kitchen, which doesn’t really work with baked goods. But I decided to be a little adventurous this time because I love how fluffy baked goods are when ricotta is incorporated. Also, blueberries are in their peak season! You will love this Lemon Blueberry […]