The Pioneer Woman Tasty Kitchen
Profile photo of Faith (An Edible Mosaic)

Two Quick Solutions for a Sudden Cookie Fix

Posted by in Baking, Step-by-Step Recipes

Have a cookie craving that just won’t go away? We’re bringing back this post featuring two quick 5-ingredient cookies! As a bonus, one of them is gluten-free. You know you want some. In fact, they’re so easy, why not make both? Time to get baking!
 
Tasty Kitchen Blog: Gluten Free Peanut Butter Cookies and Easy Nutella Cookies with Sea Salt

 
Let’s face it, some days you just need a quick cookie fix.

Maybe your kid is having a party at school, or maybe it’s a co-worker’s birthday at the office. Or maybe it’s just been a really long week, and you’re in the mood for a cookie or two without having to spend all day in the kitchen. Tasty Kitchen to the rescue!

I did a super quick search and found not one, but two delicious cookie recipes on Tasty Kitchen; each has just 5 ingredients and can be made in less than 30 minutes from start to finish. That’s what I call a fabulous quick cookie fix.

First up is Tasty Kitchen member Desserts by Juliette’s recipe for Gluten-Free Peanut Butter Cookies. There’s just something about a plate of peanut butter cookies and a tall glass of milk that is reminiscent of being a kid…maybe that’s why almost everyone I know is crazy about them! Juliette’s version is really lovely; it lets the flavor of peanut butter shine through, and a touch of sea salt finishes them perfectly.

Like I said, they couldn’t be easier to make, so let’s get started!


Tasty Kitchen Blog: Gluten Free Peanut Butter Cookies and Easy Nutella Cookies with Sea Salt

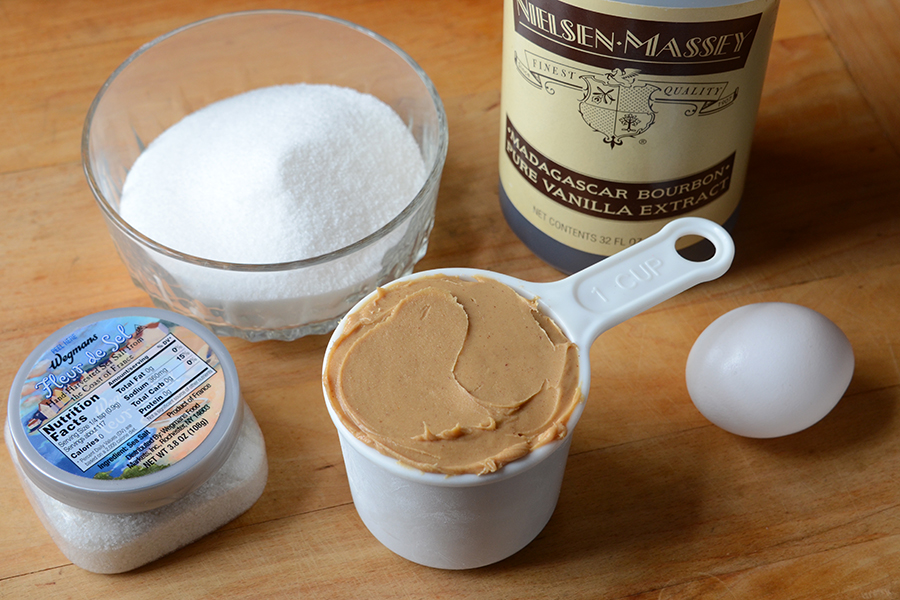
To make them, you’ll need: peanut butter, sugar, an egg, vanilla, and coarse sea salt. And yes, I know that is a crazy-big bottle of vanilla!

(Don’t forget to preheat your oven to 350F and line a baking sheet with parchment paper!)


Tasty Kitchen Blog: Gluten Free Peanut Butter Cookies and Easy Nutella Cookies with Sea Salt

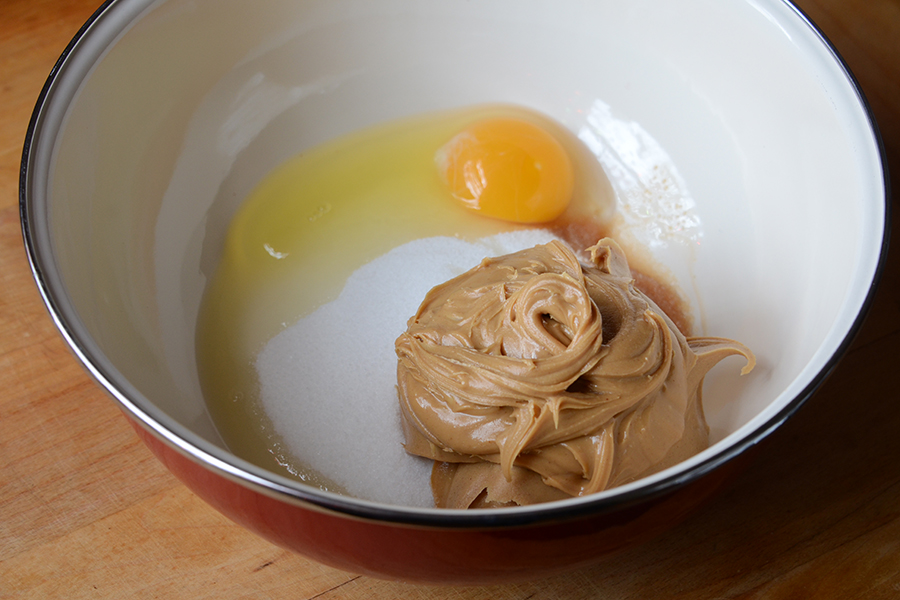
Ok, so dump everything into a bowl …


Tasty Kitchen Blog: Gluten Free Peanut Butter Cookies and Easy Nutella Cookies with Sea Salt

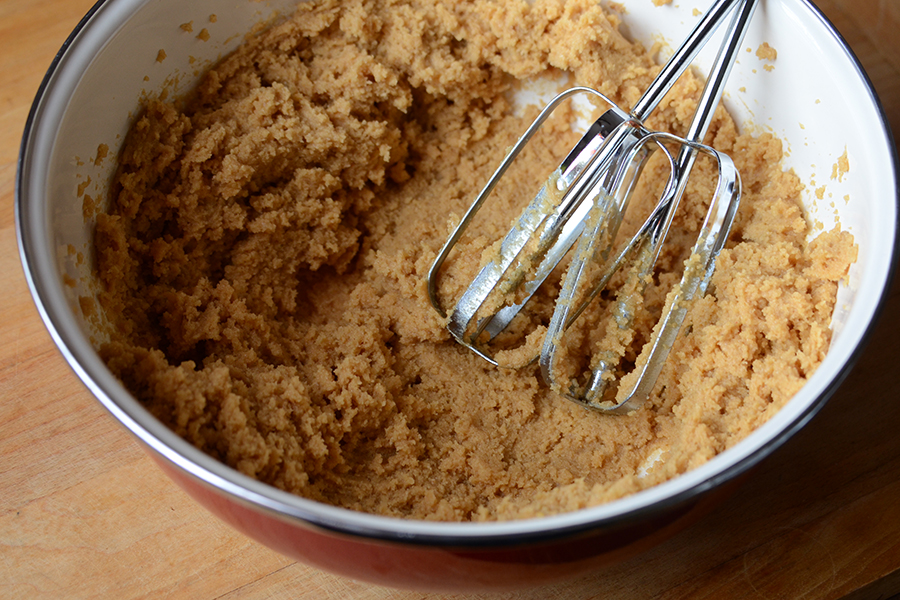
And beat it up! (I used a handheld electric mixer for this; no need to dirty a stand mixer.)


Tasty Kitchen Blog: Gluten Free Peanut Butter Cookies and Easy Nutella Cookies with Sea Salt

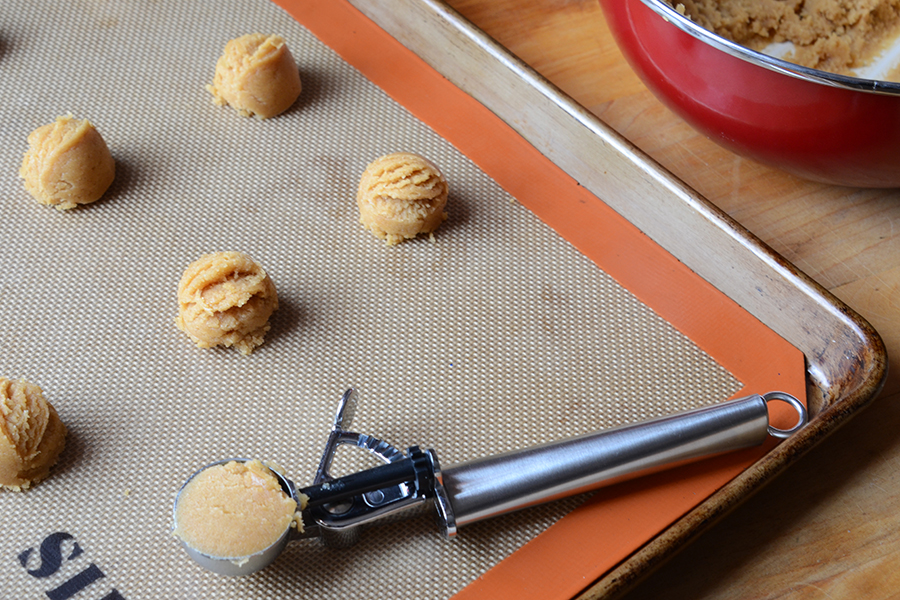
Spoon the dough by the tablespoon onto the prepared baking sheet, leaving about 2 inches between each (I got 12 cookies on 1 half-sheet pan). Oh, and I want to mention, I find that a 1-tablespoon-sized ice cream scoop is the easiest (and fastest!) way to scoop out the dough.


Tasty Kitchen Blog: Gluten Free Peanut Butter Cookies and Easy Nutella Cookies with Sea Salt

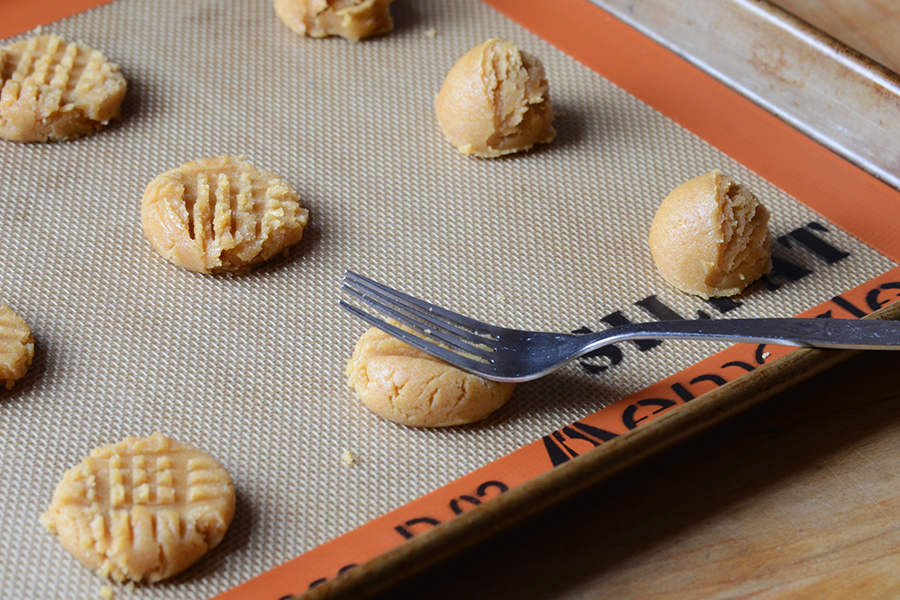
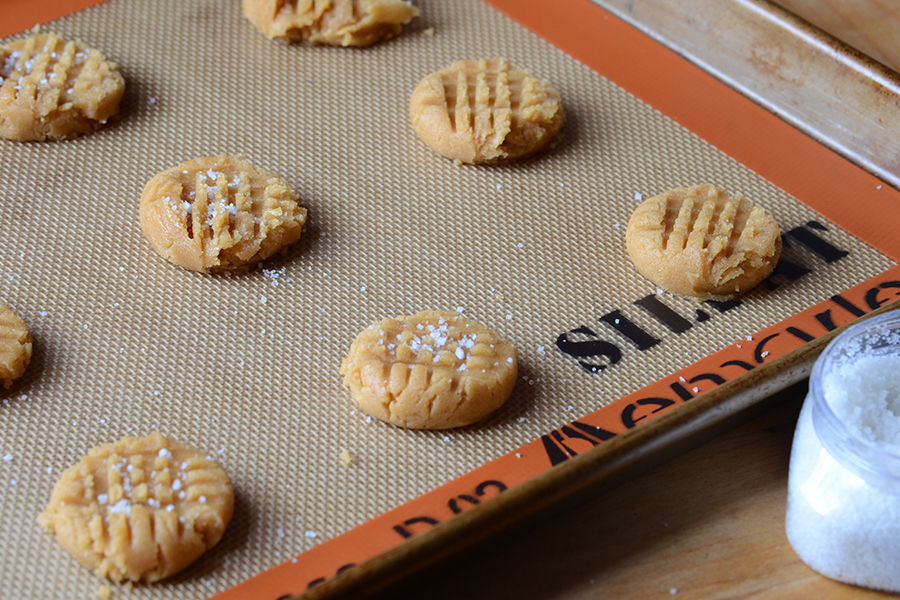
Flatten each dough ball slightly with a fork, making a cross-hatch pattern.


Tasty Kitchen Blog: Gluten Free Peanut Butter Cookies and Easy Nutella Cookies with Sea Salt

And then sprinkle the tops with sea salt. (They’re looking pretty good already, right?)


Tasty Kitchen Blog: Gluten Free Peanut Butter Cookies and Easy Nutella Cookies with Sea Salt

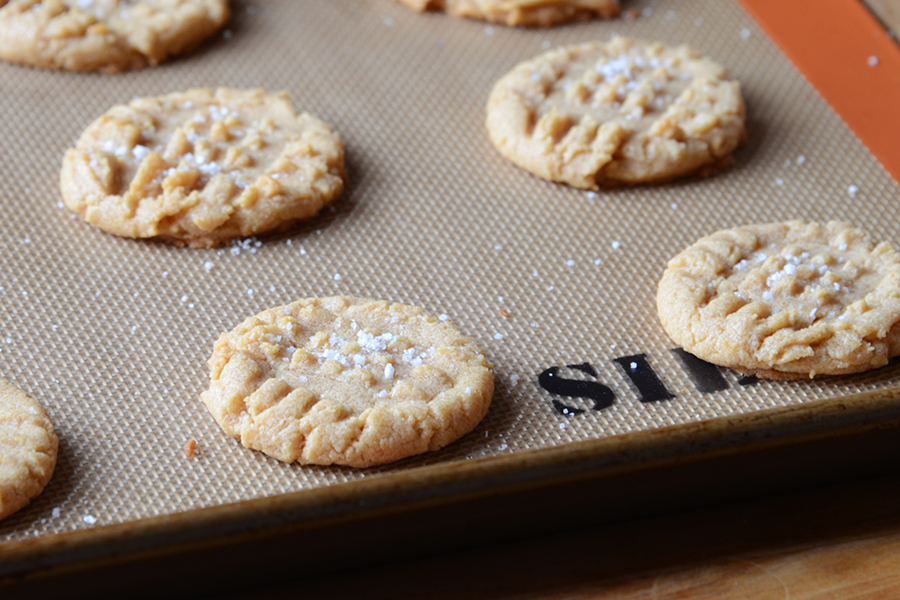
Bake until the cookies are golden brown on the bottom, set along the outside, and a touch doughy in the center, because they’ll harden as they cool. (This took about 8 to 9 minutes in my oven.) Cool the cookies slightly on the tray before removing. I got exactly 28 cookies out of this recipe.


Tasty Kitchen Blog: Gluten Free Peanut Butter Cookies and Easy Nutella Cookies with Sea Salt

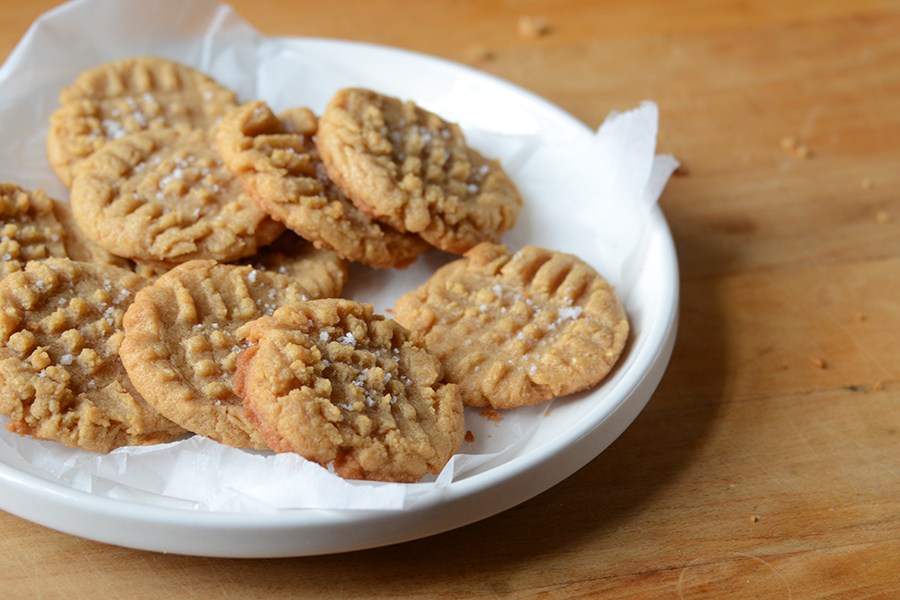
Such a delicious classic.

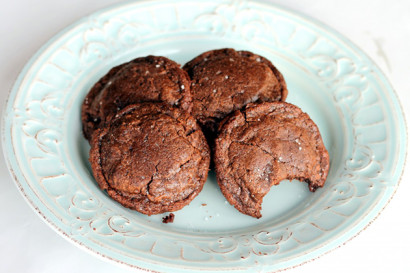
Those cookies come together so easily and you might just want to make another quick batch. If you do, Tasty Kitchen member Monique of Ambitious Kitchen has you covered with her recipe for Easy Nutella Cookies with Sea Salt. Nutella + sea salt = a very tasty combo indeed.


Tasty Kitchen Blog: Gluten Free Peanut Butter Cookies and Easy Nutella Cookies with Sea Salt

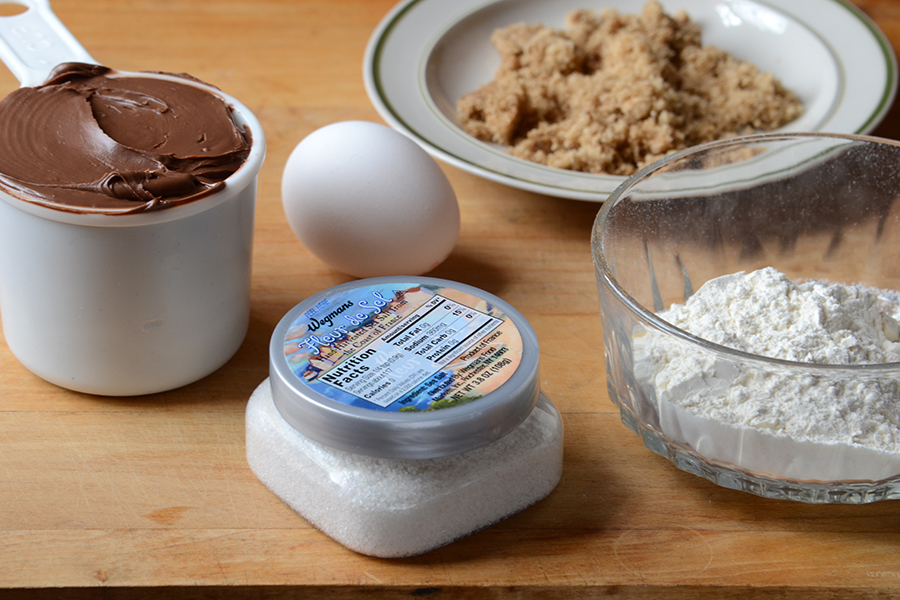
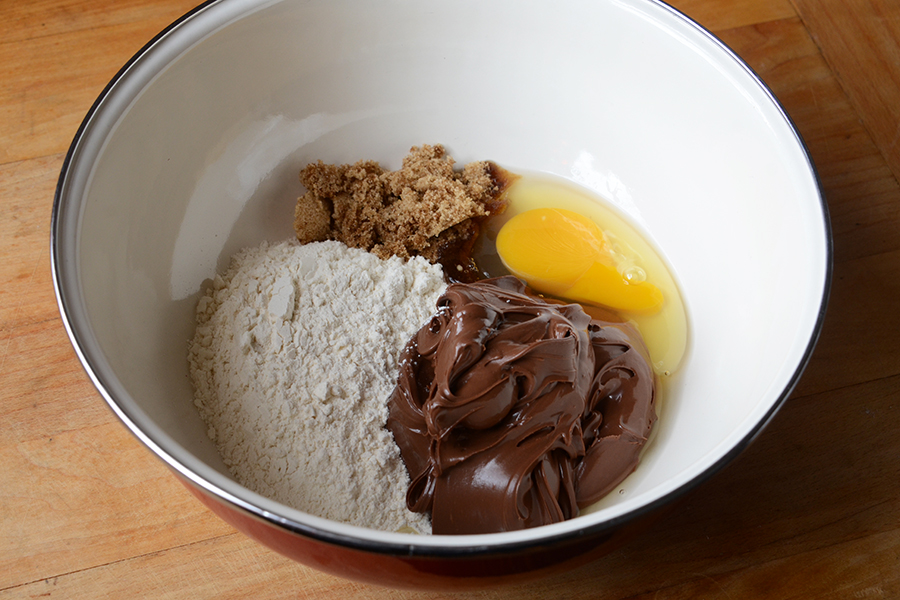
To whip them up, get out Nutella, flour, brown sugar, an egg, and coarse sea salt.

(Don’t forget to preheat your oven to 350F and line a baking sheet with parchment paper!)


Tasty Kitchen Blog: Gluten Free Peanut Butter Cookies and Easy Nutella Cookies with Sea Salt

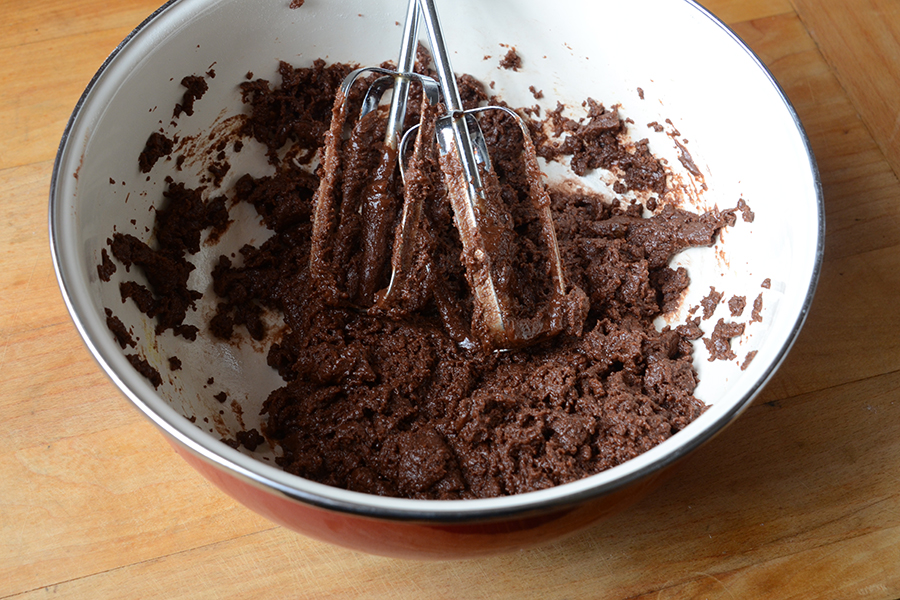
You know the drill: dump everything into a bowl …


Tasty Kitchen Blog: Gluten Free Peanut Butter Cookies and Easy Nutella Cookies with Sea Salt

And again beat it with your handheld electric mixer. Once it’s mixed, cover the bowl and stick it in the freezer to chill for 10 minutes. Go brew a pot of coffee because in about 20 minutes, you’re going to be glad you did.


Tasty Kitchen Blog: Gluten Free Peanut Butter Cookies and Easy Nutella Cookies with Sea Salt

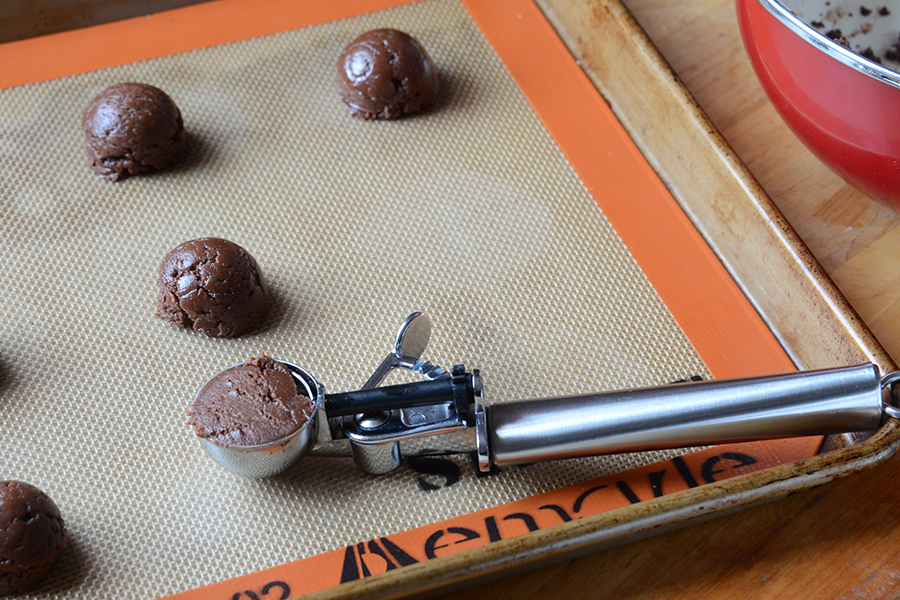
Roll the dough into 1-inch balls (I used my 1-tablespoon-sized ice cream scoop again), and line the balls up at least 2 inches apart on the prepared baking sheet.


Tasty Kitchen Blog: Gluten Free Peanut Butter Cookies and Easy Nutella Cookies with Sea Salt

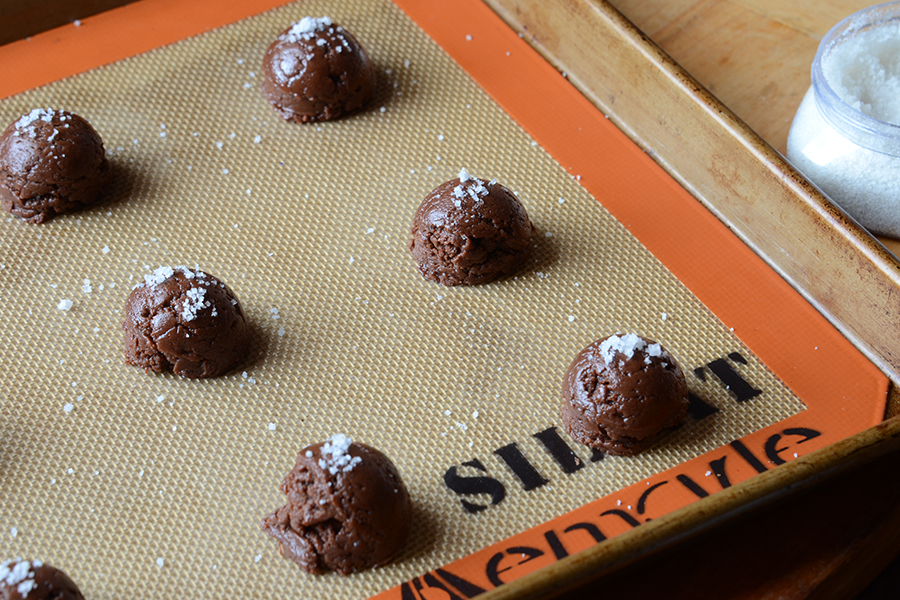
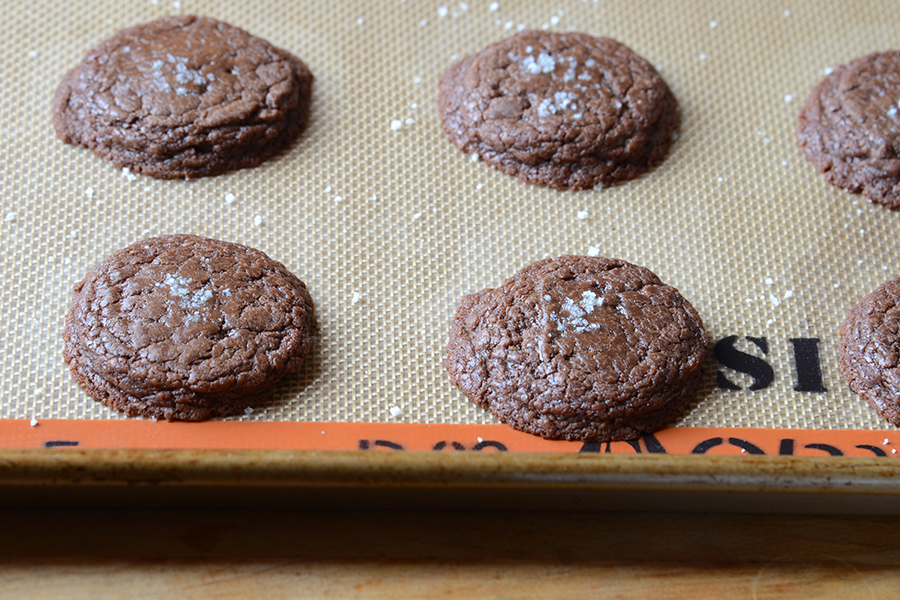
At this point I sprinkled on the sea salt, but you could wait to do it until after the cookies are baked.


Tasty Kitchen Blog: Gluten Free Peanut Butter Cookies and Easy Nutella Cookies with Sea Salt

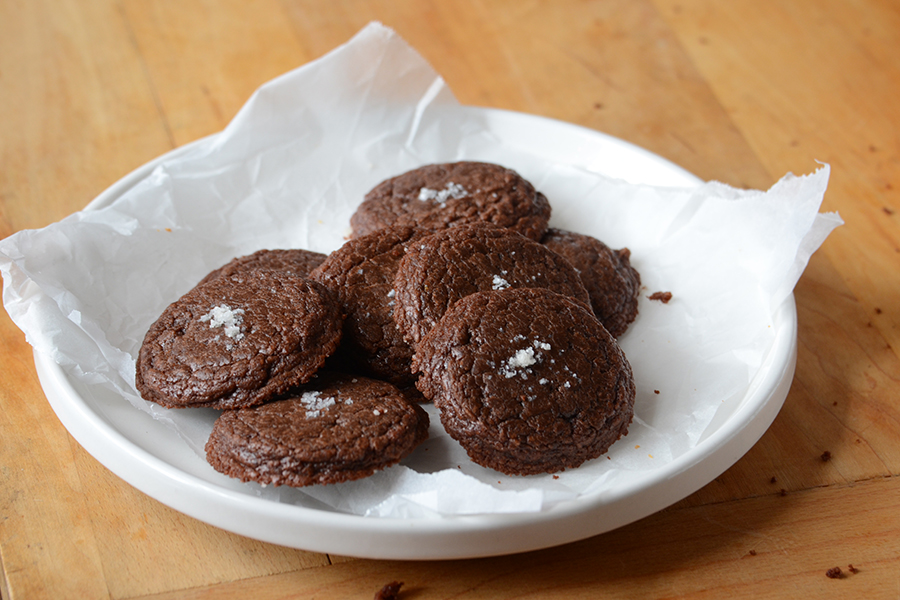
Pop the cookies into the oven and bake until they’re set along the outside and slightly doughy in the center (this took about 8 to 9 minutes in my oven). Remember to cool the cookies slightly on the tray before removing! I got exactly 22 cookies from this recipe.


Tasty Kitchen Blog: Gluten Free Peanut Butter Cookies and Easy Nutella Cookies with Sea Salt

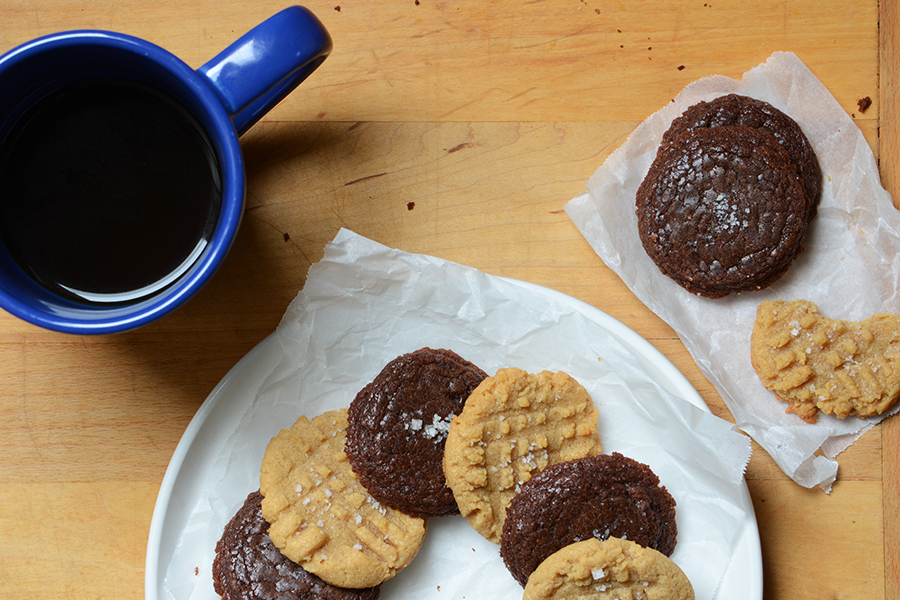
Now grab a hot cup of coffee (or a cold glass of milk) and enjoy a couple of those beauties.


Tasty Kitchen Blog: Gluten Free Peanut Butter Cookies and Easy Nutella Cookies with Sea Salt

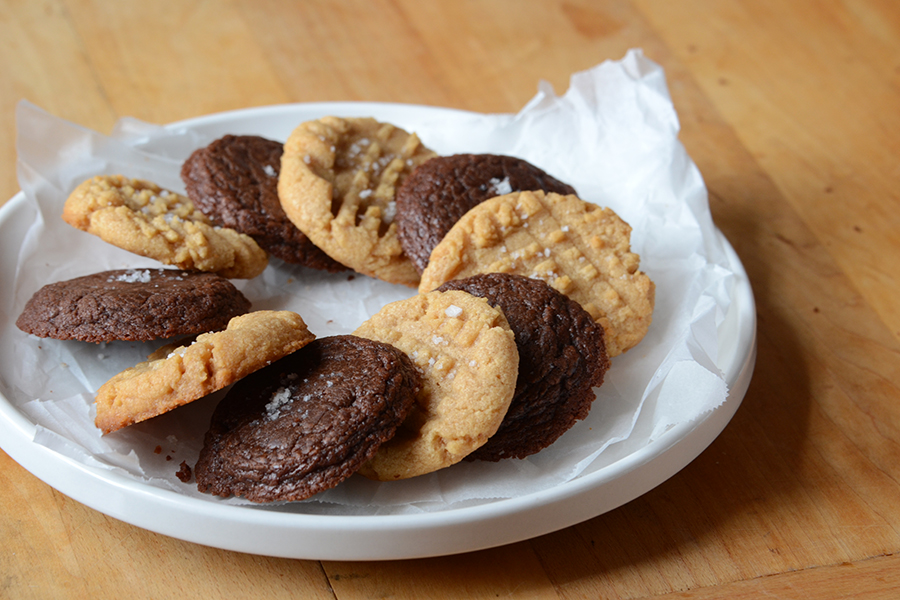
Or serve them up together! I think these two kinds of cookies complement each other in a fun, contrasting sort of way. Peanut butter and Nutella are delicious together (as anyone who has ever eaten a peanut butter and Nutella sandwich can attest to!). Plus the sea salt on both cookies pulls the two together.

But either kind of cookie is fabulous enough to stand alone if you just want to try one kind. The peanut butter cookies are perfect if you’re baking for a gluten-free crowd, and the Nutella cookies are great if you’re baking for people with peanut butter allergies! There is something for everyone.

How is that for a perfect quick cookie fix?

Now go ahead and grab that cup of coffee (or tall glass of milk). I’ll share a couple cookies with you.


Printable Recipe
Gluten Free Peanut Butter Cookies

See post on Desserts by Juliette’s site!
5.00 Mitt(s) 3 Rating(s)3 votes, average: 5.00 out of 53 votes, average: 5.00 out of 53 votes, average: 5.00 out of 53 votes, average: 5.00 out of 53 votes, average: 5.00 out of 5

Prep Time:

Cook Time:

Difficulty: Easy

Servings: 12

12
x

Print Options

Page size Letter 3x5 4x6
Text Size Small Medium Large
Content Include description
Include prep time, etc.
Show image

Description

These peanut butter cookies taste absolutely divine and you would never be able to guess that they are flourless and gluten-free. They are creamy and delicious, definitely worth trying out.

Ingredients

  • 1 cup Creamy Peanut Butter
  • 1 cup Granulated Sugar
  • 1  Egg
  • 1 teaspoon Vanilla Extract
  • Coarse Sea Salt

Preparation Instructions

1. Preheat oven to 350ºF. Line a baking sheet with parchment paper and set aside.
2. Beat peanut butter, sugar, egg, and vanilla until fully incorporated. Spoon 1 tablespoon of mixture 1 inch apart on the baking sheet. Flatten with fork, making a crosshatch pattern on the cookies. Sprinkle coarse salt over the top of the cookies
3. Bake for 10 minutes; they should still be soft to the touch when removed from oven. Let cool.


Printable Recipe
Easy Nutella Cookies with Sea Salt

See post on Monique of Ambitious Kitchen’s site!
4.80 Mitt(s) 5 Rating(s)5 votes, average: 4.80 out of 55 votes, average: 4.80 out of 55 votes, average: 4.80 out of 55 votes, average: 4.80 out of 55 votes, average: 4.80 out of 5

Prep Time:

Cook Time:

Difficulty: Easy

Servings: 12

12
x

Print Options

Page size Letter 3x5 4x6
Text Size Small Medium Large
Content Include description
Include prep time, etc.
Show image

Description

Easy, fudgy 5-ingredient Nutella Cookies with Sea Salt. In your belly in 25 minutes!

Ingredients

  • 1 cup Nutella
  • 2 Tablespoons Brown Sugar
  • 1  Egg
  • ½ cups Plus 1 Tablespoon Flour
  • Coarse Sea Salt, For Sprinkling

Preparation Instructions

Preheat oven to 350ºF.

Combine all ingredients except salt in a large bowl with electric mixer until well combined. Place dough in freezer for 10 minutes.

After 10 minutes, roll dough into approximately 1-inch balls, place on ungreased baking sheet at least 2 inches apart and bake for 8-10 minutes. Remove from oven and let cool for a few minutes until cookies are set, then very carefully transfer to a wire rack. Generously sprinkle with sea salt.


_______________________________________

Faith Gorsky is the writer, receipt developer, photographer, and food stylist behind the blog An Edible Mosaic, and the cookbook author of An Edible Mosaic: Middle Eastern Fare with Extraordinary Flair (Tuttle Publishing; November 2012). She was born, raised, and spent most of her life in Upstate New York, and she currently lives in Kuwait. When it comes to cooking, her favorite thing to do is go into the kitchen hungry, open the fridge, and start creating. She loves to travel, especially to places steeped in rich culture and history. She also enjoys reading (cookbooks mostly), vintage shopping (especially in old markets), watching movies (of all genres), and is enamored with ancient cultures (especially Rome and Egypt.


Profile photo of Betsy (TK)

Looks Delicious! Basic Granola

Posted by in Looks Delicious!

Tasty Kitchen Blog: Looks Delicious! (Basic Granola, submitted by TK member Stephanie Walker of Flavor from Scratch)

At the beginning of the week, I have good intentions about preparing homemade ingredients for breakfasts and often end up falling back on frozen waffles or the same old scrambled eggs. We’re overdue for something different this week, and some crunchy, slightly sweet granola sounds like the perfect thing to get us out of our breakfast rut.

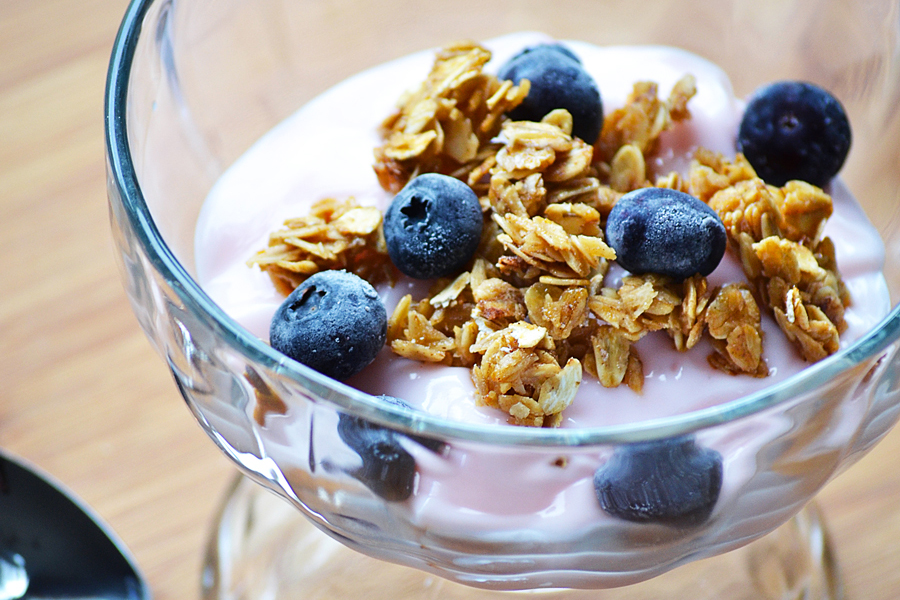
This Basic Granola from TK member Stephanie Walker works great when you just want a simple granola without all the extras, or if you’re serving it to those who might turn up their noses at additions like nuts. I’m looking at you, kids. Either way, this recipe is delicious as is, or can be customized with shredded coconut, dried fruit, or anything you can think to add! Enjoy with yogurt for breakfast or snack on it in the afternoon when you need a nibble of something sweet.

Have a tasty week!


Profile photo of Megan {Country Cleaver}

Cookies and Cream Donuts

Posted by in Step-by-Step Recipes

Tasty Kitchen Blog: Cookies and Cream Donuts. Guest post by Megan Keno of Wanna Be a Country Cleaver, recipe submitted by TK member Heather Christo.

There’s a persistent debate in the food scene, and it can grow very heated at times, even among friends. Do you want to know what it is? It’s this: doughnut vs. donut. What’s the correct way to spell it? Are both correct? Can they be used interchangeably? Is one fried and the other baked? As for me, I’m usually too busy burying my face in a platter of glazed carbs to give two hoots about it. Spell it however you want, just hand over the goods!

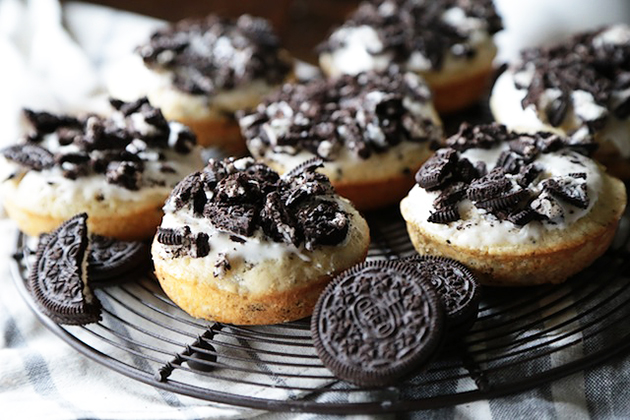
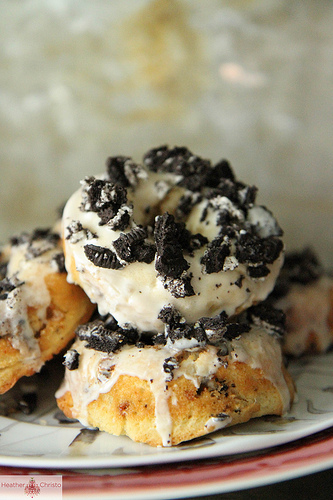
However you and your closest friends choose to resolve your donut/doughnut spelling squabbles, just make sure you discuss it over a batch of these Cookies and Cream Donuts from Tasty Kitchen member Heather.


Tasty Kitchen Blog: Cookies and Cream Donuts. Guest post by Megan Keno of Wanna Be a Country Cleaver, recipe submitted by TK member Heather Christo.

I was drawn to this recipe not just because I knew it would be a home run (because everything that comes out of Heather’s kitchen is!), but because it’s packed full of my favorite: Oreos.

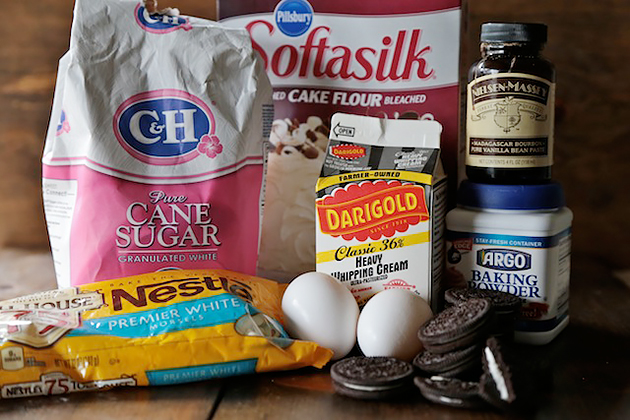
For your ingredients, you will need a few basics, including cake flour, sugar, baking powder, salt, cream, eggs, vanilla and melted butter. One ingredient my store didn’t carry was Hershey’s Cookies and Cream Pieces, so I substituted white chocolate chips and chopped up Oreos instead.


Tasty Kitchen Blog: Cookies and Cream Donuts. Guest post by Megan Keno of Wanna Be a Country Cleaver, recipe submitted by TK member Heather Christo.

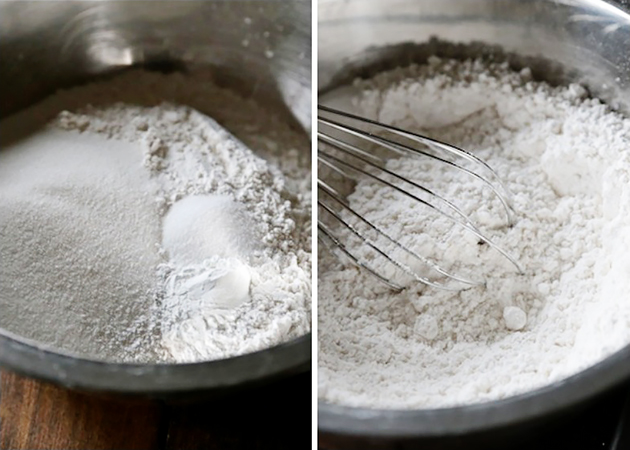
Into a bowl, whisk together the flour, sugar, baking soda, and salt.


Tasty Kitchen Blog: Cookies and Cream Donuts. Guest post by Megan Keno of Wanna Be a Country Cleaver, recipe submitted by TK member Heather Christo.

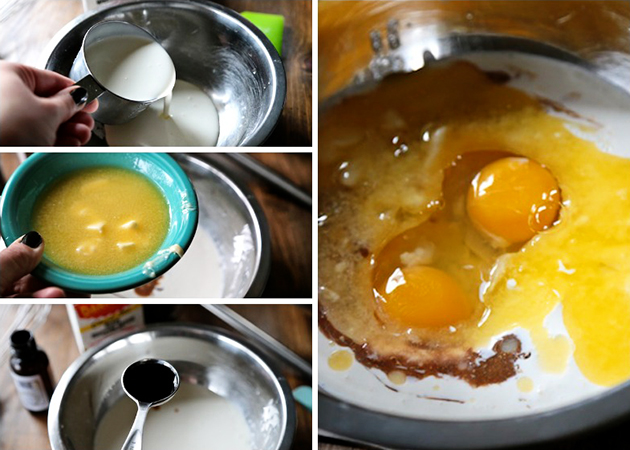
Next, in another bowl, whisk together the cream, eggs, vanilla and butter. Beat these together until combined.


Tasty Kitchen Blog: Cookies and Cream Donuts. Guest post by Megan Keno of Wanna Be a Country Cleaver, recipe submitted by TK member Heather Christo.

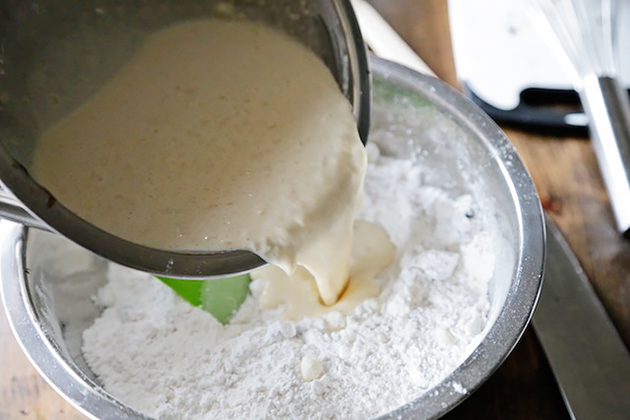
Pour the cream and egg mixture into the dry mixture and fold together until just combined.


Tasty Kitchen Blog: Cookies and Cream Donuts. Guest post by Megan Keno of Wanna Be a Country Cleaver, recipe submitted by TK member Heather Christo.

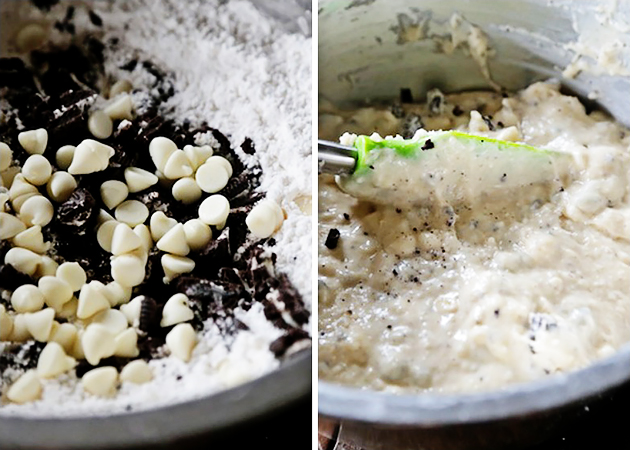
And don’t forget the cookies and cream pieces. As I mentioned earlier, I had to make a substitution here since I couldn’t find the cookies and cream pieces. I substituted 1/2 cup of white chocolate chips and 1/2 cup of chopped Oreos here. It worked like a charm. Fold these in until just combined.


Tasty Kitchen Blog: Cookies and Cream Donuts. Guest post by Megan Keno of Wanna Be a Country Cleaver, recipe submitted by TK member Heather Christo.

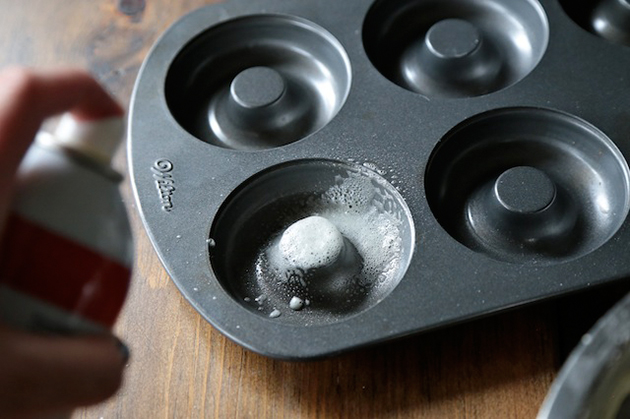
Now, spray a donut pan to help the donuts release after baking.


Tasty Kitchen Blog: Cookies and Cream Donuts. Guest post by Megan Keno of Wanna Be a Country Cleaver, recipe submitted by TK member Heather Christo.

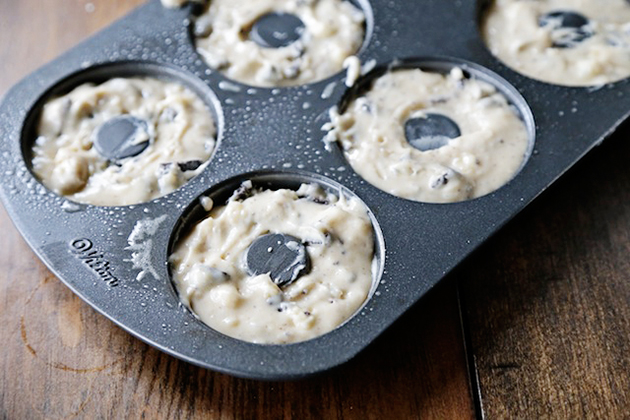
Fill each cavity with batter. Bake donuts for 10–12 minutes, or until they are golden brown on top and when a toothpick inserted into them comes out clean. Remove them from the pan and cool them on a wire rack.

Whilst the donuts cool completely, go ahead and begin preparing your glaze. (Because what’s a donut without a glaze? It’s a muffin.)


Tasty Kitchen Blog: Cookies and Cream Donuts. Guest post by Megan Keno of Wanna Be a Country Cleaver, recipe submitted by TK member Heather Christo.

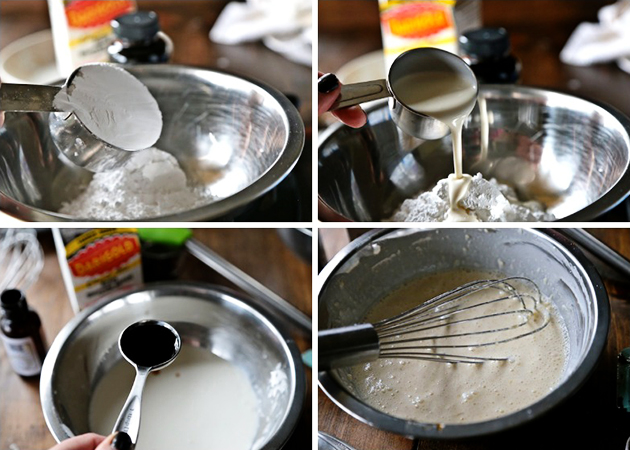
In a bowl, whisk together the heavy cream, vanilla and powdered sugar until smooth. It may be thick, but that is good. You want to make sure the cookie pieces stick to the top and don’t slide off.


Tasty Kitchen Blog: Cookies and Cream Donuts. Guest post by Megan Keno of Wanna Be a Country Cleaver, recipe submitted by TK member Heather Christo.

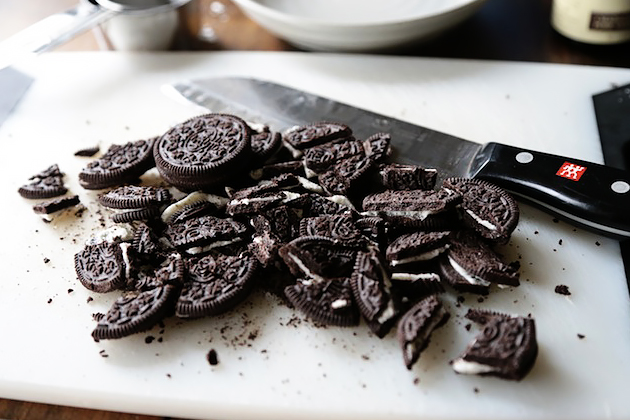
Crush additional Oreos if necessary, and place on a plate or in a bowl.


Tasty Kitchen Blog: Cookies and Cream Donuts. Guest post by Megan Keno of Wanna Be a Country Cleaver, recipe submitted by TK member Heather Christo.

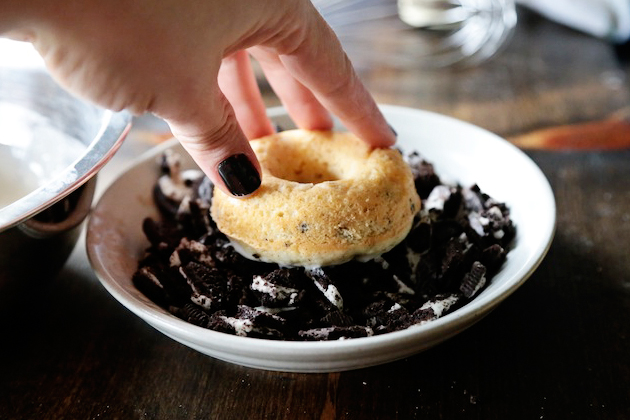
Dip the top of each donut into the glaze and then invert into the crushed Oreos. Place back on the wire rack (with something under it to catch any glaze that drips off) to set. Then, serve!


Tasty Kitchen Blog: Cookies and Cream Donuts. Guest post by Megan Keno of Wanna Be a Country Cleaver, recipe submitted by TK member Heather Christo.

If you can’t get enough of these Cookies and Cream Donuts from Heather, be sure to check out more of her incredible creations, like these Chicken Flautas with Spicy Avocado Sauce/. Be sure to rifle through her TK recipe box for more delicious creations.

What is your favorite donut combination? Do you like the traditional types, or do you shake it up with new flavors? Share your favorites, and links, in the comments so we can get some new inspiration from our Tasty Kitchen Community!


Printable Recipe

Cookies and Cream Donuts

See post on Heather Christo’s site!
1.00 Mitt(s) 1 Rating(s)1 vote, average: 1.00 out of 51 vote, average: 1.00 out of 51 vote, average: 1.00 out of 51 vote, average: 1.00 out of 51 vote, average: 1.00 out of 5

Prep Time:

Cook Time:

Difficulty: Easy

Servings: 18

18
x

Print Options

Page size Letter 3x5 4x6
Text Size Small Medium Large
Content Include description
Include prep time, etc.
Show image

Description

Baked cookie donuts slathered in creamy glaze and crushed Oreos!

Ingredients

  • FOR THE DONUTS:
  • ½ cups Cookies And Cream Pieces (in The Baking Section, By Hersheys)
  • 2-¼ cups Cake Flour
  • 1 cup Sugar
  • 2 teaspoons Baking Powder
  • 1 teaspoon Salt
  • 1 cup Heavy Cream
  • 2  Eggs
  • 1 Tablespoon Vanilla
  • 4 Tablespoons Melted Butter
  • FOR THE GLAZE AND TOPPING:
  • ¼ cups Heavy Cream
  • 1 teaspoon Vanilla
  • 1 cup Powdered Sugar
  • ½ cups Oreo Cookies, Crushed

Preparation Instructions

1. Preheat the oven to 350 F. Grease donut pans well with baking spray. Recipe makes roughly 18 full size donuts.
2. Roughly chop the cookies and cream pieces and set aside.
3. Sift together all of the dry ingredients (flour through salt) in a large bowl. In a smaller bowl, combine the cream, eggs, vanilla and butter and whisk together. Pour the wet ingredients into the dry ingredients and fold the batter until well combined.
4. Fold in the cookies and cream pieces.
5. Either spoon the batter into the prepared pan, or transfer the batter to a Ziploc or piping bag, snip off a corner of the bag and pipe into the donut pan (it’s a little neater this way).
6. Bake the donuts until just cooked through and golden on top 10-12 minutes.
7. Remove pan from the oven. Let the donuts cool on a wire rack after turning them out of the pans.
8. While the donuts are cooling, make the glaze by whisking the cream, vanilla and powdered sugar together in a medium sized bowl.
9. Dip the cooled donuts in the glaze until they have a nice thick coating. Generously sprinkle on the crushed Oreo chunks and crumbs.
10. Enjoy!


_______________________________________

Megan Keno is the writer and photographer of Country Cleaver, a food blog fueled by Nutella and images of June Cleaver—if June wore cowboy boots and flannel, that is. A self-proclaimed country bum, Megan creates from-scratch recipes that range from simple to sublime and how-to’s to build your cooking repertoire. But she couldn’t do it without the help of her trusty—and furry—sous chef, Huckleberry. He’s a world class floor cleaner.


Profile photo of Natalie | Perry's Plate

Grilled Macadamia-Crusted Pineapple with Coconut Cream

Posted by in Step-by-Step Recipes

Tasty Kitchen Blog: Grilled Macadamia-Crusted Pineapple with Coconut Cream. Guest post by Natalie Perry of Perry's Plate, recipe submitted by TK member Taylor Kiser of Food Faith Fitness.

I big puffy heart love grilled pineapple. To me, it’s right up there with corn on the cob, watermelon, and drippy popsicles on my favorite summer food list. Cover it in crushed macadamia nuts and coconut cream, though? It’ll seem like you’re indulging, but it’s actually a pretty healthy treat!

I’ve been eyeing Taylor Kiser’s recipes for a while and her Grilled Macadamia-Crusted Pineapple with Coconut Cream caught my eye. Naturally.

Let’s make some!


Tasty Kitchen Blog: Grilled Macadamia-Crusted Pineapple with Coconut Cream. Guest post by Natalie Perry of Perry's Plate, recipe submitted by TK member Taylor Kiser of Food Faith Fitness.

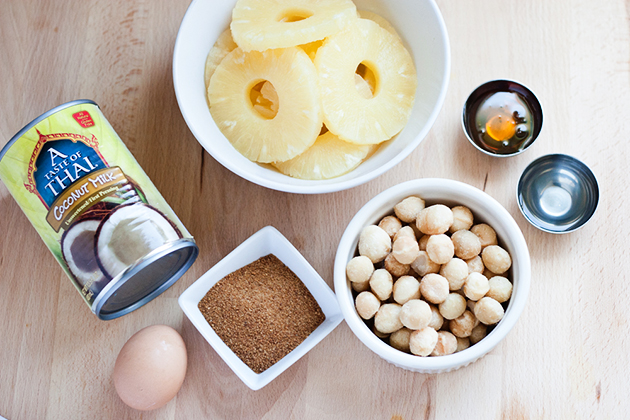
You’ll need coconut milk, pineapple rings,macadamia nuts, honey, coconut oil, coconut sugar, and an egg.

Yes, I went with canned pineapple rings. I don’t have one of those nifty pineapple slicers. Plus, I had a 4-month-old baby strapped to my chest.

You’ll need to put the coconut milk in the fridge for several hours—preferably 24 hours.


Tasty Kitchen Blog: Grilled Macadamia-Crusted Pineapple with Coconut Cream. Guest post by Natalie Perry of Perry's Plate, recipe submitted by TK member Taylor Kiser of Food Faith Fitness.

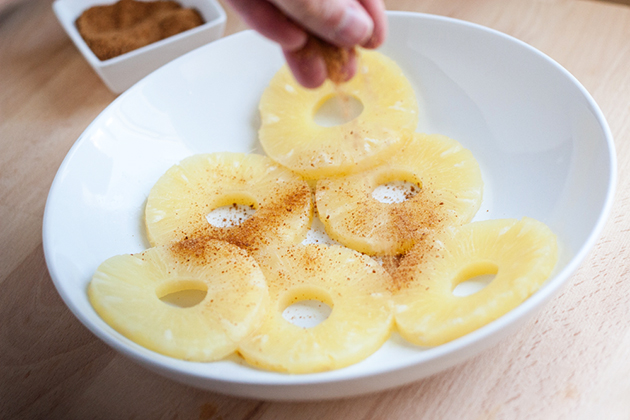
Sprinkle some coconut sugar on the pineapple rings.


Tasty Kitchen Blog: Grilled Macadamia-Crusted Pineapple with Coconut Cream. Guest post by Natalie Perry of Perry's Plate, recipe submitted by TK member Taylor Kiser of Food Faith Fitness.

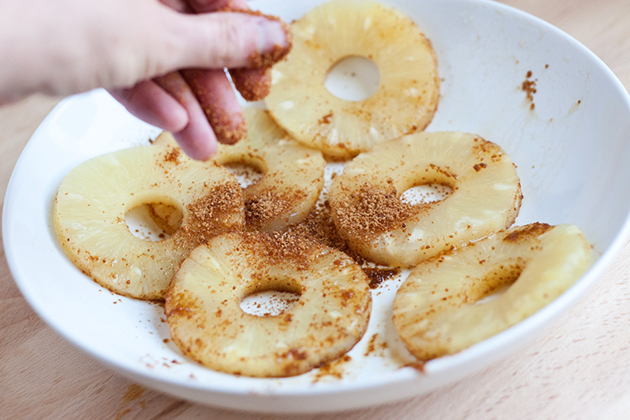
Flip them over and do the same on the other side.


Tasty Kitchen Blog: Grilled Macadamia-Crusted Pineapple with Coconut Cream. Guest post by Natalie Perry of Perry's Plate, recipe submitted by TK member Taylor Kiser of Food Faith Fitness.

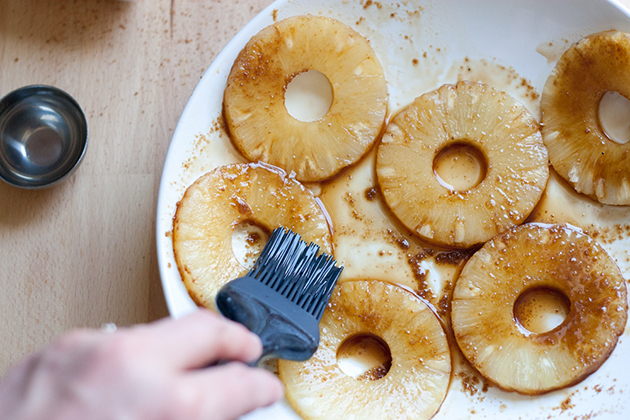
Brush them with coconut oil.


Tasty Kitchen Blog: Grilled Macadamia-Crusted Pineapple with Coconut Cream. Guest post by Natalie Perry of Perry's Plate, recipe submitted by TK member Taylor Kiser of Food Faith Fitness.

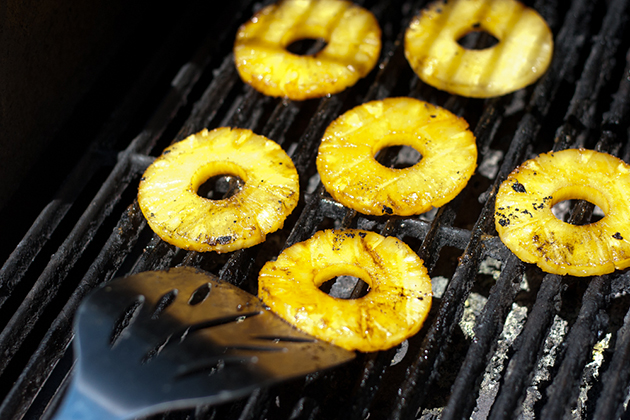
Is your grill hot? You mean you don’t just leave it on all summer and constantly throw stuff on it? Party pooper.

Okay, grill those rings. You don’t have to make distinct grill marks, just get them golden brown and heated through. Flip them once, let them grill a little longer, then pull them off and set them aside.


Tasty Kitchen Blog: Grilled Macadamia-Crusted Pineapple with Coconut Cream. Guest post by Natalie Perry of Perry's Plate, recipe submitted by TK member Taylor Kiser of Food Faith Fitness.

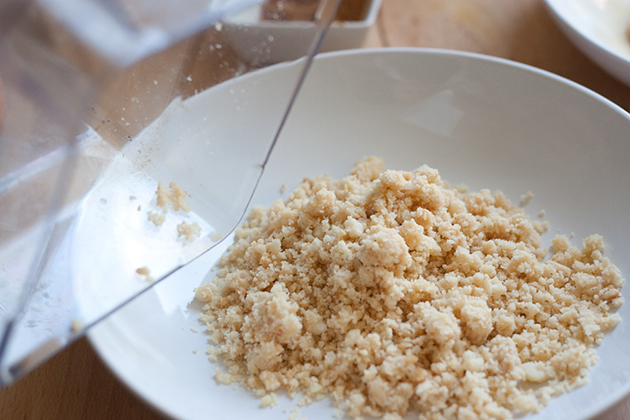
Crush the nuts in a food processor or if your processor bowl happens to be in the dishwasher, use your blender. But be careful not to make macadamia nut butter. Not that that’s a bad thing, but in this case you might not want it.

Transfer the nuts to a shallow bowl.


Tasty Kitchen Blog: Grilled Macadamia-Crusted Pineapple with Coconut Cream. Guest post by Natalie Perry of Perry's Plate, recipe submitted by TK member Taylor Kiser of Food Faith Fitness.

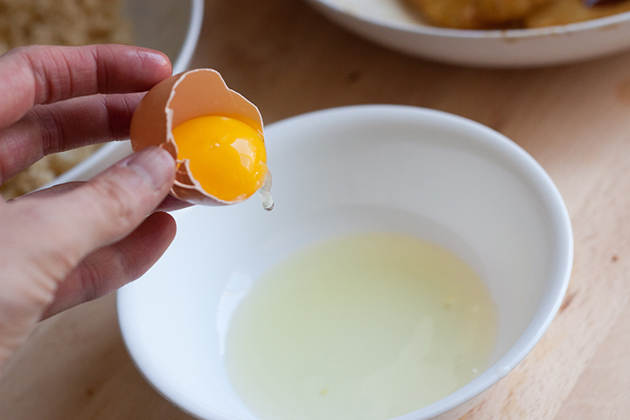
Put your egg white into another shallow bowl.


Tasty Kitchen Blog: Grilled Macadamia-Crusted Pineapple with Coconut Cream. Guest post by Natalie Perry of Perry's Plate, recipe submitted by TK member Taylor Kiser of Food Faith Fitness.

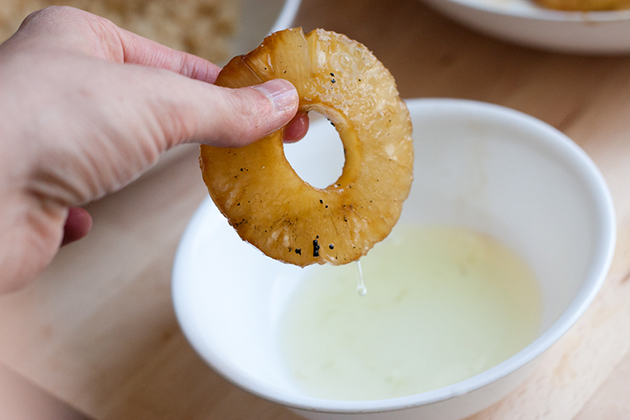
Dip each ring into the egg white.


Tasty Kitchen Blog: Grilled Macadamia-Crusted Pineapple with Coconut Cream. Guest post by Natalie Perry of Perry's Plate, recipe submitted by TK member Taylor Kiser of Food Faith Fitness.

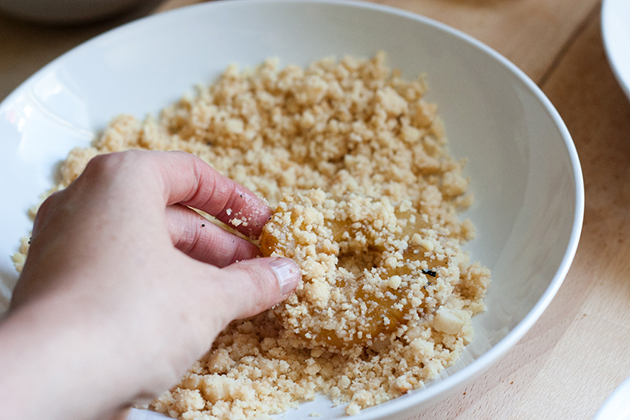
Then coat with the crushed nuts.


Tasty Kitchen Blog: Grilled Macadamia-Crusted Pineapple with Coconut Cream. Guest post by Natalie Perry of Perry's Plate, recipe submitted by TK member Taylor Kiser of Food Faith Fitness.

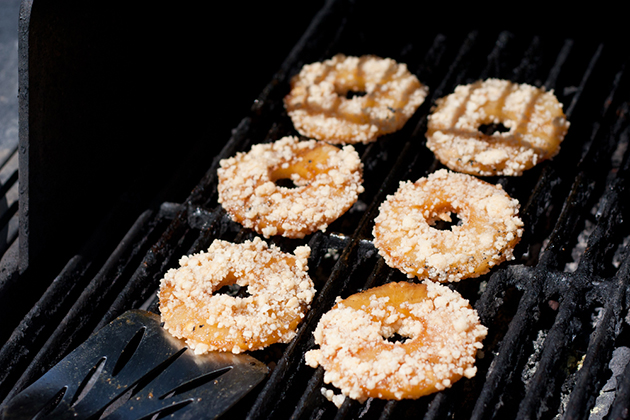
Throw the pineapple back on the grill for a few minutes until the nuts are lightly toasted. They burn easy, so keep an eye on them. I wouldn’t try to flip them or you’ll lose the coating.


Tasty Kitchen Blog: Grilled Macadamia-Crusted Pineapple with Coconut Cream. Guest post by Natalie Perry of Perry's Plate, recipe submitted by TK member Taylor Kiser of Food Faith Fitness.

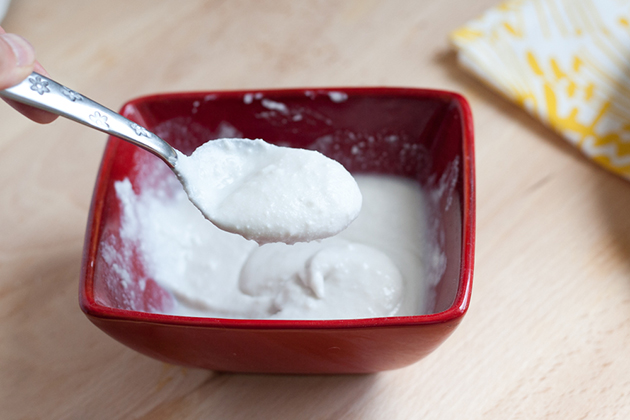
Pull the coconut milk out of the fridge. Turn it upside down and open it from the bottom. Pour out the watery coconut milk and scrape out the cream at the bottom of the can. This is the coconut cream. Pretty cool, huh?


Tasty Kitchen Blog: Grilled Macadamia-Crusted Pineapple with Coconut Cream. Guest post by Natalie Perry of Perry's Plate, recipe submitted by TK member Taylor Kiser of Food Faith Fitness.

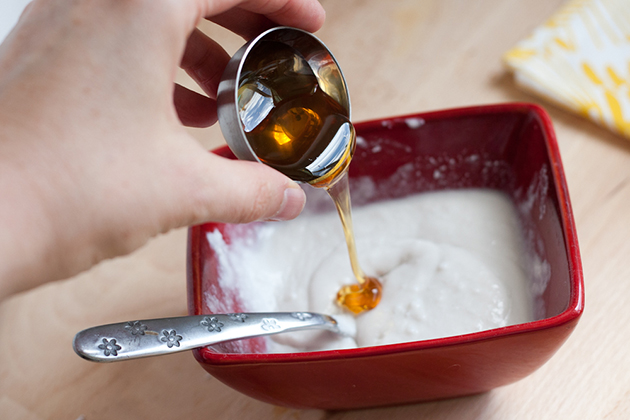
Stir in the honey, to taste.


Tasty Kitchen Blog: Grilled Macadamia-Crusted Pineapple with Coconut Cream. Guest post by Natalie Perry of Perry's Plate, recipe submitted by TK member Taylor Kiser of Food Faith Fitness.

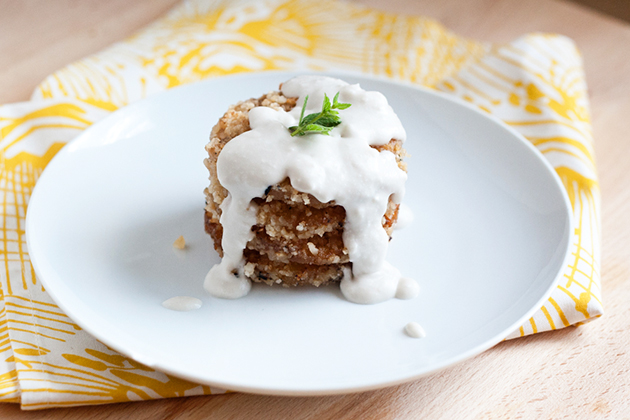
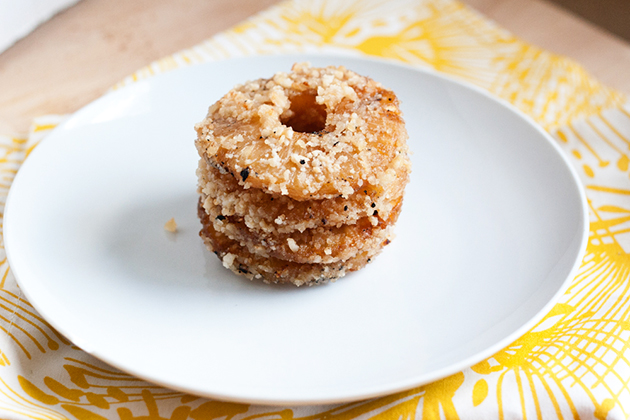
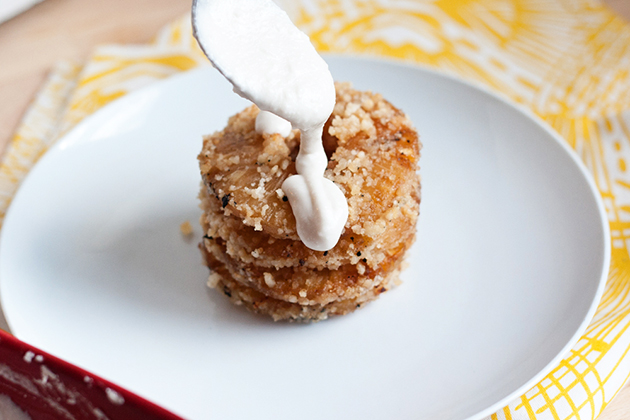
Stack a few of those grilled, toasty pineapple rings …


Tasty Kitchen Blog: Grilled Macadamia-Crusted Pineapple with Coconut Cream. Guest post by Natalie Perry of Perry's Plate, recipe submitted by TK member Taylor Kiser of Food Faith Fitness.

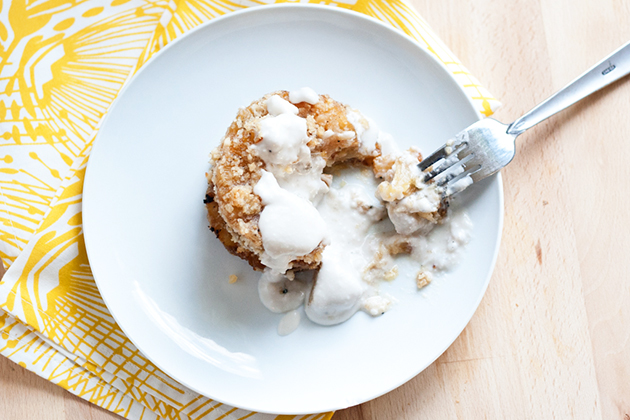
And drizzle some cream on top. You could also put the cream in the fridge for several hours so it thickens up. I can’t wait that long. (Nor plan ahead these days.)


Tasty Kitchen Blog: Grilled Macadamia-Crusted Pineapple with Coconut Cream. Guest post by Natalie Perry of Perry's Plate, recipe submitted by TK member Taylor Kiser of Food Faith Fitness.

Eat up, friends.

Many thanks to Taylor Kiser for a delicious, light (paleo-friendly!) dessert! Go check out her blog Food Faith Fitness and her TK recipe box, which are both overflowing with great recipes.


Printable Recipe

Grilled Macadamia-Crusted Pineapple with Coconut Cream

See post on Taylor Kiser’s site!
0.00 Mitt(s) 0 Rating(s)0 votes, average: 0.00 out of 50 votes, average: 0.00 out of 50 votes, average: 0.00 out of 50 votes, average: 0.00 out of 50 votes, average: 0.00 out of 5

Prep Time:

Cook Time:

Difficulty: Easy

Servings: 4

4
x

Print Options

Page size Letter 3x5 4x6
Text Size Small Medium Large
Content Include description
Include prep time, etc.
Show image

Description

Smokey-sweet grilled pineapple is crusted with macadamia nuts and then layered with coconut whipped cream for an easy, healthy, paleo-friendly summer dessert!

Ingredients

  • FOR THE PINEAPPLE:
  • 12  Pineapple Rings
  • 5-½ Tablespoons Coconut Sugar, Divided
  • 1-¼ cup Dry Roasted Macadamia Nut Pieces
  • 2  Large Egg Whites
  • Coconut Oil, Melted (for Grilling)
  • FOR THE COCONUT CREAM:
  • 13 ounces, weight Canned Full-fat Coconut Milk, Chilled At Least 24 Hours
  • 2 Tablespoons Honey
  • Mint, For Garnish

Preparation Instructions

Note: I like to whip my coconut cream a few hours in advance and then cover and refrigerate it. This way it hardens up and doesn’t melt as quickly one sandwiched between the warm pineapple. If you want to do this, do step 7 first.

1. Rub your grill generously with coconut oil and preheat to medium/high heat.
2. Lightly pat the pineapple rings dry and place them into a large bowl. Toss with 3 tablespoons of the coconut sugar until evenly coated.
3. Place the pineapple onto the preheated grill and cook until lightly charred and caramelized, about 2 minutes. Flip and repeat again. Place grilled pineapple on a plate and set aside. Turn your grill down to medium heat.
4. While the pineapple cools, place macadamia pieces into a small food processor (mine is 3 cups size) and process until large crumbs form. Spread the crumbs into a large, sided plate. Place the egg whites into a medium bowl.
5. Take one pineapple ring and dunk it into the egg whites, shaking off the excess. Then, place the pineapple into the macadamia pieces, using your opposite hand, and gently press both sides into the nut pieces. You’ll need to lightly press the nuts on to adhere them to the pineapple. Place onto a separate plate and repeat with remaining pieces.
6. Brush a little more coconut oil on the grill and place the pineapple back on it. Cook until the macadamia pieces are just beginning to look charred and the egg appears to set, about 1-2 minutes per side. Watch carefully so you don’t burn them. Transfer to a plate and let them cool while you make the coconut cream.
7. Turn your can of chilled coconut milk upside down and open. Pour out the liquid that has risen to the top (save it for a smoothie later) and scoop the thick cream from the bottom of the can into a large bowl. Add in the honey and beat with an electric hand mixer until light and fluffy (see note).
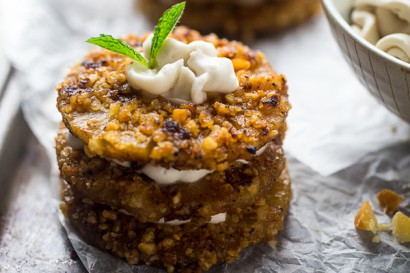
8. Place one ring of pineapple down on your serving plate and spoon (or pipe, like I did) some coconut cream (about a heaping 1 ½ tablespoons) onto the center. Top with another ring and repeat. Finish with one more piece of pineapple and a squeeze of coconut cream. Repeat with remaining rings.
9. Garnish with mint, if desired, and devour immediately!


_______________________________________

Be sure to check out Natalie’s own beautiful food blog, Perrys’ Plate, where you can see her growing collection of lovely recipes. There’s always something new to see there. Go visit now!