The Pioneer Woman Tasty Kitchen
Profile photo of ThreeManyCooks

New Year’s Black-Eyed Peas

Posted by in Holidays, Step-by-Step Recipes

Tasty Kitchen Blog: New Year's Black-Eyed Peas, Slightly Updated. Guest post by Maggy Keet of Three Many Cooks, recipe from Three Many Cooks.

 
For Southerners, black-eyed peas on New Year’s Day are as mandatory a tradition as turkey on Thanksgiving Day. We’ve had black-eyed peas, collard greens and cornbread on New Year’s Day for as long as I can remember. Even the year my family spent the week after Christmas in Hawaii. While most families would have traded the sweet tea and peas for an umbrella drink and a luau, my mom’s side of the family considered this the unforgivable sin. My Granny and her younger sister, Dot, conspiring like young girls, packed dried black-eyed peas in their luggage bound for Waikiki Beach. Without them a proper New Year’s was not possible. So on January 1st, 2004 eight of us squeezed into a beach-side condo to enjoy black-eyed peas and not much more.


Tasty Kitchen Blog: New Year's Black-Eyed Peas, Slightly Updated. Guest post by Maggy Keet of Three Many Cooks, recipe from Three Many Cooks.

The specific recipe isn’t important. The fundamentals remain unchanged: black-eyed peas and a dime. The one who finds the dime will also find luck in the coming year. I think I was a better Southerner as a little girl, because back then I believed in the dime magic. Now it’s lovely to think it might be so.

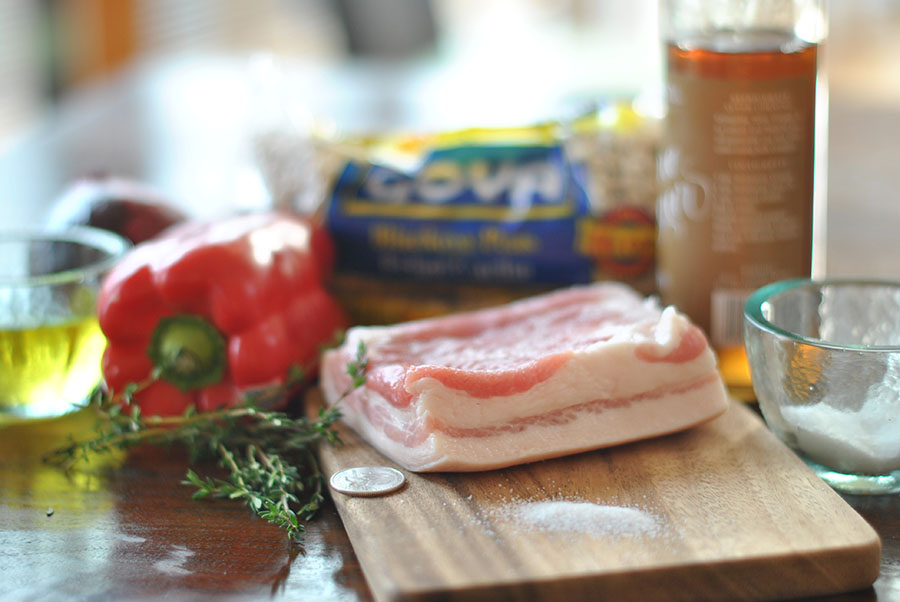
This is a new version of the family classic my Mom and I came up with this year.


Tasty Kitchen Blog: New Year's Black-Eyed Peas, Slightly Updated. Guest post by Maggy Keet of Three Many Cooks, recipe from Three Many Cooks.

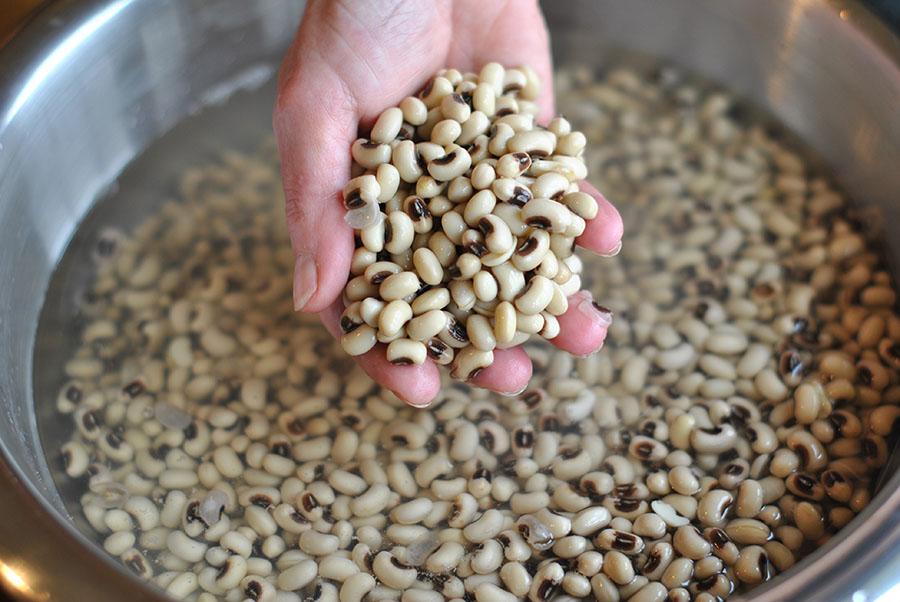
Begin by soaking the beans overnight. If you forget (as we did) you can quickly soak your beans by pouring boiling water over them. Then they’re ready in an hour or two.


Tasty Kitchen Blog: New Year's Black-Eyed Peas, Slightly Updated. Guest post by Maggy Keet of Three Many Cooks, recipe from Three Many Cooks.

Once soaked, drain the beans.


Tasty Kitchen Blog: New Year's Black-Eyed Peas, Slightly Updated. Guest post by Maggy Keet of Three Many Cooks, recipe from Three Many Cooks.

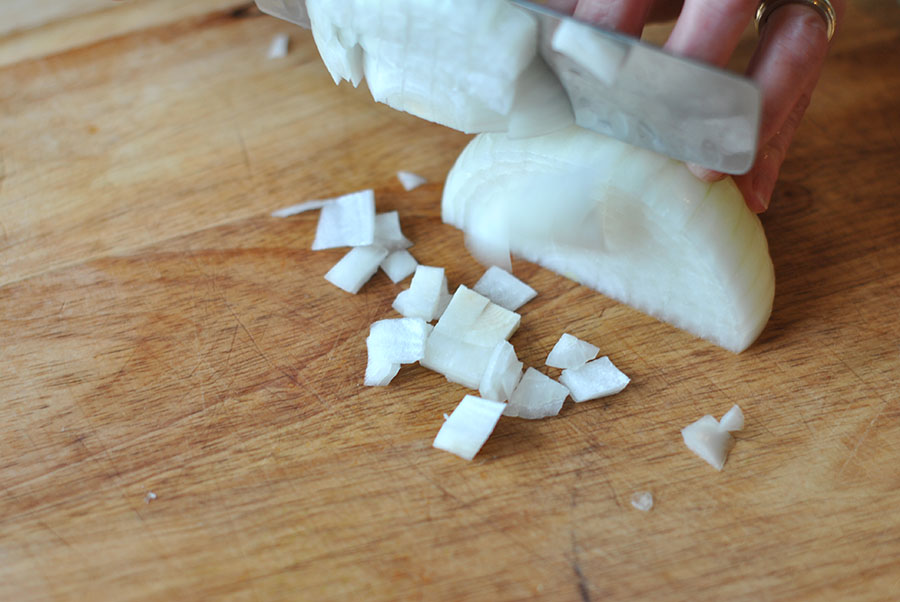
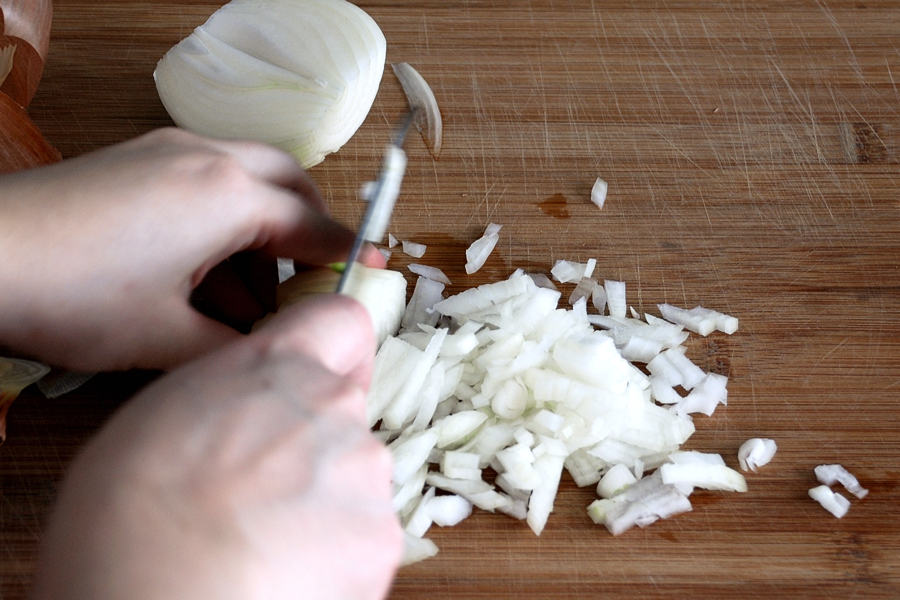
Start by dicing an onion. Everyone can do that with relative ease.

But chopping a bell pepper is a bit more difficult. My Mom says the secret to chopping round vegetables is getting them flat ASAP. I only learned this little trick a few months ago and it’s been a culinary game-changer.


Tasty Kitchen Blog: New Year's Black-Eyed Peas, Slightly Updated. Guest post by Maggy Keet of Three Many Cooks, recipe from Three Many Cooks.

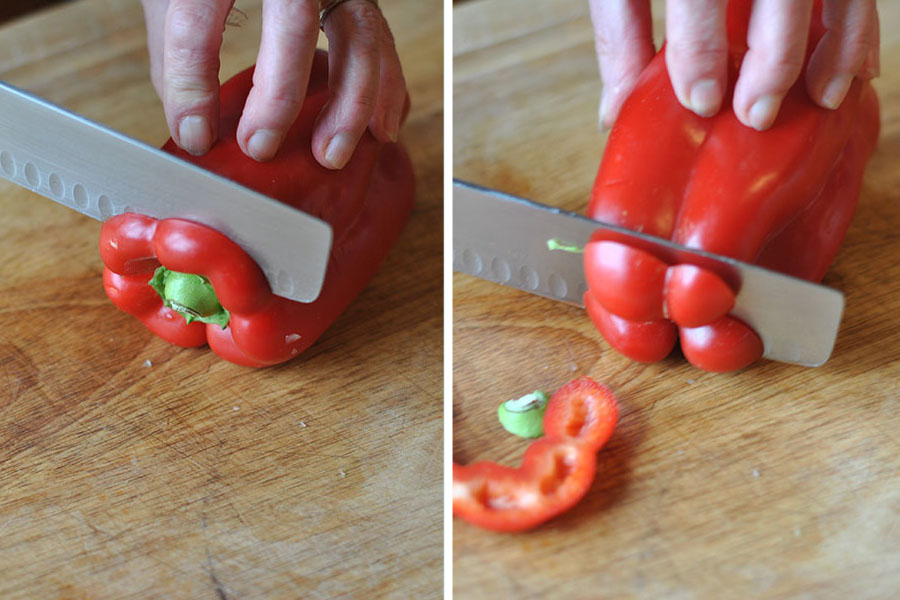
First, lop off the ends of the pepper.


Tasty Kitchen Blog: New Year's Black-Eyed Peas, Slightly Updated. Guest post by Maggy Keet of Three Many Cooks, recipe from Three Many Cooks.

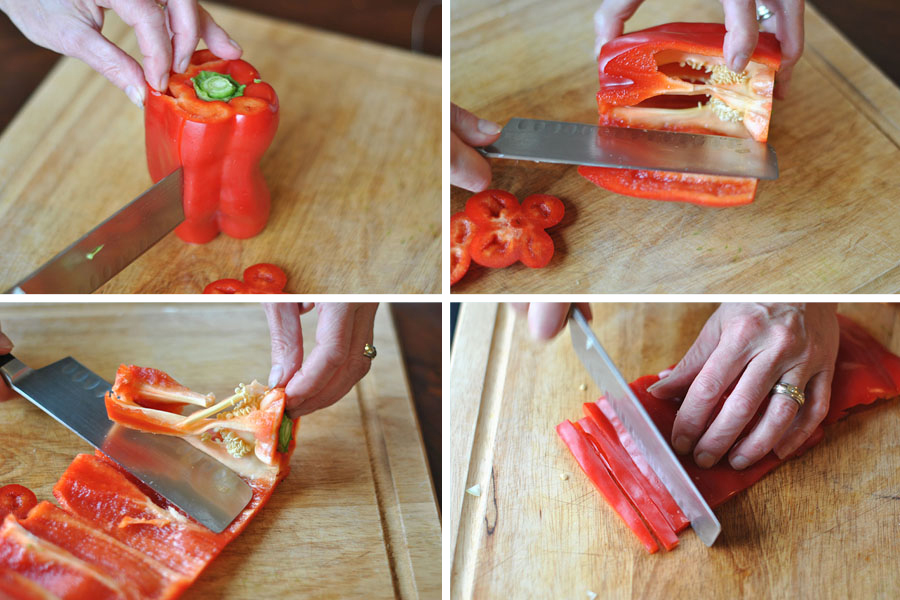
Slice down the length of the pepper, lay the pepper on its side, and use the knife to remove the membranes inside. Once the pepper is flat, it’s easier to slice into strips.
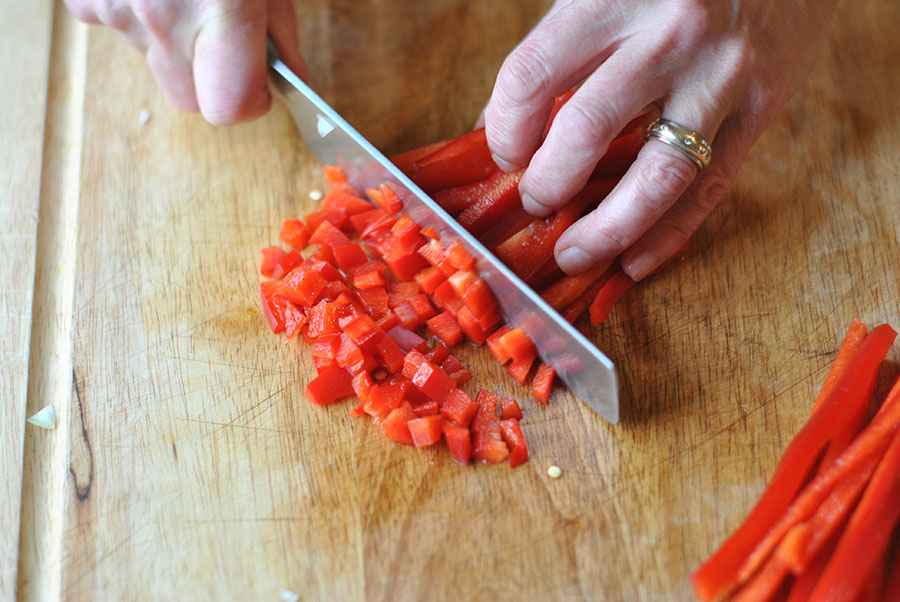


Tasty Kitchen Blog: New Year's Black-Eyed Peas, Slightly Updated. Guest post by Maggy Keet of Three Many Cooks, recipe from Three Many Cooks.

See? Easy peasy.


Tasty Kitchen Blog: New Year's Black-Eyed Peas, Slightly Updated. Guest post by Maggy Keet of Three Many Cooks, recipe from Three Many Cooks.

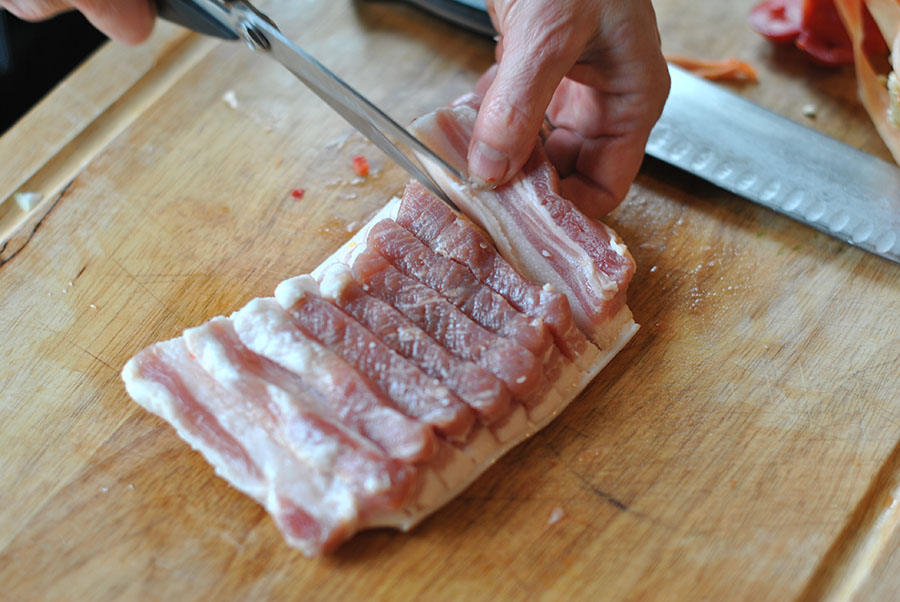
Next, cut up your salt pork.


Tasty Kitchen Blog: New Year's Black-Eyed Peas, Slightly Updated. Guest post by Maggy Keet of Three Many Cooks, recipe from Three Many Cooks.

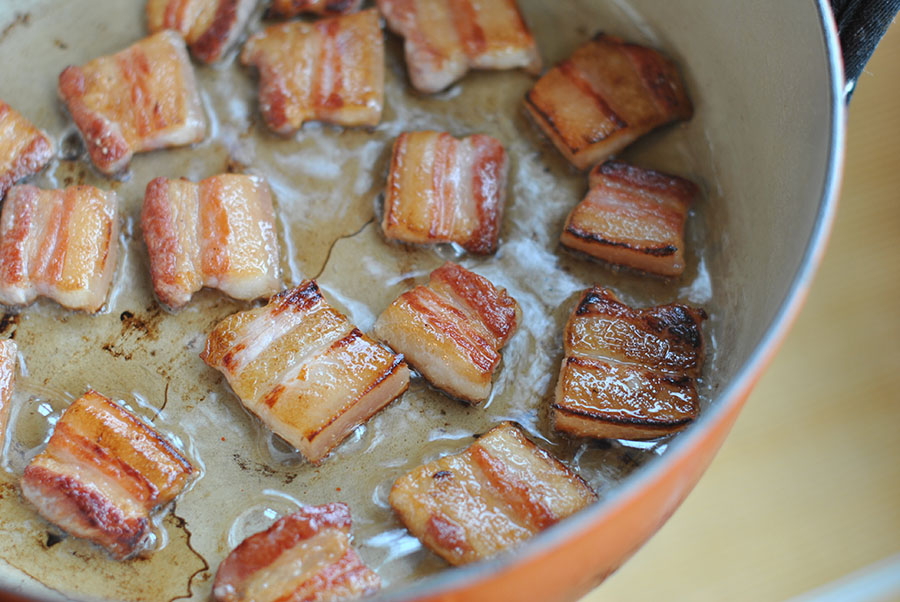
Sauté the salt pork for a few minutes on each side until lightly crisped and brown. In my opinion, we could stop the recipe here and simply eat these! But we must show some restraint and carry on with the recipe.


Tasty Kitchen Blog: New Year's Black-Eyed Peas, Slightly Updated. Guest post by Maggy Keet of Three Many Cooks, recipe from Three Many Cooks.

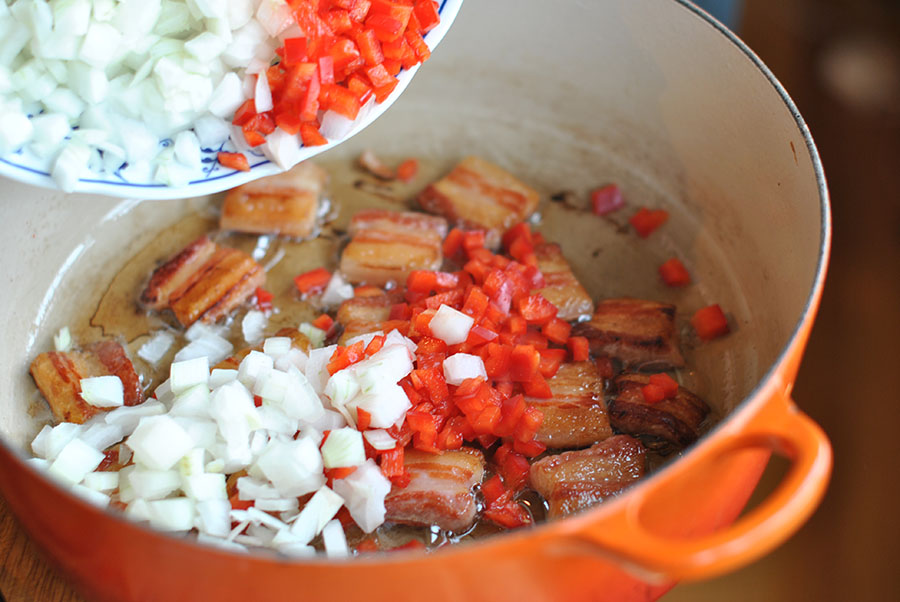
Add your chopped onions and peppers to the pot.


Tasty Kitchen Blog: New Year's Black-Eyed Peas, Slightly Updated. Guest post by Maggy Keet of Three Many Cooks, recipe from Three Many Cooks.

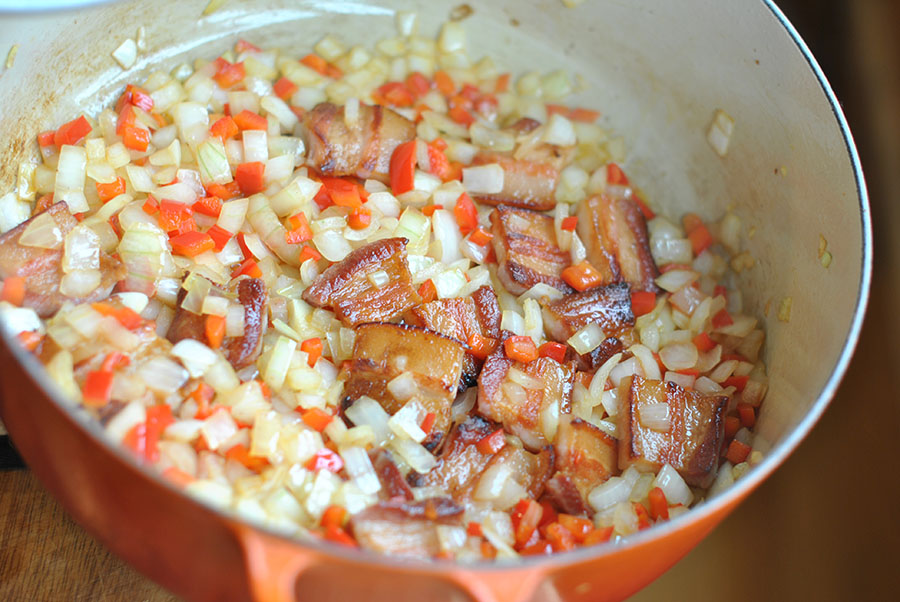
Cook until peppers are tender and onions are translucent.


Tasty Kitchen Blog: New Year's Black-Eyed Peas, Slightly Updated. Guest post by Maggy Keet of Three Many Cooks, recipe from Three Many Cooks.

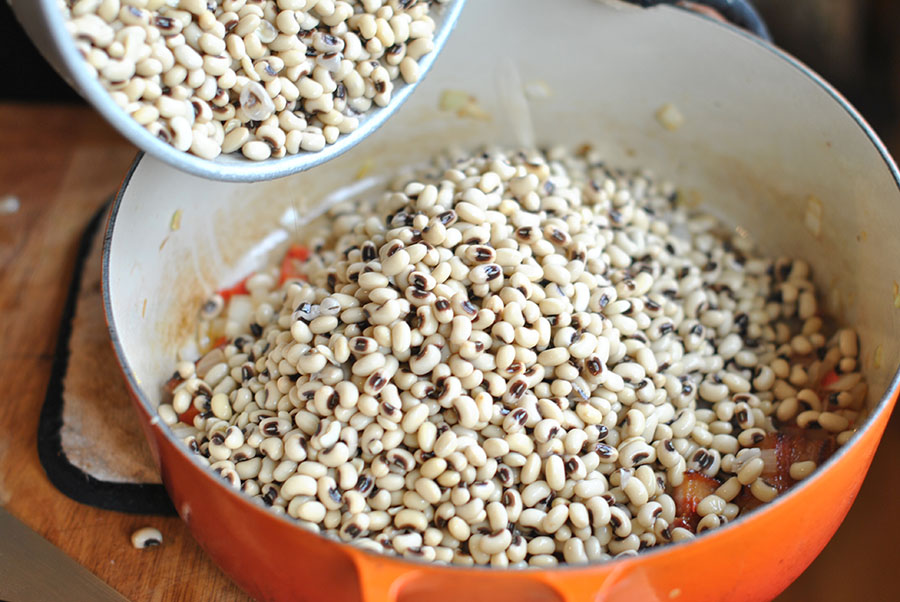
Add the soaked beans to the pot, followed by the chicken broth.


Tasty Kitchen Blog: New Year's Black-Eyed Peas, Slightly Updated. Guest post by Maggy Keet of Three Many Cooks, recipe from Three Many Cooks.

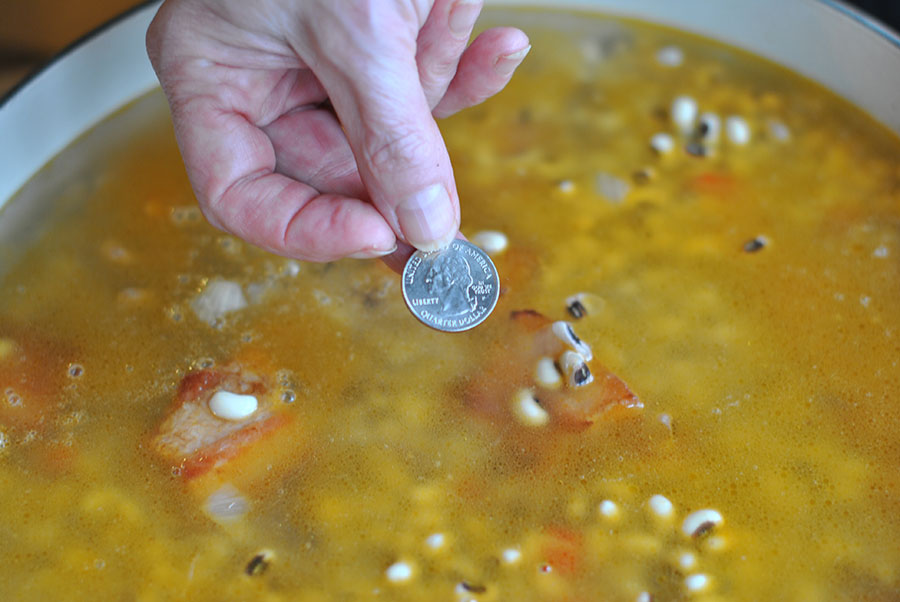
Then the most important part of the recipe: Add the dime! (When we photographed this dish we couldn’t find a dime, so we used a quarter. Call it inflation).


Tasty Kitchen Blog: New Year's Black-Eyed Peas, Slightly Updated. Guest post by Maggy Keet of Three Many Cooks, recipe from Three Many Cooks.

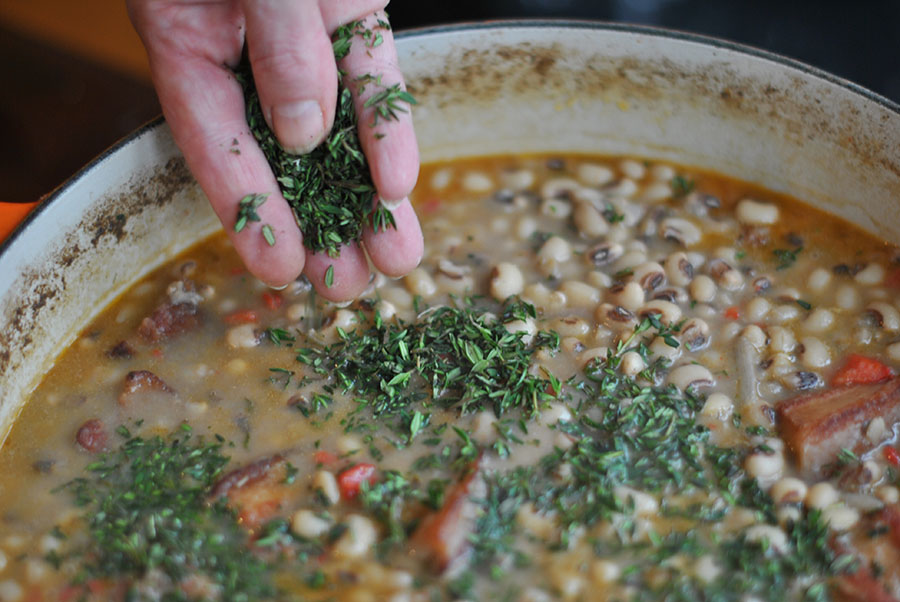
When the beans are cooked and soft and the broth becomes opaque, add the thyme.


Tasty Kitchen Blog: New Year's Black-Eyed Peas, Slightly Updated. Guest post by Maggy Keet of Three Many Cooks, recipe from Three Many Cooks.

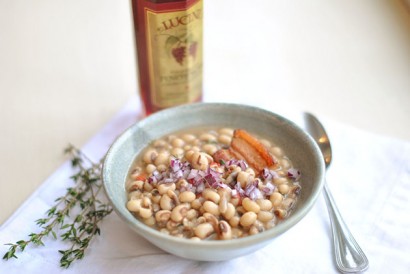
We garnished with minced red onion and vinegar.

We may live in the North, but Mom makes sure we respect our Southern roots. (You can take the girl out of the South, but you can’t take the South out of the girl.) Come Saturday afternoon, we’ll be eating these beans with collard greens and cornbread.

Happy New Year, one and all, from Three Many Cooks! Hope 2011 brings you, well—everything promised in that little dime.


Printable Recipe

New Year’s Black-Eyed Peas, Slightly Updated

4.87 Mitt(s) 8 Rating(s)8 votes, average: 4.87 out of 58 votes, average: 4.87 out of 58 votes, average: 4.87 out of 58 votes, average: 4.87 out of 58 votes, average: 4.87 out of 5

Prep Time:

Cook Time:

Difficulty: Easy

Servings: 12

12
x

Print Options

Page size Letter 3x5 4x6
Text Size Small Medium Large
Content Include description
Include prep time, etc.
Show image

Description

Ring in the New Year with Black-Eyed Peas, Slightly Updated.

Ingredients

  • ¾ pounds Slab Salt Pork, Sliced Thick And Then Into 2-inch Pieces
  • 1 whole Large Onion, Cut Into Medium Dice
  • 1 whole Large Bell Pepper, Cut Into Medium Dice
  • 2 pounds Black Eyed Beans, Soaked In 12 Cups Of Water Overnight And Drained (See Note For Quicker Method)
  • 2 quarts Chicken Broth, Plus 1 To 2 Cups Water As Needed
  • 1 whole Coin (i.e. A Dime)
  • 1 pinch Salt And Ground Black Pepper To Taste
  • 2 Tablespoons Tablespoons Chopped Fresh Thyme Leaves
  • 1 whole Medium Red Onion, Minced
  • 1 dash Red Wine Vinegar (or Pepper Sauce) As Desired

Preparation Instructions

Heat a large soup kettle over medium-high heat. Add salt pork; fry until golden brown and fat has rendered, 4 to 5 minutes. Add onions and pepper; sauté until tender, about 5 minutes. Add peas, chicken broth, and coin. Bring to a boil, reduce heat to medium-low and simmer, partially covered and stirring occasionally, until peas are fully tender and cooking liquid turns from translucent to opaque, adding water as necessary to keep peas moist but not soupy, about 1 hour. When peas have fully softened, season generously with salt and pepper and stir in thyme. Continue to simmer to blend flavors, a couple of minutes longer. Serve with a dish of red onion and vinegar or pepper sauce alongside.

Note: You can quickly soak your beans by pouring boiling water over them. Then they’re ready in an hour or two.


_______________________________________

Three Many Cooks is the always-entertaining food blog of Pam Anderson and her two daughters, Maggy and Sharon. Pam is a well-known and much-respected food writer and author, Maggy is a “hippy adventurer meets 1950s housewife,” and Sharon refers to herself as a recovering food snob learning to survive on a graduate student’s budget. Theirs is a strong relationship both inside and outside the kitchen, and it shows in the food they create and the stories they tell.


Profile photo of Erica Lea

Favorite Cheese Ball

Posted by in Step-by-Step Recipes

Tasty Kitchen Blog: Favorite Cheese Ball. Guest post and recipe from Erica Kastner of Cooking for Seven.

 
I have made this recipe so often that I could probably do it with my eyes shut and one hand held behind my back. My dad loves it and complains if we try to alter it in any way.

My sister and I developed this cheese ball because we couldn’t find a recipe to suit our fancy. We added a little of this, a handful of that, and, to our surprise, created something deliciously savory with a mere hint of sweetness.

It’s ridiculously easy to make. Care to learn how?


Tasty Kitchen Blog: Favorite Cheese Ball. Guest post and recipe from Erica Kastner of Cooking for Seven.

Here’s what you’ll need: cream cheese, sour cream, cheddar cheese, parmesan cheese, garlic powder, cayenne pepper, lemon, onion, dried cranberries (optional), freshly ground black pepper, and pecans.


Tasty Kitchen Blog: Favorite Cheese Ball. Guest post and recipe from Erica Kastner of Cooking for Seven.

Begin by chopping the onion fine. You only need about 1/4 cup.


Tasty Kitchen Blog: Favorite Cheese Ball. Guest post and recipe from Erica Kastner of Cooking for Seven.

Roll the lemon and squeeze out the juice. You only need 1 teaspoon.


Tasty Kitchen Blog: Favorite Cheese Ball. Guest post and recipe from Erica Kastner of Cooking for Seven.

Place all of the ingredients except the pecans into the bowl of a stand mixer.


Tasty Kitchen Blog: Favorite Cheese Ball. Guest post and recipe from Erica Kastner of Cooking for Seven.

Beat until combined.


Tasty Kitchen Blog: Favorite Cheese Ball. Guest post and recipe from Erica Kastner of Cooking for Seven.

Scrape onto a piece of plastic wrap.


Tasty Kitchen Blog: Favorite Cheese Ball. Guest post and recipe from Erica Kastner of Cooking for Seven.

Form into a ball. Place in the refrigerator until it firms up a bit, about 30 minutes.


Tasty Kitchen Blog: Favorite Cheese Ball. Guest post and recipe from Erica Kastner of Cooking for Seven.

Toast the pecans and chop coarsely.


Tasty Kitchen Blog: Favorite Cheese Ball. Guest post and recipe from Erica Kastner of Cooking for Seven.

Just before serving, roll the cheese ball in the nuts to cover completely. You may need to press the nuts into the ball with your hands to make them stick.


Tasty Kitchen Blog: Favorite Cheese Ball. Guest post and recipe from Erica Kastner of Cooking for Seven.

Serve with your favorite crackers. I recommend something simple without intense flavors. You don’t want to overpower the cheese ball. These crispy wheats from Back to Nature are quite good.


Tasty Kitchen Blog: Favorite Cheese Ball. Guest post and recipe from Erica Kastner of Cooking for Seven.

Notes: The cranberries are completely optional. If you dislike fruit in your cheese ball, simply omit them. You can also switch out the nuts for walnuts, almonds, etc. Pecans are our favorite.

For the best flavor, take the cheese ball out of the refrigerator about 20 minutes before serving.


Printable Recipe

Favorite Cheese Ball

See post on Erica Lea’s site!
5.00 Mitt(s) 7 Rating(s)7 votes, average: 5.00 out of 57 votes, average: 5.00 out of 57 votes, average: 5.00 out of 57 votes, average: 5.00 out of 57 votes, average: 5.00 out of 5

Prep Time:

Cook Time:

Difficulty: Easy

Servings: 12

12
x

Print Options

Page size Letter 3x5 4x6
Text Size Small Medium Large
Content Include description
Include prep time, etc.
Show image

Description

Our favorite cheese ball recipe. Dad complains if we make any other.

Ingredients

  • 8 ounces, weight Cream Cheese
  • ¼ cups Sour Cream
  • 1 cup Finely Shredded Cheddar Cheese
  • ¼ cups Shredded Parmesan Cheese
  • ¼ cups Finely Chopped Onion
  • ½ teaspoons Teaspoon Garlic Powder
  • 1 pinch Cayenne Powder
  • 1 teaspoon Lemon Juice
  • ¼ teaspoons Freshly Ground Black Pepper
  • ⅓ cups Dried Cranberries (optional)
  • ½ cups Toasted Pecans, Chopped Coarse (optional)

Preparation Instructions

1) Place all ingredients except pecans in a large bowl. Beat with a hand mixer on medium-low speed until well combined.

2) Scrape the mixture onto a piece of plastic wrap. Cover with the plastic wrap and shape into a ball or log. Put the cheese ball on a plate and place in the refrigerator to harden, about 30 minutes – 1 hour.

3) Roll the cheese ball in the chopped pecans and place on a serving plate. Serve with crackers.

Note: this cheese is best if allowed to sit for at least 1 hour in the refrigerator to allow the flavors to blend. The flavors are best if it is allowed to sit at room temperature for 15-20 minutes before serving.


_______________________________________

Erica Berge shares her wonderful recipes and amazing food photography on her blog, Cooking for Seven. She also writes about crafts and posts more of her beautiful photography in her personal blog, EricaLea.com. There really isn’t much that this amazing young lady can’t do, and we’re thrilled she does some of it here.


Profile photo of missamy

How to Open a Pomegranate

Posted by in Kitchen Talk

Maybe you’ve passed by pomegranates in the grocery thinking they’re much too exotic and pricey for your tastes. A couple of years ago, I found my friend Sallie munching on the bright red arils, or seeds, from the pomegranate. Since I’d only used pomegranate juice in teas and recipes, I talked to her for a moment about the pomegranate. Sallie said she loved when pomegranate season rolled around, greatly reducing the price while increasing the availability. She told me how she’d take one to work for a snack.

I was like, wha?! A snack? I can hardly open the thing. I’d have red juice everywhere and would’ve grabbed a pack of Ho-Hos by the time I got the seeds out.


Tasty Kitchen Blog: How To Open a Pomegranate. Guest post by Amy Johnson of She Wears Many Hats.

Besides, it seemed so exotic. And sometimes Jalapéno Cheetos are as exotic as I can get. Yeah, I’m not typically a healthy snacker.

Just keepin’ it real, folks.

But seeing Sallie, the woman who can swim three laps to my one … Sallie who is ten years my senior but who could easily pass as my younger sister … Sallie who eats pomegranates for a snack … I’m thinking Sallie may be on to something.

So, on my next trip to the grocer I picked up a few to give it a go. When I got home I did a little checking, first on the pomegranate and second how to approach the strange-looking fruit. Sakes alive, have you ever read about the pomegranate? Truly an amazing fruit.


Tasty Kitchen Blog: How To Open a Pomegranate. Guest post by Amy Johnson of She Wears Many Hats.

And have you ever opened one? They really are unbelievable. Pictures don’t do it justice. The vibrant red, ruby looking seeds are a marvel. And pretty tasty too. Not to mention that pomegranate seeds and the juice are a great addition to many recipes. The arils burst with a sweet, tart flavor, ending with a crunch. They’re to be enjoyed whole, seed and all.

Plus, the possible health benefits alone make the price of this fruit seem not so expensive. These include the antioxidant benefits of helping keep bad cholesterol from developing further, preventing blood platelets from forming clots (similar to aspirin), and even helping reduce inflammation, which can aid in treating arthritis. At least, what’s what I read in the American Journal of Clinical Nutrition and the American Journal of the College of Cardiology.

These are just a few of the possible benefits from the pomegranate that I ran across. Do a thorough check yourself. You may be surprised at what you find.


Tasty Kitchen Blog: How To Open a Pomegranate. Guest post by Amy Johnson of She Wears Many Hats.

There seems to be a variety of recommended ways to open a pomegranate. I’ve tried a few, but have two that I prefer. Wanna see?

Before beginning, I’d recommend—unless you own a red cutting board—laying parchment paper or paper towels out on the surface where you’ll be cutting. I’ve found that no matter how careful you are, unless you’re a professional pomegranate opener-upper, it’s difficult to avoid the juice splattering. Also, have a medium-large bowl filled halfway with cold water ready.

On to the two ways I get to the goodness.


Tasty Kitchen Blog: How To Open a Pomegranate. Guest post by Amy Johnson of She Wears Many Hats.

The first way: halve the pomegranate, cutting it from top to bottom.


Tasty Kitchen Blog: How To Open a Pomegranate. Guest post by Amy Johnson of She Wears Many Hats.

Place both halves in the water. Working with one half face down, using your fingers, gently coax the seeds out.


Tasty Kitchen Blog: How To Open a Pomegranate. Guest post by Amy Johnson of She Wears Many Hats.

Eventually you’ll be able to turn the pomegranate peel inside out to extract those closest to the outer skin. The seeds will sink to the bottom, while the white pith floats. Skim off the white pith and strain the water out.

 
The second way to cut a pomegranate is my favorite. It requires more cutting but I think is less messy in the long run.


Tasty Kitchen Blog: How To Open a Pomegranate. Guest post by Amy Johnson of She Wears Many Hats.

Start by gently cutting a circle around the top of the pomegranate, just barely piercing the skin. (Of course you can use a much smaller knife than this one. A small paring knife should work well.)


Tasty Kitchen Blog: How To Open a Pomegranate. Guest post by Amy Johnson of She Wears Many Hats.

The idea is to take the top off without popping any of the seeds, like this.


Tasty Kitchen Blog: How To Open a Pomegranate. Guest post by Amy Johnson of She Wears Many Hats.

As you can see, I cut a few seeds. I could use some more practice. But how pretty is that? It’s like a little bowl of jewels.


Tasty Kitchen Blog: How To Open a Pomegranate. Guest post by Amy Johnson of She Wears Many Hats.

Once the top is off, you can easily see the different sections of the pomegranate. There should be six different “chambers,” roughly the same size. See the white pithy areas separating each section?


Tasty Kitchen Blog: How To Open a Pomegranate. Guest post by Amy Johnson of She Wears Many Hats.

Using those pithy dividers as a guide, and, again, gently piercing the skin of the fruit but not cutting all the way through, cut down the sides of the pomegranate following where the individual sections seem to be. You’ll make six different cuts working around the pomegranate.


Tasty Kitchen Blog: How To Open a Pomegranate. Guest post by Amy Johnson of She Wears Many Hats.

Next, gently pry open the pomegranate.


Tasty Kitchen Blog: How To Open a Pomegranate. Guest post by Amy Johnson of She Wears Many Hats.

It opens up like a beautiful gift revealing all the tasty jewels inside. Simply an amazing fruit, huh?

To remove the seeds, either gently pick them out or repeat the steps above with the bowl of water.


Tasty Kitchen Blog: How To Open a Pomegranate. Guest post by Amy Johnson of She Wears Many Hats.

All of these seeds are from a single pomegranate. One pomegranate holds hundreds of these little beauties. A handy tip to remember when purchasing pomegranates is the heavier the pomegranate, the more seeds it will have.

 
So there you go. Next time you’re in the grocery store, grab one of these babies and take it home for a snack, or as an addition to a recipe. Be sure to let me know how it goes. And a big thanks to my friend Sallie for turning me on to this super fruit!


_______________________________________

Amy Johnson is a blogger who writes about food, travel, the home (both inside and out), and various observations and random musings about anything and everything. Visit her blog She Wears Many Hats for a dose of deliciousness, practicality, hilarity, or just plain fun. She lives in South Carolina with her husband and two children.


Profile photo of ThreeManyCooks

Light and Crisp Waffles

Posted by in Step-by-Step Recipes

Tasty Kitchen Blog: Nancy’s Mom’s Light and Crisp Waffles. Guest post by Maggy Keet of Three Many Cooks, recipe submitted by TK member Sweetpea Nancy.

 
As a P.K. (preacher’s kid), Christmas morning has never been normal for our family. Growing up, Sharon and I would have to wait until Dad got back from Christmas services before opening our presents (torture), and breakfast was something like eggs and toast or muffins. Don’t feel sorry for us; we didn’t know any different. The idea of making a special Christmas morning breakfast and opening our presents by the tree is entirely foreign to our family.

As Sharon and I have grown up, our family has adapted and we now celebrate at night with a show-stopping dinner followed by gifts. This only works because we’re all adults now. My dream for the future (when we hear the pitter patter of little feet) would be waffles with an assembly line of toppings on Christmas morning before we head to the tree.

But this recipe for Nancy’s Mom’s Light and Crisp Waffles is a great breakfast for any morning during the holidays when you have family and friends staying. As Sweetpea Nancy points out, you can even make a double batch ahead and freeze them. But I think part of the fun is everyone sitting around in their pajamas, making waffles and eating them as they come hot off the iron.


Tasty Kitchen Blog: Nancy’s Mom’s Light and Crisp Waffles. Guest post by Maggy Keet of Three Many Cooks, recipe submitted by TK member Sweetpea Nancy.

The ingredient list is simple: eggs, milk or buttermilk, flour, baking powder, salt, and oil.


Tasty Kitchen Blog: Nancy’s Mom’s Light and Crisp Waffles. Guest post by Maggy Keet of Three Many Cooks, recipe submitted by TK member Sweetpea Nancy.

Start by plugging in your waffle iron so it’s good and hot by the time your batter is ready. Obviously we’re comfortable with you all because we didn’t even bother to clean our well-loved, often-used waffle iron (circa 1989) before photographing it.


Tasty Kitchen Blog: Nancy’s Mom’s Light and Crisp Waffles. Guest post by Maggy Keet of Three Many Cooks, recipe submitted by TK member Sweetpea Nancy.

Then separate your eggs. For some people this is easy, for others it is hard. Crack the egg in half and pass the yolk back and forth between the two shell halves. The white will fall into the bowl, leaving you with just the egg in the shell.


Tasty Kitchen Blog: Nancy’s Mom’s Light and Crisp Waffles. Guest post by Maggy Keet of Three Many Cooks, recipe submitted by TK member Sweetpea Nancy.

Now beat your egg whites until they form stiff peaks.


Tasty Kitchen Blog: Nancy’s Mom’s Light and Crisp Waffles. Guest post by Maggy Keet of Three Many Cooks, recipe submitted by TK member Sweetpea Nancy.

Then add the salt, baking powder and baking soda to your flour.


Tasty Kitchen Blog: Nancy’s Mom’s Light and Crisp Waffles. Guest post by Maggy Keet of Three Many Cooks, recipe submitted by TK member Sweetpea Nancy.

Whisk the egg yolks in with the buttermilk.


Tasty Kitchen Blog: Nancy’s Mom’s Light and Crisp Waffles. Guest post by Maggy Keet of Three Many Cooks, recipe submitted by TK member Sweetpea Nancy.

Then add all wet ingredients to the dry ingredients (we added them at the same time which made this cool yin and yang design) and mix until combined.


Tasty Kitchen Blog: Nancy’s Mom’s Light and Crisp Waffles. Guest post by Maggy Keet of Three Many Cooks, recipe submitted by TK member Sweetpea Nancy.

Then fold in the egg whites. Don’t over mix, you want batter to be light and fluffy.


Tasty Kitchen Blog: Nancy’s Mom’s Light and Crisp Waffles. Guest post by Maggy Keet of Three Many Cooks, recipe submitted by TK member Sweetpea Nancy.

Make sure that your waffle iron is good and hot. Like smokin’.


Tasty Kitchen Blog: Nancy’s Mom’s Light and Crisp Waffles. Guest post by Maggy Keet of Three Many Cooks, recipe submitted by TK member Sweetpea Nancy.

Add 1/2 cup of batter to the waffle iron….


Tasty Kitchen Blog: Nancy’s Mom’s Light and Crisp Waffles. Guest post by Maggy Keet of Three Many Cooks, recipe submitted by TK member Sweetpea Nancy.

And cook until golden brown.


Tasty Kitchen Blog: Nancy’s Mom’s Light and Crisp Waffles. Guest post by Maggy Keet of Three Many Cooks, recipe submitted by TK member Sweetpea Nancy.

Serve with any of your favorite toppings. Mine happen to be banana, chopped nuts and maple syrup.

While I may not be enjoying these Christmas morning, I’m hoping you will.


Tasty Kitchen Blog: Nancy’s Mom’s Light and Crisp Waffles. Guest post by Maggy Keet of Three Many Cooks, recipe submitted by TK member Sweetpea Nancy.

Enjoy!

Thanks again, Sweetpea Nancy!


Printable Recipe

Nancy’s Mom’s Light & Crisp Waffles

4.76 Mitt(s) 13 Rating(s)13 votes, average: 4.76 out of 513 votes, average: 4.76 out of 513 votes, average: 4.76 out of 513 votes, average: 4.76 out of 513 votes, average: 4.76 out of 5

Prep Time:

Cook Time:

Difficulty: Easy

Servings: 8

8
x

Print Options

Page size Letter 3x5 4x6
Text Size Small Medium Large
Content Include description
Include prep time, etc.
Show image

Description

Get out the waffle iron. Once you’ve tried these homemade waffles, you will never go back to buying them again. I like to double the batch and put the leftover cooked waffles in a airtight container and in the freezer. When you need a fast breakfast, just pop them in the toaster and you have fresh hot waffles for breakfast! My favorite topping is watermelon and maple syrup.

Ingredients

  • 2 whole Eggs, Separated
  • 2 cups Milk Or Buttermilk
  • 2 cups Flour
  • 1 Tablespoon Baking Powder
  • ½ teaspoons Salt
  • ⅓ cups Canola Oil

Preparation Instructions

Beat egg whites until stiff. In a separate large bowl, put remaining ingredients and beat on low with a hand mixer until moistened. Increase speed to medium and mix until smooth. By hand, gently fold in beaten egg whites. Pour 1/2 cup of batter onto hot waffle iron. Cook until lightly browned. Serve with your favorite toppings. Enjoy!

Note: I like to double the recipe and put the leftovers in the freezer. When I double the recipe, I just use 1 litre of milk or buttermilk.

Some of my favorite toppings are: fresh fruit and whipping cream, watermelon and maple syrup. Yum yum!

Makes 8 waffles.


_______________________________________

Three Many Cooks is the always-entertaining food blog of Pam Anderson and her two daughters, Maggy and Sharon. Pam is a well-known and much-respected food writer and author, Maggy is a “hippy adventurer meets 1950s housewife,” and Sharon refers to herself as a recovering food snob learning to survive on a graduate student’s budget. Theirs is a strong relationship both inside and outside the kitchen, and it shows in the food they create and the stories they tell.


Profile photo of cookincanuck

Graham Cracker Cookie Bars

Posted by in Baking, Step-by-Step Recipes

  Every year at this time, I grapple with the decision of what holiday treat to give my neighbors. The first year we were married—you know, when I was young, ambitious, and naïve—I made a loaf of our favorite zucchini bread for every neighbor. About ten hours into the process and pounds of zucchini later, […]

Profile photo of Erika (TK)

Looks Fabulous! Holiday Platter Ideas

Posted by in Holidays, Looks Delicious!

  Our Tasty Kitchen members continue to amaze me with their crazy creativity and talent. It’s so inspiring, and you all are just so lovely about sharing your talent. Today I want to show you just a few recipes that I thought would make lovely and impressive additions to any holiday platter. They’ll make everyone […]

Profile photo of Erika (TK)

The Gift of Food

Posted by in Holidays, The Theme Is...

  ‘Tis the season for giving (not that there’s any wrong season for giving) and I don’t know about you, but I just love receiving thoughtful, special gifts made by hands that belong to those who are near and dear to me. I also love sharing goodies from my kitchen and I do feel there […]

Profile photo of missamy

Rosemary Turkey Pockets

Posted by in Step-by-Step Recipes

  Tasty Kitchen is full of recipes that bring back memories from potlucks, parties and shindigs long past. As I was meandering through the Tasty Kitchen offerings, I found this recipe for Rosemary Chicken Pockets, submitted by Tasty Kitchen member, punkrebelmama. It reminded me of a recipe my mother used to make each year using […]