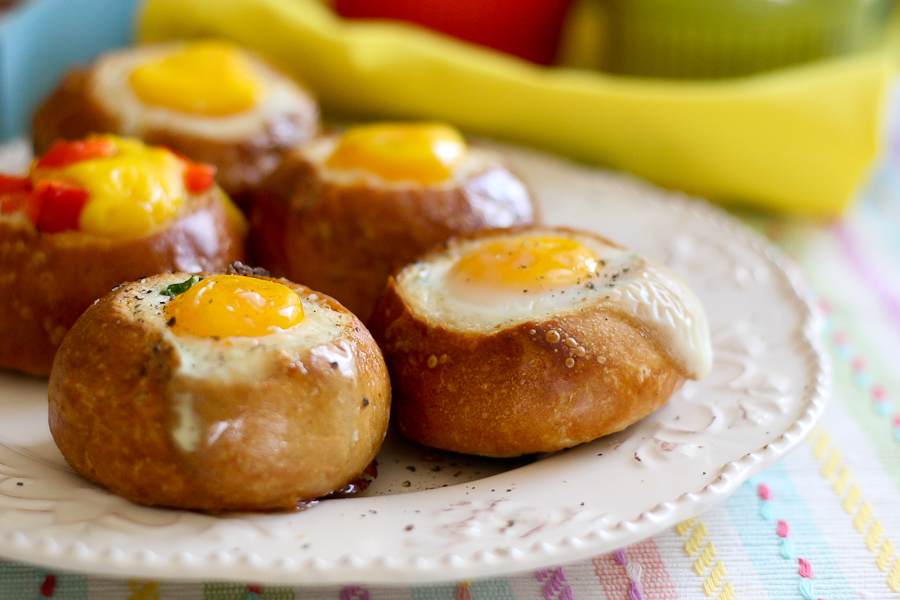
If I ask my (almost) 5-year-old what cooking show she wants to watch with Mom, she always says, “Pioneer Woman!” She adores Ree’s show! After one recent episode where Ree made soup in bread bowls, my little girl was obsessed with the idea of eating her bowl when she finished her soup. (It IS pretty cool if you ask me.) She’s been hounding me to make them for several weeks now.
Since bread bowls are pretty substantial (especially for a 5-year-old) I was so excited when I saw a miniature version made from crusty rolls! The Customizable Bread Bowl Breakfast idea comes from TK member Lindsay.
I love recipes like this that are more conceptual than a strict-measurement recipe. You can literally go any direction with these bowls and simply use what you have on hand! They’d also be great to serve a crowd at brunch (perhaps an Easter brunch if you’re planning one?). If you have enough fillings, then there’s bound to be something that everyone will like!
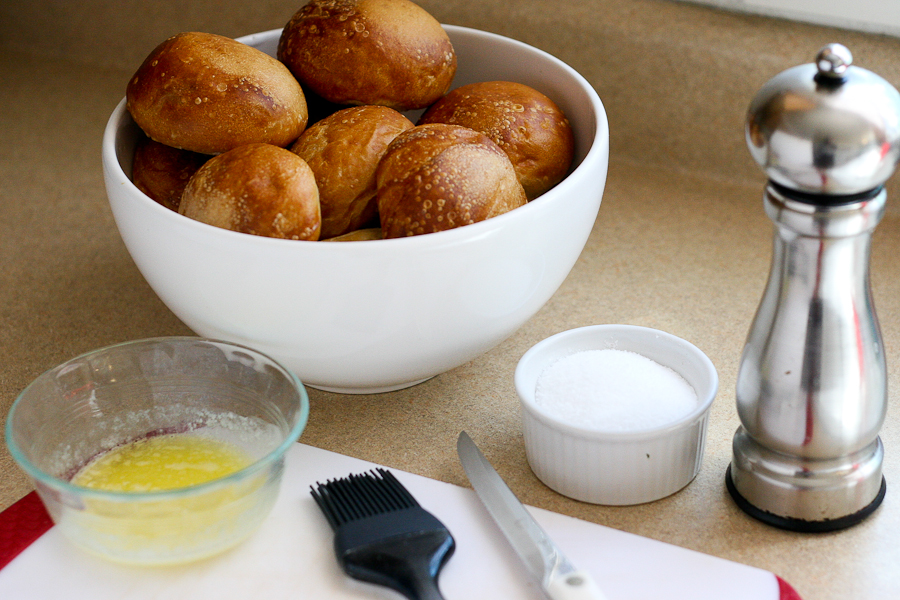
To get started you’ll need some crusty dinner rolls, some melted butter, a sharp serrated knife, a pastry brush, salt, and pepper.
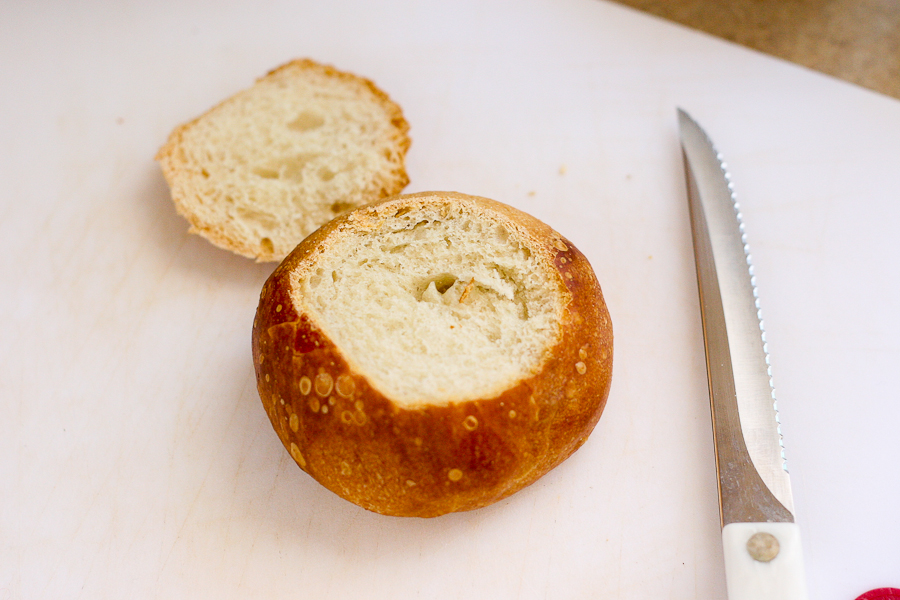
Slice off the very top of the roll.
(These are so easy. It kills me.)
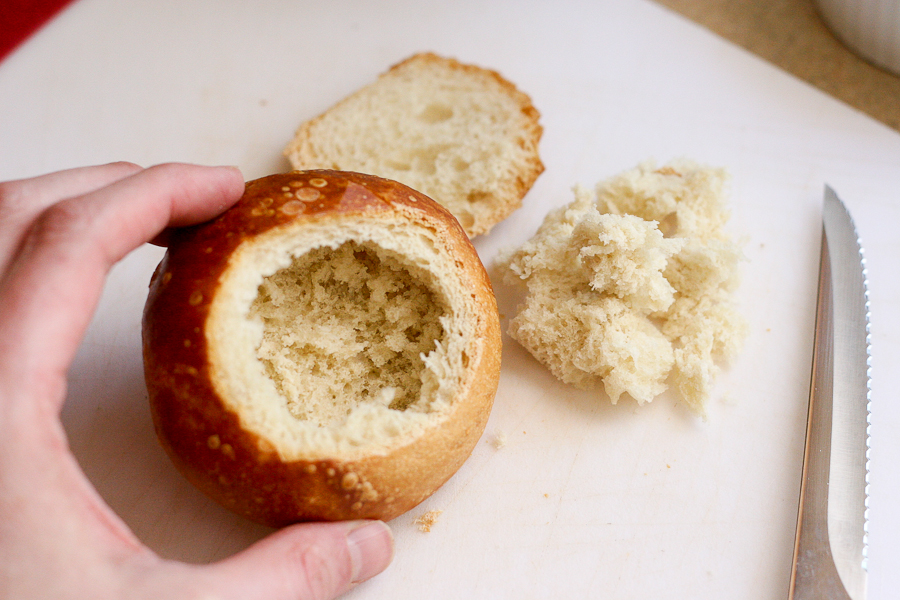
Pull out as much of the inside of the roll as you can without breaking through the crust. My rolls had a pretty thick, crusty outside, so that’s about as far as I could go.
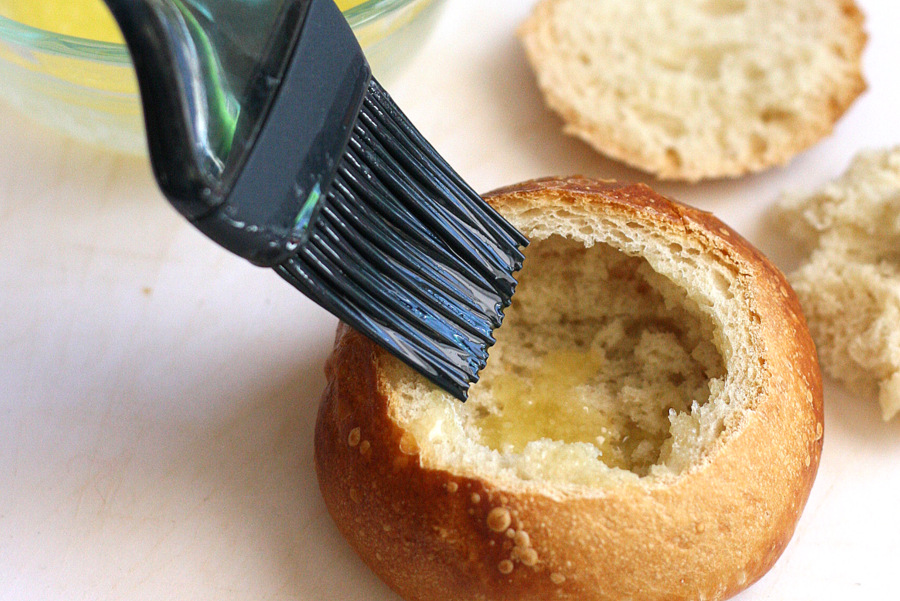
Brush the inside with butter.
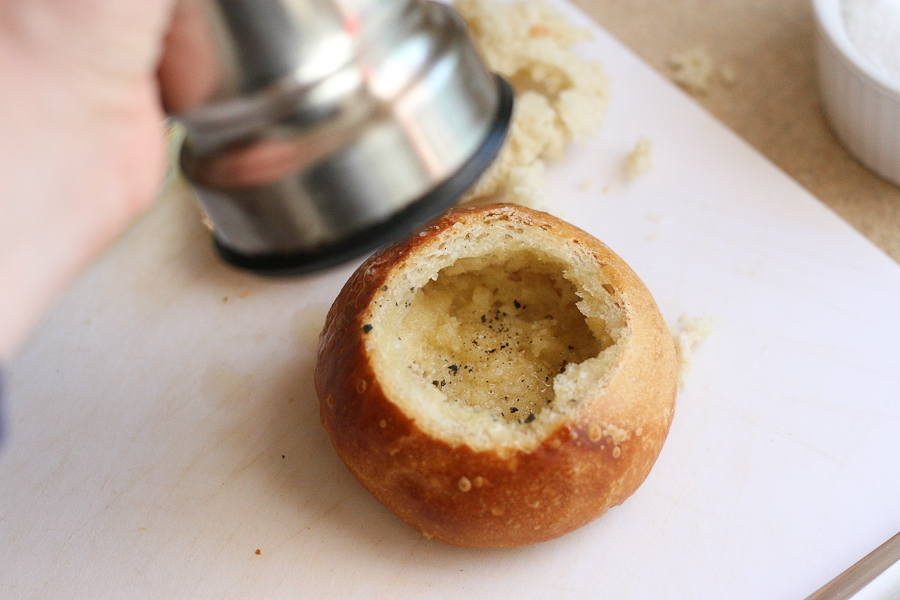
Then sprinkle some salt and pepper inside.
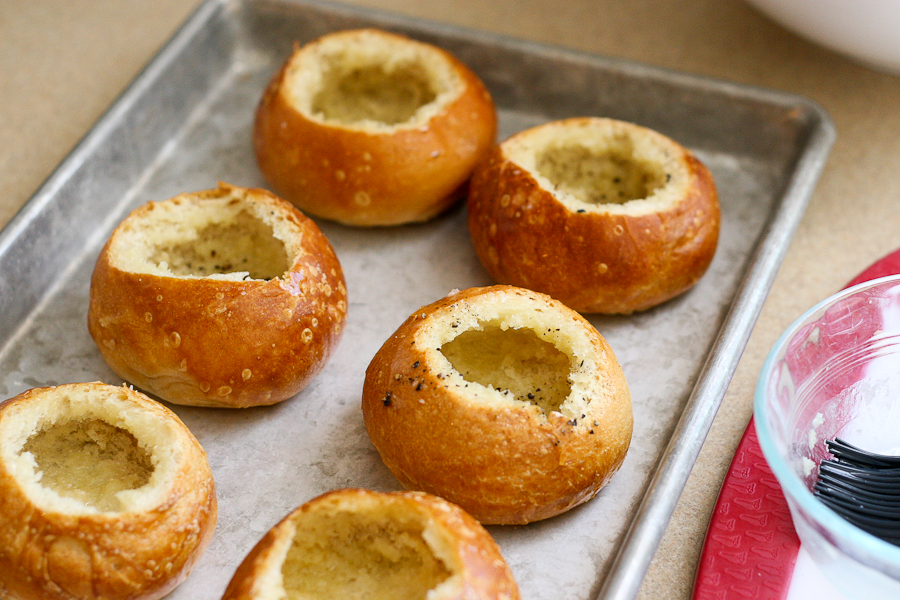
Put them on a sheet pan or a platter for your hungry ones to grab and fill.
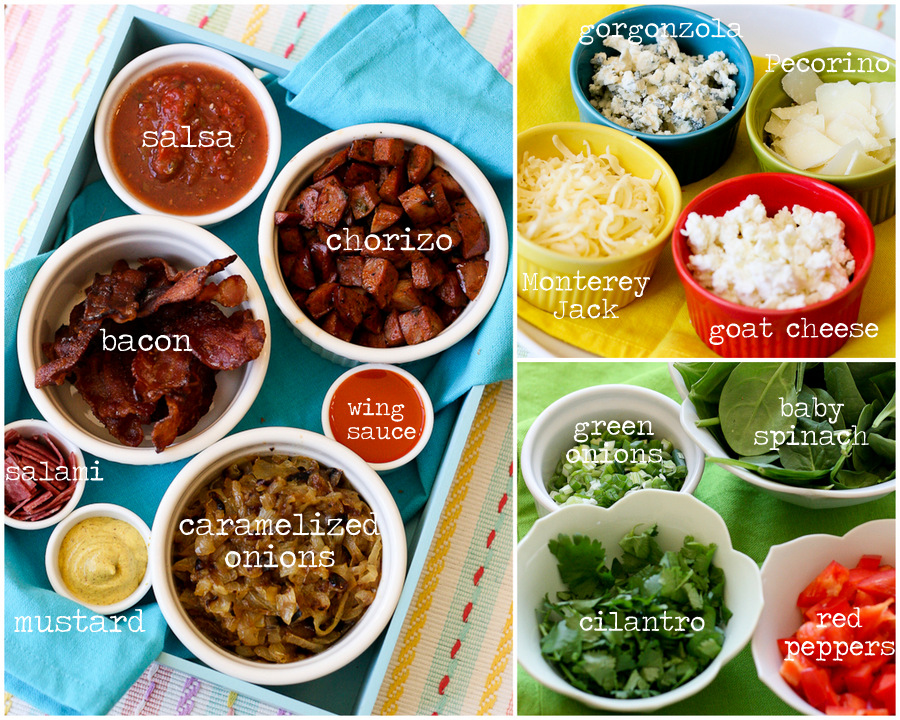
Here comes the fun part: gathering the fillings! I actually did this before I prepped my rolls, and you can even do it the night before breakfast. They don’t have to be hot because everything gets baked in the oven anyway. I began to “clean out” my fridge, so to speak, and ended up with WAY more fillings than we needed. Things got a bit heady with flavor combinations.
(By the way, if you don’t use all of the fillings, you have everything conveniently prepped for omelets later!)
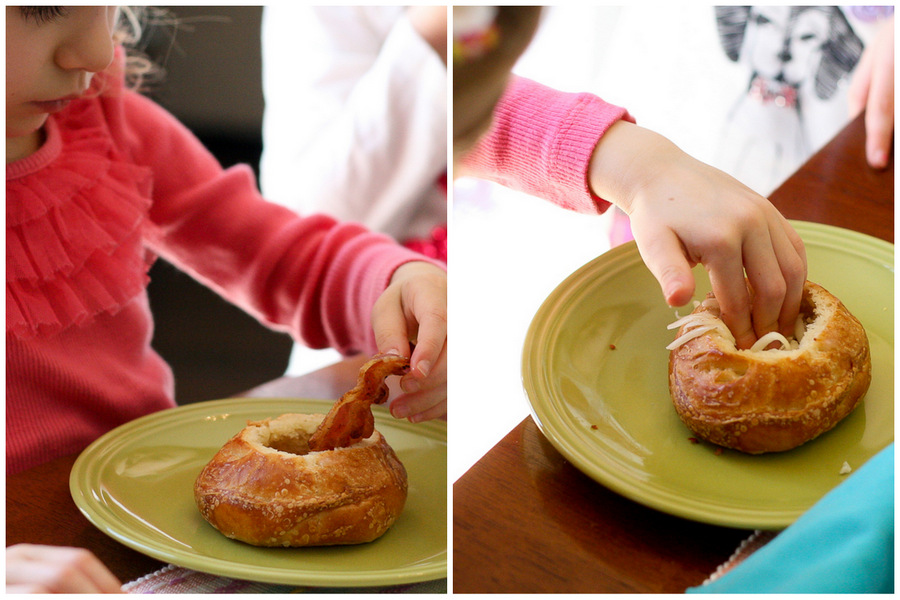
I let my kids go at it, curious to see what they would put in their rolls. My 3-year-old went straight for the bacon. And the cheese. (She’s a momma’s girl.) One thing we learned through this is to fill the rolls sparingly and really push the fillings down and into the sides. You’ll see why in a second.
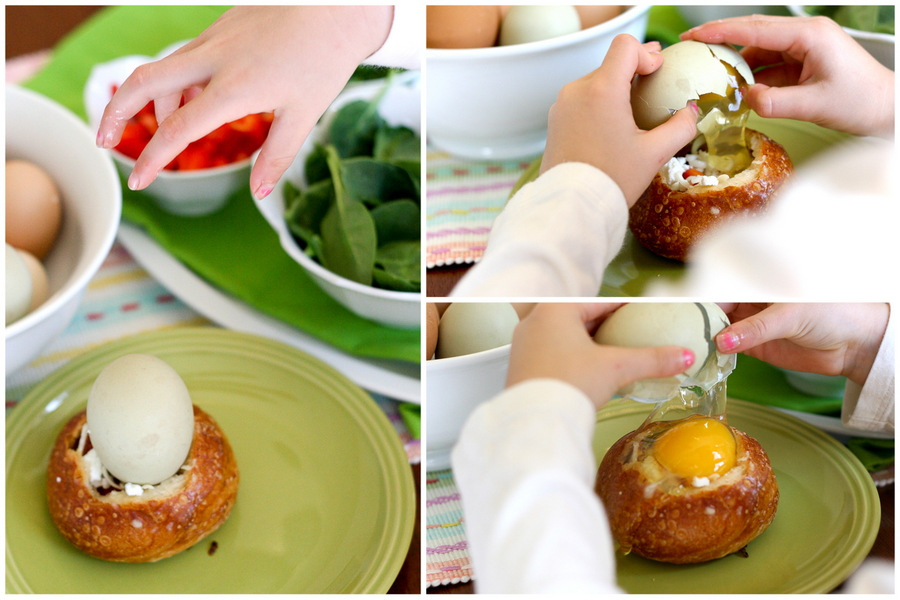
I told the 5-year-old to put an egg in hers. I should have been more specific. She figured out soon enough that meant cracking the egg. Silly girl.
I’m not sure if my rolls were on the small side or if my eggs were on the large side (yolks from pastured eggs tend to be larger), but we lost a good bit of the white down the side of the roll. No biggie.
You could also use the whites only or whisk together the eggs (for those who like things mixed up) and only pour as much as you need into each roll.

After you have your rolls filled and baked, you’re ready to eat! If you like your yolks runny, keep an eye on them closely so they don’t firm up in the oven.
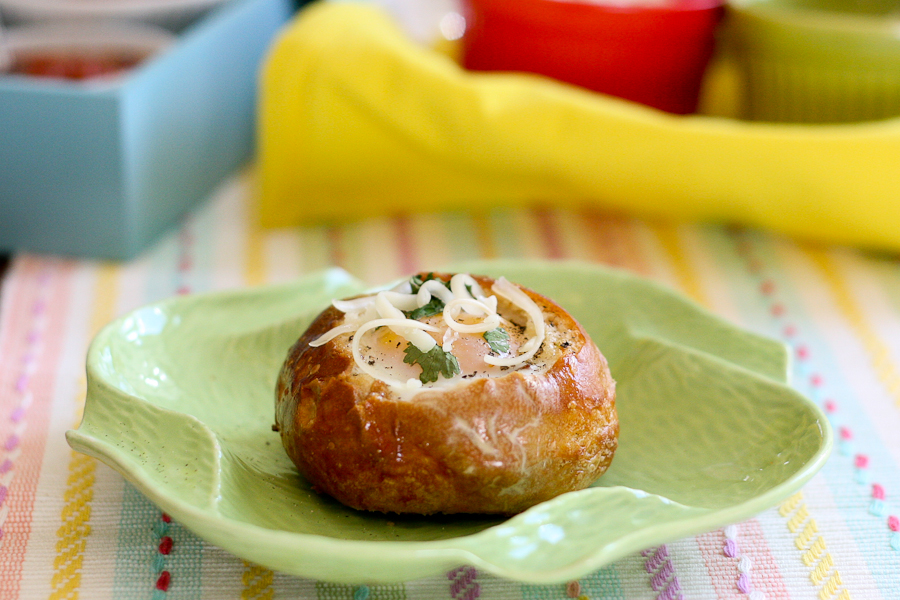
Thanks to Lindsay for a fabulous brunch idea! Be sure to visit her TK recipe box as well as her own blog, Perfecting the Pairing, for more delicious recipes.
Printable Recipe
Print Options
Description
Egg in a bread bowl is the perfect breakfast for a crowd because it is completely customizable!
Ingredients
- 8 whole Crusty Bread Rolls
- 2 Tablespoons Butter, Melted
- Salt And Pepper
- Assorted Fillings (See Suggestions In Instructions)
- 8 whole Eggs
Preparation Instructions
Preheat your oven to 350ºF. Slice off the top of each roll and scoop out the soft bread inside, leaving the sides of the roll intact. Brush the inside of each roll with the melted butter and season with salt and pepper.
Let your guests fill the roll with their favorite toppings (see suggestions below). Crack an egg or egg white on top, season with salt and pepper, and place on a cookie sheet. Bake for 10-12 minutes and then cover the pan loosely with foil. Bake an additional 20-25 minutes, or until the egg is just set.
Suggested fillings: grape tomatoes, cilantro, parsley, thyme, shredded cheese, herbed goat cheese, caramelized onions, pre-cooked breakfast potatoes, spinach artichoke dip, deli ham, cooked sausage, crumbled bacon, onions, mushrooms, spinach, feta cheese.
_______________________________________
Be sure to check out Natalie’s own beautiful food blog, Perrys’ Plate, where you can see her growing collection of lovely recipes. There’s always something new to see there. Go visit now!


37 Comments
Comments are closed for this recipe.
Charlie on 4.13.2012
These look fantastic!
Just put crusty rolls on my grocery list. :~D
Have a joyful day!
Charlie
Nicole on 4.8.2012
That’s a great idea. It looks like a good and wholesome breakfast!
Lori R on 4.5.2012
These look fantastic! Just in time for Easter too! I’m going to stop at Panera on my way home Saturday morning for my rolls. Thank you so much for posting; I can’t wait to try them!
LynnieU on 4.5.2012
YUM-O!!! What a great idea. My family will love this for a weekend breakfast! THanks for the new take on breakfast!
NCMountainwoman on 4.5.2012
They look delicious. Ree did not do this and neither did your recipe, but when we make bread bowls we do not remove any bread from the inside. Just cut off the “lid” and use your thumbs to press the bread inside against the wall. It gives you plenty of space for the filling and the added benefit of a stronger wall.
Lindsay on 4.5.2012
Natalie, what a great post!! Thank you so much for making these look so great! Your photos are beautiful. Love the shot of your daughter with the egg in the bowl. I would love to try these with my niece and nephews sometime. I am so glad you liked the recipe!
Natalie | Perry's Plate on 4.5.2012
Thank YOU, Lindsay! This was such a brilliant, kid-friendly (psh… everyone-friendly!) idea!
Kendra on 4.5.2012
I’m no chef by any means, and I could be completely wrong here…but 35 minutes seems like an awfully long time to bake this, without the already-baked rolls getting hard as a rock and the egg turning into a hockey puck too…is that really the right time?
Natalie | Perry's Plate on 4.5.2012
Mine were in the oven that long. The rolls got a bit crustier (but not rock-like). I could have taken them out a few minutes earlier because my yolks were getting too firm, but I did it that way because my kids don’t like runny yolks. I think a 25-35 window ought to do it. The heat has to pass through the roll to get to the whites all mixed up with the filling. It does take some time.
beetree on 4.5.2012
Super silly question…but- how do you eat them?!! Pick them up (messy?) or cut them (tough to do with crust?). Or- do you just eat everything out with a fork first, then eat the bread? I guess I’d go with the third (even though I totally would want to pick them up!). They look yummy- want to make them for Easter!
Natalie | Perry's Plate on 4.5.2012
No, not silly at all! We did it all three ways, actually. The bread gets pretty crusty in the oven and can be tricky to just pick up and eat (for children at least). I cut mine in half, and then picked up the halves and ate them. That seemed to work well.
Laurie - Simply Scratch on 4.4.2012
Love that this is such a kid friendly recipe. I love the shots of your daughter cracking the egg! Great post Natalie! Thanks for the recipe Lindsay!
Heather :) :) :) on 4.4.2012
This is really cool. This is way better than eggs in a hat
 Love and hugs from the ocean shores of California, Heather
K.Young on 4.4.2012
What a fun idea. And these photos are superb!
Natalie | Perry's Plate on 4.4.2012
Thank you!!
Diane on 4.4.2012
They look so good, I can’t wait to have company so we can make them. Thank you.
Donna J. on 4.4.2012
YUUUUUMMMMMMM! My kind of breakfast!
Kerry C. on 4.4.2012
Love this idea! The kids will have a blast making their own.
Heather (Heather's Dish) on 4.4.2012
i LOVE this idea…so cute! and it would be perfect for lunch or dinner too!
Ashley on 4.4.2012
Those look so good right now! That cracks me up about your daughter putting the whole egg in! When I was 5, I opened a Coke and looked on the cap to see if I won anything…it said “Try Again”, so I screwed it back on and opened it again. Kids are funny!
VA DE PAN on 4.4.2012
Perfect breakfast!!!!!!!What an original way of making a different breakfast!!!!!Perfect for those clean up of fridge mornings!!!!!!!
Kendra on 4.4.2012
This is perfect!!! Thank you!!!!
Anita Johnson on 4.4.2012
THANK YOU! What a wonderful idea and one that is so obvious it’s hard to imagine no one thought of it sooner (or, maybe they did and kept this secret all to themselves….selfish). Cannot wait for Sunday morning to try these. FABULOUS idea!
Lauren's Latest on 4.4.2012
This is such a fun and cute idea!! I love cute food!
Tracy A. on 4.4.2012
This is SO up my alley!
carrie on 4.4.2012
what did you have your oven set at for each step?
Natalie | Perry's Plate on 4.4.2012
Oven is set at 350. You can find the details in the recipe at the end of the post!
molly stillman on 4.4.2012
oh. my. gosh. these look AMAAAAAAZING. the perfect Easter morning breakfast!
Megan {Country Cleaver} on 4.4.2012
I heart this 11/10!
homegrown countrygirl on 4.4.2012
What a fabulous idea, especially for times when you want all the eggs to be done at the same time! (p.s… personally, I wouldn’t find any trouble getting rid of the pulled out middles… “what pulled out middles?”)
Sandi ~ LoveFromCapeCod~etsy on 4.4.2012
YUM!! Oh these look SOOOOOOO delicious. I especially adore that last photo!! Thank you for this one. xoxoxoo ~Sandi
Sonja on 4.4.2012
Oh, my! These look dreadfully delicious! I will simply HAVE to make them! They’re pinned to my food board!
You can use the middles of the bread for anything. Bread pudding, stuffing, feeding ducks, bread crumbs, croutons. I have a hard time believing most people would just toss it.
PreK Teacher on 4.4.2012
Chris…make bread pudding!
Chris on 4.4.2012
Looks good, but what do you do with all that bread that you pull out of the middle of the rolls? Seems like a waste of perfectly good bread!
Natalie | Perry's Plate on 4.4.2012
I’m with Erika. It’ll get eaten one way or another! Since the bowls are so small you really don’t end up with that much extra (unless you’re making 25 of these…)
Erika (TK) on 4.4.2012
Ah Chris, a woman after my own heart. I don’t like waste either! In the past when I’ve done bread bowls, I save the pulled-out bread in a baggie in the freezer for homemade breadcrumbs whenever I need some. That is, when I’m not compressing them into balls, dipping them in melted butter and cinnamon-sugar, and chowing down. (Don’t tell on me.)
The Mrs @ Success Along the Weigh on 4.4.2012
That looks really good! Gee and it’ll give me an excuse to place an order with Boudin so I’m down with that!