No Reviews
You must be logged in to post a review.

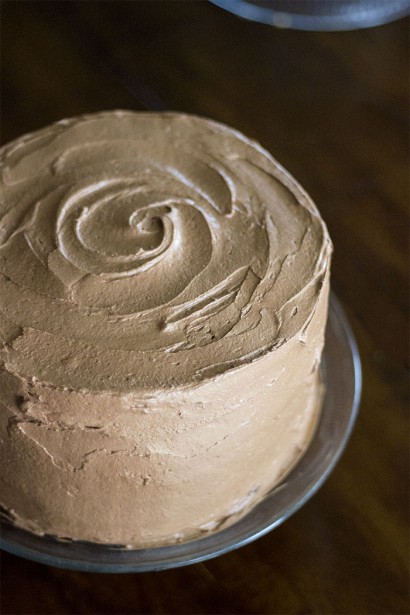
A sugar-free cake with a surprise checkered pattern inside! No fancy cake pans required!
Preheat oven to 350 F. Line two or three 9-inch round cake pans with parchment paper. Lightly spray with cooking spray and set aside.
For the vanilla cake:
Combine the milk and vinegar in a small bowl and set it aside. In a large bowl, whisk together the cake flour, baking powder, baking soda and salt. In a separate bowl, or in the bowl of an electric mixer, cream together the butter, powdered honey, eggs and vanilla. Mix until smooth. Add the flour mixture to the wet, alternating with the milk and mix on low until everything is incorporated. Divide the batter up between 2 cake pans. Bake in the preheated oven for 20-30 minutes. A toothpick inserted in the center should come out clean when done. Remove from oven when done.
For the chocolate cake:
While the vanilla cakes are baking, use the same large bowl that you used for the vanilla cake’s dry ingredients and whisk together the chocolate cakes dry ingredients: flour, baking powder, baking soda, cocoa and salt. Set aside. In a large bowl, cream together the butter, applesauce and coconut sugar until light and fluffy. Add the eggs one at a time, beating well with each addition. Add the vanilla. Combine the flour mixture with the wet mixture, alternating with the milk. Beat until well combined and set aside until the vanilla cakes are done baking.
When the cakes are done, allow them to cool for about 10 minutes before removing them from the pans. Gently remove the cakes from the pans and re-line the pans with parchment paper for the chocolate cakes. Divide the chocolate cake batter into the two cake pans. Bake for 20-30 minutes or until a toothpick inserted comes out clean. Remove from the oven. Allow these cakes to cool 10 minutes before removing them from the pans. Allow cakes to cool completely before frosting.
For the buttercream:
Blend natural sweeteners and cornstarch in a high powdered blender for at least 5 minutes, scraping inside the bowl occasionally. Pour the blended mixture into a large bowl or electric mixer. Add all of the other buttercream ingredients and whip until smooth and creamy.
For the assembly:
When cakes are cooled, carefully level off any large bumps or bubbles on cake tops so all cakes are smooth and flat. On a sheet of parchment paper, trace out a 6-inch circle and a 3-inch circle or use round cookie cutters. Place the 6-inch stencil in the center of all the cakes and cut the circle out of each cake. In the 6-inch cakes, cut out the 3-inch circles in the center of those cakes. You will be left with 9 or 12 rings of cake.
Place a large outer chocolate ring of cake on a serving platter or cake stand. Place a 6-inch vanilla cake ring in the center of that, followed by a small chocolate circle to finish the base layer. Scoop out about a 1/3 cup of frosting onto this layer and spread to evenly coat, not covering the sides of the cake. You are now ready for the next layer of cake! Alternate the pattern for the middle layer (vanilla, chocolate, vanilla). Spread more frosting in the middle of the layers. Repeat the layers.
Next, spread a thin layer of frosting all over the cake with a damp cake spatula. This is the crumb layer. Begin frosting cake with more frosting with a large spatula or frosting spatula. Occasionally wetting spatula with water helps make frosting spread smoothly and gives a nice finished shine.
Once cake is frosted, decorate however else you would like! Coat the bottom half in chocolate shavings or chocolate chips or top with chocolate ganache or sprinkles. It is also pretty piped with big roses. Although this cake will stay delicious for up to 3 days, because it is so tall, most cake stands do not accommodate this cake. If you don’t want to cut it up to store, or mash the top with a cake lid, enjoy it the day of! Will last up to 3 days, covered well at room temperature or up to 4 weeks in an airtight container in the freezer.
No Comments
Leave a Comment!
You must be logged in to post a comment.